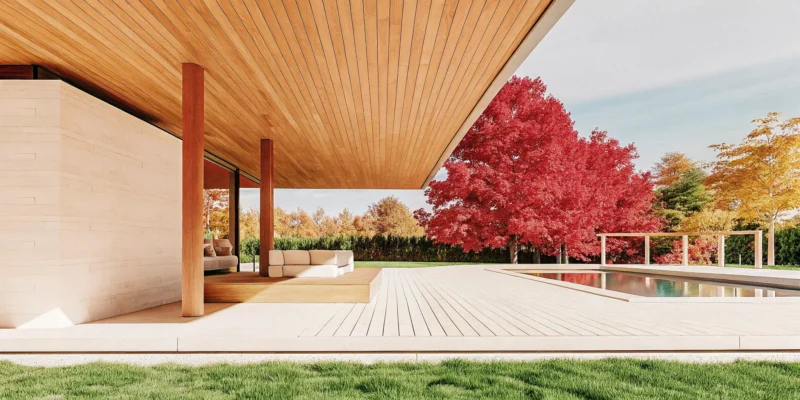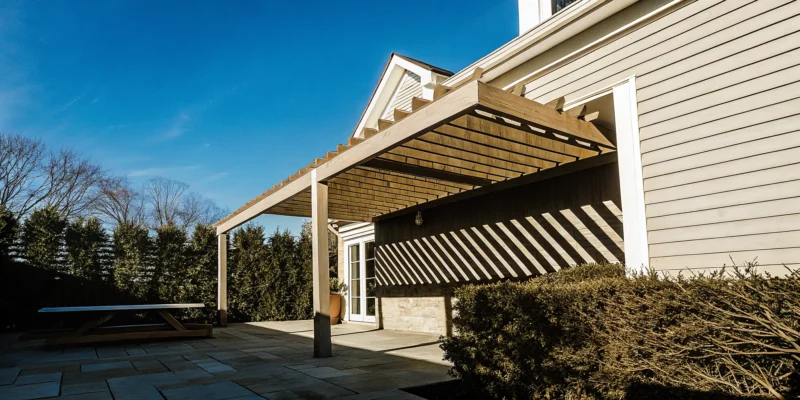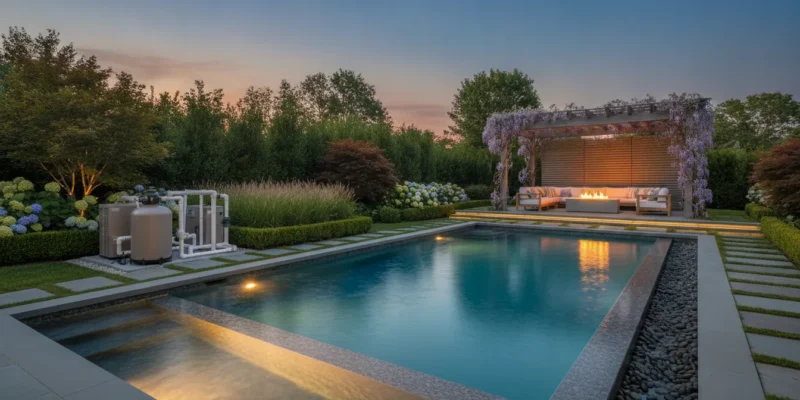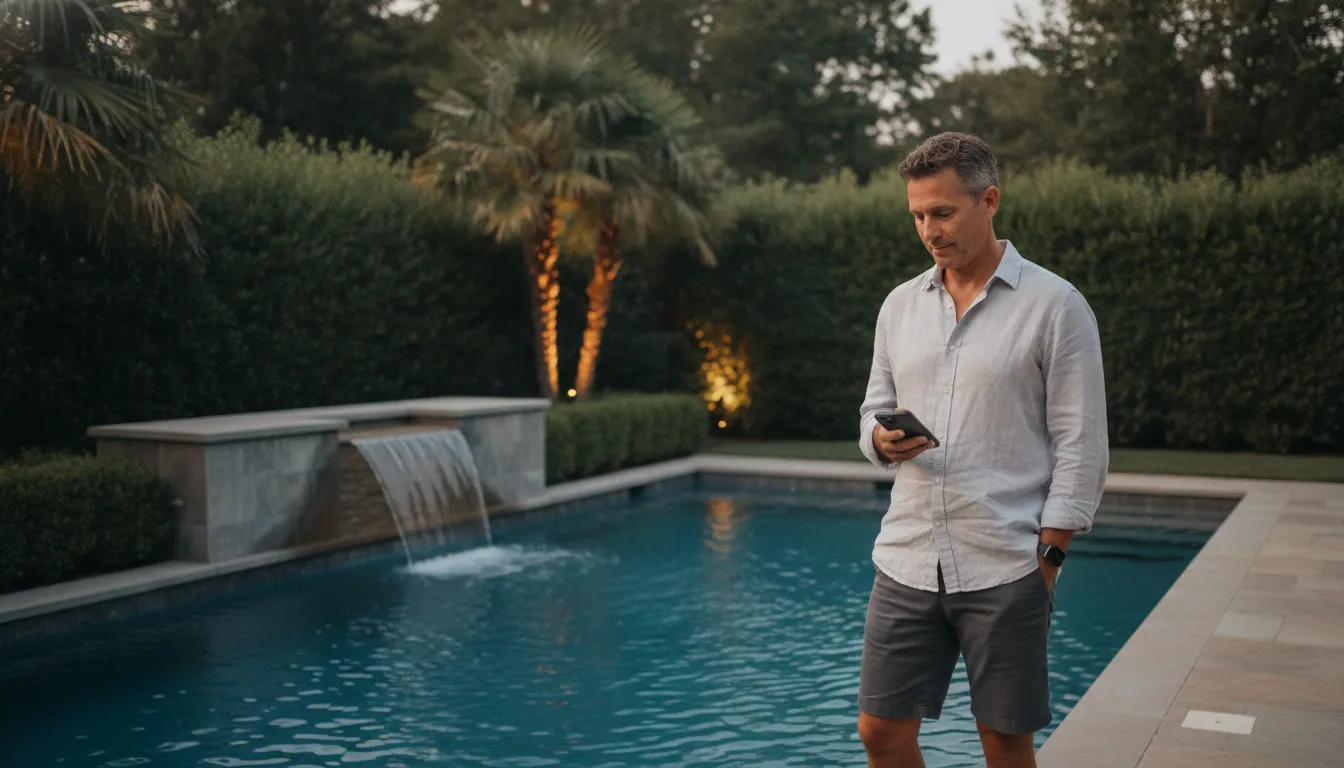
Outdoor shower beside a Long Island swimming pool

Outdoor Shower Installation on Long Island: Ideas and Cost

.

After a swim or a beach day, wet feet are only part of the mess that can move through a home. Sand, sunscreen, chlorine, and grass clippings can reach indoor floors and bathrooms when there is no convenient place to rinse outside. An outdoor shower can solve that problem while making the pool, patio, and landscape work together as one usable backyard.

Call Gappsi at (631) 831-3177 to discuss your outdoor shower design and installation.

An outdoor shower gives swimmers a dedicated place to rinse before and after using the pool. It can keep sand and residue outside while making it easier for guests to move between the pool and the rest of the property. The design should account for privacy, water temperature, durable finishes, drainage, winter protection, and utility access.

What Makes an Outdoor Shower Useful for a Long Island Backyard?

An outdoor shower is useful because it gives swimmers a convenient place to rinse before entering the pool and wash away chlorine, sand, sunscreen, and soil afterward. That keeps wet traffic out of the home, supports cleaner pool routines, and makes the pool, patio, and landscape easier to use together. The CDC explains why showering before swimming helps reduce contaminants introduced into a pool.

Convenience is the practical benefit homeowners notice first. Children and guests do not need to track water across a hallway to reach an indoor bathroom. A rinse station near the pool also gives people a place to wash sandy feet after a trip to the shore. If the shower is near a landscaped path, it can serve pool users without interrupting the main entertaining area.

Placement and construction determine whether the feature remains pleasant to use. A shower that empties against a foundation can create a maintenance problem. A shower with no privacy plan may be avoided even when it is close to the pool. A shower that uses slippery materials or poorly protected plumbing can become difficult to use as the seasons change.

For that reason, Gappsi approaches the shower as part of the outdoor living plan. The surrounding pool deck, patio, planting, masonry, and path should guide the location and finish. The goal is a clear route from the water to the rinse area, a controlled route for wastewater, and a design that fits the property.

Call Gappsi at (631) 831-3177 to plan an outdoor shower around your Long Island pool and landscape.

How Should You Choose the Location and Privacy Design?

Choose an outdoor shower location that is close to the pool but screened from the house, neighboring properties, and the main entertaining space. Walk the route before selecting the enclosure. Check views from windows, side yards, gates, driveways, and seating areas, then plan a safe, well-drained approach with room for service access and towels.

  • Poolside placement: keeps the rinse station convenient and limits wet traffic through the home.
  • Side-yard placement: can provide natural screening when the property line and access path allow it.
  • Near-house placement: may shorten hot and cold water runs, but it requires careful attention to the wall, foundation, and roof drainage.
  • Beach-facing or garden placement: works for properties that need a broader rinse area for sand, outdoor gear, or muddy feet.

Privacy can come from a masonry wall, a framed screen, a fence panel, layered planting, or a combination of elements. A solid enclosure provides the most immediate screening, while plants soften the view and connect the shower to the landscape. The enclosure should still allow air movement and enough room to inspect fixtures, clean joints, and service the plumbing.

Think about the floor area as well as the shower head. A narrow standing zone may be adequate for one person, but families may need space for towels, a hand shower, hooks, and a small bench. A textured walking surface improves footing when wet. The shower door or opening should direct users toward the pool or path, not through a planting bed or onto a slippery transition.

An experienced landscape design and construction team can coordinate privacy planting, grading, paths, and the shower enclosure. That coordination helps prevent a common mistake: installing the fixture first and then discovering that the finished space has no comfortable approach or useful screening.

Outdoor shower design with bluestone and privacy planting

Which Plumbing and Drainage Details Need Attention?

Outdoor shower plumbing should be planned around the water source, supply-line route, pressure, shutoffs, temperature control, and drainage path. Existing utilities, pool equipment, grades, soil, and finished hardscape determine the work required. The design must keep discharge away from foundations, planting beds, paths, and neighboring properties while leaving access for service.

A cold-water line may be enough for a quick summer rinse. Hot and cold supply lines create a more comfortable experience for longer use, children, guests, and cooler mornings. A mixing valve should be accessible and protected from weather. The location of the home, pool equipment, utility routes, and proposed hardscape all affect the cost and complexity of the connection.

Drainage deserves the same attention as water supply. The shower should not discharge against a foundation, erode a planting bed, leave standing water on a path, or send concentrated flow toward a neighboring property. Depending on site conditions, the design may use a properly graded surface, a linear drain, a dry well, or another approved drainage approach. Local requirements and site-specific conditions should be confirmed before construction.

Surface runoff and shower discharge are not interchangeable. The EPA stormwater guidance explains why managed discharges matter. The installation plan should account for soil, slope, nearby structures, local regulations, and the amount of water the fixture will produce.

Protect the utility route during the rest of the backyard project. New pavers, pool coping, planting beds, lighting, and irrigation can make later repairs harder if the layout is not documented. A coordinated plan identifies shutoffs and service access before surfaces are installed.

At the shower itself, use a drain cover that can be inspected and cleared. Keep leaves, soil, and mulch away from the drain. If the area has a bench or privacy wall, slope the finished surfaces so water does not collect behind those elements. These small details make routine cleaning easier and help reveal leaks early.

Outdoor shower drainage planning beside a pool

What Materials Work Well for an Outdoor Shower?

Natural stone, exterior-rated porcelain tile, masonry, and carefully detailed screens can work well for an outdoor shower. Choose materials for wet traction, moisture exposure, cleaning, drainage, and visual connection to the pool deck or patio. The floor, walls, hardware, and transitions should be evaluated as one system before ordering materials.

Material or element Planning considerations
Natural stone Can connect the shower to a stone patio or pool surround. Select a textured finish and plan for cleaning and sealing.
Porcelain tile Offers many colors and patterns. Confirm that the selected product is suitable for wet exterior use and provides appropriate traction.
Masonry walls Create a durable privacy element that can coordinate with other site walls. Include access for fixtures and drainage inspection.
Composite or treated screens Can provide privacy with a lighter visual profile. Detail the base so it does not trap soil or remain in standing water.
Stainless or corrosion-resistant hardware Helps fixtures withstand outdoor moisture and pool chemicals. Hardware still needs cleaning and seasonal inspection.

Slip resistance matters more than a surface that looks smooth in a showroom. Water, soap, sunscreen, and leaves can all reduce traction. Edges should be finished cleanly, and transitions between the shower floor, deck, and path should not create a raised trip point.

Stone and porcelain can also tie the shower to a larger patio project. Gappsi’s porcelain and natural stone work can help homeowners evaluate materials in relation to the pool deck, paths, walls, and outdoor kitchen. The objective is a consistent material story, not a shower that looks unrelated to the rest of the property.

Maintenance should be part of the material decision. Ask how each surface should be cleaned, whether it needs sealing, how joints will be maintained, and what happens if a fixture must be replaced. Gappsi’s stone cleaning and sealing service is relevant when the shower uses materials that require periodic care. Homeowners comparing finishes can also review light ivory travertine pavers as a reference for color, texture, and poolside coordination.

How Much Does Outdoor Shower Installation Cost on Long Island?

Outdoor shower installation cost on Long Island depends on utility distance, water temperature, drainage, privacy construction, finish materials, and related pool or landscape work. A cold-water fixture may require less construction than a masonry enclosure with hot and cold plumbing, custom drainage, tile, lighting, and hardscape restoration. A site review is needed for a responsible estimate.

Important cost factors include:

  1. Distance to utilities: longer supply and drain routes may require more excavation and surface restoration.
  2. Water temperature: hot and cold connections add planning, components, and installation work.
  3. Drainage: grading, trenching, a drain body, or a dry well can change the site scope.
  4. Privacy construction: a masonry wall, fence screen, or planting plan each has different labor and material needs.
  5. Finish materials: stone, porcelain, concrete, and composite elements vary in cost and maintenance requirements.
  6. Related improvements: a path, patio, pool deck, bench, lighting, or landscape work may be installed at the same time.

Because these variables are site-specific, a responsible estimate should follow a review of the property rather than a generic online price. The review should identify the proposed location, utility access, drainage route, surface materials, privacy approach, and any work that must be coordinated with the pool or landscape.

A kit can appear less expensive because it may include only the visible fixture. It may not include excavation, a safe floor, a drain, screening, utility connections, winterization, or repairs to surrounding surfaces. A coordinated installation evaluates those parts together and makes the final scope easier to understand.

For a related hardscape plan, Gappsi can also review the surrounding Long Island masonry design. That is useful when the shower will be built into a wall, patio, pool surround, or larger outdoor entertaining area. Homeowners can use the Gappsi contact page to organize a site-specific conversation about access, drainage, and finishes.

Call Gappsi at (631) 831-3177 for a site-specific outdoor shower installation discussion.

What Does the Installation Process Include?

Outdoor shower installation typically includes a property review, use and layout decisions, water and drainage planning, coordinated excavation, enclosure and finish construction, and final testing. The sequence varies by site, but planning the shower before paving, planting, or pool work is complete helps prevent demolition and rework. The finished plan should also identify shutoffs, service access, and transitions to nearby surfaces.

A typical process includes:

  1. Review the property: identify the pool, home, property lines, utilities, grades, privacy views, and access routes.
  2. Define the use: decide whether the shower is for a quick pool rinse, beach cleanup, extended outdoor use, or several purposes.
  3. Develop the layout: set the shower, enclosure, floor, hooks, bench, path, fixture controls, and service access.
  4. Plan water and drainage: determine cold or hot and cold supply, shutoffs, slope, drain type, and discharge location.
  5. Coordinate construction: complete excavation and utility work before installing finished masonry, tile, stone, planting, or paving.
  6. Test and finish: check temperature, pressure, drainage, transitions, privacy, and access before the area is put into regular use.

Timing is easier to manage when the shower is included in a broader pool or patio plan before surfaces are finalized. Retrofitting plumbing through completed hardscape can add demolition and restoration. Planning the shower at the same time as a custom swimming pool project can help align the rinse area with the deck, equipment, and circulation pattern.

How Do You Protect an Outdoor Shower Through the Seasons?

Protect an outdoor shower on Long Island by planning winter shutoffs and drainage, then checking the floor, drain, fixtures, seals, and privacy elements through the swimming season. Exposed lines should be handled according to the system design, and leaves, soil, mulch, and standing water should be kept away from the shower base. Ask the installer to explain the seasonal steps for the selected plumbing arrangement.

During the swimming season, rinse the floor and walls regularly to remove sunscreen, soap, leaves, and soil. Keep the drain clear and check the base of privacy screens for damp debris. At the beginning and end of the season, operate the controls and look for slow drips, loose connections, cracked seals, and changes in pressure.

  • Keep leaves and mulch away from the drain and fixture base.
  • Use the manufacturer’s recommended cleaner for tile, stone, and hardware.
  • Inspect caulk and grout where water can collect.
  • Confirm that the surrounding soil and planting have not shifted toward the shower.
  • Store removable accessories before severe weather.

Seasonal inspection is also a chance to evaluate how the area is being used. If towels are always left on a wall, add hooks. If the route becomes muddy, improve the path. If users avoid the shower because the enclosure feels exposed, add screening. A practical design can be adjusted as the household’s routine becomes clear. If the shower is part of a broader surface-care plan, Gappsi’s paver sealing guidance offers another maintenance reference for hardscape around the rinse area.

Frequently Asked Questions

These answers cover common outdoor shower planning questions. Local requirements and site conditions can change the final design, so confirm project-specific details during a property review.

Do I need a permit for an outdoor shower?

Permit and approval requirements depend on the municipality, plumbing scope, drainage approach, and relationship to other work. Before construction, confirm the requirements for the property and proposed installation. A site review can identify questions that should be addressed before materials are ordered.

How do you drain an outdoor shower?

The shower needs a controlled drainage plan based on the surface, slope, soil, nearby structures, and local requirements. Options may include a graded surface, a linear drain, a dry well, or another approved approach. Water should not be directed against a foundation or allowed to erode a planting bed.

Do outdoor showers need hot water?

No. A cold-water shower can suit quick summer rinses. Hot and cold water can make the feature more comfortable for longer rinses, children, guests, and shoulder-season use. The choice depends on use, utility access, and project scope.

Can an outdoor shower be installed on a deck?

It can be possible, but the deck must be evaluated for structure, water management, surface durability, privacy, and plumbing access. The design should prevent uncontrolled water from collecting below the deck or damaging adjacent materials.

Where should an outdoor shower be placed near a pool?

Choose a location with a short, safe route from the pool, practical privacy, durable footing, service access, and controlled drainage. The best position is not always the closest point to the water because sightlines, utilities, grading, and the rest of the backyard layout also matter.

Plan Your Outdoor Shower with Gappsi

Gappsi helps Long Island homeowners plan outdoor living projects around the way the property will be used. An outdoor shower works best when the fixture, enclosure, floor, plumbing, drainage, and surrounding landscape are considered together. A site-specific discussion can clarify the right location, finish, utility approach, and construction sequence for your property. Gappsi’s design and construction experience includes masonry, pool areas, landscape construction, and hardscape materials, giving homeowners one coordinated conversation for the surrounding work.

Call Gappsi at (631) 831-3177 to plan your outdoor shower installation on Long Island.

Share this page:
Building a DIY faux feature wall with MDF panels, tools, and a ladder.

DIY Faux Feature Wall: A Beginner’s Guide

You’ve picked the perfect paint color and arranged your furniture, but the room still feels like it’s missing something. The answer might be a faux feature wall. This is your chance to go bold and define your space with a pop of color, a striking pattern, or rich texture. From modern geometric designs to classic board and batten, an accent wall serves as the perfect backdrop for your bed, sofa, or dining area. It anchors the room and draws the eye, creating a polished and intentional look that elevates your entire home’s style.

Key Takeaways

  • Get a High-End Look for Less: A faux feature wall is a practical way to get the appearance of real stone, brick, or custom millwork; it uses affordable, lightweight materials to create a stunning focal point without the high cost.
  • Preparation Is Key to a Professional Finish: Your project’s success depends on the details, so proper wall prep, accurate measurements, and finishing touches like caulk and paint are essential for achieving a seamless, built-in look.
  • Balance Design with Practicality: Make sure your feature wall design complements the room’s scale and existing decor. While many projects are DIY-friendly, it is always best to call a professional for complex designs or any work involving electrical changes.

What Is a Faux Feature Wall?

Think of a faux feature wall as a clever design shortcut to get the high-end look of materials like stone, brick, or intricate wood paneling without the hefty price tag and complex installation. It’s a way to create a stunning focal point in a room using materials that mimic the real thing. For example, instead of hiring a mason to build a stone wall, you can use lightweight stone veneer panels. Or, you can create the illusion of classic wainscoting with strategically placed trim pieces and a fresh coat of paint. This approach makes a dramatic room transformation much more accessible.

While a full home remodeling project involves extensive planning and professional expertise, a faux feature wall lets you dip your toes into design and make a big impact with a smaller commitment of time and money. It can instantly define a space, creating a cozy backdrop for your bed, a sophisticated setting for your dining area, or a textured background for your entertainment center. The goal is to add texture, character, and a custom feel to your space, making it feel more personal and thoughtfully designed, often in just a weekend.

Faux vs. Traditional: What’s the Difference?

The biggest difference between a faux and a traditional feature wall comes down to materials and installation. A traditional feature wall uses authentic, heavy materials like solid wood planks, individual bricks, or genuine stone slabs. These projects require specialized tools, potential structural support, and a skilled professional to install. The result is an authentic wall built with classic masonry or carpentry techniques, which is often more costly and time-consuming.

Faux feature walls, on the other hand, use lightweight, manufactured materials designed to look like their traditional counterparts. This includes everything from MDF trim and PVC panels to high-quality veneers and wallpapers. Because these materials are lighter and engineered for simplicity, they are much easier to handle and install, making them perfect for a DIY project. You get a very similar visual effect without needing to be a construction expert.

Why Choose a Faux Feature Wall?

Opting for a faux feature wall is a fantastic choice for several reasons, especially if you’re looking for an affordable and manageable update. The most obvious benefit is the cost savings. Materials like faux brick or shiplap panels are significantly less expensive than real brick and wood. This allows you to achieve a luxurious look on a practical budget. Ease of installation is another major plus. You can completely change the feel of a room in a day or two with basic tools, which is a huge win for busy homeowners.

Beyond the practical perks, faux walls are incredibly versatile. Whether your style is modern, rustic, or coastal, there’s a faux option that will fit right in. You can get ideas for high-end looks by viewing galleries of porcelain and natural stone to see what kind of textures and patterns inspire you. A faux feature wall gives you the creative freedom to experiment with designs that might be too expensive or permanent with traditional materials.

Best Materials for a DIY Faux Feature Wall

Choosing the right material is the most important step in bringing your feature wall to life. The best option for you depends on your budget, your DIY comfort level, and the look you want to achieve. From classic paneling to rustic stone, there’s a material that fits your vision. Let’s walk through some of the most popular and user-friendly choices for a DIY project.

MDF Panels and Trim

If you love the timeless look of wainscoting or board and batten, MDF (Medium Density Fiberboard) is your best friend. It’s a fantastic material for beginners because it’s stable, affordable, and won’t warp with humidity changes like some natural woods can. MDF has a smooth surface that’s perfect for painting, giving you a flawless finish. You can buy large panels or individual trim pieces to create custom geometric or traditional patterns. This approach gives you the sophisticated feel of custom millwork, which is a cornerstone of high-end home remodeling, without the complex installation. It’s a straightforward way to add architectural character to any room.

Faux Stone and Brick Panels

For a touch of rustic charm or an industrial edge, faux stone and brick panels are a game-changer. These lightweight panels give you the gorgeous texture of real masonry without the cost, weight, and messy mortar of a traditional installation. They are designed for DIYers, often interlocking for a seamless fit. You can completely transform a fireplace surround, kitchen backsplash, or bedroom wall in a single weekend. While these panels are great for a DIY project, seeing professionally installed stonework can provide incredible inspiration. You can explore Gappsi’s porcelain and natural stone projects to get ideas for how to integrate beautiful textures into your home design.

Faux Wood Panels

Want to add warmth and organic texture to your space? Faux wood panels can create anything from a cozy, cabin-like atmosphere to a sleek, modern wood slat wall. These panels are much lighter and easier to cut and install than real wood planks, making them a practical choice for a feature wall. They come in a variety of finishes, so you can find the perfect match for your decor. Using faux wood is a simple way to get the look of a custom wood feature, which you often see in professionally designed pavilions and pergolas. It’s an effective method for making a room feel more inviting and grounded.

Peel-and-Stick Wallpaper

If you’re a renter or someone who loves to change up your decor frequently, peel-and-stick wallpaper is the ultimate low-commitment option. The application is simple: just peel off the backing and smooth it onto the wall. There’s no messy paste, and it’s designed to be removable without damaging your walls. The design possibilities are nearly endless, with wallpapers that mimic brick, stone, wood, and intricate geometric patterns. It’s the quickest way to create a dramatic accent wall with minimal effort. For more visual ideas on how different materials can transform a space, you can find plenty of inspiration on the Gappsi YouTube channel.

Design Inspiration for Your Faux Feature Wall

Once you decide to create a feature wall, the fun part begins: choosing a design. A faux feature wall can completely change the feel of a room, adding character, texture, and a focal point. The best part is that you can achieve a high-end look without the cost or complexity of traditional materials. Whether you prefer a subtle, classic style or a bold, modern statement, there’s a design that will fit your home perfectly. Let’s explore some popular ideas to get your creativity flowing.

Coastal and Natural

Bring the serene, calming feeling of the Long Island coast into your home with a natural-themed feature wall. This style is all about texture and organic elements. Faux panels provide a realistic appearance of natural materials, making them a versatile and practical choice for achieving this look. Think of a wall covered in faux weathered wood to create a beachy, rustic vibe or faux stone panels for a more grounded, earthy feel.

To complete the coastal aesthetic, pair your feature wall with a palette of soft blues, sandy beiges, and crisp whites. You can draw inspiration from the beautiful textures found in high-quality natural stone to select a faux panel that mimics the real thing. This approach creates a sophisticated backdrop that feels both refreshing and timeless.

Board and Batten and Wainscoting

For a touch of classic elegance, you can’t go wrong with board and batten or wainscoting. A faux-paneled accent wall uses trim pieces on your wall to look like traditional wood paneling, and it’s a cheaper and easier way to get the look of real wood panels. This style adds architectural depth and a sense of history to any room, from a formal dining room to a cozy bedroom. You can choose a traditional design, like lower-wall wainscoting, or go for a full-wall grid pattern.

Painting the trim and the wall the same color creates a subtle, textured effect, while painting the trim a contrasting color makes it a more prominent feature. While this is a great DIY project, achieving perfectly straight lines and clean joints is key. For complex designs, consulting with a home remodeling expert can ensure a flawless, professional finish.

Geometric and Modern

If your style leans more contemporary, a geometric feature wall can serve as a stunning piece of modern art. This design uses clean lines, repeating shapes, and sharp angles to create a dynamic and visually interesting focal point. Popular accent wall styles include geometric patterns, like diamonds, triangles, or intersecting lines, which you can create with thin wood trim or MDF strips.

Start by sketching your pattern on paper before transferring it to the wall. You can paint the entire wall a single color for a subtle, three-dimensional effect or use multiple colors to make the pattern pop. The precision required for these designs is similar to the detailed work found in custom masonry, where patterns create a huge impact. This style works especially well in living rooms, home offices, or anywhere you want to add a burst of energy.

Bold Colors and Accent Lighting

Sometimes, the simplest feature wall is the most effective. Painting one wall a bold, dramatic color is a quick and affordable way to transform a space. Current trends for accent walls often involve colorful walls, so don’t be afraid to choose a deep jewel tone, a vibrant primary color, or a moody dark shade. The key is to select a color that complements your existing furniture and decor while still making a statement.

To really make your accent wall shine, consider the lighting. Installing wall sconces or adjustable track lighting can highlight the color and create an inviting ambiance. Proper lighting draws the eye to your feature wall and can even enhance the texture of decorative panels. Thinking about how lighting interacts with structures, like in outdoor pavilions and pergolas, can give you great ideas for your indoor space.

How to Build a DIY Faux Feature Wall

Ready to transform your room? Building a faux feature wall is a fantastic weekend project that adds major personality without needing a full renovation. It might seem intimidating, but breaking it down into simple steps makes it manageable for any DIY enthusiast. With the right plan and a little patience, you can create a stunning focal point that looks professionally done. Let’s walk through the process together, step by step.

Step 1: Plan Your Design and Choose a Wall

First, decide which wall will become your masterpiece. A good rule of thumb is to pick the wall your eyes naturally go to when you enter the room, like the one behind your bed or sofa. This ensures your new feature wall becomes the true focal point. Once you’ve chosen your spot, sketch out a few design ideas. Consider the room’s overall style and how your new wall will complement it. Planning your design on paper helps you visualize the final look and work out any potential issues before you start. For more complex projects, getting expert design and construction advice can help refine your vision.

Step 2: Gather Your Tools and Materials

Having everything you need on hand before you begin makes the entire process smoother. For most paneling or trim projects, you will need a miter saw, nail gun, tape measure, level, pencil, caulk gun, and a stud finder. Depending on your design, your materials might include MDF boards, faux stone panels, or trim pieces. Make a detailed list and do one big shopping trip. This way, you won’t have to stop your progress to run to the store. A well-prepared workspace is the first step toward a professional-looking finish.

Step 3: Prepare and Mark Your Wall

Proper preparation is key to a successful installation. Start by clearing the wall and giving it a good cleaning. Next, use your stud finder to locate and mark the studs with a pencil; this is where you’ll nail your panels for a secure hold. Measure the height and width of your wall, and be sure to note the location of any outlets or light switches. Use your level and tape measure to draw precise guidelines for your design directly onto the wall. This roadmap will ensure your pieces are installed straight and evenly, which is crucial for a polished result.

Step 4: Cut and Install Panels or Trim

Now for the fun part: bringing your design to life. Following the “measure twice, cut once” rule is essential here. Use your miter saw to make precise cuts according to your design plan. Begin installing your main pieces first, whether it’s the outer frame or a central panel. Apply a bead of construction adhesive to the back of each piece and secure it to the wall with your nail gun, making sure to hit the studs you marked earlier. Taking your time with accurate measurements and cuts is the best way to avoid frustrating gaps and mistakes.

Step 5: Caulk, Sand, and Paint for a Flawless Finish

The final touches are what separate an average DIY project from a spectacular one. Once all your panels are installed, use caulk to fill every nail hole and seam. This step is critical for creating a seamless, built-in look. After the caulk dries, lightly sand any rough spots until everything is smooth to the touch. Finally, apply a coat of primer followed by your paint color of choice. Don’t rush this part. Neglecting these finishing touches can leave your hard work looking incomplete, so give it the attention it deserves for a truly flawless result.

Common DIY Mistakes to Avoid

A DIY project can be incredibly satisfying, but a few common missteps can turn your dream feature wall into a frustrating experience. Taking the time to avoid these errors will make the process smoother and ensure a professional-looking result you’ll be proud to show off. Let’s walk through some of the most frequent mistakes and how you can steer clear of them.

Skipping Wall Prep

It’s tempting to jump straight to the fun part, but skipping proper wall preparation can lead to a disaster. For your panels or trim to stick securely and look seamless, the wall underneath needs to be clean, smooth, and primed. Any dust, grease, or imperfections will prevent good adhesion and can show through your final finish. Before you begin, make sure to wear safety goggles and a dust mask, especially when sanding. Proper home remodeling always starts with a solid foundation.

Incorrect Scale and Proportions

This is where your design can either shine or fall flat. A common mistake is choosing a pattern or panel size that doesn’t fit the scale of the room. Oversized patterns can overwhelm a small space, while tiny details can get lost on a large wall. Before you make any cuts, map out your design on the wall with painter’s tape. This lets you visualize the proportions and adjust the spacing. Step back and look at it from different angles. Does it feel balanced? Taking this extra step helps you avoid disrupting the visual harmony of your space and ensures your design complements the room perfectly.

Using the Wrong Adhesives

Not all glues are created equal, and using the wrong one can compromise the entire project. An adhesive that isn’t strong enough or isn’t formulated for your specific materials could cause panels to peel away or sag over time. Always read the manufacturer’s instructions for both your wall material (like MDF or faux brick) and the adhesive itself. They will recommend the best type of construction adhesive for a secure, long-lasting bond. When in doubt, choose a product specifically designed for paneling or the type of masonry you are imitating to ensure your hard work holds up.

Ignoring Existing Decor and Lighting

A feature wall should feel like an intentional part of the room, not an afterthought. Before you commit, consider the room’s existing elements. Pick the wall your eyes are naturally drawn to when you walk in, and try to avoid walls with too many doors, windows, or awkward angles that will clutter the design. Think about how natural and artificial light will interact with your new wall. A textured surface, for example, will create different shadows and highlights throughout the day. Your feature wall should enhance your existing decor and create a cohesive look for the entire space, just like a well-designed pavilion does for a backyard.

Best Rooms for a Faux Feature Wall

A faux feature wall can dramatically change the feel of a room, adding texture, color, and a clear focal point. The beauty of this project is its versatility; you can install one almost anywhere. From creating a cozy retreat in your bedroom to defining a sophisticated outdoor lounge area, the right feature wall ties your entire space together. The best room for your project really depends on the atmosphere you want to create and the materials you’ve chosen to work with.

While this is a fantastic DIY project, seeing how a feature wall fits into a larger design can be a game-changer. If you’re planning a more extensive update, considering a full home remodeling project can help ensure every element, including your new accent wall, works in perfect harmony. Think about the spaces you use most and which ones could use a little extra personality. A feature wall is your chance to be bold and make a statement that reflects your personal style.

Living Rooms and Bedrooms

Your living room and bedroom are personal sanctuaries, making them perfect candidates for a feature wall. In a living room, an accent wall behind the sofa or around a fireplace can anchor the entire space and create an instant focal point. Imagine the warmth of faux wood panels or the classic elegance of a faux stone design. In the bedroom, a feature wall behind the headboard adds depth and can make the room feel more spacious and luxurious. It’s a simple way to inject high-end style and personality without committing to a complete overhaul. This is your opportunity to play with textures that create a cozy and inviting atmosphere.

Kitchens and Dining Rooms

Don’t overlook your kitchen and dining room when planning a feature wall. These spaces are the heart of the home, and adding a textured element can make them feel more welcoming and unique. You can use faux brick panels to create a rustic, industrial-style backsplash that’s much simpler to install and clean than traditional brick. In the dining room, a wall of geometric trim or sophisticated board and batten can define the space and add a touch of formal elegance. These materials give you the look of high-end finishes like natural stone or intricate woodwork with a fraction of the maintenance.

Outdoor Entertainment Spaces

Why limit beautiful design to your home’s interior? A faux feature wall can completely transform your outdoor entertainment areas. Use weather-resistant faux stone panels to add a rustic, natural look to an outdoor kitchen, a patio seating area, or the base of a pergola. It’s an excellent way to get the appearance of a custom stone wall without the complexity and cost of traditional masonry. This addition can make your backyard feel like a true extension of your living space, creating a polished and inviting environment for relaxing and entertaining guests. It’s the perfect finishing touch for structures like custom pavilions and pergolas.

When to Call a Professional

Taking on a DIY project is incredibly rewarding, but it’s also important to know your limits. While a simple faux feature wall is a great weekend project for many, some situations are better left to experienced professionals. The goal is a beautiful, lasting result, and sometimes the clearest path to achieving that is by calling for backup. Recognizing when you need help is a key part of any successful home improvement project.

The most important factor to consider is safety. If your design involves anything more than applying panels or trim to a flat, empty wall, it’s time to pause. Any project that requires electrical work, like installing built-in sconces or backlighting, should be handled by a licensed professional. The same goes for walls that contain plumbing or require structural changes. Messing with your home’s core systems is risky, so for these complex jobs, it’s best to rely on a full-service home remodeling team.

Think about the scope and complexity of your vision. Are you planning an intricate geometric design that requires precise, angled cuts? Are you working with heavy faux stone panels that need expert handling for a seamless finish? If your feature wall is part of a larger renovation, a professional can ensure the new design element feels cohesive with the rest of the space. An expert can integrate a stunning feature wall into a complete basement finish or make it the focal point of a new outdoor kitchen, ensuring the materials and style complement the overall landscape design.

Finally, be realistic about your time and skills. A professional has the right tools and years of experience to complete the job efficiently and with a flawless finish. If you’re short on time or feel the project is stretching your abilities, hiring a pro is a smart investment. It saves you from potential frustration and ensures the final product looks polished and high-end. For projects that require specialized knowledge, like detailed masonry work, an expert touch makes all the difference.

Related Articles

Frequently Asked Questions

How much time should I set aside for a DIY feature wall? For most simple designs using trim or panels, you can expect the project to take a full weekend. Plan to spend the first day on preparation, measuring, and cutting your materials. The second day can be for installation, caulking, and painting. If you’re attempting a more complex geometric pattern or working with a very large wall, it’s wise to give yourself an extra day so you don’t have to rush the finishing touches.

Are faux materials durable and easy to clean? Yes, most modern faux materials are designed for real life. MDF panels, once painted, can be wiped down just like a regular wall. Faux stone and brick panels are often made from high-density polyurethane, which is resistant to moisture, pests, and fading. Cleaning usually just requires a gentle wipe with a damp cloth. Always check the manufacturer’s care instructions, but you’ll find they are generally very low-maintenance.

Can I install a faux feature wall in a high-moisture area like a bathroom? You can, but you must choose your materials carefully. Avoid using standard MDF, as it can swell with prolonged exposure to moisture. Instead, look for PVC panels, vinyl wallpapers, or faux stone panels specifically rated for use in damp environments like bathrooms or basements. Proper ventilation in the room is also key to ensuring your feature wall looks great for years to come.

What’s the most important step for making my project look professional instead of DIY? The finishing work makes all the difference. Taking the time to caulk every seam and nail hole is what creates that seamless, built-in appearance. After the caulk dries, a light sanding to smooth everything out, followed by a quality primer and two coats of paint, will give you a flawless result. Rushing these final steps is the quickest way to make your hard work look unfinished.

I love the idea, but I’m not sure I can do it myself. When should I definitely call a professional? You should call a professional if your project involves any electrical or plumbing work, like adding wall sconces or working around pipes. It’s also a good idea to hire an expert for very intricate designs that require advanced cutting skills or for installing heavy faux stone panels on a large or high wall. A professional ensures the job is done safely and with a perfect finish, which is a smart investment for more complex visions.

Share this page:
Indoor sauna installation in a modern Long Island home with a beach view.

Indoor Sauna Installation Long Island: A Complete Guide

Adding a sauna to your home is more than just a luxury upgrade; it’s a powerful investment in your daily health. Think of it as creating a personal wellness retreat, a quiet space to relieve muscle soreness, reduce stress, and support better sleep. The benefits of regular sauna use are profound, helping you feel recharged and revitalized. It’s a simple practice that becomes a cornerstone of a healthier lifestyle. For homeowners looking to enhance their well-being, a professional indoor sauna installation Long Island provides a dedicated space for relaxation and recovery, seamlessly integrated into your home’s design and your daily routine.

Key Takeaways

  • Choose Your Experience: Decide if you prefer the deep, gentle warmth of an infrared sauna or the intense, steamy heat of a traditional model; your personal preference is the most important factor in selecting the right sauna for your lifestyle.
  • Plan for a Safe Installation: A successful sauna project depends on crucial details like location, electrical wiring, ventilation, and drainage. Partnering with a professional ensures these technical aspects are handled correctly, preventing safety hazards and costly mistakes.
  • Understand the Full Investment: The total cost includes the sauna unit, professional installation, and necessary electrical work. Knowing these components from the start helps you budget for a project that is a long-term investment in your health and well-being.

Infrared vs. Traditional Saunas: Which Is Right for You?

Deciding to bring a sauna into your home is exciting, but choosing the right one can feel like a big decision. The two main types you’ll encounter are infrared and traditional steam saunas. While both offer incredible relaxation and health benefits, they provide very different experiences. The best fit for you really comes down to your personal preferences for heat, the kind of wellness routine you envision, and the space you have in your Long Island home.

Think about what you want to get out of your sauna sessions. Are you looking for a gentle, soothing warmth that penetrates deep into your muscles, or do you crave the intense, steamy heat of a classic Finnish spa? Understanding how each type works is the first step in creating your perfect home sanctuary. We can help you explore the features of both, ensuring the sauna you choose aligns perfectly with your lifestyle and wellness goals.

What Is an Infrared Sauna?

An infrared sauna works a bit differently than the saunas you might see at a gym. Instead of heating the air around you, it uses infrared light waves to warm your body directly. It’s a similar feeling to the way the sun warms your skin on a cool day. This process allows you to experience a deep, therapeutic sweat at much lower temperatures, typically between 120°F and 140°F. Because the heat is more targeted and less overwhelming, many people find they can enjoy longer, more comfortable sessions. This makes infrared saunas a great option if you’re new to sauna use or are sensitive to high heat.

What Is a Traditional Steam Sauna?

A traditional steam sauna, often called a Finnish sauna, creates the classic experience many people associate with the word “sauna.” It uses an electric or wood-burning stove to heat a compartment of rocks. When the rocks are hot, you pour water over them to produce a burst of steam, or “löyly,” which fills the room with moist heat. Temperatures in a traditional sauna are much higher, often reaching 195°F. This intense, enveloping heat provides a powerful, purifying sweat. It’s an invigorating experience that is perfect for those who love a hot, humid environment and want to incorporate it into a larger home remodeling project.

Key Differences to Help You Choose

When you’re weighing your options, the main differences come down to heat, installation, and experience. An infrared sauna offers a gentle, dry heat that warms up quickly and is often easier to install, sometimes just needing a standard electrical outlet. A traditional sauna provides a more intense, humid heat and requires a more involved installation process that includes proper ventilation and electrical wiring. The experience is also distinct: infrared is about deep, penetrating warmth, while traditional is about a powerful, steamy sweat session. Both paths lead to relaxation and wellness; the right one is simply the one that feels best for you.

The Health Benefits of an Indoor Sauna

Adding a sauna to your home is more than just a luxurious upgrade; it’s a powerful investment in your daily health and well-being. Think of it as your personal retreat, a quiet space to unwind and recharge your body and mind. Regular sauna sessions can have a profound impact, offering a range of benefits from physical recovery to mental clarity. It’s a simple, enjoyable practice that can easily become a cornerstone of your wellness routine. The warmth envelops you, stress melts away, and you emerge feeling renewed. This isn’t just about relaxation, it’s about actively supporting your body’s functions in a gentle, natural way. Gappsi offers beautiful, high-quality saunas that can be seamlessly integrated into your Long Island home, creating a sanctuary for relaxation and health. Whether you’re finishing a basement or designing a new master bathroom, a sauna is a feature that provides lasting value for your entire family. Let’s explore some of the incredible ways an indoor sauna can support a healthier lifestyle.

Improve Circulation and Detoxification

One of the most immediate effects you’ll notice in a sauna is how it gets your blood flowing. The gentle heat raises your body temperature, causing your blood vessels to widen. This process improves circulation, which means more oxygen and nutrients are delivered throughout your body. Better blood flow is fantastic for your cardiovascular health and gives your skin a vibrant, healthy glow. At the same time, the heat induces a deep sweat, which is your body’s natural way of flushing out toxins. This cleansing process can leave you feeling refreshed and revitalized from the inside out.

Relieve Muscle Pain and Soreness

If you deal with sore muscles after a workout or chronic joint stiffness, a sauna can become your best friend. The penetrating heat works wonders on tired, aching muscles, helping them relax and release tension. This increased blood flow also helps reduce inflammation and speeds up your body’s natural recovery process. For athletes or anyone with an active lifestyle, regular sauna use can be a game-changer for muscle repair. It’s also a wonderful source of relief for those with arthritis or other chronic pain conditions. Integrating a sauna is a perfect complement to a wellness-focused home remodeling project.

Reduce Stress and Promote Better Sleep

In our busy lives, finding a moment of true peace can be difficult. A sauna provides a warm, quiet escape where you can shut out the noise and simply breathe. The heat helps your body release endorphins, which are natural mood-lifters, creating a profound sense of calm and well-being. This deep relaxation is the perfect antidote to a stressful day. By making a pre-bedtime sauna session part of your nightly routine, you can help prepare your body for a deeper, more restorative sleep. You’ll find it easier to fall asleep and wake up feeling more rested and ready for the day.

Support Clearer, Healthier Skin

Your skin loves a good sauna session. As you sweat, your pores open up and release the dirt, oil, and bacteria that can build up over time. This deep cleansing action can help reduce breakouts and leave your skin feeling incredibly clean and soft. The improved circulation also plays a huge role, delivering a fresh supply of oxygen and nutrients to your skin cells. This can help stimulate collagen production and give you that coveted healthy, natural glow. Think of it as an all-natural facial that you can enjoy in the comfort of your own home, leaving your complexion clearer and more radiant.

How to Prepare Your Home for a Sauna Installation

Bringing a sauna into your home is an exciting step toward creating your personal wellness retreat. Before the installation team arrives, a little preparation can make the entire process smoother and faster. Thinking through a few key details ensures your new sauna will be safe, efficient, and perfectly placed. Getting these elements sorted out first means you’ll be enjoying your first steam or infrared session in no time.

Let’s walk through the four main things you need to consider to get your space ready for a seamless installation.

Find the Perfect Spot

The first step is deciding where your new sauna will live. You have more options than you might think. Basements, garages, and even large, well-ventilated bathrooms are popular choices. A spare bedroom or a finished attic can also work beautifully, provided there is good airflow. The main requirements are a solid, level surface and enough space for the sauna’s footprint and clearance for the door to swing open. When you work with us, our team can help you evaluate potential locations in your home to find the one that offers the best combination of convenience, privacy, and structural soundness for your new sauna.

Plan for Electrical and Ventilation Needs

Saunas have specific power and ventilation requirements that are crucial for safety and performance. Most infrared saunas can run on a dedicated 15 to 20 amp electrical outlet, similar to a major appliance. Traditional steam saunas often require a more powerful 240V connection. Proper ventilation is also essential to manage moisture and keep the air fresh. This might involve tying into an existing exhaust system or installing a new one. Don’t worry about the technical details, our professional home remodeling team handles all the necessary electrical and ventilation work to ensure your installation is safe and up to code.

Select the Right Flooring and Insulation

The right foundation is key to a long-lasting sauna. You’ll need a flat, strong, and waterproof surface. Materials like concrete, tile, or luxury vinyl are excellent choices. Carpet is not a suitable option because it can trap moisture and lead to mold. Proper insulation within the sauna walls is just as important. It ensures the sauna heats up efficiently, maintains a consistent temperature, and operates safely. Using the correct type and amount of insulation is a detail that professionals never overlook, as it directly impacts your energy bills and overall experience. We can even help you select beautiful and durable porcelain tiles that are perfect for the area around your sauna.

Check Local Long Island Building Codes

Any significant home improvement project, including a sauna installation, must comply with local building codes. These regulations exist to ensure safety and proper construction practices. For homeowners in Nassau and Suffolk County, trying to figure out these rules can be a headache. The good news is, you don’t have to. When you partner with Gappsi, we take care of everything. Our team is deeply familiar with Long Island’s specific building codes and permit requirements. We manage the entire process, from filing paperwork to passing final inspections, so you can have complete peace of mind knowing your project is done right.

The Sauna Installation Process, Step-by-Step

Bringing a sauna into your home is an exciting project, and understanding the process can make it feel much more manageable. At Gappsi, we’ve refined our installation to be as smooth and transparent as possible, so you know exactly what to expect. From the initial idea to your first relaxing session, our team handles every detail. We believe the journey to getting your dream sauna should be as stress-free as the sauna itself. Let’s break down the four key steps we take to transform a space in your home into a personal wellness retreat.

Step 1: Consultation and Design

Everything starts with a conversation. Our first step is a detailed consultation where a Gappsi expert visits your home. We’ll talk about your vision, how you plan to use the sauna, and your wellness goals. This is also when we’ll carefully measure your intended space, whether it’s a corner of your master bathroom or a dedicated room in your basement. We assess the existing electrical and ventilation setups to ensure a safe and seamless fit. This initial meeting is all about creating a personalized plan that aligns your dream with the practicalities of your home, ensuring the final result is perfect for you.

Step 2: Choosing Your Materials

Once we have a design, it’s time for the fun part: choosing your sauna. We offer a wide range of options to fit your lifestyle and aesthetic preferences. You can select from traditional Finnish wood-burning models, modern electric dry saunas, or therapeutic infrared saunas. Each type offers a unique experience and health benefits. Our team will guide you through the different materials, like beautiful cedar or hemlock, and features available. We handle the sourcing of all high-quality materials, ensuring your new sauna not only looks stunning but is also built to last for years of enjoyment.

Step 3: Delivery and Professional Setup

With your design finalized and materials selected, our professional team takes over. Gappsi manages the complete delivery and installation, so you don’t have to worry about coordinating logistics. Our skilled technicians will arrive on schedule and assemble your sauna with precision and care. We follow manufacturer specifications and our own high standards to ensure every component is installed correctly and safely. For most models, the setup is surprisingly quick, often taking just a few hours. Our home remodeling experts work efficiently and cleanly, respecting your home and leaving the space ready for you to enjoy.

Step 4: Final Walkthrough and Tutorial

Our job isn’t finished once the last panel is in place. Before we leave, we conduct a thorough final walkthrough with you. We’ll turn on the sauna and show you exactly how to operate all the controls, from setting the temperature to managing any special features. We also provide practical tips for cleaning and maintenance to keep your sauna in pristine condition. This tutorial is your opportunity to ask any questions you might have. We want to make sure you feel completely confident and comfortable using your new home spa from the very first day.

How Much Does an Indoor Sauna Cost in Long Island?

Thinking about your budget is one of the first steps in any home improvement project, and adding a sauna is no different. The total cost of your indoor sauna will depend on a few key things: the type of sauna you choose, its size, the materials used, and any custom features you have in mind. To give you a clearer picture, let’s break down the typical costs you can expect for an indoor sauna installation here on Long Island.

Breaking Down Infrared Sauna Costs

Infrared saunas are a popular choice for their modern technology and straightforward installation. The unit itself typically costs between $3,200 and $6,500, though high-end models can cost more. Because many infrared saunas come as pre-fabricated kits, the installation process is quite efficient. A professional can often assemble and set up the unit in just three to four hours, which helps keep labor costs down. This makes infrared saunas an excellent option if you’re looking for a quicker path to relaxation without a complex construction project. These saunas offer a gentle, therapeutic heat that many people love.

Breaking Down Traditional Sauna Costs

If you dream of a classic, steamy sauna experience, a traditional model is the way to go. These saunas generally range from $4,000 to $10,000 or more for the unit and materials. Professional installation can add another $400 to $1,500 to the final price, depending on the complexity of your design. The higher cost reflects the more involved construction process, which includes building the insulated room, installing the electric or wood-fired heater, and setting up the rocks for generating steam. While the investment is greater, a traditional sauna offers that authentic, high-heat environment and often allows for more custom design possibilities.

Additional Expenses to Consider

Beyond the sauna unit and basic installation, there are a few other potential costs to keep in mind. The most important is the electrical work. An infrared sauna might require a dedicated circuit, which can cost between $300 and $800 on average. Traditional saunas often have more demanding electrical needs. It is vital to work with a licensed electrician to ensure the wiring is safe and meets local codes. At Gappsi, we handle all the electrical requirements for our sauna installations, giving you peace of mind that everything is done correctly. Other costs could include preparing the space, upgrading flooring, or adding custom lighting to complete your personal oasis.

Common Sauna Installation Mistakes to Avoid

Adding a sauna to your home is an exciting project, but a smooth installation requires careful attention to detail. A few common missteps can lead to costly repairs and safety concerns down the road, turning a dream project into a major headache. By understanding these potential pitfalls ahead of time, you can ensure your new wellness retreat is a source of relaxation, not stress. The good news is that you don’t have to figure it all out on your own. Working with an experienced team helps you sidestep these issues entirely, as they handle the technical details so you can focus on the fun part: enjoying your new sauna. From initial design to the final touches, a professional approach guarantees a safe, beautiful, and long-lasting addition to your home.

Skipping the Planning Stage

It’s tempting to jump right into picking out wood types and heaters, but rushing past the planning phase is a recipe for trouble. A successful installation starts with a thoughtful design that considers the specific dimensions of your space, your home’s layout, and how you plan to use the sauna. Without a clear blueprint, you might end up with a sauna that feels cramped or doesn’t fit the room correctly. A proper plan ensures every element, from bench placement to door swing, is accounted for, creating a functional and beautiful final product. This is why our comprehensive home remodeling projects always begin with a detailed consultation to get every detail just right.

Overlooking Proper Ventilation

Proper ventilation is one of the most critical aspects of a safe and long-lasting sauna, yet it’s often overlooked. A sauna generates significant heat and moisture, and without an adequate way for air to circulate, you risk creating a perfect environment for mold and mildew. This can damage your home’s structure and create an unhealthy atmosphere. Good ventilation not only prevents moisture buildup but also ensures a steady supply of fresh air, making your sauna sessions more comfortable and enjoyable. Professional installers will design a ventilation system that protects both your sauna and your home for years to come.

Attempting DIY Electrical Work

While the DIY spirit is admirable for many home projects, sauna electrical work is not one of them. Saunas require dedicated circuits and specific wiring to handle the high power demands of the heater safely. Incorrect wiring is a serious fire hazard and can lead to electrical shorts or equipment failure. You should always hire a licensed and qualified electrician to handle this part of the installation. This ensures your sauna is compliant with local building codes and, most importantly, that your family is safe. A professional installation team will coordinate all electrical work for you, providing total peace of mind.

Forgetting About Drainage

Water and saunas go hand in hand, whether you’re ladling it over hot stones or rinsing off afterward. Because of this, proper drainage is essential to prevent water from pooling and causing damage. Without a plan for where water will go, you can face issues like warped flooring, rot in the surrounding walls, and moisture seeping into your home’s foundation. A well-designed sauna includes a subtle, effective drainage system, often involving a sloped floor and a drain. This simple feature is key to protecting your investment and making your sauna easy to clean and maintain.

How to Hire the Best Sauna Installer in Long Island

Choosing the right installer is just as important as picking the perfect sauna. You want a team that makes the process feel effortless, handling everything from delivery to the final electrical hookups. A great installer ensures your new home spa is not only beautiful but also safe and built to last, giving you peace of mind so you can focus on the exciting part: enjoying your first session.

What to Look for in a Professional

When you start your search, look for a company that offers a complete, all-in-one service. The ideal partner doesn’t just sell you a sauna; they manage the entire project from start to finish. This means they handle the supply, delivery, and full installation. Working with a single, dedicated team prevents miscommunication between different contractors and simplifies the whole experience for you. You’ll have one point of contact who understands your vision and is responsible for bringing it to life. This integrated approach is the key to a smooth, stress-free installation, ensuring every detail is handled professionally without you having to coordinate multiple vendors.

Why Choose Gappsi for Your Sauna Installation

Finding an installer who truly understands Long Island is a game-changer. At Gappsi, we provide high-quality saunas and manage every technical aspect of the installation. Our licensed experts handle all the electrical work, making sure your setup fully complies with local codes in both Nassau and Suffolk Counties. This removes a major headache for homeowners, as you won’t need to hire a separate electrician. We believe a sauna should be a source of wellness, not worry. Whether you’re looking for a space to unwind after a long day, soothe sore muscles, or simply enjoy with family, we ensure your installation is seamless and secure from day one.

Tips for Maintaining Your New Sauna

Once your sauna is installed, a little care will keep it in pristine condition for years. Make it a habit to wipe down the interior surfaces with a clean towel after each use to manage moisture. About once a month, do a quick check of the door, vents, and controls to make sure everything is working correctly. For a deeper clean, a simple solution of white vinegar and water can keep the wood fresh and sanitized. Remember that consistent use is also a form of maintenance for your own well-being. Regular sessions can feel like a gentle workout for your heart, helping you relax and recharge right at home.

Related Articles

Frequently Asked Questions

Will an indoor sauna significantly increase my electricity bill? That’s a great question, and the answer is usually no. Modern saunas, especially infrared models, are designed to be very energy-efficient. Think of it like running another major appliance. The exact cost will depend on how often you use it and your local electricity rates, but for most people, the impact on their monthly bill is minimal. Proper insulation, which is a key part of our professional installation, also plays a big role in keeping energy use down by helping the sauna heat up quickly and retain its warmth.

How much upkeep does a sauna need? You’ll be happy to hear that saunas are surprisingly low-maintenance. The most important habit is to simply wipe down the benches and walls with a clean towel after you’re done to absorb any excess moisture. For a deeper clean, you can occasionally use a mild solution of water and white vinegar. We’ll walk you through all the simple care tips during our final tutorial, but you can expect to spend far more time relaxing in your sauna than you will cleaning it.

I’m not sure if I have enough room for a sauna. What are my options? Many people are surprised by how versatile sauna placement can be. You don’t need a huge, dedicated room. We’ve installed beautiful saunas in finished basements, home gyms, garages, and even spacious master bathrooms. Infrared saunas, in particular, come in a variety of compact sizes, with some needing only a small corner. The best first step is our in-home consultation, where we can measure your potential spaces and show you what’s possible for your home.

How long does the entire process take, from consultation to my first sauna session? The timeline can vary depending on whether you choose a pre-fabricated or a custom-built sauna. Once you’ve made your selection, the process moves quickly. After the initial consultation and design phase, we order your materials. The on-site installation itself is quite efficient; our team can often have a pre-fabricated unit fully assembled and ready to go in just a day. We handle every step, so the process feels seamless and straightforward for you.

Why is it so important to have a professional handle the electrical work? This is a matter of safety, pure and simple. Saunas are powerful units that require a dedicated electrical circuit to operate correctly and prevent overloads, which can be a serious fire hazard. A licensed professional ensures the wiring is done correctly, meets all local Long Island building codes, and can safely handle the heater’s power demands. When you work with us, this isn’t something you have to worry about, as our expert team manages all the electrical work as part of our complete installation service.

Share this page:
Above ground swim spa landscaping idea with a modern stone paver patio and evergreen shrubs.

9 Inspiring Above Ground Swim Spa Landscaping Ideas

The height and bulk of an above ground swim spa can feel like a design challenge, but it’s actually a creative opportunity. Instead of trying to hide it, you can work with its structure to create a dynamic, multi-dimensional space. Building a deck up to its edge can give it a seamless, built-in look, while surrounding it with raised stone planters can make it feel like a natural part of the garden. The goal is to make the spa look intentional and beautifully integrated. We’ve gathered our favorite above ground swim spa landscaping ideas to help you solve this design puzzle and turn your spa into a stunning architectural feature in your yard.

Key Takeaways

  • Design around your spa, not just next to it: Make your swim spa look intentional by building a deck, patio, or garden beds that connect it to your yard. This approach helps manage the spa’s height and turns it into a beautiful, integrated feature instead of a standalone object.
  • Plan for low-maintenance enjoyment: Think about the practical details from the start to save yourself headaches later. This means ensuring a solid foundation, proper drainage for splashes, non-slip surfaces for safety, and choosing plants that will not make a mess in your water.
  • Layer privacy for a stylish retreat: Create a secluded oasis by layering different privacy solutions. Combine stylish fencing with vertical elements like a pergola or trellis, and use lush, year-round plants to build a natural screen that feels beautiful, not boxy.

What Makes Swim Spa Landscaping Unique?

Landscaping around a swim spa is a unique project that blends the best of pool design and garden planning. Unlike a traditional in-ground pool, a swim spa often sits above ground, creating a significant vertical element in your yard. Its compact size allows it to fit in spaces where a full pool might not, but its year-round usability means the surrounding area needs to be functional and beautiful in every season. The key is to create a design that feels intentional, making the spa a seamless and integrated feature of your outdoor living space rather than an afterthought.

Thinking about your swim spa landscaping requires a different approach. You have to consider how to manage its height, ensure the surrounding area is safe and accessible, and choose materials that complement the spa without causing damage. It’s a wonderful opportunity to create a personal retreat, whether that’s a lush garden oasis, a sleek modern patio, or a cozy, private corner. With the right planning, you can transform the area around your swim spa into your favorite spot to relax, exercise, and entertain.

Design Around the Height and Structure

An above-ground swim spa’s height is one of its most defining features, and your design should work with it, not against it. You can place a swim spa in several ways: completely above ground, partially recessed into the earth, or fully built into a multi-level deck. Each choice creates a different look and feel. A fully above-ground spa, for instance, requires stairs or a small deck for access, which can be designed to add architectural interest.

A partially recessed spa can soften the spa’s profile, making it feel more connected to the ground. This approach works beautifully with surrounding porcelain or natural stone pavers that create a smooth transition from the lawn or patio to the water’s edge. Building the spa into a larger deck structure is another popular option, creating a cohesive entertainment area with distinct zones for lounging, dining, and swimming. The goal is to make the spa look like it truly belongs in your yard.

Plan for Drainage, Safety, and Access

Practicality is just as important as aesthetics when it comes to swim spa landscaping. First, you need a solid, perfectly level foundation that can support the immense weight of the spa when filled with water, which can be around 20,000 pounds. This usually means a reinforced concrete slab or a specially engineered deck. Our expert masonry and construction teams can ensure your foundation is built to last.

Water will inevitably splash out, so proper drainage is critical. The surface around your spa should be slightly sloped to direct water away from the foundation and prevent pooling. It’s also vital to choose non-slip materials for decking and patios to keep the area safe. Finally, think about access. You’ll need easy entry and exit from the spa, but don’t forget about the equipment panel. Make sure your design leaves enough clear space for a technician to perform routine maintenance without having to tear up your beautiful landscaping.

Avoid These Common Landscaping Mistakes

A little foresight can help you avoid common mistakes that create extra work or even damage your investment. For example, never place sharp rocks, loose gravel, or stones directly against the acrylic shell of your swim spa. Over time, these materials can shift, potentially scratching the finish or putting pressure on the structure. It’s better to create a border a few inches away from the spa’s base.

You should also be mindful of what you plant nearby. Avoid trees and large shrubs with aggressive root systems that could disrupt the spa’s foundation over time. It’s also wise to steer clear of plants that drop a lot of leaves, flowers, or needles, as this debris will end up in your water and filter system. Working with a professional landscape designer can help you select the right plants and materials from the start, ensuring your swim spa area remains a low-maintenance sanctuary.

9 Landscaping Ideas for Your Above Ground Swim Spa

An above ground swim spa is a fantastic addition to any backyard, but it can look a bit stark sitting on its own. The right landscaping can transform it from a simple container of water into a stunning, integrated feature of your outdoor living space. This process is about creating a seamless transition between your home, your yard, and your new relaxation spot. With a thoughtful design, you can make your swim spa area beautiful, functional, and uniquely yours. Here are nine ideas to get you started on creating a beautiful and functional area around your swim spa.

1. Build a Wraparound Deck or Elevated Platform

One of the best ways to make an above ground swim spa feel like a permanent, luxurious part of your yard is to build a deck around it. A multi-level or wraparound deck can completely hide the sides of the spa, giving it the appearance of an in-ground installation. This approach also provides easy, safe access and creates usable space for lounge chairs, planters, or a small table. You can use materials like wood or low-maintenance composite decking to match your home’s style. A well-designed deck makes your swim spa the true centerpiece of your backyard oasis, perfect for both relaxing and entertaining.

2. Lay a Stone or Porcelain Paver Patio

Creating a solid, stylish foundation around your swim spa is essential for both looks and function. A patio made from porcelain or natural stone pavers provides a durable, slip-resistant surface that stands up to splashes and foot traffic. Unlike grass, a paver patio means no mud or grass clippings getting tracked into your spa. With a huge variety of colors, shapes, and textures available, you can design a patio that perfectly complements your home and landscape. This creates a clean, polished look and a stable area for furniture, turning your spa zone into a complete outdoor room.

3. Add a Pergola or Pavilion for Shade and Style

A structure like a pergola or pavilion does more than just look great; it adds function and a sense of enclosure to your swim spa area. These structures provide welcome shade on sunny days and offer protection from light rain, extending the time you can enjoy your spa. You can hang string lights for evening ambiance, grow climbing vines for a touch of green, or add outdoor curtains for extra privacy. A pavilion or pergola adds a vertical architectural element that defines the space and makes it feel like a true outdoor retreat.

4. Use Raised Garden Beds and Flower Borders

To soften the hard lines of a swim spa, surround it with life and color. Building raised garden beds around the base is a clever way to conceal the spa’s exterior while adding lush greenery. You can construct the beds from stone, wood, or composite materials to match your deck or patio. Fill them with a mix of flowering plants, textured foliage, and fragrant herbs to create a sensory experience. This approach helps your swim spa blend more naturally into your yard’s landscape design and turns it into a vibrant, beautiful focal point.

5. Plant Evergreen Shrubs and Ornamental Grasses

For year-round beauty and privacy, choose your plants wisely. Evergreen shrubs like boxwood or arborvitae provide a consistent green screen that hides the spa and blocks views from neighbors. They look great in all seasons and require minimal upkeep once established. To add texture and movement, mix in some ornamental grasses. Their feathery plumes catch the breeze and create a soft, natural look that contrasts nicely with the hardscape. Choosing the right plants for your landscape ensures your spa area looks beautiful and feels private throughout the year.

6. Create Pathways with Decorative Stone or Gravel

Well-defined pathways are key to a functional and polished landscape design. A path leading to your swim spa keeps feet clean and protects your lawn from wear and tear. You can create beautiful walkways using materials like flagstone, pavers, or decorative gravel. A winding gravel path can add a rustic, organic feel, while a straight paver walkway offers a more formal, modern look. Using Gravelfix stabilization grids ensures your gravel path stays neat and tidy. These pathways connect your swim spa to other areas of your yard, like the patio or back door, creating a cohesive flow.

7. Install Synthetic Turf for a Low-Maintenance Lawn

If you want the look of a lush lawn without the constant upkeep, synthetic turf is an excellent choice for the area around your swim spa. It provides a soft, comfortable surface for bare feet and stays perfectly green all year long with no mowing, watering, or fertilizing. Best of all, you won’t have to worry about mud or grass clippings getting into your spa water. Synthetic turf is incredibly durable and drains quickly, making it a practical and attractive solution for creating a clean, usable space for relaxation and play.

8. Add Lighting for Evening Ambiance

Don’t let the sunset end your swim spa enjoyment. Thoughtful outdoor lighting can transform your space into a magical retreat after dark while also improving safety. You can hang elegant string lights from a pergola, install subtle path lights along your walkway, or use uplighting to highlight beautiful trees and plants. In-deck lighting can define the spa’s perimeter and prevent trips. A well-planned landscape lighting scheme creates a warm, inviting atmosphere, making your evening soaks feel even more special and extending the usability of your entire backyard.

9. Incorporate a Soothing Water Feature

Why stop at just one water feature? Adding a small fountain or a cascading waterfall near your swim spa can greatly enhance the relaxing atmosphere. The gentle sound of moving water is incredibly soothing and can help mask unwanted background noise from neighbors or traffic. This feature can be a standalone piece or integrated into the surrounding patio or garden beds. It adds another layer of sensory enjoyment to your space, complementing the main attraction of your swim spa or pool and turning your backyard into a true sanctuary of tranquility.

What Are the Best Plants and Materials for a Swim Spa?

Choosing the right plants and materials to surround your swim spa is about more than just looks. It’s about creating a functional, safe, and low-maintenance environment so you can spend more time relaxing and less time on upkeep. The right combination of softscaping and hardscaping will frame your spa beautifully and make the entire space more enjoyable. From lush greenery to elegant stone, let’s explore the best options for your backyard oasis.

Choose Low-Maintenance Shrubs and Grasses

You want plants that look great without demanding all your free time. Evergreen shrubs are a fantastic choice because they provide year-round color and structure, effectively hiding the spa’s walls while adding a touch of green. Consider planting varieties like boxwood or dwarf arborvitae. Ornamental grasses, such as fountain grass or feather reed grass, are another excellent option. They add soft texture and movement to the landscape and are incredibly resilient. The goal is to create a beautiful backdrop that doesn’t shed leaves into your spa, which is why an expert landscape design often prioritizes these clean, hardy plants.

Add Color with Water-Tolerant Flowers

While shrubs provide the foundation, flowers bring your spa area to life with vibrant color. Layering colorful flowering plants in front of your evergreens creates depth and visual interest. Choose perennials that are known to be water-tolerant, like daylilies, hostas, or black-eyed Susans, as they can handle occasional splashes from the spa. Before planting, it’s a good idea to lay down a layer of mulch. Mulch helps the soil retain moisture, reduces weed growth, and gives the garden beds a clean, finished look. This simple step makes your flower borders much easier to maintain throughout the season.

Select the Right Base: Pavers, Gravel, and Stone

The material you choose for the area immediately surrounding your swim spa is critical for safety and style. A patio provides a stable, slip-resistant surface for getting in and out of the spa. Porcelain and natural stone pavers are top-tier choices because they offer endless design possibilities and incredible durability. They create a sophisticated, high-end look that stands up to the elements. For pathways leading to the spa or as a decorative accent, consider using gravel. Modern stabilized gravel systems keep the stones in place, creating a tidy and comfortable walking surface that adds a natural, rustic texture to your design.

Know What to Avoid Planting Nearby

Just as important as what you plant is what you don’t plant. Avoid trees or shrubs that drop a lot of flowers, fruit, or needles, as they will create constant cleanup work in and around your spa. Also, steer clear of plants with aggressive root systems that could damage the spa’s foundation or surrounding patio over time. When it comes to materials, never place loose rocks, stones, or gravel directly against the spa wall. These materials can trap moisture and may even chip or corrode the spa’s exterior. Instead, use proper masonry techniques to build a small, supportive retaining wall or raised border to keep these materials contained.

How Do You Add Privacy Without Losing Style?

Your swim spa should be a personal retreat, a place where you can relax without feeling like you’re on display. Creating privacy is essential, but it doesn’t mean you have to build a fortress around your yard. The key is to blend privacy solutions into your landscape design so they feel intentional and beautiful. Instead of just blocking views, think about creating a secluded sanctuary. With the right combination of structures, fencing, and plants, you can screen your swim spa from neighbors while adding depth, texture, and style to your entire outdoor living space. This approach turns a practical need into a design opportunity, making your backyard feel more like a cohesive and intimate escape. When privacy is part of the overall vision, it enhances the sense of luxury and tranquility. It allows you to fully immerse yourself in the experience, whether you’re exercising, unwinding after a long day, or spending time with family. The goal is to make your private space feel expansive and inviting on the inside, not closed off and restrictive from the outside.

Choose Fencing That Complements Your Design

Fencing is often the first solution that comes to mind for privacy, and for good reason. It’s effective and clearly defines your space. But a fence doesn’t have to be a plain, solid wall. Think of it as a backdrop for your swim spa oasis. You can choose materials and styles that match your home’s architecture and your garden’s aesthetic. For example, a horizontal wood fence can create a modern, spa-like feel, while a classic white vinyl fence offers a clean, traditional look. There are many modern fencing options available, from aluminum to composite materials, that provide privacy without sacrificing style. Consider a fence with integrated lattice at the top to add visual interest while still blocking sightlines.

Use Pergolas and Lattices for Vertical Privacy

Sometimes, privacy is needed from above, especially if your yard is overlooked by neighboring windows. This is where vertical structures shine. A custom pergola not only adds an elegant architectural element but also creates a sense of place around your swim spa. You can add retractable shades, outdoor curtains, or fixed slats to the roof for adjustable privacy and sun protection. Lattice panels can also be incorporated into the sides of a pergola or used as standalone screens. These are perfect for supporting climbing vines like clematis or jasmine, which will eventually form a beautiful, living wall that offers natural screening and a lovely fragrance while you relax.

Plant for Natural, Year-Round Screening

For a softer, more organic approach, nothing beats using plants to create a natural privacy screen. The goal is to build layers that look lush and intentional. Start with a backbone of evergreen shrubs or trees, like Arborvitae or Holly, which provide dense, year-round coverage even in winter. This is a key part of a strategic landscape design. Then, you can layer in ornamental grasses, flowering shrubs, and perennials to add texture, color, and seasonal interest. Planting in staggered rows rather than a single straight line creates a more natural and effective visual barrier. This method not only hides your swim spa from view but also integrates it beautifully into the surrounding garden.

How Do Budget and Yard Size Affect Your Design?

Your budget and the size of your yard are the two main factors that will shape your swim spa project. But don’t think of them as limitations. Instead, see them as creative starting points. A smaller budget encourages smart, high-impact choices, while a compact yard challenges you to be efficient and clever with your design. On the other hand, a larger budget or yard opens up a world of possibilities for creating a true backyard resort. No matter your circumstances, a thoughtful plan is the key to creating a space you’ll love.

Ideas for a Modest Budget

Creating a beautiful setting for your swim spa doesn’t have to break the bank. You can achieve a polished look by focusing on simple, elegant materials. For example, creating a clean, modern patio area with affordable and durable gravel solutions can define the space beautifully. Instead of complex garden beds, consider using large, attractive planters filled with low-maintenance greenery. This adds color and texture without the cost of extensive garden installation. Smart planning allows you to build a stylish and functional swim spa environment that feels luxurious, proving that a great design is more about creativity than cost.

High-End and Luxury Upgrades

If your budget allows, you can transform your swim spa into the centerpiece of a luxurious outdoor retreat. Imagine your spa surrounded by an expansive patio made from exquisite porcelain and natural stone pavers, seamlessly connecting to a custom outdoor kitchen. You can integrate high-end features like powerful swimming jets or self-cleaning systems into the spa itself. For ultimate comfort and style, adding a custom pavilion or pergola provides shade and a stunning architectural element. You could even create a complete wellness zone by installing a sauna nearby, offering a perfect escape right in your backyard.

Landscaping a Small Backyard

In a smaller yard, the goal is to make the space feel open and uncluttered while maximizing functionality. A great strategy is to build vertically. A privacy fence, a trellis with climbing vines, or tall, slender shrubs can draw the eye upward and create a sense of seclusion. A line of evergreen shrubs is an excellent choice because it can hide the walls of the swim spa and provides beautiful greenery all year. Using light-colored pavers for your patio can also make the area feel larger and brighter. For a green, no-fuss lawn area, synthetic turf is a perfect space-saving solution that always looks pristine.

Designing for a Large Backyard

A large backyard gives you the freedom to dream big and create distinct “zones” for different activities. Your swim spa can be the heart of a dedicated relaxation zone, perhaps built into a multi-level deck or surrounded by a sprawling stone patio. You can connect these areas with grand, winding pathways made from natural stone or decorative gravel. With more space, you can incorporate larger structures, like a complete outdoor kitchen or a dining area under a large pavilion. You could even add other recreational features, like a putting green or one of our Sports Games Courts, to create the ultimate entertainment hub for family and friends.

What Landscaping Style Is Right for You?

Your swim spa is the main attraction, but the right landscaping style sets the entire mood for your backyard. Think about the feeling you want to create. Do you dream of a tropical getaway, a serene Zen retreat, or a space that feels like a natural extension of your Long Island home? Choosing a theme helps guide your decisions on plants, materials, and decor, ensuring every element works together to create a cohesive and beautiful outdoor oasis. Let’s explore a few popular styles to find the perfect fit for you.

Create a Tropical or Mediterranean Escape

To make your backyard feel like a permanent vacation, a tropical or Mediterranean theme is a fantastic choice. For a lush, tropical vibe, surround your swim spa with large-leafed plants like elephant ears and canna lilies. Layering is key here. You can use evergreen shrubs to hide the spa’s structure and keep things green all year, then add pops of vibrant, colorful flowers in front. For a Mediterranean feel, think about materials like travertine or light-colored porcelain pavers. These options create a bright, sun-drenched look that pairs beautifully with lavender, rosemary, and ornamental grasses. It’s all about creating a rich, inviting atmosphere that feels worlds away.

Embrace a Modern or Zen Garden Approach

If you prefer clean lines and a sense of calm, a modern or Zen-inspired design is ideal. This style focuses on simplicity and the beauty of natural elements. Think minimalist. Decorate the area around your swim spa with carefully chosen plants, smooth stones, and sleek wood or tile accents. A limited color palette of greens, grays, and whites creates a tranquil feeling. A structured pavilion or pergola can add a strong architectural element that complements the modern aesthetic while providing shade. The goal is to design an uncluttered, peaceful space where you can truly unwind and escape from the everyday hustle.

Design a Naturalistic, Seamless Landscape

For a swim spa that looks like it has always been part of your yard, a naturalistic approach is perfect. This style aims to blend the spa seamlessly into its surroundings. Use local plants and materials that feel native to Long Island to create a cohesive look. You can place large, natural stones around the base of your above ground swim spa to give it a rustic, integrated feel. Our expert masonry services can help you build a custom stone surround that makes your spa look like a natural hot spring. This approach turns your backyard into a beautiful, functional space for family time and entertaining.

Frequently Asked Questions

How can I make my above-ground swim spa look more integrated and less like it was just dropped in my yard? The key is to build up the surrounding landscape to meet the height of the spa. Creating a multi-level deck or a raised stone patio around it can make the spa appear built-in, giving it a permanent and polished look. You can also use raised garden beds built against the spa’s base to soften the edges with lush greenery. These strategies help blend the spa into your yard, making it feel like a cohesive and intentional part of your outdoor living space.

What is the most critical first step before any landscaping begins? Before you think about plants or patios, you must ensure you have a proper foundation. A swim spa is incredibly heavy when filled with water, so it needs a perfectly level and reinforced concrete slab or a specially engineered deck to support it. Proper site preparation also includes planning for drainage to direct splash-out away from the spa and your home’s foundation. Getting this step right is essential for the safety and longevity of your entire project.

I have a small backyard. Will landscaping around a swim spa make it feel even more cramped? Not at all, if you design it thoughtfully. In a smaller space, the trick is to think vertically. Using tall, slender plants like arborvitae or installing a stylish privacy screen can draw the eye upward and create a sense of seclusion without taking up much ground space. Choosing light-colored pavers for a small patio can also make the area feel more open and bright. A smart design will make your small yard feel like a functional and intimate retreat.

How do I choose plants that won’t create a huge mess or damage the spa? You want to select plants that are clean and have non-aggressive root systems. Evergreen shrubs and ornamental grasses are excellent choices because they provide year-round color and texture without dropping a lot of leaves into your water. Avoid planting large trees nearby, as their roots can disrupt the foundation over time. Also, steer clear of plants that shed a lot of flowers or fruit to minimize your cleaning duties and keep your filter system happy.

Can I landscape my swim spa area myself, or should I hire a professional? While you can certainly handle smaller tasks like arranging container plants or adding decorative lights, the core elements of a swim spa installation often require professional expertise. Projects involving a concrete foundation, extensive masonry, multi-level decking, and proper drainage are best left to experienced contractors. A professional designer can also help you create a cohesive plan that pulls all the elements together, ensuring your investment is both beautiful and built to last.

Share this page:
Modern outdoor cabin sauna with a glass door in a lush Long Island backyard.

Your Guide to an Outdoor Cabin Sauna on Long Island

Your backyard can be a wonderful place to connect with friends and family, and an outdoor sauna offers a unique setting to do just that. It creates an intimate, screen-free zone for sharing quiet conversations and making memories. Far from being just a solo retreat, a sauna can become the social heart of your outdoor space, complementing a pool or patio and offering a healthy, relaxing activity for guests. It’s a new way to host gatherings that leave everyone feeling refreshed. An outdoor cabin sauna Long Island is more than a wellness tool; it’s a lifestyle upgrade that fosters connection right in your own home.

Key Takeaways

  • A sauna is a powerful wellness tool: Beyond simple relaxation, regular sauna use can support your heart health, soothe sore muscles after a workout, reduce daily stress, and promote deeper, more restful sleep.
  • Match the sauna to your lifestyle: Find the right fit by considering your preferences for heat type (wood, electric, or infrared), choosing durable materials like cedar, and selecting a size that suits your personal or social needs.
  • Prioritize a professional installation: A safe and long-lasting sauna depends on careful planning, which includes preparing a solid foundation, securing the right permits, and relying on experts for all electrical and structural work.

Why Add an Outdoor Sauna to Your Backyard?

Imagine stepping out into your Long Island backyard and into your own private wellness retreat. An outdoor sauna is more than just a beautiful addition to your home; it’s a powerful tool for improving your health and creating a unique space to relax and connect. From easing sore muscles to providing a quiet escape, adding a sauna can completely transform how you use your outdoor space and how you feel every day. It’s an investment in your well being that offers benefits you can enjoy year round, turning a simple corner of your yard into a destination for relaxation and rejuvenation.

Support Cardiovascular Health

Stepping into a warm sauna does more than just relax you; it gives your heart a gentle workout. The heat raises your heart rate and gets your blood flowing, much like a brisk walk. This process helps improve circulation and, over time, can contribute to lower blood pressure30275-1/fulltext). Think of it as a passive form of cardio that supports your overall heart health. Regular sessions are a simple, enjoyable way to complement an active lifestyle and invest in your long term wellness. It’s a relaxing habit that your cardiovascular system will thank you for, making it a smart and soothing addition to your daily routine.

Soothe Muscles and Aid Recovery

Whether you’ve spent the day gardening, playing on your home Sports Games Courts, or just dealing with daily tension, an outdoor sauna is your personal recovery zone. The deep, penetrating heat works wonders on tired, sore muscles, helping to release tightness and ease aches. This warmth increases blood flow, which delivers more oxygen to your muscles and helps them repair faster. For anyone with an active lifestyle, a sauna can become an essential part of your routine, reducing stiffness and getting you ready for your next adventure. It’s a natural way to manage muscle soreness and keep your body feeling its best.

Reduce Stress and Improve Sleep

In our busy lives, finding a moment of true peace can be a challenge. An outdoor sauna provides a dedicated sanctuary for you to disconnect and unwind. The quiet warmth encourages mindfulness and helps your body release endorphins, the natural chemicals that make you feel good. This deep relaxation doesn’t just melt away the day’s stress; it also paves the way for a better night’s sleep. As your body cools down after a sauna session, it sends a powerful signal to your brain that it’s time to rest. This can lead to falling asleep faster and enjoying a deeper, more restorative sleep cycle.

Create a Unique Space for Socializing

A sauna isn’t just for solo relaxation; it can also be a wonderful and healthy way to connect with friends and family. Imagine sharing a warm, tranquil space for conversation, away from the distractions of phones and screens. It offers a unique and intimate setting for catching up that feels more special than sitting in the living room. An outdoor sauna can be the centerpiece of your backyard entertainment area, perfectly complementing a patio, pool, or garden. It’s a fantastic way to design a wellness-focused backyard where you can host gatherings that leave everyone feeling refreshed and rejuvenated.

Which Type of Outdoor Sauna Is Right for You?

Choosing an outdoor sauna is about matching your wellness goals and lifestyle with the right type of heat and experience. Each sauna offers a unique atmosphere, from rustic and traditional to modern and convenient. Do you envision a classic, wood-scented retreat or a sleek, high-tech space you can control with the push of a button? Understanding the differences is the first step to creating your perfect backyard escape.

The four main types of outdoor saunas are traditional wood-burning, electric, infrared, and steam. Each has its own heating method, installation needs, and overall feel. Thinking about how you plan to use your sauna, who will be using it, and what kind of maintenance you’re comfortable with will help you narrow down the options. Let’s look at what makes each type special so you can find the one that fits seamlessly into your Long Island home.

Traditional Wood-Burning Saunas

For the purist, nothing compares to a traditional wood-burning sauna. This is the most authentic experience, offering the gentle crackle of a fire and the rich, earthy aroma of burning wood. It’s a ritual that invites you to slow down and connect with the elements. These saunas create a soft, enveloping heat that many people love. Keep in mind that they require a steady supply of wood and proper ventilation for the stove. They also take a bit longer to heat up, but for many owners, the wait is a worthy part of the relaxing process.

Electric Saunas

If convenience and control are at the top of your list, an electric sauna is an excellent choice. With a simple turn of a dial or press of a button, you can set your desired temperature and let the sauna heat up quickly and efficiently. This ease of use makes it simple to fit a sauna session into a busy schedule. Electric saunas are reliable and provide a consistent dry heat. Installation typically requires a dedicated electrical circuit, a straightforward job for a professional team during a home remodeling project or backyard renovation.

Infrared Saunas

Infrared saunas represent a modern approach to heat therapy. Instead of heating the air around you, infrared technology uses light to warm your body directly. This results in a deep, penetrating heat at a much lower air temperature than traditional saunas. For this reason, they are a great option for people who find the high heat of other saunas uncomfortable or overwhelming. You can still work up a great sweat and get all the benefits of heat therapy in a gentler, more temperate environment.

Steam Saunas

Often called steam rooms, steam saunas create a completely different environment from their dry-heat counterparts. A steam generator pumps warm, moist air into the space, resulting in nearly 100% humidity. This wet heat is fantastic for hydrating skin and providing relief for sinuses and respiratory issues. The feeling is more like a tropical rainforest than a dry desert. Because of the high moisture content, steam saunas require meticulous waterproofing, proper drainage, and excellent ventilation, making professional design and construction absolutely essential.

How to Choose the Best Outdoor Cabin Sauna

Choosing an outdoor sauna is about more than just picking a model from a catalog. It’s about designing a personal wellness retreat that fits your lifestyle and your backyard perfectly. To find the right fit, you need to think about how you’ll use it, what it’s made of, and how it will hold up to our unique Long Island climate. Taking the time to consider these details ensures you get a sauna that you’ll love for years to come.

Think of it as a rewarding home upgrade. Before you get to the exciting moment when your sauna arrives, ready for assembly, a little planning goes a long way. Key factors like size, materials, heating method, and special features will shape your experience. You also need to consider how the structure will integrate with your existing landscape and withstand local weather patterns. By balancing your personal wish list with these practical considerations, you can confidently select an outdoor cabin sauna that becomes a cherished part of your home. At Gappsi, we guide homeowners through this entire process, helping you find the perfect sauna to create your backyard oasis.

Determine the Right Size and Capacity

First, think about who will be using your sauna. Are you dreaming of a quiet, personal escape for one or two people? Or do you envision it as a social hub for relaxing with family and friends after a swim? The answer will guide you to the right capacity. A cozy two-person sauna is perfect for intimate relaxation, while a larger six or eight-person model can accommodate gatherings. Consider your available backyard space as well. You want the sauna to feel like a natural part of your landscape, not a cramped addition. Planning the right size from the start ensures your new sanctuary meets all your expectations.

Inspect Materials and Build Quality

The materials used to build your sauna directly affect its longevity, performance, and maintenance needs. While some entry-level kits use spruce or pine, these woods can be prone to sticky resin seeping out over time. For a truly durable and beautiful outdoor sauna, look for premium woods like cedar. Western Red Cedar is a popular choice because it’s naturally resistant to decay and insects, and it releases a wonderful aroma when heated. Beyond the wood, inspect the overall build quality. Look for thick walls for better insulation, sturdy benches, and a well-constructed door that seals tightly to keep the heat in. A high-quality build ensures your investment will last through many seasons of use.

Compare Heating Methods and Energy Use

Your sauna’s heater is its heart, and you have a few great options to choose from. Traditional wood-burning stoves offer an authentic, rustic experience with a soft heat and gentle crackle. Electric heaters are incredibly convenient, allowing you to turn on your sauna with the flip of a switch or a tap on an app. It’s a common misconception that electric saunas always heat up faster; the heat-up time is often similar for both wood and electric models depending on the unit’s power. Infrared saunas use a different technology to heat your body directly, operating at lower temperatures. Each has its own energy use profile, so consider what works best for your home and budget when you compare heating options.

Select Your Must-Have Features and Amenities

This is where you can truly personalize your sauna. Think about what would make your experience special. Do you want a large window to enjoy a view of your garden? Or do you prefer a more enclosed, meditative space? Proper ventilation is essential for any sauna, but you can also add features like multi-level benches, ergonomic backrests, or even an attached changing room for convenience. Modern amenities like Bluetooth speakers for music or chromotherapy lighting for mood enhancement can turn a simple sauna session into a full sensory experience. Integrating your sauna into a complete landscape design can create a seamless flow in your outdoor living space.

Account for Long Island Weather

Installing an outdoor sauna is one of the most rewarding upgrades you can make, but it’s important to plan for our local climate. A sauna on Long Island needs to withstand hot, humid summers and cold, snowy winters. This starts with a solid foundation that allows for proper drainage. The structure itself should be built from weather-resistant materials and feature a durable, protective roof to shield it from rain and snow. Proper sealing and finishing are also critical to prevent moisture damage and ensure your sauna performs well for years. Choosing a sauna designed to handle these elements will protect your investment and guarantee it remains a beautiful, functional retreat no matter the season.

Installing a Sauna in Your Long Island Backyard

Bringing a sauna to your backyard is an exciting project. While it might seem complex, the installation process is quite straightforward when you break it down into clear steps. With careful planning and the right team, you can ensure your new wellness retreat is built safely, correctly, and exactly where you want it. From preparing the ground to flipping the switch for your first session, each step is a move toward creating your personal oasis. Let’s walk through the key considerations for installing an outdoor cabin sauna on Long Island.

Prepare the Site, Foundation, and Drainage

First things first, your sauna needs a solid, level base to sit on. Preparing the installation site is a critical first step for a stable and long-lasting structure. You should never install a sauna directly on grass or uneven soil. Instead, you’ll need a structurally sound surface to serve as its foundation. Excellent options include a concrete pad or a patio built with beautiful porcelain and natural stone pavers. A reinforced deck can also work, as long as it’s designed to handle the weight. Proper site preparation also includes planning for drainage to prevent water from pooling around the base, protecting your investment for years to come.

Check Local Permits and Zoning Rules

Before you get too far into planning, it’s time to handle the paperwork. Most municipalities on Long Island require building permits for permanent outdoor structures like a sauna, and you will definitely need an electrical permit for the heater. It’s essential to check your local zoning laws for specific rules, such as setback requirements that dictate how far the sauna must be from your property lines and any height restrictions. Navigating these regulations can feel tedious, but it’s a non-negotiable part of the process. Working with an experienced local company like Gappsi can make this step much smoother, as we are familiar with the home remodeling codes and permit processes across Nassau and Suffolk counties.

Plan for Electrical and Ventilation Needs

Proper electrical work is crucial for a safe and functional sauna. Whether you choose a traditional electric heater or an infrared model, the installation must be handled by a licensed electrician to ensure it meets all safety codes. Your sauna will require a dedicated circuit, so it’s important to plan the wiring route from your home’s electrical panel to the sauna’s location. Just as important is ventilation. An effective ventilation system allows fresh air to circulate, which ensures a comfortable breathing environment, helps the sauna heat efficiently, and prevents moisture from building up inside the cabin. Our team at Gappsi coordinates with certified electricians to guarantee your sauna is installed perfectly.

Position for Privacy and Landscaping

Now for the fun part: deciding exactly where your new sanctuary will live. Think about how you can create a private, tranquil experience. Many homeowners position their saunas in a spot that is shielded from neighbors’ views, perhaps tucked behind a row of lush trees or elegant fencing. This is a wonderful opportunity to integrate your sauna into your overall backyard design. You can use thoughtful landscape design to create a beautiful stone path leading to the door, add soft exterior lighting for evening sessions, and plant fragrant flowers nearby to enhance the relaxing atmosphere. Your sauna shouldn’t just be in your backyard; it should be part of it.

Follow a Simple Maintenance Routine

One of the best things about modern outdoor saunas is how easy they are to maintain. Keeping your sauna in top condition requires just a few simple habits. After each use, it’s a good idea to wipe down the benches and backrests with a clean, damp cloth. You can clean the floor as needed and periodically check the heater and stones to make sure everything is in working order. For the exterior, an occasional cleaning will keep the wood looking fresh. If your sauna is surrounded by a patio or walkway, our restoration and sealing services can help protect those surfaces from the elements, ensuring your entire sauna area remains pristine and inviting.

Where to Find Your Outdoor Sauna on Long Island

Finding the right outdoor sauna for your Long Island home is about more than just picking a model you like. It’s about partnering with a team that can guide you through the entire process, from design to installation. Adding a sauna is a wonderful upgrade to your property, creating a personal retreat for relaxation and wellness. To get it right, you need a provider who understands the local landscape, building codes, and what it takes to create a lasting outdoor feature. A great partner will help you think through all the details, like where the sauna will fit best in your yard, what kind of foundation it needs, and how to run the necessary electrical lines safely.

When you start your search, look for a company with a proven track record in creating beautiful and functional outdoor living spaces. You want someone who can answer your questions honestly and provide a clear plan for your project. This includes everything from selecting the right materials that can withstand Long Island’s weather to ensuring the final installation is flawless. The right team will make the process feel exciting, not overwhelming. They will handle the technical aspects so you can focus on anticipating your first relaxing session. With the right guidance, you can be confident that your new sauna will be a source of enjoyment for many years.

Partner with Gappsi for Expert Design and Installation

When you’re ready to add a sauna to your backyard, working with a local expert makes all the difference. At Gappsi, we specialize in the sale, delivery, and installation of high-quality saunas across Nassau and Suffolk County. Our team lives and works here on Long Island, so we understand how to design outdoor spaces that are both beautiful and durable. We’ll help you select the perfect sauna for your home and handle every detail of the installation. From initial design to the final walkthrough, our goal is to provide a seamless and enjoyable experience, leaving you with a stunning backyard retreat you can be proud of.

Key Questions to Ask a Sauna Provider

Before you commit to a sauna, it’s important to ask a few key questions to ensure a smooth process. First, confirm that you have a suitable spot. Is the ground level? Is there enough clearance around the unit? Next, discuss the electrical requirements. Most outdoor saunas need a dedicated circuit, so you’ll want to understand what’s involved in setting that up. You should also ask about the delivery and installation timeline. A reputable provider will give you a clear picture of the entire project from start to finish. Thinking through these details ahead of time is a crucial step in a successful Long Island sauna installation.

Explore Your Financing Options

An outdoor sauna is a valuable addition to your home, and it’s an investment in your well-being. We understand that budgeting for a large home improvement project is a top priority for many homeowners. That’s why it’s a good idea to ask potential providers about their financing options. Many companies, including Gappsi, offer flexible payment plans to help make your dream sauna more accessible. These options allow you to get the high-quality sauna you want without having to compromise. By exploring financing, you can manage the cost in a way that fits your budget, making it easier to move forward with your project.

Why Professional Installation Is a Must

While a DIY project can be tempting, professional installation is essential for an outdoor sauna. Proper setup is critical for both safety and performance. A professional installer ensures that all electrical components are connected correctly, which prevents potential hazards. They also handle the ventilation system, which is vital for maintaining air quality and protecting the structure from moisture damage. Beyond the technical aspects, a professional installation guarantees that every feature, from the lighting to the audio system, works perfectly. Investing in an expert installation protects your sauna and ensures it will provide years of reliable relaxation.

Related Articles

Frequently Asked Questions

What’s the real difference in feeling between an infrared and a traditional sauna? Think of it like the sun’s warmth on a cool day versus the heat of a summer afternoon. An infrared sauna uses light to warm your body directly, so you feel a deep, penetrating heat without the air around you getting intensely hot. A traditional sauna, whether electric or wood-burning, heats the air itself to create that classic, hot, and enveloping environment. If you love high heat and a steamy atmosphere (if you add water to the rocks), go traditional. If you prefer a gentler warmth that still makes you sweat, infrared is a fantastic choice.

How much space do I really need in my backyard for a sauna? You might be surprised by how little space you need. A cozy two-person sauna can fit comfortably in a corner of a patio or deck, often requiring a footprint of just five by five feet. For larger models that can host friends and family, you’ll want to plan for a bigger area. The most important factor is ensuring you have a solid, level foundation and enough clearance around the structure for access and proper ventilation.

Can I actually use an outdoor sauna during a cold Long Island winter? Absolutely, and it’s one of the best times to use it. A well-built sauna with thick, insulated walls and a quality heater is designed to perform beautifully in the cold. The contrast between the crisp winter air and the deep warmth inside is incredibly refreshing and invigorating. Just make sure your sauna is made from weather-resistant materials, like cedar, and has a durable roof to handle snow and rain.

Which type of sauna is the easiest to own and maintain? For pure convenience, electric and infrared saunas are the front-runners. They heat up with the press of a button and require very little upkeep beyond wiping down the interior after use. A traditional wood-burning sauna involves more of a ritual, as you need to manage the fire and clean out the stove, but many people find that process to be part of its charm. All types are fairly low-maintenance once installed correctly.

Do I need to hire my own electrician and handle the permits myself? You don’t have to go it alone, and you really shouldn’t. Navigating local permits and ensuring the electrical work is done to code are critical steps for safety and compliance. When you work with a full-service company like Gappsi, we coordinate all of that for you. We handle the permit process and work with licensed electricians to ensure your sauna is installed safely and correctly, so you can just focus on the excitement of your new backyard retreat.

Share this page: