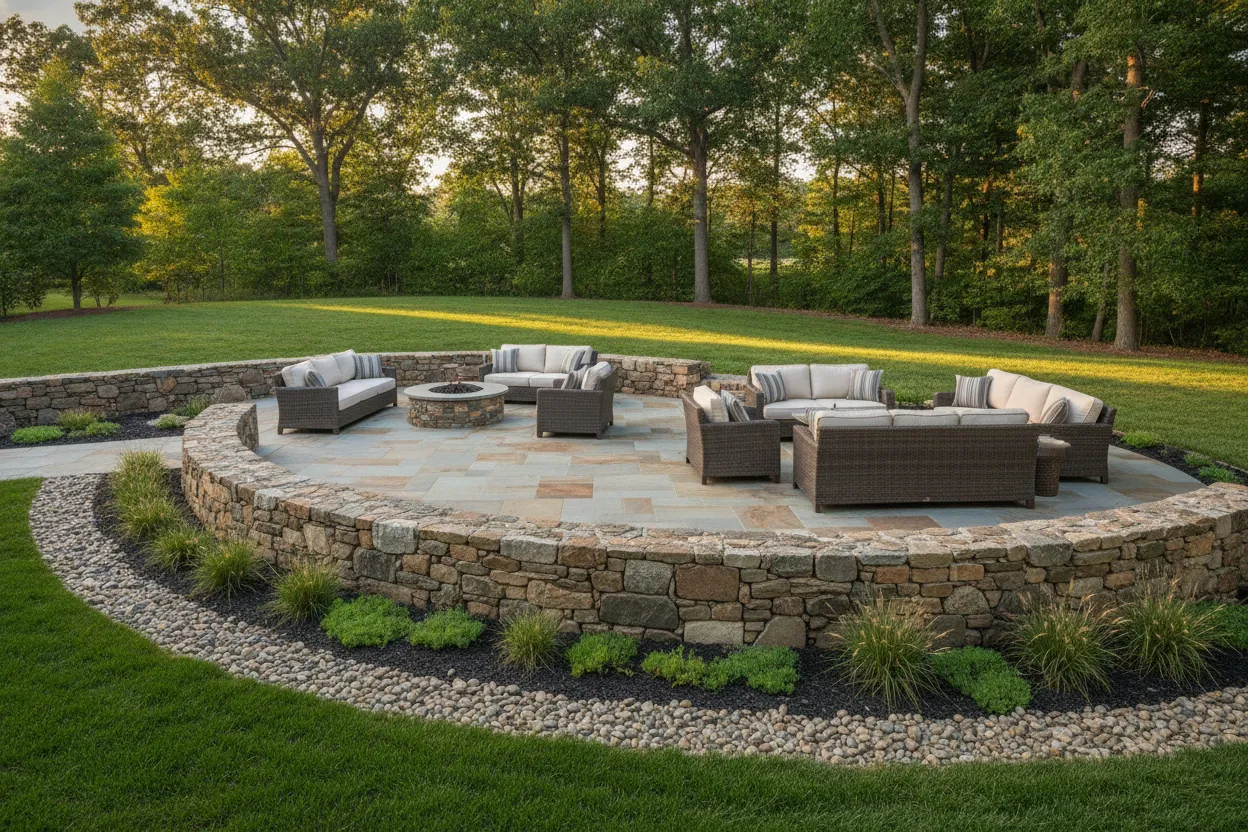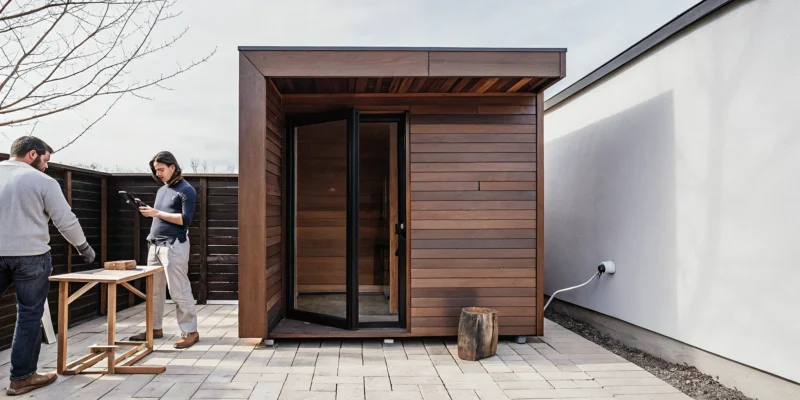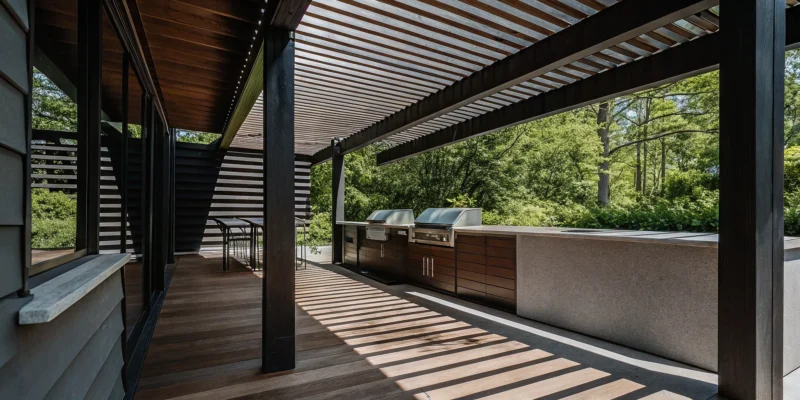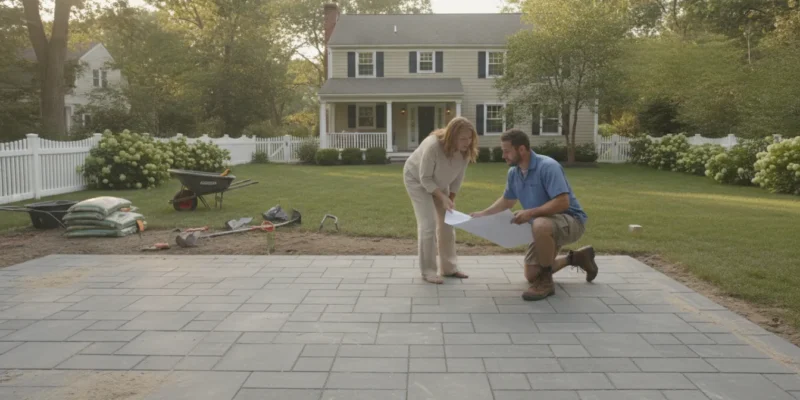
Cedar outdoor sauna in a landscaped Long Island backyard

Outdoor Sauna Installation for Long Island Homes

Proper outdoor sauna installation requires more than just picking a spot on the lawn. It is a long term cost for your home and health. This process works best when you plan for local weather and safety.

Outdoor sauna installation involves picking a strong model, making a level base, and getting any building permits needed by your local town office for your own home project. You must choose between old-style wood burning heaters or electric units, and you will need a thick concrete slab to keep the frame from warping in the soil. Check with your local office since permits for permanent structures often cost between 300 and 800 dollars depending on your specific town rules and your site needs. Working with an expert team helps you manage the site work and power needs to ensure your new wellness space stays safe and runs well for many years.

Installing a sauna is a big step for any homeowner who wants to improve their lifestyle and health. You need to know how to prepare your land and manage the project from start to finish. The fact that outdoor sauna installation starts with the right site is the focus of our next section. The path begins with.

Outdoor sauna installation starts with the right site

Choosing the best spot for your new sauna is the first step for any Long Island home. You need to find a place that is easy to reach but still offers privacy. Most owners in Nassau and Suffolk counties want a spot that fits well with their yard. It should be near your house so you can get to it fast in the winter. A short walk makes it much easier to use your sauna all year long.

You also need to think about how you will get power to the site. Picking a spot close to your main lines can save you money. A good spot will make your outdoor sauna installation more helpful for your life. It should be a place where you feel relaxed and safe.

Building a strong base

Your sauna needs a level and stable floor to stay in good shape. If the ground is not flat, the wood walls may warp or shift over time. This can cause the door to stick or gaps to form in the structure. A solid base keeps the unit dry and safe from the wet soil. You should check that the ground does not hold water after a rain. Good drainage is key to keeping the wood from rotting.

Expert teams suggest a few ways to build this base. A concrete slab 3 to 4 inches thick is a top choice for a strong base. You can also use a pad made of crushed stone or gravel. This pad should be at least 4 to 6 inches deep to allow water to flow away. These steps help keep your sauna level for many years.

Weather and wind safety

On Long Island, we get strong winds and heavy snow. You must think about wind and weather when you pick your spot. High winds can cool down your sauna too fast. This makes the heater work harder and uses more power. If you can, place the sauna near a fence to block the wind. This shield helps keep the heat inside where it belongs.

You should also think about the sun. A spot with some shade can keep the outside of the sauna from fading. Health studies from the National Institutes of Health show that high heat in a dry sauna can help your heart. To get these benefits, your unit must reach and keep the right heat level. Proper site choice ensures your sauna works well in any season.

Local rules and permits

Before you start, you must check the rules in your town. Many places in Nassau and Suffolk have laws about where you can put a new structure. You may need to keep the sauna a certain distance from your land line. This is called a setback rule. Following these rules from the start keeps you from getting a fine later. It is a vital part of a smooth project.

You will likely need a building permit for a fixed structure. These permits often cost between $300 and $800 based on where you live. Gappsi can help with the permit work to make it easy. We know the local codes and can help get your plans approved fast. Getting the right papers now means you can enjoy your sauna without any worry.

  • Check local setback rules in your town.
  • Look for a spot with good soil drainage.
  • Find a place near power and water lines.
  • Pick a site that offers good privacy.

Which foundation is best for an outdoor sauna?

Choosing the right base is the first step in a good outdoor sauna installation. A strong base keeps your unit flat and dry. Without it, the wood may warp or rot over time. A good base also makes sure your sauna stays safe for many years of use.

Why a flat base matters

A flat site is vital for any large unit. When the ground is not flat, the sauna walls can shift. This leads to gaps where heat leaks out. Keeping the unit flat also helps the door open and close well. It stops the wood from bending under its own weight.

Saunas offer great health perks that make them worth the work. Studies show that heat from a Finnish sauna can help your heart. Research from the National Institutes of Health links steady sauna use to a lower risk of heart disease. To get these perks, you need a unit that stays in top shape. A flat base is the best way to protect your purchase.

Popular base options for saunas

There are four main types of bases for a home sauna. You can use a concrete slab, stone pavers, a gravel bed, or a wood deck. Each one has pros and cons for your Long Island home. The best pick depends on your yard and the type of sauna you buy.

A concrete slab is the most stable choice. It should be 3 to 4 inches thick to handle the weight. This base is best for large cabin-style saunas that stay in one place. If you want a faster path, try a gravel pad. Use crushed stone at least 4 to 6 inches deep to help with water flow and keep the area dry.

Base Type Best For Water Flow Strength
Concrete Slab Large cabin kits Fair Highest
Stone Pavers Patio matching Good High
Gravel Pad Barrel saunas Great Medium
Wood Deck Raised units Good High

Concrete slabs and pavers

A concrete slab is a fixed base for your yard. It works well for heavy units that need a lot of help. You must make sure it is flat before the mix dries. This base lasts a long time and needs very little work. It is a smart choice for any high-end sauna model.

Stone pavers are also a good pick for your home. They look great and can match your current patio or walk. They are easy to fix if one stone cracks or shifts. Pavers allow more water to pass through than solid concrete. This helps keep the ground under the sauna from getting too wet.

Gravel and wood decks

Gravel is a quick and cheap base that works well. It helps water flow fast away from the wood. This is good for areas that get a lot of rain or snow. You can set up a gravel bed in just one day. It is a smart pick for installing an outdoor sauna like a barrel unit.

A wood deck is another choice that many people like. It feels nice under your feet when you step out of the heat. But you must check if the deck is strong enough. A sauna with four people can be very heavy. Make sure the wood beams can hold the load before you start the build.

Long Island site factors

At Gappsi, we see many types of soil across Nassau and Suffolk County. Some yards have sand while others have thick clay. Sandy soil drains well but can shift over time. Clay soil holds water and might need a deeper gravel bed to stay dry. We know the local land and can help you pick the best spot.

Weather is also a factor on Long Island. Strong winds and heavy snow can test your sauna unit. A firm base keeps the unit from moving during a storm. We suggest looking at your yard after a big rain. See where the water goes before you pick your base. This simple step saves you from big trouble later on.

Plan permits, power, heat, and ventilation early

Before you start your outdoor sauna installation, you must look at local rules and power needs. Planning early helps you avoid high costs and keeps your project on track. This stage is about more than just where the sauna sits. It is about how the unit works with your home and stays safe for years.

Check local building rules

Most towns on Long Island have specific rules for new structures. You might need a permit for your sauna, which often costs between $300 and $800 Eden Hut. These rules often cover how far the unit must be from your property line. Checking these setbacks now prevents legal issues later. Working with a team like Gappsi can help since we handle the sauna and wellness design along with the paperwork.

Map out power and heat

Most outdoor sauna installation projects use electric heaters. These heaters usually need a 220V line run from your main panel. You should get quotes from two or three licensed pros to find the best path for these wires Almost Heaven. If you choose a wood-burning heater, you must plan for chimney height and fire safety. Both types reach high heat, often between 176°F and 212°F PubMed.

Manage air and water

Good air flow is vital for any sauna. You need vents to bring in fresh air and let out heat. This stops mold and keeps the wood in good shape. You also need to think about how water will drain from the area. Most units sit on a stone or concrete pad that stays level and dry. Taking time to plan these parts will make your new spa area much better for your home.

  1. Verify town codes. Call your local building office in Nassau or Suffolk to ask about sauna permits and property line rules.
  2. Select your heater. Choose between a wood stove or an electric heater based on your power access and style choice.
  3. Hire licensed trades. Find a pro to run the power lines or set up the gas for your heater to meet safety codes.
  4. Design air flow. Place intake and exhaust vents to keep the air fresh and protect the wood from moisture.
  5. Finalize setbacks. Mark the spot for your sauna to make sure it meets all town distance rules before the base is set.

Choose a sauna design made for the backyard

The right look for your outdoor sauna helps it fit your landscape and last for years. When you plan an outdoor sauna installation on Long Island, you must think about both form and function. Your design choice affects how the unit handles the local weather from the North Shore to the South Shore. You want a structure that stays warm in the winter but also looks like a natural part of your home.

Barrel and cabin shapes

Barrel saunas are a popular pick for backyards because of their round shape and efficiency. The curved walls help heat move in a circle. This keeps the air warm without using too much power. This shape also lets snow and rain slide right off the sides. If you want a more classic look, luxury outdoor sauna installation often uses cabin-style designs. These units have flat walls and more head room. They feel like a small guest house or pool shed.

Both styles come in kits or pre-built models that work well for most yards. Cabin shapes allow for larger glass windows and tiered seating. Barrels take up less space and often do not need a deep base. Your choice depends on how many people will use the sauna. It should also match your current landscape design. Both forms provide a private space to relax and may help your heart health.

Wood and weather protection

Outdoor units face wind, rain, and sun every day. Picking the best wood is the first step to a long-life unit. Most high-end saunas use cedar or thermo-aspen. These woods resist rot and bugs. Cedar has natural oils that protect it from moisture. Thermo-aspen is wood that has been heat-treated to make it very stable and strong. These materials help the walls stay straight and tight even when the temperature changes fast.

You also need to think about wind and weather exposure when you pick a spot. A roof with a good overhang or high-quality shingles will keep the wood dry. For the best view, many owners add glass walls or large windows. These panes must be tempered glass to handle the high heat inside and the cold air outside. High-quality seals around the door and windows keep the steam in and the drafts out.

Cohesive backyard design

A sauna should not look like an afterthought in your yard. It works best when it is part of a full plan. Many homeowners on Long Island place their sauna near a pool or hot tub for a “hot and cold” routine. Research shows that Finnish sauna bathing at high heat can lower the risk of heart disease. Placing it near a cold plunge pool makes this routine easy to follow during the week.

Using the same stones or wood for the sauna base and your patio helps the space feel unified. You can also add lights or plants around the path to the sauna door. This makes the walk safe and inviting at night. When the design matches your home and yard, it adds value and beauty to your property. A well-placed unit creates a true spa feel right in your own backyard.

What happens during professional outdoor sauna installation?

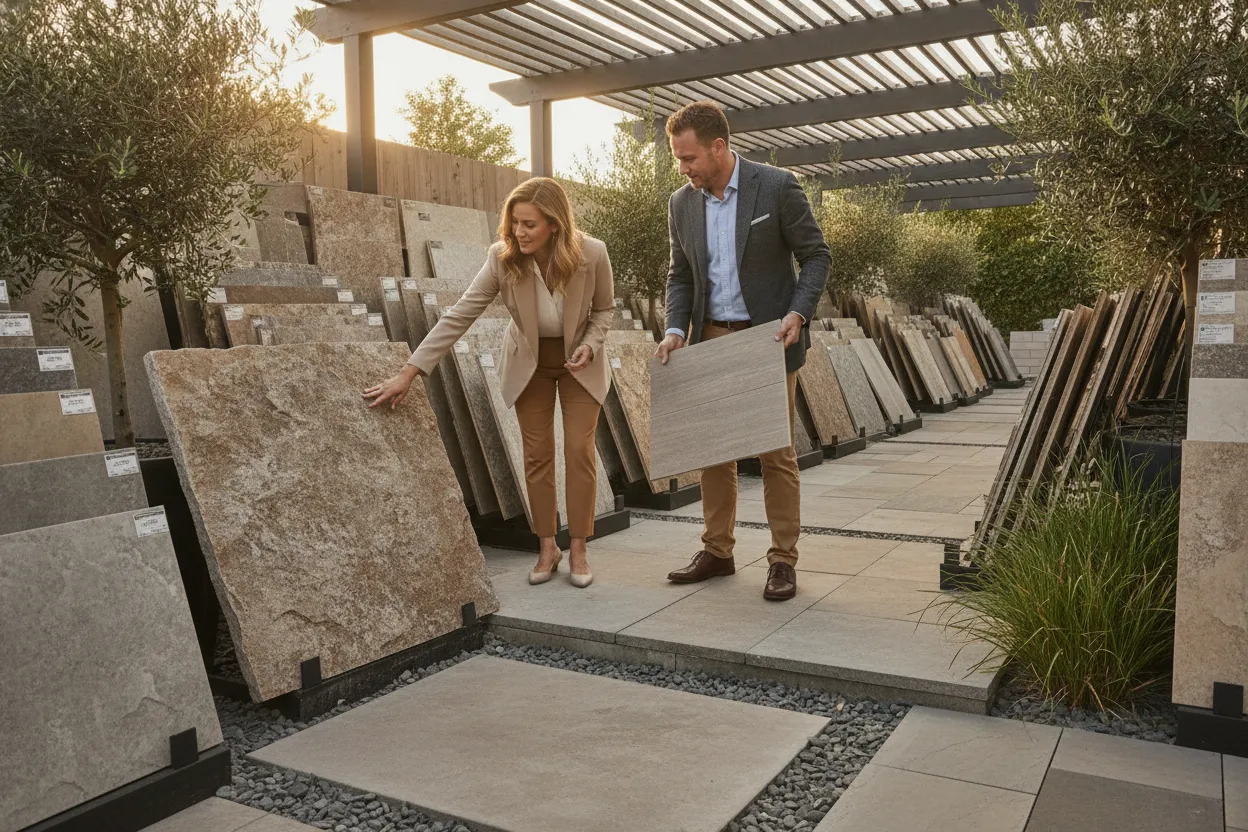
Working with a full-service team makes the path to a backyard wellness space simple and clear. Professional outdoor sauna installation starts with a visit to our Smithtown showroom to view premium models from brands like SaunaLife and Auroom. Our design-build experts help you choose the right style for your Long Island home and plan the layout of your yard. We handle the complex tasks like permit expediting to ensure your project meets all local rules in Nassau or Suffolk County.

Initial site planning and design

Before any work begins, we assess your yard to find the best spot for your new unit. A professional team looks for a site that is level and stable to prevent the structure from shifting or warping over time. We also consider wind and weather exposure to help your sauna run at its best for years. This phase often includes a look at how the sauna fits with your other features like swimming pools or masonry work to create a full outdoor retreat.

During the design stage, we also talk about the specific needs for your chosen model. Traditional Finnish saunas often use outdoor sauna installation options like electric or wood-burning heaters that produce dry heat. These units typically run at high temperatures from 176°F to 212°F to provide the best results for your heart and blood flow. Regular use of these saunas is linked to a lower risk of heart disease and high blood pressure, according to health studies.

Site preparation and base construction

A solid foundation is the key to a long-lasting outdoor sauna installation. A pro crew will build a base that allows for proper drainage and leveling. Most sites need a 3-4 inch thick concrete slab or a crushed stone pad that is 4-6 inches deep to stay firm under the weight of the unit. We use our own masonry team to build these pads so they match the rest of your landscape and stand up to the local weather.

Getting the base right also helps with the electrical and utility work that follows. For electric models, we coordinate with licensed pros to run the proper power lines to your site. This setup must be done safely and meet all code rules before the sauna unit arrives. Having one team handle the site prep and the build means these steps happen in the right order without any delays.

Assembly delivery and final handoff

The final part of the process is the delivery and setup of your sauna. Some units arrive as outdoor sauna installation kits that our skilled crew builds on your new base. Others come pre-assembled and need to be placed with care using special tools. Once the unit is in place, we connect the heater and test all parts of the system to make sure they work well. We check that the air flows correctly and the benches are set for comfort.

After the build is done, we walk you through how to use and care for your sauna. We show you how to set the heat and humidity to get the most from each session. This is also when we do a final check of the work to ensure it meets our high standards for craftsmanship. Our goal is to hand off a ready-to-use space that adds value and health benefits to your Long Island property.

How do you protect an outdoor sauna through Long Island seasons?

Long Island weather brings salt air, damp air, and heavy snow, so you must plan for these shifts to keep your unit in top shape. Good outdoor sauna installation starts by picking a spot that can handle local wind and rain. A firm base keeps the wood from warping when the ground freezes and thaws. Check the roof and door seals twice a year to stop leaks.

Managing coastal salt and moisture

Living near the shore means your sauna faces salt air and wet weather, which can wear down wood and metal parts fast. Apply a good wood stain or sealer to the outside to block water and keep the cedar or spruce from turning gray. It also stops the wood from soaking up salt, which is vital because salt can cause rot over time. This keeps the wood strong and looking great for years. Keep the air dry inside the sauna after each use by leaving the door or vent open for a few minutes. This step prevents mold and mildew while often using the heat helps keep the wood dry and clean. Studies show that Finnish sauna use can also lower the risk of high blood pressure and heart disease. Using the heat is a great way to stay healthy and protect your cabin.

Planning for winter snow and drainage

Winter on Long Island can bring deep snow and ice, so your sauna needs a solid roof to hold the weight. Clear snow away from the base and the door to keep water from seeping inside the unit. Good drainage is key to stop ice build up, and a gravel pad allows water to flow away from the wood. Check the seals around the heater as the cold sets in because small cracks can let in cold air. This makes the heater work harder, which wastes power and puts stress on the unit. If you use a wood burning stove, make sure the pipe is clear of debris before the first frost to help it run well.

Routine cleaning and wood care

Cleaning your sauna is easy if you scrub the benches with a soft brush and warm water often. Do not use harsh soaps or bleach since these can damage the wood and leave bad smells. A light sanding can make the wood look new if you see stains and helps keep the surface smooth for your skin. Most people only need to do this once or twice a year. Check parts like hinges and handles for rust and wipe them with a damp cloth to remove salt near the coast. If a part looks worn, swap it quickly to keep the unit safe and secure. Caring for your sauna takes very little time but adds years to its life if you stay on top of these tasks. Small steps now will save you from big repairs later on.

Questions to answer before your sauna consultation

Planning for an outdoor sauna installation takes more than just picking a spot in the yard. A bit of work before your design talk can help you save time and get a better result. You should think about how you plan to use the space and what style fits your home best. Gappsi helps Long Island homeowners through every step of this path. Here are the key things to think about before you meet with a pro.

Define your goals and users

First, ask yourself who will use the sauna most often. Is it for solo rest or for the whole family? A small cabin might be enough for two people, but you may need a larger model for guests. Thinking about the number of users helps you pick the right size. It also helps you find the best way to set up the seats inside the unit.

You should also think about your health goals. Many people use saunas to help with heart health and blood pressure. Research shows that Finnish sauna bathing may lower the risk of high blood pressure and heart disease. If you want these benefits, you may want a classic unit that can hit high heat levels. Knowing your goals helps your designer find the best product for your needs.

Select a location and heat source

Where you put your sauna matters for both look and use. A flat and firm spot will keep the structure from shifting. You also need to think about wind and snow. Picking the right spot ensures your sauna stays in good shape for years. You must also check that there is easy yard access for the setup crews.

You must also pick a heat source. Wood-burning units give a classic feel but take more work to start. Electric heaters are simple to use but need a power line from your home. Some people prefer outdoor sauna installation options that use infrared heat instead. Each type has different needs for wiring or venting that you should talk about during your meeting.

Consider style and budget

Next, think about the look of your new sauna. Do you like the round shape of a barrel sauna or the clean lines of a cabin? The style should match your home and other outdoor features like pools or patios. Gappsi can help you design a full space that looks great and works well for your life. Picking a style early helps the team give you a better price estimate.

Finally, think about what you need most for your budget. You do not need a fixed price yet, but you should know what matters to you. Are you looking for a luxury cabin or a simple kit? Do not forget to plan for things like base prep and permits. Some towns may charge for a permit to set up a new structure on your land. Having these answers ready will help you get the most out of your consultation.

Frequently Asked Questions

How much does it cost to install an outdoor sauna?

Installation costs for an outdoor sauna can vary based on the model and site needs. To get a clear price, it is best to get quotes from two or three licensed pros before you start. Factors like running power lines and building a concrete base will change the final cost. Expert teams can help you plan your budget while making sure the setup meets all local safety codes for your home.

Do I need a permit for an outdoor sauna on Long Island?

Yes, most towns in Nassau and Suffolk County need a building permit for a permanent outdoor structure. These permits often cost between $300 and $800 based on your local rules. Since laws can change from one town to the next, it is wise to work with a team that offers permit help. This makes sure your new wellness space is legal and safe according to all regional building standards.

What is the difference between electric and wood-burning sauna heaters?

Traditional Finnish saunas often use either electric or wood-burning heaters to create dry heat. Most units reach temperatures between 160 degrees and 195 degrees during a session. Electric heaters offer ease and quick starts with the turn of a dial. Wood-burning stoves provide a classic feel and a soft heat but need more work to light and clean. Both types provide a high-heat space that is perfect for a deep sweat and relaxation.

How does regular sauna use help with heart health?

Using a Finnish sauna often can help lower your risk of high blood pressure and heart disease. These saunas use very hot, dry air with low humidity to improve your blood flow. Research shows that regular sauna bathing is a safe way to boost your heart health. For the best results, saunas should run between 176 degrees and 212 degrees. This heat puts a healthy stress on the heart that helps it stay strong over time.

Ready to book your Long Island outdoor sauna installation today?

Putting off your sauna project often leads to higher supply costs and fewer open dates as more local people look for outdoor upgrades now. If you wait too long, you will miss the chance to use your sauna during the cold months when you need the heat the most. Starting your plan now saves your place on our list and ensures you get a high-quality retreat that adds real value to your own home.

Ready to book? Please contact the expert team at Gappsi today to request an outdoor sauna design consultation. Our team is ready to help you with your new home sauna project right here on Long Island.

Share this page:
Basketball court installers building a new home court on Long Island, NY.

A Guide to Basketball Courts Installers on Long Island NY

We’ve all seen a neglected basketball court: cracked surfaces, faded lines, and puddles after every rainstorm. These issues often stem from poor planning and construction. Choosing the wrong materials or skipping proper site preparation can turn a dream project into a long-term headache. You can avoid these pitfalls by partnering with a professional from the start. The best basketball courts installers on Long Island ny understand how to build a court that withstands our weather and years of play. They handle everything from permits to drainage, giving you peace of mind and a flawless court that’s ready for action the day it’s finished.

Key Takeaways

  • Hire a professional you trust: Your project’s success hinges on your installer. Look for a licensed and insured expert with a strong portfolio who can manage everything from design and permits to the final installation.
  • Pick the perfect surface for your family: The right material depends on your budget and how you’ll play. Consider safety and performance when choosing between options like shock-absorbing tiles, classic concrete, or cushioned synthetic turf.
  • Get the foundation right from the start: A great court is built on solid planning. A detailed contract, professional site preparation, proper permits, and a maintenance plan are essential for a smooth project and a lasting investment.

Your Guide to Building a Home Basketball Court on Long Island

Adding a basketball court to your Long Island home is a fantastic project that offers endless fun and activity. It transforms your backyard into a personal arena for fitness, family time, and friendly competition. But before you start planning your dream court, it’s helpful to understand the benefits and what the building process involves. Let’s walk through what you need to know to get started.

Why Install a Personal Basketball Court?

A personal basketball court is more than just a place to shoot hoops; it’s an investment in your family’s health and happiness. Having a court right outside your door makes it so much easier to get in a quick workout and stay active. It’s also a fantastic way to bring everyone together. Imagine spending evenings playing games with your kids or hosting friendly matches with neighbors, creating memories that will last for years. Plus, it gives your kids and their friends a safe, designated spot to play and burn off energy, giving you peace of mind. A personal court can truly become the heart of your outdoor living space.

What to Expect from the Installation Process

So, what does it take to bring a basketball court to life in your yard? The process is more straightforward than you might think, especially with an experienced team. It all starts with a custom design tailored to your space and preferences. We handle everything from planning to the final installation. One of the biggest hurdles for homeowners can be securing permits, but we take care of the entire permitting process for you. A typical installation takes about two to six weeks. You’ll also have a variety of surface options to choose from, including classic asphalt, modern modular tiles, or even synthetic turf. We’ll help you select the perfect material for your court’s performance and look.

What Services Do Basketball Court Installers Offer?

When you decide to build a basketball court in your backyard, you’re not just hiring someone to pour concrete. You’re partnering with a team of professionals who handle every step of the process, from the initial idea to the final bounce of the ball. A full-service installer offers a complete package, ensuring your project is seamless, stress-free, and results in a court that perfectly suits your home and family. They bring the expertise, equipment, and vision needed to transform a patch of your yard into a premier playing surface.

Think of it as a comprehensive service that covers design, construction, and even long-term care. These installers manage the entire project, so you don’t have to juggle multiple contractors for excavation, paving, and finishing touches. They are your single point of contact for creating a durable, safe, and beautiful home court. From custom designs that fit your unique space to installing professional-grade surfaces and features, a dedicated installer turns your dream court into a reality. Gappsi provides expert installation for a variety of sports games courts, ensuring your project is handled with care from start to finish.

Custom Court Design

The first step with any professional installer is creating a custom design. This isn’t about picking a standard court from a catalog; it’s a collaborative process tailored to your specific needs. An expert will assess your property, discuss how your family plans to use the court, and create a design that fits your yard and your goals. Whether you have a sprawling lawn or a more compact space, they can design a court that maximizes playability without overwhelming your landscape. This design phase is also where you can start personalizing the look, choosing colors and layouts that match your home’s aesthetic. A great installer will ensure the court integrates beautifully with your overall landscape design.

Site Preparation and Grading

A high-quality basketball court starts with a solid foundation. Before any surface is laid, the ground must be professionally prepared. This critical phase involves clearing the designated area, excavating to the proper depth, and grading the land to create a perfectly level and stable base. Proper site preparation prevents future problems like cracking, uneven surfaces, and poor drainage, which can ruin your court and become a safety hazard. Installers use specialized equipment to ensure the base is compacted and ready for construction. This foundational work is something only a professional can guarantee, setting the stage for a court that will last for years. This process often involves expert masonry skills to build a durable sub-base.

Surface Installation

Once the site is prepared, the next step is installing the playing surface. Professional installers offer a variety of high-performance materials, and they’ll help you choose the right one for your needs and budget. Options range from classic asphalt and concrete to modern modular interlocking tiles that provide excellent shock absorption and quick drainage. Each surface has its own benefits for playability and maintenance. An experienced installer has the technical skill to lay these materials correctly, ensuring a true ball bounce and a surface that can withstand Long Island’s changing seasons. Their expertise in handling different pavers and stones translates directly to creating a flawless court surface.

Fencing, Lighting, and Add-Ons

A basketball court is more than just its surface. Professional installers can outfit your court with all the features you need to make it fully functional and enjoyable. This includes installing sturdy fencing and netting to keep the ball in play and protect your surrounding landscape. You can also add lighting systems for games that go on after sunset, adjustable hoops that grow with your kids, and rebounder systems for solo practice. This is also where you can add custom logos and line markings to give your court a professional look. These add-ons are seamlessly integrated into the overall design and construction, creating a complete, ready-to-use athletic space.

Maintenance and Repairs

A reputable installer’s service doesn’t end once the court is built. They also provide guidance and services for long-term maintenance to protect your investment. Different surfaces have different needs; for example, a modular tile court may only need occasional cleaning with a hose, while an asphalt court might require crack filling or fresh paint every few years. Should any issues arise, a professional installer can perform repairs, from fixing a crack to replacing a damaged tile. This ongoing support gives you peace of mind, knowing that help is available to keep your court in top condition. Services like professional cleaning and sealing can extend the life and look of your court for years to come.

What Are the Best Materials for a Home Court?

Choosing the right surface for your home basketball court is one of the most important decisions you’ll make. The material you pick affects everything from player safety and performance to the court’s long-term durability and maintenance needs. There isn’t a single “best” option for everyone; the ideal choice depends on your budget, how you plan to use the court, and the aesthetic you want for your backyard. Think about who will be playing. Are there young kids who might take a tumble, or serious athletes who need a high-performance surface?

To help you find the perfect fit, let’s walk through the most popular materials for home Sports Games Courts. We’ll look at the pros and cons of traditional options like asphalt and concrete, as well as modern solutions like modular tiles and synthetic turf. Each has unique qualities, and understanding them will help you create a space that your family will love for years. Gappsi offers a range of high-quality materials, ensuring you can find a surface that matches both your functional needs and your home’s style.

Asphalt Courts

Asphalt is a very common and reliable choice for outdoor basketball courts. An asphalt court, typically finished with a durable acrylic paint, provides a consistent and familiar playing surface. It’s known for its resilience and ability to stand up to Long Island’s varied weather, from hot summers to icy winters. This durability makes it a practical, long-lasting option.

However, one thing to keep in mind is maintenance. Over time, the elements will cause the painted surface to fade and wear. You can expect to repaint the court every five to eight years to keep it looking fresh and to maintain clear boundary lines. While it requires some upkeep, asphalt remains a solid, cost-effective foundation for a home court.

Concrete Courts

Concrete is another traditional material for building a home court, valued for its incredible strength and longevity. A professionally installed concrete court provides a solid, flat surface that can last for decades with minimal structural upkeep. It’s a true workhorse. If you’re already planning other hardscaping projects, incorporating a concrete court can be a natural extension of that work, creating a cohesive look across your property.

The main drawback is its unforgiving nature. Concrete is very hard, which can be tough on players’ joints during intense games. For families with younger children or those concerned about impact, this is an important consideration. To improve player comfort and safety, you can add special acrylic coatings that provide better grip and a small degree of shock absorption. Our masonry experts can ensure your concrete base is poured perfectly for any future surface you choose.

Modular Interlocking Tile Courts

If player safety and comfort are at the top of your list, modular interlocking tiles are an excellent choice. These modern court surfaces are engineered with performance in mind. The tiles snap together to create a seamless playing area that offers superior shock absorption, which is much gentler on the knees and ankles than asphalt or concrete. This makes them a fantastic option for families and players of all ages.

Another huge benefit is their all-weather performance. The tiles are designed to drain water quickly, so you won’t have to deal with puddles after a rainstorm, and you can get back to playing sooner. They also stay cooler to the touch than dark asphalt in the summer sun. With a wide variety of colors available, you can fully customize the look of your home sports games courts to match your favorite team or your home’s exterior.

Synthetic Turf Courts

For a truly unique and versatile playing surface, consider synthetic turf. While you might associate it with soccer or football fields, modern turf systems are also designed for sports like basketball. A turf court provides a soft, cushioned surface that offers exceptional shock absorption, significantly reducing the risk of injury from falls. It’s a low-maintenance option that eliminates the need for painting and crack repairs.

Synthetic turf also gives you incredible design freedom. You can choose from different colors, integrate custom logos, and create a multi-sport area that blends beautifully with your surrounding landscape. It provides a lush, green look year-round without the hassle of mowing or watering. If you want a court that is as beautiful as it is functional, synthetic turf is a wonderful and innovative solution.

How Much Does a Home Basketball Court Cost on Long Island?

Figuring out the budget for your dream basketball court is a big first step. The final cost for a home

What Affects the Final Price?

Several key elements will shape the final cost of your basketball court. Size is one of the biggest factors, a compact half-court will naturally cost less in materials and labor than a full-sized court. The surface you choose also heavily influences the price. Options range from classic asphalt to high-performance synthetic turf and sports games courts.

Beyond the basics, customizations like painted logos, multi-sport lines, and professional-grade hoops add to the cost. You should also consider features like fencing and netting for safety and convenience, as well as lighting for nighttime games. Finally, site preparation and any necessary permits are essential parts of the budget.

How to Get an Accurate Quote

The best way to understand the true cost of your project is to get a detailed, professional quote. Start by scheduling a consultation with an experienced installer. This allows an expert to assess your property, listen to your ideas, and provide specific recommendations. The more details you can provide about your desired court size and features, the more precise the estimate will be.

When you receive a quote, make sure it’s a comprehensive, itemized document that clearly outlines all costs. A transparent quote leaves no room for surprises. It’s also a great idea to review an installer’s portfolio, like the projects on our Gappsi YouTube channel, to see their quality of work and get inspiration for your own design.

Planning Your Project: Permits and Site Prep

Before the exciting part of building your court begins, there are a couple of essential planning steps to address. Getting the paperwork and the ground ready is just as important as choosing the right hoop. Properly handling permits and site preparation ensures your project starts smoothly and results in a court that lasts for years. A professional installer can guide you through these preliminary stages, making the entire process feel much more manageable. Taking the time to get these details right prevents future headaches and protects your investment.

Understanding Local Permit Requirements

So, do you need a permit to build a basketball court on Long Island? In most cases, the answer is yes. Projects of this scale typically require a building permit from your local town or village to ensure they meet safety and zoning regulations. This might sound like a hassle, but it doesn’t have to be. When you work with an experienced installer, they often handle the entire permit application process for you. This is a huge advantage, as they are familiar with the specific requirements in areas across Suffolk and Nassau County. A team that manages the permitting process ensures everything is done by the book, giving you complete peace of mind.

The Importance of a Professional Site Assessment

A professional site assessment is a critical first step for a successful installation. This is where an expert evaluates your property to determine the best location and preparation strategy for your court. Key factors include proper water drainage and soil stability. Without good drainage, you could end up with puddles that damage the surface and create unsafe playing conditions. Likewise, the ground needs to be stable and properly compacted to prevent shifting or cracking down the line. This assessment is foundational to the quality and longevity of all sports game courts, ensuring your court remains a safe and enjoyable feature of your home for many seasons to come.

What to Look for in a Basketball Court Installer

Choosing the right installer is the most important decision you’ll make for your home basketball court project. The right partner will turn your vision into a reality, while the wrong one can lead to headaches and costly repairs. To make sure you hire a true professional, focus on these four key areas.

Experience and a Proven Track Record

You want a team that has done this before, many times. An experienced installer understands the nuances of building in Long Island, from proper ground preparation to selecting materials that withstand our specific climate. A company with a long history has a refined process for managing the project from the initial design to the final hoop installation. They can anticipate potential challenges and solve them efficiently. Look for a specialist who can show you a history of building custom sports games courts and can confidently guide you through every step.

Proper Licensing and Insurance

This is non-negotiable. A professional installer must be fully licensed and insured in New York. This protects you from liability if an accident happens on your property during construction. Hiring an unlicensed contractor might seem cheaper upfront, but it exposes you to significant financial and legal risks, not to mention the potential for subpar work with no warranty. Always ask for proof of licensing and general liability insurance before signing any contract. This simple step gives you peace of mind and ensures you are working with a legitimate and accountable business.

High-Quality Materials

A basketball court is only as good as the materials used to build it. A top-tier installer will source and recommend durable, safe, and high-performance materials for your court’s surface, whether it’s classic concrete or modern modular tiles. They should explain the pros and cons of each option based on your budget and how you plan to use the court. A company’s commitment to quality often extends across all their services, from the porcelain and natural stone they use for patios to the turf on their game courts.

A Strong Portfolio and Positive Reviews

Past work is the best indicator of future results. Before you commit, ask to see a portfolio of their completed basketball court projects. Photos and videos give you a clear idea of their design style and the quality of their craftsmanship. You can often find these on a company’s website or social media channels. Just as important are reviews from previous clients. Testimonials can tell you a lot about the customer experience, communication, and whether they delivered on their promises. Seeing a company’s work in action on platforms like YouTube can provide an even deeper look into their process and results.

Common Mistakes to Avoid When Hiring an Installer

Building a home basketball court is an exciting project, but choosing the right installer is the most critical decision you’ll make. To protect your investment and make sure your project goes smoothly, it helps to know what common pitfalls to look out for. Thinking through these points ahead of time will help you hire a professional you can trust to bring your vision to life.

Choosing Based on Price Alone

It’s always tempting to go with the lowest bid, but this is one of the biggest mistakes you can make. An unusually low price is often a red flag for subpar work, inexperienced labor, or lower-quality materials that won’t stand up to Long Island weather. You might save a little money upfront, but you could face much larger expenses later for repairs or even a complete replacement. A quality installation is an investment in your property’s value and your family’s enjoyment. Focus on the value you receive, which includes durable materials, expert craftsmanship, and a court built to last.

Skipping Research and Reference Checks

Before you commit, it’s essential to do your homework. A reputable installer will be proud to share their work and connect you with past clients. Ask for a portfolio of completed projects and, if possible, a list of local references you can speak with. Seeing a contractor’s work firsthand gives you a clear idea of their quality standards. You can also check online platforms to see projects in action; many installers showcase their process and finished results, giving you confidence in their abilities.

Not Getting a Detailed Written Contract

A handshake and a verbal agreement are not enough for a project of this scale. A professional installer will always provide a detailed written contract that protects both you and them. This document should clearly outline the entire scope of the project, including the specific materials to be used, a project timeline, a payment schedule, and details about site cleanup. It should also specify exactly what is included in the price. A thorough contract prevents misunderstandings and ensures everyone is on the same page before any work begins, creating a foundation for a successful project.

Overlooking Maintenance and Support Plans

Your relationship with an installer shouldn’t end the day the project is finished. A basketball court is exposed to the elements, and Long Island’s freeze-thaw cycles can take a toll. A great contractor will discuss long-term care with you from the start. Ask about warranties on materials and labor, and find out if they offer ongoing maintenance plans. Understanding how to care for your court and knowing you have professional support for future needs, like restoration and sealing, ensures your court remains in top condition for years of play.

Key Questions to Ask Before You Hire

Choosing the right installer for your home basketball court is a big decision. To make sure you find a partner you can trust, it helps to go into your initial conversations prepared. Asking specific, thoughtful questions will give you a clear picture of their experience, work style, and what you can expect from the final result. This isn’t about grilling them; it’s about starting a conversation that builds confidence and ensures you and your contractor are on the same page from day one. A great installer will welcome your questions and provide clear, honest answers. Think of it as the first step in a successful partnership. The following questions will help you cover all the important bases before you sign a contract.

What Does the Full Installation Process Look Like?

Ask for a complete walkthrough of the installation process, from the first day of excavation to the final line painting. Understanding each step helps you know what to expect regarding timelines, noise, and activity on your property. A professional installer should be able to clearly explain their methods for site preparation, base construction, surface installation, and finishing. This conversation gives you insight into their experience and attention to detail. Knowing the full scope of the project ensures there are no surprises and that you feel comfortable with how your custom sports games court will come to life.

What Materials Do You Recommend for My Property?

The surface you choose impacts everything from ball bounce to player safety and long-term maintenance. A knowledgeable contractor will assess your property and discuss the best options for your specific needs. Ask them to explain the pros and cons of different materials, such as asphalt with acrylic paint, modular interlocking tiles, or even synthetic turf. Gappsi offers a wide selection of high-quality materials, including various porcelain and natural stone options for surrounding patios and walkways. Your installer should recommend a solution that fits your budget, intended use, and Long Island’s climate, ensuring your court performs well for years.

What Is Included in the Quote?

To avoid unexpected costs, ask for a detailed, itemized quote that breaks down all expenses. A transparent quote should clearly state what is and is not included in the final price. Does the total cover site grading, all materials, labor, the basketball hoop system, lighting, and site cleanup? A typical court installation can take a few weeks, so confirming the scope of work is essential. Getting everything in writing protects you and ensures the price you agree to covers the entire project. This level of detail is standard for any major home remodeling project and should be expected for your court installation.

Do You Handle Permits and Site Preparation?

Navigating local building codes and permit requirements can be one of the most challenging parts of any construction project. Ask potential installers if they manage this process for you. A full-service company will handle obtaining all necessary building permits and providing the required architectural drawings, saving you time and a major headache. This ensures your project complies with all local regulations from the start. At Gappsi, we manage the entire permitting process for our clients, a key part of our comprehensive masonry and construction services. Confirming your contractor handles this lets you focus on the exciting parts of designing your court.

How to Choose the Right Court Surface

Selecting the right surface for your home basketball court is one of the most important decisions you’ll make. The material you choose affects everything from the project’s cost and durability to player safety and performance. It’s not just about how the court looks; it’s about creating a space that meets your family’s needs for years to come. Thinking through your budget, how you’ll use the court, and our local climate will help you land on the perfect option for your backyard.

Match the Surface to Your Budget

While it’s tempting to let price guide your decision, choosing a court surface based on cost alone can be a mistake. A budget-friendly option might save you money initially, but it could lead to higher maintenance costs or the need for a full replacement sooner than you’d like. Instead, think about the long-term value. A high-quality surface is an investment in durability and performance. At Gappsi, we help you find a solution that fits your budget without compromising on quality, offering a range of materials for our custom Sports Games Courts. We’ll walk you through the pros and cons of each so you can make an informed choice that provides lasting enjoyment.

Think About Player Use and Performance

The ideal court surface depends entirely on who will be using it. Are you building a court for young children to learn the game, or will competitive teenagers and adults be playing on it? The answer changes things. For example, modular tiles offer excellent shock absorption, which is easier on joints during intense play. Concrete, on the other hand, provides a fast, consistent ball bounce favored by serious players. The ultimate guide to basketball court flooring is one that prioritizes both safety and an optimal playing experience. Considering your family’s specific needs ensures you get a court that everyone will love to use.

Consider Long Island’s Climate

Here on Long Island, we get the full range of weather, from hot, humid summers to freezing winters. These conditions are tough on any outdoor structure. The constant freeze-thaw cycles can cause materials like concrete and asphalt to crack and heave if they aren’t installed with expert care. This is why professional site preparation is non-negotiable. We have to consider factors like drainage to prevent water from pooling and freezing beneath the surface. Materials like interlocking modular tiles are often a great choice for our climate because they are designed to expand, contract, and drain efficiently. Our extensive landscape design experience ensures your court is built to withstand Long Island’s specific environmental challenges.

How to Maintain Your Basketball Court Year-Round

Once your dream basketball court is installed, a little routine care will keep it in top shape for years of enjoyment. Proper maintenance ensures your court remains a safe, high-performing surface that looks fantastic. The upkeep varies depending on your chosen material, but the goal is always the same: to protect your investment and keep the games going strong, season after season.

Maintaining Asphalt and Concrete Courts

Asphalt and concrete are classic choices for a reason, they are incredibly durable. To keep them looking their best, your main task is to keep the surface clean. Regularly sweep away leaves, dirt, and other debris to prevent stains and slick spots. It’s also wise to periodically check for any small cracks that may form. Addressing these early prevents them from becoming bigger issues. Given Long Island’s weather, you may find that the painted lines and surface need a refresh every five to eight years. A professional restoration and sealing service can make your court look brand new again.

Maintaining Modular Tile Courts

If you chose a modular tile court, you’re in luck because the maintenance is minimal. These surfaces are designed to be low-effort, making them a favorite for busy homeowners. Most of the time, all you’ll need is a leaf blower or a garden hose to clear away any debris that accumulates. One of the biggest advantages of a tile system is that if a single tile gets damaged, you can simply pop it out and replace it without having to resurface the entire court. This simple upkeep makes modular tiles a practical and long-lasting option for your backyard sports games courts.

Maintaining Synthetic Turf Courts

Synthetic turf offers a unique, cushioned playing experience that’s gentle on the joints. To maintain this surface, you’ll want to keep it free of leaves and debris with a leaf blower or a stiff brush. Regularly brushing the turf fibers helps them stand upright, which ensures consistent ball bounce and player footing. For any spills or dirt, a simple rinse with a hose is usually sufficient. This type of court is a fantastic, low-maintenance alternative that provides a professional feel and keeps players comfortable, helping them play longer without getting as tired.

Integrating Your Court with Other Outdoor Features

Your basketball court doesn’t have to be a standalone feature. It can be the centerpiece of a complete outdoor entertainment zone. Maintaining these integrated features is just as important. For instance, if you have court lighting for nighttime games, check the bulbs and wiring periodically. If you’ve installed fences and netting for safety, ensure they are secure and free of damage. By thinking of your court as part of a larger landscape, you can create a cohesive and functional space with features like adjacent patios, seating areas, and walkways that connect everything beautifully.

Related Articles

Frequently Asked Questions

How long will it take to build my court from start to finish? A typical home basketball court installation on Long Island takes about two to six weeks to complete. This timeframe covers everything from initial site preparation and grading to the final surface installation and line painting. Keep in mind that factors like weather delays or the time it takes to secure local permits can sometimes adjust the schedule, but a professional team will keep you informed and manage the project efficiently.

What if I don’t have enough space for a full-sized court? You can absolutely still have a fantastic home court, even with a smaller yard. This is where custom design makes all the difference. Many homeowners opt for a half-court, which provides plenty of room for practice and games. We can also design custom-sized playing areas or even dedicated shooting zones that fit perfectly within your landscape, giving you a great space for fun and fitness without needing a massive amount of land.

What’s the best court surface for a family with young kids? When safety and comfort are top priorities, modular interlocking tiles are an excellent choice. These surfaces are engineered with shock absorption, which is much gentler on the joints of growing kids (and adults) during play. They also provide great traction and drain quickly after rain. Synthetic turf is another wonderful option, offering a soft, cushioned surface that can significantly reduce the impact and scrapes from falls.

Do I have to deal with getting the permits myself? Not at all. Navigating the permit process with local town and village offices can be complicated, but it’s a standard part of the service when you work with an experienced installer. A full-service company will handle the entire permit application for you, including providing any necessary drawings and ensuring your project meets all local building codes and zoning regulations. This lets you focus on the exciting parts of the project, not the paperwork.

Can the court be used for more than just basketball? Yes, your court can easily become a versatile hub for all kinds of family activities. During the design phase, you can choose to have lines painted for other sports, such as pickleball, volleyball, or shuffleboard. This transforms your basketball court into a multi-purpose Sports Games Courts, maximizing your investment and creating a space that offers something for everyone in the family to enjoy.

Share this page:
Basketball court installers building a new home court on Long Island, NY.

A Guide to Basketball Courts Installers on Long Island NY

We’ve all seen a neglected basketball court: cracked surfaces, faded lines, and puddles after every rainstorm. These issues often stem from poor planning and construction. Choosing the wrong materials or skipping proper site preparation can turn a dream project into a long-term headache. You can avoid these pitfalls by partnering with a professional from the start. The best basketball courts installers on Long Island ny understand how to build a court that withstands our weather and years of play. They handle everything from permits to drainage, giving you peace of mind and a flawless court that’s ready for action the day it’s finished.

Key Takeaways

  • Hire a professional you trust: Your project’s success hinges on your installer. Look for a licensed and insured expert with a strong portfolio who can manage everything from design and permits to the final installation.
  • Pick the perfect surface for your family: The right material depends on your budget and how you’ll play. Consider safety and performance when choosing between options like shock-absorbing tiles, classic concrete, or cushioned synthetic turf.
  • Get the foundation right from the start: A great court is built on solid planning. A detailed contract, professional site preparation, proper permits, and a maintenance plan are essential for a smooth project and a lasting investment.

Your Guide to Building a Home Basketball Court on Long Island

Adding a basketball court to your Long Island home is a fantastic project that offers endless fun and activity. It transforms your backyard into a personal arena for fitness, family time, and friendly competition. But before you start planning your dream court, it’s helpful to understand the benefits and what the building process involves. Let’s walk through what you need to know to get started.

Why Install a Personal Basketball Court?

A personal basketball court is more than just a place to shoot hoops; it’s an investment in your family’s health and happiness. Having a court right outside your door makes it so much easier to get in a quick workout and stay active. It’s also a fantastic way to bring everyone together. Imagine spending evenings playing games with your kids or hosting friendly matches with neighbors, creating memories that will last for years. Plus, it gives your kids and their friends a safe, designated spot to play and burn off energy, giving you peace of mind. A personal court can truly become the heart of your outdoor living space.

What to Expect from the Installation Process

So, what does it take to bring a basketball court to life in your yard? The process is more straightforward than you might think, especially with an experienced team. It all starts with a custom design tailored to your space and preferences. We handle everything from planning to the final installation. One of the biggest hurdles for homeowners can be securing permits, but we take care of the entire permitting process for you. A typical installation takes about two to six weeks. You’ll also have a variety of surface options to choose from, including classic asphalt, modern modular tiles, or even synthetic turf. We’ll help you select the perfect material for your court’s performance and look.

What Services Do Basketball Court Installers Offer?

When you decide to build a basketball court in your backyard, you’re not just hiring someone to pour concrete. You’re partnering with a team of professionals who handle every step of the process, from the initial idea to the final bounce of the ball. A full-service installer offers a complete package, ensuring your project is seamless, stress-free, and results in a court that perfectly suits your home and family. They bring the expertise, equipment, and vision needed to transform a patch of your yard into a premier playing surface.

Think of it as a comprehensive service that covers design, construction, and even long-term care. These installers manage the entire project, so you don’t have to juggle multiple contractors for excavation, paving, and finishing touches. They are your single point of contact for creating a durable, safe, and beautiful home court. From custom designs that fit your unique space to installing professional-grade surfaces and features, a dedicated installer turns your dream court into a reality. Gappsi provides expert installation for a variety of sports games courts, ensuring your project is handled with care from start to finish.

Custom Court Design

The first step with any professional installer is creating a custom design. This isn’t about picking a standard court from a catalog; it’s a collaborative process tailored to your specific needs. An expert will assess your property, discuss how your family plans to use the court, and create a design that fits your yard and your goals. Whether you have a sprawling lawn or a more compact space, they can design a court that maximizes playability without overwhelming your landscape. This design phase is also where you can start personalizing the look, choosing colors and layouts that match your home’s aesthetic. A great installer will ensure the court integrates beautifully with your overall landscape design.

Site Preparation and Grading

A high-quality basketball court starts with a solid foundation. Before any surface is laid, the ground must be professionally prepared. This critical phase involves clearing the designated area, excavating to the proper depth, and grading the land to create a perfectly level and stable base. Proper site preparation prevents future problems like cracking, uneven surfaces, and poor drainage, which can ruin your court and become a safety hazard. Installers use specialized equipment to ensure the base is compacted and ready for construction. This foundational work is something only a professional can guarantee, setting the stage for a court that will last for years. This process often involves expert masonry skills to build a durable sub-base.

Surface Installation

Once the site is prepared, the next step is installing the playing surface. Professional installers offer a variety of high-performance materials, and they’ll help you choose the right one for your needs and budget. Options range from classic asphalt and concrete to modern modular interlocking tiles that provide excellent shock absorption and quick drainage. Each surface has its own benefits for playability and maintenance. An experienced installer has the technical skill to lay these materials correctly, ensuring a true ball bounce and a surface that can withstand Long Island’s changing seasons. Their expertise in handling different pavers and stones translates directly to creating a flawless court surface.

Fencing, Lighting, and Add-Ons

A basketball court is more than just its surface. Professional installers can outfit your court with all the features you need to make it fully functional and enjoyable. This includes installing sturdy fencing and netting to keep the ball in play and protect your surrounding landscape. You can also add lighting systems for games that go on after sunset, adjustable hoops that grow with your kids, and rebounder systems for solo practice. This is also where you can add custom logos and line markings to give your court a professional look. These add-ons are seamlessly integrated into the overall design and construction, creating a complete, ready-to-use athletic space.

Maintenance and Repairs

A reputable installer’s service doesn’t end once the court is built. They also provide guidance and services for long-term maintenance to protect your investment. Different surfaces have different needs; for example, a modular tile court may only need occasional cleaning with a hose, while an asphalt court might require crack filling or fresh paint every few years. Should any issues arise, a professional installer can perform repairs, from fixing a crack to replacing a damaged tile. This ongoing support gives you peace of mind, knowing that help is available to keep your court in top condition. Services like professional cleaning and sealing can extend the life and look of your court for years to come.

What Are the Best Materials for a Home Court?

Choosing the right surface for your home basketball court is one of the most important decisions you’ll make. The material you pick affects everything from player safety and performance to the court’s long-term durability and maintenance needs. There isn’t a single “best” option for everyone; the ideal choice depends on your budget, how you plan to use the court, and the aesthetic you want for your backyard. Think about who will be playing. Are there young kids who might take a tumble, or serious athletes who need a high-performance surface?

To help you find the perfect fit, let’s walk through the most popular materials for home Sports Games Courts. We’ll look at the pros and cons of traditional options like asphalt and concrete, as well as modern solutions like modular tiles and synthetic turf. Each has unique qualities, and understanding them will help you create a space that your family will love for years. Gappsi offers a range of high-quality materials, ensuring you can find a surface that matches both your functional needs and your home’s style.

Asphalt Courts

Asphalt is a very common and reliable choice for outdoor basketball courts. An asphalt court, typically finished with a durable acrylic paint, provides a consistent and familiar playing surface. It’s known for its resilience and ability to stand up to Long Island’s varied weather, from hot summers to icy winters. This durability makes it a practical, long-lasting option.

However, one thing to keep in mind is maintenance. Over time, the elements will cause the painted surface to fade and wear. You can expect to repaint the court every five to eight years to keep it looking fresh and to maintain clear boundary lines. While it requires some upkeep, asphalt remains a solid, cost-effective foundation for a home court.

Concrete Courts

Concrete is another traditional material for building a home court, valued for its incredible strength and longevity. A professionally installed concrete court provides a solid, flat surface that can last for decades with minimal structural upkeep. It’s a true workhorse. If you’re already planning other hardscaping projects, incorporating a concrete court can be a natural extension of that work, creating a cohesive look across your property.

The main drawback is its unforgiving nature. Concrete is very hard, which can be tough on players’ joints during intense games. For families with younger children or those concerned about impact, this is an important consideration. To improve player comfort and safety, you can add special acrylic coatings that provide better grip and a small degree of shock absorption. Our masonry experts can ensure your concrete base is poured perfectly for any future surface you choose.

Modular Interlocking Tile Courts

If player safety and comfort are at the top of your list, modular interlocking tiles are an excellent choice. These modern court surfaces are engineered with performance in mind. The tiles snap together to create a seamless playing area that offers superior shock absorption, which is much gentler on the knees and ankles than asphalt or concrete. This makes them a fantastic option for families and players of all ages.

Another huge benefit is their all-weather performance. The tiles are designed to drain water quickly, so you won’t have to deal with puddles after a rainstorm, and you can get back to playing sooner. They also stay cooler to the touch than dark asphalt in the summer sun. With a wide variety of colors available, you can fully customize the look of your home sports games courts to match your favorite team or your home’s exterior.

Synthetic Turf Courts

For a truly unique and versatile playing surface, consider synthetic turf. While you might associate it with soccer or football fields, modern turf systems are also designed for sports like basketball. A turf court provides a soft, cushioned surface that offers exceptional shock absorption, significantly reducing the risk of injury from falls. It’s a low-maintenance option that eliminates the need for painting and crack repairs.

Synthetic turf also gives you incredible design freedom. You can choose from different colors, integrate custom logos, and create a multi-sport area that blends beautifully with your surrounding landscape. It provides a lush, green look year-round without the hassle of mowing or watering. If you want a court that is as beautiful as it is functional, synthetic turf is a wonderful and innovative solution.

How Much Does a Home Basketball Court Cost on Long Island?

Figuring out the budget for your dream basketball court is a big first step. The final cost for a home

What Affects the Final Price?

Several key elements will shape the final cost of your basketball court. Size is one of the biggest factors, a compact half-court will naturally cost less in materials and labor than a full-sized court. The surface you choose also heavily influences the price. Options range from classic asphalt to high-performance synthetic turf and sports games courts.

Beyond the basics, customizations like painted logos, multi-sport lines, and professional-grade hoops add to the cost. You should also consider features like fencing and netting for safety and convenience, as well as lighting for nighttime games. Finally, site preparation and any necessary permits are essential parts of the budget.

How to Get an Accurate Quote

The best way to understand the true cost of your project is to get a detailed, professional quote. Start by scheduling a consultation with an experienced installer. This allows an expert to assess your property, listen to your ideas, and provide specific recommendations. The more details you can provide about your desired court size and features, the more precise the estimate will be.

When you receive a quote, make sure it’s a comprehensive, itemized document that clearly outlines all costs. A transparent quote leaves no room for surprises. It’s also a great idea to review an installer’s portfolio, like the projects on our Gappsi YouTube channel, to see their quality of work and get inspiration for your own design.

Planning Your Project: Permits and Site Prep

Before the exciting part of building your court begins, there are a couple of essential planning steps to address. Getting the paperwork and the ground ready is just as important as choosing the right hoop. Properly handling permits and site preparation ensures your project starts smoothly and results in a court that lasts for years. A professional installer can guide you through these preliminary stages, making the entire process feel much more manageable. Taking the time to get these details right prevents future headaches and protects your investment.

Understanding Local Permit Requirements

So, do you need a permit to build a basketball court on Long Island? In most cases, the answer is yes. Projects of this scale typically require a building permit from your local town or village to ensure they meet safety and zoning regulations. This might sound like a hassle, but it doesn’t have to be. When you work with an experienced installer, they often handle the entire permit application process for you. This is a huge advantage, as they are familiar with the specific requirements in areas across Suffolk and Nassau County. A team that manages the permitting process ensures everything is done by the book, giving you complete peace of mind.

The Importance of a Professional Site Assessment

A professional site assessment is a critical first step for a successful installation. This is where an expert evaluates your property to determine the best location and preparation strategy for your court. Key factors include proper water drainage and soil stability. Without good drainage, you could end up with puddles that damage the surface and create unsafe playing conditions. Likewise, the ground needs to be stable and properly compacted to prevent shifting or cracking down the line. This assessment is foundational to the quality and longevity of all sports game courts, ensuring your court remains a safe and enjoyable feature of your home for many seasons to come.

What to Look for in a Basketball Court Installer

Choosing the right installer is the most important decision you’ll make for your home basketball court project. The right partner will turn your vision into a reality, while the wrong one can lead to headaches and costly repairs. To make sure you hire a true professional, focus on these four key areas.

Experience and a Proven Track Record

You want a team that has done this before, many times. An experienced installer understands the nuances of building in Long Island, from proper ground preparation to selecting materials that withstand our specific climate. A company with a long history has a refined process for managing the project from the initial design to the final hoop installation. They can anticipate potential challenges and solve them efficiently. Look for a specialist who can show you a history of building custom sports games courts and can confidently guide you through every step.

Proper Licensing and Insurance

This is non-negotiable. A professional installer must be fully licensed and insured in New York. This protects you from liability if an accident happens on your property during construction. Hiring an unlicensed contractor might seem cheaper upfront, but it exposes you to significant financial and legal risks, not to mention the potential for subpar work with no warranty. Always ask for proof of licensing and general liability insurance before signing any contract. This simple step gives you peace of mind and ensures you are working with a legitimate and accountable business.

High-Quality Materials

A basketball court is only as good as the materials used to build it. A top-tier installer will source and recommend durable, safe, and high-performance materials for your court’s surface, whether it’s classic concrete or modern modular tiles. They should explain the pros and cons of each option based on your budget and how you plan to use the court. A company’s commitment to quality often extends across all their services, from the porcelain and natural stone they use for patios to the turf on their game courts.

A Strong Portfolio and Positive Reviews

Past work is the best indicator of future results. Before you commit, ask to see a portfolio of their completed basketball court projects. Photos and videos give you a clear idea of their design style and the quality of their craftsmanship. You can often find these on a company’s website or social media channels. Just as important are reviews from previous clients. Testimonials can tell you a lot about the customer experience, communication, and whether they delivered on their promises. Seeing a company’s work in action on platforms like YouTube can provide an even deeper look into their process and results.

Common Mistakes to Avoid When Hiring an Installer

Building a home basketball court is an exciting project, but choosing the right installer is the most critical decision you’ll make. To protect your investment and make sure your project goes smoothly, it helps to know what common pitfalls to look out for. Thinking through these points ahead of time will help you hire a professional you can trust to bring your vision to life.

Choosing Based on Price Alone

It’s always tempting to go with the lowest bid, but this is one of the biggest mistakes you can make. An unusually low price is often a red flag for subpar work, inexperienced labor, or lower-quality materials that won’t stand up to Long Island weather. You might save a little money upfront, but you could face much larger expenses later for repairs or even a complete replacement. A quality installation is an investment in your property’s value and your family’s enjoyment. Focus on the value you receive, which includes durable materials, expert craftsmanship, and a court built to last.

Skipping Research and Reference Checks

Before you commit, it’s essential to do your homework. A reputable installer will be proud to share their work and connect you with past clients. Ask for a portfolio of completed projects and, if possible, a list of local references you can speak with. Seeing a contractor’s work firsthand gives you a clear idea of their quality standards. You can also check online platforms to see projects in action; many installers showcase their process and finished results, giving you confidence in their abilities.

Not Getting a Detailed Written Contract

A handshake and a verbal agreement are not enough for a project of this scale. A professional installer will always provide a detailed written contract that protects both you and them. This document should clearly outline the entire scope of the project, including the specific materials to be used, a project timeline, a payment schedule, and details about site cleanup. It should also specify exactly what is included in the price. A thorough contract prevents misunderstandings and ensures everyone is on the same page before any work begins, creating a foundation for a successful project.

Overlooking Maintenance and Support Plans

Your relationship with an installer shouldn’t end the day the project is finished. A basketball court is exposed to the elements, and Long Island’s freeze-thaw cycles can take a toll. A great contractor will discuss long-term care with you from the start. Ask about warranties on materials and labor, and find out if they offer ongoing maintenance plans. Understanding how to care for your court and knowing you have professional support for future needs, like restoration and sealing, ensures your court remains in top condition for years of play.

Key Questions to Ask Before You Hire

Choosing the right installer for your home basketball court is a big decision. To make sure you find a partner you can trust, it helps to go into your initial conversations prepared. Asking specific, thoughtful questions will give you a clear picture of their experience, work style, and what you can expect from the final result. This isn’t about grilling them; it’s about starting a conversation that builds confidence and ensures you and your contractor are on the same page from day one. A great installer will welcome your questions and provide clear, honest answers. Think of it as the first step in a successful partnership. The following questions will help you cover all the important bases before you sign a contract.

What Does the Full Installation Process Look Like?

Ask for a complete walkthrough of the installation process, from the first day of excavation to the final line painting. Understanding each step helps you know what to expect regarding timelines, noise, and activity on your property. A professional installer should be able to clearly explain their methods for site preparation, base construction, surface installation, and finishing. This conversation gives you insight into their experience and attention to detail. Knowing the full scope of the project ensures there are no surprises and that you feel comfortable with how your custom sports games court will come to life.

What Materials Do You Recommend for My Property?

The surface you choose impacts everything from ball bounce to player safety and long-term maintenance. A knowledgeable contractor will assess your property and discuss the best options for your specific needs. Ask them to explain the pros and cons of different materials, such as asphalt with acrylic paint, modular interlocking tiles, or even synthetic turf. Gappsi offers a wide selection of high-quality materials, including various porcelain and natural stone options for surrounding patios and walkways. Your installer should recommend a solution that fits your budget, intended use, and Long Island’s climate, ensuring your court performs well for years.

What Is Included in the Quote?

To avoid unexpected costs, ask for a detailed, itemized quote that breaks down all expenses. A transparent quote should clearly state what is and is not included in the final price. Does the total cover site grading, all materials, labor, the basketball hoop system, lighting, and site cleanup? A typical court installation can take a few weeks, so confirming the scope of work is essential. Getting everything in writing protects you and ensures the price you agree to covers the entire project. This level of detail is standard for any major home remodeling project and should be expected for your court installation.

Do You Handle Permits and Site Preparation?

Navigating local building codes and permit requirements can be one of the most challenging parts of any construction project. Ask potential installers if they manage this process for you. A full-service company will handle obtaining all necessary building permits and providing the required architectural drawings, saving you time and a major headache. This ensures your project complies with all local regulations from the start. At Gappsi, we manage the entire permitting process for our clients, a key part of our comprehensive masonry and construction services. Confirming your contractor handles this lets you focus on the exciting parts of designing your court.

How to Choose the Right Court Surface

Selecting the right surface for your home basketball court is one of the most important decisions you’ll make. The material you choose affects everything from the project’s cost and durability to player safety and performance. It’s not just about how the court looks; it’s about creating a space that meets your family’s needs for years to come. Thinking through your budget, how you’ll use the court, and our local climate will help you land on the perfect option for your backyard.

Match the Surface to Your Budget

While it’s tempting to let price guide your decision, choosing a court surface based on cost alone can be a mistake. A budget-friendly option might save you money initially, but it could lead to higher maintenance costs or the need for a full replacement sooner than you’d like. Instead, think about the long-term value. A high-quality surface is an investment in durability and performance. At Gappsi, we help you find a solution that fits your budget without compromising on quality, offering a range of materials for our custom Sports Games Courts. We’ll walk you through the pros and cons of each so you can make an informed choice that provides lasting enjoyment.

Think About Player Use and Performance

The ideal court surface depends entirely on who will be using it. Are you building a court for young children to learn the game, or will competitive teenagers and adults be playing on it? The answer changes things. For example, modular tiles offer excellent shock absorption, which is easier on joints during intense play. Concrete, on the other hand, provides a fast, consistent ball bounce favored by serious players. The ultimate guide to basketball court flooring is one that prioritizes both safety and an optimal playing experience. Considering your family’s specific needs ensures you get a court that everyone will love to use.

Consider Long Island’s Climate

Here on Long Island, we get the full range of weather, from hot, humid summers to freezing winters. These conditions are tough on any outdoor structure. The constant freeze-thaw cycles can cause materials like concrete and asphalt to crack and heave if they aren’t installed with expert care. This is why professional site preparation is non-negotiable. We have to consider factors like drainage to prevent water from pooling and freezing beneath the surface. Materials like interlocking modular tiles are often a great choice for our climate because they are designed to expand, contract, and drain efficiently. Our extensive landscape design experience ensures your court is built to withstand Long Island’s specific environmental challenges.

How to Maintain Your Basketball Court Year-Round

Once your dream basketball court is installed, a little routine care will keep it in top shape for years of enjoyment. Proper maintenance ensures your court remains a safe, high-performing surface that looks fantastic. The upkeep varies depending on your chosen material, but the goal is always the same: to protect your investment and keep the games going strong, season after season.

Maintaining Asphalt and Concrete Courts

Asphalt and concrete are classic choices for a reason, they are incredibly durable. To keep them looking their best, your main task is to keep the surface clean. Regularly sweep away leaves, dirt, and other debris to prevent stains and slick spots. It’s also wise to periodically check for any small cracks that may form. Addressing these early prevents them from becoming bigger issues. Given Long Island’s weather, you may find that the painted lines and surface need a refresh every five to eight years. A professional restoration and sealing service can make your court look brand new again.

Maintaining Modular Tile Courts

If you chose a modular tile court, you’re in luck because the maintenance is minimal. These surfaces are designed to be low-effort, making them a favorite for busy homeowners. Most of the time, all you’ll need is a leaf blower or a garden hose to clear away any debris that accumulates. One of the biggest advantages of a tile system is that if a single tile gets damaged, you can simply pop it out and replace it without having to resurface the entire court. This simple upkeep makes modular tiles a practical and long-lasting option for your backyard sports games courts.

Maintaining Synthetic Turf Courts

Synthetic turf offers a unique, cushioned playing experience that’s gentle on the joints. To maintain this surface, you’ll want to keep it free of leaves and debris with a leaf blower or a stiff brush. Regularly brushing the turf fibers helps them stand upright, which ensures consistent ball bounce and player footing. For any spills or dirt, a simple rinse with a hose is usually sufficient. This type of court is a fantastic, low-maintenance alternative that provides a professional feel and keeps players comfortable, helping them play longer without getting as tired.

Integrating Your Court with Other Outdoor Features

Your basketball court doesn’t have to be a standalone feature. It can be the centerpiece of a complete outdoor entertainment zone. Maintaining these integrated features is just as important. For instance, if you have court lighting for nighttime games, check the bulbs and wiring periodically. If you’ve installed fences and netting for safety, ensure they are secure and free of damage. By thinking of your court as part of a larger landscape, you can create a cohesive and functional space with features like adjacent patios, seating areas, and walkways that connect everything beautifully.

Related Articles

Frequently Asked Questions

How long will it take to build my court from start to finish? A typical home basketball court installation on Long Island takes about two to six weeks to complete. This timeframe covers everything from initial site preparation and grading to the final surface installation and line painting. Keep in mind that factors like weather delays or the time it takes to secure local permits can sometimes adjust the schedule, but a professional team will keep you informed and manage the project efficiently.

What if I don’t have enough space for a full-sized court? You can absolutely still have a fantastic home court, even with a smaller yard. This is where custom design makes all the difference. Many homeowners opt for a half-court, which provides plenty of room for practice and games. We can also design custom-sized playing areas or even dedicated shooting zones that fit perfectly within your landscape, giving you a great space for fun and fitness without needing a massive amount of land.

What’s the best court surface for a family with young kids? When safety and comfort are top priorities, modular interlocking tiles are an excellent choice. These surfaces are engineered with shock absorption, which is much gentler on the joints of growing kids (and adults) during play. They also provide great traction and drain quickly after rain. Synthetic turf is another wonderful option, offering a soft, cushioned surface that can significantly reduce the impact and scrapes from falls.

Do I have to deal with getting the permits myself? Not at all. Navigating the permit process with local town and village offices can be complicated, but it’s a standard part of the service when you work with an experienced installer. A full-service company will handle the entire permit application for you, including providing any necessary drawings and ensuring your project meets all local building codes and zoning regulations. This lets you focus on the exciting parts of the project, not the paperwork.

Can the court be used for more than just basketball? Yes, your court can easily become a versatile hub for all kinds of family activities. During the design phase, you can choose to have lines painted for other sports, such as pickleball, volleyball, or shuffleboard. This transforms your basketball court into a multi-purpose Sports Games Courts, maximizing your investment and creating a space that offers something for everyone in the family to enjoy.

Share this page:
Backyard designers Long Island homeowners trust planning a pool and patio

Backyard Designers Long Island: Your Project Guide

Hiring backyard designers Long Island homeowners can trust is about more than choosing attractive features. The right team studies how your family lives, how water moves across the property, and how patios, pools, planting, lighting, and outdoor structures should work together. Gappsi brings a design-build-supply approach shaped by Long Island projects since 1987, three generations of Italian craftsmanship, and hands-on material selection at its Smithtown showroom.

Schedule a backyard design consultation with Gappsi to turn your ideas into one coordinated plan.

Backyard designers Long Island homeowners hire should offer a full design-build-supply model to keep the project on track. This method gives you one point of contact for the whole job. It covers 3D drawings, stone choice, and the final build. Expert designers help you avoid common errors by focusing on site water flow, local rules, and family needs. You should look for a firm with a local showroom to see stone in person. According to experts at Mississippi State University Extension, knowing the design process helps you ask the right questions during your first meeting. This knowledge ensures your new yard provides the privacy and fun your family needs for many years.

Finding the right expert for your home needs a clear plan. You must know what to check before you sign a contract. Knowing what backyard designers Long Island homeowners should do first is the best way to start. The path begins with

What backyard designers Long Island homeowners should do first

Planning your dream yard starts long before you dig. Most expert backyard designers Long Island owners trust say you should start with a clear list of goals. Knowing how the landscape design process works helps you ask the right questions when you meet with a pro. This early work helps to stop big mistakes and makes sure the final plan fits your life. You should think about how your family will use the space to play, rest, and host friends.

Find your lifestyle needs

Your yard should work for your needs while looking great. A well-planned landscape gives your family a place for fun and privacy. Think about who will use the space each day. If you have young kids, you might want open grass or unique Sports Games Courts. If you love to cook outside, a high-end kitchen might be your top goal. Matching your yard to how you live is the best way to get long-term value from your project.

You should also think about how much time you want to spend on yard care. Some plants and features need lots of work, while others are easy to keep up. Being honest about your goals helps your expert pick the right parts and plants. You can see many of these choices in person at the Gappsi showroom in Smithtown. Seeing the stones and plants up close makes it easier to pick what you love.

Set your budget and scope

Before you call an expert, you should have a rough idea of your budget. Top-grade design is a big cost that can increase your home’s value by making the space look better. Knowing your price range helps the pro pick the best options for your space. It also keeps the project from growing too large. A clear budget allows you to pick must-have features over things that are just nice to have.

A full project scope includes more than just a patio or pool. It covers lights, water flow, and how areas link up. Working with a team that does everything from design to build makes the work simple. This model offers more trust and ease for the owner. You can start this journey by booking a design meeting to share your ideas and get expert feedback.

  1. Define how you plan to use your space for daily life and hosting.
  2. List your must-have features versus nice-to-have add-ons.
  3. Decide how much time and money you can spend on yard care.
  4. Set a clear budget range for the whole project.
  5. Collect photos of styles and features that you like.
  6. Visit a local showroom to see stones and plants in person.

What happens during a backyard site evaluation?

A backyard site evaluation documents grading, drainage, access, utilities, sunlight, privacy, and the relationship between existing structures. On Long Island, this early review also helps the design team account for local property conditions and identify practical constraints before concepts become construction plans.

A site evaluation is a key step in any outdoor project. It helps you find out what is possible for your land and your budget. During this visit, professional backyard designers on Long Island look at the layout of your yard to plan the best use of space. They check the soil, land shape, and sun paths to make sure your new design will last for years.

Checking your yard for technical needs

Experts start by looking at how water flows through your yard. Proper drainage keeps your basement dry and stops pools of water from forming on your patio. Designers also check the grade of the land. If your yard slopes, you may need retaining walls or custom steps to create flat areas for play or dining. These choices help prevent costly mistakes during the build phase of your project.

Privacy and sun are also big parts of the review. A good designer looks at where the sun hits at different times of the day. This helps them decide where to put a pool or a seating area. They also see which spots need screening from neighbors. This consultative design process ensures your yard offers both beauty and a place for your family to relax in private.

Planning for utilities and local rules

A major part of the site visit is finding where gas, water, and power lines run. Knowing these spots is a must before any digging starts. It keeps your home safe and helps the team plan where to put outdoor kitchens or fire pits. Designers also look for existing trees or structures that might stay or need to go. This step helps you ask the right questions before the work begins.

Your designer also checks for local permit rules and property lines. Long Island towns have specific laws about how close a pool or shed can be to a fence. Understanding these rules early saves time and keeps your project on track with the town. A team with deep local knowledge can help guide you through these permit steps so you do not face fines or delays later.

Backyard designers Long Island consultation beside a coordinated patio and pool
A coordinated design helps homeowners see how materials and outdoor features will work together before construction.

How concepts and materials become a buildable plan

A buildable backyard plan connects the design vision to accurate material choices, site conditions, and construction sequencing. With Gappsi’s integrated team, homeowners can review concepts, compare materials at the Smithtown showroom, and refine details before crews begin work.

The step from a simple idea to a real build starts with a solid plan. A good plan turns your vision into a map for your yard. It looks at how you use your space and what items work best for the local land. When you work with expert backyard designers on Long Island, they help you see the big picture. This plan keeps the project on track and helps you avoid high costs later.

A smart plan also looks at how a yard adds value to a home. Research shows that design sophistication is the top factor that can boost how much people think a home is worth. By planning for beauty and use, you create a space that serves your family now and helps you later if you sell. This way makes sure your yard is both useful and pretty.

Viewing your project with 3D views

It can be hard to see how a new pool or patio will look just from a drawing. That is why pros use 3D tools to show you the end result. This step lets you walk through your new yard in a virtual way. You can see how the sun hits your patio or where to put your Sports Games Courts for the best play.

Using 3D design views helps find any issues with the flow of the space. It makes sure the build plans match your vision before any work starts. This clear view makes the whole process easier for you. It gives you peace of mind that the final build will be what you want.

Picking stone and tile in a physical showroom

The items you pick define the look and feel of your yard. You should not have to guess what a stone or tile looks like from a small photo. A physical showroom lets you touch and see the items in person. You can check the colors and see how different stones work together.

This hands-on step is a big part of making a buildable plan. It helps you pick stones that are both pretty and strong enough for the local weather. At the Gappsi showroom in Smithtown, you can view many high-quality options. Seeing these items in person helps you make the best choice for your home.

Handling permits and local rules

A plan is only buildable if it follows the law. Every town has rules for how you can change your land. You need a team that knows the permit process for Nassau and Suffolk Counties. This local knowledge helps you get the right papers and avoid fines. Experts who know the local land can also help with drainage and soil issues. They make sure your new yard is safe and legal. This part of the plan is vital for a smooth build. It ensures that your project is done right the first time.

Decision Phase Focus Area Plan Result Key Benefit
Initial Design Layout and flow 3D models See the yard first
Picking Items Style and strength Choice of items Find the best look
Building Plan Rules and safety Permit papers Avoid local fines

How design-build coordination changes the experience

Design-build coordination gives homeowners one accountable team from the first concept through construction. Designers, material specialists, and builders can resolve details together, reducing handoff gaps and helping pools, patios, masonry, planting, lighting, and other features come together as one usable outdoor environment.

Choosing a design-build model for your home project makes the whole process easy. Instead of hiring many firms, you work with one team from start to finish. This method brings designers, builders, and suppliers together under one roof. For homeowners looking for backyard designers long island, this means less stress and better results. You will not have to act as a middleman between a designer and a builder.

One point of contact for the full build

When you hire different teams, wires often get crossed. A designer might plan a feature that a builder cannot make. Or, a builder may change a detail without telling the design team. In a design-build setup, every person works for the same company. This creates a smooth flow of facts from the first sketch to the last stone laid. It also makes things more clear. You always know who to call when you have a question.

This single point of contact saves you a lot of time. You do not have to repeat your goals to new people at each stage. Your team knows your vision from day one. They keep that vision in mind as they pick out tiles or plants. This is helpful when you plan complex parts like masonry design for a patio or pool deck. Having one team handle the masonry design and build keeps the look and quality the same throughout.

Bridging the gap between 3D design and construction

Modern tools like 3D models let you see your yard before any work starts. But those models only help if the build team follows them to the letter. In a design-build firm, the people who drew the plan are in close touch with the crew on the ground. They make sure the real yard looks just like the online one. This close link helps find and fix errors before they cost too much.

Learning about the landscape design process helps you ask the right questions during your first talk. When the same firm handles the plan and the build, they can give you a real price early on. They know what the parts cost and how long the work will take. This keeps your project on track and helps you stay within your budget.

Managing changes with ease

Most large outdoor projects face a few changes along the way. You might find a rock under the soil that blocks a pipe. Or, you might see a new plant at the showroom that you love. In a split system, these small changes can cause big delays. The builder has to wait for the designer to sign off on a new plan. In a design-build model, these shifts happen much faster.

The team can adjust the plan and the budget in one step. This keeps the work moving without a long pause. This speed is vital for backyard designers long island who work with tight local timelines. A well-planned yard does more than just look good. High-quality landscape design style can even raise how much people think your home is worth. By keeping the design and build teams close, you get the best value for your home.

How Long Island conditions shape backyard design

Long Island backyard design must respond to the individual property’s soil, drainage, exposure, access, and municipal requirements. A locally experienced team can plan around those conditions while selecting durable materials and creating comfortable spaces that work through changing seasons in Nassau and Suffolk Counties.

Planning a yard in Nassau or Suffolk County needs a deep look at the local land. The weather and soil here can change how you use your outdoor space. Long Island experts must plan for sea winds and changing seasons to keep your yard looking great all year. By choosing professional backyard designers on Long Island, you make sure your plan works with the local land and permit rules.

Adapting to soil and drainage

The ground in our area can vary from sandy shores to heavy clay inland. Good drainage is key to keep water from pooling near your home or patio. A smart plan uses the natural slope of your land to move water away from busy zones. This step helps keep your stone work and plants healthy through heavy rain. Proper grading also makes sure your luxury patio and backyard designers can set a strong base for masonry.

Managing salt and wind air

Homes near the water face extra tests from salt spray and strong gusts. These things can hurt common plants and wear down some building goods. Designers often use hardy, local plants that can handle the harsh air without constant care. A well-planned yard gives your family space for fun and privacy while helping the environment, according to Mississippi State University Extension. Strong walls or fences can also act as breaks to keep your seats calm.

Planning for four seasons

Long Island yards should be useful from the first warm days of spring through the cool fall. This means picking goods that can handle freezing and thawing without cracking. Good lights and heat, like fire pits, stretch the time you can spend outside. A top-tier plan with large plants and many types can also increase the perceived value of a home. Balancing beauty with use ensures your yard stays a favorite spot for the family for many years.

How should you compare backyard designers?

Compare backyard designers by reviewing relevant completed work, local experience, planning process, material access, construction responsibility, and communication. The strongest choice should explain how each feature fits the whole property, who manages each phase, and how decisions are documented before construction begins.

Picking from the many expert backyard designers on Long Island takes a clear plan. You want a team that can take your ideas and turn them into a real, useful space. Checking other firms helps you find the right fit for your home and budget.

Check for local skill and past work

A great designer must know the local area well. Long Island has unique soil, weather, and rules. Ask if the team knows the permit steps in Nassau or Suffolk County. They should have a deep history of working with local towns to avoid delays. Gappsi Group has served the area since 1987, which gives them a lot of local insight.

You also want to see a portfolio that fits your style. Look for projects that match what you want for your own yard. If you want a pool and a patio, find a designer who has done both. A team that knows the local land will make better choices for your yard. They can pick plants that grow well here and stone that stays strong through cold winters.

Look at the design and build process

The best way to compare teams is to look at how they work. Some firms only draw a plan. Others handle everything from the first sketch to the last brick. This is called a design-build model. It gives you one point of contact and keeps the project on track. Per the Mississippi State University Extension, knowing the process helps you ask better questions when you meet a pro.

Ask if they use 3D tools to show you the plan. Seeing your yard in 3D before work starts helps you find mistakes early. It also ensures the final result matches what you have in mind. A firm that uses modern tools shows they care about your time. This stage is vital for setting a clear budget and timeline for your home project.

Verify items and clear updates

A designer should be open about where they get their items. It is helpful if they have a showroom where you can see the stones, tiles, and plants. Being able to touch and see the items in person helps you make better choices. This prevents shocks once the work begins. It also shows the firm has strong ties with its sources.

Clear updates are also key. You need a team that listens to your ideas and gives plain reports. Ask how they handle changes or problems during the build. A team that values your input will create a space that fits your lifestyle. They should focus on your vision while using their skills to keep the project safe and strong. They should also explain the steps in the build so you know what to expect each week.

What should you expect after approving the design?

After design approval, the team finalizes selections, confirms project details, coordinates scheduling, and prepares the site for construction. Homeowners should expect clear communication about upcoming phases, access, material decisions, and questions that need answers as the approved backyard plan moves from drawings into the built environment.

Once you give the green light to your 3D design, the real work starts. This is an exciting time for your home. You have already seen the digital version of your dream yard. Now, the team will turn those images into a real space.

The next steps focus on picking items and getting the site ready. Knowing this landscape design process helps you know what comes next. It also lets you ask the right questions as the work moves forward.

Choosing your material picks

The next task is to pick the exact items for your project. You will need to choose the stones, pavers, and plants. Many professional backyard designers on Long Island have a local showroom. You can visit these places to see the goods in person.

This helps you check the colors and feel of the stones. You can also see the size of the plants that will go in your yard. Picking these items now prevents delays later.

It ensures that the team has everything they need when they start the build. It also gives you a chance to see how different stones look next to each other. This step is vital for making sure the yard matches your style.

It also helps the project stay within your goals for both beauty and use. A good plan keeps the work on track from the start. This allows you to relax while the team builds your new space.

Site prep and local permits

Before the heavy machines arrive, the team must prep the site. This involves clearing the area and marking where everything will go. They might need to move dirt or take out old shrubs.

This part can be loud and messy, but it is needed for a strong base. A firm base ensures that your new patio or pool lasts for many years. It is the first step in the real build of your new yard.

Your team will also handle the forms. Local towns have strict rules for backyard projects. Expert backyard designers on Long Island know how to get the right permits.

They work with Nassau and Suffolk County offices to make sure your build is legal. This keeps the project on track and helps you avoid fines. Having a team that knows the local laws is a big plus for any homeowner.

Building steps and talking points

As the build starts, you will see your yard change fast. You should expect regular updates from your project lead. This person is your main link to the crew.

They can answer questions about the schedule or the work being done. Good talk keeps everyone on the same page. It also helps the team find and fix any small issues before they become big problems.

Sometimes you might want to make a small change. You should talk about these ideas as soon as possible. Your designer can tell you how a change might affect the build or the plan.

Once the project is done, you will do a final walkthrough. This is your time to check every detail. The team will also show you how to care for your new plants and hardscape. This last step ensures that you are happy with the results for a long time.

Frequently Asked Questions

These quick answers cover the questions Long Island homeowners most often ask before choosing a backyard design partner.

What is the typical process for hiring a backyard designer on Long Island?

Hiring a professional begins with a meeting to discuss your goals and property needs. According to Gappsi, a talk-first way helps avoid costly mistakes by knowing your vision before work starts. After looking at your site, the designer makes a plan, often using 3D images. Once you approve the design, the project moves to the build phase. This step-by-step path makes sure the final result fits your life and budget.

What factors should I consider when selecting a backyard designer on Long Island?

You should check a designer’s local name and what they know about Long Island building rules. It is also smart to see if they offer a full design-build-supply model so you have one group to hold to their word. According to Mississippi State University, a good yard plan should give you privacy and fun while showing your style. Last, look for a firm with a local shop where you can see and pick materials before work begins.

Should I hire a landscape designer or a landscape contractor for my backyard?

A landscape designer focuses on the art and planning, while a builder handles the hard work. Picking a firm that does both gives you one point of contact and more trust. For example, Gappsi uses an all-in-one model to handle every step from 3D art to the final build. This way removes the need to talk to many different workers and helps keep the project on track and on time.

How much does professional backyard design cost on Long Island?

Price for backyard work changes based on how big the project is and the parts you pick. While first meetings might have a fee, the total cost often grows with the size of your yard and the quality of stones or plants. A study from Virginia Tech says that good designs and large plants are top ways to help your home sell for more. Spending on a pro plan helps you pick the best parts.

Ready to set up your backyard design consultation?

Putting off your backyard plans can lead to more than just a late start on building. It often means paying more for supplies and facing a long wait for the best crews. If you act now, you can work through each part of your plan without any rush or stress. This early start gives you the time to pick the right items and find the best look for your home. Working with professional backyard designers on Long Island helps you avoid the stress of trying to fix errors after the work has started. Our team will help you find the best path for your project so you can enjoy your new yard as soon as you can.

Ready to get started? Call 631-543-1177 to schedule a backyard design consultation or visit the Smithtown showroom today.

Share this page:
Luxury gunite pool builders planning a custom design with a client on a laptop.

How to Hire the Best Luxury Gunite Pool Builders

Your backyard should be more than just a patch of grass; it should be a personal retreat, a place where you can relax and entertain. A custom swimming pool often becomes the heart of this outdoor oasis. When it comes to creating a truly unique and lasting pool, gunite construction stands out. Unlike other pool types, gunite offers complete design freedom, allowing you to build a pool that perfectly fits your space and style. This durability and flexibility are why so many homeowners on Long Island choose this method. The key to bringing this vision to life is partnering with experienced luxury gunite pool builders who understand how to blend artistry with engineering. This guide will walk you through why gunite is the top choice and how to select the right team for your project.

Key Takeaways

  • Gunite Offers Unmatched Durability and Design Freedom: As the strongest pool construction method, gunite provides a lasting investment. Its on-site building process allows for any shape, size, or custom feature you can envision, from tanning ledges to integrated spas.
  • Choosing the Right Builder is Crucial: Your project’s success hinges on your contractor. Protect your investment by verifying their credentials, checking references from past clients, and securing a detailed written contract that covers all project specifics and warranties.
  • Know the Process from Design to Finish: A custom pool build involves several key stages, including design, permitting, excavation, curing, and finishing. Understanding this timeline helps you plan effectively and ensures a smoother experience from start to finish.

Why Are Gunite Pools a Top Choice for Luxury?

When you picture a truly luxurious backyard, a stunning, custom-designed swimming pool is often the centerpiece. More often than not, that pool is made of gunite. Gunite pools have become the gold standard for high-end residential properties, and for good reason. They represent a perfect blend of strength, flexibility, and beauty, allowing you to create a personal oasis that is built to last. Unlike other pool types that come with design limitations, a

This construction method involves spraying a high-velocity mixture of sand and cement over a steel-reinforced frame, creating a solid, monolithic shell. This process allows for incredible customization while providing a structure that can endure for decades. Investing in a gunite pool means you’re not just adding a feature to your home; you’re creating a lasting experience and a significant asset that enhances your lifestyle and property value. Gappsi specializes in designing and building custom swimming pools that transform your outdoor living space into a luxurious retreat. From the initial design to the final touches, the focus is on creating a pool that is uniquely yours, reflecting your taste and complementing your home’s architecture.

Unmatched Durability

One of the biggest reasons homeowners choose gunite is its incredible strength. Gunite is the most durable pool construction method available, creating a dense, steel-reinforced shell that can withstand the test of time. This resilience makes it an ideal choice for the varied climate of Long Island, as it holds up well against ground shifts and changing weather conditions. A properly installed and maintained gunite pool can last a lifetime, making it a wise long-term investment for your property. This durability ensures your backyard oasis remains a source of enjoyment for your family for many years to come.

Complete Design Freedom

If you can dream it, you can build it with gunite. Because gunite pools are built on-site, they offer the most flexibility in shape, depth, and integrated features. You are not limited to standard shapes or sizes. Whether you envision a free-flowing lagoon that blends with your landscape, a sleek geometric design for a modern aesthetic, or a multi-level pool with varying depths, gunite makes it possible. This complete design freedom allows you to create a pool that perfectly complements your home’s architecture and your personal style, ensuring the final result is a true one-of-a-kind masterpiece.

Beautiful Finish Options

The final finish of your pool is what brings your vision to life, and gunite offers a spectacular range of options. With a vast array of interior finishes, from classic plaster to shimmering pebble aggregates and elegant glass tiles, you can achieve the exact look and feel you desire. These finishes determine the water’s color, texture, and sparkle, allowing for true personalization. You can also integrate custom features like waterfalls, spas, and tanning ledges seamlessly into the design. The ability to select from beautiful porcelain and natural stone for the coping and surrounding patio further enhances the luxurious aesthetic, increasing your property’s value.

Popular Custom Features for Your Gunite Pool

One of the best parts of choosing a gunite pool is the incredible design flexibility. You aren’t limited to a standard shape or size. Instead, you can create a custom swimming pool that perfectly matches your home’s style and your family’s lifestyle. From serene water features to practical additions, these custom touches are what make a pool truly yours. Thinking about what features you want early in the design process helps your builder create a cohesive and functional backyard retreat. Let’s look at some of the most popular custom features homeowners are adding to their gunite pools.

Add Infinity Edges and Tanning Ledges

An infinity edge, also known as a vanishing edge, creates a stunning visual effect where water flows over one or more sides of the pool, making it seem as if it merges with the horizon. This feature is perfect for properties with a view, adding a touch of resort-style luxury. Another popular addition is a tanning ledge, which is a large, shallow area perfect for lounging in a few inches of water. It’s an ideal spot for sunbathing, relaxing with a book, or providing a safe space for small children to splash and play. Gunite construction allows for these architectural details, along with custom steps and benches, to be seamlessly integrated into your swimming pool design.

Integrate Spas and Water Features

Why limit your relaxation to just the pool? Integrating a custom spa or hot tub is a fantastic way to extend your pool’s usability into the cooler months and create a space for unwinding after a long day. You can design a spillover spa, where warm water cascades into the pool, creating a beautiful focal point and a soothing sound. Water features like waterfalls, deck jets, and bubblers also add movement and ambiance to your backyard. A custom gunite pool paired with a built-in spa transforms your backyard into a versatile retreat for both fun and relaxation, giving you a personal escape right at home.

Include Custom Lighting and Seating

The right lighting can completely change the mood of your pool area, turning it into a magical space once the sun goes down. Modern LED lighting offers a spectrum of colors and can be programmed to create different effects, from a tranquil glow to a vibrant party atmosphere. Thoughtfully placed lights can highlight water features, illuminate steps for safety, and make your pool inviting for an evening swim. In-pool seating, like custom-built benches along the sides, provides comfortable spots to sit and chat without having to leave the water. These features create a calming atmosphere that encourages you to slow down and enjoy your beautiful outdoor space, as you can see in our project showcases.

Create a Complete Outdoor Oasis

Your pool is the centerpiece of your backyard, but it doesn’t have to stand alone. Think of it as the anchor for a complete outdoor living environment. You can design a space that flows from the poolside to other functional areas. Imagine stepping out of the water and relaxing under a shaded pergola or enjoying a meal prepared in your outdoor kitchen. With Gappsi, you can integrate your pool with beautiful masonry patios, lush landscaping, and even a cozy fire pit. By planning these elements together, you create a cohesive and luxurious outdoor oasis that serves as a true extension of your home.

How to Choose the Right Gunite Pool Builder

Building a custom gunite pool is a significant investment in your home and lifestyle. The builder you choose is your most important partner in this project. They are responsible for turning your vision into a beautiful, functional, and lasting reality. Taking the time to carefully vet potential builders will protect your investment and ensure a smooth process from start to finish. Here’s what to look for to find a trustworthy and skilled professional for your Long Island home.

Verify Their Credentials

First things first, you need to confirm that any builder you consider is properly licensed and insured. A license shows they meet local and state regulations for construction, while insurance and bonding protect you financially from accidents or if the company can’t finish the job. A builder with years of experience constructing custom swimming pools is better equipped to handle any surprises that might pop up during excavation or construction. Don’t be shy about asking for proof of their credentials. A reputable company will be happy to provide documentation and answer your questions.

Review Their Portfolio

A picture is worth a thousand words, but a portfolio is worth even more. Go beyond the glossy photos on their website and ask to see a range of their completed projects. Look for examples that are similar in style and complexity to what you have in mind. An experienced builder should also be able to provide a list of past clients you can speak with. This is your chance to get honest feedback from other homeowners. Ask them about their experience with the communication, timeline, budget, and overall quality of the work. A builder’s video gallery can also offer a more dynamic look at their craftsmanship.

Check for Professional Memberships

Does the builder belong to any industry organizations? Membership in groups like the Pool & Hot Tub Alliance (PHTA) is a great sign. It shows a builder is committed to staying current with the latest industry standards, technologies, and best practices. These organizations often have a strict code of ethics that members must follow, which gives you an extra layer of confidence. While not a requirement, it demonstrates a level of professionalism and dedication to their craft that sets the best builders apart from the rest. It’s another piece of the puzzle that helps you find a contractor you can trust.

Clarify Project Details and Warranties

Before you sign anything, make sure you have a detailed, written contract. This document should clearly outline the entire scope of the project, including all materials, features, and a specific timeline. It should also include a clear payment schedule. A financially stable company will be transparent about all costs. Equally important is understanding the warranties. Ask what’s covered for the pool structure, the equipment like pumps and filters, and the workmanship. A strong warranty is a testament to the builder’s confidence in their own design and construction expertise. Read everything carefully and get clarification on any points you don’t understand.

The Gunite Pool Construction Process Explained

Building a custom gunite pool is an exciting project, but it’s also a significant undertaking. Knowing what to expect at each stage can make the entire experience feel more manageable and enjoyable. A professional builder will guide you through every step, but it helps to have a clear picture of the journey from start to finish. The timeline for a pool build can vary based on design complexity and local permitting, but a well-defined process ensures your project stays on track. Let’s walk through the key phases of constructing your dream gunite pool.

Step 1: Consultation and Design

This is where your vision begins to take shape. The initial consultation is a creative collaboration between you and your pool designer. You’ll discuss everything from the pool’s size and shape to custom features and how it will blend with your overall landscape. This foundational phase is all about ensuring the final plan aligns perfectly with your lifestyle and aesthetic. A great design team will provide 3D renderings to help you visualize the final result. Gappsi’s comprehensive design services ensure every detail is considered, creating a seamless transition from your home to your new outdoor oasis.

Step 2: Permitting and Excavation

Before the first shovel hits the ground, your project needs official approval. Your builder will handle the process of submitting plans and securing permits from your local municipality on Long Island. This step can sometimes take a few weeks or even longer, depending on local regulations. Once the permits are in hand, the real excitement begins with excavation. Heavy equipment will arrive to dig out the area for your pool, creating the first tangible outline of your new backyard centerpiece. This is a major milestone that prepares the site for the pool’s structure. The entire installation can take up to 90 days, so getting through permitting is a key step.

Step 3: Applying and Curing the Gunite

With the site excavated, the next step is to build the pool’s skeleton. A network of steel rebar is installed to create a durable framework. Then, the gunite, a specialized mixture of sand and cement, is pneumatically applied over the rebar to form the pool’s shell. This method creates a dense, strong, and monolithic structure. After application, the gunite must cure for about 28 days to reach its maximum strength. This curing period is absolutely essential for the long-term durability and structural integrity of your swimming pool. While it requires patience, this step ensures your pool is built to last for decades.

Step 4: Finishes and Final Walkthrough

Once the gunite shell has cured, it’s time for the finishing touches that bring your pool’s design to life. This includes installing the waterline tile, coping, and the interior finish, such as plaster, pebble, or an all-tile surface. This is also when plumbing is completed and pool equipment is installed. You can explore a variety of beautiful and durable materials, like porcelain and natural stone, for the surrounding patio and coping. The final step is a walkthrough with your project manager. This is your opportunity to inspect every detail, learn how to operate your new equipment, and ensure everything meets your expectations before the project is officially complete.

Mistakes to Avoid When Hiring a Pool Builder

Building a luxury gunite pool is a major investment in your home and lifestyle, so choosing the right partner for the job is the most important decision you’ll make. The right builder ensures a smooth process and a stunning final product, while the wrong one can lead to headaches and costly repairs. To make sure your project is a success from day one, it’s helpful to know the common pitfalls homeowners face. By avoiding these key mistakes, you can protect your investment and create the backyard oasis you’ve always wanted.

Don’t Choose Based on Price Alone

While it’s always smart to be mindful of your budget, selecting a pool builder based on the lowest bid can be a costly mistake. An unusually low price often signals that a contractor is cutting corners, whether on materials, equipment, or skilled labor. Cheap concrete, plaster, or plumbing might reduce the upfront cost, but these materials can lead to cracks, leaks, and expensive repairs down the road. A luxury gunite pool is built to last for decades, so investing in quality craftsmanship and durable materials from the start is essential. A premier builder will provide a fair price that reflects the high standards needed to construct beautiful and long-lasting swimming pools.

Never Skip Reference Checks

Any pool builder proud of their work will be happy to share a list of satisfied clients. Never skip the step of checking these references. A company’s portfolio and website are great starting points, but speaking directly with past customers gives you unfiltered insight into their experience. Ask them about the builder’s communication, professionalism, and ability to stick to the timeline and budget. Reputable builders who deliver exceptional value will have a long history of successful projects. You can also review their work on platforms like their YouTube channel to see the quality and scope of their projects for yourself. This step helps you confirm you’re hiring a team with proven expertise.

Insist on a Detailed Written Contract

A clear, comprehensive contract is your best tool for ensuring there are no surprises during construction. A verbal agreement or a simple, one-page estimate is not enough for a project of this size. Your contract should explicitly outline every detail, including the full scope of work, a complete list of materials and equipment, a clear payment schedule, and a projected timeline from start to finish. It should also specify warranty information for both labor and materials. This document protects you and the builder by setting clear expectations for the entire project. A professional company will always provide a detailed contract for complex jobs like masonry and pool construction.

Understand Your Maintenance Plan

Your relationship with your pool doesn’t end once the construction is complete. Before you sign a contract, ask potential builders about their post-installation support and what you’ll need to do to maintain your new pool. A gunite pool requires specific care to keep it looking and functioning its best. A great builder will educate you on everything from balancing chemicals to winterizing the pool and equipment. Some full-service companies even offer ongoing maintenance plans. Knowing what to expect for long-term care ensures you can enjoy your pool for years to come. It’s always a good sign when a company also offers services like patio restoration and sealing, as it shows they are committed to long-term quality.

Related Articles

Frequently Asked Questions

How long does a gunite pool actually last? A properly built and maintained gunite pool is a permanent addition to your home. Thanks to its steel-reinforced concrete shell, it’s designed to last for decades. This incredible durability is why it’s considered a lifetime investment. Unlike other pool types that may need major replacements over time, a gunite pool’s structure is built to withstand ground shifts and changing weather, making it a reliable choice for your property.

What makes gunite different from other pool types like vinyl or fiberglass? The main difference is how they are built, which directly impacts your design options. Fiberglass pools are pre-made shells that are dropped into an excavated hole, so you are limited to the manufacturer’s available shapes and sizes. Vinyl liner pools use a pre-made liner that fits into a standard frame. Gunite, however, is built completely on-site by spraying a concrete mixture over a custom steel framework. This process gives you total freedom to design any shape, size, or depth you can imagine.

How long will it take to build my gunite pool from start to finish? The timeline can vary, but a typical gunite pool project can take up to 90 days from excavation to the final walkthrough. The exact duration depends on the complexity of your design, the permitting process in your town, and weather conditions. A key part of the timeline is the curing phase, where the gunite shell needs about a month to harden and gain its full strength. While it requires some patience, this step is essential for ensuring your pool’s long-term structural integrity.

What kind of upkeep does a gunite pool need? Like any swimming pool, a gunite pool requires regular care to stay in great condition. This includes routine tasks like testing and balancing the water chemistry, cleaning filters, and brushing the pool’s interior surface to prevent algae buildup. While the structure itself is very low-maintenance, the interior finish may need to be updated every 10 to 15 years. Consistent care is the best way to protect your investment and keep your pool beautiful and ready for swimming.

Why is gunite the best choice for custom features like tanning ledges or infinity edges? Gunite is ideal for custom features because it offers complete structural flexibility. Since the pool is built from scratch on your property, features like tanning ledges, in-water benches, and integrated spas can be formed directly into the pool’s shell. This creates a seamless, high-end look that feels like it was always meant to be there. With pre-made pool types, adding these kinds of architectural details is much more difficult, if not impossible.

Share this page: