Fire Pit Installation in Lake Grove: A Buyer’s Guide

A fire pit is more than just a source of heat; it’s a powerful design element that can anchor your entire outdoor living area. Whether you envision a rustic stone hearth or a sleek, modern fire table, the right feature becomes a stunning focal point. But creating that perfect look involves more than just aesthetics. You need to consider the right materials, the best fuel source for your lifestyle, and the proper placement for safety and function. We’ll explore all these details, from custom paver designs to the benefits of smokeless technology, giving you the knowledge to create a beautiful and safe fire pit installation lake grove.

Breeo-Smokeless-Fire-Pit-Lake-Grove-NYUpgrading your patio with a cozy smokeless fire pit from a renowned brand like Breeo Smokeless Fire Pit gives your family an ideal year-round occasion for unwinding.

The beauty of it is that your fire pit will be helpful in all seasons – spring, summer, winter, and fall.

Breeo is a pioneer of smokeless fire pit technology and is responsible for building the finest wood-burning fire pits on the planet.  Breeo seamlessly melds the backyard fire pit experience with open-flame cooking.   All Breeo Fire Pits are made in the USA and crafted from premium materials.  The company is located in Lancaster, PA.

X SERIES BREEO FIRE PIT

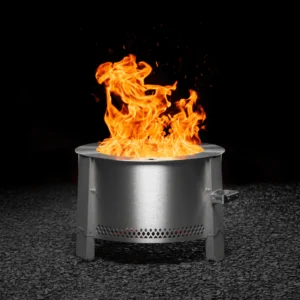
The X Series elevates your campfire experience by eliminating the frustration of traditional fires and creating a smokeless centerpiece to gather around.  As the most versatile fire pit, the X series is the perfect size for hosting friends and family and includes all the cooking capabilities you’ll need.

The X19 is the perfect size for small backyards with the portability to take you wherever you go. As our most versatile fire pit, the X24 is the perfect size for hosting friends and family and includes all the cooking capabilities you’ll need. Host the biggest parties and grill the most burgers (46 to be exact) with the X30, our largest fire pit, and the ultimate grilling machine.

Product Specifications:

  • X19 Outside diameter – 22 inches
  • X24 Outside diameter – 27.5 inches
  • X30 Outside diameter – 34.5 inches

Features

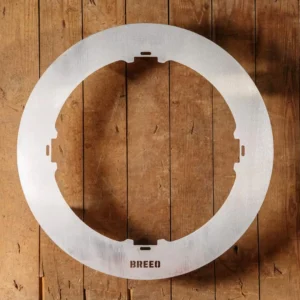
  • Accessories – All X Series fire pits are compatible with the Outpost™ grilling system.
  • Choose your look – Available in sleek Stainless and ageless Corten Steel
  • Corten Steel – Corten fire pits arrive as blue steel and develop a patina over time as it is exposed to the elements.

X Series Breeo Fire Pit How It WorksHow The Breeo Smokeless Fire Pit Works

The Breeo Smokeless Fire Pits work through a double-wall, secondary combustion design. When the fire is burning, the walls heat up and the hot air rises through the gap between the two walls, exiting through the line of holes around the rim. This pressurized, heated oxygen mixes with the smoke and causes it to burn. This secondary combustion is what causes your fire to be smokeless.

Breeo stoves are designed to be smokeless. They have raised air vents at the bottom, allowing more airflow to the base of your fire. When fed more oxygen, the fire burns hotter, leaving low carbon emissions from the burn chamber.

The fire pits come with a double wall design, letting in more oxygen to the double wall when heated by fire. Hot air rises through these double walls to exit through the holes lining the rim. Once the hot air is released out of the holes, it mixes with smoke and causes secondary combustion.  Secondary combustion means the carbon-containing materials are re-burned to minimize the number of particulates floating in the air. This creates a smokeless experience.

THE Y SERIES BREEO SMOKELESS FIRE PIT

The Breeo Y series allows you to chill and grill on the go. With built-in features, compact size, and a range of live-fire cooking accessories, you’re packing ultimate portability with the rugged functionality. The Y Series can adapt to camping, tailgating, backyard grilling, or just relaxing on the deck.

TRI-FUEL FUNCTIONALITY

The Y Series allows you to burn wood, pellets, or lump charcoal, expanding the scope of traditional fire pits and making it the most versatile fire pit on the market.

Choosing the Perfect Fire Pit for Your Long Island Backyard

There’s something magical about gathering around a fire, isn’t there? It’s the perfect centerpiece for making memories, whether you’re roasting marshmallows with the kids or enjoying a quiet evening under the stars. Adding a fire pit to your Long Island backyard can completely transform your outdoor space into a year-round destination for relaxation and entertainment. But with so many options out there, from sleek, modern designs to rustic, custom-built hearths, figuring out the right one for your home can feel like a big task. That’s why we’ve put together this guide to walk you through everything you need to consider, from the type of fire pit and fuel source to safety regulations and installation, ensuring you make a choice you’ll love for years to come.

Before you start dreaming of cozy nights by the fire, it’s important to think about how you plan to use your space. Are you looking for a permanent architectural feature or something more flexible? Do you prefer the crackle of a real wood fire or the convenience of a gas-powered flame? We’ll explore the differences between custom-built fire pits and portable models, break down the pros and cons of various fuel types like natural gas and propane, and even explain what those BTU ratings really mean for heat output. With the right information, you can confidently select a fire pit that not only matches your aesthetic but also fits your lifestyle and keeps your family safe.

Types of Fire Pits: From Portable to Custom-Built

When you start looking at fire pits, you’ll find they generally fall into two categories: portable units you can buy off the shelf and permanent, custom-built installations. Portable fire pits, like the excellent smokeless models from Breeo, offer flexibility and are great for smaller spaces or for those who want the option to move their fire feature around. They are ready to use right out of the box and come in various styles and fuel types. On the other hand, a custom-built fire pit is a permanent addition to your landscape, designed to integrate seamlessly with your patio and overall backyard design. This option offers endless possibilities for personalization, allowing you to choose the exact size, shape, and materials to create a truly unique outdoor focal point.

The choice between portable and custom really comes down to your long-term vision for your backyard, your budget, and how you plan to entertain. If you envision a grand outdoor living room with a fire feature as the anchor, a custom build is likely the way to go. These installations can be designed as part of a larger masonry project, incorporating seating walls, outdoor kitchens, and other elements for a cohesive look. If you value simplicity, have a smaller yard, or want to test the waters before committing to a permanent structure, a high-quality portable fire pit provides an excellent, hassle-free way to enjoy a backyard fire.

Custom-Built Fire Pits and Fireplaces

A custom-built fire pit or outdoor fireplace is more than just a source of heat; it’s a statement piece that becomes an integral part of your home’s architecture and landscape. Unlike pre-made units, a custom design gives you complete creative control. You can work with designers to craft a feature that perfectly complements your home’s style, whether it’s a rustic stone fire pit for a traditional backyard or a sleek, linear fireplace for a modern patio. According to the experts at Stone Escapes, a custom installation is designed to make your outdoor space “warmer, more stylish, and more useful.” You also have the freedom to choose your preferred fuel source—wood, natural gas, or propane—to match your lifestyle and local regulations.

At Gappsi, we specialize in bringing these unique visions to life. Our team of masonry experts can help you design and construct a fire feature using high-quality materials that stand the test of time. By opting for a custom build, you’re not just adding a fire pit; you’re investing in a durable, beautiful, and functional extension of your living space. It becomes a natural gathering spot that enhances your property’s value and provides a stunning backdrop for countless family memories. From the initial design to the final stone, every detail is tailored to your specifications, ensuring the result is exactly what you envisioned.

Stone and Brick Paver Designs

The materials you choose for your custom fire pit will define its character and ensure it blends beautifully with your existing outdoor space. Stone and brick pavers are classic choices that offer timeless appeal and exceptional durability. Natural stone, with its unique textures and earthy tones, can create a rustic, organic feel that connects your patio to the surrounding landscape. Imagine a fire pit built from rugged fieldstone or elegant bluestone that perfectly matches your walkway or retaining wall. Brick, on the other hand, provides a more traditional, uniform look that can complement classic home styles, offering clean lines and a warm, inviting color palette.

The beauty of a custom design is the ability to mix and match materials to create a one-of-a-kind look. You could pair a smooth, polished capstone with a textured stone base or incorporate decorative patterns with different colored bricks. At Gappsi, we offer a vast selection of porcelain and natural stone pavers, allowing you to find the perfect materials to bring your vision to life. Our design team can help you select options that not only look stunning but are also rated for high heat and will withstand the harsh Long Island weather, ensuring your fire pit remains a beautiful focal point for years.

Alternative Fuel Types

While the classic wood-burning fire pit has a certain rustic charm, it’s not the only option available. Modern fire pits offer a variety of fuel types, each with its own set of benefits. Your choice will depend on factors like convenience, maintenance preferences, and local regulations. Natural gas and propane are popular alternatives that provide instant flames with the turn of a knob, eliminating the need to chop wood or deal with smoke and embers. For those seeking an eco-friendly option, bioethanol fire pits burn cleanly without any smoke or soot, making them an excellent choice for smaller patios or areas where smoke might be a concern for neighbors.

Deciding on a fuel type is a key step in planning your fire pit. If your home already has a natural gas line, tapping into it can provide a continuous, cost-effective fuel source for a permanent fire pit. Propane offers more flexibility, as it uses a refillable tank that can be connected to both permanent and portable units. Bioethanol is prized for its simplicity and clean burn, often used in smaller, more decorative fire features. Each fuel type offers a different experience, so it’s worth considering what best fits your vision for hassle-free evenings by the fire.

Natural Gas

For the ultimate in convenience, a natural gas fire pit is hard to beat. Connected directly to your home’s gas line, it provides an endless supply of fuel, so you’ll never have to worry about running out of propane mid-party or hauling firewood. With the simple flip of a switch or turn of a key, you can have a beautiful, consistent flame in seconds. This makes it incredibly easy to enjoy your fire pit on a whim, even on a busy weeknight. Natural gas is also generally more cost-effective than propane over the long term. While the heat output, typically between 30,000 to 60,000 BTUs, might be slightly less intense than a large wood fire, it provides plenty of warmth for most gatherings.

Propane

Propane fire pits offer a fantastic blend of convenience and flexibility. Like natural gas models, they ignite instantly and provide a clean, smoke-free flame, but they have the added advantage of being self-contained. Since they run on a standard propane tank (the same kind used for gas grills), they don’t need to be connected to a gas line, making them a great option for both permanent installations and portable units. This allows you to place your fire pit almost anywhere in your yard without being tethered to a fuel source. According to Fire Pit Surplus, propane fire pits are a popular choice for their “convenience and ease of use,” offering consistent heat output that you can easily control.

Bioethanol

If you’re looking for an eco-friendly and modern fire feature, a bioethanol fire pit is an excellent choice. This renewable fuel, derived from plants like corn and sugarcane, burns cleanly and produces no smoke, soot, or ash. This makes it an ideal solution for urban settings, covered patios, or even indoor use in some cases, as it doesn’t require a chimney or vent. Bioethanol fire pits are celebrated for their simple operation and minimal maintenance—just pour the fuel into the burner and light it. While they typically produce less heat than gas or wood fire pits, they create a beautiful, vibrant flame that adds incredible ambiance to any space without the environmental impact.

Understanding Heat Output and Performance (BTUs)

When you’re shopping for a gas fire pit, you’ll see the term “BTU” mentioned frequently. Understanding what this means is key to choosing a fire pit that will actually keep you warm and comfortable. BTU stands for British Thermal Unit, and it’s a standard measurement of heat energy. In simple terms, a fire pit’s BTU rating tells you its maximum heat output. A higher BTU rating means a more powerful flame and more heat. However, more isn’t always better. The right BTU level for you depends on the size of your outdoor space, the climate here on Long Island, and how many people you typically host.

Think of it like this: a small, intimate patio doesn’t need the same heating power as a large, open backyard. Choosing a fire pit with an appropriate BTU rating ensures you get the warmth you want without wasting fuel or creating an uncomfortably hot environment. It’s also important to remember that factors like wind can affect how much heat you actually feel. We’ll help you figure out what those numbers mean in a practical sense so you can select a fire pit that creates the perfect cozy atmosphere for your specific needs, ensuring your investment provides just the right amount of warmth for those cool evenings.

What Are BTUs?

So, what exactly is a BTU? As Fire Pit Surplus explains, “BTU stands for British Thermal Unit. It’s a way to measure heat or energy.” For fire pits, it specifically quantifies how much heat the unit can produce in an hour. One BTU is the amount of energy needed to raise the temperature of one pound of water by one degree Fahrenheit. While you don’t need to get bogged down in the scientific definition, thinking of BTUs as a “heat score” is a helpful way to compare different models. A fire pit with a 50,000 BTU rating will generate more heat than one with a 30,000 BTU rating, making it better suited for warming a larger area or for use on colder nights.

It’s a common misconception that BTUs are the only factor determining warmth. The design of the fire pit, the materials it’s made from, and the type of fire media used (like lava rocks or fire glass) can also influence how efficiently heat is radiated outward. However, the BTU rating is the most straightforward starting point for understanding a fire pit’s heating potential. It gives you a reliable baseline to ensure the model you choose has enough power to create the warm, inviting atmosphere you’re looking for in your backyard space.

Choosing the Right BTU Level for Your Space

Finding the sweet spot for BTUs is all about matching the fire pit’s power to your environment. You don’t want to be huddled right next to the flame to feel warmth, nor do you want to be pushed back by overwhelming heat. For most small to medium-sized patios or decks on Long Island, a fire pit with a rating of 40,000 to 60,000 BTUs is generally sufficient to create a comfortable and inviting space for a small group. This range provides enough heat to take the chill off the air without being too intense. It’s the perfect level for enjoying conversation and drinks around the fire.

If you have a large, sprawling backyard or a more open, windy area, you’ll want to look for a fire pit with a higher BTU output. Models that produce 70,000 to 100,000 BTUs or more are better suited for heating larger spaces and accommodating bigger gatherings. Some high-end custom installations can even reach up to 200,000 BTUs. When making your decision, consider the primary use of your fire pit. Is it for intimate family nights or for hosting large parties? Answering this question will help you select a BTU level that ensures everyone stays warm and comfortable, no matter the occasion.

Heat Output Examples

To put BTUs into perspective, let’s compare the typical outputs of different fuel types. A classic wood-burning fire pit can produce a wide range of heat, from around 30,000 BTUs for a small fire to over 100,000 BTUs for a large, roaring blaze. The heat is intense but can be inconsistent and harder to control. In contrast, natural gas fire pits usually fall within the 30,000 to 60,000 BTU range, offering a steady and easily adjustable flame. Propane fire pits often have a slightly higher output, commonly ranging from 40,000 to 70,000 BTUs. This makes them a great middle-ground option, providing substantial warmth with the convenience of a controlled flame.

Fire Pit Installation and Construction

Once you’ve chosen the perfect fire pit, the next critical step is installation. Proper installation is not just about aesthetics; it’s fundamentally about safety and durability. Whether you’ve opted for a custom-built masonry masterpiece or a high-end gas unit, ensuring it’s set up correctly is paramount. For custom builds, this involves preparing a stable foundation, using heat-rated materials, and ensuring proper drainage. For gas fire pits, it means safely connecting fuel lines and verifying that all components are functioning correctly. While a DIY approach might seem tempting for simpler projects, the complexities and potential risks, especially with gas lines, often make professional installation the wisest choice.

Working with experienced professionals ensures that your fire pit is not only beautiful but also compliant with local building codes and safety standards. A professional installer will handle all the technical aspects, from excavating the site and laying the foundation to running gas lines and installing the burner system. This is particularly important on Long Island, where specific regulations may apply. At Gappsi, our team has decades of experience in home construction and outdoor living projects, guaranteeing that your fire pit is installed with precision and care. Investing in professional installation gives you peace of mind, knowing your new backyard feature is safe, reliable, and built to last.

Hiring a Professional Installer

When it comes to installing a permanent fire pit, especially one that uses natural gas or propane, hiring a professional is non-negotiable. As the team at Stone Escapes emphasizes, having your fire pit “built and installed by professionals” is crucial to ensure it’s safe and lasts a long time. A professional brings the expertise needed to handle every aspect of the job correctly, from site preparation and foundation work to the intricate details of masonry and gas line connections. They understand the properties of different materials and how they react to high heat, preventing dangerous situations like cracking or spalling.

A professional installer is also knowledgeable about local building codes and permit requirements in towns across Nassau and Suffolk counties. They can ensure your project is fully compliant, saving you from potential fines and headaches down the road. By entrusting the installation to a reputable company like Gappsi, you’re not just paying for labor; you’re investing in safety, quality craftsmanship, and the assurance that your fire pit will be a secure and enjoyable feature for your family. Don’t take chances with fire and fuel lines—leave it to the experts who have the training and experience to do it right.

Gas Line Safety

Connecting a fire pit to a natural gas line is a task that absolutely must be handled by a licensed professional. This is not a DIY project. According to Angi, “You cannot connect a gas grill or fire pit to your gas line yourself. You must hire a licensed plumber or a gas grill installation company.” Gas lines are highly regulated for a reason—an improper connection can lead to dangerous leaks, creating a risk of fire or explosion. A licensed professional will ensure the line is installed correctly, with proper fittings, shut-off valves, and pressure testing to guarantee it’s completely safe and up to code. They will also handle the necessary permits, which are almost always required for this type of work.

DIY Fire Pit Construction

For those with a knack for home projects, building your own wood-burning fire pit can be a rewarding experience. A simple DIY fire pit, typically made from stacked retaining wall blocks or a fire pit ring kit, can be a great weekend project. The key to a successful and safe DIY build is careful planning and preparation. It starts with choosing the right location—a level spot far away from any structures or flammable materials. You’ll need to create a solid, non-combustible foundation to ensure the structure is stable and to prevent the fire from spreading. While the process can be straightforward, it’s crucial not to cut corners on safety.

Before you start digging, make sure you understand the entire process, from laying the foundation to choosing the right materials for the pit walls. Research is your best friend here. Watch tutorials, read guides, and be realistic about your skill level. Remember that while you might save money on labor, you are taking on the full responsibility for the safety and longevity of the structure. If you have any doubts, especially when it comes to ensuring the structure is sound and the materials are appropriate, consulting with a professional is always a smart move.

Building a Safe Foundation

The foundation is the most important part of your DIY fire pit. A weak or improper base can cause the structure to shift, crack, or collapse over time. Start by clearing a circular area and digging down about 6-12 inches. Your goal is to create a level base below the topsoil. Fill the excavated area with gravel or crushed stone to provide a stable, well-draining foundation. Use a tamper to compact the gravel firmly, ensuring it’s perfectly level. A solid, level base will not only support the weight of your fire pit blocks but also prevent water from pooling, which can cause damage during freeze-thaw cycles in the winter.

DIY Material Warnings

When building your own fire pit, the materials you choose are critical for safety. Never use rocks or stones that you’ve collected from a riverbed, lake, or your own backyard. These rocks can contain trapped moisture, and when heated, that moisture can turn to steam and expand rapidly, causing the rock to explode and send dangerous shrapnel flying. Similarly, avoid using standard concrete blocks or porous pavers that aren’t fire-rated. They can also crack or explode under high heat. Stick to materials specifically designed for fire pits, such as fire bricks (also called refractory bricks) for the inner lining and dense, solid wall blocks or natural stone for the exterior.

Essential Fire Pit Safety and Regulations

Enjoying your fire pit comes with the responsibility of operating it safely. Fire is inherently dangerous, and a few simple precautions can prevent accidents and ensure your cozy evenings don’t turn into emergencies. The first rule of fire pit safety is location. It needs to be placed on a stable, non-flammable surface like a stone patio or gravel area, and positioned a safe distance away from your house, deck, trees, and anything else that could catch fire. Beyond placement, it’s crucial to be prepared for any situation. This means having a way to extinguish the fire quickly and never leaving it unattended, even for a moment.

It’s also important to be aware of and follow local regulations. Many towns on Long Island have specific rules about open burning, including when you can have a fire and what you’re allowed to burn. Before you light your first fire, take the time to check with your local fire department and your homeowner’s insurance provider to understand all the requirements. Following these guidelines not only keeps you, your family, and your neighbors safe but also ensures you can enjoy your fire pit without any legal or financial issues. A little bit of preparation goes a long way in creating a safe and relaxing fire pit experience.

Proper Placement and Clearances

Where you place your fire pit is one of the most important safety decisions you’ll make. It needs to be on a level, non-combustible surface to prevent it from tipping over and to keep embers from igniting dry grass or leaves. According to Mercury Insurance, a fire pit should be kept “at least 10 feet away from your house, garage, shed, or fence.” They even suggest that a distance of 20-25 feet is even better. This clearance also applies to overhanging tree branches, patio umbrellas, and anything else that could catch fire from rising heat or sparks. Before you finalize the location, look up and all around to ensure there’s plenty of open space.

Safe Operating Conditions

Always check the weather before lighting a fire. Windy conditions are a major red flag. Strong gusts can blow sparks and embers onto nearby flammable materials, quickly starting an unintended fire. If it’s a blustery day, it’s best to postpone your plans for a fire. Additionally, never use gasoline, lighter fluid, or any other accelerant to start your fire. These can cause a dangerous flare-up. Instead, use a proper fire starter or kindling to build your fire gradually. And perhaps the most important rule: never, ever leave a fire unattended. An adult should be supervising the fire from the moment it’s lit until it’s completely extinguished.

Safety Precautions and Equipment

Being prepared is key to fire pit safety. Before you even light the kindling, make sure you have fire-extinguishing equipment within easy reach. This could be a garden hose with the water turned on, a bucket of water, a shovel to smother the flames with sand or dirt, or a fire extinguisher. It’s also wise to keep fires to a manageable size. A good rule of thumb is to keep the flames no taller or wider than three feet. Using a spark screen can also be a great safety measure, as it helps contain embers and sparks, especially on slightly breezy evenings. These simple precautions can make all the difference in preventing an accident.

Approved Burning Materials

Only burn materials that are meant for a fire pit. The best choice is dry, seasoned hardwood like oak, hickory, or ash. Seasoned wood has been dried for at least six months, which means it will burn hotter, cleaner, and produce less smoke than green or wet wood. Never burn trash, plastic, pressure-treated wood, particleboard, or yard waste like leaves and pine needles. These materials can release toxic fumes and create excessive smoke and embers. Burning clean, dry wood is not only safer and more pleasant for you and your neighbors, but it’s also better for the longevity of your fire pit.

Checking Local Laws and Insurance

Before you install or use a fire pit, it’s essential to do your homework. Contact your local fire department or municipal office to learn about any specific ordinances regarding backyard fires in your Long Island town. Some areas may have restrictions on the size of the fire pit, the times you’re allowed to burn, or may even require a permit. It’s also a smart idea to call your homeowner’s insurance agent. Let them know you’re adding a fire pit to your property to ensure you have adequate liability coverage and to see if it affects your policy. Taking these steps beforehand can prevent any unwelcome surprises and ensure you’re fully compliant and protected.

Our Favorite Smokeless Fire Pits

If you love the idea of a wood-burning fire but can’t stand the smoke that follows you around the circle, a smokeless fire pit is the perfect solution. These innovative fire pits are engineered to significantly reduce the amount of smoke they produce, making for a much more enjoyable experience. Our top recommendation is the lineup from Breeo, a pioneer in smokeless fire pit technology. You can find these incredible fire pits right here at the Gappsi Store. Breeo fire pits are not only beautifully designed and made in the USA from heavy-duty steel, but they also double as amazing open-flame cooking devices, adding a whole new level of versatility to your backyard gatherings.

So, how do they work? According to Breeo, their smokeless technology is based on a “double-wall, secondary combustion design.” As the fire burns, the walls heat up, and air is drawn up through the gap between them. This super-heated oxygen then exits through holes around the rim and mixes with the smoke, causing it to re-burn before it has a chance to escape. This secondary combustion process eliminates most of the visible smoke, leaving you with a clean, efficient, and mesmerizing fire. It’s a brilliant design that lets you enjoy all the warmth, crackle, and ambiance of a real wood fire without the watery eyes and smoky clothes.

TRI-FUEL FUNCTIONALITY

What really sets the Y Series apart is its incredible versatility. You aren’t locked into just one type of fuel; you have the freedom to burn wood, pellets, or lump charcoal. This tri-fuel functionality completely changes the game for traditional fire pits, making it one of the most adaptable options you can find. Imagine having the classic crackle of a wood fire for a relaxing evening, then switching to lump charcoal for a weekend barbecue, or using pellets for a consistent, low-maintenance burn. This flexibility means the Y Series is ready for anything, whether you’re hosting a party in your backyard, heading out for a camping trip, or setting up for a tailgate.

LUXEVE® SMOKELESS FIRE PIT

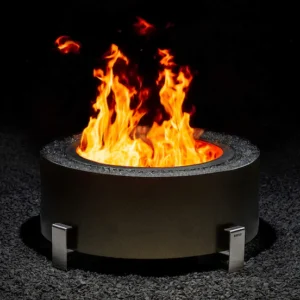
The Luxeve® fire pit is designed to transform your backyard with a high-end design and the ultimate smokeless experience.   This model includes the lid and you can choose from four exterior colors and five decorative glass colors with a 33-inch diameter.

The Luxeve® Smokeless Fire Pit offers a sophisticated and modern alternative to the traditional backyard fire pit. The design of the Luxeve radiates beauty and elevates any backyard space. With customizable features for both the fire pit color and glass pebbles, the Luxeve fire pit has the ability to complement any backyard. The sophisticated aesthetic paired with the Breeo® patented X Airflow™ Technology means that this fire pit can enhance any outdoor space, feature as the focal point of all your backyard gatherings, and offer you the comfort of a wood-burning, smokeless fire experience.

The Cover And Why You Want One

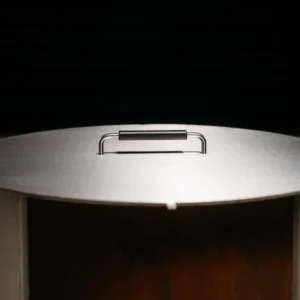
To get the cover or not to get the cover? Please be advised that the covers for Breeo fire pits are available for purchase separately.  Many customers ask do you need a cover? In our opinion YES. Here is why. You and your family are enjoying a great night outdoors, toasting marshmallows over your smoke-less fire pit. You are getting tired but just about 10 minutes ago you put another piece of wood inside the fire pit so the fire is still burning. What do you do? Do you walk away and leave it burning? Never! Do you wait it out until the fire dies down? Maybe. If you get a cover, you can safely cover the fire pit, which will limit the air, and safely extinguish the fire.

Come in and visit our showroom today.  Let us help you choose the best model to fit your lifestyle and backyard!

SCHEDULE A MEETING TODAY WITH GAPPSI

View Gappsi’s YouTube channel for videos of The Breeo Smokeless Fire Pit

Frequently Asked Questions

“Smokeless” sounds too good to be true. How does it actually work? It’s a fair question! Smokeless fire pits, like the ones from Breeo, use a clever dual-wall design. As the fire burns, air is pulled into the gap between the walls and heated. This hot air is then pushed out over the top of the fire, where it ignites the smoke particles before they can escape. This process, called secondary combustion, is what eliminates most of the smoke. You might see a little smoke when you first light the fire, but once it’s going, you can enjoy the warmth without the watery eyes.

Should I choose a custom-built fire pit or a portable model like the ones from Breeo? This really comes down to your vision for your backyard. A custom-built fire pit is a permanent architectural feature that integrates seamlessly with your patio and landscape design. It’s ideal if you want a central, built-in gathering spot. A high-quality portable model offers incredible flexibility. You can move it around your yard, take it on the go, and start using it immediately. It’s a great choice if you value versatility or aren’t ready to commit to a permanent structure.

What’s the easiest fuel type to manage: wood, natural gas, or propane? For pure convenience, natural gas is the winner. It’s connected directly to your home, so you have an endless supply of fuel with the flip of a switch. Propane offers similar push-button ease but runs on a refillable tank, giving you more freedom to place your fire pit anywhere. A classic wood fire provides that wonderful crackle and aroma, but it requires more hands-on effort, from sourcing seasoned wood to managing the fire and cleaning up the ash.

What is the single most important safety step when placing a new fire pit? Location is everything. Your fire pit must be on a level, non-flammable surface like stone pavers or gravel—never on a wooden deck or dry grass. The most critical rule is to maintain a safe distance from anything combustible. A good guideline is to keep it at least 10 to 25 feet away from your house, shed, fences, and any overhanging tree branches or umbrellas.

How do I know what BTU level is right for my backyard? Don’t get too caught up in the numbers, but think of BTUs as a measure of heating power. For a typical Long Island patio where you want to create a warm, comfortable zone for a few friends, a fire pit in the 40,000 to 60,000 BTU range is usually perfect. If you have a very large, open, or windy space and plan to host bigger groups, you might want to look for something with 70,000 BTUs or more to ensure everyone feels the warmth.

Key Takeaways

  • Define Your Vision: Custom vs. Portable: Decide if you want a permanent masonry fire pit that acts as a stunning architectural feature or a flexible, high-quality portable unit. Your long-term plans for the space and your budget are the best guides for this decision.
  • Pick a Fuel Source That Fits Your Life: Choose the effortless convenience of a natural gas or propane fire pit for instant, smoke-free flames. If you love a classic wood fire, a smokeless model offers the same crackle and warmth without the hassle of smoke.
  • Commit to Non-Negotiable Safety Rules: Always place your fire pit on a non-flammable surface at least 10 feet from your house or any other structure. Remember that professional installation for any gas line is a critical step to ensure your fire pit is safe and up to code.

Related Articles

Share this page:

The Essential Guide to a Gunite Pool in Muttontown

Creating a true backyard retreat is about more than just adding water. It’s about designing a cohesive space where the pool, patio, and plantings work together in harmony. This is where the unique advantages of a gunite pool really shine. Because they are custom-built on-site, gunite pools can be designed to flow seamlessly with your home’s architecture and outdoor living areas. A recent gunite pool Muttontown project we designed is a perfect example of this integrated approach. In this article, we’ll cover everything you need to know about gunite, from its incredible design flexibility to the construction process, helping you plan your perfect backyard oasis.

Gunite Pool Renovation With Marble Pavers Muttontown, NY (1)Deciding to complete a gunite pool renovation with marble pavers comes with a range of incredible benefits for your home. From increased home value to the joy of creating your own space, it’s a decision that you won’t soon forget.

Does your backyard and pool need an update?  It might be time to resurface your pool or change the pavers to what you always wanted.  Resurfacing your pool can repair problems like cracks and wearing, while also enhancing and updating your pool’s appearance. Now that the season is changing to Fall and the Summer fun is ending it is the perfect time to plan for next year.  Your pool area might be out of sight and out of mind as the temps gradually get lower.  Maintain it now so you don’t cut into your swim time later on.

To keep your pool in top shape and working properly, resurfacing is a must. But, if you’re unsure if your pool needs resurfacing, there are a few signs to look for.

What Is Pool Resurfacing?

Are you seeing cracks and staining in your swimming pool? If so resurfacing is a great solution to correct those issues.  The kind of surface your pool has will determine how it will be resurfaced, but the process is generally the same. Resurfacing consists of taking off a pool’s top surface layer, replacing it with a new one, and then applying a new sealant.

The goal of resurfacing is to improve both the look and lifespan of your pool, restoring it to its former glory.  Resurfacing is more than just a way to repair and maintain your pool: It also gives you the opportunity to transform and enhance the way your pool looks.

When Should You Resurface Your Pool?

Gappsi recommends resurfacing your pool every 10 to 15 years.  Your pool’s size and shape will impact how long it will take to resurface but expect a project to last anywhere from a few days to a couple of weeks.

Gunite Pool Renovation With Marble Pavers Muttontown, NY (2)Marble Patio Pavers

Now that you have decided to upgrade your gunite swimming pool why not upgrade your patio area as well?  If you’re thinking about upgrading your outdoor living space by installing pavers and making it a place for family gatherings, entertaining friends, or just enjoying and reading a book. You’re at the right place with Gappsi. We are marble flooring pros and help you with your decision to enhance your patio.

Marble is made to stand the test of time.  This high-density stone also withstands heavy loads; thus is the perfect choice for traffic areas like backyards and patios.  Marble pavers do come with a price tag but they sure are worth it. Their elegance and beautycannot be compared to other materials used for making pool decks. Installing them can dramatically elevate the appearance of your pool area and even boost the value of your property overall.

Marble pavers are chosen often for a pool deck and patio because of their high heat resistance.  Pretty cool, right? (Yes, irony intended.)  During the summer months, it can get pretty hot here on Long Island, marble pavers are an excellent choice for pool surrounds because when installed, they will stay cool underfoot.  This is a very important consideration when choosing pool pavers.  Not only from the perspective of enjoying the pool surroundings but because it’s a safer choice.  This is an important consideration if you have children and the elderly living with you.

Before Choosing Marble Pavers

Marble pavers, when compared to other natural stone pavers, do require a higher initial investment.  When properly installed, they will require minimum attention and maintenance, saving you time (and money) in the long run.

Marble pavers are as practical, durable, and versatile as they are elegant and majestic.  They are a worthy investment for any home pool surrounds, outdoor areas like patios, steps, staircases, and even driveways.  At Gappsi we offer a variety of marble outdoor pavers suitable for paving, steps, and pool coping.  Our pool coping is available in drop edge coping, pencil edge coping, and bullnose edge coping.

So, whether you are looking for cool and modern colored exterior marble pavers or more traditional and warm-colored ones, at Gappsi you’ll find a marble paver to suit any outdoor project.

Gunite Pool Renovation With Marble Pavers Muttontown, NY (3)Muttontown Gunite Pool Renovation With Marble Pavers Pool Deck & Patio

Gappsi completed this gunite pool renovation in Muttontown NY located in Nassau County on Long Island. The pool was totally renovated as well as the patio. We used marble pavers selected from the Gappsi Natural Stone Collection. For the patio, we used the French pattern and two-inch thick coping for the swimming pool. Our team installed ceramic tiles under the coping in the water line of the pool. The pool plaster consists of Diamond Brite Super Blue. We also installed tile markers on the edge of the steps and then extended the pool.  We extended the pool by building a bench incorporated into the semi-round steps. Additionally, we added an eight-foot round spa on the outside of the pool spilling into the pool.

The new spa installed was part of the pool modification and upgrade project. Gappsi custom cut the copings to match the patio and veneered walls with mocha travertine four-inch veneers split face and tumbled. The spa spills over into the pool and it can also work on its own, keeping the water within the spa and heating it over 100 degrees! This is the latest gunite pool renovation completed by Gappsi with a new patio layout and installation of marble pavers.

What is a Gunite Pool?

If you’re dreaming of a backyard pool that’s uniquely yours, you’ve likely come across the term “gunite.” So, what exactly is it? A gunite pool is a type of inground swimming pool built with a steel-reinforced concrete framework. Unlike other pool types that use pre-formed shells, a gunite pool is built entirely on-site, giving you complete control over the shape, size, and design. The process involves spraying a mixture of sand, cement, and water over a rebar frame, creating a dense and incredibly durable single-piece shell. This method allows for a level of customization that’s hard to match, making it the top choice for homeowners who want a pool that perfectly complements their landscape and lifestyle.

The real beauty of a gunite pool lies in its versatility. Because it’s a custom build from the ground up, you can incorporate features like built-in benches, tanning ledges, waterfalls, and attached spas seamlessly into the design. The interior finish can also be tailored to your taste, with options ranging from classic plaster to vibrant pebble aggregates or elegant glass tiles. This flexibility ensures your new swimming pool isn’t just a place to swim, but a true centerpiece for your outdoor living space. It’s a structure built to last, offering a permanent and valuable addition to your Long Island home.

Composition and Construction Process

Building a gunite pool is a fascinating process that blends raw strength with detailed craftsmanship. It all starts with excavation, where your backyard is carefully dug out to match the exact specifications of your pool design. Next, a grid of steel reinforcement bars, or rebar, is meticulously placed to form the pool’s skeleton. This steel cage provides the immense structural integrity that gunite pools are known for. Plumbers also come in at this stage to install the necessary pipes and drains before the concrete is applied. This foundational work is critical for ensuring the pool’s longevity and proper function for years to come.

Once the rebar and plumbing are in place, the magic happens. A specialized crew uses a high-pressure hose to spray the gunite mixture—a dry blend of sand and cement that mixes with water at the nozzle—directly onto the steel frame. This application method creates a dense, solid structure with superior strength. After the gunite shell is sprayed, it needs to cure for several weeks, a process that involves keeping it hydrated to allow it to reach maximum hardness. Finally, a waterproof interior finish, like plaster or pebble aggregate, is applied to create a smooth, beautiful surface, and your custom pool is ready to be filled.

Gunite vs. Shotcrete

When exploring concrete pools, you might also hear the term “shotcrete.” While gunite and shotcrete are often used interchangeably, they refer to slightly different application processes. The key distinction lies in how the concrete mix is prepared. Gunite uses a dry mix of sand and cement, with water added at the spray nozzle just before application. This gives the installer precise control over the water-to-cement ratio, which can result in a stronger, denser final product when handled by a skilled technician. This control is a major reason why many high-end pool builders prefer the gunite method for its consistency and strength.

Shotcrete, on the other hand, uses a wet mix that is prepared at the plant before being transported to the job site. This pre-mixed concrete is then pumped through a hose and sprayed onto the rebar frame. While shotcrete can be applied more quickly, the gunite process is often favored for its flexibility and the superior bond it creates. For homeowners, the most important takeaway is that both methods can create a durable, long-lasting pool. The ultimate quality depends less on the specific method and more on the expertise and experience of the company you hire to build your custom pool.

Typical Construction Timeline

Patience is key when building a custom gunite pool, as the process is more involved than dropping a pre-made shell into the ground. From the initial design consultation to the first cannonball, you can generally expect the construction to take between 8 and 12 weeks. This timeline can vary based on factors like the complexity of the design, weather conditions, and how quickly your local municipality processes permits. The first phase involves finalizing your design, securing the necessary permits, and excavating the site, which can take a couple of weeks alone before any real building begins.

The gunite application itself is usually completed in a single day, but the crucial curing phase that follows takes up the most time. The concrete shell needs to cure for about 28 days to achieve its full strength, during which it must be regularly watered down. Once cured, the final steps move more quickly. This includes installing the tile and coping around the pool’s edge, applying the interior plaster finish, and completing the final plumbing and electrical work for the filtration system. While it seems like a long wait, the result is a durable, beautiful pool built to last for decades.

Advantages and Disadvantages of Gunite Pools

Choosing the right type of pool is a big decision, and gunite pools come with a distinct set of pros and cons. On the plus side, their biggest advantage is unparalleled design flexibility. You aren’t limited to standard shapes or sizes; if you can dream it, a skilled builder can create it. This makes gunite ideal for fitting pools into tricky backyards or for creating one-of-a-kind designs with integrated features. They are also incredibly durable. The steel-reinforced concrete shell is built to withstand ground movement and harsh weather, offering a lifespan that can exceed 50 years with proper care. This longevity often translates into a significant increase in your home’s value.

However, there are some disadvantages to consider. The initial cost of a gunite pool is typically higher than that of fiberglass or vinyl liner pools due to the custom labor and materials involved. The construction process is also longer, often taking several months from start to finish. Maintenance can be more intensive as well; the porous nature of plaster finishes can make them more susceptible to algae growth and staining if not cared for properly. Understanding both sides of the coin will help you make an informed decision that aligns with your budget, timeline, and long-term vision for your backyard.

Advantages of Choosing Gunite

When you invest in a gunite pool, you’re choosing a premium product known for its strength and beauty. The primary advantage that draws homeowners to gunite is the limitless potential for customization. You have complete freedom to design a pool that fits your backyard’s unique contours and your personal aesthetic. Whether you envision a sleek, modern lap pool, a naturalistic lagoon with rock features, or a family-friendly design with a shallow tanning ledge, gunite can make it happen. This flexibility extends to features like built-in spas, waterfalls, and custom steps, which can be integrated directly into the pool’s structure for a seamless, high-end look.

Beyond aesthetics, gunite pools are celebrated for their incredible durability. The monolithic shell, formed by spraying concrete over a steel grid, is exceptionally strong and built to last a lifetime. This robust construction makes them a wise long-term investment for your property, capable of withstanding Long Island’s changing seasons. A well-designed gunite pool not only provides endless enjoyment for your family but can also significantly increase your home’s resale value. It transforms your backyard into a luxurious retreat, making your home more attractive to potential buyers should you ever decide to sell.

Exceptional Durability and Longevity

One of the most compelling reasons to choose a gunite pool is its remarkable durability. These pools are built like fortresses, with a core of steel rebar encased in thick, high-strength concrete. This construction method creates a monolithic shell that can withstand ground shifts and the freeze-thaw cycles we experience here on Long Island without cracking or failing. With proper maintenance, a gunite pool can easily last for 50 years or more, making it a permanent fixture of your home. This is a stark contrast to vinyl liner pools, which require liner replacements every 5 to 10 years.

Ultimate Design Flexibility

If you have a specific vision for your backyard, gunite is the way to go. The design possibilities are virtually endless because the pool is built from scratch on-site. You can choose any shape, size, or depth you desire, allowing you to create a pool that perfectly fits your space and style. This flexibility also means you can incorporate custom features like swim-up bars, underwater benches, and dramatic water features that flow organically from the pool’s structure, often involving custom masonry work to create a truly bespoke outdoor environment.

Potential to Increase Home Value

A beautiful, well-built inground pool is a highly desirable feature for many homebuyers, and a gunite pool is often seen as the gold standard. Studies have shown that an inground pool can increase a home’s value by 5% to 7%. Because gunite pools are permanent, custom additions to the property, they are viewed as a significant upgrade. When paired with professional landscaping and a beautiful patio, a gunite pool transforms your backyard into a luxurious outdoor living space, which can be a major selling point and a solid return on your investment.

Disadvantages to Consider

While gunite pools offer incredible benefits, it’s important to be aware of the potential downsides before you commit. The most significant factor for many homeowners is the higher upfront cost. The custom nature of the build, intensive labor, and quality of materials mean that gunite pools are a larger initial investment compared to fiberglass or vinyl liner options. The construction timeline is also considerably longer. You’ll need to be prepared for your backyard to be a construction zone for two to three months, which requires patience and planning.

Maintenance is another key consideration. The traditional plaster finish on a gunite pool is porous, which means it requires more diligent chemical balancing and regular brushing to prevent algae growth. Over time, the plaster surface will also need to be refinished, typically every 10 to 15 years, which is an additional long-term expense. Finally, the quality of your finished pool is entirely dependent on the skill of your installer. Choosing an inexperienced contractor can lead to costly structural problems down the road, making it essential to partner with a reputable and experienced company.

Higher Initial Installation Cost

There’s no getting around it: gunite pools are one of the more expensive inground pool options. The price tag reflects the custom, hands-on construction process. Unlike pre-fabricated pools, every gunite pool requires a dedicated team of skilled laborers for excavation, steelwork, plumbing, and the specialized gunite application. The raw materials, including tons of concrete and steel, also contribute to the higher cost. While the long-term durability can offset some of this expense, you need to be prepared for a significant upfront investment that typically starts around $50,000 and can easily exceed $100,000 for larger, more complex designs.

Surface and Maintenance Needs

The interior surface of a gunite pool, most commonly plaster, requires more hands-on maintenance than the smooth, non-porous surfaces of fiberglass pools. Because plaster is slightly porous, it can be a breeding ground for algae if water chemistry isn’t properly maintained. This means you’ll need to be diligent about testing your water, balancing chemicals, and brushing the pool walls weekly. Over the years, the plaster can also stain or erode. Most gunite pools will need to be resurfaced every 10 to 15 years, and this type of restoration project is essential to keep them looking and feeling their best.

Importance of a Skilled Installer

The final quality of a gunite pool is 100% dependent on the expertise of the team that builds it. The process of bending rebar, installing plumbing, and spraying the gunite correctly requires years of experience and specialized knowledge. An improper installation can lead to a host of problems, from plumbing leaks hidden within the concrete to structural cracks that are incredibly expensive to repair. This is not a project for a general contractor. It is absolutely critical to choose a dedicated pool builder with a proven track record and a portfolio of high-quality gunite projects, like Gappsi, to ensure your investment is built to last.

Understanding Gunite Pool Costs

When budgeting for a gunite pool, it’s helpful to understand what goes into the final price. The total cost is a combination of materials, labor, and any additional features you choose to include. On average, homeowners can expect a gunite pool installation to cost between $50,000 and $120,000. This wide range is due to the completely custom nature of these projects. A simple, medium-sized pool will fall on the lower end of that spectrum, while a large, freeform pool with an attached spa, waterfall, and high-end finishes will be at the higher end or even exceed it. The price reflects a permanent home improvement that adds both lifestyle and monetary value to your property.

Beyond the pool itself, remember to budget for the surrounding environment. The cost of the pool shell is just one piece of the puzzle. You’ll also need to account for the patio or pool deck, landscaping, and fencing, which is required by law in most areas. These elements are essential for creating a complete and functional outdoor space. When you receive a quote, make sure it clearly outlines what is included, from excavation and equipment to the final finish. Working with a comprehensive design and build firm like Gappsi can help streamline this process, ensuring all aspects of your backyard transformation are considered from the start.

Average Installation Cost

The initial investment for a gunite pool is significant, but it’s important to see it as a long-term addition to your home. The national average cost for a basic gunite pool installation typically ranges from $50,000 to $120,000, with prices on Long Island often leaning toward the higher end of this spectrum due to regional labor and material costs. This base price generally includes the design, excavation, steel framework, plumbing, the gunite shell, standard filtration equipment, and a basic plaster finish. The final price tag is heavily influenced by the size, shape, and depth of the pool, as a larger pool naturally requires more materials and labor. When planning your budget, it’s wise to have a clear idea of your must-have features to create a design that delivers your dream backyard within your financial comfort zone.

Cost Breakdown: Materials, Labor, and Permits

The cost of a gunite pool can be broken down into several key components, with a general price range of $100 to $280 per square foot for the pool itself. Materials make up a large portion of this, including tons of steel rebar for the frame, the specialized gunite concrete mix, all necessary plumbing pipes and fittings, and the interior finish. Labor is the other major expense, covering the skilled teams needed for each stage: excavation, steel-tying, plumbing, the certified gunite nozzleman, and the plastering specialists. You also need to account for municipal permits and inspections, which are required for any new pool construction and vary in cost by town.

Factors That Affect the Final Price

Several key factors will influence the final cost of your gunite pool project beyond the basic build. The most obvious are size and depth; a larger and deeper pool will always cost more due to the increased materials and labor required. The complexity of the design also plays a big role, as a simple rectangular pool is more affordable to form and build than a custom freeform shape with multiple curves or a vanishing edge. Site conditions are another important consideration. If your backyard has a high water table, is on a steep slope, or is difficult to access with heavy machinery, it may increase labor and preparation costs. Finally, your choice of interior finish can significantly impact the price, with standard white plaster being the most budget-friendly option and premium pebble or all-tile finishes costing considerably more.

Cost of Popular Add-On Features

This is where you can truly personalize your pool, but it’s also where costs can add up quickly. Popular add-on features like a diving board, slide, or a dramatic waterfall will each increase the total price. An attached spa is one of the most sought-after additions, providing a year-round place to relax, similar to our standalone hot tubs and swim spas. Advanced features like automated pool covers for safety and heat retention, energy-efficient variable-speed pumps, and colorful LED lighting systems also contribute to the final cost. And don’t forget the area around the pool. A beautiful patio made from high-quality natural stone pavers, a shaded pergola for lounging, and professional landscaping are all part of creating the complete backyard resort experience.

Long-Term Ownership and Maintenance Costs

A gunite pool is a significant investment in your home and lifestyle, and like any major home feature, it comes with ongoing ownership costs. Thinking about these long-term expenses from the start helps you plan your budget and ensures you can enjoy your backyard oasis without any financial surprises. The primary long-term costs are periodic resurfacing and annual maintenance. By understanding these predictable expenses, you can properly care for your pool, protecting its structural integrity and keeping it beautiful for years of family fun and relaxation. Proper care is key to maximizing the life of your investment.

The Cost of Resurfacing and Repairs

The plaster finish on a gunite pool is durable, but it doesn’t last forever. Over time, you might notice staining, roughness, or small cracks appearing. To address this, we recommend resurfacing your pool every 10 to 15 years. This process involves removing the old finish and applying a new one, which restores the pool’s appearance and seals the surface to prevent leaks. The cost for resurfacing typically ranges from $6,000 to $15,000, depending on your pool’s size and the materials you choose. It’s a crucial maintenance step that protects your investment and gives you a chance to update the look of your swimming pools.

Annual Maintenance Expenses

Beyond the major periodic updates, you’ll have regular annual costs to keep your pool in pristine condition. These expenses cover chemicals, cleaning, and minor repairs, generally totaling between $2,700 and $4,000 per year, or about $80 to $150 per month during pool season. This budget accounts for everything needed to keep the water balanced and safe for swimming, as well as running the pump and filter. Consistent upkeep not only makes your pool more enjoyable but can also help extend the life of its surface. Part of this upkeep includes caring for the surrounding patio, which may require professional restoration and sealing to prevent wear and tear.

How to Plan Your Gunite Pool Project

Bringing a gunite pool to life is an exciting process, but it requires careful planning to ensure everything goes smoothly. From setting a budget to choosing the right team, each step is crucial for creating the backyard oasis you’ve envisioned. Thinking through the details upfront will save you time and stress later, making the construction phase much more enjoyable. Let’s walk through the key considerations for planning your project, so you can feel confident and prepared as you get started on this amazing home addition.

Ways to Save Money on Your Installation

There’s no getting around it: gunite pools are a significant investment. They are often considered the most premium option, with installation costs that can range from around $100 to $280 per square foot for the pool itself. However, being mindful of your design choices can help manage the budget. Opting for a classic geometric shape instead of a complex freeform design can reduce labor and material costs. You can also plan for elaborate features like waterfalls or custom lighting as a future upgrade rather than part of the initial build. Scheduling your installation during the off-season, like the fall or winter, may also present opportunities for savings with some builders.

Hiring the Right Pool Builder

The single most important decision you’ll make is choosing your pool builder. The right partner will not only deliver a stunning, well-built pool but also provide a seamless and positive experience from start to finish. A builder with a strong reputation and deep roots in the community ensures your pool is constructed correctly and will last for decades. Here on Long Island, working with an experienced team like Gappsi means you have a partner who understands local building codes and soil conditions. A great builder acts as your guide, helping you design the perfect pool and outdoor space that fits your lifestyle and complements your home’s architecture.

Get Multiple Quotes

Before you commit, it’s wise to gather at least three detailed estimates from different pool companies. This isn’t just about finding the lowest price; it’s about understanding the value each builder offers. A thorough quote will break down the costs for excavation, materials, labor, and equipment. Comparing these proposals side-by-side allows you to see differences in the quality of materials proposed or the scope of work included. Be cautious of any bid that is drastically lower than the others, as it could signify subpar materials or hidden costs that will appear later.

Check Credentials and Reviews

Once you have a few quotes, do your homework on each company. Verify that any builder you consider is fully licensed, bonded, and insured to protect yourself from liability. Next, look for social proof of their quality and customer service. Read online reviews and testimonials, but also ask to see a portfolio of their completed projects. A confident builder will be proud to share their work. You can often get a great feel for a company’s craftsmanship by watching videos of their projects, which showcases their process and the final product in a dynamic way. This research helps ensure you’re hiring a professional and reliable team.

Request a Detailed Contract

After selecting your builder, the final step before breaking ground is to sign a comprehensive contract. This document is your project’s blueprint and your protection. Always get a detailed, written contract that clearly outlines every aspect of the job. It should include a complete cost breakdown, a specific payment schedule, the exact materials and equipment to be used, and a projected timeline with start and completion dates. The contract should also specify warranty information for both the pool structure and the equipment. A clear and thorough contract ensures everyone is on the same page and minimizes the chance of misunderstandings.

SCHEDULE A MEETING TODAY WITH GAPPSI

View Gappsi’s YouTube channel for videos of Gunite Pool Renovation With Marble Pavers

https://youtu.be/pwhlTVa4vKk

Frequently Asked Questions

How long will a gunite pool actually last? A gunite pool is a permanent addition to your home. With proper care, its structure can easily last for 50 years or more. The steel-reinforced concrete shell is incredibly strong and built to withstand Long Island’s weather. While the interior plaster surface will need to be refinished every 10 to 15 years to keep it looking fresh, the pool itself is built for a lifetime of enjoyment.

Why does it take so long to build a gunite pool? The construction timeline, typically 8 to 12 weeks, reflects the custom, hands-on nature of the project. Unlike pre-made pools that are simply placed in the ground, a gunite pool is built from scratch right in your backyard. The process involves excavation, intricate steel framework installation, plumbing, and then spraying the concrete. The most time-consuming part is the curing phase, where the concrete shell needs about a month to gain its full strength. This patience ensures a durable, high-quality result.

Is a gunite pool harder to take care of than other pools? It does require a bit more hands-on attention, but it’s very manageable. The plaster surface is more porous than fiberglass, so it needs consistent weekly brushing to prevent algae from taking hold. You’ll also need to stay on top of your water chemistry. Think of it as regular upkeep, similar to tending a garden. This routine care is key to protecting your investment and keeping the water sparkling clean.

I love the idea of a custom shape, but does that make it a lot more expensive? The complexity of the design is a major factor in the final price. A simple rectangular pool will cost less than a freeform lagoon with multiple curves and built-in features. While custom shapes do increase the initial investment, the primary benefit of gunite is getting a pool that perfectly fits your yard’s unique layout and your personal style, which is something standard pool shapes just can’t offer.

The Muttontown project added a spa. Can I add features like that to my existing pool later? Yes, it’s possible to renovate and add features like a spa to an existing gunite pool, as the Muttontown project shows. However, it’s much more seamless and cost-effective to incorporate these elements into the original design. Planning for features like a spa, tanning ledge, or waterfall from the beginning allows them to be integrated directly into the pool’s structure and plumbing for a flawless look.

Key Takeaways

  • Design Without Limits: Gunite construction offers unmatched flexibility, allowing you to create a pool that perfectly matches your home’s architecture and includes custom features like waterfalls or built-in seating.
  • Invest in Durability: Gunite pools are built to last a lifetime and can increase your property value, but it’s important to plan for both the initial installation cost and future maintenance like resurfacing every 10 to 15 years.
  • A Skilled Pro is Non-Negotiable: The quality of a gunite pool is entirely dependent on the builder’s skill, making it essential to hire a licensed, experienced professional to protect your investment and ensure a flawless result.

Related Articles

Share this page:

Freeform Gunite Swimming Pool

Freeform-Gunite-Swimming-Pool1Making the decision to build a custom freeform gunite swimming pool in your own backyard is exciting! Imagine a beautiful oasis with custom water features for relaxing and spending time with family and friends.

Gappsi specializes in gunite pool construction in Smithtown NY and surrounding areas. From initial consultation and coming up with your backyard design to completing the project in a timely manner, we promise excellent service and quality work every step of the way.

What Pool Shapes Are Available? Geometric and Freeform

A lot of thought should go into your pool shape and style. There are several factors that will play a part in determining that shape. Function is a big factor. It’s important to know what you want to be able to use the pool for and to consider all the users. Will it be a family-oriented pool that will incorporate a diving board, slide, grotto or other features your kids may enjoy? Or, maybe the pool’s primary function is to provide an oasis from the New York heat, someplace to unwind from a busy week where every feature revolves around escape and relaxation.

If that’s the case you may want to incorporate features like a shallow tanning reef, swim-up bar, or a relaxing water feature. It is easy to extend the use of your pool into the cooler months by adding a spa, fire pit, or outdoor kitchen area and incorporating it into the design.

Yard space is an important consideration when adding a pool to your property.  You may need a strategic pool design to make the most of a small or oddly shaped yard, or perhaps you have more space than you literally know what to do with. Both are scenarios that our experienced designers and pool builders at Gappsi know how to deal with.

Freeform Pools Gunitre Pool

Freeform custom pools are those taking on any shape and form. There’s no certain geometric shape such as a square or rectangle. Instead, freeform design (sometimes also referred to as a radius pool), has no set rules or shapes.  It can take on any curvilinear form.

Freeform-Gunite-Swimming-PoolWhen you start to plan out your swimming pool installation with Gappsi, you will have the option of creating a freeform design for your pool area. Unlike traditional swimming pools, which contain rigid, geometric shapes, freeform pools have an organic look and feel. Gappsi has plenty of experience with pool installation and will be able to help you plan out a freeform pool that matches beautifully with your backyard.

SCHEDULE YOUR APPOINTMENT TODAY

There are a few terrific benefits to the freeform swimming pool. When you create a freeform pool, you will be able to create a one-of-a-kind design for your backyard. Small pools are particularly suited to a freeform design because they can be crafted to look like natural water elements. You may also find that your swimming pool maintenance requirements are lower when you create a freeform design. Overall, planning a freeform pool will allow you to express your personality and sense of style.

Freeform pools are made up of soft curves. These gunite pools can be built in an infinite amount of pool shapes. Contemporary freeform pools often have natural rock or waterfall features that are designed to resemble a natural lake, lagoon, or oasis. They are usually surrounded by lush landscaping and blend seamlessly with the rest of the yard.

Gunite freeform pools can be built into almost any yard including those oddly shaped, limited space, or homes that have a sloping landscape. Our gunite pools can be built with a wide range of features that can include:

  • Beach entry or built-in steps
  • Deeper areas for diving pools
  • Built-in seating
  • Built-in tables or bar areas
  • Tanning reefs
  • Waterfalls, fountains and bubblers
  • Spas & Grottos

Freeform-Gunite-Swimming-Pool2Freeform Gunite Swimming Pool Built in East Northport NY

Gappsi designed this freeform gunite swimming pool in East Northport NY. This is a very large swimming pool with a 9-foot deep end. In the shallow area, we built a sundeck with steps across in twelve-inch deep water. We used porcelain tiles, a very close combination of colors. Our team built a natural-looking waterfall at the deep end of the pool using moss rocks.  We made the moss rocks to also double as the diving rock. In addition, the shelf to the waterfall can be used as a diving board to jump into the pool. Around the pool area, we installed Blue Limestone on the patio in a French pattern and finished the pool is white quartz.

The pool coping is 12-inch by 2-inch thick limestone selected from the Gappsi Natural Stone Collection. The customer has a very large patio which includes a Breeo Fire Pit on one side of the yard. The Breeo Fire Pit is perfect for summer night fires while enjoying the view of the pool. This is the latest Gappsi backyard project in East Northport NY.


review-from-a-customer-whiteI highly recommend Gappsi! Giuseppe designed our entire backyard and we couldn’t be happier with how it turned out. I love the automatic cover for our pool and our synthetic turf grass. Anytime we have anyone come over, they always compliment our marble stone patio and retaining wall. Giuseppe was great to work with and would answer all of our questions so quickly – there was always an open line of communication throughout our backyard renovation. Looking forward to creating many memories in our new backyard thanks to Gappsi!


SCHEDULE A MEETING TODAY WITH GAPPSI

View Gappsi’s YouTube channel for videos of Freeform Gunite Swimming Pool


Share this page:

Luxury Custom Outdoor Water Fountain

Luxury-Custom-Outdoor-Water-Fountain1Designing a luxury custom outdoor water fountain is much like creating a work of art. Outdoor fountains make a graceful statement about your home by creating a pleasing and welcoming ambiance. They enhance the landscaping style of any property. Outdoor fountains are especially beneficial serving as camouflage for traffic noise and other nuances in your surroundings. This can provide relief on those hot summer days.  At Gappsi we offer a wide variety of styles that will be sure to impress anyone who enters your yard. Whether you are interested in grand scale models or water fountains for smaller areas, we can customize many of our water fountain designs to meet your needs.

Custom Outdoor Water Fountain Benefits

Stress Relief & Relaxation – Everyone has a little stress in their life. Find some stress relief and relaxation at the end of a hard day by your fountain. With its soothing sounds of flowing water your water fountain will bring stress relief and relaxation to your environment.

Indoor & Outdoor Décor – An indoor or outdoor fountain will add instant beauty to your surroundings. Whether it is a large wall fountain, a tabletop fountain, or a garden fountain, you are decorating and showing your style.

Drowning Out Sounds – A soft flowing water sound can drown out other sounds around you.  For example: traffic, voices in the next room, and the dog that always barks at the same time every night.  The sound of flowing water will help you relax and give you a new sound to enjoy drowning out other sounds around you.

Luxury-Custom-Outdoor-Water-FountainArtistic Water Fountain Features

Many of today’s homeowners gravitate towards water features that act as a focal point of a design, like an interactive piece of modern art that makes a statement. That statement can be bold or simple, often reflecting the personality of the homeowner. Designs of this type add an element of zen to an outdoor space and can range from water walls to urn fountains and bubbling rocks.

Are you looking for an easy way to beautify your outdoor living space? An outdoor fountain adds instant beauty, and you’ll enjoy the soothing sight and sound of running water in your yard. Not only that, but your fountain will attract birds and butterflies who stop by for a bit of refreshment.

4 Things To Know About Outdoor Fountains

  1. Power Source – There are two power source options: Hardwired or Solar-Powered.  A hardwired fountain draws on an electric power source to function. In most areas, only a licensed electrician can install a hardwired outdoor fountain. Solar-powered outdoor fountains are popular because they don’t require hardwiring to your home’s electrical supply.
  2. Water Source – Most fountains are connected to a home’s water supply. There are some that can be filled using a water hose without the need for a permanent connection.
  3. Fountain Finishes – The finish of the fountain makes a big difference in the way the product looks and the care it needs.
    • Concrete and stone fountains usually don’t require as much care as other materials.
    • Stone fountains look more natural and might blend better into the surroundings.
    • Bronze and copper fountains provide a nice contrast to natural outdoor settings but may require more care than other finishes.
  4. Lighting – If you plan on spending time in your garden when it’s dark outside then outdoor fountain lighting options include:

Submersible lights: These go directly into the water. If your fountain is large enough, submersible lights offer a dramatic effect. They may be colorful or white and provide a soft effect not only on the water but also on the surrounding landscape.

External lights: External lights can be installed around the perimeter of the fountain.  Lighting options include spotlights, path lights, or even hanging lights.

Solar lights: Solar lights are exceptionally easy to install and require no electrical outlet. This is perfect for areas where a power source is not readily available.

Luxury-Custom-Outdoor-Water-Fountain2Gappsi Luxury Custom Outdoor Water Fountain with Copper Statue In A Pool

We constructed a 14′ ft wide x 18″ inches deep gunite pool, with a custom-sized pedestal.  The pedestal was shaped using gunite as the shell.  It supports and raises the brass Four Seasons statue above water level.  Gappsi’s team installed a brick veneer to cover the outside pool wall and added a custom bluestone coping on top of the fountain wall. The custom water fountain finish inside is a black diamond brite quartz.

To illuminate the fountain in the evening we installed LED lights.  This included underwater illumination of the pool and shining up to the statue as well. Pentair equipment powers the water circulation for the fountain.  The unit returns water to the top of the statue and creates a free-fall spillover on all sides.  We installed a UV light sanitation system.  This keeps the water sanitized and cuts down on the maintenance needed.  The customers are extremely happy and love pulling into their home and seeing their custom Copper Water Fountain by Gappsi!  

SCHEDULE A MEETING TODAY WITH GAPPSI

View Gappsi’s YouTube channel for videos of Luxury Custom Outdoor Water Fountain

Share this page:

Looking For Hot Tubs And Spas On Long Island?

long-island-hot-tubs-spas-indoor-outdoor-installation-2048x683Are you looking for hot tubs and spas on Long Island for your home?  Passion Spas are at the forefront of world-class spa development and production which is why Gappsi offers these spas and hot tubs.  We know that you expect quality and performance in your spa, and our experience tells us that you desire a spa that is reliable, easy to maintain, and inexpensive to operate. After all, you want your spa to enhance your lifestyle!

Passion Spas are focused on creating a spa experience that delights all of your senses:

  • the touch of therapeutic massage
  • the aroma of scented oils
  • taste of mist from the steaming water
  • sight of beautiful and flowing lines in the design
  • listening to the sound of rippling water

A Passion Spa is designed to enhance your life through an innovative and totally relaxing spa experience.

Spa Versus Hot Tub

Hot tubs and spas have become luxury items desired by many homeowners. They are in hotels and resorts all across the globe. People use them to enjoy time with friends or to spend time relaxing after a long day.

We call them spas or hot tubs interchangeably but did you know, there is a difference? They have similar functions, and at the end of the day, sitting in either with your favorite beverage is an amazing thought. But knowing the difference between a hot tub and a spa can help you make a better decision as to which one is right for your home and your daily use.

Differences Between a Spa And A Hot Tub

HOT TUBS
  1. A hot tub sits above the ground and can be made from acrylic, vinyl, or fiberglass.
  2. They are smaller than spas and generally portable.
  3. They come in fixed designs, with sitting made specifically for relaxation.
  4. Hot tubs can be plugged into your regular outlet, or if they use 220v, you may need an electrician to set up your wiring.
  5. The sole purpose of a hot tub is to relax and unwind.
SPAS
  1. Spas can also be used to relax and unwind, and have some jets and seats for this purpose.
  2. They are traditionally built in-ground and can also be used for exercise and swimming.
  3. They are larger than hot tubs, with extra space for movement.
  4. The jets, while they can be relaxing, can also create resistance to be used with your exercise program.
  5. In-ground spas will need to have the ground dug up and will need water and electrical features to be installed.

Behind every Passion Spas design is a foundation of health and wellness, the result of having invested so much time, so much creativity, and so many resources into developing an impressive range of massage and therapy options. Here’s a quick breakdown of what those options look like.

SCHEDULE YOUR APPOINTMENT TODAY

  • Aqua Rolling Massage ~ The Aqua Rolling Massage uses specially designed recesses in the spa shell to push water up the back, working muscles as it goes.
  • Intense Therapy Zone ~ This massage feature provides a concentrated, penetrating massage to the lower regions of the back, and the intensity of the pressure can be adjusted and customized to meet individual needs.
  • Therapy Wave Zone ~ Available in some models, the Therapy Wave Zone is a massage that starts at the lower back and slowly works its way up to the shoulders and neck. The sensation mimics a cushioned rolling pin running up and down the back, soothing muscles along the way.
  • Waterfall Massage ~ There’s also the Waterfall Massage, a continuous stream of cascading, warm water falling gently on the neck and shoulders, relaxing the upper back and neck muscles.
  • Levitation Bed ~ In some of our spas, we offer the most innovative massage feature available in the industry: the Levitation Bed. The Levitation Bed creates a floating sensation because the body is completely enveloped in a soothing massage that can be adjusted for intensity and effect. An individual can lie either face down or face up, receiving a full head-to-toe massage.

Partial or Complete In Ground

At Gappsi our experience and expertise in designing and installing in-ground hot tubs and swim spas throughout Long Island are unmatched compared to the competition. We have the experience, knowledge, and expertise to install your hot tub either partially or completely in-ground with ease. We can make your hot tub look as if it was a completely custom-built in-ground hot tub adding to the aesthetics of your backyard paradise. The custom installation options also allow you to surround your in-ground spa with material that matches the design aesthetics of your home and yard (Brick Pavers, Stone, Wood, etc).

Our designs will give you the aesthetic appeal of a custom in-ground hot tub with the therapy, efficiency, features, and comfort of a traditional, free-standing hot tub. No other company on Long Island can match our expertise with Passion Spas.

Advantages Of The Spa

Spas are popular with people that have in-ground pools and don’t plan on moving anytime soon. Your spa can be built with a pool or custom-made. You can use the spa for entertaining, relaxing, water therapy, and exercise.

Space. Spas are larger and have more space for entertaining. They have plenty of legroom so your guests aren’t crowded. You can customize the size you want and where you want your seating to be.

Features. You can pick from a variety of different features for a spa, including bubble jets, massage jets, and underwater lights in many diverse colors. You can mix and match the additional features to create your perfect spa.

Versatile. In the built-in spa vs. hot tub debate, spas win this category easily. Spas can be designed as stand-alone pools, or as part of your existing pool. They can be created as swim spas, for relaxation, or both. It can be built in and look like a part of your property, easily, so the transitions are seamless.

Granite Pavers | Driveway | Walkway | Merrick | Long Island NY | 11566Advantages of the Hot Tub

Hot tubs are fantastic for people who tend to move frequently and want to take their hot tub with them. They can also be used for entertaining and relaxing, although swimming and exercise are not common in a hot tub. Let’s look at some of the pros and cons of a hot tub.

Cost-effective. Hot tubs generally are less expensive than spas. They don’t have the installation costs that are associated with in-ground spas and are smaller than a swim spa.

Easy to store and maintain. When not in use, you can cover a hot tub and store it away until you’re ready to use it again. Filters are easy to replace and cleaning chemicals are easy to add.

Energy efficient. One big hot tubs vs spa difference is that hot tubs are more energy efficient than spas. They are good at keeping the water warm, and they can be covered up to keep the heat in.

Passion Spas include an exclusive Synergy™ water purification system that combines exceptional filtration with the latest in water sanitation technology.  Give us a call today or stop down to our showroom to view your next spa or hot tub.

SCHEDULE A MEETING TODAY WITH GAPPSI

View Gappsi’s YouTube channel for videos of Passion Spas On Long Island


Share this page: