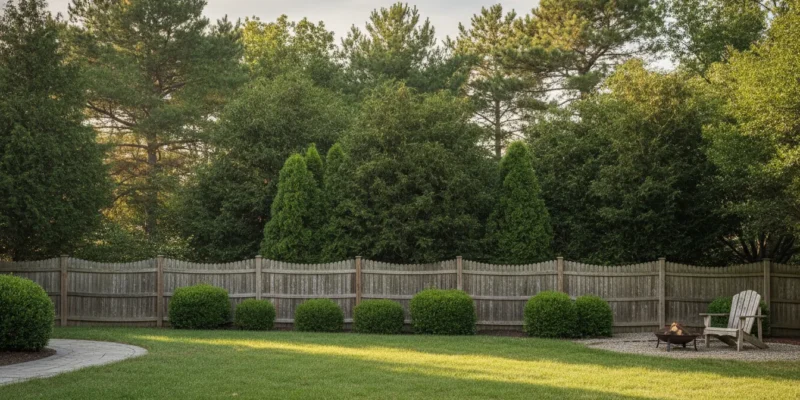
Long Island backyard with layered plantings and a privacy fence

Privacy Landscaping Ideas for Long Island Backyards

A backyard can feel exposed even when the property has plenty of space. On Long Island, neighboring homes, open side yards, coastal wind, and established masonry can all shape how much screening you need and where it should go. The most effective approach starts with the sightlines you want to soften, not with choosing a single plant or fence style.

Contact Gappsi through our contact page

The best privacy landscaping ideas combine screening layers that suit the yard: evergreen plantings for year-round coverage, shrubs for depth and seasonal texture. Fencing for immediate separation, and trellises or mixed plantings where you want privacy without a solid visual barrier. The right mix depends on setbacks, mature plant size, sun, drainage, maintenance, and the views from inside the home and outdoor living areas.

Planning these elements together helps the result look intentional rather than pieced together. Begin by mapping the views, boundaries, and daily-use areas that need protection, then compare how each screening method will perform as the landscape matures.

How Do You Plan Privacy Landscaping Ideas for a Long Island Yard?

Start with the privacy problem you actually want to solve. A screen may keep neighbors from looking into a patio or pool area, soften road noise, hide an unattractive view, or create a defined outdoor room. Those goals can require different heights, placements, and combinations of plants or structures. Sketch the views from the spots where you sit, dine, swim, and enter the yard before choosing a hedge or fence. A useful planning reference from Washington State University Extension recommends using line of sight and temporary stakes to test the preferred location and height.

Decide how much privacy you need. A fully opaque boundary is not the only option. A lower planting bed, staggered shrubs, trellis, or partial screen may provide enough separation while preserving light and openness. Mark the sightlines with stakes, then view them from both sides of the property. This simple test can reveal that a screen needs to be taller in one area, shifted to one side, or layered rather than installed as a continuous wall.

Allow for mature width, not just current size. Measure the planting bed, access paths, property edges, and space around utilities before selecting plants. The mature width of a hedge must fit the available area, and spacing should follow the requirements of the chosen plants. Crowding a narrow bed may create future pruning problems, restrict walkways, and put roots or branches too close to structures. A coordinated Long Island landscape design plan can show those dimensions before installation.

Account for Long Island site conditions. Note whether the yard receives salt exposure, strong coastal or winter winds, full sun, shade, standing water, or fast-draining soil. Plant selection should respond to those conditions rather than rely on a universal list. Check how water moves after heavy rain and make sure grading and irrigation will support the screen without directing runoff toward a foundation or neighboring property.

Before finalizing the layout, review applicable town, county, property, and homeowner association rules for screen height and planting types. Also protect safety sightlines. A privacy screen should not block the view needed for vehicles entering, leaving, or traveling beside the property. Planning around privacy level, mature dimensions, exposure, drainage, regulations, and safety produces a screen that functions well as the yard develops.

Evergreen Plantings Offer Year-Round Structure

Evergreen screening can provide a consistent visual boundary when a backyard needs privacy in every season. That does not make it the right answer for every Long Island property. A planting that looks suitable at the garden center may struggle when its roots meet compacted soil. Poor drainage, limited water, or conditions that do not match its needs.

Start with the site, not the plant list. Evaluate soil type, natural drainage, available water, and the amount of direct sunlight before choosing an evergreen hedge. The same review should account for exposure to coastal salt, drying wind, reflected heat, and winter weather. Horticultural guidance recommends selecting hedge plants according to soil, water availability, sunlight, and their other relevant characteristics, rather than appearance alone. When site conditions are ignored, plants may struggle or die. North Carolina Cooperative Extension explains the site-selection considerations.

Water management matters during establishment. New plantings need a plan for consistent irrigation while their root systems develop, but the soil must also drain appropriately. A landscape professional can identify whether grading, amended soil, or a different planting location is needed before a row goes in. This is especially important where downspouts, paved areas, or compacted construction soil create alternating wet and dry conditions.

Plan for mature width before deciding on spacing. Measure the available bed from the property line, fence, walkway, patio, or pool edge. Then verify that the hedge’s mature width will fit without constant shearing or encroaching into circulation space. Spacing should follow the needs of the selected hedge plants, not an arbitrary visual rule. Plants placed too close together can compete for water and root space, while plants placed too far apart can leave openings for years.

Evergreens also involve a timing decision. They offer year-round coverage, but they may take time to reach their intended height and density. If screening is needed immediately, combine them with a fence, trellis, or another structural element rather than forcing immature plants to solve an urgent sightline problem. Conversely, if the goal is a softer seasonal boundary, deciduous or layered planting may provide more variation and may suit the space better. Wind-buffering and privacy benefits can develop as a living screen matures, but the final design should reflect the property’s exposure, available room, and maintenance capacity. Washington State University Extension outlines living-screen planning and mature-size considerations.

Can Layered Shrubs and Trees Create Better Privacy?

Yes. A layered planting plan can soften a property edge while addressing several sightlines instead of creating one rigid wall. Structural diversity combines plants with different heights and forms, including trees, shrubs, ornamental grasses, and groundcovers. That mix can make a backyard feel more connected to its surroundings and less like a single row of plants placed along the property line.

The key is to assign each layer a job. Taller trees and large shrubs can create a backdrop where views travel over or through the yard. Medium-height shrubs can fill the visual gaps between larger plants, while ornamental grasses and groundcovers define the lower edge. This arrangement follows a layered screening approach recommended by the University of Maryland Extension, which places larger plants behind medium plants and uses lower plants around the perimeter. Learn more about mixed privacy screens from the University of Maryland Extension.
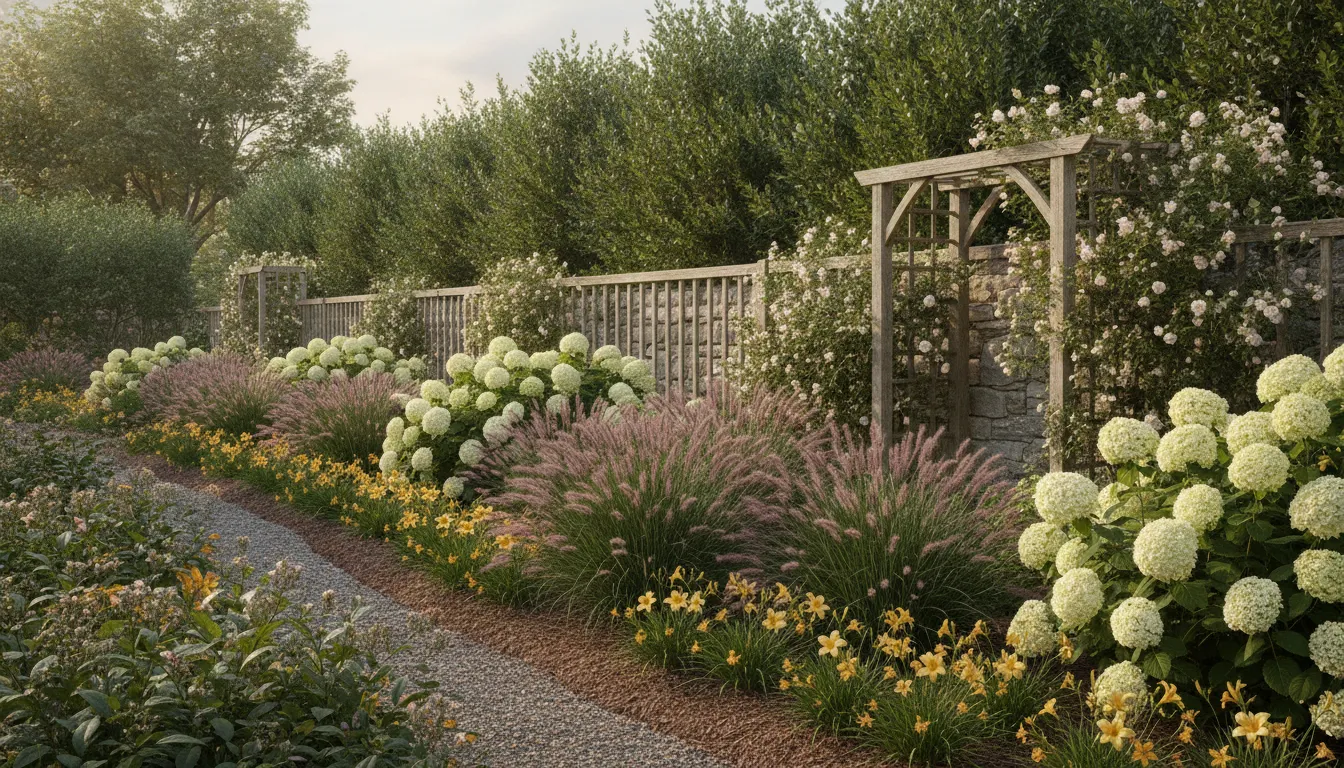
Layered shrubs and trellis used for backyard privacy

How do layers respond to different sightlines?

Privacy is rarely needed at one uniform height. A neighbor’s second-story window, a nearby road, and a seating area may each require a different visual response. A taller backdrop can interrupt an elevated view, while a denser middle layer can screen people standing or sitting across a boundary. Lower planting can define a pool deck, patio, or walkway without closing off the entire yard.

This approach also allows privacy to feel more natural. Rather than repeating identical plants at equal intervals, the design can vary height, texture, and spacing while preserving a deliberate visual rhythm. More plant species and structural diversity are associated with greater visual interest and can support wildlife such as pollinators and beneficial insects. Those benefits should support the design, not override practical concerns such as available space, drainage, sunlight, wind, salt exposure, and mature plant dimensions.

Where can layered planting work around a pool?

For a pool area, the lowest layer can frame the hardscape without obstructing circulation or sightlines. Medium shrubs can screen a neighboring property from the lounge area, while taller plants can address views from beyond the immediate yard. Plant placement should leave room for access, maintenance, drainage, and equipment service. It should also be coordinated with paving, fencing, grading, and irrigation rather than added as an afterthought.

Homeowners planning a screened pool area can also review these pool landscaping ideas for Long Island. The right mix depends on the specific property, so a planting plan should be based on measured sightlines and site conditions rather than a universal plant list.

Fences, Trellises, and Low Walls Add Immediate Structure.

Not every backyard needs a fully enclosed visual barrier. In many cases, the most effective privacy landscaping ideas combine a built element with planting, especially where space is tight or the desired screening level changes from one part of the yard to another. A fence can close a narrow side yard quickly, while a trellis, low wall, or berm can define an outdoor room without making the entire property feel enclosed. Privacy screening can also be phased over time rather than treated as an all-or-none decision, according to Washington State University Extension guidance.

How common backyard screening structures compare.
Option. Speed. Footprint. Seasonal coverage. Maintenance. Best use.
Fence. Fast once designed and permitted. Efficient in narrow spaces. Consistent through the year. Periodic cleaning, repairs, and finish care. Immediate boundary definition or a side yard where plants would leave too little room.
Trellis. Fast to install; coverage develops as plants grow. Small vertical footprint. Depends on the selected climber and season. Plant training, pruning, and structure checks. Softening a patio edge, screening a view, or adding height without a solid wall.
Low wall or berm. Fast after grading and layout are resolved. Uses more ground area than a fence. Structure remains; planting determines additional coverage. Wall or slope inspection plus planting care. Creating a graduated boundary, redirecting foot traffic, or separating outdoor rooms.
Living screen. Coverage increases as plants mature. Requires room for mature width and root zones. Varies by plant selection; evergreen coverage is possible. Watering during establishment, pruning, mulching, and plant health monitoring. Filtering views while preserving a planted, natural character.

In a narrow side yard, a manmade fence may be more practical than living plants because it uses less horizontal space. A low screen or flower bed can establish a sense of partition, while a berm or terrace wall can create a physical barrier and help redirect movement. These approaches are not mutually exclusive. For example, a fence can handle the immediate sightline, with a trellis or planting bed softening its appearance.

Material, height, property lines, drainage, and local requirements should be reviewed before construction. Explore Gappsi’s Long Island fencing options when comparing structured boundaries for a Nassau or Suffolk County property.
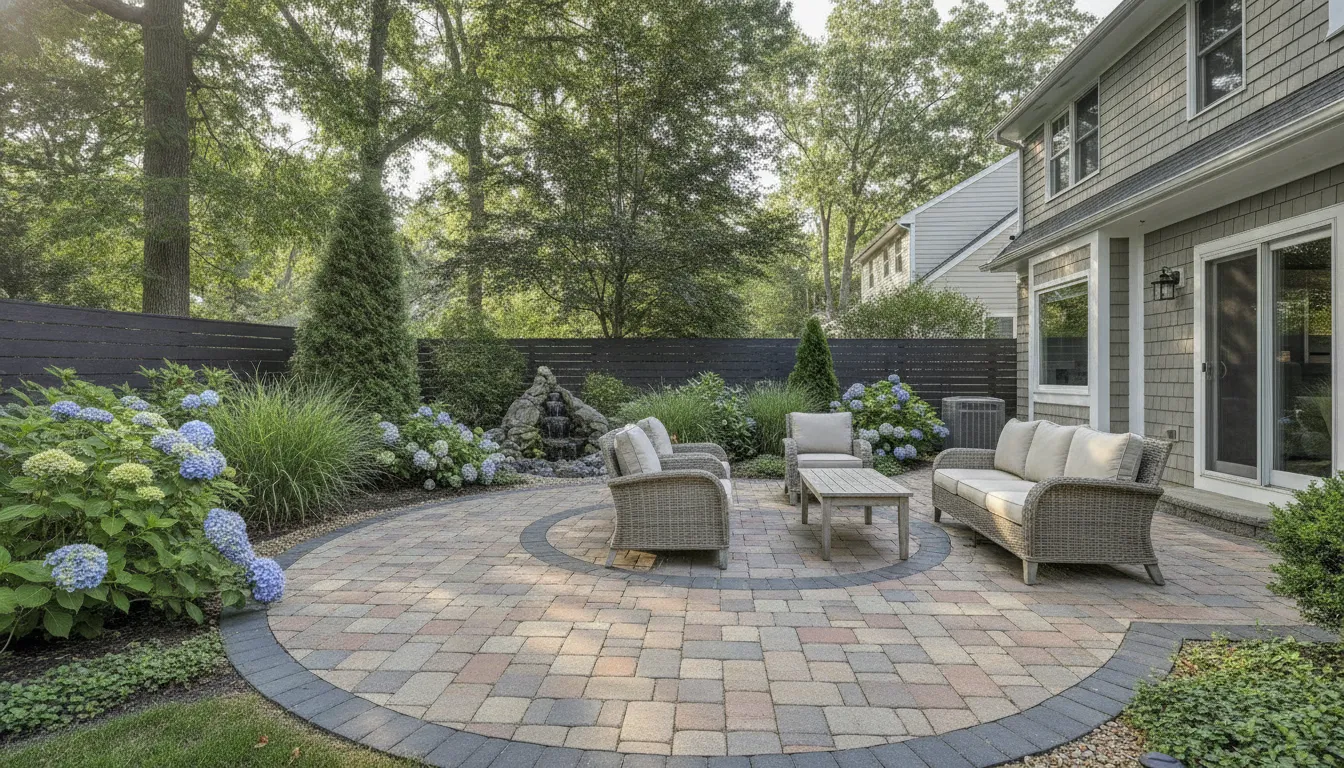
Paver patio framed by mixed privacy plantings

Why Mixed Screening Often Beats a Single-Row Hedge

A single-row hedge can create a clean boundary, but it also concentrates your screening in one plant type. If that plant struggles with a site condition, pest, or disease, gaps can develop across the same row. A mixed screen distributes that risk while creating a more natural view from the patio, pool area, or outdoor room. University of Maryland Extension recommends using a variety of plants rather than many plants of one kind. The extension notes that diversity can make a screen more resilient to pests, disease, and changing climate conditions. Learn more about mixed privacy screens.

Think in layers, not just rows. A taller plant can establish the backdrop, with medium-height shrubs filling spaces between larger forms. Lower plants, ornamental grasses, or groundcovers can define the edge without making the entire planting bed look like a wall. This arrangement adds texture and seasonal variation, and structurally diverse landscapes tend to provide greater visual interest and support more wildlife, including pollinators and beneficial insects.

Choose plants for the site, not only the appearance

Native plants are adapted to local soils and climate conditions and generally need less fertilizer and watering after establishment. That does not mean every native plant belongs in every Long Island yard. Selection still depends on sunlight, soil, mature dimensions, wind, salt exposure, water availability, and the amount of privacy needed in each season. Avoid invasive choices such as bamboo and Japanese barberry. A qualified planting plan should also account for mature width so the screen does not overtake a walkway, fence line, drainage area, or neighboring property.

Coordinate maintenance, irrigation, and drainage

Mixed screening is not maintenance-free. Different plants may have different pruning, watering, and replacement needs, so group plants with similar requirements where possible. Check how water moves through the bed before installation. Clay or sandy soil can affect how plants establish and respond to drought or heavy rainfall. A poorly drained area can undermine plants that cannot tolerate wet soil. Irrigation should support the actual planting zones rather than deliver the same amount of water indiscriminately to every species.

Planning a resilient screen for your Long Island property? Contact Gappsi through our contact page to discuss planting, grading, drainage, irrigation, and privacy screening together.

A phased installation can also make sense. Start with the most exposed sightline, then add lower layers, adjacent screening, or a trellis as the yard develops. Privacy does not have to be all or nothing. A site-specific plan can combine living plants with fencing or hardscape, then expand the screen over time as the landscape and your outdoor uses evolve.

How Should Privacy Screening Fit the Rest of Your Backyard?

Privacy screening works best when it is planned as part of the backyard, not added as an isolated row along the property line. The right location may protect a patio from a neighboring view, soften a pool deck, define an outdoor room, or guide movement along a walkway. It also needs to coexist with grading, irrigation, access, and the mature size of the planting.

  1. Map the sightlines and daily uses first. Stand in the patio, pool, kitchen, and seating areas where privacy matters most. Mark the views you want to block and the views you want to preserve. Temporary stakes can help test the preferred height and placement before construction or planting begins. Keep driveways, corners, and vehicle sightlines clear. This approach lets the screen support the way your family uses the yard instead of creating a visual barrier everywhere.
  2. Choose a screening type that fits the space. A living screen may suit a broad planting bed, while a fence or trellis may be more practical in a narrow side yard. Layered trees, shrubs, grasses, and groundcovers can create a softer transition than one straight row. Screening can also be phased, beginning with a low planting bed or structural element and adding taller coverage over time. Review mature width, soil, sunlight, water availability, and salt or wind exposure before selecting plants. A landscape designer can develop these decisions through Long Island landscape design rather than relying on a universal plant list.
  3. Coordinate grading and irrigation before installation. Privacy beds, fences, patios, and walls all depend on accurate elevations and clear drainage paths. Confirm where runoff will move, how planting areas will be watered, and whether roots or footings could interfere with existing utilities. Gappsi’s landscape planning can combine grading, planting, fencing, irrigation, and 3D design into one site plan. That coordination is especially useful on Long Island properties where compact lots and changing soil conditions limit room for adjustment.
  4. Connect the screen to hardscape and outdoor rooms. Use planting to frame a patio rather than hide it, or place a trellis and layered bed behind a seating area to give the space definition. If a new entertaining area is part of the project, review paver patio ideas alongside the screening layout. Walkways, pool decks, retaining walls, outdoor kitchens, and fire features should share a coherent material and circulation plan. For those details, explore masonry design and construction as part of the broader backyard design.

Contact Gappsi through our contact page

Frequently Asked Questions

How can you create privacy with landscaping?

Start by mapping the views you want to block, then combine evergreen plantings, layered shrubs, and smaller trees to create depth. A single row can look thin when young, while varied heights soften the boundary and provide screening from more than one angle. Leave room for mature growth and account for coastal exposure, existing masonry, fences, and pool or patio access.

What provides privacy faster, plants or structures?

Structures provide immediate screening, so a fence, trellis, or privacy panel can block a sightline as soon as it is installed. Plants take time to establish, but they add seasonal texture and can soften the appearance of a structure. Many Long Island backyards benefit from combining both, such as evergreen shrubs in front of a fence or vines trained across a trellis.

How do you block a neighbor’s view without enclosing the whole yard?

Focus on the specific sightline rather than screening every boundary. Use a layered privacy plan with taller evergreens or a narrow tree where the view enters, then add mid-height shrubs and a trellis near the seating area. This preserves open views elsewhere and helps the yard feel more spacious. Check mature plant width before choosing locations.

What is the cheapest way to create backyard privacy?

The least expensive approach depends on the site, but using existing fences or walls and adding strategically placed shrubs is often more economical than rebuilding the entire boundary. A trellis with fast-growing, site-appropriate plants can address a smaller view. Compare installation, watering, pruning, and replacement needs, not just the initial materials cost.

Ready to Plan Your Long Island Privacy Landscape?

A site-specific plan can help you balance mature plantings, layered shrubs, fencing, trellises, and mixed screening with your backyard’s sightlines and existing features. Gappsi can discuss the layout and help identify an approach that fits the way you use the space. Contact Gappsi through our contact page for a custom Long Island privacy landscape plan.
Share this page:
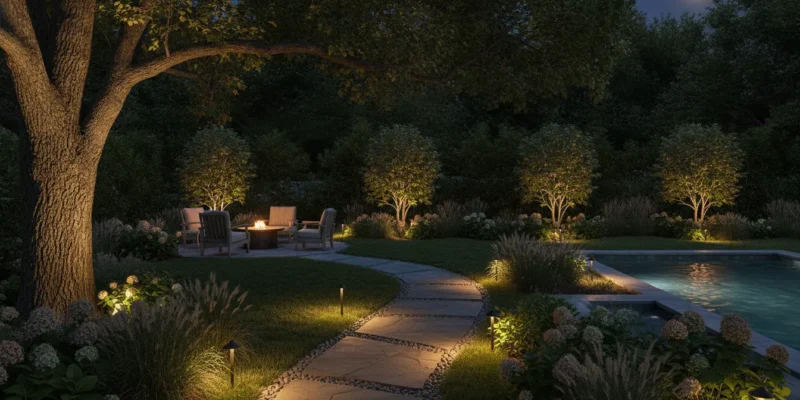
Landscape lighting along a Long Island stone patio and walkway

Landscape Lighting Ideas for Long Island Homes

After sunset, a Long Island yard needs light that guides movement and preserves atmosphere.

Contact Gappsi through our contact page

The most useful landscape lighting ideas layer visibility, architectural accents, and softer focal points by zone. Path and step fixtures guide movement, shielded lights reveal trees and stonework, and adjustable scenes let the same outdoor area support dinner, conversation, or quiet evening use.

The right balance depends on sightlines, mature planting, existing hardscape, and where wiring can be coordinated with the broader design. Start at the places people move through first, then build outward from the entry paths and steps.

What Landscape Lighting Ideas Work Best for Entry Paths and Steps?

The most effective entry lighting helps people read the route without making the fixtures the main attraction. Start at the driveway or sidewalk and identify the sequence a visitor actually follows: the turn toward the front door, changes in grade, the first riser. The landing, and the final approach, then layer light so each transition is visible while planting, masonry, and the front door remain the visual focus.

Use path lights to shape the route

Path lights work well along walkways because they create a repeated rhythm at the edge of the route. Avoid lining them up directly opposite one another unless the path needs a very formal treatment. Alternating fixtures from side to side can produce a more natural appearance. And the cited landscape-lighting guidance places typical pathway fixtures about 8 to 10 feet apart as a starting point: pathway spacing guidance. That distance is not a rule for every Long Island property. A narrow walk, a broad bluestone approach, dense shrubs, and mature trees can all change the sightline.

Space fixtures by what the eye needs to see, not by a tape measure alone. A bend may need light before and after the turn. A darker section beside a hedge may need closer coverage, while an open stretch may look calmer with fewer fixtures. Keep the beam on the walking surface and nearby planting rather than aiming it toward the house, the street, or a neighbor’s windows.

Make steps readable without creating glare

Step lights should reveal the edge of each tread and the depth of the stair without shining directly into approaching eyes. Recessed fixtures in risers, low-profile lights beneath a wall cap, or carefully positioned side lighting can all work, depending on the material and construction. On a masonry stair, the fixture location should be coordinated before stone, pavers, or coping are installed. A light that is technically bright enough can still perform poorly if its lens is exposed at the wrong viewing angle.

Downlights can add a softer layer from a nearby wall, tree, or architectural element. Use them to support the route, not to flood the entire entry. Responsible outdoor-lighting guidance recommends a clear purpose, the lowest light level required, and shielding or careful aiming to limit spill: responsible outdoor-lighting principles. This approach also helps preserve the contrast that makes a front entry feel dimensional after dark.

Before finalizing the layout, review the route twice: once from the driveway and once from the front door. Look for exposed lenses, bright spots, dark gaps, reflected glare on pale paving, and light spilling beyond the property. Walk the path after the planting and hardscape are in place, then make small aiming or shielding adjustments. The goal is a comfortable visual handoff from driveway to door, with each step and change in direction clear enough to follow.

How Can Trees and Planting Beds Become Nighttime Focal Points?

Mature trees and layered planting can give a Long Island property its strongest evening character, but the goal is not to make every leaf equally bright. Start by choosing the view that matters most, such as the approach from the driveway, the view from a patio, or the sightline from inside the house. Then shape the lighting around the trunk, canopy, bed edge, and background so the planting reads as part of the landscape rather than a collection of visible fixtures.

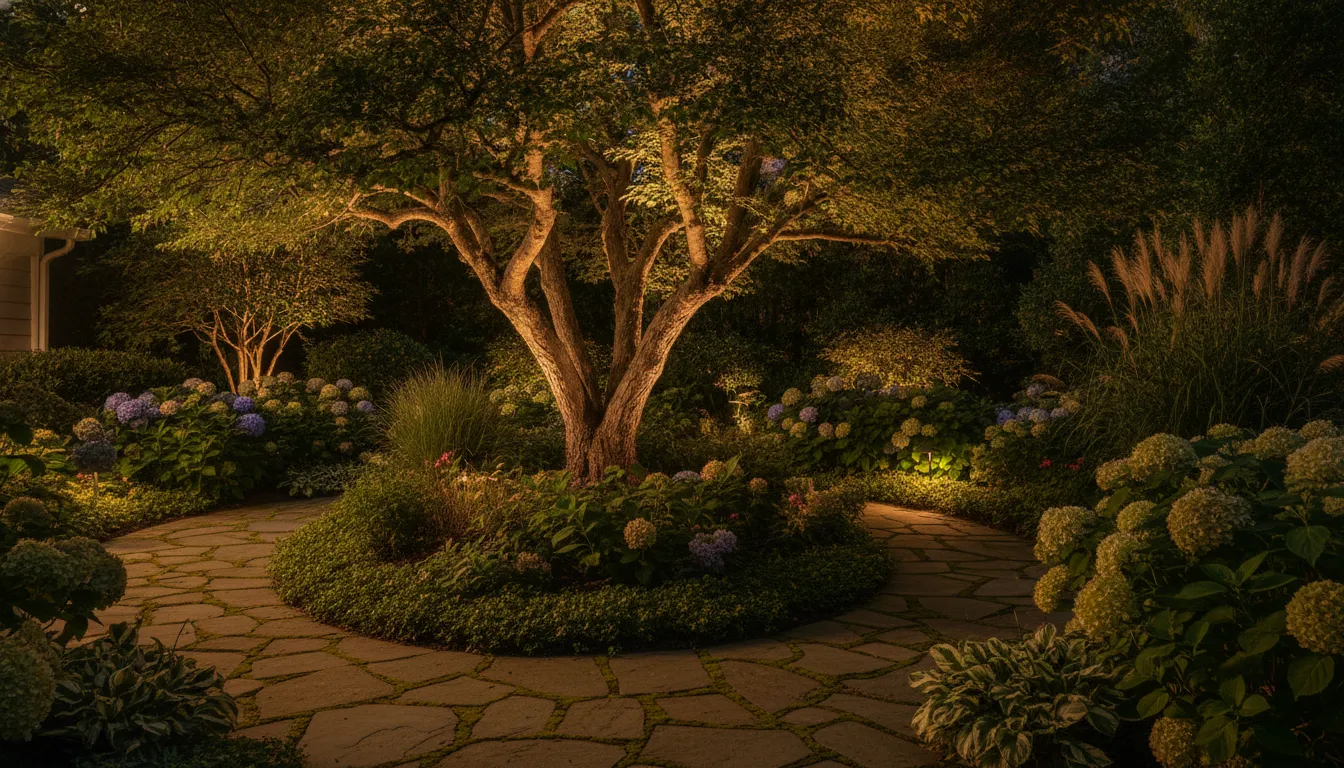
Uplights placed near a trunk can reveal bark texture and branch structure. The exact distance and angle depend on the tree, surrounding surfaces, and the viewing position. One cited landscape-lighting guide describes placing tree uplights a few feet from the trunk and angling them upward. The placement should be tested on site rather than treated as a fixed formula. A narrow beam can emphasize a single trunk or branching form, while a wider beam can spread softly through a fuller canopy.

Low-voltage light highlighting a Long Island landscape tree

Downlights can create a quieter moonlit effect when concealed above eye level in suitable branches. Aim them toward the ground or planting below, not toward windows, seating, or neighboring properties. This preserves the canopy as the source of interest while giving lower layers enough definition to connect the tree to the rest of the bed. Shielding and careful aiming are important because responsible outdoor lighting guidance recommends directing light only where needed and limiting spill (DarkSky lighting principles).

Build depth instead of a bright wall of foliage

In a planting bed, combine a few accent lights with discreet well lights or adjustable fixtures. Highlight a specimen form, ornamental grass mass, stone edge, or change in height, then allow darker areas to separate those moments. Guidance for garden lighting recommends selective highlighting instead of lighting every plant, and it also advises accounting for seasonal changes in plant size and density (landscape lighting techniques). Adjustable stakes can help maintain the composition as plants mature or are divided.

Test the scene from the locations where people actually stand. A fixture that looks balanced beside the bed may create a harsh hot spot from a kitchen window or patio chair. Move the fixture farther away for softer coverage, lower the intensity, change the beam spread, or use a shield to hide the light source. Look for reflected glare on pale walls, wet leaves, and paving, especially around pools and entertaining areas. The best landscape lighting ideas leave room for shadow, future growth. And the natural shape of the planting, so the focal point remains comfortable to view throughout the season.

Wall-Wash and Hardscape Lighting Ideas Add Texture

Masonry changes character after sunset when light is used to reveal its surface rather than flatten it. A textured stone retaining wall, brick edge, stucco garden wall, or seat wall can become a quiet architectural backdrop with the right fixture position. Start by deciding whether the goal is a broad wash, a grazing effect, or a narrow accent. The surface, viewing distance, and nearby planting all affect the result.

Wall washing spreads light across a larger plane. The cited guidance places fixtures about 12 to 18 inches from an exterior wall and angles them toward the surface to reveal texture in stone, brick, or stucco. Fixtures spaced about 3 to 4 feet apart can help create more even coverage. Although actual spacing should be tested against the wall height, joints, surface color, and fixture output. See the source guidance on wall-washing placement for the technical basis of these ranges.

Grazing is more directional. Moving a fixture closer to rough masonry and aiming the beam across the face can emphasize stone faces, cap edges, mortar joints, and irregular relief. On a smooth wall, that same approach may expose every imperfection, so a wider, softer wash can be more forgiving. A longer distance between the fixture and surface generally softens contrast and broadens the illuminated area, while a closer fixture and sharper angle produce stronger texture and shadow. Test both positions from the main seating and walking viewpoints before finalizing the layout.

Location Lighting effect Planning note
Retaining wall Low, even wash that defines grade changes Coordinate fixture placement with drainage, planting, and the wall cap.
Seat wall Soft grazing that outlines masonry texture Keep fixtures concealed and prevent direct glare for people seated nearby.
Wall cap Subtle line of light along the top edge Use compact, shielded fixtures where they will not be visible from the patio.
Outdoor steps Layered illumination on risers and landings Light walking surfaces without aiming beams into approaching eyes.

Step and cap lighting should support orientation without making every edge bright. Recessed or concealed fixtures beneath a cap can cast light onto the face of a riser. While small fixtures set beside a landing can define a change in elevation. On a seat wall, place the light source where cushions, backs, and nearby plants will not block the intended spread. For retaining walls, account for mature planting and maintenance access so the fixtures remain serviceable.

Shielding matters wherever a wall borders a patio, pool, or neighboring property. DarkSky guidance recommends shielding and careful aiming so light points where it is needed, using the lowest required level and limiting spill. The same principles reduce glare from pale masonry and help preserve darker areas around the composition. Plan the hardscape and lighting together through masonry design and construction, especially when new walls, caps, steps, or outdoor living areas are part of the project.

What Lighting Ideas Make Patios, Pools, and Outdoor Kitchens Inviting?

Outdoor rooms should feel connected after sunset. A patio may need a soft perimeter glow for conversation. While the route to a pool or outdoor kitchen needs more deliberate illumination around changes in grade, steps, and working surfaces. The strongest landscape lighting ideas support how people move through the space without making every surface equally bright.

Begin with the evening view from inside the house and from the main seating area. A concealed source beneath a counter edge can outline an outdoor kitchen without competing with the person preparing food. Low fixtures tucked into planting beds can define the patio edge. While a pergola can carry subtle downlighting that reaches the dining table without putting a bright fixture in the line of sight.

Low-voltage light highlighting a Long Island landscape tree

Use the patio as a layered entertaining zone

For a dining area, combine focused task light with lower-level ambient light. A fixture aimed at a grill or prep counter should illuminate the work surface, not shine across the yard or into a guest’s eyes. Around lounge seating, light can come from nearby masonry, planting, or a pergola structure. This layering gives the eye places to rest and keeps the patio from looking like a brightly lit room.

Hardscape details can carry the design. Concealed fixtures beneath a seat wall cap, along a step riser. Or under a counter lip can reveal the shape of the construction while preserving a clean daytime appearance. Coordinate those locations with the masonry plan before installation. Gappsi’s Long Island paver patio ideas can help homeowners think through patterns, edges, and entertaining layouts that lighting will later reinforce.

Make the pool approach visible without fighting the water

Pool areas need a different balance because water reflects light. A bright fixture aimed toward the pool can create distracting glare. It can obscure the surrounding view and make the water surface visually dominant. Instead, place light on the approach, nearby planting, steps, and seating areas, then aim beams away from direct sightlines. The U.S. Department of Energy notes that outdoor lighting can support navigation and enjoyment. Responsible planning also considers how much light is actually needed: outdoor lighting should serve a clear purpose.

Near water features, use fixtures specifically rated for wet locations. The cited landscape-lighting guidance identifies IP65 and IP68 as appropriate ratings for its wet-location recommendation. But the correct equipment and placement still depend on the feature, wiring route, and installation conditions. Gappsi’s Long Island swimming pool design services provide useful context when pool edges, decks, planting, and lighting are being considered together.

Plan for the full evening, not one photograph

Test the composition from the grill, dining chairs, pool approach, and house windows. A Long Island backyard may include masonry, mature planting, coastal exposure, and several entertaining zones. So fixture positions that look balanced from one angle may create glare from another. Keep the most important views open, use shielding where needed, and leave room to adjust fixtures as planting grows or furniture changes.

How Do You Choose Color Temperature and Control Glare?

Color temperature is a design decision, not a universal rule. A warmer appearance can make planting, stone, wood, and entertaining areas feel connected to the warmth of a Long Island home. A cooler appearance can create a crisper, more contemporary effect around clean architectural lines, pale masonry, or a modern pool setting. The right choice depends on the materials, paint colors, planting, existing exterior lighting, and the mood you want after dark. Review samples at night, because the same fixture can look very different against dark mulch, bluestone, white walls, or evergreen foliage.

One commonly cited landscape-lighting guide associates warm, inviting ambiance with LEDs between 2700K and 3000K. While it describes 3500K to 4000K as cooler tones for a crisp, modern aesthetic. Treat those ranges as reference points rather than an automatic specification. Using one color family throughout a connected view usually feels more intentional than mixing noticeably different whites between the front entry, patio, pool deck, and planting beds. There can still be exceptions, such as a brighter task area at an outdoor kitchen, if the transition is controlled and visually comfortable.

For a coordinated plan, call Contact Gappsi through our contact page.

Shield the source, then aim the beam

Glare usually comes from seeing the light source directly, not from a landscape being thoughtfully illuminated. Use hoods, shields, louvers, recessed fixtures, and careful fixture placement to keep the lamp out of normal sightlines. Aim light toward the path, tread, planting form, or wall surface that needs attention. The DarkSky lighting principles recommend shielding and careful aiming so light points downward and does not spill beyond where it is needed: responsible lighting guidance.

Walk the property from the viewpoints that matter. Check the approach from the street, the view from the front door, seating positions on the patio, and sightlines from inside nearby windows. On a Nassau or Suffolk property, also consider neighboring homes, raised decks, pool enclosures, and upper-story rooms. A fixture that looks hidden while standing beside a planting bed may be visible from across the yard or from a neighbor’s window. Adjust the height, beam angle, shield, or location before adding more output.

Use light only where the property needs it

Start with purpose: navigation, a cooking surface, a step, a favorite tree, a wall texture, or a seating zone. The U.S. Department of Energy notes that outdoor lighting can support navigation, hazard detection, reassurance, and enjoyment, while also recognizing that nighttime light can affect ecological conditions. DarkSky principles likewise recommend using the lowest light level required and being mindful of reflective surfaces. Light-colored pavers, water, glass, and pale walls can bounce more light than expected, so dimming may improve comfort without changing the fixture layout.

Controls make the design adaptable. Put paths and arrival areas on a schedule, keep entertaining zones available later when needed, and use separate zones for architectural accents, planting, and task lighting. Dimming allows the scene to shift from arrival mode to dinner or quiet evening use. Timers or motion controls can make light available when needed and turn it off when it is not. For more technical guidance on low-voltage planning, controls, and installation details, review Gappsi’s technical landscape lighting guide.

How Should You Coordinate Landscape Lighting With a Long Island Design?

Landscape lighting works best when it is planned alongside the spaces it will illuminate, not added after grading, planting, and masonry are complete. On Long Island, existing stonework, mature trees, coastal exposure, pool layouts, and changing soil conditions can all affect fixture locations and wire routes. A coordinated plan lets the lighting support the way your property is used while preserving the intended character of the landscape.

  1. Walk the property at dusk. Start when there is enough natural light to see the layout, then observe what disappears as the sky darkens. Note the front walk, steps, driveway, planting beds, trees, patio edges, pool approaches, and views from the kitchen, living room, and primary entertaining areas. These viewpoints reveal where visibility is needed and where a fixture could create glare.
  2. Map the routes and focal points. Mark circulation paths first, including transitions between the house, patio, pool, outdoor kitchen, and lawn. Then identify features that deserve emphasis, such as a specimen tree, retaining wall, water feature, or architectural planting. Selective lighting creates a clearer composition than treating every plant and surface equally.
  3. Choose the lighting effect before choosing fixture locations. Decide whether each area needs soft path illumination, a concealed downlight, an uplight for bark and branching, a wall wash, or a controlled accent. The effect should match the feature and the viewing angle. Shielded fixtures can keep the source out of sight, while adjustable fixtures allow the design to respond as planting grows and changes through the seasons.
  4. Coordinate grading, planting, irrigation, masonry, and wiring. Establish wire routes and transformer locations before soil is prepared, plants are installed, or hardscape is set. Keep cables clear of planned footings, drainage paths, irrigation lines, tree root zones, and pool construction. Gappsi’s landscape work includes Long Island landscape design, grading, planting, irrigation, and 3D planning. Its masonry team can coordinate patios, walkways, pool decks, and retaining walls through the masonry design and construction process.
  5. Review the design from real use points. Before final installation, test the proposed scenes from the front door, path, patio seating, pool approach, and nearby rooms. Check whether steps are legible, tree light reaches the intended branches, and reflective pool surfaces or pale masonry send light toward eye level. Adjust aiming, shielding, spacing, and intensity instead of simply adding more fixtures.
  6. Plan for maintenance and future growth. Record fixture locations, wire routes, controls, and planting assumptions so the system can be serviced without disturbing the landscape. Schedule checks after major pruning, planting changes, or masonry work. A design that anticipates mature trees, seasonal plant density, and future outdoor use will remain easier to refine over time. Gappsi serves homeowners across Nassau and Suffolk Counties with integrated design, construction, material supply, and maintenance services.

Contact Gappsi through our contact page

Frequently Asked Questions

What is the rule of thumb for outdoor lighting?

Use light for a clear purpose, then place and aim each fixture so it supports navigation, a task, or a focal point without creating glare. The U.S. Department of Energy recommends considering both the intended use and the effect on surrounding areas. While DarkSky guidance supports shielding and careful aiming to keep light where it is needed. Learn more about responsible outdoor lighting.

What are common outdoor lighting mistakes?

Common problems include lighting every plant equally, pointing fixtures toward windows, exposing the light source, and overlooking how mature plants will change the composition. Too much light can flatten the yard and increase glare. Selective highlighting, concealed fixtures, and adjustable placement usually create a more dimensional result.

What are the best landscape lighting ideas for a front yard?

Begin with the approach to the front door, then layer path lighting with a restrained accent on a tree, masonry detail, or planting bed. Alternate path fixtures rather than creating a rigid runway, and use lower-output light near the entry if nearby windows or reflective surfaces could cause discomfort. The final layout should follow the home’s sightlines and existing hardscape.

Are low-voltage systems suitable for residential landscape lighting?

Yes. Low-voltage kits operate at 12 volts, and a transformer converts household current to that lower system voltage. The right layout still depends on wire length, fixture load, connections, and local conditions. So a professional should plan circuits rather than treating a kit as a complete design. Review the cited low-voltage system guidance.

Ready to Plan Landscape Lighting Ideas for Your Long Island Home?

A site-specific conversation can help you balance pathways, planting, walls, patios, pools, and entertaining areas while accounting for sightlines and existing landscape features. Share how you use your outdoor spaces, and Gappsi can help shape a lighting direction that fits the property. Contact Gappsi through our contact page

Share this page:
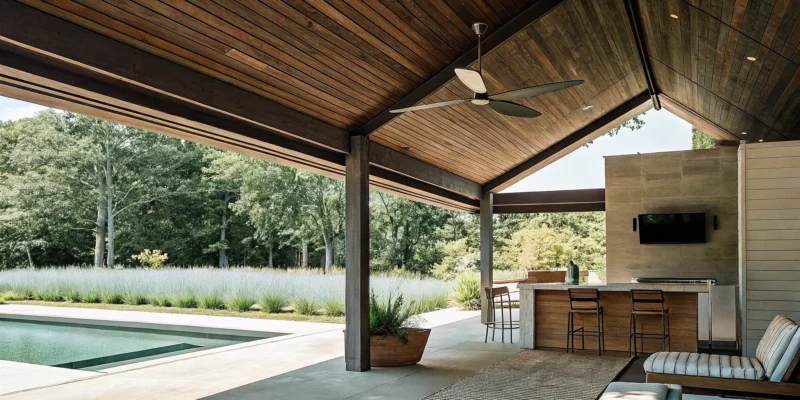
Modern custom pavilion on Long Island with an outdoor kitchen and poolside lounge area.

Custom Pavilion Long Island: Design & Cost Guide

A pavilion is a blank canvas for your outdoor living dreams. It serves as a functional extension of your home that you can tailor to your exact needs and style. You can design it as an elegant outdoor dining room, a comfortable living area with couches and a coffee table, or a fully equipped outdoor kitchen complete with a grill and bar. The structure provides a distinct feel of luxury and defines a specific zone in your backyard. This versatility allows you to create a multi-purpose hub for everything from poolside lounging and family game nights to quiet relaxation with a book. When designing a custom pavilion Long Island homeowners have endless options to create a truly personalized space.

Key Takeaways

  • Extend Your Living Space Outdoors: A custom pavilion adds a functional, weather-protected room to your backyard, increasing your home’s usability and overall property value.
  • Choose Materials and Features for Your Lifestyle: Select materials like wood, vinyl, or aluminum based on your style and maintenance preferences. You can also add custom features like an outdoor kitchen or fireplace to create a space that is uniquely yours.
  • Hire a Professional for a Seamless Process: Working with an experienced Long Island builder is essential. They will help you with the design, select climate-appropriate materials, and handle the entire permit process for a stress-free project.

Why Add a Custom Pavilion to Your Long Island Home?

A custom pavilion is more than just a roof in your backyard; it’s a statement piece that transforms your outdoor area into a true extension of your home. Think of it as creating a dedicated outdoor room, a space that invites you to step outside and live more of your life in the fresh air. For Long Island homeowners, a pavilion offers a perfect blend of elegance and practicality, giving you a sheltered spot to relax, entertain, and make memories. It provides a sense of permanence and luxury that a simple patio umbrella or retractable awning just can’t match.

Whether you envision a cozy nook for quiet mornings, a grand space for hosting family gatherings, or a shaded retreat by the pool, a pavilion provides the structure to make it happen. It’s an investment that pays off in daily enjoyment and long-term value. By adding a permanent, covered space, you can use your outdoor kitchen, patio, and fire pit more often, regardless of the weather. Let’s look at the key reasons why a custom pavilion or pergola is a fantastic addition to any Long Island property.

Enjoy Your Backyard All Year

One of the biggest benefits of a pavilion is its ability to make your backyard usable in almost any weather. The Long Island climate gives us beautiful seasons, but it also brings intense summer sun, unexpected rain showers, and chilly evenings. A pavilion’s solid roof provides reliable protection from the elements, so you don’t have to cancel your barbecue or run inside when a cloud rolls in. It creates a comfortable, shaded oasis on hot days and a dry haven during summer storms. This means you can confidently plan outdoor events and get far more use out of your patio, pool deck, and outdoor furniture throughout the year.

Increase Your Property Value

Adding a high-quality, permanent structure to your property is a smart financial move. A beautifully designed pavilion is a major selling point that can significantly increase your home’s market value. Potential buyers see it as added functional living space, an attractive feature that sets your home apart. Unlike temporary gazebos or awnings, a custom-built pavilion is an integral part of your landscape and a true home improvement. It’s an investment in your lifestyle that also provides a tangible return, making it a valuable addition for both your enjoyment now and for your home’s future resale potential.

Create a Versatile Outdoor Space

A pavilion is a blank canvas for your outdoor living dreams. It serves as a functional extension of your home that you can tailor to your exact needs and style. You can design it as an elegant outdoor dining room, a comfortable living area with couches and a coffee table, or a fully equipped outdoor kitchen complete with a grill and bar. The structure provides a distinct feel of luxury and defines a specific zone in your backyard. This versatility allows you to create a multi-purpose hub for everything from poolside lounging and family game nights to quiet relaxation with a book.

What Are the Best Materials for a Long Island Pavilion?

Choosing the right material for your pavilion is one of the most important decisions you’ll make. This choice affects not just the look of your outdoor space but also its durability and the amount of maintenance it will need down the road. On Long Island, we get a little bit of every season, from sunny, humid summers to snowy winters. Your pavilion needs to be built from materials that can handle it all. At Gappsi, we work with a wide range of high-quality materials, so you can find the perfect match for your home’s style and your family’s lifestyle.

Wood Pavilions

There’s something timeless and inviting about a classic wood pavilion. Materials like cedar and pine bring a natural warmth and rustic charm to any backyard, creating a cozy shelter from the sun and rain. A wooden structure can feel like a true extension of the natural landscape. To keep it looking its best, wood does require some upkeep, like periodic staining or sealing to protect it from moisture and UV rays. For many homeowners, this maintenance is a small price to pay for the authentic beauty and character that only real wood can provide.

Vinyl Pavilions

If you love the classic look of a pavilion but prefer a low-maintenance lifestyle, vinyl is an excellent choice. Vinyl pavilions offer the traditional style of wood without the need for regular staining or painting. This durable material stands up beautifully to the elements, resisting moisture, rot, and pests. A simple cleaning with soap and water is usually all it takes to keep a vinyl pavilion looking fresh and new. Gappsi often builds these structures with sturdy masonry columns for a mixed-material design that is both elegant and incredibly strong.

Aluminum and Composite Options

For a more modern and sleek design, aluminum and composite materials are fantastic options. Aluminum is lightweight yet very strong, and it won’t rust, making it perfect for creating clean, contemporary structures with minimal fuss. Composite materials give you the look of wood but with superior durability and weather resistance. We can use these materials to create stunning pavilions and pergolas, including custom louvered roofs that you can adjust to let in just the right amount of sun. These modern materials open up a world of design possibilities for a truly custom outdoor living space.

Choosing Materials for the Long Island Climate

Living on Long Island means your pavilion needs to be tough. The salty air, summer humidity, and winter snow demand materials that are built to last. This is where working with an experienced local builder makes all the difference. We understand which materials perform best here. For example, we select pressure-treated woods and apply the right finishes, or we recommend vinyl and aluminum for their resilience. Proper material selection and construction techniques are key to a long-lasting structure. We also offer restoration and sealing services to protect your investment for years to come.

Pavilion Design Styles and Custom Features

A pavilion is so much more than just a roof in your backyard. It’s a chance to create a true extension of your home, tailored exactly to your style and how you want to live outdoors. The beauty of a custom build is that you get to make all the decisions, from the overall architectural style to the small details that make the space uniquely yours. Whether you envision a rustic retreat for quiet afternoons or a modern entertainment hub for hosting friends and family, the design possibilities are endless. Let’s explore some of the most popular styles and features to get you inspired.

Traditional and Rustic Styles

If you love a timeless, classic look, a traditional or rustic pavilion is a perfect choice. These designs often feature natural materials, with wood being the star of the show. Think warm cedar or rich pine, crafted with details like exposed beams, decorative posts, and classic rooflines. A traditional pavilion feels established and elegant, providing a sense of luxury and permanent shelter. It can serve as the crown jewel of your garden, creating a cozy and inviting atmosphere that complements historic or classic Long Island homes beautifully. This style is all about creating a space that feels both grand and deeply comfortable.

Modern and Contemporary Styles

For those who prefer clean lines and a minimalist aesthetic, modern and contemporary designs offer a sleek and sophisticated alternative. These pavilions often use materials like aluminum, vinyl, or composite, sometimes combined with wood for a touch of warmth. The focus is on simple forms, neutral color palettes, and an uncluttered feel. You can tailor a modern design to perfectly match your home’s architecture, creating a seamless transition from indoors to out. Features like integrated lighting and unobtrusive structural elements help maintain a polished look. A contemporary pavilion makes a bold statement while providing functional, stylish shade and shelter.

Open-Air vs. Enclosed Designs

One of the first decisions you’ll make is whether you want a completely open-air structure or something more enclosed. An open-air pavilion provides fantastic protection from the sun and rain while still letting you enjoy the breeze and a connection to your yard. For more protection, you might consider a partially or fully enclosed design. Adding screens can keep insects out, while installing windows and doors can create a true three-season or even four-season room. This gives you a protected space to enjoy your backyard, offering a snow-free spot in the winter and a bug-free retreat in the summer.

Integrating with Your Landscape and Pool

A well-designed pavilion doesn’t just sit in your yard; it becomes part of it. We can help you select a design and location that seamlessly complements your home’s architecture and existing landscape. Placing a pavilion next to your swimming pool creates a luxurious, resort-like cabana for lounging and entertaining. It can also act as a central hub, connecting your patio, garden, and other outdoor features into one cohesive living area. The goal is to make the pavilion look like it was always meant to be there, enhancing the flow and usability of your entire property.

Outdoor Kitchens and Grills

One of the most popular features for a custom pavilion is an outdoor kitchen. This is where Gappsi truly excels. We can integrate a fully custom outdoor cooking island into your pavilion, complete with a built-in grill, refrigerator, sink, and plenty of counter space. This transforms your pavilion from a simple seating area into a complete outdoor dining and entertainment destination. Imagine hosting summer barbecues where you can cook and socialize with guests without ever leaving the party. It’s a functional upgrade that adds incredible value and enjoyment to your backyard.

Lighting, Power, and Sound

To make your pavilion truly functional day and night, you’ll want to include electrical features. Gappsi coordinates the complete electrical rough-in for you. This includes installing ceiling fans for a comfortable breeze on hot days and adding custom outdoor lighting to create the perfect ambiance in the evening. We can also wire your pavilion for power outlets, so you can charge devices or plug in appliances. For entertainment, integrating an outdoor audio system allows you to enjoy your favorite music while you relax or host gatherings, turning your pavilion into the ultimate outdoor living room.

Fireplaces and Heaters

Why limit your pavilion use to warm weather? Adding a fireplace or built-in heaters can turn your outdoor structure into a cozy, year-round retreat. An outdoor fireplace creates a stunning focal point and a natural gathering spot for friends and family on cool Long Island evenings. It provides warmth, light, and an unbeatable atmosphere. For more widespread heat, overhead infrared heaters can be installed discreetly in the ceiling. These features extend the usability of your investment, allowing you to enjoy your backyard sanctuary through the spring, fall, and even on mild winter days.

Ceiling Fans, Flooring, and Pavers

The finishing touches are what tie your pavilion design together. A ceiling fan is a must-have for comfort during humid Long Island summers, providing a gentle breeze that keeps the space cool and discourages insects. For the floor, you can define the space and add a touch of elegance with high-quality pavers. Gappsi offers a wide selection of beautiful and durable porcelain and natural stone pavers that create a polished, permanent floor for your pavilion. These details complete the look, making your pavilion feel like a true outdoor room.

How Much Does a Custom Pavilion Cost in Long Island?

Figuring out the budget for a custom pavilion is one of the first steps in the planning process. Since every project is unique, there isn’t a single price tag. The final cost depends entirely on your vision, from the structure’s size and the materials you choose to the special features you add to make it your own. Think of it as an investment in your home and lifestyle, one that you can tailor to fit your specific needs and budget.

A simple, open-air pavilion will naturally have a different price point than an elaborate structure with a full outdoor kitchen and stone fireplace. The best way to get an accurate picture of the cost is to understand the key factors that influence the final price. Breaking down the expenses into categories like size, materials, custom features, and permits can help you prioritize what matters most to you and create a realistic budget for your dream outdoor living space. We’ll walk through each of these components so you can feel confident in your decisions.

How Size and Complexity Impact Cost

The most straightforward factors affecting your pavilion’s cost are its size and design complexity. A larger pavilion requires more materials and labor, which directly increases the price. For example, a 12×12 foot structure will be significantly less expensive than a 20×30 foot one designed to cover an entire patio and dining area. It’s helpful to think about how you plan to use the space. Will it be an intimate seating area or a large spot for entertaining?

Beyond the footprint, the complexity of the design plays a huge role. A standard rectangular pavilion with a simple hip roof is a classic and cost-effective choice. If you prefer a more intricate design, like a hexagonal shape, a multi-level roof, or custom architectural details that match your home, the cost will go up to account for the specialized craftsmanship and additional materials. Our team helps you find the right balance between your vision and your budget, ensuring the final pavilion design feels like a natural extension of your home.

Material and Structural Choices

Your choice of materials is another major driver of the total cost. Each option offers a different look, level of durability, and maintenance requirement. Gappsi builds beautiful pavilions and pergolas using a variety of high-quality materials to suit your style and preferences. Wood, such as pressure-treated pine or cedar, offers a classic, rustic appeal, with cedar being the more premium option.

For a low-maintenance alternative, vinyl and composite materials are excellent choices. They resist weathering and don’t require staining or sealing, which can save you time and money in the long run. For a modern or exceptionally durable structure, aluminum is a sleek option, while incorporating masonry columns made of stone or brick can create a powerful, elegant statement. We can guide you through the pros and cons of each material, helping you select the best fit for Long Island’s climate and your aesthetic goals.

The Price of Custom Features and Upgrades

This is where you can truly personalize your pavilion and transform it into a complete outdoor oasis. Custom features are what make the space uniquely yours, but they also add to the overall project cost. One of the most popular upgrades is a built-in outdoor kitchen. Gappsi specializes in creating stunning and functional cooking areas, complete with grills, sinks, refrigerators, and beautiful countertops finished in granite or natural stone.

Other common additions include stone fireplaces or fire pits for warmth and ambiance on cool evenings. You can also integrate electrical wiring for custom lighting, ceiling fans, and outlets for charging devices or plugging in speakers. Adding these utilities requires extra planning and labor but makes the space far more versatile. From flooring choices like elegant porcelain pavers to integrated sound systems, each upgrade contributes to the final cost, so it’s important to prioritize the features that will bring you the most enjoyment.

Permit and Approval Fees

An often-overlooked part of the budget is the cost of permits. In most Long Island towns and villages, a permit is required to build a permanent structure like a pavilion. These fees vary depending on your specific municipality and the scope of your project. While it might seem like a hassle, the permitting process ensures your new pavilion is built to code and is safe for you and your family to enjoy for years to come.

Navigating the permit process can be confusing, which is why working with an experienced local builder is so valuable. At Gappsi, we handle the entire process for you, from submitting the plans to scheduling inspections. We understand the specific requirements of different Long Island municipalities, which helps prevent delays and ensures your project moves forward smoothly. Factoring permit fees into your initial budget will help you avoid any surprises down the road.

What Is the Design and Build Process?

Bringing a custom pavilion to life is an exciting project, and understanding the process can make it feel much more manageable. A well-planned approach ensures your project moves smoothly from a simple idea to a beautiful, finished structure in your backyard. Working with an experienced design and build team means you have a partner to guide you through every step, from the first sketch to the final construction. This structured process helps keep your project on schedule and within budget, making sure the final result is exactly what you envisioned. The journey typically unfolds in four key phases: an initial consultation to discuss your vision, a custom design phase to bring it to life on paper, a permitting stage to handle all the local paperwork, and finally, the construction itself. Each step builds on the last, creating a seamless flow from concept to completion. Having a single team manage both the design and the build eliminates confusion and ensures everyone is working toward the same goal: creating your perfect outdoor oasis.

Initial Consultation and Site Assessment

Everything starts with a conversation. The first step is an on-site consultation where a design expert visits your home to see the space and understand your goals. This is your opportunity to share your vision, whether it’s creating a cozy spot for family dinners or an elegant space for entertaining. We’ll discuss how you plan to use the pavilion, your style preferences, and your budget. A thorough site assessment helps us understand your property’s layout, sun exposure, and any unique features we can incorporate into the design. This collaborative meeting lays the groundwork for a pavilion that truly complements your home and lifestyle.

Custom Design and Material Selection

This is where your vision starts to take shape. Using the ideas from our initial consultation, our team will create a custom design for your pavilion. You’ll get to see drawings or 3D renderings that help you visualize the final structure in your backyard. During this phase, you’ll make key decisions about materials, from classic wood to low-maintenance vinyl or modern aluminum. You can also personalize the design by selecting the size, shape, and custom features. Gappsi offers a wide range of pavilions and pergolas to inspire your project, with options for built-in lighting, ceiling fans, and even outdoor kitchens.

Securing Permits and Zoning Approval

Navigating local regulations can be one of the most confusing parts of any home improvement project, but a professional builder will handle it for you. Most municipalities on Long Island require a permit to build a permanent structure like a pavilion. Our team takes care of this entire process, from preparing the necessary architectural plans to submitting the application to your local town or village. We make sure your pavilion design complies with all zoning laws and building codes, so you don’t have to worry about the paperwork. This step is crucial for ensuring your project is built safely and legally.

The Construction Timeline and What to Expect

Once the design is finalized and permits are approved, construction can begin. Your project manager will provide a clear timeline so you know what to expect every step of the way. The process starts with preparing the site and building a solid foundation, often using high-quality masonry work for durability. From there, our craftsmen will construct the pavilion’s frame and roof. We also coordinate all the finishing touches, including the installation of electrical wiring for lighting, fans, and audio systems. Before you know it, your new custom pavilion will be ready for you to furnish, decorate, and enjoy.

How to Choose the Right Pavilion Builder in Long Island

Choosing a builder for your custom pavilion is one of the most important decisions you’ll make. This is your partner in turning a vision into a beautiful, functional structure, so you want to find a team you can trust. The right builder not only delivers high-quality craftsmanship but also makes the entire process feel seamless and exciting. A great contractor will listen to your ideas, offer expert guidance, and handle the complexities of the build, from initial design to the final touches. They should be a resource, an expert, and a reliable project manager all in one, making sure your project stays on schedule and within budget.

Your goal is to find a company with a proven track record of building stunning and durable outdoor structures right here on Long Island. Look for a team that combines creative design with technical skill, ensuring your new pavilion is not only beautiful but also built to last. This means checking their portfolio, reading reviews from other Long Island homeowners, and making sure their communication style works for you. Taking the time to vet your options will pay off in the long run, giving you peace of mind and a backyard retreat you’ll love for years to come. The following tips will help you identify a builder who can bring your dream pavilion to life.

Key Questions to Ask Before Hiring

Before you commit, it’s wise to have a few key questions ready for any potential builder. Start with their experience building custom features. If you’re dreaming of a pavilion with a full outdoor kitchen or a cozy fireplace, ask them directly if they have experience with these integrations. You should also inquire about the permit process. Most towns on Long Island require a permit for a new pavilion, so ask how they handle this. A seasoned builder will be familiar with local municipal codes and can manage the entire application process for you, which is a huge weight off your shoulders.

What to Look for in a Builder

When evaluating builders, look for a team that offers a wide range of material options. A versatile builder can work with wood, vinyl, composite, and aluminum, allowing you to choose the perfect material for your home’s aesthetic and your desired level of maintenance. Ask to see a portfolio of their completed projects. This will give you a clear idea of their design style and the quality of their work. The right builder will have a strong design sense and can help you create a structure that seamlessly complements your home and landscape, making it feel like a natural extension of your living space.

Why Local Long Island Experience Matters

Hiring a builder with deep roots in Long Island offers significant advantages. A local expert understands how to design structures that can withstand our specific climate, from salty sea air to heavy snow. They have established relationships with local suppliers and are experts in the unique zoning laws and building codes of towns across Nassau and Suffolk counties. This local knowledge helps prevent delays and ensures your project runs smoothly. A Long Island-based company also understands the local lifestyle, designing functional outdoor spaces meant for relaxing, entertaining, and making memories with family and friends right in your own backyard.

Build Your Custom Pavilion with Gappsi

When you’re ready to create the perfect outdoor living area, Gappsi is the premier choice for custom pavilions on Long Island. The company specializes in designing and building structures perfectly tailored to your home’s style and your family’s needs. Gappsi designs and constructs beautiful pavilions, pergolas, and gazebos, offering wholesale prices without compromising on quality. They can create any outdoor covering you envision, including modern aluminum louvered pergolas customized to your exact size and specifications.

Gappsi works with a wide range of materials, including classic wood, low-maintenance composite, sleek aluminum, and sturdy masonry columns. This variety ensures your new pavilion not only complements your home but also fits your lifestyle. Gappsi also excels at integrating functional elements like custom outdoor kitchens. Imagine a cooking island finished with stunning natural stone veneer or elegant granite countertops, turning your pavilion into the ultimate entertainment hub. The team handles all the details, coordinating electrical work for ceiling fans, lighting, and audio systems to create the perfect atmosphere. Building a pavilion often requires a permit, and Gappsi is experienced with local Long Island regulations, helping you through the process for a smooth and successful project.

Related Articles

Frequently Asked Questions

What’s the difference between a pavilion and a pergola? The main difference is the roof. A pavilion has a solid, continuous roof that offers full protection from rain and direct sun, creating a true outdoor room. A pergola has a slatted or latticed roof structure, which provides partial shade and a more open, airy feel. We can help you decide which style better suits your goals for your backyard, whether you need complete shelter or just a bit of filtered sunlight.

How long does it take to build a custom pavilion? The total timeline depends on a few factors, including the complexity of your design, the materials you choose, and how long it takes to secure permits from your local town. Once the design is finalized and permits are approved, the actual on-site construction typically takes a few weeks. We manage the entire schedule and will give you a clear timeline from the very beginning so you always know what’s happening.

Can I really use my pavilion during the colder months? Absolutely. We can design your pavilion specifically for year-round enjoyment. By integrating features like a custom stone fireplace or discreet overhead heaters, your pavilion can become a warm and cozy retreat on cool fall evenings and even on mild winter days. This allows you to get so much more use out of your investment beyond just the summer season.

How much maintenance should I expect with a new pavilion? The level of maintenance depends entirely on the materials you select. A classic wood pavilion will need some upkeep, like periodic staining or sealing, to keep it protected from the Long Island weather. However, if you prefer a solution with less work, materials like vinyl, aluminum, and composite are fantastic choices. They are incredibly durable and typically only require a simple cleaning to stay looking new.

Do I need to hire separate contractors for electrical work or the flooring? No, you won’t have to. As a comprehensive design and build company, we manage every part of your project from start to finish. This includes coordinating licensed electricians for lighting, ceiling fans, and outlets, as well as installing beautiful paver or natural stone flooring. Our goal is to provide a seamless, stress-free experience by handling all the details for you.

Share this page:
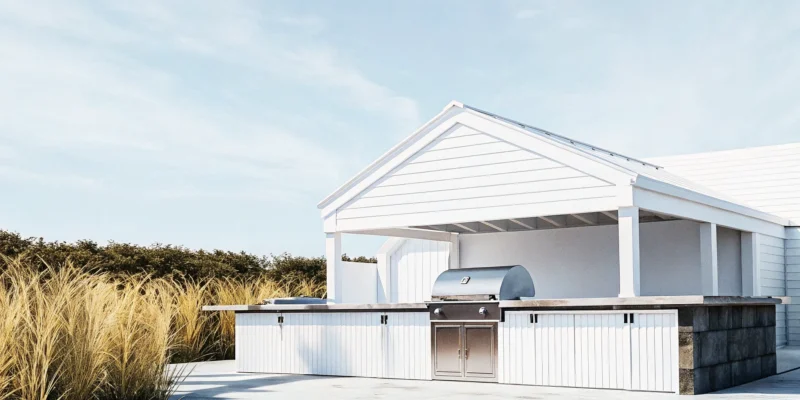
A modern outdoor kitchen pavilion on Long Island with a built-in stainless steel grill.

The Ultimate Outdoor Kitchen Pavilion Long Island Guide

Think about your last backyard barbecue. You probably spent a lot of time running between the grill outside and the kitchen inside, trying to keep food warm and guests happy. An outdoor kitchen pavilion solves this problem by bringing everything you need into one cohesive, beautiful space. It provides shelter from the sun and rain, a dedicated area for cooking and prep, and a comfortable spot for everyone to gather. This isn’t just about convenience; it’s about creating a seamless outdoor living experience. Let’s explore the features and design ideas that make an outdoor kitchen pavilion on Long Island the ultimate upgrade for your home.

Key Takeaways

  • Invest in Your Lifestyle and Home Value: An outdoor kitchen pavilion does more than just look good; it extends your outdoor season for year-round enjoyment and adds significant, sought-after value to your property.
  • Plan for Function and Durability: Create a space that lasts by carefully choosing a layout that fits your needs, selecting weather-resistant materials for the Long Island climate, and planning for utilities like lighting and heating from the start.
  • Budget Smartly and Maintain Simply: Understand that costs depend on size, materials, and appliances, and remember to account for site prep and permits. Investing in quality construction upfront makes seasonal maintenance easier and protects your pavilion for years.

Is an Outdoor Kitchen Pavilion a Worthwhile Investment?

Adding an outdoor kitchen pavilion is a big decision, and it’s natural to wonder if it’s the right move for your home. Beyond the initial cost, it’s an investment in your lifestyle, your property’s value, and the way you enjoy your home. A well-designed pavilion isn’t just an add-on; it transforms your backyard into a functional and beautiful extension of your living space. It creates a central point for gathering, cooking, and relaxing, making every day feel a little more like a vacation. Let’s look at the key reasons why a pavilion is one of the most rewarding home improvements you can make.

Extend Your Outdoor Living Season

One of the biggest benefits of a pavilion is its ability to make your backyard usable for more than just a few months a year. Unlike a simple patio umbrella, a pavilion is a permanent structure with a solid roof designed to handle Long Island’s unpredictable weather. It provides reliable shade from the summer sun and shelter from rain, allowing you to keep your plans without worrying about the forecast. With a sturdy, engineered structure, you can comfortably host a barbecue on a drizzly spring day or enjoy a quiet morning coffee outdoors in the fall. This makes your outdoor kitchen a true year-round asset, not just a seasonal novelty.

Increase Your Home’s Value and Curb Appeal

An outdoor kitchen is one of the most impactful upgrades you can make to a Long Island home, and adding a pavilion takes it to the next level. This feature is highly sought after by homebuyers, who see it as a premium addition that offers a sophisticated lifestyle. A beautifully constructed pavilion significantly enhances your home’s curb appeal and can provide a strong return on investment. When you invest in home remodeling, you want projects that add both personal enjoyment and long-term financial value. An outdoor kitchen pavilion checks both boxes, making your property stand out in the market while giving you a stunning space to enjoy for years.

Create the Ultimate Entertainment Space

A pavilion turns your outdoor kitchen into the social hub of your home. The best designs are integrated into the overall landscape, creating a seamless flow from your house to your yard. You can design your pavilion to include distinct zones for different activities, like a cooking area with a grill and pizza oven, a bar with casual seating, and a separate lounge or dining space. This thoughtful layout makes it the perfect spot for hosting everything from intimate family dinners to large gatherings with friends. With the right pavilions and pergolas, your backyard becomes the go-to destination for making memories.

What Are the Must-Have Features for a Pavilion?

Once you decide to build an outdoor kitchen pavilion, the fun part begins: choosing the features that will make it your family’s favorite spot. A truly great pavilion is more than just a structure; it’s a seamless blend of durability, function, and comfort. Thinking through these key elements from the start ensures your new space will meet your needs for years to come. From the materials that will stand up to Long Island weather to the appliances that will make you feel like a professional chef, every choice helps create your perfect outdoor retreat.

Choose Durable Materials for Long Island’s Climate

Living on Long Island means dealing with a unique climate, from humid, salty summer air to cold, snowy winters. The materials you choose for your pavilion need to be tough enough to handle it all without warping, rotting, or corroding. That’s why we often recommend materials like stainless steel for appliances and fixtures, along with beautiful and resilient porcelain and natural stone for countertops and flooring. These options not only look stunning but also provide the long-lasting durability you need, ensuring your investment remains beautiful and functional season after season.

Select Your Appliances, Countertops, and Storage

Your outdoor kitchen can be just as capable as your indoor one. Think beyond a simple grill and consider what would make your outdoor cooking experience truly special. Many modern designs include built-in refrigerators for cold drinks, pizza ovens for fun family nights, and even sinks for easy cleanup. When you build a custom pavilion, you can integrate high-end appliances and create plenty of counter space for food prep and serving. Don’t forget to include smart storage solutions, like cabinets and drawers, to keep your cooking tools organized and protected from the elements.

Plan for Lighting, Heating, and Utilities

To get the most out of your pavilion, you’ll want to use it in the evening and during cooler weather. Thoughtful lighting, like built-in LEDs or elegant string lights, creates a warm and inviting atmosphere for nighttime gatherings. For chilly nights, you can incorporate overhead heaters or a nearby fire pit to keep everyone comfortable. It’s also critical to plan for utilities early in the design process. Running gas, water, and electrical lines requires careful coordination, which is why our home remodeling expertise is so valuable. Proper planning ensures everything is conveniently and safely installed.

How Can You Customize Your Outdoor Kitchen Pavilion?

Creating a pavilion that feels like a true extension of your home is all about personalization. This is your chance to design a space that perfectly fits your lifestyle, whether you envision quiet family dinners or lively backyard parties. From the foundational structure to the finishing touches, every choice you make contributes to the final look and feel. Customization ensures your new outdoor kitchen pavilion is not just beautiful but also incredibly functional for your specific needs. Let’s walk through the key areas where you can put your personal stamp on the design.

Define Your Pavilion’s Layout, Size, and Roof Style

First, think about how you’ll use the space. The layout and size of your pavilion should be directly influenced by its purpose. A larger footprint can accommodate distinct zones for cooking, dining, and lounging, while a more compact design might focus on an efficient kitchen and seating area. The right roof design is also critical for year-round comfort. On Long Island, where we get our fair share of snow and need plenty of summer shade, styles like gable or hip roofs are excellent choices. These designs effectively manage snowfall and provide ample coverage, making your outdoor pavilion a comfortable retreat in any season.

Explore Materials Like Wood, Vinyl, and Stone

When you’re selecting materials for your pavilion, durability is a top priority. Long Island’s coastal air and winter weather demand materials that can stand up to the elements without warping, rotting, or corroding. Wood offers a timeless, rustic appeal, while modern vinyl provides a low-maintenance alternative that holds up well over time. For a truly luxurious and enduring structure, incorporating natural stone or porcelain adds unmatched elegance and strength. Combining materials, such as stone bases for wooden posts, can create a beautiful look while also protecting the structure from ground moisture and wear.

Find a Design Style That Complements Your Home

Your pavilion shouldn’t look like it was dropped into your backyard from somewhere else. The best designs feel like a natural extension of your house. Take cues from your home’s existing architecture, materials, and color scheme. For instance, matching the pavilion’s roof style and shingles to your house creates a seamless and intentional connection. Our approach to home remodeling and design is rooted in this same principle of cohesion. By echoing the lines, textures, and overall character of your home, your new pavilion will enhance your property’s aesthetic and feel like it was always meant to be there.

Consider Add-Ons to Enhance Functionality

This is where you can really tailor the space to your lifestyle. Think beyond just a grill and a counter. A full outdoor kitchen can include a sink, refrigerator, pizza oven, and plenty of storage. Built-in seating is a great space-saver, while a fireplace or fire pit adds warmth and a cozy focal point for cooler evenings. Don’t forget practical elements like lighting, ceiling fans, and electrical outlets for music or a TV. You can even integrate custom fencing or netting to create a bug-free zone, ensuring you can enjoy your outdoor oasis in complete comfort.

How Much Does an Outdoor Kitchen Pavilion Cost on Long Island?

Figuring out the budget for your dream outdoor kitchen pavilion is one of the most important steps in the planning process. The total cost can vary quite a bit, because every project is unique. The final price tag depends on the size of your pavilion, the materials you choose, the appliances you install, and the complexity of the build.

Think of it less as a single purchase and more as a custom project tailored to your home and lifestyle. To give you a clear picture of what to expect, let’s break down the key elements that will shape your budget. By understanding these factors, you can plan effectively and make informed decisions that align with your vision and financial goals.

Understand the Factors That Influence Price

The price of an outdoor kitchen pavilion is a sum of its parts, and some parts have a bigger impact on the budget than others. The most significant factors are size, materials, and appliances. A larger pavilion that can accommodate more guests will naturally cost more than a smaller, more intimate structure. The materials you select for the pavilion frame, roofing, and kitchen finishes also play a huge role. For example, custom masonry work and high-end natural stone countertops will be more of an investment than simpler options.

Beyond the structure itself, the appliances you choose are a major cost driver. A basic grill and sink setup will be more budget-friendly than a full suite with a pizza oven, refrigerator, and warming drawers. Finally, consider the logistics. Depending on how far the outdoor kitchen is from your house, running electrical and gas service to it could increase costs.

Plan Ahead for Potential Hidden Costs

Planning an outdoor kitchen involves more than choosing a grill. To create a realistic budget, you need to account for costs that might not be obvious at first glance. Site preparation is a big one. Your yard may need to be graded, or you might need a new patio or foundation poured before construction can even begin. These foundational steps are critical for a lasting structure but are often overlooked in initial estimates.

Another consideration is permits. Most municipalities on Long Island require building permits for new structures, which come with their own fees and processes. You also need to think about the cost of running utility lines for water, gas, and electricity. This can involve trenching and professional installation, adding to the overall project expense. Finally, remember to budget for finishing touches like landscaping to seamlessly blend your new pavilion into your existing yard.

How to Budget for a Long-Term Investment

While the initial cost is a key consideration, it’s helpful to view your project as a long-term investment. An outdoor kitchen is one of the most impactful upgrades you can make to a Long Island home. It not only adds significant resale value but also transforms how you experience your property. A pavilion is the single addition that extends the return on everything else already built into your yard, from the pool to the patio.

When you budget, think about the value it brings to your daily life. A beautiful and functional outdoor kitchen pavilion becomes the heart of your home for months out of the year, creating a perfect setting for family dinners and entertaining friends. By investing in quality materials and a thoughtful design, you are creating a space that will deliver enjoyment and value for many years to come.

How to Keep Your Outdoor Kitchen Pavilion in Great Condition

Your outdoor kitchen pavilion is the heart of your backyard, a place for making memories and enjoying beautiful Long Island weather. To keep it looking and functioning its best for years to come, a little regular maintenance goes a long way. Think of it not as a chore, but as a way to protect your investment and ensure your space is always ready for an impromptu family barbecue or a quiet evening outdoors. Sticking to a simple routine will prevent small issues from becoming big problems, saving you time and money down the road.

Your Guide to Seasonal Maintenance and Winterizing

As the seasons change on Long Island, so do your pavilion’s needs. Before winter arrives, it’s essential to prepare your outdoor kitchen for the cold. Start by giving everything a thorough cleaning, especially the grill grates and burners. Shut off the water lines to your sink and ice maker to prevent pipes from freezing and bursting. It’s also a good idea to cover your appliances, countertops, and furniture to protect them from snow and ice. When spring returns, you can reverse the process: uncover everything, reconnect your utilities, and inspect for any wear from the winter months. This seasonal checklist ensures your pavilion is always protected and ready for enjoyment.

Tips for Cleaning Appliances, Surfaces, and Structures

A consistent cleaning schedule is the key to keeping your outdoor kitchen looking brand new. For appliances like grills and pizza ovens, make a habit of wiping down stainless steel exteriors and cleaning cooking surfaces after use. For your pavilion’s structure and surfaces, a gentle wash every few months can remove pollen, dirt, and other buildups. The right cleaning method depends on your materials. For instance, porcelain and natural stone pavers have different needs than a wooden deck. Taking the time to deep clean your cooking appliances and restock drawers with utensils will make your next gathering feel effortless and organized.

Know When to Call a Professional for Repairs

While regular cleaning and minor upkeep are manageable, some issues require an expert touch. If you notice problems like cracks in your stone countertops, loose pavers in your patio, or issues with gas and electrical lines, it’s best to call for help. Structural problems with the pavilion itself, such as significant wood rot or instability, also demand professional attention to ensure safety. Trying to fix these complex issues yourself can often lead to bigger, more expensive problems. A professional can diagnose the root cause and provide a lasting solution, giving you peace of mind. Gappsi’s restoration and sealing services can address wear and tear to keep your patio and stonework in top shape.

Choose the Right Long Island Pavilion Builder

The easiest way to ensure a low-maintenance outdoor kitchen is to build it right from the start. A builder with deep experience constructing pavilions and pergolas on Long Island will understand how to work with our specific climate. They will recommend durable materials that can withstand humid summers, freezing winters, and coastal air without constant upkeep. Investing in quality craftsmanship and weather-resistant materials from the beginning means you’ll spend less time on maintenance and more time enjoying your beautiful outdoor space. Choosing the right partner ensures your pavilion is not only stunning but also built to last for decades.

Related Articles

Frequently Asked Questions

How long does the entire process take, from design to completion? The timeline for building an outdoor kitchen pavilion can vary quite a bit. The design phase, where we map out your vision, can take a few weeks. After that, securing permits and ordering materials adds to the schedule. The construction itself depends on the project’s complexity, but a good builder will give you a clear and realistic timeline from the start so you know exactly what to expect.

What’s the real difference between a pavilion and a pergola? That’s a great question. The main difference is the roof. A pavilion has a solid, continuous roof that provides complete protection from sun and rain, making it a true outdoor room. A pergola has a slatted or open-beam roof structure, which offers partial shade and is often used to support climbing plants. Your choice depends on how much protection from the elements you want for your space.

Can a pavilion be added to my existing patio or pool area? Yes, in many cases, a pavilion can be beautifully integrated with your existing outdoor spaces. The most important step is to have a professional assess your current patio or deck to ensure its foundation is strong enough to support the weight of a new pavilion structure. This ensures the new addition is both safe and built to last.

Do I really need a permit for an outdoor pavilion on Long Island? Generally, yes. Most towns and villages on Long Island require building permits for permanent structures like pavilions. While it might seem like an extra step, the permit process is there to protect you. It ensures your pavilion is built safely and meets all local building codes. A reputable builder will handle the entire permitting process for you.

How do I get started with designing my own pavilion? The best way to start is by thinking about how you want to use the space. Do you envision large parties or quiet family dinners? Look for inspiration online and in magazines to get a feel for the styles you like. Once you have a few ideas, the next step is to talk with a design professional who can help you refine your vision and create a functional plan that fits your home and your lifestyle.

Share this page:
Red brick floor laid in a classic herringbone pattern in a modern home.

Red Brick Herringbone Floor: Pros, Cons & Cost

Some design trends fade as quickly as they appear, but others have a staying power that makes them true classics. The red brick herringbone floor falls firmly into the second category. With its rich, earthy tones and dynamic zig-zag pattern, it brings a sense of movement and history to any room, from a cozy farmhouse kitchen to a chic, industrial-style living area. It’s a choice that feels both grounded and full of character. If you’re considering this beautiful and durable option, you’re in the right place. We’ll cover what defines the pattern, the best materials to use, and how to care for your investment, ensuring it remains a beloved feature in your home for decades.

Key Takeaways

  • It’s a Stylish Choice That Lasts: A red brick herringbone floor provides both timeless character and serious durability. The classic pattern adds warmth and texture, making it a practical and beautiful foundation for busy areas of your home like kitchens and entryways.
  • Professional Installation Is Worth It: The intricate herringbone pattern requires precision to look right, making it a difficult installation. Hiring an experienced masonry professional is the best way to avoid a skewed layout and ensure a flawless, long-lasting result.
  • Sealing Is Key for Easy Maintenance: Because brick is naturally porous, applying a quality sealant is a critical step. This protects your floor from stains and moisture, which simplifies daily cleaning and preserves the brick’s beauty for years.

What Is a Red Brick Herringbone Floor?

A red brick herringbone floor is a classic design choice that brings warmth, texture, and a touch of history into any home. It involves laying rectangular red bricks or brick-like pavers in a distinctive zig-zag pattern. This flooring style has been around for centuries, yet it feels just as fresh and relevant in modern homes as it does in rustic farmhouses. Whether you’re aiming for a cozy kitchen, a durable mudroom, or a statement entryway, this flooring makes a lasting impression.

The beauty of a red brick herringbone floor lies in its ability to be both a neutral backdrop and a standout feature. Its rich, earthy tones complement a wide range of color palettes and design styles, from industrial to traditional. Before you decide if this look is right for your space, let’s explore what defines the pattern, the materials you can use, and where it works best in a home.

Understanding the Herringbone Pattern

The herringbone pattern gets its name from its resemblance to the bone structure of a herring fish. It’s created by arranging rectangular bricks in a staggered, zig-zag layout. Each brick is laid at a 90-degree angle to the one next to it, forming a broken V-shape that repeats across the floor. This arrangement creates a sense of movement and visual interest that can make a room feel more spacious and dynamic.

Don’t confuse it with the chevron pattern, where the ends of the pieces are cut at an angle to meet in a perfect point. The herringbone pattern uses simple rectangular bricks, which gives it a more intricate and textured look. This timeless design requires precision, making expert masonry work essential for a flawless finish that adds character and sophistication to your home.

Real Brick vs. Brick-Look Alternatives

When planning your floor, you have two main material choices: real brick or a brick-look alternative. Real thin brick pavers offer unmatched authenticity. Often made from reclaimed clay, each brick has its own unique character, with subtle variations in color and texture that tell a story. This option provides a genuinely rustic and warm feel underfoot. However, real brick is porous, heavier, and typically requires sealing to protect it from stains and moisture.

For a more practical approach, you can opt for porcelain or natural stone tiles designed to look like brick. These alternatives are incredibly durable, water-resistant, and easier to clean, making them a great choice for busy households. While they may not have the exact texture of real brick, modern manufacturing techniques have made them look remarkably similar. The choice between real brick and a look-alike often comes down to balancing your desire for authenticity with your lifestyle needs.

Best Rooms for a Red Brick Herringbone Floor

The durability and classic style of a red brick herringbone floor make it a versatile choice for many areas of your home. It’s especially popular in high-traffic zones where you need a floor that can handle daily wear and tear. Think of entryways, mudrooms, and hallways, where the pattern can hide dirt while making a great first impression. Kitchens are another perfect spot, as the brick adds a cozy, European-inspired feel that pairs beautifully with both modern and traditional cabinetry.

Beyond floors, you can use the herringbone pattern to create stunning accent walls, fireplace surrounds, or even a backsplash. It’s also an excellent option for laundry rooms, sunrooms, and covered patios. As part of a larger home remodeling project, a brick herringbone floor can connect different spaces and add a cohesive, custom-designed element throughout your property.

Weighing the Pros and Cons of Red Brick Herringbone

A red brick herringbone floor makes a stunning statement, but it’s important to look at the full picture before you commit. Like any design choice, it comes with a unique set of benefits and challenges. Understanding these factors will help you decide if this beautiful, classic flooring is the right fit for your home, your lifestyle, and your budget. Let’s walk through the key pros and cons to consider.

The Pros: Durability, Character, and Timeless Appeal

The biggest draw of a red brick herringbone floor is its undeniable character. It brings a sense of history and warmth into a room that’s hard to replicate. Made from real clay, these bricks have a rustic, authentic look with classic red tones arranged in a dynamic zig-zag pattern. This flooring is also incredibly durable and can handle high-traffic areas with ease, making it a practical choice for entryways, kitchens, and mudrooms.

Best of all, the herringbone pattern is a timeless design element. It turns the simple brick into something more sophisticated, ensuring your floor won’t look dated in a few years. You get the charm of old, reclaimed bricks, which adds a unique story to your home’s design. This classic appeal pairs well with many different styles, from modern farmhouse to industrial chic, making it a versatile foundation for your decor.

The Cons: Weight, Cost, and Installation Challenges

On the other hand, there are a few practical challenges to keep in mind. First, real brick is heavy. Your home’s subfloor must be strong enough to support the additional weight, which might require reinforcement and should always be assessed by a professional. Brick is also a porous material, meaning it can absorb spills and stain if not properly sealed. Without a good sealant, it can also give off a bit of clay dust.

The installation itself is another major consideration. Herringbone is one of the most difficult patterns to lay correctly. It requires precision, careful planning, and a lot of cuts, which makes the installation more labor-intensive and costly than a standard layout. This is not a simple DIY project; you’ll want to rely on an experienced masonry designer to ensure the lines are perfect and the pattern remains consistent across the entire floor.

Brick Herringbone vs. Other Flooring Types

So, how does brick herringbone stack up against other options? Compared to a standard running bond brick pattern, the herringbone layout instantly adds more visual interest. It breaks up the monotony and creates a high-end look using a relatively humble material. It feels more intentional and decorative, turning your floor into a true focal point.

When compared to wood herringbone, brick offers a more rustic and industrial feel. It’s also a more durable option for areas prone to moisture, like a mudroom or covered patio. Of course, you can also find brick-look alternatives made from porcelain or other materials. While these can be easier to clean and install, they don’t offer the same authentic texture and natural color variation as real clay brick. Ultimately, the choice comes down to balancing authentic character with your project’s practical needs, something a home remodeling expert can help you sort out.

What’s the Cost of a Red Brick Herringbone Floor?

Understanding the cost of a red brick herringbone floor involves looking beyond the price tag on the tile. The total investment depends on the materials you choose, the size of your space, and whether you hire a professional or tackle the installation yourself. While it can be more of an upfront investment than some other flooring types, its durability and classic style make it a worthwhile addition that adds lasting value to your home.

Think of the final price in three parts: the cost of the brick itself, the price of additional materials like grout and sealer, and the cost of labor. Each of these elements can vary, but breaking them down will give you a much clearer picture of your total budget. We can help you explore material options and provide a detailed estimate that covers every aspect of the project, ensuring there are no surprises along the way.

Breaking Down the Cost Per Square Foot

When you start shopping for materials, you’ll often see an advertised price of around $9.99 per square foot for popular red brick herringbone mosaics. This is a great starting point for budgeting, but remember that this number typically only covers the cost of the tile itself. The final material cost can change depending on whether you choose genuine thin brick pavers or a porcelain lookalike, with natural materials often costing a bit more.

Exploring different porcelain and natural stone options can help you find the perfect balance between your budget and your design vision. While the per-square-foot price is a key piece of the puzzle, it’s just one part of the overall financial picture.

Factors That Affect the Final Price

Several other factors influence the final cost of your herringbone floor. First, it’s wise to get 10% more tile than you think you need. This extra material provides a buffer for any cuts, mistakes, or accidental breaks that can happen during installation. You’ll also need to budget for supplies like thin-set mortar, grout, and a high-quality sealer to protect the brick from stains and moisture.

The condition of your subfloor matters, too. If it needs leveling or repairs before the tile can be laid, that will add to the project’s cost and timeline. The complexity of a herringbone pattern often requires more skilled labor, which is why working with an experienced masonry designer can ensure the job is done right.

Comparing Professional vs. DIY Costs

Deciding between a DIY installation and hiring a professional is a major cost consideration. Some modern brick mosaics come with a mesh backing that simplifies installation, making a DIY approach more manageable for a handy homeowner. Going the DIY route saves you money on labor, but you’ll still need to account for your time and the cost of renting or buying specialized tools like a wet saw.

Hiring a professional, on the other hand, provides peace of mind. An expert installer can handle any subfloor issues and execute the intricate herringbone pattern flawlessly. While professional labor adds to the upfront cost, it protects your investment by ensuring a beautiful, long-lasting floor. For a project of this scale, professional home remodeling services guarantee a polished result.

How Difficult Is a Red Brick Herringbone Installation?

A red brick herringbone floor is a showstopper, but its beauty comes from a complex installation. Unlike a simple grid, the interlocking zigzag pattern demands precision and patience. Even a small mistake at the start can throw off the entire layout, creating a wavy effect that’s hard to ignore. So, is this a weekend DIY project or a job best left to the pros?

The answer depends on your skill level, your tools, and your tolerance for imperfection. While some find the rustic nature of brick forgiving, others argue that the herringbone pattern itself is one of the most difficult to execute correctly. Before you start pulling up your old floors, it’s important to understand exactly what the process entails. From establishing perfect lines to making countless angled cuts, installing a herringbone floor is a significant undertaking. Let’s look at what makes this installation so challenging and help you decide the best path forward for your home.

A Look at the Installation Process

The herringbone installation process is methodical and requires careful planning from the very first step. It begins with finding the exact center of the room and snapping a chalk line to serve as your guide. From there, you lay out the V-shaped pattern, ensuring each brick is perfectly placed against the next. This isn’t as simple as just laying tiles side by side; there are specific rules to starting this layout to keep the pattern straight.

You’ll need to apply thin-set mortar, place each brick, and use spacers to maintain consistent grout lines. The real challenge comes with the cuts you’ll need to make along the walls, which will all be at an angle. This requires a good quality wet saw and a steady hand. For many homeowners, the complexity and precision involved make hiring an expert in masonry a worthwhile investment.

Why Precision Is Key for the Herringbone Pattern

With a herringbone pattern, precision is everything. Because the bricks interlock at a 45-degree angle, every piece affects the position of the next. If your starting line is even slightly off, or if a few bricks are misaligned, the error will multiply as you move across the floor. This can result in grout lines that “wander” and a pattern that looks skewed rather than sharp and uniform. A perfectly straight layout is what gives herringbone its sophisticated and timeless appeal.

While it’s true that a perfect installation is possible, it takes a very skillful hand to achieve it. An experienced installer knows how to constantly check their lines and make micro-adjustments to keep the pattern true from one end of the room to the other. This level of expertise ensures your floor becomes a stunning feature, not a distracting eyesore.

Planning for Extra Material

When you’re budgeting for your project, remember to account for extra material. For a herringbone pattern, it’s wise to order at least 10% to 15% more flooring than your room’s square footage requires. This isn’t just a buffer for accidental breaks; it’s a necessity due to the nature of the pattern. The angled cuts you’ll make where the floor meets the walls create more waste than the straight cuts used in a standard grid layout.

Having extra bricks on hand prevents the stress of running out of material mid-project, especially if you’re using reclaimed brick where finding a perfect match later can be difficult. This overage ensures you have enough to complete the job and keep a few extra bricks for any future repairs. When sourcing materials, exploring a supplier with a wide variety of porcelain and natural stone can help you find the perfect brick look.

Deciding Between a Professional and DIY

So, should you do it yourself? Some DIYers feel that because brick is naturally rustic, the end result is meant to be imperfect, making it a great project for first-time tilers. If you’re aiming for a very casual, farmhouse look and aren’t bothered by a few imperfections, a DIY installation could be a rewarding challenge. You’ll save on labor costs and gain a huge sense of accomplishment.

However, if you want a crisp, clean, and perfectly aligned herringbone pattern, hiring a professional is the safest bet. A flooring installation is a major part of any home remodeling project, and mistakes can be costly and difficult to fix. An experienced team has the right tools, techniques, and foresight to handle the complexities of the pattern, ensuring a beautiful, durable floor that adds lasting value to your home.

How to Care for Your Red Brick Herringbone Floor

One of the best things about a red brick herringbone floor is its incredible durability. This isn’t a delicate surface you have to tiptoe around. It’s meant to be lived on and can handle the daily hustle of a busy home, including kids and pets. With the right care routine, your brick floor will not only last for decades but will also develop a beautiful patina over time. Keeping it in top shape is straightforward and doesn’t require a lot of complicated steps.

The key is to start with a properly sealed surface and then follow a simple maintenance schedule. This involves routine cleaning to prevent grit from scratching the finish, knowing how to tackle spills quickly, and understanding when it’s time to reapply a protective coat. Let’s walk through the simple steps to protect your investment and keep your gorgeous herringbone floor looking its best for years to come.

Sealing Your Floor for Moisture Protection

Think of sealant as your floor’s first line of defense. Brick is naturally porous, which means it can absorb liquids and dirt, leading to stains and discoloration. A high-quality sealer penetrates the brick and grout, creating a protective barrier that repels moisture and grime, making cleanup much easier. For older homes that may not have a modern damp-proof membrane, it’s wise to use a breathable sealer. This allows any naturally occurring moisture from below to escape instead of getting trapped, which could cause issues down the road. A professional sealing ensures complete and even coverage, giving you peace of mind from day one.

Simple Tips for Daily Cleaning

Maintaining your brick floor is surprisingly simple and doesn’t require much more than your usual cleaning routine. The main goal is to keep abrasive dirt and sand off the surface. Regular sweeping with a soft-bristle broom or vacuuming with a hard floor attachment will do the trick perfectly. For a deeper clean, you can mop the floor weekly. Just use a gentle, pH-neutral cleaner mixed with warm water. Harsh chemicals or acidic cleaners like vinegar can strip the sealant and damage the brick over time, so it’s best to stick with products designed for natural stone or brick surfaces. This simple habit prevents buildup and keeps your floor looking fresh.

How to Handle Spills and Stains

The golden rule with a porous surface like brick is to act fast. When a spill happens, whether it’s wine, juice, or a pet accident, clean it up immediately. Use a clean cloth or paper towel to blot the liquid, working from the outside of the spill inward to prevent it from spreading. Avoid rubbing, as this can push the liquid deeper into the brick and grout lines. For most everyday spills, a quick blot is all you need, especially on a well-sealed floor. If you do encounter a tougher, set-in stain, a specialized brick cleaning product or a paste made from baking soda and water can often lift it out.

When to Reseal Your Brick Floor

No sealant lasts forever. Over time, foot traffic will gradually wear down the protective layer. How often you need to reseal depends on how much use the area gets, but a good rule of thumb is every three to five years. A simple way to check is to sprinkle a few drops of water on the floor. If the water beads up, your sealer is still doing its job. If it soaks into the brick and darkens it, it’s time for a new coat. When the time comes, resealing your floors is a project that restores that essential layer of protection, ensuring your brick continues to resist stains and moisture for years to come.

Is a Red Brick Herringbone Floor Right for You?

Deciding on a new floor is a big commitment, and a red brick herringbone floor is a particularly bold and beautiful choice. It’s more than just a surface to walk on; it’s a statement piece that brings incredible character and texture into your home. But before you start picturing that perfect rustic entryway or cozy kitchen, it’s important to consider if this unique flooring truly fits your lifestyle, budget, and home. Let’s walk through the key considerations, from styling and installation to safety, to help you make a confident decision. With the right approach, you can create a stunning feature that you’ll love for years to come.

Styling Your Red Brick Herringbone Floor

One of the best things about a red brick herringbone floor is its versatility. The classic zig-zag pattern, where bricks are laid at an angle, instantly adds a sense of history and movement to a room. While it’s a natural fit for rustic, farmhouse, or industrial designs, it can also create a surprising and warm contrast in more modern spaces. You can choose from different layouts, like single or double herringbone, to change the scale and feel of the pattern. This timeless look adds so much charm and warmth, making it a durable and stylish choice for high-traffic areas like mudrooms, kitchens, and entryways. The rich color and texture of the brick serve as a beautiful foundation for almost any decor.

Common Design Mistakes to Avoid

While the final look is stunning, getting there requires precision. The herringbone pattern is known for being one of the most difficult to lay correctly. A common mistake is underestimating the complexity of the installation. There are specific rules for starting the pattern and keeping the lines straight, and even a small error can throw off the entire floor. A bad herringbone layout is immediately noticeable and can undermine the sophisticated look you’re aiming for. This is one of those projects where professional expertise makes all the difference. An experienced installer will ensure the pattern is centered, the lines are crisp, and the final result is flawless.

A Note on Safety and Slip Resistance

When considering brick flooring, it’s wise to think about the practical details, including safety. Because brick is naturally porous, it can be prone to absorbing moisture and stains if not properly treated. An unsealed or uneven floor can also present a tripping hazard and create nooks where dirt can hide. The solution is to have your floor professionally installed and sealed. A quality sealant protects the brick from spills and wear while also creating a more uniform, slip-resistant surface. With proper restoration and sealing services, your brick floor will not only be safer but also much easier to clean and maintain over the years.

Bring Your Vision to Life with Gappsi

A red brick herringbone floor is a project that requires both vision and skill. It’s a choice that promises timeless appeal, adding a touch of charm and warmth that is durable enough to withstand years of wear. While the installation demands expertise, the result is a truly special feature in your home. At Gappsi, our team has the masonry and design experience to bring your vision to life perfectly. We handle every detail, from preparing the subfloor to laying each brick with precision and applying the final seal. If you’re ready to add this beautiful and enduring element to your home, we’re here to help you get it right.

Related Articles

Frequently Asked Questions

Is a brick floor hard or uncomfortable to stand on for long periods? Brick is a hard surface, similar to natural stone or porcelain tile, so it doesn’t have the softness of carpet or cork. In areas where you stand a lot, like in the kitchen, many people place a stylish area rug or a cushioned mat for extra comfort. That said, the unique texture can feel pleasant underfoot, and it’s a surface that holds warmth well, especially in a sunny room.

Can I install radiant heating underneath a brick herringbone floor? Yes, you absolutely can. Brick is an excellent material for radiant floor heating because it conducts and retains heat very well. An underfloor heating system can make your brick floor feel wonderfully warm and cozy, which is a fantastic feature in kitchens, bathrooms, or entryways during colder months. Just be sure the installation is handled by a professional who is experienced with both radiant heat systems and brick flooring.

How do I keep the grout lines from getting dirty? This is a great question and a common concern with any tiled floor. The most important step is to have the floor properly sealed right after it’s installed. A good quality sealer will protect both the brick and the grout, creating a barrier that stops dirt and spills from soaking in. For routine cleaning, simply avoiding harsh chemicals and using a pH-neutral cleaner will keep your grout looking fresh without damaging the sealant.

Is this a good flooring choice for a home with kids and pets? It’s one of the best. A red brick floor is incredibly tough and can easily handle the daily chaos of family life, from dropped toys and running pets to heavy foot traffic. Its natural color variations and textured pattern are also great at hiding minor scuffs, crumbs, and pet hair between cleanings. When properly sealed, the floor is also resistant to spills and stains, making cleanup much less stressful.

What’s the main difference between using real brick pavers and porcelain tiles that look like brick? The choice really comes down to a balance of authenticity and practicality. Real thin brick pavers offer an unmatched rustic character, with genuine texture and subtle color variations that give your floor a truly historic feel. Porcelain alternatives, on the other hand, are manufactured to be extremely dense and non-porous. This makes them incredibly resistant to stains and water, and they often require less long-term maintenance.

Share this page: