An outdoor kitchen is a serious construction project. It’s not just about placing a grill on a patio; it involves building a durable foundation, running gas and electrical lines, and selecting materials that can withstand Long Island’s weather. Juggling plumbers, electricians, and masons can quickly become a full-time job filled with stress and potential mistakes. This is why you hire a contractor for an outdoor kitchen. A qualified professional serves as your project’s single point of contact, coordinating all the moving parts and ensuring every aspect of the job is done correctly, on time, and up to code, leaving you free to plan the menu for your first cookout.
Key Takeaways
- A Contractor Manages the Entire Project: Your contractor should be more than just a builder; they are your project manager. They will guide you from the initial design and material choices to securing permits and coordinating all the skilled labor, ensuring a smooth process from start to finish.
- Vet Your Contractor Thoroughly: Protect your home and budget by confirming three key things: a valid license, full insurance coverage, and a strong portfolio of past projects. Don’t hesitate to ask for proof and speak with their former clients.
- Get Everything in Writing: A trustworthy contractor provides a detailed, itemized contract that outlines the full project scope, materials, timeline, and payment schedule. This document is your best tool for avoiding surprise costs and ensuring everyone is on the same page.
What Does an Outdoor Kitchen Contractor Do?
So, you’re dreaming of an outdoor kitchen. You can almost smell the burgers sizzling and hear the clink of glasses with friends. But how do you get from that dream to a fully functional, beautiful reality? That’s where an outdoor kitchen contractor comes in. Think of them as your project’s captain. They don’t just build the structure; they guide the entire process from the first sketch to the final cleanup. A great contractor combines the skills of a designer, a project manager, and a construction expert, ensuring your new space is built to last and perfectly suits your lifestyle. They handle the complexities so you can focus on planning your first backyard party.
Design and Planning
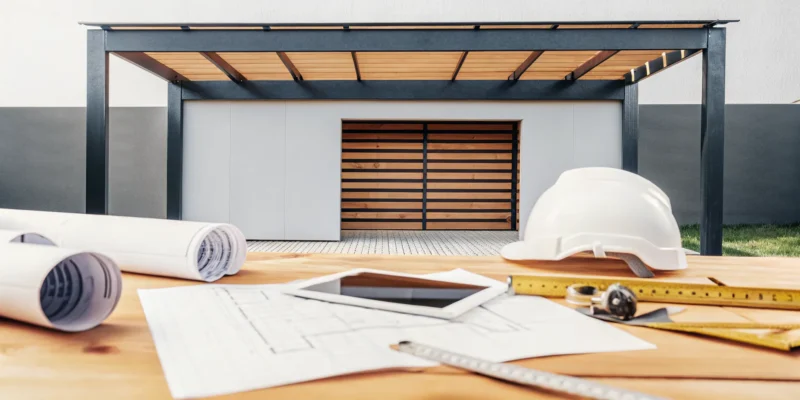
The first step is always the most exciting: bringing your ideas to life. A skilled contractor will sit down with you to talk about how you plan to use your space. Are you an aspiring grill master, a pizza enthusiast, or a host who needs a full-service bar? They translate your vision into a functional layout. Many professionals, including our team at Gappsi, use 3D mockups to give you a virtual tour of your kitchen before any ground is broken. This personalized design and construction process ensures every cabinet, countertop, and appliance is exactly where you want it, creating a space that is uniquely yours.
Construction and Installation
Once you’ve approved the design, your contractor takes over the heavy lifting. They manage the entire construction phase, which is a huge relief. This includes everything from preparing the foundation and running utility lines for water, gas, and electricity to the final installation of your grill and cabinets. They coordinate all the different specialists, like plumbers and electricians, so you don’t have to juggle multiple contacts. A professional contractor also handles all the necessary permits and ensures the project adheres to local building codes. This gives you peace of mind that your beautiful new kitchen is also safe and compliant, creating a seamless transition from concept to reality.
Material Selection and Sourcing
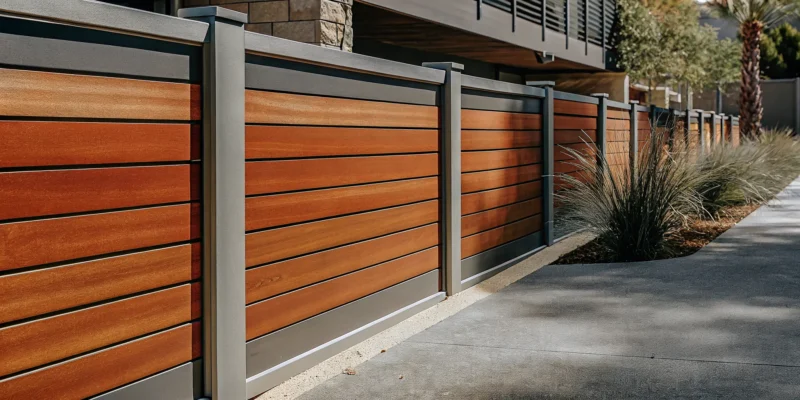
An outdoor kitchen needs to be tough enough to handle everything from summer sun to winter snow. This is where a contractor’s expertise in materials really shines. They know which products are not only beautiful but also durable and weather-resistant. Your contractor will guide you through selecting the best options, from stunning porcelain and natural stone for your countertops to high-performance stainless steel for your appliances. By sourcing reliable, long-lasting materials, they help protect your investment and ensure your outdoor kitchen remains a beautiful, functional centerpiece of your backyard for many years to come.
How to Choose the Right Outdoor Kitchen Contractor
Choosing a contractor is the most important decision you’ll make for your outdoor kitchen project. You’re not just hiring someone to build something; you’re trusting them with your home and your vision. The right partner will bring expertise and peace of mind, while the wrong one can lead to headaches and disappointment. To make sure you find a great match, focus on three key areas: their credentials, their past work, and their insurance coverage. Taking the time to vet these details will help you hire with confidence.
Verify Their Licenses and Certifications
Before you get into the exciting design details, start with the basics. Your contractor must have the proper licenses and certifications to work in Long Island. This isn’t just red tape; it’s your assurance that they understand local building codes and safety standards. A licensed professional is accountable for their work, which protects your investment and ensures the project is completed correctly and safely. Don’t be shy about asking for their license number. A reputable company will have this information ready and will be happy to provide it. This simple step confirms their legitimacy and commitment to professional standards for all their home remodeling projects.
Evaluate Their Experience and Portfolio
Experience is what separates a good contractor from a great one. You want a team that specializes in outdoor kitchens, not someone who is building one for the first time. Ask to see a portfolio of their completed projects. Look for high-quality photos and a variety of designs that show their range and attention to detail. If a contractor can’t show you examples of their work, consider it a major red flag. A strong portfolio demonstrates their skill and gives you a feel for their style. You can also check their YouTube channel to see video tours of past projects, which can give you an even better sense of their craftsmanship.
Confirm They Are Insured and Bonded
This is a non-negotiable. Your contractor must carry both general liability insurance and workers’ compensation. General liability protects your property from accidental damage during construction, while workers’ compensation covers any injuries that might happen to the crew on your property. Without this coverage, you could be held financially responsible for accidents. Any legitimate contractor will have comprehensive insurance and should be able to provide you with a certificate of insurance upon request. This protects everyone involved and is a clear sign that you’re working with a true professional who takes their masonry and construction work seriously.
Key Questions to Ask Your Contractor
Once you have a shortlist, it’s time to interview your potential contractors. Asking the right questions now can save you from headaches, unexpected costs, and disappointment later. A reputable contractor will welcome your questions and provide clear answers. Here are the key areas to cover to ensure you’re hiring the best team for your outdoor kitchen.
Inquire About Project Management and Timelines
A great design needs great execution. Ask about their project management process and who your main point of contact will be. Inquire about their experience with projects similar to yours, as this gives you a realistic idea of their capabilities and how they handle timelines. A contractor who has completed many outdoor living projects can walk you through their process with ease, giving you confidence that they can deliver on schedule and keep things moving smoothly.
Ask About the Design Process and Customization
Your outdoor kitchen should reflect your style, so understanding the design process is vital. Ask if they create custom designs and provide 3D renderings to help you visualize the space before construction begins. This step is crucial for making adjustments and ensuring the final result is what you envisioned. A great design process is collaborative, so make sure you feel heard and that they can bring your specific vision to life.
Clarify Budget Estimates and Costs
A trustworthy contractor provides a detailed, itemized estimate. Be cautious of vague quotes and ask specifically what is included, such as permits or utility hookups. Getting clear budget estimates upfront prevents surprise expenses. The quality of materials, like the porcelain and natural stone you choose, will also impact the final cost, so discuss these options early on. A transparent conversation about money from the beginning builds trust.
Request References and Discuss Communication
A contractor’s past work predicts your future experience. Ask for references from recent clients, ideally from projects completed in the last year. Speaking to former customers gives you unfiltered insight into their workmanship. Also, pay attention to their communication style. Are they responsive to your calls and emails? A contractor who is difficult to reach before you’ve signed a contract is a major red flag. You want a partner who is communicative and transparent throughout the project.
Contractor Red Flags to Watch For
Choosing a contractor is a big decision, and you want to feel confident you’re bringing the right team into your home. While most professionals are honest and hardworking, it’s smart to know the warning signs of a less-than-reputable operator. Trusting your gut is important, but knowing these specific red flags will help you protect your investment and ensure your project goes smoothly from start to finish. Think of this as your checklist for vetting potential partners, so you can move forward with total peace of mind.
Warning Signs with Licensing and Insurance
This is a non-negotiable. Any contractor you hire must have a valid license for your area and carry both liability insurance and worker’s compensation. If a contractor is hesitant to provide proof of either, consider it a major red flag. A proper license shows they meet local standards, while insurance protects you from liability if a worker is injured on your property or if accidental damage occurs. A professional company understands this is a standard part of doing business and will have their documentation ready. Don’t feel awkward asking for it; a legitimate home remodeling company will expect you to.
Issues with Pricing and Contracts
A price that seems drastically lower than all other bids can be tempting, but it’s often a sign of trouble. This could mean the contractor is using subpar materials, cutting corners on safety, or plans to add unexpected fees later. Always insist on a detailed, itemized contract before any work begins or money changes hands. The contract should clearly outline the full scope of work, specific materials to be used, a payment schedule, and an estimated timeline. Be wary of anyone who asks for a large cash deposit upfront or operates without a formal agreement. A clear contract is the foundation of a successful project and protects both you and the contractor.
Problems with Communication and Credibility
A construction project is a partnership, and clear communication is essential. If a contractor is difficult to reach, vague with their answers, or dismissive of your questions during the bidding process, imagine how they’ll be once they have your deposit. A professional will be happy to explain their process and keep you informed. Furthermore, a contractor should be proud of their past work. Ask to see a portfolio and speak with recent references. If they can’t provide examples or have a trail of negative online reviews, it’s best to walk away. A company with a strong reputation will have a gallery of completed projects they are eager to share.
Budgeting and Timeline: What to Expect
Once you start seriously planning your outdoor kitchen, two big questions usually come to mind: “How much will this cost?” and “How long will it take?” Getting clear, honest answers is crucial, and it’s a hallmark of a great contractor. A professional partner will walk you through a detailed budget and a realistic schedule, ensuring there are no major surprises along the way. This transparency is key to a stress-free project. Understanding the financial and time commitments from the start helps you plan accordingly and feel confident in your investment. At Gappsi, we pride ourselves on a comprehensive approach to home remodeling that keeps you informed every step of the way. Let’s break down what you can typically expect when it comes to budgeting and project timelines for your new outdoor kitchen.
Breaking Down the Costs
A trustworthy contractor will provide a detailed and transparent cost breakdown. Many professionals charge an initial consultation fee to cover the time spent creating a thorough design and proposal. This fee is often credited toward your total project cost if you decide to move forward. This approach ensures you receive an exact price upfront, preventing unexpected expenses later. Your estimate should clearly outline costs for labor, materials, appliances, and any other project-specific expenses. This level of detail helps you understand exactly where your money is going and allows you to make informed decisions about your investment.
Understanding the Project Timeline
The timeline for an outdoor kitchen can vary depending on its complexity, but a reliable contractor will manage the entire process to keep things moving efficiently. From the initial design and securing permits to construction and the final walkthrough, having one team handle everything is the smoothest path to completion. A good project manager will provide a clear schedule and communicate regularly about progress. While unforeseen events like weather can cause delays, a professional team will anticipate potential hurdles and have contingency plans in place. You can see examples of our streamlined process on the Gappsi YouTube channel, where we showcase projects from start to finish.
How Materials and Permits Impact Your Project
The materials you choose have a significant impact on both your budget and the project timeline. High-quality, durable materials like natural stone or porcelain may have a higher upfront cost but offer incredible longevity and require less maintenance. For example, using non-combustible materials for the kitchen’s structure ensures it won’t rot, warp, or rust over time. Your contractor should also be an expert in local building codes and permits. A professional who is knowledgeable about Long Island’s regulations will handle the entire permitting process, preventing costly delays and ensuring your outdoor kitchen is built safely and legally. This expertise in both masonry and local requirements is non-negotiable.
Related Articles
- Outdoor Kitchen Contractor Long Island: A Hiring Guide
- Hiring an Outdoor Kitchen Contractor on Long Island
- Backyard Kitchen & Patio Design for NY Homes | Gappsi Inc
Frequently Asked Questions
Do I really need a specialized outdoor kitchen contractor, or can a general contractor do the job? While a talented general contractor can build many things, an outdoor kitchen specialist brings a unique set of skills to the table. They have deep knowledge of weather-resistant materials, proper ventilation for grills, and the specific utility requirements for outdoor spaces. This expertise is crucial for building a kitchen that not only looks great but also functions safely and withstands the elements for years to come.
What are the biggest factors that influence the final cost of an outdoor kitchen? The final price is mainly shaped by three things: the size and complexity of the layout, the quality of your appliances, and the materials you choose for countertops and finishes. A simple grill island will naturally cost less than a full U-shaped kitchen with a sink, refrigerator, and bar seating. Likewise, premium appliances and high-end natural stone will affect the budget more than standard, builder-grade options.
How involved will I need to be in the project once construction starts? Your most important work happens during the design phase. Once you approve the final plans and materials, a great contractor takes over the day-to-day management. They will handle scheduling, oversee the construction crew, and solve any problems that arise. You should expect to receive regular progress updates, but you won’t need to be on-site directing the work. Your main job is to get excited for the final reveal.
What is the most common mistake homeowners make when planning an outdoor kitchen? A frequent oversight is underestimating the importance of a functional layout. It’s easy to focus on the grill and forget to plan for adequate counter space for food prep, a landing zone for hot dishes, and easy access to a sink or trash bin. Thinking through how you will actually cook and entertain in the space is key to creating a kitchen that is a joy to use, not a source of frustration.
Besides the kitchen itself, what other elements should I consider for the surrounding space? A great outdoor kitchen is the heart of a larger outdoor living environment. Think about how it connects to the rest of your yard to create a cohesive experience. You might consider adding a shaded structure like a pavilion for comfort, installing proper lighting for evening gatherings, or creating comfortable seating areas nearby. Integrating your kitchen with landscaping or a patio helps transform your entire backyard into an inviting retreat.