Custom Bocce Court Built in Westhampton, NY by Gappsi

View Gappsi’s YouTube Channel to view Custom Bocce Court Built in Westhampton, NY by Gappsi

A beautifully designed bocce court can transform a backyard into a destination for outdoor recreation, entertaining, and spending time with family and friends. At Gappsi, we specialize in designing and building custom outdoor living spaces throughout Long Island, including professionally constructed bocce courts designed for years of enjoyment.

Our latest bocce court installation in Westhampton, NY was completed for a private residence and showcases the quality, craftsmanship, and attention to detail that goes into every Gappsi bocce court.

From the synthetic wood construction and imported Italian bocce turf to the specially engineered base and surrounding gravel landscape, every component of this court was selected to create a beautiful, durable, and exceptionally playable bocce court.

A Custom Bocce Court for a Westhampton Residence

This Westhampton, NY homeowner wanted to add a dedicated bocce court to the property that would complement the surrounding landscape while providing a high-quality playing surface for family and guests.

Gappsi designed and constructed the court using our proven bocce court installation system. While every project can be customized to fit the property and homeowner’s vision, we build our bocce courts using the same fundamental construction principles to provide a durable, low-maintenance playing environment.

The result is much more than simply placing turf over a section of the backyard. A professionally constructed bocce court requires careful attention to the base, drainage, playing surface, walls, and surrounding landscape.

Synthetic Wood Construction for Long-Term Durability

One feature that sets this Gappsi bocce court apart is the synthetic wood used for the walls and top of the court.

Traditional wood can eventually rot, warp, crack, or deteriorate when exposed to outdoor weather conditions. Bocce courts are often installed outdoors where they are exposed to rain, humidity, sunlight, and seasonal temperature changes, making material selection particularly important.

For this reason, Gappsi uses synthetic wood designed for outdoor applications.

The synthetic wood provides the appearance and character of traditional wood while offering significant durability advantages. It is designed not to rot, wear, or warp like conventional wood can over time.

Another important detail is the finished appearance. Gappsi constructs the court without visible screws or nails on the finished surfaces. This creates a cleaner, more refined appearance that works well with upscale residential landscaping.

The result is a bocce court that looks like an intentional architectural feature of the property rather than an afterthought.

Italian Bocce Turf Provides the Playing Surface

The playing surface is one of the most important components of any bocce court.

For this Westhampton project, Gappsi installed our specialized bocce turf imported from Italy. The turf is specifically selected for bocce court applications and provides a consistent playing surface.

Unlike ordinary artificial grass designed primarily for landscaping, bocce turf needs to perform as a recreational playing surface. The ball needs to roll consistently across the court, and the surface needs to remain stable and level.

The Gappsi bocce court system is designed around these requirements.

The turf creates the finished playing surface while the engineered materials beneath it provide the stability and cushioning necessary for proper play.

Gravel Base and High-Density Foam

What is underneath a bocce court is just as important as what you see on top.

At Gappsi, we install a properly prepared gravel base underneath the turf. This helps provide stability while also allowing water to drain through the court.

Proper drainage is especially important for outdoor recreational surfaces. Without an effective drainage system, water can collect beneath the turf and potentially contribute to uneven areas or other problems over time.

Above the gravel base, Gappsi installs high-density foam as part of the court construction system.

The foam provides an important benefit for bocce players because it helps create a stable but forgiving playing surface. The combination of the engineered base, high-density foam, and specialized turf helps prevent divots.

Custom Bocce Court Built in Westhampton

A Virtually Divot-Free Bocce Court

Anyone who has played on a traditional bocce court knows that divots can become a problem.

Repeated play can create depressions in the surface when bocce balls land. Over time, those divots can affect how the balls roll and make the court less consistent.

The Gappsi bocce court construction system is designed to minimize this issue.

The high-density foam beneath the Italian bocce turf helps absorb the impact of the balls and helps prevent the surface from developing the types of depressions commonly associated with traditional playing surfaces.

The goal is a virtually divot-free bocce court that maintains a flat and consistent playing surface.

That means homeowners can spend more time playing and less time worrying about repairing or maintaining the court.

Keeping the Court Flat and Consistent

A quality bocce court needs to provide consistent playing conditions.

The floor of a Gappsi bocce court is engineered to stay flat and stable. This is important because even small changes in the surface can affect the path and speed of a bocce ball.

The carefully prepared base, high-density foam, and specialized turf work together to create a level playing surface.

For a private residence in Westhampton, this provides homeowners with a dedicated recreational area that can be enjoyed throughout the season without the constant maintenance associated with some traditional bocce court surfaces.

Turf Extends Up the Side Walls

Another unique detail of this Gappsi bocce court is the way the turf comes up along the sides of the walls.

This is more than an aesthetic detail.

When a bocce ball hits the wall, a traditional hard surface can produce a loud impact. By bringing the turf up the side of the wall, Gappsi helps reduce the sound created when the ball makes contact with the court’s side.

This creates a more comfortable playing environment while also giving the court a finished, integrated appearance.

It is another example of how Gappsi considers both the appearance and functionality of every component of a custom outdoor recreation project.

White Gravel Surrounds the Bocce Court

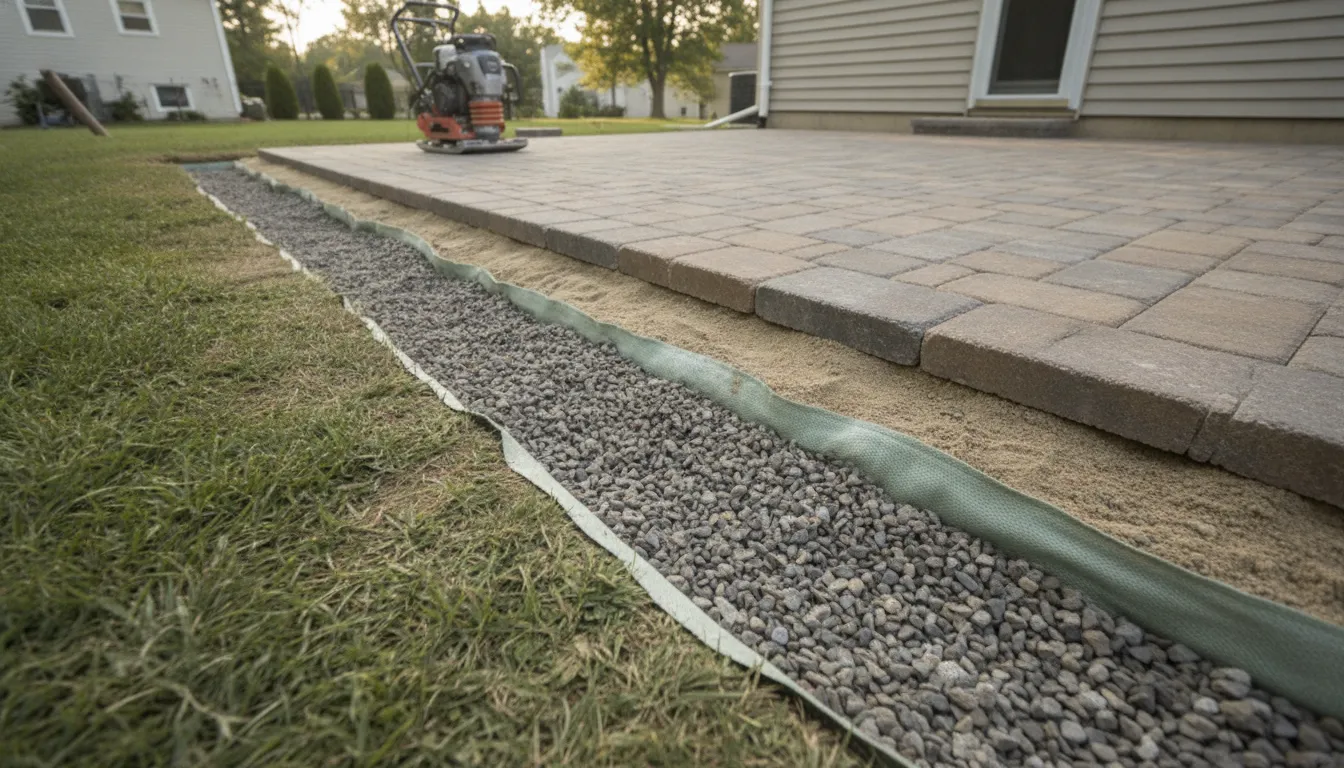
To complete the installation, Gappsi surrounded the bocce court with white gravel.

The white gravel creates a clean contrast against the green bocce turf and helps integrate the court into the surrounding landscape.

However, simply placing loose gravel around a recreational area can result in the stone moving, spreading, and eventually becoming difficult to maintain.

For this project, Gappsi installed the gravel using a Gravel Fix honeycomb system.

The honeycomb structure helps hold the individual gravel pieces in place. This creates a more stable surface while helping prevent the gravel from shifting throughout the surrounding area.

The finished combination of white gravel, green turf, and synthetic wood creates a sophisticated outdoor recreational space that complements the Westhampton home’s landscape.

Professional Bocce Court Installation on Long Island

Building a bocce court requires more than installing artificial turf in the backyard. The foundation, drainage, playing surface, wall construction, materials, and finishing details all contribute to the quality and longevity of the finished court.

Gappsi brings experience in outdoor living construction and recreational installations throughout Long Island. Our team can design and build custom bocce courts for private residences, country clubs, commercial properties, and other outdoor spaces.

Whether you are looking for a traditional bocce court or want to create a completely customized outdoor recreation area, we can help develop a design that fits your property and lifestyle.

Build Your Custom Bocce Court with Gappsi

This latest Westhampton, NY bocce court installation demonstrates what is possible when thoughtful design is combined with quality materials and professional construction.

From the durable synthetic wood walls to the imported Italian bocce turf, engineered gravel and foam base, virtually divot-free playing surface, turf-lined walls, and Gravel Fix surrounding system, every part of this court was designed with performance, durability, and appearance in mind.

A custom bocce court can become one of the most enjoyable features of a Long Island backyard. It provides a place for friendly competition, family gatherings, entertaining guests, and enjoying the outdoors.

If you are considering adding a bocce court to your property in Westhampton, the Hamptons, Suffolk County, Nassau County, or elsewhere on Long Island, contact Gappsi to discuss your project.

From the initial design to the final installation, Gappsi can help create a custom bocce court that is built for outdoor enjoyment and designed to complement your property for years to come.

Contact Gappsi Today

📍 Serving all of Long Island, NY — Nassau & Suffolk Counties
🌐 https://www.gappsi.com/
📞 Call now for a free consultation and estimate

SCHEDULE A MEETING TODAY WITH GAPPSI

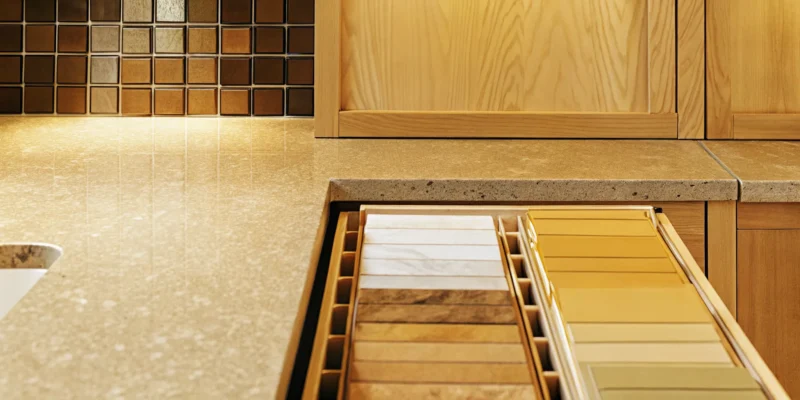
A selection of brick wall tiles in various colors, styles, and finishes.

Brick Wall Tiles 101: A Complete Homeowner’s Guide

Creating a seamless flow between your indoor and outdoor living areas is key to a well-designed Long Island home. You want materials that feel cohesive and can stand up to the elements. Brick wall tiles are a perfect solution for bridging this gap. Their durability makes them ideal for an outdoor kitchen backsplash or patio wall, while their classic style adds warmth to an interior living room or kitchen. This guide explores how you can use these versatile tiles to create a unified, elegant look that connects your entire property, from your cozy fireplace to your beautiful outdoor entertainment space.

Key Takeaways

  • Achieve the Classic Brick Look Practically: Brick wall tiles provide the authentic character of exposed brick without the high cost, heavy weight, or structural work of a traditional installation, making them a smart choice for remodels.
  • Customize Your Style with Material and Grout: Your final look is all in the details, so choose from materials like genuine reclaimed brick for rustic charm or sleek porcelain for a modern finish, and use grout color to make the pattern pop or blend seamlessly.
  • Install Them Almost Anywhere: These tiles are durable enough for high-traffic areas and can be used in kitchens, bathrooms, and even outdoor spaces; they are easy to clean and can be sealed against moisture, making them a beautiful and functional choice.

What Are Brick Wall Tiles?

Everyone loves the classic, warm look of a brick wall. It adds character and a timeless feel to any space, from a cozy living room to a rustic outdoor kitchen. But building a full brick wall isn’t always practical, especially during a renovation. That’s where brick wall tiles come in. They give you that same charming aesthetic without the weight, cost, and structural demands of traditional brick. These tiles are a versatile and stylish alternative that can transform a room. They generally fall into two main categories: real brick veneer, which is made from actual brick, and faux brick tiles, which are convincing replicas made from other materials.

Real Brick Veneer vs. Faux Brick Tiles

When you hear “real brick veneer,” think of it as the genuine article, just sliced thin. These tiles are cut directly from the sides of real, often reclaimed or antique, bricks. This process gives each tile a unique texture, color, and history that you can’t replicate. Because they come from actual bricks, they provide an unmatched level of authenticity. On the other hand, you have faux brick tiles. These are expertly crafted replicas, often made from durable materials like porcelain and natural stone. They are designed to mimic the look of brick with incredible realism while offering consistency in color and shape, which can make installation a bit more straightforward.

How Brick Tiles Differ from Traditional Brick

The biggest difference between brick tiles and a traditional brick wall comes down to weight and structure. A wall made of full bricks is incredibly heavy and requires a strong foundation to support it, which can be a major challenge. Brick tiles are much lighter and thinner, so they don’t add significant stress to your walls. This makes them a fantastic choice for home remodeling projects, accent walls, or installations on upper floors where weight is a concern. Beyond that, brick-look tiles often provide a great combination of durability, low maintenance, and design flexibility, allowing you to get the look you want in almost any room of the house.

Exploring Types of Brick Wall Tiles

Once you decide to bring the classic look of brick into your home, you’ll find a surprising number of options waiting for you. Brick wall tiles come in several materials, each with its own unique texture, installation process, and benefits. Understanding the differences will help you choose the perfect tile to match your home’s style and your project’s needs. From genuinely old reclaimed bricks to modern, durable porcelain, there’s a material that fits your vision. Let’s look at the most common types so you can make a confident choice for your space.

Clay and Reclaimed Thin Brick

For a truly authentic and rustic feel, nothing beats clay and reclaimed thin brick. These tiles are sliced from the sides of real, vintage bricks, giving each piece a unique story and character. If you love the look of an old warehouse or a historic brownstone, this is the material for you. Choosing reclaimed brick is also a sustainable option, as it gives old materials a beautiful new life. The natural variations in color and texture create a wall with depth and timeless appeal that manufactured products work hard to imitate. Our masonry experts can help you integrate this classic look into your home.

Ceramic and Porcelain Brick

If you want the look of brick combined with modern durability and low maintenance, ceramic and porcelain tiles are an excellent choice. These tiles are manufactured to be strong, consistent, and versatile. Porcelain, in particular, is incredibly dense and resistant to moisture, making it a great option for kitchens, bathrooms, or even outdoor patios. They come in a huge variety of colors and styles, from clean and contemporary to perfectly imperfect rustic looks. You get the aesthetic you want without worrying about the sealing and upkeep that can come with traditional brick. Gappsi offers a wide selection of high-quality porcelain pavers that can achieve this beautiful and practical effect.

Natural Stone Brick

Natural stone cut into brick shapes offers an earthy, high-end look with unmatched durability. Formed from materials like shale or slate and fired at high temperatures, these bricks are built to last. They stand up exceptionally well to the elements, resisting fire, pests, and weather with ease, making them a fantastic investment for both interior and exterior walls. Their dense composition means they are less likely to crack or warp over time compared to other materials. A natural stone brick wall provides a sense of permanence and luxury, adding significant value and a powerful design statement to your property.

Faux Brick Panels

Faux brick panels are a smart and practical solution for getting the brick look without the weight or complex installation. These lightweight panels are designed to realistically mimic the texture and color of real brick but are much easier and faster to put up. This makes them a fantastic choice for a weekend DIY project or for walls that can’t support the weight of heavy masonry. They are surprisingly durable and can be used for both interior accent walls and exterior siding. Faux panels are a cost-effective way to completely transform a room, making them a popular tool in many home remodeling projects.

Choosing Your Style, Finish, and Color

This is where the fun really begins. Once you have an idea of the material you want, you can start envisioning the final look. The style, finish, and color of your brick tiles will define the personality of your space, whether you’re aiming for a cozy, historic feel or a sharp, modern edge. From the texture under your fingertips to the way the light hits the surface, these details make all the difference. Let’s look at some popular options to help you find the perfect match for your home.

Rustic and Reclaimed Looks

This style is all about character and warmth. If you love the idea of a wall with a story, reclaimed thin brick tiles are a fantastic choice. These are often made from real antique bricks, sliced thin to create tiles that carry a genuine piece of history. The natural imperfections, color variations, and weathered textures create a cozy, lived-in feel that’s impossible to replicate with new materials. This look is perfect for creating a feature wall in a living room or a charming kitchen backsplash. It’s a style that feels both timeless and deeply personal, adding a touch of rustic elegance to any masonry project.

Smooth and Modern Finishes

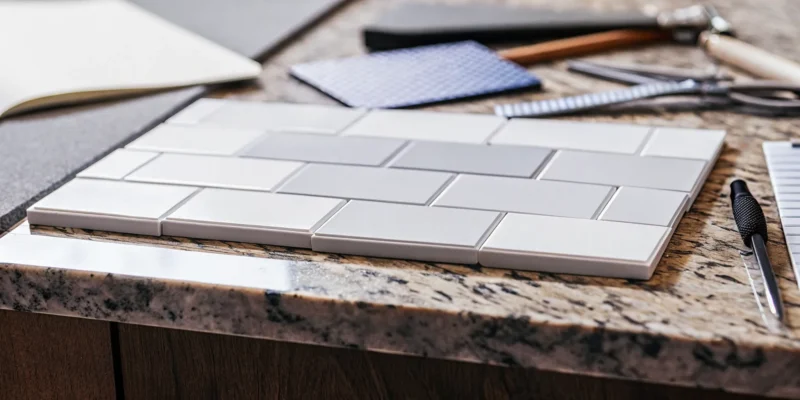
If your taste leans more contemporary, you can still get the classic pattern of brick with a clean, updated twist. Modern brick tiles often feature smooth surfaces, sharp edges, and uniform colors for a sleek and polished appearance. Think of solid whites for a bright, airy feel or cool grays for a sophisticated urban look. These tiles are incredibly versatile and work beautifully in minimalist kitchens, spa-like bathrooms, or as a chic backdrop in a bedroom. They provide the familiar, comforting grid of brick while fitting perfectly into a modern home remodeling project.

Color and Grout Pairings

Don’t underestimate the power of color and grout. The shade of your brick tile and the color of the mortar holding it together work as a team to create the final effect. Before committing, it’s a great idea to lay out tiles from different boxes to see the natural color blend. For the grout, a contrasting color, like white grout with red brick, will make each tile stand out and emphasize the pattern. A similar color will create a more subtle, cohesive surface. Exploring different porcelain and natural stone options can give you a great sense of how different color combinations feel in a space, helping you perfect your vision.

The Benefits of Using Brick Wall Tiles

Choosing brick wall tiles for your home is about more than just looks, it’s a practical decision that pays off for years. You get the warm, timeless character of brick without the complexities and cost of traditional masonry. It’s the perfect blend of classic charm and modern convenience. Whether you’re designing a rustic kitchen backsplash, a contemporary accent wall, or a durable outdoor feature, brick tiles offer a solution that is both beautiful and built to last.

The advantages are clear. First, these tiles are incredibly durable and surprisingly easy to care for, making them ideal for busy households. They also provide incredible design flexibility, with styles ranging from reclaimed and rustic to smooth and polished. Beyond the surface, they can even contribute to your home’s insulation, potentially helping you save on energy bills. Best of all, achieving this high-end look is often more affordable than you might think, both in terms of initial installation and long-term upkeep. Our expert home remodeling team frequently incorporates them into projects for these very reasons.

Durability and Easy Maintenance

One of the biggest draws of brick tiles, especially porcelain and ceramic varieties, is their impressive durability. Unlike traditional brick, which can be porous and prone to chipping, these tiles are manufactured to withstand daily life. They resist scratches, dents, and stains, making them a fantastic choice for high-traffic areas like entryways, kitchens, and family rooms. This resilience means your walls will look fresh and new for years with minimal effort.

The low-maintenance aspect is a game-changer for many homeowners. Forget about special cleaners or worrying about spills. Most brick-look tiles are non-porous, so messes wipe away easily with just a damp cloth and mild detergent. This simple cleaning routine saves you time and ensures your space remains beautiful without constant work. For added protection, our restoration and sealing services can ensure even natural thin brick veneers are properly sealed against moisture and stains.

Versatile Aesthetics

Brick tiles give you the freedom to bring any design vision to life. While a full brick wall has a distinct and singular look, tiles open up a world of possibilities. You can capture the charming, weathered feel of a historic building or opt for a sleek, uniform finish that feels clean and modern. This versatility allows brick to fit into design schemes far beyond the typical industrial or farmhouse styles.

The options for customization are nearly endless. You can find tiles in a wide spectrum of colors, from classic reds and earthy browns to cool grays and whitewashed tones. The texture can also vary, with choices ranging from rough and rustic to smooth and refined. By pairing your chosen tile with different grout colors, you can further define the look. Gappsi offers a curated selection of high-quality porcelain and natural stone to help you find the perfect match for your home’s aesthetic.

Insulation and Energy Efficiency

Beyond their surface appeal, brick tiles can also contribute to your home’s comfort and energy efficiency. Materials like clay, ceramic, and porcelain have excellent thermal mass, which means they absorb and release heat slowly. During the winter, a brick tile wall can help hold onto your home’s warmth, creating a cozier environment. In the summer, it can help keep your interior cool by absorbing heat from the sun.

While it’s not a substitute for proper wall insulation, this added thermal layer can help regulate your home’s temperature more effectively. Over time, this stabilization can lead to modest savings on your heating and cooling bills. It’s a small but significant benefit that adds another layer of value to your investment. When planning a home remodeling project, considering materials that improve efficiency is always a smart move.

Affordability

If you love the look of brick but are concerned about the cost, brick tiles are an excellent and affordable alternative. A traditional brick wall requires a foundation, specialized labor, and a significant amount of material, all of which add up quickly. In contrast, brick tiles are much lighter and thinner, making the installation process faster and less labor-intensive. This directly translates to lower costs for your project.

The savings continue long after the installation is complete. Because brick tiles are so durable and easy to clean, you won’t have to budget for the costly maintenance associated with traditional brick, such as repointing mortar or extensive repairs. This combination of a lower upfront cost and minimal long-term upkeep makes brick tiles a financially savvy choice for achieving a high-end, timeless look in your home. You can explore a variety of options at the Gappsi Store to find a style that fits your budget.

Where to Use Brick Wall Tiles

One of the best things about brick wall tiles is their incredible versatility. Whether you’re aiming for a rustic farmhouse vibe or a sleek industrial look, there’s a place for them in almost any room of your house, and even outside. Their ability to add texture, color, and character is unmatched. Let’s walk through some of the most popular and impactful ways to incorporate brick tiles into your home’s design, transforming ordinary walls into stunning features. From cozy indoor nooks to expansive outdoor entertainment areas, brick tiles offer a design solution that is both beautiful and practical for your Long Island home.

Kitchens and Bathrooms

Kitchens and bathrooms are prime locations for brick wall tiles. In the kitchen, a brick tile backsplash adds a touch of rustic charm or industrial edge behind the stove and countertops. It’s a classic look that’s always in style. In the bathroom, you can create a feature wall behind the vanity or even use properly sealed, water-resistant porcelain brick tiles for a unique shower surround. Updating these high-traffic rooms is a core part of any home remodeling project, and a brick tile feature can completely transform the space without requiring a full structural change. They provide the look of exposed brick with easier cleanup and installation.

Living Room and Bedroom Accent Walls

If you want to create a dramatic focal point in your living room or bedroom, an accent wall is the way to go. A floor-to-ceiling brick tile wall behind your sofa or bed adds instant warmth, texture, and architectural interest. This is where the timeless appeal of brick really shines, creating a feature that feels both classic and personal. It can anchor a large, open-concept space or add depth to a smaller room. This type of project showcases the kind of detailed work our masonry designers specialize in, turning a simple wall into a piece of art that defines the entire room’s character.

Outdoor Patios and Entertainment Spaces

Don’t forget about your home’s exterior. Brick wall tiles are durable enough to handle the Long Island elements, making them perfect for outdoor applications. You can use them to upgrade your patio walls, build a stylish backsplash for your outdoor kitchen, or create an accent wall for your seating area. Imagine a stunning brick wall as the backdrop for your outdoor kitchen, perfectly complementing your custom pavilions and pergolas to create a resort-like escape in your backyard. They provide a cohesive look that connects your indoor and outdoor living spaces, adding elegance and durability to your property’s design.

Understanding the Cost of Brick Wall Tiles

Let’s talk about one of the most important parts of any project: the budget. The cost of adding brick wall tiles to your home can vary quite a bit, but it’s more approachable than you might think. The final price tag depends on a few key things, like the type of tile you choose, the size of your space, and whether you hire a professional for the installation. Understanding these elements from the start will help you plan your project without any surprises.

When you’re planning a home remodeling project, knowing the potential costs helps you make confident decisions. Brick tiles offer a huge range of styles, from rustic to modern, and each comes with its own price point. By breaking down the costs, you can find a beautiful option that fits your vision and your wallet. We’ll walk through the main factors so you can feel prepared as you start sourcing materials and planning your design.

Price by Material Type

The material you choose is the biggest factor in determining the cost of your project. Prices often start at around $10 per square foot, but this can change based on the tile’s composition and finish. For example, thin brick veneers made from genuine reclaimed clay will often cost more than ceramic or porcelain tiles designed to look like brick. Each material offers a different aesthetic and level of durability.

Exploring different porcelain and natural stone options can give you a good idea of how material choice impacts price. While some specialty brick tiles with antique finishes might be at the higher end of the price spectrum, there are plenty of budget-friendly styles that still deliver that classic, textured look you’re going for.

Factors That Influence the Final Cost

Beyond the price per square foot, a few other elements will shape your total investment. The quality and weight of the material are significant. While real thin brick is authentic, it’s also much heavier than porcelain tile, which can put more pressure on your walls. In some cases, your wall might need extra support to handle the weight, which adds to the installation cost.

The complexity of the installation itself also plays a role. A successful project depends on the tiles bonding securely to the wall, as a failure can create safety issues. This is where professional masonry expertise becomes invaluable. An experienced installer will properly prepare the surface and use the right adhesive, ensuring your new brick wall is not only beautiful but also safe and built to last.

Before You Install: Key Considerations

Jumping into a new project is exciting, but a little prep work can make all the difference between a good result and a great one. Before you start laying tiles, there are a few key things to think about to ensure your new brick wall looks fantastic and stands the test of time. Proper planning helps you avoid common pitfalls and guarantees a smoother installation process, whether you’re tackling a kitchen backsplash or a full feature wall.

Thinking through surface preparation, material choices, and your local climate will set you up for success. It’s also the perfect time to decide if you’re ready for a DIY adventure or if bringing in a professional is the better route. Taking these steps ensures your investment not only looks beautiful on day one but continues to add character and value to your home for years. This planning phase is a crucial part of any successful home remodeling project. We’ll walk through everything from checking your wall’s readiness to choosing the right grout, so you can feel confident moving forward.

Prepare Your Surface and Check for Weight

First things first, let’s talk about your wall. The surface needs to be clean, dry, and perfectly flat before any tile goes up. Any bumps or debris can cause issues with adhesion and create an uneven finish. It’s also important to consider the weight of your chosen material. While traditional brick is very heavy and can require extra structural support, most brick-look tiles are designed to be lightweight. This makes them a versatile option for almost any room in your house, including upper floors, without needing to reinforce your walls.

Choose the Right Adhesive, Mortar, and Grout

The materials you use to stick your tiles to the wall are just as important as the tiles themselves. Using the right products is key to making sure your brick wall stays put. For most brick tile installations, a thinset mortar is the recommended adhesive. It provides a strong, durable bond. Don’t forget about the grout, which fills the spaces between the tiles. The color you choose can dramatically change the final look, from a classic, high-contrast white to a subtle, blended gray. Our masonry experts can help you select the perfect combination for your project.

Plan for Climate and Expansion

Believe it or not, your home’s environment plays a role in your tile installation. All building materials, including brick and mortar, naturally expand and contract with changes in temperature and humidity. While this is a bigger concern for exterior brick walls, it’s still something to be aware of, especially for outdoor patios or kitchens here on Long Island. Using the correct installation techniques and flexible adhesives allows for this slight movement, preventing cracks and ensuring the longevity of your wall. Proper planning helps your installation adapt to seasonal shifts without a problem.

Manage Moisture and Seal Your Tiles

Depending on where you install your brick tiles, moisture might be a factor. In kitchens and bathrooms, or for outdoor applications, you’ll want to choose a material that can handle a little water. Porcelain brick tiles are an excellent choice because they are naturally resistant to water and stains. Other materials, like reclaimed clay brick, are more porous and can absorb moisture. To protect them from stains and water damage, applying a quality sealant is a must. Sealing your tiles makes them easier to clean and helps preserve their color and texture for years, a service our restoration and sealing team specializes in.

DIY vs. Professional Installation

Are you feeling handy? While installing brick tiles can be a rewarding DIY project, it requires precision and patience. From preparing the surface to cutting tiles and applying grout evenly, there are many steps where things can go wrong. For a flawless finish that lasts, we always encourage homeowners to consider a professional installation. A pro has the right tools, experience, and techniques to handle any challenges that come up. This ensures your new brick wall is not only beautiful but also a durable, long-term addition to your home.

A Step-by-Step Guide to Installation

Ready to bring your brick wall vision to life? Installing brick tiles is a rewarding project that can transform a room over a weekend. While it requires patience and attention to detail, following a clear process makes all the difference. If you’re feeling adventurous and want to tackle it yourself, here’s a breakdown of the key steps. Remember, for complex projects or if you simply want a flawless finish without the fuss, our masonry experts are always here to help.

Plan Your Layout and Dry Fit the Tiles

Before a single tile touches the wall, a solid plan is your best friend. Start by laying out your brick tiles on the floor to get a feel for the pattern and color variations. This “dry fit” helps you plan where cuts will be needed and ensures you love the final look. Next, find the center of your wall and use a level to draw horizontal and vertical guidelines. These lines will keep your installation straight and professional. It’s also wise to check local building codes and consult the Tile Council of North America’s handbook to ensure your installation meets all requirements for safety and durability.

Apply the Adhesive and Set the Tiles

With your layout planned, it’s time to start setting the tiles. Thinset mortar is usually the best adhesive for the job. You can apply a thin, even layer to a small section of the wall with a notched trowel, or apply it directly to the back of each tile, a technique called “back buttering.” Firmly press each tile into place with a slight wiggle to ensure a strong bond. Use tile spacers to maintain consistent gaps for your grout lines. It’s often easiest to start from a level line near the bottom of the wall and work your way up, which prevents the tiles from sliding down before the adhesive sets.

Grout, Finish, and Allow to Cure

After setting the tiles, you need to let the adhesive cure for at least 24 hours before grouting. To make cleanup easier, consider applying a grout release agent before you begin. This helps prevent the grout from staining the face of the bricks. Use a grout bag to carefully apply the grout into the joints between the tiles. Once the grout has slightly firmed up, use a jointing tool to smooth and shape it for a clean, finished look. After cleaning off any excess grout, let the entire wall cure completely. This final step is crucial before you consider any sealing services to protect your beautiful new wall.

How to Clean and Maintain Your Brick Wall Tiles

One of the best things about brick tiles is how durable they are. Compared to other materials, brick requires very little upkeep to stay looking great for decades. With just a bit of routine care, you can ensure your new accent wall or backsplash remains a stunning feature in your home. Following a few simple steps for cleaning, sealing, and inspecting your tiles will protect your investment and keep the brick’s character shining through.

Cleaning Tips for Different Materials

Keeping your brick tiles clean is surprisingly simple. For most messes on clay or stone brick veneers, a soft-bristled brush and a bucket of warm water with a little mild detergent is all you need. Gently scrub the surface in small sections and rinse with a clean, damp cloth. Avoid using acid-based cleaners or wire brushes, as these can damage the brick face and the surrounding grout. If you have porcelain or ceramic tiles with a brick look, you can typically follow the same process, though they are less porous and even easier to wipe clean. Always test your cleaning solution on a small, hidden spot first to be safe.

Seal for Long-Term Protection

Think of sealant as sunscreen for your brick. Applying a quality sealant is a crucial step, especially for tiles in kitchens, bathrooms, or outdoor spaces where they might be exposed to moisture or stains. A good sealant prevents water from soaking into the porous brick and grout without trapping moisture inside. For exterior brickwork, it’s important to use a breathable water repellent that allows water vapor to pass through. This prevents damage from freeze-thaw cycles. While you can do it yourself, professional restoration and sealing services ensure the correct type of sealant is applied perfectly for long-lasting protection.

Knowing When to Repair or Replace

Brick is incredibly resilient, but it’s wise to give your walls a quick look-over a couple of times a year. Check for any cracks in the tiles or crumbling mortar joints. Small cracks in the grout are often the first sign of settling or moisture issues and are much easier to fix when caught early. Because brick structures are known for their longevity, you likely won’t face major problems. However, if you notice any widespread cracking, loose tiles, or persistent damp spots, it’s a good idea to consult with masonry experts. A professional can assess the situation and determine if a simple repair is all that’s needed.

Transform Your Long Island Home with Brick Tiles

If you’re looking to add character and warmth to your Long Island home, there’s nothing quite like the classic look of brick. It feels both timeless and modern, fitting in everywhere from a cozy kitchen to a sophisticated living room. Brick wall tiles give you that authentic aesthetic without the complexities of traditional brickwork. They are a fantastic way to transform your home’s interior or outdoor living space with texture and style.

One of the biggest advantages of choosing brick tiles is their weight. Real brick is incredibly heavy and often requires extra structural support, which can complicate a renovation. In contrast, brick-look tiles offer the same visual appeal without the added weight, making them perfect for accent walls, kitchen backsplashes, and even second-story rooms. This lighter profile simplifies the installation process, as there’s less concern about tiles sagging or slipping. The durability of brick look tiles is also a major plus, as they are crafted to withstand daily life while being incredibly easy to clean and maintain.

With brick tiles, you get the best of both worlds: the rustic charm of exposed brick and the practical benefits of modern materials. You can create a stunning feature wall that becomes the focal point of a room or design a beautiful, low-maintenance outdoor kitchen that’s ready for entertaining. Because brick has such a timeless appeal, you can be confident it’s a design choice that will last for years to come. At Gappsi, our design team can help you select the perfect brick tiles to match your vision, ensuring a seamless and beautiful result for your home.

Related Articles

Frequently Asked Questions

Can I use brick tiles in a kitchen or bathroom where they might get wet? Absolutely, but your choice of material is important. For areas with high moisture, like a kitchen backsplash or a bathroom wall, porcelain brick tiles are a fantastic choice. They are manufactured to be dense and non-porous, so they won’t absorb water or stains. If you have your heart set on the authentic look of reclaimed clay brick, you can still use it, but it’s essential to apply a high-quality sealant to protect the porous surface from water damage and make cleaning easier.

Are brick tiles too heavy for a standard interior wall? This is a common concern, but you can rest easy. Brick tiles are specifically designed to be a lightweight alternative to traditional, full-sized bricks. Whether you choose thin-cut real brick or a porcelain replica, they are light enough to be installed on almost any standard interior wall without needing extra structural reinforcement. This is one of their biggest advantages, making them a practical choice for adding character to any room in your home.

What’s the real difference between reclaimed brick tiles and porcelain ones? It really comes down to a choice between authentic character and modern performance. Reclaimed brick tiles are sliced from genuine antique bricks, so each piece has a unique history, texture, and color variation for a truly rustic feel. Porcelain brick tiles are expertly manufactured replicas. They offer incredible durability, water resistance, and consistency in color and shape, which can simplify installation and maintenance. Both are great options, so the best choice depends on the specific look and function you need for your space.

Is installing brick tile a good DIY project? While it can be a rewarding project for a skilled and patient DIYer, it’s more complex than it looks. Achieving a professional result requires careful surface preparation, precise layout, straight grout lines, and the right adhesives. For a feature that will be a permanent part of your home, we often suggest hiring a professional. An experienced installer has the tools and expertise to ensure the tiles are secure, the finish is flawless, and the wall will look beautiful for years to come.

How much does a brick tile wall cost compared to a traditional brick wall? Brick tiles are a significantly more affordable way to get the look of brick. The tiles themselves are often less expensive than full bricks, but the biggest savings come from the installation. A traditional brick wall is a major construction project that requires a structural foundation and specialized masonry labor. Brick tiles are much lighter and faster to install, which dramatically reduces labor costs and eliminates the need for expensive foundational work.

Custom wood pergola with a modern design, white canopy, and outdoor seating area.

Custom Wood Pergola: A Complete Buyer’s Guide

Your home is a reflection of your personal style, and your backyard should be no different. Instead of settling for a generic, one-size-fits-all structure, you can create an outdoor oasis that is uniquely yours. A custom wood pergola serves as the perfect canvas for this personalization. You get to control every detail, from the exact dimensions and shape to the type of wood, the finish color, and integrated features like lighting or privacy screens. This is your opportunity to design a space that perfectly suits your needs and aesthetic, creating the backyard you’ve always wanted.

Key Takeaways

  • Choose a custom build over a kit for lasting quality: A custom pergola is tailored to your home’s exact dimensions and style, using superior materials designed for the local climate. This approach creates a seamless, durable addition, not a generic, one-size-fits-all structure.
  • Plan for function and durability from the start: Your choice of wood, like cedar or redwood, directly impacts your pergola’s lifespan. Integrating features such as lighting, electrical outlets, and privacy screens during the design phase is more efficient and creates a more useful, polished outdoor room.
  • Invest in professional installation for peace of mind: Hiring an experienced builder ensures your pergola is structurally sound, safe, and compliant with all local building codes. This protects your investment by preventing common DIY mistakes and guarantees a high-quality result that adds true value to your home.

Custom vs. Kit: Why Choose a Custom Wood Pergola?

When you start looking at pergolas, you’ll quickly find two main paths: pre-made kits and custom-built structures. While a kit might seem like a straightforward solution, a custom wood pergola offers unmatched benefits in quality, design, and long-term value, especially for a discerning homeowner. A custom approach ensures your new outdoor feature is a perfect extension of your home, not just a generic addition.

The Limits of a Pre-Made Pergola

A pre-made pergola kit is a one-size-fits-all solution for a home that is anything but. These kits come in standard dimensions with limited material and style options, which may not fit the unique layout of your yard or complement your home’s architecture. More importantly, the materials are often chosen for cost-effectiveness, not durability. They may not be prepared to handle Long Island’s humid summers and coastal air, making them susceptible to rot, warping, and insect damage. A structure that isn’t built for our specific climate can quickly become a maintenance headache, requiring frequent repairs or even a full restoration and sealing to keep it looking its best.

Design for Your Exact Size, Style, and Needs

Choosing a custom build means you are in complete control of the final product. Custom pavilions and pergolas are a versatile way to give your home and landscape a dynamic new look and feel because they are designed just for you. You can specify the exact dimensions to perfectly cover your patio, select a roof style that provides the right amount of sun and shade, and choose a design that echoes your home’s architectural details. Most importantly, you get to select the right material. Your choice of wood is the single biggest factor in your pergola’s longevity and upkeep. With a custom project, you can opt for premium, weather-resistant woods like cedar that will stand the test of time.

Add Lasting Value to Your Property

A beautiful, well-built pergola does more than just create a lovely spot for outdoor dining; it’s a smart investment in your property. A custom wood pergola can provide an estimated 50% to 80% return on investment by enhancing your outdoor living space and increasing your home’s overall appeal to future buyers. Unlike a standard kit, a custom structure feels like an intentional and permanent part of the home. It creates a true outdoor room that extends your living area and makes your home more enjoyable. This kind of thoughtful home remodeling adds significant functional and financial value that you and your family can appreciate for years to come.

What Are the Best Woods for a Custom Pergola?

Choosing the right wood for your pergola is one of the most important decisions you’ll make. This choice directly impacts your pergola’s appearance, its durability against the Long Island weather, and how much maintenance it will need over the years. While aesthetics are important, you also need a material that can stand up to humid summers, snowy winters, and everything in between. The best wood for you will balance your style goals, your budget, and your desired level of long-term upkeep.

At Gappsi, we guide homeowners through selecting the perfect materials for their custom pavilions and pergolas. Some woods offer incredible natural resistance to rot and pests, while others provide immense strength for larger, more intricate designs. Understanding the unique properties of each option helps you make an informed choice that you’ll be happy with for decades. Let’s look at some of the most popular and effective wood choices for a custom pergola.

Western Red Cedar

Western Red Cedar is a top contender for outdoor projects, and for good reason. This wood is naturally resistant to rot and insects, which makes it an incredibly durable choice for a pergola. You get peace of mind knowing your structure can handle moisture and pests without needing chemical treatments. Aesthetically, it has a beautiful reddish-brown tone that looks stunning with a clear sealant or can be left to age into a sophisticated silvery-gray. It’s a reliable, beautiful, and long-lasting option that performs exceptionally well in the Long Island climate.

Redwood

Similar to cedar, redwood is another premium choice known for its striking beauty and natural longevity. Its rich red hue brings a touch of elegance to any backyard, creating a warm and inviting atmosphere. Redwood contains natural oils and compounds that make it inherently resistant to decay and insects, so it’s built to last. With proper care and sealing, a redwood pergola can easily last for decades, making it a wonderful long-term investment for your home. It’s a fantastic material if you want your pergola to be a standout feature.

Pressure-Treated Pine

If you’re working with a specific budget, pressure-treated pine is often the most affordable wood for a pergola. This wood is chemically treated to resist rot and insects, giving it a durability it wouldn’t have otherwise. While it’s a cost-effective solution, it does require more diligent maintenance. You will need to regularly clean and apply a stain or sealant to prevent warping and decay, ensuring it lasts. With consistent care, a pressure-treated pine pergola can serve your family well for many years.

Douglas Fir

When strength is the top priority, Douglas Fir is an excellent choice. This wood is known for its structural integrity and durability, making it ideal for large or complex pergola designs that require long, sturdy beams. It’s exceptionally strong for its weight and can handle the demands of various climates, including environments with high moisture. Douglas Fir provides a solid, reliable frame for your outdoor living space. It also takes stains and paints very well, giving you complete flexibility to match your home’s exterior style.

Cypress and Tropical Hardwoods

For the ultimate in durability and elegance, tropical hardwoods like Ipe and Cumaru are in a class of their own. These woods are incredibly dense and so naturally resistant to weather, rot, and insects that they are often used for boardwalks and docks. A pergola built from a tropical hardwood offers unmatched longevity and a truly luxurious appearance. While the upfront cost is higher, the minimal maintenance and incredible lifespan make it a worthwhile investment for a high-end, permanent addition to your property.

What Are Your Customization Options for a Wood Pergola?

This is where the fun really begins. Choosing a custom wood pergola means you get to be the architect of your own backyard oasis. Unlike a one-size-fits-all kit, a custom design allows you to tailor every single detail to your home, your landscape, and the way you want to live outdoors. From the fundamental structure to the finishing touches that add comfort and personality, you have complete creative control.

Think of your pergola not just as a structure, but as a framework for your ideal outdoor experience. Do you envision a cozy nook for morning coffee, a grand space for entertaining friends, or a shaded retreat by the pool? The right customizations can bring that vision to life. As you explore the options, you’ll see how a few thoughtful choices can transform a simple wooden frame into the heart of your backyard. We can help you design and build stunning pavilions and pergolas that perfectly suit your style and needs. Let’s walk through the exciting possibilities for making your pergola uniquely yours.

Size, Shape, and Roof Design

The first and most important decisions you’ll make are about the pergola’s core structure. The size should be proportional to your yard and home, providing enough space for its intended use without overwhelming the landscape. Whether you need a small 10×10 frame for an intimate seating area or a large 20×30 structure to cover an outdoor kitchen and dining table, a custom build ensures a perfect fit. You can also get creative with the shape. While rectangular pergolas are classic, you might consider an L-shape to wrap around a corner of your patio or a custom shape that follows the curve of a swimming pool. The roof design itself offers more options, from traditional open rafters to angled louvers that provide more shade.

Stains, Finishes, and Paint Colors

The finish you choose for your wood pergola does double duty: it defines the structure’s aesthetic and provides critical protection from the elements. You can opt for a translucent stain that celebrates the natural grain and color of cedar or redwood, giving it a warm, organic feel. Alternatively, a solid stain or paint can create a completely different look. A crisp white pergola can feel bright and coastal, while a dark charcoal or espresso stain offers a modern, dramatic touch. You can even paint it to perfectly match your home’s trim for a seamless, integrated appearance. A quality finish is your first line of defense, so we always recommend professional restoration and sealing services to keep the wood healthy for years.

Integrated Lighting and Electrical Outlets

Don’t let the sunset put an end to your outdoor enjoyment. Planning for integrated lighting and electrical access from the start will make your pergola a functional and inviting space day or night. You can incorporate subtle downlights on the posts, recessed LEDs along the beams for a clean look, or hang elegant string lights for a festive ambiance. Beyond lighting, adding electrical outlets is a game-changer. They provide convenient power for speakers, a television, phone chargers, or even a blender for poolside drinks. Thoughtful electrical planning turns your pergola into a true extension of your home, ready for relaxation or entertainment at any hour.

Privacy Walls and Screens

While a pergola’s open design is part of its appeal, sometimes you need a bit of seclusion. Adding privacy walls or screens can shield you from nearby neighbors, block an undesirable view, or simply create a more intimate, room-like feel. These can be designed in countless ways. A solid wall on one side can offer complete privacy and wind protection, while slatted wood panels provide partial screening without completely closing off the space. For a decorative touch, consider laser-cut metal screens or a traditional lattice perfect for climbing vines. Even outdoor curtains can be installed on a track to give you flexible, resort-style privacy whenever you want it.

Heaters, Fans, and Retractable Canopies

Make your pergola comfortable through more of the year by incorporating climate control features. For chilly Long Island evenings in the spring and fall, built-in infrared heaters can be mounted overhead to provide gentle, radiant warmth that keeps you and your guests cozy. In the peak of summer, a ceiling fan can create a welcome breeze that makes hot, humid days much more pleasant. For the ultimate control over sun and shade, a retractable canopy is an excellent addition. You can extend it for full shade during the hottest part of the day and retract it in the evening to enjoy a view of the stars. These features maximize the usability of your investment.

Built-In Planters and Trellises

Integrate your pergola with the surrounding garden by incorporating elements for plants. Built-in planters at the base of the posts can create a beautiful, seamless look, allowing you to add colorful flowers or herbs right into the structure. You can also add trellises or wire systems to the posts and overhead beams to support climbing plants. Imagine fragrant wisteria, vibrant clematis, or classic climbing roses winding their way up the posts and across the roof. This not only softens the look of the structure and helps it blend with your landscape design, but the foliage will also provide additional natural shade and privacy as it grows.

How Much Does a Custom Wood Pergola Cost?

A custom wood pergola is a beautiful investment that adds living space, style, and value to your home. While it’s exciting to imagine the final result, it’s also important to understand the costs involved. The final price tag for a custom pergola can vary quite a bit, as it depends entirely on your specific choices. Most homeowners find themselves spending between $4,000 and $7,000, but this is just a starting point. A simple structure might be on the lower end, while a large, intricate design with premium materials can go well beyond $15,000. Let’s look at the four main factors that will shape your budget.

The Impact of Size and Footprint

The single biggest factor influencing the cost of your pergola is its size. A larger footprint requires more materials, more labor, and a more substantial foundation, all of which contribute to a higher price. Before you settle on dimensions, think about how you plan to use the space. Will it be a cozy nook for two, or will it need to accommodate a large dining table for entertaining? Planning the function first helps you determine the right size. A well-proportioned pergola not only provides shade and structure but also becomes a true extension of your home, making your backyard feel more complete. Our team can help you design custom pavilions and pergolas that perfectly fit your property and lifestyle.

Your Choice of Wood

The type of wood you select has a major impact on both the initial cost and the long-term maintenance of your pergola. Pressure-treated pine is often the most budget-friendly option and can last 10 to 15 years with proper care. For a more premium look and natural durability, woods like cedar and redwood are excellent choices. They have a natural resistance to rot and insects, often lasting 15 to 25 years. While they cost more upfront, their longevity can make them a worthwhile investment. Just as with our natural stone pavers, choosing the right material is key to creating an outdoor feature that stands the test of time.

The Complexity of the Design

A simple, four-post rectangular pergola will naturally cost less than a complex, multi-level structure with custom curves or an elaborate roof design. Intricate details, such as decorative post carvings, arched beams, or a unique lattice pattern, require more skilled craftsmanship and time to build. The height of the structure and the complexity of its connection to your home can also add to the cost. Working with an experienced designer ensures your vision is not only beautiful but also structurally sound. A professional landscape design process helps you avoid common mistakes and creates a pergola that seamlessly integrates with your home and yard.

Optional Add-Ons and Features

Custom features are what truly make a pergola your own, but they also add to the final cost. Popular add-ons include integrated lighting for evening ambiance, ceiling fans for a cooling breeze, and electrical outlets for convenience. You might also consider retractable canopies for adjustable shade, privacy screens for a more intimate feel, or built-in heaters to extend your outdoor season. It’s almost always more cost-effective to include these elements in the initial design rather than trying to add them later. Planning ahead ensures all wiring and structural supports are handled correctly from the start, giving you a polished and functional space for years to come.

DIY Pergola vs. Hiring a Professional Builder

Deciding between building a pergola yourself and hiring a professional comes down to more than just your budget or weekend availability. While the idea of a DIY project is tempting, a pergola is a permanent addition to your home. It’s important to weigh the convenience of a kit against the lasting quality and safety of a professional build. Let’s break down what each path looks like so you can make the right choice for your backyard.

What Comes in a DIY Kit

If you’ve ever put together a piece of furniture, you have a good idea of what to expect from a DIY pergola kit. These kits are designed to be straightforward, arriving with all the necessary components in one box. You’ll typically find pre-cut and pre-drilled lumber, along with the required screws, bolts, and other hardware. The goal is to simplify the process, removing the need for complex measurements or cuts. Most manufacturers claim that two people can assemble their pergolas in just a few hours, making it a manageable weekend project for someone who is comfortable with basic tools and following instructions.

Where DIY Projects Fall Short

The main drawback of a kit is its one-size-fits-all nature. Your yard isn’t standard, and a pre-made pergola can’t account for uneven ground, unique dimensions, or how the sun hits your patio at different times of day. A common mistake is choosing a height that feels too low and cramped or so tall that it fails to provide adequate shade. More importantly, installation errors can compromise the structure’s stability, creating safety risks. Without professional experience, it’s easy to overlook crucial steps that ensure your pergola can withstand Long Island’s coastal weather, leading to a structure that lacks durability and doesn’t truly fit your space.

The Benefits of Working with a Professional

Hiring a professional builder is an investment in peace of mind. While it costs more upfront, you’re paying for expertise that prevents costly mistakes and ensures the job is done safely and correctly. A professional team manages the entire process, from creating a custom design that complements your home to securing the necessary permits. They build pavilions and pergolas that are engineered to last and integrate perfectly with your landscape. Plus, a professionally installed, permitted pergola is often covered by your homeowner’s insurance, which isn’t always the case for a DIY build. This approach guarantees a beautiful, durable, and safe addition to your home.

How to Design the Perfect Pergola for Your Yard

Designing a pergola is more than just picking a style you like. It’s about creating a structure that feels like a natural extension of your home and lifestyle. A little forethought can be the difference between an awkward add-on and a stunning outdoor room that becomes your family’s favorite spot. Before you get caught up in the details of wood types and finishes, take a step back and look at the big picture. Think about how the pergola will integrate with your home’s architecture, your existing landscape, and the unique Long Island climate.

The perfect pergola design considers both form and function. It should provide the right amount of shade exactly where you need it, stand up to coastal weather, and complement the flow of your yard. Will it be a quiet retreat for your morning coffee, a poolside lounge area, or the centerpiece for your outdoor dining set? By answering these questions first, you can ensure your new pergola not only looks beautiful but also works perfectly for your needs. Working with a professional can help you see all the possibilities and create a truly cohesive design that blends seamlessly with your landscaping and patio.

Match Your Home’s Architectural Style

Your new pergola should look like it was always meant to be there. The best way to achieve this is by matching its design to your home’s existing architectural style. Custom pergolas are a versatile way to give your home and landscape a dynamic new look, but harmony is key. A modern home with clean lines might call for a sleek pergola with a simple, unadorned frame. A traditional colonial or cape-style house, on the other hand, could support a more classic design with decorative rafter tails and substantial posts. The goal is to create a visual connection between the two structures, making your yard feel like a true outdoor living room.

Choose the Right Location

Where you place your pergola is just as important as how it looks. It’s tempting to pick a spot based only on aesthetics, but you also need to consider function and structure. Think about how you plan to use the space. Do you want it attached to the house for easy access from the kitchen, or would a freestanding structure create a lovely destination spot by the pool? Pay attention to the sun’s path throughout the day to ensure your pergola provides shade when and where you need it most. Also, consider the foundation. A pergola needs a stable, level base, like one of Gappsi’s expertly installed porcelain or natural stone patios, to ensure its long-term stability.

Plan for the Long Island Climate

Long Island weather can be tough on outdoor structures. From humid, sunny summers to windy, snowy winters, your pergola needs to be built to last. Understanding the local climate and its impact on design is essential for creating a structure that remains beautiful and functional year after year. This means choosing materials that can withstand moisture, resist rot, and handle the occasional nor’easter. It also means designing for factors like snow load and wind resistance. Features like retractable canopies can offer flexible protection from sun and rain, while proper sealing and finishing will protect the wood from the elements.

Understand Local Permits and Building Codes

Before you break ground, it’s crucial to understand your local building codes. Many towns across Long Island have specific regulations for outdoor structures like pergolas, covering everything from their size and height to how close they can be to your property line. Trying to figure this out on your own can be a real headache, and making a mistake can lead to costly fines or even having to tear down your project. This is where working with an experienced professional really pays off. A reputable builder will be familiar with local requirements and can manage the entire permitting process for you, ensuring your beautiful new pergola is fully compliant and built to code.

Pergola, Pavilion, or Gazebo: What’s the Difference?

Walking through backyard design options can feel like learning a new language. The terms pergola, pavilion, and gazebo are often used interchangeably, but they describe three distinct structures with different functions. Understanding the difference is the first step to choosing the perfect centerpiece for your outdoor living space. The main distinction comes down to the roof design and the level of shelter each one provides.

A pergola is defined by its open, slatted roof supported by posts or columns. Think of it as a framework for your outdoor room. It creates partial shade, casting beautiful light and shadows, but it won’t offer full protection from rain or intense sun. Pergolas are fantastic for defining a walkway, creating an airy cover for a patio, or supporting climbing plants like wisteria or ivy. They add architectural interest without completely closing off a space.

A pavilion, on the other hand, features a solid, continuous roof but has open sides. This makes it the ideal choice if you want reliable protection from the elements. A pavilion can comfortably shelter an outdoor kitchen, a dining set, or a full seating area, keeping you and your guests dry during a summer shower and shaded on hot days. Gappsi offers a range of custom pavilions and pergolas to fit any backyard style.

Finally, a gazebo is a freestanding structure with a solid, pitched roof, a closed floor, and a distinct shape, often octagonal or round. Gazebos typically have built-in railings and seating, creating a more enclosed and intimate feel. They work beautifully as a quiet garden retreat or a charming focal point in a landscape design. So, when choosing, ask yourself: do you want decorative partial shade (pergola), a fully sheltered open-air room (pavilion), or a cozy, enclosed hideaway (gazebo)?

Common Mistakes to Avoid with Your Pergola Design

A custom pergola is a fantastic investment, but a few design missteps can keep it from reaching its full potential. Planning ahead helps you create a structure that is not only beautiful but also functional and durable for years to come. By sidestepping these common mistakes, you can ensure your new outdoor space is everything you dreamed it would be.

Choosing the Wrong Size or Placement

One of the easiest mistakes to make is getting the scale wrong. A pergola that’s too small will feel insignificant and fail to define the space, while one that’s too large can overwhelm your yard and home. It’s all about proportion. Think about how you want to use the area. Will it be for intimate dinners or large gatherings? The function should inform the footprint. Placement is just as important. Consider the sun’s path throughout the day to ensure you get shade right where you need it, and plan for a natural flow between your pergola and other spaces like your patio or swimming pool.

Focusing on Looks Over Durability

It’s tempting to choose a material based on aesthetics alone, but looks won’t matter if your pergola can’t handle a Long Island winter. Prioritizing appearance over structural resilience is a recipe for future problems. Lightweight wood or flimsy hardware might look good at first, but they can quickly fall victim to moisture, wind, and wear. A durable structure starts from the ground up with a solid foundation. Working with an expert ensures you select high-quality wood and strong masonry footings that provide both the style you want and the long-lasting strength you need.

Skipping Essential Weatherproofing

A pergola should be a comfortable retreat, but that won’t happen if it’s constantly exposed to the elements. Forgetting to plan for weather is a common oversight. For example, setting the structure’s height too low can make it difficult to add a fan for hot summer days or a retractable canopy for rain showers. An ideal height is typically between 8 and 10 feet. You should also think about how you’ll protect the wood itself. Proper sealing and staining are non-negotiable for preventing rot and weather damage, keeping your pergola looking its best season after season.

Ignoring Local Climate and Codes

Every design choice should be made with Long Island’s climate in mind. Your pergola needs to be strong enough to handle a heavy snow load and provide enough shade to offer relief during humid summers. You might consider an adjustable or louvered roof for maximum flexibility. Beyond the weather, you also need to account for local building codes. Depending on the size and location, your pergola may require a permit from your town. A professional builder will be familiar with these regulations and can manage the entire process, ensuring your project is safe, compliant, and built to last.

How Do You Maintain a Wood Pergola?

A custom wood pergola is a stunning addition to any Long Island backyard, but like any beautiful wooden structure, it needs a little care to stay that way. Think of it as protecting your investment. With our region’s mix of sunny summers, wet springs, and snowy winters, a consistent maintenance routine is the best way to ensure your pergola stands strong and looks great for years to come. The good news is that it doesn’t require a huge amount of work. A few simple tasks performed seasonally can prevent common issues like rot, fading, and weather damage, saving you from more significant repairs down the road. By staying on top of these small jobs, you can keep your outdoor retreat as inviting as the day it was built. Gappsi’s pavilions and pergolas are built to last, and with this guide, you’ll have all the information you need to maintain its beauty.

Perform Seasonal Cleaning and Inspections

Think of this as a quick health check for your pergola. At least once a season, take a walk around and give it a good look. Are there any loose screws or wobbly joints? Do you see any small cracks, signs of peeling stain, or rusted hardware? Catching these things early is the key. It’s also a great time for a gentle cleaning. You can use a soft brush to sweep away any cobwebs, leaves, or debris. For a deeper clean, a simple mixture of mild soap and water is usually all you need to wash away dirt and pollen. This simple seasonal routine helps keep your pergola looking fresh and allows you to spot potential issues before they become big problems.

Stain, Seal, and Refinish as Needed

Stain and sealant are your pergola’s best defense against sun and moisture. Within the first year or two of installation, it’s wise to apply a maintenance coat of stain and seal any small cracks with an exterior-grade caulk. After that, a good rule of thumb is to re-stain and seal your pergola every few years. The exact timing depends on the type of wood and how much direct sunlight it gets. A pergola in a very sunny spot might need attention more often than one in a shadier area. This step is crucial for preventing the wood from fading, drying out, or absorbing too much water. If the job feels too big, professional restoration and sealing services can get it done efficiently.

Prevent Rot, Pests, and Weather Damage

A little prevention goes a long way in protecting your pergola’s structural integrity. Once a year, check the base of each post to make sure water isn’t pooling there. Proper drainage is essential for preventing rot from starting at the bottom. While you’re there, clear away any soil, mulch, or debris piled up against the wood, as this can trap moisture and invite pests. It’s also a good idea to check and tighten any hardware, like bolts and screws, that may have loosened over time as the wood expands and contracts. Just be careful not to overtighten them. These proactive steps help ensure your pergola remains a safe and sturdy structure for your family to enjoy.

Prepare Your Pergola for Winter

Long Island winters can be tough, so getting your pergola ready is an important final step in your yearly maintenance plan. If your pergola has a retractable canopy or fabric shade, be sure to remove and store it to protect it from snow and wind. The most important task is to keep an eye on snow and ice accumulation on the roof. Heavy, wet snow can put a lot of stress on the structure. If you notice a significant buildup, use a broom with soft bristles or a roof rake to gently brush it off. Taking this simple precaution can prevent the weight from causing damage, ensuring your pergola is ready for action as soon as the warm weather returns.

Ready to Build Your Custom Wood Pergola?

Building a custom wood pergola is an exciting project, and you’re likely already picturing how it will transform your outdoor space. Before you start, a little planning goes a long way in creating a structure that’s both beautiful and built to last. The beauty of a custom build is that you can design a pergola that perfectly fits your yard’s dimensions and your personal style. Unlike a one-size-fits-all kit, a custom project gives you complete control over the final look and function.

Choosing the right materials is one of the most critical steps. Woods like Western Red Cedar and Redwood are popular for a reason, as they are naturally resistant to rot and insects, which is a huge plus for Long Island weather. While it can be tempting to focus on looks, a common mistake is choosing materials that can’t stand up to the elements. Prioritizing structural resilience will save you from costly repairs down the road. A professional can help you select the right wood for your design and local climate.

Once your pergola is built, a little upkeep will keep it looking its best for years. Simple pergola maintenance, like seasonal cleaning and applying a fresh coat of stain every few years, protects your investment. Working with an experienced builder ensures every detail, from the foundation to the final finish, is handled correctly. If you’re ready to create the perfect outdoor retreat, our team at Gappsi can help you design and build the custom wood pergola you’ve been dreaming of.

Related Articles

Frequently Asked Questions

How long will a custom wood pergola actually last? The lifespan of your pergola depends heavily on the wood you choose and how well it’s built. A pressure-treated pine structure might last 10 to 15 years with consistent maintenance. However, a custom pergola built by a professional using a premium, rot-resistant wood like cedar or redwood can easily last 20 to 30 years or more. Proper installation and routine care, like sealing the wood, are key to ensuring it stands up to the Long Island climate for decades.

What’s the main difference between a pergola and a pavilion? The simplest way to tell them apart is by looking at the roof. A pergola has an open, slatted or latticed roof designed to provide partial shade and create an airy, architectural feature. A pavilion has a solid, continuous roof that offers full protection from sun and rain, essentially creating a true open-air room. If you want a defined space with some light filtering through, choose a pergola. If you need reliable shelter for an outdoor kitchen or dining area, a pavilion is the better choice.

Do I really need a permit to build a pergola on Long Island? In most cases, yes. Many towns across Nassau and Suffolk counties have specific building codes for outdoor structures, including pergolas. The requirements often depend on the structure’s size, height, and whether it’s attached to your house. Navigating these local regulations can be complicated, which is a major benefit of working with a professional builder who understands the process and can handle the permits for you, ensuring your project is safe and compliant.

Can I add features like lights or a fan to my pergola later on? While it’s sometimes possible to retrofit these features, it is always better and more cost-effective to plan for them from the start. Integrating electrical elements like lighting, outlets, or a ceiling fan during the initial build means all the wiring can be hidden cleanly within the structure. Adding them later often requires running visible conduit, cutting into the wood, and hiring a separate electrician, which can be more complex and expensive.

How much maintenance does a wood pergola require in our climate? The maintenance is quite manageable, especially if you choose a durable wood. Your main tasks will be seasonal cleaning to remove dirt and debris, and inspecting for any loose hardware. The most important job is re-staining or sealing the wood every few years to protect it from sun and moisture. A wood like pressure-treated pine will require more frequent attention than a naturally resilient wood like cedar, but a little upkeep goes a long way in preserving the beauty and integrity of your investment.

Fixing a common hydrazzo pool finish problem like calcium buildup.

4 Hydrazzo Pool Finish Problems & How to Fix Them

Have you noticed a stubborn stain on your pool floor or a rough patch that feels like sandpaper under your feet? When you’ve invested in a premium surface like Hydrazzo, discovering these imperfections is incredibly disheartening. You’re not alone; these are common hydrazzo pool finish problems that can leave homeowners searching for answers. The good news is that most issues are preventable and, in many cases, fixable. This guide is designed to help you diagnose what’s going on with your finish. We will explore the root causes and provide clear, actionable steps to help you restore your pool’s stunning appearance and silky-smooth feel.

Key Takeaways

  • Prioritize a professional installation: The long-term quality of your pool’s finish is set from day one. Hiring an expert ensures correct surface preparation and proper curing, which prevents common problems like streaks, roughness, and peeling down the road.
  • Make water testing a weekly habit: Consistent water chemistry is the most important factor in maintaining your Hydrazzo finish. Regularly checking pH, alkalinity, and calcium levels prevents the water from becoming corrosive or leaving behind chalky scale deposits.
  • Address issues gently and know when to call for help: When you see a stain or rough patch, start with simple brushing and avoid harsh chemicals. If a problem persists, spreads, or seems serious, contact a professional for an accurate diagnosis and a safe solution.

What Is a Hydrazzo Pool Finish?

If you’re dreaming of a pool that feels as luxurious as it looks, you’ve probably come across the name Hydrazzo. So, what exactly is it? Think of Hydrazzo as the silk shirt of pool finishes. It’s a polished marble surface known for its incredibly smooth, silky texture. This premium finish is created from a blend of white marble, colored stones, and other carefully selected aggregates. The result is a stunning and durable surface that brings a touch of elegance to any swimming pool, transforming it into the centerpiece of your backyard. It’s a popular choice for homeowners who want a high-end look without compromising on strength.

What Makes Hydrazzo Different from Other Finishes?

While many pool finishes are available, Hydrazzo stands out for a few key reasons. It masterfully combines a smooth-to-the-touch feel with the strength of an exposed aggregate finish. In fact, it’s widely considered the smoothest exposed aggregate surface you can find. Unlike other materials that can be weakened by the finishing process, Hydrazzo actually becomes stronger and more compact when it’s polished. This unique quality gives it a dense, durable surface that’s built to withstand the test of time, making it a top choice for high-end swimming pools. It offers the best of both worlds: refined beauty and rugged resilience.

Why Homeowners Love Hydrazzo

It’s easy to see why Hydrazzo is a favorite among homeowners. Its timeless beauty and luxurious feel are perfect for creating a resort-like atmosphere, a key part of any major home remodeling project. It’s especially popular for spas or entertainment pools where comfort is key. Beyond its good looks, Hydrazzo is also incredibly practical. The dense, non-porous surface naturally resists common pool headaches like permanent algae and scale buildup. It’s also less prone to developing spots or stains, which means you can spend more time enjoying your pool and less time worrying about its upkeep. This is a finish that’s truly built to last.

Common Problems with Hydrazzo Pool Finishes

Hydrazzo is a beautiful and durable choice for a pool finish, but like any premium material, it requires proper installation and care to look its best. When things go wrong, the issues are often noticeable and can be frustrating for any homeowner. Understanding what these common problems look like is the first step toward preventing them or getting them fixed correctly. Most issues fall into a few key categories, ranging from simple cosmetic flaws to more serious signs of damage that could affect the longevity of your pool’s surface.

You might see changes in the color and texture of your finish, like blotchy areas, rough patches, or fine white dust that keeps coming back no matter how much you brush. In more serious cases, you could find cracks, hollow spots that sound different when you tap them, or even areas where the finish is starting to peel away from the pool shell. While this sounds concerning, the good news is that many of these problems are preventable with a professional installation and consistent maintenance. Knowing what to watch for helps you protect your investment and keep your swimming pool looking pristine for years to come. We’ll walk through the most frequent issues so you can identify them early and take the right steps.

Discoloration and Blotching

One of the most common complaints with any plaster finish is discoloration, and Hydrazzo is no exception. This can show up as uneven coloring, dark spots, streaks, or a generally blotchy appearance across the surface of your pool. Instead of a uniform, consistent color, you might notice patches that are lighter or darker than the rest. While sometimes this is just a cosmetic issue caused by inconsistent troweling or polishing during application, it can also be a sign of improper curing or water chemistry issues. It’s the kind of thing that can detract from the luxurious look you were hoping for.

Rough Patches and Streaks

A key feature of a Hydrazzo finish is its silky smooth texture. If you start to feel rough patches under your feet or hands, something is not right. These areas can feel like sandpaper and are often caused by mistakes during the installation, such as the crew not spending enough time polishing the surface consistently. Streaks can also appear, which are visual and textural imperfections. Not only is a rough surface uncomfortable for swimmers, but it also creates a place for algae and dirt to cling, making your pool harder to keep clean. A proper, meticulous application process is key to avoiding this.

Cracking, Chipping, and Peeling

Seeing cracks, chips, or peeling sections in your pool finish is a major red flag. These issues are more than just cosmetic; they point to a failure in the finish’s structure. Cracks can range from tiny hairline fractures to larger, more obvious splits. Chipping is when small pieces of the finish break off, while peeling, or delamination, is when the Hydrazzo layer separates from the concrete shell underneath. These problems often begin with poor surface preparation before the finish was applied or an incorrect startup procedure after the pool was filled. Addressing these issues quickly is essential to prevent further damage.

Calcium Buildup and White Dust

If you notice a fine white powder that settles on the pool floor or stubborn, crusty white deposits along the waterline, you are likely dealing with calcium. This is one of the most frequent issues homeowners face after installation, and it is almost always tied to water chemistry. When your pool water’s pH, alkalinity, or calcium hardness levels are too high, the water can leave behind mineral deposits, known as scale. If the levels are too low, the water can become corrosive and pull calcium directly from the finish, creating a “plaster dust” effect. Proper water balance is your best defense against this persistent problem.

What Causes Problems with a Hydrazzo Finish?

A Hydrazzo finish is incredibly durable, but it’s not indestructible. When problems like staining or cracking appear, they can almost always be traced back to one of four main causes. Understanding what goes wrong is the first step in keeping your pool finish looking flawless for years. From the day of installation to your weekly maintenance routine, every step plays a part in the longevity of your pool’s surface. Let’s look at the most common reasons why a Hydrazzo finish might run into trouble.

Poor Installation or Surface Prep

A perfect pool finish starts long before the Hydrazzo is even mixed. Many issues begin with improper preparation of the pool shell. If the underlying surface isn’t clean, stable, and correctly prepared, the new finish won’t bond well. The application itself is also a craft. An unevenly applied finish can result in blotches and streaks down the road. Many problems start simply because the pool wasn’t filled with water and started up correctly. This is why hiring an experienced team for your swimming pool installation is so critical. A professional ensures every step, from prep to polish, is handled with precision.

Mistakes During the Curing Process

The first 28 days after your Hydrazzo finish is applied are the most important. During this time, the finish goes through a curing and hydration process that sets its final hardness and color. This period requires careful attention. The pool must be filled with water immediately after the finish is complete, brushed twice a day, and have its water chemistry monitored closely. Skipping these steps or doing them incorrectly can interrupt the curing process, leading to a weaker finish that’s more susceptible to stains, scaling, and discoloration. Think of it as protecting a major investment while it settles into its final, beautiful state.

Imbalanced Pool Water Chemistry

After the initial installation and curing, imbalanced water chemistry becomes the number one cause of Hydrazzo problems. If your pool water’s pH, total alkalinity, or calcium hardness levels are off, it can become aggressive. This “hungry” water will try to balance itself by leaching calcium directly from the plaster finish, causing it to etch and become rough. On the other hand, water with excessively high calcium levels can deposit scale, leaving chalky white residue on the surface. Regular water testing is non-negotiable for maintaining a healthy finish. If you notice persistent scaling or etching, it may be time to call for professional restoration and sealing services.

How Weather and Seasons Play a Role

Even the weather on installation day can affect the outcome of your Hydrazzo finish. The material needs to dry and cure at a controlled rate. Conditions like high winds, direct sun on a hot day, or very low humidity can cause the surface to dry too quickly. This rapid drying can lead to shrinkage cracks and a weaker finish overall. A professional installer knows how to manage these variables, often choosing to work during cooler parts of the day or taking measures to protect the fresh surface from the elements. It’s a small detail that makes a huge difference in the final quality and durability of your pool.

How Water Chemistry Impacts Your Hydrazzo Finish

Think of your pool water as a living environment. Its chemistry is constantly changing, and keeping it balanced is the single most important thing you can do to protect your beautiful Hydrazzo finish. While this polished surface is incredibly durable, it’s not invincible. Unbalanced water can slowly cause damage that dulls its shine and ruins its smooth texture. The good news is that with a little knowledge and consistent testing, you can keep your water in perfect harmony and your swimming pool looking pristine for years. Understanding a few key factors, like pH, alkalinity, and calcium hardness, is your first step toward becoming a pro at pool care.

The Role of pH and Alkalinity

The first two measurements to watch are pH and total alkalinity. Because a Hydrazzo finish contains natural marble and cement, it’s sensitive to acidic conditions. If your pool’s pH and alkalinity levels drop too low, the water becomes acidic and starts to break down the cement components of the finish. This process can expose the marble aggregate underneath, turning your once-silky surface into something that feels rough and abrasive, almost like sandpaper. Maintaining a stable pH and alkalinity acts as a buffer, protecting the integrity of the finish and ensuring it stays smooth and comfortable for every swim.

Why Calcium Hardness Matters

Next up is calcium hardness, which measures the amount of dissolved calcium in your pool water. This is all about finding a happy medium. If the calcium level is too low, the water becomes “hungry” and aggressive. It will try to get the calcium it needs by pulling it directly from your pool’s finish, causing etching and pitting over time. On the other hand, if the calcium level is too high, the water becomes oversaturated and will start to deposit the excess calcium as scale. This leaves behind chalky, white mineral deposits that are difficult to remove and can make your finish feel gritty. Proper restoration and sealing may be needed if scaling becomes severe.

Aggressive vs. Scaling Water

So, you have two potential enemies: aggressive water and scaling water. Both are caused by imbalanced chemistry. Aggressive water, which is often too acidic or low in calcium, actively damages the finish by dissolving parts of it. This is what leads to roughness and a shorter lifespan for your pool surface. Scaling water does the opposite. It leaves mineral deposits on the finish, affecting both its appearance and texture. You might see cloudy patches or feel a gritty layer on the walls and floor. Both issues stem from unbalanced water, which is why regular testing is not just a suggestion, it’s a necessity for maintaining your investment.

The Risk of Acid and Exposed Marble

When you see a stain or a rough patch, it can be tempting to reach for a quick, powerful fix like an acid wash. Please don’t. Using harsh chemicals without knowing the exact cause of the problem can make things much worse. A strong acid wash can strip away the delicate top layer of your Hydrazzo finish, permanently damaging it and shortening its life. This can expose the raw marble aggregate, completely ruining the smooth, polished feel that makes Hydrazzo so luxurious. Instead of attempting a risky DIY treatment, it’s always best to consult a professional who can diagnose the issue correctly. You can see examples of our expert work on our YouTube channel.

Why the First 28 Days Are So Important

Think of the first month after your Hydrazzo finish is installed as the most important time in your pool’s life. This initial 28-day period is when the finish cures and hardens, setting the stage for its long-term beauty and durability. What you do, or don’t do, during this window has a lasting impact. Getting this startup phase right is the single best way to protect your investment and ensure your swimming pool looks incredible for years to come. It’s not just about waiting, it’s about actively caring for the new surface as it settles.

The Make-or-Break Startup Period

The first 28 days are absolutely critical because the Hydrazzo finish is undergoing a rehydration process. As soon as the plastering is complete, the clock starts ticking. The shell needs to be filled with water immediately to allow the material to cure properly underwater. This isn’t a passive process. It requires consistent, hands-on attention to prevent issues like blotching and streaking from developing. Skipping or rushing these steps can compromise the integrity of the finish, leading to problems that are much harder to fix later. This initial care is what creates that smooth, luxurious surface Hydrazzo is known for.

Essential Steps: Filling, Brushing, and Testing

During the startup period, a few key actions are non-negotiable. First, the pool must be filled with water right away. Next, you’ll need to brush the entire surface twice daily to sweep away any plaster dust and ensure a uniform cure. Just as important is monitoring the water chemistry. You should test the water regularly to keep the pH levels between 7.2 and 7.6 and the total alkalinity between 80 and 120 parts per million. It’s also crucial to avoid adding chlorine for the first two weeks and to keep saltwater generators off for at least 30 days. This careful process is the foundation of long-term pool restoration and sealing.

The Value of a Professional Startup

While you can try to manage the startup yourself, we strongly recommend letting a professional handle it. Balancing water chemistry is a delicate science, especially in a brand-new pool where levels can fluctuate quickly. An expert knows exactly what to look for and how to make precise adjustments to keep the water perfectly balanced from day one. Entrusting your pool’s startup to an experienced team like Gappsi’s is the best way to protect your new finish. We ensure every step is followed correctly, giving your Hydrazzo surface the ideal environment to cure into a flawless, durable, and beautiful finish.

How to Prevent Problems with Your Hydrazzo Finish

A Hydrazzo finish is a fantastic investment for your pool, offering a silky-smooth surface and lasting beauty. Like any premium feature, it needs the right care to stay in top condition. The good news is that preventing problems is straightforward. It all comes down to a combination of professional installation and consistent, mindful maintenance. By focusing on a few key areas from day one, you can ensure your pool finish remains flawless for years to come. Let’s get into the simple, actionable steps you can take to protect your investment and keep your pool looking its best.

Hire a Qualified Installer

The single most important step to prevent issues is to start with a flawless installation. Make sure a trained Hydrazzo installer does the work. They should follow all steps carefully, from preparing the pool shell to applying and polishing the finish. This isn’t a place to cut corners. An expert knows how to properly prep the surface, mix the material to the right consistency, and apply it for a uniform look. The final polishing is what creates that signature smooth feel, and it requires a specific technique. A professional swimming pool company ensures every stage is handled correctly, preventing future headaches like streaks, rough patches, and peeling.

Test Your Water Regularly

Your pool’s water chemistry is the biggest factor in your Hydrazzo finish’s long-term health. You should test your pool water often for pH, total alkalinity, and calcium hardness. Adjust chemicals as needed to keep the water balanced. This is the best way to prevent damage from corrosive or scaling water. Imbalanced water can slowly eat away at the finish or cause chalky calcium deposits to form. Keeping a simple testing kit on hand and checking the levels weekly will help you make small adjustments before they become big problems. Consistent water management is the secret to preserving that beautiful, smooth surface for years.

Keep Up with Brushing and Circulation

Regular physical maintenance is just as important as chemical balancing. You should brush your pool regularly, especially when it’s new, to help remove plaster dust and keep the surface even. Brushing helps polish the surface over time and prevents algae or scale from getting a foothold. It also helps mix the chemicals you add to the water. Along with brushing, ensure your pump and filter are running long enough each day to circulate the water properly. Good circulation distributes chemicals evenly and prevents stagnant spots where problems can begin. You can find helpful visual guides on pool care on the Gappsi YouTube channel.

Prepare Your Pool for Every Season

For homeowners on Long Island, seasonal changes play a big role in pool care. Pay close attention during your pool’s opening and closing. These are critical times to inspect the finish, take photos, and keep records of your water tests. When you open your pool for the summer, check for any changes that may have occurred over the winter. Before closing it, make sure the water is perfectly balanced to protect the finish during the cold months. Keeping a log of your inspections and water tests helps you track the health of your pool finish over time and spot any gradual changes before they require major restoration and sealing.

Red Flags to Watch For with Your Pool Finish

Even the most durable pool finish needs a little attention. Knowing how to spot trouble early can save you from costly repairs down the road. While some changes are normal, certain red flags indicate that your Hydrazzo finish needs a closer look. Pay attention to how your pool surface looks and feels, and don’t hesitate to investigate if something seems off. Acting quickly is the best way to protect your investment and keep your pool looking beautiful for years to come.

Recurring Stains or White Dust

Have you noticed stubborn stains that keep coming back, or a fine, white dust that settles on the surface? These are common signs that something is amiss. Discoloration can appear as white streaks, dark spots, or patches of uneven color. While a single spot might just be a bit of dirt, recurring stains often point to an underlying problem. A pale area could be a sign of scale buildup or etching from improper water chemistry, while a dark spot might be caused by metals in the water. If cleaning doesn’t solve the problem, it’s time to investigate the root cause.

Roughness or Hollow Spots

Your Hydrazzo pool finish should feel silky smooth. If you run your hand along the surface and find rough, sandpaper-like patches, it’s a clear warning sign. This roughness often indicates etching or scale. An even more serious issue is discovering hollow spots. If you tap on the finish and hear a hollow sound, it means the plaster has begun to separate from the pool’s shell, a problem known as delamination. These issues frequently trace back to improper surface preparation or application, so they require a professional eye to properly diagnose and fix.

Spreading Cracks or Discoloration

A single, tiny hairline crack might not be an immediate emergency, but it’s something you should monitor closely. If you notice that crack beginning to spread, or if new ones appear, you have a developing problem. The same principle applies to discoloration. A small, isolated spot is one thing, but an area of discoloration that is visibly growing suggests a persistent issue that won’t fix itself. Ignoring these spreading symptoms can turn a manageable repair into a major project. Prompt action is key to preventing small flaws from compromising your entire swimming pool finish.

When Minor Issues Signal Major Damage

It’s easy to dismiss a small stain or a slightly rough patch as a minor imperfection. However, these can be the first symptoms of significant damage. For example, what looks like a simple stain could actually be a sign that aggressive water chemistry is eating away at the finish. Hollow spots and peeling are never minor issues; they point directly to a failure in the bond between the finish and the pool structure. Our experts in restoration and sealing can help determine if a small problem is just cosmetic or a sign of something more serious.

What to Do When You Spot a Problem

Seeing an unexpected spot or rough patch in your beautiful Hydrazzo pool can be alarming. But before you worry, take a deep breath. Most issues can be managed, especially when caught early. The key is to follow a calm, step-by-step process to figure out what’s going on and how to handle it. Acting quickly doesn’t mean acting rashly. By first assessing the situation, trying a few simple remedies, and knowing when to bring in an expert, you can protect your investment and keep your pool looking its best for years to come. This approach helps you address problems effectively without accidentally making them worse. Let’s walk through what to do the moment you notice something isn’t right.

Assess the Damage

If you notice something off, like white dust, dark spots, or a rough texture on your pool’s surface, it’s time to play detective. Waiting can allow a small issue to become a much bigger headache. Take a close look at the problem area. Is it a pale spot or a dark one? A pale spot might be a sign of scale, etching, or even an issue from the initial application. A dark spot could be anything from organic debris and metal stains to a problem with your water chemistry. Understanding the specific appearance of the blemish is the first step in diagnosing the root cause and finding the right solution.

Try Gentle Fixes First

Your first instinct might be to reach for a strong chemical, but with a premium finish like Hydrazzo, a gentle approach is always better. Harsh acid washing can damage the polished surface and shorten its lifespan. Instead, start with the basics. Regularly brushing your pool walls and floor is one of the most effective things you can do. This simple task helps remove any plaster dust, prevents debris from settling, and keeps the surface smooth and even. If brushing doesn’t resolve a minor texture issue, a professional might recommend a light re-sanding or a specialized non-acid treatment, which are much safer for the finish.

Know When to Call a Professional

Some problems are more than a homeowner can or should handle alone. If you see a stain that keeps spreading, a rough patch that is growing, or an issue that returns after you’ve balanced the water, it’s time to call for help. A trained pool expert can tell the difference between surface dirt and deeper damage. They will inspect the mark, feel the surface, and perform precise water tests to identify the true cause. For any complex or persistent issues with your finish, getting a professional diagnosis from a swimming pools company is the smartest and safest path forward to protect your pool.

Is a Hydrazzo Finish Right for Your Long Island Pool?

Choosing a pool finish is a big decision, and Hydrazzo is often at the top of the list for its luxurious feel and stunning appearance. But before you commit, it’s important to weigh its unique benefits against its specific care requirements. For many Long Island homeowners, it’s the perfect choice, but it’s not a set-it-and-forget-it option. Here’s a straightforward look at what owning a Hydrazzo pool really involves.

Balancing Longevity and Maintenance

A Hydrazzo finish is known for its durability, but its silky, polished surface is sensitive. It can be prone to mottling, streaking, and scaling if not cared for properly. These issues often stem from an improper initial start-up or fluctuating water chemistry. To keep your finish looking its best, you’ll need to regularly test the water to maintain the correct pH and alkalinity levels. Using a sequestering agent can also help prevent metal staining and scale buildup. If you do notice roughness or discoloration, a professional can often fix it with a light re-sanding. It’s best to avoid harsh acid washing, as it can damage the finish and shorten its lifespan.

Understanding the Investment

There’s no denying the appeal of a Hydrazzo finish. It’s made from a blend of white marble and colored aggregates, polished to create a smooth, timeless look that feels incredible. This is why it’s a popular choice for high-end swimming pools and spas where luxury is a priority. While Hydrazzo has a higher upfront cost compared to standard plaster, think of it as a long-term investment in your backyard. Its dense, durable surface resists algae and stains better than many other finishes, potentially saving you money on chemicals and intensive cleaning down the road. For homeowners who want a premium finish that will last for many years, the initial cost is often well worth it.

Let Gappsi Perfect Your Pool Finish

A Hydrazzo finish is a beautiful investment for your pool, but keeping it flawless requires a keen eye and expert care. When you notice something off, like a stubborn stain or a rough patch, it’s easy to feel a little panicked. Is it just surface dirt, or is it a sign of a bigger problem? This is where professional experience makes all the difference. Many issues with pool finishes stem from things that happened long before you noticed a problem, like improper surface preparation or mistakes during the initial startup.

Even with a perfect installation, unbalanced water chemistry can cause trouble. If your pool water’s pH or calcium levels are off, it can slowly damage the finish. A trained expert can properly assess the damage, test your water, and determine the root cause. Waiting too long can turn a small fix into a major repair. If you see a stain that keeps coming back, a rough area that’s growing, or any changes that concern you, it’s time to call for help. Our team at Gappsi specializes in high-end swimming pools and has decades of experience installing and maintaining premium finishes like Hydrazzo. We can diagnose the issue and provide the right solution, from deep cleaning and chemical adjustments to more involved restoration services. Let us handle the hard work so you can get back to enjoying your beautiful pool.

Related Articles

Frequently Asked Questions

Is Hydrazzo really that much better than a standard pool finish? Think of it this way: while a standard plaster finish is functional, Hydrazzo is a luxury upgrade in both feel and performance. Its main advantage is the unique combination of a silky, polished texture with the durability of an aggregate surface. This dense, non-porous finish is naturally better at resisting algae and stains, which can mean less time spent on intensive cleaning. If you want a pool that feels exceptionally smooth and maintains a pristine look for years, Hydrazzo is an excellent investment.

How long can I expect my Hydrazzo finish to last? With proper installation and consistent care, a Hydrazzo finish can last 15 to 20 years, or even longer. The key to its longevity is twofold: a flawless installation and startup process, followed by diligent maintenance. The single biggest factor you can control is balanced water chemistry. Regularly testing your water and keeping the pH, alkalinity, and calcium levels in the ideal range will protect the finish from etching and scaling, ensuring it stays beautiful for many seasons.

What is the single most important thing I can do to protect my new finish? The most critical period is the first 28 days. Ensuring your pool undergoes a professional startup, which includes proper filling, daily brushing, and careful water balancing, is essential for the finish to cure correctly. After that initial month, your most important job is to consistently test your pool water at least once a week and make small chemical adjustments as needed. This proactive approach prevents the water from becoming aggressive or scaling, which are the main culprits behind long-term damage.

Can I fix a small stain or rough patch myself? It can be tempting to try a quick fix, but we strongly advise against it. Harsh chemicals or abrasive tools can permanently damage the polished surface of your Hydrazzo finish. What might look like a simple stain could be a sign of a water chemistry issue that a chemical patch will only mask or worsen. Your best first step is always gentle brushing. If the issue persists, it’s time to call a professional who can accurately diagnose the problem without risking the integrity of your pool’s surface.

Is a Hydrazzo finish slippery since it’s so smooth? This is a great question and a common concern. While the finish is polished to a very smooth, silky feel, it is not slippery in the way wet tile can be. The surface is composed of finely blended aggregates that, even when polished, provide a comfortable and secure footing. You get the luxurious feel under your feet without sacrificing safety, making it an ideal surface for family fun and relaxation.

Travertine Pool Deck: Cost, Installation & Care

Travertine Pool Deck: Cost, Installation & Care

Pool decking has to handle more than appearance. On Long Island, it must stay comfortable under summer sun, provide dependable footing around wet surfaces, and tolerate seasonal freeze-thaw conditions. The material and installation method also need to work with the pool structure, coping, drainage, and surrounding masonry.

Call Gappsi at (631) 831-3177 to discuss a travertine pool deck for your Long Island home.

A travertine pool deck is a natural-stone surface that can offer a cooler walking temperature, textured slip resistance. And a practical fit for pool renovations when it is properly selected, installed, finished, and maintained. Costs vary by stone grade, paver style, site preparation, and whether the installation is sand-set or mortar-set.

Choosing between beige or silver travertine is only the beginning. The right decision depends on how the stone will meet a gunite pool edge. How the base will manage water and movement, and how regularly the surface will be cleaned and sealed. Those details establish why travertine is often considered for Long Island pool environments.

What Is a Travertine Pool Deck and Why Is It a Natural Choice for Long Island?

A travertine pool deck is an outdoor pool surface made from travertine pavers, a form of natural limestone created when mineral-rich water deposits layers of calcium carbonate over time. Its softly varied color, small surface voids, and natural texture give a pool surround more visual depth than a uniform poured slab. Beige and silver tones can also coordinate with gunite, coping, masonry walls, and planting throughout a Long Island backyard.

Travertine is especially well suited to the area around a pool because it combines practical surface characteristics with a natural stone appearance. The material stays relatively cool to the touch in direct sunlight, which makes barefoot movement more comfortable during summer use. Gappsi identifies natural cooling as a key reason travertine is recommended for pool decks. Learn more about Gappsi swimming pools.

Natural travertine pavers around a Long Island swimming pool

How does travertine handle water around a pool?

The stone’s textured surface provides natural slip resistance, an important consideration where swimmers regularly track water onto the deck. Proper finishing and sealing help maintain a non-slip surface suitable for a pool environment. Travertine pavers also handle routine water exposure well when the base, joints, drainage, and installation method are designed correctly.

What makes travertine a practical Long Island material?

Long Island pool decks face intense sun, seasonal temperature changes, and freeze-thaw conditions. Proper material selection and installation matter more than the label alone. Carefully selected travertine that is correctly installed can remain durable through freeze-thaw cycles, while a professional layout helps manage transitions at pool edges and other masonry connections. Gappsi coordinates masonry with pool construction so the deck, coping, and pool edge are planned as one system.

The result is a surface that feels cooler than many conventional options, offers a naturally refined appearance, and supports safer circulation around the water. Periodic cleaning and sealing remain part of responsible care, but travertine does not require a complicated maintenance routine when it is installed and finished appropriately.

How Much Does a Travertine Pool Deck Cost per Square Foot?

A reliable cost per square foot for a Long Island travertine pool deck requires more than multiplying the deck area by a material price. The final quote reflects the stone selected, the condition of the site, the installation method, access, drainage, pool geometry, and the labor needed to prepare a stable base. A professional measurement and site review are necessary before anyone can price the work responsibly.

How do travertine grade and finish affect the estimate?

Beige and silver travertine pavers can differ in availability, sorting, color variation, thickness, and visual consistency. A selected grade with fewer noticeable variations may carry a higher upfront material cost, while a more varied stone can create a broader natural palette. Finish matters as well. Honed surfaces have a smoother appearance, while tumbled edges and texture create a softer, weathered look. The right choice should balance appearance, pool safety, maintenance, and the overall masonry design.

Material quality is not simply an aesthetic decision. Properly selected and installed travertine is suited to pool environments, and a properly finished surface can provide natural slip resistance. Spending more upfront on stone that fits the site and installation plan may support longer-term value, especially in a climate with seasonal freezing and thawing.

What installation conditions change the cost?

Deck size affects total investment, but it is only one part of the calculation. A small, irregular pool area may require more layout and cutting work than a larger, straightforward rectangle. Existing concrete may allow a sand-set or mortar-set approach, depending on its condition, drainage, elevation, and structural suitability. If the base is uneven, cracked, poorly drained, or needs removal, sub-base preparation can add labor and materials before the pavers are installed.

New gunite construction also requires careful coordination around coping, steps, drainage, and pool edges. Ask for a quote that separates stone selection, demolition or preparation, installation, coping, sealing, and related masonry work. That detail makes proposals easier to compare and helps ensure the finished deck performs as intended.

Masons installing natural travertine pavers around a gunite pool edge

Travertine vs Concrete, Porcelain, and Bluestone for Pool Decks

Material choice affects how a pool deck feels underfoot, performs around water, and holds up through Long Island winters. Travertine offers a naturally textured surface and remains relatively cool in direct sunlight. When properly finished and sealed, it also provides useful slip resistance for pool environments. The best choice depends on how you weigh heat, maintenance, appearance, and installation requirements.

How does travertine compare with concrete?

Poured concrete can provide a broad range of colors, textures, and patterns, but its surface and color may change as it weathers. Travertine brings natural variation and can be installed as pavers, including over an existing concrete deck with either a sand-set or mortar-set method. That approach can simplify a renovation when the underlying slab is suitable. Concrete may be the practical choice for a continuous surface, while travertine is often better suited to homeowners who want a natural stone texture and cooler walking surface.

Is travertine a better choice than porcelain pavers?

Porcelain pavers offer consistent sizing and a clean, manufactured appearance, but they require careful specification and installation around pool edges. Travertine has more variation from piece to piece, which can make the finished deck feel less uniform but more connected to a natural-stone landscape. Bluestone provides a dark, structured look, though darker stone can feel warmer in strong sun. Compare samples in the actual pool setting before deciding.

Pool deck material comparison
Material Heat retention Slip resistance when wet Maintenance Freeze-thaw durability Appearance
Travertine Generally stays cooler in direct sun Naturally textured; improved with proper finish Low maintenance; periodic cleaning and sealing Durable when quality stone is properly installed Natural variation in beige, silver, and related tones
Poured concrete Can retain noticeable heat in sun Depends on texture and finish Periodic cleaning; surface upkeep may be needed Depends on mix, drainage, joints, and installation Uniform or patterned, with broad finish options
Porcelain pavers Depends on color, profile, and exposure Depends on the rated surface finish Typically straightforward cleaning Depends on product rating and installation system Consistent sizes, colors, and manufactured patterns
Bluestone Can feel warmer because of its darker color Depends on finish and surface texture Periodic cleaning and appropriate sealing Depends on stone selection, drainage, and installation Dark blue-gray tones with a more formal appearance

For a detailed look at related options, review Gappsi’s natural stone pool decking guidance. Travertine is a strong fit when cooler surface temperatures, wet-foot traction, low routine maintenance, and natural variation matter. Its freeze-thaw performance still depends on correct stone selection, drainage, base preparation, and installation.

Request a project-specific travertine deck estimate from Gappsi.

How Is Travertine Decking Installed Around a Gunite Pool Edge?

A successful pool deck installation begins before the first travertine paver is set. The gunite shell, coping line, drainage plan, and masonry layout must be treated as one coordinated system. This is especially important at the pool edge, where small changes in elevation or alignment can create an uneven transition between the waterline, coping, and walking surface. Gappsi coordinates masonry with pool installation to create seamless transitions between deck materials and pool edges. Learn more about swimming pool construction and masonry coordination.

The installation sequence protects the pool edge

  1. Prepare the site and gunite edge. The crew confirms the finished elevations, checks the gunite edge and coping dimensions, and removes loose material or debris. The edge must be clean, stable, and properly coordinated with drainage before the deck base is installed.
  2. Build or verify the supporting base. Travertine pavers need a stable, properly graded foundation that can handle normal pool-deck foot traffic. Where the existing foundation is suitable, travertine may be installed over concrete using a sand-set or mortar-set method. The chosen assembly depends on the condition and layout of the base, as well as the required transition at the gunite shell. See the travertine paver installation options for additional context.
  3. Select the setting method. A sand-set system places pavers on a prepared bedding layer, while a mortar-set system bonds the pavers to the prepared surface. The installer selects the method with the pool structure, elevations, drainage, and long-term movement in mind. This decision should be made with the gunite and masonry crews, not after the pool edge is complete.
  4. Place and cut the pavers at the coping. The field pavers are laid according to the design, with cuts measured carefully around corners, curves, steps, and the coping edge. Consistent joint lines and a deliberate edge detail produce a cleaner transition than forcing irregular pieces into the final row.
  5. Fill joints and compact the surface. Joint sand is swept into the spaces between pavers, then the surface is compacted using equipment and protection appropriate for the stone. The goal is a stable walking surface without disturbing the coping or shifting the edge pieces.
  6. Seal the finished travertine. After the installation materials have set and the surface is clean and dry, the travertine can be sealed with a product appropriate for the stone and pool environment. Proper finishing helps support a non-slip surface, while periodic sealing and cleaning help maintain appearance and longevity, as noted in Gappsi’s pool material guidance.

The critical detail is coordination: the gunite crew establishes the pool structure, while the masonry team carries those elevations and lines into the deck. That shared plan helps the finished travertine surface meet the pool edge cleanly and perform as intended.

Does a Travertine Pool Deck Get Hot in the Sun?

A travertine pool deck can warm in direct sun, but it generally feels more comfortable underfoot than many dense paving materials. The stone’s natural structure helps it stay cool to the touch, even during sunny afternoons. That makes travertine a practical choice for the walkways, lounging areas, and pool edges where bare feet are common. The cooling benefit is not a promise that the surface will never warm. Shade, air movement, stone color, moisture, and the intensity of the sun all affect how it feels.

Why travertine feels cooler around a pool

Natural travertine is valued for its heat resistance and natural cooling properties in pool-deck applications. Its lighter beige and silver tones can also support a cooler visual and physical surface than very dark paving. The finish still matters. A properly selected and finished stone should provide texture for traction, while regular care helps preserve the surface in a wet pool environment. Gappsi identifies travertine as a pool-deck material that stays relatively cool in direct sunlight and offers natural slip resistance. Learn more about swimming pool materials and surrounds.

Comfort underfoot is only one part of the decision. A Long Island deck also needs to handle seasonal temperature changes, water exposure, foot traffic, and movement at the pool edge. That is why the base, drainage, joint treatment, stone selection, and installation method matter as much as the surface material. A properly installed travertine system is designed to manage these conditions rather than relying on the stone alone.

How travertine handles Long Island freeze-thaw cycles

Well-selected, properly installed travertine can resist freeze-thaw conditions. Water that enters a paving system can expand as it freezes, so sound drainage and installation details are important for reducing stress, shifting, and cracking. This is especially relevant around a pool, where repeated wetting can increase exposure to seasonal changes.

An academic study of travertine-based pervious concrete reported strength loss ranging from 11.39% to 17.93% after 25 freeze-thaw cycles, with the strongest resistance observed in one tested mixture. The study examined a specific pervious-concrete formulation, not every travertine paver or pool-deck assembly, so its results should not be treated as a direct lifespan guarantee. It does, however, provide useful evidence that travertine-based materials can retain substantial structural performance through repeated freezing and thawing when engineered appropriately. Read the PubMed study on travertine-based pervious concrete.

For a durable installation, evaluate the stone and the complete assembly together. Confirm the substrate, slope, drainage, edge details, and setting method before work begins. Those decisions help a travertine deck remain comfortable in summer and stable through winter.

How to Clean and Maintain a Travertine Pool Deck

A travertine pool deck is relatively low maintenance, but a simple care routine helps preserve the stone’s color, texture, and service life. Periodic cleaning and sealing are recommended for travertine used around swimming pools, where sunscreen, leaves, soil, splashed chemicals, and standing water can collect on the surface. The goal is not to scrub aggressively. It is to remove residue without damaging the stone or reducing its natural slip resistance.

What is the safest way to clean travertine?

Begin with routine sweeping using a soft-bristle broom to remove grit, leaves, and other debris before it is ground into the surface. Follow with a rinse using a garden hose and allow the deck to drain and dry. For stuck-on grime near the pool waterline, use a soft brush and a pH-neutral stone cleaner mixed according to the product directions. Rinse thoroughly so cleaner residue does not remain in the travertine’s pores.

Travertine is calcium-based, so acidic substances can etch it. Citrus, wine, vinegar, and harsh cleaning agents may leave dull spots or change the surface texture. Avoid acidic cleaners, abrasive powders, stiff wire brushes, and pressure-washing settings that can dislodge joints or damage the stone. If a spill occurs, blot it promptly rather than spreading it across the deck.

Clean travertine surface being rinsed and maintained beside a pool

How often should travertine be sealed?

Periodic resealing helps maintain the appearance and longevity of a travertine pool deck. The right interval depends on the sealer, exposure, drainage, traffic, and how quickly water stops beading on the surface. Rather than applying a new coat over dirt, clean the deck first and let it dry fully. A masonry professional can evaluate whether the existing sealer is worn and select a finish that maintains the stone’s texture instead of creating a slick film.

Watch the waterline and low points after storms or heavy pool use. White, powdery deposits may indicate efflorescence, while dark areas can reflect organic grime or persistent moisture. Address these conditions early with appropriate stone-care methods, then review drainage and joint conditions if the problem returns. With regular sweeping, careful rinsing, pH-neutral cleaning, and timely resealing, travertine remains an easy-care surface for a Long Island pool area.

Talk with Gappsi about a coordinated pool, coping, and natural-stone deck plan: (631) 831-3177.

Frequently Asked Questions

Is travertine good for pool decks?

Yes. Natural travertine offers a relatively cool surface in direct sunlight and a naturally textured finish suited to pool areas. When it is properly sealed and finished, it can provide a non-slip surface for wet environments. Source: Gappsi swimming pools.

How much does a travertine pool deck cost per square foot?

There is no single price because the total depends on the stone grade, paver color such as beige or silver. Deck dimensions, existing foundation, edge details, drainage, and whether the installation is sand-set or mortar-set. A project-specific site review is the reliable way to compare the full installed cost.

Does travertine get hot in the sun?

Travertine stays relatively cool to the touch even in direct sunlight, which is one reason it is commonly selected around swimming pools. Actual comfort still depends on sun exposure, stone color, surrounding materials, and local weather. Source: Gappsi swimming pools.

Is travertine slippery when wet?

Proper stone selection, finishing, and sealing matter. According to Gappsi’s pool guidance, properly sealed and finished travertine provides a non-slip surface for pool environments. The installation should also address drainage and transitions around the pool edge. Source: Gappsi swimming pools.

How do you maintain a travertine pool deck?

Routine care is straightforward: remove surface debris, clean with products appropriate for natural stone, address spills promptly, and schedule periodic sealing. Travertine is considered low maintenance, but cleaning and sealing help preserve its appearance and longevity. Source: Gappsi swimming pools.

Ready to Plan Your Travertine Pool Deck?

A thoughtful deck plan helps align the travertine selection, pool edge details, and installation approach with your Long Island home. Schedule a free consultation with Gappsi to discuss your natural travertine pool deck design and installation. Call (631) 831-3177 to get started with the conversation and determine the right next step for your project.