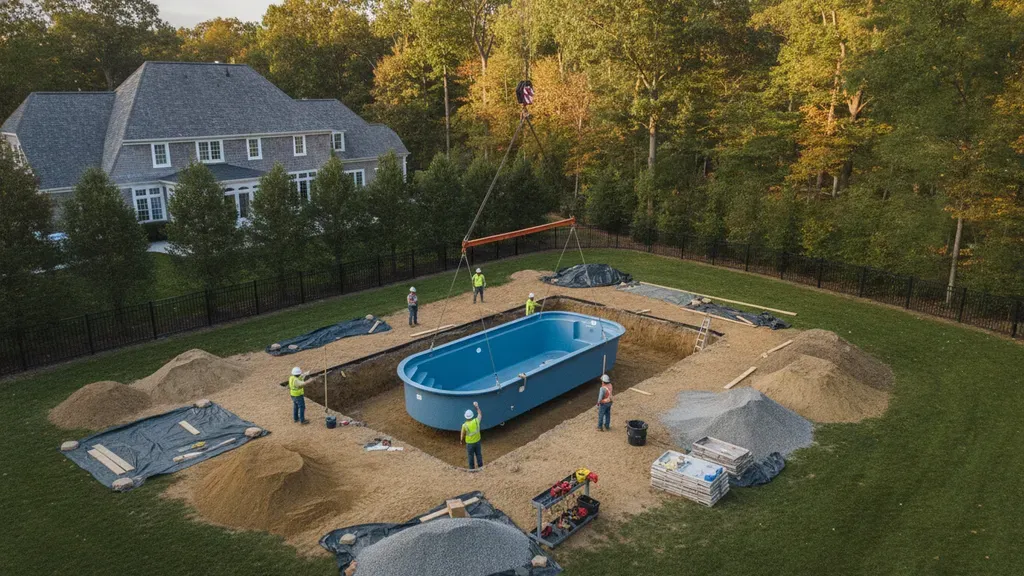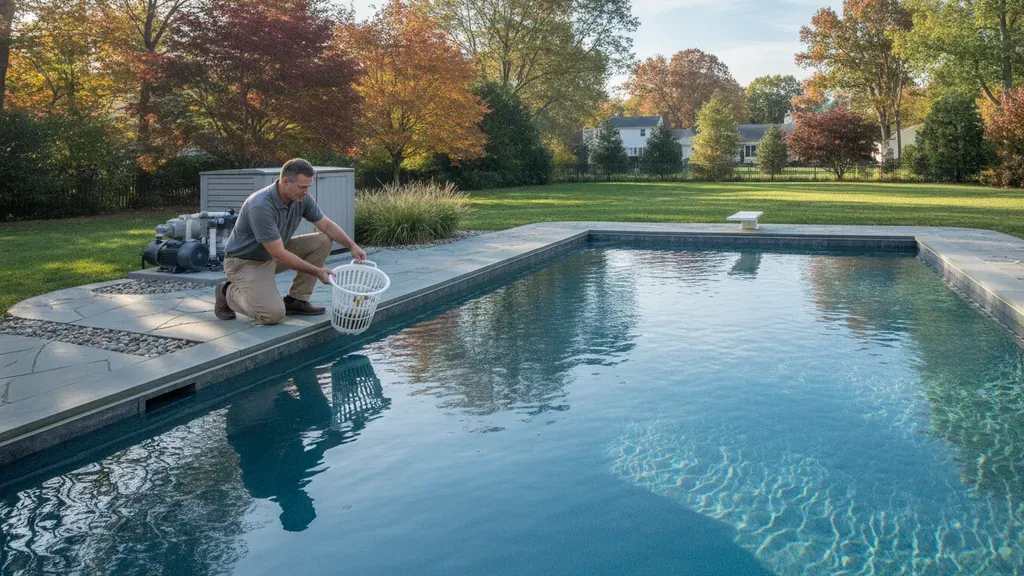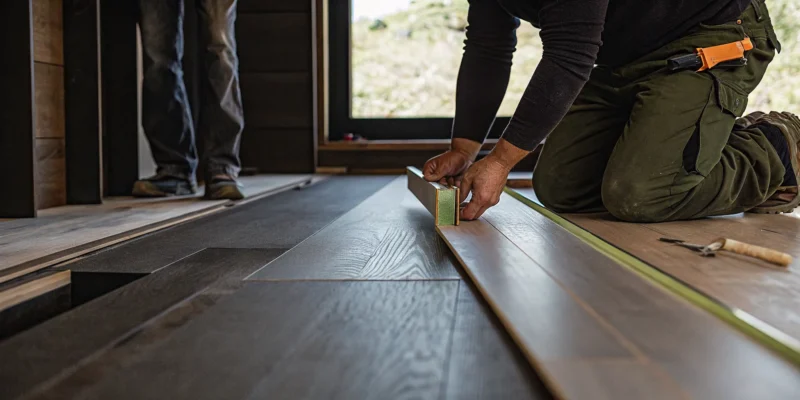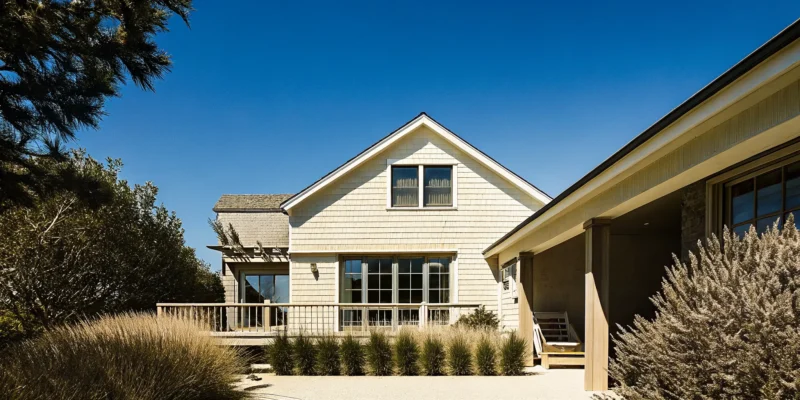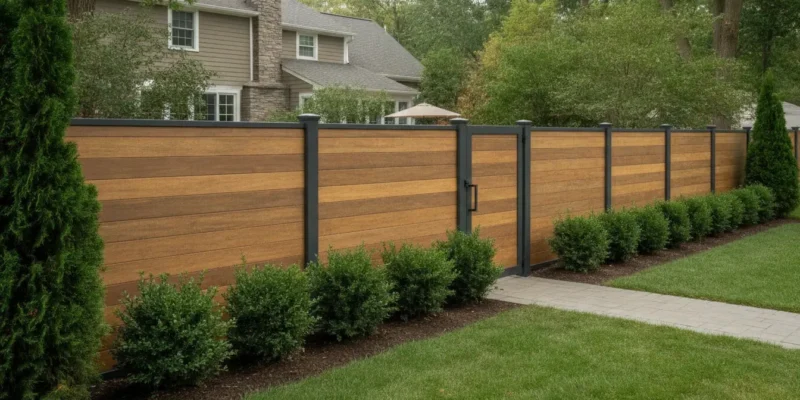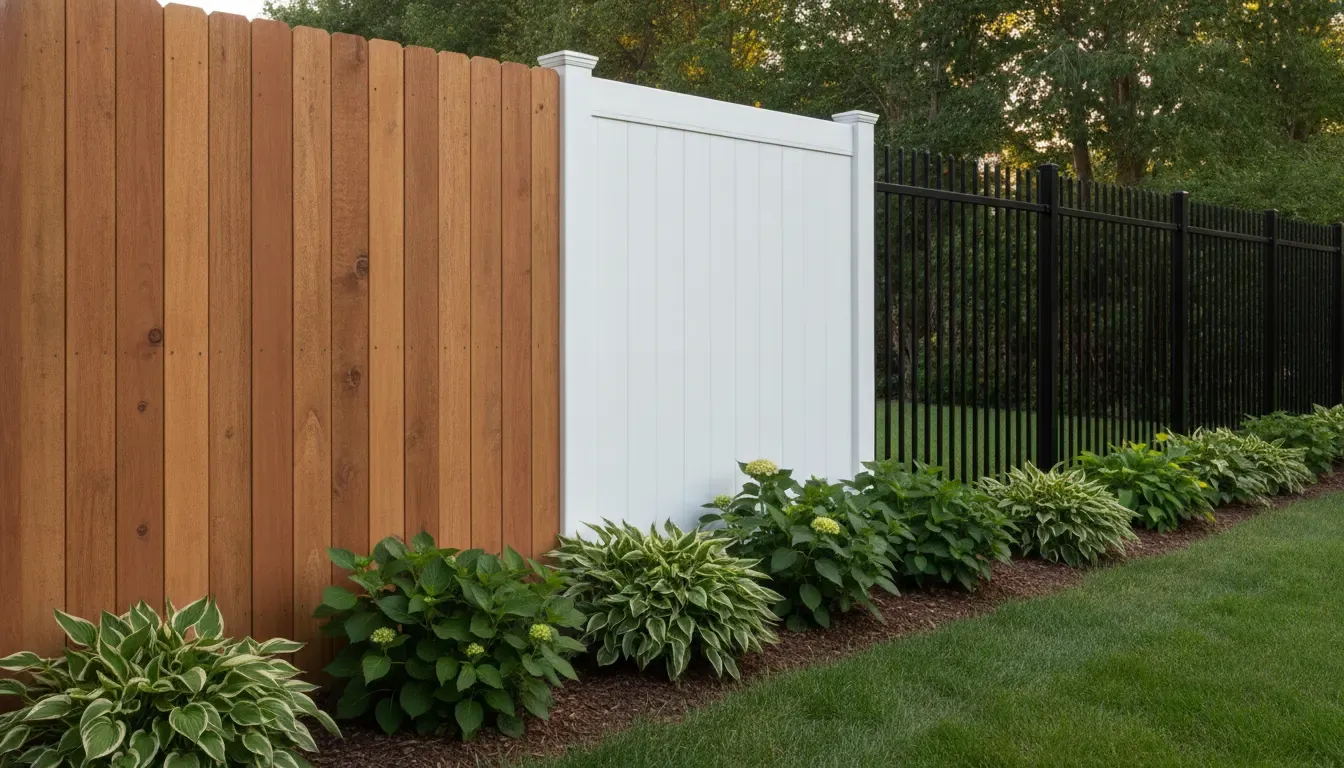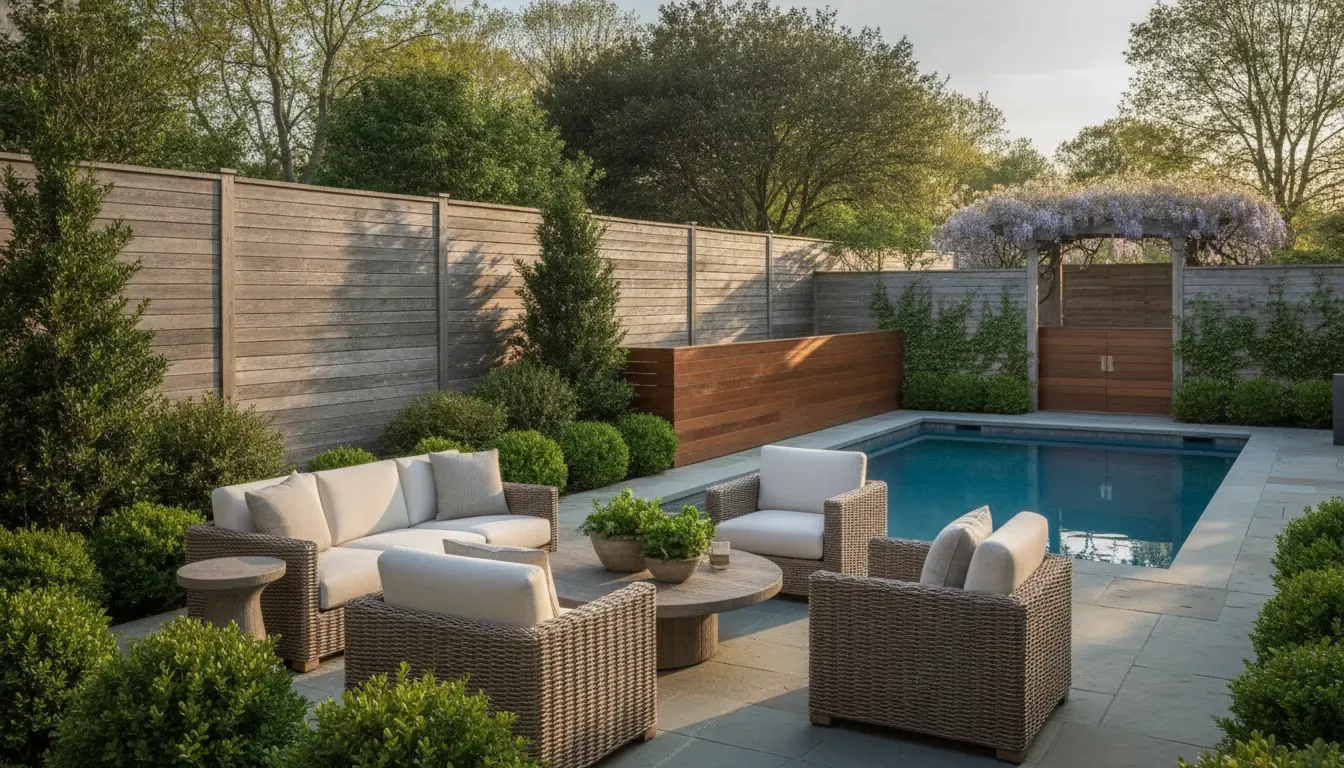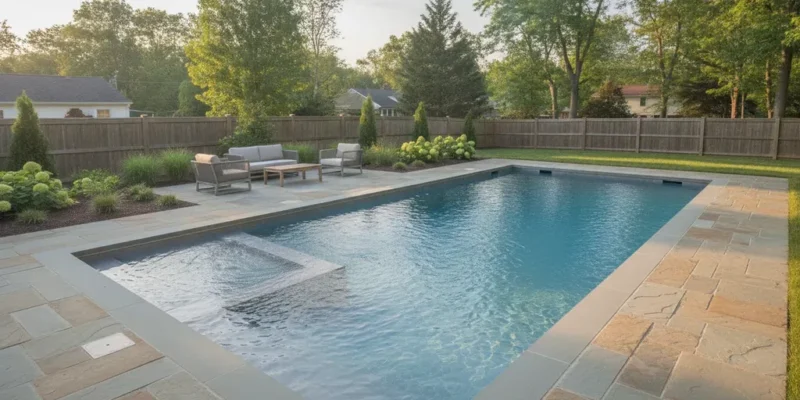
A luxury Hamptons home after a project by a Long Island, New York home improvement company.

How to Choose a Hamptons Long Island New York Home Improvement Company

Starting a major home improvement project can feel like standing at the base of a mountain. You know the view from the top will be worth it, but the path to get there seems daunting. Where do you even begin? From setting a realistic budget and understanding the permit process to finding a trustworthy contractor, the list of tasks can be long. This guide is designed to be your practical checklist. We’ll break down the process into manageable steps, giving you the clarity you need to move forward with confidence. Let’s start by demystifying the search for the right Hamptons Long Island new york home improvement company to guide you on your journey.

Key Takeaways

  • Success in the Hamptons requires a specific approach: Your project needs to balance luxury aesthetics with durable, coastal-ready materials while also following the area’s unique historic and building regulations.
  • Choose your partner wisely: Go beyond the portfolio by verifying licenses and insurance, confirming deep local experience, and analyzing customer reviews for consistent feedback on communication and quality.
  • Master the project logistics from the start: A smooth renovation depends on a clear contract, a realistic timeline that accounts for seasons and permits, and a solid understanding of your budget and financing options before work begins.

What Makes Home Improvement in the Hamptons Different?

Renovating a home in the Hamptons isn’t quite like a project anywhere else. It’s a unique blend of high-end design, coastal living, and deep-rooted history. The expectations are higher, the environment is more demanding, and the local rules can be intricate. Understanding these differences is the first step in finding a home improvement company that can truly bring your vision to life.

From Southampton to Montauk, every project needs to meet an exceptional standard of luxury while also being practical enough to withstand the salty air and seasonal weather. It’s about creating a space that feels like a personal retreat, whether that’s a sprawling outdoor kitchen or a serene primary bathroom. Plus, many areas have specific historic preservation rules you’ll need to follow. Choosing a partner who understands this specific landscape isn’t just helpful; it’s essential for a smooth and successful renovation.

Meeting Luxury Standards

In the Hamptons, home improvement is synonymous with luxury. This isn’t just about a fresh coat of paint; it’s about impeccable craftsmanship, premium materials, and a design that feels both timeless and personal. With the cost to build a custom home often ranging from $800 to $2,000 per square foot for construction alone, the standard for quality is incredibly high. Your renovation should reflect that same level of excellence.

This means your contractor should be fluent in high-end finishes, from sourcing the perfect porcelain and natural stone for your patio to installing custom millwork. It’s about creating a cohesive, beautifully executed space that enhances your home’s value and your enjoyment of it. A top-tier company won’t just complete the work; they will guide you through material selection and design choices to ensure the final result is flawless.

Building for a Coastal Climate

The beautiful coastal setting of the Hamptons also presents unique construction challenges. The salt air, humidity, and strong sun can take a toll on building materials. A home improvement project here must be built to last, using materials and techniques that can stand up to the elements. This is especially true for outdoor spaces, which are central to the Hamptons lifestyle.

As one report notes, the costs that often surprise homeowners are for the exterior: “Gardens, pools, pool houses, tennis courts, and outdoor living areas.” These features require durable, weather-resistant materials to prevent corrosion, fading, and moisture damage. When planning a new swimming pool or patio, your contractor should prioritize materials designed for coastal performance to ensure your investment remains beautiful for years to come.

Navigating Historic Preservation Rules

Many villages in the Hamptons have a rich architectural history, and local regulations are in place to protect it. This means your renovation plans may need to go through an architectural review board or comply with strict historic preservation guidelines. These rules can affect everything from window styles and exterior paint colors to the footprint of an addition.

Hiring a company with extensive local experience is crucial. A contractor who is unfamiliar with these specific codes can cause major delays and headaches. The right team will know how to prepare and submit plans that meet local requirements, helping you get the necessary permits without a hitch. Their familiarity with the process ensures your home remodeling project respects the area’s heritage while achieving your modern living goals.

Who Are the Top Home Improvement Companies in the Hamptons?

Finding the right home improvement company in the Hamptons means looking for a team that understands the area’s unique blend of luxury, coastal resilience, and timeless style. The best partner for your project depends entirely on your vision. Are you dreaming of a complete outdoor oasis, a full interior gut renovation, or do you need a skilled artisan for a specific, detailed job? The Hamptons is home to a variety of experts, from comprehensive outdoor living specialists to full-service firms and niche contractors. Knowing which type of company to look for is the first step in turning your ideas into a beautifully executed reality. Each type of professional brings a different strength to the table, ensuring you can find the perfect fit for the scale and style of your renovation.

Gappsi: Your Outdoor Living Specialist

When your focus is on creating an exceptional outdoor experience, Gappsi is a name that consistently comes up. With a legacy stretching back to 1987, they have a deep understanding of how to design and build spaces that feel like a natural extension of a Hamptons home. They specialize in transforming backyards into personal resorts, handling everything from the initial design to the final installation. Whether you’re envisioning elegant masonry for a new patio, a custom-designed swimming pool, or a complete landscape overhaul, their team manages the entire process. This integrated approach means you have one point of contact for a complex project, ensuring a seamless and cohesive result for your property.

Full-Service Renovation Firms

For homeowners planning extensive, multi-room interior renovations or whole-home remodels, a full-service firm is often the best choice. These companies act as the project’s command center, managing every detail from architectural plans and permits to hiring subcontractors and overseeing construction. They are ideal for large-scale projects where you want a single, accountable team to handle all the moving parts. A full-service contractor can orchestrate everything from a kitchen and bath remodel to adding a new wing to your home. This approach streamlines communication and helps keep complex projects on schedule and within budget, which is essential for a stress-free renovation experience.

Specialty Contractors and Artisans

Sometimes, a project’s success comes down to a single, perfectly executed detail. This is where specialty contractors and artisans shine. These experts focus on a specific craft, whether it’s installing intricate stonework, building custom pergolas, or designing and installing a private sports game court. While you might hire a full-service firm for a large remodel, you’d turn to a specialist for that unique feature that makes your home stand out. Companies like Gappsi also offer these specialized services, providing the detailed craftsmanship of an artisan for projects like installing stunning porcelain and natural stone patios or creating beautiful, low-maintenance gravel driveways.

What Services Do You Need for Your Hamptons Home?

Before you start searching for a contractor, it helps to have a clear vision for your project. Are you dreaming of a backyard oasis for summer parties, a functional kitchen for family dinners, or a complete property overhaul? Hamptons homes often require a blend of services to achieve that perfect balance of luxury, comfort, and coastal durability. Pinpointing your primary needs will help you find a company with the right specialization, whether you need a single service or a team that can manage a complex, multi-faceted renovation.

Outdoor Living and Entertainment

Your backyard should be an extension of your home, a place to relax and entertain. Think about how you want to use the space. Do you envision hosting barbecues in a custom outdoor kitchen or enjoying quiet evenings under a new pergola? Services like deck building, patio installation, and even creating custom home bars can completely transform your property. Finding a company that specializes in outdoor living ensures every detail is designed to enhance your experience, turning a simple yard into the perfect spot for making memories with family and friends.

Interior and Kitchen Remodeling

The inside of your home should be both beautiful and practical. A well-executed interior remodel focuses on high-quality materials and thoughtful design to create spaces that fit your lifestyle. This is especially true for kitchens, which are often the heart of the home. When you’re planning an update, look for a team that has experience with home remodeling and can deliver excellent craftsmanship. The right contractor will help you create a functional, inviting interior that feels both timeless and personal, ensuring your home is a sanctuary you love spending time in.

Pools and Landscaping

A stunning pool is a hallmark of many Hamptons homes, but the surrounding landscape is what truly makes it feel like a private resort. It’s wise to find an all-inclusive company that handles both swimming pool installation and landscape design. This integrated approach ensures your pool, patio, and plantings all work together in a cohesive design. From selecting the right greenery to designing functional and beautiful poolside areas, a unified team can create a seamless outdoor environment that is both visually striking and perfectly suited for relaxation and fun.

Masonry and Hardscaping

Stone and paver work are fundamental to your home’s curb appeal and the usability of your outdoor spaces. High-quality masonry defines everything from your driveway and walkways to your garden walls and patios. These hardscaping elements provide structure and elegance to your landscape. Whether you prefer classic natural stone or modern porcelain pavers, the right materials and expert installation are key. Investing in professional hardscaping not only improves the look of your property but also adds lasting value and functionality for years to come.

How to Read Customer Reviews

When you’re investing in a significant home improvement project, you want assurance that you’re hiring the right team. Customer reviews are one of the best ways to get an unfiltered look at a company’s track record. Going beyond the simple star rating can give you a much clearer picture of what it’s like to work with a contractor, from their communication style to the quality of their finished product.

Think of testimonials as a conversation with past clients. They can reveal a company’s strengths, weaknesses, and overall approach to their work. By learning what to look for, you can spot the difference between a contractor who just gets the job done and one who delivers an exceptional experience from start to finish. This is especially important in the Hamptons, where the standards for quality and service are incredibly high.

What Testimonials Really Tell You

When you start reading reviews, look for consistent themes. A single glowing review is nice, but a dozen reviews that all mention the same positive traits are far more telling. Pay attention to specific keywords that signal a great working relationship. For example, when clients consistently describe a company as “responsive,” “professional,” and delivering “quality work,” it’s a strong indicator of reliability.

This kind of feedback shows that a company respects your time and investment. It tells you they’ll likely show up on schedule, communicate clearly, and stand behind the quality of their masonry and other projects. These are the foundational qualities you need for a smooth and successful renovation.

Reading Between the Lines

The most insightful reviews often go beyond just praising the final result. Look for comments that speak to the company’s process and customer care. A review that says, “they care about the customers to make them happy,” reveals a company culture that prioritizes your satisfaction. This is crucial for large-scale projects that involve a lot of collaboration, like a complete backyard redesign.

Similarly, when a client says a company “designed our entire backyard and we couldn’t be happier,” it highlights their expertise in the creative and planning stages. This is different from just being good at construction; it shows they can translate a vision into a beautiful, functional space. A strong landscape design portfolio paired with reviews like this is a powerful combination.

Red Flags to Watch For

While you’re looking for positive patterns, you should also be on the lookout for red flags. A few less-than-perfect reviews aren’t necessarily a dealbreaker, but recurring complaints are. If you see multiple clients mentioning poor communication, missed deadlines, or unexpected costs, it’s wise to be cautious. On the other hand, a review that mentions a company’s commitment to aftercare is a huge green flag.

For instance, a client who notes that their contractor “comes around each year to replace or fix any loose stones” is telling you that the company provides long-term support. This shows they build lasting relationships and stand by their work, offering services like patio restoration long after the initial project is complete. The absence of this kind of follow-up, or worse, a pattern of unresolved issues, should give you pause.

How Much Does Home Improvement Cost in the Hamptons?

Let’s talk numbers. It’s no secret that home improvement in the Hamptons comes with a premium price tag, reflecting the high demand for skilled labor, quality materials, and specific local regulations. Understanding the potential costs from the start helps you set a realistic budget and make informed decisions. While every project is unique, here’s a general breakdown of what you can expect when investing in your Hamptons home.

Kitchen and Bath Renovation Costs

Kitchen and bathroom remodels are always a popular choice for adding value and comfort. In the Hamptons, even a standard bathroom renovation can start around $22,000. This often involves more than just new tile and fixtures; it can require significant updates to plumbing and electrical systems to meet modern codes. A full kitchen overhaul is an even larger investment, especially when you factor in custom cabinetry, high-end appliances, and luxury finishes. A company that handles comprehensive home remodeling can provide a detailed estimate based on your specific design goals and the existing conditions of your space.

Outdoor Project Pricing

Creating your dream outdoor space is an investment in your lifestyle, and the costs can vary widely because the possibilities are nearly endless. A beautiful natural stone patio will have a different price point than installing a complete outdoor kitchen, a custom swimming pool, or a new sport court. The materials you choose, the project’s size, and any site-specific challenges all play a significant role in the final cost. The best approach is to get a custom quote from an outdoor living specialist who can walk your property with you and truly understand your vision.

Understanding Labor and Material Costs

So, why are costs higher in the Hamptons? It really comes down to labor and materials. The demand for experienced craftsmanship is intense, and the best local tradespeople command higher rates for their expertise. Similarly, the materials expected in Hamptons homes are top-of-the-line. Think durable hardwoods, resilient natural stones, and specialized components designed for coastal construction. These premium materials not only look better but are also chosen for their ability to withstand salty air and harsh weather, ensuring your investment lasts for years to come.

Factoring in Permits and Design Fees

The contractor’s proposal isn’t the final number. It’s crucial to remember to budget for ‘soft costs’ like architectural design fees and town building permits, which can add a substantial amount to your total. In the Hamptons, working with the various town and village building departments requires local expertise. The permit process can be complex, often requiring detailed plans and surveys. An experienced local company understands these requirements and can manage the process efficiently, preventing costly delays and ensuring your project is fully compliant from day one.

How to Choose the Right Company

Finding the right partner for your home improvement project is just as important as choosing the right materials. This is the team you’ll be trusting with your home, your budget, and your vision. To make sure you find a great match, it’s helpful to have a clear checklist of what to look for. Beyond a great portfolio, you want a company that is professional, experienced in the Hamptons, and easy to communicate with. Let’s walk through the key steps to vetting a company and finding a team you can count on.

Check for Licensing and Insurance

This is the absolute first step and a total deal-breaker. A professional company will always be properly licensed and insured, and they won’t hesitate to prove it. This protects you from liability if something goes wrong on the job site and ensures they meet state and local standards. Don’t just take their word for it; you can easily verify a contractor’s license through the New York State database. Think of it as a simple background check that provides essential peace of mind. If a company is hesitant to share this information or isn’t listed, consider it a major red flag and move on. Your home is too important to take that kind of risk.

Look for Local Hamptons Experience

The Hamptons has its own unique character, from its coastal climate to specific building codes and community aesthetics. A contractor with deep local experience will understand these nuances inside and out. They’ll know how to source materials that can withstand salt air and humidity, navigate local permit processes efficiently, and design spaces that feel authentic to the area. A company that has been serving Nassau and Suffolk County for years, like Gappsi, brings a level of insight that an outside firm simply can’t match. They understand the local landscape, literally and figuratively, which helps your project run smoothly from start to finish and ensures the final result is built to last.

Review Their Portfolio and Design Style

A picture is worth a thousand words, especially when it comes to home design. A company’s portfolio is your best window into their craftsmanship, quality, and creative vision. As you browse their past projects, don’t just look for beautiful photos. Pay attention to the details. Do they have experience with the specific type of project you have in mind, whether it’s a modern pool deck or a classic stone patio? Does their design style align with your own? Watching videos of completed projects on channels like the Gappsi YouTube channel can give you an even better sense of their work and the scale of their transformations. Find a company whose past work gets you excited for your own project.

Assess Their Communication and Process

A great final product starts with a great process, and that hinges on clear communication. During your initial conversations, pay attention to how the team interacts with you. Do they listen to your ideas and answer your questions thoroughly? Ask them to walk you through their project management process. How will they keep you updated on progress, and who will be your main point of contact? You’re looking for a partner who is organized, responsive, and transparent. A well-defined home remodeling process is a sign of a professional operation and sets the foundation for a collaborative and stress-free experience. Trust your gut; you should feel comfortable and confident in their ability to guide you.

What Should You Ask Before Signing a Contract?

You’ve reviewed portfolios, checked references, and found a company you’re excited about. Now comes the most important step: the contract. This document is the blueprint for your entire project, and getting it right from the start is key to a smooth process. Before you sign anything, it’s time to ask some direct questions to make sure you and your contractor are completely aligned on the scope, timeline, and quality of the work. A clear contract protects both you and your builder, ensuring there are no surprises down the road. Think of this as your final due diligence step to confirm you’ve made the right choice for your Hamptons home.

Contract and Warranty Details

First, let’s talk about the nuts and bolts of the agreement. Your contract should be incredibly detailed, outlining every aspect of the project. Ask for a complete breakdown of costs, including labor, materials, and any other fees. It’s also essential to confirm the company is fully licensed and insured for work in the Hamptons. Beyond the project itself, you need to understand what happens after the work is done. Ask about their warranty policy. What does it cover, and for how long? A reputable company will stand by its work and offer a clear warranty that protects your investment in your home remodeling project.

Timelines and the Permit Process

Setting realistic expectations for your project timeline is crucial, especially in the Hamptons where things can take a bit longer. Ask for an estimated schedule that includes milestones for design, permits, and construction. Large-scale projects can take years, so a detailed timeline helps everyone stay on the same page. You should also clarify who is responsible for securing the necessary permits. The permitting process can be complex, so find out if the company handles all the paperwork and if those administrative costs are included in your quote. This is particularly important for projects like installing new swimming pools or building large outdoor structures.

Material Sourcing and Quality

The materials used in your project will determine its final look and long-term durability, which is especially important in a coastal climate. Don’t hesitate to ask where the company sources its materials. Are they known for quality and longevity? At Gappsi, we prioritize using high-quality materials, from the foundation to the finishing touches. Ask potential contractors if you can see samples of the materials they plan to use, like different types of porcelain and natural stone. This gives you a tangible sense of the quality and helps you make informed decisions about the final aesthetic of your home.

How to Manage Your Project Timeline

A successful home renovation in the Hamptons hinges on a well-managed timeline. From seasonal weather to local permits, several factors can influence your project’s schedule. Understanding these elements from the start helps you set realistic expectations and keeps your project moving forward smoothly. A clear timeline not only reduces stress but also ensures that every phase of your renovation gets the attention it deserves, leading to a final result you’ll love for years to come.

Planning Around the Seasons

In Long Island, the seasons play a big role in any construction schedule. While a full custom home can take years from land purchase to move-in day, even smaller projects are affected by the weather. Outdoor work like installing a new swimming pool or building a stone patio is best done during warmer, drier months. This means the planning, design, and permitting phases should happen during the fall and winter. By working with the seasons instead of against them, you can avoid weather-related delays and ensure your outdoor living spaces are ready to enjoy by summer. Talk to your contractor early to map out a schedule that makes sense for our coastal climate.

Understanding the Permit Process

Navigating the permit process is one of the most critical and often underestimated parts of a home improvement timeline. Depending on the scope of your project, securing the necessary permits can take several months and involves coordination with architects, engineers, and local town officials. This isn’t just a formality; it’s a significant block of time you need to build into your schedule before any physical work can begin. When interviewing companies, ask about their experience with local permits and how they manage this process. An experienced team can guide you through the paperwork and help prevent unnecessary delays, keeping your project on the right track from the very beginning.

Coordinating Different Contractors

If your project involves multiple specialties like masonry, landscaping, and electrical work, coordinating different contractors can feel like a full-time job. A delay with one team can create a domino effect, pushing back your entire timeline. To avoid this, consider working with a firm that offers comprehensive home remodeling services under one roof. Having a single point of contact streamlines communication and ensures all the moving parts are synchronized. This integrated approach not only keeps the project on schedule but also makes the entire experience much more manageable for you as the homeowner.

What Are Your Financing Options?

A beautiful Hamptons renovation is a significant investment, but funding your project doesn’t have to be a headache. Many homeowners are surprised to learn about the variety of financing solutions available that can make their dream home a reality without draining their savings. The best home improvement companies understand this and often guide their clients through the process. Before you get overwhelmed by the numbers, let’s walk through the most common ways you can finance your project, from traditional loans to special offers from your contractor.

Traditional Financing

When you think of financing a large project, traditional loans are probably what come to mind. This route involves working with a bank, credit union, or a specialized lender to secure funds through a home equity loan, a home equity line of credit (HELOC), or a personal loan. Each option has its own set of terms, interest rates, and repayment structures. A great first step is to explore the different types of home improvement loans to see which one aligns with your financial situation. Don’t hesitate to ask potential contractors if they have relationships with lenders they recommend, as they often partner with firms that specialize in renovation financing and can streamline the application process for you.

Payment Plans and Promotions

Many top-tier contractors offer their own payment plans or have partnerships with financial institutions to provide promotional financing. These plans are designed specifically for home improvement projects and can sometimes be more flexible than a standard bank loan. You might find options like fixed-rate installment loans that give you a clear, manageable monthly payment for the life of the loan. This approach is incredibly helpful for budgeting because you know exactly what to expect. A company that offers these kinds of solutions is showing you they are invested in making the project work for your budget, which is always a good sign.

Zero-Interest Offers

You’ve likely seen “zero-interest” or “same-as-cash” financing offers, and they can be an excellent tool if used wisely. These promotions allow you to pay for your project over a set period, often 12 or 18 months, without accruing any interest. It’s essentially a free short-term loan. This is a fantastic option if you have the cash flow to pay off the entire balance before the promotional period ends. Just be sure to read the fine print. If the balance isn’t paid in full by the deadline, you could be charged interest retroactively from the date of purchase, which can be a costly surprise.

Related Articles

Frequently Asked Questions

What is a realistic timeline for a major renovation in the Hamptons? The timeline for any project depends on its scale, but it’s wise to plan for a longer schedule in the Hamptons. Securing permits alone can take several months before any work begins. For a large outdoor project like a pool and patio, it’s best to start the design and permitting process in the fall or winter to ensure construction can happen during the warmer months and be ready for summer.

Is it better to hire one company for my entire project or different specialists for each part? While hiring individual artisans for small, specific jobs can work well, a larger project with multiple elements benefits greatly from a single, integrated team. Using one company that handles everything from landscape design and masonry to pool installation ensures a cohesive vision and streamlined communication. This approach prevents the logistical headaches of coordinating different contractors and helps keep your project on schedule.

What is the very first step I should take when planning a home improvement project? Before you even start looking at portfolios, the best first step is to define your vision and your goals. Think about how you want to use the space, what problems you’re trying to solve, and what your ideal outcome looks like. Having a clear idea of your needs will make it much easier to communicate with potential contractors and find a team that truly understands what you want to achieve.

Why is a contractor’s experience specifically in the Hamptons so important? Local experience is about more than just knowing the area. A contractor familiar with the Hamptons understands the specific challenges of building in a coastal environment, from selecting salt-resistant materials to designing for proper drainage. They also have established relationships with local building departments, which can make the complex permit process much smoother and faster.

How can I ensure the materials used in my project will last in the coastal weather? The best way to ensure longevity is to ask direct questions about where a contractor sources their materials. A reputable company will be transparent about the quality and durability of the products they use. Ask to see samples of the stone, wood, or pavers they recommend and inquire about their performance in coastal settings. A contractor who prioritizes high-quality, weather-resistant materials is investing in the long-term success of your project.

A premium SaunaLife outdoor sauna with a modern design in Long Island, NY.

Your Guide to SaunaLife Saunas in Long Island, NY

There’s a distinct difference between a simple hot room and an authentic sauna experience rooted in tradition. True sauna culture is about more than just heat; it’s about thoughtful design, proper air circulation, and materials that create a restorative atmosphere. This dedication to authenticity is what sets a truly great sauna apart. Hand-crafted in Northern Europe by passionate enthusiasts, the SaunaLife brand of premium outdoor and indoor saunas Long Island NY homeowners can now enjoy brings this genuine experience home. Each model is built with meticulous care, ensuring you receive a wellness tool that honors its heritage and delivers unparalleled relaxation.

Key Takeaways

  • Invest in lasting quality: SaunaLife saunas are built with premium, durable materials like Nordic spruce from Northern Europe, making them a long-term addition to your wellness routine.
  • Find the perfect fit for your space: Whether you want a convenient indoor model for your master bath or a stunning outdoor sauna as a backyard centerpiece, SaunaLife offers versatile designs to match your home’s layout.
  • Ensure safety and protect your investment: Proper sauna installation requires professional electrical work, and partnering with an expert team guarantees your sauna is set up correctly so you can safely enjoy its health benefits.

Why Choose a SaunaLife Sauna?

Thinking about adding a personal wellness space to your home is exciting. When you’re ready to make that happen, you want a product that delivers on its promise of relaxation and quality. SaunaLife stands out for its commitment to authentic sauna culture, thoughtful design, and durable construction. It’s more than just a hot room; it’s a carefully crafted experience designed to last a lifetime. Let’s look at what makes a SaunaLife sauna the perfect addition to your Long Island home.

European Craftsmanship

SaunaLife saunas are hand-crafted in Northern Europe by people who are genuinely passionate about the sauna experience. This isn’t just a manufacturing process; it’s a tradition. Each room is built with the same care and attention to detail as if the creators were making it for their own homes. This dedication to craftsmanship means you get an authentic, high-quality sauna that honors the wellness rituals it was designed for. You can feel the difference that genuine expertise and passion make from the moment you step inside.

Smart Engineering and Modern Design

A great sauna should feel as good as it looks. SaunaLife combines innovative engineering with meticulous craftsmanship to create spaces that are both beautiful and incredibly comfortable. The attention to detail in every design is exceptional, ensuring your sauna is not only a wellness tool but also a stunning feature of your home. Whether you’re integrating it into a new bathroom or creating a backyard oasis, these saunas are built for a lifetime of enjoyment and good health. This focus on smart design makes a SaunaLife sauna a seamless part of any home remodeling project.

Durable, Weather-Resistant Materials

The materials used in a sauna are crucial for its longevity and performance, especially for outdoor models. SaunaLife uses top-grade Nordic spruce and thermally modified wood, materials known for their exceptional durability and weather resistance. This ensures your sauna can withstand Long Island’s changing seasons while maintaining an authentic, inviting atmosphere. These high-quality woods are also sustainably sourced. Plus, SaunaLife’s efficient building process helps reduce construction time, so you can start enjoying your new wellness retreat sooner. The same commitment to quality materials can be seen in other outdoor structures like pavilions and pergolas.

Explore the Indoor Sauna Collection

Bringing the restorative power of a sauna into your home is easier than you might think. SaunaLife’s indoor collection is designed to fit beautifully within your existing space, turning a spare room, basement, or large bathroom into a personal wellness retreat. These saunas combine thoughtful engineering with stunning design, so you get a functional sanctuary that also enhances your home’s interior. Imagine having a dedicated space to decompress after a long day, soothe sore muscles after a workout, or simply enjoy a quiet moment of reflection. It’s a small luxury that makes a big impact on your daily routine.

Whether you’re looking for a compact unit for personal use or a larger model for the whole family, there’s an indoor sauna that feels like it was made just for you. Each one is crafted to deliver an authentic, relaxing experience that supports your health and well-being for years to come. Instead of being a bulky, out-of-place appliance, a SaunaLife indoor sauna becomes an integrated part of your home’s design. It’s an investment not only in your personal health but also in creating a home environment that truly supports a balanced lifestyle.

Simple Modular Assembly

One of the best features of SaunaLife’s indoor models is their simple, modular design. Your sauna arrives in manageable parts, making it easy to bring into your home and assemble in your chosen location. This flexibility means you can install a beautiful, high-quality sauna without needing major renovations. It’s an ideal solution for integrating a wellness space into your home with minimal disruption. During a home remodeling project, our team at Gappsi can help you find the perfect spot and ensure the modular assembly is handled perfectly, creating a seamless addition to your home. This approach makes luxury and relaxation more accessible than ever.

The Traditional Finnish Experience

SaunaLife is dedicated to providing an authentic sauna experience rooted in Finnish tradition. Hand-crafted in Northern Europe by true sauna enthusiasts, each room is built for those who appreciate the deep health benefits of sauna bathing. This isn’t just about heat; it’s about creating the perfect environment for relaxation and detoxification. The meticulous craftsmanship ensures optimal heat circulation and comfort, allowing you to fully immerse yourself in a centuries-old wellness practice. With one of these saunas in your home, you can enjoy the genuine feeling of a traditional Finnish retreat whenever you need to unwind and recharge.

Customizable Designs for Your Home

A SaunaLife sauna is more than a wellness appliance; it’s a statement of quality and style. Constructed from premium-grade materials like Nordic spruce and Canadian hemlock, these saunas offer natural beauty and exceptional durability. The innovative engineering is matched by meticulous craftsmanship, resulting in a space that is both comfortable and visually stunning. These designs are created to be a lifetime investment in your health and your home’s value. The clean lines and warm wood tones complement a wide range of interior styles, making your sauna a beautiful focal point of your personal wellness space rather than just an afterthought.

Discover the Outdoor Sauna Models

An outdoor sauna transforms your backyard into a year-round wellness destination. SaunaLife offers several distinct collections, each designed to fit different styles and needs, making it easy to find the perfect model for your Long Island home.

Garden-Series Outdoor Saunas

The Garden-Series is all about creating a beautiful, personal getaway right in your backyard. Models like the G2, G3, and G4 are designed to be your private wellness retreat, blending seamlessly with your landscape. They combine classic aesthetics with practical functionality, making them a popular choice for homeowners looking to invest in daily relaxation. Whether you envision a quiet escape after a long day or a cozy spot to unwind on a cool evening, the Garden-Series provides a welcoming and restorative experience. These saunas are a wonderful addition to any custom landscape design, turning a simple garden into a true sanctuary.

Cube-Series Contemporary Designs

If you have a modern aesthetic, the Cube-Series delivers a clean, contemporary look that makes a statement. Models like the CL4G and CL5G feature a stunning glass front, creating a bright, open feel and a unique visual appeal. These saunas are designed for socializing, with sizes that accommodate anywhere from two to eight people. The largest model, the CL12GCP, even includes a convenient changing area and a front porch, making it the perfect hub for entertaining guests. It’s an ideal centerpiece for a modern patio or next to one of our custom swimming pools, offering a stylish way to relax with family and friends.

Garden Luxury-Series Premium Models

For the ultimate in outdoor relaxation, the Garden Luxury-Series offers a truly premium experience. Models like the GL4 and GL6 are crafted for those who appreciate finer details and a touch of elegance. Featuring a beautiful glass front, these saunas provide a spacious and sophisticated environment for four or six people. The elegant design and roomy interiors are perfect for unwinding in style or hosting intimate gatherings. Think of it as the finishing touch on a high-end backyard transformation, complementing other luxury features like custom pavilions and pergolas. This series truly brings the comfort of an exclusive spa right to your home.

What Are the Health Benefits of a Sauna?

Adding a sauna to your home is more than just a luxury upgrade; it’s a meaningful investment in your daily wellness routine. Stepping into a

Improve Circulation and Detoxify

One of the most immediate benefits of sitting in a sauna is the way it gets your blood flowing. The heat raises your body temperature, which in turn causes your blood vessels to widen, improving circulation throughout your body. This process is similar to the effects of light exercise and helps deliver more oxygen to your cells. SaunaLife saunas are designed with a passive ventilation system that uses natural air circulation to maintain excellent air quality. This thoughtful engineering ensures your sauna session is comfortable and effective, allowing your body to sweat and naturally release toxins. It’s a refreshing way to support your body’s detoxification processes.

Relieve Stress and Support Wellness

In our busy lives, finding a moment of true quiet can be a challenge. A sauna provides a dedicated space to unwind, breathe deeply, and let go of daily pressures. The enveloping warmth helps relax your muscles and calm your mind, reducing feelings of stress and fatigue. Making a sauna session part of your regular routine can significantly enhance your mood and contribute to your overall sense of well-being. Think of it as a personal retreat where you can recharge your batteries. Integrating a sauna into your home is a wonderful way to create a permanent space dedicated to your mental and physical wellness.

Soothe Muscles and Rejuvenate Skin

If you deal with muscle soreness from workouts or daily activities, a sauna can become your best friend. The heat penetrates deep into your muscle tissue, helping to ease tension and speed up recovery. Studies on traditional sauna use have shown it can lead to improvements in blood pressure and cardiovascular health, which supports this healing process. At the same time, the steam and sweat work wonders for your skin. Sweating helps to cleanse your pores of impurities, leaving your skin feeling soft and looking rejuvenated. It’s a two-in-one benefit that helps you feel great both inside and out.

How Does SaunaLife Stand Out?

When you’re investing in your home, you want something that is not only beautiful but also built to last. SaunaLife gets this. They bring together smart engineering and careful craftsmanship to create saunas that are a true centerpiece for your wellness routine. It’s the small details and commitment to quality that make a big difference, ensuring your sauna is a source of relaxation for years to come. From the materials they choose to the way they design their benches, every element is considered to give you the best possible experience.

Superior Materials and Durability

SaunaLife saunas are hand-crafted in Northern Europe by people who are genuinely passionate about sauna culture. This dedication shows in the final product. They use sustainably sourced wood that is not only more durable but also helps keep the saunas at a great value. This focus on quality materials means your sauna is built for a lifetime of enjoyment and good health. The meticulous attention to detail in each design ensures you get a beautiful, comfortable space that stands up to regular use, whether it’s placed inside your home or in your Long Island backyard.

Innovative, User-Friendly Features

SaunaLife perfectly blends traditional sauna design with modern technology. Many models come with convenient features like WiFi controls and app integration, allowing you to preheat your sauna from anywhere. For their outdoor models, they use thermo-spruce, a specially treated wood that offers incredible dimensional stability and weather resistance for year-round use. This means you get the classic sauna experience without compromising on the latest comforts and durability. These user-friendly features make incorporating a sauna session into your daily routine simple and seamless.

Thoughtful Ergonomic Design

Comfort is at the core of the SaunaLife experience. Many of their saunas, like the Ergo barrel models, feature ergonomic benches designed to support your body for ultimate relaxation. They also incorporate thoughtful details like integrated LED chromotherapy lighting to create a calming ambiance. To maintain fresh, clean air, SaunaLife uses a passive ventilation system that relies on natural air circulation, which is both effective and quiet. Every aspect, from the layout to the lighting, is designed with your comfort and well-being in mind, making each session a truly restorative escape. You can explore Gappsi’s full range of saunas to see these designs for yourself.

Find the Right Sauna for Your Long Island Home

Choosing the perfect sauna is an exciting step toward creating your personal wellness retreat. With so many excellent options from SaunaLife, it helps to think through a few key factors to find the one that fits your home and lifestyle perfectly. Let’s walk through how to select the right size, location, and style, so you can start enjoying the benefits of your new sauna sooner.

Choose the Right Capacity

First, think about who will be using your sauna. Are you looking for a quiet, personal escape or a space to share with family and friends? SaunaLife offers models designed for intimate relaxation and larger gatherings. You can find cozy two-person saunas perfect for a couple, or you can opt for a four, six, or even eight-person model to host wellness sessions. Considering your primary use will help you select a capacity that feels just right, ensuring everyone has enough room to relax comfortably. Our team can help you explore the different saunas to find the ideal size for your needs.

Decide Between Indoor and Outdoor

Next, decide where you want to place your sauna. An indoor sauna offers incredible convenience, turning a master bathroom or basement into a private spa. SaunaLife’s modular indoor models are designed for simple assembly within your home, making them a great addition to any home remodeling project. An outdoor sauna, on the other hand, creates a true backyard destination. These fully assembled units are built to endure the Long Island climate and can be beautifully integrated near a patio, garden, or swimming pool, offering a refreshing escape into nature.

Consider Your Available Space

Whether you’re leaning toward an indoor or outdoor model, measuring your available area is a crucial step. SaunaLife designs are not only functional but also aesthetically pleasing, so you’ll want to ensure a seamless fit. An indoor sauna needs proper ventilation and a dedicated electrical connection, while an outdoor model requires a level foundation. Don’t worry if you’re unsure about the logistics. The Gappsi team specializes in complete landscape design and installation, and we can help you assess your space to find a sauna that complements your home’s layout and style perfectly.

Where to Buy SaunaLife Saunas on Long Island

Once you’ve decided on the perfect SaunaLife model, the next step is finding a trusted local partner for your purchase and installation. This is a crucial part of the process. A high-quality sauna is an investment in your home and well-being, and professional installation ensures it operates safely, efficiently, and looks beautiful for years to come. You want a team that not only understands the product but also has deep experience integrating luxury features into Long Island homes. For a seamless experience from selection to your first steam, it’s best to work with a company that provides both the product and the expert installation service. This approach guarantees that every detail is handled correctly, allowing you to simply relax and enjoy your new home spa.

Professional Installation by Gappsi

As a premier home improvement company on Long Island, Gappsi offers professional sales and installation for the complete SaunaLife collection. We partner directly with SaunaLife to bring their exceptional products, crafted from beautiful woods sourced from Northern Europe, to our clients. Our team handles every aspect of the installation, ensuring your new sauna is perfectly integrated into your home or backyard design. Whether you’re adding a sauna to your master bathroom or creating a complete wellness retreat with one of our custom swimming pools, our expertise guarantees a flawless finish. With Gappsi, you get the peace of mind that comes from working with a single, trusted team for your entire project.

Find a Local Authorized Dealer

To ensure you are purchasing a genuine SaunaLife product with a full warranty, it’s always a good idea to buy from an authorized dealer. These sellers are approved by SaunaLife and have the product knowledge to help you make the right choice for your home. You can use the official SaunaLife dealer locator to find a list of certified retailers in the Long Island area. Working with an authorized dealer confirms you’ll receive authentic products and the high level of customer support you expect. This step helps protect your investment and ensures you get the best possible sauna experience.

What Are Customers Saying?

When you’re considering a significant addition to your home like a sauna, hearing from people who have already made the investment is incredibly valuable. Real-life experiences from homeowners offer a clear picture of what to expect, from the quality of the materials to the day-to-day enjoyment. We’ve gathered feedback from SaunaLife users to help you feel confident in your decision to bring a SaunaLife sauna into your home. These reviews highlight the craftsmanship, design, and overall experience you can anticipate.

Real Customer Feedback

Honest feedback is the most helpful, and SaunaLife customers aren’t shy about sharing their thoughts. The brand consistently earns high marks, with an average rating of 4.8 out of 5 stars across hundreds of reviews. One new owner shared, “It’s been a great experience so far.” They also noted a minor issue, saying, “After about 3 weeks of consistent usage, I noticed some staining directly above the heater on the ceiling.” This kind of real-world feedback is valuable because it shows the saunas are being used and loved, giving you a realistic look at long-term ownership.

Praise for Quality and Design

Customers consistently praise the craftsmanship and thoughtful design of SaunaLife products. Reviews often point to premium materials like Nordic spruce and Canadian hemlock, which ensure both beauty and durability. One reviewer called SaunaLife “one of the most complete sauna brands on the market today,” highlighting their wide range of options. Whether you want a compact two-person barrel sauna or a modern indoor cabin, the brand offers a style to fit your space. This commitment to quality and design is a major reason homeowners choose SaunaLife for their wellness spaces.

The Gappsi Customer Experience

Choosing the right sauna is just the first step; a smooth purchase and installation are just as important. When you work with Gappsi, you get a dedicated partner. Our customers often tell us our team’s responsiveness gives them peace of mind. As one client said, “Their customer service is hands-down the best…incredibly responsive both before and after our purchase, which gave us a lot of confidence.” We bring that same level of care to every project, from helping you select the perfect home remodeling features to installing your new sauna with precision.

Your Guide to Installation and Maintenance

Once you’ve chosen the perfect SaunaLife model, you’re one step closer to enjoying your personal wellness retreat. Proper installation and simple, consistent care are the keys to making sure your sauna remains a beautiful and functional part of your home for years to come. At Gappsi, we manage the technical details so you can focus on relaxing. Our team ensures a seamless setup from start to finish, and with a few easy maintenance tips, you can keep your sauna in pristine condition.

What to Expect from Installation

Getting your new sauna set up correctly is crucial for both safety and performance. It’s important to know that many SaunaLife models, especially the X-series, are not simple plug-and-play units. They require a 240V dedicated circuit, which means a professional electrician needs to handle the wiring. This ensures your sauna operates efficiently and meets all safety standards. Our expert team at Gappsi takes care of the entire sauna installation, coordinating every detail so you don’t have to worry. We make sure your sauna is perfectly integrated into your home, ready for you to enjoy.

Simple Tips for Sauna Care

SaunaLife saunas are built with premium materials like Nordic spruce and Canadian hemlock, which are chosen for their durability and natural beauty. A little care goes a long way in preserving these materials. After each use, you can leave the door open to air it out and allow the wood to dry completely. For cleaning, a simple wipe-down with a damp cloth is usually all that’s needed. You might notice some light staining on the ceiling above the heater over time, which is completely normal. Regular, gentle cleaning will help manage this and keep your sauna looking its best.

Related Articles

Frequently Asked Questions

Is installing a sauna a complicated project? It’s more straightforward than you might think, especially when you have the right team. While SaunaLife’s indoor models have a simple modular design, most saunas require a dedicated 240V circuit, which needs to be installed by a professional electrician for safety. Our team at Gappsi manages the entire process for you, from assessing your space to coordinating the electrical work and final assembly, so the experience is completely seamless.

How well do these saunas hold up, especially outdoors on Long Island? They are built specifically for durability. SaunaLife uses premium, sustainably sourced materials like Nordic spruce and thermally modified wood, which are known for their natural resistance to weather and temperature changes. This thoughtful European craftsmanship ensures your outdoor sauna can handle Long Island’s seasons, giving you a beautiful and reliable wellness retreat for many years.

I’m not sure if an indoor or outdoor sauna is right for me. What should I consider? Think about how you want to fit sauna sessions into your life. An indoor sauna offers amazing convenience, turning a master bathroom or basement into a private spa you can use anytime. An outdoor sauna creates a true backyard destination, perfect for relaxing after a swim or enjoying a quiet evening. We can help you look at your space and discuss your routine to figure out which option is the perfect match for your home.

What kind of maintenance does a SaunaLife sauna require? The upkeep is surprisingly simple. These saunas are made from high-quality woods that are naturally resilient. The best practice is to leave the door open after each use to let it air out and dry completely. For cleaning, a quick wipe-down with a damp cloth is all you need to keep the wood looking fresh. It’s a low-maintenance addition to your home.

Why should I buy my SaunaLife sauna from Gappsi instead of another store? When you work with us, you get a complete solution from a single, trusted local partner. We don’t just sell you a sauna; we provide professional installation backed by decades of experience transforming Long Island homes. Our team ensures your sauna is perfectly integrated into your home or landscape design, so you can be confident that the entire project is handled with expert care from start to finish.

Travertine brick floor on an outdoor patio with wicker furniture and a stone planter.

Travertine Brick Floor: The Homeowner’s Guide

Creating the perfect outdoor oasis is all about choosing materials that are both beautiful and functional. When it comes to patios, walkways, and pool surrounds, the surface underfoot matters immensely. You want something that feels comfortable, looks stunning, and provides a safe, non-slip surface. This is where travertine truly shines. Its natural ability to stay cool under the hot summer sun makes it a top contender for any backyard project. In this article, we’ll explore why a travertine brick floor is such a popular choice for outdoor spaces and cover everything you need to know about its durability, care, and timeless appeal.

Key Takeaways

  • Protect its natural beauty: Travertine is a porous stone, so sealing it upon installation and then every few years is essential. This simple step prevents stains and preserves its unique, earthy look for the long term.
  • Match the finish to the function: The safety and durability of your floor depend on its finish. Choose a textured finish like tumbled or honed for better grip in outdoor or wet areas, and save polished finishes for low-traffic, dry indoor spaces.
  • Adopt a simple care routine: Keep your travertine looking its best by cleaning with a pH-neutral stone cleaner and avoiding harsh, acidic products. Blot spills quickly and sweep regularly to prevent scratches and stains.

What Is Travertine Brick Flooring?

If you’re looking for flooring that feels both timeless and connected to nature, travertine brick might be exactly what you need. Travertine is a beautiful natural stone that brings a warm, classic look to any space, from rustic kitchens to elegant patios. It’s known for its unique, earthy appearance, with subtle variations in color and texture that make every installation one-of-a-kind. Unlike mass-produced tiles, each piece of travertine tells a story of its geological past.

This material is essentially a form of limestone deposited by mineral springs. Its signature characteristic is the collection of small pits and channels on its surface, which are created by the escape of water and gas during its formation. These features give travertine its distinct, organic texture. When you choose travertine, you’re not just picking a floor covering; you’re bringing a piece of natural history into your home. It’s a popular choice for homeowners who appreciate materials with character and a story to tell. Gappsi offers a wide selection of porcelain and natural stone pavers to help you find the perfect fit for your project.

How This Natural Stone Is Formed

Travertine’s journey begins in hot mineral springs. As water rich in calcium carbonate bubbles up from the ground, it deposits layers of calcite. Over thousands of years, this process builds up the stone we know as travertine. Think of it as an early stage of limestone. The stone often forms with tiny shells, minerals, and other bits of nature trapped inside, which contributes to its unique patterns and colors. The signature holes and troughs in the stone are created by carbon dioxide bubbles escaping as the stone forms. This natural process is what gives travertine its rustic charm and ensures no two tiles are ever exactly alike.

Travertine vs. Other Flooring Materials

When you’re weighing your flooring options, it’s helpful to know where travertine stands. It’s a very hard and durable stone that holds up well to daily foot traffic, making it a great choice for many areas of your home. While it’s not the absolute strongest stone in its category (granite, for example, is harder), it is more than tough enough for residential flooring. Compared to materials like marble, travertine has a more weathered, rustic feel. It’s softer underfoot than porcelain tile and offers a natural, non-uniform look that factory-made materials can’t replicate. Our masonry experts can walk you through how it compares to other stones for your specific project.

Clearing Up Common Travertine Myths

Let’s clear the air on a few things you might have heard about travertine. First, some people worry that the natural holes make the stone weak. This is simply not true. Travertine is quite tough, and those voids are a natural part of its character. Once the stone is properly filled and sealed, its structural integrity is not compromised at all. Another common mistake is treating travertine like it’s porcelain. Remember, travertine is a natural stone and needs to be cared for as such. Using the wrong cleaners can damage the surface. With the right care and professional sealing services, your travertine floors will stay beautiful for years.

What Are the Pros and Cons of Travertine Brick Floors?

Choosing the right flooring is a big decision, and travertine brick is a beautiful option with a lot to offer. Like any natural stone, it comes with its own set of advantages and considerations. Understanding these points will help you decide if its timeless charm is the perfect fit for your Long Island home. Let’s walk through the key pros and cons to give you a clear picture of what to expect.

Its Durability and Longevity

One of the biggest draws of travertine is its resilience. This is a tough, hard-wearing stone that stands up well to daily life, making it a great choice for high-traffic areas like hallways and kitchens. While it’s a very durable material, it’s important to know that it’s a form of limestone, so it is softer than stones like granite. However, for most residential uses, its strength is more than sufficient. With professional installation and the right care, a travertine brick floor can last for decades, adding lasting value and character to your home. Proper sealing and restoration are key to ensuring it looks great for years to come.

Its Natural Beauty and Aesthetic Appeal

Travertine has a classic, earthy beauty that is hard to replicate. Formed by mineral deposits from natural springs, each tile has unique patterns, colors, and textures. This means your floor will be a one-of-a-kind work of art. The warm, neutral tones range from creamy ivories and beiges to soft golds and browns, complementing almost any design style, from rustic to contemporary. If you love materials with character, travertine is an excellent choice. You can explore a wide variety of natural stone options to find the perfect shade and pattern that speaks to you and your home’s aesthetic.

Its Comfort and Thermal Properties

A unique benefit of travertine is its ability to stay naturally cool to the touch. During hot Long Island summers, a travertine patio or pool deck feels wonderfully comfortable under bare feet. This makes it an ideal material for creating inviting outdoor living spaces where you and your family can relax. Indoors, this same quality keeps rooms feeling fresh. In the winter, the stone can feel cool, but it pairs very well with radiant floor heating systems for year-round comfort. For rooms without heated floors, a few well-placed area rugs can easily add warmth and coziness to the space.

Addressing Slipperiness and Safety

Safety is always a top priority, and it’s a valid question when it comes to stone floors. The slipperiness of travertine depends entirely on its finish. A highly polished finish can become quite slick when wet, making it less suitable for bathrooms, kitchens, or outdoor areas. However, other finishes provide excellent traction. A tumbled or honed finish offers a more matte, textured surface that is much more slip-resistant. When selecting your travertine, it’s crucial to choose a finish appropriate for the space to ensure both beauty and safety for your family.

Understanding Maintenance Requirements

Travertine is a porous stone, which means it can absorb spills if not properly sealed. To keep it looking its best, your floor will need to be sealed upon installation and then periodically resealed every few years. This protective barrier prevents liquids from seeping in and causing stains. For daily care, simply sweep or vacuum up debris and clean with a pH-neutral stone cleaner. It’s best to wipe up acidic spills like wine or citrus juice quickly. With a simple and consistent maintenance routine, your travertine brick floors will remain a stunning feature in your home for a very long time.

Its Versatility for Indoor and Outdoor Spaces

Travertine is incredibly versatile, making it a favorite among designers and homeowners. It’s not just for floors; you can use it for walls, backsplashes, shower surrounds, and fireplace hearths. This adaptability allows you to create a cohesive look that flows seamlessly from your indoor living areas to your outdoor patios. Imagine a beautiful travertine floor that extends from your kitchen right out to your poolside lounge area. Because it’s available in various finishes, from rustic tumbled to smooth honed, it can be tailored to fit any project. This makes it a fantastic choice for any home remodeling project where you want to connect your spaces beautifully.

What to Consider Before Choosing Travertine Brick

Choosing a new floor is a big decision, and when you’re working with a natural stone like travertine, there are a few extra things to keep in mind. Unlike manufactured materials, every piece of travertine is unique, which is part of its charm. To make sure you love your new floors for years to come, it’s helpful to think through a few key factors before you start the installation process.

Taking the time to consider the quality, color, cost, and practical needs of travertine will help you feel confident in your choice. From the specific finish that fits your home’s style to the structural requirements of this beautiful, heavy stone, a little planning goes a long way. We’ll walk through the most important points to help you select the perfect travertine brick for your space.

Selecting the Right Quality and Finish

Because travertine is a natural stone and not a factory-made material, each piece is one-of-a-kind. This means it’s important to select high-quality stones that will stand the test of time. Higher-grade travertine has fewer pits and a more consistent density, making it more durable. You’ll also want to consider the finish. A tumbled finish offers a rustic, aged look with soft edges, while a honed finish is smooth and matte. Polished travertine is glossy and elegant, but it can be slippery when wet, so it’s often better for low-traffic, dry areas. A brushed finish provides a textured, antique feel. We always recommend seeing and touching samples in person at the Gappsi Store to find what you love.

Choosing Your Color and Pattern

Travertine comes in a beautiful range of earthy colors, from warm creams and golden browns to silvery greys. This variety allows you to choose a style that complements your existing decor and personal taste. You can select a single, consistent color for a uniform look or mix different shades for a more dynamic, mosaic-like effect. Beyond color, the installation pattern makes a huge impact. A classic running bond pattern is timeless, while a herringbone or basketweave design can add a touch of custom elegance. Our masonry design experts can help you visualize how different colors and patterns will look in your home.

Planning Your Budget and Costs

It’s important to plan your budget before falling in love with a specific type of travertine. Material prices can range from about $41 to $71 per square foot, but the total project cost includes more than just the stone itself. You’ll also need to account for professional installation, subfloor preparation, grout, and sealant. While the initial investment might be higher than for other flooring types, travertine’s incredible durability makes it a great long-term value. To get a clear picture of the overall cost, it’s best to get a detailed quote that covers every aspect of your home remodeling project.

Factoring in Your Climate

Here on Long Island, we know all about freeze-thaw cycles. If you’re planning to install travertine outdoors for a patio or walkway, climate is a critical factor. When water gets into the natural pores of the stone, freezes, and expands, it can cause cracks. That’s why proper sealing is absolutely essential. A high-quality sealer will prevent water from getting in and causing damage. Making sure your travertine is well-sealed is crucial for maintaining its integrity through our tough winters. Professional restoration and sealing services can ensure your stone is protected from the elements.

Understanding Weight and Structural Needs

Travertine is a heavy material, which is a testament to its durability. However, its weight means you need to ensure your home’s structure can support it. This is especially important for second-floor installations or in older homes. A professional installer will assess your subfloor to confirm it’s strong and level enough to handle the load. An unstable or uneven subfloor can lead to cracked tiles down the road, so this step is not one to skip. Our masonry construction team always prepares a solid foundation to ensure your travertine floor is built to last.

How to Install and Maintain Travertine Brick Floors

Once you’ve chosen your beautiful travertine brick, the next step is ensuring it’s installed correctly and cared for properly. Proper installation and a simple maintenance routine are the keys to keeping your floors looking incredible for decades. While travertine is a durable, long-lasting material, it does require specific handling to protect its natural beauty. The process starts with a solid foundation and expert installation, followed by a straightforward cleaning and sealing schedule.

Think of it like this: you’re investing in a timeless feature for your home, and a little bit of care goes a long way in protecting that investment. From preparing the ground correctly to knowing which cleaners to use, every step matters. Don’t worry, it’s not as complicated as it sounds. We’ll walk through the essential steps for installation and give you actionable tips for daily care, so you can feel confident about living with and loving your new travertine floors.

The Importance of Professional Installation

While the DIY spirit is admirable, travertine brick installation is a job best left to the professionals. This natural stone has unique characteristics, and its weight and composition require expert handling. A professional masonry team ensures the subfloor is perfectly level, the layout is aesthetically pleasing, and each brick is set correctly to prevent future issues like cracking or shifting. They understand how to work with the natural variations in the stone to create a seamless, beautiful finish. Proper installation is crucial for the floor’s durability and longevity, guaranteeing your investment looks stunning and performs well for years to come. It’s the foundational step that sets your project up for success.

Preparing a Stable Foundation

A beautiful travertine floor is only as good as the foundation it sits on. Before a single brick is laid, the subfloor must be perfectly prepared. This means it needs to be completely clean, dry, and level. Any remnants of old flooring, adhesives, dust, or debris must be thoroughly removed. An unstable or uneven foundation can cause the travertine to shift, crack, or become uneven over time, leading to costly repairs. This preparation phase is one of the most critical parts of the installation process. It ensures the mortar adheres correctly and provides a stable base that will support the heavy stone for its entire lifespan, giving you a flawless and durable surface.

Simple Daily Care and Cleaning

Keeping your travertine floors looking pristine is surprisingly simple. The key is consistency and using the right products. You should sweep or dust mop the floors regularly to remove dirt and grit that can cause microscopic scratches. For cleaning, avoid acidic or abrasive cleaners like vinegar, ammonia, or citrus-based soaps, as they can etch the stone’s surface. Instead, use a pH-neutral cleaner specifically designed for natural stone and a soft mop. This gentle approach will clean your floors effectively without damaging the material. For deeper cleaning or to address any stubborn spots, our restoration services can bring back that brand-new look.

Sealing and Protecting Your Travertine

Because travertine is a porous natural stone, sealing it is an essential step in its maintenance. A high-quality sealer acts as a protective barrier, preventing liquids from seeping into the stone and causing stains. This is especially important for outdoor installations, like patios or pool surrounds, where the stone is exposed to the elements. Sealing also makes daily cleaning easier and helps preserve the stone’s natural color and finish. We recommend resealing your travertine every one to two years, though high-traffic areas may need it more frequently. This simple protective measure is one of the best ways to ensure your travertine brick remains beautiful and resilient for a lifetime.

Preventing Spills and Stains

Accidents happen, but with travertine, a quick response can prevent a small spill from becoming a permanent stain. If you spill something, especially an acidic liquid like wine, coffee, or juice, blot it up immediately with a soft cloth. Do not wipe, as that can spread the spill. For extra protection in high-risk areas like kitchens or dining rooms, use coasters under drinks and place mats under dishes. Using area rugs or runners in high-traffic zones can also help protect the floor from dirt and wear. These small, preventative habits will go a long way in keeping your travertine looking flawless and free of unwanted marks.

Where to Find the Best Travertine Brick

Once you’ve decided that travertine brick is the right fit for your home, the next step is finding a quality product. Not all travertine is created equal, and the source you choose can make a huge difference in the final look and longevity of your project. Sourcing high-quality stone involves more than just picking a color; it’s about understanding the material, identifying reputable manufacturers, and knowing what to look for in a product line.

A trusted supplier will guide you through their selection, explaining the unique characteristics of each option. They should be able to tell you where the stone comes from and how it was processed. By focusing on premium selections from reliable brands, you can feel confident that your new floor or patio will not only look beautiful but will also stand the test of time. Let’s walk through how to find the best travertine for your home improvement project.

Explore Gappsi’s Premium Travertine Selection

When you’re looking for top-tier materials, it helps to start with a curated collection. At Gappsi, we source a variety of premium porcelain and natural stone pavers chosen for their beauty and durability. Our selection includes options like Pemberley Pavers, which are outdoor tiles made from gorgeous natural stone. These pavers have a classic, timeless look that actually improves with age, developing a rich patina over time. They are an excellent choice for homeowners who want to add a touch of old-world elegance to their patios, walkways, and pool surrounds. Visiting a showroom or viewing a portfolio gives you a real-world sense of how these materials can transform an outdoor space.

Identifying Quality Manufacturers

Travertine is a natural stone, a form of limestone that has been used in construction for centuries. Its presence in ancient structures speaks volumes about its durability. However, the quality of the final product depends heavily on the manufacturer. A quality manufacturer understands the stone’s unique properties and uses precise techniques to cut and finish it without compromising its integrity. They invest in technology that ensures consistency in thickness and size, which is crucial for a smooth installation. When you work with an experienced team, you gain access to materials from manufacturers who have a proven track record of excellence in their masonry work.

What to Look for in a Reputable Brand

A reputable brand is transparent about its products. Look for detailed descriptions that specify the type of travertine and the finish, such as “tumbled,” “honed,” or “polished.” For example, a product described as “Noce Travertine Baby Brick Tumbled Mosaic Tile” tells you it’s made from real travertine and has a textured, aged finish created by tumbling the stones. This level of detail shows a commitment to authentic materials and craftsmanship. Reputable suppliers like the Gappsi Store take the guesswork out of the equation by vetting their sources, ensuring every product they offer meets high standards for quality and aesthetic appeal.

Comparing Product Lines and Warranties

Travertine is a fantastic investment that can significantly increase your home’s value. As you compare different product lines, pay attention to the details. Note the variations in color, the consistency of the finish, and the available sizes. A strong product line will offer a range of options to suit different design needs. It’s also smart to ask about warranties. A manufacturer that stands behind its product with a solid warranty offers peace of mind. This shows they are confident in the stone’s durability and the quality of their finishing process, ensuring your beautiful new travertine surface is a lasting addition to your home.

Is Travertine Brick Flooring Right for You?

Deciding on the perfect flooring involves weighing aesthetics, function, and your lifestyle. Travertine is a fantastic option for many homes, but it’s helpful to know where it shines and what to consider before you commit. Let’s walk through the final steps to help you decide with total confidence.

The Best Rooms and Spaces for Travertine

Travertine is a type of limestone that has been used in construction for centuries, and for good reason. Its earthy tones and unique patterns bring a natural, classic feel to any space. This stone is incredibly versatile, working beautifully for floors, walls, backsplashes, and even fireplace hearths. Indoors, it adds a touch of warmth to entryways, kitchens, and bathrooms. Outdoors, it’s a popular choice for patios, walkways, and pool surrounds because it blends so well with natural landscapes. Gappsi offers a wide selection of porcelain and natural stone to fit any design you have in mind.

How Travertine Compares to Other Floors

When you put travertine up against other flooring materials, its unique qualities stand out. While it’s a very hard and durable stone that will easily handle daily foot traffic, it’s softer than materials like granite or quartzite. Where it truly excels is outdoors. Travertine is naturally porous, which gives it a non-slip texture that’s ideal for wet areas. It also has a remarkable ability to stay cool to the touch, even on the hottest summer days. This makes it a top-tier choice for the area around your swimming pool, creating a comfortable and safe surface for bare feet.

Making Your Final Decision with Confidence

Feeling confident in your choice comes down to understanding the details. Most issues homeowners run into with natural stone aren’t due to defects in the material itself, but rather from choosing the wrong finish or improper care. For example, a tumbled finish provides more texture and grip for outdoor spaces, while a honed finish offers a smooth, matte look for indoors. Making the right selection is key for safety, durability, and appearance. Working with experienced masonry professionals ensures your travertine is installed correctly from the start, so you can enjoy its beauty for years to come.

Related Articles

Frequently Asked Questions

Is travertine a good choice for a Long Island patio, considering our winters? Yes, absolutely, as long as it’s installed and sealed correctly. The key is preventing water from seeping into the stone’s natural pores, freezing, and expanding, which can cause damage. A professional installation with a high-quality sealer creates a protective barrier against our freeze-thaw cycles. With proper care, your travertine patio will handle Long Island weather beautifully for years.

Will travertine floors be too cold in my house? Travertine does stay naturally cool, which feels amazing during our humid summers. In the winter, it can feel cool underfoot, but it’s nothing a cozy area rug can’t fix. A great benefit is that travertine pairs exceptionally well with radiant in-floor heating systems. If you’re planning a renovation, it’s a perfect opportunity to install a heated floor for ultimate year-round comfort.

Is travertine difficult to keep clean? Not at all. The routine is actually quite simple. Regular sweeping or dust mopping prevents grit from scratching the surface. For spills, just blot them up quickly. When it’s time to mop, use a gentle, pH-neutral cleaner made for natural stone instead of harsh chemicals. As long as your travertine is properly sealed, daily upkeep is very manageable.

What makes travertine a good option for a pool deck? Travertine is a fantastic choice for pool decks for two main reasons. First, it stays remarkably cool to the touch, even in direct summer sun, so you won’t have to worry about hot feet. Second, its naturally porous texture, especially with a tumbled finish, provides excellent slip resistance when it gets wet. It creates a safe, comfortable, and beautiful area for relaxing by the pool.

What’s the real difference between tumbled and honed travertine finishes? It really comes down to texture and style. A tumbled finish gives the stone a rustic, aged look with softened, rounded edges, which provides great traction and is perfect for outdoor spaces. A honed finish is smooth and flat with a matte, non-reflective surface. It offers a more refined and contemporary look that works beautifully for indoor floors in kitchens or entryways.

Applying a fresh coat of stain to old concrete pavers on Long Island.

How to Stain Old Concrete Pavers on Long Island NY

Let’s talk about home improvement budgets. Replacing a whole patio, walkway, or driveway is a major financial commitment that isn’t always necessary. If your pavers are structurally sound but just look worn out, there’s a more practical path forward. Staining offers a dramatic visual upgrade for a fraction of the cost of a full tear-out and replacement. It’s one of the most effective ways to get that brand-new look without the brand-new price tag. For homeowners looking to make a smart investment, the decision to stain old concrete pavers on Long Island NY is a clear winner. This guide will walk you through how this process works, what it costs, and why it’s the perfect solution for refreshing your property’s appearance while protecting your wallet.

Key Takeaways

  • Refresh your pavers instead of replacing them: Staining is a budget-friendly solution that revitalizes the look of your outdoor spaces and protects your investment from the elements, saving you the significant cost of a full replacement.
  • A successful project depends on the process: A flawless, durable finish requires meticulous surface preparation, an even application of stain (preferably with a sprayer), and two protective coats of a quality sealer.
  • Choose your contractor with care: Hire a licensed and insured specialist in paver restoration, check their portfolio and reviews, and ask specific questions about their methods to ensure you get a high-quality, lasting result.

Why Stain Your Old Concrete Pavers?

If your concrete paver patio, walkway, or driveway is looking a bit tired and faded, you might think your only option is a complete, and costly, replacement. But there’s a much simpler way to bring them back to life. Staining your old concrete pavers can completely transform your outdoor space, giving it a fresh, vibrant look while also adding a crucial layer of protection. It’s a practical and stylish solution that addresses aesthetics, durability, and your budget all at once.

Think of it as a makeover for your hardscaping. Over time, the sun, rain, and changing seasons on Long Island can take a toll, leaving pavers looking washed out. A quality stain penetrates the surface of the concrete, depositing rich, permanent color that revitalizes the appearance of your entire property. Beyond the visual upgrade, staining helps shield your investment from the elements, extending its lifespan for years to come. It’s one of the most effective ways to refresh your home’s exterior without the disruption of a major construction project. This process not only restores color but also unifies the look of pavers that may have weathered differently over the years, creating a cohesive and polished finish for your outdoor living areas.

Improve Curb Appeal and Property Value

Let’s be honest, the first thing people notice is your home’s exterior. Faded, stained, or worn-out pavers can make an entire property look dated. Staining can make old, faded pavers look almost new again, instantly enhancing your home’s curb appeal. You can choose a color that matches your home’s original design or opt for a completely new shade to create a modern look. This simple update makes your outdoor living areas more inviting and enjoyable for your family and guests. A beautiful and well-maintained hardscape, from your driveway to your pool deck, also contributes directly to your property value, making it a smart investment for any Long Island homeowner.

Protect Pavers from Long Island’s Climate

The weather on Long Island can be tough on outdoor surfaces. From the hot, humid summers and UV exposure to the freezing winters with snow and ice, your pavers are constantly under assault. Staining and sealing provide a protective barrier against these harsh conditions. A quality stain helps prevent water from seeping into the concrete, which can stop erosion and prevent cracking during freeze-thaw cycles. Gappsi’s professional restoration and sealing services are designed to protect your pavers from moisture, salt damage, and fading. Regularly maintaining your pavers this way ensures they last longer and continue to look great season after season.

Save Money by Staining, Not Replacing

One of the biggest advantages of staining is the cost savings. Tearing out and replacing an entire paver patio or driveway is a significant expense and a major project. Staining is a much more affordable option that delivers dramatic results without the high price tag or lengthy disruption of a full replacement. By choosing to restore your existing pavers, you’re making a budget-friendly decision that extends the life of your current hardscape. It’s an efficient way to get the look of brand-new masonry and protect your investment for a fraction of the cost of starting over from scratch.

Choosing the Best Stain for Your Pavers

Picking the right stain is the most important step in bringing your old pavers back to life. The product you choose will determine the final color, finish, and how well your patio or walkway holds up to Long Island’s weather. It’s about finding the perfect balance between beautiful aesthetics and long-lasting durability. Let’s walk through the best options available, the key differences between stain types, and where you can find them locally.

Top Stain Brands You Can Find on Long Island

When you start looking for paver stains, you’ll find many options, but not all are created equal. For older, porous concrete pavers, a high-quality, semi-transparent stain is often your best bet. These products are specifically designed to penetrate the surface rather than just sitting on top, which helps create a rich, durable color that won’t easily chip or peel. They are formulated to revitalize faded surfaces and give them a more natural, stone-like appearance. While you can find consumer brands at hardware stores, the products used by professionals are selected for their superior performance and longevity in our specific climate.

Water-Based vs. Acid-Based Stains: What’s the Difference?

Understanding the chemistry behind your stain helps you choose the right one for your project. The main choice is between water-based and acid-based stains. An acid-based stain chemically reacts with the lime in the concrete, creating a permanent, mottled, and variegated color that becomes part of the paver itself. This makes it incredibly durable and a great choice for high-traffic areas. A water-based stain, on the other hand, is a non-reactive coating that offers a wider range of colors and a more uniform finish. It’s generally easier to apply and has lower odors, making it a solid option for projects where you want more control over the final look.

Where to Buy Paver Stain Locally

For a DIY project, you can find paver stains at most big-box home improvement stores on Long Island. However, for a project that truly lasts, sourcing professional-grade materials is a smart move. Local suppliers often carry products that are better suited for our region’s specific weather challenges. For expert advice and a curated selection of top-tier products, you can visit the Gappsi Store. If you’d rather leave the job to the experts, our team offers professional paver restoration and sealing services. We use proven techniques and premium stains to ensure your pavers look incredible and are protected for years to come.

What’s the Cost to Stain Pavers on Long Island?

Figuring out the budget for a paver staining project is a top priority for most homeowners. The total cost can vary quite a bit, as it depends on several factors specific to your property and the look you want to achieve. Think of it less as a fixed price and more as a custom investment in your home’s curb appeal. The size of your patio or driveway, the current condition of the pavers, and whether you hire a professional all play a part in the final number. Let’s break down what goes into the cost so you can plan your project with confidence.

What Affects the Final Price?

Several key elements influence the cost of staining pavers on Long Island. The most obvious factor is the size of the area you want to stain; a larger driveway will naturally require more materials and time than a small walkway. The current condition of your pavers is also important. If they need extensive cleaning, repairs, or stripping of old sealant, expect the prep work to add to the overall cost. The complexity of the job, such as creating a multi-toned or patterned design, will also impact the price compared to a simple, single-color application. Finally, local labor and material costs are a significant part of the equation.

DIY vs. Professional Staining: A Cost Comparison

You might be tempted to stain your pavers yourself to save money. A DIY project involves paying for the stain, cleaner, a sprayer, brushes, and a good quality sealer. While the upfront material cost is lower, the process can be tricky. Achieving an even, professional-looking finish requires skill and the right equipment. Mistakes can be difficult and expensive to fix. Hiring a professional service costs more, primarily due to labor, but you are paying for expertise, efficiency, and peace of mind. A professional team has the experience to properly prep the surface and apply the stain for a durable, beautiful result, saving you from potential DIY mishaps and ensuring the job is done right.

How to Get an Accurate Quote

To get a clear and accurate price for your project, it’s best to request a detailed quote from a local professional. Before you call, gather some basic information. First, measure the square footage of the area you want to stain. Second, take a few photos of the pavers to show their current condition. Finally, have an idea of the color and finish you’re hoping for. When you speak with a contractor, provide these details to get a more precise estimate. Always ask for an itemized quote that breaks down the costs for surface preparation, materials, and labor. This transparency helps you understand exactly what you’re paying for and allows you to compare quotes effectively.

How to Hire the Right Paver Staining Contractor

Choosing the right professional for your paver staining project is just as important as picking the right color. The quality of the application determines how your pavers will look and how well they’ll hold up over time. A great contractor not only has the technical skills but also serves as a trusted partner, guiding you to the best outcome for your home. Taking the time to find an experienced, reliable company ensures your investment is protected and your patio, driveway, or walkway looks fantastic for years to come.

What to Look for in a Contractor

When you start your search, look for a contractor who specializes in paver restoration. A general handyman might not have the specific knowledge needed for a lasting finish. You want a team that understands how to bring life back to faded driveways, patios, and pool areas with the right products and techniques. Ask to see a portfolio of their previous staining projects. This will give you a clear idea of their workmanship and the results you can expect. A dedicated professional will offer comprehensive restoration and sealing services, showing they have deep expertise in caring for hardscapes.

Key Questions to Ask Before You Hire

Before making a decision, have a list of questions ready. This helps you compare contractors and find the best fit. Start by asking about their process. How do they prepare the pavers before staining? What type of stain do they recommend for your specific situation and why? It’s also smart to confirm if staining is the right choice. A trustworthy expert will tell you if staining is a good, affordable option or if your pavers require more extensive repairs. Don’t forget to ask for a project timeline, what kind of warranty they offer on their work, and for a detailed, written estimate.

Check for Reviews, Licensing, and Insurance

Protect yourself by doing a final background check. Look for recent reviews and testimonials from other Long Island homeowners. Past customer experiences can tell you a lot about a company’s reliability, communication, and quality of work. Pay attention to comments about their professionalism and whether they completed the job on time and on budget. Most importantly, always confirm that the contractor is fully licensed and insured. This is non-negotiable, as it protects you from any liability in case of accidents on your property. A reputable company will gladly provide proof of their credentials.

What to Expect During the Staining Process

Staining your concrete pavers is a straightforward project, but it requires careful attention to detail to get that beautiful, long-lasting finish you’re looking for. Whether you plan to tackle this yourself or hire a professional, understanding the key stages will help you know what a quality job looks like. The process breaks down into three main phases: preparing the surface, applying the stain, and sealing it for protection. Each step is crucial for ensuring the stain adheres properly and stands up to Long Island’s weather for years to come. A professional team will handle every detail, from the initial cleaning to the final coat of sealer, giving you a flawless result without the guesswork.

Step 1: Preparing and Cleaning the Surface

You can’t get a beautiful finish on a dirty canvas. That’s why the first step is always a thorough cleaning. Before any stain is applied, you have to “make sure your pavers are very clean, free of all dirt and dust.” This means removing any grime, moss, algae, or tough stains that have built up over time. For most patios and walkways, a power washer is the best tool for the job. This deep cleaning clears the pores of the concrete, allowing the stain to penetrate evenly and bond directly with the paver. Skipping this step can lead to a splotchy, uneven color that won’t last. Proper surface preparation is the foundation of a professional-grade restoration and sealing project.

Step 2: Applying the Stain Correctly

Once the pavers are clean and completely dry, it’s time to apply the color. Technique is everything here. For the most consistent finish, it’s best to “use a pump sprayer to put on two even coats of stain in a circular motion.” This method helps prevent streaks and blotches, ensuring the color looks natural across your entire patio or driveway. Applying two thin coats is always better than one thick one, as it allows for better absorption and a richer final color. While different products may have slightly different instructions, this technique works well for most high-quality paver stains. A steady hand and careful application are key to transforming your old pavers and creating a stunning new look for your outdoor living space.

Step 3: Curing and Long-Term Care

The job isn’t finished once the stain is down. Protecting that fresh color is the final, and arguably most important, step. “After the stain dries, apply two coats of sealer, letting each coat dry completely.” The sealer acts as a protective topcoat, locking in the stain and shielding it from UV rays, rain, and foot traffic. This is what gives your pavers their durability and vibrant appearance for the long haul. To keep them looking their best, you should “regularly maintain and seal your brick pavers to protect them from stains and fading.” A little upkeep goes a long way in preserving your investment and ensuring your newly stained pavers remain a beautiful feature of your home for years.

Related Articles

Frequently Asked Questions

How long will the new stain last on my pavers? The longevity of your paver stain really depends on a few things: the quality of the stain and sealer used, how much foot traffic the area gets, and its exposure to the elements. When applied professionally and properly sealed, you can expect the color to look great for many years. To keep it looking fresh, we recommend a simple cleaning and re-sealing every few years, which protects the color and the paver itself.

Will staining make my patio or walkway slippery? This is a great question, especially for pool decks and high-traffic walkways. The stain itself doesn’t make pavers slippery; the finish of the sealer is what determines the texture. A high-gloss sealer can sometimes reduce traction, but professionals can mix a non-slip additive into the final sealing coat. This creates a slightly gritty, invisible texture that maintains excellent grip without changing the beautiful new look of your pavers.

What if my pavers have some cracks or damage? Can they still be stained? In many cases, yes. Minor surface cracks and small chips can typically be repaired as part of the preparation process before any stain is applied. However, if your pavers have significant structural issues, like heaving or widespread cracking, those problems should be addressed first to ensure a stable foundation. An experienced contractor can assess the condition and let you know the best course of action.

Is it possible to choose a completely different color for my pavers? Absolutely. One of the best parts about staining is the opportunity to completely refresh your outdoor space with a new color palette. You can easily go from a dated, faded red to a sophisticated charcoal or a warm tan. A semi-transparent stain allows you to achieve a rich, new hue while still letting some of the paver’s natural texture show through for a more authentic look.

How long does the whole staining and sealing process take? For an average-sized patio or driveway, the entire project usually takes just a few days from start to finish. The first day is typically for deep cleaning and any necessary prep work. The pavers then need to dry completely, which can take a day or two depending on the weather. The actual staining and sealing process is relatively quick, but the final coats of sealer will need some time to cure before you can walk on them or place furniture.

Applying a fresh coat of stain to old concrete pavers on Long Island.

How to Stain Old Concrete Pavers on Long Island NY

Let’s talk about home improvement budgets. Replacing a whole patio, walkway, or driveway is a major financial commitment that isn’t always necessary. If your pavers are structurally sound but just look worn out, there’s a more practical path forward. Staining offers a dramatic visual upgrade for a fraction of the cost of a full tear-out and replacement. It’s one of the most effective ways to get that brand-new look without the brand-new price tag. For homeowners looking to make a smart investment, the decision to stain old concrete pavers on Long Island NY is a clear winner. This guide will walk you through how this process works, what it costs, and why it’s the perfect solution for refreshing your property’s appearance while protecting your wallet.

Key Takeaways

  • Refresh your pavers instead of replacing them: Staining is a budget-friendly solution that revitalizes the look of your outdoor spaces and protects your investment from the elements, saving you the significant cost of a full replacement.
  • A successful project depends on the process: A flawless, durable finish requires meticulous surface preparation, an even application of stain (preferably with a sprayer), and two protective coats of a quality sealer.
  • Choose your contractor with care: Hire a licensed and insured specialist in paver restoration, check their portfolio and reviews, and ask specific questions about their methods to ensure you get a high-quality, lasting result.

Why Stain Your Old Concrete Pavers?

If your concrete paver patio, walkway, or driveway is looking a bit tired and faded, you might think your only option is a complete, and costly, replacement. But there’s a much simpler way to bring them back to life. Staining your old concrete pavers can completely transform your outdoor space, giving it a fresh, vibrant look while also adding a crucial layer of protection. It’s a practical and stylish solution that addresses aesthetics, durability, and your budget all at once.

Think of it as a makeover for your hardscaping. Over time, the sun, rain, and changing seasons on Long Island can take a toll, leaving pavers looking washed out. A quality stain penetrates the surface of the concrete, depositing rich, permanent color that revitalizes the appearance of your entire property. Beyond the visual upgrade, staining helps shield your investment from the elements, extending its lifespan for years to come. It’s one of the most effective ways to refresh your home’s exterior without the disruption of a major construction project. This process not only restores color but also unifies the look of pavers that may have weathered differently over the years, creating a cohesive and polished finish for your outdoor living areas.

Improve Curb Appeal and Property Value

Let’s be honest, the first thing people notice is your home’s exterior. Faded, stained, or worn-out pavers can make an entire property look dated. Staining can make old, faded pavers look almost new again, instantly enhancing your home’s curb appeal. You can choose a color that matches your home’s original design or opt for a completely new shade to create a modern look. This simple update makes your outdoor living areas more inviting and enjoyable for your family and guests. A beautiful and well-maintained hardscape, from your driveway to your pool deck, also contributes directly to your property value, making it a smart investment for any Long Island homeowner.

Protect Pavers from Long Island’s Climate

The weather on Long Island can be tough on outdoor surfaces. From the hot, humid summers and UV exposure to the freezing winters with snow and ice, your pavers are constantly under assault. Staining and sealing provide a protective barrier against these harsh conditions. A quality stain helps prevent water from seeping into the concrete, which can stop erosion and prevent cracking during freeze-thaw cycles. Gappsi’s professional restoration and sealing services are designed to protect your pavers from moisture, salt damage, and fading. Regularly maintaining your pavers this way ensures they last longer and continue to look great season after season.

Save Money by Staining, Not Replacing

One of the biggest advantages of staining is the cost savings. Tearing out and replacing an entire paver patio or driveway is a significant expense and a major project. Staining is a much more affordable option that delivers dramatic results without the high price tag or lengthy disruption of a full replacement. By choosing to restore your existing pavers, you’re making a budget-friendly decision that extends the life of your current hardscape. It’s an efficient way to get the look of brand-new masonry and protect your investment for a fraction of the cost of starting over from scratch.

Choosing the Best Stain for Your Pavers

Picking the right stain is the most important step in bringing your old pavers back to life. The product you choose will determine the final color, finish, and how well your patio or walkway holds up to Long Island’s weather. It’s about finding the perfect balance between beautiful aesthetics and long-lasting durability. Let’s walk through the best options available, the key differences between stain types, and where you can find them locally.

Top Stain Brands You Can Find on Long Island

When you start looking for paver stains, you’ll find many options, but not all are created equal. For older, porous concrete pavers, a high-quality, semi-transparent stain is often your best bet. These products are specifically designed to penetrate the surface rather than just sitting on top, which helps create a rich, durable color that won’t easily chip or peel. They are formulated to revitalize faded surfaces and give them a more natural, stone-like appearance. While you can find consumer brands at hardware stores, the products used by professionals are selected for their superior performance and longevity in our specific climate.

Water-Based vs. Acid-Based Stains: What’s the Difference?

Understanding the chemistry behind your stain helps you choose the right one for your project. The main choice is between water-based and acid-based stains. An acid-based stain chemically reacts with the lime in the concrete, creating a permanent, mottled, and variegated color that becomes part of the paver itself. This makes it incredibly durable and a great choice for high-traffic areas. A water-based stain, on the other hand, is a non-reactive coating that offers a wider range of colors and a more uniform finish. It’s generally easier to apply and has lower odors, making it a solid option for projects where you want more control over the final look.

Where to Buy Paver Stain Locally

For a DIY project, you can find paver stains at most big-box home improvement stores on Long Island. However, for a project that truly lasts, sourcing professional-grade materials is a smart move. Local suppliers often carry products that are better suited for our region’s specific weather challenges. For expert advice and a curated selection of top-tier products, you can visit the Gappsi Store. If you’d rather leave the job to the experts, our team offers professional paver restoration and sealing services. We use proven techniques and premium stains to ensure your pavers look incredible and are protected for years to come.

What’s the Cost to Stain Pavers on Long Island?

Figuring out the budget for a paver staining project is a top priority for most homeowners. The total cost can vary quite a bit, as it depends on several factors specific to your property and the look you want to achieve. Think of it less as a fixed price and more as a custom investment in your home’s curb appeal. The size of your patio or driveway, the current condition of the pavers, and whether you hire a professional all play a part in the final number. Let’s break down what goes into the cost so you can plan your project with confidence.

What Affects the Final Price?

Several key elements influence the cost of staining pavers on Long Island. The most obvious factor is the size of the area you want to stain; a larger driveway will naturally require more materials and time than a small walkway. The current condition of your pavers is also important. If they need extensive cleaning, repairs, or stripping of old sealant, expect the prep work to add to the overall cost. The complexity of the job, such as creating a multi-toned or patterned design, will also impact the price compared to a simple, single-color application. Finally, local labor and material costs are a significant part of the equation.

DIY vs. Professional Staining: A Cost Comparison

You might be tempted to stain your pavers yourself to save money. A DIY project involves paying for the stain, cleaner, a sprayer, brushes, and a good quality sealer. While the upfront material cost is lower, the process can be tricky. Achieving an even, professional-looking finish requires skill and the right equipment. Mistakes can be difficult and expensive to fix. Hiring a professional service costs more, primarily due to labor, but you are paying for expertise, efficiency, and peace of mind. A professional team has the experience to properly prep the surface and apply the stain for a durable, beautiful result, saving you from potential DIY mishaps and ensuring the job is done right.

How to Get an Accurate Quote

To get a clear and accurate price for your project, it’s best to request a detailed quote from a local professional. Before you call, gather some basic information. First, measure the square footage of the area you want to stain. Second, take a few photos of the pavers to show their current condition. Finally, have an idea of the color and finish you’re hoping for. When you speak with a contractor, provide these details to get a more precise estimate. Always ask for an itemized quote that breaks down the costs for surface preparation, materials, and labor. This transparency helps you understand exactly what you’re paying for and allows you to compare quotes effectively.

How to Hire the Right Paver Staining Contractor

Choosing the right professional for your paver staining project is just as important as picking the right color. The quality of the application determines how your pavers will look and how well they’ll hold up over time. A great contractor not only has the technical skills but also serves as a trusted partner, guiding you to the best outcome for your home. Taking the time to find an experienced, reliable company ensures your investment is protected and your patio, driveway, or walkway looks fantastic for years to come.

What to Look for in a Contractor

When you start your search, look for a contractor who specializes in paver restoration. A general handyman might not have the specific knowledge needed for a lasting finish. You want a team that understands how to bring life back to faded driveways, patios, and pool areas with the right products and techniques. Ask to see a portfolio of their previous staining projects. This will give you a clear idea of their workmanship and the results you can expect. A dedicated professional will offer comprehensive restoration and sealing services, showing they have deep expertise in caring for hardscapes.

Key Questions to Ask Before You Hire

Before making a decision, have a list of questions ready. This helps you compare contractors and find the best fit. Start by asking about their process. How do they prepare the pavers before staining? What type of stain do they recommend for your specific situation and why? It’s also smart to confirm if staining is the right choice. A trustworthy expert will tell you if staining is a good, affordable option or if your pavers require more extensive repairs. Don’t forget to ask for a project timeline, what kind of warranty they offer on their work, and for a detailed, written estimate.

Check for Reviews, Licensing, and Insurance

Protect yourself by doing a final background check. Look for recent reviews and testimonials from other Long Island homeowners. Past customer experiences can tell you a lot about a company’s reliability, communication, and quality of work. Pay attention to comments about their professionalism and whether they completed the job on time and on budget. Most importantly, always confirm that the contractor is fully licensed and insured. This is non-negotiable, as it protects you from any liability in case of accidents on your property. A reputable company will gladly provide proof of their credentials.

What to Expect During the Staining Process

Staining your concrete pavers is a straightforward project, but it requires careful attention to detail to get that beautiful, long-lasting finish you’re looking for. Whether you plan to tackle this yourself or hire a professional, understanding the key stages will help you know what a quality job looks like. The process breaks down into three main phases: preparing the surface, applying the stain, and sealing it for protection. Each step is crucial for ensuring the stain adheres properly and stands up to Long Island’s weather for years to come. A professional team will handle every detail, from the initial cleaning to the final coat of sealer, giving you a flawless result without the guesswork.

Step 1: Preparing and Cleaning the Surface

You can’t get a beautiful finish on a dirty canvas. That’s why the first step is always a thorough cleaning. Before any stain is applied, you have to “make sure your pavers are very clean, free of all dirt and dust.” This means removing any grime, moss, algae, or tough stains that have built up over time. For most patios and walkways, a power washer is the best tool for the job. This deep cleaning clears the pores of the concrete, allowing the stain to penetrate evenly and bond directly with the paver. Skipping this step can lead to a splotchy, uneven color that won’t last. Proper surface preparation is the foundation of a professional-grade restoration and sealing project.

Step 2: Applying the Stain Correctly

Once the pavers are clean and completely dry, it’s time to apply the color. Technique is everything here. For the most consistent finish, it’s best to “use a pump sprayer to put on two even coats of stain in a circular motion.” This method helps prevent streaks and blotches, ensuring the color looks natural across your entire patio or driveway. Applying two thin coats is always better than one thick one, as it allows for better absorption and a richer final color. While different products may have slightly different instructions, this technique works well for most high-quality paver stains. A steady hand and careful application are key to transforming your old pavers and creating a stunning new look for your outdoor living space.

Step 3: Curing and Long-Term Care

The job isn’t finished once the stain is down. Protecting that fresh color is the final, and arguably most important, step. “After the stain dries, apply two coats of sealer, letting each coat dry completely.” The sealer acts as a protective topcoat, locking in the stain and shielding it from UV rays, rain, and foot traffic. This is what gives your pavers their durability and vibrant appearance for the long haul. To keep them looking their best, you should “regularly maintain and seal your brick pavers to protect them from stains and fading.” A little upkeep goes a long way in preserving your investment and ensuring your newly stained pavers remain a beautiful feature of your home for years.

Related Articles

Frequently Asked Questions

How long will the new stain last on my pavers? The longevity of your paver stain really depends on a few things: the quality of the stain and sealer used, how much foot traffic the area gets, and its exposure to the elements. When applied professionally and properly sealed, you can expect the color to look great for many years. To keep it looking fresh, we recommend a simple cleaning and re-sealing every few years, which protects the color and the paver itself.

Will staining make my patio or walkway slippery? This is a great question, especially for pool decks and high-traffic walkways. The stain itself doesn’t make pavers slippery; the finish of the sealer is what determines the texture. A high-gloss sealer can sometimes reduce traction, but professionals can mix a non-slip additive into the final sealing coat. This creates a slightly gritty, invisible texture that maintains excellent grip without changing the beautiful new look of your pavers.

What if my pavers have some cracks or damage? Can they still be stained? In many cases, yes. Minor surface cracks and small chips can typically be repaired as part of the preparation process before any stain is applied. However, if your pavers have significant structural issues, like heaving or widespread cracking, those problems should be addressed first to ensure a stable foundation. An experienced contractor can assess the condition and let you know the best course of action.

Is it possible to choose a completely different color for my pavers? Absolutely. One of the best parts about staining is the opportunity to completely refresh your outdoor space with a new color palette. You can easily go from a dated, faded red to a sophisticated charcoal or a warm tan. A semi-transparent stain allows you to achieve a rich, new hue while still letting some of the paver’s natural texture show through for a more authentic look.

How long does the whole staining and sealing process take? For an average-sized patio or driveway, the entire project usually takes just a few days from start to finish. The first day is typically for deep cleaning and any necessary prep work. The pavers then need to dry completely, which can take a day or two depending on the weather. The actual staining and sealing process is relatively quick, but the final coats of sealer will need some time to cure before you can walk on them or place furniture.