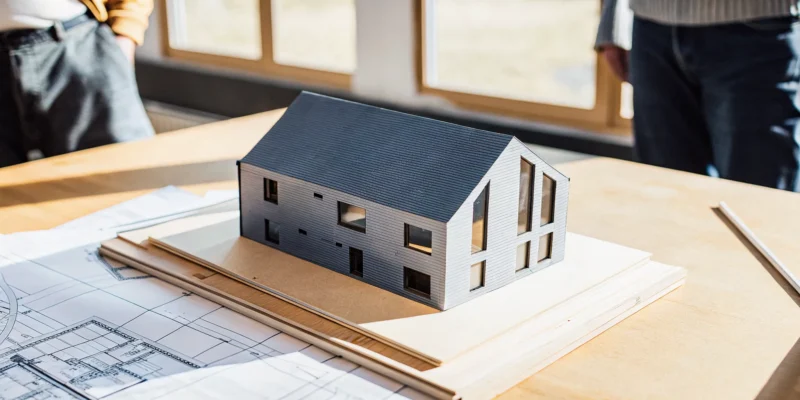
Long Island landscape designer discussing plans with clients on their patio.

How to Hire a Landscape Designer Long Island

Your backyard should be an extension of your home, but for many, it’s an underused space with untapped potential. Maybe you’re dealing with a sloped yard, a lack of privacy, or a patio that’s just too small for entertaining. These are the exact challenges a skilled professional can solve. A great landscape designer Long Island does more than just pick pretty flowers; they are creative problem-solvers who redesign spaces to improve how you live. They see the potential for functional outdoor rooms, seamless indoor-outdoor flow, and beautiful, low-maintenance solutions. This article will show you how to find a designer who can transform your property’s challenges into its best features, creating a space that is as practical as it is beautiful.

Key Takeaways

  • Simplify Your Project with a Design-Build Firm: A company that handles everything from design to construction provides a single point of contact. This integrated approach reduces stress, prevents miscommunication, and ensures your final landscape perfectly matches the original vision.
  • Look for Deep Local Knowledge: A great Long Island landscape designer understands our unique coastal climate, native plants, and complex town permit processes. This local expertise is essential for creating a beautiful outdoor space that is built to last and avoids costly compliance issues.
  • Use the Off-Season to Your Advantage: Begin the design process in the fall or winter for a project you want to enjoy by summer. Planning ahead gives you plenty of time to finalize your design, select materials, and secure a spot with a top-tier firm before their schedule fills up.

What Does a Landscape Designer Do?

Think of a landscape designer as the creative visionary for your outdoor space. Their job is to blend artistry with practical knowledge to transform your yard into a beautiful, functional extension of your home. They work with you to understand your lifestyle, tastes, and how you want to use your space, whether you’re dreaming of a quiet garden retreat, a lively entertainment area, or a safe place for your kids to play.

A great designer considers everything from the big picture layout to the smallest details. They map out where to place patios, walkways, and plantings. They also help you select the right materials and plants that will thrive in Long Island’s specific climate. Ultimately, they create a cohesive plan that brings your vision to life, ensuring the final result is not only stunning but also perfectly suited to your family’s needs.

Landscape Design vs. Landscape Architecture

While you might hear these terms used interchangeably, there are some key differences. A landscape architect is a state-licensed professional, which allows them to work on a broad range of public and commercial projects and handle complex technical challenges like large-scale grading and drainage plans.

A landscape designer, on the other hand, typically focuses on the aesthetic and horticultural elements of residential projects. Their expertise often comes from years of hands-on experience and specialized certifications. For most homeowners on Long Island, a talented landscape designer is the perfect partner. You can see a designer’s skill reflected in their portfolio. Look for experience with high-end residential landscapes, intricate masonry, and thoughtful planting designs that match the style you want for your home.

Design-Build vs. Design-Only Firms

When you start your search, you’ll find two main types of companies: design-only and design-build. A design-only firm creates the blueprints for your project. Once the design is complete, it’s up to you to find and hire separate contractors to actually build it. This can sometimes create a disconnect between the original vision and the final execution.

A design-build firm, like Gappsi, handles the entire process from start to finish. Our team provides a single, seamless experience, managing everything from the initial concept and 3D renderings to the final installation. This integrated approach ensures clear communication and accountability. Examining a design-build firm’s completed projects shows you not just their creative ideas, but also their ability to execute those ideas with quality craftsmanship. Gappsi takes a whole-property approach, designing and building stunning outdoor living spaces alongside interior renovations for a truly cohesive home.

Common Landscape Design Services on Long Island

When you hear “landscape design,” you might picture beautiful flower beds and lush green lawns. While that’s certainly part of it, the field is much broader, especially here on Long Island. A great landscape designer combines artistry with practicality, creating outdoor spaces that are not only stunning but also perfectly suited to your lifestyle. From the soft touches of a garden to the solid foundation of a stone patio, these services work together to build your personal oasis.

Understanding the different services available can help you clarify your vision and find the right professional for your project. Whether you want a quiet retreat for your family, an entertainer’s paradise, or a low-maintenance yard that still looks incredible, there’s a design solution. The goal is to create a cohesive environment that extends your living space into the outdoors. A full-service firm can bring all these elements together, offering everything from initial landscape design to the final installation, ensuring every detail is just right.

Garden and Planting Design

The heart of any landscape is its plant life. Garden and planting design is all about selecting the right flowers, shrubs, and trees for your space and arranging them beautifully. This service goes beyond just picking pretty plants; it involves preparing the ground with proper topsoil and grading, ensuring healthy growth. A designer considers Long Island’s climate, your soil type, and the amount of sunlight your yard gets. This can include planting mature trees for instant shade, laying sod for a perfect lawn, or creating vibrant seasonal flower beds that provide color all year long.

Hardscaping and Masonry

Hardscaping provides the structure and foundation for your outdoor living areas. This includes all the non-plant elements, like patios, walkways, retaining walls, and fire pits. Expert masonry is what turns a simple backyard into a functional and elegant space. A well-built stone wall can create visual interest and define different areas of your yard, while a custom patio becomes the perfect spot for dining and relaxing. These features are built to last, adding lasting value and usability to your property.

Outdoor Living Spaces and Patios

Your patio is the centerpiece of your outdoor life. It’s where you host summer barbecues, enjoy your morning coffee, and unwind at the end of the day. Designing an effective outdoor living space involves more than just laying down some pavers. It’s about creating a seamless flow from your home into your yard. You can incorporate features like outdoor kitchens, seating walls, and fireplaces to make the space truly your own. The choice of materials, from classic natural stone to modern porcelain pavers, sets the tone for the entire area.

Synthetic Turf and Game Courts

For many Long Island families, the backyard is a place for play. If you want a pristine lawn without the constant upkeep, synthetic turf is a fantastic option. It’s perfect for creating durable, green play areas, dog runs, or even personal putting greens. Beyond turf, you can add dedicated Sports Games Courts for basketball, bocce, or pickleball. These additions provide endless entertainment and encourage an active lifestyle, all within the convenience of your own backyard.

Swimming Pools and Water Features

Nothing says “backyard oasis” quite like a beautiful body of water. A custom swimming pool can transform your property into a private resort, providing a refreshing escape during hot Long Island summers. But water features don’t stop at pools. Designers can also create serene koi ponds, elegant fountains, or natural-looking rock waterfalls that add the soothing sound of moving water to your landscape. These elements become stunning focal points that enhance the tranquility and beauty of your outdoor space.

Pavilions, Pergolas, and Shade Structures

To truly enjoy your outdoor space, you need a comfortable place to escape the sun. Pavilions and pergolas provide essential shade while adding a strong architectural element to your landscape. A pavilion offers a fully covered roof, creating an outdoor room perfect for dining or lounging, rain or shine. A pergola, with its slatted roof, provides filtered sunlight and a structure for growing beautiful climbing vines. These structures define your outdoor living areas and make them more comfortable and usable throughout the day.

Fencing and Privacy Solutions

Good fences do more than just mark property lines; they are a key part of your landscape’s design and function. The right fencing can provide privacy from neighbors, keep pets and children safe, and add to the overall aesthetic of your yard. You might choose a classic wood fence for a traditional look, a low-maintenance vinyl fence, or even a “living fence” made of carefully planted evergreens. A designer can help you select a solution that meets your privacy needs while beautifully integrating with the rest of your landscape.

What Makes Long Island Landscape Design Unique?

Designing a landscape on Long Island is about more than just picking pretty plants. It’s a unique challenge that blends coastal living with four distinct seasons and a complex web of local regulations. From the salt spray of the South Shore to the rolling hills of the North Shore, every property has its own character. A successful design works in harmony with these local conditions, not against them. Understanding what makes our island special is the first step to creating an outdoor space that you’ll love for years. It requires a designer with deep local knowledge who can create a beautiful, functional, and resilient landscape that feels right at home.

Adapting to Long Island’s Climate and Soil

Long Island’s coastal climate brings sandy soil, salty air, and strong winds, which can be tough on plants. A knowledgeable designer knows how to work with these elements. With Long Island’s varied tree coverage, a great plan involves protecting existing trees while selecting new plants that will thrive in coastal conditions and handle wind exposure. This means choosing salt-tolerant species for homes near the water and understanding the specific soil type on your property. A thoughtful landscape design considers these factors from the start, ensuring your garden doesn’t just survive, but flourishes through the seasons.

Handling Local Permits, Zoning, and HOA Rules

Each town and village on Long Island has its own set of rules for construction projects. Adding a pool, patio, or pavilion often requires permits, and zoning laws dictate how and where you can build. If you live in a community with a homeowners’ association (HOA), you have another layer of guidelines to follow. This is where an experienced local firm becomes invaluable. Gappsi takes a whole-property approach, which means we can manage the entire project, from home remodeling to outdoor living spaces. Having a single point of contact simplifies project management for you and ensures your design is both beautiful and compliant from day one.

Designing for Every Season

A truly great Long Island landscape offers beauty and function all year long. Our four distinct seasons provide a wonderful opportunity for a dynamic outdoor space. Imagine spring bulbs giving way to lush summer greenery, followed by the rich colors of fall and the quiet beauty of evergreens in the snow. Seasonal landscaping keeps your outdoor space beautiful year-round. This approach also involves practical considerations, like ensuring your patio materials can withstand freeze-thaw cycles. Investing in a year-round design and proper maintenance, like professional restoration and sealing, protects your landscape investment and creates a beautiful outdoor environment for years to come.

Why Choose Gappsi for Your Long Island Landscape Design?

Choosing a landscape designer for your Long Island home is a big deal. You’re not just hiring someone to plant a few shrubs; you’re trusting them with your vision for your home’s outdoor sanctuary. It’s about creating a space where you’ll make memories, whether you’re hosting summer barbecues, watching your kids play, or just enjoying a quiet morning coffee. The right partner can make this process exciting and seamless, while the wrong one can lead to headaches and a finished project that doesn’t quite feel like you.

This is why it’s so important to look beyond just the portfolio. You need a team that understands the unique challenges and opportunities of Long Island properties, from the salty air to the specific town permits. You also want a process that feels collaborative and clear from start to finish. At Gappsi, we’ve built our entire approach around these ideas. We combine comprehensive design and construction services with a commitment to quality that simplifies the entire experience for homeowners. Instead of juggling multiple contractors, you get one dedicated team that sees your project through from the first sketch to the final walkthrough, ensuring your vision comes to life exactly as you imagined.

A Full-Service, Design-Build Approach with 3D Renderings

The term “design-build” simply means that one team handles your entire project, from the initial concept to the final installation. This integrated approach prevents miscommunications and ensures your project stays on schedule and on budget. We start with a consultation to understand your goals and then create a detailed 3D design. This allows you to see a realistic preview of your new landscape, so you can make adjustments and feel completely confident before any work begins. Our full-service landscape design covers everything from grading and planting to irrigation systems and water features, all managed by a single, cohesive team.

All Your Outdoor and Indoor Services in One Place

What truly sets Gappsi apart is our ability to manage your entire property’s transformation, both inside and out. Imagine renovating your kitchen and creating a seamless flow to a new outdoor patio and pool area. With most companies, that would mean hiring and managing separate architects, designers, and contractors. We are one of the few Long Island firms that can design and build it all. This provides you with a single point of contact and ensures a consistent design language throughout your home. It simplifies project management for you and results in a more harmonious living space, making your home remodeling project feel effortless.

Our Commitment to Quality Materials and Expert Craftsmanship

A beautiful design is only as good as the materials and craftsmanship used to build it. With over three decades of experience on Long Island, we know which materials stand up to our coastal climate and which ones don’t. We use only high-quality products, from the soil we grade to the stones we lay, ensuring your investment is built to last. Our team of expert craftsmen takes immense pride in their work, whether they are installing intricate porcelain and natural stone patios, building a custom swimming pool, or planting a privacy screen of evergreens. This commitment to quality is the foundation of every project we undertake.

How to Choose the Right Landscape Designer on Long Island

Finding the right landscape designer is the most important step in bringing your dream backyard to life. You’re not just hiring someone to plant a few shrubs; you’re looking for a partner who can see your vision and has the expertise to execute it. On Long Island, this means finding a professional who understands our unique coastal climate, local regulations, and the desire for beautiful, functional outdoor living spaces. Taking the time to carefully vet your options will ensure your project is a success from the first sketch to the final reveal.

Review Portfolios and Service Offerings

Start by exploring a designer’s portfolio. This is more than just looking at pretty pictures; it’s about seeing their range and capabilities. A strong portfolio will show a variety of styles, proving the designer is versatile and not just repeating the same design. Look for projects similar to what you have in mind. Do you see examples of creative masonry, elegant poolscapes, or innovative lighting? A diverse portfolio, like the projects showcased on the Gappsi YouTube channel, demonstrates a team’s ability to handle different challenges and deliver customized results. Also, confirm they offer the specific services you need, whether it’s hardscaping, planting design, or installing a pavilion.

Check for Licensing, Insurance, and Experience

Never underestimate the importance of proper credentials. Your landscape designer should be fully licensed and insured to work in Long Island. This protects you from liability and ensures they are accountable for their work. Don’t be shy about asking for proof of insurance. Beyond the basics, look into their experience and qualifications. Reviewing their educational background, industry certifications, and professional affiliations can give you valuable insight into their commitment to their craft. A team with decades of experience, for example, has likely managed a wide range of projects and knows how to solve problems effectively, giving you peace of mind.

Why to Choose a Full-Service Design-Build Firm

Consider the benefits of a design-build firm. Instead of hiring a separate designer and multiple contractors, a design-build company handles everything from concept to construction. Gappsi is one of the few companies on Long Island that takes this whole-property approach. We can design and build your swimming pool, patio, pavilion, and landscaping all at once, even coordinating with indoor renovations. This integrated process means you have a single point of contact, which simplifies communication and project management. It also ensures a cohesive design across your entire property, creating a seamless flow between your indoor and outdoor living spaces.

Key Questions to Ask Before You Hire

Once you’ve narrowed down your list, it’s time to interview your top candidates. This conversation is your chance to understand their process and see if your personalities click. Go beyond the portfolio and ask about their project management style, how they handle unexpected issues, and their preferred methods of communication. Will they provide regular updates? Who will be your main contact? Also, ask about their design process. For instance, do they provide 3D renderings so you can visualize the final result before construction begins? These conversations offer a glimpse into their professionalism and help you determine if they will be a true partner in creating your ideal outdoor space.

How to Know You’ve Found the Right Designer

Choosing a landscape designer is about more than just hiring someone to draw up a plan. You’re starting a partnership. The right designer will not only have the technical skills to transform your property but also the communication skills to make the process smooth and even enjoyable. It’s a relationship built on trust, shared vision, and a clear understanding of your goals. While a stunning portfolio is a great start, it only tells part of the story. The true measure of a great designer is found in the details: how they communicate, how they solve problems, and how they make you feel about the project.

To find the perfect fit, you need to look beyond the surface. This means reading between the lines of reviews, knowing which warning signs to look out for, and recognizing the green flags that signal a great partnership ahead. When you find a designer who listens intently, offers creative solutions tailored to your life, and is transparent about every step, you can feel confident that your vision is in the right hands. This is how you move from simply hiring a contractor to collaborating with a true partner who will help you create an outdoor space you’ll love for years to come.

How to Read Between the Lines of Reviews

Online reviews and testimonials are a helpful first step, but the real value isn’t in the star rating. It’s in the story. Look for reviews that describe the entire experience, not just the final result. Did the homeowner mention clear communication, a designer who listened to their ideas, or a team that respected their property? These details paint a picture of the working relationship you can expect.

A portfolio shows you what a designer can build, but reviews tell you how they do it. Pay attention to comments about the process, problem-solving, and professionalism. A designer’s portfolio might showcase their approach to layout and material selection, but reviews reveal their commitment to client satisfaction. When you find reviews that consistently praise a designer’s communication and attention to detail, you’re on the right track to finding a great landscape design partner.

Common Red Flags to Avoid

Your intuition is a powerful tool, and if something feels off during your initial conversations, it probably is. Not everything you need to know will be in a glossy portfolio. A major red flag is a designer who is vague about their process, timeline, or costs. You want a partner who is upfront and transparent, not one who avoids direct questions.

Also, be cautious of designers who seem to push their own style instead of listening to your needs or who pressure you into making a quick decision. A lack of flexibility or an unwillingness to provide references from recent clients is another warning sign. Finally, consider if they are a full-service company. Juggling separate designers, builders, and installers can lead to miscommunication and delays. A fragmented approach can turn your dream project into a logistical headache, especially for complex elements like masonry and hardscaping.

Green Flags: Signs of a Great Partnership

On the flip side, there are clear signs that you’ve found a fantastic designer. A great partner will listen more than they talk during your first meeting. They’ll ask thoughtful questions about your lifestyle, family, and how you envision using the space. This shows they’re focused on creating a custom design that truly works for you, not just a one-size-fits-all solution.

Look for a portfolio that showcases a range of styles, proving their versatility and ability to adapt to different clients’ tastes. Transparency is another huge green flag. They should be open about their process, provide clear estimates, and explain how they handle changes or challenges. The best designers are proud of their work and will gladly encourage you to speak with past clients. When you see their completed projects and hear positive feedback directly from other homeowners, you can feel confident you’ve found a team that builds beautiful spaces and strong relationships. You can often see this firsthand on a company’s YouTube channel.

What Does Landscape Design Cost on Long Island?

Let’s talk about one of the biggest questions on every homeowner’s mind: what will this actually cost? While there isn’t a single price tag for a landscape project on Long Island, understanding the key cost drivers will help you set a realistic budget. Think of it less like buying a product off a shelf and more like creating a custom piece of art for your home. The final price depends on your vision, your property, and the materials you choose. A clear picture of these elements is the first step toward getting an accurate estimate and creating a plan that aligns with your financial goals.

A landscape project is a significant investment, not just in your property’s value, but in your quality of life. It’s about creating a space for morning coffee, family barbecues, or quiet evenings by a fire pit. The right design extends your living area into the outdoors, providing a beautiful and functional backdrop for years of memories. Because every project is tailored to a specific home and family, the costs are just as personalized. A simple refresh will have a very different budget from a full-scale backyard resort with a pool and outdoor kitchen. Our goal is to help you understand what goes into the final number so you can feel confident and excited about the process.

Factors That Influence Project Cost

The cost of a landscape project can vary widely because every design is unique. The most significant factors are the size of your property and the complexity of the design. A simple planting plan for your front yard will naturally cost less than a complete backyard transformation with multiple levels and features. The materials you select also play a huge role. For example, choosing high-end porcelain or natural stone for a patio will have a different price point than standard concrete pavers. Finally, the existing condition of your site, like steep slopes requiring retaining walls or poor soil needing replacement, can also influence the overall investment.

Softscaping vs. Hardscaping Costs

Your project budget will be divided between two main categories: softscaping and hardscaping. Softscaping includes all the living elements, like trees, shrubs, flowers, soil, and grass. Hardscaping refers to the non-living, structural components, such as patios, walkways, retaining walls, and fire pits. Generally, hardscaping is the more significant investment due to the cost of materials and the skilled labor required for installation. A project heavy on intricate masonry will have a higher budget than one focused primarily on lush garden beds. Finding the right balance between these two elements is key to achieving your desired look while staying within your budget.

Balancing Installation and Long-Term Maintenance Costs

A smart landscape plan considers costs beyond the initial installation. It’s important to think about long-term maintenance from the very beginning. Some choices may have a higher upfront cost but save you time and money down the road. For instance, installing high-quality synthetic turf eliminates the recurring expenses of watering, mowing, and fertilizing. Similarly, properly installed hardscapes made from durable materials will last for decades with minimal upkeep, especially with professional cleaning and sealing services. Factoring maintenance into your decision helps protect your investment and ensures your outdoor space looks beautiful for years to come.

Smart Budgeting Tips for Your Project

Feeling confident about your budget starts with a bit of preparation. Before you meet with a designer, create a list of your “must-haves” and “nice-to-haves.” This helps you and your designer prioritize where to allocate funds. If your complete vision feels out of reach right now, consider phasing the project. You could build the foundational patio and walkways this year and add the outdoor kitchen or swimming pool later. When you do get estimates, ask for an itemized breakdown so you can see exactly where your money is going. Most importantly, be open with your designer about your budget. A great partner will use that information to create a beautiful, functional design that respects your financial comfort zone.

When Is the Best Time to Start a Landscape Project on Long Island?

Timing is everything, especially when it comes to landscaping. The best time to start your project depends on what you’re building and what your priorities are. A project focused on new garden beds has a different ideal schedule than one centered on a new stone patio. Understanding the seasonal flow of landscape work on Long Island can help you plan better, save money, and enjoy a smoother process from start to finish.

Thinking about your project in terms of seasons allows you to work with the natural rhythm of the climate, not against it. It also puts you in a strategic position to hire the right designer and construction team before their schedules fill up. Let’s look at the ideal timelines for different types of projects and how you can make the most of off-season planning.

Ideal Seasons for Planting and Hardscaping

For softscaping, which includes planting trees, shrubs, and flowers, fall is often the perfect season on Long Island. The soil is still warm from the summer, but the cooler air temperatures reduce stress on new plants. This gives their roots a chance to get established before winter arrives. Spring is the second-best option, offering a gentle start before the summer heat sets in.

Hardscaping projects, on the other hand, are much more flexible. You can install masonry for patios, walkways, and retaining walls almost any time the ground isn’t frozen solid. In fact, late fall and winter can be an excellent time for this work, as it won’t interfere with your ability to enjoy your yard during the warmer months.

The Benefits of Off-Season Planning

The single best thing you can do for your landscape project is to plan it during the off-season. The design process takes time, and you don’t want to feel rushed. If you dream of a new pool for next summer, you should begin the landscape design process in the fall or winter. This gives you and your designer plenty of time for consultations, creating 3D renderings, making revisions, and selecting materials.

Starting early also means you can handle permits and approvals without a time crunch. Most importantly, it helps you secure a spot on your preferred contractor’s schedule. The best design-build firms are often booked months in advance, so planning ahead ensures you don’t have to settle for your second choice or delay your project for another year.

Finding Value with Seasonal Promotions

Because spring and summer are the busiest times for landscape construction, you may find more flexibility and even potential savings by scheduling work during the slower months. Some contractors offer promotions in the late fall and winter to keep their skilled crews working. While this isn’t a universal rule, it’s always worth asking if there’s any pricing advantage to an off-season installation.

This is especially true for projects that aren’t dependent on warm weather. For example, installing a covered pavilion or starting an indoor home remodel can often be done efficiently during the winter. Planning your project during this time also allows you to watch for sales on materials or outdoor furniture, helping you get the most value for your budget.

Related Articles

Frequently Asked Questions

How long does the landscape design process take before construction can start? The design phase itself can take anywhere from a few weeks to a couple of months, depending on the project’s complexity and how quickly decisions are made. This period includes our initial consultation, a thorough site analysis, the creation of your detailed 3D design, and any revisions you’d like to make. We also use this time to select materials and handle the necessary permits, so once the plan is perfect, our construction team is ready to get started without delay.

My dream backyard is a big project. Can I build it in stages? Absolutely. In fact, phasing a large project is a very smart approach. We can create a complete master plan for your entire property first, which ensures the final result will be cohesive. From there, we can help you prioritize and break the project into logical phases that fit your timeline and budget. For example, you might decide to install the patio and foundational plantings this year, and then add the swimming pool and outdoor kitchen in the next phase.

Do I need to have a complete vision for my yard before I contact a designer? Not at all. It’s our job to help you discover and refine your vision. You just need to start with a general idea of how you want to feel in your space or what activities you want to do there. During our first conversation, we’ll ask questions to understand your lifestyle and tastes. From there, we use tools like 3D renderings to show you what’s possible, allowing you to see and shape the design until it feels just right.

I want a beautiful yard, but I don’t have a lot of time for maintenance. What are my options? Creating a stunning, low-maintenance landscape is one of our specialties. We can design a space that works for your lifestyle by making smart choices from the start. This could involve selecting hardy, native plants that thrive in Long Island’s climate with minimal care. We can also incorporate durable hardscaping, like porcelain paver patios, that are easy to clean. For a perfect lawn without the constant upkeep, synthetic turf is a fantastic solution for play areas or even personal putting greens.

You mentioned Gappsi handles both indoor and outdoor projects. How does that actually work? It works by creating a single, seamless process for you. Instead of you having to hire and coordinate a separate architect, interior designer, and landscape contractor, our team manages it all. We start with a holistic design conversation about your entire home. This allows us to ensure the style, materials, and flow between your indoor and outdoor spaces are perfectly harmonized. You have one point of contact, which simplifies communication and creates a more unified and beautiful result for your whole property.
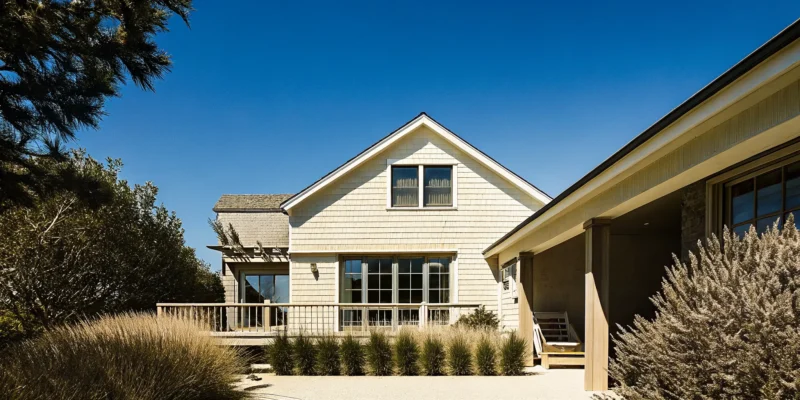
A full home renovation in Long Island featuring a modern exterior with new siding and windows.

Your Guide to a Full Home Renovation in Long Island

You have a clear vision for your home. You can see the open-concept kitchen, the spa-like primary bathroom, and the perfect outdoor patio for summer evenings. The problem isn’t the dream; it’s the overwhelming reality of making it happen. Where do you even begin? A full home renovation Long Island project involves countless decisions, from budgeting and permits to choosing materials and hiring the right professionals. It’s easy to feel stuck before you even start. This guide is designed to be your practical roadmap. We’ll walk you through each step, helping you set clear goals, avoid common challenges, and build a team you can trust to bring your vision to life, smoothly and successfully.

Key Takeaways

  • Plan for Success Before You Start: A smooth renovation depends on clear upfront planning. Define your goals, establish a realistic budget that includes a 20% contingency fund for surprises, and account for Long Island’s permit process to prevent delays.
  • Extend Your Living Space Outdoors: A full renovation is an opportunity to connect your indoor and outdoor areas. Integrating features like patios, landscaping, or a swimming pool into your plan creates a seamless flow and turns your entire property into a cohesive retreat.
  • Hire a Partner, Not Just a Contractor: Your choice of professional is critical. Partnering with a full-service design-build company simplifies the process, providing one team to manage everything from design to construction and ensuring a less stressful experience.

What Does a Full Home Renovation Include?

A full home renovation is much more than a simple kitchen update or a fresh coat of paint. It’s a comprehensive project that reimagines your entire home, creating a cohesive design and improved functionality from the inside out. Think of it as hitting the reset button on your property. The goal is to transform your house into a space that truly reflects your lifestyle and meets your family’s needs, both now and for years to come. This process involves making significant changes to multiple rooms and almost always includes the exterior of your home as well.

It’s about creating a seamless flow, where your kitchen complements your living area and your indoor spaces connect beautifully with your outdoor ones. A full renovation is an opportunity to fix what isn’t working, enhance what you love, and build the home you’ve always envisioned. Whether you’re looking to modernize an older Long Island home or customize a newer build, this type of project addresses everything from the structural bones to the final decorative touches. It’s a chance to create a home that feels completely new, without having to move.

Inside Your Home: Interior Renovations

The interior part of a full renovation touches nearly every corner of your house. This often starts with high-impact areas like kitchens and bathrooms, but it extends much further. We’re talking about replacing flooring, updating trim, and painting throughout to create a unified aesthetic. Beyond the surface, a complete home remodeling project addresses the core systems of your house. This can include upgrading electrical wiring, modernizing plumbing, and installing more efficient heating and cooling systems. It’s also the perfect time to rethink your floor plan, perhaps by removing walls to create an open-concept living space or reconfiguring rooms for better flow and function.

Outside Your Home: Exterior and Outdoor Living

A true full home renovation doesn’t stop at your front door. It extends to your home’s exterior and your entire property, turning your yard into a functional and beautiful living space. This can involve practical updates like new siding, but the real magic happens when you create dedicated areas for relaxation and entertainment. Imagine a stunning patio for summer dinners or a cozy fire pit area for cool evenings. Using durable and elegant materials is key to achieving a high-end look that lasts. High-quality porcelain and natural stone pavers can transform a simple backyard into a sophisticated outdoor oasis, seamlessly connecting your indoor and outdoor living experiences.

What to Consider Before Starting Your Renovation

A full home renovation is an exciting prospect, but jumping in without a solid plan can lead to stress and costly mistakes. Before you even think about picking out paint colors or tile, it’s essential to lay the groundwork for a smooth project. Taking the time to think through your goals, timeline, and local requirements will make the entire process more manageable and help you achieve the results you’re dreaming of.

Thinking about these key areas first will set you up for success. You’ll want to define your core reasons for renovating, map out a realistic schedule, get familiar with Long Island’s specific building codes, and prepare for the unique character of older homes in the area. A clear vision and practical preparation are your best tools for turning your current house into your forever home.

Define Your “Why”: Setting Renovation Goals

Before any walls come down, get clear on what you want to achieve. Are you renovating to create a more open, functional layout for your growing family? Do you want to update a dated kitchen to make it the heart of your home? Or are you hoping to build an outdoor retreat for entertaining? Your “why” will be the guiding star for every decision you make.

Create a detailed plan that outlines what’s included and what’s not. Make two lists: one for your must-haves and another for your nice-to-haves. This simple exercise helps you prioritize and communicate your vision clearly to your contractor. A well-defined scope is the foundation of a successful home remodeling project and keeps everyone on the same page from start to finish.

Create a Realistic Timeline

It’s easy to underestimate how long a renovation can take. A realistic timeline goes far beyond the construction phase. It needs to account for the design process, material selection and ordering, and securing permits, all of which happen before any physical work begins. On Long Island, factors like local permit backlogs and the specific challenges of your property can also affect the schedule.

An experienced local contractor can help you build a practical timeline that reflects these realities. For example, custom cabinetry or specialty porcelain and natural stone can have long lead times that need to be factored in. Planning for these steps from the beginning helps prevent frustrating delays and keeps your project moving forward as smoothly as possible.

Understand Long Island Building Permits and Codes

In Nassau and Suffolk counties, you can’t just start a major renovation. You must get a building permit for almost any project involving construction, demolition, or significant electrical and plumbing work. Each town and village has its own set of rules and processes, which can be complex to handle on your own. Trying to skip this step can result in hefty fines and orders to tear out completed work.

Working with a reputable, full-service company is a huge advantage here, as they will manage the entire permitting process for you. They know the local codes and have relationships with the building departments, ensuring everything is filed correctly. This is especially critical for complex projects like adding a swimming pool or a major home extension, letting you focus on the exciting parts of your renovation.

The Unique Challenges of Older Long Island Homes

Many homes on Long Island have a rich history and unique charm, but they can also hide expensive surprises. Renovating an older property often means preparing for the unexpected. Once you open up the walls, you might find outdated wiring, old plumbing, asbestos, or structural issues that need to be brought up to modern safety standards. These discoveries can impact both your budget and your timeline.

This isn’t a reason to avoid renovating an older home, but it is a reason to be prepared. A seasoned contractor with experience in the area will know what to look for during the initial assessment. They can help you anticipate potential issues and build a proper contingency fund into your budget. This proactive approach turns potential crises into manageable tasks, ensuring your home’s character is preserved while its safety and function are updated for modern life.

How Much Does a Full Home Renovation Cost in Long Island?

Talking about renovation costs can feel a bit like asking, “How much does a car cost?” The answer really depends on what you’re looking for. A full home renovation in Long Island can range anywhere from $50,000 to $250,000 and beyond. The final number on your invoice depends entirely on the scale of your project, the materials you choose, and the complexity of the work. To give you a clearer picture, let’s break down what goes into that final price tag. Understanding these numbers will help you create a realistic budget and turn your dream home into a reality without any major surprises.

A Cost Breakdown by Project

To get a better handle on your potential budget, think about which category your project falls into. A basic refresh, which might include new paint, flooring, and updated fixtures in the kitchen and bath, could land around the $100,000 mark. If you’re planning more significant functional updates, like a full kitchen remodel, removing walls for an open concept, or upgrading plumbing, you’re likely looking at a budget of $200,000 or more. For a complete transformation that involves taking rooms down to the studs, making structural changes, and using high-end finishes, the budget will be higher. Each level of home remodeling offers a different degree of change and impact.

Factors That Drive Up Costs on Long Island

Several key factors will influence the total cost of your renovation. The size of your home is a straightforward one; more square footage means more materials and labor. The age and condition of your house also play a big role. Older homes can sometimes hide outdated wiring or plumbing that needs to be brought up to code. Of course, the scope of your work is the biggest driver. Cosmetic updates are less expensive than major structural changes. Finally, your choice of materials and finishes can dramatically affect the price. Standard options are budget-friendly, while luxury materials like high-end porcelain and natural stone will increase the cost but also add significant value and beauty.

Watch Out for These Hidden Costs

Some parts of a renovation are just naturally more expensive, and it’s smart to know what they are ahead of time. Kitchens and bathrooms are typically the priciest rooms to remodel. This is because they involve a lot of moving parts: cabinets, countertops, appliances, intricate tile work, and specialized plumbing and electrical work. Any structural changes, like removing a wall or adding a support beam, will also add to your costs. These tasks require careful engineering, permits, and highly skilled masonry and construction professionals. Being aware of these potential high-cost areas from the start helps you allocate your budget more effectively and avoid sticker shock later on.

How to Build a Realistic Renovation Budget

Creating a budget is one of the most important first steps in any home renovation. Think of it less as a restriction and more as a roadmap that guides your decisions and keeps the project on track. A well-planned budget helps you and your contractor stay aligned on the scope of work, material choices, and overall vision. It’s the key to transforming your house into your dream home without unnecessary financial stress. A successful home remodeling project starts with a clear understanding of the costs involved and a solid plan for how to manage them.

Building a realistic budget involves more than just a single number. It requires you to set a baseline, plan for the unexpected, identify your top priorities, and consider breaking the project into manageable stages. By thinking through these elements, you can approach your renovation with confidence. This process ensures you can afford the changes you want to make and helps you communicate your financial boundaries clearly to your design-build team. With a thoughtful budget in hand, you’re prepared to make smart, informed choices every step of the way.

Set Your Baseline Budget

The first step is to determine a realistic starting point for your investment. On Long Island, a full home renovation can range anywhere from $50,000 to over $250,000. This wide spectrum exists because every project is unique, depending on the size of your home, the complexity of the work, and the materials you choose. To set your baseline, consider what you can comfortably afford by reviewing your savings and exploring financing options. This initial number provides a crucial foundation for discussing your goals and what is possible within your means when you begin planning your project. It allows your contractor to develop a proposal that respects your financial comfort zone from day one.

Why a Contingency Fund Is Non-Negotiable

No matter how carefully you plan, renovations can come with surprises, especially in older homes. That’s why a contingency fund is essential. Experts recommend you build an extra 20% into your budget to cover unforeseen costs. This fund acts as a safety net for issues like hidden water damage, outdated electrical systems, or structural problems that are only discovered after demolition begins. Having this buffer prevents unexpected expenses from derailing your project or forcing you to make compromises on your vision. It’s the best way to ensure peace of mind from start to finish, knowing you are prepared for whatever might be behind the walls.

Prioritize High-Impact Projects

When your wish list is longer than your budget, prioritization is key. Start by making two lists: one for your “must-haves” and another for your “nice-to-haves.” Focus your investment on the projects that will have the biggest impact on your daily life and your home’s value, like a modern kitchen or a primary bathroom retreat. Investing in high-quality materials and skilled craftsmanship may have a higher upfront cost, but it pays off in durability and long-term satisfaction. Using premium materials like beautiful porcelain and natural stone can completely transform a space and ensure it stands the test of time.

Phase Your Renovation Strategically

If your entire dream renovation isn’t feasible all at once, consider phasing the project. Breaking a large-scale renovation into smaller, sequential stages can make it much more manageable financially. For example, you could focus on the interior remodel this year and plan for the outdoor living space, including a new patio or swimming pool, for next year. This approach allows you to complete your full vision over time without the pressure of a single, massive investment. By clearly defining your priorities from the start, you can create a logical timeline that aligns with your budget and long-term goals.

Common Renovation Challenges and How to Avoid Them

Even the most exciting renovation can hit a few bumps. Knowing what to watch for is the best way to keep your project on track and your stress levels low. Most issues stem from incomplete planning or unrealistic expectations, not bad intentions. By anticipating common hurdles, you can work with your contractor to create a smoother process from start to finish. A successful renovation is all about smart preparation, and that’s something you have complete control over. Let’s walk through the most frequent challenges and, more importantly, how to sidestep them.

Budget Overruns

It’s the number one fear for any homeowner: the final bill being much higher than the initial quote. Renovations often cost more than expected, which is why it’s wise to build a contingency fund of 15% to 20% into your budget. This isn’t for adding extra features on a whim; it’s a safety net for the true unknowns, like discovering old plumbing that needs replacing. Another common culprit is underestimating costs from the start. Clearly defining your priorities during the planning phase with a professional home remodeling team helps keep the project aligned with your goals and prevents your budget from spiraling.

Timeline Delays

Nothing is more frustrating than a project that seems to drag on forever. Delays can happen for many reasons, but two big ones are permit issues and scope creep. Overlooking the time it takes to secure the proper building permits can delay your project before a single hammer is swung. An experienced contractor will factor this into the schedule. Scope creep is that tempting thought: “While the walls are open, should we update the wiring too?” While these small additions make sense individually, they can add up, significantly extending your timeline and increasing costs. A detailed plan from the outset is your best defense against these schedule-busting changes.

Unexpected Structural Issues

You never truly know what’s behind a wall until you open it up. This is especially true in older Long Island homes. Assuming a renovation is “simple” can lead to major surprises once the work begins. You might find anything from termite damage to outdated electrical systems or foundation problems that need immediate attention. While a contingency fund helps cover the cost, the best way to minimize these shocks is with a thorough upfront inspection. Working with a team that has experience in restoration and sealing means they know what to look for and how to handle whatever they might find.

Choosing the Wrong Contractor

Your choice of contractor can make or break your entire renovation experience. The wrong fit can lead to poor quality work, communication breakdowns, and constant stress. To avoid this, make sure you have a detailed written agreement that outlines every aspect of the project before work begins. Effective and regular communication is just as crucial. You want a partner who keeps you informed and listens to your concerns. A full-service design-build company can be a great option, as they manage every detail and provide a single point of contact, ensuring your project progresses smoothly and your vision is realized.

Who Should You Hire for a Full Home Renovation on Long Island?

Choosing the right team for your renovation is the single most important decision you will make. The right partner can turn your vision into a reality with skill and efficiency, while the wrong one can lead to stress and costly mistakes. Your choice will shape the entire experience, from the first design sketch to the final walkthrough. So, how do you find the perfect fit for your Long Island home? It starts with knowing what to look for and understanding the different types of professionals available.

What to Look For in a Renovation Contractor

When you start your search, focus on contractors with a solid reputation and proven experience with projects similar to yours. A team that has built beautiful swimming pools might not be the best fit for a complex kitchen remodel unless they have a portfolio to prove it. It’s essential that they have a clear understanding of Long Island’s local building codes and regulations to keep your project on track and compliant. Always insist on a detailed written agreement that outlines the scope of work, timeline, and costs. This contract is your protection and ensures everyone is on the same page before any work begins.

The Value of a Full-Service Design-Build Company

A design-build company offers a streamlined approach by managing both the design and construction phases of your project. Instead of you having to coordinate between a separate architect, designer, and builder, you have one cohesive team working together from start to finish. This integrated model reduces the risk of miscommunication and ensures your initial vision is carried through to the final product. For a homeowner, this means a simpler process, a single point of contact, and the peace of mind that comes from having a single team for your entire project. It’s an efficient way to bring your renovation to life without the stress of managing multiple moving parts.

Inspiring Design Trends for Your Long Island Home

A full home renovation is your chance to create a space that truly reflects your style and supports your lifestyle. While classic designs are always in fashion on Long Island, incorporating current trends can make your home feel fresh, functional, and uniquely yours. Thinking about what’s popular can help you discover new possibilities for your layout, materials, and finishes. From creating open, airy living areas to designing spa-like bathroom retreats, these trends focus on blending beauty with everyday practicality. Many homeowners find that looking at current styles helps them articulate what they want, even if they end up with a more traditional design.

As you plan your project, consider how these ideas can be adapted to your home. A successful renovation combines timeless appeal with modern comforts, resulting in a space you’ll love for years to come. It’s not about chasing fads, but about understanding what’s possible and making intentional choices. Whether you’re drawn to the clean lines of modern design or the warmth of natural materials, these trends offer a starting point for your own creative vision. Let’s look at some of the top design trends inspiring Long Island homeowners right now.

Open Floor Plans and Multifunctional Spaces

The desire for connected living isn’t going away. Open-concept floor plans remain a top request because they create a seamless flow between the kitchen, dining, and living areas. This layout is perfect for families who want to stay connected and for those who love to entertain. It makes your home feel larger, brighter, and more inviting. A well-executed home remodeling project can transform a series of small, closed-off rooms into one cohesive and multifunctional space. Imagine preparing dinner while still being part of the conversation in the living room, or hosting a party where guests can move around freely. This approach to design prioritizes connection and flexibility.

Gourmet Kitchens and Spa-Like Bathrooms

Many Long Island homeowners find their kitchens and bathrooms are the first rooms to feel outdated. Today’s trends transform these functional spaces into personal sanctuaries. A gourmet kitchen is about more than just looks; it’s about creating a practical, inspiring place to cook and gather. Think custom cabinetry, high-end appliances, and a large island that serves as both a workspace and a social hub. Similarly, bathrooms are becoming spa-like retreats. Features like walk-in showers with rainfall heads, freestanding tubs, and elegant vanities can turn your daily routine into a moment of luxury. These high-impact renovations add significant value and enjoyment to your home.

Luxurious Finishes: Porcelain and Natural Stone

The materials you choose have a huge impact on the overall feel of your home. Luxurious, durable finishes are a hallmark of modern design, with an emphasis on bringing natural textures indoors. High-quality porcelain and natural stone are incredibly versatile choices for flooring, countertops, backsplashes, and even accent walls. Natural stone like marble or quartzite offers one-of-a-kind beauty, while modern porcelain provides incredible durability and a vast range of styles, from realistic wood looks to sleek, minimalist designs. These materials not only add a touch of elegance but also stand up to the demands of a busy household, making them a smart and stylish investment.

Sustainable Materials and Smart Home Tech

Homeowners are increasingly looking for ways to create healthier and more efficient living environments. This has led to a greater interest in sustainable materials and smart home integration. Using eco-friendly options like reclaimed wood, bamboo flooring, and non-toxic paints can improve your home’s air quality and reduce its environmental footprint. At the same time, integrating smart home technology adds a layer of modern convenience. Imagine automated lighting that adjusts throughout the day, thermostats that learn your preferences, and security systems you can control from your phone. These thoughtful additions make your home more comfortable, secure, and economical to run.

Integrating Outdoor Living into Your Renovation

A full home renovation isn’t just about what happens inside your four walls. On Long Island, our yards are a huge part of our lifestyle. Thinking about your outdoor space as an extension of your home from the very beginning of your renovation planning is a game-changer. It creates a seamless flow from your living room to your patio and turns your entire property into a functional, beautiful retreat. Integrating these projects not only gives you more space to relax and entertain but also significantly increases your home’s value.

Swimming Pools, Pavilions, and Pergolas

Imagine your backyard as a private resort. A beautifully designed swimming pool can become the centerpiece for summer gatherings and quiet afternoon dips. But a pool is just the beginning. Adding a structural element like a pavilion or pergola creates a designated zone for lounging or dining. These structures provide welcome shade on hot days and can be outfitted with lighting and fans for evening enjoyment. Thoughtfully planned pavilions and pergolas define your outdoor rooms, making your backyard feel more intentional and luxurious.

Synthetic Turf, Game Courts, and Fencing

For a yard that’s all about fun and less about work, consider functional, low-maintenance features. Synthetic turf gives you a lush, green lawn year-round without the constant mowing, watering, and fertilizing. It’s a perfect solution for play areas. You can also dedicate a space for family fun by installing custom sports games courts for everything from basketball to pickleball. To complete your private oasis, the right fencing provides security and privacy while complementing your home’s overall design, ensuring your backyard is truly your own.

Masonry, Landscaping, and Driveways

The right hardscaping and plantings are what tie your entire outdoor vision together. Expert masonry work creates the foundation for your outdoor living spaces, from elegant patios to durable walkways and retaining walls. You can choose from a wide selection of materials, including beautiful and long-lasting porcelain and natural stone, to match your home’s style. Finally, professional landscape design softens the hardscapes with greenery, adds color and texture, and ensures your property looks cohesive and inviting from the curb to the back fence.

Is a Full Home Renovation on Long Island Worth It?

Deciding to undertake a full home renovation is a major decision, and it’s natural to wonder if the investment will pay off. For many Long Island homeowners, the answer is a resounding yes. If you love your neighborhood but your house no longer fits your lifestyle, a complete remodel allows you to create a space that is perfectly tailored to your needs without the hassle of moving. It’s an opportunity to transform your entire home, creating a connected, updated look and feel that improves both aesthetics and daily function.

A full renovation is more than just a financial calculation; it’s an investment in your quality of life. However, the financial benefits are significant, especially in the competitive Long Island real estate market. A well-executed home remodeling project can substantially increase your property’s value. While the cost can range from $50,000 to over $250,000 depending on the scope, it’s important to view this as a long-term gain. Opting for high-quality materials and expert craftsmanship might mean a higher initial cost, but it often translates to fewer repairs and greater durability, saving you money down the road. Ultimately, a renovation can turn the house you have into the home you’ve always wanted.

Related Articles

Frequently Asked Questions

Do I have to move out of my house during a full renovation? For a project of this scale, it is almost always best to plan on living elsewhere. A full home renovation is incredibly disruptive, involving significant dust, noise, and safety considerations as large areas of your home become construction zones. While you might be able to stay for a smaller, single-room remodel, a full renovation means your kitchen, bathrooms, and main living areas will be unusable for extended periods. Moving out not only protects your family’s well-being but also allows the construction team to work more efficiently, which can help keep the project on schedule.

What’s the real difference between hiring a design-build firm and just a general contractor? Think of it this way: a general contractor is hired to build from a set of plans you already have. You would need to hire an architect or designer separately to create those plans first, and then you would manage the communication between them. A full-service design-build company, on the other hand, handles the entire process under one roof. Their team includes designers, architects, and builders who all work together from the very beginning. This integrated approach streamlines communication, creates a more cohesive plan, and makes you, the homeowner, the client of a single, accountable team.

My budget is tight. Is it better to use less expensive materials or do the project in phases? This is a great question, and it’s a situation many homeowners face. While it can be tempting to choose less expensive materials to get everything done at once, I almost always recommend phasing the project instead. Opting for high-quality materials and craftsmanship in the most important areas, like your kitchen, ensures durability and a better long-term investment. You can complete your interior remodel now and then plan for the outdoor living space or a second-floor update next year. This strategic approach allows you to achieve your complete vision with the quality you want, without compromising on the final result.

How long does a typical full home renovation take on Long Island? The timeline depends heavily on the scope of your project, but it’s wise to plan for a significant amount of time. For a comprehensive, multi-room renovation, you should realistically expect the process to take anywhere from six months to over a year. This includes the initial design phase, securing permits from your local town or village, ordering materials which can have long lead times, and the construction itself. An experienced local team can give you a more precise estimate based on your specific project and help you plan for each stage.

What is the very first step I should take if I’m considering a renovation? Before you even start looking for a contractor, the most important first step is to sit down and define your goals. Ask yourself what isn’t working in your current home and what you hope to achieve with a renovation. Create a list of your “must-haves” versus your “nice-to-haves.” Having this clarity will make your initial conversations with design-build firms much more productive. It helps you communicate your vision effectively and allows professionals to give you more accurate advice and initial cost estimates.

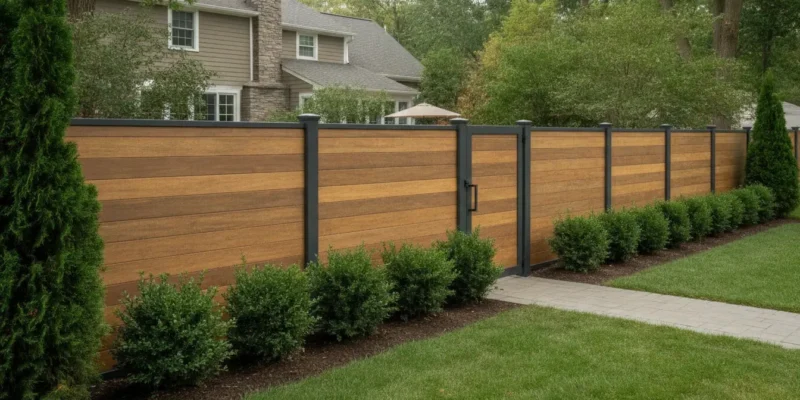
Wood-look privacy fence with dark aluminum posts and evergreen planting in a Long Island backyard

Privacy Fence Ideas for Long Island Homes

Looking for privacy fence ideas that make a Long Island backyard feel more comfortable without turning it into a blank wall? The right design balances sightline control, wind exposure, maintenance, property lines, and the way your family uses the yard. Wood, vinyl, aluminum, composite panels, evergreen planting, trellises, and mixed designs can all work, but each creates a different appearance and maintenance plan.

Contact Gappsi through our contact page

What Makes a Privacy Fence Work for a Long Island Property?

A useful privacy fence does more than block a view. It should create a comfortable boundary while fitting the house, landscape, and outdoor living areas around it. Before choosing a panel style, identify the view you want to screen, the direction of prevailing wind, and the activities that happen near the fence.

  • Privacy goal: Decide whether you need full screening from a neighboring window, partial screening from a street, or a softer backdrop for a patio.
  • Viewing angle: A six-foot fence may block a seated view but leave an upper-story window exposed. The most useful height depends on the sightline, grade, and distance between properties.
  • Wind and drainage: A solid fence catches more wind than an open design. Posts, footings, panel spacing, and drainage need to match the site.
  • Maintenance: Compare the time required for staining, washing, repainting, trimming, and seasonal repairs before selecting a material.
  • Visual weight: A tall, uninterrupted surface can make a small yard feel narrower. Board orientation, color, planting, and open sections can keep the design proportional.

Walk the property at the times when privacy matters most. A morning coffee area, pool deck, outdoor kitchen, and bedroom window may each need a different screening solution. That simple observation often leads to a better plan than choosing one fence height for every boundary.

Which Privacy Fence Material Fits Your Yard?

Material selection affects the fence’s appearance, expected upkeep, resistance to moisture and pests, and ability to coordinate with gates and landscape materials. The best privacy fence ideas usually start with the property’s conditions instead of a single material trend.

Material Design strengths Planning considerations
Wood Warm texture, flexible dimensions, and many stain or paint options. Requires a maintenance plan for weathering, moisture, and surface changes.
Vinyl Clean lines, consistent color, and simple washing. Panel proportions, color, and post design matter because large solid areas can feel visually heavy.
Aluminum Lightweight structure, crisp profiles, and durable coated finishes. Many aluminum styles are open or semi-private, so privacy panels or planting may be needed.
Composite Wood-look appearance with low-routine-maintenance panel surfaces. Review the support system, color, expansion details, and gate hardware as part of the complete design.

Think about the fence from both sides of the property. A design can look finished from the yard while exposing unfinished posts, rails, or hardware to a neighbor. Ask how the selected system handles corners, gates, grade changes, and maintenance access before choosing the final panel pattern.

Gappsi’s Long Island fencing and gate service includes aluminum, composite, vinyl, and wood options. A material comparison should also account for the design on both sides of the fence, since neighbors and passersby may see the back of the installation.

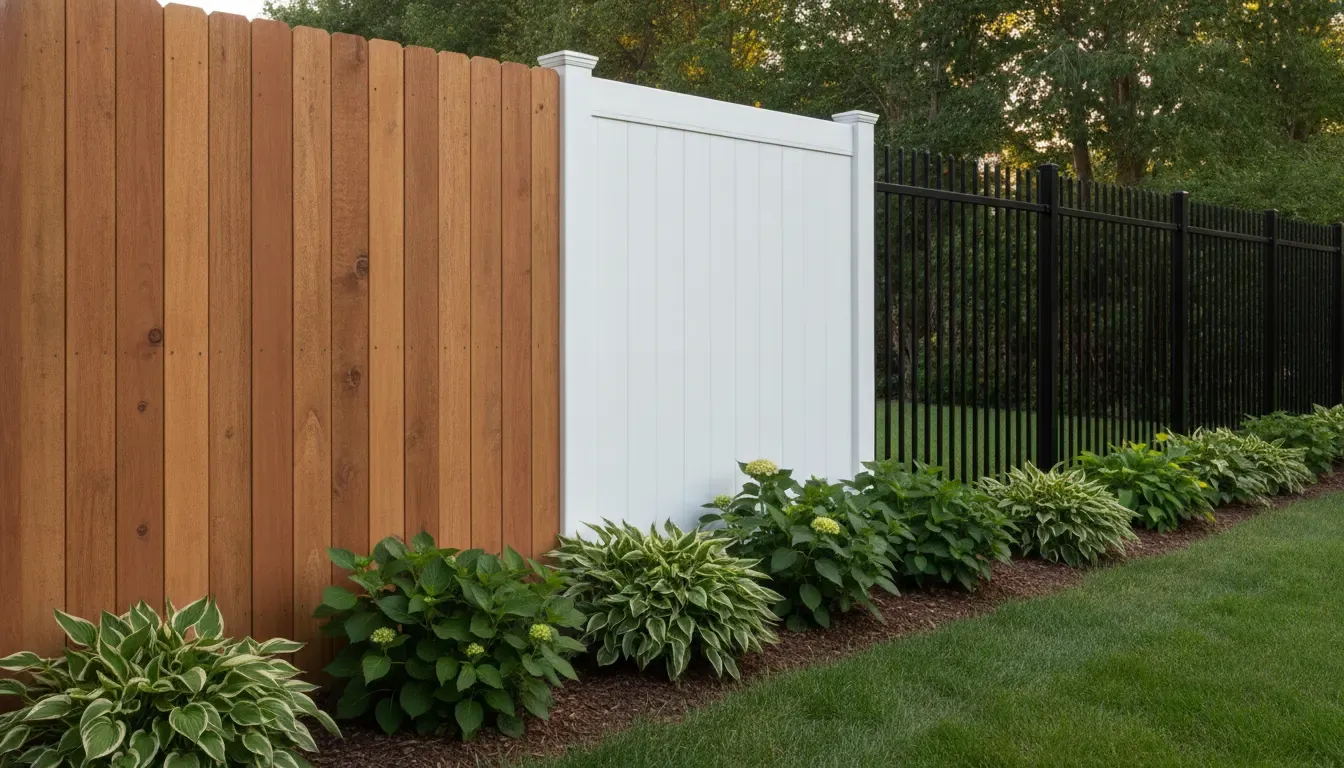
Wood, white vinyl, and black aluminum privacy fence material options with landscape planting
Different fence materials create different levels of privacy, openness, and maintenance.

Wood privacy fence ideas

Wood works well when you want a natural surface that can be coordinated with a deck, pergola, garden, or masonry wall. A board-on-board layout closes gaps between boards, while a shadowbox layout can look similar from both sides and allow limited airflow. Horizontal boards create a contemporary line, but the span, framing, and post spacing must be designed for the site rather than copied from a photograph.

Wood can also be softened with a lattice top, a narrow open section, a gate with matching trim, or a planting bed. Select the finish with the surrounding materials in mind. A stain that repeats the tone of a door or outdoor kitchen can make the fence feel intentional instead of separate from the house.

Vinyl privacy fence ideas

Vinyl provides a consistent appearance and is easy to wash, making it useful for homeowners who prefer predictable routine maintenance. Traditional vertical panels can create a familiar boundary, while a white or neutral finish can keep the yard bright. To avoid a repetitive run, use a deliberate change at a gate, corner, or planting bed rather than adding random decorative pieces.

Check how a vinyl panel handles grade changes and corners before installation. A fence that follows the slope with careful transitions generally looks more finished than one that leaves uneven gaps or abrupt steps. Gates should be selected with the post system and daily use in mind.

Aluminum privacy fence ideas

Aluminum is useful when you want a crisp profile, a coated finish, or an easier visual transition between a fence and modern masonry. Standard picket styles provide security and definition without fully blocking a view. For more privacy, consider solid or closely spaced panels in the sections that face a neighbor, then use open aluminum where the yard benefits from light or a wider view.

Black, bronze, gray, and white finishes can each support a different design direction. The key is to coordinate the fence color with window trim, gates, lighting, and landscape edging. A dedicated aluminum fence comparison can help when the project is centered on aluminum rather than a whole-yard privacy plan.

Composite privacy fence ideas

Composite panels can provide a structured wood-look surface with less routine coating work than a traditional wood fence. They are a strong option for a modern backyard, especially when the panel color can repeat a deck, planter, or outdoor kitchen detail. Ask how the system manages expansion, fasteners, corners, and gate loads, not only how the boards look in a sample.

Mixed composite and aluminum designs are especially useful when you want solid screening in one zone and a lighter frame elsewhere. Use the solid section near a seating area, then step down to a more open treatment along a side yard or planting bed.

How Tall Should a Privacy Fence Be?

Fence height should respond to the view that needs screening, the property’s grade, and applicable local requirements. Start by marking the eye level of the person whose view you want to block. Then consider whether the fence is below, level with, or above a patio, pool deck, or neighboring yard.

Do not assume that the tallest possible fence is the best answer. A tall solid run can increase wind pressure, shade planting, and dominate a narrow yard. In some locations, a shorter base fence paired with a trellis, layered shrubs, or a targeted privacy screen creates the same sense of enclosure with less visual weight.

Confirm the property line before finalizing the layout. A survey or clear boundary record can prevent an attractive design from becoming a placement dispute. Also ask the municipality or project professional about permits, corner visibility, easements, height limits, and any rules that apply to fences near a pool or public way.

Contact Gappsi through our contact page

Can You Mix Fence Panels, Screens, and Plantings?

Yes. A mixed privacy design often looks more natural and performs better than one material installed around the entire property. Use the most opaque section where privacy is most important, then transition to plants, a trellis, an open fence, or a lower wall where you want light and air.

  • Fence plus evergreens: Planting can soften a fence line and add seasonal texture. Leave enough room for mature growth and future access for washing or repairs.
  • Fence plus trellis: A trellis creates a vertical frame for vines without requiring a fully solid wall. Choose plants based on sun, soil, maintenance, and winter appearance.
  • Solid panels plus open metal: This combination can screen a patio while preserving views from a side yard or keeping a small space from feeling enclosed.
  • Fence plus masonry: A short masonry section at an entry or outdoor kitchen can anchor the design, while lighter panels continue along the property line.

Planting should support the fence, not hide a poor installation. Keep beds graded away from posts where appropriate, avoid trapping moisture against wood, and allow access to gates, latches, irrigation, and drainage. Gappsi’s landscape design and construction guide explains how site planning and installation can be coordinated as one outdoor project.

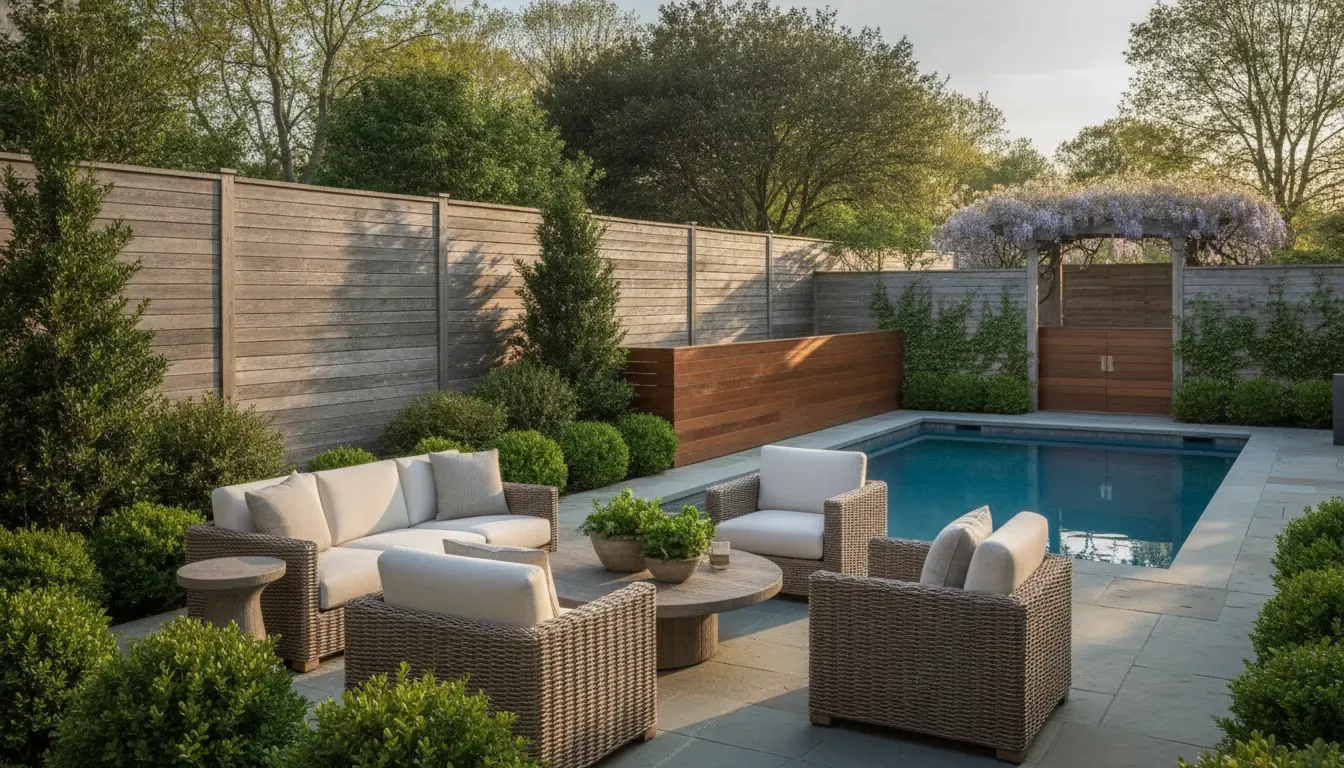
Privacy fence coordinated with a Long Island pool patio and outdoor seating area
A privacy fence can be coordinated with a pool deck, patio, planting beds, and outdoor seating.

How Can You Make a Solid Fence Look Less Heavy?

Privacy does not have to mean a flat, uninterrupted wall. Use a few repeated details to give the fence rhythm and connect it to the rest of the property.

  1. Change the height deliberately: Keep the tallest section near the sightline that needs it, then step down near an entry, planting bed, or open view.
  2. Use horizontal or vertical orientation with purpose: Horizontal boards can emphasize width, while vertical boards can make a boundary feel taller and more traditional.
  3. Frame gates and corners: Posts, caps, trim, or a material change can make transitions look designed rather than patched together.
  4. Break up long runs: Use planting pockets, a trellis, an open panel, or a small return to create visual pauses without compromising the main privacy zone.
  5. Coordinate color: Repeat a fence finish in gates, planters, outdoor furniture, or window trim. Avoid adding many unrelated colors to an already busy yard.
  6. Plan lighting carefully: Low, shielded lighting can make a path and gate easier to use without placing bright fixtures directly at a neighbor’s property.

These details also improve the view from inside the home. A fence should look considered from the kitchen, living room, pool deck, and neighboring side of the property, not only from the street.

What Privacy Fence Ideas Work Around Pools and Outdoor Living Areas?

Pool decks, patios, outdoor kitchens, and seating areas need privacy without losing safe circulation. Place the most opaque screening where it protects a seating zone or hides equipment, while keeping gates, pathways, and service access easy to use.

For a pool project, treat fence design and pool safety as related but separate decisions. The fence layout must follow the applicable local and state requirements, and the final design should be reviewed for gate placement, latch operation, clearances, and access. A decorative screen that looks private may not serve as a compliant pool barrier.

Coordinate the fence with the pool coping, patio pavers, planting beds, and outdoor furniture. Gappsi’s Long Island pool design and construction service covers pool planning alongside related outdoor living elements. Planning the fence early can prevent awkward changes to the patio edge or equipment access later.

For a smaller backyard, consider screening only the primary seating sightline instead of enclosing every boundary. This approach can preserve daylight, create a better view from the house, and reduce the feeling that the pool or patio is boxed in.

Contact Gappsi through our contact page

Frequently Asked Questions

What is the best material for a privacy fence?

The best material depends on the desired appearance, maintenance plan, wind exposure, grade, and budget scope. Wood offers natural texture, vinyl offers consistent low-routine-maintenance surfaces, aluminum offers crisp profiles, and composite can provide a wood-look design with less routine coating work.

What is the cheapest privacy fence option?

There is no single answer for every property because material, height, posts, gates, grade changes, access, and site preparation all affect the scope. Compare complete installed designs rather than choosing a panel based only on its unit price.

How do I block a neighbor’s view of my yard?

Identify the exact sightline first. A targeted solid panel, taller section, trellis, evergreen planting, or combination of treatments may block the view more effectively than a tall fence around the whole yard.

Can a privacy fence be used around a pool?

A fence may be part of a pool safety plan, but the design must meet the requirements that apply to the property and pool. Review height, gate, latch, access, and placement requirements with a qualified local professional before installation.

Contact Gappsi through our contact page

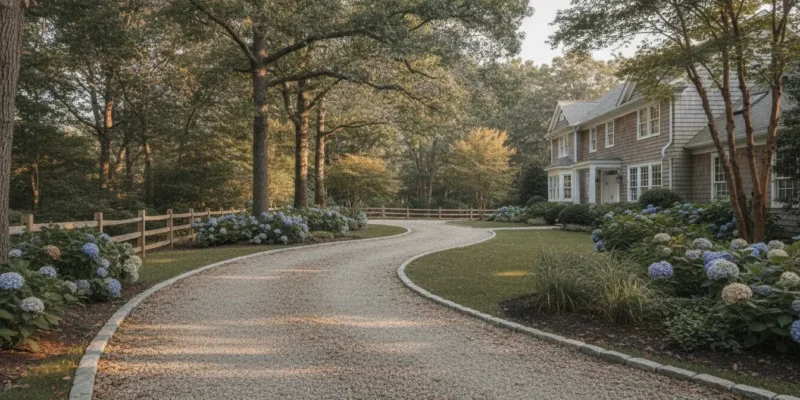
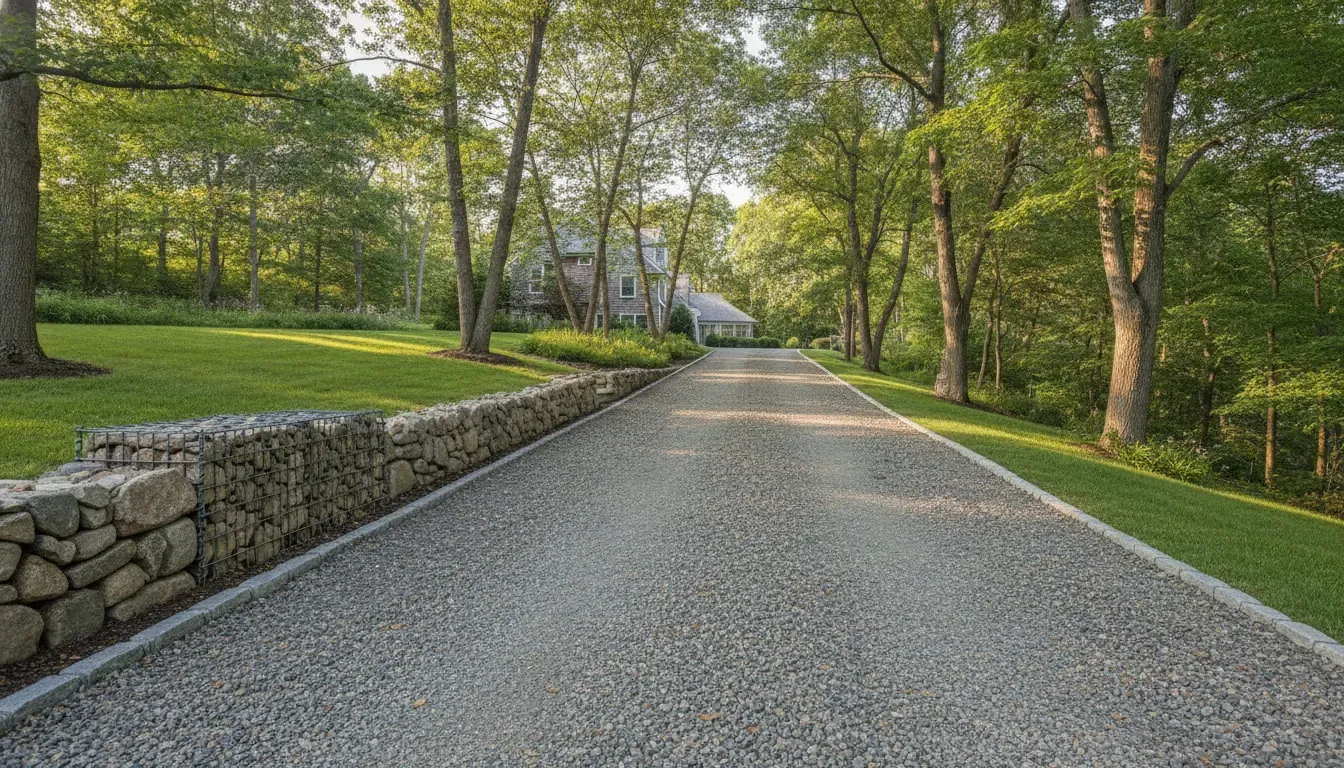
Curved gravel driveway with stone edging at a Long Island home

Gravel Driveway Pros and Cons for Long Island Homes

Choosing a driveway material is not only an appearance decision. The right surface must handle vehicle traffic, heavy rain, freeze-thaw cycles, snow removal, and the way your property drains. These gravel driveway pros and cons can help Long Island homeowners decide whether loose stone is a practical fit, or whether a more structured surface makes better sense.

Contact Gappsi through our contact page

What Are the Main Gravel Driveway Pros and Cons?

In brief: Gravel is often a flexible, permeable, and visually natural driveway material that can suit long drives and properties where stormwater movement matters. Its tradeoffs are recurring raking, stone migration, weeds, dust, and more difficult snow removal. Performance depends on the aggregate, base, slope, edging, drainage, and maintenance plan.

Potential advantage. Potential drawback. What changes the outcome.
Permeable surface. Can wash or rut. Grading, base preparation, and runoff control.
Natural color and texture. Loose stone can track. Angular aggregate, edging, and driveway layout.
Flexible to ground movement. Needs periodic top-dressing. Traffic volume, drainage, and maintenance timing.
Works well on long drives. Snow removal needs care. Plow technique, equipment, and edge restraint.

This is why a gravel driveway should be evaluated as a complete surface system, not just as a truckload of stone. A well-planned base and controlled edges can prevent many common problems. Poor grading or a shallow, unprepared base can make even attractive gravel frustrating to own.

Why Can Gravel Be a Good Choice for a Long Island Driveway?

Gravel can be a good choice when a homeowner values permeability, a natural look, flexible repairs, and a surface that works across a long or irregular driveway. It can also be useful where tree roots, changing grades, or stormwater patterns make a rigid surface less practical. The material still needs proper site preparation.

  • Drainage potential: Open spaces between stones allow water to move through the surface instead of shedding all runoff to one edge.
  • Flexible appearance: Gravel can complement wooded properties, traditional homes, and informal landscapes with several aggregate colors and textures.
  • Spot repair: A damaged area can often be graded and replenished without replacing the entire surface.
  • Adaptability: Loose aggregate can respond to modest ground movement more easily than a rigid slab.
  • Long-driveway practicality: The material can make sense for extended approaches where a continuous hard surface would require more extensive construction.
  • Traction: Angular stone with a well-compacted base can provide useful grip for vehicles in wet conditions.

Those benefits are most meaningful when the driveway has a defined drainage path and the stone is selected for the way the property will be used. Rounded decorative gravel may look appealing but can move more readily under tires. Angular crushed stone generally interlocks better, especially when the driveway receives frequent traffic.

Homeowners considering the construction side can review Gappsi Group’s gravel driveway installation service page for a better understanding of how design, preparation, and installation fit together.

What Are the Main Disadvantages of a Gravel Driveway?

The main disadvantages are movement, maintenance, dust, weeds, and winter care. Gravel can migrate toward lawns and roads, form ruts under repeated traffic, and collect organic debris. These issues are manageable, but they require more attention than many homeowners expect when they first focus on the material’s lower-maintenance reputation.

  • Ruts and potholes: Concentrated tire paths, soft subgrade, and poor drainage can create low spots that hold water.
  • Stone migration: Tires, rain, snowmelt, and plows can move aggregate beyond the driveway edges.
  • Weed growth: Windblown soil and leaves can create enough organic material for weeds to establish over time.
  • Dust and tracking: Fine particles may be visible in dry weather, while loose stones can reach nearby walkways or garage floors.
  • Uneven walking: Loose aggregate is less comfortable for people using strollers, wheelchairs, carts, or mobility aids.
  • Snow removal challenges: A plow set too low can collect stone, damage edges, or push gravel onto landscaping.

The most important question is not whether gravel has drawbacks. Every driveway material does. The question is whether the homeowner is willing to maintain the surface and whether the site can be designed to control the predictable problems.

Contact Gappsi through our contact page

Which Type of Gravel Is Best for a Driveway?

For most driveways, angular crushed aggregate that can compact and interlock is more stable than very round, loose stone. The best selection still depends on the desired appearance, traffic, slope, drainage, and how comfortable the surface needs to be for walking. “Gravel” describes a family of materials, not one uniform product.

Angular crushed stone and quarry process

Angular particles fit together more securely than rounded particles. A blend containing smaller fines can compact into a firmer driving surface, while larger aggregate may provide drainage and visual texture. The right blend should be selected with the base and surface layers in mind, not as an isolated color choice.

Pea gravel and rounded decorative stone

Rounded stone can create a softer, more decorative appearance, but it is more likely to shift under tires and foot traffic. It may be appropriate for a lightly used lane or a landscape border, yet it is not automatically the best top layer for a frequently used driveway.

Stabilized gravel systems

Where rutting, erosion, steep grades, or heavy traffic are concerns, a grid or other restraint system can hold aggregate in place. Gappsi’s gravel driveway grid system guide explains how stabilization can support drainage and reduce movement. It is a solution to a defined site condition, not a requirement for every gravel driveway.

How Do Long Island Weather and Drainage Affect Gravel Driveways?

Long Island weather makes drainage and grading central to gravel driveway performance. Heavy rain can expose low spots, while freeze-thaw movement can loosen weak areas. Snow removal can displace aggregate at the edges. A permeable surface helps only when water has somewhere to go and the underlying layers remain stable.

Rainwater moving across a graded gravel driveway with defined edging

Before choosing gravel, look for low points, roof runoff, uphill drainage, driveway crossings, and soil that stays wet. A driveway can be permeable and still experience washout if water is concentrated in one channel. Depending on the property, solutions may include adjusted grading, swales, drains, stabilized shoulders, or a redesigned connection to the street.

Coastal exposure and sandy or shifting soils can also change the recommendation. These conditions do not automatically rule out gravel, but they increase the importance of a compacted base, edge restraint, and a maintenance plan that addresses migration before it becomes a larger repair.

For a local example, Gappsi’s Long Island gravel driveway installation example shows why a steep, heavily used approach may need more than loose stone placed over existing ground.

When Do You Need Edging, a Grid, Gabion, or Retaining Work?

Edging is useful when the driveway borders lawn, planting beds, walkways, or a drop in grade. Grid, gabion, or retaining work becomes more relevant when the site has concentrated runoff, a steep slope, erosion risk, or a need to hold back soil. These features solve different problems and should not be treated as interchangeable decorations.

  • Edging: Defines the driving lane and helps keep surface stone from spreading into planting areas.
  • Grid restraint: Locks aggregate into cells to reduce rutting and migration on selected slopes or high-traffic areas.
  • Gabion work: Uses stone contained in wire baskets to support a bank, manage erosion, or create a durable transition at a grade change.
  • Retaining work: Holds back soil where a driveway cut or slope would otherwise move material toward the lane.

Sloped gravel driveway beside a stone retaining wall and gabion structure

A property may need only simple edging, or it may need a coordinated grading, drainage, and retaining plan. Warning signs include repeated washouts after storms, soil sliding into the driveway, water crossing the lane, exposed base material, or a slope that cannot be safely maintained with ordinary equipment.

How Much Maintenance Does a Gravel Driveway Need?

Gravel driveways need periodic inspection and surface maintenance, especially after major rain, snowmelt, and winter plowing. The exact schedule depends on traffic and site conditions. The goal is to correct small changes before they become deep ruts, broad washouts, or edge failures that require substantial regrading.

  1. Walk or drive the surface after major storms and note standing water, channels, and displaced stone.
  2. Repair potholes while they are small instead of filling only the visible depression with loose stone.
  3. Rake displaced aggregate back into the driving lane and keep shoulders clear.
  4. Remove leaves and organic debris before they decompose into a soil layer that supports weeds.
  5. Control vegetation at the edges without sending soil or mulch into the driveway.
  6. Plan periodic top-dressing or regrading when the surface becomes thin, uneven, or difficult to drain.

Snow removal deserves a separate plan. A snow blower can throw gravel, and a plow can push it into the lawn. Operators may need to raise the blade slightly, mark the edges, and leave a protective layer rather than scraping directly against the surface. If snow service is contracted, discuss the driveway material before winter begins.

Gappsi’s Gravelfix gravel driveway stabilization system article is a useful next read when recurring ruts, migration, or washout are the deciding concerns.

How Does Gravel Compare With Pavers, Asphalt, and Concrete?

Gravel generally offers a more informal appearance and a flexible, permeable surface, while pavers, asphalt, and concrete provide a firmer and more predictable driving and walking experience. The better option depends on the desired appearance, maintenance tolerance, drainage plan, traffic, snow routine, accessibility needs, and the property’s grade.

Surface. Often suits. Tradeoff to consider.
Gravel. Long drives, natural landscapes, flexible drainage goals. More movement and routine surface care.
Pavers. Defined patterns, structured curb appeal, easier individual-unit repairs. Requires a carefully built base and joint maintenance.
Asphalt. Smooth vehicle travel and familiar snow clearing. Less informal, with its own weathering and repair needs.
Concrete. Firm surface and clean edges. Rigid material can show cracking and requires deliberate drainage planning.

For readers comparing a firm surface with loose aggregate, Gappsi’s paver driveway installation guide covers a different construction approach. A separate paver driveway cost guide for Long Island can help frame the questions to ask about base preparation, access, materials, and site work without treating one project as a universal quote.

Contact Gappsi through our contact page

Frequently Asked Questions

What are the biggest advantages of a gravel driveway?

The biggest advantages are permeability, design flexibility, a natural appearance, adaptability to some ground movement, and the ability to repair or replenish sections. Gravel can be especially practical for long drives or properties where a softer landscape character matters. It still needs suitable aggregate, a prepared base, controlled runoff, and defined edges.

What are the biggest disadvantages of a gravel driveway?

The main disadvantages are ruts, potholes, stone migration, weeds, dust, uneven walking, and careful snow removal. These problems are more likely when the base is weak, water crosses the lane, the stone is too rounded, or the edges are not contained. Routine inspection and timely regrading can reduce the severity of many issues.

Is gravel good for drainage?

Gravel can support drainage because water can pass through open spaces between stones. It does not solve drainage by itself. The driveway still needs a stable base, appropriate slope, and a plan for water arriving from roofs, hillsides, or adjacent pavement. Low spots and concentrated runoff can cause pooling or washout on any surface.

What type of gravel is best for a driveway?

Angular crushed aggregate that compacts and interlocks is usually more stable for vehicle traffic than very rounded stone. The correct blend depends on the driveway layers, traffic, slope, appearance, and drainage goals. A material that looks attractive in a sample may perform poorly if it does not match the base or the property’s grade.

Can a gravel driveway handle snow removal?

Yes, but snow removal requires more care than on a smooth rigid surface. Mark the edges, avoid scraping too deeply, and use equipment settings that reduce stone displacement. Plan for replenishment near the shoulders after winter. A steep or heavily used driveway may benefit from additional edging, stabilization, or a different surface.

When should I consider a retaining wall or gabion structure?

Consider retaining or gabion work when the driveway cuts into a slope, soil is moving toward the lane, water is eroding the shoulder, or a grade change cannot be managed with surface gravel alone. The correct solution depends on soil, drainage, height, and site conditions. Have the full slope and runoff relationship evaluated before construction.

Contact Gappsi through our contact page

A Long Island design build contractor reviews blueprints with a modern house model.

Find the Best Design Build Contractor in Long Island

Building on Long Island comes with its own set of rules. Each town and village has unique building codes, zoning laws, and permit requirements that can be tricky to handle. This is why local expertise is so important for your home renovation. A local design build contractor Long Island already understands this complex environment. They have experience working with municipal offices across Nassau and Suffolk counties, which helps prevent costly delays and ensures your project is fully compliant. Whether you’re planning a new masonry patio or a major home addition, partnering with a team that knows the local landscape is your best strategy for a successful and stress-free project.

Key Takeaways

  • Simplify Your Project with One Team: The design-build model unites designers and builders under a single contract. This gives you one point of contact, which streamlines communication, creates clear accountability, and prevents the blame game between separate companies.
  • Do Your Homework Before You Commit: Choosing the right partner is crucial for success. Always verify a contractor’s license and insurance, review their portfolio for similar projects, and speak with past clients to understand their experience with communication and quality.
  • Stay Involved to Stay on Track: You are a key part of the project’s success. Help keep things moving smoothly by making design decisions promptly, responding to your project manager’s questions, and clearly defining the project scope before construction begins.

What Is a Design-Build Contractor?

When you’re planning a major home project, the last thing you want is to play telephone between a designer, an architect, and a construction crew. A design-build contractor simplifies this entire process. Think of it as having one expert team that handles your project from the initial sketch to the final nail. This approach combines both the design and construction phases under a single contract, creating a seamless and unified workflow. Instead of you managing multiple contacts, the design-build firm acts as your single, dedicated partner.

This integrated method is perfect for complex projects where design and function are deeply connected, like creating a custom outdoor living space or undertaking a complete home remodeling project. Because the designers and builders are on the same team from day one, they collaborate closely to ensure the vision is beautiful, the plan is practical, and the budget is respected. This teamwork leads to creative problem-solving and a much smoother experience for you as the homeowner.

How Is It Different from Traditional Contracting?

The traditional way of building involves hiring at least two separate companies. First, you find an architect or designer to draw up the plans. Once those are complete, you take the plans and shop for a contractor to build the project. This separation can create a disconnect. If a problem comes up during construction, the builder might blame the design, and the designer might blame the builder, leaving you stuck in the middle. With design-build, that entire dynamic disappears. You have one team and one point of contact, which eliminates finger-pointing and simplifies communication.

The Advantage of a Single Contract

Having a single contract is about more than just convenience; it’s about clarity and peace of mind. With one agreement covering everything from design to construction, you have a clear understanding of the total cost, timeline, and scope of work from the very beginning. This reduces the risk of unexpected costs and disputes between different parties. Your design-build partner takes full responsibility for the project’s success. This unified approach fosters better collaboration and efficiency, ensuring your masonry and landscaping elements, for example, are perfectly integrated.

Why It’s a Great Fit for Long Island Homeowners

Long Island’s towns and villages each have their own unique building codes, zoning laws, and permit requirements. A local design-build firm already knows this complex landscape. They can create custom solutions that not only match your vision but also comply with all local regulations, saving you from potential headaches and delays. Whether you’re dreaming of a backyard swimming pool in Suffolk County or a new kitchen in Nassau, the design-build model offers the flexibility and local expertise needed to bring your specific vision to life efficiently and effectively.

What Are the Benefits of a Design-Build Project?

Choosing a design-build contractor for your Long Island home renovation is about more than just convenience, it’s a strategic move that can save you time, money, and a lot of headaches. Instead of you managing separate architects, designers, and construction crews, a design-build firm brings everyone to the table from day one. This collaborative approach streamlines the entire process, creating a smoother and more enjoyable experience from the initial sketch to the final walkthrough. The benefits are clear, especially for complex projects like a full backyard makeover or a major home remodeling project. Let’s look at what makes this method a game-changer for homeowners.

Simplified Communication with One Point of Contact

One of the biggest sources of stress in a traditional renovation is juggling communication between different teams. You might find yourself playing telephone, relaying messages from your architect to your builder and hoping nothing gets lost in translation. With a design-build project, that all goes away. You have a single, dedicated point of contact who manages the entire team of designers, engineers, and builders. This person is your partner, working with you to bring your vision to life. They understand your goals and are responsible for ensuring every member of the team is aligned, making communication straightforward and efficient.

Faster Project Completion

The traditional method of home renovation often involves long pauses between phases. You wait for the design to be finalized, then you wait for bids, and then you wait for construction to start. If a problem arises on-site, work can grind to a halt while the builder consults the architect. The design-build model changes this timeline by allowing design and construction to overlap. Because the entire team collaborates from the beginning, they can anticipate challenges and plan accordingly. This integrated approach helps keep the project moving forward, getting you into your new pavilion or pergola sooner.

Better Budget Control and Cost Savings

Sticking to a budget is a top priority for any homeowner, and the design-build process is structured to help you do just that. Since the builder is involved during the design phase, they can provide real-time cost feedback. This means your project is designed with your budget in mind from the start, preventing the sticker shock that can occur when an independent design is bid out and comes back much higher than expected. Your design-build partner can also suggest alternative materials or methods, like different types of porcelain and natural stone, to achieve your desired look without breaking the bank.

Clear Accountability and Greater Flexibility

When you hire separate designers and builders, it can be easy for finger-pointing to start if something goes wrong. Is it a design flaw or a construction error? With a design-build firm, there is no question of who is responsible. One company is accountable for the entire project, from the initial concept to the final execution. This single source of accountability gives you peace of mind and a clear line of communication. It also allows for greater flexibility. If you want to make a change mid-project, your single point of contact can immediately coordinate with the entire team to assess the impact on the timeline and budget, making adjustments seamless.

What Services Can a Design-Build Contractor Provide?

One of the best parts of working with a design-build contractor is the sheer scope of what they can accomplish. Because they manage both design and construction, they can handle a wide variety of projects, big and small. This integrated approach means you have a single, expert team ready to bring your vision to life, whether you’re starting from scratch or reimagining your current space. From sprawling outdoor oases to cozy interior updates, a full-service firm has the expertise to manage it all.

Custom Home Builds and Major Renovations

If you’re dreaming of building a custom home on a new piece of land or planning major renovations that will completely transform your current house, a design-build contractor is your ideal partner. They handle the entire process, from creating the initial architectural plans to managing every phase of construction. This unified workflow ensures that the original design intent is perfectly executed, resulting in a home that is truly yours. Instead of juggling architects, engineers, and builders, you have one team dedicated to building your dream home from the ground up, ensuring every detail aligns with your vision and budget.

Outdoor Living Spaces, Landscapes, and Pools

Design-build firms excel at creating stunning outdoor environments. Imagine a seamless flow from your back door to a beautiful patio, complete with an outdoor kitchen, a cozy fire pit, and elegant landscaping. These contractors can design and construct everything from custom swimming pools and relaxing saunas to pavilions and pergolas that define your outdoor rooms. They also handle hardscaping with natural stone or porcelain pavers, install synthetic turf for a low-maintenance lawn, and can even build custom Sports Games Courts for family fun. Their expertise ensures all elements work together harmoniously, creating a functional and beautiful extension of your home.

Kitchen, Bathroom, and Interior Remodeling

The design-build model isn’t limited to new construction or outdoor projects. It’s also a fantastic approach for significant interior remodeling. Whether you want to update your kitchen with modern appliances and custom cabinets, transform a dated bathroom into a personal spa, or finish your basement to create more living space, a design-build team can guide the project from concept to completion. They help you select materials, create functional layouts, and manage all the construction, plumbing, and electrical work. This ensures your new interior space is not only beautiful but also perfectly tailored to your lifestyle.

How to Choose the Right Long Island Design-Build Contractor

Choosing a design-build contractor is one of the most important decisions you’ll make for your home renovation. This is the team you’ll be partnering with for weeks or months, trusting them to bring your vision for a new kitchen, backyard oasis, or custom home remodel to life. The right partner makes the process feel collaborative and exciting, while the wrong one can lead to stress and disappointment. Taking the time to properly vet your options is a crucial step that will pay off in the long run.

Think of this process as conducting a series of interviews to find the perfect fit for your project and your family. You’re looking for a company that not only has the technical skills but also communicates clearly and understands your goals. From verifying their credentials to seeing their past work, each step gives you a clearer picture of who they are and how they operate. A great contractor will be transparent and happy to provide you with everything you need to feel confident in your decision. By focusing on a few key areas, you can find a reliable, skilled, and trustworthy partner to build the home of your dreams.

Verify Their Credentials, License, and Insurance

Before you get swept up in design ideas and material samples, it’s essential to cover the basics. The first step is to confirm that any contractor you consider is properly licensed and insured. This is a non-negotiable part of your due diligence. A valid license proves they have met the requirements to operate legally in Long Island, while insurance protects you from liability in case of accidents or property damage during the project. You should ask for proof of both general liability insurance and worker’s compensation. As one expert notes, you should always verify a contractor’s license, insurance, and references before signing anything. A professional firm will have this documentation ready and will gladly share it with you.

Confirm Their Knowledge of Local Building Codes

Long Island is made up of numerous towns and villages, each with its own specific zoning laws and building codes. A contractor who isn’t familiar with these local rules can cause significant delays and costly mistakes. You need to work with a contractor who is familiar with local regulations and can handle the paperwork on your behalf. An experienced local design-build firm will know exactly what permits are needed for your project, whether it’s a new gravel driveway or a multi-level deck. Their expertise ensures your project is not only beautiful but also safe, compliant, and built to code, saving you from potential legal headaches down the road.

Review Their Portfolio of Past Work

A portfolio is more than just a collection of pretty pictures; it’s a testament to a contractor’s experience, style, and quality of craftsmanship. When you review a company’s past projects, look for work that is similar in scope and style to what you envision for your own home. Pay attention to the details in their masonry, landscaping, and construction. A robust portfolio demonstrates that the company has refined its processes to ensure every project is managed with clarity and professionalism. Don’t hesitate to check out their website, social media, and even their YouTube channel to get a comprehensive feel for their work and capabilities.

Read Client Testimonials and Ask for Referrals

Hearing from past customers offers invaluable insight into what it’s actually like to work with a contractor. While online reviews are a good starting point, asking for referrals allows you to have a real conversation with a previous client. A reputable contractor will be proud of their work and happy to connect you with satisfied homeowners. As industry professionals warn, selecting the wrong residential contractor can lead to budget overruns and project delays. Asking referrals about their experience with communication, timelines, and problem-solving can help you avoid these issues and confirm you’re choosing a reliable and trustworthy partner for your project.

Finding a Premier Design-Build Partner in Long Island

Choosing a design-build contractor is the most important decision you’ll make for your home improvement project. You’re not just hiring someone to build something; you’re selecting a partner to guide you through a creative and complex process from start to finish. For homeowners here on Long Island, finding a local expert is key. You need a team that understands our unique coastal environment, local zoning laws, and the architectural styles that define our neighborhoods, from Nassau to Suffolk County. A local firm will have established relationships with suppliers and municipal offices, which helps keep your project moving smoothly.

A premier partner brings more than just tools and a crew. They offer a seamless experience that integrates visionary design with expert construction. This means they listen to your ideas for a new swimming pool or a complete backyard transformation and translate them into a workable, beautiful plan. They manage every detail, ensuring that the final result not only meets but exceeds your expectations. Finding a firm with a proven track record, a diverse portfolio of high-quality work, and a solid reputation gives you the confidence that your investment is in good hands. This collaborative approach is what turns a standard home remodeling project into a truly personalized living space.

Why Gappsi Is a Trusted Local Choice

For over three decades, Gappsi has been that trusted partner for countless Long Island families. We live and breathe the design-build philosophy, providing a single, cohesive team to manage your project from the first sketch to the final nail. This integrated approach simplifies everything. With one point of contact, communication is clear and consistent, and you avoid the accountability gaps that can derail projects with separate designers and builders. Our in-house experts in masonry, landscaping, and construction work together, ensuring quality craftsmanship and a smooth process. By managing every phase, we maintain control over the timeline and budget, delivering exceptional results that reflect your vision and our commitment to excellence.

How to Vet Your Contractor Before You Sign

You’ve done your research and have a few potential contractors lined up. This is an exciting step, but it’s also where your due diligence really counts. Taking the time to properly vet a contractor is the single best thing you can do to ensure your project runs smoothly and finishes beautifully. Think of it as building a partnership. You want to find someone whose expertise you trust and whose communication style works for you. A few pointed questions and a careful review of their documents can save you from major headaches and help you move forward with total confidence.

Key Questions to Ask in Your First Meeting

Your first conversation with a contractor is more than just a discussion about your vision for a new swimming pool or patio; it’s an interview. Come prepared with a list of questions to gauge their professionalism and experience. Always ask to see their license and proof of insurance. This is non-negotiable and confirms they are qualified and that you are protected. You should also ask for a list of references from recent, similar projects. A confident contractor will be happy to connect you with past clients. Also, inquire about their familiarity with local Long Island building codes and permit processes, as this knowledge is critical for keeping your project on track.

Red Flags to Watch Out For

Just as important as knowing what to look for is knowing what to avoid. Trust your gut. If a contractor makes you feel pressured or rushed, consider it a red flag. Be wary of any bid that is dramatically lower than all the others, as it could mean they’ve underestimated the job and will ask for more money later. A professional contractor should be willing to discuss the project scope in great detail. If they seem vague or dismissive of your questions, they may not be the right fit. Another warning sign is a demand for a large cash deposit upfront. A reputable company will have a clear, fair payment schedule outlined in their contract.

Get Every Detail in Writing

Once you’ve found a contractor you feel good about, the final step is to get a comprehensive contract. A verbal agreement is not enough to protect your investment. A detailed written contract protects both you and the contractor by making sure everyone is on the same page. Your contract should clearly outline the full scope of work, a specific list of materials to be used, and a project timeline with start and completion dates. It also needs to include a payment schedule and a clear process for handling any changes or additions to the project. This document is your roadmap, ensuring there are no surprises when it comes to your home remodeling project.

Common Mistakes to Avoid When Hiring a Contractor

Choosing a contractor is one of the biggest decisions you’ll make for your home improvement project. While it’s exciting to get started, moving too quickly can lead to preventable headaches. Knowing what to look out for helps you select a true partner for your project, ensuring the process is as smooth as the finished result. Let’s walk through a few common missteps homeowners make and how you can sidestep them. By being prepared, you can approach your project with confidence and find a team that will bring your vision to life, whether it’s a full backyard transformation or an interior remodel.

Forgetting to Verify Credentials

It’s easy to get swept up in beautiful portfolio photos, but a contractor’s qualifications are what truly protect you and your home. Before you commit, it’s essential to confirm they are properly licensed and insured. A license shows they meet state and local standards, while insurance protects you from liability if an accident happens on your property. You can verify a professional’s license through the New York State Department of State. Skipping this step can leave you vulnerable to contractors who might underestimate the job and ask for more money later, or worse, leave you responsible for workplace injuries. A reputable contractor will always be upfront with their credentials.

Not Getting a Detailed Estimate

A one-line price on a piece of paper is not an estimate, it’s a guess. A common source of homeowner frustration stems from vague pricing that doesn’t account for the full scope of the project. To avoid surprise costs, you need a detailed, itemized estimate that breaks everything down. This document should clearly outline the costs for materials, labor, permits, and other expenses. It should also include a payment schedule. This level of detail ensures everyone is on the same page and provides a clear reference point if questions about your home remodeling project come up later. Insist on this clarity from the beginning.

Failing to Clearly Define the Project Scope

“A new patio” can mean a thousand different things. One of the most frequent mistakes is failing to clearly define the project scope from the start. This can lead to misunderstandings where the final product doesn’t match what you had in mind. Before meeting with contractors, take time to write down exactly what you want, including materials, dimensions, finishes, and specific features. The more detail you can provide, the better. A great contractor will work with you to refine this scope, ask clarifying questions, and document everything in the contract. This ensures your vision for a new swimming pool or outdoor kitchen is perfectly aligned with the construction plan.

Your Project Roadmap: The Design-Build Process Step-by-Step

Seeing your vision come to life is exciting, but understanding the path to get there is key. The design-build process is a structured journey that takes your project from a simple idea to a beautiful reality. While every project is unique, the steps generally follow a clear and collaborative path. This roadmap ensures that from the first conversation to the final reveal, you are part of a streamlined and efficient process. Knowing what to expect at each stage helps you feel confident and prepared as your dream space takes shape.

Step 1: The Initial Consultation

This is where it all begins. Your initial consultation is a conversation, a chance for you to share your dreams, ideas, and the problems you want to solve in your home. Think of it as a creative brainstorming session with an expert. You’ll discuss your vision, budget, and timeline. This first meeting is all about establishing a connection and ensuring the team fully understands what you want to achieve, whether it’s a complete home remodeling or a new backyard oasis. A good design-build partner will listen carefully, ask insightful questions, and start exploring possibilities with you, laying a strong foundation for the entire project.

Step 2: Design and Planning

Once your vision is clear, the design and planning phase turns those ideas into a concrete blueprint. Your design-build team will create detailed drawings, 3D renderings, and plans that bring your project to life on paper. This is a highly collaborative stage where you’ll refine layouts, select materials, and make key decisions. Taking the time to perfect the plan before construction begins is a hallmark of the design-build model. It ensures everyone is aligned and helps create a reliable project timeline. This detailed planning is essential for everything from a new landscape design to a custom kitchen.

Step 3: Permits and Pre-Construction

With a finalized design in hand, the next step involves all the crucial behind-the-scenes work. This includes securing the necessary permits and approvals from your local municipality. Handling these requirements can be complex, but an experienced design-build firm manages it all for you. They understand Long Island’s specific building codes and regulations, which prevents delays down the road. This pre-construction phase also involves ordering materials and scheduling the trade professionals needed for your project. It’s a critical step that ensures when construction on your new swimming pool or patio begins, everything is in place for a smooth process.

Step 4: The Construction Phase

This is the most exciting part, where you finally see your project physically take shape. With all the planning and preparation complete, the construction team gets to work. Because you’re working with a single design-build entity, communication remains seamless. Your project manager keeps you informed, manages the schedule, and ensures the work is executed to the highest standard. A well-managed construction phase keeps the project on budget and on time. You can watch the progress and see how the skilled craftsmanship transforms your space, turning the detailed plans into your new reality. You can even see examples of Gappsi’s work in action on our YouTube channel.

Step 5: The Final Walkthrough

As construction wraps up, the final walkthrough is the last important step. This is your opportunity to walk through the completed space with your project manager to ensure every detail meets your expectations. The collaborative nature of design-build means your input has been valued from the start, so there should be no major surprises. This walkthrough is simply a final check to confirm that the finished project aligns perfectly with the vision you established together. It’s the moment you officially sign off on the work, and your beautiful new space is ready for you to enjoy for years to come.

What Factors Can Impact Your Project Timeline?

Even with a perfect plan and a fantastic contractor, some things can shift your project’s timeline. Knowing what these potential hurdles are ahead of time is the best way to keep your project running smoothly. An experienced design-build team will anticipate many of these variables and build a schedule that accounts for them, but some factors are simply out of anyone’s control. From town permits to unexpected weather, being prepared for these possibilities helps manage expectations and reduces stress, ensuring the construction process is as seamless as possible.

Local Permits and Approvals

Before any ground is broken, your project needs the green light from local authorities. Securing permits is a non-negotiable step for most major projects, including new swimming pools, home additions, and significant masonry work. The timeline for these approvals can vary widely depending on your specific town or village in Long Island. An experienced local contractor is invaluable here, as they understand the specific requirements and processes for different municipalities in Nassau and Suffolk counties. They can manage the paperwork and follow up diligently, but a backlog at the town hall can still cause delays before your project even begins.

Weather and Material Availability

We all know Long Island weather can be unpredictable. A week of heavy rain can halt excavation for a new patio, and a sudden cold snap can delay concrete from curing properly. While a good contractor builds buffer days into the schedule, extended periods of bad weather can impact the timeline. Similarly, the availability of materials can play a role. If you have your heart set on specific porcelain pavers from Italy or a custom-built pergola, supply chain disruptions can lead to waiting periods. A great design-build partner will order long-lead items early to minimize these delays.

How You Can Help Keep Your Project on Schedule

You play a key role in keeping your project on track. The most important thing you can do is communicate clearly and make decisions in a timely manner. Your contractor will have questions throughout the process, and responding promptly helps them maintain momentum. It’s also helpful to finalize as many design choices as possible before construction starts. While the flexibility of the design-build model is a huge plus, making significant changes mid-project will almost always add time and cost. By trusting the plan you developed with your home remodeling team, you help ensure a timely and successful completion.

Related Articles

Frequently Asked Questions

Is the design-build approach more expensive than hiring a separate architect and builder? Not necessarily, and in many cases, it can actually save you money. Because the construction team is involved during the design phase, they can provide real-time cost feedback. This helps ensure the design stays aligned with your budget from the very beginning. The unified workflow also minimizes the risk of expensive delays and communication errors that can happen when you’re managing separate companies, helping to keep the project on its financial track.

How much involvement do I have in the design process? You are a key member of the team. The entire design-build process is founded on collaboration between you and the professionals. Your partner will work with you to understand your vision, lifestyle, and aesthetic preferences. You’ll be directly involved in making decisions on everything from the overall layout to the specific materials and finishes. Your input is essential to creating a final space that truly feels like your own.

What happens if I want to change my mind about something during construction? It’s completely normal for ideas to shift as you see your project take shape. The design-build model is structured to be flexible. If you want to make a change, you simply talk to your project manager. They will coordinate with the entire team to determine how the adjustment will impact the timeline and budget. You will then be presented with a clear change order to review and approve before any new work proceeds, ensuring you are always in control.

Is design-build only for huge projects like building a new house? While it’s an excellent model for large-scale projects, design-build is just as effective for more focused renovations. It’s a great choice for any project where design and construction are closely intertwined, such as a full kitchen remodel, a bathroom overhaul, or creating an integrated outdoor living space. The benefits of streamlined communication and clear accountability are valuable no matter the size of the job.

Why is it so important to choose a contractor who knows Long Island specifically? Long Island has a very specific set of rules. Each town and village has its own building codes, permit requirements, and zoning laws. A local contractor who is familiar with these regulations can manage the approval process efficiently, preventing major delays. They also understand our local architectural styles and how to build for our coastal climate, ensuring your project is not only beautiful but also durable and compliant.