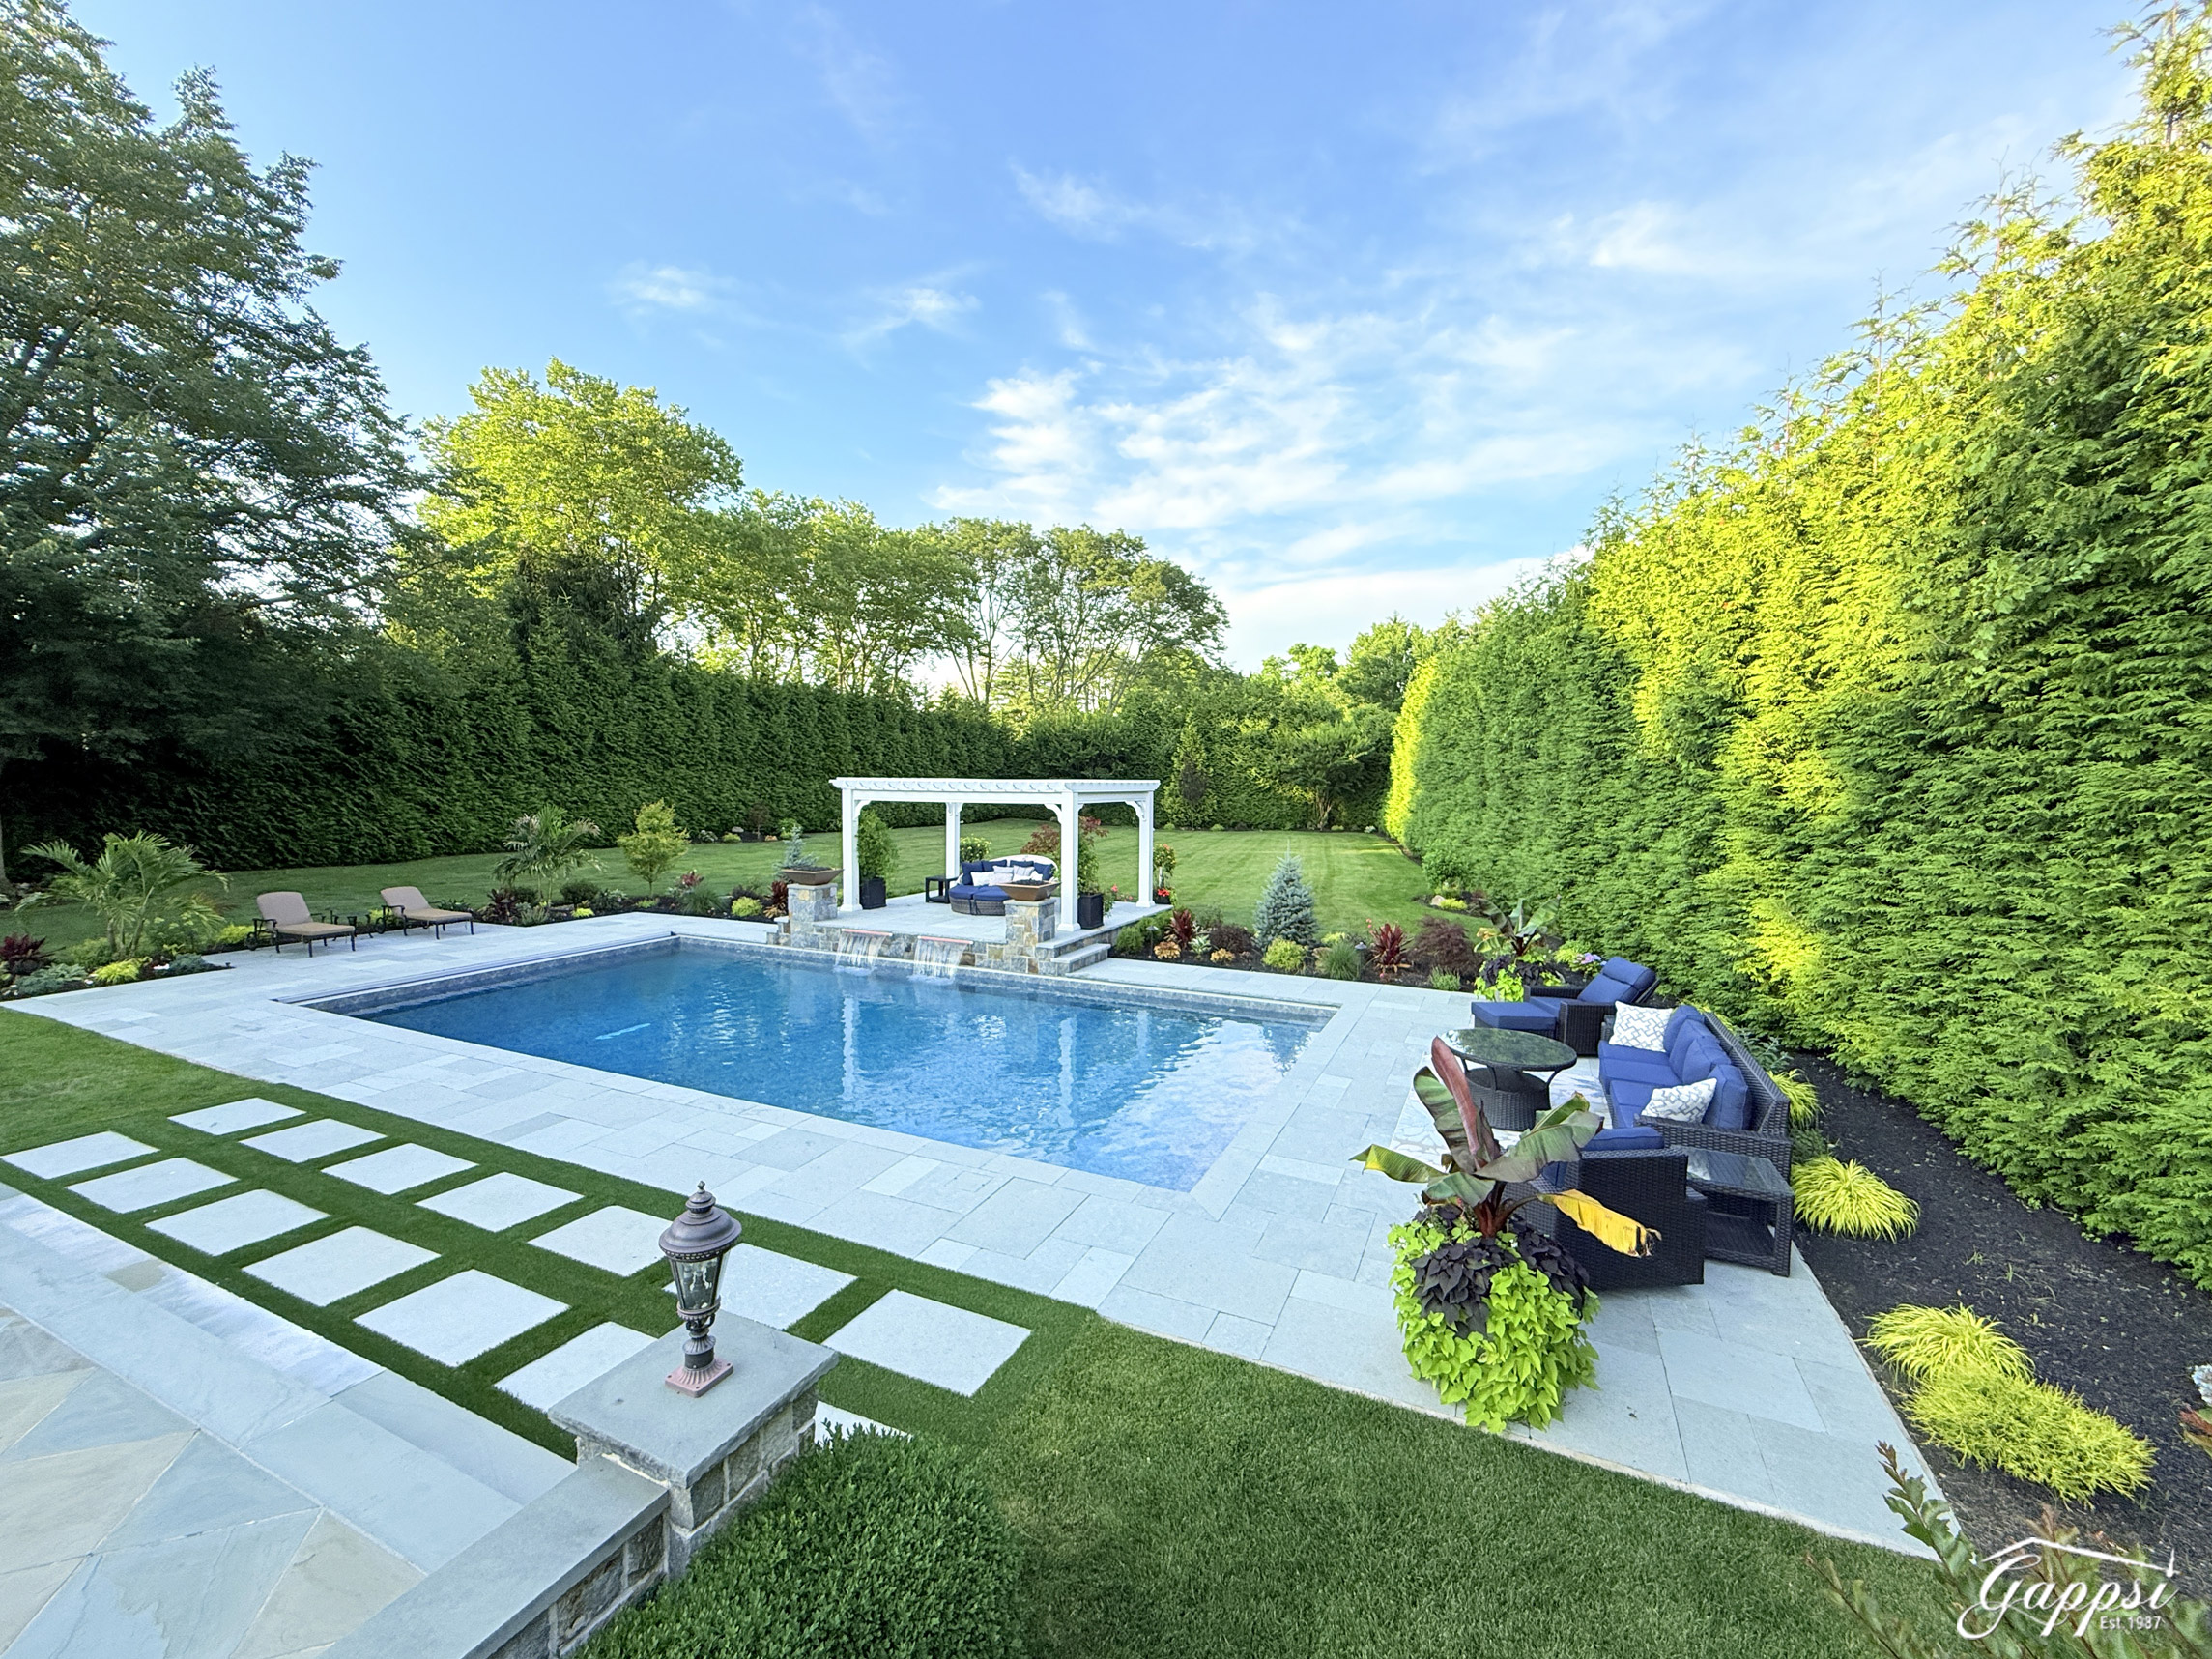
Modern sunken swim spa deck with clean lines and natural wood accents.

Your Guide to the Best Swim Spa Deck Ideas

Without a thoughtful plan, a swim spa can look like a large box dropped in the middle of your yard. The key to making it look like a luxurious, fully integrated feature is the deck design. The right deck elevates your spa from a simple piece of equipment to the centerpiece of a sophisticated outdoor living area. Whether you prefer the sleek, modern look of a sunken spa or the functionality of a multi-level entertainment space, the design possibilities are endless. We’ve gathered our favorite swim spa deck ideas to inspire you, focusing on how different layouts, materials, and finishing touches can create a cohesive and beautiful extension of your home.

Key Takeaways

  • Plan Your Deck as an Outdoor Room: Create a truly functional space by designing a layout with distinct zones for lounging and easy access. A great design considers traffic flow and materials to feel like a natural extension of your home.
  • Get the Technical Details Right: Your spa’s safety and longevity depend on the essentials. Ensure your project includes a reinforced, level foundation to support the weight, proper electrical work, and at least three feet of clearance for maintenance access.
  • Layer in Comfort and Privacy: Complete your backyard retreat by adding elements that enhance the experience. Use landscaping, fences, or a pergola to create a secluded feel, and install lighting to improve ambiance and safety for evening use.

What Makes a Swim Spa Deck Great?

A great swim spa deck does more than just hold your spa; it creates a destination in your backyard. It’s about designing a space that feels like a natural extension of your home and personal style. The best designs seamlessly integrate the spa into your overall landscape design, making it look like it was always meant to be there. This means thinking about how the deck flows with your garden, patio, and the architecture of your house to create one cohesive and beautiful outdoor living area.

Functionality is just as important as appearance. Consider the path from your back door to the spa. You’ll want it to be short and convenient, especially on cooler evenings. Privacy is another key factor. A well-placed deck can shield you from the view of neighbors, creating a private retreat for you and your family to relax. Thoughtful placement ensures you can enjoy your swim spa comfortably any time of day.

The materials you choose will define the look and durability of your deck. Composite decking is a fantastic, low-maintenance option that resists moisture, while natural woods like cedar offer timeless beauty. You can also incorporate porcelain and natural stone pavers to create stunning multi-level designs with separate zones for lounging, dining, or sunbathing. A sunken design, where the deck is built around a partially recessed spa, can provide a sleek, modern look and make getting in and out easier.

Finally, the details complete the experience. Proper lighting is essential for safety after dark and sets a relaxing mood. And here’s a pro tip that’s often overlooked: always plan for maintenance access. Your swim spa will need service at some point, so designing a removable panel or hatch will save you a major headache down the road. Combining these elements of design, function, and foresight is what truly makes a swim spa deck great.

How to Choose the Best Deck Materials

Selecting the right material for your swim spa deck is one of the most important decisions you’ll make. The material you choose sets the tone for your entire backyard oasis, influencing everything from the look and feel to the amount of maintenance required. You want something that not only looks beautiful but can also handle poolside splashes and Long Island’s distinct seasons. Let’s walk through some of the best options so you can find the perfect fit for your lifestyle and aesthetic.

Composite Decking

If you love the look of wood but not the upkeep, composite decking is a fantastic choice. Made from a blend of wood fibers and recycled plastic, it gives you that classic deck appearance without the risk of rot, warping, or splintering. This material is especially great for wet areas around a swim spa because it resists moisture damage and provides excellent durability. You can spend more time enjoying your spa and less time on maintenance. Plus, it comes in a variety of colors and finishes, making it easy to match your home’s style.

Natural Wood (Cedar and Redwood)

There’s nothing quite like the timeless, natural beauty of a real wood deck. Woods like cedar and redwood are popular for a reason: they offer a warm, classic look and are naturally resistant to rot and insects. A wooden deck creates an inviting, organic feel that blends seamlessly with your landscape. Keep in mind that natural wood does require some love to keep it looking its best. You’ll need to plan for regular sealing and staining to protect it from the elements and maintain its rich color, but for many homeowners, the stunning result is well worth the effort.

Stone and Porcelain Pavers

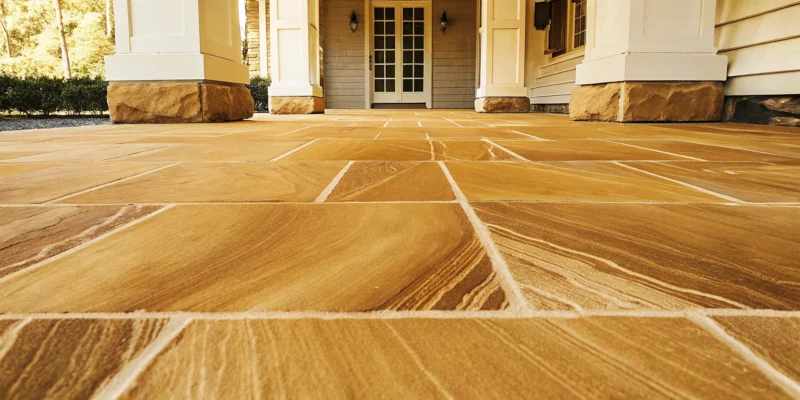
For a truly luxurious and permanent feel, consider building your deck with stone or porcelain pavers. This option creates a sophisticated hardscape that feels like a natural extension of your home. Porcelain and natural stone pavers are incredibly durable, slip-resistant, and can withstand harsh weather without fading or cracking. They offer endless design possibilities, allowing you to create a custom look that complements your pool and landscaping perfectly. A paver deck provides a solid, elegant foundation for your swim spa that will last for decades with minimal maintenance.

Consider Long Island’s Climate

Living on Long Island means we get to experience a unique coastal climate, from humid summers to freezing winters. This is a critical factor when choosing your deck materials. Salt in the air can be tough on certain woods, and the freeze-thaw cycle can challenge less durable surfaces. It’s important to select a material that is proven to perform well in our specific environment. As local experts, we help homeowners choose materials that are not only beautiful but are also engineered to handle Long Island’s weather, ensuring your investment remains safe and stunning for years to come.

How to Design Your Deck Layout

Once you have your materials picked out, it’s time for the fun part: designing the layout. The right design does more than just hold your swim spa; it creates an experience. Think about how you want to use the space. Will it be a quiet retreat for morning workouts, a hub for family fun, or a sophisticated spot for entertaining guests? A thoughtful layout defines different zones for various activities, ensuring smooth traffic flow and making the most of your backyard. This planning stage is crucial for creating a space that is both beautiful and highly functional for your specific needs.

Your deck should feel like a natural extension of your home and landscape. Consider the views you want to highlight and the areas where you might want more privacy. A well-designed layout can transform a simple backyard into a functional and beautiful outdoor living area. With a bit of planning, you can create a swim spa deck that not only looks incredible but also perfectly suits your lifestyle. The key is to balance aesthetics with practicality, creating a space you’ll love for years. Our team can help you visualize the possibilities with a professional landscape design that brings all these elements together seamlessly.

Multi-Level Decks

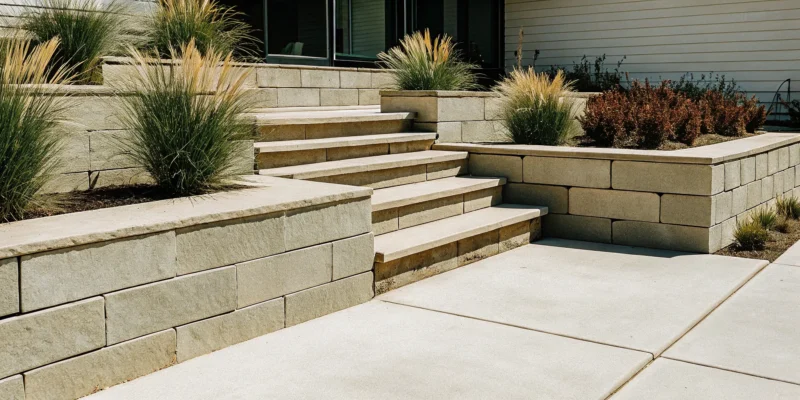
A multi-level deck is a fantastic way to add dimension and visual interest to your backyard. By creating different platform heights, you can naturally separate your space into distinct zones. Imagine a lower level for your swim spa, providing easy entry, with an upper level dedicated to a dining table or a comfortable lounge area. This approach is especially effective for sloped or uneven yards, as it works with the natural contours of your land instead of against them.

These separate levels create a more dynamic and organized outdoor living space. You can connect the tiers with wide, inviting steps, and use different materials or lighting to define each area. This design isn’t just practical; it makes your backyard feel larger and more luxurious.

Sunken Deck Designs

For a sleek, integrated look, consider a sunken deck design. This style places the swim spa partially or fully in the ground, with the decking built flush around it. The result is a seamless, high-end appearance that makes your swim spa look like it was always meant to be there. This design is perfect for creating a private, intimate atmosphere, almost like your own personal grotto.

A sunken design is also a great solution for yards that aren’t perfectly level, as it can help create a flat, usable area. It minimizes the visual height of the swim spa, allowing it to blend beautifully with your landscaping. This approach gives you a clean, modern aesthetic while making it easy to get in and out of the water.

Wraparound Decks

A wraparound deck provides 360-degree access to your swim spa and creates a generous amount of usable surface area. This design can surround your spa on two, three, or all four sides, offering plenty of room for lounge chairs, planters, and side tables. It’s an excellent choice if you plan on entertaining, as it gives guests space to relax by the water without having to get in.

If you have an existing deck, you don’t necessarily have to start from scratch. We can often modify your current structure to accommodate a new swim spa, cutting out a section and reinforcing the frame to support the weight. This type of home remodeling project seamlessly integrates your new spa into your existing outdoor living space.

Built-In Seating and Lounge Areas

To maximize space and create a polished, custom look, incorporate built-in features directly into your deck design. Benches that flow from the deck’s edge, for example, provide ample seating without the clutter of extra furniture. This is a smart way to ensure there’s always a spot for family and friends to gather and socialize.

You can also add other built-in elements like planters, storage boxes for towels and spa accessories, or even a bar top along one side of the spa for drinks and snacks. These thoughtful details make the space more functional and feel completely integrated. For ultimate comfort, consider adding a pavilion or pergola overhead to provide shade and define your new lounge area.

What Does Installation Involve?

Bringing a swim spa into your backyard is an exciting project, but it’s more than just picking a spot and filling it with water. A successful installation requires careful planning and execution to ensure safety, longevity, and easy maintenance for years to come. From building a solid base to handling the electrical work, each step is crucial. Working with a professional team ensures that all the technical details are managed correctly, so you can focus on the fun part: enjoying your new backyard oasis. A proper setup for your swim spa is the first step toward creating a seamless and beautiful outdoor living space.

Start with a Strong, Level Foundation

A swim spa is incredibly heavy, especially when filled with water and people. Because of this, it needs a perfectly solid and level surface that can support the immense weight without shifting or cracking over time. The standard recommendation is a reinforced concrete pad that is at least four inches thick. This isn’t a step where you want to cut corners. An unstable foundation can damage the spa’s shell and components. Our expert masonry team can prepare the perfect base, giving you peace of mind that your investment is secure.

Plan for Clearance and Access

When designing your deck and layout, think beyond the footprint of the swim spa itself. You need to leave at least three feet of clear, accessible space on all sides. This clearance is essential for several reasons. It provides a safe path for getting in and out of the spa, gives you room to handle the cover, and, most importantly, allows service technicians to access the internal components for any maintenance or repairs. Factoring this space into your initial landscape design will prevent major headaches down the road.

Electrical Requirements

Swim spas require a significant amount of power to run the jets, heaters, and filtration systems. Most models need a dedicated 240V/50-amp electrical connection, which is not a DIY project. For your safety and to ensure your spa operates correctly, this work must be completed by a licensed electrician. They will run the proper wiring from your home’s electrical panel to the spa’s location and install a GFCI (Ground Fault Circuit Interrupter) for protection. We coordinate with trusted electricians to make sure all electrical work is done safely and meets all local codes.

Permits and Local Building Codes

Before any work begins, it’s important to understand your local regulations. Many towns on Long Island require permits for swim spa installations. These rules often cover aspects like placement, safety barriers, and electrical connections. For example, you may be required to have specific fencing or a locking cover to meet safety standards. Navigating the building codes in different parts of Suffolk and Nassau County can be complex, but it’s a critical part of any home improvement project. An experienced installer will handle the permitting process for you, ensuring your project is fully compliant from day one.

Common Planning Mistakes to Avoid

A swim spa is a fantastic investment, but a few planning missteps can create major headaches. Thinking through the entire process, from delivery to your first dip, will save you time, money, and stress. Let’s walk through some common mistakes I’ve seen homeowners make so you can sidestep them completely.

Underestimating the Weight Load

It’s easy to think of a swim spa deck as just another deck, but it’s supporting a massive amount of weight. When filled with water and people, a swim spa can weigh up to 24,000 pounds. That’s more than three elephants. This incredible weight requires a foundation that is far more robust than a typical patio or deck structure. Without proper support, your deck could sag, crack, or even collapse, leading to costly damage and serious safety risks. This is why working with professionals who understand the structural engineering needed for heavy water features is not just a good idea, it’s essential.

Forgetting Maintenance Access

A sleek, built-in swim spa looks amazing, but if you can’t access the internal components, you’ll have a big problem when it’s time for service. A common rule of thumb is to leave at least three feet of clear space around all sides of the spa. This gives a technician room to work on the plumbing and electrical systems. This space is also useful for you, providing a clear path for getting in and out and a place to store the cover when the spa is in use. If you’re planning a sunken design, be sure to incorporate removable access panels into your deck plan.

Not Planning for Delivery

Your swim spa will arrive as one large, bulky unit. A frequent oversight is failing to plan for its journey from the delivery truck to its final spot in your yard. Before you even place an order, you should measure the entire delivery path. Check the width of gates, pathways, and any tight corners. Also, look up for any overhead obstacles like low-hanging tree branches or utility lines. A professional installation team will perform a site visit to confirm the logistics, but doing your own initial check can help you identify potential challenges early on. You can see examples of how these large projects come together on the Gappsi YouTube channel.

Overlooking Safety and Non-Slip Surfaces

Water and smooth surfaces are a recipe for slips and falls. When choosing materials for the area immediately surrounding your swim spa, safety should be your top priority. Opt for materials with a textured, non-slip finish. Many beautiful porcelain and natural stone pavers are designed specifically for wet areas like pool surrounds, offering both safety and style. Also, consider how you’ll use the spa at night. Integrating multi-colored LED lighting into the deck, steps, and surrounding landscape not only creates a beautiful ambiance but also improves visibility and safety after dark. Just be sure any electrical work is handled by a licensed professional.

Landscaping Ideas for Your Swim Spa Oasis

Your swim spa deck is the foundation, but the landscaping is what truly transforms the space into a personal paradise. The right plants, lighting, and privacy features work together to create a cohesive and inviting atmosphere that feels like a natural extension of your home. Think of it as the finishing touch that pulls your entire backyard vision together. A thoughtful landscape design not only adds beauty and value but also enhances the experience of using your swim spa, making every dip feel like a getaway.

By carefully selecting greenery and structural elements, you can craft an environment that is both stunning and functional. The goal is to create a space that feels secluded, peaceful, and completely your own. From lush plantings that add color and fragrance to strategic lighting that sets the mood for an evening soak, every detail contributes to your backyard oasis. Let’s look at a few key landscaping ideas that will make your swim spa area the highlight of your home.

Add Plants, Flowers, and Greenery

Surrounding your swim spa with plants and flowers is one of the easiest ways to soften the hardscape of a deck and integrate it into your yard. Greenery adds color, texture, and a sense of life, making the area feel lush and relaxing. For a low-maintenance approach, choose hardy perennials and evergreen shrubs that thrive in Long Island’s climate. Consider adding fragrant plants like lavender or gardenias in pots near the spa to create a soothing aroma while you unwind. A mix of tall grasses for movement, flowering shrubs for color, and potted plants for flexibility allows you to create a layered, dynamic garden design.

Create Privacy with Hedges, Trellises, and Fencing

To make your swim spa feel like a true retreat, privacy is essential. You want to be able to relax without feeling like you’re on display. Tall, dense hedges like Arborvitae or Holly create a beautiful living wall that offers year-round seclusion and helps block wind. Another great option is installing a trellis with climbing vines, such as clematis or wisteria, for a softer, more romantic look. For a more immediate and structural solution, a stylish privacy fence or screen can define the space while complementing your home’s architecture. These elements ensure your spa area is a peaceful and intimate sanctuary.

Use Lighting for Ambiance and Safety

The right lighting plan serves two important purposes: it creates a magical ambiance for evening soaks and ensures the area is safe to use after dark. Soft, warm landscape lighting can completely change the mood of your backyard. Consider installing uplights to highlight beautiful trees, path lights to guide the way, and string lights over a seating area for a festive glow. For safety, it’s critical to illuminate steps, deck edges, and the path to and from your house. Modern LED systems offer incredible flexibility, allowing you to adjust color and brightness to suit any occasion, turning your swim spa into a stunning nighttime feature.

Add-Ons for the Ultimate Swim Spa Experience

Your swim spa is the star of the show, but the right supporting features can turn your backyard into a personal resort. These add-ons bring comfort, convenience, and a major wow-factor, making your space the go-to spot for relaxation and entertainment. From creating shady lounge areas to building cozy spots for cool evenings, the right additions complete your swim spa oasis and extend its use throughout the year. By thoughtfully integrating these elements, you create a cohesive and luxurious outdoor living area that you and your family will enjoy for years to come.

Install Shade with Pergolas and Pavilions

A swim spa is all about relaxation, but the Long Island sun can be intense. Adding a shade structure is a game-changer for comfort and usability. A beautifully crafted pergola or pavilion not only provides a welcome escape from direct sunlight but also defines the space, creating a resort-like feel. These structures are perfect for setting up a seating area or an outdoor dining spot right next to your spa. Gappsi’s custom pavilions and pergolas can be designed to match your home’s architecture and your personal style, seamlessly blending function with sophisticated design to enhance your entire backyard aesthetic.

Include an Outdoor Kitchen or Bar

Why limit your swim spa to just swimming and relaxing? Turn it into the ultimate social hub by adding an outdoor kitchen or bar area. Imagine preparing drinks and snacks for your guests without ever having to leave the party. A custom bar top with built-in seating encourages conversation and creates a fun, casual atmosphere right by the water. This is a fantastic way to entertain friends and family. With expert masonry, you can build a durable and stylish outdoor kitchen that includes everything from a grill and refrigerator to a sink and counter space, making outdoor gatherings effortless and enjoyable.

Add Built-In Storage Solutions

A cluttered deck can really take away from the relaxing vibe you’re trying to create. That’s where smart storage comes in. Instead of having towels, spa covers, and cleaning supplies out in the open, consider incorporating built-in storage into your deck design. Benches with hinged tops, hidden cabinets, or custom-built cubbies can keep everything organized and out of sight. This not only keeps your space tidy but also maximizes functionality. Thoughtful home remodeling expertise can help you integrate these solutions seamlessly into your deck’s structure, ensuring they are both practical and visually appealing.

Ensure Year-Round Comfort with Heaters and Fire Pits

Don’t let cooler weather cut your swim spa season short. You can extend your enjoyment throughout the year by adding a source of warmth to your deck area. A custom-built fire pit or an outdoor fireplace creates a cozy and inviting atmosphere, perfect for gathering around after an evening swim. The warmth and flickering light make the space comfortable even on chilly nights. These features serve as a natural focal point for your outdoor living space, and our masonry designers can help you create a fire feature that perfectly complements your swim spa and overall backyard design.

Create Your Dream Swim Spa Deck on Long Island

Creating the perfect deck for your swim spa is about blending beauty with function. When you’re planning your Long Island backyard oasis, a few key decisions will make all the difference. Start by thinking about location. Placing your

Next, consider your materials. While composite decking is a popular choice for its resistance to water damage, don’t forget about the timeless look of natural wood. For a truly elegant and durable surface, porcelain and natural stone pavers create a stunning foundation that stands up to the elements. The right design can also transform your space. A multi-level deck creates distinct zones for lounging and dining, while a sunken design can make your swim spa feel seamlessly integrated into your yard.

Finally, don’t overlook the finishing touches. The right landscaping adds color and serenity, with tall hedges or trellises offering an extra layer of privacy. It’s also critical to ensure the foundation is strong enough to support the spa’s weight, which can be substantial when filled, and that delivery access is planned for. Thinking through these elements from the start helps ensure your new swim spa deck is a dream come true.

Related Articles

Frequently Asked Questions

What’s the most important factor when choosing a deck material for Long Island? For our coastal climate, durability is everything. You need a material that can handle humid summers, salty air, and winter’s freeze-thaw cycles without failing. Composite decking is a great low-maintenance option that resists moisture and won’t splinter. For ultimate longevity and a high-end look, porcelain or stone pavers are practically weatherproof. While natural wood is beautiful, be prepared for the regular sealing it will need to withstand our specific weather conditions.

How do I make sure my deck is strong enough for a swim spa? A swim spa deck is not a typical deck; it’s a specialized structure. A filled swim spa is incredibly heavy, so it requires a foundation built to handle that specific load, which is usually a reinforced concrete pad. The deck itself must also be engineered with extra support. This is not a DIY-friendly project. The safest approach is to work with an experienced builder who understands the structural requirements to prevent sagging or collapse and ensure your family’s safety.

Can I build a deck around my swim spa if my yard isn’t level? Absolutely. An uneven yard is actually a great opportunity to get creative with your design. A multi-level deck is a perfect solution, as it allows you to build different platforms that follow the natural slope of your land. This can create separate, functional zones for the spa, dining, and lounging. Another option is a sunken design, where we excavate a portion of the yard to create a level spot for the spa, making it look beautifully integrated with the landscape.

What’s the biggest mistake people make when planning their swim spa deck? The most common and costly mistake is forgetting to plan for maintenance access. Your swim spa has pumps, heaters, and electrical components that will eventually need service. If you build the deck flush against all sides without including a removable panel or hatch, a technician won’t be able to reach anything. Always plan for at least three feet of clearance on the side with the equipment panel to save yourself a major headache in the future.

Do I need a permit to install a swim spa on Long Island? Yes, in most cases you will need a permit. The specific requirements vary between towns across Suffolk and Nassau County, but they generally cover safety regulations for things like electrical wiring and fencing or locking covers. Navigating these local codes can be complicated, so it’s a huge benefit to work with a professional installer who is familiar with the process and can handle all the paperwork for you, ensuring your project is compliant from the start.

Natural bluestone paver patio with herringbone pattern and stone fire pit in a Long Island backyard

Paver Patio Ideas: Layouts, Patterns & Materials

Long Island homeowners need durable outdoor surfaces that survive freezing winters and hot summer days. Choosing the right layouts and materials ensures your yard remains safe and beautiful for years.

Durable paver patio ideas help you design a beautiful outdoor space that fits your home and lifestyle. This guide covers key layouts, patterns, and materials like natural bluestone, travertine, and concrete pavers to build a lasting backyard setup. We explain how to choose the right layouts, such as running bond or herringbone, to match your home. You will learn how to add features like fire pits, outdoor kitchens, and custom stone borders to make your yard more useful. We also show how proper base prep prevents settling in Nassau and Suffolk county soils. Choosing permeable materials helps water soak back into the ground to protect your lawn. This is recommended by the Clemson University Cooperative Extension.

Call Gappsi at (631) 831-3177 for a free paver patio consultation.

Why should you choose stone pavers over other options, and how do they boost your home value? You must look at their long-term durability and how they handle freezing winter weather. To understand these choices, we explore Why Paver Patios Are a Smart Investment for Long Island Homes.

Why Paver Patios Are a Smart Investment for Long Island Homes

A new patio can make your backyard a central hub for relaxation and fun. When you look at new paver patio ideas, you want a choice that looks great and lasts for many years. Building a stone or concrete patio is one of the smartest upgrades you can make for your property. It gives you a strong, beautiful space for outdoor dining and family gatherings.

Wood decks rot and concrete slabs crack. A built stone patio stays strong and needs very little work to keep its charm. This makes it a great investment that saves you time and money on yearly repairs.

Weather resistance in our local climate

The weather on Long Island can be very harsh on outdoor stone surfaces. Cold winter months bring freezing temperatures that can crack solid concrete slabs. Paver patios solve this problem because the stones can move slightly without breaking. You can build these patios with strong materials like natural bluestone, granite, travertine, or concrete pavers.

To ensure your patio lasts, proper base preparation is the most critical step. You must build a solid paver base using gravel and sand to help water drain away from the surface. This deep layer allows water to flow through instead of pooling under the stones. When water pools and freezes, it pushes the stones upward and ruins the flat surface. Also, using permeable materials helps reduce standing water and cut erosion in your backyard.

Boosting home resale value

A well-built patio is more than just a place to relax. It is a smart way to increase the market value of your home. Most home buyers on Long Island look for move-in ready outdoor spaces. A gorgeous stone patio makes your yard look finished and clean.

It acts as an extra room where people can host guests or enjoy quiet nights. Because natural stone and concrete pavers hold their shape for decades, they offer a high return on your investment. You will not have to spend money on regular repairs or costly replacements. This strong design is a key selling point that can attract buyers if you sell your house in the future.

More space for year-round living

A custom paver patio expands your living space past the walls of your house. It creates a stable ground for cozy fire pits, outdoor kitchens, and seating areas. On Long Island, a well-planned layout lets you enjoy your backyard during spring, summer, and autumn.

You can set up dining tables for warm summer dinners or add a fire pit to stay warm on crisp fall nights. This custom setup lets you make the most of your property throughout the year. It turns your backyard into a functional retreat where your family can make lasting memories. By adding paths and distinct zones, you create a smooth flow that connects your home directly to the natural landscape.

Ready to bring your paver patio ideas to life? Call Gappsi at (631) 831-3177.

What Paver Materials Work Best for a Long Island Patio?

Choosing the proper stone is a major part of your project. The best paver patio ideas rely on choosing materials that can stand up to local weather. You have several great options for your yard, ranging from natural stone to manufactured blocks.

Natural stone options for elegant patios

Many homeowners on Long Island choose bluestone because of its natural look. This popular stone has a unique color range and a rich texture that fits any yard. Another great option is travertine. This stone stays cool under your feet on hot summer days. Using light-colored stones in full sun helps keep the surface cool on warm days. For borders and pool edges, granite coping is very strong and offers a clean look. These natural materials add a timeless feel to your outdoor living space. They can last for decades with simple care.

Choosing natural stones allows you to create a patio that feels like a natural part of the landscape. Each piece of stone has its own distinct markings and shades. This means no two patios will look exactly the same. You can mix these materials to create a beautiful and custom look.

The versatility of concrete pavers

If you want more options for shapes and colors, concrete pavers are a great choice. These blocks are durable and feel comfortable underfoot when you walk. They come in many sizes, which allows you to build unique patterns. You can find styles that look like natural stone or classic brick. When choosing the right paver material, you should think about how you will use the space. Some brands like Nicolock offer rich color blends that do not fade over time. These pavers hold up well against heavy foot traffic and changing seasons.

Concrete blocks are also easy to replace if one gets stained or damaged. You can simply pull out the broken block and slide a new one in. This makes repairs very cheap and fast compared to poured concrete. Homeowners like this choice when they plan their yard.

Permeable pavers for better water flow

Managing water is a key part of designing any patio on Long Island. Patios built with permeable materials help water soak back into the ground. This helps to reduce standing water and soil loss in your yard after a storm. These special pavers allow rain to flow through the joints into the soil. This stops runoff from washing away soil and helps refill ground water. Using these stones is a smart way to protect your lawn. They keep your lawn dry and prevent pools of water from forming on your patio.

Material Appearance Durability Maintenance Best Use
Bluestone Blue and gray tones with natural texture High strength Low, regular sweeping Rustic patios and walkways
Travertine Warm tan and cream tones, smooth feel High, resists cracking Low, seal every few years Sunny patios and pool decks
Concrete Pavers Many shapes, colors, and textures Very high, handles heavy traffic Low, easy to wash Custom patio patterns
Granite Coping Sleek, modern gray or white colors Extreme strength Very low, resists wear Patio borders and pool edges

Timeless Paver Patio Ideas for Layouts and Patterns

When you begin to plan your paver patio installation, you must decide how the stones will lie. The way you arrange your pavers shapes the style, scale, and strength of your outdoor living space. Modern paver patio ideas rely on classic layouts to guide the eye and make yards feel larger or more cozy. Your pattern choice also affects how well the stones lock together to resist shifting over time.

The Classic Herringbone Layout

The herringbone pattern is a historic design with roots in old European roads. In this layout, builders place rectangular stones at 45-degree or 90-degree angles to form a classic v-shape. The pattern gets its name because the zig-zag lines look like the bones of a herring fish, a look drawn from ancient Roman roads. This interlocking design is highly stable, making it the best choice for high-traffic zones like driveways and main patios.

When you lay these pavers at a 45-degree angle, you can make a small patio feel much wider. The slanted lines draw your eyes outward to the corners and edges of the yard. The type of stone you select plays a huge role in the final look of this pattern. Take time for choosing the right paver material before any work begins on your lawn.

The Traditional Basketweave Pattern

The basketweave pattern brings a warm, old-world look to your outdoor living space. In this layout, builders place rectangular pavers in neat, crossing pairs to make square blocks. This simple swap repeats across the floor to make the stones look like woven wooden strips. It is a detailed pattern that works best in flat areas where you want a cozy look.

This layout works well for small seating areas and cozy alcoves. It adds rich texture to the ground without making the space feel busy or cluttered. Choosing a layout with wider joints can help you build a permeable hardscape for your yard. This design allows water to soak into the ground, which helps to replenish local groundwater and reduce yard runoff.

The Clean Running Bond Style

The running bond design is the most common pattern for modern patios. In this layout, builders lay pavers in straight, even lines across the yard. Each row is offset by half a stone, which creates a clean, classic look. This layout is easy to install and needs little cutting of stone, which speeds up the work and lowers your costs.

You can use running lines to change how people see the scale of your patio. If you run the lines along your house, the patio will look wider from side to side. If you run the lines away from your house, the space will feel much longer to your guests. This pattern also lets you mix different colors to form borders that match your home landscape.

How Big Should Your Paver Patio Be and How Do You Lay It Out?

To design a backyard space that works well, plan your patio size based on how you want to use the area. A small space can feel tight, while a huge patio can look cold and bare. You need to map out your plans before you dig. When you plan your paver patio installation, match the size to your needs. This ensures you have enough room for dining tables, seating, and foot traffic.

Patio size rules by zone

Your patio must fit your chairs and tables. A small dining area with a table and four chairs needs a space of at least twelve by twelve feet. For large dining tables or a deep couch, plan for fifteen by fifteen feet. Fire pit seating areas need a space of at least ten to twelve feet wide. This size allows guests to sit at a safe distance from the heat while keeping their chairs on the paving stones.

Traffic flow and zoning plans

A good layout splits your outdoor space into clear zones. You can use different paver colors or textures to mark where the cooking area ends and the lounge area begins. Keep main walking paths three to four feet wide so people can pass easily. Always check the slope during planning. You want to make sure water drains away from your home. Hardscaping guides from Clemson University Extension show that pervious systems work best on slopes under two percent. This means your yard should not slope more than one foot for every fifty feet.

Steps to map your layout

To get the best results, follow a clear plan to map your yard. You want to make sure your new space fits well with your home’s style. Gappsi ensures that patterns and layouts complement your existing landscape and architecture. Here are the steps to size and lay out your new paver patio:

  1. List your patio uses. Write down how you want to use the space, such as for outdoor dining, cooking, or sitting by a fire pit. This list helps you find the total square footage you need.
  2. Measure your yard. Mark the edges of your lawn, trees, and gardens. Use these sizes to see how much flat space you have for paving.
  3. Stitch zones together. Arrange your zones so that the cooking area is close to the house door. Place lounging and fire pit areas further out in the yard for a quiet feel.
  4. Outline the shape with stakes. Use wood stakes and string to mark the patio edges in your yard. Use garden hoses if you want to test curved shapes.
  5. Test the traffic paths. Place your outdoor chairs and tables inside the outlined area. Walk around the furniture to make sure your paths are wide enough for guests to move around.

Adding Fire Pits, Outdoor Kitchens, and Borders to Your Patio

A well-planned outdoor space is more than just a flat stone surface. Homeowners can use fresh paver patio ideas to turn a simple backyard into a lively outdoor living room. Adding key features like a built-in fire pit, a stone outdoor kitchen, or a custom seating wall helps to zone your yard for different uses. Each feature works to draw people in, making the patio an active hub for outdoor life.

Defining Space with Custom Borders and Coping

A contrasting border or custom coping acts as a frame for your patio layout. Using different paver colors, textures, or sizes defines the outer edge of your patio and separates it from the surrounding lawn. This border gives the entire design a polished, high-end look. Beyond style, borders also keep your edge pavers locked tightly in place.

Within the patio, low built-in sitting walls do double duty. They give you extra seating around a fire feature while they zone the space. For instance, a low wall can split a cozy fire pit lounge from a busy cooking area. This smart zoning keeps your foot traffic moving smoothly during backyard parties.

Integrating a Fire Pit and Outdoor Kitchen

When you plan to build heavy features like a stone fire pit or a stone outdoor kitchen, proper ground work is key. For any durable patio, the choice to build a solid paver base is the most important first step. Heavy stone features put extra weight on the soil. This weight can cause pavers to sink or shift over time if the base is weak. Proper base prep ensures that your cooking and lounging zones stay stable for years to come.

Managing Slope and Drainage for Heavy Features

Managing water runoff is another key detail when adding fixed stone features. Using permeable surfaces around your outdoor kitchen or fire pit helps rain soak directly into the ground. This cuts standing water and stops soil erosion around your heavy stone structures. A study on hardscaping from Clemson University Extension shows that permeable hardscapes let water soak into the soil instead of creating runoff. This simple change helps to fill local groundwater.

To keep these surfaces working well, the work site must meet tight rules. According to university guidance on permeable hardscapes, pervious pavers work best on slopes under 2%. That is a one-foot drop for every 50 feet of length. Also, builders must leave two feet of space between the bottom of the base and any bedrock or the water table. Following these rules ensures that your custom patio stays dry, level, and safe in Long Island’s changing seasons.

Do Paver Patios Need a Solid Base and Maintenance?

Do you want your outdoor living area to stay beautiful and stable for years to come? Yes, every successful backyard design needs a strong base and regular care to last. When you explore different paver patio ideas, you must plan for what lies beneath the surface. Knowing how to prep the site and keep it clean will save you time and money.

Why base preparation determines patio lifespan

Long Island gets intense freeze and thaw cycles. This shift in the weather causes the soil to expand and shrink. To stop shifting, you must build a solid paver base with deep gravel layers. Proper base prep is key to help your patio last in this local climate. Without it, your stone layout will sag, crack, or become uneven over time. A strong gravel bed drains water away quickly to protect the joints.

A standard build begins by digging deep into the ground. Most yards need about six inches of crushed stone under the pavers. This stone layer must be packed down with a heavy machine. Packing the gravel creates a hard surface that will not budge under heavy foot traffic.

Siting rules for permeable paver installations

Using permeable stone can improve your yard. These systems let rain soak into the ground to reduce runoff. According to Clemson University, these surfaces let water soak back into the earth. But you must place these systems on the right land. Permeable designs work best on gentle slopes of under two percent. A slope steeper than this will not let the water drain straight down. Also, you must keep at least two feet of space between the stone base and bedrock or the water table. This gap ensures that the filtered water can seep safely back into the earth.

Proper water drainage keeps your lawn healthy. When water pools on top of your stones, it can flood your gardens. It can also seep toward your house foundation to cause wet basements. Permeable stones solve this problem by directing storm water down into the soil. This natural flow prevents erosion and keeps your outdoor space dry.

Routine steps to keep your patio clean

Once your patio is built, regular care is simple but vital. You should sweep loose leaves, dirt, and debris off the stones every week. This habit stops organic matter from staining the stone surfaces. Next, wash the stone with a garden hose and a mild soap to remove tough grime. Keeping the joints filled is another key step.

You can secure the stones by finishing your patio joints with polymeric sand. This special sand hardens when wet to block weeds and ants. To protect against stains and frost damage, you should seal and protect your paver patio every one to three years. Sealing keeps the colors bright and keeps water from breaking down the concrete or natural stone.

Have questions about your project? Call (631) 831-3177 for expert guidance.

Frequently Asked Questions

What are the most durable patio pavers?

Granite pavers are the most durable option for your yard. This natural stone resists wear, chipping, and cracks from the cold winter freeze. Natural concrete pavers also offer high strength and come in many shapes. Proper base setup is key to keep them from shifting over time.

How do you maintain patio pavers?

To maintain your pavers, sweep them often to clear dirt. You should also fill the joints with polymeric sand to block weeds. Sealing your patio every one to three years will protect the stone from salt, oil, and the winter freeze. Read our guide to seal and protect your paver patio for best results.

What are some paver patio ideas on a budget?

For a low-cost patio, you can use gravel or crushed shell instead of full stone. These materials cost less and let water drain back into the soil. According to the Clemson University Cooperative Extension, a grid system can help hold these loose materials in place for a solid walkway.

How can I design a patio with fire pits and pavers?

You can center your design around a focal point by using circular paving patterns for your fire pit. Using a different brick color for the borders will help separate the fire area from your dining space. This layout keeps the yard organized and safe for your family.

Ready to design your ideal Long Island paver patio?

Putting off your project means missing out on prime warm weather and outdoor fun next year. If you wait until spring to start planning, busy build schedules and cold weather ground shifts will delay your job. Designing your yard now ensures that the hard work is done before the first warm day of the season. Our team handles every step from base prep to the final layout to make sure your stone patio looks great and stays stable. Do not let another year go by wishing you had a space to gather with your friends and loved ones.

Ready to build? Call (631) 831-3177 to schedule a free paver patio consultation with Gappsi Group.

Weatherproof outdoor kitchen cabinets with stainless steel grill and stone veneer on a Long Island bluestone patio

Outdoor Kitchen Cabinets Built for Long Island Weather

Salt air from the Atlantic Ocean can corrode low-grade metal fixtures within a single humid summer. For Nassau and Suffolk County homeowners, choosing the wrong backyard setup leads to warped frames and rust.

Call (631) 831-3177 to plan durable outdoor kitchen cabinets with our design team.

Outdoor kitchen cabinets on Long Island must use durable, weatherproof materials to withstand salty ocean breezes, high summer humidity, and harsh winter freeze-thaw cycles. Marine-grade polymer is a durable, non-porous option that never rots, splits, or swells, while 304 and 316 stainless steel offer strong, rust-resistant cabinet setups.

For built-in masonry structures, sealed concrete bases and stone veneer cladding match local patios well and provide stable protection against heavy snow and ocean moisture. You should avoid standard wood composites and low-grade plastics because they quickly fade, warp, or decay under the hot summer sun and damp coastal air. Selecting these weather-resistant materials ensures your backyard kitchen remains functional and beautiful for many years.

How do you find the right setup that stays beautiful and functional against salty ocean air and freezing snow? Start by understanding why Long Island weather demands weatherproof outdoor kitchen cabinets, then compare the materials that stand up to this climate before you plan your backyard build.

Why Long Island Weather Demands Weatherproof Outdoor Kitchen Cabinets

Building a cooking space in your backyard is a great way to enjoy the warm months on Long Island. But Nassau and Suffolk Counties have a harsh coastal climate that puts huge stress on your home. To make your space last, you must choose durable materials over style alone. Finding outdoor kitchen cabinets that can survive the salty wind, wet air, and freezing winters is critical.

The toll of salt air and high humidity

If you live near the water, you know how tough coastal air can be. The outdoor kitchen services we offer help you choose products that can stand up to these conditions. High moisture is common across Long Island, and this wet air is full of ocean salt. This harsh salt-air environment is a major cause of rust and corrosion on standard metals.

Standard metals will quickly rust, flake, and fall apart without proper care. Cheap wood or thin plastic will also warp and peel when the humidity stays high for weeks. For example, standard wood composite panels require special resins and wax to stay stable. But research from the Oklahoma State University Extension shows they still swell and rot in wet outdoor settings.

Freeze-thaw cycles and winter weather

Summer is not the only season that can damage your backyard setup because Long Island winters are cold, wet, and windy. The ground and your backyard structures go through many freeze-thaw cycles every year. When water gets into small cracks in your cabinets, it turns to ice and expands. This constant expansion can split cheap wood, crack stone, and pull cabinet joints apart.

Your doors and drawers can also become hard to open. Standard hardware like hinges and slides will quickly rust or bind when exposed to these cold, wet months. To keep your kitchen working well, you must invest in corrosion-resistant hardware made from high-grade steel or tough polymer. These parts are made to move smoothly even after years of winter snow and ice.

Weather resistance over style choices

When you design your space, it is easy to focus on style. You might want a look that matches your indoor kitchen. But you must prioritize weather resistance over aesthetic preference to prevent your kitchen from failing too soon. Standard indoor cabinets will rot, mold, and break down within a year if left in the open wind and rain.

Choosing strong, durable products is the only way to protect your investment. When you use materials like marine-grade polymer, thick stone, or top-grade stainless steel, your kitchen stays strong for decades. It will keep its shape, keep your tools dry, and look great season after season. Starting with the right weather-proof cabinet choices will save you time, money, and stress in the future.

What Is the Best Outdoor Kitchen Cabinets Material for Coastal Air?

Choosing materials for outdoor kitchen cabinets on Long Island is a task of style and science. Salt air and high moisture can soon destroy standard indoor parts. To build a space that lasts, you must find how cabinet options stand up to coastal weather. Our local shore environment demands materials that resist salt rust and winter freeze cycles.

Material durability comparison

This overview shows how the four main families of cabinet materials perform in our local climate. Each material has distinct strengths and weaknesses when exposed to salt water and winter freezes.

Material Salt-Air Resistance Freeze-Thaw Maintenance Best For
Marine-grade polymer Excellent Excellent Very low Coastal homes
Stainless steel (304/316) Good to excellent Excellent Low to medium Sleek modern looks
Sealed concrete Excellent Excellent Low Stone design matching
Wood and PVC Poor to moderate Moderate High Sheltered spots

Not sure which family of outdoor kitchen cabinets fits your yard best? Call (631) 831-3177 for a free material recommendation.

Marine-grade polymer performance

Many homeowners choose marine-grade polymer for their coastal kitchens. This plastic is fully non-porous, so it will not crack, swell, or rot in damp air. It is made to resist bad weather and needs very little care to keep its clean look.

If you want a stress-free setup, you can learn more about weatherproof outdoor kitchen cabinets that use this plastic. Because the color goes all the way through the material, scratches do not show easily. You can clean these cabinets with a simple spray from a garden hose.

Stainless steel and sealed concrete strength

Metal cabinets offer a sleek look and withstand high heat. But stainless steel can rust in salty coast air if you do not care for it or if you use the wrong grade. To stop rust, you must use 304 or 316 stainless steel.

These exact grades give the best shield against salt-water rust on the shore. Adding a powder coat is another wise choice. A powder coat baked onto the metal seals the surface and blocks salt air.

If you prefer a stone look, sealed concrete is a strong choice. When sealed the right way, concrete stands up to wet air and is highly heat-resistant. It gives your cooking space a bold look that does not wear down from cold winter freezes.

You can also cover the concrete base with a stone veneer. This natural stone veneer ties the kitchen style into your yard paving and masonry.

Wood and PVC challenges

Natural wood and PVC plastics present key trials in coastal areas. Teak wood resists rot because of its natural oils, but it still needs constant oiling to keep its color and stop splits. On the other hand, PVC is cheap and resists water, but it can warp when exposed to intense summer sun.

Over time, high heat makes cheap PVC sag and lose its form. This warping can prevent the doors from closing tightly, which lets damp sea breeze reach your stored items.

Standard indoor wood composites are even worse for outdoor use. Research from Oklahoma State University shows that wood composite panels like particleboard need special glue and wax to keep their shape.

Even with these binders, these panels absorb moisture and swell up, which leads to quick cabinet ruin when placed near the ocean. Using indoor grade panels outside is a mistake that leads to costly repairs.

Marine-Grade Polymer vs Stainless Steel: Which Lasts Longer?

Indoor cabinets often use wood composite substrates. Standard wood boards need wax and resin to stay stable, as shown in Oklahoma State University research. But outdoor spaces face much harsher conditions. For a coastal backyard, you need materials that are completely waterproof and rustproof. Marine-grade polymer and stainless steel are the two top choices for outdoor kitchen cabinets. Both resist water, but they handle salt air and heat in very different ways.

The strength of marine-grade polymer

Marine-grade polymer is a dense plastic that cannot absorb water. Because it is non-porous, it will not crack, swell, or rot when exposed to snow and rain. This material has UV blockers to stop fading from the sun. Salt air on Long Island will not corrode polymer cabinets. You can clean them with a quick hose-down. They do not need painting, staining, or sealing. For homeowners who want a clean look with minimal work, this material is hard to beat.

The limits of stainless steel in coastal air

Stainless steel offers a sleek, modern look. It is very strong and stands up to hot grills and heavy use. But coastal air is tough on metal. Salt can cause rust on steel cabinets if you do not clean them often. To prevent rust, you must choose the right grade of metal. High-end brands like Danver build their doors and boxes from 304-grade stainless steel, and they offer 316-grade stainless steel for coastal homes. These high-grade metals resist rust, but they still need to be wiped down to remove salt buildup.

Warranty and maintenance differences

Warranties often show how long a material will last. For example, Danver offers a lifetime warranty on their outdoor cabinets, and a five-year limited warranty on their powder-coat finishes. Marine-grade polymer cabinets also come with long warranties because they do not decay. When it comes to care, polymer is the clear winner. You only need mild soap and water to keep polymer clean. Stainless steel is more demanding. It must be wiped down with special cleaners to prevent tea staining and rust spots near the ocean.

How to choose the right look

Both options can look great in your yard. Stainless steel gives a bright, commercial kitchen feel. Polymer can be made in many colors and door styles to match your home. If you want to see these choices in person, you can visit the Gappsi showroom in Smithtown, New York. Our team can help you compare both options to find the best fit for your yard.

Do Stone and Masonry Cabinets Hold Up to Freeze-Thaw Cycles?

Long Island winters bring harsh cold and deep frost. If you build your outdoor kitchen cabinets with the wrong materials, they will not last. Stone and masonry are the oldest building methods for a reason. When built with care, these materials can easily survive many seasons of freezing and thawing.

The freeze-thaw threat on Long Island

Freeze-thaw cycles happen when water gets into a material and freezes, expanding to put huge pressure on the structure. As shown in research on wood composite panels, indoor wood needs wax and resin to stay strong. But these wood products still fail fast in wet, freezing air. If water enters tiny cracks, ice will push the pieces apart.

Proper masonry resists this damage because stone does not soak up water easily. Solid stone and brick structures form a shield against wet weather. Gappsi brings authentic Italian masonry craftsmanship to every build to ensure your outdoor kitchen stays dry and tight. Since we started in 1987 in Smithtown, we have designed kitchens that stand up to the local weather.

Weatherproof core construction

The secret to a durable masonry kitchen is a strong core. We construct the frame of the cabinets using concrete block or poured concrete. As noted on the Gappsi outdoor kitchen page, sealed concrete is highly durable and heat-resistant for outdoor kitchen cabinet structures. This solid core does not warp, rot, or burn when you cook.

To keep water out, we apply a waterproof seal over the concrete base. We also use the right type of mortar to fill any gaps where water might pool. Without this seal, freezing water would crack the mortar and loosen the structure over time. We seal the joints with strong sealants that do not shrink or pull away.

Stone veneer and natural finishes

Once the core is built, we apply the outer finish. Stone veneer can be used to clad outdoor kitchen cabinets to match your existing landscape design. You can choose natural stone veneer, brick, or concrete pavers. These outer layers protect the core and give your yard a classic look.

Working with masonry allows you to create a unified outdoor space. Our team blends the kitchen walls with your patio pavers and pool decks. We combine our masonry and paving craftsmanship to build a space that lasts for decades. You can see these stone options at our local showroom to find the perfect fit.

How Should Outdoor Kitchen Cabinets Be Ventilated and Laid Out?

Planning the setup of outdoor kitchen cabinets requires more than just choosing materials. To make a space that is safe and works well, you must focus on air flow and layout. Proper setup stops heat buildup and protects your cooking area.

Ventilation for gas safety

Safety is the first step in any outdoor setup. Gas grills and cooktops produce heavy fumes and heat that can build up inside enclosed spaces. If you use gas appliances, you must make sure that all cabinet designs include enough ventilation to comply with local safety codes. Vents on the sides or back of your outdoor kitchen cabinets let these gases escape. Without proper vents, gas can collect under your grill and create a fire hazard.

You must also plan clearances around your grill. Heat from cooking can damage your countertops or cabinets if they sit too close. Leave enough space between the grill and other units to keep the surfaces cool. Using fireproof materials like concrete or stone veneer can also help prevent heat damage.

Functional workspace layouts

A good layout makes outdoor cooking much easier. The classic work triangle connects your grill, prep area, and sink. Placing these parts in a smooth sequence keeps your cooking workflow easy. You should have enough counter space next to your grill to plate food and prep meals.

  1. Confirm appliance clearances first so heat and flame stay away from cabinetry and countertops.
  2. Route plumbing and electrical before framing, leaving service access panels for future repairs.
  3. Balance the work triangle so the grill, sink, and prep area form a short, efficient path.
  4. Seal every joint between cabinets, walls, and appliances to keep wind, pests, and water out.

Plumbing and electrical lines need a clear plan before you set up any cabinets. Your sink cabinet must have easy access for pipe repairs. Water can collect under the sink because of small leaks or humidity. To protect your storage, you should use a rubber under-sink mat with a lip to catch any spills. This simple step prevents water damage and keeps your stored items dry through the humid coastal months.

Gaps and hardware details

Outdoor setups often have gaps between the cabinets and the nearby structures. Wind, dirt, and pests can get into these spaces if you leave them open. You should use filler and closure panels to close spaces between cabinets and walls or other appliances. These panels give your kitchen a finished look and block dirt from piling up in hard-to-reach areas.

Lastly, you must choose the right hardware for your doors and drawers. Coastal air can quickly damage standard metal parts. You should avoid basic steel hinges that rust and bind after a few months. Instead, choose stainless steel or polymer-coated hardware for all drawers and hinges to keep them working smoothly. This hardware is tough against salt air and damp weather. If you want to see these tough materials in person, you can visit our showroom to explore your options.

How Much Do Weatherproof Outdoor Kitchen Cabinets Cost on Long Island?

Building a kitchen outside on Long Island is a big project. You might want to know the cost of outdoor kitchen cabinets first. This cost is not fixed. It changes based on the size of your yard and the materials you pick. But choosing the right material is more important than how it looks. When planning your layout, choosing durable outdoor kitchen cabinets is the best way to prevent early cabinet failure.

Factors driving the upfront investment

The total price of your project depends on your specific choices. A small setup with few doors costs less than a large, curved island. Materials also play a major role in the initial price.

For instance, standard indoor wood cabinets are cheap but will rot fast outside. They use low-cost wood composite sheets that fail in wet air. These cheap panels often rely on urea-formaldehyde glue, which cannot handle moisture. You can read about how wood composite sheets are made for indoor use. To build a kitchen that lasts, you must invest in outdoor materials. Materials like marine-grade polymer or 304 stainless steel have a higher upfront cost, but they are built to last.

Why durable materials save money over time

Long Island has a harsh coastal climate. The salt air accelerates corrosion, which quickly ruins cheap metal hinges and drawers. In winter, the freeze-thaw cycles crack weak plastics and split standard wood.

If you choose cheap cabinets, you will have to replace them in just a few years. That means you pay for parts and labor twice. Investing in strong, weatherproof materials costs more on day one, but it saves you from constant repairs. These specialized materials do not rust, warp, or crack under the sun and snow. By choosing tough products, you protect your wallet for decades to come.

The Gappsi design-build advantage

When you plan an outdoor kitchen, you often have to deal with many contractors. One person designs the space, another pours the concrete, and a third sets up the plumbing. This can lead to costly mistakes and delays.

Gappsi offers a seamless design-build process that handles everything from start to finish. Since 1987, Gappsi has been designing and building custom outdoor living spaces on Long Island. We start with a 3D design so you can see your kitchen before we build it. Then, our own team carries out the work. This keeps your costs clear and prevents errors. You do not have to pay multiple fees to different workers. To get started on your custom yard layout, you can contact Gappsi for a project quote.

Still deciding between marine-grade polymer, stainless steel, and masonry for your coastal yard? Call (631) 831-3177 for a free materials consultation.

Frequently Asked Questions

Which outdoor kitchen cabinets are best for salt air?

Marine-grade polymer and grade 304 or 316 stainless steel are the best choices for coastal areas. Marine-grade polymer is non-porous and does not rust, crack, swell, or rot. Stainless steel resists rust but needs regular cleaning. The Gappsi outdoor kitchen guide explains that salt air speeds up metal rust, which makes these materials necessary.

Can I use wood for outdoor kitchen cabinets on Long Island?

You can use teak wood, but it needs a lot of care. Teak resists rot because of its natural oils, but it will turn gray unless you oil it regularly. Other wood products, like particleboard, will fail fast. According to an Oklahoma State University study, standard wood-composite panels need special wax and resins to hold their shape and are meant for indoor cabinets.

Do stone and masonry cabinets hold up to freeze-thaw cycles?

Yes, masonry and stone cabinets are highly durable against freezing weather. Gappsi uses stone veneer to clad outdoor cabinet bases, which matches your home landscape. Concrete cabinets must be sealed properly to protect them from water and temperature swings. Choosing these tough materials helps prevent cracks during the cold Long Island winters.

Does outdoor kitchen cabinetry need ventilation?

Yes, proper ventilation is vital for safety. This is especially true for cabinets that hold gas appliances. Vents stop gas and heat from building up inside the cabinet spaces. You must use vents that meet local safety codes. Investing in stainless steel or polymer-coated hinges keeps your doors working in the humid air.

Ready to build your weatherproof outdoor kitchen?

Winter freeze and coastal salt air will quickly warp and rust cheap outdoor kitchen cabinets. Delaying your custom kitchen project means you miss out on cooking outside with your family this season. If you start planning now, Gappsi can design and build your new weatherproof space before the next big holiday.

Our Smithtown team has designed and built custom outdoor spaces on Long Island since 1987. We use durable materials like marine-grade polymer and stainless steel to make sure your setup lasts. We invite you to visit our local showroom to see these rugged materials in person. Do not let another warm month go by with an empty or bare backyard patio.

Ready to get started? Call (631) 831-3177 to schedule a free outdoor kitchen consultation.

A newly installed interlocking concrete paver driveway in front of a Long Island home

Driveway Pavers on Long Island: Cost, Materials, Design

Harsh Long Island winters will crack standard concrete and asphalt driveways within just a few years. Shifting to driveway pavers prevents this costly damage because they move with the freezing soil.

Driveway pavers are interlocking concrete or stone blocks that make a strong, beautiful path for cars. On Long Island, a new paver driveway usually costs between $15 and $40 per square foot. This price depends on the material type, the size of your yard, and the design pattern you choose. Homeowners can choose durable materials like natural bluestone, travertine, or concrete blocks. Unlike solid concrete, these individual pieces shift naturally with the freezing soil so they do not crack during cold winters. Permeable designs also help drain stormwater and prevent ice puddles from forming on the surface. Using a professional design-build company ensures proper excavation, base prep, and edge restraints so the driveway lasts for decades.

Before starting your project, you need to understand the planning steps and the financial investment for your home. You must consider the size of your driveway and the materials you want to use. To start planning your budget, let us examine What Does a Paver Driveway Cost on Long Island?

What Does a Paver Driveway Cost on Long Island?

A new driveway is a major home update that adds curb appeal and value. If you want to use paver patio and driveway services to install driveway pavers, you must first plan your budget. On Long Island, the final price depends on several local factors and your choice of materials.

Call Gappsi at (631) 831-3177 to schedule a free paver driveway consultation.

Key cost factors for paver driveways

Your choice between concrete and natural stone often depends on budget, upkeep, and the look you want. Concrete pavers offer a highly uniform fit and cost less. Natural stone looks unique and beautiful but costs more to buy and install.

Three main things drive the cost of your project. These are the type of stone or concrete, the design complexity, and the total area size. Precast concrete paver installation costs include all labor, equipment, and material transport as shown in state specs. Selecting simple layouts and local materials can help keep your costs low.

Square foot pricing on Long Island

To budget properly, you need to understand the costs for different project sizes. A small two-car space of 20×20 feet is 400 square feet. Basic concrete pavers for this size cost between 6,000 and 12,000 dollars, which covers subbase prep, sand, and pavers. If you select natural stone, the cost for this small area can rise to 16,000 dollars or more due to higher material prices and extra labor.

For larger estate properties, a 2,000 square foot driveway is common. A driveway of this size using concrete pavers will usually cost between 30,000 and 60,000 dollars. If you choose natural stone, the price can exceed 80,000 dollars. These larger projects also need more excavation, soil removal, and base gravel, so you must always work with a skilled team.

Necessary permits and construction add-ons

Beyond the pavers and labor, you must budget for specific local rules and construction add-ons. For example, if you build in the Town of Huntington, you will need a permit. You must also submit a hold harmless agreement with Suffolk County as shown on the town portal. This is because installing pavers in a public right-of-way can alter public land, but filing early prevents delays.

Another common add-on is a concrete apron where the road meets your driveway. This apron is often needed to protect the strength of both the road and your driveway. A solid apron prevents the edge of your new paver driveway from shifting under the weight of heavy cars turning in from the street. These details may add minor costs, but they ensure your investment lasts for decades.

Is It Cheaper to Choose Pavers or Concrete for a Driveway?

Choosing a new driveway is a big choice for Long Island homeowners. Many people focus only on the upfront price when they start. But a smart property owner looks at the overall value over many years. While some materials cost less on day one, others save you money on upkeep and repairs down the road.

Upfront installation costs

Standard concrete or asphalt often has a lower price tag when you first build it. Precast concrete paver installation costs include labor, tools, and hauling materials to your yard. According to state guidelines, concrete paver installation costs cover all of these steps as a package deal. Because of this first work, driveway pavers need a larger investment at the start than poured concrete or asphalt.

But the first price tag is not the whole story. You must also consider how long each option lasts. To help you choose, here is a quick breakdown of how these materials compare across key areas.

Material Upfront cost Lifespan Durability & aesthetics Maintenance Repair ease Freeze-thaw
Concrete pavers Higher initial cost 30 to 50 years Very high durability, clean look Occasional sand top-off Easy to swap single units Excellent, shifts with ground
Poured concrete Moderate initial cost 20 to 30 years Good but prone to cracking, plain Sealing every few years Hard, patches are visible Poor, rigid slabs crack
Standard asphalt Lowest initial cost 15 to 20 years Low durability over time, dark look Frequent seal coating Easy to patch but looks uneven Moderate, softens in heat

Material durability and ground movement

Concrete pavers offer superior durability and clean looks when you compare them to basic blacktop. In cold Long Island winters, the soil below your driveway freezes and thaws. Rigid materials like solid concrete often crack under this pressure because they cannot bend. But interlocking driveway pavers are different.

These systems adapt to minor ground movement without cracking because the joints between them are flexible. Sturdy materials combined with a solid setup give you a long-lasting driveway that outperforms standard asphalt in the long run. If one stone gets stained or damaged, you can just swap out that single piece for a new one.

To find the right look for your home, you can read our guide on how to choose the best driveway pavers for your project. Proper paver maintenance and sealing also keeps colors bright and shields the surface from oil stains.

If you want a beautiful, long-lasting entrance to your home, we can help. Call Gappsi today at (631) 831-3177 to schedule a free paver driveway consultation.

The Best Paver Materials for a Long Island Driveway

Choosing the right materials for your new driveway is a big choice. Long Island homes need durable surfaces that look great and last for decades. Before you look at colors or styles, you must focus on strength. Not all stones are made for cars, so you must pick the right products to avoid cracks and shifting.

Why vehicular-rated pavers matter

A driveway has to support tons of moving weight every single day. Because of this, the installation of heavy-duty pavers made for car traffic is needed for driveways. This is different from thin slabs used for foot paths, which will crack under a car. Choosing heavy-duty best driveway pavers for your project keeps your driveway safe.

These thick pavers resist shifting and sinking when cars turn. If you use thin stones, they will break within a year because they are not made to handle wheel loads. Instead, heavy-duty units distribute weight across a thick bed of stone and sand. This layout stops rutting and keeps your driveway flat.

Interlocking concrete pavers

For most homes on Long Island, concrete blocks are the top choice. These units are a solid pick because they are manufactured to be uniform in size and shape. This high level of detail ensures a tight, consistent fit during installation. They fit together like a puzzle to spread out the load from heavy trucks.

Concrete blocks also give you great design choice. These concrete pavers come in a range of colors and textures that can mimic brick or natural stone. You can get the look of old brick or granite without the high price. The New York State DOT rules show that these precast blocks must meet strict limits for public roads.

Interlocking concrete driveway pavers laid in a herringbone pattern with sand-filled joints
Interlocking concrete pavers laid in a herringbone pattern stay locked under heavy vehicle loads.

Natural stone and clay brick

If you want a classic look, natural stone is a top option. Natural stone pavers like bluestone or travertine give a unique, upscale look that fits classic and modern home designs. Bluestone offers rich blue and gray tones, while travertine gives warm beige colors. Both materials are dense and strong when you buy the correct thick cut.

Clay brick is another traditional path. Genuine clay bricks are made from baked earth and hold their color for decades. You can also mix natural stone with concrete borders to get a custom design. This blend gives you a custom look that stands out.

How to choose the best material

Your choice between concrete and natural stone pavers often depends on budget, care needs, and how you want them to look. Concrete blocks cost less to buy and install, and they are also easy to clean. Natural stone costs more but adds rich style. Think about how much time you want to spend on sealing and cleaning before you buy.

Concrete needs regular seal coats to block oil stains. Natural stone needs less care but can be harder to install. Talk with a local design-build expert to see which stone works best for your home. Making the right choice now will keep your driveway looking beautiful for many years.

How a Driveway Paver Installation Is Built to Last

Building a driveway that can handle heavy trucks takes careful work. Every step must be done right to make sure your driveway pavers do not sag or shift. The weight of cars can easily push stones out of place if the soil is weak. The work starts with a deep plan for the dirt beneath the stone.

The role of a strong base

Before the first stone is set, crew members must dig out the old driveway. They remove the soft topsoil to reach the hard earth below. In public road works, the State of New York bills excavation and subbase course work as distinct tasks. This shows how key these steps are for any road or driveway build. A solid base is the main thing that stops a driveway from sinking. If you skip this step, the stones will shift when the ground freezes and thaws in the cold winter. To keep your stones flat for years, you must prepare the ground well.

Why edge and apron support matters

A great driveway does not just sit on the ground. It must connect to the street with a strong, safe edge. Many towns have strict rules about how you link your driveway to the road. A poor edge lets the pavers slide out when cars turn on them. Using concrete support near the street keeps the whole system locked tight. This makes sure the borders of your new driveway stay in place for a lifetime.

The key steps of the build

To build a strong path, you should follow this clear process:

  1. Digging the site: Crews dig down to a set depth to make space for the base layers and your driveway pavers. This dig gets rid of soft dirt that cannot hold heavy loads.
  2. Geotextile fabric stabilization: Laying a geotextile fabric over the raw soil keeps the dirt from mixing with the gravel base. This step helps make the base strong and stops weeds from growing up.
  3. Compacted gravel subbase: Packing down a thick gravel layer is the most vital step of the build. This compacted gravel subbase supports heavy vehicle traffic without shifting.
  4. Bedding layer placement: A thin, flat layer of clean sand is spread over the packed gravel to form a smooth bed. See our guide on the best driveway pavers for your project to pick the right stone type.
  5. Laying vehicular pavers: Workers place the thick stones close together in your chosen pattern. Using tough vehicular pavers ensures they will not crack under the weight of large trucks.
  6. Edge restraints and concrete apron: Strong edge restraint pieces are set along the sides to lock the stones in place. A concrete apron where the driveway meets the street is also a common rule to keep the structure strong.
  7. Polymeric sand joint filling: Sweeping polymeric sand into the joints blocks weeds and locks the stones in place. For more care tips, see our guide on paver maintenance and sealing.

How Driveway Pavers Stand Up to Long Island Winters

Long Island winters bring harsh freezing and thawing cycles. Standard asphalt and concrete often crack under these cold weather stresses. But interlocking driveway pavers bend with the ground to prevent damage. This flexible design stops the surface from cracking when the soil freezes.

On Long Island, freeze-thaw damage is a constant threat to driveways. When water gets into tiny pores in asphalt or concrete, it expands as it freezes. This creates pressure that leads to deep cracks and surface crumbling over time.

Freeze-thaw cycle protection

Expert installers use setting beds, joint materials, and sealers that meet state standards. For example, the New York State Department of Transportation sets standards for precast concrete block pavers and sealers. These state installation rules ensure the materials can handle heavy winter loads.

Applying a proper sealer is a key step in protecting your stone. Sealing driveway pavers helps to lock in their rich color and block oil or gas stains. Also, a good seal keeps water from soaking into the stone. This protects the driveway from winter cracking.

Unlike solid concrete slabs, interlocking systems use many small stones. The joints between the stones let them shift slightly without breaking. This means the driveway can adjust to minor ground movements when the soil freezes and shifts in winter.

Drainage and ice prevention

Winter weather often leaves pools of water on driveways that turn into slick ice sheets. Paver driveways solve this problem because they drain water well. They work even better when you use permeable joints.

Choosing permeable pavers is a smart way to handle heavy rain. These stones let rain and melting snow flow straight down into the soil. This fast drainage keeps water from pooling and forming slick ice patches.

When you shovel or plow snow, the flat surface of the stones makes the job simple. You do not have to worry about catching on deep cracks as you would with old concrete.

Permeable joints let water drain straight into the base below. This stops water from running off the driveway and flooding your yard. It also prevents ice from forming on the edges of your property where melting snow piles up.

Ongoing maintenance and easy repair

Even with great care, winter wear can sometimes damage a driveway. If a standard concrete driveway cracks, you often must replace the entire slab. But pavers are much easier to fix. You can remove and replace single stones if they get stained or broken.

Taking care of these stones is very easy compared to other driveway types. You do not need to patch cracks with ugly black tar. If a single stone is damaged by a plow, an installer can swap it out quickly.

Keeping your driveway in top shape through the winter needs very little work. Regular care mostly means sweeping, power washing, and adding new sand to the joints. Keeping up with paver maintenance and sealing will make sure your driveway looks great and lasts for decades.

Design and Value: Making Driveway Pavers Work for Your Home

Your driveway is the first thing guests see when they visit your house. Choosing driveway pavers can turn a plain front yard into a charming entrance. These stone or concrete blocks enhance home value and visual appeal, which makes them a smart choice for people on Long Island. A custom layout lets you match your yard to your own taste.

Choosing Your Layout Pattern

You can choose from many different ways to lay your stone. The pattern options range from a classic herringbone layout to modern, geometric layouts. A herringbone pattern holds up well under the weight of heavy cars because the blocks lock in place. This keeps the stones from shifting when you drive on them daily.

Geometric layouts use clean lines and neat angles to give your yard a fresh, sleek style. If you have a curved driveway, these stones fit with ease. Skilled builders can arrange the pieces to follow smooth curves without making too many messy cuts. This curved style gives your yard a softer, more natural look. You can also mix other shapes to make a style that is unique to your home.

To make the edges stand out, you can add border stones with accent colors. Many homeowners add borders or dark colors to define the edges of their drive and add visual appeal. These borders frame the driveway and make the pattern in the middle pop. They also guide the eyes of your guests toward your front door.

Built-In Lighting and Edges

Good design is about more than just the stones. Expert planning can build light fixtures and plant beds right into the border of the drive. Placing small lights along the edge makes the driveway safe to use at night and shows off the path. Solid stone borders also keep your lawn soil from washing onto the driveway when it rains. This keeps your yard looking neat after big storms.

Before you build, you must check local rules. For instance, if you plan to lay paver blocks in a town right-of-way, you must follow local laws. In the Town of Huntington, you need a permit if you use pavers near the road. You must also sign a hold-harmless deal with Suffolk County. Knowing these rules early keeps your job on track and avoids legal delays.

Matching Your Whole Yard

To get the best results, your new drive should match the rest of your outdoor space. Skilled builders like Gappsi offer full landscape design and installation to make sure your new driveway fits your whole yard. A single plan links your walkways, patio, and drive into one great space.

Working with one team for design and setup keeps the project simple. The builders will make sure the stones fit your home shape, house color, and garden beds. This approach boosts your street appeal and increases your home value.

Call (631) 831-3177 for a free driveway paver estimate today.

Frequently Asked Questions

Do paver driveways need a concrete base?

No, a concrete base is not needed. Instead, a strong driveway relies on a deep, packed gravel subbase and a geotextile fabric layer. This base lets the interlocking pavers shift slightly during freeze-thaw cycles and under heavy vehicle weight. According to Gappsi, this design lets the surface absorb soil movement without cracking, unlike standard poured concrete.

How long do paver driveways last?

When built with proper care, a paver driveway can last thirty to fifty years. This lifespan far outperforms standard asphalt. Their long life comes from strong stone and easy repairs. If a single block gets stained, you can remove and replace just that piece. Regular cleaning and paver maintenance and sealing will also protect the colors from winter frost and vehicle oil.

Do you need a permit for a paver driveway on Long Island?

Yes, you often need a permit if your project touches public property. For example, installing driveway pavers in a town right-of-way, like in Huntington, needs a permit. You must also submit a hold harmless agreement to Suffolk County. According to the Town of Huntington, this rule applies to any custom pavement like pavers or stone blocks. Always check with your local town hall before you start work.

How long does it take to install a paver driveway?

Most driveway paver projects take about three to seven days to complete. The exact time depends on the size of your driveway and the design you choose. First, the team must excavate the old surface and pack the gravel base. Laying the stones goes fast once the base is ready. Finally, the team fills the joints with polymeric sand and seals the surface. Bad weather can also add a few days to the job.

Ready to design and build a better paver driveway?

An old asphalt or cracked concrete driveway does more than hurt your home’s curb appeal. Leaving a cracked or broken driveway through next winter lets water sink deep into the soil. When this water freezes, it expands and shifts the dirt under the driveway. This ruins the base support and makes building a new paver driveway cost much more.

If you start your project now, you can avoid these costly issues and secure your booking. Gappsi handles the full design-build process from expert excavation and base prep to placing the final stone borders. Our team will help you select the best driveway pavers for your project and complete the layout before the harsh cold weather arrives.

Ready to start? Call (631) 831-3177 to schedule a free paver driveway consultation.

A pergola installation in progress over a backyard pool in Long Island.

How Long Does a Pergola Install in Long Island Take?

Adding a pergola is a wonderful investment in your home and your lifestyle, creating a perfect spot for making memories. But a quality investment requires a quality process, and that process takes time. Many of our clients wonder how long does pergolas take to install in Long Island, hoping for a quick transformation. While the physical assembly can be surprisingly fast, a truly durable and beautiful installation involves careful planning, securing the right permits, and preparing a solid foundation built for our coastal weather. We believe in transparency, so let’s break down the typical timelines for both standard and custom projects so you can plan your backyard upgrade with complete confidence.

Key Takeaways

  • Set Realistic Timeline Expectations: Your total project time includes more than just the 1 to 3 day construction; design complexity, site preparation, and the crucial permit approval phase can extend a custom project to several weeks.
  • Plan for Permits from the Start: A pergola almost always requires a permit on Long Island, a process that adds time but ensures safety and compliance. A professional team handles the complex paperwork so your structure meets all local codes without the headache.
  • Choose Materials for Longevity and Climate: Your material choice affects both appearance and future upkeep. To combat Long Island’s coastal weather, consider durable, low-maintenance options like vinyl or aluminum that will last for years with minimal effort.

What Affects Your Pergola Installation Timeline?

Thinking about adding a pergola to your Long Island backyard is exciting, but it’s natural to wonder how long you’ll have a construction crew on your property. The truth is, the timeline can vary quite a bit. A simple, straightforward installation might only take a day, while a more complex project could take several weeks from start to finish. Several key factors influence the schedule, including the design you choose, the materials you select, the condition of your yard, and even our unpredictable Long Island weather. Understanding these elements will give you a much clearer picture of your project’s timeline.

Size and Design Complexity

The most significant factor influencing your installation timeline is the pergola’s size and complexity. A standard, pre-fabricated kit on a prepared site can often be assembled by a professional team in just one to three days. However, if you’re dreaming of a large, custom-designed structure with intricate details like built-in lighting, adjustable louvers, or a unique shape that fits a tricky corner of your yard, the process will take longer. These more elaborate pavilions and pergolas require more precise measurements, cutting, and assembly, potentially extending the physical installation to three to five days or more.

Your Choice of Materials

The materials you choose for your pergola affect not only its appearance and durability but also the installation time. Traditional wood pergolas, for example, may require on-site cutting and staining, adding to the labor involved. In contrast, vinyl or aluminum pergolas often come in pre-finished kits designed for quicker assembly. Your material choice is critical for handling Long Island’s weather, from humid summers to snowy winters. We can help you select the right materials that match your home’s style and are built to last, ensuring your new outdoor structure is both beautiful and resilient. The foundation is also key, and our masonry experts can create the perfect base.

Site Conditions and Prep Work

Before any assembly can begin, your site needs to be properly prepared. The condition of the installation area plays a huge role in the project’s timeline. If the ground is already level and you have an existing patio, the process is much faster. However, if the site is on a slope, is uneven, or requires clearing, that prep work adds time. Our landscape design team will evaluate your property to determine what’s needed, whether it’s grading the land or installing concrete footings for a secure foundation. This professional evaluation is essential for a safe and stable installation that will stand strong for years.

Local Weather and Potential Delays

Here on Long Island, we know the weather doesn’t always cooperate with our plans. Heavy rain, strong winds, or even a sudden snowstorm can cause unavoidable delays in an outdoor construction project. For safety reasons, our team cannot work in poor weather conditions, which can push the timeline back a day or two. The coastal salt air and humidity also influence how we build and what materials we recommend. We always plan with potential weather delays in mind and communicate openly with you, ensuring the final structure is built to withstand our specific climate and that you’re kept in the loop every step of the way.

Will You Need a Permit for Your Pergola?

The word “permit” can make any homeowner a little nervous, but it does not have to be a roadblock to getting the backyard of your dreams. For most pergola projects on Long Island, getting a permit is a necessary step to ensure your new structure is safe, stable, and compliant with local codes. Think of it less as red tape and more as a quality check that protects your investment and your family. The process involves submitting your design plans to your local town or village for approval before any construction begins.

The good news is you do not have to go it alone. A seasoned professional will handle the entire permitting process for you, from preparing the paperwork to communicating with the building department. At Gappsi, we manage all the details so you can focus on the exciting parts, like choosing the final touches for your new pavilion or pergola. Understanding the requirements ahead of time helps set clear expectations for your project’s timeline.

Understanding Local Permit Rules

Before any work begins, it is important to understand local building requirements, which can vary quite a bit between towns in Nassau and Suffolk County. While the specific rules differ, there are some common guidelines. For example, smaller, freestanding pergolas under a certain size (often around 120 square feet) might not need a permit. However, larger structures or any pergola that attaches directly to your house almost always requires one. This ensures the foundation and construction are sound and meet all safety standards. An experienced local builder will know the exact codes for your specific area, taking the guesswork out of the equation.

Checking HOA and Zoning Regulations

Beyond your town’s building department, you might also have Homeowners Association (HOA) or specific zoning rules to consider. These regulations can influence everything from where you can place your pergola to its maximum height and even its color. For instance, zoning laws often include “setback” requirements, which dictate how far a structure must be from your property lines, your house, or other buildings. Your HOA may have its own set of aesthetic guidelines to maintain a cohesive look throughout the neighborhood. A professional pergola builder for Long Island will help you review these rules early in the design phase to ensure your project gets a smooth approval.

How Long Does the Permit Process Take?

This is one of the most common questions we get, and the honest answer is: it varies. The permit process is not instant and can easily add several weeks to your project’s overall timeline. After submitting the application and plans, the town’s building department needs time to review everything thoroughly. Sometimes they may have questions or require small adjustments before giving their approval. While this waiting period can feel slow, it is a crucial part of the process. An experienced team knows how to prepare accurate submissions to minimize delays and will manage all the follow-up, keeping your project moving forward as efficiently as possible.

How Long Does Pergola Installation Really Take?

So, you’ve decided a pergola is the perfect addition to your backyard. Great choice! One of the first questions that probably comes to mind is, “How long will this actually take?” The answer really depends on what kind of pergola you have in mind. A straightforward, standard design has a much different timeline than a fully custom structure that’s integrated into your landscape. Let’s break down the typical timeframes so you know exactly what to expect for your Long Island home.

Standard Pergolas: A 1–3 Day Project

If you’re opting for a standard pergola design, you’ll be happy to know the physical installation is quite fast. For most professional teams, a standard build takes just one to three days to complete. This timeline assumes the site is clear and ready to go. These projects move quickly because the designs are pre-planned and the materials are readily available. While it sounds simple, having a professional handle the assembly ensures your pergola is structurally sound, perfectly level, and safely anchored, giving you peace of mind to simply enjoy your new outdoor space.

Custom Pergolas: A 2–4 Week Project

When you want a pergola that’s truly one-of-a-kind, the timeline naturally extends. A custom project is a creative partnership, and the entire process, from our first conversation to the final walkthrough, typically takes between two and four weeks. This longer timeframe accounts for the detailed design phase, ordering or fabricating special materials, and securing any necessary permits. This is where we can perfectly match the pergola to your home’s architecture or integrate it with other features like an outdoor kitchen or a beautiful stone patio. The extra time is well worth it for a structure that feels like it was always meant to be there.

When Is the Best Time to Schedule an Installation?

The best time to schedule your installation is as soon as you start dreaming about it. Planning ahead is key, especially if you want your pergola ready for a specific season, like summer. Spring and fall are popular times for outdoor construction on Long Island, so our schedule can fill up quickly. Booking in advance gives us plenty of time for the design and permitting phases without feeling rushed. It also provides a buffer for potential weather delays. Proper planning helps your entire home remodeling project run smoothly from start to finish.

The Installation Process, Step by Step

Seeing your pergola come to life is exciting, and understanding the process makes it even more so. While the actual construction can be surprisingly fast, a professional installation involves several key stages to ensure your new structure is beautiful, safe, and built to last. We handle every detail from start to finish, but here’s a look at what you can expect when you work with our team.

Step 1: Design and Material Selection

This is where your vision starts to take shape. We’ll work closely with you to design a pergola that fits your home’s style and your family’s needs. You’ll choose the size, shape, and materials, whether you prefer classic wood, low-maintenance vinyl, or a modern aluminum frame. This initial design phase is crucial, as your choices will guide the entire project. Our team can help you explore a wide range of options and find the perfect fit for your backyard oasis. We’ll create a detailed plan that ensures your new pavilion or pergola is exactly what you’ve dreamed of.

Step 2: Site Prep and Permitting

Before any construction begins, we need to prepare the site and handle the paperwork. Navigating local building requirements in Nassau and Suffolk County can be complex, as rules can vary from one town to the next. This is a critical step that we manage for you, ensuring your project is fully compliant with all local codes and zoning laws. We’ll secure any necessary permits, which saves you the time and headache of dealing with municipal offices. Our experience with Long Island regulations means your project will start on the right foot, without any unexpected delays or compliance issues down the road.

Step 3: Marking Utilities and Preparing the Foundation

Safety and stability are our top priorities. Before we dig, we arrange for all underground utility lines to be professionally marked. This prevents any dangerous or costly surprises. Once the area is confirmed to be safe, we prepare the foundation. A solid foundation is essential for a long-lasting pergola. We install concrete footings that anchor the structure securely to the ground, providing the stability needed to withstand Long Island’s coastal weather. Our expertise in masonry and construction ensures this foundational work is done right, giving you peace of mind for years to come.

Step 4: Setting Footings and Assembling the Frame

This is the stage where you’ll see your pergola rise from the ground. With the footings cured and ready, our team will set the posts and begin assembling the main frame. You’ll be amazed at how quickly the structure takes shape. For most standard designs, the assembly process itself takes just one to three days. Our skilled crew works efficiently to construct the beams, rafters, and support system according to the design plan. You can watch the progress and see your outdoor living space transform right before your eyes. We document many of our projects, and you can see our team’s craftsmanship on the Gappsi YouTube channel.

Step 5: Finishing Touches and Optional Features

Once the main structure is built, we add the finishing touches that make your pergola unique. This can include anything from decorative post caps and lattice screens to integrated lighting, ceiling fans, or retractable canopies for added shade. If your pergola is part of a larger project, this is when we integrate it with surrounding elements like a new patio or an outdoor kitchen. This final step is all about personalizing the space to fit your lifestyle. We’ll ensure every detail is perfect, leaving you with a beautiful, functional, and complete outdoor room ready for you to enjoy with family and friends.

How to Prepare for Your Pergola Installation

A smooth installation begins long before our crew arrives at your home. Thoughtful preparation is the key to a seamless project and a beautiful pergola that you’ll enjoy for decades. Taking the time to think through a few key details ensures the final result perfectly matches your vision and lifestyle. It also helps prevent surprises, making the entire process feel more organized and less stressful.

Before we break ground, it’s helpful to consider how your new pergola will fit into your life and your landscape. Think about where you’ll place it, what materials will stand up to the Long Island weather, and how much maintenance you’re prepared to handle down the road. Answering these questions upfront helps us design and build a structure that’s not just an addition to your home, but a true extension of it. Proper preparation helps prevent issues later on, so your focus can remain on enjoying your new outdoor retreat. Let’s walk through the simple steps you can take to get ready for your installation.

Assess Your Space and Sunlight

First, think about how you want to use your pergola. Will it be a cozy spot for your morning coffee, an elegant outdoor dining area, or a shady lounge next to your swimming pool? The function will help determine the best location. Consider how the structure will connect with the rest of your backyard and affect foot traffic. You’ll also want to observe how sunlight moves across your property throughout the day. If you want shade during hot afternoons, you’ll want to place it accordingly. This initial assessment is a crucial part of a thoughtful landscape design and ensures your pergola serves its purpose beautifully.

Choose the Right Materials for Our Climate

Living on Long Island means dealing with a unique climate that includes high humidity, heavy snow, and salty coastal air. These elements can be tough on outdoor structures, which is why material selection is so important for your pergola’s longevity. While traditional wood is beautiful, it requires regular maintenance to prevent rot and weather damage. Modern materials like aluminum and vinyl, on the other hand, offer incredible durability with minimal upkeep. We can help you explore all the options for pavilions and pergolas to find a material that not only matches your home’s style but is also built to withstand our specific weather challenges for years to come.

Plan for Future Maintenance

Your choice of materials will directly influence the amount of future maintenance your pergola will need. It’s wise to be realistic about how much time you want to spend on upkeep. A natural wood pergola, for example, will likely need to be stained or sealed every few years to protect it from the elements. In contrast, an aluminum pergola might only require an occasional cleaning with soap and water to look its best. By planning for maintenance now, you can select a material that fits your lifestyle. This foresight ensures you won’t face unexpected work later, and Gappsi even offers restoration and sealing services to keep your outdoor spaces pristine.

Why a Professional Installation Is Worth It

While a DIY pergola project might seem like a good way to save money, it often comes with hidden costs, from unexpected challenges to time spent away from your family. A professional installation ensures your new outdoor structure is beautiful, safe, and built to last. When you partner with an experienced team, you’re not just paying for labor; you’re investing in peace of mind and a final product that truly enhances your home.

Ensure Safety and Durability in Coastal Weather

Long Island’s weather is a key factor in any outdoor construction project. Our humid summers, salty air, heavy rains, and winter snows all put stress on outdoor structures. A professional installer understands how to build a pergola that can withstand these specific conditions. They will help you select the right materials to prevent rust and rot and use construction techniques that ensure your pergola remains stable and secure through high winds and heavy snow loads. This expertise is crucial for creating a durable structure that you can enjoy safely for many years.

Stay Compliant with Local Building Codes

Most towns on Long Island require a permit to build a pergola, and the rules can vary significantly between Nassau and Suffolk counties. Navigating these regulations involves submitting architectural drawings, site plans, and other detailed paperwork. A professional installer is familiar with these local requirements and can manage the entire permitting process for you. This not only saves you from the headache of dealing with the town building department but also ensures your project is fully compliant, avoiding potential fines or problems down the road.

Save Time and Avoid Costly Mistakes

What might take a homeowner several weekends to complete, a professional team can often finish in just a few days. They have the right tools, a streamlined process, and the experience to work efficiently without sacrificing quality. More importantly, a professional installation prevents common DIY errors, like setting improper footings or misaligning the structure, which can compromise safety and lead to expensive repairs. By hiring experts, you get the job done right the first time, saving you both time and money in the long run.

Why Long Island Homeowners Trust Gappsi

For decades, Long Island homeowners have trusted Gappsi to create stunning and durable outdoor living spaces. Our team handles every detail, from initial design to final installation. We have deep experience working with local building departments across Nassau County, Suffolk County, and Southampton, and we manage the entire permitting process as part of our service. We build pavilions and pergolas designed specifically for the coastal climate, ensuring your investment is as long lasting as it is beautiful. Our commitment to quality craftsmanship means you can relax and look forward to enjoying your new backyard retreat.

Related Articles

Frequently Asked Questions

How far in advance should I plan if I want my pergola ready for summer? That’s a great question. To be safe, I recommend starting the conversation in the late winter or early spring. The physical installation is quick, but the design and permitting stages take time. Planning ahead gives us plenty of room to perfect your design, secure any necessary permits from your town without feeling rushed, and get you on the schedule before the busy season is in full swing.

My yard has a slight slope. Can I still get a pergola? Absolutely. An uneven yard is a very common situation on Long Island, and it’s not a barrier to getting a beautiful pergola. Our installation process always begins with site preparation. Our team will professionally grade the area and install secure concrete footings to create a perfectly level and stable foundation for the structure. This foundational work is critical for ensuring your pergola is safe and lasts for decades.

You mentioned handling permits. What does that mean for me? It means you can relax. Navigating the permit process can be a real headache, so we take it completely off your plate. Our team prepares all the required drawings and paperwork, submits the application to your local building department, and handles all the communication. Your only involvement is typically signing the documents. We manage the entire process to ensure your project is fully compliant, saving you time and stress.

Why does a custom pergola take weeks to build, while a standard one takes just a few days? The difference comes down to process. A standard pergola installation is mostly assembly, using a pre-planned design and materials. A custom project, however, is a creative partnership from the ground up. The longer timeline includes a detailed design phase to create something unique, the time it takes to source or fabricate special materials, and the careful work of integrating the structure perfectly with your home and landscape.

What is the most durable, low-maintenance pergola material for Long Island’s weather? For our coastal climate, aluminum and vinyl are fantastic low-maintenance choices. They stand up incredibly well to humidity, salt air, and snow without rusting, rotting, or needing to be repainted. They generally just need an occasional cleaning to look their best. While classic wood is beautiful, it does require regular sealing or staining to protect it from the elements. We can walk you through all the options to find the right balance of style and upkeep for your lifestyle.