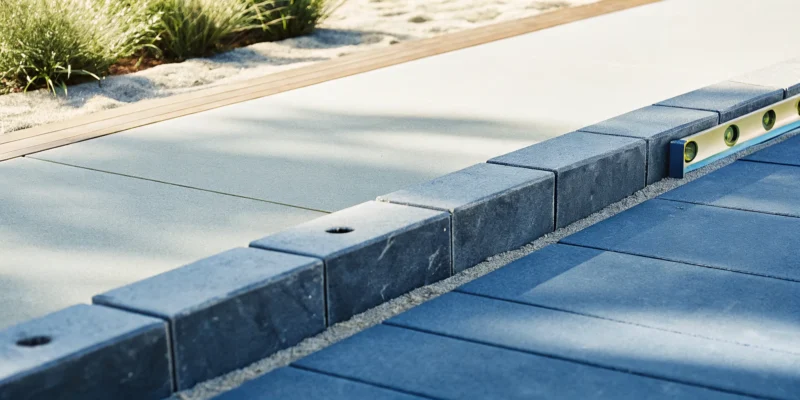
Custom basketball court built by a Long Island, NY courts builder.

Basketball Courts Builder Long Island NY: How to Choose

A backyard basketball court should be more than just a place to play; it should be a reflection of your family’s style. This is your chance to create a standout feature that’s completely unique to your home. You can move beyond standard gray and choose custom colors that match your house, represent your favorite team, or simply make you smile. You can even add a personal logo at center court or paint lines for other activities like pickleball. A skilled basketball courts builder in Long Island, NY, can bring these creative ideas to life, ensuring the final result is both beautiful and functional. We’ll explore all the ways you can personalize your court, from lighting and hoops to custom designs.

Key Takeaways

  • A Pro Handles the Hard Parts: Hiring a professional builder means you have an expert to manage the technical details, including site preparation, proper drainage, and navigating local Long Island permit requirements, which ensures your court is built correctly from the ground up.
  • Customize Your Court to Fit Your Home: The best backyard court is one designed for your space and family. You get to make key decisions on the surface material, the size (like a practical half-court), and personal touches like colors, logos, and lighting.
  • Your Choices Determine the Cost: The total investment for a basketball court depends on your specific selections. The final price is shaped by the court’s size, the surface material you choose, and any custom accessories like hoops or fencing, so a detailed estimate is essential.

What Does a Basketball Court Builder Do?

Thinking about adding a basketball court to your backyard? It’s a fantastic way to bring fun and fitness right to your home, but it’s a bigger project than just setting up a portable hoop. A professional basketball court builder is your partner from start to finish, managing every detail to create a durable, high-performance playing surface that will last for years. They don’t just build a court; they work with you to bring your vision to life, ensuring the final result is exactly what you dreamed of. A builder’s role covers three main areas: designing a court that fits your space and style, installing a high-quality surface built for performance, and adding all the custom features that make the court uniquely yours. They handle all the technical work, from site preparation and drainage solutions to material selection and final line painting. This comprehensive approach ensures that your investment is protected and that the court is safe, functional, and beautiful. This leaves you free to focus on the fun part, like planning your first neighborhood tournament. Let’s look at what you can expect when you work with a professional builder.

Designing Your Court and Handling Permits

The first step is creating a plan. A great builder works with you to design a court that meets your exact needs. Do you want a full court for serious games or a half court that fits neatly into your landscape? They’ll help you figure out the best size and layout for your property. More importantly, a local Long Island builder understands the specific zoning laws and regulations in towns across Nassau and Suffolk counties. They will create the necessary architectural drawings and handle the entire permit process for you, which saves you a ton of time and potential headaches with your town building department.

Installing the Court Surface

Once the design is set, the real work begins. The builder prepares the site, ensuring the ground is level and has proper drainage to prevent water damage. Then comes the most critical part: installing the court surface. You have a surprising number of options here. While many people think of simple asphalt or concrete, modern sports games courts can be made from a variety of materials, including synthetic turf, specialized interlocking tiles, or even clay. Each material offers a different level of performance, durability, and player comfort. A professional builder will explain the benefits of each and install your chosen surface with precision for a perfect finish.

Adding Custom Features and Accessories

This is where you can really make the court your own. A builder can add custom features that match your home’s aesthetic and your family’s style. You can choose from a wide range of colors for the surface and add custom game lines for basketball, pickleball, or volleyball. You can even add a personal logo right on the court. Beyond aesthetics, your builder will help you select and install essential accessories. This includes high-quality, adjustable basketball hoops, lighting for night games, and protective fencing and netting to keep the ball in play. They can also install cushioning systems beneath the surface to reduce stress on joints and improve player safety.

Which Court Surface Is Right for Your Backyard?

Choosing the right surface for your basketball court is one of the most important decisions you’ll make. It affects how the ball bounces, how comfortable it is to play on, and how much maintenance you’ll need to do down the road. Each material has its own unique feel and set of benefits, so it’s all about matching the surface to your family’s playing style, your property, and your budget. Let’s walk through the most popular options for Long Island backyards so you can find the perfect fit for your home.

Asphalt

Asphalt is a classic and reliable choice for a backyard basketball court. It provides a firm, consistent surface that delivers a true ball bounce, making it great for practicing your dribbling skills. An asphalt court is typically finished with an acrylic paint coating, which adds color and grip. While it’s a durable option, the weather here on Long Island means you’ll likely need to have it repainted every five to eight years to keep it looking fresh and playing its best. If you value a traditional feel and straightforward installation, asphalt is a solid starting point. Proper upkeep, including periodic restoration and sealing, will ensure it lasts for years.

Concrete

Concrete is another common and extremely durable material for a basketball court. It’s known for creating a very fast playing surface, which many players love for quick-paced games. Like asphalt, a concrete court is usually coated with acrylic paint to define the lines and improve traction. Because it’s so hard, concrete offers excellent longevity and can withstand decades of play. The trade-off is that it’s an unforgiving surface, offering little shock absorption, which can be tough on your joints over time. As a long-lasting foundation, it’s a popular choice for multi-purpose game courts that will see a lot of action.

Modular Interlocking Tiles

If player safety and comfort are at the top of your list, modular interlocking tiles are an excellent choice. These modern surfaces are specifically engineered for athletics, offering superior shock absorption that’s much easier on your knees and ankles. One of the biggest perks for Long Island homeowners is their fantastic drainage; rainwater flows right through the tiles, so you can get back to playing soon after a storm without waiting for puddles to dry. They also stay cooler than asphalt in the summer sun. Plus, with a wide range of colors available, you can create custom designs, logos, and line combinations for a truly personalized sports game court.

Synthetic Surfaces

For a professional-grade playing experience, a seamless synthetic surface is the ultimate choice. These courts, often made from materials like cushioned polyurethane, are designed to provide the perfect balance of grip, shock absorption, and ball response. A synthetic surface helps players maintain their footing during intense games and is built to handle both aggressive play and harsh weather with ease. While it’s a premium option, its durability and superior playability make it a worthwhile investment for serious players or families who want the absolute best for their backyard. These surfaces offer a completely seamless look and can be customized to fit your aesthetic perfectly.

Find the Right Court Size and Layout

One of the most exciting parts of planning your backyard court is deciding on its size and layout. This decision really comes down to two things: how much space you have and how you want to use the court. You might be picturing full-court games, or maybe you just want a dedicated spot for your kids to practice their free throws. The great news is that you don’t need a massive property to create an amazing playing experience. With a little planning, you can design a court that feels just right for your home and family.

Full Court or Half Court?

When you think of a basketball court, a full-sized, 50-by-84-foot court might come to mind. While that’s the standard for high school games, it’s often more space than most Long Island backyards can accommodate. That’s why the half-court is such a popular and practical choice for homeowners. Common half-court sizes like 30-by-30 feet or 30-by-50 feet provide plenty of room for shooting drills, one-on-one matchups, and family fun. A well-designed half-court gives you all the function you need for practice and play without taking over your entire yard, making it a perfect fit for most properties.

Making a Court Fit Your Space

What if a standard half-court size doesn’t quite work with your yard’s layout? That’s where customization comes in. Your basketball court doesn’t have to be a perfect rectangle to be a great place to play. We can help you design a court that fits the unique dimensions of your property. Whether you have a narrower yard, want to work around a beautiful old tree, or need to integrate the court with an existing patio, we can create a layout that maximizes your available space. Our expertise with sports game courts allows us to tailor a solution that feels like it was always meant to be there.

Personalizing Your Long Island Basketball Court

Once you have the size and surface material figured out, you can get to the really fun part: making the court your own. A backyard basketball court is more than just a slab of concrete with a hoop; it’s an extension of your home and a reflection of your family’s personality. Customization is what transforms a standard playing area into a standout feature of your property, creating a space that feels uniquely yours. Think about how you want the court to look and feel. Do you want it to blend seamlessly with your landscaping or make a bold statement with your favorite team’s colors?

The right builder will walk you through all the options for creating a truly unique space. From choosing colors that match your home’s exterior to adding a custom logo, the possibilities are extensive. You can also add features that improve gameplay and safety, like professional lighting for night games and high-quality netting to keep the ball in play. These details are what make your court a personalized destination for family fun, friendly competition, and lasting memories. It’s an investment not just in your property, but in your family’s lifestyle. We can help you design custom sports game courts that fit your vision perfectly, ensuring every detail is just right.

Choosing Colors, Lines, and Logos

Your court’s appearance is defined by its colors and lines. You can move beyond standard court colors and select a palette that complements your home or even represents your alma mater. We can paint the surface with vibrant, UV-stable colors that resist fading over time. You can also add custom game lines for other activities like pickleball or volleyball, turning your basketball court into a multi-sport hub for the whole family. For a truly personal touch, consider adding a custom logo, like a family initial or a favorite team’s emblem, right at center court. These visual elements make your court one of a kind.

Adding Lights for Night Games

Don’t let the sunset end a great game. Installing a lighting system is one of the best ways to maximize your court’s usability, allowing you to play well into the evening. This is perfect for busy families whose only time to play is after school or work, or for hosting friends for a nighttime shootaround. Professional lighting is designed to illuminate the court evenly without creating harsh glares or disturbing your neighbors. Integrating lights can also enhance your backyard’s overall ambiance, especially when combined with other features like lighted pavilions and pergolas.

Selecting Hoops, Fencing, and Netting

The right accessories are crucial for both function and safety. We can help you select a high-quality basketball hoop system, with options like adjustable backboards that grow with your kids. You can choose from various backboard sizes and materials to suit your level of play. To keep the game contained and protect your surrounding landscape, proper fences and netting are essential. A good containment system prevents stray balls from damaging gardens or ending up in a neighbor’s yard, ensuring a safer and more enjoyable experience for everyone.

How Much Does It Cost to Build a Basketball Court in Long Island?

One of the first questions on everyone’s mind is, “What’s the budget for something like this?” The cost to build a backyard basketball court in Long Island typically ranges from $10,000 to $50,000. That’s a wide range, I know, but the final price tag depends entirely on your vision. Think of it like building a custom home, just on a smaller scale. The size of the court, the surface material you choose, and any special features you add will all shape the total investment. A simple half-court with a basic surface will be on the lower end of the spectrum, while a full-sized court with professional lighting, high-end hoops, and custom logos will be at the higher end.

The biggest factors influencing cost are the court’s dimensions, the materials used for the surface, and the amount of site preparation needed. For example, a smaller 3-on-3 court will naturally cost less than a regulation-size half-court. Similarly, a flat, clear area will require less prep work than a sloped yard with trees that need to be removed. At Gappsi, we specialize in creating custom sports games courts that fit your space and budget perfectly. The best way to get a clear picture of your project’s cost is to have a conversation with a professional who can provide a detailed estimate based on your specific goals.

How Surface Materials Affect Cost

The surface you choose for your court is one of the most significant decisions you’ll make, both for performance and for your budget. Asphalt is often the most wallet-friendly option, giving you a solid, reliable surface. Concrete is a step up in durability and provides a consistent ball bounce, though it comes at a higher price point. For a truly professional feel, many homeowners opt for modular interlocking tiles. These tiles offer excellent grip, better shock absorption (which is easier on the joints), and come in a huge variety of colors for custom designs. While they are a premium choice, their longevity and performance are hard to beat. A detailed basketball court cost guide can help you compare the financial investment for each material.

The Cost of Site Prep and Drainage

Before the fun can begin, you need a solid foundation. Proper site preparation is a critical step that you absolutely shouldn’t overlook. This process involves clearing and leveling the land, which might include excavation and grading to create a perfectly flat base. It also includes establishing a proper drainage system. Here on Long Island, we get our fair share of rain and snow, and without good drainage, you’ll end up with puddles that can damage the court surface over time. Depending on your property’s current condition, site prep can add between $1,000 and $5,000 to your project cost. Our expertise in masonry and landscape construction ensures your court is built on a foundation that’s made to last.

Factoring in Lights, Hoops, and Fencing

Once the court surface is down, it’s time to add the features that make it truly yours. These accessories are what turn a simple slab into a fully functional court. If you dream of playing after sunset, installing lights is a must. For hoops, you can choose from a wide range of options, from standard adjustable models to professional-grade, in-ground systems. And don’t forget about fencing. A good fence keeps the ball in play and adds a layer of safety. We can help you select the right fences and netting to contain stray shots without obstructing your view. Budgeting for these elements from the start ensures there are no surprises and that your court is ready for action day or night.

A Step-by-Step Look at the Installation Process

Seeing a professional basketball court come to life in your own backyard is an exciting process. While it might seem complex, a professional builder breaks it down into a series of manageable steps. Understanding this timeline helps you know what to expect from start to finish. From the initial design chat to the final walkthrough, each phase is carefully planned to ensure your court is built to last and looks exactly how you imagined. A typical installation can take anywhere from two to six weeks, depending on the scope of the project and weather conditions. This timeline includes everything from digging and preparing the base to letting it set properly before the surface and hoop go in. Knowing the process helps you partner effectively with your builder and watch your vision become a reality, one step at a time.

Step 1: Site Assessment and Custom Design

Everything starts with a conversation and a look at your space. A professional will visit your home to assess your yard, take measurements, and discuss your ideas. This is your chance to share your vision for the court. Do you want a half court for practice or a larger area for full games? We handle everything from the initial concept to the final installation, creating custom sports games courts that fit your property and your family’s needs. During this design phase, we’ll figure out the best placement for the court, considering factors like sun exposure and existing landscaping. We then create a custom design plan that maps out every detail before any work begins.

Step 2: Preparing the Ground and Drainage

A great court needs a solid foundation. Once the design is approved, the physical work starts with site preparation. This involves excavating the area to the required depth and ensuring the ground is perfectly level. A sturdy base, often made of crushed stone or a similar aggregate, is then installed and compacted. Proper drainage is a critical part of this step, especially with Long Island’s variable weather. We make sure your court has the right slope and drainage system to prevent water from pooling on the surface, which protects your investment and ensures the court is ready for play soon after it rains. This careful masonry work is essential for the court’s longevity.

Step 3: Installing the Surface

This is the part where your court really starts to look like a court. After the base has been prepared and allowed to cure, it’s time to install the playing surface. The material you choose will determine the look, feel, and performance of your court. We offer a wide range of options, from classic concrete and asphalt to advanced modular tiles and even our own unique crushed marble dust. Each surface has its own installation process. For example, concrete needs to be poured and cured, while interlocking tiles can be snapped into place. We’ll guide you through selecting the best porcelain and natural stone or synthetic surface for your needs and install it with precision.

Step 4: Adding Finishing Touches and a Final Walkthrough

With the surface in place, it’s time for the details that make the court yours. This final step includes installing the basketball hoop, painting the game lines, and adding any custom elements you’ve chosen. This is where you can personalize your court with your favorite team’s colors or a custom family logo at center court. We can also install optional features like professional-grade lighting for night games and perimeter fences and netting to keep the ball in play. Once everything is complete, we’ll do a final walkthrough with you to make sure every detail meets your expectations and you’re ready to enjoy your new basketball court.

What to Look for in a Basketball Court Builder

Choosing a builder for your backyard basketball court is a big decision. You’re not just hiring a contractor; you’re finding a partner to bring a significant home improvement project to life. The right builder will make the process smooth and exciting, resulting in a court your family will love for years. To find a professional you can trust, focus on a few key areas: their local expertise, the quality of their materials, their communication style, and the support they offer after the project is complete. These factors separate an average builder from a truly great one.

Experience with Long Island Regulations

Building a basketball court involves more than just clearing a space and laying a surface. In Long Island, you’ll likely need to deal with local zoning laws and permits. A builder with deep experience in Nassau and Suffolk counties will understand these specific requirements inside and out. They can manage the process of getting the necessary permits and architectural drawings, saving you from confusing paperwork and potential delays. This local knowledge ensures your project is compliant from day one, giving you peace of mind that your court is built correctly and legally. A builder who is prepared for these steps demonstrates true professionalism and a commitment to doing things the right way.

High-Quality Materials and Warranties

A basketball court is an investment in your home and your family’s enjoyment, so it needs to be durable. Ask potential builders about the materials they use for their sports game courts. Top-tier builders use high-performance surfaces and premium, long-lasting paints that can withstand intense games and Long Island’s weather. Furthermore, a confident builder will stand behind their work with a solid warranty. A warranty isn’t just a piece of paper; it’s a promise of quality and a sign that the company is committed to the longevity of your court. Don’t hesitate to ask for details on what their warranty covers and for how long.

Clear Pricing and Communication

Transparency is essential when you’re undertaking a major project. Your builder should provide a clear, detailed estimate that breaks down all the costs, so you know exactly what you’re paying for without any surprise fees later on. Beyond the initial quote, look for a builder who values open communication. They should be easy to reach, happy to answer your questions, and proactive about providing updates throughout the installation process. A great partner will make you feel informed and involved from the initial design consultation to the final walkthrough, ensuring the final product perfectly matches your vision. This level of home remodeling expertise is a hallmark of a true professional.

Support and Maintenance After Installation

A great builder’s commitment to you doesn’t end once the court is finished. Ask about the post-installation support and maintenance guidance they offer. A reliable company will provide you with practical advice on how to care for your new court, helping you keep it in excellent condition for years of play. For example, they can show you the best ways to clean the surface or what to look for as seasons change. Companies that also offer services like restoration and sealing have a deep understanding of long-term care, making them an invaluable resource long after your project is complete. This ongoing support shows a builder is invested in your satisfaction for the long haul.

Why Hire a Local Long Island Builder?

When you decide to add a basketball court to your backyard, you have a lot of choices for who will build it. While a national company might seem appealing, there are powerful reasons to partner with a builder right here in your community. A local Long Island company brings a specific set of skills and knowledge that you just can’t get from an out-of-towner. They’re your neighbors, and they have a vested interest in doing great work. From understanding our unique weather to being just a phone call away, a local expert provides a level of service that makes the entire process smoother and more successful.

They Know Long Island’s Climate and Zoning Laws

A builder from Long Island understands the local environment in a way no one else can. They know how our salty air, humid summers, and freeze-thaw cycles can affect different materials. This expertise is crucial for selecting the right surface and base for your court so it lasts for years. Local builders are also well-versed in the specific zoning laws and permit requirements for towns across Nassau and Suffolk counties. They handle the paperwork and ensure your project complies with all local regulations, saving you from potential headaches and delays. This insider knowledge is a key part of building professional sports games courts that are made to last.

Quicker Service and Local Support

Choosing a local builder means you get faster, more responsive service. Since the team is already in the area, scheduling site visits, getting materials delivered, and starting construction happens much more efficiently. If an unexpected issue comes up, they can be at your home quickly to address it. This proximity also extends to long-term support. Should your court need a repair or resealing down the road, you have a trusted local partner to call. You’re not just another customer on a long list; you’re part of their community, and they have a reputation to maintain by providing excellent restoration and sealing services.

Personalized Attention for Your Project

Local builders pride themselves on offering a personal touch. Instead of a one-size-fits-all approach, they take the time to understand your vision and your family’s needs. You’ll likely work directly with the owner or a small, dedicated team that is invested in bringing your dream court to life. This close collaboration ensures every detail, from the court dimensions to the color scheme, is exactly what you want. A local company like Gappsi can offer truly custom masonry design and construction, creating a unique space that perfectly complements your home and lifestyle. This personalized attention is what transforms a simple project into a standout feature of your property.

Beyond the Court: Complementary Outdoor Features

A basketball court is a fantastic addition to your backyard, but it doesn’t have to stand alone. Thinking about the surrounding space is key to creating a cohesive and inviting outdoor environment that your whole family will love. The right features can transform your court from just a playing surface into the centerpiece of a complete outdoor living area. Imagine having a comfortable spot to watch the game, beautiful greenery that softens the court’s edges, and practical additions that make playing safer and more convenient. This approach turns a simple court into a destination for activity, relaxation, and entertainment.

By integrating your court with other landscape and hardscape elements, you create a multi-functional space that works for athletes and spectators alike. This is your chance to build a true backyard destination. Whether you want a shaded lounge area for post-game relaxation or a safe, enclosed space for worry-free play, these complementary features add value and enjoyment. A thoughtful landscape design ties everything together, ensuring your new court feels like a natural part of your home’s overall aesthetic, not just an afterthought. It’s about creating a space where memories are made, both on and off the court, for years to come.

Synthetic Turf and Landscaping

Pairing your basketball court with the right greenery can make a world of difference. Instead of having a hard surface surrounded by patchy grass, consider installing synthetic turf. It provides a lush, green look all year round without the constant mowing, watering, and fertilizing. It’s also incredibly durable, so it can handle foot traffic from players and spectators without turning into a mud pit. Thoughtful landscaping with native plants, shrubs, and trees can soften the court’s lines, add a pop of color, and create natural privacy. This combination of turf and plants makes the entire area more beautiful and functional.

Pavilions and Pergolas

Why let a little sun or a light drizzle stop the fun? Adding a pavilion or pergola near your court creates a dedicated space for comfort and relaxation. These structures provide welcome shade for players taking a break or for family and friends who want to watch the game. A pavilion or pergola can house an outdoor seating area, a small bar, or even an outdoor TV, turning your court into a true entertainment hub. With various materials and styles available, you can design a structure that perfectly complements your home’s architecture and your court’s design, creating a stylish and practical outdoor room.

Fencing and Netting

Fencing is one of the most practical additions you can make to your backyard basketball court. A good fence keeps the ball in play, so you can stop worrying about it rolling into the street or your neighbor’s flower beds. It also adds a layer of safety, clearly defining the play area for kids. But fencing and netting don’t have to be purely functional. You can choose from a variety of materials, like sleek aluminum or classic wood, to match your home’s style. For a less obstructive option, high-tension netting can effectively contain stray shots while maintaining an open feel and clear sightlines.

How to Maintain Your Basketball Court

Once your dream basketball court is installed, you’ll want to keep it in prime condition for years of enjoyment. The good news is that modern court surfaces are designed for durability and require minimal upkeep. A little routine care goes a long way in protecting your investment, ensuring the surface remains safe, and keeping your court looking its best. Following a simple maintenance plan will help you spend less time on chores and more time perfecting your jump shot.

Keeping It Clean

Regular cleaning is the easiest way to preserve your court’s quality and safety. For surfaces like modular tiles, a quick sweep with a leaf blower or a rinse with a garden hose is often all you need to clear away leaves, dirt, and other debris. Keeping the surface clear isn’t just about appearances; it also prevents buildup that can become slippery or cause stains over time. Think of it as a quick weekend task that keeps your court ready for a spontaneous game. For a deeper clean or to tackle stubborn spots, professional restoration and sealing services can bring back that brand-new look.

Handling Repairs and Repainting

Over time, any well-loved court will show signs of wear. For asphalt courts, a fresh coat of paint every five to eight years is a great way to restore its vibrant look and, more importantly, its grip. A new paint job helps maintain good traction for safer, more responsive play. Using high-quality, durable paints designed for athletic surfaces ensures the finish lasts. While some minor repairs can be a DIY project, repainting is often best left to professionals who can guarantee an even, long-lasting application. This periodic refresh is a key part of maintaining your sports game courts for peak performance.

Prepping for Long Island Seasons

Choosing the right materials from the start is your best defense against Long Island’s varied weather. Modular tiles are an excellent all-season choice because they are built to handle both hot summers and cold winters. They can stay up to 50% cooler than dark asphalt, making afternoon games much more comfortable during a summer heatwave. These tiles are also designed to expand and contract with temperature changes, which prevents cracking. Their durable construction stands up to tough play and harsh weather, ensuring your court performs beautifully year after year with very little seasonal prep required.

Related Articles

Frequently Asked Questions

How long does the entire process of building a basketball court take? From our first design chat to the final walkthrough, you can generally expect the project to take between two and six weeks. The exact timeline depends on a few things, like the size of your court, the materials you choose, and how much site preparation your yard needs. Weather can also play a role, as we need dry conditions for steps like pouring a concrete base or painting lines. We manage the entire schedule, including permit applications, to keep things moving smoothly.

Do I really need a permit to build a basketball court on Long Island? Yes, in most towns across Nassau and Suffolk counties, building a permanent structure like a basketball court requires a permit. The process can involve submitting architectural drawings and ensuring the project meets local zoning laws. It might sound like a hassle, but it’s a crucial step to make sure your court is built safely and legally. A professional local builder will handle the entire permit process for you, which saves you a lot of time and prevents any issues with your town.

What is the best court surface for families with kids? If safety and comfort are your top priorities, modular interlocking tiles are an outstanding choice. These surfaces are engineered with shock absorption to be easier on growing joints, which is great for kids who love to play for hours. They also offer excellent traction to help prevent slips. Another big benefit is that rainwater drains right through them, so the court dries quickly after a storm, meaning less downtime for your family.

My yard has a slight slope. Can I still build a court? Absolutely. It’s very common for yards to have some unevenness, and a sloped property doesn’t prevent you from building a fantastic court. The key is proper site preparation. The installation process will include professional excavation and grading to create a perfectly level foundation for the court. This foundational work is critical for ensuring proper drainage and a true, consistent ball bounce for years to come.

Can I use my basketball court for other sports? Of course. We can easily turn your basketball court into a multi-sport hub for the whole family. During the design phase, we can add custom game lines for other popular sports like pickleball, volleyball, or shuffleboard. By planning for this from the start, you can create a versatile sports games court that offers something for everyone, maximizing the fun and value you get from your investment.

Outdoor Wolf Kitchen & Pavilion in Merrick NY | Custom Outdoor Living by Gappsi

View Gappsi’s YouTube Channel to view Outdoor Wolf Kitchen & Pavilion in Merrick, NY | Custom Outdoor Living by Gappsi

Creating a fully functional and visually striking outdoor living space requires thoughtful design, premium materials, and expert craftsmanship. This project in Merrick, NY, showcases exactly how those elements come together to transform a backyard into a luxurious, all-season retreat. Gappsi designed and installed a 16×36 framed pavilion that seamlessly integrates comfort, functionality, and high-end outdoor kitchen features, making it an ideal space for entertaining and relaxation.

A Custom Pavilion Designed for Year-Round Living

At the core of this project is the 16×36 framed pavilion, which serves as the structural and aesthetic anchor of the entire outdoor space. The pavilion provides both shelter and definition, allowing the homeowner to enjoy the outdoors regardless of weather conditions. Its size offers ample room to create distinct zones within the same structure, maximizing usability without compromising flow or openness.

The layout was strategically planned to accommodate three primary functions: a lounge area, a dining space, and a fully equipped outdoor kitchen. Each section is thoughtfully positioned to create a natural progression from one area to the next, making the space feel cohesive and inviting.

A Warm and Inviting Fireplace Lounge

One side of the pavilion features a stunning wood-burning fireplace that immediately draws attention and sets the tone for the space. The fireplace was custom-built and veneered with clay brick, adding a timeless and rustic aesthetic that complements the overall design. Beyond its visual appeal, the fireplace serves a practical purpose by extending the usability of the outdoor space into cooler months.

In front of the fireplace, the client created a comfortable couch seating area, turning this section into a cozy lounge perfect for relaxing evenings or intimate gatherings. The warmth of the fire, combined with the soft seating arrangement, creates a welcoming atmosphere that encourages people to linger and unwind.

A Central Dining Area for Entertaining

Positioned in the center of the pavilion is the dining area, which acts as the transitional hub between the lounge and kitchen spaces. This placement ensures easy access from both sides, making it ideal for hosting guests and serving meals.

The open layout allows for a full-sized table and chairs while maintaining enough space for movement and interaction. Whether it’s a casual family dinner or a larger gathering, the dining area is designed to handle a variety of occasions with ease. Its central location also keeps guests connected to both the cooking and relaxation zones, enhancing the overall social experience.

outdoor-wolf-kitchen--pavilion-in-merrick-ny

A High-End Outdoor Wolf Kitchen

On the opposite side of the pavilion, Gappsi constructed a fully customized outdoor kitchen using premium materials and top-tier components. The kitchen features Wolf powder-coated aluminum cabinets, known for their durability, weather resistance, and sleek, modern appearance. These cabinets not only provide ample storage but also maintain their integrity in outdoor conditions.

To enhance the kitchen’s visual appeal, the back wall was veneered with Eldorado stone. Specifically, the design uses wood-look planks from Eldorado, which are actually made from cement board. This innovative material offers the aesthetic of natural wood while providing the durability and low maintenance of stone. The result is a sophisticated backdrop that adds texture and depth to the kitchen area.

The countertop is crafted from black granite with a leather finish, a choice that balances elegance with practicality. The leathered surface offers a matte finish with subtle texture, reducing glare and providing greater resistance to fingerprints and smudges, ideal for outdoor use.

Premium Appliances and Functional Design

Functionality is a key component of any outdoor kitchen, and this project delivers on every level. The kitchen is equipped with a stainless steel sink, making food prep and cleanup convenient and efficient. Paired with a Delta grill, the setup provides everything needed for high-performance outdoor cooking.

The layout of the kitchen is designed for efficiency, ensuring that all essential elements are within easy reach. From prepping ingredients to grilling and serving, the workflow is smooth and intuitive. This attention to detail enhances the overall cooking experience and makes the space as practical as it is beautiful.

Durable and Elegant Natural Stone Flooring

The flooring throughout the pavilion is finished with Melfi limestone, a natural stone known for its durability and timeless appeal. This material not only complements the overall design but also provides a stable surface that can withstand outdoor conditions.

To enhance both the appearance and longevity of the limestone, a multi-step sealing process was applied. First, a color-enhancing sealer was applied to bring out the stone’s natural tones and richness. This step adds depth and vibrancy, making the flooring stand out visually.

Following that, a natural stone treatment was applied as a protective sealer over the color enhancer. This additional layer helps guard against moisture, stains, and wear, ensuring that the flooring maintains its beauty over time. The result is a surface that is both visually appealing and highly resilient.

Seamless Integration of Design Elements

One of the standout aspects of this Merrick, NY project is how seamlessly all the elements come together. The combination of materials, clay brick, Eldorado stone, black granite, and Melfi limestone, creates a balanced and cohesive aesthetic. Each component was carefully selected not only for its individual qualities but also for its contribution to the overall design.

The pavilion structure ties everything together, providing a unified space that feels both expansive and intimate. The thoughtful layout ensures that each area serves its purpose while remaining connected to the rest of the space.

Elevating Outdoor Living

This project exemplifies how a well-designed outdoor space can significantly enhance a home’s functionality and value. By incorporating a pavilion, fireplace, dining area, and fully equipped kitchen, the homeowner now has a versatile environment that supports a wide range of activities.

From quiet evenings by the fire to lively gatherings with friends and family, the space is designed to accommodate it all. The use of high-quality materials and expert installation ensures that it will continue to perform and impress for years to come.

The Outdoor Wolf Kitchen and framed pavilion in Merrick, NY, is a perfect example of modern outdoor living done right. It combines luxury, durability, and thoughtful design to create a space that is both beautiful and highly functional.

Every detail, from the clay brick fireplace to the leathered granite countertop and sealed limestone flooring, reflects a commitment to quality and craftsmanship. This project not only meets the homeowner’s needs but also sets a standard for what an outdoor living space can be in today’s homes.

For anyone considering an outdoor upgrade, this installation serves as inspiration for what’s possible when design expertise and premium materials come together.

Contact Gappsi Today

📍 Serving all of Long Island, NY — Nassau & Suffolk Counties
🌐 https://www.gappsi.com/
📞 Call now for a free consultation and estimate

SCHEDULE A MEETING TODAY WITH GAPPSI

Clementi Colorado wood-fired cooktop & firepit with a central fire and wood storage base.

Your Guide: Clementi Colorado Wood-Fired Cooktop & Firepit

When you host a backyard barbecue, do you ever feel stuck behind the grill while your guests are mingling elsewhere? It’s a common problem that separates the cook from the party. The Clementi Colorado Wood-Fired Cooktop & Firepit is designed to solve this by becoming the heart of your social gatherings. It’s a beautiful, permanent fixture that combines a cozy fire pit with a high-performance cooking surface, creating a natural spot for everyone to gather. This guide will walk you through its unique features, the benefits of its two-in-one design, and how it can completely transform your outdoor entertaining experience.

Key Takeaways

  • It’s a social centerpiece, not just a grill: The Clementi Colorado’s dual design as a fire pit and cooktop creates a natural gathering spot, making entertaining more interactive and fun for everyone involved.
  • Master your cooking with multiple heat zones: Its unique cooktop allows you to sear, grill, and warm different foods simultaneously, all while infusing them with an authentic wood-fired flavor that gas grills cannot replicate.
  • Enjoy a durable, low-maintenance design: Built from Corten steel that develops its own protective layer, this cooktop is designed for longevity. Simple features like the ash drawer make cleanup easy, so you spend more time enjoying your backyard.

What is the Clementi Colorado Wood-Fired Cooktop & Firepit?

If you love hosting friends and family in your backyard, the Clementi Colorado is designed for you. It’s a special outdoor cooking unit that merges a cozy fire pit with a high-performance grill, creating a natural gathering spot. Unlike a typical grill, the Clementi Colorado is a permanent fixture that becomes the heart of your patio, built to make outdoor entertaining simpler and more enjoyable.

A Look at Its Key Features

The Clementi Colorado is thoughtfully designed to be both a powerful cooking appliance and a beautiful fire pit. Its main purpose is to bring people together around a warm fire while offering incredible cooking versatility. The unit features a wide, circular cooktop that surrounds the central fire, allowing you to grill, sear, and warm foods with ease. It’s a complete system that simplifies your outdoor cooking process. Instead of managing a separate fire pit and grill, you get an all-in-one solution that looks incredible and performs even better. You can find this and other premium outdoor appliances at the Gappsi Store.

Understanding the Corten Steel Design

One of the first things you’ll notice about the Clementi Colorado is its striking, rustic appearance. This comes from its Corten steel construction, a special alloy known for its exceptional strength and weather resistance. When exposed to the elements, Corten steel develops a stable, rust-like protective layer. This patina not only gives it a unique, evolving look but also prevents corrosion, making it incredibly durable. For a Long Island backyard, this means your cooktop can withstand rain, snow, and sun for years to come. It’s a material that combines beauty with the kind of resilience we value in all our masonry and hardscape projects.

Cooking with Four Unique Heat Zones

Here’s where the Clementi Colorado truly shines. The stainless steel cooktop is designed to create four distinct heat zones. The area closest to the central fire gets intensely hot, perfect for searing steaks or getting a great char on burgers. As you move toward the outer edge of the cooktop, the temperature gradually decreases. This allows you to grill delicate vegetables, toast buns, and keep side dishes warm all at the same time. This level of control is something most standard grills can’t offer, making it the perfect anchor for a complete outdoor kitchen under one of our custom pavilions or pergolas.

How Does the Clementi Colorado Compare to Other Grills?

When you’re designing your dream outdoor kitchen, you’ll find plenty of grills on the market. But the Clementi Colorado isn’t just another grill, it’s a complete outdoor cooking experience. While traditional gas or charcoal grills serve a single purpose, the Colorado is designed to be the heart of your patio, combining the ambiance of a fire pit with the power of a professional-grade cooktop. It’s a permanent, beautiful fixture that transforms how you cook and entertain outdoors. Unlike a standard grill you might roll out for a weekend barbecue, the Clementi Colorado is an integrated part of your outdoor living space. Its unique features, from its dual-function design to its incredible heat capabilities, set it in a class of its own. Let’s look at what makes it so different from the grills you’re used to.

Fire Pit and Cooktop: A Two-in-One Design

The most striking difference is its brilliant two-in-one design. The Clementi Colorado is a special outdoor cooking unit that combines a fire pit with a high-performance grill. This means you get the cozy, inviting atmosphere of a crackling wood fire and a versatile cooking surface all in one. Imagine gathering with friends and family around the warm glow of the fire pit after enjoying a meal you cooked on the very same unit. It’s a functional centerpiece that encourages connection and extends your time outdoors. This dual purpose makes it a standout addition to any patio, especially when integrated into a custom masonry project.

Reaching High Temperatures for a Perfect Sear

If you’ve ever tried to get a perfect, steakhouse-quality sear on a standard backyard grill, you know it can be a challenge. The Clementi Colorado solves this problem with its impressive power. It can reach very high temperatures, up to 900°F, which is great for searing meats and locking in flavors. This intense heat creates a delicious crust on steaks, burgers, and chops in seconds, keeping the inside tender and juicy. It’s a level of performance that most residential grills simply can’t match, giving you professional results right in your own backyard. You can find the Clementi Colorado and other premium outdoor appliances at the Gappsi Store.

Why Multiple Cooking Zones Matter

One of the most practical features of the Clementi Colorado is its multi-zone cooking surface. It has four stainless steel cooking plates that create different heat zones. This means you can cook different foods, like searing steaks, grilling veggies, and warming sides, all at the same time. You can sear a tuna steak on the hottest part of the cooktop while gently warming flatbreads on a cooler section. This versatility streamlines your cooking process, allowing you to prepare an entire meal outdoors without running back and forth to the kitchen. It makes entertaining feel effortless and allows you to stay part of the conversation while you cook.

What Are the Benefits of Cooking with the Clementi Colorado?

When you bring a Clementi Colorado into your backyard, you’re getting more than just a new appliance. You’re investing in a new way to cook, entertain, and enjoy your outdoor space. From the incredible flavor it imparts to its role as a social hub, the benefits are clear. It transforms your patio into the heart of your home, creating memorable experiences with every meal. Let’s look at what makes this wood-fired cooktop so special.

Achieving That Authentic Wood-Fired Flavor

There’s something truly special about the taste of food cooked over a real wood fire. The Clementi Colorado brings that rich, smoky flavor right to your garden. Unlike gas grills, which just provide heat, burning wood infuses everything on the 7mm thick cooking plate with a subtle, aromatic essence that you can’t get any other way. Imagine searing steaks, roasting vegetables, or even grilling delicate fish, all with that authentic wood-fired char and depth. It turns a simple weeknight dinner into a culinary event. This style of cooking pairs beautifully with a well-designed outdoor kitchen, set on a stunning natural stone patio where your ingredients and tools are all within reach.

The Ultimate Centerpiece for Social Gatherings

The Clementi Colorado is designed to be a showstopper. Its combination of a fire pit and a versatile cooktop makes it a natural gathering point for friends and family. Picture your guests circling the warm, crackling fire, drinks in hand, as you cook dinner right in front of them. The circular design is inherently social, inviting everyone to participate and connect. It’s not just about one person manning the grill; it’s an interactive experience that makes entertaining feel effortless and fun. By placing it under one of Gappsi’s custom pavilions or pergolas, you can create a cozy, all-weather entertainment zone that becomes the go-to spot for every get-together.

Choosing a Sustainable, Wood-Fueled Option

Built from Corten steel, the Clementi Colorado is made to last. This industrial-strength material is designed to form a protective, rust-like layer over time, which shields it from corrosion and harsh weather without needing any paint or special treatments. It’s a beautiful, low-maintenance finish that gets better with age. Beyond its durability, cooking with wood is a more sustainable choice. Wood is a renewable resource, and using it for fuel connects you back to a more traditional, elemental way of cooking. This cooktop is a smart investment that not only looks incredible but also aligns with a desire for quality and longevity. You can explore the full range of models and accessories at the Gappsi Store to find the perfect fit for your home.

How Do You Maintain the Clementi Colorado?

One of the best things about investing in high-quality outdoor equipment is that it’s built to last with minimal fuss. The Clementi Colorado is no exception. Its smart design makes upkeep straightforward, so you can spend more time enjoying delicious food with family and friends and less time on cleanup. Here’s a simple breakdown of how to keep your cooktop in top condition for years to come.

Simple Daily Cleanup with the Ash Drawer

After an evening of cooking, the last thing you want is a complicated cleaning routine. The Clementi Colorado was designed with this in mind, featuring a built-in ash drawer that makes daily maintenance a breeze. Once the fire has completely cooled, you just slide the drawer out and empty the ash into a fire-safe container. This simple step keeps your fire pit clean and ready for its next use. Properly caring for your outdoor features ensures they remain a beautiful part of your home. This thoughtful design means you can say goodbye to scooping out messy ash and hello to more relaxing nights by the fire.

Caring for the Corten Steel Finish

The beautiful, rustic look of the Corten steel is one of the Clementi Colorado’s signature features. This material is designed to form a stable, rust-like protective layer over time, which means it gets better with age. To maintain its integrity, you don’t need any harsh chemicals. Simply wipe the surface down once or twice a year with a soft cloth, mild soap, and water. This gentle cleaning removes any dirt or grime without disturbing the natural patina. It’s a testament to the expert craftsmanship that goes into creating durable and aesthetically pleasing outdoor living products. Resisting the urge to scrub or use abrasive cleaners will keep your fire pit looking its best.

Protecting Your Cooktop from the Elements

While the Clementi Colorado is built to withstand the outdoors, giving your cooktop extra protection is always a smart move, especially during Long Island winters or rainy spells. Investing in a custom-fit cover is the easiest way to shield the cooking surface from moisture and debris when it’s not in use. This simple step prevents unwanted rust on the cooktop and ensures it’s always ready for an impromptu barbecue. For a more integrated solution, you might consider housing your cooking area under permanent structures like a pavilion. This not only protects your investment but also creates a dedicated, all-weather outdoor kitchen space for year-round enjoyment.

Is the Clementi Colorado Right for Your Backyard?

The Clementi Colorado is an amazing addition to any outdoor space, but it’s important to think through the practical side before you commit. Owning a wood-fired cooktop is a lifestyle choice that involves a bit more than just flipping a switch. Let’s walk through what you need to consider to make sure it’s the perfect fit for your home and family. From planning the right spot to learning the ropes of wood-fired cooking, a little preparation goes a long way in creating your dream outdoor kitchen.

Planning Your Space and Installation

First things first, let’s talk about space. The Clementi Colorado is a statement piece, and it needs a proper stage. It’s a large unit, measuring 31.5 inches long, 23.6 inches deep, and 39.4 inches high, so you’ll want to measure your intended spot carefully. It must be placed on a non-combustible surface, which makes a beautiful stone patio or a dedicated masonry base an ideal foundation. Think about how it will fit into the flow of your backyard. You’ll want easy access to your home and other outdoor features, like your pool or dining area, without creating a bottleneck.

Selecting the Right Wood for Fuel

The secret to that incredible wood-fired flavor is, you guessed it, the wood. You’ll need a steady supply of quality hardwood, like oak or hickory, to get the best results. These woods burn hot and clean, infusing your food with a subtle, smoky taste that you just can’t get from gas or charcoal. You will also need a dry place to store your firewood to keep it from getting damp, which can make it difficult to light and create excess smoke. A covered wood rack near your cooktop or a small storage area under one of Gappsi’s custom pavilions or pergolas can be a perfect solution.

Following Key Safety Guidelines

Cooking with a live fire is part of the fun, and following a few simple safety rules will keep it that way. Before you light the fire, always make sure the area around the cooktop is clear of flammable items like chair cushions, umbrellas, or dry leaves. When you’re finished cooking, let the unit cool down completely before you attempt to clean it or put a cover on it. A custom cover is a great investment to protect your Clementi Colorado from the elements during bad weather or the off-season. Thinking about safety from the start is key to a well-designed outdoor living space.

What Models and Add-Ons Are Available?

One of the best things about the Clementi Colorado is how you can make it your own. It’s not a one-size-fits-all appliance; instead, it offers a variety of models and accessories that let you tailor it perfectly to your backyard space and cooking ambitions. Whether you have a sprawling patio or a more intimate corner, you can configure the Colorado to feel like a custom part of your outdoor kitchen. Let’s look at the different ways you can personalize your setup, from its physical footprint to its functional features. Thinking through these options will help you design a cooktop that not only performs beautifully but also complements your home’s aesthetic.

Finding the Right Size for Your Patio

Before you fall in love with the Clementi Colorado, it’s smart to pull out the measuring tape. This is a substantial unit, measuring 31.5 inches long, 23.6 inches deep, and 39.4 inches high. You’ll need to ensure you have enough room for it to stand comfortably with plenty of clearance. Just as important is the surface it will sit on. The Colorado must be placed on a non-combustible surface to ensure safety. This makes it a perfect addition to a stone patio or a dedicated outdoor kitchen counter built from fire-safe materials. Planning this placement is the first step to integrating it seamlessly into your backyard design.

Customizing with Accessories

This is where you can really personalize your cooktop. The Clementi Colorado comes in several setups to match your needs, including the basic unit, a model with a base, one with a log holder base, and even a version with a full prep stand. You can also choose between a modern Charcoal Gray or the classic Corten Steel finish, and decide whether you want it with or without a pedestal. Every model includes a stainless steel grill attachment, which allows you to cook directly over the open flame. These options let you create a complete cooking station, turning a simple fire pit into the heart of your outdoor entertainment space.

Common Myths About Wood-Fired Cooking

The idea of cooking over a real wood fire can feel a little intimidating. You might picture a process that’s difficult to control, messy, or limited to just a few specific foods. For many, it brings to mind rustic camping trips rather than sophisticated backyard entertaining. However, modern designs have completely changed the game, making wood-fired cooking more accessible and versatile than ever before. Many of the old challenges have been engineered away, leaving you with all the flavor and fun, without the fuss.

The Clementi Colorado, for example, is designed to debunk these common myths. It’s not just a simple grill, it offers incredible temperature control, and its unique material is built to last a lifetime with minimal effort. Thinking that wood-fired cooking is too complicated is a thing of the past. Once you understand how these modern cooktops work, you’ll see that they offer a level of performance and social engagement that other cooking methods just can’t match. You can find a variety of premium outdoor cooking solutions at the Gappsi Store to see what fits your lifestyle. Let’s clear up a few things you may have heard.

It’s More Than Just a Grill

One of the biggest misconceptions is that a wood-fired cooktop is just a fancier charcoal grill. The Clementi Colorado is so much more. It’s a hybrid unit that functions as both a high-performance cooktop and a captivating fire pit. This dual purpose transforms it from a simple cooking appliance into the heart of your outdoor living space. Instead of being off to the side, it becomes a central gathering point where guests can mingle and watch the magic happen. It creates an interactive and social cooking experience, perfect for building beautiful pavilions and pergolas around. It’s a centerpiece that provides warmth, ambiance, and incredible food all at once.

Mastering Heat Control Across Four Zones

If you think a wood fire means unpredictable heat, think again. The fear of burning one thing while another remains raw is a valid concern with basic fire pits, but the Clementi Colorado was engineered to solve this exact problem. Its design features four distinct cooking zones on the stainless steel plates. The area closest to the fire gets screaming hot, perfect for getting that beautiful sear on a steak. As you move outward, the temperature gradually decreases. This allows you to grill delicate vegetables, toast buns, and even keep side dishes warm all at the same time. This level of control is a game-changer, giving you the precision you need for any recipe and often becomes a key feature in our custom masonry projects.

Understanding the Corten Steel Patina

At first glance, the weathered, rust-colored finish of Corten steel might seem like a flaw. But this couldn’t be further from the truth. That beautiful patina is actually a protective layer that the steel develops when exposed to the elements. This layer prevents the deeper steel from corroding, making it incredibly durable and resistant to all kinds of weather. Unlike painted grills that can chip and rust, the Clementi Colorado’s finish is self-healing and requires virtually no maintenance. It’s a material chosen for its strength and longevity, perfectly complementing other durable outdoor elements like porcelain and natural stone. This ensures your cooktop will remain a stunning and functional part of your backyard for years to come.

Where Can You Buy the Clementi Colorado?

Ready to make the Clementi Colorado the new star of your backyard? Finding the right place to purchase it is just as important as choosing the cooktop itself. You want to make sure you’re getting an authentic product, a fair price, and the support you need to get started. As a premier home improvement company on Long Island, we have helped countless homeowners create their dream outdoor spaces, and we can guide you through this process. Let’s walk through where to buy your Clementi and what to consider before you do.

Finding an Authorized Dealer

When you’re investing in a high-quality piece like the Clementi Colorado, it’s essential to buy from an authorized dealer. This guarantees you receive a genuine product, backed by a full manufacturer’s warranty and expert customer service. Purchasing from an unauthorized seller might seem cheaper upfront, but it can lead to issues with authenticity or a lack of support down the line. As a proud supplier of premium outdoor living products, we offer the Clementi Colorado directly through the Gappsi store. Our team is trained on the product and can answer any questions you have, ensuring you feel confident with your purchase from day one.

Understanding the Cost and Long-Term Value

The Clementi Colorado is a premium cooktop, and its price reflects its superior craftsmanship, design, and performance. While it’s an investment, it’s helpful to think about it as more than just a grill. This is a permanent, beautiful addition to your backyard that offers incredible long-term value. It serves as a stunning fire pit for gatherings and a versatile cooking station that will completely change your approach to outdoor entertaining. By adding such a unique and functional element, you’re not just buying a product; you’re enhancing your lifestyle and the overall appeal of your outdoor living space. It’s a centerpiece that creates memories for years to come.

How to Find Current Promotions

Everyone appreciates getting the best value for their purchase, so it’s always a great idea to look for current promotions. Because offers can change with the seasons, the best way to find out about any available deals is to check with us directly. You can explore our online shop or give our team a call to ask about any ongoing specials, package deals, or delivery options for our Long Island customers. Sometimes, bundling a product like the Clementi Colorado with a larger masonry or patio project can also create opportunities for savings. We’re always happy to help you find the best way to bring your vision to life within your budget.

Related Articles

Frequently Asked Questions

Will the Corten steel finish stain my new patio? This is a great question, and a very practical one. The Corten steel is designed to form a stable, protective patina, which is not the same as corrosive rust that flakes off. During the initial weathering period, there can be some runoff. However, with proper installation on a suitable base like a stone or porcelain paver patio, this is managed easily. We ensure the unit is placed correctly to protect your beautiful hardscape from the very beginning.

How difficult is it to control the cooking temperature? You might think a wood fire is unpredictable, but the Clementi Colorado is engineered for control. The cooktop naturally creates different heat zones. The area right next to the flames is incredibly hot, perfect for searing, while the outer edges are much cooler, great for gently warming vegetables or toasting bread. It becomes intuitive very quickly. You just slide your food from one zone to another to get the perfect temperature, giving you more control than a standard grill often allows.

What can I cook on it besides the usual barbecue fare? While it makes an amazing steak, its versatility is what makes it so special. The large, flat cooktop acts like a griddle, so you can cook delicate fish, sear scallops, grill asparagus, and even make breakfast outside. Think fried eggs and bacon with a smoky flavor. You can also use cast iron pans directly on the surface to make sauces or even a fruit crumble for dessert. It truly turns your patio into a complete outdoor kitchen.

Can I put the Clementi Colorado on my wood or composite deck? For safety, the answer is a firm no. The Clementi Colorado is a heavy, wood-burning unit that generates significant heat and must be placed on a non-combustible surface. The ideal foundation is a professionally installed stone, porcelain, or concrete patio. This not only ensures safety but also creates a durable and beautiful base that complements the cooktop and turns the area into a permanent outdoor living feature.

How is this different from just putting a grill grate over a fire pit? The Clementi Colorado is a completely different experience. A simple grate over a fire gives you one intense, often uncontrollable, temperature. The Colorado’s solid cooktop provides four distinct and stable heat zones for incredible versatility. Plus, its design as a social hub, its durable Corten steel construction, and its easy-to-clean ash removal system make it a thoughtfully designed appliance, not just a makeshift grill. It’s a permanent centerpiece for cooking and gathering.

Get a quote for basement finishing for an unfinished basement with a fireplace.

Get a Quote for Basement Finishing: What to Expect

That unused space downstairs holds so much potential. It could be a cozy family room, a sleek home gym, or a quiet guest suite. But turning that vision into a reality starts with one crucial, practical step. When you get a quote for basement finishing, you’re not just getting a price; you’re creating the blueprint for your project. This process helps you understand the costs, define the scope, and find the right professional partner. It’s the moment your idea begins to take shape. This guide will walk you through everything you need to know to navigate this first step with confidence, ensuring your home remodeling project is a success from the very beginning.

Key Takeaways

  • Look Beyond the Price Tag: A quality quote is more than a number; it is a detailed breakdown of materials, labor, and permits. This transparency protects you from surprise costs and helps you compare offers accurately.
  • Prepare for Your Consultation: Before meeting a contractor, define your vision for the space, set a realistic budget, and take basic measurements. This preparation helps them create a more precise and personalized estimate.
  • Vet the Professional, Not Just the Paper: Ask critical questions about their license, insurance, and references. Also, make sure you understand their process for handling project changes to ensure you are partnering with a reliable team.

What Drives Your Basement Finishing Cost?

Understanding what goes into the price of a basement remodel helps you plan your budget and make informed decisions. The final cost isn’t just a single number; it’s a combination of several key factors. From the sheer size of the space to the materials you choose, each element plays a role in shaping your quote. Let’s walk through the five main drivers of your basement finishing cost.

The Size and Design of Your Space

The square footage of your basement is the foundation of your project’s cost. A larger area naturally requires more materials and labor. But beyond size, the complexity of your design is a major factor. A simple, open-plan layout with drywall, basic flooring, and standard lighting will be on the lower end of the cost spectrum. However, if your vision includes custom features, the price will adjust accordingly. Adding walls to create separate rooms, like a bedroom or office, increases the scope. Incorporating a bathroom, a wet bar, or a dedicated home theater involves more intricate work and specialized home remodeling expertise, which will be reflected in your quote.

Your Choice of Materials

The materials you select have a direct impact on both the look and the cost of your finished basement. For flooring, options range from budget-friendly vinyl planks to plush carpeting or elegant tile, each with a different price point. You might also need a subfloor to create a level and moisture-resistant base, which is an additional material and labor cost. This principle applies to everything in the space, including wall finishes, ceiling styles, and lighting fixtures. While premium materials like natural stone for a feature wall cost more upfront, they often provide greater durability and a more high-end finish, adding long-term value to your home.

Essential Utilities: Electrical, Plumbing, and HVAC

Turning a concrete shell into a comfortable living area requires significant utility work. This is a critical part of any basement project and a major cost component. Your plan will likely require an electrician to run new wiring for outlets, overhead lighting, and dedicated circuits for appliances or entertainment systems. If you’re adding a bathroom or a wet bar, a licensed plumber will need to install new supply and drain lines. You also need to consider climate control. Extending your home’s existing HVAC system with new ductwork ensures the space is comfortable year-round. This work is essential for creating a safe, functional, and habitable room.

Local Permits and Building Codes

On Long Island, any renovation that creates a new living space requires permits from your local town. This is a non-negotiable step that ensures your project is safe, legal, and up to code. Permit requirements are in place to protect you and future owners. They often dictate specifics like the minimum ceiling height, the number and size of egress windows for emergency exit, and proper ventilation. The cost of the permits themselves, along with any work needed to meet these building codes, will be part of your overall budget. Working with an experienced local contractor like Gappsi ensures the process is handled correctly from the start, avoiding potential fines and future headaches.

Keeping Moisture Out: Waterproofing

Before any finishing work begins, it’s crucial to address potential moisture issues. Basements are below ground, making them naturally susceptible to water intrusion and dampness. Proper waterproofing is an investment that protects your entire renovation from costly water damage and mold growth down the road. Depending on your home’s specific needs, this could involve sealing the interior foundation walls, installing a sump pump to manage groundwater, or adding a French drain system. A thorough contractor will assess your basement for any signs of moisture and recommend the right solution. These restoration and sealing services are fundamental to creating a dry, healthy, and long-lasting living space.

How to Prepare for Your Quote

Being prepared for your quote meeting helps us give you the most accurate estimate. A little homework ensures we can bring your vision to life. Here’s how you can get ready for our conversation.

Measure Your Space and Note Its Condition

Before we visit, get familiar with your basement’s layout. Grab a tape measure for a rough idea of the length and width. Basic dimensions are a great starting point. Also, note the current condition. Are there support columns, low-hanging pipes, or a sump pump we need to work around? Knowing these details in advance helps us plan more effectively during our initial consultation.

Define Your Vision and Must-Haves

How do you dream of using your new basement? Think about its primary function: a family media room, a home gym, or a guest suite? Make a list of your “must-haves,” like a wet bar, and your “nice-to-haves,” like a sound system. This clarity helps us understand your priorities and design a space that fits your lifestyle. When you can clearly define your vision, we can better align the project scope with your goals.

Set a Realistic Budget

Knowing your budget is key to a successful renovation. On Long Island, basement finishing costs vary widely based on features like a custom bathroom or home theater. Be honest with your contractor about what you are comfortable spending. This allows us to suggest materials and designs that fit your financial plan. We also recommend a contingency fund, about 10% to 15% of the total cost, for any unexpected surprises during construction.

Research Local Building Codes

Finishing a basement is about safety and compliance, not just looks. Renovations on Long Island involving new living space or changes to plumbing and electrical systems require permits. Your town has rules about ceiling height, egress windows, and ventilation. While a reputable contractor manages the permit process, understanding these requirements helps you ask informed questions. It ensures your new space is beautiful, legal, and safe for your family to enjoy for years to come.

What to Expect During the Quoting Process

Getting a quote for your basement remodel is more than just getting a price; it’s the first step in building a relationship with your contractor. A professional and transparent quoting process is a strong indicator of the quality and communication you can expect throughout the entire project. This phase is all about making sure both you and your contractor are on the same page, with a clear understanding of the vision, scope, and costs involved. It’s a collaborative effort that sets the foundation for a successful renovation. From the first conversation to the final, detailed estimate, each step is designed to eliminate surprises and ensure your project starts on the right foot. A contractor who invests time in a thorough quote is one who values precision and client satisfaction. This initial stage is your opportunity to gauge their expertise, attention to detail, and how they handle questions. It’s the blueprint for your partnership, so it’s important to know what a quality process looks like. Understanding these steps will help you feel confident and prepared as you move forward with your home remodeling project.

The First Chat: Your Initial Consultation

Your journey begins with an initial conversation. This first chat, whether over the phone or in our showroom, is our chance to listen. We want to hear all about your vision for the space. Are you dreaming of a cozy family media room, a sleek home gym, or a functional guest suite with a kitchenette? This is the time to share your must-haves, your style preferences, and your ideal budget range. Feel free to bring any inspiration photos or ideas you’ve collected. Think of it as a discovery call where we get to know you and your goals, ensuring we are a good fit before moving on to the next step.

The On-Site Visit and Measurements

After our initial talk, the next step is for us to see the space in person. An on-site visit is essential for creating an accurate and comprehensive quote. During this meeting, we will take detailed measurements of your basement, noting the location of key features like support columns, windows, and existing utility lines. We’ll also assess the current condition of the space, checking for any potential challenges like moisture issues or structural quirks. This thorough evaluation allows us to gather all the technical data needed to plan for every phase of the project, from framing and electrical work to insulation and flooring. You can see examples of our meticulous process on our YouTube channel.

When to Expect Your Estimate

A detailed, accurate quote takes time to build. Be wary of any contractor who gives you a price on the spot. After our on-site visit, we take all the information we gathered, your vision, and our precise measurements back to the office. We then carefully calculate the costs for materials, labor, and any necessary permits. This process can take a week or more, depending on the complexity of your project. A rushed estimate often leads to surprise costs and missed details down the road. We believe in taking the time to get it right from the start, so your final quote is a reliable roadmap for your project’s budget and timeline.

How to Read Your Quote

When you receive our estimate, you won’t just see a single number. A trustworthy quote should be a detailed, transparent document that breaks down the entire project. Look for itemized lines for each part of the job, including demolition, framing, electrical, plumbing, and finishes. It should clearly specify the materials to be used and the associated labor costs. This level of detail is your best protection against unexpected expenses. A vague quote is a red flag, but a comprehensive one shows that your contractor has thoroughly planned your project and is committed to transparency. This is especially important for custom work like detailed masonry.

How to Compare Your Basement Finishing Quotes

Once you have a few estimates in hand, the real work begins. It’s tempting to just look at the final number, but a smart comparison goes much deeper. This is your chance to see which contractor truly understands your vision and which one might be cutting corners. A lower price can sometimes hide bigger problems, like vague terms, missing services, or low-quality materials. Taking the time to properly evaluate each quote protects your investment and ensures you partner with a professional who will deliver the basement you’ve been dreaming of.

Think of each quote as a blueprint for your project. It reveals a contractor’s process, their attention to detail, and how they value their work and your home. By looking at the specifics, you can identify the best partner for your comprehensive home remodeling project, not just the cheapest option. Let’s walk through exactly what you should be looking for to make a confident and informed decision.

Break Down the Line Items

A single number on a piece of paper is not a quote, it’s a guess. A professional estimate should be a detailed, itemized list that breaks down every aspect of the project. This includes costs for labor, specific materials, permits, demolition, and cleanup. If you receive a vague estimate, don’t hesitate to ask for a more detailed breakdown. This transparency is a hallmark of a trustworthy contractor. It shows they have thoroughly planned the project and are confident in their pricing, leaving no room for surprise costs down the line. A clear, itemized quote is your best tool for comparing apples to apples and understanding exactly where your money is going.

Vet Your Contractor’s Credentials

The numbers only tell part of the story. The team behind the quote is just as important. Is the contractor licensed and insured in Long Island? Do they have a portfolio of finished basements you can review? A reputable company will be happy to provide these credentials. You can also get a feel for their professionalism during the on-site visit. Did they take precise measurements and ask detailed questions about your goals? You can often see their work firsthand on their website or social media, which gives you a clear idea of their craftsmanship and style. This research helps you confirm you’re hiring an experienced and reliable team.

Spot Potential Hidden Costs

The lowest bid can be tempting, but it might be missing crucial elements. Some contractors leave out necessary work to make their price seem more attractive. Be on the lookout for omissions related to plumbing, electrical, or HVAC rough-ins, especially if you plan to add a bathroom or kitchenette. Egress windows, which are often required by code, involve expert masonry work and can add a significant amount to the final cost. Ask each contractor directly if these items are included and what other potential costs could arise during the project. A good contractor will be upfront about these possibilities from the start.

Compare Payment Schedules and Warranties

A contractor’s payment terms and warranties speak volumes about their stability and confidence. Be cautious of anyone asking for a large percentage of the total cost upfront. A typical payment schedule is tied to project milestones, ensuring you only pay for completed work. Equally important is the warranty. Does it cover both labor and materials? A strong warranty shows that the contractor stands behind their work and uses quality materials built to last. Comparing these policies side-by-side will help you understand the long-term value each contractor offers beyond the initial price tag. This gives you peace of mind that your investment is protected.

Key Questions to Ask Every Contractor

Once you have a few quotes in hand, the real work begins. It’s not just about comparing numbers; it’s about vetting the people you’re inviting to transform your home. Asking the right questions upfront can save you from headaches, unexpected costs, and a project that doesn’t meet your expectations. Think of this as your interview process. You are the hiring manager for one of the most important jobs: improving your home. A reputable contractor will welcome your questions and provide clear, confident answers. This conversation helps build the trust and communication that are essential for a successful partnership. We’ve put together a list of key questions to help you get the clarity you need before signing on the dotted line.

What’s the Project Timeline?

Knowing the project timeline is about more than just circling a date on your calendar. It helps you plan your life around the construction and set realistic expectations. Ask for a detailed schedule that outlines each phase of the project, from demolition to the final touches. While a basement remodel can often take eight to twelve weeks, your specific project’s timeline will depend on its complexity. Understanding the sequence of events also helps you see progress and know if things are on track. A clear timeline is a sign of a well-organized contractor who has a solid plan for your home remodeling project.

What Materials Will You Use?

Your quote should be more than just a final number. A detailed estimate lists the specific materials the contractor plans to use, and this is where you can really see the value. When you get an estimate that’s just a number with no detail, it’s time to ask questions. Inquire about the brands, quality, and durability of everything from flooring to fixtures. This allows you to compare apples to apples between quotes and ensures there are no surprises. Knowing the materials helps you understand the long-term quality of your investment, whether you’re choosing beautiful porcelain pavers for a new patio or specific cabinetry for your basement bar.

Can I See Your License, Insurance, and References?

This is a non-negotiable question. Before you hire anyone, you must confirm they are properly licensed to work in your area and carry both liability insurance and workers’ compensation. Many homeowners don’t realize their contractor skipped these important steps until it’s too late, leaving them financially responsible for accidents or property damage. A professional contractor will readily provide these documents. Also, ask for a list of recent references from clients with similar projects. Speaking to past customers is one of the best ways to gauge a contractor’s reliability, communication, and quality of work.

How Do You Handle Changes and Cost Overruns?

Even with the best planning, changes can happen. You might decide to add a feature, or an unexpected issue might arise during construction. It’s essential to know how your contractor handles these situations. Ask about their process for “change orders,” which are written documents that detail the change and its impact on the cost and timeline. Signing off on a vague estimate can leave you exposed to surprise costs and blown timelines. A clear process for managing changes protects both you and the contractor, ensuring that any adjustments are agreed upon in writing before the work proceeds.

Common Mistakes to Avoid When Getting Quotes

Getting quotes is an exciting step, but it’s also where some costly mistakes can happen. Being aware of common pitfalls will help you choose the right partner for your project and ensure your vision comes to life without any unwelcome surprises. Let’s walk through a few key things to watch out for so you can move forward with confidence.

Choosing Based on Price Alone

It’s so tempting to jump on the lowest number you see, but this is one of the biggest mistakes you can make. An unusually low bid often means corners are being cut somewhere. This could be in the quality of materials, the skill of the team, or even skipping essential steps like pulling the right permits. While it saves money upfront, it can lead to poor workmanship, safety issues, and expensive repairs down the road. Instead of focusing only on the price tag, consider the overall value. A quality home remodeling project is an investment in your home, and a slightly higher quote from a reputable contractor often reflects better materials, expert craftsmanship, and peace of mind.

Accepting a Vague Estimate

A one-page quote with a single number at the bottom is a major red flag. Vague estimates leave you vulnerable to surprise charges and misunderstandings about what’s included. A professional contractor should provide a detailed, itemized breakdown of all costs, including labor, materials, and any subcontractor fees. This document should clearly outline the entire scope of work, from demolition to the final touches. Don’t be afraid to ask for clarification. A trustworthy partner will be happy to walk you through every line item, ensuring you both have the same expectations before any work begins. This level of detail protects you and sets the stage for a smooth project.

Skipping the Comparison Step

Even if you have a great feeling about the first contractor you meet, it’s always wise to get a few different quotes. Not getting multiple estimates means you have no way of knowing if the price is fair or if another company might offer a better approach. Comparing quotes helps you establish a baseline for your project’s cost and see how different professionals plan to tackle the job. This step isn’t just about finding a better price; it’s about making an informed decision. By speaking with a few experts, you’ll gain valuable insights and feel more confident when you finally choose the right team for your basement finishing project.

Forgetting About Permits and Extra Costs

Many homeowners are surprised to learn that finishing a basement often requires permits, especially if you’re adding plumbing, new electrical wiring, or changing the structure. Forgetting to account for these can halt your project and lead to fines. Beyond permits, there can be other unforeseen expenses. For example, you might discover a moisture issue that needs to be addressed or decide to add an egress window for safety. A great contractor will discuss these possibilities with you from the start. Be sure to ask what’s included in their quote regarding permits and how they handle unexpected issues that may affect the budget. Proactive restoration and sealing can often prevent future problems.

How Many Quotes Do You Really Need?

Deciding on a contractor is one of the biggest steps in your basement finishing project. A crucial part of this process is gathering quotes, but how many do you actually need? While it can feel like a lot of work, getting the right number of estimates helps you find a great partner for your project and ensures you get a fair price for quality work. Let’s walk through how to approach this step with confidence.

The Rule of Three

You’ve probably heard this before, and for good reason. The “rule of three” is a solid guideline for most home improvement projects. Getting at least three quotes gives you a clear picture of what the project should cost. It helps you compare prices for your project and see the different approaches contractors might take. With three different estimates in hand, you can easily spot any outliers. Is one quote significantly higher or lower than the others? Having multiple options provides the context you need to make a smart, informed decision without feeling overwhelmed by too much information.

Is It Worth Your Time to Get More?

So, is three the magic number? Often, yes. But for larger or more complex projects, like a complete home remodeling that includes a finished basement, gathering another one or two quotes can be a wise investment of your time. Taking this extra step helps you truly understand the market rate for the job. It also gives you more opportunities to talk with different professionals, learn about new material options, and gain confidence in your final choice. The goal isn’t just to find the cheapest price, but to find the best value and the right team for your vision.

Red Flags That Mean You Need Another Quote

As you review your quotes, keep an eye out for red flags that signal it’s time to get another estimate. A bid that is dramatically lower than the others might seem like a great deal, but it can be a warning sign. A contractor with a rock-bottom price may be cutting corners on materials, skipping permits, or using less experienced labor. Another major red flag is a vague estimate that’s just a single number with no breakdown of costs. A professional quote should be detailed, outlining the costs for labor, materials, and other expenses. If a contractor isn’t transparent from the start, it’s best to move on.

Related Articles

Frequently Asked Questions

Why can’t I get a simple price estimate over the phone? A basement is a unique space, and an accurate quote requires seeing it in person. A phone call can’t tell us if there are hidden moisture issues, low-hanging pipes, or an uneven foundation that needs to be addressed. The on-site visit allows us to take precise measurements and assess the existing conditions, ensuring the quote we provide is comprehensive and reliable, not just a guess that will change later.

Do I really need a permit just to finish my basement? Yes, you absolutely do. On Long Island, any project that creates a new living area requires permits from your town. This is a critical step that ensures all work, especially electrical and plumbing, is done safely and meets local building codes. It protects your family, your investment, and your home’s future resale value. A professional contractor handles this entire process for you.

How long will my basement be under construction? A typical basement finishing project often takes between eight and twelve weeks from the start of construction. The exact timeline depends on the scope of your project. A simple, open-plan family room will be on the shorter end, while a more complex design with a full bathroom, a wet bar, or custom masonry will naturally require more time. We will always provide you with a detailed schedule before we begin.

Can I save money by doing some of the work myself, like painting? While it can be tempting to handle parts of the job yourself, we generally advise against it. Our projects run on a tightly coordinated schedule, and DIY work can cause delays that impact every other trade, from electricians to flooring installers. Furthermore, our warranty covers the craftsmanship of our team, and we can’t guarantee work that we don’t perform ourselves. Letting a professional team handle the entire project ensures a seamless and high-quality result.

What is a ‘change order’ and why is it important? A change order is a written document that outlines any adjustments to the original plan. For instance, you might decide to add built-in shelving or upgrade your flooring choice after the project has started. The change order details the new work, the associated cost, and any impact on the timeline. You review and approve it before we proceed, which ensures total transparency and prevents any surprise charges on your final bill.

Clementi Gas Gold oven making homemade pizza with pro performance and the convenience of gas.

Clementi Gas Gold Oven: Wood-Fired Pizza at Home

If you think a high-performance outdoor oven is just for making pizza, it’s time to think bigger. While the Clementi Gas Gold Oven produces a phenomenal Neapolitan-style pizza, its true value lies in its incredible versatility. This appliance can transform your entire approach to outdoor cooking, turning your patio into a full-service culinary station. From baking artisan bread with a perfect crust to roasting vegetables and searing steaks, its consistent, controllable heat opens up a world of possibilities. The Clementi Gas Gold Oven – The simplicity of gas, the performance of a pro. The Gold gas oven is ideal for those who love homemade pizza but don’t want to give up the convenience of gas. Perfect for decorating your outdoor space and sharing any recipe without having to worry about wood. Let’s explore all the delicious meals you can create beyond pizza.

Key Takeaways

  • Enjoy authentic pizza without the hassle: The Clementi Gas Gold Oven combines a traditional firebrick floor with the convenience of gas, giving you a perfectly cooked 90-second pizza with simple, push-button controls.
  • Go beyond pizza with versatile cooking: This oven’s consistent high heat is not just for pizza; use it to roast meats, grill vegetables, and bake artisan bread, turning your patio into a complete outdoor kitchen.
  • Protect your investment with proper care: Ensure your oven performs safely for years by opting for professional installation and following key maintenance steps, such as letting it cool completely before covering it.

Why Choose the Clementi Gas Gold Oven?

When you’re designing your dream backyard, every element matters. The Clementi Gas Gold Oven isn’t just another piece of equipment; it’s the heart of your outdoor kitchen, blending authentic Italian heritage with modern convenience. It’s for the homeowner who appreciates both beautiful design and incredible performance. This oven delivers the coveted flavor of a wood-fired pizza with the simplicity and control of gas, making it a fantastic choice for entertaining friends and family. Let’s look at a few reasons why this oven stands out from the rest.

Experience Italian Craftsmanship

The Clementi Gas Gold Oven is a testament to true Italian craftsmanship. Made in Italy, it embodies a long tradition of quality and attention to detail that you can see in its sleek lines and robust construction. This isn’t just a cooking appliance; it’s a beautiful centerpiece that enhances your entire outdoor living area. Imagine this stunning oven integrated into a custom masonry kitchen island, creating a focal point for gatherings. Its design is as much about aesthetics as it is about function, ensuring it looks just as good as the food it produces.

Perfect Your Pizza with the Air Plus System

One of the most impressive features of the Clementi Gas Gold Oven is its patented Air Plus System. This technology continuously feeds air into the flame, ensuring the heat stays steady and is distributed evenly throughout the oven. What does this mean for you? No more rotating your pizza every 20 seconds or worrying about burnt edges and a soggy middle. The consistent temperature gives you the control to cook pizzas perfectly every time. This innovative system takes the guesswork out of achieving an authentic, crispy-chewy crust, letting you relax and enjoy the cooking process. You can find this exceptional oven and other high-end outdoor appliances at the Gappsi Store.

Get the Perfect Crust with a Firebrick Floor

The secret to an amazing pizza crust lies in the cooking surface, and the Clementi oven nails it. It features a firebrick floor, the same kind of material used in traditional pizzerias. This special floor absorbs and radiates intense, even heat directly to the bottom of your dough. When combined with the heat circulating within the oven’s dome, it creates the perfect environment for a phenomenal crust. The result is a pizza that’s delightfully crispy on the outside while remaining soft and airy on the inside. It’s this combination of a hot floor and ambient heat that gives you that signature leopard-spotting char you look for in a Neapolitan-style pizza.

Gas vs. Wood-Fired: How Do They Compare?

Choosing between a gas and a wood-fired pizza oven really comes down to your cooking style and what you value most in your outdoor kitchen. While traditional wood-fired ovens offer that classic, smoky aroma that many of us love, modern gas ovens like the Clementi Gas Gold provide incredible convenience without sacrificing performance. It’s a common debate for anyone designing their dream patio. Both have their merits, but understanding the key differences will help you decide which fuel source is the perfect fit for your Long Island backyard gatherings. Let’s break down how they stack up in terms of temperature control, cooking speed, flavor profile, and overall heat distribution so you can make the best choice for your home.

Achieve Consistent Temperature Control

If you want predictable, repeatable results every time you cook, a gas oven is your best friend. Gas ovens give you precise temperature control with the simple turn of a dial, ensuring your pizzas are cooked perfectly from the crust to the center. This takes the guesswork out of managing a live fire. While a wood fire can produce an unmatched authentic experience, it requires active management to maintain the right temperature. For those who want to focus more on the food and less on the fire, the consistency of a gas oven is a major advantage for any outdoor entertainment space.

Cook Neapolitan Pizza in 90 Seconds

One of the biggest draws of a high-quality pizza oven is its ability to reach scorching hot temperatures, and the Clementi Gas Gold is no exception. It gets incredibly hot, reaching about 750°F in just 15 to 20 minutes. This intense heat is the secret to cooking a true Neapolitan-style pizza in as little as 90 seconds. The crust gets that perfect leopard-spotted char, while the inside stays soft and chewy. You can bring that authentic, pizzeria-quality speed and taste right to your patio, making pizza night faster and more delicious than ever.

Enjoy Clean Flavor Without the Smoke

Flavor is a key point of comparison. Wood-fired cooking is known for adding a complex, smoky flavor to food, which many people love. On the other hand, a gas-fired pizza has a cleaner taste that allows the flavors of your sauce, cheese, and toppings to be the stars of the show. There’s no right or wrong answer here; it’s all about personal preference. If you prefer a pure flavor profile and want to avoid the smoke that comes with burning wood, a gas oven delivers a consistently clean and delicious result every time you fire it up under your pavilion or pergola.

Understand Heat Retention and Distribution

How an oven holds and distributes heat is critical for a perfect crust. Wood fires produce a unique rolling flame that cooks the top of the pizza while the hot floor cooks the base. The Clementi Gas Gold oven is designed to replicate this environment. Its specialized burners create a similar heating pattern, and the firebrick floor retains heat exceptionally well, giving you that crispy, evenly cooked crust. You get the convenient and precise control of gas combined with the superior heat retention you’d expect from a traditional masonry oven, all available through the Gappsi Store.

Explore the Clementi’s Key Features

Discover Its Durable Materials and Insulation

When you invest in an outdoor oven, you want it to last. The Clementi Gas Gold Oven is built from robust steel, ready to handle the changing seasons on Long Island. What really makes it special is the heavy-duty insulation. It’s packed with 8cm of wool-rock and a 2.5cm Skamotec board underneath the cooking surface. In simple terms, this means the oven gets hot and stays hot, without wasting energy. This incredible heat retention ensures your oven floor is always ready for the next pizza, giving you consistent results every time you cook. It’s the kind of quality construction that looks right at home on a beautiful natural stone paver patio.

Harness High-Heat Cooking Power

If you dream of making authentic Neapolitan pizza, you need serious heat. The Clementi Gas Gold Oven delivers, reaching temperatures between 350–400°C. This intense heat is the secret to cooking a perfect pizza with a crispy, leopard-spotted crust in just 90 to 120 seconds. Imagine pulling out delicious, piping-hot pizzas for your family and friends in under two minutes. This oven transforms your backyard into the best pizzeria in town, making it the perfect centerpiece for any gathering. It’s an amazing addition to an outdoor entertainment space, especially when you have a covered area like one of Gappsi’s pavilions or pergolas to cook under.

Start Cooking with Simple Push-Button Ignition

Forget the hassle of starting a wood fire. The Clementi Gas Gold Oven makes getting started incredibly simple with its user-friendly gas controls and piezoelectric ignition. With just the push of a button, the oven sparks to life, and you can begin preheating right away. This means you can decide to have a pizza night on a whim without any of the prep work or cleanup that comes with wood. The convenience lets you focus on what matters most: crafting delicious food and enjoying your time outdoors. You can find this oven and other premium outdoor living products at the Gappsi Store.

Find the Right Size for Your Patio

No matter the size of your outdoor space, there’s a Clementi Gas Gold Oven that will fit perfectly. It comes in three different sizes: Small (60×60), Medium (80×60), and Large (100×80). Whether you have a cozy patio or an expansive backyard entertainment area, you can choose the model that best suits your needs. This flexibility ensures you don’t have to compromise on quality for the sake of space. We can even help you incorporate the perfect oven into a custom landscape design, creating a seamless and functional outdoor kitchen you’ll love for years to come.

What Are the Benefits of a Gas Pizza Oven?

If you love the idea of authentic, high-heat pizza but feel intimidated by the work of a traditional wood-fired oven, a gas model might be your perfect match. Gas pizza ovens, like the Clementi Gas Gold Oven, combine the incredible cooking power of a classic oven with the convenience and control of modern technology. This blend of old and new offers some serious perks for your outdoor kitchen, making it easier than ever to create amazing meals right in your backyard. It’s about getting that perfect, crispy crust without the steep learning curve, turning your patio into the neighborhood’s favorite pizzeria.

Preheat in Under 20 Minutes

One of the biggest hurdles with wood-fired ovens is the time it takes to get them hot. With a gas oven, that wait time is practically eliminated. The Clementi Gas Gold Oven reaches an impressive 750°F in just 15 to 20 minutes. This means you can go from craving pizza to cooking it in less time than it takes to decide on a movie. This incredible speed allows you to cook a Neapolitan-style pizza in about 90 seconds. Spontaneous pizza nights are suddenly on the table, even on a busy weeknight. You can find models like this at the Gappsi Store to complete your outdoor setup.

Cook Delicious Food in Any Weather

A sudden breeze or a damp evening can make starting and maintaining a wood fire a real challenge. Gas ovens give you a reliable flame every single time, regardless of the weather. While you’ll still want to be protected from a downpour, you won’t have to worry about the wind extinguishing your heat source or damp wood refusing to light. This dependability means you can plan an outdoor cooking night with confidence. Just imagine enjoying fresh, hot pizza under the cover of your custom pavilion or pergola on a cool evening. It’s about making your outdoor kitchen a functional and enjoyable space you can use more often.

Forget About Managing Wood and Ash

Let’s be honest, managing a wood fire can be a lot of work. You have to source the right kind of wood, make sure it stays dry, build the fire, and tend to it constantly. Then comes the cleanup, which involves sweeping out piles of ash. A gas oven lets you skip all of that. With the push of a button and the turn of a dial, you have instant, controllable heat. There’s no wood to manage and no ash to clean. This means you get to spend less time working and more time relaxing with your family and friends. It’s the clean, simple way to get that incredible wood-fired taste without the hassle.

Master Your Heat with Precise Control

While the rustic nature of a wood fire is romantic, it’s also unpredictable. Temperatures can vary wildly, leading to unevenly cooked food. Gas ovens, on the other hand, offer incredibly precise temperature control. You can set the exact temperature you need and trust the oven to maintain it consistently. This level of control is a game-changer. It ensures your pizza crust is perfectly crisp all the way around and your toppings are cooked just right. This precision also makes it easier to experiment with other dishes, like baking bread or roasting vegetables, that require a steady, specific heat. It takes the guesswork out of high-heat cooking, letting you feel like a professional chef in your own backyard.

What Else Can You Cook Besides Pizza?

While the Clementi Gas Gold Oven makes incredible pizza, thinking of it as just a pizza oven is selling it short. Its real magic lies in its versatility. The consistent, high heat that perfects a Neapolitan crust can also be used to create a huge range of other delicious dishes. This oven can easily become the centerpiece of your outdoor kitchen, transforming how you cook and entertain. From savory roasts to delicate pastries, you can prepare entire multi-course meals without ever stepping back inside. It’s all about getting creative and exploring what this powerful oven can do.

Bake Artisan Breads and Pastries

Imagine pulling a loaf of crusty, golden-brown artisan bread from your own backyard oven. The Clementi makes this a reality. The firebrick floor provides the intense, direct heat needed for a perfect “oven spring,” creating a light, airy interior and a wonderfully crisp crust. You can also bake flaky pastries, warm scones, or even a batch of morning buns. The oven’s ability to maintain a steady temperature gives you the control needed for baking, allowing you to expand your culinary skills. It’s the perfect way to complement an afternoon spent relaxing on your beautiful porcelain and natural stone patio.

Roast Meats and Grill Vegetables

Move over, barbecue. The Clementi oven is fantastic for roasting meats and grilling vegetables. The high heat sears the outside of steaks, chicken, and fish, locking in juices and creating incredible flavor that’s hard to replicate indoors. Slide in a cast-iron skillet with your favorite vegetables, like asparagus, bell peppers, or zucchini, and watch them roast to tender, caramelized perfection in minutes. You can even cook larger items like a whole roasted chicken or a pork loin. This oven turns a simple weeknight dinner into a special occasion, especially when enjoyed under one of Gappsi’s custom pavilions or pergolas.

Get Creative with Desserts and More

Your culinary adventure doesn’t have to end with the main course. The Clementi oven is also perfect for making show-stopping desserts. Think bubbling fruit crumbles, gooey cast-iron skillet cookies, or rustic baked apples topped with cinnamon and oats. The residual heat after you’ve finished cooking your main dishes is often ideal for gently baking a sweet treat. Beyond desserts, you can experiment with dishes like baked fish, savory curries, or bubbling pots of beans. This oven truly invites you to experiment, and you can find it along with other outdoor essentials at the Gappsi Store.

Let’s Talk About Cost

An outdoor pizza oven is an investment in your home and your lifestyle, so it’s natural to have questions about the cost. Thinking about the price is about more than just the number on the tag; it’s about understanding the quality, longevity, and overall value you get in return. The Clementi Gas Gold Oven is a premium appliance, and its price reflects the expert Italian engineering and high-quality materials that go into its construction. Let’s break down what that means for you and your outdoor kitchen.

Understanding the Price Point

When you invest in a Clementi Gas Gold Oven, you are paying for exceptional craftsmanship and performance that lasts. This isn’t a temporary grill; it’s a permanent, high-end feature for your backyard entertainment space. The cost accounts for its durable, weather-resistant construction and advanced features like the Air Plus system, which are designed to give you a perfect cooking experience for years to come. Think of it as a long-term addition to your home, similar to installing a professional-grade stove in your indoor kitchen. It’s a centerpiece that adds both function and style to your outdoor living area.

Compare Its Value to Wood-Fired Ovens

Many people love the idea of a traditional wood-fired pizza oven, and for good reason. They offer a rustic charm and can impart a unique, smoky flavor. However, they also require a lot of hands-on management, from sourcing the right wood to constantly tending the fire and cleaning up ash. The Clementi Gas Gold Oven provides the same high-heat, stone-floor cooking environment but with far more convenience and control. You get consistent, repeatable results without the steep learning curve. While some purists argue about flavor, many chefs find that a gas-fired oven delivers a cleaner taste that allows the quality of your ingredients to be the star of the show. The value of the Clementi lies in its ability to deliver wood-fired performance with modern, push-button simplicity.

What to Know About Safety and Maintenance

Your Clementi Gas Gold Oven is an incredible addition to your outdoor kitchen, and with a little care, it will perform beautifully for years to come. Following a few simple safety and maintenance steps protects your investment and ensures every pizza night is a safe and delicious one. Think of it as the key to countless perfect meals and memories in your backyard.

Install Your Oven Safely

Proper installation is the first step to safely enjoying your new pizza oven. It’s important to place your oven on a stable, level, and non-combustible surface with plenty of clearance from flammable materials. While the Clementi is designed for straightforward setup, ensuring it’s correctly connected to the gas supply is critical. For total peace of mind, we recommend professional installation. Our team has decades of experience creating custom outdoor kitchens, and we can make sure your oven is integrated perfectly and safely into your space. And a good rule of thumb for any time you’re handling the oven, especially during setup: always use heatproof gloves.

Follow Simple Operating Guidelines

Once your oven is installed, operating it safely is easy. The most important thing to remember is to let it cool down completely before putting on its protective cover. Do not put the protective cover on the oven while it is still warm; wait at least 24 hours after use to ensure it has fully cooled. Covering it too soon can trap heat and moisture, which can damage the finish over time. It’s also wise to keep the area around the oven clear and never leave it unattended when it’s on, especially if you have children or pets. You can find high-quality covers and other essentials at the Gappsi Store.

Keep Your Oven Clean with Ease

One of the best parts of a gas oven is how simple it is to clean. Unlike wood-fired models, there’s no ash or soot to scoop out. To maintain your oven, just let it cool completely and then use a stiff brush to sweep any baked-on food debris off the firebrick floor. For the stainless steel exterior, a simple wipe-down with a soft cloth and a suitable cleaner will keep it shining. Regular cleaning prevents buildup, ensures your oven heats efficiently, and keeps it looking like the centerpiece of your patio. It’s a similar principle to our restoration and sealing services: a little maintenance goes a long way.

Protect Your Oven Year-Round

Your Clementi oven is built to last, but protecting it from Long Island’s weather will extend its life even further. A high-quality, waterproof cover is your best defense against rain, snow, and sun. Just remember to wait for the oven to cool completely before you cover it up. For the ultimate year-round protection, consider integrating your oven into a covered outdoor living area. A custom pavilion or pergola not only shields your oven from the elements but also creates a stunning, functional outdoor room for entertaining in any season. And as always, when you’re working with a hot oven, keep those heatproof gloves handy.

Is the Clementi Gas Gold Oven Right for You?

Deciding on the perfect pizza oven comes down to your lifestyle, your space, and your cooking ambitions. The Clementi Gas Gold Oven is a fantastic choice for many Long Island homeowners because it combines authentic Italian quality with modern convenience. If you dream of serving up incredible pizza without the learning curve of a wood-fired oven, this might be the perfect addition to your home. Let’s walk through a few key considerations to help you determine if it’s the right fit for your backyard.

Does It Fit Your Long Island Backyard?

The Clementi Gold Gas Pizza Oven is a high-quality appliance made in Italy, designed for people who love great food but also value their time. Because it runs on gas, you can skip the process of managing a wood fire and get straight to cooking. This makes it an incredibly practical choice for any outdoor space, whether you have a sprawling yard or a cozy patio. Imagine it as the centerpiece of a custom masonry countertop or nestled into a corner of your deck. Its sleek design complements any aesthetic, turning a simple backyard into a functional and beautiful outdoor kitchen.

Create Your Dream Outdoor Entertainment Space

Think of the Clementi Gold as more than just a pizza oven; it’s a culinary powerhouse that can transform how you entertain. This oven is designed for exceptional performance, giving you the power to create everything from perfectly charred pizzas to roasted vegetables. It even offers the option to use wood logs if you’re occasionally in the mood for that classic smoky flavor. When you integrate this oven into your backyard, it becomes the heart of your social gatherings. We can help you design a complete outdoor living area around it, perhaps under one of our custom pavilions or pergolas, creating a welcoming space for everyone.

Why Professional Installation Matters

While setting up a portable pizza oven can be simple, a permanent, high-performance model like the Clementi Gold requires a professional touch. For your safety and the oven’s optimal performance, proper installation is crucial, especially if you plan to connect it to your home’s main gas line. A gas expert must handle this connection to ensure it meets all local codes and safety standards. Our team at Gappsi provides comprehensive home remodeling and installation services, so you can have complete peace of mind. We manage the entire process, from placement to final hookup, ensuring your new oven is ready for its first pizza night.

Related Articles

Frequently Asked Questions

Can I still get that smoky, wood-fired flavor with a gas oven? This is a great question. The Clementi Gas Gold Oven provides a very clean heat, which really lets the flavors of your fresh sauce, cheese, and toppings stand out. However, if you occasionally crave that classic, smoky aroma, this oven offers the flexibility to use wood logs alongside the gas burner. This gives you the best of both worlds: the convenience of gas for a quick weeknight meal and the option for authentic wood flavor when you have more time.

How difficult is it to learn to cook with this oven? This oven is designed to make you feel like a pro, even if you’re a complete beginner. The biggest challenge with traditional pizza ovens is managing the fire to maintain a consistent temperature. The Clementi eliminates that guesswork. With its simple push-button start and precise temperature dial, you have total control. You can set the heat and trust it to stay there, so you can focus on making delicious food instead of tending a fire.

What kind of setup or installation is required for this oven? For safety and performance, the oven needs to be placed on a stable, level, and non-combustible surface, like a stone or masonry countertop. While it can be used with a propane tank, connecting it to your home’s natural gas line is a popular option for a seamless look. This connection must be done by a licensed professional. We can help you design the perfect custom outdoor kitchen island to house the oven, ensuring it’s installed safely and beautifully.

Besides pizza, what are the best things to cook in it? While it makes phenomenal pizza, this oven is incredibly versatile. You can use a cast-iron skillet to sear steaks and get an amazing crust, or roast a whole tray of vegetables to caramelized perfection in minutes. It’s also fantastic for baking artisan bread with a perfectly crisp crust and a soft interior. Think of it as a high-performance outdoor convection oven that can handle almost anything you throw at it.

How do I take care of the oven, especially with Long Island weather? Maintenance is surprisingly simple. After cooking, you just need to brush any food debris off the stone floor once it cools. The stainless steel exterior can be wiped down with a soft cloth. The most important step is to protect it from the elements with a high-quality, waterproof cover. Just be sure to let the oven cool completely for at least 24 hours before covering it to prevent trapping moisture.