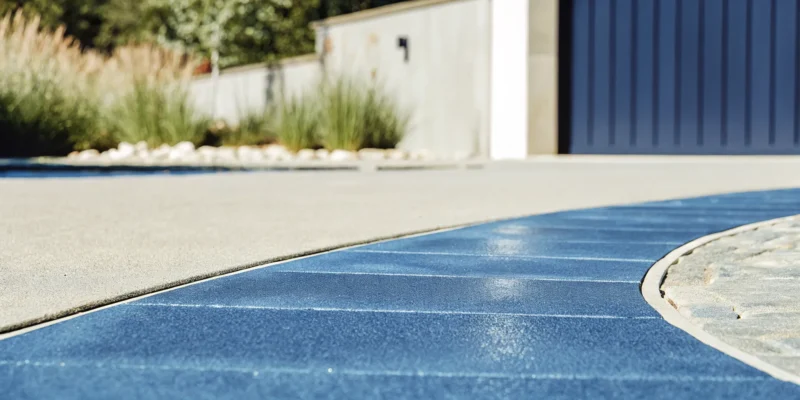
Porcelain patio tiles from a Smithtown, NY supplier installed on a modern home patio.

How to Find Porcelain Patio Tiles Suppliers Smithtown NY

A beautiful patio is the centerpiece of a perfect backyard, but who wants to spend their weekends staining, sealing, and scrubbing? Your outdoor space should be for relaxing with family and friends, not for constant upkeep. If you love the idea of a stunning patio without the demanding maintenance schedule, porcelain tiles are an excellent choice. Their non-porous surface resists stains, mold, and mildew, and they never need sealing. A simple wash is all it takes to keep them looking brand new. Before you can kick back and relax, you need to find the best materials. This article will help you connect with the top porcelain patio tiles suppliers in Smithtown, NY, and show you why this low-maintenance option is a game-changer.

Key Takeaways

  • Choose porcelain for its unmatched durability: Porcelain is perfectly suited for Long Island’s climate because its non-porous surface resists frost damage, stains, and slips, ensuring a safe and low-maintenance patio.
  • Get the look you want without the work: You can achieve the beautiful aesthetic of natural stone or wood, but porcelain eliminates the need for the constant sealing and difficult upkeep those materials require.
  • Partner with an expert for a lasting investment: The quality of your patio depends heavily on the installation, so select a supplier who provides comprehensive design and installation services to guarantee a beautiful result.

Why Choose Porcelain Tiles for Your Smithtown Patio?

When you’re planning a new patio, the material you choose is one of the biggest decisions you’ll make. You want something that looks incredible, of course, but it also needs to stand up to Long Island life. Porcelain tiles have become a go-to choice for Smithtown homeowners, and for good reason. They offer a perfect combination of sophisticated style, practical durability, and peace of mind, making them an ideal foundation for your outdoor living space.

Built to Handle Long Island Weather

We all know Long Island weather can be unpredictable, from humid summer days to freezing winter nights. Your patio needs to handle it all without cracking, fading, or warping. Because porcelain tiles are fired at extremely high temperatures, they are incredibly dense and strong. This process makes them resistant to moisture, so they won’t absorb water and crack during a freeze-thaw cycle. You can trust that your investment in beautiful porcelain and natural stone will look just as good after a tough winter as it did on the day it was installed.

Enjoy a Low-Maintenance Lifestyle

Your backyard should be a place for relaxation, not constant chores. One of the best things about porcelain is that it’s non-porous, which means spills from summer barbecues, fallen leaves, or dirt won’t seep in and cause stains. A simple sweep and occasional wash with soap and water are all it takes to keep your patio looking pristine. Unlike other materials that require regular, intensive cleaning and sealing to stay protected, porcelain lets you spend less time on upkeep and more time making memories with family and friends.

Find Your Perfect Design Style

Your patio is an extension of your home, and porcelain offers the design flexibility to create a truly personal retreat. Whether you love the rustic charm of wood planks, the timeless elegance of natural stone, or a sleek, modern look, there’s a porcelain tile to match. This versatility makes it easy to design a cohesive outdoor living space that flows seamlessly from your indoor decor. You can achieve any aesthetic you want without compromising on the strength and durability that porcelain provides.

Keep Your Family Safe with Slip-Resistant Surfaces

Safety is always a top priority, especially in areas where kids might be running or where surfaces can get wet. Many porcelain tiles are manufactured with a textured, slip-resistant finish, making them a fantastic choice for patios and pool decks. This added grip gives you confidence, knowing that your family and guests are safer, even after a summer rainstorm or a splash from the pool. You can relax and enjoy your beautiful outdoor space without worrying about slips and falls.

Where to Find the Best Porcelain Patio Tiles in Smithtown

Once you’ve decided on porcelain for your patio, the next step is finding the right supplier in Smithtown. This is a crucial part of the process because the quality of your materials and the expertise of your installer will directly impact the final result. You want a partner who not only offers beautiful tiles but also understands the specific demands of Long Island’s climate. A full-service approach often saves time, prevents headaches, and ensures your new patio is built to last. Here are some of the best places to start your search.

Gappsi: Your Local Porcelain and Natural Stone Experts

When you’re looking for a team that specializes in outdoor living, Gappsi is the place to go. We are a leading supplier and installer of high-quality porcelain and natural stone in the Smithtown area. We source a wide variety of premium, Italian-made porcelain pavers, giving you access to some of the most beautiful and durable options on the market. Because we handle both supply and installation, we ensure a seamless process from start to finish. Our team knows these products inside and out and can help you choose the perfect style for your home.

Exploring Other Local Showrooms

Doing your homework is always a smart move, and visiting a few showrooms can help you feel confident in your final decision. Places like Cancos Tile in Smithtown offer a broad selection of tiles and pavers, which is helpful for seeing what’s out there. Taking the time to browse different options allows you to compare textures, colors, and prices. While you explore, pay attention to the product quality and the staff’s knowledge. This research will help you appreciate the value of working with a specialized team that can manage your entire project from concept to completion.

What to Expect Beyond the Sale: Design and Installation

Choosing a supplier is about more than just buying tiles; it’s about the service and expertise you receive. At Gappsi, we provide comprehensive design and installation services to bring your vision to life. Our design consultants work with you to select products that complement your home’s style and meet your functional needs. We then manage the entire installation, making sure your project is completed on time and to the highest standards. This end-to-end service is what turns a good patio into an exceptional outdoor living space.

Exploring Your Porcelain Patio Tile Options

One of the best things about porcelain is its incredible versatility. No matter what vision you have for your backyard, there’s a porcelain tile that can bring it to life. Forget the idea that tile is one-size-fits-all. Modern porcelain comes in a huge range of colors, textures, and sizes, allowing you to create a custom look that perfectly complements your Smithtown home. From the rustic charm of a woodland retreat to the sleek lines of a modern oasis, the right tile sets the entire tone for your outdoor space.

At Gappsi, we’ve seen how the perfect material can transform a simple patio into a true extension of the home. Our collection of porcelain and natural stone is curated to offer Long Island homeowners the best in both beauty and performance. Let’s walk through some of the most popular styles to help you find the one that speaks to you.

Get the Warmth of Wood, Without the Upkeep

If you love the cozy, inviting look of a wood deck but dread the thought of sanding, staining, and sealing, wood-look porcelain is your answer. These tiles capture the natural grain and warm tones of real wood with stunning accuracy, creating a comfortable and rustic atmosphere. Unlike actual wood, however, porcelain won’t warp, rot, or fade after a few seasons of Long Island sun and snow. You get all the aesthetic appeal of a classic deck without the constant maintenance. It’s the perfect choice for creating a relaxing outdoor living room or a charming dining area where you can simply enjoy the space instead of working on it.

Achieve the Elegant Look of Natural Stone

There’s a timeless elegance to natural stone that can make any patio feel like a luxury escape. Many homeowners are drawn to porcelain tiles that replicate the beautiful variations of materials like slate, bluestone, or travertine. This option gives you the high-end look of a custom stone patio while offering the superior durability and consistency of porcelain. Because porcelain is non-porous, you won’t have to worry about spills from the grill or fallen leaves staining the surface. It’s a practical way to incorporate the sophisticated patterns of classic masonry into your design with complete peace of mind.

Go Modern with Large-Format Designs

For a clean, contemporary look, large-format porcelain tiles are an excellent choice. These oversized tiles (think 24×24 inches or larger) minimize grout lines, which creates a seamless and uncluttered surface. The result is a patio that feels more spacious and sophisticated. This style is ideal for modern homes and for creating a smooth visual flow from your indoor living area to your outdoor space. If your goal is a sleek, minimalist patio that feels both expansive and elegant, large-format tiles provide the perfect foundation for your design. They pair beautifully with simple landscaping and modern outdoor furniture.

Prioritize Grip with Textured Surfaces

Your patio should be a safe place for everyone to enjoy, and that starts with the right surface. Many porcelain tiles designed for outdoor use feature a textured finish to provide better grip and prevent slips, especially in wet conditions. This is a critical feature for pool decks and any patio area where kids might be running around. Thankfully, you don’t have to sacrifice style for safety. These textures are often subtle, mimicking the natural feel of riven stone or brushed wood, which adds another layer of depth and character to your patio’s appearance while keeping your family and guests safe.

What’s the Budget for a Porcelain Tile Patio in Smithtown?

Planning your budget is one of the most important first steps in any home improvement project. When it comes to a new porcelain patio, the final cost involves more than just the price of the tiles. Several factors, from the specific materials you choose to the complexity of the installation, will shape the total investment. Understanding these elements will help you create a realistic budget and ensure there are no surprises along the way.

A well-planned budget allows you to balance your design dreams with financial reality. It helps you decide where to splurge and where to save, ensuring you get a beautiful, durable patio that you’ll love for years. Let’s break down what you can expect to pay for a porcelain tile patio in the Smithtown area.

What Influences the Final Price?

The final price tag for your patio project depends on a few key variables. The quality, brand, and design of the porcelain tile itself play a big role. Just like with any other material, there’s a wide range of options, from budget-friendly choices to premium designer tiles. The size of your patio and the complexity of the design will also affect material and labor costs. A simple square patio will cost less to install than one with intricate curves and patterns that require more cuts. Finally, don’t forget site preparation. If your yard needs significant grading or an old patio must be removed, that will add to the overall expense.

Comparing Budget and Premium Tiles

When you start looking at porcelain and natural stone options, you’ll notice a difference in price between budget and premium tiles. Budget-friendly tiles can be a great choice, but they may have simpler designs and might not offer the same long-term durability as higher-end options. Premium porcelain tiles often feature more sophisticated textures, through-body color that hides chips, and better warranties. While they cost more upfront, their superior resilience can make them a better value over time, especially for a high-traffic area like a patio. Think about how you’ll use the space and how important specific design aesthetics are to you when making your choice.

Factoring in Installation and Other Costs

The cost of the tiles is only one part of the equation. Professional installation is essential for a patio that will withstand Long Island’s weather, and labor can be a significant portion of your budget. The installation process for a porcelain patio is detailed and requires a solid, properly prepared base to prevent cracking and shifting. Beyond labor, you’ll also need to account for other materials like gravel for the base, mortar, and grout. When you get a quote for your project, make sure it’s comprehensive and includes all aspects of the job, from site prep and materials to the final masonry installation and cleanup.

How to Choose the Right Porcelain Tile Supplier

Finding the right supplier is about more than just picking out tiles. You’re looking for a partner who can guide you through the process, from design to installation, and ensure your new patio is built to last. A great supplier combines high-quality products with deep expertise and a commitment to your vision. When you start meeting with potential suppliers, keep these key factors in mind to find the perfect fit for your Smithtown home project.

Look for High-Quality Products

The quality of the porcelain itself is the foundation of a beautiful and durable patio. You want tiles that can stand up to Long Island’s weather without fading, cracking, or staining. Look for a supplier that sources premium materials. For example, Gappsi offers a curated selection of high-quality, Italian-made porcelain and natural stone pavers known for their strength and style. A reputable supplier will have a wide variety of sizes, colors, and finishes, giving you the freedom to find the exact look you want for your outdoor space. Don’t hesitate to ask where their tiles come from and what makes them a superior choice.

Verify Their Installation Experience

A beautiful tile can be let down by poor installation. That’s why it’s so important to choose a supplier with proven installation experience. A company that both supplies and installs the product has a complete understanding of how to get the best results. Gappsi’s team provides expert masonry and installation services, ensuring every project is built on a solid foundation, often using reinforced concrete bases for maximum durability. This dual expertise means they know the products inside and out and can guarantee a finished patio that not only looks great but also lasts for decades.

Ask About Design Support

Unless you’re a design professional, it can be overwhelming to choose from all the available options. This is where design support becomes invaluable. A great supplier will have consultants who can help you sort through different styles and create a cohesive look that complements your home. They can help you select the right products to fit your vision while keeping your project on schedule and within budget. This collaborative approach is a core part of our home remodeling process, ensuring you feel confident and excited about every decision you make for your home.

Understand Their Warranty and Customer Service

Your relationship with a supplier shouldn’t end once the last tile is laid. Before you commit, make sure you understand their warranty and approach to customer service. A company that stands behind its work will offer clear guarantees on both its products and its craftsmanship. Look for a team that is committed to your satisfaction from the first conversation to the final walkthrough. This includes offering services to keep your patio looking its best for years to come, like professional restoration and sealing. A strong commitment to service is a clear sign that you’ve found a reliable, long-term partner.

Key Features to Look for in a Patio Tile

When you start shopping for patio tiles, you’ll quickly realize there are a ton of options out there. But not all tiles are suited for a Long Island backyard. To make sure you choose a material that looks great and lasts for years, you need to know what features matter most. Focusing on a few key characteristics will help you select a tile that’s safe, durable, and perfect for your home.

Safety First: Slip Resistance

Your patio is a place for relaxing and having fun, so safety should always be a top priority. Think about rainy days, morning dew, or splashes from the pool. A slippery surface can be a real hazard. That’s why it’s so important to choose a tile with good slip resistance. High-quality porcelain and natural stone pavers are designed with textured surfaces that provide grip, even when wet. This makes them an excellent choice for any outdoor space, especially for pool surrounds or walkways where water is common.

Winter-Proof: Frost Resistance

We all know how harsh Long Island winters can be. The constant freezing and thawing can wreak havoc on outdoor materials, causing them to crack and split. Porcelain tiles are a fantastic solution because they are non-porous and don’t absorb water. This means they are completely frost-resistant and won’t be damaged by dropping temperatures. While other materials might need replacing after a few tough winters, a porcelain patio will maintain its strength and integrity, making it a smart investment for our climate.

Stain-Proof: Low Porosity

Your patio is meant for living, which means spills are bound to happen. Whether it’s a tipped-over glass of red wine, a greasy drip from the grill, or mud tracked in from the garden, you want a surface that’s easy to clean. Because porcelain tiles have extremely low porosity, they are virtually stain-proof. Liquids can’t penetrate the surface, so messes can be wiped away without leaving a permanent mark. Unlike many natural stones that require regular sealing to prevent stains, porcelain offers a low-maintenance lifestyle.

Built to Last: Durability Ratings

A patio is a significant addition to your home, so you want it to stand the test of time. Porcelain pavers are manufactured under extreme heat and pressure, which makes them incredibly dense and strong. They can easily handle heavy patio furniture, high foot traffic, and everyday wear and tear without scratching or chipping. This inherent durability means your patio will look just as beautiful in ten years as it does on day one. When you choose a strong material, you’re not just building a patio; you’re investing in lasting value for your home.

Porcelain vs. Other Patio Materials

When you’re planning a new patio, the material you choose sets the tone for your entire outdoor space. While classic options like natural stone and concrete pavers have been popular for years, porcelain tiles are quickly becoming a favorite for Smithtown homeowners. Let’s look at how porcelain compares to other common materials so you can make the best choice for your home and lifestyle.

Porcelain vs. Natural Stone: What’s the Difference?

Natural stone, like bluestone or travertine, has a timeless, organic beauty that’s hard to deny. Each piece is unique. However, porcelain offers a compelling alternative with some serious performance advantages. Because porcelain is manufactured at incredibly high temperatures, it’s denser and stronger than most natural stones. This process makes it highly resistant to wear and tear. While natural stone is porous and can absorb moisture, leading to stains or freeze-thaw damage in our Long Island winters, porcelain is virtually non-porous. This means you get the gorgeous look of stone without the worry of constant sealing and upkeep. Gappsi offers a beautiful selection of both porcelain and natural stone, so you can compare them side-by-side.

Porcelain vs. Concrete Pavers: A Head-to-Head

Concrete pavers are a go-to for many projects because they are durable and often budget-friendly. But when you put them head-to-head with porcelain, you’ll notice key differences in long-term appearance and durability. Porcelain’s hard, fired surface is extremely resistant to scratches and abrasion, so it keeps its original texture and color for years. Concrete pavers, on the other hand, can show wear more quickly and their color can fade from sun exposure. Aesthetically, porcelain provides much more design flexibility with high-definition patterns that realistically mimic everything from rich wood to elegant marble. While concrete pavers are a solid choice, porcelain delivers a more refined and lasting finish for your masonry projects.

Comparing Long-Term Value and Upkeep

Your patio is an investment, so it’s important to think about long-term value, not just the initial price. This is where porcelain truly shines. Its non-porous surface means it doesn’t need sealing, ever. Compare that to natural stone and concrete, which typically require sealing every few years to protect them from stains and water damage. That’s an ongoing cost and chore you can completely avoid with porcelain. Cleaning is also a breeze; spills wipe right off without leaving a trace. Over the years, the money and time you save on maintenance make porcelain an incredibly smart choice. It’s a material that lets you spend more time enjoying your patio and less time working on it.

How to Select the Perfect Porcelain Tile for Your Home

Choosing the right tile feels like a big decision, but it doesn’t have to be overwhelming. The perfect porcelain tile for your Smithtown home is one that fits your lifestyle, complements your home’s character, and holds up beautifully for years to come. It’s all about finding that sweet spot between form and function. By thinking through a few key factors, you can confidently pick a tile that you’ll love seeing every time you step into your backyard.

Consider Your Climate and How You’ll Use the Space

Here on Long Island, our patios need to handle everything from summer sun to winter snow. Porcelain is a fantastic choice because it’s incredibly durable and built to withstand those temperature swings without cracking or fading. Think about how you’ll live in your new outdoor space. Will it be a busy hub for family barbecues, a quiet spot for morning coffee, or the area around your swimming pool? Because porcelain pavers are designed with slip-resistant properties, they’re a safe and practical option for any use, especially in wet areas where kids might be running around.

Match Your Home’s Architectural Style

Your patio should feel like a natural extension of your home. Take a look at your house’s style. Is it a classic colonial, a modern ranch, or a coastal-inspired cape? Porcelain tiles come in so many designs that you can easily find one to match. You can get the sleek, industrial feel of concrete for a contemporary home or the warm, textured look of travertine for a more traditional one. A popular approach is to create a seamless transition from your indoor living area to your outdoor patio, which you can achieve by choosing a tile that complements your interior flooring. Gappsi’s collection of porcelain and natural stone offers plenty of inspiration.

Plan for Installation and Long-Term Care

One of the best things about porcelain is how easy it is to care for. Its surface is non-porous, which means it resists stains from things like spilled wine or grill grease, and it won’t absorb moisture. This quality makes sealing unnecessary in most cases, saving you a maintenance step right from the start. Long-term care is simple: regular sweeping to clear off leaves and dirt, and an occasional wash with soap and water is all it takes to keep your patio looking new. This is a huge advantage over materials that require annual sealing or special cleaning, giving you more time to simply enjoy your beautiful outdoor space.

Ready to Start Your Smithtown Patio Project?

Now that you have a better idea of what makes porcelain tiles a fantastic choice for your patio, the next step is bringing that vision to life. Finding the right materials and a team you trust is key to creating an outdoor space you’ll love for years. The best way to feel confident in your decision is to see the options for yourself and speak with experts who understand the nuances of Long Island landscapes.

At Gappsi, we specialize in creating beautiful, durable outdoor living areas with high-quality porcelain and natural stone pavers. We don’t just supply the materials; our team offers complete design and installation services to ensure every detail is perfect. Having one team handle everything from the initial design to the final paver placement means a smoother process for you, with clear communication and a cohesive final look. Whether you’re drawn to the modern feel of large-format tiles or the rustic charm of wood-look porcelain, we can help you select the perfect style for your home.

Visiting a showroom is one of the best ways to get a feel for your options. You can see how different colors and textures look in person and compare the quality of various products. It’s also a great opportunity to ask questions and get expert advice tailored to your specific needs. If you’re ready to take the next step, we invite you to get in touch with our team. We can walk you through our extensive collection at the Gappsi Store and start discussing how to turn your dream patio into a reality.

Related Articles

Frequently Asked Questions

Why should I choose porcelain over a natural stone like bluestone? Natural stone is beautiful, but porcelain offers some serious practical advantages for a Long Island home. The biggest difference is that porcelain is non-porous, meaning it doesn’t absorb water. This makes it incredibly resistant to stains and, more importantly, prevents it from cracking during our winter freeze-thaw cycles. You get the elegant look of stone without the need for regular sealing and with much less worry about weather damage.

Are porcelain tiles slippery when they get wet? This is a great question, especially for patios around a pool or for families with kids. You can rest easy because outdoor-rated porcelain tiles are specifically made with a textured, slip-resistant finish. This provides the necessary grip to keep everyone safe, even after a summer rainstorm or a splash from the pool. Safety and style can absolutely go hand-in-hand.

How much maintenance does a porcelain patio actually require? One of the best things about porcelain is how little upkeep it needs. Because the surface is so dense and non-porous, spills from a barbecue or fallen leaves won’t seep in and cause stains. For the most part, a simple sweep to clear debris and an occasional wash with soap and water are all it takes to keep your patio looking brand new. You can forget about the annual sealing required by many other materials.

Can porcelain tiles handle a harsh Long Island winter without cracking? Yes, they are perfectly suited for our climate. Cracking in outdoor materials is often caused by water absorption; the water freezes, expands, and damages the paver from the inside out. Since porcelain doesn’t absorb water, this simply isn’t an issue. It’s one of the most durable choices you can make for a patio that needs to endure cold, snowy winters year after year.

What does the installation process involve? Proper installation is the key to a long-lasting patio. The process involves creating a solid, stable base to prevent any shifting or settling over time. For porcelain, this often means installing it over a reinforced concrete slab. This ensures the tiles have a perfectly level and unmoving foundation, which protects them from cracking and guarantees your investment looks great for decades.

A Masterpiece in Upper Brookville: The Ultimate Backyard Bocce Court

View Gappsi’s YouTube Channel to view A Masterpiece in Upper Brookville: The Ultimate Backyard Bocce Court

There is something timeless about the game of bocce. Whether it’s the gentle clink of the balls meeting on the court or the spirited conversation that flows between frames, bocce is more than just a sport; it’s a lifestyle. At Gappsi, we take pride in bringing these lifestyle dreams to fruition. Our latest project in the prestigious neighborhood of Upper Brookville, NY, is a testament to how traditional craftsmanship and modern materials can create a backyard oasis that is both functional and breathtaking.

If you’ve been considering adding a professional-grade bocce court to your Long Island home, this recent installation showcases exactly what is possible when you prioritize quality and design.

Designing for Durability: The Foundation

When planning a bocce court, the first decision is often the most critical: what will hold it all together? For this Upper Brookville residence, the client had a specific vision. They wanted the warmth and organic feel of wood to define the space.

To satisfy this aesthetic while ensuring the court survives the changing New York seasons, we built the court walls using high-quality, pressure-treated lumber.

Why choose pressure-treated lumber?

  • Longevity: It is chemically treated to resist rot, fungal decay, and wood-boring insects.
  • Structural Integrity: It provides a rigid, straight perimeter that can withstand the impact of bocce balls over years of play.
  • Natural Aesthetics: The lumber walls blend seamlessly into the lush, wooded landscapes typical of Upper Brookville, offering a rustic yet polished look that stone sometimes lacks.

The Surface: Pro-Grade Synthetic Turf

While the walls provide the frame, the playing surface is the heart of the court. In the past, bocce courts were often made of clay, crushed stone, or oyster shells. While authentic, these materials require constant raking, leveling, and moisture control.

For this project, we installed a specialized synthetic turf specifically engineered for bocce courts. This isn’t your average backyard grass; it is a short-pile, high-density turf designed to provide a consistent “roll” and the perfect amount of friction.

The Benefits of Gappsi’s Bocce Turf:

  1. Low Maintenance: No more weeding or leveling. A quick brush-off is all it takes to prepare for a game.

  2. All-Weather Play: Our turf systems are designed for superior drainage. Even after a heavy Long Island summer rain, the court is ready for action in minutes.

  3. Consistency: Every inch of the court offers the same speed and trajectory, allowing players to truly hone their skills.

a-masterpiece-in-upper-brookville-the-ultimate-backyard-bocce-court

Integrating the Landscape

A bocce court shouldn’t just be “dropped” into a yard; it should feel like it has always been there. To achieve this, we focused heavily on the surrounding environment. We landscaped one entire side of the court, creating a soft, living border that anchors the structure into the existing backyard topography.

By integrating professional landscaping, we transformed a “sports installation” into a “garden feature.” The contrast between the clean lines of the pressure-treated lumber and the organic textures of the plantings creates a stunning visual balance.

Accessibility and Comfort: The Walkway and Seating

A great game of bocce is as much about the time spent between turns as it is about the game itself. We wanted to ensure that the transition from the home to the court was elegant and safe.

We constructed a custom walkway using G040 natural stone pavers. This choice was intentional; the G040 series offers a sophisticated color palette and a non-slip texture that complements the wood of the court and the greenery of the yard.

To complete the “clubhouse” feel, we installed two custom benches. Positioned strategically, these benches allow players and spectators to relax, enjoy a drink, and engage in the friendly “trash talk” that makes bocce so much fun. It turns the court into a social hub rather than just a place to play.

Why Upper Brookville Chooses Gappsi

Upper Brookville is known for its sprawling estates and high standards for home improvement. This project is a perfect example of why Gappsi remains the leading choice for luxury outdoor amenities on Long Island. We don’t just “install”; we design, we engineer, and we craft.

“The client wanted a space that felt authentic to the game but was easy to maintain. By combining the classic look of lumber walls with the modern performance of synthetic turf, we delivered a court that looks like a heritage piece but performs like a professional venue.”

Your Turn to Play

The beauty of a custom bocce court is that it encourages us to put down our phones, step outside, and connect with friends and family. Whether you are an expert player or just looking for a new way to entertain guests, a Gappsi-built court is an investment in your home’s value and your quality of life.

Key Features of this Upper Brookville Build:

  • Walls: Pressure-treated lumber for a classic, durable frame.
  • Surface: Specialized synthetic bocce turf for a perfect roll.
  • Hardscape: G040 stone walkway for elegant access.
  • Amenities: Two integrated benches for spectator comfort.
  • Design: One-sided landscaping to blend with the natural environment.

Ready to Transform Your Backyard?

At Gappsi, we specialize in everything from bocce courts and putting greens to full-scale masonry and pool designs. If this Upper Brookville project has inspired you, we would love to help you plan your own backyard retreat.

Contact Gappsi Today

📍 Serving all of Long Island, NY — Nassau & Suffolk Counties
🌐 www.gappsi.com
📞 Call now for a free consultation and estimate!

SCHEDULE A MEETING TODAY WITH GAPPSI

Choosing the best gunite or vinyl swimming pool for the weather on Long Island, NY.

Gunite vs. Vinyl Pools for Long Island Weather

Living on Long Island means embracing all four seasons, from hot, humid summers to freezing winters with unpredictable nor’easters. When you invest in a swimming pool, you need to be sure it’s tough enough to handle everything our climate throws at it. The freeze-thaw cycle alone can put immense pressure on outdoor structures, making durability a top concern. This is where the debate between gunite and vinyl liner pools becomes so important. One is known for its fortress-like strength, while the other offers flexibility at a different price point. For a gunite or vinyl swimming pool what’s the best for Long Island ny weather? Let’s explore how each material stands up to the elements so you can make a confident choice.

Key Takeaways

  • Prioritize long-term durability with gunite: A gunite pool’s concrete shell is built to last over 50 years and withstands harsh Long Island winters. In contrast, a vinyl pool requires a full liner replacement every 7 to 10 years, making it a recurring maintenance project.
  • Look beyond the initial price tag: A vinyl pool’s lower upfront cost is offset by the need for expensive liner replacements every decade. While gunite costs more initially, its long-term expenses are more predictable, often making it a more stable financial investment over the life of the pool.
  • Choose gunite for customization, vinyl for speed: Gunite offers nearly unlimited design freedom for custom shapes and features, perfect for a unique backyard oasis. Vinyl pools offer a faster installation with standard shapes and a wide selection of liner patterns, getting you swimming sooner.

Gunite vs. Vinyl Pools: What’s the Difference?

When you start planning for a new pool, you’ll quickly find two popular options: gunite and vinyl liner. On the surface, they both promise a backyard oasis, but how they’re built and how they last are worlds apart. Understanding these core differences is the first step to choosing the right pool for your Long Island home, one that fits your family’s lifestyle and stands up to our unique weather. Let’s break down what each type of pool is and how they come to life.

What is a Gunite Pool?

Think of a gunite pool as the gold standard in backyard swimming. These are custom-built, permanent structures made from a mixture of sand, cement, and water that’s sprayed over a steel-reinforced frame. This process creates a solid, incredibly durable concrete shell that can last for more than 50 years with the right care. Because they are so robust, gunite swimming pools are known for their longevity and strength. You get a pool that’s not just beautiful but is truly built to last, becoming a permanent feature of your home and a worthwhile investment for decades of enjoyment.

What is a Vinyl Liner Pool?

A vinyl liner pool is constructed differently. First, a frame made of steel or polymer panels is assembled in the excavated hole. Then, a custom-fitted sheet of vinyl is stretched over the frame and attached to a track along the top edge, forming the pool’s surface. This liner is what holds the water. While they are a popular option, the liners themselves are not as durable as a concrete surface. They typically need to be replaced every 7 to 10 years and can be more susceptible to punctures or tears from sharp objects, which can lead to repairs.

How Are They Built?

The construction process really highlights the main distinction between these two pool types. A gunite pool is built entirely on-site. We dig the hole, create a custom web of steel rebar, and then apply the gunite mixture to form a single, monolithic shell. This expert masonry work allows for complete design freedom and results in a structure that’s exceptionally strong against ground movement. In contrast, a vinyl liner pool involves assembling pre-made wall panels. The process is generally faster, but the structure relies on the liner to be waterproof, and the design is limited by the shapes of the available panels.

Which Pool Best Handles Long Island Weather?

Choosing a pool on Long Island means thinking about more than just sunny summer days. Our weather brings a bit of everything: hot, humid summers, freezing winters, and the occasional powerful storm rolling in off the Atlantic. Your pool needs to be tough enough to handle it all, year after year. The materials and construction of your pool will determine how well it holds up to the freeze-thaw cycles, intense UV rays, and everything in between. Let’s look at how gunite and vinyl pools perform through the seasons, so you can feel confident in your investment.

Surviving Winter Freezes and Ice

Winter on Long Island can be tough on any outdoor structure. When the ground freezes and thaws, it expands and contracts, putting immense pressure on a pool’s shell. This is where gunite truly shines. Built on-site with a web of steel rebar covered in concrete, a gunite pool is a monolithic structure that flexes with the ground, resisting cracks and damage from frost heave. Vinyl liner pools, on the other hand, rely on separate wall panels for their structure. These panels can be more vulnerable to shifting and pressure from frozen soil. While proper winterization is key for any pool, the inherent strength of gunite provides an extra layer of security against the harshest winter conditions.

Resisting Summer Heat and Sun Damage

Just as our winters are cold, our summers can be intensely hot and sunny. Constant exposure to UV rays can take a toll on pool surfaces. A gunite pool’s plaster finish is incredibly durable and resistant to sun damage. It won’t fade or become brittle like other materials can. Over many years, it may need to be refinished, but its core integrity remains. Vinyl liners are more susceptible to the sun’s effects. UV exposure can cause the liner’s color to fade and the material to break down, making it more prone to rips and tears from pool toys, pets, or even routine cleaning. This means you might face a full liner replacement sooner than you’d expect.

Standing Up to Storms

From summer thunderstorms to powerful nor’easters, Long Island weather demands durability. Gunite pools are often called the “gold standard” for a reason. Their solid, steel-reinforced concrete construction makes them exceptionally strong and heavy, anchoring them firmly in the ground. They can withstand shifting soil and are highly resistant to damage from falling branches or wind-blown debris. A vinyl liner is much more delicate. A sharp object hitting the surface during a storm could easily cause a puncture, leading to leaks and the need for an immediate patch or a full replacement. For homeowners seeking peace of mind, the robust nature of a gunite pool is a significant advantage.

Comparing the Costs: Upfront vs. Long-Term

When you’re planning your dream pool, the price tag is obviously a huge factor. But the number you see on the initial quote doesn’t tell the whole story. To make the best financial decision for your family, you need to look at both the upfront installation price and the long-term costs of maintenance, repairs, and replacements. A pool is a long-term addition to your home, so thinking about the total cost of ownership over 10, 15, or even 20 years will give you a much clearer picture of your investment. Let’s break down what you can expect to spend on both gunite and vinyl liner pools.

Gunite Pool Installation Costs

Gunite pools come with a higher initial price, typically ranging from $50,000 to $120,000 on Long Island. This cost reflects the custom nature of the construction, the quality of the materials, and the sheer durability of the finished product. The final price depends on factors like the pool’s size, depth, and any special features you want to add, such as waterfalls, built-in seating, or an attached spa. While it’s a larger upfront investment, think of it as paying for a permanent, structural improvement to your property. You’re getting a completely customized swimming pool that is built to last for decades with proper care.

Vinyl Liner Pool Installation Costs

One of the biggest draws of a vinyl liner pool is the lower upfront cost, which usually falls between $25,000 and $65,000. This makes them a more accessible option if you’re working with a tighter initial budget. The installation process is also faster, which can contribute to the lower price point. For many families, the initial savings make vinyl liner pools an attractive way to start enjoying a backyard pool without the larger financial commitment of a gunite build. However, it’s important to remember that this initial price is just the starting point for the pool’s lifetime cost.

Ongoing Maintenance and Replacement Costs

This is where the financial paths of gunite and vinyl pools really start to diverge. The biggest long-term expense for a vinyl pool is replacing the liner, which you’ll need to do every 7 to 10 years. This is a significant, recurring cost that you must factor into your budget. Gunite pools, on the other hand, don’t have a liner to replace. Their ongoing costs are related to regular chemical maintenance and electricity, plus the eventual need to be resurfaced every 10 to 15 years. Keeping the surrounding patio in good shape is also key, and professional restoration and sealing services can protect your entire pool area.

The 20-Year Cost Breakdown

When you look at the numbers over a 20-year span, the financial picture becomes much clearer. A vinyl liner pool might require two, or even three, expensive liner replacements during that time. When you add those costs to the initial installation price, the total investment can easily meet or exceed that of a gunite pool. While the gunite pool started with a higher price tag, its costs are more predictable over the long term without the major expense of liner replacements. For many Long Island homeowners, this makes a gunite pool a more cost-effective and stable investment in their property over time.

Let’s Talk Maintenance: Gunite vs. Vinyl

A pool is a long-term relationship, and like any good relationship, it requires consistent care. When it comes to maintenance, gunite and vinyl pools have different needs. Understanding these differences is key to choosing a pool that fits your lifestyle, not one that runs it. It’s not just about the weekly skimming and chemical checks; it’s about seasonal routines, potential repairs, and the major upkeep you’ll need to plan for down the road. For Long Island homeowners, this also means preparing your pool for the freeze-thaw cycles of winter and the sunny days of summer. Let’s break down what you can expect with each type.

Seasonal Upkeep for Each Pool

Both gunite and vinyl pools need regular attention to keep the water sparkling clean. For a gunite pool, this includes weekly brushing of the plaster surface to prevent algae from taking hold. You’ll also test the water chemistry and clean the filters regularly. When spring arrives, a reliable pool maintenance checklist is your best friend. It involves removing the cover, cleaning out debris, reconnecting equipment, and balancing the water. A vinyl liner’s smooth surface is less prone to algae, but you still need to be diligent with water chemistry to protect the liner from fading or becoming brittle. It’s also important to use soft-bristled brushes to avoid any accidental tears.

Closing for Winter and Opening for Spring

On Long Island, we know how to prepare for winter. Your pool is no different. The closing process is similar for both gunite and vinyl pools and should happen when water temperatures stay consistently below 65°F, usually from late September through October. This involves lowering the water level below the skimmers, winterizing the plumbing lines to prevent freezing, adding winterizing chemicals, and putting on a secure safety cover. While a gunite pool’s structure is incredibly tough against the cold, ensuring your vinyl pool’s cover is properly secured is vital to prevent debris from causing punctures during winter storms. Gappsi offers professional swimming pool services to handle seasonal opening and closing for you.

How Often Do They Need Repairs?

Accidents happen, but some pools are more forgiving than others. Vinyl liners are susceptible to punctures and tears. A fallen branch, a pet’s claws, or even a sharp pool toy can cause a leak. While small holes can be patched, finding them can be a hassle, and frequent repairs can become frustrating. Gunite pools, on the other hand, are exceptionally durable. The concrete shell is tough enough to withstand most daily activities without a scratch. While surface cracks can occasionally form over many years due to ground shifting, they are far less common than liner tears and can be professionally repaired to restore the pool’s integrity.

Replacing a Liner vs. Refinishing a Surface

This is where the long-term maintenance costs really diverge. A vinyl liner typically needs to be completely replaced every 7 to 10 years. This is a significant expense that you’ll need to budget for as a recurring cost of ownership. Gunite pools don’t have a liner. Instead, their interior is a plaster finish that is incredibly long-lasting. This surface will eventually need to be refinished, but usually only every 10 to 15 years, sometimes even longer depending on the water chemistry and care. While refinishing is a major project, it happens about half as often as replacing a liner, giving gunite a clear advantage in long-term durability.

Durability and Lifespan: Which Pool Lasts Longer?

When you’re investing in a swimming pool, you’re not just thinking about this summer; you’re thinking about all the summers to come. You want a pool that will host family barbecues, kids’ birthday parties, and quiet evening swims for decades. That’s why durability is one of the most important factors to consider. A pool is a permanent addition to your home, and its lifespan directly impacts its long-term value and your enjoyment.

Gunite and vinyl liner pools are built very differently, which means they also age differently. One is known for its incredible longevity, becoming a true part of your landscape, while the other requires more frequent updates to keep it in top shape. Understanding these differences in durability and what they mean for maintenance and replacement costs is key to choosing the right pool for your family and your home. Let’s look at how many years you can expect from each type and which one is better suited to stand the test of time.

How Long Gunite Pools Last

If you’re looking for a pool that can last a lifetime, gunite is the answer. These pools are the gold standard for durability. Because they are built with a steel-reinforced frame and a concrete shell, they are incredibly strong and resilient. With proper maintenance, a gunite pool can easily last 50 years or more, often outliving the original homeowners. The structure itself is built to last for generations. While the interior finish will need to be replastered every 10 to 15 years to keep it looking fresh and feeling smooth, the underlying shell remains solid. This makes gunite swimming pools a permanent, valuable addition to your property.

Vinyl Liner Lifespan and Replacement

Vinyl liner pools have a different story when it comes to lifespan. While the pool’s wall structure (typically made of steel or polymer) can last for over 20 years, the vinyl liner itself is much less durable. The liner is the soft, pliable surface you see and feel, and it typically needs to be replaced every 7 to 10 years. Exposure to UV rays, pool chemicals, and sharp objects can cause it to fade, stretch, or tear over time. This means that while the initial cost might be lower, you’ll need to budget for a full liner replacement multiple times over the life of the pool, which is a significant recurring expense.

Handling Long Island’s Temperature Swings

Here on Long Island, we get the full range of seasons, from hot, sunny summers to cold, icy winters. This freeze-thaw cycle can be tough on outdoor structures, and pools are no exception. Gunite pools have a distinct advantage in this climate. Their thick, monolithic concrete shell is incredibly strong and can withstand the pressure from freezing ground and shifting soil without cracking. Vinyl liners, on the other hand, can become brittle in cold temperatures, making them more susceptible to tearing or damage during the winter months. A durable gunite structure provides peace of mind, knowing your investment is built to handle whatever our local weather throws at it, season after season.

Get Creative: Design and Customization

Your swimming pool is more than just a place to cool off; it’s the centerpiece of your backyard. The material you choose plays a huge role in what your final oasis will look like. If you have a specific vision, from a free-form lagoon to a sleek, modern rectangle, the choice between gunite and vinyl is one of the first and most important decisions you’ll make. Gunite offers nearly limitless freedom, while vinyl provides a more structured approach with its own set of aesthetic choices. Let’s look at how your creativity can take shape with each option.

Custom Shapes and Features with Gunite

If you can dream it, you can probably build it with gunite. This is where gunite truly shines. Because it’s sprayed onto a rebar framework, it can be molded into any shape you can imagine. This flexibility allows for a high degree of customization to perfectly match your yard and home’s style. Gunite pools are ideal for creating unique designs with special features like gentle beach-style entries, shallow sun ledges for lounging, or stunning infinity edges that blend with the horizon. These custom touches transform a standard swimming pool into a personal resort.

Design Options for Vinyl Liners

While vinyl liner pools don’t offer the same free-form design possibilities as gunite, they still provide plenty of ways to create a beautiful backyard. Vinyl pools are typically built from pre-manufactured panels, which means they come in a variety of standard shapes like rectangles, ovals, and kidneys. The real customization comes from the liner itself. You can choose from a huge selection of colors, patterns, and textures to define your pool’s look, from a deep blue that mimics the ocean to a light, sandy tone for a tropical feel. You can also add features like built-in stairs and benches for a more custom touch.

Matching Your Home’s Aesthetic

Ultimately, your pool should feel like a natural extension of your home. A gunite pool can be designed to flow with the curves of your landscape or the sharp angles of modern architecture. You can integrate it seamlessly with surrounding patios and stonework, creating a cohesive outdoor living space. A vinyl pool, with its clean lines, often complements more traditional homes and landscapes. The key is to work with a designer who understands how to blend your new pool into your existing environment, ensuring the final result enhances your entire property.

How Long Does Installation Take?

You’ve decided on the perfect pool, and now you’re probably wondering how long it will be until you can actually take a dip. The installation timeline is a major factor in any home improvement project, and with pools, the difference between gunite and vinyl is significant. Planning your project means understanding the construction process for each type. A gunite pool is a long-term investment in craftsmanship, and its timeline reflects that. A vinyl liner pool, on the other hand, offers a much faster path to your first pool party.

The time of year you start also plays a huge role, especially here on Long Island. Beating the spring rush can make a world of difference in getting your project scheduled and completed without delays. Thinking about your installation timeline now will help you set realistic expectations and ensure your backyard is ready for summer fun right on schedule. Let’s break down what you can expect for each pool type.

The Gunite Construction Timeline

Patience is key when it comes to gunite pools, but the result is a completely custom and durable masterpiece. Because a gunite pool is built from the ground up right in your backyard, the process is more involved. After excavation, our team builds a rebar framework, sprays the gunite shell, and then lets it cure. This curing process alone can take several weeks. After that, we move on to tile work, plaster finishing, and installing the surrounding patio. All told, a typical gunite swimming pool installation ranges from twelve to eighteen weeks, depending on the complexity of the design and weather conditions.

How Quickly Vinyl Pools Are Installed

If you’re looking for a faster turnaround, a vinyl liner pool is an excellent choice. The construction process is much quicker because the pool’s structural walls are assembled on-site from pre-fabricated panels. Once the excavation is complete and the walls are in place, the custom-fitted vinyl liner is installed, and the pool is filled. This streamlined process means vinyl liner pools can often be installed in just a few weeks. While site conditions and weather can always influence the schedule, you’ll generally be swimming much sooner than you would with a gunite pool.

When Is the Best Time to Install?

While it might seem logical to start a pool project in the spring, the best time to begin construction on Long Island is often in the late summer or fall. Starting your project after the peak season helps you avoid the spring rush and potential scheduling delays. An autumn installation also means your pool will be completely finished and ready to go for the first warm day of the next year. Plus, it gives your new landscaping and lawn time to recover and establish themselves before you start hosting backyard gatherings.

Energy Use and Running Costs

Once your beautiful new pool is installed, the next big consideration is what it will cost to run it season after season. Here on Long Island, where we enjoy hot summers but also have to account for cooler spring and fall days, heating is a significant part of that budget. The material your pool is made of plays a direct role in how much energy you’ll use to keep the water at that perfect, inviting temperature.

While some materials are known for their inherent insulating properties, both gunite and vinyl pools can be built with efficiency in mind. The key is understanding how each material interacts with the water and the surrounding ground, and then choosing the right equipment to minimize your energy bills. Let’s break down how gunite and vinyl compare when it comes to keeping your pool warm without breaking the bank.

Which Pool Stays Warmer?

When it comes to heat retention, vinyl liner pools tend to have a slight natural advantage. The vinyl material itself is non-porous and doesn’t have the massive thermal-absorbing quality of concrete. This means more of your heater’s energy goes directly into warming the water, rather than being pulled into the pool’s structure first. Think of it like this: the liner acts as a barrier, helping the water hold onto its warmth a bit more effectively.

Gunite, on the other hand, is essentially a concrete shell. Concrete is dense and can draw heat out of the water, especially during cooler weather or when the surrounding ground is cold. It takes more initial energy to heat the entire mass of a gunite pool, as you’re warming both the water and the concrete structure itself.

Comparing Heating Bills

While the pool material matters, it’s not the only thing that determines your monthly heating bill. The good news is that modern swimming pools can be equipped with technology that dramatically cuts down on energy use, regardless of whether you choose gunite or vinyl. You can design either pool type to be highly efficient.

Investing in features like a variable-speed pump, a high-efficiency heater, or an automatic pool cover will make a huge difference. A pool cover, in particular, is the single most effective way to prevent heat loss overnight. By adding these energy-saving components from the start, you can manage your running costs and enjoy a comfortable swimming temperature for a longer season.

Insulation and Energy Savings

Diving a little deeper, the structural differences between gunite and vinyl directly impact their insulation potential. As mentioned, gunite pools require more energy to heat because their concrete structure absorbs warmth. While that thermal mass can help the pool maintain its temperature once heated, it takes a significant amount of energy to get there.

Vinyl liner pools offer a unique opportunity for added insulation. During construction, a layer of wall foam can be installed behind the liner. This creates an extra thermal break between the pool water and the cooler ground, further improving heat retention and reducing your overall energy consumption. For any pool owner on Long Island, this is a smart, simple upgrade that pays for itself in lower heating costs over time.

Gunite vs. Vinyl: Myths vs. Facts

When you start researching pools, you’ll come across a lot of strong opinions and conflicting information. It can be tough to figure out what’s true and what’s just noise. Let’s clear up some of the most common myths about gunite and vinyl pools so you can feel confident in your decision.

The Truth About Costs

One of the first things people point to is the price tag. It’s true that a vinyl liner pool typically has a lower upfront installation cost. But that initial number doesn’t paint the full picture of your long-term investment. The vinyl liner itself will need to be completely replaced every 7 to 10 years, which is a significant recurring expense.

A gunite pool requires a larger investment from the start, with costs often ranging from $50,000 to over $100,000 depending on the design. However, this is a one-time cost for a permanent structure that adds lasting value to your property. When you look at the total cost over 20 years, the expenses for both pool types often start to even out. The Gappsi team can provide a detailed quote for your specific swimming pool project.

Common Maintenance Myths

You might hear that gunite pools are a nightmare to maintain, but that’s a huge exaggeration. The truth is, every pool requires consistent care to stay clean and safe. Gunite pools thrive with a simple, structured routine of daily skimming, weekly chemical balancing, and monthly equipment checks.

On the flip side, vinyl liners are not as carefree as they seem. Their surface is delicate and can be easily punctured or torn by pool toys, a dog’s claws, or even sharp debris. These small tears can lead to leaks and costly repairs that you simply don’t have to worry about with a durable gunite surface. Proper pool maintenance is key, regardless of the type you choose.

How Durable Are They, Really?

When it comes to durability, there is no comparison. A properly built and maintained gunite pool can last for more than 50 years. It’s a fortress of rebar and concrete that can handle decades of family fun and harsh Long Island weather without showing signs of wear. Its sturdy structure is highly resistant to scratches, stains, and damage.

A vinyl liner’s lifespan is much shorter, typically lasting between 7 and 10 years before it needs a full replacement. For homeowners who want a permanent, worry-free feature in their backyard, the incredible durability of a gunite pool makes it the clear winner. It’s an investment in strength and longevity.

So, Which Pool Is Right for You?

Choosing between a gunite and a vinyl liner pool is a big decision, but it doesn’t have to be overwhelming. By thinking through a few key areas, you can find the perfect fit for your Long Island home, your family’s lifestyle, and your budget. It’s all about weighing what matters most to you, from the initial design to long-term enjoyment. Let’s break down the final considerations to help you make a choice you’ll be happy with for years to come.

Factors for Long Island Homeowners

Here on Long Island, gunite and vinyl liner pools are the two most popular choices for a reason, but they serve different needs. Gunite pools, built with a sturdy steel rebar frame and sprayed concrete, are known for their incredible strength and longevity. They are built to last. Vinyl liner pools, on the other hand, use a custom-fitted vinyl sheet. While this makes them more affordable upfront, the liner is more susceptible to damage from sharp objects or even pets’ claws, which can lead to repairs. Think about your backyard activities and who will be using the pool when you consider durability.

Matching Your Budget and Lifestyle

Your budget and lifestyle are the biggest guides in this decision. If you’re dreaming of a one-of-a-kind backyard oasis with custom features like built-in benches, unique shapes, or attached spas, a gunite pool is your best bet. It comes with a higher initial price tag and a longer installation time, but the design possibilities are nearly endless. If a lower upfront cost is your priority, a vinyl liner pool is a great option. Just remember to factor in the expense and effort of replacing the liner every 8 to 15 years, which is a significant long-term consideration.

How to Make Your Final Decision

The final step is to look at the big picture. A well-maintained gunite pool can last for 50 years or more, making it a true long-term investment in your property. A vinyl liner pool’s lifespan is tied to its liner, which typically needs replacement every 10 to 15 years. Proper maintenance is key for both types, but the tasks differ. Ultimately, the right choice comes down to balancing upfront cost with long-term value and design freedom with future maintenance. Talking with a professional can help clarify which option best suits your vision for the perfect backyard swimming pool.

Related Articles

Frequently Asked Questions

Is a gunite pool really worth the higher initial cost? Think of it this way: the upfront cost of a gunite pool is for a permanent structural addition to your home. While the initial price is higher, you are investing in a pool that can last for 50 years or more. With a vinyl pool, you pay less at the start, but you’re also signing up for a major recurring expense, which is replacing the liner every 7 to 10 years. When you look at the total cost over a couple of decades, the gunite pool often proves to be the more stable and predictable financial investment.

How difficult is it to repair a tear in a vinyl liner? Small punctures in a vinyl liner can often be patched, sometimes even underwater, using a simple patch kit. While this sounds convenient, finding the source of a small leak can be frustrating. These patches are also temporary solutions and can be noticeable. A larger tear or damage from a storm often requires a professional repair, and if the liner is older, it might make more sense to do a full replacement. It’s a level of upkeep you simply don’t have with a durable gunite surface.

Can I use a saltwater system with both gunite and vinyl pools? Yes, you can use a saltwater system with either type of pool, and many people love the softer feel of the water. Vinyl liners are very compatible with salt systems. With a gunite pool, it’s also possible, but it requires you to be diligent about maintaining proper water chemistry. If the salt and pH levels are not managed correctly, the salt can be corrosive to the plaster finish and some metal components over time.

Which pool adds more value to my home? Both pools add enjoyment, but when it comes to property value, a gunite pool is typically seen as a more significant, permanent upgrade. Because of its longevity and high-end construction, potential buyers often view it as a premium feature. A vinyl liner pool is a wonderful amenity, but its value can be affected by the age of the liner. A buyer might see an older liner as an upcoming expense they will have to handle.

Besides the shape, what other custom features can I add to a pool? Customization is where you can really make a pool your own. With gunite, the options are almost limitless. You can integrate features like shallow sun ledges for lounging, built-in benches and seating, dramatic waterfalls, or an attached spa that flows right into the pool. While vinyl pools are more limited in shape, you can still add features like built-in stairs or benches and choose from a huge variety of liner colors and patterns to create a unique look.

Choosing the best gunite or vinyl swimming pool for the weather on Long Island, NY.

Gunite vs. Vinyl Pools for Long Island Weather

Living on Long Island means embracing all four seasons, from hot, humid summers to freezing winters with unpredictable nor’easters. When you invest in a swimming pool, you need to be sure it’s tough enough to handle everything our climate throws at it. The freeze-thaw cycle alone can put immense pressure on outdoor structures, making durability a top concern. This is where the debate between gunite and vinyl liner pools becomes so important. One is known for its fortress-like strength, while the other offers flexibility at a different price point. For a gunite or vinyl swimming pool what’s the best for Long Island ny weather? Let’s explore how each material stands up to the elements so you can make a confident choice.

Key Takeaways

  • Prioritize long-term durability with gunite: A gunite pool’s concrete shell is built to last over 50 years and withstands harsh Long Island winters. In contrast, a vinyl pool requires a full liner replacement every 7 to 10 years, making it a recurring maintenance project.
  • Look beyond the initial price tag: A vinyl pool’s lower upfront cost is offset by the need for expensive liner replacements every decade. While gunite costs more initially, its long-term expenses are more predictable, often making it a more stable financial investment over the life of the pool.
  • Choose gunite for customization, vinyl for speed: Gunite offers nearly unlimited design freedom for custom shapes and features, perfect for a unique backyard oasis. Vinyl pools offer a faster installation with standard shapes and a wide selection of liner patterns, getting you swimming sooner.

Gunite vs. Vinyl Pools: What’s the Difference?

When you start planning for a new pool, you’ll quickly find two popular options: gunite and vinyl liner. On the surface, they both promise a backyard oasis, but how they’re built and how they last are worlds apart. Understanding these core differences is the first step to choosing the right pool for your Long Island home, one that fits your family’s lifestyle and stands up to our unique weather. Let’s break down what each type of pool is and how they come to life.

What is a Gunite Pool?

Think of a gunite pool as the gold standard in backyard swimming. These are custom-built, permanent structures made from a mixture of sand, cement, and water that’s sprayed over a steel-reinforced frame. This process creates a solid, incredibly durable concrete shell that can last for more than 50 years with the right care. Because they are so robust, gunite swimming pools are known for their longevity and strength. You get a pool that’s not just beautiful but is truly built to last, becoming a permanent feature of your home and a worthwhile investment for decades of enjoyment.

What is a Vinyl Liner Pool?

A vinyl liner pool is constructed differently. First, a frame made of steel or polymer panels is assembled in the excavated hole. Then, a custom-fitted sheet of vinyl is stretched over the frame and attached to a track along the top edge, forming the pool’s surface. This liner is what holds the water. While they are a popular option, the liners themselves are not as durable as a concrete surface. They typically need to be replaced every 7 to 10 years and can be more susceptible to punctures or tears from sharp objects, which can lead to repairs.

How Are They Built?

The construction process really highlights the main distinction between these two pool types. A gunite pool is built entirely on-site. We dig the hole, create a custom web of steel rebar, and then apply the gunite mixture to form a single, monolithic shell. This expert masonry work allows for complete design freedom and results in a structure that’s exceptionally strong against ground movement. In contrast, a vinyl liner pool involves assembling pre-made wall panels. The process is generally faster, but the structure relies on the liner to be waterproof, and the design is limited by the shapes of the available panels.

Which Pool Best Handles Long Island Weather?

Choosing a pool on Long Island means thinking about more than just sunny summer days. Our weather brings a bit of everything: hot, humid summers, freezing winters, and the occasional powerful storm rolling in off the Atlantic. Your pool needs to be tough enough to handle it all, year after year. The materials and construction of your pool will determine how well it holds up to the freeze-thaw cycles, intense UV rays, and everything in between. Let’s look at how gunite and vinyl pools perform through the seasons, so you can feel confident in your investment.

Surviving Winter Freezes and Ice

Winter on Long Island can be tough on any outdoor structure. When the ground freezes and thaws, it expands and contracts, putting immense pressure on a pool’s shell. This is where gunite truly shines. Built on-site with a web of steel rebar covered in concrete, a gunite pool is a monolithic structure that flexes with the ground, resisting cracks and damage from frost heave. Vinyl liner pools, on the other hand, rely on separate wall panels for their structure. These panels can be more vulnerable to shifting and pressure from frozen soil. While proper winterization is key for any pool, the inherent strength of gunite provides an extra layer of security against the harshest winter conditions.

Resisting Summer Heat and Sun Damage

Just as our winters are cold, our summers can be intensely hot and sunny. Constant exposure to UV rays can take a toll on pool surfaces. A gunite pool’s plaster finish is incredibly durable and resistant to sun damage. It won’t fade or become brittle like other materials can. Over many years, it may need to be refinished, but its core integrity remains. Vinyl liners are more susceptible to the sun’s effects. UV exposure can cause the liner’s color to fade and the material to break down, making it more prone to rips and tears from pool toys, pets, or even routine cleaning. This means you might face a full liner replacement sooner than you’d expect.

Standing Up to Storms

From summer thunderstorms to powerful nor’easters, Long Island weather demands durability. Gunite pools are often called the “gold standard” for a reason. Their solid, steel-reinforced concrete construction makes them exceptionally strong and heavy, anchoring them firmly in the ground. They can withstand shifting soil and are highly resistant to damage from falling branches or wind-blown debris. A vinyl liner is much more delicate. A sharp object hitting the surface during a storm could easily cause a puncture, leading to leaks and the need for an immediate patch or a full replacement. For homeowners seeking peace of mind, the robust nature of a gunite pool is a significant advantage.

Comparing the Costs: Upfront vs. Long-Term

When you’re planning your dream pool, the price tag is obviously a huge factor. But the number you see on the initial quote doesn’t tell the whole story. To make the best financial decision for your family, you need to look at both the upfront installation price and the long-term costs of maintenance, repairs, and replacements. A pool is a long-term addition to your home, so thinking about the total cost of ownership over 10, 15, or even 20 years will give you a much clearer picture of your investment. Let’s break down what you can expect to spend on both gunite and vinyl liner pools.

Gunite Pool Installation Costs

Gunite pools come with a higher initial price, typically ranging from $50,000 to $120,000 on Long Island. This cost reflects the custom nature of the construction, the quality of the materials, and the sheer durability of the finished product. The final price depends on factors like the pool’s size, depth, and any special features you want to add, such as waterfalls, built-in seating, or an attached spa. While it’s a larger upfront investment, think of it as paying for a permanent, structural improvement to your property. You’re getting a completely customized swimming pool that is built to last for decades with proper care.

Vinyl Liner Pool Installation Costs

One of the biggest draws of a vinyl liner pool is the lower upfront cost, which usually falls between $25,000 and $65,000. This makes them a more accessible option if you’re working with a tighter initial budget. The installation process is also faster, which can contribute to the lower price point. For many families, the initial savings make vinyl liner pools an attractive way to start enjoying a backyard pool without the larger financial commitment of a gunite build. However, it’s important to remember that this initial price is just the starting point for the pool’s lifetime cost.

Ongoing Maintenance and Replacement Costs

This is where the financial paths of gunite and vinyl pools really start to diverge. The biggest long-term expense for a vinyl pool is replacing the liner, which you’ll need to do every 7 to 10 years. This is a significant, recurring cost that you must factor into your budget. Gunite pools, on the other hand, don’t have a liner to replace. Their ongoing costs are related to regular chemical maintenance and electricity, plus the eventual need to be resurfaced every 10 to 15 years. Keeping the surrounding patio in good shape is also key, and professional restoration and sealing services can protect your entire pool area.

The 20-Year Cost Breakdown

When you look at the numbers over a 20-year span, the financial picture becomes much clearer. A vinyl liner pool might require two, or even three, expensive liner replacements during that time. When you add those costs to the initial installation price, the total investment can easily meet or exceed that of a gunite pool. While the gunite pool started with a higher price tag, its costs are more predictable over the long term without the major expense of liner replacements. For many Long Island homeowners, this makes a gunite pool a more cost-effective and stable investment in their property over time.

Let’s Talk Maintenance: Gunite vs. Vinyl

A pool is a long-term relationship, and like any good relationship, it requires consistent care. When it comes to maintenance, gunite and vinyl pools have different needs. Understanding these differences is key to choosing a pool that fits your lifestyle, not one that runs it. It’s not just about the weekly skimming and chemical checks; it’s about seasonal routines, potential repairs, and the major upkeep you’ll need to plan for down the road. For Long Island homeowners, this also means preparing your pool for the freeze-thaw cycles of winter and the sunny days of summer. Let’s break down what you can expect with each type.

Seasonal Upkeep for Each Pool

Both gunite and vinyl pools need regular attention to keep the water sparkling clean. For a gunite pool, this includes weekly brushing of the plaster surface to prevent algae from taking hold. You’ll also test the water chemistry and clean the filters regularly. When spring arrives, a reliable pool maintenance checklist is your best friend. It involves removing the cover, cleaning out debris, reconnecting equipment, and balancing the water. A vinyl liner’s smooth surface is less prone to algae, but you still need to be diligent with water chemistry to protect the liner from fading or becoming brittle. It’s also important to use soft-bristled brushes to avoid any accidental tears.

Closing for Winter and Opening for Spring

On Long Island, we know how to prepare for winter. Your pool is no different. The closing process is similar for both gunite and vinyl pools and should happen when water temperatures stay consistently below 65°F, usually from late September through October. This involves lowering the water level below the skimmers, winterizing the plumbing lines to prevent freezing, adding winterizing chemicals, and putting on a secure safety cover. While a gunite pool’s structure is incredibly tough against the cold, ensuring your vinyl pool’s cover is properly secured is vital to prevent debris from causing punctures during winter storms. Gappsi offers professional swimming pool services to handle seasonal opening and closing for you.

How Often Do They Need Repairs?

Accidents happen, but some pools are more forgiving than others. Vinyl liners are susceptible to punctures and tears. A fallen branch, a pet’s claws, or even a sharp pool toy can cause a leak. While small holes can be patched, finding them can be a hassle, and frequent repairs can become frustrating. Gunite pools, on the other hand, are exceptionally durable. The concrete shell is tough enough to withstand most daily activities without a scratch. While surface cracks can occasionally form over many years due to ground shifting, they are far less common than liner tears and can be professionally repaired to restore the pool’s integrity.

Replacing a Liner vs. Refinishing a Surface

This is where the long-term maintenance costs really diverge. A vinyl liner typically needs to be completely replaced every 7 to 10 years. This is a significant expense that you’ll need to budget for as a recurring cost of ownership. Gunite pools don’t have a liner. Instead, their interior is a plaster finish that is incredibly long-lasting. This surface will eventually need to be refinished, but usually only every 10 to 15 years, sometimes even longer depending on the water chemistry and care. While refinishing is a major project, it happens about half as often as replacing a liner, giving gunite a clear advantage in long-term durability.

Durability and Lifespan: Which Pool Lasts Longer?

When you’re investing in a swimming pool, you’re not just thinking about this summer; you’re thinking about all the summers to come. You want a pool that will host family barbecues, kids’ birthday parties, and quiet evening swims for decades. That’s why durability is one of the most important factors to consider. A pool is a permanent addition to your home, and its lifespan directly impacts its long-term value and your enjoyment.

Gunite and vinyl liner pools are built very differently, which means they also age differently. One is known for its incredible longevity, becoming a true part of your landscape, while the other requires more frequent updates to keep it in top shape. Understanding these differences in durability and what they mean for maintenance and replacement costs is key to choosing the right pool for your family and your home. Let’s look at how many years you can expect from each type and which one is better suited to stand the test of time.

How Long Gunite Pools Last

If you’re looking for a pool that can last a lifetime, gunite is the answer. These pools are the gold standard for durability. Because they are built with a steel-reinforced frame and a concrete shell, they are incredibly strong and resilient. With proper maintenance, a gunite pool can easily last 50 years or more, often outliving the original homeowners. The structure itself is built to last for generations. While the interior finish will need to be replastered every 10 to 15 years to keep it looking fresh and feeling smooth, the underlying shell remains solid. This makes gunite swimming pools a permanent, valuable addition to your property.

Vinyl Liner Lifespan and Replacement

Vinyl liner pools have a different story when it comes to lifespan. While the pool’s wall structure (typically made of steel or polymer) can last for over 20 years, the vinyl liner itself is much less durable. The liner is the soft, pliable surface you see and feel, and it typically needs to be replaced every 7 to 10 years. Exposure to UV rays, pool chemicals, and sharp objects can cause it to fade, stretch, or tear over time. This means that while the initial cost might be lower, you’ll need to budget for a full liner replacement multiple times over the life of the pool, which is a significant recurring expense.

Handling Long Island’s Temperature Swings

Here on Long Island, we get the full range of seasons, from hot, sunny summers to cold, icy winters. This freeze-thaw cycle can be tough on outdoor structures, and pools are no exception. Gunite pools have a distinct advantage in this climate. Their thick, monolithic concrete shell is incredibly strong and can withstand the pressure from freezing ground and shifting soil without cracking. Vinyl liners, on the other hand, can become brittle in cold temperatures, making them more susceptible to tearing or damage during the winter months. A durable gunite structure provides peace of mind, knowing your investment is built to handle whatever our local weather throws at it, season after season.

Get Creative: Design and Customization

Your swimming pool is more than just a place to cool off; it’s the centerpiece of your backyard. The material you choose plays a huge role in what your final oasis will look like. If you have a specific vision, from a free-form lagoon to a sleek, modern rectangle, the choice between gunite and vinyl is one of the first and most important decisions you’ll make. Gunite offers nearly limitless freedom, while vinyl provides a more structured approach with its own set of aesthetic choices. Let’s look at how your creativity can take shape with each option.

Custom Shapes and Features with Gunite

If you can dream it, you can probably build it with gunite. This is where gunite truly shines. Because it’s sprayed onto a rebar framework, it can be molded into any shape you can imagine. This flexibility allows for a high degree of customization to perfectly match your yard and home’s style. Gunite pools are ideal for creating unique designs with special features like gentle beach-style entries, shallow sun ledges for lounging, or stunning infinity edges that blend with the horizon. These custom touches transform a standard swimming pool into a personal resort.

Design Options for Vinyl Liners

While vinyl liner pools don’t offer the same free-form design possibilities as gunite, they still provide plenty of ways to create a beautiful backyard. Vinyl pools are typically built from pre-manufactured panels, which means they come in a variety of standard shapes like rectangles, ovals, and kidneys. The real customization comes from the liner itself. You can choose from a huge selection of colors, patterns, and textures to define your pool’s look, from a deep blue that mimics the ocean to a light, sandy tone for a tropical feel. You can also add features like built-in stairs and benches for a more custom touch.

Matching Your Home’s Aesthetic

Ultimately, your pool should feel like a natural extension of your home. A gunite pool can be designed to flow with the curves of your landscape or the sharp angles of modern architecture. You can integrate it seamlessly with surrounding patios and stonework, creating a cohesive outdoor living space. A vinyl pool, with its clean lines, often complements more traditional homes and landscapes. The key is to work with a designer who understands how to blend your new pool into your existing environment, ensuring the final result enhances your entire property.

How Long Does Installation Take?

You’ve decided on the perfect pool, and now you’re probably wondering how long it will be until you can actually take a dip. The installation timeline is a major factor in any home improvement project, and with pools, the difference between gunite and vinyl is significant. Planning your project means understanding the construction process for each type. A gunite pool is a long-term investment in craftsmanship, and its timeline reflects that. A vinyl liner pool, on the other hand, offers a much faster path to your first pool party.

The time of year you start also plays a huge role, especially here on Long Island. Beating the spring rush can make a world of difference in getting your project scheduled and completed without delays. Thinking about your installation timeline now will help you set realistic expectations and ensure your backyard is ready for summer fun right on schedule. Let’s break down what you can expect for each pool type.

The Gunite Construction Timeline

Patience is key when it comes to gunite pools, but the result is a completely custom and durable masterpiece. Because a gunite pool is built from the ground up right in your backyard, the process is more involved. After excavation, our team builds a rebar framework, sprays the gunite shell, and then lets it cure. This curing process alone can take several weeks. After that, we move on to tile work, plaster finishing, and installing the surrounding patio. All told, a typical gunite swimming pool installation ranges from twelve to eighteen weeks, depending on the complexity of the design and weather conditions.

How Quickly Vinyl Pools Are Installed

If you’re looking for a faster turnaround, a vinyl liner pool is an excellent choice. The construction process is much quicker because the pool’s structural walls are assembled on-site from pre-fabricated panels. Once the excavation is complete and the walls are in place, the custom-fitted vinyl liner is installed, and the pool is filled. This streamlined process means vinyl liner pools can often be installed in just a few weeks. While site conditions and weather can always influence the schedule, you’ll generally be swimming much sooner than you would with a gunite pool.

When Is the Best Time to Install?

While it might seem logical to start a pool project in the spring, the best time to begin construction on Long Island is often in the late summer or fall. Starting your project after the peak season helps you avoid the spring rush and potential scheduling delays. An autumn installation also means your pool will be completely finished and ready to go for the first warm day of the next year. Plus, it gives your new landscaping and lawn time to recover and establish themselves before you start hosting backyard gatherings.

Energy Use and Running Costs

Once your beautiful new pool is installed, the next big consideration is what it will cost to run it season after season. Here on Long Island, where we enjoy hot summers but also have to account for cooler spring and fall days, heating is a significant part of that budget. The material your pool is made of plays a direct role in how much energy you’ll use to keep the water at that perfect, inviting temperature.

While some materials are known for their inherent insulating properties, both gunite and vinyl pools can be built with efficiency in mind. The key is understanding how each material interacts with the water and the surrounding ground, and then choosing the right equipment to minimize your energy bills. Let’s break down how gunite and vinyl compare when it comes to keeping your pool warm without breaking the bank.

Which Pool Stays Warmer?

When it comes to heat retention, vinyl liner pools tend to have a slight natural advantage. The vinyl material itself is non-porous and doesn’t have the massive thermal-absorbing quality of concrete. This means more of your heater’s energy goes directly into warming the water, rather than being pulled into the pool’s structure first. Think of it like this: the liner acts as a barrier, helping the water hold onto its warmth a bit more effectively.

Gunite, on the other hand, is essentially a concrete shell. Concrete is dense and can draw heat out of the water, especially during cooler weather or when the surrounding ground is cold. It takes more initial energy to heat the entire mass of a gunite pool, as you’re warming both the water and the concrete structure itself.

Comparing Heating Bills

While the pool material matters, it’s not the only thing that determines your monthly heating bill. The good news is that modern swimming pools can be equipped with technology that dramatically cuts down on energy use, regardless of whether you choose gunite or vinyl. You can design either pool type to be highly efficient.

Investing in features like a variable-speed pump, a high-efficiency heater, or an automatic pool cover will make a huge difference. A pool cover, in particular, is the single most effective way to prevent heat loss overnight. By adding these energy-saving components from the start, you can manage your running costs and enjoy a comfortable swimming temperature for a longer season.

Insulation and Energy Savings

Diving a little deeper, the structural differences between gunite and vinyl directly impact their insulation potential. As mentioned, gunite pools require more energy to heat because their concrete structure absorbs warmth. While that thermal mass can help the pool maintain its temperature once heated, it takes a significant amount of energy to get there.

Vinyl liner pools offer a unique opportunity for added insulation. During construction, a layer of wall foam can be installed behind the liner. This creates an extra thermal break between the pool water and the cooler ground, further improving heat retention and reducing your overall energy consumption. For any pool owner on Long Island, this is a smart, simple upgrade that pays for itself in lower heating costs over time.

Gunite vs. Vinyl: Myths vs. Facts

When you start researching pools, you’ll come across a lot of strong opinions and conflicting information. It can be tough to figure out what’s true and what’s just noise. Let’s clear up some of the most common myths about gunite and vinyl pools so you can feel confident in your decision.

The Truth About Costs

One of the first things people point to is the price tag. It’s true that a vinyl liner pool typically has a lower upfront installation cost. But that initial number doesn’t paint the full picture of your long-term investment. The vinyl liner itself will need to be completely replaced every 7 to 10 years, which is a significant recurring expense.

A gunite pool requires a larger investment from the start, with costs often ranging from $50,000 to over $100,000 depending on the design. However, this is a one-time cost for a permanent structure that adds lasting value to your property. When you look at the total cost over 20 years, the expenses for both pool types often start to even out. The Gappsi team can provide a detailed quote for your specific swimming pool project.

Common Maintenance Myths

You might hear that gunite pools are a nightmare to maintain, but that’s a huge exaggeration. The truth is, every pool requires consistent care to stay clean and safe. Gunite pools thrive with a simple, structured routine of daily skimming, weekly chemical balancing, and monthly equipment checks.

On the flip side, vinyl liners are not as carefree as they seem. Their surface is delicate and can be easily punctured or torn by pool toys, a dog’s claws, or even sharp debris. These small tears can lead to leaks and costly repairs that you simply don’t have to worry about with a durable gunite surface. Proper pool maintenance is key, regardless of the type you choose.

How Durable Are They, Really?

When it comes to durability, there is no comparison. A properly built and maintained gunite pool can last for more than 50 years. It’s a fortress of rebar and concrete that can handle decades of family fun and harsh Long Island weather without showing signs of wear. Its sturdy structure is highly resistant to scratches, stains, and damage.

A vinyl liner’s lifespan is much shorter, typically lasting between 7 and 10 years before it needs a full replacement. For homeowners who want a permanent, worry-free feature in their backyard, the incredible durability of a gunite pool makes it the clear winner. It’s an investment in strength and longevity.

So, Which Pool Is Right for You?

Choosing between a gunite and a vinyl liner pool is a big decision, but it doesn’t have to be overwhelming. By thinking through a few key areas, you can find the perfect fit for your Long Island home, your family’s lifestyle, and your budget. It’s all about weighing what matters most to you, from the initial design to long-term enjoyment. Let’s break down the final considerations to help you make a choice you’ll be happy with for years to come.

Factors for Long Island Homeowners

Here on Long Island, gunite and vinyl liner pools are the two most popular choices for a reason, but they serve different needs. Gunite pools, built with a sturdy steel rebar frame and sprayed concrete, are known for their incredible strength and longevity. They are built to last. Vinyl liner pools, on the other hand, use a custom-fitted vinyl sheet. While this makes them more affordable upfront, the liner is more susceptible to damage from sharp objects or even pets’ claws, which can lead to repairs. Think about your backyard activities and who will be using the pool when you consider durability.

Matching Your Budget and Lifestyle

Your budget and lifestyle are the biggest guides in this decision. If you’re dreaming of a one-of-a-kind backyard oasis with custom features like built-in benches, unique shapes, or attached spas, a gunite pool is your best bet. It comes with a higher initial price tag and a longer installation time, but the design possibilities are nearly endless. If a lower upfront cost is your priority, a vinyl liner pool is a great option. Just remember to factor in the expense and effort of replacing the liner every 8 to 15 years, which is a significant long-term consideration.

How to Make Your Final Decision

The final step is to look at the big picture. A well-maintained gunite pool can last for 50 years or more, making it a true long-term investment in your property. A vinyl liner pool’s lifespan is tied to its liner, which typically needs replacement every 10 to 15 years. Proper maintenance is key for both types, but the tasks differ. Ultimately, the right choice comes down to balancing upfront cost with long-term value and design freedom with future maintenance. Talking with a professional can help clarify which option best suits your vision for the perfect backyard swimming pool.

Related Articles

Frequently Asked Questions

Is a gunite pool really worth the higher initial cost? Think of it this way: the upfront cost of a gunite pool is for a permanent structural addition to your home. While the initial price is higher, you are investing in a pool that can last for 50 years or more. With a vinyl pool, you pay less at the start, but you’re also signing up for a major recurring expense, which is replacing the liner every 7 to 10 years. When you look at the total cost over a couple of decades, the gunite pool often proves to be the more stable and predictable financial investment.

How difficult is it to repair a tear in a vinyl liner? Small punctures in a vinyl liner can often be patched, sometimes even underwater, using a simple patch kit. While this sounds convenient, finding the source of a small leak can be frustrating. These patches are also temporary solutions and can be noticeable. A larger tear or damage from a storm often requires a professional repair, and if the liner is older, it might make more sense to do a full replacement. It’s a level of upkeep you simply don’t have with a durable gunite surface.

Can I use a saltwater system with both gunite and vinyl pools? Yes, you can use a saltwater system with either type of pool, and many people love the softer feel of the water. Vinyl liners are very compatible with salt systems. With a gunite pool, it’s also possible, but it requires you to be diligent about maintaining proper water chemistry. If the salt and pH levels are not managed correctly, the salt can be corrosive to the plaster finish and some metal components over time.

Which pool adds more value to my home? Both pools add enjoyment, but when it comes to property value, a gunite pool is typically seen as a more significant, permanent upgrade. Because of its longevity and high-end construction, potential buyers often view it as a premium feature. A vinyl liner pool is a wonderful amenity, but its value can be affected by the age of the liner. A buyer might see an older liner as an upcoming expense they will have to handle.

Besides the shape, what other custom features can I add to a pool? Customization is where you can really make a pool your own. With gunite, the options are almost limitless. You can integrate features like shallow sun ledges for lounging, built-in benches and seating, dramatic waterfalls, or an attached spa that flows right into the pool. While vinyl pools are more limited in shape, you can still add features like built-in stairs or benches and choose from a huge variety of liner colors and patterns to create a unique look.

Sweeping polymeric sand into paver joints for a stable, weed-free patio surface.

Polymeric Sand for Pavers: A Complete DIY Guide

For many homeowners, the battle against weeds sprouting between patio pavers is a constant chore. Just when you think you’ve pulled them all, new ones appear. This frustrating cycle is often a sign that the joint filler isn’t doing its job. If you’re tired of the endless maintenance, it’s time to learn about polymeric sand for pavers. This innovative product creates a hardened barrier that makes it nearly impossible for weed seeds to take root. It also prevents insects from burrowing underneath and stops erosion from washing out the joints during heavy rain. It’s a simple upgrade that delivers powerful, long-term results, letting you spend less time on upkeep and more time enjoying your beautiful outdoor living area.

Key Takeaways

  • Choose performance over price: Polymeric sand is a smart upgrade from regular sand because its polymer additives harden when wet. This process locks pavers in place, creating a durable barrier that effectively stops weeds and resists erosion.
  • Master the application details: A flawless finish depends on careful preparation. Start with a completely dry surface, fill joints to the correct depth, and use a leaf blower to remove all sand residue from paver tops before activating with a gentle mist of water.
  • Recognize when to reapply or call a pro: Expect to refresh your sand every few years, especially if you see weeds or wobbly pavers. If your patio has deeper issues like an uneven base, hiring a professional ensures a lasting fix and a perfect result.

What Is Polymeric Sand and How Does It Work?

If you’ve ever admired a perfectly smooth paver patio and wondered how the stones stay so neatly in place, the secret is likely polymeric sand. Think of it as the high-performance glue that holds your outdoor masterpiece together. It’s a special type of sand used to fill the joints, or gaps, between pavers, natural stones, and bricks. Unlike the loose sand you’d find at the beach,

This process not only locks your pavers in place but also adds a clean, finished look to your patio, walkway, or driveway. It’s a crucial final step in any professional masonry project that ensures your investment looks great and lasts for years. Understanding how it works is the first step to achieving a flawless, long-lasting finish for your outdoor space.

Breaking Down the Ingredients

So, what exactly is in this special sand? At its core, polymeric sand is a simple mixture of fine sand and polymer additives. These polymers are the key ingredient. They act as a powerful binding agent that remains dormant until it comes into contact with water. When you wet the sand according to the product’s instructions, the polymers activate and begin to harden.

This chemical reaction creates a firm yet flexible bond that locks the pavers together, transforming individual stones into a single, interconnected surface. It’s this unique formula that gives your patio or walkway its stability and resilience against the elements, preventing shifting and maintaining that crisp, professional appearance.

Polymeric Sand vs. Regular Sand: What’s the Difference?

You might be wondering if you can just use regular sand from the hardware store. While regular sand can fill the gaps, it simply can’t compete with the performance of polymeric sand. The biggest difference is durability. Polymeric sand’s binding agents help stop weeds from growing through the cracks and keep pesky insects from burrowing underneath your pavers.

Unlike regular sand, which can easily wash out during a heavy rainstorm, properly installed polymeric sand stays put. This hardened joint is specifically designed to withstand foot traffic, weather, and erosion, keeping your stone pavers secure for years to come. It’s a small upgrade that makes a huge difference in the longevity and maintenance of your outdoor living area.

Why Use Polymeric Sand for Your Pavers?

If you’ve invested in a beautiful paver patio or walkway, the last thing you want is for it to be overrun with weeds or become uneven. The secret to a long-lasting, pristine paver surface lies in the joints, and that’s where polymeric sand comes in. This isn’t just ordinary sand; it’s a high-tech mix of fine sand and polymer binders that hardens when activated with water. Using it to fill the gaps between your pavers offers some major advantages over traditional joint sand, transforming your outdoor space from high-maintenance to hassle-free.

Say Goodbye to Weeds and Pests

One of the biggest headaches for paver owners is the constant battle against weeds sprouting up in the joints. Polymeric sand creates a solid, durable barrier that stops weed seeds from taking root. When the sand hardens, it forms a firm bond that’s almost impossible for weeds to penetrate. This also means you can say goodbye to pesky ants and other insects that love to build their homes in the soft sand between pavers. You’ll spend less time on your knees pulling weeds and more time actually enjoying your beautiful masonry work. It’s a simple step that provides a powerful, long-term defense for your patio or driveway.

Keep Your Pavers Stable and Strong

Have you ever walked across a paver patio and felt a few stones wobble under your feet? That’s often a sign that the joint sand has washed away, leaving the pavers loose. Polymeric sand solves this problem by acting like a flexible yet firm grout, locking each paver securely in place. This interlocking bond distributes weight more evenly and prevents the pavers from shifting over time. It’s also highly resistant to erosion from heavy rain or power washing. While regular sand can easily wash out, polymeric sand stays put, ensuring your paver surfaces remain stable, safe, and level for years to come.

Enjoy a Flawless Finish and Easy Maintenance

Beyond its structural benefits, polymeric sand gives your paver project a clean, polished look. It fills the joints completely, creating a smooth and uniform surface that highlights the beauty of the stones themselves. With various colors available, you can even choose a sand that complements your pavers perfectly. This flawless finish also makes maintenance a breeze. Since the joints are sealed, dirt and debris tend to sit on the surface instead of getting lodged in the cracks, making cleanup as simple as a quick sweep or rinse. For a perfect application without any leftover haze, professional restoration and sealing can ensure your patio looks its best from day one.

Choosing the Right Type of Polymeric Sand

Walking into a home improvement store and seeing a wall of different polymeric sand options can feel a bit overwhelming. They aren’t all created equal, and picking the right one is key to getting that durable, beautiful finish you’re looking for. The best choice for your project depends on a few things: the type of traffic your paver surface will get, the look you want to achieve, and the specific size of the joints between your pavers. Thinking through these factors beforehand will help you select the perfect sand for a long-lasting, professional-looking result.

Standard vs. Premium: Which Is for You?

Think of polymeric sand as a special blend of sand mixed with a glue-like polymer. When you add water, it activates and hardens, locking your pavers tightly in place. While any polymeric sand is a big step up from regular sand, you’ll usually find two main grades: standard and premium. Standard-grade sand is great for projects with less foot traffic, like a garden walkway or a small patio. Premium options contain stronger polymers, offering more flexibility and durability. This makes them ideal for high-traffic areas like driveways or pool decks, wider paver joints, and places exposed to harsh weather. If you want maximum protection against weeds and erosion, investing in a premium product is often worth it.

Finding the Perfect Color Match

The color of your polymeric sand plays a huge role in the final look of your project. It can either blend in seamlessly with your pavers or create a striking contrast that makes the pattern pop. Most brands offer a range of neutral colors like gray, beige, and black to complement different paver styles. To find the perfect match, take a sample of your paver with you when you shop, or bring a few sand color samples home. Seeing the colors together in the natural light of your outdoor space is the best way to decide. A well-chosen color will tie the whole look together, giving your patio or walkway a polished, cohesive finish.

Making Sure It Fits Your Paver Joints

Polymeric sand is designed to work within a specific range of joint widths, typically between 1/8 of an inch and up to 4 inches, depending on the product. Before you buy, measure the gaps between your pavers. If the joints are too narrow, the sand won’t be able to fill them properly, leading to a weak bond. If they’re too wide for the product you chose, it may wash out or crack over time. Always check the manufacturer’s instructions on the bag to see the recommended joint width and depth. Getting the right fit ensures the sand can compact properly and create a strong, flexible bond that will last for years. If you’re unsure, our masonry experts can always help.

How to Apply Polymeric Sand: A Step-by-Step Guide

With the right polymeric sand in hand, you’re ready for the most important part: the application. Getting this right is key to achieving that durable, professional-looking finish for your paver patio, walkway, or driveway. The process isn’t complicated, but it does require attention to detail. By following these steps carefully, you can ensure your pavers stay locked in place and free from weeds for years to come. Let’s walk through exactly how to get it done.

Prep and Clean Your Paver Surface

A successful application starts with a clean slate. Before you even open the bag of sand, your paver surface and joints must be completely clean and, most importantly, bone dry. Any moisture can activate the polymers prematurely, leaving a hazy film on your pavers that’s tough to remove. Start by clearing out any old sand, dirt, or weeds from the joints. A pressure washer on a gentle setting or a sturdy utility knife can work well for this. Once the joints are clear, sweep the entire surface thoroughly. If you’re dealing with stubborn stains or an older patio, professional restoration and sealing services can get your pavers back to their original condition.

The Right Way to Install Polymeric Sand

Once your surface is perfectly dry, pour the polymeric sand directly onto the pavers. Using a push broom with stiff bristles, sweep the sand across the surface, guiding it into the joints from multiple angles. Your goal is to fill each joint to the very bottom. After the initial fill, you need to compact the sand to eliminate any air pockets. You can do this by gently tapping the pavers with a rubber mallet or by using a plate compactor for larger areas. This vibration helps the sand settle deep into the joints. Add more sand and repeat the process until the joints are filled to about 1/8 inch below the paver’s edge. Finally, use a leaf blower on a low setting to remove every last grain of sand from the paver surfaces.

Activating and Curing for a Perfect Set

Now it’s time to activate the polymers with water. Set your garden hose nozzle to a gentle “shower” or “mist” setting. A strong jet of water will wash the sand right out of the joints. Start at the highest point of your paved area and work your way down, watering in small sections. Lightly spray each section for about 20-30 seconds, let the water soak in, and then repeat two or three more times until the joints are saturated. You’ll know they’re done when the water starts to pool slightly on top. Once you’ve watered the entire area, the curing process begins. Check the manufacturer’s instructions, but most products need 24-48 hours to fully harden. During this time, it’s crucial to keep all foot and vehicle traffic off the pavers.

Common Polymeric Sand Mistakes to Avoid

Applying polymeric sand can give your patio or walkway a professional, long-lasting finish. But a few simple mistakes can turn your dream project into a frustrating mess. Getting the details right is key to avoiding issues like a hazy film on your pavers or joints that wash out in the first rainstorm. Let’s walk through the most common slip-ups so you can get a flawless result the first time. By paying close attention to the weather, your application technique, and how you water, you’ll ensure your hard work pays off with a beautiful, durable surface that stands the test of time.

Don’t Ignore the Weather Forecast

Think of yourself as a fair-weather friend to your polymeric sand project. The polymers in the sand need a specific set of conditions to cure properly, and moisture is the main variable you need to control. Before you even open the bag, check the forecast. You need a solid 24-48 hours of dry weather after you finish the job. Rain can wash the sand out of the joints before it has a chance to harden, creating a mess and weakening the bond. It’s also important that your pavers and the joint base are completely dry before you start. Any existing moisture can cause the sand to clump and cure unevenly. If your patio has low spots that tend to collect water, you’ll want to address those drainage issues first. Proper masonry installation is foundational to good drainage and a long-lasting paver surface.

Avoid Overfilling and Hazy Surfaces

One of the most common frustrations with polymeric sand is “poly-haze,” a white, cloudy film that can linger on your paver surfaces. This happens when sand residue is left on top of the pavers when you add water. To avoid this, be meticulous about cleaning. After sweeping the sand into the joints, use a leaf blower on a low setting to blow all the excess dust and grains off the surface. Make sure the joints are filled correctly, leaving the sand about 1/8 inch below the paver’s edge. This small gap prevents the sand from smearing onto the surface during activation. Overfilling is a primary cause of hazing. If you do end up with a hazy finish, don’t panic. There are cleaners available, but prevention is always easier. For stubborn haze or older stains, professional restoration and sealing services can bring your pavers back to life.

Using the Right Amount of Water

Activating the sand with water is the final, and arguably most critical, step. This is where the magic happens, as the water causes the polymers to bind and harden. However, using the wrong amount of water can ruin the entire application. Too little water will only harden the top layer, leaving the sand below loose and unstable. Too much water can wash the binding polymers right out of the joints, resulting in a weak bond that won’t stand up to weeds or weather. The best method is to use a hose with a spray nozzle set to a gentle “shower” setting. Mist the pavers in a sweeping motion, allowing the water to soak in slowly. Repeat this two or three times until the joints are saturated but not flooded. You want the water to penetrate to the bottom of the joint without dislodging the sand. This careful approach ensures a strong, consistent bond from top to bottom.

How Long Does Polymeric Sand Last?

When you put your time and energy into a paver project, you want the results to last. So, how long can you expect your polymeric sand to hold up? Generally, a good application of polymeric sand will last between three to five years. However, with the right conditions and a top-notch installation, it’s not uncommon for it to last up to 10 years.

The biggest factor influencing its lifespan is the quality of the initial application. A job done right from the start will always perform better. Other elements also play a part, like the amount of foot traffic the area receives and the local weather. Here on Long Island, our patios and walkways face freeze-thaw cycles, which can be tough on any jointing material. Proper drainage is also crucial; if water constantly pools on your patio, it can shorten the sand’s life.

Ensuring your pavers are installed on a solid base with good drainage is the first step toward a long-lasting finish. When every step is handled correctly, from the base preparation to the final curing of the sand, you give your project the best possible chance to reach that 10-year mark. For complex projects, working with a professional masonry team can make all the difference in maximizing durability.

What Makes Polymeric Sand Last Longer?

The secret to polymeric sand’s durability is right in its name: polymers. These are binding agents mixed in with the fine sand particles. Think of it as a special sand blended with a powerful, water-activated adhesive. When you introduce water, these polymers create a glue-like reaction, causing the sand to harden into a firm yet flexible joint.

This hardened material locks your porcelain and natural stone pavers in place, preventing them from shifting over time. Unlike regular sand, which can easily wash away with heavy rain or get displaced by foot traffic, polymeric sand stays put. This solid barrier is what gives it its staying power, resisting erosion and effectively blocking weeds and insects from making a home between your pavers.

Signs It’s Time for a Reapplication

Your patio will give you a few clear signals when it’s ready for a refresh. Catching these signs early can prevent small issues from turning into bigger problems. Here’s what to look for:

  • Empty or Low Joints: If you notice the sand between your pavers looks sunken or washed out, it’s a sign of erosion.
  • Weeds and Moss: Are little green sprouts popping up? This is a clear indication that the sand’s protective barrier has weakened, allowing seeds to take root.
  • Loose Pavers: If a few pavers have started to wobble underfoot, the sand is no longer doing its job of locking them securely in place.
  • Ant Hills: Tiny mounds of sand are a telltale sign that insects have found a way to tunnel through the joints.

If you’re seeing any of these issues, it might be time to consider Gappsi’s restoration and sealing services to bring your patio back to life.

Tips to Extend Its Lifespan

A little care goes a long way in getting the most out of your polymeric sand. To help it last as long as possible, follow these simple tips.

First, preparation is everything. If you’re reapplying, make sure you remove all the old, failed sand and any debris from the joints. Clean the paver surfaces thoroughly and let them dry completely before you begin.

Next, pay close attention to the curing process. After activating the sand with water, keep all foot traffic off the area for at least 24 hours and vehicles off for 72 hours. If heavy rain is in the forecast, protect the surface with a tarp to allow the sand to set properly without being disturbed.

Polymeric Sand vs. Other Joint Fillers

When you’re finishing a paver project, you have a few options for filling the joints. The most common alternative to polymeric sand is regular jointing sand, sometimes called paver sand. While it’s less expensive, it doesn’t offer the same long-term benefits. Think of regular sand as a simple filler, while polymeric sand is an active bonding agent that works to protect and stabilize your entire patio or walkway.

So, how do they really stack up against each other? Let’s compare their performance and look at whether the extra cost for polymeric sand is a smart investment for your home.

Comparing Durability and Performance

The biggest difference between polymeric sand and regular sand comes down to its composition. Polymeric sand is a special mix of fine sands and polymer additives. When you add water, these polymers activate and harden, creating a firm, durable joint. According to the experts at Sakrete, this hardened material is much better than regular sand because it helps stop weeds from growing, resists washing out during heavy rain, and keeps insects from burrowing between your pavers.

Regular sand, on the other hand, stays loose. It can easily be washed away by rain or a hose, creating a mess and leaving your paver joints empty. This means you’ll have to reapply it often. More importantly, polymeric sand locks the pavers together, adding stability to the entire surface. This is a crucial part of any quality masonry project and ensures your investment looks great for years.

Is It Worth the Investment?

It’s true that polymeric sand costs more upfront than regular sand, which might make you pause. However, it’s a worthwhile investment that pays for itself over time. Because it creates a durable, semi-solid joint, you won’t have to spend your weekends pulling weeds or sweeping away anthills. It provides long-lasting stability and a much cleaner, more polished look for your pavers.

Think of it this way: the higher initial cost saves you money and time on maintenance down the road. You won’t need to buy bags of replacement sand every year or spend hours on upkeep. The demand for polymeric sand is rising in both residential and commercial construction for this very reason. It delivers a professional-grade finish that protects your patio, driveway, or walkway, making it a smart choice for any homeowner who values durability and a pristine appearance.

When to Call in the Pros for Your Project

Tackling a home improvement project yourself can be incredibly satisfying. But sometimes, what looks like a simple weekend task can reveal deeper issues that need an expert eye. Applying polymeric sand is often straightforward, but knowing when to step back and call a professional can save you time, money, and a lot of frustration. It’s the key to ensuring your patio or walkway not only looks great but is also structurally sound for years to come.

Deciding between DIY and hiring a pro often comes down to the complexity of the job and the quality of the finish you’re after. If your pavers are in rough shape or you simply want the peace of mind that comes with a flawless, long-lasting result, bringing in an experienced team is a smart move. Let’s walk through a few signs that indicate your project might be bigger than it seems.

Assessing Your Project’s Complexity

Take a good look at your paver surface. Is it mostly level with just a few weeds, or are you seeing more significant problems? If your pavers are very broken, tilted, or uneven, this usually points to an issue with the foundation beneath them. Simply sweeping in a new layer of polymeric sand won’t fix the root cause. A professional will need to lift the pavers, re-level the base, and replace any damaged stones before application. Ignoring these underlying problems means you’ll likely face the same issues again in a year or two. A professional restoration and sealing service can properly diagnose and fix these foundational issues for a lasting repair.

The Advantages of a Professional Touch

Even if your pavers are in good condition, there are still great reasons to hire a professional. Reapplying polymeric sand might seem like a minor maintenance task, but it plays a big role in extending the life and look of your hardscape. Professionals have the right equipment, like commercial-grade plate compactors, to ensure the sand settles deep into the joints for maximum stability. They also have the experience to avoid common DIY mistakes, such as leaving a hazy residue on the paver surface or using the wrong amount of water during activation. Hiring an expert masonry team guarantees the job is done efficiently and correctly the first time, giving you a perfect finish without the guesswork.

Related Articles

Frequently Asked Questions

Can I just add new polymeric sand on top of the old stuff? It’s tempting to take a shortcut, but for the best results, you really need to remove the old, failed sand first. The new sand needs to fill the entire joint from bottom to top to create a strong, stable bond. If you just top it off, the new layer will be too thin to harden properly and will likely crack or wash away, leaving you back where you started. Taking the time to clean out the joints completely ensures a durable, long-lasting finish.

What should I do if it unexpectedly rains after I’ve applied the sand? An unexpected rain shower is a common worry. If you can, cover the area with a plastic tarp as soon as you see rain coming. If the area does get wet before the sand has had a chance to cure, the best thing to do is wait. Let it dry out completely for a day or two and then check the joints. Sometimes, a light shower won’t cause major issues, but a heavy downpour can wash the polymers out. If the sand is loose or washed out after drying, you will likely need to re-do the application.

Is polymeric sand a good choice for around a swimming pool? Absolutely. In fact, it’s an excellent choice for pool decks. The area around a pool sees a lot of water and foot traffic. Polymeric sand creates a solid joint that won’t wash out from splashes or rain. It also helps keep the paver surface stable and prevents weeds from growing, which keeps your pool area looking clean and well-maintained with less effort.

Why did my polymeric sand crack or wash out so quickly? If your polymeric sand failed soon after application, it usually points to an issue with the installation process. The most common reasons are applying it when the pavers were not completely dry, not compacting the sand enough to fill all the air pockets, or using too much or too little water during the final activation step. Poor drainage under the pavers can also cause problems, as constant moisture can weaken the bond over time.

How do I clean my paver patio without damaging the polymeric sand? Regular, gentle cleaning is the best way to maintain your patio. You can sweep it with a broom or use a leaf blower on a low setting to clear away debris. For dirt or stains, use a paver-safe cleaner and a brush with soft bristles. It’s best to avoid using a high-pressure washer, as the intense spray can blast the sand right out of the joints. If you must use one, use a wide-angle nozzle and keep a safe distance from the surface.