A dog's paws on the best artificial grass for pets.

Best Artificial Grass for Pets: A Pet Owner’s Guide

If you’re a pet owner, you know the constant struggle of maintaining a beautiful lawn. Between muddy paws tracked through the house, patchy yellow spots, and the endless worry about your dog digging up your hard work, a natural grass yard can feel like a losing battle. You deserve an outdoor space that’s both pristine and practical, a place where your pet can play freely without creating a mess. This is where artificial turf comes in. It offers a clean, durable, and consistently green solution. But not all turf is created equal. This guide will walk you through everything you need to know to choose the best artificial grass for pets, focusing on the key features that ensure a safe, hygienic, and beautiful lawn for your entire family.

Key Takeaways

  • Prioritize pet-specific turf features: When choosing artificial grass, look for excellent drainage to manage waste, non-toxic materials to ensure safety, and a durable, shorter pile height that simplifies cleaning.
  • Create a cleaner, safer environment: Artificial turf eliminates muddy paws tracked indoors, removes the need for potentially harmful lawn chemicals, and reduces common pests like fleas and ticks, making your yard healthier for your pet.
  • Rely on professional installation for lasting results: The long-term success of your pet-friendly lawn depends on expert installation. Proper ground preparation is essential for guaranteeing the superior drainage and durability needed to withstand daily play.

What to Look for in Pet-Friendly Artificial Grass

When you’re choosing artificial grass for your home, adding a pet to the mix changes the game. You’re not just looking for something green and neat; you need a surface that can handle everything from potty breaks to playful pounces. The right turf will make your life easier and give your pet a safe, comfortable space to enjoy. To find the perfect match, focus on a few key features that separate standard turf from a true pet-friendly solution. Let’s walk through exactly what you should look for.

Superior drainage for easy cleanup

First things first: drainage. This is probably the most important factor for any pet owner. When your dog does their business, you need assurance that liquids won’t pool on the surface. High-quality pet turf is designed with a permeable backing that allows urine and water to drain through quickly, preventing smelly puddles and making cleanup a breeze. Look for turf with a high drainage rate, ideally over 100 inches per hour. This ensures that a quick rinse with the hose is all you need to wash away messes, keeping your yard fresh and hygienic for everyone to enjoy.

Non-toxic materials for your peace of mind

Your pet’s safety is non-negotiable. Since they’ll be rolling, playing, and maybe even chewing on the grass, you need to be sure it’s made from non-toxic materials. The best synthetic turf for pets is free from harmful chemicals like lead, heavy metals, and PFAs. Always check that the product you’re considering has been tested and proven safe for animals. Choosing a hypoallergenic and lead-safe option gives you complete peace of mind, knowing your furry family member has a secure place to play without being exposed to any hazardous substances.

Durability that withstands zoomies and play

Pets can be tough on lawns. From energetic zoomies to determined digging, their daily activities can turn a natural lawn into a muddy mess. That’s why durability is a must-have. Pet-friendly artificial grass is engineered to withstand rough-and-tumble play. Its strong backing and resilient fibers resist digging, chewing, and heavy foot traffic, so your yard stays looking pristine. This resilience means you can say goodbye to patchy spots and muddy paws tracked through the house. It’s a clean, low-maintenance solution built to last through years of fun.

Odor-control to keep your yard fresh

No one wants a backyard that smells like a litter box. While superior drainage is the first line of defense against odors, some turf systems offer extra protection. Many modern options feature antimicrobial technology built into the blades or infill, which helps to break down bacteria from pet waste and prevent unpleasant smells from developing. For extra assurance, you can use specialized deodorizing products designed for turf. These solutions, like the ones we use for a custom dog run, sanitize the surface without harsh chemicals, keeping your yard smelling fresh and clean.

Why Long Island Pet Owners Choose Gappsi Turf

Choosing the right artificial grass for your pet involves more than just picking a product; it’s about trusting the team that installs it. For years, Long Island homeowners have turned to Gappsi for our deep understanding of local needs and our commitment to creating beautiful, functional, and pet-safe outdoor spaces. We combine high-quality materials with decades of hands-on experience to deliver a lawn that both you and your furry family members will love. Our approach is built on providing personalized service and flawless execution, ensuring your new turf is a perfect fit for your home and lifestyle.

We know that for parents and pet owners, safety is the top priority. Synthetic turf provides peace of mind by creating a controlled, clean, and safe outdoor environment. From the initial design consultation to the final installation, our team works with you every step of the way. We listen to your concerns, answer your questions, and make sure the final result exceeds your expectations. It’s this dedication to quality and customer satisfaction that has made us a trusted name in home improvement across Suffolk and Nassau counties.

Customized solutions for your yard and pet

Your yard is unique, and so is your pet. That’s why we don’t believe in one-size-fits-all solutions. We take the time to understand how you and your pet use your outdoor space. Whether you have a tiny terrier who loves to sunbathe or a high-energy retriever who needs room to run, we design a turf solution that works for everyone. Gappsi also designs custom dog runs with American-made synthetic grass and safe chain-link fencing, providing a secure, comfortable space for pets to play and exercise outdoors. We consider every detail, from the layout of your yard to your pet’s specific habits.

Expert installation for flawless results

The best artificial turf in the world won’t perform well if it’s not installed correctly. Our experienced team handles every aspect of the installation process with precision and care, ensuring proper ground preparation, seamless connections, and optimal drainage. We know that a flawless installation is key to a long-lasting, beautiful lawn. As one of our clients shared, “Gappsi designed our inground pool, laid artificial turf, as well as laid natural stone in our yard. We absolutely love the work they did in our yard.” This level of satisfaction comes from our team’s dedication to getting every detail right, from start to finish.

High-quality, pet-safe materials

Your pet’s safety is our top priority. We exclusively use high-quality, non-toxic turf materials that are completely safe for animals and children. You’ll never have to worry about your pet being exposed to harmful chemicals, lead, or heavy metals. This commitment to safety means you can let your pet play freely with complete peace of mind. We also ensure our turf is paired with effective cleaning solutions that are just as safe. As our product guides state, our sanitizers are “specially designed to sanitize and deodorize synthetic turf without the use of harsh chemicals. It’s safe for both humans and pets.”

Local expertise you can trust

As a Long Island-based company, we have a unique understanding of the local environment. We know the soil, the weather patterns, and what it takes to create a durable, beautiful lawn that can withstand our region’s specific challenges. Since 1987, Gappsi has been helping homeowners across Suffolk and Nassau counties transform their properties. Our long history in the community is a testament to our reliability and commitment to quality. When you work with us, you’re not just hiring a contractor; you’re partnering with a local expert who is invested in making your home the best it can be.

How to Choose the Right Turf Features for Your Pet

When you’re creating a backyard oasis for your family, your furry members are a top priority. Choosing the right artificial grass involves more than just picking a shade of green; it’s about selecting features that ensure a safe, clean, and durable space for your pets to enjoy. The right turf makes cleanup a breeze, keeps your yard looking pristine, and gives your pet a comfortable surface for everything from sunbathing to spirited games of fetch. A beautiful, low-maintenance lawn that your dog loves is the ultimate win-win for any Long Island homeowner.

Thinking about the technical details might seem overwhelming, but it’s actually quite simple when you know what to look for. Key features like drainage capacity, blade height, and heat resistance can make all the difference in the long-term success of your lawn. A quality pet turf system is designed from the ground up, considering everything from the sub-base preparation to the type of infill used between the blades. This holistic approach ensures that your investment not only looks great on day one but also stands up to years of play, weather, and pet-related messes. Let’s walk through the most important factors to consider so you can feel confident you’re making the best choice for your home and your four-legged friend.

Get the right drainage rate

Proper drainage is non-negotiable when it comes to pet-friendly turf. Without it, pet urine can pool on the surface or get trapped in the backing, leading to unpleasant odors and a soggy, unhygienic mess. Look for turf with a high drainage rate, ideally over 100 inches per hour. This allows liquids to pass through quickly, washing away waste and keeping the surface fresh. A fully permeable backing is essential for this process. When you install synthetic turf, a proper sub-base is also prepared to ensure water drains away from the surface efficiently, preventing any lingering moisture or smells.

Choose the perfect pile height and density

Pile height, or the length of the grass blades, plays a big role in maintenance and comfort. For pets, a shorter pile height of around 1.6 inches or less is usually best. Shorter blades make it much easier to spot and clean up solid waste, and they are less likely to trap odors over time. This height also provides a soft yet sturdy surface that feels great under paws. Density refers to how many fibers are stitched into the backing. A denser turf is more durable and can better withstand the wear and tear of active pets, ensuring your lawn stays lush and full for years.

Select the best backing and infill

The backing and infill are the unsung heroes of a great pet turf system. The backing holds the turf blades in place, while the infill weighs the turf down, helps the blades stand upright, and provides cushioning. For pet areas, it’s crucial to choose a turf with a 100% permeable backing to maximize drainage. For the infill, opt for a non-toxic, antimicrobial material. Many modern infills are specifically designed to neutralize ammonia in pet urine, which is the primary source of odor. This combination creates a clean, safe, and fresh-smelling environment for everyone to enjoy.

Protect paws with UV and heat resistance

We all know how hot surfaces can get on a sunny Long Island day, and artificial turf is no exception. To keep your pet’s paws safe and comfortable, look for turf with built-in UV and heat resistance. Advanced technologies in modern turf and game courts can reflect sunlight, keeping the surface temperature significantly cooler than older turf products. UV protection also prevents the grass from fading or becoming brittle over time, preserving its vibrant color and soft texture. This ensures your lawn remains a safe and inviting place for your pet to play, even during the warmest months.

Artificial Turf vs. Natural Grass: What’s Best for Pets?

Choosing the right surface for your yard is a big decision, especially when you have a four-legged family member to consider. While a natural lawn has its classic appeal, many Long Island pet owners are finding that artificial turf offers a more practical, clean, and durable solution that stands up to zoomies and digging. The constant battle with mud, pests, and patchiness can make a natural lawn feel like more work than it’s worth. On the other hand, artificial turf promises a consistently green, low-maintenance space for everyone to enjoy. But is it the right fit for your home and your pet? The best choice comes down to a few key factors: maintenance, health and safety, long-term cost, and year-round usability. We’ll break down how natural grass and artificial turf stack up in each of these areas so you can feel confident in your decision and create a backyard that both you and your pet will love for years to come.

Maintenance: Say goodbye to mud and mowing

If you’re tired of muddy paw prints trailing through your house after every rainy day, you’re not alone. For many homeowners, muddy paws and a torn-up yard are top complaints. Artificial turf eliminates this problem entirely. Because it has a built-in drainage system and no soil, your yard stays clean and mud-free, no matter the weather. This also means you can say goodbye to the endless cycle of mowing, watering, and fertilizing. With high-quality synthetic turf and sports game courts, you get a perfectly green lawn with minimal effort, giving you more time for fetch and less time on chores.

Health & Safety: Avoid pesticides and pests

A pet’s health is a top priority, and your yard plays a big role in their well-being. Natural lawns often require chemical fertilizers, pesticides, and weed killers to stay lush, which can expose your pet to harmful toxins. Artificial turf provides peace of mind by creating a controlled and safe environment. It doesn’t need chemical treatments to look great, so your pet can roll around and play without you having to worry. Plus, turf is less hospitable to pests like fleas and ticks, which prefer the soil and moisture of a natural lawn. A professional landscape designer can help you integrate pet-safe turf seamlessly into your overall yard design.

Cost: Understand the long-term investment

There’s no getting around it: the initial installation cost for artificial turf is higher than laying down sod or seed. However, it’s important to look at the bigger picture. Think of it as a long-term investment in your property. With a natural lawn, you’re constantly paying for upkeep, whether it’s a higher water bill, bags of fertilizer, lawnmower fuel, or hiring a landscaping service. Over the years, these recurring costs add up significantly. Artificial turf, on the other hand, eliminates most of these expenses. It’s a one-time home remodeling project that pays for itself in savings and convenience.

Usability: Enjoy a perfect lawn year-round

A natural lawn can be temperamental. It gets muddy in the spring, can develop brown patches in the summer heat, and becomes a frozen, brittle surface in the winter. This often means there are long stretches when the yard is off-limits for play. Artificial turf is ready for action 365 days a year. Its durable surface stands up to energetic pets and drains quickly after rain, so there’s no downtime. For pet owners, we can even design custom dog runs with synthetic grass and secure fences and netting, giving your pet a secure and comfortable space to play and exercise outdoors, no matter the season.

Addressing Common Health and Safety Questions

When you’re thinking about a new lawn, your pet’s well-being is naturally at the top of your list. You want a space that’s not only beautiful and low-maintenance but also a safe playground for your furry family members. It’s smart to ask questions about what goes into your yard. Let’s walk through some of the most common health and safety concerns pet owners have about artificial turf, so you can feel confident in your decision.

Is it free of harmful chemicals?

Absolutely, your pet’s safety comes first. High-quality, modern artificial grass is specifically designed to be non-toxic and safe for both pets and children. Reputable manufacturers ensure their products are free from harmful chemicals like lead, PFAs, and other heavy metals. When we help you select your turf, we prioritize materials that are hypoallergenic and completely safe for your pets to roll around and play on. You can rest easy knowing that the synthetic turf we install is made with your family’s health in mind, giving you a beautiful yard without the worry.

Will it get too hot for my pet’s paws?

This is a great question, especially when you think about those sunny Long Island summer days. While older generations of turf could get warm in direct sunlight, today’s products are much more advanced. Many types of pet-friendly turf now include cooling technology, with fibers that are shaped to reflect sunlight and dissipate heat. This innovation helps keep the surface temperature comfortable and safe for sensitive paws. When choosing your turf, we can show you options with the best heat-resistance properties, ensuring your pet has a cool, comfortable place to play year-round.

How do I keep it clean and hygienic?

Keeping your artificial lawn fresh and clean is surprisingly simple. For solid waste, you just scoop it up as you would on any surface. For liquid waste, the turf’s built-in drainage system does most of the work. A quick rinse with a hose will wash away any residue and prevent odors from setting in. For a deeper clean, you can use specialized, pet-safe cleaners. We even offer products designed to sanitize and deodorize synthetic turf without harsh chemicals, ensuring your yard stays a pleasant and hygienic environment for everyone to enjoy.

Your Simple Guide to Maintaining Pet-Friendly Turf

One of the best things about artificial turf is how little maintenance it requires compared to a natural lawn. But a little regular care goes a long way, especially with pets. Keeping your turf clean and fresh is simple with a few easy habits. These steps will help you protect your investment and ensure your yard remains a beautiful, hygienic space for your whole family, paws included.

Quick daily clean-up

This is the easiest but most important step. Remove any solid waste as soon as you spot it, then give the area a quick rinse with a hose. This simple action prevents odors from setting in and keeps the surface clean and ready for your pet’s next play session. Think of it like wiping a kitchen counter right after you cook; doing it immediately makes deep cleans much easier and less frequent. It’s a small habit that makes a huge difference in maintaining a fresh, inviting, and hygienic yard for everyone.

Your weekly refresh routine

To keep your lawn looking and smelling its best, set aside a few minutes each week. A couple of times a week, give the areas where your dog frequently urinates a good rinse with the hose. For a deeper clean, a mixture of equal parts water and white vinegar can neutralize any lingering smells. Once a month, give the entire lawn a thorough rinse and gently brush the fibers with a stiff, non-metal brush. This helps the blades stand up and keeps your synthetic turf looking lush and new.

Simple strategies to prevent odors

The best way to deal with odors is to stop them before they start. During installation, choosing a safe, antibacterial infill is key, as it helps control smells and supports the grass blades. For ongoing maintenance, use a specialized turf deodorizer. Gappsi recommends products designed to sanitize and deodorize synthetic turf without harsh chemicals, making them completely safe for your pets. You can find effective and pet-friendly cleaning solutions at the Gappsi Store to keep your lawn fresh.

Know when it’s time for a replacement

High-quality synthetic turf is incredibly durable, but it won’t last forever, especially in a yard with active pets. Over time, you might notice signs of wear. Look for matted areas that won’t fluff up, persistent odors that cleaning can’t resolve, or visible damage like tears or separating seams. When your turf no longer provides that clean and safe environment for your pet, it might be time for an update. A fresh turf installation restores your yard’s beauty and function, ensuring your pet has a safe place to play for years to come.

How to Choose the Perfect Artificial Grass for Your Pet

Picking the right artificial grass for your pet goes beyond aesthetics. You’re creating a space for them to play, relax, and live, so it needs to be safe, durable, and easy to clean. Thinking through a few key factors will help you find the perfect match for your yard and your four-legged friend. Let’s walk through how to make the best choice for your home.

Assess your yard and drainage

Before you fall in love with a turf sample, take a good look at your yard. The success of your pet-friendly lawn depends heavily on what’s underneath it. Proper drainage is the most critical factor. Without it, pet urine and rainwater can pool, creating unpleasant odors and a soggy mess. A quality pet turf will have a permeable backing with plenty of drainage holes. We also ensure the ground is properly prepared with a base of crushed stone to help whisk moisture away, keeping the surface dry and fresh. A professional assessment of your yard’s grading and soil is the best first step to guarantee your synthetic turf performs perfectly for years to come.

Match the turf to your pet’s lifestyle

Think about your pet’s daily routine. Do you have a high-energy dog who loves to sprint and dig, or a calm cat who prefers to sunbathe? An active pet requires a highly durable turf with a strong, resilient backing that can withstand rough play. A shorter pile height (the length of the grass blades) is often easier to clean and more durable for energetic dogs. If you have multiple pets, prioritizing superior drainage and odor control is even more important. The goal is to create a clean, safe, and comfortable space. Gappsi can even design custom dog runs that give your pet a dedicated area to play without compromising the rest of your beautiful lawn.

Plan your budget and installation

Artificial turf is a significant investment in your home, but it pays off in the long run with minimal maintenance and water savings. Your total project cost will include the turf itself, the materials for the sub-base, and professional installation. While a DIY approach might seem tempting, we always recommend professional installation for pet turf. An expert team ensures the ground is perfectly graded, the base is compacted correctly for optimal drainage, and the seams are invisible and secure. This prevents future issues like lifting edges or poor drainage, giving you a flawless, long-lasting lawn where your pet can safely play.

Related Articles

Frequently Asked Questions

Will my yard smell bad, especially during hot Long Island summers? This is a top concern for pet owners, and a valid one. The key to preventing odors is a proper turf system, not just the grass itself. It starts with a permeable backing that allows liquids to drain through quickly, combined with a properly prepared base underneath that wicks moisture away. Using a specialized antimicrobial infill also works to neutralize ammonia from pet urine. With the right installation and a simple routine of rinsing the area regularly, your yard will stay fresh, even on the hottest days.

My dog is a big digger. Can they tear through the turf? High-quality pet turf is designed specifically to stand up to this kind of behavior. The material has a very strong, reinforced backing that is incredibly difficult for a dog to tear or dig through. Unlike natural grass, there’s no satisfying soil to get to underneath. This resilience means you can finally stop worrying about your dog creating muddy holes and tracking dirt into the house.

What’s the real difference between professional installation and doing it myself? While a DIY project can be tempting, professional installation is critical for a pet-friendly lawn. An expert team ensures the ground is graded correctly for perfect drainage, which is the most important factor in preventing odors and sogginess. They also prepare a solid sub-base, secure the turf properly, and make sure the seams are invisible and durable. A flawless installation is what guarantees your turf will perform well and last for years, even with active pets.

Does the type of infill really matter for a pet-friendly lawn? Yes, it absolutely does. The infill is the material that goes between the grass blades, and it plays a huge role in a pet turf system. It helps the blades stand up, provides cushioning for paws, and, most importantly, can help control odors. We recommend using a non-toxic, antimicrobial infill specifically designed to neutralize the ammonia in pet urine, which is the main source of bad smells. It’s a small detail that makes a massive difference in keeping your yard clean and fresh.

Can I still have real plants and garden beds with an artificial lawn? Of course. Artificial turf integrates beautifully with all kinds of landscaping features. You can absolutely design a yard that includes natural flower beds, shrubs, trees, and stone pathways alongside your turf. A professional designer can help you create a cohesive look that gives you the best of both worlds: a lush, green, low-maintenance area for your pet to play and beautiful, natural elements that complete your outdoor space.

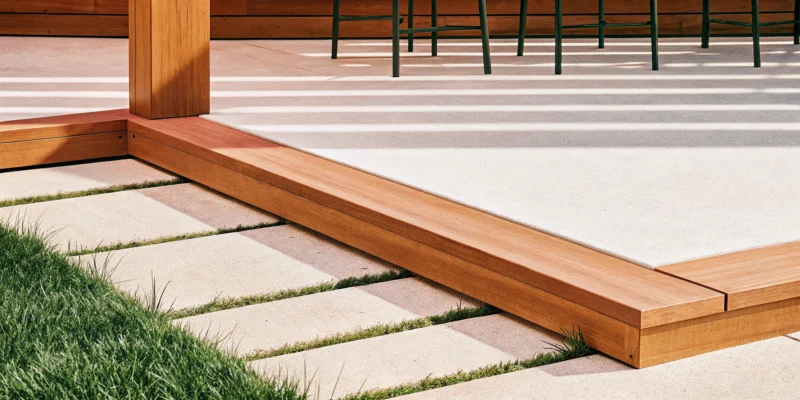
Modern porcelain pool copings with a slip-resistant tile surface beside the water.

Your Guide to Porcelain Tiles for Pool Copings

A swimming pool should be a source of relaxation, not a list of chores. Yet, many traditional coping materials demand constant attention. Natural stone needs regular sealing to prevent stains, while concrete can crack under the pressure of our harsh freeze-thaw cycles. These issues can turn your backyard oasis into a maintenance headache. This is exactly why so many homeowners are turning to a more resilient solution. Porcelain tiles for pool copings are engineered to resist stains, water damage, and fading, all without needing to be sealed. This guide will walk you through why this low-maintenance material is the perfect choice for a beautiful, worry-free pool.

Key Takeaways

  • Opt for porcelain for a low-maintenance finish: Its non-porous surface resists stains, weather damage, and fading, saving you time and money on upkeep compared to materials that require regular sealing.
  • Get your ideal look without compromising safety: Porcelain offers endless design options, from realistic wood grains to sleek stone, and comes in textured, slip-resistant finishes to keep your pool area safe for everyone.
  • Professional installation is non-negotiable: The long-term performance of porcelain coping depends on expert installation; using the correct adhesives and techniques is essential to prevent future issues and protect your investment.

What Are Porcelain Pool Copings?

If you’re planning a new pool or renovating an existing one, you’ve probably heard the term “coping.” Think of it as the frame for your masterpiece. It’s the material used to cap the edge of the pool shell, creating a finished look. While you have a few material options, porcelain has become a favorite for good reason. It’s a man-made product crafted from fine clay and fired at high temperatures, which makes it incredibly dense, strong, and beautiful.

What they are and why they matter

Porcelain pool copings are specially designed tiles that create a smooth, rounded border around your swimming pool. Unlike other materials, porcelain is non-porous, meaning it won’t absorb water. This prevents staining, frost damage, and the growth of mold or mildew, which is a huge deal for any outdoor surface, especially one that’s constantly exposed to chlorinated water and the elements here on Long Island. This durability matters because it translates directly to less work and fewer costs for you over time. You won’t have to worry about constant sealing or frequent repairs. Instead, you get a stunning, low-maintenance finish that lasts. Gappsi offers a curated collection of premium porcelain and natural stone that provides that perfect, lasting look for your backyard oasis.

The role of copings in pool safety and style

Coping isn’t just about looks; it serves a critical purpose for both safety and the structural health of your pool. The rounded edge, often called a bullnose, provides a secure and comfortable grip for swimmers as they enter or exit the water. Many porcelain tiles also feature a slightly textured, slip-resistant finish, adding an essential layer of safety for wet feet on the pool deck. Functionally, coping acts as a protective barrier. It directs water that splashes out of the pool away from the shell and into your deck drains. This prevents water from seeping behind the pool wall, which could cause serious damage over time. Aesthetically, the coping is what ties everything together, creating a seamless transition from your pool to your patio. The right choice can elevate your swimming pool from a simple backyard feature to a luxurious retreat.

Why Choose Porcelain for Your Pool Coping?

When you’re designing your dream pool, the details make all the difference. Pool coping, the material that caps the edge of your pool shell, is one of those crucial details. It’s not just about looks; it’s about safety, comfort, and longevity. While you have several options, porcelain has become a top choice for homeowners, and for good reason. It blends incredible strength with sophisticated style, giving you a beautiful finish that’s built to last.

Porcelain is an engineered material, which means it’s designed to overcome the common issues you see with other materials. It’s strong, non-porous, and incredibly versatile. Choosing porcelain for your pool coping means you’re investing in a material that will keep your pool area looking pristine with minimal effort. Let’s get into the specific benefits that make porcelain such a smart and stylish option for your Long Island home.

Unmatched durability and weather resistance

Here on Long Island, our pool materials have to withstand a lot, from scorching summer sun to freezing winter temperatures. Porcelain is exceptionally well-suited for this challenge. Because it’s fired at extremely high temperatures, it has a very low water absorption rate. This means it won’t soak up water that can freeze, expand, and cause cracks during the winter. Unlike some natural stones that can degrade over time, porcelain maintains its integrity year after year. This durability means fewer repairs and replacements down the road, making it a cost-effective choice for your swimming pool.

Low-maintenance for easy upkeep

Your pool should be a place for relaxation, not constant chores. Porcelain coping makes that possible. Its non-porous surface is highly resistant to stains from pool chemicals, spilled drinks, and even algae growth. A simple wipe-down is usually all it takes to keep it looking brand new. You won’t need to worry about annual sealing or special cleaners. This gives you an easy-maintenance, high-end finish that lets you spend more time enjoying your pool and less time working on it. You get a product that won’t fade, crack, stain, or be damaged by weather.

A safer, slip-resistant surface

Safety is always the top priority around a swimming pool, especially if you have kids or frequently host guests. Water and smooth surfaces can be a dangerous combination. Porcelain tiles are manufactured with safety in mind and are available in textured, matte finishes that provide excellent grip underfoot, even when wet. This slip-resistant quality offers peace of mind, allowing everyone to walk around the pool edge with confidence. When selecting your tiles, it’s important to choose a product specifically rated for pool decks and coping to ensure you get the right texture for maximum safety.

Versatile styles to match your aesthetic

Your pool coping should complement your home’s overall design, and porcelain offers endless possibilities to achieve your perfect look. Whether your style is modern, rustic, or classic, there’s a porcelain tile to match. These tiles are designed to “add an elegant and lasting look to your home.” You can find porcelain that beautifully mimics the appearance of natural stone, rich wood grains, or sleek concrete, all without the maintenance headaches of the real materials. You can explore a wide variety of these styles at the Gappsi Store to find the perfect finish for your outdoor oasis.

Porcelain vs. Other Coping Materials

When you’re deciding on the perfect finishing touch for your pool, it’s helpful to see how porcelain stacks up against other popular materials. Each option has its own unique profile when it comes to appearance, durability, and overall cost. The main contenders you’ll likely consider are natural stone, concrete, and brick. While all can create a functional pool edge, they differ quite a bit in maintenance needs and long-term performance. Understanding these differences will help you choose a material that not only fits your budget and style but also suits your lifestyle. Let’s break down how porcelain compares to the classics.

Porcelain vs. Natural Stone

Natural stone, like travertine or bluestone, offers a timeless, organic beauty that’s hard to deny. Each piece is unique, adding a touch of luxury that can attract future homebuyers. However, this beauty comes with responsibility. Natural stone is porous, meaning it needs to be sealed regularly to prevent stains and water damage. It can also be more expensive upfront. Porcelain, on the other hand, gives you the high-end look of stone without the demanding upkeep. Since it’s non-porous, you never have to seal it. It provides a consistent, durable surface that mimics the look of natural materials beautifully, making it a practical and cost-effective alternative. You can explore a wide variety of both porcelain and natural stone to see the difference for yourself.

Porcelain vs. Concrete and Brick

Concrete and brick are often seen as the most budget-friendly choices for pool coping. Poured or precast concrete can get the job done at a lower initial price point, but it comes with trade-offs. These materials can be rough on bare feet and swimsuits, and they are prone to cracking over time, especially with Long Island’s freeze-thaw cycles. They also require sealing to maintain their color and integrity. Porcelain offers a significant upgrade in both feel and function. Its smooth, dense surface is comfortable to walk on and incredibly resilient. It won’t fade in the sun or crack under pressure, giving your pool a polished, modern look that lasts for years. While Gappsi’s expert masonry team can install any material flawlessly, porcelain is the clear winner for durability.

A look at cost and long-term value

Thinking about the budget for your pool project involves more than just the initial price tag. While concrete may be the cheapest option upfront, porcelain often provides better long-term value. Its durability means you’ll spend far less on maintenance and repairs down the road. Unlike natural stone or concrete, porcelain doesn’t require costly annual treatments. You can skip the expense of professional cleaning and sealing services that other materials need to stay in good shape. By reducing these recurring costs, porcelain proves to be a smart investment that saves you money and time over the life of your pool.

Exploring Styles and Colors for Porcelain Copings

One of the best parts of designing your pool area is choosing the finishes that bring your vision to life. Porcelain coping is a fantastic choice because it offers an incredible range of styles, letting you create a space that feels uniquely you. Whether you’re dreaming of a sleek, modern oasis or a cozy, rustic retreat, there’s a porcelain tile that fits perfectly. Think of the coping as the frame for your masterpiece; it’s the finishing touch that ties your pool, patio, and landscaping together into one cohesive design.

Find your look: from modern to rustic

Because porcelain is a manufactured material, the design possibilities are nearly endless. You aren’t limited by what can be pulled from a quarry. This versatility means you can find a coping style to match any outdoor aesthetic. For a contemporary look, you might choose a large-format tile in a solid, neutral color with a clean, square edge. If you prefer something more traditional or rustic, you can find porcelain that mimics the look of classic stone. The key is to think about the overall vibe you want for your backyard and select a coping that complements it.

Popular color palettes

While you can find porcelain in many colors, the most popular choices tend to be timeless neutrals. Shades of gray, beige, cream, and white are always in style and create a sophisticated backdrop for your pool. These colors beautifully complement the sparkling blue water and any surrounding greenery in your landscape. Choosing a neutral palette for your coping also gives you more freedom to play with color in your outdoor furniture, planters, and decor, knowing that your pool’s border will work with any accents you choose season after season.

Realistic wood and stone finishes

Want the warm, inviting look of wood or the earthy texture of natural stone without the demanding upkeep? This is where porcelain truly shines. Modern manufacturing techniques make it possible to create porcelain pavers with incredibly realistic wood grain or stone vein patterns. You can achieve the aesthetic of a natural material while getting all the benefits of porcelain’s strength and low maintenance. It’s the perfect way to get a high-end, natural look that’s built to last through every Long Island season.

Textured surfaces for added safety

When it comes to your swimming pool, safety is just as important as style. The area around the water will inevitably get wet, so choosing a slip-resistant material is essential. For pool decks and copings, it’s best to select a porcelain tile with a textured or matte finish rather than a smooth, polished one. This texture provides better traction underfoot, helping to prevent slips and falls. It’s a simple choice that makes a big difference in creating a safer and more enjoyable environment for your family and guests.

Finding the Best Porcelain Tile Brands

Once you’ve decided on porcelain for your pool coping, the next step is choosing a brand. This might seem like a small detail, but the manufacturer you choose can make a big difference in the quality, durability, and overall look of your finished project. Different brands specialize in different finishes, thicknesses, and styles, so it’s worth doing a little research to find the one that aligns with your vision and performance needs.

The good news is that you don’t have to sort through countless options alone. A trusted partner can guide you to collections that are proven to perform well, especially in the unique climate of Long Island. At Gappsi, we’ve spent years curating a selection of top-tier porcelain tiles that we stand behind, ensuring you get a product that is as beautiful as it is resilient. Let’s explore what makes our collection special and what to look for in other quality manufacturers.

Discover Gappsi’s premium porcelain collection

We’ve carefully selected a premium collection of outdoor porcelain pavers specifically for projects like pool copings. Unlike standard indoor tiles, our porcelain is thicker and engineered for superior durability. This is crucial for a pool area, which has to endure everything from constant sun and water exposure to heavy foot traffic and changing seasons. Our pavers are designed to resist wear and tear, so you can be confident you’re investing in a solution that will look stunning for years to come. By focusing on high-performance materials, we help you create a safe, stylish, and long-lasting outdoor oasis.

A look at other top manufacturers

When you look at the broader market, you’ll notice that leading manufacturers focus on a few key qualities. Many brands emphasize the cost-effectiveness of their porcelain, highlighting how its incredible durability reduces long-term maintenance and replacement costs. Others specialize in creating specific trim and coping pieces that are engineered for both strength and a clean, finished aesthetic around the pool’s edge. Top designers often gravitate toward brands that offer a wide range of elegant styles and realistic textures, proving that porcelain can deliver both longevity and high-end appeal. These are the hallmarks of a quality brand and the exact standards we use to select products for our own clients.

How to Choose the Right Porcelain Pool Coping

Once you’ve explored the beautiful styles and colors of porcelain, it’s time to get practical. Choosing the right coping isn’t just about picking your favorite look; it’s about selecting the perfect fit for your pool’s structure, your backyard design, and our unique Long Island environment. Thinking through a few key details will ensure your pool edge is not only stunning but also safe, durable, and built to last. Let’s walk through the most important factors to consider so you can make a choice with confidence.

Selecting the perfect size, thickness, and edge

The dimensions of your coping play a huge role in your pool’s look and function. Most porcelain coping tiles are two centimeters thick, offering a sleek, modern profile that’s incredibly strong. For a bolder look, some options come in a five-centimeter thickness. The edge style is another key decision. A rounded “bullnose” edge is a classic that provides a soft, comfortable grip, while a straight edge offers a clean, contemporary aesthetic. When you explore different porcelain pavers, consider how these details will contribute to your pool’s overall character and safety.

Coordinating colors with your overall design

Your pool coping is the frame for your pool, so its color should connect with the rest of your outdoor space. With so many styles available, you can easily find a porcelain tile to match any outdoor area. Look at your home’s siding, your patio materials, and your landscaping. Do you want the coping to blend seamlessly or create a contrast that makes the pool pop? I always recommend getting samples to see how they look under the Long Island sun. The right color will tie your entire landscape design together beautifully.

Planning for proper drainage

Water management around a pool is non-negotiable. Proper drainage is crucial to prevent water from pooling on the surface, which can create slipping hazards and strain the pool structure over time. The coping should be installed with a slight slope away from the pool’s edge to direct splashes and rainwater toward deck drains. It’s a technical detail that makes a world of difference for safety and longevity. When discussing your swimming pool project, make sure you work with your installer to create an effective drainage plan from the start.

Considering Long Island’s climate

Here on Long Island, we get the full range of seasons, and your pool coping needs to handle it all. This is where porcelain truly shines. Because it absorbs very little water, it’s highly resistant to the freeze-thaw cycles that can crack more porous materials. Its durability means fewer repairs and lower maintenance costs over the years. Porcelain is also fade-resistant, so its color will stay true even after years of summer sun. Choosing a weather-resistant material is a smart investment that looks great season after season, without needing constant restoration and sealing.

Breaking Down the Cost of Porcelain Copings

When you’re planning your pool project, the budget is always a key consideration. Understanding the costs associated with porcelain copings can help you make an informed decision that balances beauty, durability, and your finances. The price isn’t just about the tiles themselves; it’s a combination of materials, installation, and long-term value. Let’s look at what goes into the total cost.

Price factors: style and brand

Porcelain pool copings come in a wide range of price points, largely depending on the style and brand you choose. While it’s generally more affordable than premium natural stone, the specific design impacts the cost. For example, tiles that expertly mimic the look of rare marble or rustic wood may have a higher price tag than simpler, solid-color options. At Gappsi, we offer a curated selection of high-quality porcelain and natural stone to fit various budgets and design visions. Think of it like any other design element for your home: premium brands and more intricate patterns will be a larger investment upfront, but they also bring a unique character to your poolside.

What to expect for installation costs

The cost of the tiles is only one part of the equation; professional installation is the other. While materials like precast concrete might seem cheaper initially, the skill required for a flawless porcelain installation is what ensures its longevity. Proper installation prevents issues like cracking or shifting down the road, which can be expensive to fix. The process involves careful surface preparation, using the right adhesives for a poolside environment, and ensuring perfect alignment. Investing in an expert team for your swimming pool construction guarantees your coping will not only look stunning but will also be safe and durable for years of enjoyment.

How porcelain saves you money over time

Here’s where porcelain truly shines as a smart investment. While the initial cost might be higher than some alternatives, it offers significant long-term savings. Porcelain is incredibly durable and non-porous, meaning it resists stains, fading, and water damage without needing regular sealing. This saves you money on the maintenance and restoration services that other materials like natural stone often require. Its strength also means it’s less likely to chip or crack, reducing the need for costly repairs or replacements. For Long Island homeowners, this resilience against weather and wear makes porcelain a cost-effective choice that keeps your pool looking pristine with minimal effort and expense.

A Guide to Porcelain Coping Installation

Porcelain coping is an incredible choice for its beauty and durability, but the secret to making it last is all in the installation. Getting the details right ensures your pool edge looks stunning and stands up to years of sun and splashes. Here’s a look at the key steps for a flawless finish.

Preparing the surface correctly

Think of this as the foundation of your project. Before a single tile is laid, the pool’s bond beam must be perfectly clean, dry, and level. Any lingering dust or debris will prevent the new coping from bonding properly, which can lead to shifting or cracking down the road. A strong, stable base is non-negotiable for a professional result that lasts. This meticulous prep work is a hallmark of quality masonry and is the first step toward a secure pool edge.

Using the right adhesive for pools

The adhesive you use is just as important as the porcelain itself. A standard tile adhesive won’t work in a pool environment with its constant exposure to water and chemicals. For porcelain coping, you need a high-performance, polymer-modified thin-set mortar specifically formulated for wet conditions. Using the right product ensures a powerful, waterproof bond that holds your coping securely in place for decades. This is a crucial detail that protects the integrity of your entire swimming pool structure.

Ensuring proper spacing and joints

Those small gaps between each piece of coping are more than just a design choice. Proper spacing is essential, as these joints allow the tiles to expand and contract with temperature changes without cracking or buckling. Using tile spacers ensures every gap is uniform for a clean, professional look. Once the tiles are set, these joints are filled with a flexible, durable grout that can withstand the pool environment. This small detail makes a huge difference in the longevity of your coping.

The value of professional installation

While it might be tempting to tackle this project yourself, installing pool coping has many nuances. From achieving the perfect slope for drainage to cutting intricate curves, experience makes a difference. A professional installer understands the common pitfalls and has the right tools and materials to get the job done efficiently. Investing in expert installation from a team that specializes in porcelain and natural stone means you can relax, knowing your pool coping will be safe, beautiful, and correctly installed from day one.

Where to Find Porcelain Pool Copings on Long Island

Once you’ve decided on porcelain, the next step is finding the perfect tiles for your Long Island home. You have a few great options, from visiting local showrooms to partnering with a full-service expert who can manage the entire process for you. The right path depends on how hands-on you want to be. For most homeowners, a combination of seeing materials in person and getting professional guidance ensures the best results for your poolside project.

Exploring local suppliers and showrooms

There’s a real advantage to seeing your options up close. Visiting a local showroom allows you to touch the different textures, compare colors in natural light, and get a true sense of the material’s quality. Photos online can be helpful, but they don’t always capture the subtle details and finishes of a porcelain tile. At a showroom, you can lay out different samples next to each other and visualize how they’ll look with your pool and patio design. The Gappsi Store is a great place to explore a curated selection of high-quality porcelain pavers and get expert advice tailored to Long Island’s unique environment.

Shopping online vs. in-person

Shopping online offers convenience and an almost endless variety of styles at your fingertips. You can browse options from multiple brands from the comfort of your home. However, the biggest drawback is not being able to see the product before you buy. Colors can vary significantly from screen to screen, and what looks like a perfect match online might clash with your existing hardscaping. Shopping in person removes that guesswork. It also gives you the opportunity to speak with a professional who can answer your questions immediately. We always recommend seeing a physical sample before making a final decision for your project.

Partnering with an expert contractor

The simplest and most effective way to source and install your pool coping is by working with an expert contractor. A team like Gappsi not only helps you select the perfect porcelain and natural stone but also handles the entire installation process. This integrated approach guarantees that the design is cohesive and the materials are installed correctly for lasting beauty and safety. An experienced contractor understands the specific requirements for poolside applications, from ensuring proper drainage to using the right adhesives. Partnering with an expert saves you time, prevents costly mistakes, and delivers a beautiful, professional finish for your swimming pool.

Are There Any Downsides to Porcelain Copings?

Porcelain is an incredible material for pool copings, but like any choice in a big home project, it’s smart to look at the full picture. While the benefits often outweigh the drawbacks, there are a few things to keep in mind before you commit. Thinking through these points ensures you’ll be completely happy with your decision for years to come. The main considerations boil down to the initial cost, the importance of a flawless installation, and what happens if a repair is ever needed.

Understanding the initial investment

Let’s talk about budget. Porcelain coping typically costs more upfront than basic options like precast concrete. However, it’s generally more affordable than high-end natural stone like travertine or bluestone. It’s best to view porcelain as a long-term investment in your pool area. Its incredible durability means you’ll spend far less on maintenance and replacements over the life of your pool. When you factor in the savings from not having to seal it annually or deal with stains and weathering, the value becomes clear. Gappsi offers a beautiful selection of porcelain and natural stone so you can directly compare the costs and benefits.

Why proper installation is critical

The success of your porcelain coping lies almost entirely in the quality of the installation. This is not a forgiving DIY project. Because porcelain is non-porous, it requires a specific type of mortar and a perfectly prepared, clean surface for the adhesive to bond correctly. Any mistakes, like improper spacing or an uneven base, can lead to shifting, cracking, or water issues down the line. A professional installation is essential to guarantee your coping is secure, level, and built to last. Entrusting your swimming pool project to experienced installers protects your investment and ensures you get all the performance benefits porcelain has to offer.

What to know about repairs

Porcelain is tough, but it’s not indestructible. A very heavy or sharp object dropped from a height could potentially chip or crack a tile. While repairs are rare, they can be tricky. The biggest challenge is finding an exact match for the damaged tile, as dye lots can vary and styles can be discontinued over time. To be safe, I always recommend buying a few extra tiles from the same batch during your initial installation. Storing them away gives you perfect replacements for any future repairs, making a potential fix seamless and stress-free.

Related Articles

Frequently Asked Questions

Does porcelain coping get hot in the summer sun? This is a great question, especially for Long Island summers. Porcelain’s heat retention really depends on the color you choose. Lighter shades of white, cream, or beige will reflect more sunlight and stay much cooler underfoot compared to dark grays or blacks. While no material is completely cool in direct sun, porcelain generally performs better than many types of dark natural stone or concrete.

Is porcelain coping slippery when it gets wet? Safety is a top priority, and porcelain is designed with that in mind. The key is to choose a tile specifically made for outdoor, poolside use. These products have a textured, matte finish that provides excellent traction for wet feet. You should avoid using smooth, polished porcelain tiles, which are meant for indoor applications and would be very slippery around a pool.

How do I clean and maintain my porcelain coping? This is one of the best parts about choosing porcelain: it’s incredibly easy to care for. Because the material is non-porous, it resists stains, mold, and mildew. For routine cleaning, a simple sweep to remove debris and an occasional wash with water and a mild soap is all you need. You can skip the annual sealing and special chemical treatments that other materials require.

Can porcelain be installed directly over my old pool coping? It’s almost always best to remove the old coping first. A successful porcelain installation depends on having a perfectly clean, stable, and level surface for the adhesive to bond to. Installing new tiles over an old, potentially uneven or deteriorating surface can lead to instability, cracking, and drainage problems down the road. Starting with a fresh base ensures your new coping will be secure for years.

Why is professional installation so important for porcelain? Porcelain’s durability is directly linked to how it’s installed. It requires a specific type of polymer-modified mortar to create a strong bond, since the tiles themselves don’t absorb water. A professional installer ensures the surface is perfectly prepared, uses the correct materials, and sets the tiles with the proper slope for drainage. This expert touch prevents future issues and protects your investment.

Modern porcelain pool copings with a slip-resistant tile surface beside the water.

Your Guide to Porcelain Tiles for Pool Copings

A swimming pool should be a source of relaxation, not a list of chores. Yet, many traditional coping materials demand constant attention. Natural stone needs regular sealing to prevent stains, while concrete can crack under the pressure of our harsh freeze-thaw cycles. These issues can turn your backyard oasis into a maintenance headache. This is exactly why so many homeowners are turning to a more resilient solution. Porcelain tiles for pool copings are engineered to resist stains, water damage, and fading, all without needing to be sealed. This guide will walk you through why this low-maintenance material is the perfect choice for a beautiful, worry-free pool.

Key Takeaways

  • Opt for porcelain for a low-maintenance finish: Its non-porous surface resists stains, weather damage, and fading, saving you time and money on upkeep compared to materials that require regular sealing.
  • Get your ideal look without compromising safety: Porcelain offers endless design options, from realistic wood grains to sleek stone, and comes in textured, slip-resistant finishes to keep your pool area safe for everyone.
  • Professional installation is non-negotiable: The long-term performance of porcelain coping depends on expert installation; using the correct adhesives and techniques is essential to prevent future issues and protect your investment.

What Are Porcelain Pool Copings?

If you’re planning a new pool or renovating an existing one, you’ve probably heard the term “coping.” Think of it as the frame for your masterpiece. It’s the material used to cap the edge of the pool shell, creating a finished look. While you have a few material options, porcelain has become a favorite for good reason. It’s a man-made product crafted from fine clay and fired at high temperatures, which makes it incredibly dense, strong, and beautiful.

What they are and why they matter

Porcelain pool copings are specially designed tiles that create a smooth, rounded border around your swimming pool. Unlike other materials, porcelain is non-porous, meaning it won’t absorb water. This prevents staining, frost damage, and the growth of mold or mildew, which is a huge deal for any outdoor surface, especially one that’s constantly exposed to chlorinated water and the elements here on Long Island. This durability matters because it translates directly to less work and fewer costs for you over time. You won’t have to worry about constant sealing or frequent repairs. Instead, you get a stunning, low-maintenance finish that lasts. Gappsi offers a curated collection of premium porcelain and natural stone that provides that perfect, lasting look for your backyard oasis.

The role of copings in pool safety and style

Coping isn’t just about looks; it serves a critical purpose for both safety and the structural health of your pool. The rounded edge, often called a bullnose, provides a secure and comfortable grip for swimmers as they enter or exit the water. Many porcelain tiles also feature a slightly textured, slip-resistant finish, adding an essential layer of safety for wet feet on the pool deck. Functionally, coping acts as a protective barrier. It directs water that splashes out of the pool away from the shell and into your deck drains. This prevents water from seeping behind the pool wall, which could cause serious damage over time. Aesthetically, the coping is what ties everything together, creating a seamless transition from your pool to your patio. The right choice can elevate your swimming pool from a simple backyard feature to a luxurious retreat.

Why Choose Porcelain for Your Pool Coping?

When you’re designing your dream pool, the details make all the difference. Pool coping, the material that caps the edge of your pool shell, is one of those crucial details. It’s not just about looks; it’s about safety, comfort, and longevity. While you have several options, porcelain has become a top choice for homeowners, and for good reason. It blends incredible strength with sophisticated style, giving you a beautiful finish that’s built to last.

Porcelain is an engineered material, which means it’s designed to overcome the common issues you see with other materials. It’s strong, non-porous, and incredibly versatile. Choosing porcelain for your pool coping means you’re investing in a material that will keep your pool area looking pristine with minimal effort. Let’s get into the specific benefits that make porcelain such a smart and stylish option for your Long Island home.

Unmatched durability and weather resistance

Here on Long Island, our pool materials have to withstand a lot, from scorching summer sun to freezing winter temperatures. Porcelain is exceptionally well-suited for this challenge. Because it’s fired at extremely high temperatures, it has a very low water absorption rate. This means it won’t soak up water that can freeze, expand, and cause cracks during the winter. Unlike some natural stones that can degrade over time, porcelain maintains its integrity year after year. This durability means fewer repairs and replacements down the road, making it a cost-effective choice for your swimming pool.

Low-maintenance for easy upkeep

Your pool should be a place for relaxation, not constant chores. Porcelain coping makes that possible. Its non-porous surface is highly resistant to stains from pool chemicals, spilled drinks, and even algae growth. A simple wipe-down is usually all it takes to keep it looking brand new. You won’t need to worry about annual sealing or special cleaners. This gives you an easy-maintenance, high-end finish that lets you spend more time enjoying your pool and less time working on it. You get a product that won’t fade, crack, stain, or be damaged by weather.

A safer, slip-resistant surface

Safety is always the top priority around a swimming pool, especially if you have kids or frequently host guests. Water and smooth surfaces can be a dangerous combination. Porcelain tiles are manufactured with safety in mind and are available in textured, matte finishes that provide excellent grip underfoot, even when wet. This slip-resistant quality offers peace of mind, allowing everyone to walk around the pool edge with confidence. When selecting your tiles, it’s important to choose a product specifically rated for pool decks and coping to ensure you get the right texture for maximum safety.

Versatile styles to match your aesthetic

Your pool coping should complement your home’s overall design, and porcelain offers endless possibilities to achieve your perfect look. Whether your style is modern, rustic, or classic, there’s a porcelain tile to match. These tiles are designed to “add an elegant and lasting look to your home.” You can find porcelain that beautifully mimics the appearance of natural stone, rich wood grains, or sleek concrete, all without the maintenance headaches of the real materials. You can explore a wide variety of these styles at the Gappsi Store to find the perfect finish for your outdoor oasis.

Porcelain vs. Other Coping Materials

When you’re deciding on the perfect finishing touch for your pool, it’s helpful to see how porcelain stacks up against other popular materials. Each option has its own unique profile when it comes to appearance, durability, and overall cost. The main contenders you’ll likely consider are natural stone, concrete, and brick. While all can create a functional pool edge, they differ quite a bit in maintenance needs and long-term performance. Understanding these differences will help you choose a material that not only fits your budget and style but also suits your lifestyle. Let’s break down how porcelain compares to the classics.

Porcelain vs. Natural Stone

Natural stone, like travertine or bluestone, offers a timeless, organic beauty that’s hard to deny. Each piece is unique, adding a touch of luxury that can attract future homebuyers. However, this beauty comes with responsibility. Natural stone is porous, meaning it needs to be sealed regularly to prevent stains and water damage. It can also be more expensive upfront. Porcelain, on the other hand, gives you the high-end look of stone without the demanding upkeep. Since it’s non-porous, you never have to seal it. It provides a consistent, durable surface that mimics the look of natural materials beautifully, making it a practical and cost-effective alternative. You can explore a wide variety of both porcelain and natural stone to see the difference for yourself.

Porcelain vs. Concrete and Brick

Concrete and brick are often seen as the most budget-friendly choices for pool coping. Poured or precast concrete can get the job done at a lower initial price point, but it comes with trade-offs. These materials can be rough on bare feet and swimsuits, and they are prone to cracking over time, especially with Long Island’s freeze-thaw cycles. They also require sealing to maintain their color and integrity. Porcelain offers a significant upgrade in both feel and function. Its smooth, dense surface is comfortable to walk on and incredibly resilient. It won’t fade in the sun or crack under pressure, giving your pool a polished, modern look that lasts for years. While Gappsi’s expert masonry team can install any material flawlessly, porcelain is the clear winner for durability.

A look at cost and long-term value

Thinking about the budget for your pool project involves more than just the initial price tag. While concrete may be the cheapest option upfront, porcelain often provides better long-term value. Its durability means you’ll spend far less on maintenance and repairs down the road. Unlike natural stone or concrete, porcelain doesn’t require costly annual treatments. You can skip the expense of professional cleaning and sealing services that other materials need to stay in good shape. By reducing these recurring costs, porcelain proves to be a smart investment that saves you money and time over the life of your pool.

Exploring Styles and Colors for Porcelain Copings

One of the best parts of designing your pool area is choosing the finishes that bring your vision to life. Porcelain coping is a fantastic choice because it offers an incredible range of styles, letting you create a space that feels uniquely you. Whether you’re dreaming of a sleek, modern oasis or a cozy, rustic retreat, there’s a porcelain tile that fits perfectly. Think of the coping as the frame for your masterpiece; it’s the finishing touch that ties your pool, patio, and landscaping together into one cohesive design.

Find your look: from modern to rustic

Because porcelain is a manufactured material, the design possibilities are nearly endless. You aren’t limited by what can be pulled from a quarry. This versatility means you can find a coping style to match any outdoor aesthetic. For a contemporary look, you might choose a large-format tile in a solid, neutral color with a clean, square edge. If you prefer something more traditional or rustic, you can find porcelain that mimics the look of classic stone. The key is to think about the overall vibe you want for your backyard and select a coping that complements it.

Popular color palettes

While you can find porcelain in many colors, the most popular choices tend to be timeless neutrals. Shades of gray, beige, cream, and white are always in style and create a sophisticated backdrop for your pool. These colors beautifully complement the sparkling blue water and any surrounding greenery in your landscape. Choosing a neutral palette for your coping also gives you more freedom to play with color in your outdoor furniture, planters, and decor, knowing that your pool’s border will work with any accents you choose season after season.

Realistic wood and stone finishes

Want the warm, inviting look of wood or the earthy texture of natural stone without the demanding upkeep? This is where porcelain truly shines. Modern manufacturing techniques make it possible to create porcelain pavers with incredibly realistic wood grain or stone vein patterns. You can achieve the aesthetic of a natural material while getting all the benefits of porcelain’s strength and low maintenance. It’s the perfect way to get a high-end, natural look that’s built to last through every Long Island season.

Textured surfaces for added safety

When it comes to your swimming pool, safety is just as important as style. The area around the water will inevitably get wet, so choosing a slip-resistant material is essential. For pool decks and copings, it’s best to select a porcelain tile with a textured or matte finish rather than a smooth, polished one. This texture provides better traction underfoot, helping to prevent slips and falls. It’s a simple choice that makes a big difference in creating a safer and more enjoyable environment for your family and guests.

Finding the Best Porcelain Tile Brands

Once you’ve decided on porcelain for your pool coping, the next step is choosing a brand. This might seem like a small detail, but the manufacturer you choose can make a big difference in the quality, durability, and overall look of your finished project. Different brands specialize in different finishes, thicknesses, and styles, so it’s worth doing a little research to find the one that aligns with your vision and performance needs.

The good news is that you don’t have to sort through countless options alone. A trusted partner can guide you to collections that are proven to perform well, especially in the unique climate of Long Island. At Gappsi, we’ve spent years curating a selection of top-tier porcelain tiles that we stand behind, ensuring you get a product that is as beautiful as it is resilient. Let’s explore what makes our collection special and what to look for in other quality manufacturers.

Discover Gappsi’s premium porcelain collection

We’ve carefully selected a premium collection of outdoor porcelain pavers specifically for projects like pool copings. Unlike standard indoor tiles, our porcelain is thicker and engineered for superior durability. This is crucial for a pool area, which has to endure everything from constant sun and water exposure to heavy foot traffic and changing seasons. Our pavers are designed to resist wear and tear, so you can be confident you’re investing in a solution that will look stunning for years to come. By focusing on high-performance materials, we help you create a safe, stylish, and long-lasting outdoor oasis.

A look at other top manufacturers

When you look at the broader market, you’ll notice that leading manufacturers focus on a few key qualities. Many brands emphasize the cost-effectiveness of their porcelain, highlighting how its incredible durability reduces long-term maintenance and replacement costs. Others specialize in creating specific trim and coping pieces that are engineered for both strength and a clean, finished aesthetic around the pool’s edge. Top designers often gravitate toward brands that offer a wide range of elegant styles and realistic textures, proving that porcelain can deliver both longevity and high-end appeal. These are the hallmarks of a quality brand and the exact standards we use to select products for our own clients.

How to Choose the Right Porcelain Pool Coping

Once you’ve explored the beautiful styles and colors of porcelain, it’s time to get practical. Choosing the right coping isn’t just about picking your favorite look; it’s about selecting the perfect fit for your pool’s structure, your backyard design, and our unique Long Island environment. Thinking through a few key details will ensure your pool edge is not only stunning but also safe, durable, and built to last. Let’s walk through the most important factors to consider so you can make a choice with confidence.

Selecting the perfect size, thickness, and edge

The dimensions of your coping play a huge role in your pool’s look and function. Most porcelain coping tiles are two centimeters thick, offering a sleek, modern profile that’s incredibly strong. For a bolder look, some options come in a five-centimeter thickness. The edge style is another key decision. A rounded “bullnose” edge is a classic that provides a soft, comfortable grip, while a straight edge offers a clean, contemporary aesthetic. When you explore different porcelain pavers, consider how these details will contribute to your pool’s overall character and safety.

Coordinating colors with your overall design

Your pool coping is the frame for your pool, so its color should connect with the rest of your outdoor space. With so many styles available, you can easily find a porcelain tile to match any outdoor area. Look at your home’s siding, your patio materials, and your landscaping. Do you want the coping to blend seamlessly or create a contrast that makes the pool pop? I always recommend getting samples to see how they look under the Long Island sun. The right color will tie your entire landscape design together beautifully.

Planning for proper drainage

Water management around a pool is non-negotiable. Proper drainage is crucial to prevent water from pooling on the surface, which can create slipping hazards and strain the pool structure over time. The coping should be installed with a slight slope away from the pool’s edge to direct splashes and rainwater toward deck drains. It’s a technical detail that makes a world of difference for safety and longevity. When discussing your swimming pool project, make sure you work with your installer to create an effective drainage plan from the start.

Considering Long Island’s climate

Here on Long Island, we get the full range of seasons, and your pool coping needs to handle it all. This is where porcelain truly shines. Because it absorbs very little water, it’s highly resistant to the freeze-thaw cycles that can crack more porous materials. Its durability means fewer repairs and lower maintenance costs over the years. Porcelain is also fade-resistant, so its color will stay true even after years of summer sun. Choosing a weather-resistant material is a smart investment that looks great season after season, without needing constant restoration and sealing.

Breaking Down the Cost of Porcelain Copings

When you’re planning your pool project, the budget is always a key consideration. Understanding the costs associated with porcelain copings can help you make an informed decision that balances beauty, durability, and your finances. The price isn’t just about the tiles themselves; it’s a combination of materials, installation, and long-term value. Let’s look at what goes into the total cost.

Price factors: style and brand

Porcelain pool copings come in a wide range of price points, largely depending on the style and brand you choose. While it’s generally more affordable than premium natural stone, the specific design impacts the cost. For example, tiles that expertly mimic the look of rare marble or rustic wood may have a higher price tag than simpler, solid-color options. At Gappsi, we offer a curated selection of high-quality porcelain and natural stone to fit various budgets and design visions. Think of it like any other design element for your home: premium brands and more intricate patterns will be a larger investment upfront, but they also bring a unique character to your poolside.

What to expect for installation costs

The cost of the tiles is only one part of the equation; professional installation is the other. While materials like precast concrete might seem cheaper initially, the skill required for a flawless porcelain installation is what ensures its longevity. Proper installation prevents issues like cracking or shifting down the road, which can be expensive to fix. The process involves careful surface preparation, using the right adhesives for a poolside environment, and ensuring perfect alignment. Investing in an expert team for your swimming pool construction guarantees your coping will not only look stunning but will also be safe and durable for years of enjoyment.

How porcelain saves you money over time

Here’s where porcelain truly shines as a smart investment. While the initial cost might be higher than some alternatives, it offers significant long-term savings. Porcelain is incredibly durable and non-porous, meaning it resists stains, fading, and water damage without needing regular sealing. This saves you money on the maintenance and restoration services that other materials like natural stone often require. Its strength also means it’s less likely to chip or crack, reducing the need for costly repairs or replacements. For Long Island homeowners, this resilience against weather and wear makes porcelain a cost-effective choice that keeps your pool looking pristine with minimal effort and expense.

A Guide to Porcelain Coping Installation

Porcelain coping is an incredible choice for its beauty and durability, but the secret to making it last is all in the installation. Getting the details right ensures your pool edge looks stunning and stands up to years of sun and splashes. Here’s a look at the key steps for a flawless finish.

Preparing the surface correctly

Think of this as the foundation of your project. Before a single tile is laid, the pool’s bond beam must be perfectly clean, dry, and level. Any lingering dust or debris will prevent the new coping from bonding properly, which can lead to shifting or cracking down the road. A strong, stable base is non-negotiable for a professional result that lasts. This meticulous prep work is a hallmark of quality masonry and is the first step toward a secure pool edge.

Using the right adhesive for pools

The adhesive you use is just as important as the porcelain itself. A standard tile adhesive won’t work in a pool environment with its constant exposure to water and chemicals. For porcelain coping, you need a high-performance, polymer-modified thin-set mortar specifically formulated for wet conditions. Using the right product ensures a powerful, waterproof bond that holds your coping securely in place for decades. This is a crucial detail that protects the integrity of your entire swimming pool structure.

Ensuring proper spacing and joints

Those small gaps between each piece of coping are more than just a design choice. Proper spacing is essential, as these joints allow the tiles to expand and contract with temperature changes without cracking or buckling. Using tile spacers ensures every gap is uniform for a clean, professional look. Once the tiles are set, these joints are filled with a flexible, durable grout that can withstand the pool environment. This small detail makes a huge difference in the longevity of your coping.

The value of professional installation

While it might be tempting to tackle this project yourself, installing pool coping has many nuances. From achieving the perfect slope for drainage to cutting intricate curves, experience makes a difference. A professional installer understands the common pitfalls and has the right tools and materials to get the job done efficiently. Investing in expert installation from a team that specializes in porcelain and natural stone means you can relax, knowing your pool coping will be safe, beautiful, and correctly installed from day one.

Where to Find Porcelain Pool Copings on Long Island

Once you’ve decided on porcelain, the next step is finding the perfect tiles for your Long Island home. You have a few great options, from visiting local showrooms to partnering with a full-service expert who can manage the entire process for you. The right path depends on how hands-on you want to be. For most homeowners, a combination of seeing materials in person and getting professional guidance ensures the best results for your poolside project.

Exploring local suppliers and showrooms

There’s a real advantage to seeing your options up close. Visiting a local showroom allows you to touch the different textures, compare colors in natural light, and get a true sense of the material’s quality. Photos online can be helpful, but they don’t always capture the subtle details and finishes of a porcelain tile. At a showroom, you can lay out different samples next to each other and visualize how they’ll look with your pool and patio design. The Gappsi Store is a great place to explore a curated selection of high-quality porcelain pavers and get expert advice tailored to Long Island’s unique environment.

Shopping online vs. in-person

Shopping online offers convenience and an almost endless variety of styles at your fingertips. You can browse options from multiple brands from the comfort of your home. However, the biggest drawback is not being able to see the product before you buy. Colors can vary significantly from screen to screen, and what looks like a perfect match online might clash with your existing hardscaping. Shopping in person removes that guesswork. It also gives you the opportunity to speak with a professional who can answer your questions immediately. We always recommend seeing a physical sample before making a final decision for your project.

Partnering with an expert contractor

The simplest and most effective way to source and install your pool coping is by working with an expert contractor. A team like Gappsi not only helps you select the perfect porcelain and natural stone but also handles the entire installation process. This integrated approach guarantees that the design is cohesive and the materials are installed correctly for lasting beauty and safety. An experienced contractor understands the specific requirements for poolside applications, from ensuring proper drainage to using the right adhesives. Partnering with an expert saves you time, prevents costly mistakes, and delivers a beautiful, professional finish for your swimming pool.

Are There Any Downsides to Porcelain Copings?

Porcelain is an incredible material for pool copings, but like any choice in a big home project, it’s smart to look at the full picture. While the benefits often outweigh the drawbacks, there are a few things to keep in mind before you commit. Thinking through these points ensures you’ll be completely happy with your decision for years to come. The main considerations boil down to the initial cost, the importance of a flawless installation, and what happens if a repair is ever needed.

Understanding the initial investment

Let’s talk about budget. Porcelain coping typically costs more upfront than basic options like precast concrete. However, it’s generally more affordable than high-end natural stone like travertine or bluestone. It’s best to view porcelain as a long-term investment in your pool area. Its incredible durability means you’ll spend far less on maintenance and replacements over the life of your pool. When you factor in the savings from not having to seal it annually or deal with stains and weathering, the value becomes clear. Gappsi offers a beautiful selection of porcelain and natural stone so you can directly compare the costs and benefits.

Why proper installation is critical

The success of your porcelain coping lies almost entirely in the quality of the installation. This is not a forgiving DIY project. Because porcelain is non-porous, it requires a specific type of mortar and a perfectly prepared, clean surface for the adhesive to bond correctly. Any mistakes, like improper spacing or an uneven base, can lead to shifting, cracking, or water issues down the line. A professional installation is essential to guarantee your coping is secure, level, and built to last. Entrusting your swimming pool project to experienced installers protects your investment and ensures you get all the performance benefits porcelain has to offer.

What to know about repairs

Porcelain is tough, but it’s not indestructible. A very heavy or sharp object dropped from a height could potentially chip or crack a tile. While repairs are rare, they can be tricky. The biggest challenge is finding an exact match for the damaged tile, as dye lots can vary and styles can be discontinued over time. To be safe, I always recommend buying a few extra tiles from the same batch during your initial installation. Storing them away gives you perfect replacements for any future repairs, making a potential fix seamless and stress-free.

Related Articles

Frequently Asked Questions

Does porcelain coping get hot in the summer sun? This is a great question, especially for Long Island summers. Porcelain’s heat retention really depends on the color you choose. Lighter shades of white, cream, or beige will reflect more sunlight and stay much cooler underfoot compared to dark grays or blacks. While no material is completely cool in direct sun, porcelain generally performs better than many types of dark natural stone or concrete.

Is porcelain coping slippery when it gets wet? Safety is a top priority, and porcelain is designed with that in mind. The key is to choose a tile specifically made for outdoor, poolside use. These products have a textured, matte finish that provides excellent traction for wet feet. You should avoid using smooth, polished porcelain tiles, which are meant for indoor applications and would be very slippery around a pool.

How do I clean and maintain my porcelain coping? This is one of the best parts about choosing porcelain: it’s incredibly easy to care for. Because the material is non-porous, it resists stains, mold, and mildew. For routine cleaning, a simple sweep to remove debris and an occasional wash with water and a mild soap is all you need. You can skip the annual sealing and special chemical treatments that other materials require.

Can porcelain be installed directly over my old pool coping? It’s almost always best to remove the old coping first. A successful porcelain installation depends on having a perfectly clean, stable, and level surface for the adhesive to bond to. Installing new tiles over an old, potentially uneven or deteriorating surface can lead to instability, cracking, and drainage problems down the road. Starting with a fresh base ensures your new coping will be secure for years.

Why is professional installation so important for porcelain? Porcelain’s durability is directly linked to how it’s installed. It requires a specific type of polymer-modified mortar to create a strong bond, since the tiles themselves don’t absorb water. A professional installer ensures the surface is perfectly prepared, uses the correct materials, and sets the tiles with the proper slope for drainage. This expert touch prevents future issues and protects your investment.

Outdoor kitchen contractor plans a design on a tablet at a waterfront Long Island, NY home.

How to Find an Outdoor Kitchen Designer Long Island

When you decide to build an outdoor kitchen, you’re not just hiring one person; you’re assembling a team. You need a designer for the vision, an installer for the appliances, and a contractor for the construction. Managing all those moving parts can be complicated. The best approach is to find a single, experienced firm that does it all. This ensures a smooth process where the design, masonry, and utility work are perfectly coordinated. A unified Outdoor Kitchen Designer Installer Contractor Long Island NY simplifies the entire project, providing a single point of contact and guaranteeing that every element works together harmoniously from start to finish.

Key Takeaways

  • A designer is your project lead: Their role goes far beyond aesthetics; they create a functional layout, manage utility hookups, secure permits, and oversee the foundational masonry work to ensure a seamless build.
  • Choose materials built for the climate: For a kitchen that lasts on Long Island, select durable surfaces like natural stone or porcelain and weatherproof cabinetry that can withstand humidity, salt air, and changing temperatures.
  • The right partner prevents costly mistakes: Take time to find a licensed, insured designer with a strong portfolio. A thorough planning process is your best defense against common issues and ensures the final kitchen matches your vision and budget.

What Does an Outdoor Kitchen Designer Actually Do?

When you decide to build an outdoor kitchen, you’re creating more than just a place to grill. You’re designing a new hub for your home, a space for making memories with family and friends. An outdoor kitchen designer is the professional who brings that vision to life. Think of them as a project manager, creative director, and technical expert all rolled into one. Their job goes far beyond just picking out a nice grill or stylish countertops.

A great designer considers how you live, how you entertain, and how your new kitchen will blend seamlessly with your home’s existing architecture and landscape. They are responsible for the entire project, managing every detail from the initial sketch to the final installation. This ensures the final product is not only beautiful but also highly functional, safe, and built to withstand Long Island weather for years to come. They are the key to transforming a simple idea into a stunning and practical extension of your living space, preventing costly mistakes and making the process smooth and enjoyable for you. From ensuring proper drainage to selecting materials that won’t fade in the sun, their expertise covers all the little things that make a big difference.

Crafting Your Custom Layout

The first thing a designer does is map out a functional and beautiful layout. This isn’t just about where to put the grill. They carefully consider the size of your space, how people will move through it, and what you need to make cooking and entertaining effortless. They’ll ask questions about how you plan to use the kitchen. Are you hosting large parties or intimate family dinners? This thoughtful planning ensures every inch is maximized, creating a natural flow between cooking, dining, and relaxing areas. The goal is a custom layout that fits your specific lifestyle perfectly.

Installing Appliances and Features

Choosing the right appliances is crucial, and a designer is your expert guide. They are knowledgeable about the latest high-quality, “chef-grade” appliances built to withstand the elements. From built-in grills and smokers to outdoor refrigerators, sinks, and even pizza ovens, they help you select features that match your cooking style. More importantly, they ensure these appliances are installed correctly and integrated seamlessly into the overall design. You can find a wide range of top-tier outdoor kitchen products at the Gappsi Store to get an idea of what’s possible for your space.

Building the Foundation: Hardscaping and Masonry

An outdoor kitchen is a permanent structure that needs a solid and durable foundation. A huge part of a designer’s job is planning the hardscaping and masonry that will support your kitchen for years to come. This includes building the base for your cabinets and countertops, as well as any surrounding patios or seating walls. They work with strong materials like natural stone and porcelain to create a structure that is not only stable and long-lasting but also visually stunning. This foundational work is what gives your outdoor kitchen its character and permanence.

Handling Utilities and Permits

Beyond the design, there are critical logistics to manage. An outdoor kitchen often requires gas lines, plumbing, and electrical wiring for lighting and appliances. A designer coordinates all of this, ensuring everything is installed safely and correctly. They are also well-versed in local Long Island building codes and regulations. They can handle the entire permit application process for you, which saves you time and prevents headaches. This expertise ensures your project is completed to the highest safety standards and is fully compliant with all local requirements.

Choosing the Right Materials and Features

Once you have a layout in mind, the real fun begins: selecting the materials and features that will define your outdoor kitchen’s style and functionality. This is where your space develops its personality. The right combination of durable countertops, high-performance appliances, and thoughtful extras will make your kitchen a joy to use for years to come. A great designer will guide you through the options, but knowing what you like ahead of time can make the process smoother. Think about how you plan to cook, who you’ll be entertaining, and the overall vibe you want to create in your backyard.

Countertops: Natural Stone vs. Porcelain

Your countertops are one of the most visible elements of your outdoor kitchen, so you want them to be both beautiful and tough. Natural stone, like granite, offers a timeless, luxurious look, with each slab having a unique pattern. It’s incredibly durable and holds up well against the elements. On the other hand, you have modern porcelain pavers and countertops, which are non-porous and highly resistant to stains, scratches, and fading from the sun. Gappsi offers a stunning collection of porcelain and natural stone options, allowing you to find the perfect surface that matches your aesthetic and can handle Long Island’s weather without constant upkeep.

Must-Have Appliances: Grills, Fridges, and Pizza Ovens

The appliances you choose will form the heart of your outdoor kitchen. A high-quality built-in grill is typically the main event, but don’t stop there. Think about how you like to cook and entertain. An outdoor refrigerator is a game-changer, keeping drinks and ingredients cold and saving you trips back inside. For families and entertainers, a wood-fired or gas pizza oven can become an instant centerpiece for fun gatherings. Other popular additions include side burners for sauces and side dishes, sinks for easy cleanup, and even outdoor-rated ice makers. The right appliances transform your patio from a simple barbecue spot into a fully functional Gappsi-built culinary workspace.

Smart Storage: Weatherproof Cabinetry

An organized kitchen is an efficient kitchen, and that holds true outdoors. To protect your grilling tools, serving dishes, and other essentials from the elements, you need proper storage. Standard wood cabinets won’t survive a Long Island winter, so weatherproof cabinetry is a must. Look for options made from stainless steel or durable powder-coated aluminum, which resist rust, moisture, and pests. These cabinets are designed to keep everything dry and secure. Integrating smart storage is a key part of the masonry and construction process, ensuring your kitchen remains tidy and ready for action whenever you are.

Ambiance: Fire Pits and Outdoor Bars

An outdoor kitchen is more than just a place to cook; it’s a destination for relaxation and connection. Features that build ambiance can make your space the most popular spot in the house. A built-in bar with comfortable seating invites guests to linger and chat while you cook. Adding a nearby fire pit creates a cozy gathering point for cool evenings, perfect for making s’mores or just enjoying the warmth. To complete the setting, consider adding a structure like one of Gappsi’s custom pavilions and pergolas. It provides shade, defines the space, and adds an element of architectural beauty to your backyard oasis.

How to Find the Best Outdoor Kitchen Designer on Long Island

Finding the right designer is the most important step in bringing your outdoor kitchen dreams to life. You need a partner who not only understands your vision but also has the technical expertise to execute it flawlessly. A great designer will guide you through every decision, from the overall layout to the smallest material details, ensuring the final space is both beautiful and functional. They are the bridge between your ideas and a well-built, lasting addition to your home. Here’s how to find the perfect professional for your Long Island project.

Verify Their Experience and Specialization

When you start your search, look for a designer or company that specializes in outdoor kitchens. This is a unique field that requires knowledge of weather-resistant materials, outdoor-rated appliances, and creating a functional flow in an open-air environment. A common mistake is getting caught up in specific appliances before the layout is even planned. An experienced outdoor kitchen designer will focus on functionality first, ensuring your grill, sink, and prep areas are arranged logically. Ask potential designers about their background in custom masonry and hardscaping, as these skills are fundamental to building a durable and integrated outdoor kitchen.

Check for Licenses, Insurance, and Permit Know-How

Your outdoor kitchen project is a significant investment, so you’ll want to make sure it’s protected. Only work with designers and contractors who are fully licensed and insured in New York. This protects you from liability and confirms they meet professional standards. An outdoor kitchen often involves complex utility work, including running gas, water, and electrical lines. Your designer must be well-versed in local building codes and the permit process in Nassau or Suffolk County. A full-service home remodeling company will handle all of this for you, which simplifies the process and gives you peace of mind.

Review Their Portfolio and Communication Style

A designer’s portfolio is the best way to see their work firsthand. Look for a collection of projects that showcases a range of styles and high-quality craftsmanship. This will give you a clear idea of their aesthetic and what they can create. Pay attention to the details in their past work, from the stonework to the appliance integration. Just as important is their communication style. You should feel comfortable asking questions and sharing your ideas. A great designer will listen to your needs and collaborate with you, offering professional advice to refine your vision. Watching videos of their completed projects on a platform like YouTube can also give you a better sense of their work.

Avoid These Common Hiring Mistakes

Many outdoor kitchen issues stem from poor planning in the early stages. Rushing the design, underestimating the budget, or choosing the wrong materials for Long Island’s climate can lead to costly problems down the road. To avoid this, take your time during the hiring process. Choose a designer who encourages a thorough planning phase and provides a detailed, transparent quote. Discuss material options carefully, considering both appearance and durability. For example, selecting the right porcelain or natural stone for your countertops is crucial for longevity. By being diligent upfront, you can ensure your project runs smoothly and results in an outdoor kitchen you’ll love for years.

What to Expect During the Design and Build Process

Bringing an outdoor kitchen to life is an exciting journey, and knowing what to expect can make the process feel smooth and straightforward. At Gappsi, we guide you through every stage, from the first spark of an idea to the final, beautiful result. Here’s a look at our four-step process designed to create the outdoor oasis you’ve always wanted.

Step 1: The Initial Consultation and Site Visit

It all starts with a conversation. During our initial consultation, we’ll visit your home to see the space and listen to your vision. This is your time to share ideas, discuss your budget, and ask questions. We’ll assess the site and provide professional feedback to create a collaborative plan. Our goal is to blend your dreams with practical, beautiful masonry design that fits your lifestyle and home.

Step 2: Finalizing the Design and Materials

Next, we turn your ideas into a concrete plan. Using advanced design tools, we’ll create a visual rendering of your outdoor kitchen so you can see exactly how it will look. This is where we finalize the layout and select materials. You can explore our wide selection of durable and stunning porcelain and natural stone for countertops and patios. We’ll refine the design until you’re completely happy with every element.

Step 3: The Construction Phase

With the design approved, our skilled construction team gets to work. We handle every aspect of the build, from site preparation and foundation work to installing utilities and assembling the kitchen structure. Because our team manages the entire project, we ensure a seamless process and a flawless integration with your existing patio or pool area. You can relax knowing that every phase is handled with precision and a commitment to quality craftsmanship.

Step 4: The Final Walkthrough

The final step is the walkthrough. Once construction is complete, we’ll tour your new outdoor kitchen together. This is our chance to show you how everything works and your opportunity to confirm that every detail is perfect. We want to make sure you are completely satisfied and ready to start making memories. Your new kitchen is the future setting for countless family dinners and neighborhood parties in your beautiful Long Island home.

Breaking Down the Cost of an Outdoor Kitchen

An outdoor kitchen is a significant investment, and the final price tag can vary quite a bit. The total cost depends on your vision, the materials you choose, and the specifics of your property. Think of it less like buying a product off the shelf and more like commissioning a custom piece of functional art for your backyard. Each decision, from the layout to the type of grill, plays a role in the final budget. To give you a clearer picture, let’s break down the main factors that influence the cost.

How Size and Complexity Affect Price

As you might guess, a larger and more intricate outdoor kitchen will cost more than a simple grilling station. A straightforward, linear island is the most budget-friendly layout. Once you move into L-shaped or U-shaped designs with features like multi-level counters or a built-in bar, both material and labor costs increase. The complexity of the masonry work also plays a big part. A simple structure is one thing, but adding custom stone veneers, arches, or built-in planters requires more time and specialized skill, which will be reflected in the price.

Budgeting for Materials and Appliances

This is where you can really customize your kitchen to fit your style and cooking needs. Your choice of appliances is a major cost driver. A high-end grill with multiple burners, a rotisserie, and a sear station will cost more than a basic built-in model. The same goes for outdoor refrigerators, sinks, ice makers, and specialty items like a wood-fired pizza oven. The materials for your countertops and cabinets are another key consideration. We work with a beautiful range of porcelain and natural stone that offer different looks and levels of durability, each with its own price point.

Factoring in Site Prep and Utilities

Before the first stone is laid, your backyard needs to be ready. Site preparation can be a hidden cost if you’re not expecting it. If your chosen spot isn’t level, the ground will need to be graded. You may also need a concrete slab or paver patio to serve as a foundation. Then there are the utilities. Running gas, electrical, and water lines from your house to the kitchen area is a critical step that requires licensed professionals to ensure safety and code compliance. A good landscape design plan will account for these essential preparations from the very beginning.

Understanding Labor and Timeline Costs

Labor is a significant portion of any outdoor kitchen budget, and for good reason. You’re paying for the expertise of skilled masons, electricians, and plumbers who will bring your design to life safely and correctly. The cost of labor is directly tied to the complexity of your project and how long it will take to complete. A more detailed design with custom features requires more hours and a higher level of craftsmanship. While it might be tempting to cut corners here, investing in a professional, experienced team ensures your outdoor kitchen is built to last and will be a source of enjoyment for years to come.

Getting the Most Out of Your Investment

An outdoor kitchen is more than just a place to grill; it’s an extension of your home and a hub for making memories. To ensure it remains a source of joy for years to come, it’s important to think beyond the initial build. A truly great investment is one that is beautiful, functional, and built to last. This means making smart choices from the very beginning, from the materials you select to the long-term care you have in mind.

By focusing on durability, timeless style, and practical maintenance, you create a space that not only meets your needs today but also adds lasting value to your property. A thoughtful approach to the design and construction process will help you avoid common pitfalls and ensure your outdoor kitchen can handle everything from summer barbecues to the changing Long Island seasons. Let’s walk through the key considerations that will help you protect your investment and enjoy your outdoor oasis for many years.

Design for Long Island’s Climate

Here on Long Island, our weather can be tough on outdoor structures. From humid, salty summer air to the freezing and thawing cycles of winter, your outdoor kitchen needs to be built with materials that can withstand the elements. Choosing the right materials is the single most important decision you’ll make for the longevity of your space. Materials like high-quality natural stone and porcelain pavers are excellent choices for countertops and patios because they resist moisture, staining, and temperature changes. A skilled designer will guide you toward options that not only look great but are proven to endure our specific coastal climate, preventing cracks, fading, and other weather-related damage down the road.

Explore Timeless Design Trends

While it’s fun to look at the latest trends, you want an outdoor kitchen that feels current without becoming dated in a few years. The best way to achieve this is by focusing on timeless design principles. Think about clean lines, natural materials, and a functional layout that flows seamlessly with your home and landscape. Incorporating elements like a classic stone finish or a functional island creates a look that will always be in style. You can also add long-lasting structures like pavilions and pergolas to define the space and provide shelter, ensuring your kitchen remains a beautiful and practical feature of your home for decades.

Plan for Easy, Long-Term Maintenance

A beautiful outdoor kitchen that’s difficult to clean will quickly lose its appeal. Planning for easy maintenance from the start will save you a lot of time and effort. This means selecting non-porous countertop surfaces that wipe clean easily, choosing weatherproof cabinetry that won’t warp or rust, and ensuring your layout provides easy access for cleaning behind appliances. For natural stone surfaces, professional cleaning and sealing services can protect against stains and weather damage. By carefully considering these details during the design phase, you can avoid common mistakes and ensure your outdoor kitchen remains a source of enjoyment, not a chore.

Schedule Your Installation for the Right Season

Timing your project correctly can make the entire process smoother and less disruptive. The best times to build an outdoor kitchen on Long Island are typically in the spring and fall when the weather is mild. This allows construction crews to work efficiently without battling extreme heat, humidity, or freezing temperatures. Planning your installation for the spring means your kitchen will be ready to enjoy all summer long. Keep in mind that experienced designers and builders book up quickly, so it’s wise to start the conversation a season ahead of when you want the project completed. This gives you plenty of time to finalize designs and secure your spot on the schedule.

Related Articles

Frequently Asked Questions

How long does it typically take to build an outdoor kitchen? The timeline can vary quite a bit depending on the project’s complexity, the permit process, and material availability. Generally, you can expect the design and planning phase to take a few weeks. Once the design is approved and materials are ordered, the actual construction can take anywhere from several weeks to a couple of months. A full-service team can give you a more precise timeline after an initial site visit.

Can I build an outdoor kitchen on my existing patio? It’s definitely possible, but it depends on the condition of your current patio. An outdoor kitchen, with its heavy masonry and appliances, needs a strong, stable foundation. A professional will need to assess your patio to make sure it can support the weight and is properly graded for drainage. In some cases, the existing patio works perfectly; in others, it may need to be reinforced or replaced.

What’s the single biggest mistake to avoid when planning my outdoor kitchen? The most common mistake is focusing on the grill and other appliances before thinking about the layout and workflow. A functional kitchen needs adequate counter space for prep on both sides of the grill, a logical path between the fridge, sink, and cooking area, and enough room for people to move around comfortably. A great designer prioritizes this “work triangle” to ensure the space is a joy to use, not a frustration.

Do I need to buy all my appliances from the same brand? Not at all. In fact, it’s often better to mix and match. You can choose the best grill for your needs from one brand and an outdoor refrigerator with the perfect features from another. The goal is to select each component based on its quality, performance, and how it fits your cooking style. A designer can help you find top-performing appliances that work together seamlessly in the final design.

How do I protect my outdoor kitchen during a Long Island winter? Proper winterizing is key to protecting your investment. This involves shutting off and draining the water lines to the sink and any ice makers to prevent pipes from freezing and bursting. You should also thoroughly clean your grill and other appliances and protect them with high-quality, weatherproof covers. Finally, make sure all cabinets are closed tightly and any cushions or portable items are stored in a dry place.

Applying paver sealer to patio pavers for protection and enhanced color.

Paver Sealer 101: Everything You Need to Know

Is there anything more frustrating than seeing weeds sprout up between your beautiful pavers? Or watching a spilled glass of wine leave a permanent stain on your pristine patio? These common issues can make even the most gorgeous hardscaping look tired and unkempt. The solution is simpler than you might think: a good paver sealer. This protective coating soaks into the surface and joints, creating an invisible barrier that stops stains before they set in and makes it nearly impossible for weeds to take root. It’s the secret to less time spent on maintenance and more time enjoying your outdoor space. In this post, we’ll cover how sealer works, the different types available, and how to use it to solve your biggest paver problems for good.

Key Takeaways

  • Protect your investment with the right sealer: A quality sealer is your best defense against stains, weeds, and sun damage. It creates a protective barrier that preserves your paver’s color and makes routine cleaning much simpler.
  • Prep work is non-negotiable for a lasting finish: For the sealer to work correctly, you must start with a clean, dry, and repaired surface. Skipping this step can lead to a cloudy finish and wasted effort, so take the time to clean and dry your pavers thoroughly.
  • Think of sealing as regular maintenance, not a one-time fix: Plan to reseal your pavers every 3 to 5 years to maintain protection. You’ll know it’s time for a new coat when the color looks faded or water soaks into the pavers instead of beading on top.

What Is Paver Sealer and How Does It Work?

Think of paver sealer as a protective topcoat for your outdoor surfaces. It’s a liquid coating designed specifically for materials like concrete, brick, and natural stone. When applied, it sinks into the pores of the pavers and creates a transparent shield that defends against daily wear and tear. Its main job is to protect your investment and keep your outdoor living space looking its best. The sealer works by preventing stains from setting in, stopping weeds from sprouting up in the joints, and hardening the joint sand to keep your pavers stable and prevent shifting. Essentially, it creates an invisible barrier between your beautiful pavers and anything that could damage them, from spilled drinks to harsh weather. Gappsi offers professional restoration and sealing services to ensure your outdoor spaces stay in top condition. Applying a sealer is one of the most effective ways to maintain the beauty and integrity of your patio, walkway, or driveway for years to come, making it a crucial part of long-term paver care. It’s a proactive step that saves you from costly repairs and tedious cleaning down the road.

How Sealer Protects Your Pavers

Sealing your pavers is one of the smartest things you can do to safeguard your outdoor space. This protective layer shields your hardscaping from a whole host of potential problems. It provides crucial protection from sun damage, which can cause the color of your pavers to fade over time. It also repels water, preventing moisture from seeping in and causing issues like mold, mildew, or cracking during freeze-thaw cycles. Beyond the weather, a good sealer makes cleanup a breeze. It stops oil, grease, and dirt from soaking into the porous surface, so spills from a summer barbecue or a leaky car can be wiped away easily instead of leaving a permanent mark on your beautiful masonry.

Forming a Protective Barrier

The sealer creates a durable barrier that does more than just protect; it also enhances. One of the biggest visual benefits is how it preserves the color of your pavers. Without a sealer, UV rays can dull the rich tones of your stones, but this protective layer locks in the vibrancy, keeping your patio looking as good as the day it was installed. This barrier is what physically blocks stains and moisture from penetrating the surface. You also have options when it comes to the final look. Depending on the product you choose, you can achieve a glossy, “wet look” that deepens the colors or a more subtle, natural finish that’s barely noticeable. This allows you to customize the appearance while still getting all the protective benefits for your porcelain and natural stone surfaces.

What Are the Benefits of Sealing Pavers?

If you’ve invested in a beautiful paver patio, walkway, or driveway, you want it to look great for years to come. Think of paver sealer as the finishing touch that protects your investment. It’s a clear liquid coating that creates a protective layer over the surface, defending it from all sorts of daily wear and tear. Applying a sealer isn’t just about looks; it’s one of the most effective ways to preserve the structural integrity and appearance of your outdoor spaces.

Sealing your pavers can prevent a whole host of problems down the road, from stubborn stains to weather-related damage. It simplifies maintenance, keeps the colors looking rich, and helps stop annoying weeds from popping up in the joints. For homeowners on Long Island, where our patios and driveways face everything from intense summer sun to harsh winter freezes, sealing is a crucial step. It’s a straightforward process that delivers significant long-term value by extending the life of your hardscaping and keeping it looking as good as the day it was installed. Gappsi offers professional restoration and sealing services to ensure the job is done right.

Guard Against Stains and Spills

Life happens, especially outdoors. Whether it’s a tipped glass of red wine during a barbecue, a grease splatter from the grill, or an oil leak from a car on the driveway, stains can quickly ruin the look of your pavers. Because materials like concrete and natural stone are porous, they can absorb liquids, making stains difficult or even impossible to remove. A quality sealer creates an invisible shield on the surface, preventing spills from soaking in. This gives you more time to clean up messes, often with just a bit of soap and water. It’s a simple way to keep your outdoor living areas looking pristine and ready for guests.

Enhance Color and Appearance

Over time, exposure to the sun’s UV rays can cause the vibrant colors in your pavers to fade, leaving them looking dull and washed out. Sealing acts like sunscreen for your hardscape, protecting it from sun damage and locking in its original color. Many sealers also enhance the natural tones of the stone, giving them a richer, more polished look, similar to how water brings out the color in beach stones. Whether you prefer a subtle natural finish or a glossy “wet look,” applying a sealer can instantly revive the appearance of your porcelain and natural stone surfaces, making them look brand new again.

Prevent Weeds and Moss

One of the biggest frustrations with pavers is the constant battle against weeds, moss, and algae growing in the joints. These unwelcome guests can make your patio or walkway look unkempt and can even cause structural issues over time by displacing the jointing sand. When you seal your pavers, the sealant also seeps into the sand-filled joints. This helps to harden the sand, creating a durable bond that makes it much harder for weeds to take root. By forming this barrier, you’ll spend less time on your knees pulling weeds and more time enjoying your beautiful, clean outdoor space.

Resist Long Island’s Weather

Long Island’s weather is anything but gentle. We get it all: humid, sun-drenched summers, heavy rains, and freezing winters with snow and ice. These weather cycles can be tough on pavers. Moisture that seeps into the porous surface can freeze and expand in the winter, leading to cracks and surface damage. A sealer provides critical moisture resistance, preventing water from penetrating the pavers. This protection is essential for withstanding our freeze-thaw cycles and also helps guard against damage from de-icing salts. Properly sealed masonry is built to last through every Long Island season.

What Types of Paver Sealers Are There?

Walking into the sealer aisle can feel a bit overwhelming. With so many options, how do you know which one is right for your beautiful new patio or walkway? The good news is that paver sealers generally fall into a few distinct categories based on their chemical makeup, how they work, and the final look they create. Understanding these differences is the key to picking the perfect product for your project.

The main things to consider are the base (water or solvent), the application method (penetrating or film-forming), and the finish (wet-look or natural). Each combination offers a unique set of benefits, from providing an invisible shield against stains to creating a glossy, vibrant surface that makes your paver colors pop. Choosing the right one depends entirely on your paver material, your local climate, and the aesthetic you’re going for. For example, a high-traffic driveway will need a more durable sealer than a quiet garden path. Similarly, the sealer that looks great on bluestone might not be the best choice for a brick patio. If you’re unsure, our team at Gappsi can guide you through the best options for restoration and sealing to ensure your investment is protected beautifully.

Water-Based vs. Solvent-Based

The first major choice you’ll face is whether to go with a water-based or a solvent-based sealer. Think of this as the foundation of your sealer. Water-based sealers are known for being more environmentally friendly with lower VOCs (volatile organic compounds) and are generally easier to apply. They soak into the pavers and joint sand effectively, offering a subtle satin or natural finish.

On the other hand, solvent-based sealers are the heavy hitters. They typically provide a richer color enhancement and a high-gloss shine. Because they create a very durable surface film, they are excellent at protecting against UV rays and holding up under heavy foot traffic, making them a great choice for busy patios or driveways.

Penetrating vs. Film-Forming

Next, you’ll want to decide how you want the sealer to interact with your pavers. This is where penetrating and film-forming sealers come in. A penetrating sealer works by soaking deep into the paver’s surface to form an invisible protective shield from within. It won’t change the look or texture of your pavers, but it will do a fantastic job of preventing moisture damage and stains. It’s the perfect choice if you love the natural look of your stone.

A film-forming sealer does exactly what its name suggests: it creates a protective film on top of the paver. This barrier offers the highest level of protection against spills and wear. It also enhances the color of your porcelain and natural stone pavers and often adds a satin or glossy sheen.

Wet-Look vs. Natural Finish

Finally, let’s talk about aesthetics. Do you love how your pavers look right after it rains? If so, a wet-look sealer is for you. These formulas are designed to darken the pavers and enrich their colors, giving them a perpetually damp appearance even when they’re completely dry. You can find wet-look sealers in both water-based and solvent-based options, with varying levels of shine.

If you’d rather keep things just as they are, a natural finish sealer is the way to go. These products provide all the protection your pavers need without altering their original color or texture. It’s a great way to preserve the authentic beauty of your masonry work while still guarding it against the elements and everyday use.

How to Choose the Right Paver Sealer

With so many options on the shelf, picking a paver sealer can feel a little overwhelming. But finding the right one is crucial for getting the results you want and making them last. The best sealer for your project depends on a few key things: the type of pavers you have, our local Long Island weather, and how you use the space. Thinking through these factors will help you select a product that not only protects your investment but also gives your patio or driveway the exact finish you’re looking for.

Match the Sealer to Your Paver Material

The first step is to consider what your pavers are made of. Different materials have different levels of porosity and will react differently to sealers. For instance, porous concrete pavers or natural stones like travertine absorb sealer readily, so a penetrating sealer works well to protect them from within. Denser materials, like certain types of porcelain and natural stone, might require a specialized sealer designed for low-porosity surfaces. Choosing the correct sealant is a decision that significantly impacts both the immediate look and the long-term durability of your outdoor pavers. Using the wrong product could fail to bond properly or even damage the surface.

Consider the Long Island Climate

Here on Long Island, our patios and walkways face it all: hot, humid summers, freezing winters, and salty air if you’re near the coast. This is why applying the right sealer is a fundamental practice for preserving the beauty and integrity of your outdoor living space. A high-quality sealer will create a barrier against moisture, preventing the damaging freeze-thaw cycles that cause cracks and shifting. It also helps resist salt damage and mildew growth during our humid months. When you restore and seal your pavers, you’re giving them the specific protection they need to stand up to our local weather year after year.

Account for Foot Traffic and Use

Think about how you use the paved area. Is it a high-traffic driveway that sees cars and foot traffic daily, or a quiet garden path? High-traffic zones need a sealer with excellent durability and abrasion resistance, like a polyurethane-based product. For a poolside patio, you might prioritize a sealer with a non-slip finish. For areas where you want the color to pop, acrylic sealers are a great choice as they offer color enhancement by magnifying the pigments on the paver surface. If you don’t use the right product for the area’s use, you could degrade the surface of the paving stones over time.

How to Prep Your Pavers for Sealing

Think of sealing your pavers like painting a room. You wouldn’t just slap a new color on a dirty, cracked wall, right? The same principle applies here. Proper preparation is the most critical step to ensure your sealer goes on smoothly and lasts for years. Taking the time to clean, dry, and repair your patio or driveway first will make all the difference, giving you a beautiful, durable finish that truly protects your investment. It’s the groundwork that guarantees a professional-looking result.

Clean and Prep the Surface

Starting with a spotless surface is non-negotiable. Even brand-new pavers need a thorough cleaning to wash away any factory dust and open up their pores, which helps the sealer adhere properly. For older pavers, you’ll need to remove all the built-up dirt, grime, and any organic growth like moss or algae. A pressure washer can be a great tool for this initial cleaning. For stubborn organic stains, a solution of sodium hypochlorite (you might know it as pool chlorine or bleach) can work wonders. This step also removes efflorescence, that chalky white residue you sometimes see, ensuring the sealer bonds directly to the paver itself. Gappsi offers professional restoration and sealing services if you want to ensure the job is done right.

Get the Timing and Drying Right

Patience is key when it comes to drying your pavers. Applying sealer to a damp surface is a recipe for disaster, as it traps moisture underneath and creates a cloudy, milky haze that’s difficult to fix. After a deep clean, you need to let the pavers dry completely. In warm, sunny Long Island weather, this might only take a few hours. But in cooler temperatures or shady areas, you should wait at least 24 to 48 hours. It’s always better to be safe than sorry. Before you start, check the forecast to make sure you have a clear, dry window of a few days to get the job done without any surprise rain showers. Proper masonry care always starts with working in the right conditions.

Make Necessary Repairs First

A coat of sealer is meant to protect your pavers, not fix them. It will highlight, not hide, any existing issues like cracks, wobbly stones, or sunken areas. Before you even think about sealing, take a walk across your patio or driveway and identify any pavers that need attention. A single wobbly paver might be a simple fix, but widespread sinking could point to a bigger problem with the base layer. Sealing over these problems only makes them more difficult and costly to address later on. If you’re dealing with significant shifting or aren’t sure how to tackle a repair, it’s best to call in a professional. You can see examples of expert paver installations and repairs on the Gappsi YouTube channel.

Common Paver Sealing Mistakes to Avoid

Sealing your pavers seems straightforward, but a few common missteps can leave you with a finish you’re not happy with. The good news is that these mistakes are entirely preventable. Knowing what to watch out for is the first step toward ensuring your patio, walkway, or driveway looks its best for years to come. By avoiding these simple errors, you can protect your investment and achieve that beautiful, professional-looking result you want.

Let’s walk through some of the most frequent mistakes homeowners make, so you can get your paver sealing project right the first time. From timing the application to using the right amount of product, a little knowledge goes a long way.

Misconceptions About Sealing

One of the biggest hurdles is simply not having the right information from the start. Many homeowners aren’t told about proper paver maintenance when their patio or driveway is first installed. This can lead to the belief that sealing is a one-time fix or that it’s not necessary at all. In reality, sealing is a crucial part of a regular maintenance routine that protects your pavers from the elements and daily wear. Understanding that sealer needs to be reapplied every few years helps set the right expectations for keeping your outdoor spaces in top condition.

Application Errors and Over-application

When it comes to paver sealer, more is definitely not better. Applying too much product is a very common mistake that can create a cloudy, white film on the surface of your pavers, hiding their natural color and beauty. This happens because the excess sealer traps moisture and can’t cure properly. It’s also important to choose the right type of sealer for your specific pavers. Using the wrong formula or hiring an inexperienced company can do more harm than good. For a flawless finish, it’s often best to rely on professional restoration and sealing services to get the job done correctly.

Timing It Wrong with the Weather

Your local Long Island forecast plays a huge role in a successful sealing project. Applying sealer in the wrong weather conditions can ruin the finish. Ideally, you should apply sealer when temperatures are between 50 and 90 degrees Fahrenheit, with 75 degrees being just about perfect. It’s critical that the pavers are completely dry, so don’t start the project if rain is expected. Sealing damp pavers or applying product in extreme heat or cold can cause that same hazy, white appearance. Always give yourself a clear, dry weather window to ensure the sealer cures perfectly.

How Often Should You Reseal Your Pavers?

Sealing your pavers isn’t a one-and-done deal; it’s a key part of your home’s maintenance routine. Think of it like waxing a car or restaining a deck. It keeps your outdoor spaces looking fresh and protected. While there’s no single magic number for how often you should reseal, a little bit of observation and understanding the factors at play will tell you everything you need to know. Keeping an eye on your patio or driveway and knowing what to look for will help you create a resealing schedule that keeps your pavers in top condition for years to come.

Typical Reapplication Timelines

As a general rule of thumb, you should plan on resealing your pavers every three to five years. This timeframe is a great starting point, but it can shift based on a few things. For instance, a driveway that sees daily car traffic will likely need attention sooner than a quiet garden path that gets minimal use. The type of sealer used also plays a big role. Some high-gloss, film-forming sealers might show wear more obviously, while penetrating sealers work below the surface. The goal is to reapply before the old layer has completely worn away, ensuring your pavers never lose their protection.

Signs It’s Time to Reseal

Your pavers will give you some clear hints when they’re ready for a new coat of sealer. One of the most obvious signs is a dull, faded appearance. If the rich color your pavers had when they were new has started to wash out, it’s a good indicator that the sealer is wearing thin. You might also notice that they’re harder to clean, with dirt and grime sticking more stubbornly. A simple water test works well, too. Splash some water on the surface; if it beads up, the sealer is still working. If it soaks in and darkens the paver, it’s time to schedule a restoration and sealing service.

What Affects Your Sealer’s Lifespan?

Several factors determine how long your paver sealer will last. The Long Island climate, with its mix of sun, rain, and snow, puts any sealer to the test. Heavy foot traffic and vehicle use will also accelerate wear and tear. The type of paver material is another crucial piece of the puzzle. Porous materials like certain natural stones might absorb sealer differently than dense porcelain pavers. Finally, the quality of the sealer and the application itself are paramount. Using the right product for your specific pavers and climate ensures you get the maximum lifespan out of every application.

DIY or Hire a Pro for Paver Sealing?

Deciding whether to seal your pavers yourself or hire a professional is a common crossroads for homeowners. The DIY route can certainly seem like a great way to save some money, but it’s a project that demands time, the right equipment, and a bit of know-how. If you get it wrong, you could end up with a finish you’re not happy with or even damage your pavers. On the other hand, hiring a professional team offers expertise and the peace of mind that comes with knowing the job will be done correctly and efficiently.

Your final decision will likely come down to a few key factors: the size and complexity of your patio or driveway, the current condition of your pavers, your own experience level with this type of work, and your budget. Let’s break down what you should consider to help you make the best choice for your home.

When to Hire a Professional

While a straightforward sealing job can be a manageable DIY project, some situations are best left to the experts. If your patio has more significant issues, like widespread sinking, shifting pavers, or drainage problems, it’s time to call in a pro. These are often signs of an underlying issue with the foundation that a simple coat of sealer won’t fix. A professional can properly diagnose the problem and perform the necessary paver repairs before sealing, ensuring a beautiful and long-lasting result.

Hiring a professional is also a smart move if you’re feeling unsure about the process. Experts have the experience to select the perfect sealer for your specific pavers and apply it flawlessly for a uniform finish. For large or intricate layouts, a professional crew can complete the work far more efficiently, saving you a lot of time and physical effort.

The Costs and Commitment of DIY

The biggest draw for DIY paver sealing is the potential cost savings. However, it’s important to understand the full commitment involved. This isn’t just a quick afternoon task; it’s a multi-step process that can easily take up an entire weekend. You’ll need to dedicate time to thoroughly cleaning the pavers, waiting for them to dry completely, making any small repairs, and then carefully applying the sealer.

Unfortunately, many homeowners aren’t fully aware of the proper maintenance required, and a DIY job gone wrong can be costly to fix. Applying too much sealer, trapping moisture underneath, or using the wrong product can result in a hazy, blotchy finish that’s difficult to strip and correct. Before you start, be sure to factor in the cost of renting a pressure washer and purchasing all the necessary materials. It’s an investment of both time and money.

Essential DIY Tools and Materials

If you decide to take on the project yourself, success hinges on having the right gear. The most critical component is the sealer itself. As we’ve seen, using the wrong product can degrade the surface of your pavers, so it’s vital to choose a high-quality sealer that is compatible with your specific paver material. Do your research to find one that offers the finish and protection you’re looking for.

You’ll also need a pressure washer for deep cleaning, a stiff-bristled brush for stubborn spots, paver cleaner, polymeric sand to fill the joints, and a pump sprayer or roller for application. Don’t forget safety gear like gloves and goggles. Remember, preparation is everything. You can’t just apply sealer over a dirty surface. Taking the time to properly clean and prep your pavers is the only way to achieve that clean, professional look.

How to Maintain Your Sealed Pavers

You’ve done the work to seal your pavers, and they look fantastic. Now, the key is to keep them that way. Proper maintenance isn’t complicated, but it does require a little consistency. Think of the sealer as a shield for your patio or driveway; regular upkeep ensures that shield stays strong, protecting the beautiful pavers underneath from stains, weather, and everyday wear and tear.

A little attention goes a long way in preserving your investment. By adopting a simple cleaning routine and being mindful of how you treat the surface, you can extend the life of your sealer and keep your outdoor space looking pristine for years. It’s all about creating good habits that will make long-term care feel effortless.

Adopt a Regular Cleaning Routine

Keeping your sealed pavers looking their best starts with a simple, consistent cleaning schedule. The goal is to prevent dirt, leaves, and other debris from sitting on the surface for too long, where they can break down the sealer or cause stains. A quick sweep with a broom every week or so is a great place to start. For a slightly deeper clean, you can rinse the area with a garden hose to wash away dust and pollen.

This regular maintenance is crucial for the sealer’s longevity. When it comes time for a more thorough cleaning, avoid pressure washers, as their high-powered spray can strip the sealer right off. Instead, use a gentle detergent and a soft-bristled brush. If you notice stubborn stains or feel your pavers need a professional touch, our restoration and sealing services can bring them back to life.

Protect Your Sealer and Pavers

Beyond cleaning, protecting your sealed pavers from damage will ensure they stay in top condition. One of the biggest benefits of sealing is that it helps prevent the color of your pavers from fading due to sun exposure. To maintain this protection, it’s important to avoid things that can compromise the sealed surface. Be mindful of dragging heavy furniture across the patio, and use plastic shovels instead of metal ones to clear snow in the winter to prevent scratching.

Choosing the right sealer for your specific porcelain and natural stone pavers is the first step in protection, but how you treat it afterward matters just as much. Try to clean up spills like oil, grease, or wine as soon as you spot them. Using coasters under planters can also prevent water stains and mineral deposits from forming. These small, proactive steps will keep your sealer intact and your pavers looking beautiful.

Related Articles

Frequently Asked Questions

How long after sealing can I use my patio or driveway? Patience is your best friend after sealing. Generally, you should wait at least 24 hours before walking on the sealed surface. For driveways, it’s best to wait a full 48 to 72 hours before parking any vehicles on it. This gives the sealer enough time to fully cure and form a hard, protective layer. Rushing this process can lead to tire marks and scuffs that are difficult to remove.

Will paver sealer make my patio slippery? This is a great question, especially for poolside areas. Some high-gloss, film-forming sealers can reduce the natural texture of the pavers, making them a bit slick when wet. However, many sealers are designed with safety in mind. Penetrating sealers don’t alter the surface texture at all, so they won’t affect slip resistance. If you prefer a glossy finish, you can also look for products that include a non-slip additive to provide extra grip.

Can I seal my pavers as soon as they are installed? It’s tempting to seal your beautiful new pavers right away, but it’s best to wait. Most paver manufacturers recommend waiting at least 30 to 60 days after installation. This allows time for any efflorescence, a natural white, chalky substance, to come to the surface and be cleaned off. Sealing too early can trap this efflorescence underneath, creating a cloudy appearance.

What’s the best way to clean sealed pavers without damaging the sealer? Regular, gentle cleaning is the key to maintaining your sealed pavers. A simple sweep with a broom or a rinse with a garden hose is usually enough to handle everyday dirt and debris. For a deeper clean, use a mild detergent mixed with water and a soft-bristled brush. It’s important to avoid using a pressure washer, as the high-powered stream can easily strip the sealer from the surface.

Does sealer really protect my pavers from winter salt? Yes, it provides a crucial layer of defense. Here on Long Island, de-icing salts are a major cause of paver damage in the winter. The salt can cause the surface to pit and crumble over time. A quality sealer creates a barrier that prevents saltwater from penetrating the porous surface of the pavers, significantly reducing the risk of damage from freeze-thaw cycles and chemical corrosion.