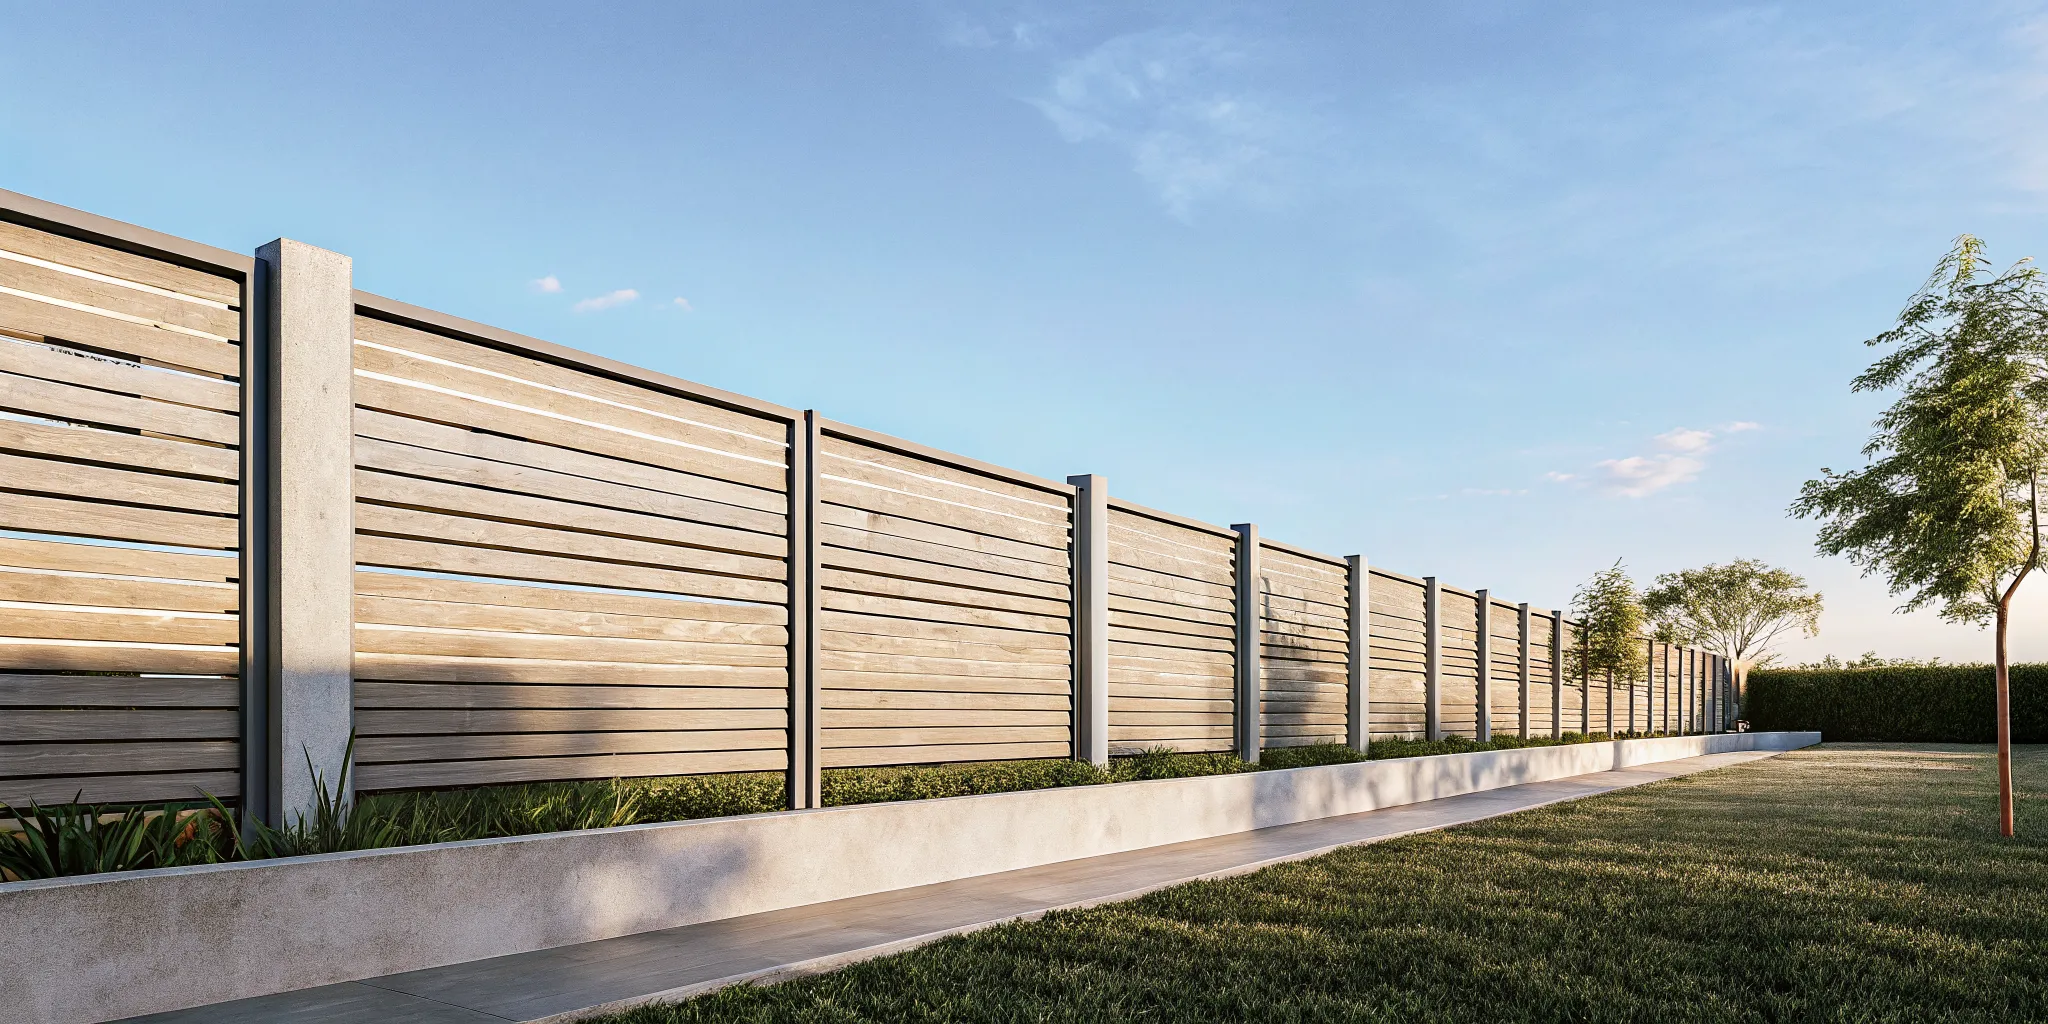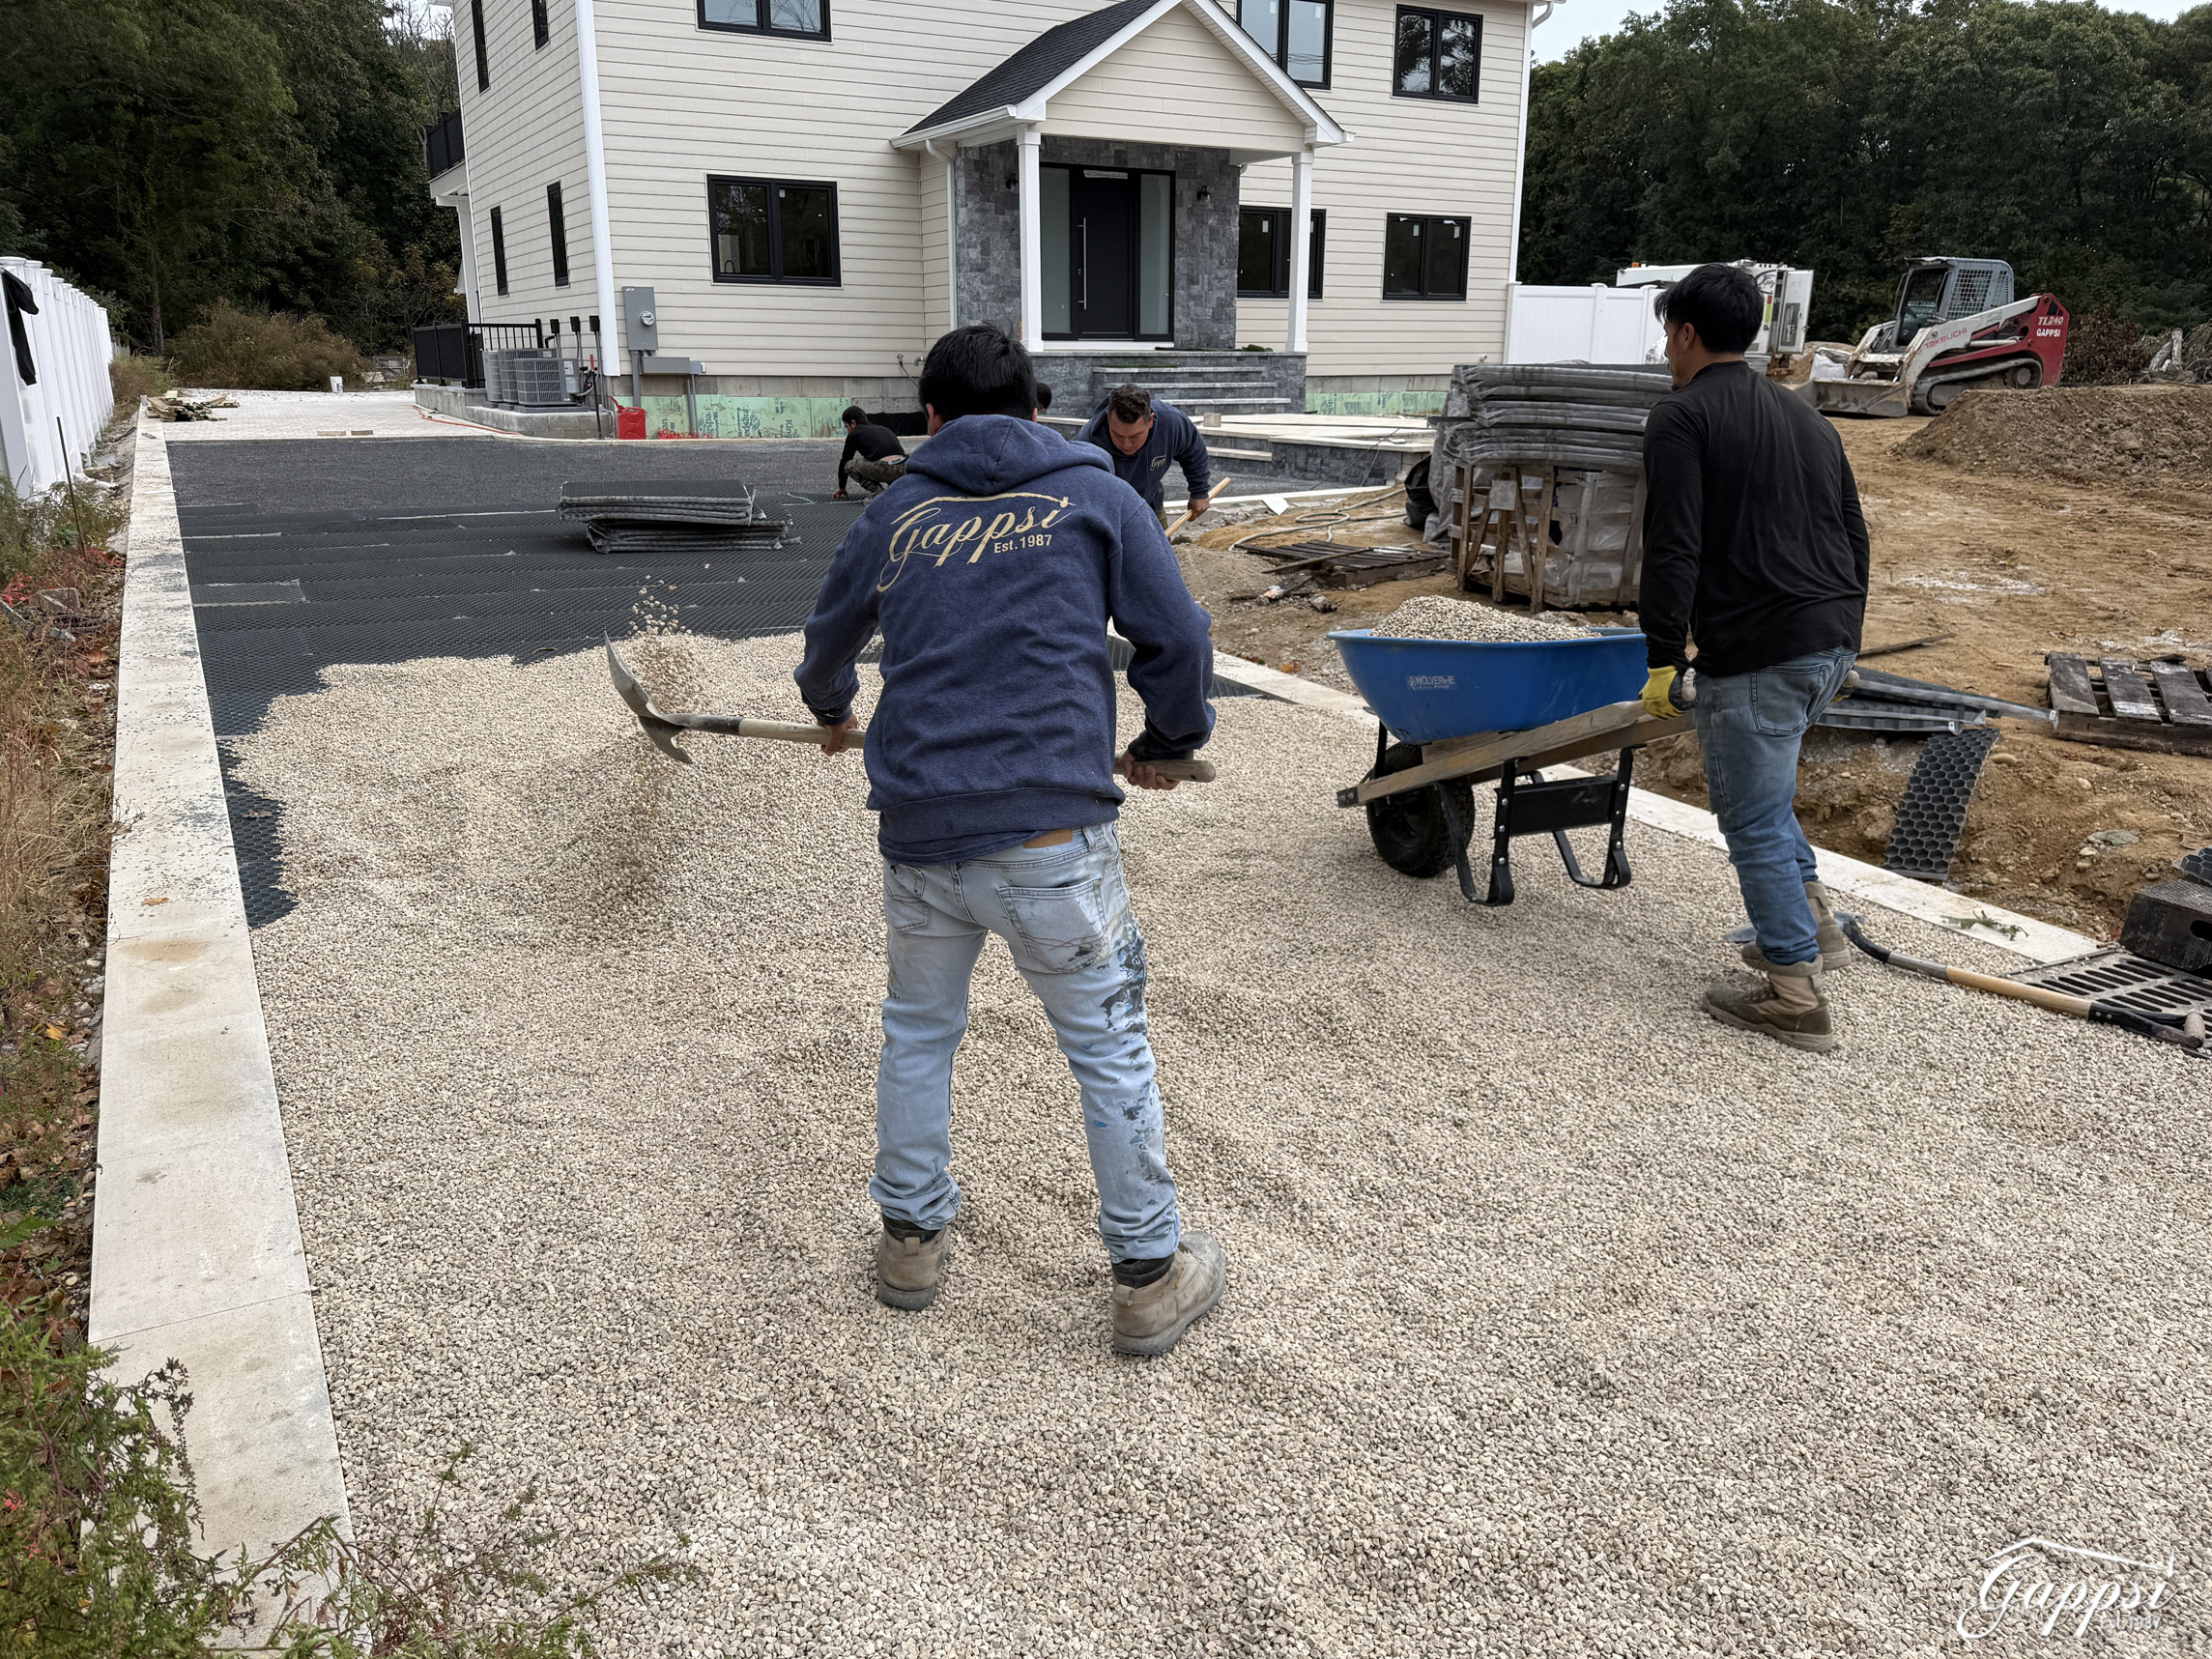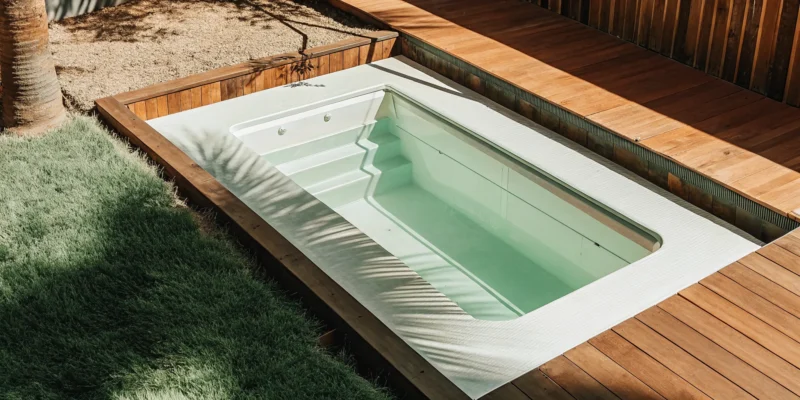
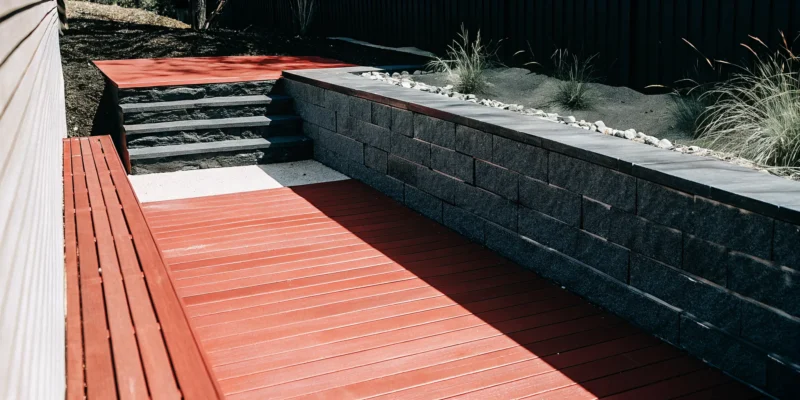
In-ground swim spa installation with decking, a key factor in the final cost.

In Ground Swim Spa Installation Cost: A Full Breakdown

A beautifully designed backyard is a seamless extension of your home, where every element works in harmony. An in-ground swim spa can be the stunning centerpiece of this space, but only when it’s thoughtfully integrated. Achieving that high-end, built-in look is a key part of the project and a major factor in the budget. This guide is designed to give you a clear understanding of the complete in ground swim spa installation cost, moving beyond the unit price to include the crucial design and construction elements. We’ll cover the expenses for creating a stable foundation, proper drainage, and the custom decking or stonework that makes your spa a true luxury feature.

Key Takeaways

  • Understand the Full Project Cost: The price of the spa itself is just the starting point; a realistic budget includes all aspects of the installation, such as excavation, electrical work, delivery, and permits, so work with your installer to get a detailed quote.
  • Invest in a Professional Installation: An in-ground swim spa is a construction project, and proper installation, including correct drainage and electrical work, is essential for safety, performance, and protecting your investment for the long haul.
  • Budget for Finishes and Future Maintenance: Your financial planning should include the beautiful finishing touches like decking and landscaping, as well as the ongoing costs for chemicals, energy, and routine upkeep that keep your spa running perfectly.

What Is an In-Ground Swim Spa?

An in-ground swim spa is a fantastic hybrid, giving you the best features of a swimming pool and a hot tub in one streamlined package. Imagine having a space where you can get in a great workout against a steady current, then relax in soothing, heated water, all within the same day. These versatile hot tubs and swim spas are built directly into your landscape, creating a seamless and permanent addition to your backyard. Unlike a traditional pool, a swim spa is designed for year-round enjoyment, offering a perfect retreat for fitness, relaxation, and socializing no matter the season. It’s a space-saving solution that adds both function and value to your home.

In-Ground vs. Above-Ground Spas and Pools

When you compare an in-ground swim spa to a traditional swimming pool, a few key differences stand out. Swim spas are generally more compact, making them a great fit for yards where a full-sized pool might not be practical. Because they hold less water and have built-in heaters, they are often cheaper to run and can be used throughout the year, even during cooler Long Island months. An in-ground model also offers a more integrated and high-end look compared to a portable, above-ground spa, which sits on top of your patio or deck.

Benefits of an In-Ground Installation

Choosing an in-ground installation transforms your swim spa from a simple backyard feature into a true luxury amenity. The seamless design allows it to blend beautifully with your patio, deck, and overall landscape design. This creates an inviting and cohesive space where you can unwind or entertain guests. A professional installation is crucial, as it ensures everything from the foundation to the electrical work is handled correctly. Proper drainage, for example, is essential to protect the spa’s equipment and guarantee its long-term performance. With a quality build, your in-ground swim spa becomes a lasting investment in your home and lifestyle.

How Much Does an In-Ground Swim Spa Cost?

When you start planning for an in-ground swim spa, the first question is almost always about the price. It’s a significant investment, so getting a clear picture of the costs is the best first step. The final number on your invoice is more than just the price of the spa itself. It’s a combination of the unit, the installation, and all the finishing touches that make it a seamless part of your backyard. Let’s break down what you can expect to budget for, so you can plan your project with confidence.

Understanding Unit vs. Total Project Cost

It’s important to separate the cost of the swim spa unit from the total project cost. The spa itself can range from $15,000 for a more basic model to over $60,000 for a high-end unit with all the bells and whistles. However, the total project cost, which includes delivery, excavation, and full installation, typically falls between $20,000 and $70,000. An in-ground installation is more complex than an above-ground setup, often requiring a crane for placement (which can add $500 to $1,500) and extensive site work. This is why a full in-ground installation can cost between $10,000 and $30,000, while a simple concrete pad for an above-ground model might only be a few thousand dollars.

How Size and Features Affect Price

Just like with a car, the size and features you choose will have a big impact on the final price of your swim spa. Entry-level models usually start in the $15,000 to $17,000 range, while mid-range options are closer to $20,000. If you’re looking for a larger spa with premium features like powerful hydrotherapy jets, dual-temperature zones, or Wi-Fi controls, you can expect prices to start at $30,000 and go up from there. While the initial investment might seem high, it’s worth noting that installing a swim spa is often more affordable than building traditional swimming pools, which can have installation costs starting at $35,000.

What Factors Influence Installation Costs?

Beyond the price of the swim spa itself, the installation process involves several key expenses that shape your total project budget. An in-ground installation is a construction project, and costs can vary based on your property’s unique conditions and your design goals. Understanding these factors ahead of time helps you plan a realistic budget and ensures there are no surprises on delivery day. From preparing the site to connecting the utilities, each step has associated costs that contribute to the beautiful, seamless final look you want.

Excavation and Site Prep

An in-ground installation is your chance to create a truly intentional and lasting backyard feature. The first major step is excavation, which involves more than just digging a hole. This is where we prepare the foundation for your spa, ensuring it’s level, stable, and properly positioned. The complexity of the excavation depends on your vision. Do you want the spa flush with a new patio or partially recessed into a deck? Our team handles the entire site preparation, from initial digging to creating the perfect base, turning a simple installation into a thoughtful part of your landscape design.

Soil Type and Site Accessibility

Your property’s specific conditions play a big role in the installation cost. Long Island soil can be sandy, loamy, or rocky, and difficult soil may require special equipment, increasing labor time and expense. Accessibility is another key factor. If your backyard is hard to reach with heavy machinery, the process might become more complex. Before any work begins, a professional site assessment is crucial. A contractor can evaluate your soil, confirm the area can support the spa’s weight when filled, and plan the best approach for a smooth and efficient excavation process.

Electrical and Plumbing Needs

Properly connecting your swim spa is a critical step that requires a licensed professional. Electrical work is a significant part of the budget, often costing between $1,000 and $2,000. Your home’s existing electrical panel might need an upgrade to handle the spa’s power requirements, so it’s important to have an electrician assess your system beforehand. Planning for this early ensures everything is ready when your spa arrives. As a full-service home improvement company, we coordinate all the necessary electrical and plumbing work, so you don’t have to manage multiple contractors.

Permits and Inspections

Navigating local building codes is a vital part of any major home improvement project. While some areas treat swim spas like portable hot tubs that don’t need extensive permitting, this isn’t always the case. Regulations in Suffolk and Nassau County can vary, and it’s essential to check what local rules apply to your installation, especially regarding safety features like fencing. Working with an experienced installer like Gappsi removes this burden from your shoulders. We handle the entire permitting and inspection process, ensuring your project is fully compliant with all local requirements for a worry-free experience.

Your Geographic Location

Just like with any construction project, labor and material costs can differ based on where you live. Here on Long Island, prices reflect the local market and the high standards of quality homeowners expect. Working with a local expert is your best advantage. A company that understands the area’s building codes, soil conditions, and design trends can provide the most accurate cost estimates and project guidance. As your local Long Island provider, we can walk you through every step, making sure your installation is seamless from start to finish.

Where Should You Install Your Swim Spa?

Choosing the perfect spot for your swim spa is one of the most exciting parts of the planning process. It’s about more than just finding an open space; it’s about creating a destination in your backyard that feels both beautiful and practical. The right location will make your spa more enjoyable to use and can even impact your total installation cost. Let’s walk through the key factors to consider so you can find the ideal home for your new backyard retreat.

Considering Sunlight, Privacy, and Access

Think about how you want to use your spa day to day. Do you love soaking up the sun, or do you prefer a shady escape? A spot with full sun will keep the water warm naturally, but you might want a pavilion or pergola for relief on hot days. Privacy is also huge. You want your spa to feel like a personal sanctuary, not a display for the neighbors. We can use strategic landscaping or stylish fencing to create the seclusion you need. Finally, consider access. You’ll need a clear, wide path for delivery and installation, but you also want a convenient path from your house for those spontaneous evening soaks.

How Utility Proximity Impacts Cost

The distance from your spa to your home’s utility connections directly affects your budget. Your swim spa will need a dedicated electrical circuit, and the farther it is from your main panel, the more expensive the trenching and wiring will be. The same logic applies to your water source for filling the spa and any gas lines if you opt for a gas heater. A professional team will ensure all connections are installed safely and up to code, which is essential for your family’s safety and for passing inspections. Planning for a location closer to your existing utilities is a smart way to manage installation costs without compromising on your overall vision.

How Ground Conditions Affect Excavation

What’s underneath the surface of your yard plays a big role in the installation process. Long Island soil can be sandy or contain heavy clay, and some properties have unexpected rocks or roots that make digging more complex and costly. A professional site assessment is key to understanding what we’re working with. Proper drainage is also non-negotiable. We need to ensure water flows away from the spa’s vault to protect its shell and internal components from moisture damage over time. This often involves installing a French drain or a similar system. By evaluating the ground conditions first, we can create a stable, long-lasting foundation for your in-ground swim spa.

The In-Ground Installation Process: A Breakdown

Seeing your swim spa project come to life is exciting. The installation process involves several key stages, each requiring careful planning and professional execution. From the initial dig to the final decorative touches, understanding these steps helps you know what to expect. A professional team handles the heavy lifting, but being informed ensures a smooth process and a result you’ll love for years. Let’s walk through the major phases of an in-ground swim spa installation.

Excavation and Ground Prep

First, we prepare the site. This begins with excavating the area where your swim spa will live. The hole needs to be precise to accommodate a reinforced concrete vault. This vault is essential, as it supports the entire weight of the spa when it’s filled with water and provides critical access for any future service needs. Before any digging starts, our team confirms all local permits are in order. We also assess your property for accessibility to ensure our equipment can get to the site without disrupting your existing landscape. Proper ground preparation is the foundation of a lasting and secure installation.

Placing the Spa and Planning Drainage

Once the concrete vault is cured and ready, we carefully lower your swim spa into place. At this stage, one of the most important considerations is drainage. Water must have a way to escape from the area around the spa to prevent moisture buildup, which can damage the spa’s components over time. To manage this, we often install systems like French drains or a sump pump. These solutions actively direct water away from the vault, protecting your investment and ensuring the equipment remains dry and functional. Proper drainage planning is a non-negotiable step for a long-lasting swim spa.

Connecting Electrical and Plumbing

With the spa in position, the next step is connecting the essential utilities. This phase requires licensed professionals and is not a DIY task. A qualified electrician will hard-wire the spa to your home’s electrical panel, implementing crucial safety measures like grounding and bonding to prevent any risk of shock. These connections are vital for the spa to operate safely and efficiently. At the same time, we handle the plumbing hookups for filling and draining your spa. Our comprehensive construction services ensure every technical detail is managed correctly by skilled experts who understand all local code requirements.

Finishing Your Spa with Decking and Pavers

The final step is where your vision truly comes together. This is when we integrate the swim spa into your backyard with beautiful, functional surroundings. You can choose from a variety of materials to create a custom deck or patio surround, including elegant porcelain and natural stone pavers or custom masonry work. We ensure the surrounding structure is engineered to handle the spa’s filled weight. This is also the perfect time to add other features that complete your outdoor living space, like a nearby pavilion for shade or fencing for privacy, creating a seamless and luxurious backyard retreat.

What to Look for in a Quality Swim Spa

When you start shopping for a swim spa, you’ll quickly realize there’s a wide range of options out there. Making a smart investment means looking past the initial price tag and focusing on the features that deliver long-term value, enjoyment, and performance. A quality swim spa is a self-contained system designed for both vigorous exercise and peaceful relaxation. To make sure you choose a model that will truly enhance your lifestyle for years to come, pay close attention to the jet system, its energy efficiency, and the available customization options. These three areas are what separate a basic model from a premium one that provides a superior ownership experience.

Jet Systems and Hydrotherapy

The heart of any swim spa is its jet system. This is what creates the powerful, continuous current you swim against. Top-tier brands design their jets to provide a smooth, wide, and adjustable stream of water, perfect for everyone from casual swimmers to athletes in training. But the best swim spas offer more than just a current. They also incorporate dedicated hydrotherapy seats with strategically placed jets for massage and muscle recovery. This dual-functionality transforms your spa from a simple exercise machine into a complete wellness hub, offering both a great workout and a relaxing escape right in your backyard.

Energy Efficiency and Insulation

A common concern with any heated body of water is the ongoing energy cost. This is where quality really matters. Premium swim spas are engineered with superior insulation and energy-efficient components that significantly reduce heat loss and electricity usage. A well-insulated spa with a custom-fit cover acts as a self-contained, efficient system, holding its temperature without constantly running the heater. This is a major advantage over many traditional swimming pools, which can have much higher heating costs. Investing in an energy-efficient model means lower monthly bills and a more sustainable addition to your home.

Customization and Sizing

One of the biggest benefits of a swim spa is its ability to deliver the function of a full-size pool in a much smaller footprint. For example, a 17-foot swim spa can offer a better swimming experience than a 40-foot lap pool. This makes them an ideal choice for properties where space is a consideration. Beyond size, look for a model that offers customization. This can include everything from the power of the swim current to the configuration of the therapy seats. The ability to integrate your spa seamlessly into your backyard design with custom finishes ensures it complements your home’s aesthetic perfectly.

What Are the Ongoing Costs of a Swim Spa?

Once your swim spa is installed, the next step is understanding what it takes to run it. While the initial investment is the biggest part of the budget, planning for ongoing expenses will ensure you can enjoy your spa for years without any financial surprises. The good news is that swim spas are designed for efficiency, and with a little know-how, you can keep your operational costs quite manageable. Let’s break down what you can expect to spend on energy, maintenance, and future needs.

Monthly Energy and Water Bills

You might be pleasantly surprised to learn that swim spas are generally more energy-efficient than traditional swimming pools. Because they hold less water and come with high-quality insulated covers, they do an excellent job of retaining heat. This makes year-round use affordable and practical. Your main ongoing expense will be electricity to power the pumps and heater. Depending on your usage, local climate, and utility rates, you can expect your monthly electric bill to increase by about $50 to $150. This cost covers everything from heating the water to running the therapeutic jets, making your swim spa an accessible luxury.

Annual Maintenance and Chemicals

To keep your swim spa water crystal clear and safe for everyone, you’ll need a regular maintenance routine. This involves testing the water and adding chemicals like sanitizers and pH balancers. Annually, you can plan on spending between $200 and $500 on these necessary supplies. When you factor in overall upkeep, the total annual cost to run and maintain your swim spa typically falls between $1,000 and $2,500. Proper care not only ensures a pleasant experience but also protects your investment, much like how routine cleaning and sealing preserves your stone patio and keeps your entire backyard looking its best.

Future Repairs, Covers, and Accessories

Over time, parts may need attention, but repairs for swim spas are usually less complex and costly than those for full-sized pools. You might eventually need to replace a pump or a heating element, for example. One of the most critical components to maintain is the cover. A high-quality, insulated cover is essential for keeping debris out and, more importantly, trapping heat to reduce energy consumption. If your spa doesn’t include one, or when it’s time for a replacement, a good cover can cost over $1,000. It’s a worthwhile investment that pays for itself in energy savings and reduced cleaning time. You can find covers and other essentials at the Gappsi Store.

How to Lower Your Ownership Costs

You have a good amount of control over your swim spa’s running costs. The best way to keep your energy bills low is to choose a model with excellent insulation from the start. High-quality foam insulation within the spa’s walls can reduce energy use significantly by preventing heat from escaping. Another simple but effective habit is to always put the insulated cover back on your spa as soon as you’re done using it, especially during the colder Long Island winters. If you notice your cover is getting waterlogged or worn out, replacing it promptly will help maintain its efficiency. Our team can help you select an energy-efficient swim spa or pool that fits your needs and budget.

Integrating Your Swim Spa into Your Landscape

An in-ground swim spa is more than just a place to exercise or relax; it’s a central feature of your backyard. The most successful installations are those that feel like they were always meant to be there, blending perfectly with your home and garden. This is where thoughtful design comes in. By planning the surrounding area with the same care you put into choosing the spa itself, you create a cohesive and inviting outdoor living space. It’s about looking beyond the spa and seeing the complete picture, from the patio underfoot to the sky overhead.

Designing with Masonry, Pavers, and Landscaping

Your swim spa will be placed in a reinforced concrete vault, which makes the surrounding materials incredibly important for both function and style. Proper drainage is essential to protect the spa’s equipment, and our team often incorporates systems like French drains to manage water effectively. From there, we can build a beautiful, durable deck or patio using high-quality porcelain and natural stone pavers that provide a safe, non-slip surface. Our expertise in masonry allows us to construct retaining walls, steps, and other features that seamlessly connect the spa to the rest of your yard. Finally, strategic landscape design with plants and lighting softens the hardscaping and makes the spa feel like a natural oasis.

Completing the Look with Pavilions and Fencing

To make your swim spa a true retreat, consider the elements that provide comfort and privacy. A well-placed structure can transform the area into an all-weather destination. We can design and install custom pavilions and pergolas to offer shade from the sun and protection from the elements, creating a defined “room” for your spa. This also gives you a perfect spot for outdoor seating or a dining area. Privacy is another key factor for relaxation. Thoughtfully selected fences and netting can screen your spa from neighbors’ views without making the space feel confined. These finishing touches are what make your swim spa area a private, comfortable, and beautiful extension of your home.

Common Budgeting Mistakes to Avoid

Creating a realistic budget is one of the most important steps you can take to ensure your swim spa installation is a success. A clear financial plan helps you avoid stress and allows you to focus on the excitement of transforming your backyard. Unfortunately, it’s easy to make a few missteps when you’re tallying up the numbers for a big project.

Thinking through the entire scope of the project from the start will help you prepare for all the associated expenses, not just the price of the spa itself. By avoiding a few common pitfalls, you can protect your investment and make sure there are no costly surprises along the way. Let’s walk through the key budgeting mistakes to watch out for so you can plan with confidence.

Underestimating the Full Project Cost

It’s a common scenario: homeowners find the perfect swim spa, get excited about the price, and then feel stressed when the total project cost is higher than they expected. The price of the spa unit is just one piece of the puzzle. The full project involves excavation, electrical and plumbing work, delivery and crane services, and finishing materials like decking and landscaping. As one industry expert notes, homeowners often underestimate the cost of the complete installation, which can cause budget issues down the line. To avoid this, work with your installer to get a comprehensive quote that details every line item, from site prep to the final touches.

Cutting Corners on Permits and Electrical Work

Tempting as it may be to save a few dollars, skimping on permits and professional electrical work is a mistake you can’t afford to make. Overlooking local building codes can lead to major fines, work-stoppage orders, and installation delays. More importantly, improper electrical work is a serious safety hazard. A swim spa is a powerful piece of equipment that requires a dedicated circuit and specific safety measures like grounding and bonding to prevent the risk of shock. Always ensure your project is handled by a licensed and insured team that understands local requirements and prioritizes safety above all else. This is a core part of any professional home remodeling project.

Forgetting to Budget for Finishes and Drainage

The details surrounding your swim spa are what transform it from a simple installation into a beautiful backyard oasis. Don’t forget to budget for the finishing touches that complete the space, such as decking, stone pavers, fencing, and landscape lighting. These elements are essential for both aesthetics and functionality. Equally important is planning for proper drainage around the spa. Without it, water can pool and damage the spa’s equipment, foundation, and surrounding patio materials. A well-designed drainage system is key to protecting your investment and ensuring your swim spa performs well for years to come.

Ignoring Long-Term Maintenance

Your financial planning shouldn’t stop once the installation is complete. Owning a swim spa comes with ongoing maintenance costs that should be factored into your household budget. These recurring expenses include water care chemicals, replacement filters, electricity to run the pumps and heater, and occasional water refills. You’ll also want to set aside funds for a quality spa cover, which helps retain heat and keep debris out, and for any future repairs that may arise. Thinking about the long-term care from the beginning ensures you can enjoy your spa without financial strain for many years.

Is an In-Ground Swim Spa a Good Investment?

A swim spa is more than just a backyard feature; it’s an investment in your lifestyle, health, and home. Unlike a traditional pool that you might only use for a few months each year, an in-ground swim spa offers year-round enjoyment. Imagine starting your day with a low-impact workout against a steady current and ending it by relaxing in the therapeutic hydrotherapy jets, all within the privacy of your own backyard. This unique combination of fitness and relaxation makes a swim spa an incredibly valuable addition to any property, serving as a personal wellness retreat just steps from your door.

While the initial cost is a significant consideration, it’s helpful to think about the long-term value it brings. A beautifully integrated swim spa can enhance your property’s appeal and become the centerpiece of your outdoor living space. It creates a destination for family fun, personal wellness, and entertaining guests without ever having to leave home. When you partner with an experienced team, your swim spa becomes a seamless part of your home’s design, adding functional luxury that you can enjoy every single day. We can help you find the perfect model from our collection of high-quality hot tubs and swim spas to fit your specific vision and needs.

Exploring Financing Options

Before you get too far into dreaming about your new spa, it’s smart to set a clear budget. Starting a major home improvement project without one can lead to stress and unexpected expenses down the line. Once you have a number in mind, you can explore different ways to fund your project. Many homeowners use home improvement loans, which allow you to spread the cost over a manageable period.

It’s also important to think beyond the initial purchase and installation. Remember to account for ongoing expenses like chemicals, energy use, and routine maintenance, which typically add up over the year. Understanding the full financial picture from the start helps ensure your swim spa remains a source of joy, not a financial burden. Discussing your project with a professional can clarify total costs and help you plan accordingly for a successful home remodeling project.

Related Articles

Frequently Asked Questions

How long does the installation process for an in-ground swim spa take? The timeline for an in-ground installation is a multi-step process that can vary. After you’ve selected your spa, we need to handle permits, excavation, and pouring the concrete vault. Once the spa is placed, we connect the utilities and complete the surrounding deck or patio. Generally, you should plan for the entire project to take several weeks from start to finish, depending on factors like inspection schedules, weather, and the complexity of your custom finishes.

Can I really use a swim spa all year, even during a Long Island winter? Absolutely. That’s one of the biggest advantages of a swim spa. They are designed with powerful heaters and excellent insulation specifically for year-round enjoyment. The key is investing in a quality model with a well-fitting, insulated cover. This combination keeps the heat in and energy costs down, so you can enjoy a warm, relaxing soak or a vigorous swim even when there’s snow on the ground.

Is a swim spa a better choice for my family than a traditional swimming pool? It really depends on your goals. If you want a space for fitness, hydrotherapy, and relaxation that you can use all year in a compact footprint, a swim spa is an excellent choice. However, if your main priority is having a large area for kids to splash around in or for hosting big pool parties in the summer, a traditional pool might be a better fit. A swim spa offers incredible versatility, combining the best of a pool and a hot tub into one efficient package.

Do I need to build a fence around my in-ground swim spa? In most cases, yes. Local building codes in Suffolk and Nassau County typically require a safety barrier, like a fence with a self-latching gate, around any body of water deeper than a certain threshold, which includes in-ground swim spas. These regulations are in place to prevent accidents. As part of our service, we manage the entire permitting process and ensure your installation is fully compliant with all local safety requirements.

How much maintenance does a swim spa actually require on a weekly basis? Maintaining a swim spa is surprisingly manageable and much less work than caring for a full-sized swimming pool. Your main tasks will be testing the water chemistry a couple of times a week and adding chemicals as needed to keep it balanced and sanitized. You will also need to clean the filters regularly. With a good routine, you can expect to spend about 15 to 20 minutes a week on upkeep, ensuring your water is always clear and ready for you to enjoy.
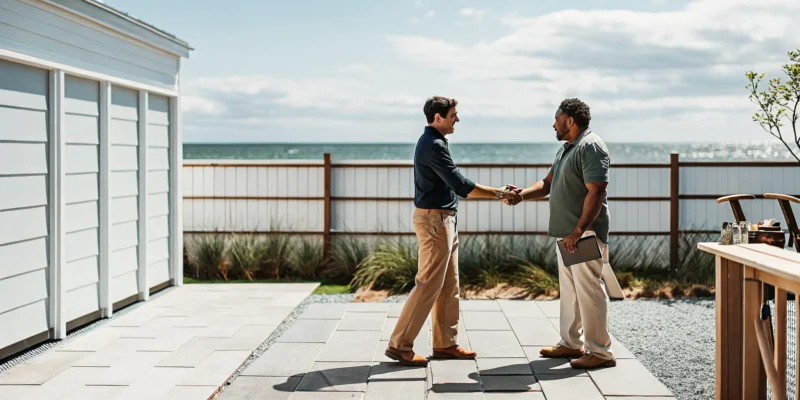
A wood fence contractor shakes hands with a client in front of a new fence on Long Island.

How to Choose a Wood Fence Contractor on Long Island

Living on Long Island means our homes face a unique set of challenges, from humid, salty air in the summer to freezing temperatures in the winter. These conditions can be tough on any outdoor structure, especially a wood fence. This is why local expertise matters so much. You need a contractor who understands our climate and knows which materials and installation techniques will stand up to the weather. A team with deep roots in the area will build a fence designed for longevity. This guide will walk you through how to identify a top-tier wood fence contractor Long Island has to offer, ensuring your new fence is built to last.

Key Takeaways

  • Choose Your Contractor Wisely: Protect your investment by selecting a licensed and insured contractor with proven Long Island experience. Always ask for a detailed quote and a written warranty to ensure transparency and quality.
  • Balance Function with Form: Select a fence style that meets your practical needs, like privacy or decoration, and choose a wood type (such as cedar or pressure-treated pine) that can withstand Long Island’s specific weather conditions.
  • Understand the Full Cost: Your final price is a combination of materials, fence style, and labor. Remember to also budget for potential extra costs like permits, site grading, or old fence removal for an accurate financial plan.

Finding the Best Wood Fence Contractors on Long Island

Choosing the right contractor is the most important step in getting a wood fence you’ll love for years. You need a team that understands Long Island’s unique environment and can deliver a beautiful, durable final product. A great contractor brings not just skill, but also reliability and clear communication to your project. To help you get started, here are a few of the most reputable wood fence installers in Nassau and Suffolk counties, known for their quality work and customer satisfaction.

Gappsi

Gappsi has earned a strong reputation across Long Island for its comprehensive home improvement services, and their fencing work is no exception. They approach each project with a designer’s eye, ensuring your wood fence not only provides privacy and security but also complements your home’s overall aesthetic. Their team handles everything from design to installation, using high-quality materials built to last. If you’re looking for a custom fencing solution and a seamless experience from a company that manages the entire process, Gappsi is an excellent choice. Their focus on expert craftsmanship means you get a beautiful fence that stands the test of time.

Amendola’s Fence Co.

With decades of experience serving Long Island, Amendola’s Fence Co. is a well-established name in the community. They offer a wide selection of fencing materials, including beautiful custom wood designs that can be tailored to your property. Homeowners often point to their team’s professionalism and the smooth installation process as major positives. If you value a company with a long history of reliability and straightforward, fair pricing, Amendola’s is a solid contender. Their extensive experience means they have seen it all and can handle just about any fencing challenge that comes their way.

Family Fence

Family Fence is another highly-rated option, known for its commitment to customer satisfaction. With more than two decades in the business, they have a proven track record of successful installations across Long Island. They provide a variety of materials, but their ability to create custom fences allows homeowners to get the exact look they want. What really stands out is their impressive number of positive reviews, which speaks volumes about their dedication to quality service. If you’re looking for a contractor with a strong, positive reputation and a focus on personalized solutions, Family Fence is definitely worth considering for your project.

Which Wood Fence Style Is Right for You?

Choosing a wood fence is about more than just drawing a line around your property. It’s a decision that shapes your home’s first impression, creates privacy for your family, and completes your outdoor living space. The right fence should feel like a natural extension of your home, complementing everything from your garden to your patio. With so many styles and materials available, finding the perfect fit can feel like a big task, but it doesn’t have to be. Think of it as choosing an accessory that pulls your whole yard together.

Whether you want to create a private sanctuary for your backyard swimming pool, add a touch of classic charm to your front yard, or simply keep pets and little ones safe, there’s a wood fence style for you. At Gappsi, we work with a variety of fencing materials, including wood and composite options, to bring your vision to life. Let’s walk through some of the most popular styles to help you decide which one is the best match for your Long Island home.

Picket Fences

The picket fence is an American classic for a reason. It’s the perfect way to define your property lines while adding a friendly, welcoming charm to your landscape. This style is not about total privacy; instead, it creates a decorative border that enhances your home’s curb appeal without blocking the view. Picket fences are a great, budget-friendly choice for front yards or garden areas. They create a sense of enclosure and safety for kids and pets while maintaining an open and neighborly feel. Their timeless design works well with a wide range of architectural styles, from historic colonials to modern farmhouses.

Privacy and Stockade Fences

If creating a secluded backyard retreat is your top priority, a privacy or stockade fence is your best bet. These fences are built with solid or tightly spaced vertical boards designed to block sightlines and help reduce neighborhood noise. This makes them an excellent choice for creating a peaceful oasis around your patio or pool area. A stockade fence, with its pointed-top pickets, offers a traditional and secure look, while a solid board fence can provide a clean, modern backdrop for your landscaping. Both styles give you the ultimate sense of seclusion, letting you enjoy your yard without an audience.

Split Rail Fences

For a rustic, open-air feel, a split rail fence is an excellent option. This style uses two or three horizontal rails fitted into posts, creating a simple and natural-looking boundary. It’s a popular choice for larger properties or homes aiming for a more pastoral aesthetic, as it marks your property lines without obstructing scenic views. Split rail fences are also one of the more cost-effective wood fencing options. While they won’t contain small pets, they are perfect for defining different areas of your yard or lining a long driveway, adding a touch of country charm to your Long Island property.

Decorative Cedar Panel Fences

When you want your fence to be a true design feature, a decorative cedar panel fence delivers. These fences combine the privacy of a solid fence with beautiful, eye-catching details like lattice tops or intricate patterns. Cedar is a fantastic choice because it’s naturally resistant to rot and insects, ensuring your fence is as durable as it is beautiful. A decorative panel fence can elevate the entire look of your property, turning a simple boundary into a stunning architectural element that complements your home and high-end outdoor features like pavilions and pergolas.

Choosing the Best Wood for Long Island’s Climate

Living on Long Island means dealing with humid summers, chilly winters, and salty air, so choosing a wood that can handle the weather is key. The right material will resist moisture, decay, and pests, ensuring your fence stays strong and beautiful for years. While the type of wood you choose is important, so is proper installation and maintenance. Investing in quality materials and routine upkeep, like cleaning and sealing, will protect your fence from the elements. Regular care from a service that offers restoration and sealing can significantly extend the life of your wood fence.

Pressure-Treated Pine

Pressure-treated pine is a very popular and practical choice for fencing, especially in our climate. This wood has been chemically treated to resist rot, fungus, and insects, giving it a major advantage in durability. It’s an affordable option that provides excellent strength and longevity, making it a reliable workhorse for any fence style, from picket to privacy. While it doesn’t have the natural rich color of cedar, pressure-treated pine can be stained or painted to match your home’s exterior, giving you plenty of design flexibility without breaking the budget.

Cedar and Redwood

If you’re looking for natural beauty and durability, cedar and redwood are top-tier choices. These woods contain natural oils and tannins that make them inherently resistant to decay and insects, so they don’t require chemical treatments. Cedar and redwood are known for their stunning color, straight grain, and dimensional stability, meaning they are less likely to warp or shrink over time. While they come at a higher price point, their longevity and gorgeous appearance make them a worthwhile investment. Their rich tones pair beautifully with other natural materials, like the porcelain and natural stone used in patios and walkways.

Composite Wood Options

For homeowners who love the look of wood but not the maintenance, composite fencing is the perfect solution. Made from a blend of wood fibers and recycled plastics, composite materials offer the best of both worlds. They mimic the appearance of natural wood but won’t rot, warp, or splinter, and they never need to be stained or sealed. A simple cleaning with soap and water is all it takes to keep a composite fence looking great. This makes it a practical, low-maintenance choice for busy families who want a beautiful, long-lasting fence. Gappsi offers several composite fencing options to fit your style.

What’s the Real Cost of a Wood Fence on Long Island?

Figuring out the budget for a new wood fence is often the first step, and it’s smart to know what you’re getting into. The final price tag is more than just the cost of lumber. It’s a mix of the wood you choose, the fence style you love, the size of your property, and the specific challenges of your landscape. On Long Island, a professionally installed wood fence can range from $15 to $50 per linear foot, but that’s a wide spectrum. Why the big difference? The total cost includes materials, labor for installation, and other potential expenses like permits and site preparation.

While you might be tempted to save money with a DIY project, professional fencing installation is often a wise investment. A pro ensures your fence posts are set correctly to withstand our coastal weather, the panels are perfectly aligned, and the entire structure is built to last. This expertise can prevent costly repairs down the road. The best way to get a clear picture of your investment is to get a detailed quote from a trusted contractor who can walk you through every line item, from materials to labor.

Cost by Material (Per Linear Foot)

The type of wood you select is one of the biggest drivers of your total cost. For materials alone, you can expect to pay between $10 and $30 per linear foot. Pressure-treated pine is a popular and budget-friendly choice, typically falling in the $10 to $20 range. It’s treated to resist rot and insects, making it a durable option for the price.

If you’re looking for a more premium look with natural longevity, woods like cedar and redwood are excellent choices. These materials cost more, usually between $20 and $30 per linear foot, because they contain natural oils that make them inherently resistant to decay and pests. This upfront investment often pays off with a longer lifespan and less maintenance. A detailed privacy fence cost guide can help you compare these options side-by-side.

Cost by Fence Style

Beyond the material, the design of your fence plays a significant role in the final price. Simpler designs like a classic split rail or picket fence require less material and labor, making them more affordable. On the other hand, a tall privacy fence or a stockade style will cost more because they use more wood and take longer to construct.

Intricate or custom designs, such as lattice-top panels or decorative post caps, will also add to the overall expense. Think of it this way: the more complex the cut and the more material needed per foot, the higher the cost. Exploring different wood privacy fence styles can give you a better feel for how aesthetics and function influence pricing. When you get a quote, make sure it specifies the style so you can accurately compare your options.

Factors That Influence the Final Price

Several other factors can affect your total cost, and it’s important to account for them in your budget. Professional installation typically adds $8 to $25 per linear foot, but this isn’t the only additional expense. Your property itself can introduce unique costs. For instance, if your yard has a significant slope, it may need grading to ensure the fence is level, which can cost anywhere from $500 to $2,000.

You should also plan for administrative costs like building permits, which can range from $50 to $500, and a property survey to clearly mark your boundary lines. If you have an old fence that needs to be torn down and hauled away, that will add to the labor costs as well. Discussing these potential hidden and extra costs with your contractor upfront will help you avoid surprises.

How to Choose Your Wood Fence Contractor

Selecting the right contractor is just as important as choosing the right wood or style for your fence. This is the team you’ll be trusting to bring your vision to life, handle the logistics, and build a structure that will stand strong for years. A great contractor ensures the project runs smoothly from the initial design consultation to the final cleanup, resulting in a fence that not only looks beautiful but is also installed correctly and safely. The best partnerships are built on clear communication, shared expectations, and a mutual respect for the process.

When you start your search, you’re looking for more than just an installer; you’re looking for a long-term partner for your home improvement projects. A company with deep roots in Long Island will understand local building codes, soil conditions, and what it takes to build a fence that can withstand our coastal weather. Taking the time to vet your options thoroughly will give you peace of mind and a final product you can be proud of. Gappsi provides expert fencing installation and can help you make the right choice for your property.

Check for Proper Licensing and Insurance

Before you even start talking about fence styles or materials, your first question for any potential contractor should be about their credentials. Make sure they are fully licensed to operate in Nassau or Suffolk County and carry comprehensive liability insurance and workers’ compensation. This isn’t just a formality; it’s your protection. If an accident happens on your property during the installation, proper insurance ensures you are not held financially responsible. A professional and trustworthy company will have no problem providing you with copies of their licenses and insurance certificates. If a contractor is hesitant or can’t produce these documents, consider it a major red flag and move on.

Review Their Experience and Reputation

Experience is a powerful indicator of a contractor’s skill and reliability. Look for a company with a long history of installing wood fences specifically on Long Island. An experienced team will have a deep portfolio of completed projects you can review to get a sense of their workmanship and style. Don’t just rely on the photos on their website; ask for addresses of recent installations you can drive by. You can also see their work through videos of past projects. Online reviews on Google and other platforms can also offer insight into what it’s like to work with them, from communication and scheduling to the quality of the final product.

Look for Transparent Pricing

While you want a fair price, the cheapest bid is rarely the best value. A trustworthy contractor will provide a detailed, itemized quote that clearly breaks down all the costs, including materials, labor, permit fees, and debris removal. Be wary of vague estimates or contractors who give you a price without a thorough site inspection. Transparent pricing means there are no surprises down the line. It also reflects a contractor’s honesty and professionalism. This detailed quote allows you to compare apples to apples when looking at different bids and understand exactly what you are paying for, ensuring you get high-quality materials and expert installation.

Assess Their Customization and Service Options

Your fence is a key element of your home’s overall aesthetic, so it’s important to find a contractor who can deliver a custom solution that fits your vision. Do they offer a wide range of wood types and fence styles? Can they accommodate unique property lines or sloped terrain? A contractor who offers comprehensive services, such as landscape design and masonry, often has a better understanding of how to integrate a fence seamlessly into your existing outdoor space. This holistic approach ensures your new fence complements your home’s architecture and landscaping, creating a cohesive and polished look for your entire property.

Ask About Warranties

A reputable contractor will stand behind their work. Always ask about the warranties they offer before signing a contract. Typically, there are two types of warranties to consider: a material warranty, which comes from the manufacturer and covers defects in the wood itself, and a workmanship warranty, which comes from the contractor and covers any issues related to the installation. A solid workmanship warranty shows that the contractor is confident in their skills and is committed to building a durable, long-lasting fence. Make sure you get the warranty details in writing so you know exactly what is covered and for how long.

Confirm Post-Installation Support

The relationship with your contractor shouldn’t end the moment the last fence post is set. A great company will provide support even after the project is complete. Ask them what their process is for handling post-installation issues, such as a gate that needs adjusting or a board that warps unexpectedly. Do they offer maintenance advice or services to help you keep your fence in top condition? Knowing that your contractor will be there to help with any future needs provides valuable peace of mind. This commitment to long-term customer satisfaction is often what separates a good contractor from a great one.

Final Checks Before You Hire

You’ve done your research and narrowed down your list of potential wood fence contractors. This is the final, crucial step before you commit. Taking the time to dig a little deeper now will give you confidence in your decision and help ensure your project goes smoothly from start to finish. Think of this as your last round of due diligence, where you confirm that a contractor’s reputation matches the quality of work you expect for your home. It’s all about making sure the team you hire is a true partner you can trust to bring your vision to life.

How to Read Customer Reviews

When you look at customer reviews, try to read between the lines. Go beyond the star rating and look for patterns in what people are saying. Are clients consistently praising a company’s reliability, fair pricing, and smooth installation process? Detailed comments about high-quality materials or excellent customer service are great indicators of a professional operation. On the other hand, if you see repeated complaints about poor communication or project delays, that’s a sign to be cautious. A great fence is about more than just the final product; it’s also about the experience you have along the way. You can often see the quality of a company’s work in their project portfolio, which showcases their fencing and netting installations.

Red Flags to Watch Out For

Knowing what to look for in a good contractor is just as important as knowing which red flags to avoid. Be wary of any company that gives you a vague estimate, pressures you to sign a contract immediately, or asks for a large cash deposit upfront. A lack of a physical office or a portfolio of past work can also be a warning sign. A contractor with a long-standing presence in the community is often a safer bet, as they have a reputation to uphold. While a single negative review isn’t necessarily a dealbreaker, a pattern of unhappy customers is a clear signal to look elsewhere. You can always check a business’s profile with the Better Business Bureau for added peace of mind.

Essential Questions to Ask Before You Sign

Before you sign any contract, make sure you have clear answers to a few key questions. A reputable contractor should be able to walk you through the pros and cons of different materials and advise you on the best wood for your specific needs and Long Island’s climate. Don’t forget to ask about warranties. A trustworthy company will stand behind their work with a workmanship warranty and pass along any manufacturer warranties on the materials. This kind of guarantee shows that they are confident in their skills and the products they use. A contractor’s expertise with a wide range of high-quality materials is often a sign of their overall commitment to excellence.

Related Articles

Frequently Asked Questions

Which wood is truly the best for Long Island’s weather? The “best” wood really depends on your budget and aesthetic goals. Pressure-treated pine is a fantastic, cost-effective choice because it’s specifically treated to stand up to moisture and insects, which is a huge plus in our climate. If you have more room in your budget, cedar is a top-tier option. It contains natural oils that make it inherently resistant to rot and pests, and it has a beautiful, rich color that looks incredible from day one.

How can I keep my new wood fence from rotting or warping? A great fence starts with quality installation, so hiring a pro who sets the posts correctly is your first line of defense. Beyond that, maintenance is key. Choosing a rot-resistant wood like cedar helps, but even the best wood benefits from protection. We recommend having your fence professionally cleaned and sealed every few years. This creates a barrier against moisture and sun damage, which are the main culprits behind rot and warping, and will significantly extend the life of your fence.

Is composite fencing really a better choice than natural wood? It’s not necessarily better, just different. The right choice depends on your priorities. If you love the authentic look and feel of real wood and don’t mind some periodic maintenance like staining or sealing, then a natural wood fence is a classic for a reason. However, if you want the look of wood without the upkeep, composite is an amazing solution. It’s made to resist rot, warping, and insects, and you’ll never have to paint or stain it. It’s a practical choice for busy homeowners who value convenience.

Why does the price for a wood fence vary so much? The final cost is influenced by a few key factors. The material you choose is a major one; pressure-treated pine is more affordable, while premium woods like cedar cost more per foot. The style also plays a big role. A simple split rail fence uses less material and labor than a tall, solid privacy fence. Finally, your property itself can affect the price. Things like removing an old fence, working on a steep slope, or needing special permits will add to the total investment.

What is the single most important thing to look for in a fence contractor? While a great portfolio and positive reviews are important, the absolute first thing you must verify is that the contractor is fully licensed and insured. A proper license proves they are a legitimate business, and comprehensive insurance protects you from any liability if an accident happens on your property during the job. A professional company will provide this information without hesitation. It’s a non-negotiable that separates the pros from the rest.

Cost of a modern stone block retaining wall in a Long Island backyard.

How Much Do Retaining Walls Cost in Long Island?

Building a retaining wall on Long Island requires local expertise. The rocky, clay-heavy soil on the North Shore presents different challenges than the sandy conditions of the South Shore. A successful, long-lasting wall must be engineered specifically for your property’s unique terrain and drainage needs. These local factors play a significant role in determining your project’s budget. To get an accurate picture of how much does retaining walls cost in Long Island, you have to consider these regional variables. This guide will explain the key cost drivers, including how our island’s specific geography influences the materials, labor, and engineering required for a successful installation.

Key Takeaways

  • Plan a Comprehensive Budget: Your total cost includes more than just materials; be sure to account for essential expenses like permits, engineering fees, site excavation, and a proper drainage system for a complete and realistic budget.
  • Know What Influences the Price: The final cost of your retaining wall is shaped by four main factors: its overall size (height and length), the material you choose, your property’s specific conditions, and any custom design elements like curves or built-in seating.
  • Prioritize Quality for Lasting Value: A professionally built wall solves practical issues like erosion and adds significant curb appeal, so protect your investment by getting detailed, itemized quotes from experienced contractors and never compromising on structural integrity.

What Is a Retaining Wall?

At its core, a retaining wall is a structure built to hold back soil on a slope. Think of it as a functional barrier that prevents gravity and rainwater from causing erosion and washing your yard away. But a well-designed retaining wall does so much more than just manage soil. It’s a powerful tool that can completely transform your property’s landscape. By carving out level tiers from a hillside, a retaining wall creates new, usable space where there was once just an unusable incline.

Suddenly, you have the perfect spot for a beautiful masonry patio, a lush garden, or a safe, flat play area for your kids. These structures can also become stunning design features in their own right. Whether crafted from rustic natural stone or modern concrete blocks, a retaining wall adds texture, dimension, and structure to your outdoor living space. It’s one of the few home improvement projects that solves a practical problem while also adding significant aesthetic value.

Why your Long Island property might need one

You might be wondering if a retaining wall is the right solution for your yard. Generally, these projects are necessary when a property has slopes, drainage problems, or a need for more functional space. If you notice your yard showing signs of soil movement or significant water runoff after a storm, a retaining wall could be the ideal long-term fix.

Look for clues like small landslides, exposed tree roots, or areas where water pools instead of draining properly. A sloped yard that’s difficult to mow or enjoy is another clear indicator. A professionally installed retaining wall addresses these issues head-on by stabilizing the soil and controlling water flow, protecting your home’s foundation and turning a challenging landscape into a beautiful, functional asset.

Factoring in Long Island’s unique terrain

Long Island’s geography is surprisingly diverse, and your location plays a huge role in designing the right retaining wall. The needs of a homeowner in Massapequa with a minor grade change are completely different from someone in Cold Spring Harbor managing a steep hillside. Understanding Long Island’s tricky soil is key to a successful project.

The North Shore often features rocky, clay-heavy soil that requires robust drainage systems to handle water properly. In contrast, the South Shore’s sandy soil presents its own challenges, especially with high water tables that demand specialized drainage solutions. A local contractor with deep experience in the area will know exactly how to approach these unique conditions, ensuring your wall is built to last.

How Much Does a Retaining Wall Cost in Long Island?

Figuring out a budget for a retaining wall is one of the first steps in planning your project. On Long Island, the cost can range quite a bit, typically falling between $50 and $200 per square foot of the wall’s face. This is a wide range because the final price tag depends on several key things: the wall’s size, the materials you choose, and how complex the installation will be. A simple, low garden wall made from concrete blocks will cost much less than a tall, curved wall built from premium natural stone on a sloped yard that requires significant site preparation.

Think of these numbers as a starting point. A professional contractor can give you a precise quote, but understanding the basic cost structure helps you set realistic expectations. The right masonry work not only solves practical issues like soil erosion but also adds significant beauty and structure to your landscape. It can define outdoor living areas, create level ground for a patio, or add terraced garden beds. As we break down the costs, you’ll get a clearer picture of how your vision aligns with your budget and what to expect for your investment.

Breaking down costs by material

The material you select is one of the biggest factors influencing your retaining wall’s cost. Each option has a different price point and offers a unique aesthetic. For example, natural stone pavers create a classic, high-end look, while interlocking blocks provide a uniform and budget-friendly alternative.

Here are some typical installed costs per square foot of wall face in Long Island:

  • Interlocking Concrete Blocks: $40 to $80. These are engineered to fit together perfectly, making them a popular and durable choice.
  • Natural Stone: $80 to $165. This premium option offers a timeless and unique appearance but requires more skilled labor to install.
  • Poured Concrete: $60 to $120. A very strong and modern-looking option, ideal for large, heavy-duty walls.

Estimating total costs by project size

Once you have a material in mind, you can start estimating the total cost based on the size of your wall. For a smaller project, like a 20 to 30-foot-long wall that’s a few feet high, you might expect to pay between $1,500 and $4,000. For a more substantial 50-foot wall, the cost could range from $4,000 to $10,000, depending heavily on its height and the site conditions.

Here’s a helpful tip: if your wall needs to be taller than four feet, it’s often better to build two or three shorter, tiered walls. This approach is not only more stable but also creates beautiful opportunities for integrated planting beds, turning a functional wall into a stunning landscape design feature.

Key Factors That Drive Retaining Wall Costs

When you start budgeting for a retaining wall, you’ll quickly find that the final price is more than just the cost of materials. Several key factors come together to determine your total investment. Understanding these variables will help you plan your project, set a realistic budget, and know exactly what you’re paying for. From the wall’s dimensions to the unique challenges of your property, each element plays a role in the final quote.

Wall height and length

The most direct cost factor is the size of your wall. Contractors typically price retaining walls per square foot of the wall’s face, so both height and length are critical. A long, low wall might cost the same as a short, tall one. For many Long Island homes, a medium-height wall is perfect for managing a sloped yard or creating a level space for a patio. These walls, which handle the grade changes most properties have, generally run from $65 to $110 per square foot.

Site conditions and accessibility

Every property is unique, and the specific conditions of your yard can significantly influence the cost. A steep slope, rocky soil, or poor drainage will require more intensive site preparation and specialized labor, adding to the budget. Accessibility is another major point. If heavy machinery can’t easily reach the construction area, the work may need to be done by hand, increasing labor hours. A professional masonry team will assess these factors during an initial consultation to provide an accurate estimate.

Local labor costs

The cost of labor is a major component of your retaining wall budget, and it reflects the skill and experience of the installation crew. While it can be tempting to find the cheapest option, quality craftsmanship is essential for a wall that is both beautiful and structurally sound. A simple, straightforward project will have lower labor costs than a complex one requiring engineering or special equipment. Investing in an experienced team ensures your wall is built correctly to handle Long Island’s specific soil and weather conditions for years to come.

Design complexity and custom features

A simple, straight wall is the most budget-friendly option, but your design choices can transform a functional structure into a stunning landscape feature. Elements like curves, tiers, and built-in staircases add complexity and cost but also create incredible visual appeal. You can also integrate custom features like bench seating, planters, or outdoor lighting directly into the wall. The natural stone or concrete blocks you choose will also impact the price, giving you another way to balance your aesthetic goals with your budget.

Comparing Retaining Wall Materials and Costs

Choosing the right material for your retaining wall is one of the most important decisions you’ll make. It’s a choice that directly impacts not only your budget but also the entire look and feel of your outdoor space for years to come. Each option comes with its own set of benefits, from the modern appeal of concrete to the timeless beauty of natural stone. We’ll walk through the most common materials used for retaining walls here on Long Island, breaking down their typical costs and what makes each one a great fit for your project. This will help you find the perfect balance between your aesthetic vision and your financial plan.

Interlocking concrete blocks

Interlocking concrete blocks are a go-to choice for many Long Island homeowners, and for good reason. They are incredibly durable, engineered to fit together perfectly, and relatively straightforward to install, which can help manage labor costs. This material offers a clean, uniform look that works well with many modern home styles. Expect the cost to range from $40 to $80 per square foot. If you need a strong, reliable wall that can handle our coastal weather without a fuss, this is an excellent option. Our masonry experts can design a block wall that is both functional and stylish.

Natural stone

If you’re aiming for a retaining wall that feels like a natural extension of your landscape, nothing beats the beauty of real stone. Each stone is unique, creating a wall with rich texture, color variation, and timeless character. While it’s one of the more expensive options, typically running from $80 to $165 per square foot, the stunning visual payoff is undeniable. A natural stone wall can transform your yard into a high-end retreat. We source a wide variety of beautiful natural stones perfect for creating a one-of-a-kind feature on your property.

Poured concrete

For a sleek, modern, and incredibly strong retaining wall, poured concrete is a fantastic choice. This material offers amazing design flexibility because it can be formed into custom curves, straight lines, and different heights to match your specific vision. The cost generally falls between $60 and $120 per square foot. Poured concrete can also be stamped or stained to mimic other materials, giving you more aesthetic control. It’s a durable, long-lasting solution that provides a minimalist backdrop for your landscaping, making it a popular choice in contemporary landscape design.

Timber

Timber walls offer a rustic, natural charm that blends beautifully with gardens and wooded properties. They are often the most budget-friendly option upfront, with costs typically ranging from $13 to $35 per square foot. This makes timber an attractive choice for homeowners looking to define garden beds or manage minor slopes without a major investment. However, it’s important to remember that wood requires ongoing maintenance. To prevent rot and decay, timber walls need to be properly treated and may eventually need replacement, so you should factor future upkeep into your decision.

Brick

A brick retaining wall delivers a classic, traditional look that never goes out of style. It’s a versatile material that complements many architectural styles, from colonial to contemporary. The cost can vary quite a bit depending on the type of brick and the complexity of the design, but it generally ranges from $10 to $30 per square foot. Brick is a durable material that holds up well over time, offering a warm and inviting feel to any outdoor space. Our masonry construction services include expert bricklaying for walls that are as sturdy as they are beautiful.

Don’t Forget to Budget for These Additional Costs

When you start planning for a new retaining wall, it’s easy to focus on the big-ticket items like materials and labor. While those are certainly major parts of the equation, the final cost involves more than just the wall itself. Several other factors, often called “hidden costs,” are essential for building a structure that is safe, legal, and built to last. Overlooking these expenses can lead to surprise bills and potential problems down the road. From securing the right permits to ensuring proper site preparation and drainage, each step plays a vital role in the success of your project.

Thinking about these additional costs from the beginning helps you create a realistic budget and ensures there are no unexpected hurdles. A professional team will account for these elements in their initial proposal, giving you a clear and comprehensive picture of the total investment. At Gappsi, our masonry experts walk you through every line item, so you understand exactly what’s needed to bring your vision to life correctly. This includes everything from initial engineering designs to the final finishing touches, ensuring your retaining wall not only looks great but also functions perfectly for years to come. We believe in transparency, so you’ll never be caught off guard by unexpected fees. A well-planned project is a successful one, and that starts with a complete and honest budget.

Permits and local regulations

Before any digging begins, it’s important to understand your town’s specific rules. On Long Island, most retaining walls over four feet tall require a building permit. This isn’t just bureaucratic red tape; it’s a crucial safety measure. Obtaining a permit usually means the project must be designed by a licensed engineer to ensure it can handle the pressure from the soil behind it. While this adds an expense to your project, it protects your investment and ensures the wall is legally compliant and structurally sound. Working with an experienced contractor simplifies this process, as they can manage the paperwork and make sure all local codes are met.

Engineering and design fees

For taller or more complex walls, you’ll need to budget for professional engineering and design. An engineer creates detailed, stamped drawings that serve as the blueprint for your project. These plans specify the wall’s dimensions, foundation requirements, reinforcement needs, and drainage system. This step is essential for getting a permit and guarantees your wall is designed to withstand Long Island’s specific soil conditions and weather patterns. Think of it as an investment in peace of mind. These professional plans ensure your contractor builds the wall correctly, preventing costly failures and ensuring long-term stability for your property.

Site prep and excavation

The cost of your retaining wall is heavily influenced by the condition of your property. Site preparation involves more than just clearing a path; it includes excavating a trench for the wall’s foundation, grading the area, and hauling away excess soil. If your yard is on a steep slope, has rocky soil, or is difficult to access with machinery, the labor and equipment costs for this phase will increase. A thorough site assessment from your contractor is key to getting an accurate estimate. Proper landscape preparation sets the stage for a smooth installation and a durable final product.

Drainage and waterproofing

Proper drainage is arguably the most critical element of a long-lasting retaining wall. Without a way for water to escape, hydrostatic pressure will build up behind the wall, causing it to bulge, crack, or even collapse. A well-designed drainage system includes a perforated pipe at the base, a layer of gravel for water flow, and filter fabric to prevent soil from clogging the system. While it adds to the upfront cost, skimping on drainage is a recipe for disaster. Investing in a proper system from the start will save you from expensive and difficult repairs in the future.

Future maintenance

Once your retaining wall is built, a little ongoing care will keep it looking and functioning its best. The type of maintenance depends on the material, but it generally involves simple tasks like keeping drainage outlets clear of debris and periodically cleaning the wall’s surface. For natural stone or concrete walls, you might consider professional cleaning and sealing every few years to protect against weathering and stains. A well-maintained retaining wall is a valuable asset that improves curb appeal and can even increase your property value, making it an investment worth protecting for the long term.

Common Budgeting Mistakes to Avoid

Creating a realistic budget is one of the most important steps in planning your retaining wall project. A well-thought-out budget prevents surprises and ensures you can complete your vision without financial stress. Let’s walk through a few common mistakes homeowners make so you can sidestep them from the start. By being aware of these potential pitfalls, you can approach your project with confidence and clarity.

Underestimating hidden costs

When you picture your retaining wall, you probably think about the cost of the stone or blocks. However, a significant portion of the budget goes toward work that happens before the first block is even laid. These “hidden” costs often include excavation, removing and hauling away soil, and installing special reinforcements for stability. A professional contractor will also factor in proper site preparation and grading. An expert masonry team will account for these elements in their initial quote, giving you a complete picture of the investment instead of surprising you with extra charges later.

Skipping permits and engineering

It can be tempting to cut corners on administrative tasks, but skipping permits and engineering is a mistake you can’t afford to make. In many Long Island towns, retaining walls over a certain height (often four feet) legally require a building permit and a design stamped by a licensed engineer. This isn’t just red tape; it’s a crucial step to ensure your wall is structurally sound and safe for your family. Failing to get the right approvals can lead to fines, forced tear-downs, and major headaches down the road. Always factor these professional fees into your initial budget.

Choosing materials on price alone

While your budget is a key factor, selecting materials based only on the initial price tag can lead to problems. The cheapest option might not be strong enough for your soil conditions or the height of your wall, leading to premature failure and costly repairs. The right material depends on your aesthetic goals, the wall’s function, and Long Island’s specific climate. Investing in high-quality natural stone or durable concrete blocks suited for your project will give you a beautiful, long-lasting wall that provides better value over time.

Not comparing multiple quotes

Before you commit to a contractor, it’s wise to get a few different quotes. This isn’t just about finding the lowest price. Comparing proposals helps you understand different construction approaches and see what each contractor includes. A low bid might be missing crucial elements like drainage or backfilling, which could lead to higher costs later. When you get a detailed proposal, look for a clear breakdown of labor, materials, and other expenses. This transparency is the mark of a trustworthy professional and helps you make a truly informed decision for your home.

How Design Choices Impact Your Budget

The look of your retaining wall is important, but the design choices you make go far beyond aesthetics. These decisions are some of the biggest drivers of your final project cost. From the wall’s structure to the special features you include, every choice has a price tag. Thinking through these options ahead of time helps you create a realistic budget and ensures the final product meets both your functional needs and your financial plan. By working with an experienced masonry design team, you can explore how different design elements will affect your bottom line and make informed choices that add long-term value to your property.

Tiered vs. single walls

When you need a taller retaining wall, you have two main options: building one tall, single wall or creating a series of shorter, stepped-back walls. While a single wall might seem like the most direct approach, a tiered system is often the smarter choice for walls over four or five feet high. Building two or three shorter walls with space for planting in between can be less expensive and simpler to engineer. This design also breaks up a massive, imposing wall into a more visually appealing feature that integrates beautifully into your landscape design.

Built-in features like lighting and seating

A retaining wall doesn’t have to be just a wall. With a little planning, it can become a multi-functional part of your outdoor living space. Incorporating features like built-in bench seating or integrated lighting can transform a purely structural element into a favorite gathering spot. While these additions will increase the initial cost, they also add immense value and usability to your yard. Imagine having a permanent, beautiful seating area for guests or soft lighting that adds ambiance and safety to your patio at night. These custom touches are what turn a simple backyard into a true outdoor retreat.

Advanced drainage solutions

This is one area where you absolutely should not cut corners. Water pressure from saturated soil is the number one reason retaining walls fail. A proper drainage system is critical to your wall’s longevity and stability. Good drainage design includes elements like a gravel backfill, perforated pipes to channel water away, and weep holes that allow moisture to escape. While investing in an advanced drainage solution adds to the upfront cost, it protects your investment from leaning, cracking, or collapsing. Think of it as essential insurance for your wall, preventing far more expensive repairs down the road.

Does a Retaining Wall Add Value to Your Long Island Home?

When you’re considering a major home improvement project, the big question is always: “Will this actually add value?” When it comes to retaining walls, the answer for Long Island homeowners is a resounding yes. A professionally installed retaining wall is more than just a barrier; it’s a smart investment that pays off in both immediate enjoyment and long-term property value. It solves common landscape problems while making your yard more beautiful and functional. Think of it as a two-for-one deal, enhancing your home’s curb appeal while actively protecting it from the elements.

Enhancing curb appeal and function

Retaining walls are a perfect example of where function meets form. A sloped, difficult-to-use yard can be transformed into a stunning, multi-level outdoor living area. Imagine turning an unusable hill into a flat space for a beautiful patio, a lush garden, or a safe play area for your kids. A well-built retaining wall holds soil in place, redirects water, and can even protect nearby structures. By choosing materials that complement your home, like elegant natural stone, your wall becomes a central feature of your landscape design, not just a background utility.

Protecting your property from erosion

Long Island’s terrain can be beautiful, but it also means many properties deal with slopes and potential water runoff. A retaining wall is your first line of defense against soil erosion. It’s a sturdy structure designed to hold back soil, especially on a slope, preventing it from washing away during heavy rains and threatening your home’s foundation, driveway, or patio. By stopping soil from moving, a retaining wall not only preserves your yard but also creates stable, level ground. This protective measure is a key part of a thoughtful landscape design that secures your property for years to come.

How to Get a Fair Quote from a Long Island Contractor

Finding the right contractor is just as important as choosing the right materials for your retaining wall. A fair and detailed quote is the foundation of a successful project, ensuring there are no costly surprises down the road. To make sure you’re partnering with a professional who understands your vision and respects your budget, it’s important to approach the quoting process with a clear strategy. Getting multiple quotes is a great start, but knowing what to look for in those proposals is what truly empowers you as a homeowner. A trustworthy contractor will be transparent about their process and costs from the very beginning.

Request an itemized proposal

When you start collecting quotes, don’t just look at the final number. Ask each contractor for a detailed, itemized proposal. This document should break down every aspect of the project, including costs for materials, labor, excavation, drainage systems, and any other specific line items. Getting at least two or three quotes from different contractors helps you compare not just prices but also their proposed methods. An itemized breakdown allows you to see exactly where your money is going and ensures you are comparing apples to apples. This level of detail is a hallmark of a professional masonry designer and helps prevent misunderstandings later on.

Key questions to ask your contractor

A good contractor will welcome your questions. Before you sign any contract, make sure you have clear answers to a few key things. Ask about costs that go beyond the wall itself, such as digging, soil removal, and any special reinforcements that might be needed for your property. It’s also a great idea to ask for references and look at their past projects; a contractor proud of their work will have a portfolio ready to share. You can see examples of high-quality work on the Gappsi YouTube channel. Also, inquire about their project timeline, who is responsible for securing permits, and what kind of warranties they offer on their craftsmanship and the materials used.

Red flags to look out for

Be cautious of quotes that seem unusually high and vague or, conversely, are so low they seem too good to be true. A quote that isn’t itemized might be hiding inflated costs for simple tasks. If a contractor can’t explain why their price is what it is, consider it a red flag. Another major warning sign is a contractor who dismisses the need for engineering plans or permits. Most retaining walls on Long Island require them, and a professional will factor this into the process from the start. A contractor who suggests skipping these steps is not only putting your project at risk but also exposing you to potential legal and safety issues.

Partner with Gappsi for Your Long Island Retaining Wall

Choosing to build a retaining wall is a significant decision for your property. It’s an investment that protects your landscape from erosion, creates more usable space, and adds lasting visual appeal. Because of Long Island’s unique soil conditions and terrain, finding a partner who understands the local challenges is essential. At Gappsi, we bring decades of experience designing and building structural elements that are not only beautiful but are also engineered to withstand the specific demands of our region. We handle every detail, from initial site assessment and design to securing permits and final construction.

Our process is built around collaboration. We know the best material for your retaining wall depends on your home’s style, your budget, and the wall’s specific job. Our team will walk you through all the options, helping you select the perfect fit. Whether you envision the timeless look of natural stone or the clean lines of interlocking concrete blocks, our expert masonry crews ensure the highest quality craftsmanship. We see a retaining wall as more than just a structure; it’s a key feature that should integrate seamlessly with your overall landscape design.

A well-designed retaining wall can also be the first step toward a larger outdoor transformation. It can carve out a level terrace for a new patio, provide a stable foundation for a pavilion or pergola, or frame a stunning poolside garden. As a full-service home improvement company, we can help you see the bigger picture and design a retaining wall that serves your entire outdoor living vision. If you’re ready to add beauty, function, and value to your property, let’s start the conversation.

Related Articles

Frequently Asked Questions

Why is there such a wide price range for retaining walls? The final cost depends on a combination of factors unique to your project. The wall’s size is the most obvious one, but the materials you choose and the conditions of your property play an equally large role. A simple, straight wall made from concrete blocks on a flat, accessible lot will naturally cost less than a tall, curved wall built from premium natural stone on a steep, hard-to-reach slope. The price reflects the custom solution your yard requires.

Do I really need to hire an engineer and get a permit? For many projects on Long Island, the answer is yes. Most towns require a building permit and plans from a licensed engineer for any retaining wall over four feet tall. This process is a crucial safety measure. It ensures your wall is properly designed to handle the immense pressure from the soil behind it, protecting your property and your investment from a costly failure down the road.

How can I make my retaining wall more than just a plain wall? A retaining wall is a fantastic opportunity to add custom features to your outdoor space. You can incorporate built-in bench seating, create integrated planters for flowers and herbs, or install subtle lighting for safety and evening ambiance. Instead of one tall wall, you could opt for a tiered design that creates beautiful terraces for gardening. These choices turn a functional structure into a central feature of your landscape.

How long will my retaining wall project take from start to finish? The timeline can vary quite a bit. A small, straightforward project might only take a few days, while a large, complex wall requiring engineering and permits could take several weeks. Factors like weather, site accessibility, and the permit approval process all influence the schedule. A professional contractor can give you a realistic timeline based on the specifics of your project during the initial consultation.

Is it okay to choose a cheaper material to save money? While it’s tempting to choose the most budget-friendly option, it’s important to consider the long-term value. The right material needs to be strong enough for your wall’s height and your property’s specific soil conditions. Choosing a material that isn’t suited for the job can lead to premature failure and much more expensive repairs later. It’s better to invest in a durable, appropriate material that will give you a beautiful and secure wall for years to come.

Modern Horizontal Fence Long Island: A Buyer’s Guide

Find out how a modern horizontal fence Long Island can upgrade your home’s style, privacy, and value. Get tips on materials, costs, and installation.

Your backyard should be a private retreat, a place where you can relax without feeling like you’re on display. Achieving that sense of seclusion is a top priority for many homeowners, and your choice of fencing plays a huge role. While traditional fences can leave you feeling exposed, a horizontal fence offers a superior solution. With boards that can be installed with minimal to no gaps, this style creates a solid, private screen. It’s the perfect choice for enclosing a swimming pool or patio area. This combination of privacy and high-end style is why the modern horizontal fence Long Island residents are choosing is becoming so popular.

Key Takeaways

  • Get Modern Style and Total Privacy: A horizontal fence gives your home an instant style update with clean lines that make your yard feel more spacious. You also control the level of privacy, since the boards can be set close together to create a solid, secluded screen for your backyard.
  • Choose Your Material Based on Upkeep: The material you pick determines how much time you’ll spend on maintenance. Wood looks beautiful but needs regular care to prevent rot and warping. For a low-effort solution, consider aluminum or composite, which are built to handle Long Island weather without the need for yearly staining or sealing.
  • Rely on a Pro for a Lasting Fence: A horizontal fence’s sleek look depends on perfect installation, as DIY attempts often lead to sagging boards and wobbly posts. A professional team has the expertise to handle challenges like uneven ground and wind resistance, ensuring your fence is built correctly and stays strong for years.

What Is a Modern Horizontal Fence?

If you’re looking for a fence that feels both current and timeless, a horizontal fence is an excellent choice. Unlike traditional fences with vertical pickets, this style features boards or slats that run parallel to the ground. This simple change creates long, clean lines that make your yard feel wider and more spacious. The popularity of horizontal fences has grown because they offer a truly modern and contemporary look that complements a wide range of architectural styles. It’s a design that feels intentional and sophisticated, instantly updating your property’s exterior.

One of the best parts about this style is its versatility. You aren’t locked into one specific look. A modern horizontal fence can be customized with your choice of material, color, and stain to perfectly match your home’s aesthetic. Whether you prefer the natural warmth of wood, the sleek durability of aluminum, or the low maintenance of composite materials, you can create a fence that is uniquely yours. This flexibility allows you to design a boundary that is not just functional but also a beautiful extension of your home’s design. Gappsi offers a complete line of fences and netting to bring your vision to life.

Horizontal vs. Vertical Fencing

The most obvious difference between horizontal and vertical fencing is the orientation of the boards, but this choice impacts more than just aesthetics. Vertical fences are the traditional standard and can be simpler to install, which sometimes translates to a lower upfront cost. However, the visual effect is completely different. A horizontal fence offers a distinctive, high-end look that a vertical fence just can’t replicate. The horizontal lines draw the eye outward, creating a sense of flow and space that can make your entire property feel more cohesive and thoughtfully designed.

The structure of a horizontal fence also requires careful planning. Because the boards span a wider distance between posts, they need proper support to prevent sagging over time, especially with Long Island’s changing seasons. This is why professional installation is so important. An expert team ensures the fence is not only beautiful on day one but also structurally sound for years to come.

A Perfect Fit for Long Island Homes

Long Island is home to a beautiful mix of architectural styles, from classic coastal cottages and traditional colonials to sleek, modern new builds. A horizontal fence is one of the few designs that works beautifully with all of them. For a more traditional home, it adds a touch of modern elegance without feeling out of place. For a contemporary house, it reinforces the clean lines and minimalist aesthetic. The key is choosing a fence that looks like it belongs with your home’s style, not one that competes with it.

The warmth of a wood horizontal fence can soften a modern exterior, while the crisp lines of an aluminum one can update a more traditional home. It’s all about creating a harmonious relationship between your house and your landscape. By pairing your fence with thoughtful masonry and hardscaping, you can create a truly seamless and polished outdoor living space. A well-chosen horizontal fence doesn’t just define your property line; it enhances your home’s character.

Key Benefits of a Horizontal Fence

A fence does more than just mark your property line. It’s a key part of your home’s first impression and your backyard’s atmosphere. A horizontal fence, in particular, offers a unique combination of benefits that go far beyond a simple barrier. From its striking modern look to its practical advantages, choosing a horizontal design is a decision that can completely reshape your outdoor space. Let’s look at the key reasons so many Long Island homeowners are opting for this contemporary style.

Modern Style and Curb Appeal

If you’re aiming for a clean, contemporary look, a horizontal fence is a fantastic choice. Its long, unbroken lines create a sense of flow and can make your yard feel wider and more spacious. Unlike traditional vertical fences, the horizontal orientation has a distinctly modern feel that complements a wide range of architectural styles, from sleek new builds to updated classic homes. This immediate visual upgrade does wonders for your home’s curb appeal. It’s one of the first things visitors see, and a stylish fence sets a sophisticated tone for your entire property.

Enhance Your Privacy and Security

Your backyard should be your personal retreat, and a horizontal fence is perfect for creating that sense of seclusion. Because the boards are run side-to-side, you can design them with very narrow gaps or no gaps at all. This creates a solid screen that offers maximum privacy from neighbors and passersby, which is ideal for enclosing a swimming pool or patio. These pre-made fence panels provide a secure boundary for your property, giving you peace of mind while you relax in your outdoor oasis. The solid construction acts as a strong visual and physical barrier, adding an extra layer of security to your home.

Built to Withstand Long Island Weather

Living on Long Island means dealing with humid summers, freezing winters, and salty coastal air. Your fence needs to be tough enough to handle it all. While wood is a classic choice, modern materials like aluminum are exceptionally well-suited for our climate. An aluminum fence is robust, won’t fade from the sun, and resists corrosion from salt and moisture. Best of all, it requires very little maintenance to keep it looking great year after year. Choosing a durable, weather-resistant material means you can spend more time enjoying your yard and less time on upkeep.

Increase Your Property Value

A beautiful, functional fence is more than just an expense; it’s an investment in your home. A modern horizontal fence significantly improves your home’s curb appeal, which can make your property more attractive to potential buyers if you ever decide to sell. The combination of sophisticated style, enhanced privacy, and durable, low-maintenance materials adds tangible value. When a fence is part of a thoughtful, cohesive outdoor design, it becomes a premium feature. This kind of upgrade shows a high level of care and contributes to your home’s overall worth, making it a smart addition to any home remodeling project.

Choosing Your Fence Material: Wood vs. Aluminum

Choosing the right material is one of the most important decisions you’ll make for your new horizontal fence. This choice affects not just the look of your fence, but also its durability, how much maintenance it will need, and the overall cost. While classic wood has its charm, modern materials like aluminum and composite offer compelling benefits for Long Island homeowners. Let’s walk through the pros and cons of each so you can feel confident in your decision.

The Classic Look of Wood

There’s no denying the warm, natural beauty of a wood fence. It’s a classic choice that can complement many home styles, providing a traditional and inviting feel. However, when it comes to horizontal designs, wood can present some real challenges. Horizontal wood fences are particularly prone to problems like warping, sagging, and rotting over time, especially with the moisture we get on Long Island. To keep a wood fence looking its best, you’ll need to commit to regular staining, sealing, or painting, which adds to its long-term cost and effort.

The Sleek Durability of Aluminum

If you’re looking for a modern, low-maintenance option, aluminum is an outstanding choice. Gappsi’s modern aluminum fences are powder-coated, making them incredibly strong and resistant to fading. Unlike wood, aluminum won’t warp, rot, or fall victim to insect damage. This makes it a practical, long-lasting solution that stands up beautifully to Long Island’s coastal weather. With a warranty of up to 20 years and minimal upkeep required, an aluminum fence is a smart investment that provides a sleek, contemporary look for years to come.

Considering Composite Fencing

For homeowners who want the best of both worlds, composite fencing is an excellent alternative. It often mimics the look of wood but without the demanding upkeep. Composite materials are engineered to last for more than 25 years and require very little maintenance, saving you from the yearly cycle of staining and sealing. This material resists rot, decay, and insects, giving you a durable and beautiful fence that lets you spend more time enjoying your yard and less time working on it. Gappsi offers a variety of fencing options, including high-quality composites.

Comparing Cost and Upkeep

When budgeting for your fence, it’s important to look beyond the initial price tag. The choice of material significantly impacts the total investment over the life of the fence. While wood might have a lower upfront cost, you have to factor in the ongoing expenses of maintenance and potential repairs. Labor can also account for a large portion of the project cost. Investing in a durable, low-maintenance material like aluminum or composite can save you money and time in the long run, making it a more cost-effective choice for your home improvement project.

How to Customize Your Horizontal Fence

A horizontal fence is more than just a boundary; it’s a design statement. The beauty of this style is its incredible flexibility. You can tailor nearly every aspect of your fence to perfectly match your home’s architecture, your landscape design, and your personal taste. From the materials you choose to the final finishing touches, customization is what makes a horizontal fence truly yours. Let’s look at the key ways you can personalize your design.

Board Spacing, Height, and Sizing

This is where you control privacy and visual texture. The spacing between your fence boards can create a light, airy feel with wider gaps, or it can provide complete privacy with a gapless design. The height is another critical choice, influencing both security and how the fence feels within your yard. While a taller fence offers more seclusion, a shorter one can define a space without closing it off. We can help you select the right height that meets local codes and your needs. You can also choose from various board widths and materials, including classic wood, durable composite, and sleek aluminum fencing, to achieve the exact modern look you want.

Colors, Finishes, and Post Styles

The color and finish of your fence set the tone for your entire outdoor space. For wood fences, you can choose a natural stain that highlights the grain or a solid color that complements your home’s exterior. Aluminum and composite fences come in a wide array of factory-applied colors with durable finishes that resist fading. Beyond the boards, the posts themselves offer another opportunity for customization. You can match them to the fencing material for a uniform look or use contrasting materials, like metal posts with wood panels, for a more dynamic style. We can even integrate your fence with custom masonry pillars for a truly grand and permanent feel.

Add Integrated Lighting

Incorporating lighting directly into your fence design is a brilliant way to add function and ambiance to your backyard. Integrated lighting can transform your outdoor space, making it safer to use after dark and creating a warm, inviting atmosphere for evening gatherings. Options range from subtle LED strips tucked under the top rail to stylish lights installed on the posts. This not only highlights the beautiful lines of your horizontal fence but also becomes a key element of your overall landscape design. Thoughtfully placed lighting ensures your yard looks just as stunning at night as it does during the day, extending the hours you can enjoy your outdoor oasis.

Matching Gates to Your Outdoor Design

A gate is the functional entry point to your yard, but it should also be a seamless part of your fence’s design. We can create custom gates that perfectly match the style, material, and color of your horizontal fence, ensuring a cohesive and polished look. Whether you need a simple pedestrian gate for garden access or a wide double gate for your driveway, we ensure it operates smoothly and complements your property. A well-designed gate doesn’t just blend in; it enhances the entire aesthetic. Pairing a custom horizontal gate with a beautifully finished gravel driveway creates an elegant and welcoming entrance to your home.

Understanding Horizontal Fence Costs in Long Island

Figuring out the budget for your new fence is a key step in the planning process. The final cost of a horizontal fence on Long Island depends on a few important variables, from the materials you choose to the specific details of your property. Breaking down these factors will help you get a clear picture of the investment and make choices that align with your vision and budget.

How Materials and Height Affect Cost

Your choice of fencing material is one of the biggest factors influencing the total price. Classic wood options like cedar offer a timeless look and are often more budget-friendly upfront. Sleek aluminum provides a modern, low-maintenance alternative that resists rust, while composite materials give you the look of wood without the upkeep.

The dimensions of your fence also play a major role. A taller fence naturally requires more material and often needs stronger, deeper posts for support, which adds to the cost. Similarly, the total length of the fence will directly impact the amount of material and labor needed for the project. By balancing material choice with your desired height and length, you can effectively manage your project’s budget.

Factoring in Labor, Site, and Accessories

Beyond materials, several other elements contribute to the overall cost. Labor for a professional installation depends on the complexity of the job. A simple, straight fence line on flat ground will be more straightforward to install than one on a sloped or rocky property, which requires extra preparation and expertise.

Accessories are another important consideration. The number, size, and style of gates you include can significantly affect the price. Custom additions like integrated post lighting or decorative hardware will also be factored in. At Gappsi, our team accounts for all these details during the design phase, so you receive a comprehensive quote with no surprises. We handle every aspect of the installation, ensuring a seamless process from start to finish.

Understanding Local Permits and HOA Rules

Before any work begins, it’s essential to understand your local regulations. Many towns and villages across Long Island have specific rules about fence height, materials, and how far a fence must be set back from your property line. If your home is part of a Homeowners Association (HOA), you will likely have an additional set of guidelines to follow.

Failing to secure the right permits or adhere to these rules can lead to fines and costly rework. Working with a local expert who is familiar with the requirements in Suffolk and Nassau County removes this burden. We manage the permitting process and ensure your new fence is fully compliant, giving you peace of mind and saving you from potential headaches down the road.

Maintaining Your Horizontal Fence

A beautiful horizontal fence is an investment in your home’s style and security, and a little maintenance goes a long way in protecting it. The good news is that modern materials have made fence care simpler than ever. The upkeep your fence requires will depend entirely on the material you choose, but every fence benefits from some seasonal attention, especially here on Long Island where coastal weather can be tough on outdoor structures.

Keeping your fence in top condition isn’t just about looks; it’s about ensuring its structural integrity for years to come. Regular inspections help you catch small issues before they become big, expensive problems. Whether you have classic wood, sleek aluminum, or durable composite, a simple care routine will preserve its beauty and function. Think of it as a quick seasonal check-in to make sure your fence continues to perfectly frame your outdoor living space. With the right approach, you can spend less time on maintenance and more time enjoying your yard.

Care Tips for Wood, Aluminum, and Composite

The material you select for your fence is the biggest factor in its maintenance plan. Wood fences have a timeless appeal but require the most care. To prevent rot, warping, and sun damage, wood needs to be regularly stained, sealed, or painted. This protective layer is key to its longevity. On the other hand, aluminum and composite are the champions of low-maintenance living. Aluminum won’t warp, twist, or rust, so a simple cleaning is often all it needs to look its best. Similarly, composite fencing requires no staining or painting to maintain its color and durability, freeing up your weekends.

Seasonal Care for Coastal Weather

Living on Long Island means our fences face salt spray, humidity, and the occasional strong storm. A simple seasonal cleaning can make a huge difference. At the start of spring and end of fall, gently hose down your fence with a low-pressure nozzle to wash away accumulated salt, dirt, and grime. For stubborn spots on composite or aluminum, a soft brush with mild dish soap and water will usually do the trick. After any significant storm, it’s a good idea to walk the perimeter and inspect for any potential damage. For a deeper clean or to protect porous materials, professional restoration and sealing services can revive your surfaces.

Warning Signs Your Fence Needs Repair

Catching problems early is the secret to a long-lasting fence. During your seasonal cleanings, keep an eye out for a few key warning signs. For wood fences, look for any boards that are warping, sagging, or showing signs of rot, which often appears as soft, discolored spots. For all fence types, check for loose posts or panels by gently pushing on them. Also, inspect metal components and hardware for rust or corrosion and make sure gates open and close smoothly. Addressing these issues promptly will prevent minor annoyances from turning into major structural failures, ensuring your fence remains a secure and beautiful boundary for your property.

Common Installation Challenges (And How We Solve Them)

A modern horizontal fence looks deceptively simple, but its clean lines demand a level of precision that can be tricky to achieve. Unlike vertical fences, where minor imperfections can blend in, a horizontal design highlights every flaw. Proper installation is not just about aesthetics; it is crucial for the fence’s strength and longevity, especially with Long Island’s variable weather. From sloping yards to coastal winds, several factors can complicate the process, turning a seemingly straightforward project into a major headache.

This is where experience makes all the difference. A professional team can anticipate these issues and implement the right techniques from the start. At Gappsi, we’ve spent decades installing fences and netting across Long Island, so we know exactly how to handle the unique challenges of our local properties. We ensure your fence is not only beautiful but also engineered to last, saving you from the stress and extra costs of a poorly executed project. By addressing potential problems before they arise, we deliver a flawless final product that stands straight and strong for years to come.

Working with Uneven Ground

Many Long Island properties are not perfectly flat, and a slope can pose a significant challenge for a horizontal fence. Because the design relies on parallel lines, even a slight grade change can disrupt the visual flow and compromise the fence’s structural integrity if not handled correctly. Simply following the slope can result in awkward angles and uneven gaps.

Our solution is to “step” the fence panels. This technique involves installing each section at a slightly different height, creating a clean, tiered look that follows the natural contour of your land. Our team carefully measures the grade of your property to plan the placement of each post, ensuring the steps are uniform and intentional. This approach maintains the sleek, modern aesthetic while adapting perfectly to your yard’s unique topography, making it look like an integrated part of your landscape design.

Ensuring Structural Support Against Wind

Horizontal fences present a large, solid surface area, which can act like a sail in strong winds. Without proper reinforcement, the constant pressure can cause boards to warp, sag, or even pull posts out of the ground. This is a serious concern in coastal areas like Long Island, where storms can bring powerful gusts. The long-term stability of your fence depends entirely on the strength of its foundational structure.

We solve this by engineering our fences for maximum durability. This starts with using robust materials and setting posts deeper in concrete footings for an unshakable anchor. We calculate the optimal spacing between posts to distribute the wind load evenly, preventing sagging over time. For wood fences, we use high-quality, moisture-resistant lumber and strong fasteners to prevent rot and warping. For aluminum and composite options, the inherent strength of the materials provides a powerful defense against the elements, ensuring your fence remains secure through any season.

The Value of Professional Installation

While it might be tempting to turn your fence installation into a weekend project, the precision required for a horizontal fence often makes it a job best left to professionals. The disadvantages of an improper installation, like sagging boards and wobbly posts, can appear quickly and lead to costly repairs. A professional installation is an investment in getting the job done right the first time.

Our installation process is meticulous from start to finish. We handle everything from site preparation and precise post alignment to ensuring every board is perfectly level and securely fastened. With our expertise, you avoid the common pitfalls that can compromise the fence’s appearance and structural integrity. You can see the quality of our craftsmanship in the finished projects on the Gappsi YouTube channel. A professionally installed Gappsi fence is built to last, giving you a beautiful, low-maintenance feature that enhances your property for years.

Completing Your Outdoor Living Space

A fence is so much more than a property line marker. It’s the finishing touch that frames your outdoor living space, tying all the different elements together into one cohesive design. A modern horizontal fence, in particular, acts as a beautiful backdrop that enhances everything from your garden beds to your patio lounge area. It’s the key to creating a private, stylish, and complete backyard retreat that feels intentional and well-designed from every angle. Think of it as the frame for your outdoor masterpiece.

Pairing Fences with Landscapes and Hardscapes

The best fence looks like it has always been part of your home’s design. A modern horizontal fence excels at this, offering a contemporary look that complements your yard without competing with it. The clean, parallel lines create a sense of order and sophistication that works beautifully with both soft, organic landscaping and structured hardscapes. Imagine how the sleek lines of a horizontal fence can make your flowerbeds pop or create a stunning contrast against the texture of your masonry patio. It’s a versatile choice that integrates seamlessly, making your entire outdoor space feel more unified and thoughtfully planned.

A Perfect Match for Pools, Patios, and Pergolas

A horizontal fence is the perfect partner for your favorite outdoor relaxation spots. Around a swimming pool, it provides essential privacy while adding a resort-like feel. The style brings a modern look and a sense of warmth that balances the cool blues of the water and the stone of the pool deck. Because you can customize the wood, color, and stain, you can create a seamless look across your entire backyard. You can match the stain of your fence to your pergola or choose a color that complements your patio furniture. This level of detail is what transforms a simple backyard into a truly personalized outdoor oasis.

Design Your Horizontal Fence with Gappsi

Choosing the right fence is a big decision, but you don’t have to make it alone. Bringing your vision for a modern horizontal fence to life is what we do best. At Gappsi, we combine our design expertise with a deep understanding of Long Island’s unique style to create a fence that’s not just a boundary, but a beautiful extension of your home. We handle every detail, from helping you select the perfect materials to ensuring a flawless, professional installation. Our goal is to make the entire process straightforward and enjoyable, leaving you with a stunning fence that you’ll love for years to come.

Expert Design and Material Selection

When you’re designing a horizontal fence, the material you choose is everything. It defines the look, durability, and maintenance of your new addition. We specialize in modern, powder-coated aluminum fences and netting that offer a sleek, contemporary aesthetic with incredible strength. As an exclusive dealer for SLEEKFENCE™ products, we provide top-tier fencing solutions that are warranted for 20 years. This high-quality aluminum won’t fade, warp, or rust, making it a perfect low-maintenance choice for homeowners who want lasting style without the constant upkeep. Our design team will work with you to select the ideal finish and style to perfectly complement your home’s architecture.

Our Local Expertise and Professional Installation

A great fence design deserves an equally great installation. With decades of experience serving homeowners across Long Island, we understand the local landscape, weather patterns, and architectural styles. Our professional installation team is committed to quality craftsmanship and exceptional customer service. We don’t just build fences; we create tailored solutions that enhance the beauty and functionality of your property. We ensure every post is secure, every board is level, and the final result stands strong against the elements. This commitment to quality is how we help you create a cohesive and beautiful outdoor living space that you and your family can enjoy.

Related Articles

Frequently Asked Questions

What’s the biggest advantage of choosing aluminum over wood for a horizontal fence? The main advantage is long-term durability with minimal effort. While wood has a classic charm, it is susceptible to warping, rotting, and sagging, especially in a horizontal layout on Long Island. Aluminum, particularly the powder-coated options we use, is engineered to resist rust, fading, and insect damage. This means you get a sleek, modern look that stays straight and strong for decades without needing the yearly staining or sealing that a wood fence requires.

Can a horizontal fence provide complete privacy? Absolutely. One of the best features of a horizontal fence is how easily it can be customized for privacy. The boards can be installed with no gaps between them, creating a solid, continuous screen. This design is perfect for enclosing a backyard, patio, or pool area, giving you a true sense of seclusion. It effectively blocks views from neighbors and passersby, turning your yard into a private retreat.

Will a horizontal fence work if my yard isn’t flat? Yes, and it can look fantastic on sloped properties when installed correctly. Instead of running the fence at an awkward angle, we use a technique called “stepping.” This involves adjusting the height of each fence panel to follow the contour of your land, creating a clean, tiered effect. This professional method ensures the horizontal lines remain crisp and level within each section, adapting beautifully to your yard’s unique topography.

Is a horizontal fence more expensive than a traditional vertical fence? The initial investment for a horizontal fence can sometimes be higher than for a basic vertical picket fence, largely due to the materials and the precision required for installation. However, it’s important to consider the total value. A modern horizontal fence adds significant curb appeal and can increase your property value. When you choose a low-maintenance material like aluminum, you also save money and time on long-term upkeep, making it a very cost-effective choice over its lifespan.

How much maintenance does a modern horizontal fence really need? The level of maintenance depends entirely on the material. If you choose a modern aluminum or composite fence, the upkeep is incredibly simple. These materials are designed to withstand the elements, so they don’t need painting or staining. A gentle cleaning with soap and water once or twice a year is usually all it takes to remove dirt and keep it looking new. This frees you from the demanding annual maintenance that comes with a traditional wood fence.

Gravel Driveway Installation with Italian Bianco Zandobbio Gravel

View Gappsi’s YouTube Channel to view Gravel Driveway Installation with Italian Bianco Zandobbio Gravel

A gravel driveway can offer a timeless, natural appearance that complements a wide range of architectural styles and landscape designs. However, maintaining an attractive gravel surface can be challenging when loose stones shift under vehicle traffic, create uneven areas, or require frequent redistribution. At Gappsi, we combine carefully selected materials with innovative installation techniques to create gravel driveways that deliver both visual appeal and everyday functionality.

Our gravel driveway installation, featuring an Italian-manufactured gravel stabilization system and 3/8-inch Bianco Zandobbio gravel, offers an elegant solution for homeowners seeking a refined, European-inspired look. By combining a properly prepared crushed bluestone base, a honeycomb-style stabilization grid, and distinctive imported Italian gravel, Gappsi creates a driveway that looks beautiful while keeping the gravel more securely in place.

What Is a Gravel Stabilization System?

Traditional gravel driveways rely on loose stone spread over a prepared base. Although gravel provides a natural aesthetic and complements many property types, loose material can shift under tire pressure, especially in areas with frequent vehicle traffic or repeated turning and braking.

A gravel stabilization system helps address these challenges by providing a structured surface that holds the gravel in place. The system used in this Gappsi installation is manufactured in Italy and features a honeycomb-style grid designed to contain the gravel within individual cells.

Once installed and filled with the selected aggregate, the grid helps create a more uniform driving surface. Instead of letting gravel move freely across the driveway, the cellular structure limits lateral displacement and maintains a more organized appearance.

For homeowners who appreciate gravel’s natural character but want a more controlled, polished finish, this system offers an appealing alternative to conventional loose-gravel installations.

Step 1: Preparing the Crushed Bluestone Base

A successful gravel driveway installation begins beneath the visible surface. Proper site preparation is essential to establish a stable foundation and support the finished driveway’s performance.

For this project, the installation begins with a carefully prepared and properly graded base of 3/8-inch crushed bluestone. This crushed stone provides the foundation for the stabilization system and helps create a consistent surface for the next stages of installation.

Grading is particularly important because it helps establish the driveway’s intended slope and supports appropriate surface-water movement. A well-planned base also helps reduce the likelihood of uneven areas developing over time.

Before installing the stabilization grid, the underlying surface must meet site-specific specifications for compaction, grading, and drainage. Soil conditions, expected vehicle loads, and the existing landscape can all influence how the base should be constructed.

At Gappsi, attention to these foundational details helps establish the conditions needed for a driveway that looks refined and performs as intended.

Step 2: Installing the Italian Gravel Stabilization Grid

Once the base has been prepared, the next step is installing the honeycomb-style gravel stabilization grid.

This specialized system creates a series of connected cells across the driveway surface. These cells contain the gravel and distribute it more evenly across the stabilized area.

The grid provides structure beneath the finished gravel layer while preserving the appearance of a traditional aggregate driveway. Because the system is filled with decorative stone, the stabilization components become largely concealed beneath the visible gravel surface.

This approach offers several practical advantages.

Improved gravel retention: The cellular structure helps keep gravel in place, reducing the tendency for stones to migrate under everyday vehicle traffic.

A more uniform appearance: By helping maintain an even distribution of aggregate, the grid supports a cleaner, more consistent finish across the driveway.

A more organized driving surface: The stabilized gravel layer can help reduce loose, scattered gravel in areas where vehicles regularly travel.

A refined landscape design: The system allows homeowners to enjoy the texture and natural character of gravel without relying entirely on a loose-stone surface.

As with any driveway system, the finished performance depends on proper installation, suitable materials, and site-specific preparation. The stabilization grid is an important part of the overall design, working with the base and selected gravel to create the finished surface.

Step 3: Filling the Grid with 3/8-Inch Italian Bianco Zandobbio Gravel

This driveway’s defining feature is 3/8-inch Bianco Zandobbio gravel, an imported Italian aggregate chosen for its distinctive natural appearance.

The gravel fills the honeycomb stabilization grid, creating the finished driving surface. Its light, elegant appearance provides a sophisticated alternative to more conventional driveway aggregates.

The Bianco Zandobbio material introduces a European-inspired aesthetic that can complement contemporary architecture, traditional homes, formal landscaping, and properties where carefully selected exterior finishes play an important role in the overall design.

The 3/8-inch aggregate size also contributes to the driveway’s visual character, creating a relatively fine gravel texture that looks cohesive across the finished surface.

The contrast between the structured stabilization system and the natural stone creates an attractive balance. The driveway retains the organic appearance homeowners appreciate about gravel while benefiting from an underlying system designed to help keep the material organized.

Material selection is an important part of any successful driveway project. When choosing the right aggregate, consider color, stone size, surrounding hardscape, landscape plantings, and the home’s exterior finishes. The goal is to create a driveway that serves as a practical access surface while enhancing the property’s overall appearance.

With Italian Bianco Zandobbio gravel, this installation shows how a thoughtfully selected aggregate can become a prominent design feature, not just a functional driveway material.

gravel-driveway-installation-with-italian-bianco-zandobbio-gravel

Why Combine Gravel Fix with Italian Decorative Gravel?

Combining a stabilization grid with imported decorative gravel brings together two key aspects of driveway design: performance and appearance.

Traditional gravel is valued for its natural texture, versatility, and understated beauty. However, keeping the surface neat can require periodic raking, replenishment, and redistributing displaced stones. A stabilization system helps address some of these maintenance challenges by providing a structure that supports the gravel.

When paired with Bianco Zandobbio gravel, the result is a driveway that feels more intentional and architecturally integrated.

For homeowners planning a new driveway or upgrading an existing one, this combination offers several considerations:

  • Natural beauty: Decorative Italian gravel creates a distinctive surface with an elegant, understated finish.
  • Gravel containment: The honeycomb grid helps limit stone movement and maintain a more consistent distribution.
  • Design flexibility: The finished appearance can complement a variety of architectural styles and landscape layouts.
  • Practical functionality: A well-designed base and stabilization system can support everyday residential vehicle use.
  • A polished presentation: Carefully selected stone and an organized surface give the driveway a more finished look.

Remember that stabilization does not eliminate all driveway maintenance. Some redistribution, replenishment, or surface adjustments may still be necessary over time, depending on weather, traffic, drainage, and site conditions. However, the system is designed to help reduce gravel movement compared with an equivalent loose-gravel surface.

Designing a Gravel Driveway That Complements Your Property

A driveway is one of the first features visitors notice when approaching a home. Its materials, layout, and overall condition contribute to the property’s curb appeal and create an impression before anyone reaches the front entrance.

Choosing a gravel driveway with a stabilization system lets homeowners keep a natural landscape aesthetic while adding a more structured, refined surface.

The light appearance of Bianco Zandobbio gravel works especially well when paired with stone walkways, masonry walls, landscaped borders, entrance gates, and other exterior features. Thoughtful transitions between the driveway and adjacent surfaces can further strengthen the overall design.

Planning should also account for the site’s practical demands. Driveway width, turning areas, slopes, drainage patterns, soil conditions, and daily vehicle traffic all influence the best installation approach.

A driveway that looks beautiful when complete should also be designed around how the property is used. By balancing visual details with functional requirements, homeowners can create an outdoor improvement that feels cohesive with the rest of the landscape.

Gappsi’s Approach to Gravel Driveway Installation

At Gappsi, our approach to outdoor improvements emphasizes the relationship between quality materials, careful preparation, and thoughtful design. This gravel driveway installation illustrates how specialized products and decorative stone can be combined to create an attractive and functional result.

The process brings together three essential components: a properly graded 3/8-inch crushed bluestone base, an Italian-manufactured honeycomb-style gravel stabilization system, and 3/8-inch Bianco Zandobbio gravel.

Each component contributes to the finished driveway. The prepared base provides the foundation, the grid contains the aggregate, and the imported Italian gravel delivers the distinctive look that defines the project.

The result is a driveway that offers the natural beauty of gravel with a more organized surface and an elegant, European-inspired finish.

Whether you are planning a new driveway or looking to improve an existing property, choosing the right materials and installation method can make a meaningful difference in both appearance and long-term usability.

Transform Your Property with a Custom Gravel Driveway

If you want the natural look of gravel without relying on a completely loose surface, a gravel stabilization system may be worth considering. Combining a structured grid with carefully selected decorative aggregate provides an opportunity to create a driveway that balances landscape design with practical performance.

Gappsi can help you explore driveway materials, stabilization options, and design considerations suited to your property’s architecture and site conditions.

Contact Gappsi to discuss your gravel driveway installation and discover how Italian Bianco Zandobbio gravel and a gravel stabilization system can enhance your home’s curb appeal.

Visit Gappsi.com to learn more about Gappsi’s outdoor design, hardscaping, and installation services.

Contact Gappsi Today

📍 Serving all of Long Island, NY — Nassau & Suffolk Counties
🌐 https://www.gappsi.com/
📞 Call now for a free consultation and estimate

SCHEDULE A MEETING TODAY WITH GAPPSI