A quality vinyl swimming pool built by a professional builder on Long Island NY.

How to Choose a Vinyl Swimming Pool Builder on Long Island NY

A swimming pool is rarely just a standalone feature; it’s the centerpiece of your entire outdoor living space. It should integrate perfectly with your patio, complement your landscape design, and create a cohesive environment for relaxing and entertaining. This is why you need more than just a pool installer—you need a design-build expert who sees the bigger picture. A premier vinyl swimming pool builder on Long Island NY understands how to create a complete backyard transformation. We’ll explore what sets these full-service companies apart and show you how to find a builder who can manage every element of your project, ensuring a beautiful and functional result.

Key Takeaways

  • Look for a Partner, Not Just a Contractor: Your builder’s qualifications are non-negotiable. Confirm they are fully licensed and insured on Long Island, and always ask to see a portfolio of their work and speak with past clients to gauge their quality and process.
  • Budget for the Full Picture: Plan for more than just the initial installation cost. A smart budget includes yearly maintenance expenses and sets aside funds for the eventual liner replacement, ensuring you can enjoy your pool without financial surprises.
  • Embrace the Flexibility of Vinyl: Vinyl pools offer a winning combination of a lower upfront cost and faster installation. They also provide incredible design freedom, allowing you to create a custom shape and size with a smooth, comfortable finish for your family.

How to Choose the Right Vinyl Pool Builder on Long Island

Choosing the right builder for your vinyl pool is one of the most important decisions you’ll make in your backyard transformation journey. This isn’t just about hiring a contractor; it’s about finding a partner who understands your vision and has the expertise to bring it to life. A great builder ensures the process is smooth and the final result is a beautiful, well-crafted pool you’ll enjoy for years. To find the best fit for your Long Island home, you need to know what to look for and what questions to ask. Let’s walk through the key things to consider so you can move forward with confidence.

What Defines a Great Pool Builder?

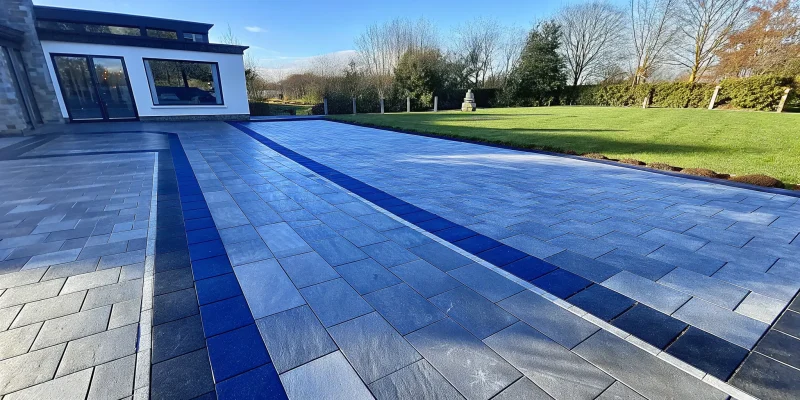
A great pool builder has a proven track record and a deep understanding of inground pool construction, especially with vinyl liners. They should be able to walk you through various options and explain the pros and cons of each. Look for a company that offers comprehensive services. A team that can handle not just the swimming pool installation but also the surrounding patio, landscaping, and fencing creates a more seamless and cohesive project. This integrated approach saves you the headache of coordinating multiple contractors and ensures every element of your backyard oasis works together perfectly. A true expert is a one-stop shop for your entire outdoor living space.

Verifying Licenses and Insurance

This step is non-negotiable. Before you sign any contracts, you must verify that your potential pool builder is fully licensed and insured to work in Long Island. A reputable contractor will readily provide you with proof of their credentials and liability insurance. Don’t be shy about asking for this documentation. This is your assurance that they operate legitimately and that you are protected from any potential accidents or issues that could arise during construction. Transparency here is a huge indicator of a trustworthy and professional company. It’s a simple check that protects your home, your investment, and your peace of mind.

Assessing Materials and Craftsmanship

The quality of your pool comes down to two things: the materials used and the skill of the people installing them. Ask potential builders about the specific types of vinyl liners they use and why they recommend them for the Long Island climate. A knowledgeable builder will explain the durability and warranty of their products. More importantly, ask to see their work. A portfolio of completed projects is essential. Pay close attention to their past vinyl pool installations to see the details—the smoothness of the liner, the precision of the coping, and the overall finish of the surrounding masonry and stonework. This visual proof is the best way to gauge their experience and commitment to quality craftsmanship.

Vetting Your List of Potential Pool Builders

Once you have a shortlist of potential builders, it’s time to do some homework. This is the most critical phase of your decision-making process, where you move beyond websites and brochures to truly understand who you might be working with. A great builder does more than just install a pool; they act as a trusted partner, guiding you through every step. Taking the time to properly vet your candidates will give you the confidence that your investment is in good hands and that the final result will be the backyard oasis you’ve always wanted.

The Gappsi Standard: A Benchmark for Quality

When you start evaluating builders, it helps to have a benchmark for excellence. A company with a long-standing reputation sets a high bar for what you should expect. For example, at Gappsi, we specialize in constructing and installing both vinyl liner and gunite swimming pools for homes and commercial properties across Long Island. This expertise shows a deep understanding of different materials and building techniques. A builder’s commitment to quality craftsmanship and customer satisfaction should be evident in every interaction. Use this as your standard—does the builder you’re considering have a proven track record and a clear dedication to delivering a superior product?

What Sets a Premier Builder Apart

So, what specific qualities should you look for? A premier pool builder stands out from the competition in a few key ways. First, look for versatility. A company with expertise in various pool types and a full-service renovation team demonstrates a broad skill set and the ability to handle diverse project requirements. This adaptability means they can find the perfect solution for your unique space and needs. A premier builder also has an established process, clear communication channels, and a professional team that respects your property and your time. They should be able to answer your questions thoroughly and provide clear, detailed proposals.

Reviewing Portfolios and Client Testimonials

One of the best ways to gauge a builder’s work is to see it for yourself. Ask to review their portfolio of completed projects. Do the pools they’ve built reflect the level of quality and style you envision for your own backyard? Pay attention to the details in the photos, from the smoothness of the liner to the precision of the surrounding stonework. Beyond pictures, see what past customers have to say. Reading through client testimonials offers invaluable insight into the actual customer experience. Honest feedback can tell you a lot about a builder’s communication, timeliness, and what it’s really like to work with them from start to finish.

What Does a Vinyl Pool Cost on Long Island?

Let’s talk numbers. Understanding the potential investment for a vinyl pool is one of the first steps in planning your backyard oasis. While every project is unique, we can look at some typical price ranges on Long Island to give you a clear starting point. The final cost will depend on the size, features, and builder you choose, but having a ballpark figure helps you set a realistic budget from day one.

Remember, the initial price tag is just one part of the equation. It’s also smart to think about the long-term costs associated with maintenance and upkeep. A quality installation from a reputable builder can save you money down the road by minimizing repairs and extending the life of your pool liner.

Breaking Down the Average Investment

On Long Island, the average cost to install an in-ground vinyl liner pool typically falls between $35,000 and $65,000. A basic, smaller pool (around 12’ x 24’) with standard equipment like a heater, filter, steps, and a simple concrete deck will likely land you in the $45,000 range. Of course, you can scale up or down from there. A more modest 10’x20′ pool with minimal features might start closer to $20,000. On the other hand, if you’re dreaming of a large, freeform pool with a waterfall, a high-end deck, and a diving board, your investment could reach $85,000 or more. These figures give you a solid idea of what to expect as you begin exploring different swimming pools.

Factors That Influence the Final Price

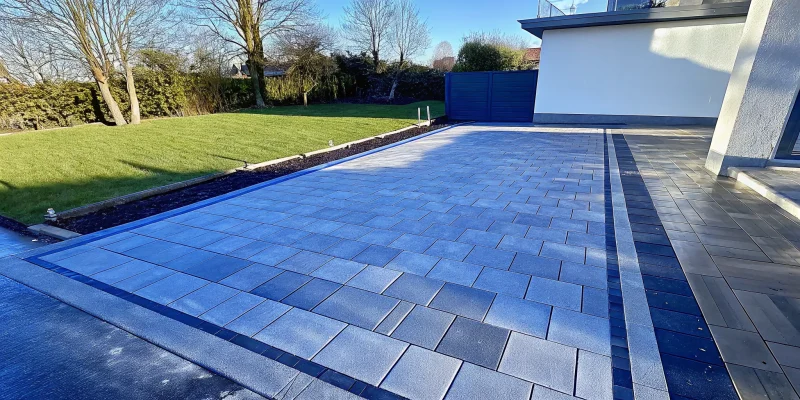
So, what causes that wide price range? Several key factors come into play. The most obvious is size—a larger pool requires more materials and labor, driving up the cost. Installation labor itself is a significant part of the budget, often accounting for 25% to 50% of the total project cost. The materials you choose for features like coping (the edge around the pool) and the surrounding deck also make a big impact. While basic concrete is the most budget-friendly decking option, upgrading to elegant natural stone pavers or custom masonry will add to the final price while creating a more luxurious finish.

Planning for Long-Term Maintenance Costs

Beyond the initial installation, it’s wise to budget for the ongoing care of your vinyl pool. Yearly maintenance, which includes chemicals and regular upkeep, generally costs between $350 and $800. The biggest long-term expense to plan for is the eventual liner replacement. A high-quality vinyl liner can last for many years with proper care, but eventually, it will need to be replaced. This typically costs between $4,000 and $7,000, depending on the pool’s size, liner thickness, and whether any structural repairs are needed. Factoring these future costs into your budget ensures you can enjoy your pool for years to come without any financial surprises.

Why Choose a Vinyl Pool for Your Home?

When you start picturing a pool in your backyard, you’ll quickly discover there are a few different types to choose from. Vinyl liner pools are an incredibly popular option here on Long Island, and for good reason. They offer a fantastic combination of affordability, design flexibility, and quick installation that makes the dream of pool ownership accessible for many families.

If you’re looking for a pool that can be tailored to your yard without an astronomical price tag, vinyl is worth a serious look. Let’s get into the specific advantages that make vinyl pools a standout choice and clear up some common questions you might have about them.

The Benefits: Cost and Installation Speed

One of the most compelling reasons to choose a vinyl pool is the initial investment. On average, installing an in-ground vinyl pool is significantly more budget-friendly than a concrete or fiberglass alternative, with typical costs falling between $35,000 and $65,000. This lower price point allows you to allocate more of your budget to other backyard features, like a beautiful stone patio or a new pergola.

Beyond the savings, you’ll also get to enjoy your pool much sooner. The construction process for vinyl swimming pools is faster and less complex than other in-ground options. This means less disruption to your yard and more time for your family to splash around during the summer.

Custom Designs and a Smooth Finish

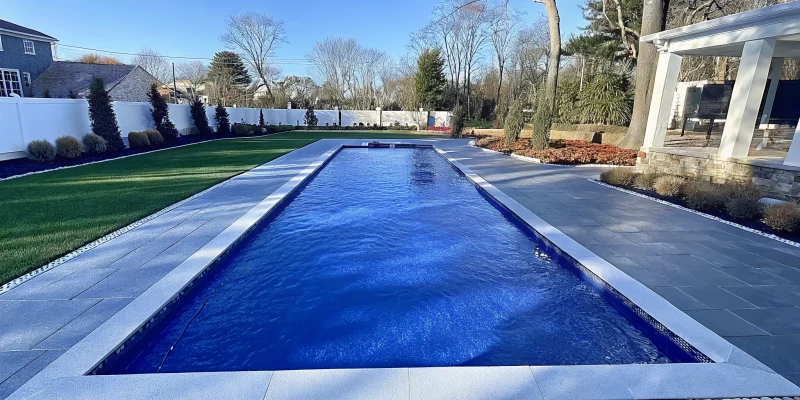
Forget the idea of a cookie-cutter pool. Vinyl pools offer amazing design freedom, allowing you to create a shape, size, and depth that perfectly suits your backyard and your family’s needs. Whether you envision a classic rectangle for swimming laps or a freeform lagoon style integrated into your landscape design, a vinyl liner can make it happen.

Another major plus is the feel of the pool itself. The vinyl liner provides a smooth, non-abrasive surface that’s gentle on your feet and won’t snag swimsuits. This soft finish is especially appreciated by families with young children who spend hours playing in the water. It’s a small detail that makes a big difference in your day-to-day enjoyment.

Debunking Common Vinyl Pool Myths

It’s smart to consider every angle, so let’s talk about some of the common concerns with vinyl pools. You may have heard they require more maintenance or don’t add as much resale value to your home. While there’s some truth to this, it’s important to have the full context. A vinyl liner does require regular care, like keeping your water chemistry balanced and checking for any potential tears. However, this is part of routine ownership for any pool type.

As for resale value, while a concrete pool might have a slight edge, any well-maintained, beautifully designed in-ground pool is a major asset that adds appeal to your property. With proper care and occasional restoration services, your vinyl pool will provide decades of fun and be a fantastic selling point if you ever decide to move.

Key Questions to Ask Your Pool Builder

Once you have a shortlist of potential builders, it’s time to start the conversation. This is your chance to understand their process, confirm their qualifications, and see if they’re the right fit for your project and your family. A reputable builder will welcome your questions and provide clear, confident answers. Think of this as an interview—you’re hiring a team for a major addition to your home, and you deserve to feel completely comfortable with your choice. Being prepared with the right questions helps you compare builders effectively and ensures there are no surprises down the road.

Inquire About Their Process and Experience

First, you need to get a feel for their background and how they operate. A builder with deep roots in the community and a long history of successful projects is a great sign. Don’t be shy about asking for specifics. You’ll want to know how long they’ve been building swimming pools on Long Island and if they have experience with vinyl liner pools similar to what you envision. Ask to see a portfolio of their past work and for a few client references you can speak with. It’s also critical to confirm they are fully licensed and insured in New York. This protects you from liability and ensures they meet professional standards.

Clarify Costs, Timelines, and Warranties

This is where you get into the nitty-gritty details of the project. A professional builder should provide a detailed, itemized quote that breaks down all the costs—no hidden fees. Ask them to walk you through the entire construction timeline, from excavation to the final fill, so you know what to expect. You should also ask about their payment schedule. A major red flag is a builder who asks for the full amount upfront. Finally, make sure you understand the warranties they offer. There should be separate warranties for the vinyl liner, the equipment (like pumps and filters), and the workmanship itself. A strong warranty shows that a builder stands behind their work.

Ask About Ongoing Support and Service

Your relationship with a pool builder shouldn’t end the day the water goes in. A swimming pool is a long-term investment that requires care, so you’ll want a partner you can rely on for years to come. Ask what kind of support they offer after the project is complete. Do they teach you how to operate the equipment and manage the water chemistry? Do they offer seasonal opening and closing services? It’s also wise to find out if they handle repairs or offer maintenance services for the pool and surrounding patio. Choosing a full-service company ensures you have expert help whenever you need it.

How to Care for Your New Vinyl Pool

Once your beautiful new vinyl pool is installed, a little routine care will keep it sparkling and ready for fun for years to come. Don’t worry, it’s not as complicated as it sounds! Taking care of your pool is all about consistency. By creating a simple maintenance schedule, you can protect your investment and ensure your backyard oasis remains a source of joy, not a chore. Think of it as a simple weekly to-do list that pays off with a perfect, swim-ready pool all season long. From balancing the water to getting it ready for winter, we’ll walk through the essentials.

Keeping Your Water Chemistry Balanced

Think of your pool water as a delicate ecosystem. When everything is in balance, it’s clear, comfortable, and safe for your liner. The most important thing is to test your water regularly. You’ll want to keep the pH level between 7.2 and 7.6. If it’s too high or too low, it can irritate swimmers’ skin and eyes and even damage your liner over time. Another key measurement is calcium hardness, which should stay between 150-250 parts per million (ppm). Too little calcium can cause foaming, while too much can lead to cloudy water and scaling on your pool surfaces. Consistent testing and adjustments are the secret to perfect water balance and a healthy pool.

Simple Ways to Protect Your Liner

Your vinyl liner is durable, but it appreciates a gentle touch. The best way to protect it is to avoid harsh, abrasive cleaning tools and chemicals. When brushing the walls, always use a soft-bristled brush designed specifically for vinyl pools. It’s also a good idea to establish a “no sharp objects” rule for pool toys to prevent accidental punctures or tears. Make a habit of visually inspecting the liner for any signs of wear. Catching a small issue early can prevent a bigger, more expensive repair down the road. Finally, maintaining the proper water level helps keep the liner properly seated and prevents unnecessary stress, ensuring it stays smooth and secure.

Seasonal Maintenance and Winterizing Tips

Here on Long Island, getting your pool ready for the off-season is a critical step. Properly winterizing your vinyl pool protects it from the harsh freeze-thaw cycles of winter. Before you close it up, you’ll want to make sure the water chemistry is perfectly balanced. Then, lower the water level to just below the skimmer line and add a dose of winterizing chemicals to prevent algae growth. The final, and perhaps most important, step is securing a high-quality safety cover. A good cover not only keeps out leaves and debris but also blocks UV rays, which can degrade the vinyl over time. Following a proper winterizing process ensures an easier and faster pool opening next spring.

Related Articles

Frequently Asked Questions

How long does it typically take to build a vinyl pool? While the installation of the pool itself is relatively quick, the entire process from signing a contract to your first swim usually takes a few weeks. This timeline accounts for essential steps like securing permits, excavation, and scheduling inspections. A well-organized builder will give you a clear schedule upfront so you know exactly what to expect and when each phase of the project will be completed.

Why should I hire one company for my entire backyard project instead of separate contractors? Using one comprehensive company to handle your pool, patio, and landscaping creates a seamless and stress-free experience. It ensures a cohesive design where every element works together beautifully. You’ll have a single point of contact, which simplifies communication and eliminates the headache of trying to coordinate the schedules of a mason, a landscaper, and a pool installer. This integrated approach almost always leads to a better final result and a much smoother process for you.

How long can I expect a vinyl liner to last, and how will I know when it’s time for a replacement? With proper care and balanced water chemistry, a quality vinyl liner can last for many years. You’ll know it’s nearing the end of its life when you start to see visible signs of aging, such as significant fading, staining, or wrinkles that won’t go away. Small tears or leaks are also a clear indicator that it’s time to start planning for a replacement to keep the pool’s structure protected.

Are vinyl pools a good option for saltwater systems? Yes, you can absolutely use a saltwater system with a vinyl liner pool. The smooth, non-porous surface of the liner is well-suited for salt water. The key is to ensure that other components of the pool, like the wall panels and any metal fixtures, are made from polymer or another corrosion-resistant material. A knowledgeable builder can guide you in selecting the right equipment to enjoy the soft, silky feel of a saltwater pool without worrying about damage.

Besides the pool itself, what other costs should I factor into my budget? It’s smart to plan for a few additional items to complete your backyard oasis. Most towns on Long Island require a safety fence with a self-latching gate around the pool area, so that will be a necessary expense. You’ll also need to budget for electrical work to power the pump and any lighting. Finally, consider the finishing touches like landscaping around the pool and any new patio furniture you’ll want for lounging.

Share this page:
Getting a quote for a new paver driveway with a modern design.

How to Get a Quote for a Paver Driveway: 5 Steps

As a Long Island homeowner, you know our local climate presents unique challenges, from humid summers to freezing winters. These conditions have a real impact on how a paver driveway should be built and, consequently, how much it costs. A proper installation needs to account for our region’s freeze-thaw cycles to prevent shifting and heaving for years to come. That’s why local expertise is so important. This guide will cover all the factors that influence cost, with a special focus on what matters right here in Suffolk and Nassau County. Before you get a quote for paver driveway services, learn what it takes to build one that lasts.

Key Takeaways

  • Understand What Shapes Your Budget: Your final paver driveway cost is a blend of several key elements. The price is determined by your choice of materials, the driveway’s size and layout, the amount of ground preparation required, and any custom design features you add.
  • Do Your Homework for Accurate Quotes: You’ll get much clearer and more useful estimates by preparing a few things first. Measure your driveway’s square footage, gather some ideas for paver styles and designs, and set a realistic budget before you start calling contractors.
  • Analyze Quotes for Value, Not Just Price: The lowest bid isn’t always the best choice. A professional quote should be a detailed roadmap, itemizing all costs for materials, labor, and site prep, and it should always include clear warranty information.

What Determines Your Paver Driveway Cost?

When you start thinking about a new paver driveway, one of the first questions that comes to mind is, “How much will this cost?” The truth is, there’s no single price tag. The final cost is a blend of several key factors, from the materials you fall in love with to the unique characteristics of your property. Think of it less like buying a product off the shelf and more like commissioning a custom piece of work.

Understanding these variables will help you set a realistic budget and make informed decisions when you start collecting quotes. Each choice you make, from a simple, classic layout to an intricate, multi-toned pattern, will influence the bottom line. Let’s walk through the five main elements that shape the cost of a paver driveway, so you know exactly what to expect.

Your Choice of Materials

The type of paver you choose is one of the biggest factors in your project’s total cost. There’s a wide world of options out there, each with its own price point and aesthetic. For example, concrete pavers are often a more budget-friendly choice, while classic brick pavers can carry a higher price tag, partly because they require specialized installation. High-end materials like natural stone or premium porcelain pavers will be at the top of the price range but offer unparalleled durability and a luxurious look. Your material choice sets the foundation for both the style and the budget of your new driveway.

Driveway Size and Layout

It might seem obvious, but the bigger your driveway, the more it will cost. A larger surface area requires more pavers, more base material, and more hours of labor to install. It’s a straightforward calculation: more square footage equals a higher price. But it’s not just about size; the layout matters, too. A simple rectangular driveway is less complex to install than one with sweeping curves, multiple angles, or a circular inlay. These more intricate designs require extra time for precise cuts and placement, which adds to the labor costs.

Ground Preparation Needs

A beautiful paver driveway is only as good as the foundation it’s built on. Proper ground preparation is absolutely essential for a long-lasting result, and the condition of your existing property plays a big role in the cost. If your land is sloped, uneven, or has poor drainage, your contractor will need to do extra work to create a stable base. This could involve extensive excavation, grading the soil, or adding materials to manage water flow. Addressing issues like large tree roots or soft soil is critical to prevent shifting and cracking down the line, making expert masonry and site prep a worthwhile investment.

Design Complexity and Custom Features

This is where you can really let your personal style shine, but it’s also where costs can climb. Simple, straightforward paver patterns are the most cost-effective. If you want to add custom features like decorative borders in a contrasting color, intricate patterns like herringbone or basketweave, or built-in elements like steps or retaining walls, expect the price to increase. These details require more planning, precision, and time from the installation crew. While custom features create a stunning, one-of-a-kind look, they add a layer of complexity that is reflected in the final quote.

Long Island’s Climate and Soil

Living on Long Island means dealing with specific environmental conditions that can impact your driveway’s longevity. Our region’s freeze-thaw cycles are particularly tough on paved surfaces. In winter, moisture in the ground freezes and expands, and then thaws and contracts, which can cause pavers to shift, heave, and become uneven over time. A contractor with local expertise will understand Long Island’s unique soil conditions and build a robust base designed to withstand these seasonal changes. This specialized knowledge is crucial for ensuring your investment lasts for years without needing constant repairs.

How to Prepare Before Requesting Quotes

Getting ready to ask for quotes is about more than just picking up the phone. A little preparation on your end helps contractors provide a much more accurate and detailed estimate right from the start. When you have a clear idea of your project’s scope, materials, and budget, you can have more productive conversations and compare your options with confidence. Taking these five steps will streamline the entire process, ensuring you find the right team for your new paver driveway.

Measure Your Driveway Area

Before you can get a realistic estimate, you need to know the size of the space you’re working with. Grab a tape measure and calculate the total square footage of your driveway. To do this, simply multiply the length by the width. If your driveway has an irregular shape, break it down into smaller rectangles or squares, measure each one, and add the totals together. Having this number handy is the first piece of information any contractor will ask for, as it’s the foundation for calculating material and labor costs. This simple step helps set a baseline for your project and makes initial conversations much more efficient.

Research Paver and Design Options

The materials and design you choose have the biggest impact on your final cost. Do you envision classic cobblestone, sleek porcelain, or durable concrete pavers? Spend some time exploring different paver materials and colors to find a style that complements your home. Think about design complexity, too. Simple layouts are more budget-friendly, while custom patterns, intricate borders, or built-in steps will add to the overall investment. Having a few ideas or inspiration photos ready will help a designer understand your vision and quote the project accurately.

Find Qualified Local Contractors

Your driveway is a long-term investment, so you want to partner with a contractor you can trust. Look for local companies with a strong portfolio of paver projects and positive client reviews. A qualified professional should be fully licensed and insured, protecting you from any potential issues. Don’t hesitate to ask for references so you can hear directly from past customers about their experience. The goal is to find an experienced team that not only does great work but also communicates clearly and respects your home.

Prep Your Property for a Site Visit

Once you’ve narrowed down your list of contractors, they’ll need to visit your property to assess the site. Before they arrive, make sure the driveway area is clear of cars, equipment, or debris so they can get a good look. Be prepared to discuss any known issues with the land. For example, if your yard has poor drainage, is on a steep slope, or has large tree roots nearby, it will likely require more extensive ground preparation. Pointing these things out ensures the contractor can account for any extra excavation or grading work in their quote, preventing surprises later on.

Set a Realistic Budget

Knowing your budget is essential before you start collecting quotes. While online calculators can give you a rough idea—often between $18 and $24 per square foot for basic installation—your actual costs will vary based on materials, design, and site conditions. Having a clear budget helps you and your contractor make decisions about which materials and features are the best fit for your project. It also allows you to compare quotes effectively, as you’ll be able to see how each company proposes to bring your vision to life within your financial plan.

What Should Be in a Paver Driveway Quote?

Think of your quote as the roadmap for your project. It’s more than just a final price; it’s a detailed breakdown that shows you exactly what you’re paying for. A thorough, transparent quote is the hallmark of a professional contractor and your best tool for avoiding surprise costs and misunderstandings down the road. When you receive an estimate, it should be clear, comprehensive, and easy to understand. It should leave you feeling confident about the investment you’re making in your home.

A great quote itemizes every aspect of the job, from the specific pavers you’ve chosen to the warranty that protects your new driveway. It ensures that you and your contractor are on the same page before any work begins. At Gappsi, we believe this transparency is non-negotiable. We want you to be fully informed about every detail of your project. Let’s walk through the key components you should always look for in a paver driveway quote to ensure you’re getting a complete picture.

A Breakdown of Material Costs

Your quote should start with a clear, itemized list of all materials. This isn’t just about the pavers themselves; it should include everything needed to build a lasting driveway. Look for specifics like the type of paver (e.g., concrete, brick, or natural stone), the manufacturer, style, and color. The quote should also list the costs for the base aggregate, bedding sand, joint sand, and edge restraints. Having this level of detail allows you to see exactly how your material choices impact the total cost and makes it easier to compare different options if you’re still deciding between a few porcelain and natural stone styles.

Labor and Installation Fees

Labor is a significant portion of your driveway’s cost, and the quote should reflect what that investment covers. A vague “labor” line item isn’t enough. A professional quote will break down the labor costs associated with each major step of the installation process: excavation of the old surface, preparation of the base, the precise laying of each paver, and the finishing touches. The cost of labor often reflects the experience and skill of the crew. A team of expert masonry craftsmen ensures your driveway is not only beautiful but also engineered to withstand Long Island’s weather for years to come.

Site Prep and Excavation Expenses

The long-term durability of your paver driveway depends entirely on what’s underneath it. That’s why site preparation is so critical. Your quote must detail all the work involved in getting the ground ready. This includes the cost of removing and disposing of your old driveway, excavating soil to the proper depth, and grading the area to ensure correct water drainage away from your home. If your property has unique challenges, like poor soil or a steep slope, the quote should specify any additional steps and costs required to create a stable foundation for your pavers.

Permits, Timelines, and Additional Costs

A comprehensive quote looks beyond just materials and labor. It should also address the administrative side of the project. Check if the contractor includes the cost and responsibility of securing any necessary permits from your local town or village. The quote should also provide a clear, realistic project timeline, outlining the start date and estimated completion. Finally, be sure to clarify any potential extra costs. Ask if the price includes debris removal, sales tax on materials, and any other fees. Getting these details in writing upfront helps you stick to your budget and prevents last-minute surprises.

Warranty and Guarantee Details

Your new driveway is a major investment, and it should be protected. A reputable contractor will always stand behind their work with a solid warranty. Your quote or contract should clearly outline the details of this guarantee. Typically, there are two parts: a manufacturer’s warranty on the pavers themselves against defects, and a contractor’s warranty on the workmanship. The workmanship guarantee is your assurance that the driveway was installed correctly and protects you from issues like sinking or shifting pavers. A strong warranty is a sign that the contractor is confident in their materials and installation quality.

How to Compare Quotes from Different Contractors

Once you have a few quotes in hand, it’s time to compare them. This isn’t just about finding the lowest number; it’s about finding the best value and the right partner for your project. A paver driveway is a significant investment in your home’s curb appeal and functionality, so choosing a contractor who is transparent, qualified, and reliable is just as important as the final price. A thorough comparison will help you spot potential issues before they become expensive problems, ensuring your project runs smoothly from start to finish and that you’ll love the results for years to come.

Look for Transparency and Completeness

A trustworthy quote is a detailed one. Be wary of any contractor who gives you a single “flat rate” without explaining what it covers. A professional quote should break down the costs clearly, including the specific types of pavers, base materials, labor, site preparation, and the projected timeline. If a contractor isn’t forthcoming with these details, it could be a sign that they might cut corners later. A transparent contractor will be happy to walk you through their estimate and answer any questions you have about their masonry construction process, ensuring you know exactly what you’re paying for.

Verify Credentials and Insurance

Before you even think about signing a contract, do a little homework. Confirm that the contractor has the proper licensing to work in your area of Long Island and, most importantly, that they carry both liability insurance and workers’ compensation. This isn’t just a formality; it protects you. If an accident happens on your property and the contractor isn’t insured, you could be held financially responsible. You can verify a contractor’s license through official state resources. Any reputable company will readily provide proof of their credentials and insurance coverage upon request.

Spot Pricing Red Flags

While a competitive price is great, an unusually low bid should make you pause. A quote that drastically undercuts all the others might indicate that the contractor is using subpar materials, inexperienced labor, or is simply desperate for work. These are major red flags. Scams are also a real concern, so look for signs of a legitimate business operation. Does the company have a physical address you can visit? Do they have branded vehicles and professional communication? A well-established company with a solid local reputation is often the safer, more reliable choice for your home.

Check References and Past Projects

A contractor’s past work is the best indicator of their future performance. Ask for a list of recent clients you can speak with and don’t be shy about calling them. Ask about their experience with the crew, the project timeline, and how the final result has held up. A great contractor will be proud of their work and happy to provide references. You should also ask to see a portfolio of their completed projects. Reviewing a gallery of their work, like the projects on the Gappsi YouTube channel, gives you a clear idea of their design style and craftsmanship.

What to Ask Before You Hire a Contractor

You’ve gathered the quotes, and now you’re close to making a final decision. This is the crucial last step: a final round of questions to make sure you’re choosing a partner, not just a paver installer. A reputable contractor will be happy to answer these questions and provide the details you need to feel confident. Think of this as a final interview to ensure they’re the right fit for you and your home. Asking the right questions now can save you from major headaches down the road and ensure your project runs smoothly from start to finish.

Their Experience and Expertise

First things first, you need to confirm they have the right experience for your specific project. Don’t just ask if they’ve installed driveways before; ask to see a portfolio of paver driveways they’ve completed right here on Long Island. A contractor with deep local experience will understand the soil conditions and weather patterns that can affect your installation. When you’re vetting a company, look for proper licensing and insurance to protect yourself. Any professional masonry designer will have this readily available. Ask them about their team’s training and what makes their installation process stand out from the competition.

The Project Timeline and Schedule

Getting a clear timeline is about more than just knowing when you can park on your new driveway. It’s about understanding the entire flow of the project. An experienced contractor should be transparent about the schedule and what to expect each day. Ask for an estimated start and completion date, but also dig a little deeper. How will they handle potential weather delays? Who will be on-site managing the crew? Understanding the project schedule helps you plan your life around the work and sets realistic expectations for everyone involved, ensuring there are no surprises once the work begins.

Payment Terms and Change Order Policies

Talking about money upfront is essential for a healthy working relationship. A clear contract should outline the total cost and a detailed payment schedule. Typically, this involves a deposit, one or more payments at key milestones, and a final payment upon completion. It’s also smart to ask how they handle changes. What happens if you decide you want to add a walkway halfway through? Or what if they discover an unexpected issue during excavation? Understanding their process for change orders will help you avoid unexpected costs and keep your project on budget.

Their Communication and Material Sourcing Process

Clear communication is the glue that holds a project together. Ask who your primary point of contact will be and how they’ll keep you updated on progress—will it be through daily check-ins, texts, or emails? You should feel comfortable with their communication style. Equally important is where they get their materials. The durability and beauty of your driveway depend on the quality of the pavers. Ask where they source their porcelain and natural stone and why they trust those suppliers. A contractor who is proud of their materials is a good sign they’re committed to a high-quality result.

Related Articles

Frequently Asked Questions

Is there a general price per square foot I can use for my initial budget? While the blog mentions a starting range of $18 to $24 per square foot, it’s best to think of that as a baseline for a straightforward project with standard materials. Your final cost will really depend on your specific choices. If you opt for premium materials like natural stone or a complex herringbone pattern, or if your property requires significant grading, the price will be higher. The most reliable way to budget is to get a detailed, custom quote based on your unique site and vision.

How long can I expect a professionally installed paver driveway to last? A paver driveway is a fantastic long-term investment for your home. When it’s built on a properly prepared foundation by an experienced crew, you can expect it to last for 25 years or even longer. The key to this longevity isn’t just the pavers themselves, but the expert installation underneath that prevents sinking and shifting over time, ensuring it looks great for decades.

Why is the base preparation so critical, especially here on Long Island? On Long Island, we deal with freeze-thaw cycles every year. When moisture in the ground freezes, it expands and pushes upward; when it thaws, it contracts. Without a deep, properly compacted base, this constant movement will heave and shift your pavers, creating an uneven and unsafe surface. A professional installation accounts for this by building a robust foundation that remains stable through our changing seasons, protecting your investment.

What kind of maintenance will my new paver driveway require? Paver driveways are refreshingly low-maintenance. For the most part, you’ll just need to sweep it regularly to keep it clear of debris and occasionally rinse it with a hose. If a weed happens to pop up in a joint, it’s easy to remove. To keep it looking its best, you can also have it professionally cleaned and sealed every few years, which helps protect the pavers from stains and weather.

Can I save money by doing some of the work, like demolition, myself? It can be tempting to handle the demolition of an old driveway yourself to cut costs, but it often creates more problems than it solves. Proper excavation and base preparation are technical skills that set the stage for the entire project’s success. If the ground isn’t prepared correctly, it can lead to drainage issues or an unstable foundation that will cost more to fix later. It’s usually best to let a professional team manage the entire process to ensure every layer is built to last.

Share this page:
A small paver driveway idea with a modern geometric pattern for big curb appeal.

9 Small Paver Driveway Ideas for Big Curb Appeal

The right design can completely change the perception of your driveway, making a small space feel much larger and more impressive. It’s all about using visual tricks to your advantage. Lighter-colored pavers, for example, reflect sunlight and create a bright, open feeling. Laying pavers in a diagonal pattern, like a herringbone, can draw the eye outward, giving the illusion of a wider and longer area. This is where smart design meets style. We’ve gathered our favorite small paver driveway ideas to show you how strategic choices in color, pattern, and texture can maximize your space and create a grand entrance, no matter the square footage.

Key Takeaways

  • Use Strategic Design to Maximize Your Space: Select lighter paver colors to create a bright, open feel, and choose patterns like herringbone to draw the eye outward, making the driveway appear wider and longer.
  • Select a Paver Material That Fits Your Home and Lifestyle: Consider the trade-offs between different materials—concrete offers versatility and value, brick provides timeless charm, and natural stone delivers a premium, one-of-a-kind look.
  • Prioritize Professional Installation for a Lasting Driveway: The most critical factor for a long-lasting paver driveway is a solid foundation. Proper site prep, drainage, and secure edging prevent common issues like sinking, shifting, and water damage.

Why Choose Pavers for a Small Driveway?

When you have a small driveway, every square foot counts. You might think your options are limited to a simple slab of concrete or asphalt, but that’s where pavers come in. Choosing pavers for your driveway is one of the smartest upgrades you can make, transforming a purely functional space into a standout feature that enhances your home’s entire exterior. They offer a level of design flexibility that other materials just can’t match. With a huge range of colors, shapes, and materials—from classic brick to sleek porcelain and natural stone—you can create a custom look that perfectly complements your home’s style.

Beyond their good looks, pavers are incredibly durable. Unlike poured concrete or asphalt that can crack under pressure and weathering, pavers are individual units that can shift with the ground and handle heavy loads without breaking. If a paver does get damaged or stained, you can simply replace that single piece instead of redoing the entire driveway. This makes maintenance much simpler and more cost-effective over the long run. A professional masonry designer can also install permeable pavers, which allow rainwater to seep into the ground instead of creating puddles or runoff. This is a fantastic, eco-friendly solution for managing drainage in a compact space. All these benefits—stunning curb appeal, lasting strength, and smart function—add up to a significant increase in your property value.

Find the Best Paver Material for Your Space

Choosing the right paver material is about finding the perfect balance between your home’s style, your budget, and the demands of a Long Island climate. The material you select will define your driveway’s look, durability, and maintenance needs for years to come. From the classic appeal of brick to the modern edge of porcelain, each option offers a unique set of benefits. Let’s walk through the most popular choices to help you find the ideal fit for your home.

Concrete: The Versatile and Budget-Friendly Choice

If you’re looking for a dependable and stylish option that won’t break the bank, concrete pavers are an excellent choice. They are incredibly durable, easy to install, and come in a huge variety of shapes, sizes, and colors. This versatility allows you to create a look that’s uniquely yours, whether you prefer a simple, clean layout or a more intricate design. Because they are manufactured, they offer a consistent and uniform appearance. Concrete pavers are a practical solution for enhancing your curb appeal, giving you a high-end look with a more accessible price tag.

Brick: Timeless Charm with Unbeatable Durability

For a classic, traditional look, nothing beats the warmth and character of brick. Brick pavers bring a sense of history and elegance to any driveway, complementing architectural styles from colonial to cottage. They are known for their exceptional durability and color retention, meaning they won’t fade from sun exposure over time. While the color palette is more limited than concrete, the rich, earthy tones of brick are timeless. Installation can be more intensive, but the result is a charming and long-lasting surface that adds significant character to your home’s exterior.

Natural Stone: A Premium Look for Maximum Curb Appeal

If you want to make a statement, natural stone pavers deliver an unmatched level of beauty and luxury. Each stone is completely unique, with its own distinct colors, textures, and patterns, creating a one-of-a-kind driveway. Materials like granite, bluestone, and travertine offer a sophisticated and organic aesthetic that blends beautifully with natural surroundings. While natural stone is a premium investment and may have a more uneven surface, its durability and timeless appeal provide lasting value and breathtaking curb appeal for your property.

Porcelain: Modern, Stylish, and Built to Last

For a sleek, contemporary driveway, porcelain pavers are the top choice. They offer a clean, high-end finish that can mimic the look of other materials like natural stone or wood, but with superior performance. Porcelain is incredibly dense and non-porous, making it highly resistant to stains, scratches, and moisture—a huge plus for a high-traffic area like a driveway. It’s also frost-proof and fade-resistant, ensuring it will look great for years with minimal maintenance. Porcelain pavers are perfect for creating a modern, polished entrance to your home.

Permeable Pavers: The Eco-Friendly Drainage Solution

Permeable pavers are a smart and sustainable choice, especially if your property deals with drainage issues or local regulations limit solid surfaces. These pavers are designed with special gaps that allow rainwater to filter through the surface and into the ground below, rather than running off into storm drains. This eco-friendly system helps reduce flooding, prevent puddles and ice spots, and replenish local groundwater. Available in a variety of styles, permeable pavers offer a functional and attractive solution that’s both beautiful and environmentally responsible.

Select Colors and Patterns to Maximize Your Space

The right colors and patterns can completely transform a small driveway, making it feel more spacious and intentional. Think of it like choosing an outfit—certain styles can create a more streamlined and flattering look. The same principle applies to your home’s exterior. By being strategic with your paver selection, you can trick the eye into seeing a larger, more impressive entrance. It’s not about magic; it’s about smart design.

Choosing lighter colors, for instance, can reflect more light and create an open, airy feeling. Similarly, laying pavers in a specific pattern can draw the eye outward, giving the illusion of a wider or longer space. This is your chance to get creative and add a personal touch that not only complements your home’s architecture but also makes the most of every square foot. Let’s look at a few ways you can use these design elements to your advantage.

Use Patterns to Create the Illusion of Space

The pattern in which you lay your pavers has a huge impact on the perception of space. Diagonal patterns, like herringbone, are fantastic for small driveways because they create lines that lead the eye outward, making the area feel wider and longer. A herringbone pattern is also a practical choice because its interlocking design helps pavers stay firmly in place under the pressure of tires. Other patterns, like a running bond laid perpendicular to the length of the driveway, can also create a sense of width. The key is to choose a design that adds visual movement and avoids making the space feel boxed in.

Pick Colors That Make Your Driveway Look Bigger

Color choice is one of the simplest ways to influence the feel of your driveway. Lighter shades like beige, light gray, or sand-colored pavers are excellent for small spaces because they reflect sunlight and create a bright, open atmosphere. This doesn’t mean you have to stick to a single color, though. Mixing different materials, such as combining sleek porcelain pavers with decorative gravel accents, can add texture and depth without creating clutter. This approach helps break up the surface visually, giving your driveway a custom, expansive look while maintaining a clean and cohesive design.

Add Borders and Accents for a Polished Finish

A border acts like a frame for your driveway, giving it a crisp, defined edge that instantly looks more polished and complete. For a small driveway, a border in a contrasting color can be particularly effective. For example, if you have a light-colored paver field, a darker border will draw attention to the main area and make it pop. This simple addition provides a high-end finish and helps contain the paver field, preventing shifting over time. You can customize your driveway with endless combinations of paver colors, patterns, and borders to perfectly match your home’s unique style.

Our Favorite Small Paver Driveway Designs

The right design can transform a small driveway from a purely functional space into a stunning feature that enhances your home’s curb appeal. It’s all about choosing a pattern and style that not only fits your aesthetic but also makes the most of your available square footage. A well-thought-out design can create the illusion of a larger, more dynamic area, proving that you don’t need a massive driveway to make a big impact.

From timeless patterns that exude classic charm to modern layouts that incorporate natural elements, the possibilities are endless. Your driveway is the first impression your home makes, so why not make it a great one? Let’s explore five of our favorite design ideas that work beautifully for smaller spaces, giving you the inspiration you need to create a driveway you’ll love coming home to.

Create Classic Elegance with a Herringbone Pattern

If you’re aiming for a look that’s both sophisticated and timeless, the herringbone pattern is a fantastic choice. This design features pavers laid in a V-shape, creating a beautiful, interlocking arrangement that immediately draws the eye. It’s a classic for a reason—it adds a sense of movement and depth, which can make a narrow driveway feel wider and more interesting.

Beyond its good looks, the herringbone pattern is also incredibly practical. The interlocking design is a great choice for driveways because it helps the pavers stay in place under the pressure of vehicle traffic, ensuring your driveway remains stable and durable for years. Our masonry experts can help you select the perfect pavers to bring this elegant and resilient design to life.

Achieve Simple Sophistication with a Running Bond Layout

Sometimes, the simplest designs are the most effective. The running bond layout, where pavers are laid in a simple, staggered pattern like bricks on a wall, offers a clean and uncluttered look. This timeless design is a popular choice for many homeowners because it provides a sense of order and sophistication without overwhelming a small space.

This layout is especially effective for making a short driveway appear longer, as the linear pattern guides the eye forward. It’s a versatile choice that complements a wide range of home styles, from modern to traditional. Whether you opt for sleek porcelain or classic brick, the running bond pattern creates a polished and cohesive look that stands the test of time.

Add Textural Interest with a Basketweave Design

For a touch of old-world charm and visual texture, consider a basketweave design. This pattern arranges pavers in pairs, alternating their direction to create a square grid that resembles a woven basket. It’s a wonderful way to add character and a sense of history to your driveway, making it feel more like a custom-designed feature.

The basketweave design is perfect for breaking up the monotony of a small, plain surface. It introduces a unique texture that adds visual interest and can make the space feel more inviting and dynamic. This pattern works especially well with brick or cobblestone-style pavers, enhancing the rustic and welcoming vibe of cottage or traditional Long Island homes.

Introduce Curves and Mix Materials for a Custom Look

Who says driveways have to be straight and narrow? Introducing gentle curves can soften the hard lines of your property and create a more organic, flowing entrance. A curved driveway feels more natural and can be a great way to work around existing landscape features, integrating your driveway seamlessly into your yard.

You can also create a custom look by mixing materials. Consider adding a border of contrasting pavers to frame your driveway or incorporating a section of natural gravel for a textural shift. Using curved shapes and combining different materials can give your driveway a truly unique and inviting appearance that reflects your personal style.

Incorporate Greenery with Grass-Infused Pavers

If you love the idea of a lush, green landscape, why not extend it to your driveway? Permeable pavers, also known as grass-grid pavers, are designed with open spaces that allow grass to grow through them. This creates a beautiful, living driveway that blends perfectly with your lawn while providing a solid surface for your car.

This eco-friendly option is not only beautiful but also functional. Using pavers that allow grass to grow through them helps with stormwater management by allowing rainwater to soak naturally into the ground. It’s a sustainable choice that reduces runoff and keeps your property looking green and vibrant, proving that your driveway can be both practical and beautiful.

Which Paver Brands Should You Consider?

Once you have a material in mind, the next step is choosing a brand. The right manufacturer can make all the difference in quality, style, and long-term performance. Different brands specialize in different materials and aesthetics, so it’s helpful to know who the key players are. To get you started, here are a few of the top paver brands we trust and recommend for driveway projects on Long Island.

Gappsi: Premium Porcelain and Natural Stone

If you’re aiming for a truly luxurious and high-end finish, Gappsi is the perfect place to start. We specialize in premium porcelain and natural stone pavers that bring an unmatched level of elegance to any driveway. Our curated selection is designed for durability and timeless beauty, ensuring your investment not only looks incredible but also stands up to the elements. Choosing Gappsi means you’re opting for top-tier materials that create a sophisticated and polished first impression for your home.

Unilock: Custom Colors and Innovative Designs

Unilock is a fantastic choice for homeowners who want to put a personal stamp on their driveway design. They are well-known for their innovative manufacturing technologies and a vast array of custom colors, patterns, and finishes. With Unilock, you can create a truly unique look that perfectly complements your home’s architecture and your personal style. Their products are engineered for exceptional strength and are resistant to fading, making them a reliable and stylish option for any driveway project.

Belgard: A Wide Variety of Styles and Textures

For those who love having plenty of options, Belgard delivers. This brand offers an extensive collection of pavers in countless styles, shapes, and textures, from the rustic look of classic cobblestone to the clean lines of modern slabs. Belgard makes it easy to find the perfect paver to match your vision, whether you’re creating a charming, traditional entrance or a sleek, contemporary one. Their commitment to quality ensures you’ll find a durable and beautiful solution that fits your home’s aesthetic.

County Materials: Durable Concrete and Permeable Options

County Materials is a go-to for strong, dependable, and attractive concrete pavers. They are recognized for producing high-performance products that are built to last, making them an excellent choice for a high-traffic area like a driveway. A major advantage is their focus on permeable paver systems, which are designed to help manage stormwater runoff. This makes them a smart, eco-friendly choice for homeowners looking for a practical and sustainable driveway solution that is also easy to maintain.

How Much Does a Small Paver Driveway Cost?

Let’s talk numbers. A new paver driveway is an investment, but it’s one that pays off in curb appeal, durability, and home value. The final price tag can vary quite a bit, but you can generally expect the cost to range from $10 to $70 per square foot. That’s a wide gap, I know, but most projects land somewhere between $10 and $30 per square foot.

So, what causes that price to swing? It really comes down to three main things: the materials you choose, the complexity of your design, and the specific labor required for your property. A simple, straight driveway using budget-friendly concrete pavers will be on the lower end, while a custom-designed driveway with premium natural stone will be at the higher end. Understanding these factors will help you set a realistic budget and make choices that align with your vision and your wallet. Below, we’ll break down exactly where your money goes.

Breaking Down Material Costs

The type of paver you select is the single biggest factor influencing your project’s cost. Think of it like choosing countertops for your kitchen—granite will cost more than laminate, and the same principle applies here. Concrete pavers are typically the most budget-friendly option, offering a huge variety of colors and styles without a hefty price tag. Brick pavers fall in the middle, providing a classic, timeless look. If you’re aiming for a high-end, luxurious finish, premium materials like porcelain and natural stone are the way to go. These options deliver unparalleled beauty and durability, making them a worthwhile long-term investment.

What Affects Labor and Installation Costs?

Beyond the pavers themselves, labor makes up a significant portion of the budget. A professional installation is critical for a driveway that lasts, and the cost of that expertise can range from $10 to $20 per square foot. Several factors influence this price. A complex pattern like herringbone or a basketweave requires more intricate cuts and time, increasing labor costs compared to a simple running bond. Site preparation is another key element; if your existing driveway needs to be removed or the ground requires significant grading to ensure proper drainage, that will add to the final bill. Our expert masonry team handles all of this to ensure a flawless foundation for your new driveway.

How to Save Money on Your Driveway Project

Want that gorgeous paver look without breaking the bank? You have options. The easiest way to manage costs is by choosing a simpler design. Straight lines and basic patterns like a running bond require less labor and fewer custom cuts, which translates directly into savings. Opting for high-quality concrete pavers can also give you a beautiful result at a more accessible price point. Finally, getting a clear, detailed quote is essential. This helps you understand every line item and allows you to estimate expenses accurately, ensuring there are no surprises along the way. Planning ahead can make a big difference in keeping your project on budget.

Avoid These Common Small Driveway Design Mistakes

A beautiful paver driveway is about more than just picking a great design; it’s about a solid execution from the ground up. Even the most stunning pattern can be undermined by a few common, yet avoidable, mistakes. Getting the fundamentals right ensures your investment not only looks fantastic on day one but also stands up to years of use and Long Island weather. A little extra attention to detail during the planning and installation phases makes all the difference between a driveway that lasts a few years and one that lasts for decades.

The three biggest areas where projects can go wrong are site preparation, drainage planning, and paver selection. Rushing the prep work can lead to a lumpy, unstable surface, while ignoring water flow can cause serious damage over time. Similarly, choosing a paver size or pattern that isn’t suited for a small space can make your driveway feel cramped instead of curated. By understanding these potential pitfalls, you can make sure your project goes smoothly. A professional team can help you sidestep these issues entirely, handling everything from initial masonry design and construction to the final finishing touches.

Don’t Skimp on Site Prep and Base Installation

Think of your driveway’s base as its foundation—if it isn’t solid, nothing you put on top will be either. One of the most significant mistakes homeowners make is underestimating the importance of proper site preparation. This isn’t the place to cut corners. A successful installation starts with a comprehensive layout plan to map out the entire project. The process involves excavating the area to the correct depth, thoroughly compacting the soil, and installing a sturdy, layered base of aggregate material. This creates a stable, level surface that prevents pavers from shifting, sinking, or becoming uneven over time. Without this crucial step, your beautiful new driveway could quickly turn into a bumpy, frustrating problem.

Plan for Proper Drainage and Secure Edging

Water is a paver driveway’s biggest enemy. Without a proper drainage plan, rainwater and snowmelt can pool on the surface, seep into the base, and cause major issues. During Long Island’s freeze-thaw cycles, trapped water can expand and heave pavers out of place. That’s why every driveway needs to be installed with a slight, carefully calculated slope that directs water away from your home’s foundation and off the paved surface. Just as important is secure edging. These restraints are installed along the perimeter of the driveway to lock the pavers in place, preventing them from spreading apart under the weight of vehicles. Together, proper drainage and strong edging frame and protect your driveway for the long haul.

Choose the Right Paver Size and Pattern for Your Space

When you’re working with a small driveway, the size and pattern of your pavers have a huge impact on the final look. While large-format pavers are trendy, they can sometimes overwhelm a compact area and make it feel even smaller. Conversely, very small pavers can create a busy pattern that feels cluttered. It’s all about finding the right scale. Planning your paver pattern ahead of time is essential for avoiding awkward cuts and uneven spacing. Simple, linear patterns like a running bond can create an illusion of length, while a classic herringbone adds elegance without being distracting. We always recommend looking at a variety of porcelain and natural stone pavers to find the perfect fit for your home’s style.

How to Maintain Your Small Paver Driveway

A paver driveway is a fantastic investment in your home’s curb appeal, and the good news is that keeping it looking its best doesn’t require a ton of work. With a little routine care and seasonal attention, you can protect your driveway for years. It all comes down to a simple cleaning schedule, knowing how to handle minor issues, and preparing for whatever the Long Island weather throws your way.

Follow a Simple Cleaning and Sealing Routine

Keeping your driveway looking fresh starts with basic cleaning. A regular sweep to clear away leaves and dirt will prevent stains from setting in. For tougher spots, a simple scrub with soap and water is usually all you need. The most important step for long-term protection is sealing. Applying a quality sealer every few years shields your pavers from stains, harsh weather, and UV rays that can cause fading. If you’d rather leave it to the experts, Gappsi offers professional restoration and sealing services to keep your investment in top condition.

How to Prevent and Fix Common Paver Issues

The best way to deal with paver problems is to prevent them from happening in the first place. A solid, properly installed base is critical to avoid sinking or shifting pavers. But if a paver does get cracked or stained, you’re in luck. One of the biggest advantages of a paver system is that you can simply lift out the damaged stone and replace it—no ugly patches like you’d get with asphalt. You should also keep an eye on the sand in the joints between pavers. If it looks low, sweeping in new polymeric sand will help keep everything locked tightly in place and prevent weed growth.

Protect Your Driveway Through the Seasons

Long Island winters can be tough, but your driveway can handle them with the right care. Avoid using harsh de-icing salts, as these chemicals can eat away at the surface of your pavers and damage the sealant. Instead, opt for sand to get better traction on icy days. Another key element for longevity is strong edge restraints. These are the hidden borders that hold all the pavers in place, preventing them from spreading apart due to traffic or the natural freeze-thaw cycles we experience. A properly installed paver driveway will always include robust edging, ensuring your beautiful pattern stays put season after season.

Take Your Driveway to the Next Level with These Features

Your driveway is more than just a path to your garage—it’s the first impression your home makes. With a little creative thinking, you can transform this functional area into a standout feature that adds value and personality to your property. Even a small driveway has the potential to be a beautifully designed space that complements your home’s architecture and landscaping. By incorporating thoughtful details, you can improve its utility, safety, and overall aesthetic appeal.

Think about adding elements that serve a dual purpose. Smart drainage systems can solve water pooling issues while contributing to a cleaner look. Integrated lighting not only makes your driveway safer to use after dark but also creates a warm, welcoming ambiance. You can even design the space to be multi-functional, blending different materials to create zones for parking, walking, or even a small garden. These enhancements turn a simple slab of pavement into an integral part of your home’s design. A well-planned driveway is a testament to great landscape design, showing that every inch of your property has been considered.

Incorporate Smart Drainage Solutions

Puddles and water runoff can be a constant headache, especially on a small driveway where every square foot counts. A smart drainage solution not only fixes this problem but also adds a sophisticated, eco-friendly touch. Permeable pavers are an excellent choice because they allow rainwater to seep through the surface and into the ground below. This prevents pooling, reduces runoff into storm drains, and helps replenish groundwater. By managing water right where it falls, you create a more sustainable and low-maintenance driveway. Gappsi offers a range of porcelain and natural stone options that can be installed as part of a permeable system, giving you both function and style.

Integrate Lighting for Safety and Style

Good lighting can completely change the look and feel of your driveway at night. It’s a practical addition that guides you safely to your door and a design feature that adds instant curb appeal. You can install subtle in-ground lights along the edges of the driveway to define its borders or place fixtures within adjacent garden walls to cast a soft, ambient glow. This not only illuminates the path but also highlights the beautiful texture and pattern of your pavers. Well-placed lighting makes your home feel more inviting and secure, creating a stunning effect that you’ll appreciate every time you come home after dark.

Design a Multi-Functional Space

Who says a driveway has to be just for parking? By getting creative with materials and layout, you can design a space that serves multiple purposes. Consider mixing pavers with strips of grass for a “ribbon” driveway that adds a touch of green and helps with drainage. You could also combine pavers with decorative gravel to create textural contrast and define different areas. This approach allows you to build a visually interesting driveway that can double as extra patio space or a play area. Expert masonry services can help you blend these materials seamlessly for a custom look that is both beautiful and practical.

Related Articles

Frequently Asked Questions

How long will a paver driveway last, especially with Long Island’s weather? A professionally installed paver driveway is built for the long haul and can easily last for decades—often 30 years or more. Unlike solid asphalt or concrete that can develop large cracks from our freeze-thaw cycles, the individual pavers have joints that allow for slight movement. This flexibility prevents widespread damage, making them an incredibly resilient choice for our climate.

Are pavers slippery when they get wet or icy? This is a great question and a common concern. Most pavers have a naturally textured surface that provides better traction than smooth, poured concrete. The real key to preventing a slippery driveway, however, is proper drainage. A correctly installed driveway is sloped to prevent water from pooling and turning into ice sheets, which is the main cause of slick winter surfaces.

Is it really that simple to replace a single damaged paver? Yes, it absolutely is, and it’s one of the best features of a paver driveway. If a paver gets cracked or badly stained, a professional can carefully lift out the single damaged piece, check that the base underneath is still level, and fit a new paver right into place. This is a quick and seamless fix compared to patching asphalt or living with a crack in a concrete slab.

How long does a typical small driveway installation take? For most small driveways, the entire process usually takes between two to five days from start to finish. The timeline depends on the amount of prep work needed, like removing an old driveway, and the complexity of the design you choose. The process involves excavating the area, building a solid base, laying the pavers, and finishing the joints and edges.

My property has some drainage issues. Are permeable pavers my only option? Permeable pavers are an excellent, eco-friendly solution for managing water, but they aren’t your only choice. A standard paver driveway, when installed correctly by an expert, is designed with a precise slope. This slight grade is often unnoticeable to the eye but is very effective at directing rainwater and snowmelt away from your home and off the driveway surface, preventing puddles and water damage.

Share this page:
Getting a quote for turf installation with tools on a prepped lawn.

How to Get a Quote for Turf Installation

Installing artificial turf on Long Island isn’t the same as installing it anywhere else. Our local soil conditions and weather patterns present unique challenges that demand real expertise. A successful, long-lasting installation here requires a deep understanding of proper ground preparation and drainage solutions specific to our area. The cost reflects not just the materials, but the skill needed to create a lawn that can handle our seasons beautifully. Before you get a quote for turf installation, it’s important to know what a quality local job entails. We’ll break down the factors that matter most for Long Island homeowners, ensuring your investment stands the test of time.

Key Takeaways

  • Understand What Shapes Your Quote: The final cost of your project is determined by more than just square footage; it’s a blend of the turf quality you select, the amount of site preparation needed, and your yard’s unique terrain.
  • Prioritize a Quality Local Installer: A beautiful, long-lasting lawn depends on expert installation. Look for a company with proven local experience, strong product and workmanship warranties, and a portfolio of successful projects.
  • View Turf as a Long-Term Home Investment: Look beyond the initial price and consider the long-term savings. Artificial turf eliminates recurring costs for watering, mowing, and fertilizing, adding lasting value and usability to your property.

What Affects Your Turf Installation Cost?

When you start planning for a new artificial lawn, one of the first questions you’ll have is about the price. The truth is, there’s no one-size-fits-all answer. The final cost of your turf installation depends on a handful of key factors, from the size of your yard to the specific materials you choose. Understanding these variables will help you set a realistic budget and know exactly what you’re paying for. Think of it less like buying a product off the shelf and more like a custom home improvement project—every detail is tailored to your space and needs. Let’s walk through the main elements that will shape your quote.

The Size and Scope of Your Project

The biggest factor influencing your total cost is the square footage of the area you want to cover. Simply put, a larger lawn requires more material and more labor. While pricing can vary, a general range for professional installation often starts between $8 and $11 per square foot. It’s also worth noting that smaller projects—think under 500 square feet—can sometimes have a higher price per square foot. This is because fixed costs, like getting the crew and equipment to your home, are spread over a smaller area. For larger projects, you benefit from economies of scale, which can bring the per-foot cost down.

The Type of Turf You Choose

Not all artificial grass is created equal. The type of synthetic turf you select plays a major role in the overall price. A standard turf designed for a typical lawn or a dog run will have a different price point than a specialty product, like a professional-grade putting green. Higher-quality turf with a more realistic look, better durability, and a longer warranty will cost more upfront. While it might be tempting to go with a cheaper option, investing in a premium product often pays off with a lawn that looks better and lasts longer, giving you more value over time.

Yard Prep and Excavation Needs

A perfect turf installation starts with a solid foundation. Before any green is rolled out, your existing lawn needs to be properly prepared. This involves removing the old grass, weeds, rocks, and any other debris. The ground is then graded to ensure proper drainage, and a weed barrier is laid down to prevent anything from growing through your new lawn. If your yard has challenging conditions, like compacted soil, large tree roots, or significant slopes, the prep work will be more intensive and will add to the labor costs. A smooth, clear area requires less work than a yard that needs a complete overhaul.

Your Yard’s Accessibility and Terrain

How easy is it for a crew to get to the installation area? The accessibility of your yard can directly impact the cost. If your backyard is easy to reach with machinery and materials, the process is more efficient. However, if the crew has to carry everything through narrow pathways, up or down stairs, or around obstacles, the project will require more manual labor and time. Similarly, a flat, level yard is simpler to work on than a hilly or uneven one. The unique terrain of your property is a key consideration when a contractor puts together your quote.

Add-Ons Like Drainage and Edging

Beyond the turf itself, you can customize your project with a variety of add-ons that affect the final price. An advanced drainage system might be necessary if your yard is prone to holding water. You can also choose custom edging to create a clean, finished border around your lawn, using materials like natural stone or composite boards. Other popular additions include pet-friendly infill, which helps with odors, or specialized features for sports courts, like cups for a putting green. These features allow you to tailor the project perfectly to your lifestyle.

How to Get an Accurate Turf Installation Quote

Getting a quote you can trust is the first step toward your new lawn. While it might seem like a simple calculation of square footage, several factors can influence the final price. To avoid surprises and ensure you’re getting a fair estimate, it helps to do a little prep work. By understanding what contractors look for and having the right information ready, you can make the process smoother for everyone and get a quote that accurately reflects your project’s unique needs.

Measure Your Space Correctly

Before you even pick up the phone, grab a measuring tape. Knowing the approximate size of your project area is the most important piece of information you can provide. Measure the length and width of the space to calculate the total square footage. Don’t forget to also measure the perimeter—the total length around the edges—as this helps determine the amount of materials needed for securing the turf. If your yard has curves or irregular shapes, do your best to break it down into smaller, manageable rectangles or squares and add them up. A simple sketch with your measurements can be incredibly helpful when you discuss your project with our team.

Prep Your Yard Before the Assessment

To help a contractor give you the most accurate quote possible, it’s a good idea to tidy up the area beforehand. A clear space allows the installation team to get a true sense of the terrain, identify any potential grading or drainage issues, and take precise measurements. Before your scheduled site evaluation, take a little time to clear away any furniture, toys, fallen branches, or other debris. Giving the lawn a quick mow can also help reveal the ground’s true condition. This simple step ensures there are no hidden surprises and helps the Gappsi team assess your yard’s specific needs for a flawless synthetic turf installation.

What to Expect During a Site Evaluation

A professional site evaluation is much more than a quick look at your yard. Quoting a synthetic turf project isn’t as simple as multiplying square footage by a rate; it’s a detailed assessment. When a Gappsi expert visits your home, they will evaluate several key factors. This includes checking your soil type, assessing the current drainage situation, and determining the accessibility of the site for equipment and materials. We’ll discuss how you plan to use the space—whether it’s for kids, pets, or a personal putting green—to recommend the right products. This is your opportunity to share your vision and ask questions so we can provide a comprehensive and accurate quote tailored to you.

Key Questions to Ask Your Contractor

Not all turf installations are created equal. The quality of materials, the installation technique, and the company’s experience all play a huge role in the final result. To ensure you’re working with a reputable professional, come prepared with a few key questions. Ask about the types of turf they recommend for your specific needs and why. Inquire about their installation process, especially the kind of base material they use and how they plan to address drainage. It’s also crucial to understand the warranty—what it covers and for how long. Don’t hesitate to ask for a portfolio of their work; you can even see our projects to get a feel for our quality craftsmanship.

Common Myths That Inflate Quotes

Some homeowners worry that turf installation is an overly complex or expensive process, but that’s often not the case. One common myth is that it’s too expensive to be a smart investment. While the upfront cost is higher than natural sod, artificial turf pays for itself over time by eliminating expenses for watering, mowing, and fertilizing. Another misconception is that the installation itself is a huge, disruptive undertaking. With an experienced team, the process is streamlined and efficient, transforming your yard with minimal interruption to your daily life. At Gappsi, we’re committed to transparency and will walk you through every aspect of the cost and process, ensuring you see the long-term value.

Breaking Down the Average Cost of Turf Installation

Let’s talk numbers. While every project is unique, understanding the average cost of turf installation can help you set a realistic budget. The final price tag depends on several key factors, from the size of your yard to the specific type of turf you fall in love with. Think of it less as a single price and more as a range that we can narrow down once we know exactly what you’re looking for.

Here’s a breakdown of what goes into the cost, so you can feel confident about your investment.

Cost Per Square Foot by Turf Type

The biggest factor in your total cost is the price per square foot, which covers both the turf and installation. Generally, you can expect to pay between $7 and $12 per square foot for high-quality artificial turf. This range reflects the variety of synthetic turf options available, from standard choices to premium, ultra-realistic materials that vary in softness and durability. The good news is that this one-time investment pays off over a 15+ year lifespan with almost no maintenance required.

Pricing for Lawns vs. Specialty Turf

The purpose of your turf also plays a role. A beautiful, low-maintenance lawn or a dog run typically costs between $4 and $8 per square foot. If you’re dreaming of a custom putting green or a personal sports field, the price will be higher. These specialty game courts require different materials and a more intricate installation, often ranging from $8.50 to $12.50 per square foot. The specialized base layers and precise techniques contribute to the higher cost for these custom projects.

How Extra Services Affect the Final Price

Your base installation is just the beginning. Many homeowners include extra features that can affect the final price. If your yard has poor drainage, we might recommend a specialized system to keep your turf pristine. Other popular add-ons include custom edging for clean lines, pet-friendly infill, or integrating the turf with existing patios and walkways. These elements ensure your new lawn is not only beautiful but also perfectly suited to your lifestyle and property.

Budgeting for Unexpected Costs

When planning your budget, it’s smart to set aside a little extra for costs not in the initial estimate. Smaller projects under 500 square feet can sometimes have a higher cost per square foot because fixed costs are spread over a smaller area. Also, make sure your quote is comprehensive. Ask if it includes taxes, delivery fees, and the complete cost of labor. A transparent contractor will walk you through every line item, ensuring there are no surprises on the final bill.

How to Choose the Right Turf Installation Company

Selecting the right company for your turf installation is just as important as picking the turf itself. The quality of the installation determines how your new lawn will look, feel, and perform for years to come. A great installer ensures proper drainage, seamless connections, and a foundation that stands up to Long Island weather and backyard fun. Not all turf installations are the same—the team’s experience, materials, and process matter far more than price alone. Making a thoughtful choice here means you’ll have a beautiful, low-maintenance yard you can enjoy without worry.

Look for Proven Local Experience

When it comes to turf, local expertise is key. A company familiar with Long Island’s specific soil conditions, climate, and drainage challenges will deliver a much better result than a generic national chain. An experienced local installer can anticipate and solve site-specific issues, like grading complexities or tricky yard shapes, that a less seasoned crew might overlook. Look for a company with a deep portfolio of local projects. Seeing their work in your area gives you confidence that they understand what it takes to create a lasting, beautiful synthetic turf lawn right here at home.

Check Their Materials and Warranty

The quality of the artificial grass itself will define your experience. Ask potential installers about the turf products they use. High-quality turf should be durable, realistic, and completely safe for kids and pets—meaning it’s free from lead and other harmful chemicals. A reputable company will be transparent about its materials and stand behind them with a solid warranty. Look for a product warranty of around 15 years, which signals a long-lasting product. Just as important, ask about the workmanship warranty. This covers the installation itself and shows the company is confident in its team’s skills and process.

Read Customer Reviews and Testimonials

Reviews are your window into a company’s true customer experience. Go beyond the testimonials featured on their website and check third-party platforms like Google and Yelp for unbiased feedback. Look for comments that mention specifics, like whether the team was professional, knowledgeable, and detailed during the consultation process. Pay attention to how the company communicates and if they stick to their proposed timeline. Seeing a long history of positive feedback, like on the Gappsi YouTube channel, is a great sign that you’re dealing with a reliable and respected local business that consistently delivers for its clients.

Verify Their Licensing and Insurance

This step is a simple but crucial checkpoint. Any contractor working on your property must have the proper licensing for your locality and carry comprehensive insurance. This includes general liability to cover any potential damage to your property and worker’s compensation to protect their crew in case of an accident. Don’t just take their word for it—ask to see proof. A professional and trustworthy company will have this documentation ready and will be happy to provide it. This protects you from liability and ensures the company adheres to professional standards for all its home improvement projects.

Red Flags to Watch Out For

As you gather quotes, keep an eye out for a few warning signs. Be cautious of any quote that seems unusually low, as it could indicate subpar materials or inexperienced labor. A vague or incomplete quote that doesn’t detail the scope of work, materials, and site prep is another red flag. You should also feel wary of any high-pressure sales tactics designed to rush your decision. A quality contractor will give you the space and information you need to feel confident. Finally, a lack of a professional online presence, a physical address, or a refusal to provide references should make you think twice.

What Are Your Payment and Financing Options?

A new turf installation is a significant upgrade to your home, and it’s important to understand how you can make this investment work for your budget. The good news is that you have several options to make the project more affordable. From seasonal deals to flexible payment plans, you can find a path to getting the beautiful, low-maintenance yard you’ve always wanted. Let’s walk through the different ways you can manage the cost.

Seasonal Discounts and Special Offers

Timing your project strategically can lead to some great savings. While spring and summer are peak seasons for outdoor projects, consider scheduling your installation during the off-season, like late fall or winter. Companies often have more availability and may offer better pricing during these slower months. It’s also a good idea to keep an eye out for holiday promotions. The best approach is to simply ask. When you connect with us about your project, be sure to inquire about any current specials we have for synthetic turf installations. We’re always happy to help you find the best value for your home.

Available Payment Plans and Financing

You don’t have to pay for the entire project upfront. Many installers offer financing to help spread the cost over time, making it much more manageable. These plans can turn a large one-time expense into predictable monthly payments that fit comfortably into your budget. Some financing options even include promotional periods with 0% interest for those who qualify, which is a fantastic way to get your new lawn now without the added cost. Exploring home improvement financing can be a smart way to fund your project without dipping into your savings, allowing you to move forward with your dream yard sooner rather than later.

Budget-Friendly Alternatives

If a full-service, professional installation feels like a stretch, you might be wondering about other ways to save. Some homeowners consider a DIY approach to cut down on labor costs. While this can save money, it’s important to know that installing turf correctly requires specialized tools, experience, and a lot of heavy lifting. Mistakes can be costly and may void your turf’s warranty. Another option is to complete your project in phases, perhaps starting with a smaller, high-traffic area. You can find high-quality materials at the Gappsi Store if you decide to explore a partial DIY or phased approach for certain elements of your outdoor space.

The Long-Term Value of Your Investment

It’s helpful to think of turf installation not as a cost, but as a long-term investment in your property and lifestyle. Your new lawn will start paying you back from day one. Think of the money you’ll save on watering, fertilizer, and lawn care services year after year. Beyond the financial return, a beautiful and functional yard significantly increases your home’s curb appeal and overall property value. More importantly, it gives you a pristine, evergreen space to relax and make memories with family and friends without the constant weekend work. It’s an upgrade that truly keeps on giving.

What to Expect From Your Turf Installation Project

Once you’ve chosen the perfect turf and received your quote, the real excitement begins. Understanding the installation process helps you know what’s happening in your yard and when. At Gappsi, we manage every detail to ensure a smooth transformation of your space, turning your vision into a durable, beautiful reality with minimal disruption to your life. Here’s a look at what you can expect from start to finish.

Your Project Timeline, From Start to Finish

Every project starts with a clear plan. After you approve your personalized quote, we’ll establish a project timeline that works for your schedule. The duration depends on the size and complexity of the area, but a typical residential lawn installation is often completed within a few days. We’ll begin by scheduling the delivery of materials and the start date for our crew. Our team will keep you informed at every stage, from the initial ground preparation to the final inspection, ensuring you know exactly what’s happening and when to expect your stunning new lawn.

Getting Ready for Installation Day

Preparation is key to a flawless finish. Before installation day, our first step is to clear the site. This involves removing the existing lawn, along with any weeds, rocks, or other debris to create a clean slate. Next, we excavate the area to the proper depth and install a sturdy base layer, typically using a combination of paver base gravel and leveling sand. This foundation is crucial for ensuring proper drainage and a perfectly smooth, stable surface. Our professional installation services handle all of this heavy lifting for you.

How to Care for Your New Turf

One of the best parts of having artificial turf is how little maintenance it requires. Forget about mowing, watering, and fertilizing. To keep your new lawn looking its best, simply rinse it with a hose periodically to wash away dust and pollen. For high-traffic areas, you can use a stiff-bristled broom to brush the fibers and keep them standing upright. This durability and all-weather playability make it a fantastic alternative to natural grass. You can see how our finished projects hold up over time in our videos, which showcase the long-lasting quality of our installations.

Frequently Asked Questions

How long will my new artificial turf last? You can expect a high-quality, professionally installed turf lawn to last for 15 years or even longer. The lifespan really depends on the quality of the materials and the skill of the installation team. A solid base preparation and proper installation techniques are just as important as the turf itself for ensuring it holds up beautifully through years of backyard parties, kids’ games, and Long Island seasons.

Is artificial turf safe for children and pets? Absolutely. Reputable modern turf is made from non-toxic materials and is completely free of lead and other harmful chemicals. In fact, it can create a safer play area because it eliminates the need for chemical fertilizers, pesticides, and weed killers. It also provides a soft, consistent surface that can help cushion falls better than hard, patchy dirt.

Will the turf get too hot during Long Island summers? While synthetic turf can get warmer than natural grass in direct sunlight, today’s premium products are designed with technology to help minimize heat absorption. If you find it gets too warm on a particularly hot day, a quick spray with a garden hose will cool it down instantly. We can also discuss different types of infill, as some are designed to stay cooler than others.

What kind of maintenance does artificial turf really need? The maintenance is truly minimal compared to a traditional lawn. Your main tasks will be to rinse it with a hose occasionally to clear off dust or pollen and to use a stiff-bristled broom to fluff up the fibers in areas that get a lot of foot traffic. If you have pets, you’ll just need to pick up solid waste and rinse the area. That’s it—no more mowing, watering, or weeding.

Can I install turf over my existing concrete patio or deck? Yes, you can. Installing turf over a hardscape like a concrete patio, balcony, or old deck is a fantastic way to soften the space and create a lush, green area without a major demolition project. The installation process is a bit different than on soil, as it involves ensuring proper drainage and often adding a shock-absorbing under-padding, but it’s a great solution for transforming an underused hard surface.

Share this page:
Brown leaf stains on concrete pavers from fallen leaves.

How to Remove Leaf Stains on Concrete Pavers

It seems impossible that a simple leaf could leave such a stubborn mark on hard stone, but it’s a natural chemical process. The culprit is a compound called tannins—the same organic dye found in tea and red wine. When leaves get wet, they release these pigments, which then seep into the porous surface of your stonework, creating frustrating leaf stains on concrete pavers. Knowing this simple science is the key to getting rid of them for good. Instead of scrubbing endlessly with the wrong cleaner, you can use targeted methods that break down the tannins and lift the stain, restoring your patio’s original beauty.

Key Takeaways

  • Proactive Cleanup is Your Best Defense: The easiest way to manage leaf stains is to prevent them. Make a habit of sweeping or blowing leaves off your pavers daily during the fall, especially before they get wet, to stop tannins from setting in.
  • Use a Step-by-Step Cleaning Method: When tackling existing stains, always start with the gentlest solution, like hydrogen peroxide. Only move on to stronger, diluted cleaners if needed, and be sure to test a small, hidden area first to protect your pavers.
  • Know When a Stain Signals a Deeper Issue: If stains are accompanied by other problems like shifting pavers, cracks, or pooling water, it’s a sign you need professional help. These issues can point to an unstable base that requires expert restoration to fix correctly.

What Causes Those Leaf Stains on Your Pavers?

You love the look of your paver patio, but after a few autumn weeks, you start noticing unsightly brown and yellow splotches left behind by fallen leaves. It’s a common headache for homeowners, but what’s actually happening when a simple leaf leaves such a stubborn mark? It’s not just dirt; it’s a natural chemical process. Understanding the cause is the first step to getting your beautiful pavers back and keeping them that way for years to come.

The Science Behind the Stains: What Are Tannins?

The culprit behind those pesky leaf stains is a natural compound called tannins. Think of tannins as the organic dyes found in plants, especially in leaves, bark, and stems. When leaves get wet from rain or morning dew, they release these tannins, which are essentially colored pigments. This tannin-rich water then sits on your patio, and as it soaks in, it leaves behind those distinct brown, yellow, or even dark green stains. Oak leaves are particularly high in tannins, making them one of the biggest offenders in your backyard. Properly restoring and sealing your surfaces is one of the best ways to prevent this from happening.

Why Your Pavers Are Prone to Staining

So why do these tannins leave a mark on your pavers and not, say, your car? It comes down to the material. Most concrete and natural stone pavers are porous, meaning they have microscopic holes on their surface, much like a sponge. When wet leaves sit on top, this porous nature allows the tannin-infused water to seep deep into the paver, causing a stain that can’t just be wiped away. While this is a completely normal characteristic of these materials, it does mean they need a little extra care to stay looking their best, especially during the fall.

Which Leaves Are the Biggest Culprits?

You might think a leaf is just a leaf, but when it comes to staining your beautiful patio, some are definitely worse than others. The key difference comes down to tannins—the same natural compounds found in tea and red wine that give them their color. The more tannins a leaf has, the more likely it is to leave a stubborn, dark stain on your porcelain and natural stone pavers. Knowing which trees are the biggest offenders can help you stay one step ahead of the mess and keep your outdoor spaces looking pristine. It’s all about understanding what you’re up against so you can tailor your cleanup routine effectively.

Oak Leaves: The Main Offender

If you have oak trees on your property, you’ll want to pay close attention. Oak leaves are packed with a high concentration of tannins, making them the number one cause of dark, tea-like stains on concrete and stone. When these leaves get wet and start to break down, they release those tannins directly onto your pavers. The result is a deep, brownish-black mark that can be tough to remove if left for too long. Since oak trees are so common across Long Island, they’re a major source of paver discoloration for local homeowners every autumn.

Other Trees to Watch Out For

While oaks get most of the blame, they aren’t the only trees to keep an eye on. Maple, birch, and sweetgum leaves can also leach pigments that stain your hardscapes. It’s not just the leaves, either—berries and fruits from certain trees can drop and leave behind their own colorful, splotchy messes. The best approach is to be mindful of what’s growing around your patio or driveway. A little strategic landscape design can go a long way in preventing these types of stains from becoming a recurring headache in the first place.

Why Fall Is Prime Stain Season

Fall creates the perfect storm for leaf stains. You have a massive amount of leaves falling all at once, combined with the damp, cool weather of a Long Island autumn. Rain and morning dew act as the catalyst, soaking the leaves and drawing out the tannins and organic pigments. This creates a staining ‘tea’ that seeps into the porous surface of your pavers. Because the leaves sit for longer periods and the sun is less intense to dry them out quickly, the stains have more time to set. This is why being extra vigilant with your leaf cleanup during the fall is so important.

How to Remove Leaf Stains From Your Pavers

When you notice those tell-tale brown outlines of leaves on your beautiful patio, don’t panic. Those stains are caused by tannins, the same organic compounds found in tea and red wine, and they can be removed. The key is to start with the gentlest method first to protect the surface of your pavers. You might find that a simple, homemade solution is all you need to get your patio looking pristine again. Below are a few effective methods, from gentle DIY solutions to more powerful techniques.

Try a Hydrogen Peroxide Solution

A great starting point for tackling leaf stains is a simple hydrogen peroxide solution. It’s a mild bleaching agent that can lift organic stains without being too harsh on your pavers. You can find 3% hydrogen peroxide at any drugstore. Pour it directly onto the stained areas and let it sit for about 20 to 30 minutes, allowing it to bubble and work on the tannins. After it has had time to sit, use a stiff-bristled brush to gently scrub the area. Rinse it thoroughly with water when you’re done. This method is often surprisingly effective, especially on lighter stains, and it’s a safe first step before moving on to stronger chemicals.

Use a Gentle Bleach and Water Mix

If hydrogen peroxide doesn’t quite do the trick, you can move on to a diluted bleach solution. Mix one part household bleach with one part water in a garden sprayer. Before you apply it, it’s a good idea to wet the pavers and any nearby plants with plain water to protect them. Spray the bleach mixture onto the stains and let it sit for a few minutes—but don’t let it dry. Use a stiff brush to scrub the area, then rinse everything completely with water. For stubborn spots, this method provides a bit more cleaning power to break down those persistent tannins. If you’re concerned about using the right solution, our team offers professional restoration and sealing services to handle it for you.

Consider Specialty Cleaners

For the most stubborn organic stains, you might need a cleaner specifically formulated for masonry. You can find a variety of paver and concrete cleaners at home improvement stores. Some professionals even recommend using Pool Shock, a strong bleach powder, for tough organic stains from leaves, moss, or berries. When using any commercial-grade cleaner, it is crucial to read and follow the manufacturer’s instructions carefully. These products are powerful, and improper use could damage your beautiful porcelain or natural stone pavers. Always test the cleaner on a small, hidden spot first to ensure it doesn’t cause any discoloration.

When to Pressure Wash or Scrub

Pressure washing is another effective way to blast away leaf stains, but it requires a careful hand. Using a pressure setting that’s too high can etch the surface of your pavers or dislodge the jointing sand between them. If you choose to pressure wash, start with the lowest possible setting and use a fan-tip nozzle, keeping it at least a foot away from the surface. Alternatively, you can always rely on some good old-fashioned elbow grease. A bucket of soapy water and a stiff-bristled brush can work wonders on fresh stains without any risk of damaging your hardscaping. This manual approach is often the safest bet for maintaining the integrity of your masonry work.

How to Prevent Leaf Stains Before They Start

While it’s great to know how to remove leaf stains, it’s even better to stop them from happening in the first place. A little proactive care goes a long way in keeping your beautiful paver patio, walkway, or driveway looking its best. Think of it as protecting your investment. By creating a simple maintenance routine, you can spend less time scrubbing stains and more time enjoying your outdoor space. These preventative steps are easy to work into your regular yard care and will make a huge difference, especially during the fall when leaves are everywhere.

Stay on Top of Leaf Removal

The most effective way to prevent leaf stains is also the simplest: get the leaves off your pavers before they have a chance to sit. When leaves, especially wet ones, linger on the surface, they start to decompose and release tannins that seep into the porous stone. Making a quick sweep with a broom or a pass with a leaf blower a daily habit during autumn can save you a lot of work later. It’s a small task that keeps your masonry looking pristine and prevents those stubborn brown spots from ever forming.

Landscape and Trim Trees Strategically

Take a look at the trees and large shrubs surrounding your paver areas. If you have branches hanging directly over your patio or driveway, you’re setting yourself up for a constant battle with falling leaves. A bit of strategic trimming can significantly reduce the amount of debris that lands on your pavers. This isn’t just about stain prevention; it’s a key part of a thoughtful landscape design that keeps your entire property looking neat and well-maintained. By managing the source of the leaves, you make your daily cleanup much faster and more manageable.

Seal Your Pavers for Protection

Applying a quality sealer is like giving your pavers a protective raincoat. Pavers made from concrete or natural stone are porous, which means they can easily absorb moisture and, unfortunately, stains. A sealer fills in those tiny pores, creating a barrier on the surface that makes it much harder for tannins to penetrate. While it won’t make your pavers completely stain-proof, it buys you more time to clean up spills and leaves. Professional restoration and sealing services ensure the job is done right, giving your pavers a durable layer of defense against stains for years to come.

Will Leaf Stains Go Away on Their Own?

If you’ve just noticed some leafy imprints on your beautiful pavers, you might be wondering if you need to grab your scrub brush immediately. The good news is, you might not have to. Leaf stains are organic, and in many cases, Mother Nature can handle the cleanup for you. The tannins that cause those brownish spots are not permanent dyes. With a little patience, you’ll often find that the combination of sun, rain, and time will work together to break down the stains and restore your pavers to their original look.

However, this natural process isn’t instantaneous, and there are situations where you’ll want to take matters into your own hands. Deciding whether to wait it out or take action depends on how quickly you want the stains gone and whether you have other paver maintenance, like sealing, on your to-do list. Let’s break down what you can expect if you decide to let nature run its course.

How Sun and Rain Help Break Down Stains

Think of the sun and rain as your personal, slow-working cleaning crew. The sun’s ultraviolet rays are fantastic at breaking down organic compounds like tannins, effectively bleaching the stains out over time. Rain helps by washing away the loosened particles and diluting the tannins left on the surface. This natural one-two punch is why you might notice stains that appeared in the fall have miraculously vanished by the time spring rolls around. It’s a completely hands-off method, requiring nothing from you but a bit of patience while the weather does its job.

How Long Does It Take for Stains to Fade?

Patience is key here, as this natural fading process doesn’t happen overnight. The exact timeline can vary quite a bit. Generally, you can expect stains to fade significantly within a few weeks or a couple of months. Factors like how much direct sunlight your patio gets, how much rainfall you receive, the type of leaf, and the porosity of your pavers all play a role. A sunny, rain-soaked area will clear up much faster than a shady, dry spot. So, while the stains will likely go away, you’ll have to be comfortable looking at them for a little while.

Should You Wait It Out or Take Action?

So, do you wait or do you clean? If the stains are faint and don’t bother you, waiting is a perfectly fine strategy. However, if you want your patio looking pristine for an upcoming gathering or the stains are particularly dark and unsightly, you’ll probably want to take action. The most important time to actively remove stains is before sealing your pavers. Sealing over existing stains will trap them underneath the protective layer, making them much more difficult to remove later. If you’re planning to protect your investment, it’s essential to start with a clean surface. Gappsi offers professional restoration and sealing services to ensure your pavers are spotless before being sealed for long-term protection.

When to Call in the Professionals

Sometimes, a stain is more than just a stain. While DIY methods are great for routine upkeep, there are times when calling in a professional is the smartest move. If you’ve tried everything and those leaf stains just won’t budge, or if you notice other issues with your patio or walkway, it might be time for an expert opinion. A professional can do more than just clean; they can diagnose underlying problems that could lead to bigger headaches down the road. Think of it as an investment in your home’s beauty and longevity. Bringing in a team with the right tools and expertise ensures the job is done right, protecting your beautiful paver surfaces for years to come.

Recognizing when a problem is beyond a simple fix is key. Stubborn stains can sometimes point to issues with the paver’s porosity or a failed sealant. And while you’re focused on the surface, an expert eye can spot signs of shifting, drainage problems, or joint failure that might otherwise go unnoticed. Gappsi’s team specializes in the complete restoration and sealing of outdoor spaces, handling everything from deep-set stains to structural repairs. We help you protect the investment you’ve made in your home’s outdoor living areas.

Signs You Need an Expert’s Help

While you’re tackling leaf stains, take a moment to look at the bigger picture. Certain issues are red flags that point to deeper problems than surface discoloration. If you see cracks, or if some pavers are higher than others, it could signal an unstable base. Another tell-tale sign is pooling water after it rains; this suggests a drainage issue that can erode the foundation of your patio over time. Also, look between the pavers. If you see a lot of weeds or grass, it likely means the joint sand has washed away, compromising the interlocking system that keeps everything stable. These are problems that a simple cleaning can’t fix and require professional masonry expertise.

What to Expect from a Professional Service

Calling a professional isn’t just about getting a more powerful pressure washer. When you bring in an expert team, you can expect a comprehensive approach. The process starts with a thorough assessment to understand the type of pavers you have and the nature of the stains and any other damage. They’ll use specialized, professional-grade cleaners that are tough on stains but gentle on your stone. A professional service also addresses the root cause of any problems, like fixing drainage or re-sanding joints. It’s a complete restoration solution designed to not only clean your pavers but also restore their integrity and appearance, ensuring your outdoor space looks its best.

Achieve Long-Term Protection for Your Pavers

Once your pavers are clean and restored, the final step is protection. This is where professional sealing makes all the difference. A high-quality sealant creates an invisible barrier on the surface of the stone, making it much harder for tannins from leaves to penetrate and stain. It also protects against moisture, oil, and UV rays, which helps preserve the color and integrity of your pavers for years. Having your pavers professionally sealed is one of the best things you can do to simplify future maintenance. It makes routine clean-ups easier and provides lasting peace of mind, safeguarding the beauty of your valuable natural stone pavers.

Build Your Year-Round Paver Care Routine

The best way to deal with leaf stains is to stop them from happening in the first place. While that might sound like a lot of work, a simple, year-round care routine is much easier than scrubbing stubborn stains later. Think of it as protecting your beautiful outdoor space. A little consistent effort keeps your patio, walkway, and driveway looking pristine and welcoming, ensuring your home’s curb appeal is always at its best. It’s about shifting from a reactive mindset—scrubbing stains after they appear—to a proactive one that keeps your pavers looking new.

The secret is staying ahead of the leaves, especially during the fall. Don’t let wet leaves sit on your pavers overnight, as that’s when the tannins really get to work, leaving behind those frustrating brown spots. A proactive approach will save you a lot of time and frustration. By building a few simple habits into your seasonal yard work, you can maintain the beauty of your hardscaping with minimal stress. If you want to give your pavers an even stronger defense, professional restoration and sealing can provide a protective barrier that makes cleanup even easier and prevents moisture from seeping into the stone.

Your Seasonal Paver Care Checklist

A good paver care plan adapts to the seasons. In the spring, it’s all about cleaning up after winter and inspecting for any shifts or cracks. For summer, a quick sweep and spot-cleaning as needed is usually enough. The most important season, however, is fall. When leaves are coming down, you’ll want to use a leaf blower or broom daily. This prevents wet leaves from sitting and releasing their tannins. Remember, regular soap and water won’t be effective against these types of stains because they are caused by tannic acid, which requires a different approach to remove.

Gather Your Essential Tools

You don’t need a garage full of special equipment to keep your pavers looking great. For daily prevention, a quality leaf blower or a stiff-bristled broom is your best friend. For general cleaning, a garden hose with a good spray nozzle will do the trick. When you’re facing actual stains, you may need a bucket, a scrub brush, and a gentle cleaner like oxygen bleach. For more set-in stains, a pressure washer can be effective, but use it on a low setting to avoid damaging the pavers or joint sand. If DIY cleaning isn’t getting the results you want, our team offers professional cleaning and sealing services to restore them perfectly.

Create a Simple Maintenance Schedule

Consistency is the key to stain-free pavers. The best way to prevent stains is to sweep leaves off your pavers often, before they have a chance to sit. Try to create a schedule that works for you. A quick sweep once a week during the spring and summer can clear away debris. In the fall, make it a daily 5-minute habit to blow or sweep away fresh leaves. This small action makes a massive difference. This simple routine is the best way to preserve the beauty of your masonry investment for years to come.

Related Articles

Frequently Asked Questions

I just noticed some leaf stains on my patio. Do I need to clean them immediately? Not necessarily. Because these stains are organic, the sun and rain will naturally break them down and fade them over time. If you have the patience to wait a few weeks or months, you might find the problem resolves itself. However, if you want your patio looking its best right away, or if you’re planning on sealing your pavers soon, it’s best to clean the stains now. You never want to seal over an existing stain, as it will trap it under the protective layer.

My patio is right under a huge oak tree. Besides constant sweeping, what can I do? Living with a beautiful, mature tree often means dealing with a lot of leaves. While keeping up with sweeping is your first line of defense, the single most effective step you can take is to have your pavers professionally sealed. A quality sealant creates a non-porous barrier on the stone’s surface. This won’t stop the leaves from falling, but it will prevent the tannins from soaking in, making cleanup much faster and easier.

Can I accidentally damage my pavers while trying to clean them? Yes, it’s definitely possible to do more harm than good if you’re not careful. Using a pressure washer on a setting that’s too high can etch the surface of the stone or blast away the important jointing sand between the pavers. Likewise, using harsh, undiluted chemicals can cause discoloration. It’s always best to start with the gentlest method first and test any cleaning solution on a small, out-of-the-way spot before applying it to a large area.

What is the real difference between a paver cleaner and a paver sealer? Think of it this way: a cleaner is for solving a current problem, while a sealer is for preventing future ones. A cleaner is like soap; its job is to lift and remove existing dirt and organic stains that are already on the surface. A sealer is like a protective raincoat; it creates an invisible shield over your pavers to stop water and tannins from ever soaking in and causing a stain in the first place.

How often should I have my pavers sealed to keep them protected? The lifespan of a sealant depends on the quality of the product used and the amount of traffic and weather exposure your pavers get. Generally, a high-quality professional sealing job can last for several years. A good rule of thumb is to keep an eye on how water behaves on the surface. If you notice that water is soaking in quickly rather than beading up on top, it’s likely time to consider having them resealed.

Share this page: