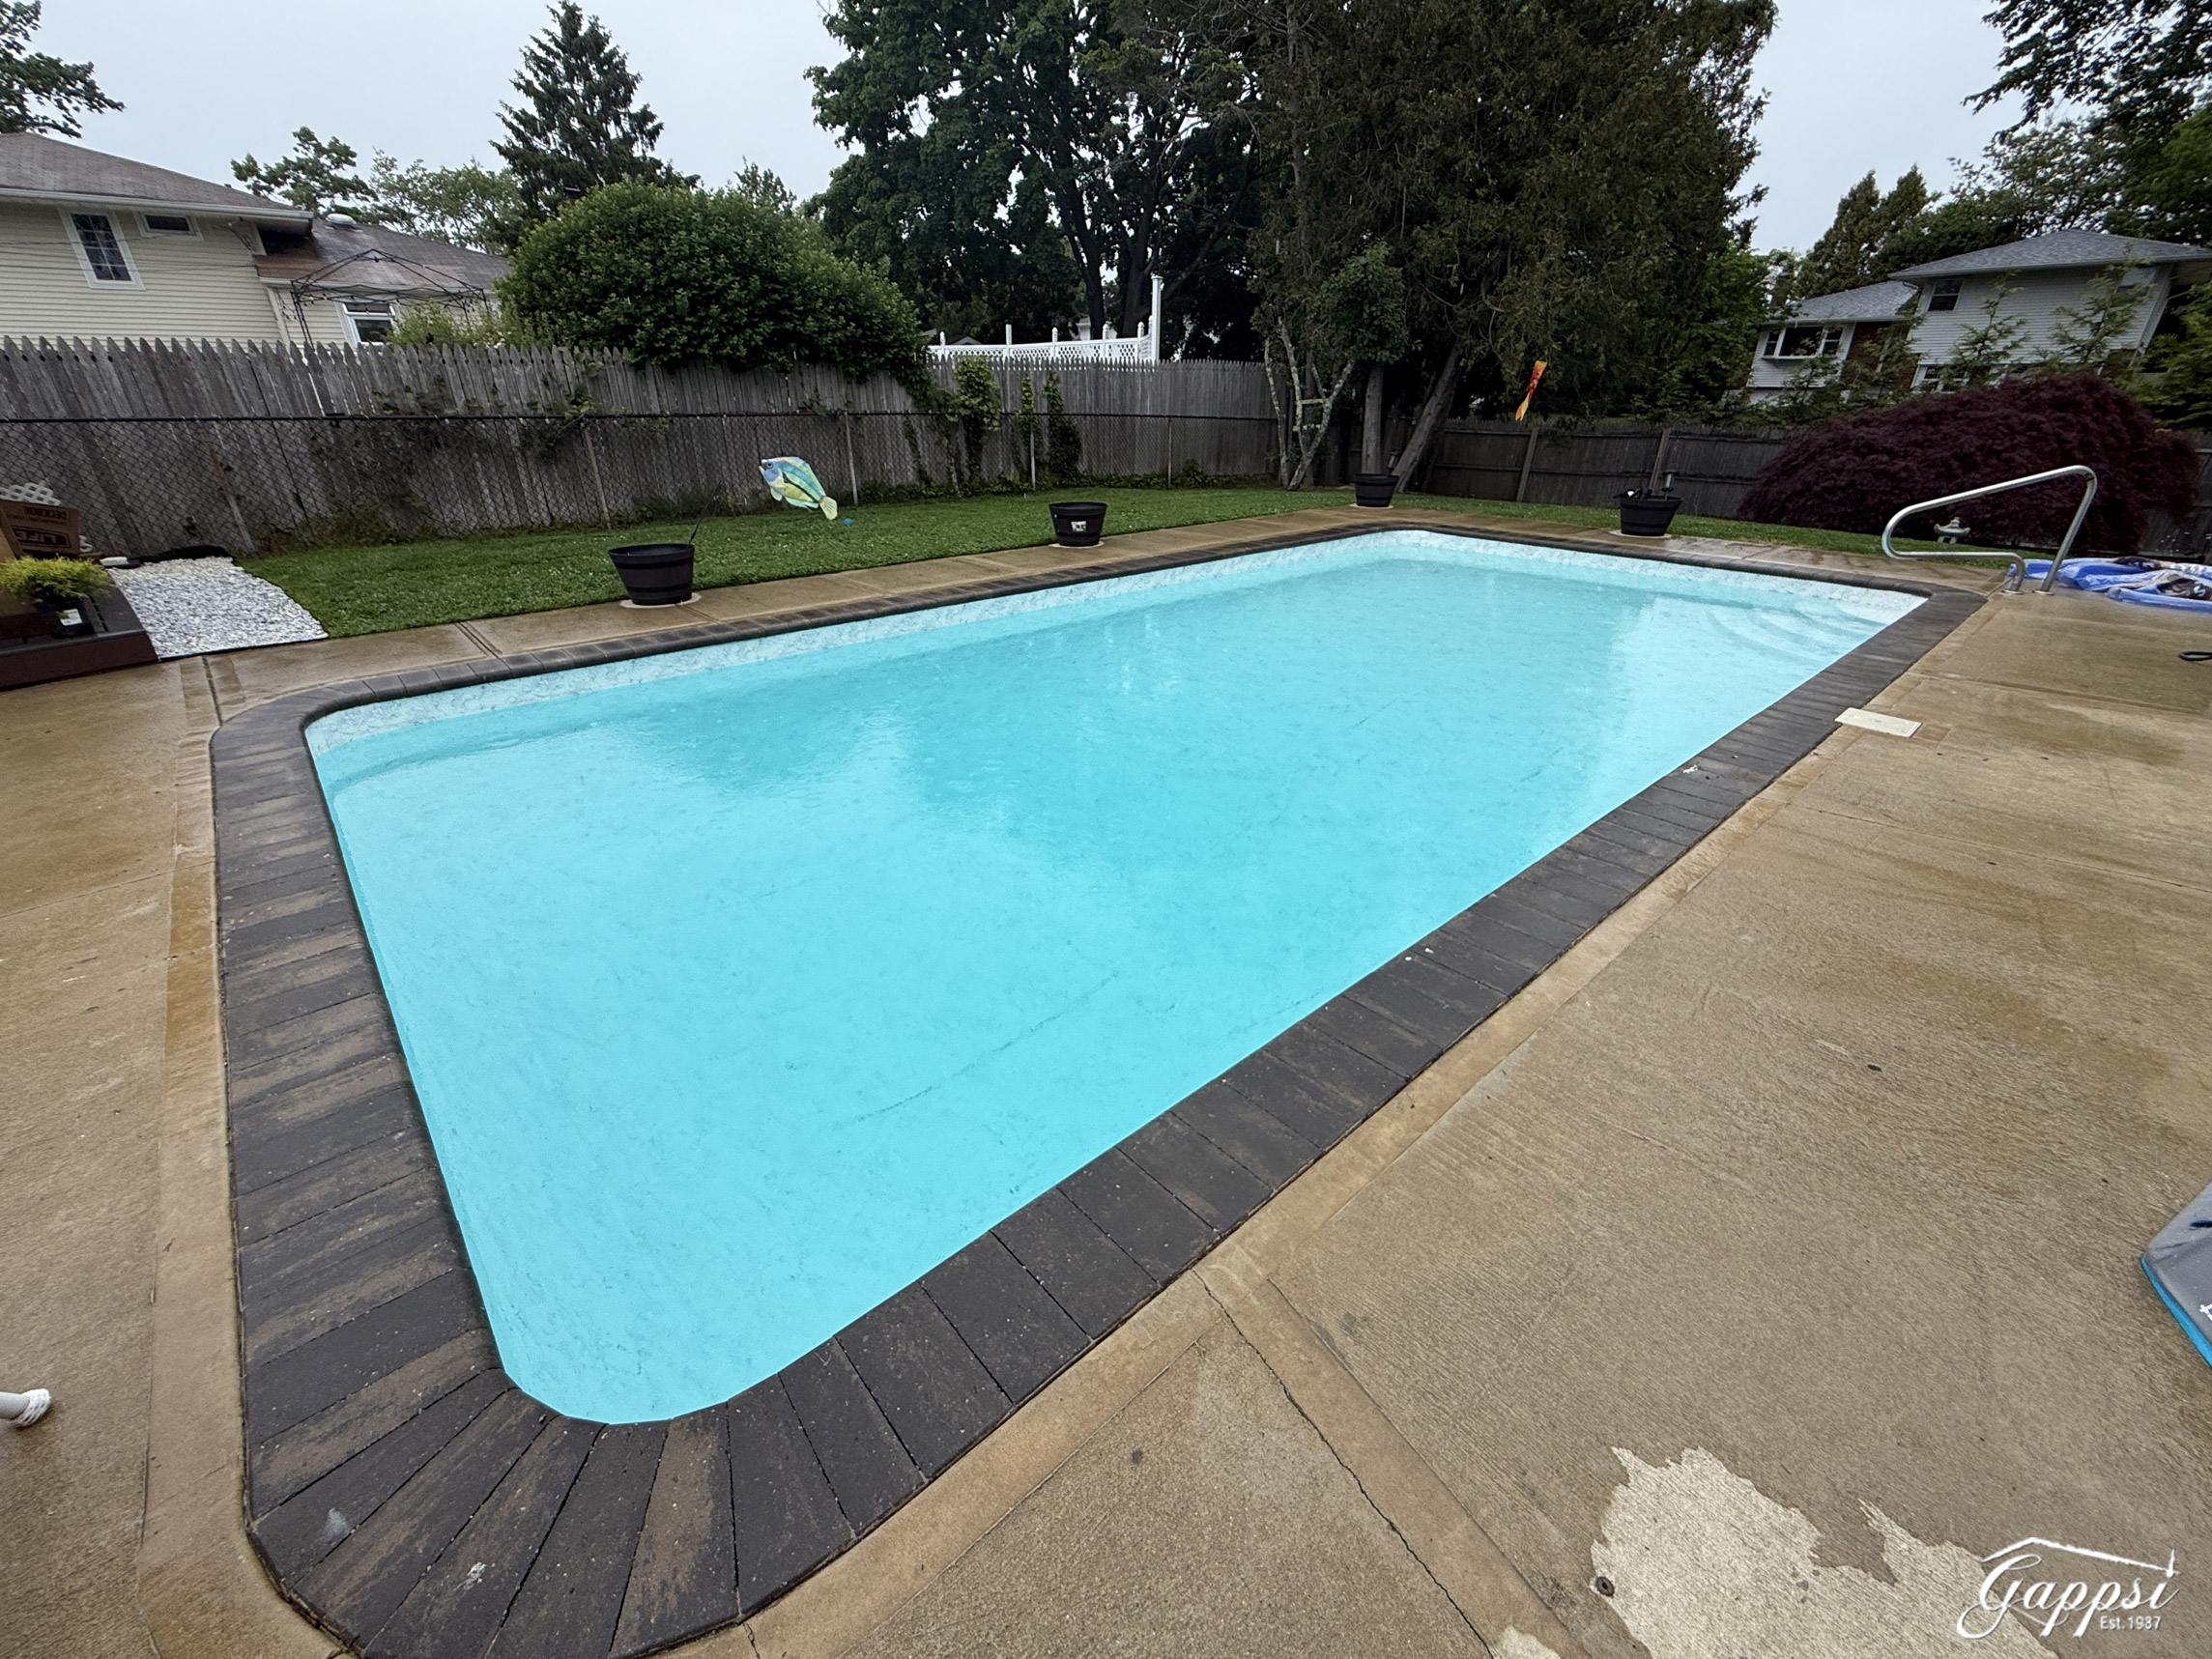
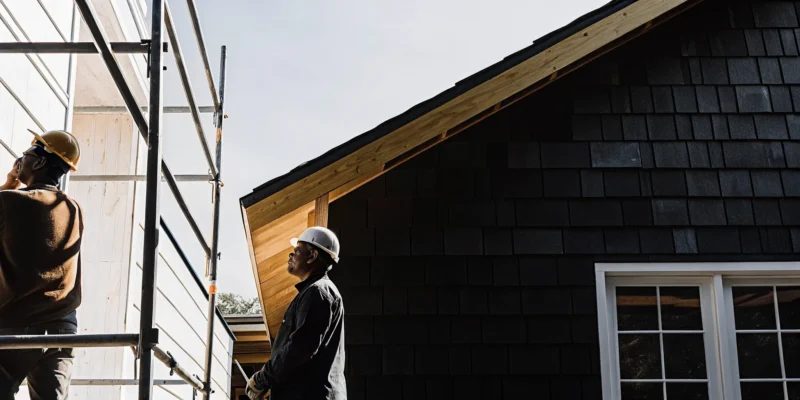
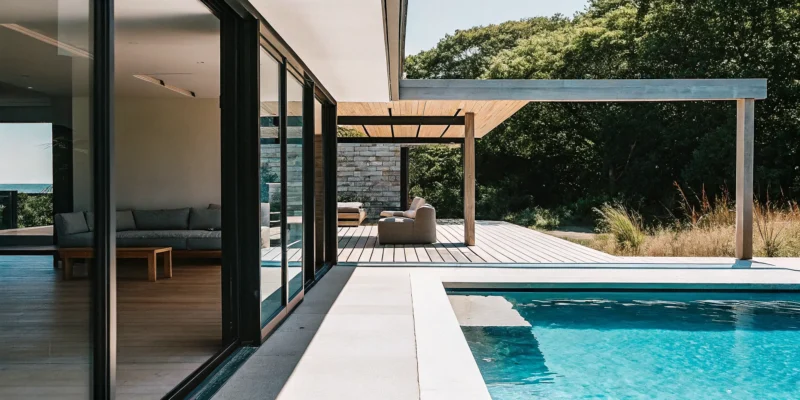
Low-voltage landscape lighting along a Long Island stone patio and walkway

Landscape Lighting Design on Long Island

Outdoor spaces on Long Island change character after sunset. A front walk, patio, planting bed, retaining wall, or pool approach can lose the structure that makes it useful during the day. A thoughtful plan restores visibility while preserving comfortable darkness and the character of the property.

Call Gappsi at (631) 831-3177 to discuss your landscape lighting plan.

Landscape lighting uses carefully positioned, low-voltage LED fixtures to guide movement, highlight architecture and planting, and extend the practical use of outdoor living areas. Gappsi plans these systems around light distribution, fixture placement, hardscape details, controls, and maintenance rather than treating lighting as a collection of isolated fixtures.

This guide explains how low-voltage systems work, which fixture types serve common outdoor spaces, how to plan a layout, what affects installation cost, and how lighting can be coordinated with patios, walls, pools, and planting.

What Is Low-Voltage Landscape Lighting and Why Use It?

A low-voltage landscape lighting system uses a transformer to supply outdoor fixtures with reduced electrical voltage. It commonly powers efficient LED lamps along paths, planting beds, walls, patios, steps, and other exterior features. The system should be designed around how people use the property, not placed wherever an outlet happens to be available.

The result depends on matching the light source, fixture position, beam direction, and control schedule to each task. A walkway may need soft, even guidance. A mature tree may need a narrower accent. A retaining wall may benefit from a controlled wash that shows texture without shining into nearby windows. The National Park Service explains that choosing the task area, fixture height, and light distribution helps limit glare and unwanted spill through its outdoor lighting principles.

How can landscape lighting improve safety and security?

Thoughtful lighting can make steps, changes in grade, walkways, and entry transitions easier to read during evening use. It can define the route from a driveway to a front door and make a patio or pool approach easier to navigate. It can also make the exterior of a home more visible from the approach. These effects can support a safer-feeling arrival, but lighting alone does not guarantee security.

Gappsi’s existing landscape lighting design guidance describes the relationship between safety, security, and appearance. The practical goal is balanced visibility, not maximum brightness.

Why choose LED and an integrated design?

LED fixtures use energy efficiently and can provide focused output for paths, trees, walls, and gathering areas. Responsible placement also reduces unnecessary light trespass. A professional plan considers the home’s facade, mature planting, masonry, circulation routes, and evening routines together. Lighting can be coordinated with Gappsi hardscaping and masonry services so steps, seat walls, patios, and retaining walls support the same nighttime composition.

Call Gappsi at (631) 831-3177 for a Long Island landscape lighting consultation.

Which Fixtures and Techniques Work Best?

The best fixture is the one that serves a clear purpose in the layout. Path lights should orient people without creating a bright runway. Uplights can give a tree or column more height. Downlights can illuminate a walking surface from above. Accent fixtures can draw attention to a specimen plant or textured masonry, while wall washes spread softer light across broader surfaces.

  • Path lights: Guide walkways, steps, and planting-bed edges with controlled illumination.
  • Uplights: Aim a managed beam into a tree canopy, column, or architectural feature to add depth.
  • Downlights: Cast light toward steps, paving, seating, or paths from an elevated position.
  • Accent lights: Focus attention on a specimen tree, planting group, or stone detail.
  • Wall wash fixtures: Spread light across a facade or retaining wall instead of creating a hot spot.
  • Well lights: Sit flush with the ground where an in-ground fixture can illuminate a tree or wall discreetly.
  • Hardscape lights: Fit beneath caps, benches, ledges, or steps to add concealed illumination.
  • Shielded fixtures: Limit direct views of the lamp and help keep light out of windows, seating areas, neighboring properties, and the sky.

Technique matters as much as hardware. Uplighting should reveal the branching structure of a tree without aiming glare toward guests. Downlighting is useful for a walking surface because the beam follows the task area. Wall washing works best when the fixture distributes light evenly. A narrower accent can create contrast on textured stone or a focal plant.

Glare control should guide every decision. Hide fixtures behind planting where practical, shield the light source, and use the lowest output that serves the area. This lets the eye move between lit features and darker areas. Gappsi can coordinate fixture placement with Long Island landscape design, patios, masonry, planting, and circulation routes.

How Should You Plan a Landscape Lighting Layout?

A successful layout begins before fixtures are selected. Walk the property after sunset and identify where light supports a real activity, guides movement, or reveals a feature worth seeing. The task-first approach described by the National Park Service is useful on Long Island properties where paths, planting beds, patios, and masonry share a limited footprint.

  1. Map task areas. Mark the front walk, driveway edge, steps, patio, outdoor kitchen, seating area, pool approach, and routes between the house and backyard. Make changes in elevation easy to read without shining fixtures toward a person’s eyes.
  2. Choose focal points. Identify the tree, specimen planting, retaining wall, entry, architectural detail, or masonry feature that should anchor the nighttime view. Add softer nearby illumination so the composition does not become one bright spot surrounded by darkness.
  3. Connect architecture and planting. Consider the facade, columns, rooflines, trees, shrubs, and beds as one composition. Account for future plant growth, views from interior rooms, and sightlines from outdoor seating.
  4. Find dark zones and control glare. Look for abrupt gaps near gates, steps, paths, and transitions between hardscape and lawn. Fill only the areas that need visual continuity. Keep light away from bedrooms, roads, neighboring properties, and the sky.
  5. Plan the transformer and load. Count fixtures by type and group them by zone. Paths, architectural accents, entertaining areas, and security-oriented locations may need separate controls or schedules.
  6. Test the design at night. Inspect the property from the sidewalk, driveway, patio, and primary interior viewpoints. Move or shield anything that causes glare, hot spots, or unwanted spill before final positions are fixed.

For a Long Island project, Gappsi can coordinate the layout with existing or planned outdoor construction. Homeowners can also review the landscape design and construction guide when planning a larger outdoor environment.

How Much Does Landscape Lighting Installation Cost?

There is no responsible one-size-fits-all price for landscape lighting installation. A professional estimate is site-specific because the scope depends on the property, desired nighttime use, access, and how the system must work with existing or planned construction. Gappsi evaluates the layout before recommending equipment, wiring, and controls rather than presenting an unsupported generic range.

The number of fixtures is one cost driver, but it is not the only one. A small group of path lights may require less labor than a broader design with uplighting. Wall washing, stair illumination, concealed hardscape fixtures, multiple zones, and restoration around established planting or paving can also change the scope. See Gappsi’s professional low-voltage LED landscape lighting service.

Landscape lighting cost drivers and planning questions
Cost driver Planning question
Fixture count and type Which paths, trees, walls, steps, beds, or gathering areas need light, and what effect should each fixture create?
Transformer and wiring Will the transformer support the planned load, and can wiring be routed efficiently while keeping connections protected?
Trenching and access Will installation cross established planting, lawn, paving, masonry, or areas requiring careful restoration?
Hardscape coordination Should lighting be planned with a patio, retaining wall, outdoor kitchen, pool edge, or steps before construction?
Controls and maintenance Do you need timers or zones, and who will clean lenses, check connections, and adjust fixtures?

Scope matters more than a fixture count alone. Planning lighting with masonry and planting can reduce disruptive rework and produce a more consistent result. Shielded fixtures and appropriate distribution direct light toward the task area while limiting glare and spill. A consultation can connect lighting priorities with existing conditions and future outdoor plans.

How Can Lighting Be Integrated Into Patios, Walls, and Pools?

Lighting works best when planned with the hardscape rather than added after construction. A patio, retaining wall, outdoor kitchen, pergola, or pool edge already has lines, steps, material changes, and gathering points that can guide fixture placement. Gappsi’s hardscaping and masonry work can be coordinated with low-voltage lighting so the finished backyard remains useful after sunset.

Patios and outdoor kitchens need layers that match each activity. Low-profile fixtures can provide subtle illumination beneath a seat wall, counter edge, or step. A covered patio may need a separate source for a dining table or food-preparation surface. Wall-mounted fixtures can define entries, while accent lights can reveal stone, brick, or stucco texture without flooding the area.

Warm low-voltage landscape lighting along a Long Island patio walkway

Walkways, steps, and retaining walls require attention to transitions. Small indicator or path fixtures can mark an edge without creating a bright line of evenly spaced lamps. Concealed hardscape fixtures under caps and steps can show changes in elevation while preserving the material’s daytime appearance. A wall wash can reveal texture, but the fixture must not shine directly into nearby windows or seating.

Pool edges and planting beds should be designed as one visual composition. Lighting can support movement around the deck, identify a change in grade, and highlight selected planting without creating reflections across the water. The plan should account for views from the house, seating areas, and paths. See the Gappsi swimming pool service for broader pool-project context.

Call Gappsi at (631) 831-3177 to coordinate landscape lighting with your outdoor construction plan.

What Maintenance Does Landscape Lighting Need?

Outdoor lighting needs periodic attention because fixtures live among soil, pollen, leaves, salt residue, irrigation, and changing plants. Maintenance should be part of the original plan. Clean lenses and housings, check connections, and confirm that fixtures still point toward their intended task area.

  • Clean lenses and housings: Remove dirt, pollen, leaves, and residue that reduce useful output.
  • Check alignment: Re-aim fixtures after planting grows, soil shifts, or seasonal work changes the view.
  • Inspect wiring: Look for damage, loose connections, or areas exposed by erosion or digging.
  • Review controls: Adjust timers and zones as sunset times change or outdoor routines evolve.
  • Manage planting: Trim growth that blocks a beam or causes unwanted shadows.

Long Island properties may need attention after storms, heavy rain, landscaping work, and winter conditions. A maintenance check is also a useful time to reassess glare, light trespass, and whether the original layout still matches how the property is used.

Frequently Asked Questions

What is the cost of professional landscape lighting installation?

Professional landscape lighting installation is priced by site and scope. Fixture types, fixture count, transformer capacity, wiring routes, access, trenching, controls, hardscape coordination, and restoration all affect the estimate. Gappsi reviews the property and intended nighttime use before recommending a project-specific system.

What are the benefits of low-voltage landscape lighting?

Low-voltage landscape lighting can improve visibility on paths and steps, highlight architecture and planting, and extend the use of patios and other outdoor areas after dark. LED fixtures can provide focused output, while shielding and careful placement help limit glare and unwanted spill.

How do you choose the right outdoor lighting fixtures?

Choose fixtures by task, not by appearance alone. Path lights guide movement, uplights add height, downlights illuminate surfaces from above, accent lights focus attention. Wall washes spread light across broad surfaces, and hardscape fixtures add concealed illumination to steps or caps.

Can landscape lighting be integrated into existing hardscapes?

Yes. Existing patios, walls, steps, outdoor kitchens, pergolas, and pool edges can be assessed for discreet fixture placement and safe wiring routes. The installer should account for material protection, access, sightlines, and glare before cutting, trenching, or attaching fixtures.

What is the typical maintenance requirement for outdoor lighting?

Maintenance usually includes cleaning lenses, checking connections, re-aiming fixtures, adjusting timers, inspecting wiring, and managing plants that block the light. Frequency depends on the landscape, weather, irrigation, salt exposure, and how much the planting changes.

Call Gappsi at (631) 831-3177 to plan landscape lighting for your Long Island property.

Share this page:
Contractors renovating an existing in-ground swimming pool with new gunite finish, coping and travertine deck

Pool Renovation on Long Island: Remodel vs Repair

An aging Long Island pool does not automatically need to be demolished. Cracked finishes, outdated equipment, leaking plumbing, and a dated deck can point to different levels of work. The first decision is whether the pool needs structural repair, a cosmetic remodel, or a broader renovation plan.

Call Gappsi at (631) 831-3177 to discuss your pool renovation options.

A pool renovation restores an existing swimming pool while upgrading selected features such as the finish, tile, coping, equipment, deck, lighting, or layout, without automatically replacing the entire shell. The right scope begins with evaluating the shell, bond beam, plumbing, and surrounding surfaces.

That distinction matters on Long Island, where repeated repairs may justify a coordinated project, while a sound shell may make targeted improvements the more practical choice. Start by defining what renovation includes, then match the scope to the pool’s condition and your long-term plans.

What Counts as a Pool Renovation?

A full pool renovation is more than applying a new finish. It is a coordinated update to the surfaces, systems, and surrounding features that determine how the pool looks, performs, and fits the backyard. The work may remain largely cosmetic, or it may include structural repairs and infrastructure upgrades after an inspection identifies underlying problems.

For a gunite pool in Nassau or Suffolk County, the scope should be defined before demolition begins. A contractor should evaluate the shell, waterline, equipment pad, plumbing, coping, and deck as connected parts of one system. If cracks or other structural problems are present, they need to be addressed before resurfacing. Covering a shell issue with a new finish can leave the cause unresolved and lead to another repair cycle.

The main components of a full renovation

  • Interior finish: The existing surface may be replaced with plaster, a pebble-based finish, or quartz. The material affects the pool’s appearance, texture, maintenance needs, and the time between major refinishing projects.
  • Waterline tile: New ceramic, porcelain, glass, or stone tile can refresh the waterline and create a more deliberate connection between the pool, coping, and deck. Tile selection also affects long-term cleaning and maintenance.
  • Coping: Replacing the edge material updates the pool’s profile and provides a clean transition to the surrounding hardscape. Coping can be coordinated with natural stone, travertine, or concrete pavers used elsewhere in the yard.
  • Equipment and plumbing: A renovation may include pumps, filters, heaters, automated controls, lighting, skimmers, main drains, or aging plumbing lines. Replacing inefficient equipment can reduce operating demands, while updating old underground lines may help prevent future leaks and disruptive excavation.
  • Deck and surrounding hardscape: Worn or cracked decking can be removed and replaced as part of the project. Addressing the deck at the same time as the pool helps manage elevations, drainage, access, and the visual relationship between the pool and outdoor living areas.

Not every project needs every component. Replacing tile and coping can modernize an older pool without changing its structural shell, while a broader renovation may combine resurfacing, equipment updates, and deck replacement. Gappsi can also coordinate design decisions so the renovated pool works with the larger backyard rather than appearing like an isolated upgrade.

For a closer look at finish work, review Gappsi’s guide to gunite pool resurfacing and refinishing. The right scope depends on the pool’s condition, the homeowner’s goals, and whether the existing shell and supporting systems can continue serving the property.

Remodel vs Repair: How to Tell the Difference

The most important distinction in an aging pool is whether the problem is structural or primarily cosmetic. A cosmetic remodel can change the appearance and usability of a sound pool. Structural repair addresses the parts that hold, contain, and circulate the water. At Gappsi, that decision should begin with an assessment of the existing gunite shell, not with a finish sample.

What belongs in a structural repair?

Structural work comes first when the pool is showing signs of movement, water loss, or deterioration behind the visible finish. Cracks in the gunite shell can allow seepage and worsen over time. The bond beam, which supports the waterline tile and coping, also needs to be sound before resurfacing or replacing those finishes. If it is compromised, installing new tile over it only conceals the problem temporarily.

Older underground plumbing is another key consideration. Aging lines can develop leaks that are difficult to locate and expensive to reach after a new surface or deck has been installed. Replacing vulnerable plumbing during a planned project may prevent future excavation. Visible seepage, unexplained water loss, shifting around the pool, recurring leaks, or repeated repairs all warrant a professional shell and systems assessment before cosmetic decisions are made.

Some warning signs are easier to see at the waterline. Loose coping, cracked tile, rough plaster, flaking finishes, and worn decking may indicate that the pool is ready for renovation, but they do not prove that the shell needs rebuilding. The same visible symptom can have different causes. For example, a damaged tile line may reflect ordinary age, movement in the bond beam, or water intrusion behind the finish. A site inspection helps separate a surface replacement from a repair that must happen below it.

  • Structural repair tasks: repairing gunite shell cracks, evaluating seepage or shifting, verifying bond beam integrity, and addressing aging underground plumbing.
  • Systems-related repairs: investigating circulation problems, plumbing leaks, and equipment issues that affect how the pool operates.

What can a cosmetic remodel change?

When the shell and supporting structure are stable, a cosmetic remodel can produce a substantial change without rebuilding the pool. Resurfacing can replace a worn interior finish with plaster, pebble-based material, or quartz. New waterline tile and coping can update the edge, improve the transition around the pool, and change the overall character of the backyard. Tile material choices, including ceramic, porcelain, or stone, also affect long-term maintenance at the waterline.

  • Cosmetic remodel tasks: resurfacing the interior, replacing waterline tile, updating coping, and refreshing the pool’s visible finishes.
  • Broader upgrades: replacing outdated equipment, improving lighting, or changing surrounding elements when they can be completed without correcting a shell defect.

A major remodel can cross both categories. Adding a tanning ledge, waterfall, or different pool shape may require significant structural modification, even when the original shell is mostly sound. That is why Gappsi evaluates the structure, plumbing, intended design, and surrounding site as one project. The right pool renovation does not simply cover old surfaces. It resolves underlying defects first, then applies cosmetic finishes.

What Are the Biggest Cost Drivers in a Pool Renovation?

How much does a pool renovation cost on Long Island? There is no responsible one-size-fits-all answer. A limited cosmetic remodel may begin in the lower thousands, while a larger renovation involving structural work, new decking, plumbing, and equipment can reach $30,000 or more. The pool’s size, age, shell condition, finish selections, and access to the property all affect the estimate. For perspective, Gappsi’s published baseline for a new gunite swimming pool on Long Island is $90,000 to $140,000. A renovation that preserves a sound shell is therefore evaluated differently from a full replacement.

The first major cost driver is the interior finish. Standard plaster, pebble-based finishes, and quartz each have different material, installation, and service-life considerations. Waterline tile and coping also affect the budget. Ceramic, porcelain, and stone tile vary in both appearance and maintenance needs. You can review a detailed guide to inground pool remodel cost before comparing finish packages.

Shell condition comes before appearance. Cracks, seepage, shifting, or a compromised bond beam must be assessed before resurfacing or replacing coping. Aging underground plumbing can add excavation and repair work, but replacing problematic lines during the project may help prevent future leaks. The scope may also expand when an older pool has outdated electrical components, filtration, or circulation equipment.

Equipment upgrades are another important variable. Replacing an inefficient pump with a variable-speed model can reduce electricity use, particularly in New York’s high-energy-cost environment. A heat pump, updated filter, automation, LED lighting, or saltwater conversion adds an upfront cost while changing how the pool operates and is maintained. Deck and coping work can become a substantial portion of the project when concrete, pavers, travertine, or other surrounding materials must be removed and rebuilt.

Typical pool project scopes and planning ranges
Scope Typical work General cost range Typical timeline
Cosmetic remodel Resurfacing, selected tile, coping, or equipment updates on a sound shell. Often lower thousands to tens of thousands, depending on materials. Several weeks
Full renovation Finish, tile, coping, plumbing or structural repairs, equipment, and portions of the deck. Often $30,000 or more when multiple systems are involved. Several weeks to a few months
Full replacement Demolition, excavation, new shell, new systems, finishes, and surrounding work. New gunite construction commonly falls near the $90,000-$140,000 Long Island baseline. Multiple months, subject to permits and weather

For additional context, see Gappsi’s guide to gunite swimming pool cost on Long Island. An on-site assessment is the only reliable way to separate a manageable remodel from a project that approaches replacement scope.

When Should You Renovate Your Pool Instead of Replacing It?

For many Long Island homeowners, the choice between remodeling a pool and building a new one is clear: renovating is more affordable when the existing shell remains structurally sound. Keeping that foundation avoids demolition, excavation, and the cost of constructing an entirely new pool. The right choice, however, depends on more than the age or appearance of the pool.

A gunite pool often gives homeowners a strong starting point for a redesign. Its concrete shell can support changes to the layout, finishes, and features, allowing a renovation to solve functional problems while updating the backyard’s appearance. Gappsi can help homeowners evaluate the existing pool alongside the surrounding patio, landscaping, and outdoor living areas through Long Island swimming pool design and construction.

Renovation is often the better economic decision when:

  • The shell is stable, with no unresolved cracking, shifting, or persistent seepage.
  • The pool’s shape and location still work for the backyard and how your household uses it.
  • Recurring repairs, aging finishes, or outdated equipment are creating a pattern of expense.
  • You want meaningful improvements without paying to remove and rebuild the entire structure.

Frequent repairs deserve special attention. Fixing one leak, finish failure, or equipment problem at a time may appear less expensive initially. Repeated service costs can add up without improving the pool as a whole. When repairs become frequent, a coordinated pool renovation may be more economical over the long term. A single project can address the finish, coping, tile, circulation system, and other related issues according to one plan.

Renovation does not necessarily mean preserving every dimension. A major rehabilitation can incorporate a tanning ledge, water feature, or revised pool shape, although these changes require substantial structural work. That flexibility can make an existing gunite shell worth renovating, especially when its placement fits the property’s grading, access, and outdoor circulation better than a new excavation would.

The deciding input should be a professional shell assessment. Gappsi should inspect for visible seepage or shifting, confirm the condition of the bond beam that supports the tile and coping, and check whether old plumbing could lead to underground leaks. Cosmetic work should not cover an unresolved structural problem. Conversely, replacing a sound shell simply because the tile, coping, surface, or equipment is dated can create unnecessary construction costs.

Call (631) 831-3177 to discuss your pool renovation with Gappsi

Replacement becomes more reasonable when the shell has extensive structural failure. The pool’s location no longer suits the property, or the desired redesign would require rebuilding nearly every component. An on-site evaluation can compare those costs with a renovation plan and give you a practical basis for deciding rather than relying on appearance alone.

Pool Renovation Upgrades That Add the Most Value

The most useful upgrades do more than change the appearance of an older pool. They can simplify routine care, improve how the space is used, and connect the pool to the rest of the backyard. During a renovation, Gappsi evaluates the existing shell, equipment, deck, and surrounding landscape together so each improvement supports the overall design.

  • Saltwater conversion: A saltwater system can make pool care more convenient and provide a softer water feel. It is not maintenance-free, but it can reduce the need to handle and add certain chemicals manually. Gappsi can assess whether the existing equipment and plumbing are suitable for the conversion.
  • LED pool lighting: Replacing older lights with LED fixtures improves evening visibility while using an efficient lighting format. Homeowners can also choose adjustable color settings to create a more flexible atmosphere for swimming, entertaining, or quiet evenings outdoors. Older underwater lights and wiring should be inspected as part of the renovation.
  • Automation and control systems: A centralized control system can bring filtration, heating, and lighting into one interface. Remote controls make it easier to adjust settings before using the pool, monitor routine operation, and avoid unnecessary equipment run time. This is especially useful when several systems were installed at different times.
  • Tanning ledges and in-pool seating: A shallow ledge creates a place to sit, cool off, or supervise children without using the deeper swimming area. Built-in seating can make the pool more comfortable for conversation. These additions may require substantial structural modification, so they belong in the design phase rather than as an afterthought.
  • Pool deck and landscape integration: A renovated pool can look disconnected if the surrounding paving, planting, drainage, and outdoor living areas remain unchanged. Coordinating the pool edge with travertine, natural stone, or concrete pavers creates a clearer transition from water to patio. Homeowners planning new or restored pavers can also review Gappsi’s guide to sealing pool deck pavers.

Contractor installing natural travertine pavers around a renovated in-ground swimming pool

Landscape integration can include planting beds, shade, walkways, an outdoor kitchen, or a seating area that follows the pool’s geometry. Gappsi’s design-build approach helps coordinate those decisions with the pool renovation instead of forcing separate contractors to work around completed surfaces. The result is a backyard that functions as one outdoor living space, with materials and elevations selected for practical use as well as visual continuity.

Prioritize upgrades according to the condition of the pool and the way your household uses it. A failing system or unsafe light circuit deserves attention before decorative features. Once the essential work is planned, design additions such as a ledge, lighting, and coordinated paving can make the renovated pool more useful for years to come.

How Long Does a Pool Renovation Take on Long Island?

There is no single schedule for every pool renovation. A simple finish replacement may move faster than a project that includes shell repairs, new plumbing, a redesigned deck, and updated landscaping. On Long Island, the most reliable timeline comes from evaluating the pool first, confirming the scope, and planning around permits and seasonal conditions. Gappsi maps those dependencies before construction begins so homeowners know what happens next.

  1. Site assessment and design: Gappsi inspects the existing pool, surrounding deck, equipment, drainage, and visible finishes. The design phase establishes whether the project is a focused update or a broader remodel, including decisions about tile, coping, surface materials, lighting, and usable backyard space.
  2. Permitting and planning: Permit requirements and review times can affect the start date. Long Island weather also matters, because cold temperatures, rain, and seasonal work limitations can change the construction sequence. The schedule should allow time for approvals, material selections, deliveries, and coordination with any masonry or landscape work.
  3. Demolition and structural repair: Existing finishes, damaged tile, coping, or sections of deck are removed as needed. Before cosmetic work proceeds, the pool shell and bond beam should be assessed. Cracks, shifting, seepage, or other structural concerns need attention first, rather than being covered by a new finish.
  4. Resurfacing, tile, and coping: Once the base is ready, the crew installs the selected interior finish and replaces waterline tile or coping where included. Material choices such as plaster, pebble, quartz, ceramic, porcelain, or stone affect both the appearance and the installation sequence.
  5. Equipment upgrades: Pumps, filters, heaters, plumbing, lighting, and controls are updated according to the approved plan. Replacing aging equipment or underground lines may add work to the schedule, but it can reduce the risk of future leaks and avoid reopening finished areas later.
  6. Deck and landscaping: Deck removal, new pavers or stone, drainage adjustments, planting, and other outdoor improvements follow the pool work when the design includes them. Coordinating these elements with Gappsi helps create a connected backyard instead of treating the pool as an isolated feature.
  7. Fill, finish, and startup: The pool is filled, systems are started, water chemistry is balanced, and the completed work is inspected. Proper balancing protects new surfaces and equipment. For Long Island homeowners, winterization and freeze-thaw protection should also be part of the care plan, especially if the project is completed near the end of the season.

Freshly resurfaced in-ground swimming pool with new quartz finish and ceramic tile waterline

In practical terms, a limited update may take less time than a complete renovation, while structural repairs and full backyard changes extend the schedule. The right answer to how long a pool renovation takes comes after an on-site assessment, not from a fixed promise. Gappsi can separate permitting, construction, and finishing milestones so the plan reflects the actual condition of your Long Island pool.

Call (631) 831-3177 to schedule your pool renovation with Gappsi

Frequently Asked Questions

Can you remodel an existing pool without rebuilding it?

In many cases, yes. A renovation can preserve the existing shell while updating the finish, tile, coping, decking, plumbing, lighting, and equipment. A professional shell assessment should come first if you see seepage, shifting, or recurring leaks.

How do I know whether my pool needs repair or a full renovation?

Cracks in the gunite shell, bond beam concerns, underground plumbing leaks, or movement call for structural evaluation before cosmetic work. If the shell is sound but the surface, coping, tile, deck, or equipment is worn, a focused remodel may address the problem without replacing the structure.

What typically affects the cost of a pool renovation?

The main variables are pool size, age, shell condition, finish materials, deck work, plumbing access, equipment selection, and design changes. Replacing a variable-speed pump, heater, or controls adds a different cost than resurfacing alone, so an on-site assessment is more useful than a broad online estimate.

Is renovating usually less expensive than building a new pool?

Often, renovation costs less because the project can retain the existing shell and avoid full demolition, excavation, and new construction. Replacement may deserve consideration when structural problems are extensive or the existing layout cannot support the way your family wants to use the backyard.

How long does a pool renovation take on Long Island?

There is no single timeline. Resurfacing or an equipment swap is generally simpler than a project involving structural repairs, new decking, or a changed pool shape. Permitting and seasonal weather can also affect scheduling, so your contractor should provide a phase-by-phase timeline after inspecting the pool.

Ready to Plan Your Pool Renovation?

A clear evaluation can help you separate structural repairs from cosmetic improvements and choose a renovation scope that fits your existing pool. Gappsi can help you review the pool’s condition, discuss design options, and map the next practical steps for your Long Island backyard.

Schedule a free pool renovation consultation by calling Gappsi at (631) 831-3177

Share this page:
Crew resurfacing the interior of an in-ground swimming pool on a Long Island backyard

Pool Resurfacing Cost on Long Island: What to Expect

A pool finish does more than affect appearance. As plaster, quartz, pebble, or another interior surface ages, stains, roughness, cracks, and repeated maintenance can signal that the finish is ready for professional attention. On Long Island, the right budget depends on the pool’s size, current condition, selected finish, and the work required around the shell.

The typical pool resurfacing cost is about $6,000 to $15,000, with an average near $11,000, while larger or more complex concrete pool projects can reach approximately $10,000 to $20,000. Those figures generally cover the interior finish work, not a full renovation that changes lighting, tile, coping, plumbing, or the pool structure.

Knowing what is included in an estimate makes it easier to compare contractors and distinguish a straightforward refinishing project from repairs or upgrades. Start by examining the factors that shape the final scope and price.

Call Gappsi Group at (631) 831-3177

What Determines Pool Resurfacing Cost on Long Island

A resurfacing estimate is built around the condition of the pool, the work required to prepare it, and the finish selected for the new interior surface. Pool size, current condition, finish choice, and location are the primary variables that move the total cost up or down. A larger pool requires more surface material, more labor, and more time to drain, prepare, and refill. A smaller pool can still require significant work if the existing surface has widespread damage.

The existing pool surface is often the first cost variable to investigate. A contractor may need to remove failing material, clean and prepare the shell. And inspect for cracks or other areas that need repair before the new finish is applied. A surface with staining or roughness may need different preparation than one with delamination, exposed aggregate, or shell damage. The condition should be documented during an on-site inspection rather than assumed from the pool’s age alone.

The selected finish also affects the budget. Plaster, quartz, pebble, and other finish systems have different material costs, application requirements, appearance, and expected service life. A finish should be chosen for the pool’s design, maintenance plan, and use, not just its initial price. The cost of a pool resurfacing project can include labor, materials, waste disposal, and possible pool-shell repairs, so an estimate that lists only the finish material may not represent the complete scope. See the documented cost components and influencing factors.

Long Island location can affect drive and logistical costs. Access to the property, distance for crews and deliveries, staging space, disposal requirements, and the municipality where the work takes place may all influence project planning. Nassau and Suffolk properties can have different site conditions, access constraints, and local procedures.

Before work begins, homeowners should verify permit requirements with their specific Long Island municipality. Requirements can vary by town or village, and confirming them early helps prevent scheduling surprises. Ask for a written scope that separates preparation, shell repairs, finish application, cleanup, disposal, and any optional updates to coping, tile, or lighting.

Call Gappsi Group at (631) 831-3177

How Much Does Pool Resurfacing Cost on Long Island?

For many Long Island homeowners, the pool resurfacing cost falls between approximately $6,000 and $15,000, with an average near $11,000. That range is a budgeting guide, not a fixed quote. The final price depends on the pool’s size, the condition of the existing finish. The selected material, and whether the crew finds shell damage after draining and preparing the pool.

Concrete pool resurfacing often occupies the higher end of the range. A typical estimate for resurfacing a concrete pool is approximately $10,000 to $20,000. Concrete surfaces may require more preparation, repairs, or finish material than a smaller or less deteriorated pool. A contractor should inspect the surface and explain each preparation or repair charge before work begins.

Resurfacing is not the same as building a new pool. These figures generally apply to renewing the pool’s interior surface. They do not represent a new gunite pool installation, and they should not be compared as if the two projects deliver the same scope. Gappsi’s published baseline for a new gunite swimming pool on Long Island is $90,000 to $140,000. A new build can include excavation, structural construction, plumbing, equipment, finishes, and other features. Resurfacing addresses the interior finish of an existing pool, although a broader renovation may add separate upgrades.

When comparing estimates, ask whether the quoted amount includes draining, surface preparation, labor, materials, disposal, and repairs. Also confirm whether the proposed finish is plaster, quartz, pebble, or another material. Two estimates with different totals may be pricing different levels of preparation or different expected service life.

Call Gappsi Group at (631) 831-3177

A useful estimate should identify the work included, the finish being installed, and any conditions that could change the price. It should also distinguish resurfacing from tile, coping, lighting, plumbing, or structural updates. Those additions can turn a surface project into a larger renovation, so keeping the scopes separate makes the budget easier to evaluate.

Pool Resurfacing Finish Types and Their Costs

The finish is one of the clearest ways to shape both the appearance and the pool resurfacing cost of a project. Gappsi Group installs several finish families, including marble dust plaster, quartz Diamond Brite, glass, Hydrazzo, and pebble. The right choice depends on the condition of the pool shell. The look you want in the water, and how much service life you expect from the new surface.

Blue pool water showing a textured interior finish

Cost tiers below are directional rather than fixed prices. Pool size, preparation, shell repairs, access, and selected color or aggregate can change the estimate. A contractor should inspect the existing surface before comparing finish proposals.

Pool resurfacing finish comparison
Finish type Cost tier Typical service life Look and characteristics
Plaster or marble dust Most budget-friendly About 7-10 years Clean, traditional surface with a simple color field
Quartz Middle Longer-lasting than standard plaster when maintained correctly Fine aggregate adds texture, color variation, and durability
Hydrazzo or polished finish Higher Varies by product, installation, and water care Smooth, marbled appearance; polished surfaces resist chemical erosion
Glass aggregate Higher Varies by product, installation, and water care Reflective detail that can create brighter color and visual depth
Pebble Higher About 15-20 years with proper care Natural, textured appearance with pronounced aggregate character

Plaster is often the practical choice when the initial budget is the priority, but its shorter expected life can mean more frequent resurfacing. Quartz occupies the middle ground, offering a durability and cost compromise between plaster and pebble. Pebble finishes generally command a higher initial investment, yet their 15-20-year service life can make the long-term calculation different. The finish is not the only variable: disciplined water chemistry helps protect any surface from premature damage.

For a closer look at finish and refinishing choices, visit Gappsi’s gunite pool refinishing guide. A site-specific estimate should identify the existing finish, preparation work, chosen material, and any related tile, coping, or shell repairs as separate line items.

When Should You Resurface Your Pool?

A pool finish does not fail all at once. It usually shows smaller warning signs before the surface becomes difficult or expensive to restore. Stains, visible cracks, rough texture, and persistent discoloration are all reasons to schedule an inspection rather than waiting for the next major pool season.

Age is another useful planning signal. Many pool finishes begin to need attention when they are approximately 10 to 15 years old, although the actual service life depends on the material, water chemistry, installation, and routine maintenance. A finish that still looks uniform and feels smooth may have more useful life remaining. A newer finish with severe wear may need work sooner if the pool has experienced chemical imbalance or surface damage.

What does a failing pool finish look like?

  • Rough or sandpaper-like areas: texture can indicate erosion, exposed aggregate, or deterioration of the finish.
  • Cracks and chips: isolated damage should be evaluated to determine whether it is limited to the finish or points to a deeper shell concern.
  • Stains that return after cleaning: recurring rust-colored, gray, or dark marks may not be ordinary surface dirt.
  • Discoloration across broad areas: uneven fading or mottling can signal that the finish is aging or reacting to water conditions.

Staining does not always mean that resurfacing is immediately necessary. Prolonged unbalanced pool chemistry can contribute to staining and discoloration, so testing the water and correcting pH, alkalinity, and sanitizer levels should be part of the diagnosis. If the surface remains stained, rough, or damaged after chemistry is brought under control, resurfacing may be the more practical solution.

It is also worth looking beyond appearance. A deteriorating finish can make brushing and cleaning harder, hold debris in rough areas, and affect how comfortable the pool feels underfoot. During an evaluation, the contractor should inspect the entire interior, waterline tile, coping, and surrounding details rather than quoting a finish replacement based only on photographs.

For a closer look at the process and local considerations, review Gappsi’s Long Island pool resurfacing guide. Planning before the finish reaches an advanced stage can give you more control over scheduling, finish selection, and the overall pool resurfacing cost.

How Long Does Pool Resurfacing Take?

Most pool resurfacing projects take about one to two weeks from preparation through refill, although the exact schedule depends on the finish, curing requirements, and weather. A contractor should give you a project sequence rather than a single optimistic date, because each stage affects the next one.

What happens during the resurfacing process?

The work typically begins with draining the pool and inspecting the exposed shell. The crew removes loose or damaged material, cleans the surface, and addresses preparation needs before the new finish is applied. For a concrete pool, preparation can include an acid wash, bond coat, and plastering. These steps are not interchangeable shortcuts. The condition of the existing surface can add work to the schedule, particularly when repairs are needed before the finish can be installed. Acid-washing chemicals can also cause serious burns when handled incorrectly, so this stage belongs with trained professionals. Safety information on muriatic acid explains the risk of improper use.

After preparation, the selected material is applied across the pool interior. The surface then needs time to cure and stabilize. Curing is one reason a finish should not be judged only by how quickly it can be installed. Plaster and pebble surfaces have different requirements, and curing time varies by product and site conditions. In some installations, pebble surfaces can be filled sooner than traditional plaster, but the installer should provide the specific startup and filling instructions for your finish.

How does Long Island weather affect scheduling?

On Long Island, seasonal planning matters. Temperature, rain, humidity, and overnight conditions can affect application and curing, while freezing weather makes late-season work more difficult. Spring and summer calendars can also fill quickly, especially when homeowners are preparing for pool season. Scheduling an inspection early helps identify whether the project can be completed before a planned event or opening date.

Once curing requirements are met, the pool can be refilled and the water balanced according to the finish manufacturer’s instructions. Plan for a follow-up period while the chemistry is monitored and adjusted. A realistic pool resurfacing cost discussion should include this timeline, the finish-specific care instructions, and any shell preparation, not just the days when material is being applied. That planning helps protect the new surface and reduces surprises during the first weeks of operation.

Pool Resurfacing vs Full Pool Renovation: What’s the Difference?

The distinction comes down to what needs to change. Pool resurfacing addresses the interior finish of an existing pool. The work may include draining the pool, preparing the shell, applying a bond coat, and installing a new plaster, quartz, hydrazzo, marble dust, glass, or pebble finish. It can correct a worn, rough, stained, or discolored surface while leaving the pool’s basic shape and equipment layout intact.

A full pool renovation has a broader scope. Renovation may change the pool structure, reshape steps or benches, add features, or alter how the pool functions within the surrounding outdoor space. If you want to change the footprint, add a tanning ledge, rebuild damaged structural areas. Or coordinate major deck and patio work, resurfacing alone will not address the entire project.

When is resurfacing the better fit?

Resurfacing is usually the practical choice when the shell remains sound and the main concern is the finish. A new surface can update the color, texture, and feel of the pool without turning a maintenance project into a structural remodel. It is also an opportunity to coordinate related details, including waterline tile, coping, and pool lighting. Those updates can make the pool look and operate more current while keeping the underlying basin in place.

The right scope depends on the condition of the pool, the finish you want, and the improvements you expect to make over the next several years. Homeowners comparing options can review this gunite pool renovation guide for a broader look at renovation planning. It is useful to separate cosmetic finish work from structural changes before estimating pool resurfacing cost, because combining several upgrades may change labor, materials, scheduling, and permitting requirements.

When does a renovation make more sense?

Renovation is the stronger fit when the pool needs more than a new interior surface. Structural repairs, redesigned circulation areas, new water features, and coordinated changes to the pool deck may require several trades and a single project plan. A renovation can also combine resurfacing with tile, coping, lighting, and surrounding masonry so the finished pool does not look like an isolated repair.

Gappsi uses a vertically integrated design-build model with its own specialized crews rather than relying on outside subcontractors. That structure allows the team to evaluate the pool, finish, lighting, coping, and surrounding hardscape as connected parts of one project. For examples of broader work, see this gunite swimming pool renovation overview. On Long Island, seasonal conditions should also be considered when combining resurfacing with a larger renovation. Since the sequence and timing of each phase affect when the pool can return to service.

How to Budget for Pool Resurfacing and Avoid Hidden Costs

A reliable budget begins with the work beneath the visible finish. The quoted pool resurfacing cost may cover labor and materials, but the final project can also involve waste disposal, repairs to the pool shell, surface preparation, and related updates. Ask for these items to be identified separately so you can compare proposals accurately instead of choosing a bid that leaves necessary work out.

On Long Island, also ask whether your municipality requires a permit for the planned work. Permit requirements can vary by location, so homeowners should verify the rules for their specific Nassau or Suffolk County municipality before scheduling the project. Building that step into the timeline can help prevent avoidable delays, reinspection costs, or changes after work has started.

Acid washing is another area where cutting costs can create a larger problem. It is used to clean and prepare some concrete pool surfaces, but it must be performed by trained professionals. Incorrect handling can damage the pool structure and turn routine preparation into a repair expense. A proper concrete resurfacing process may include acid washing, applying a bond coat, and installing the new plaster or selected finish. Your written proposal should explain which preparation steps are included and how the existing surface will be evaluated.

Pool resurfacing project with a prepared concrete pool surface

Contractor selection also affects the real cost of the job. Look for relevant resurfacing experience, current references, and crews managed by the contractor. Ask who will perform each stage, who handles shell repairs, and who is responsible if the finish does not cure as expected. A design-build company with its own specialized teams can provide clearer coordination when resurfacing is combined with tile, coping, lighting, or surrounding patio work.

Finally, protect the finish after installation. Regularly monitor and balance the pool’s pH, since proper chemistry helps prevent premature finish degradation and surface damage. Visible staining or discoloration can indicate that chemistry has been unbalanced for an extended period. Include opening, closing, and ongoing water-care responsibilities in your maintenance plan. A complete budget accounts not only for the installation, but also for the care that helps the new surface reach its expected service life.

Call Gappsi Group at (631) 831-3177 to discuss the right finish for your pool and get a site-specific estimate before you commit to a resurfacing plan.

Frequently Asked Questions

How much does it cost to resurface a pool?

Many pool owners spend about $6,000 to $15,000, with an average near $11,000. Although the final price depends on pool size, surface condition, finish selection, access, and required repairs. These figures are a planning range, not a project quote. Source: Swimply cost research.

How much does resurfacing a concrete pool cost?

Concrete pool resurfacing commonly falls around $10,000 to $20,000 when preparation, the selected finish, labor, and possible shell repairs are included. A site inspection is important because cracks, hollow areas, waterline tile, coping, and difficult access can change the scope. Source: industry cost research.

When should you consider pool resurfacing?

Consider an evaluation when the finish is roughly 10 to 15 years old or you see persistent staining. Discoloration, cracks, roughness, exposed aggregate, or trouble keeping the surface clean. Staining can also point to prolonged water-chemistry imbalance, so testing the water helps identify the cause before work begins.

How long does pool resurfacing take?

Most projects take approximately one to two weeks, but weather, preparation, finish selection, curing requirements, and inspection timing can extend the schedule. Long Island homeowners should plan around seasonal demand and confirm when the selected finish can safely be filled and treated. Source: industry timeline research.

What is the difference between pool resurfacing and a full renovation?

Resurfacing replaces the pool’s interior finish. A full renovation can also change the structure or add features such as new lighting, tile, coping, steps, equipment, or a redesigned layout. If the shell and layout are sound, resurfacing may address the main problem. Broader structural or functional goals call for a renovation assessment.

Ready to Plan Your Pool Resurfacing?

A site-specific review can help you compare finish options, identify necessary shell or surface repairs, and build a clearer budget for your Long Island pool project.

Call Gappsi Group at (631) 831-3177 for a free pool resurfacing consultation and site-specific quote.

Share this page:
Modern backyard sauna with a glass door installed by a professional Long Island installer.

Backyard Sauna Installer Long Island: An Essential Guide

Living on Long Island means enjoying beautiful, distinct seasons, but it also means any outdoor structure needs to be built tough. When you decide to install a backyard sauna, you need more than just a generic builder; you need a local expert. Someone who understands how to weatherproof a structure against coastal air and winter cold, and who knows the specific building codes for Nassau and Suffolk counties. A qualified backyard sauna installer Long Island brings this essential local knowledge to your project, ensuring your sauna is not only beautiful but also durable and compliant, ready for you to enjoy year-round.

Key Takeaways

  • Define your ideal sauna experience: Decide if you prefer the intense, steamy heat of a traditional Finnish sauna or the gentler, radiant warmth of an infrared model. Your choice will shape your wellness routine and the overall feel of your space.
  • Plan for the total investment: A realistic budget goes beyond the price of the sauna unit. Remember to account for professional installation, site preparation for a solid foundation, and the crucial cost of hiring a licensed electrician for safe wiring.
  • Vet your installer for a quality build: The right installer is essential for safety and durability. Always verify their license and insurance, ask for references from past clients, and get a detailed written estimate to ensure there are no surprises.

What Kind of Backyard Sauna Is Right for You?

Choosing a sauna for your home is an exciting step toward creating your personal wellness retreat. But with a few different types available, you might wonder which one is the best fit. The right choice really comes down to the experience you’re looking for, your health goals, and the space you have. Do you imagine a classic, steamy session after a long day, or a gentler, more modern heat? Are you dreaming of a standalone sauna in your backyard or a convenient unit inside your home?

Thinking about these questions will help you decide between the main types: traditional Finnish, infrared, and steam. Each offers a unique way to relax and recharge. At Gappsi, we help Long Island homeowners find the perfect sauna to match their lifestyle, whether it’s part of a larger backyard transformation or a quiet corner indoors. Let’s walk through the options so you can feel confident in your decision.

Traditional Finnish Saunas

When you picture a classic sauna, you’re likely thinking of a traditional Finnish sauna. These use an electric or wood stove to heat rocks, creating a powerful dry heat that can reach up to 195°F. You can also pour water over the rocks to generate a burst of steam, which adds a wonderful layer to the experience. This is the perfect choice if you love intense heat and the ritual of a classic sauna session. Because they require specific wiring or even a chimney for wood-burning models, professional installation is key to ensuring everything is safe and works perfectly from day one.

Infrared Saunas

If you find the high heat of a traditional sauna a bit too much, an infrared sauna could be your perfect match. Instead of heating the air around you, infrared saunas use special heaters to warm your body directly with gentle, radiant heat. The temperature inside usually stays between a comfortable 120°F and 140°F, allowing you to enjoy longer sessions. They are also very energy-efficient and heat up much faster than traditional models. Many infrared saunas are designed for easy setup, making them a fantastic option for those who want the wellness benefits of a sauna without the extreme temperatures.

Steam Saunas

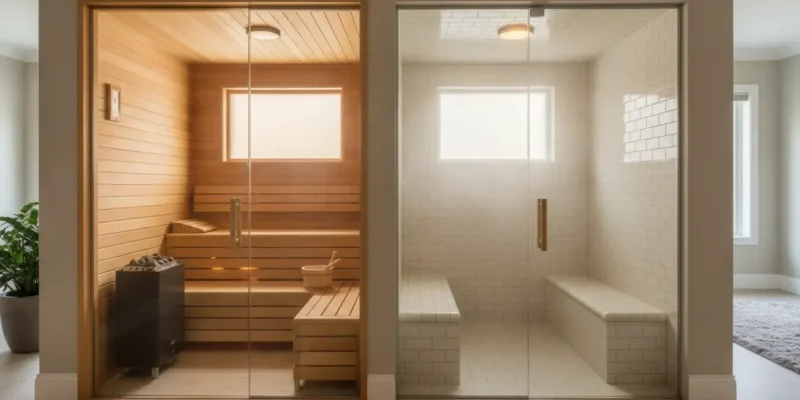
A steam sauna, often called a steam room, offers a completely different experience. Instead of dry heat, these rooms are filled with 100% humidity. This moist heat is incredible for deep relaxation, and many people find it helps with breathing and skin hydration, leaving you feeling refreshed and glowing. A steam sauna can turn your master bathroom into a personal spa. It’s a luxurious addition that can be seamlessly integrated into a larger home remodeling project, creating a true sanctuary right in your house.

Outdoor vs. Indoor Installations

Where you put your sauna is just as important as the type you choose. An outdoor sauna can become the centerpiece of your backyard, creating a beautiful escape where you can unwind in nature. Imagine stepping out of your sauna and into a cool evening or taking a dip in your swimming pool. On the other hand, an indoor sauna offers unmatched convenience and privacy. You can convert a spare room, a corner of your basement, or even a large closet into your personal wellness zone. With custom designs, a sauna can be built to fit almost any space, indoors or out.

Breaking Down the Cost of a Backyard Sauna in Long Island

Thinking about adding a sauna to your Long Island backyard is exciting, but it’s natural to wonder about the investment. The final price tag is more than just the cost of the sauna unit itself. To get a clear picture, you need to consider three main components: the sauna, the installation, and the necessary site preparations like electrical work. Understanding these elements will help you create a realistic budget and avoid any surprises along the way.

While the numbers here provide a solid starting point, remember that every project is unique. The size of your yard, the specific model you choose, and any custom features will all influence the final cost. The best way to get an accurate price is to work with a professional who can assess your space and provide a detailed quote. At Gappsi, we handle every aspect of the project, from designing the perfect layout to ensuring all the technical details are managed correctly, giving you a seamless experience and a clear understanding of the investment from day one.

Cost of the Sauna Unit

The first major expense is the sauna itself. The price can vary quite a bit depending on the type you choose. Generally, infrared saunas are a bit more budget-friendly, with prices typically ranging from $3,200 to $6,500. Traditional Finnish-style saunas, which use heated rocks and steam, often cost between $4,000 and $10,000.

What causes this price difference? It comes down to size, materials, and features. A larger sauna that fits more people will naturally cost more than a two-person model. The type of wood used, like cedar versus hemlock, also plays a role. Plus, any extra features like chromotherapy lighting or built-in sound systems will add to the price. Exploring different saunas and spas can help you see what features matter most to you.

Factoring in Installation

Once you’ve picked your sauna, the next step is getting it installed. Professional installation costs typically fall between $400 and $1,500. The final price depends on the complexity of the job. For example, assembling a pre-fabricated sauna kit is usually quicker and less expensive than building a fully custom sauna from scratch.

A straightforward installation of a pre-built model might only take a day, while a more involved custom project could take a week or more. While a DIY installation might seem tempting, hiring a professional ensures everything is set up safely and correctly, protecting your investment for years to come. A team with extensive home remodeling experience will handle the process efficiently.

Budgeting for Electrical and Extras

A crucial cost that homeowners sometimes overlook is the electrical work. Sauna heaters are powerful and require a dedicated 240-volt circuit with a GFCI breaker for safe operation. This isn’t just a suggestion; it’s often required by local building codes on Long Island. Budgeting between $300 and $800 for a licensed electrician to handle this is a smart move.

Beyond wiring, you might also need to prepare a foundation for your sauna. It needs a solid, level surface, like a concrete pad or a reinforced deck. If your chosen spot isn’t ready, you’ll need to factor in the cost of site preparation. This is where having a full-service team is beneficial, as they can handle everything from masonry work for the foundation to the final electrical hookup.

Essential Features for Your Backyard Sauna

Once you have an idea of the type of sauna you want, it’s time to think about the details that will make it perfect for you. Focusing on a few key features during the planning phase ensures your final sauna is not only beautiful but also safe, durable, and perfectly suited to your lifestyle. From the materials you choose to the way it fits into your backyard, these elements are what separate a good sauna from a great one.

Prioritize Quality Materials and Weatherproofing

Your backyard sauna is an investment, and you want it to last. Choosing high-quality, weather-resistant materials is crucial, especially with Long Island’s variable climate. Materials like cedar, hemlock, or thermally modified wood are popular for a reason: they naturally resist moisture, decay, and insects. A well-built sauna should feel solid and secure. Gappsi provides extensive design and construction expertise to ensure every structure we build is made to withstand the local weather, giving you peace of mind and a beautiful sauna for years to come. Think about the foundation and surrounding area, too, ensuring it’s built on a stable, level surface that can handle the elements.

Select Your Heating System

The heater is the heart of your sauna, and your choice will define your experience. Traditional saunas use electric or wood-fired stoves to heat rocks, creating a powerful, enveloping heat that you can control with water. If you love intense heat and steam, this is the classic choice. On the other hand, infrared saunas use infrared panels to heat your body directly, offering a gentler warmth at a lower air temperature. Many people find this experience more comfortable for longer sessions. Gappsi can help you explore the best sauna options and heating systems to match the wellness routine you’re looking for.

Ensure Proper Ventilation and Safety

Proper ventilation and electrical safety are non-negotiable. Good airflow is essential for a comfortable and safe sauna session, as it prevents the air from becoming stuffy and helps regulate the temperature. Without it, you can experience overheating and general discomfort. On the electrical side, sauna heaters require a dedicated 240V circuit, often with a GFCI breaker, to operate safely and meet local codes. This is not a DIY project. Hiring a professional installer ensures all electrical work is done correctly, protecting your home and family. It’s a critical step that guarantees your sauna is a place of relaxation, not risk.

Explore Custom Designs

Your sauna doesn’t have to be a standard box. A custom design allows you to create a sauna that fits perfectly into your backyard’s layout and your personal style. You can integrate it with an existing patio, deck, or pool area, or make it a stunning standalone feature. Think about adding a picture window to enjoy your garden view, incorporating unique bench layouts, or designing an exterior that complements your home’s architecture. With a custom build, you can tailor every detail to your needs, from the size and shape to the interior finishes. This is your chance to create a truly personal retreat with the help of Gappsi’s landscape design team.

Who Installs Backyard Saunas on Long Island?

Finding the right installer is just as important as picking the perfect sauna. You need a team that understands Long Island’s specific building codes and climate. A great installer handles everything from preparing the site to the final electrical hookup, making the process smooth and stress-free. When you partner with a full-service company, you get the peace of mind that every detail is managed correctly. Several excellent brands offer high-quality sauna units, and a local expert can help you source and install the one that fits your vision. Here are a few top names you’ll come across.

Gappsi

As a Long Island-based company with decades of experience, we at Gappsi are a one-stop shop for your entire sauna project. We supply, deliver, and install a wide range of saunas, including traditional wood-burning, electric, infrared, and steam models. Our team handles the complete installation for both indoor and outdoor setups, ensuring all electrical work complies with local regulations. Choosing a local installer who manages the whole process means you have a single point of contact and a partner who understands how to build lasting outdoor living spaces right here in your community.

Finnmark

Finnmark is a great choice if you appreciate true craftsmanship and durability. They are well-known for their high-quality traditional Finnish and infrared saunas that are built to withstand the elements. This focus on robust materials makes their units a reliable option for a backyard installation, where your sauna will be exposed to Long Island’s changing seasons. Their designs are perfect for anyone wanting an authentic and long-lasting sauna experience that feels both timeless and resilient.

SaunaLife

If you’re looking for a modern and practical solution, SaunaLife is a brand worth considering. They focus on creating energy-efficient and user-friendly designs, which can help keep your utility bills in check over the long run. SaunaLife offers a versatile selection of both indoor and outdoor models, making it easier to find a unit that fits your specific space and lifestyle. Their products are a popular choice for homeowners who want a blend of modern convenience, efficiency, and straightforward operation.

Auroom

For those who want their sauna to be a stunning design feature, Auroom delivers. This brand specializes in creating high-quality saunas that blend sleek, modern aesthetics with the traditional sauna experience. Their units are designed to be a beautiful addition to your backyard, turning your wellness space into a visual centerpiece. Auroom products are also engineered for optimal performance and a smooth installation process, making them a fantastic option for homeowners who value both form and function.

Haljas

Haljas stands out for its innovative and sustainable designs. If being eco-conscious is a priority for your home improvement projects, this brand is an excellent match. They focus on creating energy-efficient saunas with a modern, forward-thinking approach to design. Haljas offers a variety of options that can suit different backyard layouts and personal preferences. They are a top contender for homeowners interested in a sustainable product that doesn’t compromise on quality or performance.

What to Ask a Sauna Installer Before You Hire Them

Choosing the right installer is just as important as picking the perfect sauna. A great installation experience ensures your new backyard retreat is safe, functional, and built to last. Before you sign any contracts, it’s smart to have a list of questions ready. This helps you understand exactly what you’re getting and allows you to compare different companies effectively. Think of it as a friendly interview to find the best partner for your project.

Experience, Licensing, and Insurance

First things first, you want to know who you’re working with. Ask potential installers about their experience specifically with sauna installations. How many have they completed in the Long Island area? A seasoned pro will have a portfolio of work and be happy to share it. Don’t be shy about asking for references from past clients. Hearing directly from other homeowners is one of the best ways to gauge an installer’s reliability and the quality of their work.

Equally important are licensing and insurance. Your installer should have the proper licenses for construction and electrical work in Nassau or Suffolk County. Also, confirm they carry liability insurance and worker’s compensation. This protects you from any liability in case of accidents on your property. A professional company like Gappsi will readily provide this documentation for your peace of mind.

The Installation Process and Timeline

Understanding the full scope of the project will help you prepare and avoid surprises. Ask for a detailed overview of the installation process from start to finish. A key part of this involves electrical work. Most sauna heaters need a dedicated 240V circuit, which requires a licensed electrician to install safely and up to code. Clarify if their team includes a qualified electrician or if you need to hire one separately.

You should also ask about necessary permits. Many towns require building permits for permanent outdoor structures. A full-service installer should know the local regulations and handle the permit application process for you. Finally, get a clear and realistic timeline. While delays can happen, a professional installer should be able to give you a solid estimate for how long the project will take, from site preparation to the final walkthrough.

Warranties and Post-Sale Support

Your relationship with the installer shouldn’t end once the sauna is built. It’s important to ask about warranties. There are typically two types: the manufacturer’s warranty, which covers the sauna unit and its components, and the installer’s warranty, which covers their workmanship. Make sure you understand the terms and duration of both. A reputable installer will stand behind their work with a clear labor warranty.

Beyond the warranty, ask about post-sale support and maintenance. What happens if you have a question or an issue down the road? Find out if they offer any maintenance services to keep your sauna in top condition. Knowing what kind of long-term support is available can be a deciding factor, as it reflects the company’s commitment to its customers and the durability of their construction projects.

Pricing and Written Estimates

Talking about money can feel awkward, but it’s essential for a smooth project. Always request a detailed, written estimate from any installer you’re considering. A vague quote is a red flag. The estimate should break down all the costs clearly, including the sauna unit, materials, labor, permit fees, electrical work, and any other potential charges. This transparency helps you understand exactly what you’re paying for and prevents unexpected costs from popping up later.

When you compare estimates, make sure you’re comparing apples to apples. One company might seem cheaper, but they may not include services like permit handling or electrical wiring. Asking for a comprehensive quote helps you see the true value each installer offers. A trustworthy company will provide a clear, itemized estimate as part of their design and consultation process, ensuring you can budget confidently for your new backyard oasis.

How to Vet Local Sauna Installation Companies

Choosing the right installer is just as important as picking the perfect sauna. You’re not just buying a product; you’re investing in a complex project that involves design, construction, and electrical work. A great contractor ensures your sauna is safe, beautiful, and built to last, while a poor one can lead to headaches and costly repairs. Taking the time to properly vet potential companies is the best thing you can do to protect your investment and ensure you get the relaxing oasis you’ve been dreaming of. It’s about finding a partner you can trust to bring your vision to life correctly and safely.

Check Reviews and Ask for References

Before you sign any contracts, it’s time to do a little homework. Start by looking up online reviews, but don’t stop there. A reputable company should be more than willing to provide you with references from past clients. Ask for a list of recent projects and see if you can speak to a few homeowners about their experience. It’s also a great idea to see their work firsthand. Many installers showcase their finished projects online, which can give you a clear sense of their craftsmanship. You can often find video tours and testimonials on a company’s YouTube channel that provide an authentic look at their process and results.

Avoid These Common Hiring Mistakes

One of the biggest mistakes you can make is rushing the process. Some homeowners get so excited about the final product that they skip right over the critical planning and design stage. A good installer will work with you to map out every detail before construction begins. Another major pitfall is overlooking the electrical work. Improper wiring isn’t just a performance issue; it’s a serious safety hazard that can put your home and family at risk. Make sure your installer is licensed and follows all local codes. A well-planned sauna installation considers every detail from the start, ensuring a smooth process and a safe, functional final product.

Watch Out for These Red Flags

Many installation problems begin long before a single tool is picked up. Be wary of any contractor who seems to dismiss the importance of the planning phase. Critical details like layout, precise measurements, and especially ventilation must be thoughtfully considered. Forgetting to plan for proper ventilation is a classic mistake that can lead to an stuffy, uncomfortable experience and even cause the sauna to overheat. Vents need to be placed strategically to create a pleasant airflow. If an installer seems vague about these technical details or pressures you to make a quick decision, consider it a major red flag. A true professional will prioritize a safe and effective design for your backyard sauna.

Prepare Your Property for a Sauna Installation

Once you’ve picked out your dream sauna, the next step is getting your property ready for its arrival. Proper preparation is about more than just clearing a space; it’s about ensuring your sauna is safe, functional, and built to last for years of enjoyment. Thinking through the foundation, location, and electrical needs ahead of time will make the installation process smooth and stress-free. Let’s walk through the key considerations for getting your Long Island backyard ready for your new wellness retreat.

Prepare the Foundation and Site

Your sauna needs a solid, level base to sit on. Start by finding a spot in your yard with good natural drainage to prevent water from pooling around the structure. A concrete slab or a deck of crushed stone are popular choices for a stable foundation. It’s also important to check your local building codes for setback rules, which dictate how far the structure must be from property lines. Finally, consider the distance to your home’s electrical panel. A shorter distance can often simplify the wiring process and reduce installation costs. Our masonry experts can help you design and build the perfect foundation for your new sauna.

Choose the Right Location for Drainage and Access

Where you place your sauna can have a big impact on how often you use it. Think about the path from your house to the sauna, especially during a cold Long Island winter. You’ll want it close enough for a quick, comfortable walk. However, it shouldn’t be so close that it poses a fire risk or creates issues with your home’s existing utilities. A professional installer can help you find the sweet spot that balances convenience with safety. Thoughtful placement is a key part of our landscape design process, ensuring your sauna fits perfectly into your backyard oasis.

Plan for Electrical Safety and Wiring

Proper electrical work is not a place to cut corners. Most sauna heaters require a dedicated 240-volt circuit with a GFCI breaker, a safety feature that is required by code in many areas. This is not a typical DIY project. Improper wiring is a serious safety hazard that can damage your new sauna or, worse, cause a fire. Always hire a licensed electrician to handle the installation. At Gappsi, we coordinate all aspects of the project, including the electrical work, to ensure your sauna is installed safely and correctly from the start.

Consider Long Island’s Climate

Long Island weather gives us beautiful summers and chilly winters, and your outdoor sauna needs to be able to handle it all. A quality outdoor sauna is built with durable, weather-resistant materials that can withstand moisture, temperature fluctuations, and sun exposure without warping or degrading. Proper insulation is also key to ensure your sauna heats up efficiently, even on the coldest days. When we build outdoor structures, from pavilions and pergolas to saunas, we select materials and use construction techniques designed specifically for our local climate, giving you a beautiful and durable addition to your home.

Related Articles

Frequently Asked Questions

I’m still not sure if I want a traditional or infrared sauna. What’s the easiest way to decide? The best way to choose is to think about the experience you want. If you love the feeling of intense, enveloping heat and the classic ritual of pouring water over hot stones to create steam, a traditional Finnish sauna is for you. If you prefer a gentler warmth that heats your body directly and allows for longer, more meditative sessions at a lower temperature, an infrared sauna would be a perfect fit. It really comes down to whether you crave that powerful, steamy heat or a milder, radiant warmth.

Besides the sauna unit itself, what are the biggest extra costs I should budget for? It’s smart to plan for two main additional costs: the foundation and the electrical work. Your sauna needs a perfectly level and solid base, like a concrete pad or a reinforced deck, which might need to be built if you don’t have a suitable spot already. More importantly, every sauna requires a dedicated 240-volt circuit installed by a licensed electrician to operate safely. This isn’t an optional step; it’s essential for safety and meeting local codes, so be sure to include it in your initial budget.

How complicated is the installation process? Is it something I could handle myself to save money? While assembling a pre-fabricated sauna kit might seem straightforward, the complete installation has some critical steps that are best left to professionals. The electrical wiring, for example, must be done by a licensed electrician to ensure it’s safe and up to code. A professional installer also ensures the foundation is perfect, the structure is properly sealed against the weather, and the ventilation is set up correctly for a comfortable experience. Think of professional installation as an investment in safety and the long-term durability of your sauna.

What’s the best spot for a sauna in my backyard? Does it need to be near my pool or patio? The ideal location is a balance of convenience and atmosphere. You want it close enough to your house for easy access, especially on a cold day, but also placed in a way that feels like a special retreat. Integrating it near a pool or patio is a fantastic idea, as it helps create a cohesive wellness and entertainment zone. A professional can help you find a spot with good drainage that also works with your property’s layout and your home’s electrical panel location.

What kind of maintenance does an outdoor sauna require to keep it in good shape? Outdoor saunas are built to be durable, but a little regular care goes a long way. On the inside, it’s good practice to wipe down the benches and backrests after use and keep the floor clean. For the exterior, you’ll want to periodically inspect the wood for any signs of weathering and reapply a protective sealant every few years, depending on the material and Long Island’s climate. You should also occasionally check that the heater and any lighting are functioning correctly. This simple routine will keep your sauna looking and performing its best for years.

Share this page:
Budget-friendly swim spa installation with an above-ground unit and simple wood deck.

15 Swim Spa Installation Ideas on a Budget

A beautifully integrated swim spa can transform your backyard into a luxurious private resort, but achieving that polished, custom look doesn’t have to drain your savings. The secret isn’t about spending more; it’s about designing smarter. The placement of your spa, the materials you choose for the surround, and the landscaping that frames it all play a huge role in the final aesthetic. This guide is your source for creative and effective swim spa installation ideas on a budget. We’ll explore how simple choices, like tucking your spa into a corner or using a mix of gravel and pavers, can deliver a high-end feel. You can create a stunning, cohesive outdoor space that looks professionally designed, all while keeping your budget firmly in check.

Key Takeaways

  • Look beyond the sticker price: A realistic swim spa budget accounts for the unit and the installation. Factor in costs for a solid foundation, electrical work, delivery, and your chosen design (above-ground, semi-recessed, or in-ground) to avoid surprises.
  • Get creative with placement and timing: You can save money by using an existing patio for your foundation or tucking the spa into a corner to reduce finishing needs. You can also find better deals by shopping for your spa during the off-season, like fall or winter.
  • Create a luxe look for less: A beautiful surround doesn’t require a huge investment. Use budget-friendly materials like pressure-treated wood, gravel, and native plants, or tackle DIY projects like privacy screens to get a polished, custom look without overspending.

What Does a Swim Spa Installation Really Cost?

Figuring out the budget for a swim spa is about more than just the sticker price of the unit itself. The installation is a major part of the total investment, and the costs can change quite a bit depending on how you want it to look and function in your yard. The main factors are the type of installation you choose, the condition of your site, and the materials you use to finish the space. A simple setup on an existing patio will cost much less than a fully recessed spa that looks like a built-in pool, which requires excavation and more extensive construction.

At Gappsi, we help homeowners find the right balance between their dream backyard and their budget. Whether you’re looking for a simple, above-ground model or a fully integrated design, understanding the installation costs is the first step. We can help you explore options for hot tubs and swim spas that fit your lifestyle and complement your home’s aesthetic. From preparing the site to adding the final landscaping touches, every decision impacts the final cost. Let’s break down the typical costs for the three main types of installation so you can plan your project with confidence and avoid any surprises along the way.

Above-Ground Installation

This is the most straightforward and budget-friendly way to install a swim spa. For an above-ground setup, the spa simply sits on a solid, level surface. The installation cost for a simple project on a flat, accessible yard is often on the lower end of the spectrum, typically ranging from a couple of thousand dollars. The main expense here is preparing the foundation. You’ll need a reinforced concrete pad or a specially designed deck to support the spa’s weight. Our expert masonry team can create the perfect foundation to ensure your spa is safe and secure for years to come.

Semi-Recessed Installation

A semi-recessed installation offers a beautiful compromise between an above-ground and in-ground spa. By sinking the spa partially into the ground, you get a more custom, built-in look that’s easier to access. The installation costs for this style vary based on your site conditions, the vault design, and the materials you choose for the surround. You’ll need to account for excavation and building a retaining wall or vault. Finishing the area with materials like porcelain or natural stone pavers will create a polished look but will also influence the final price.

Fully In-Ground Installation

For the most seamless and luxurious look, a fully in-ground installation makes your swim spa appear like a traditional swimming pool. This is the most complex and expensive option, as it requires significant excavation, extensive plumbing and electrical work, and a concrete vault to house the spa. The final cost depends heavily on your specific design choices and the surrounding landscape construction. While the spa unit itself might have a clear price, the installation can be a major project that transforms your entire backyard into a cohesive outdoor living space.

Factor in Ongoing Running Costs

Your budget shouldn’t stop at installation. It’s also smart to plan for the long-term running costs of your swim spa. On average, you can expect to spend between $1,000 and $3,000 per year to operate your spa. These costs cover electricity to run the heater and jets, water care chemicals to keep it clean, and occasional filter replacements. A high-quality, well-insulated cover is one of the best investments you can make to keep these heating costs down. Thinking about these recurring expenses from the start will help you enjoy your new swim spa without any financial surprises down the road.

Check These Site Requirements Before You Buy

Before you get too far into dreaming about your new swim spa, it’s important to handle the practical side of things. Proper site preparation is the key to a smooth installation and a spa that lasts for years. Taking the time to assess your property for these key requirements will save you from unexpected costs and headaches down the road. Think of it as creating the perfect home for your new favorite backyard feature.

Find a Solid, Level Foundation

Your swim spa needs to sit on a perfectly solid and level surface. When filled with water and people, a swim spa can weigh close to 20,000 pounds, so a structurally sound foundation is not negotiable. A reinforced concrete pad is the most common and reliable option. Placing your spa on an uneven or weak surface can cause structural damage to the spa shell over time and may even void your warranty. We can help you prepare the perfect base with professional masonry services to ensure your investment is secure from day one.

Consider Sunlight, Shade, and Privacy

Think about where the sun hits your yard throughout the day. Placing your swim spa in a spot with full, direct sun might make it too hot for a comfortable afternoon soak in the summer. On the other hand, a completely shaded spot might feel too cool. You also want to consider privacy from neighbors. The ideal location offers a balance of sun, shade, and seclusion. A well-placed pergola or pavilion can provide shade and privacy, creating a comfortable and intimate atmosphere for you to enjoy your spa in any weather.

Plan for Power, Plumbing, and Access

A swim spa requires a dedicated electrical circuit, which must be installed by a certified electrician to ensure safety and meet local codes. You’ll also need easy access to a water source for filling it and a plan for drainage. Don’t forget about the delivery itself. You need a clear, wide path from the street to the final location, free of obstructions like fences, air conditioning units, or low-hanging tree branches. Planning for these logistical needs is a core part of our home remodeling and installation process, so everything is handled correctly from the start.

Review Local Permits and Regulations in Long Island, NY

Before any work begins, you must check the local regulations in your specific Long Island town or village. Permitting requirements can vary significantly across Nassau and Suffolk counties. You may need an electrical permit, a general construction permit, or both. Some areas also have specific rules about how far the spa must be from your property line or home. Failing to secure the right permits can lead to fines and problems later on. Working with an experienced local installer who understands these regional differences ensures your project is fully compliant and hassle-free.

Budget-Friendly Swim Spa Placement Ideas

You don’t need a massive yard or an unlimited budget to create a beautiful swim spa retreat. In fact, some of the most stunning and functional designs come from clever placement. Thinking strategically about where your swim spa will go can save you a significant amount on site preparation, materials, and labor. It’s all about working with what you have and making smart choices that align with your vision and your wallet.

From tucking it into an unused corner to building a simple deck around it, your placement decision is the first step toward creating a space you’ll love. Let’s look at a few practical and cost-effective ideas for your Long Island home.

Tuck It Into a Corner or Against the House

Placing your swim spa in a corner of your yard or right up against your house is a fantastic way to save space and money. This approach minimizes the need for extensive landscaping on all four sides and can create a cozy, sheltered nook. Using existing structures like your home or a sturdy fence as a backdrop provides instant privacy and a windbreak. You can install it above ground for simplicity or partially recess it for a more integrated feel. This flexibility allows you to choose a location that best fits your landscape and budget, turning an overlooked area into your favorite spot to unwind.

Use an Existing Patio or Concrete Slab

If you already have a structurally sound patio or concrete slab, you’re in luck. Using an existing foundation is one of the biggest money-savers for a swim spa installation. It eliminates the cost and time associated with pouring a new concrete pad, which can be a major expense. A simple above-ground installation on a flat, accessible surface is the most straightforward option. Before moving forward, have our team at Gappsi inspect the slab to ensure it’s level and can support the weight of a filled swim spa. If it’s ready to go, you can focus your budget on other features, like landscaping or a beautiful porcelain paver surround.

Get a Polished Look with Partial Recessing

For a high-end look without the full cost of an in-ground installation, consider a semi-recessed design. By digging down just a foot or two, you can lower the profile of your swim spa, making it easier to get in and out of while creating a sleek, custom appearance. This method requires less excavation than a fully in-ground project, which saves on labor costs. You can then build a simple deck or stone patio up to the edge of the spa. This gives you the best of both worlds: a streamlined look that integrates beautifully with your yard and a more manageable price tag. Our swimming pool installation experts can help design the perfect semi-recessed setup for your space.

Shop Off-Season to Find Better Deals

While this isn’t a placement tip, it’s a budgeting strategy that’s too good to ignore. Timing your purchase can lead to significant savings. Swim spa retailers often offer discounts during the fall and winter months after the peak summer season has ended. This “off-season” is the perfect time to find a great deal on the model you want. By planning ahead and buying when demand is lower, you can free up more of your budget for the installation and surrounding landscape. You can then schedule your installation for the spring and have your new swim spa ready to enjoy as soon as the weather warms up.

Affordable Decking and Surround Ideas

The area around your swim spa, often called the surround, is just as important as the spa itself. It’s what integrates the spa into your backyard, provides a safe entry and exit, and sets the overall mood. A beautiful surround can make an affordable, above-ground swim spa look like a custom-built oasis. You don’t need a massive budget to create a stunning and functional space. From classic wood to modern pavers, there are plenty of cost-effective materials that deliver a high-end look. Thinking about the material that best fits your lifestyle and budget is the first step toward creating a swim spa area you’ll love for years to come.

Choose Pressure-Treated Wood Decking

Wood is a timeless and popular choice for a reason. It’s affordable, versatile, and creates a warm, natural look. Building a custom wood deck that wraps around your swim spa can give an above-ground model the polished appearance of a fully recessed installation for a fraction of the cost. Pressure-treated pine is one of the most budget-friendly options available. While it requires regular maintenance like staining and sealing to prevent rot and weathering, the initial savings are significant. Proper care ensures your deck remains beautiful for years, and professional restoration and sealing services can help keep it in top condition.

Explore Budget-Friendly Composite Decking

If you love the look of wood but want to skip the annual maintenance, composite decking is an excellent alternative. Made from a blend of wood fibers and recycled plastics, this material is designed to withstand the elements without warping, splintering, or fading. While the upfront cost is higher than pressure-treated wood, you’ll save money and time on upkeep in the long run. Composite decking comes in a wide variety of colors and finishes, making it easy to match your home’s exterior and create a cohesive outdoor living space. It’s a durable, stylish option for a low-maintenance swim spa surround that looks great for years.

Use Gravel and Stone for a Low-Cost Surround

For a simple, modern, and incredibly budget-friendly surround, consider using gravel or crushed stone. A clean bed of pea gravel creates a minimalist look that’s easy to install and provides excellent drainage around your swim spa. You can frame the area with landscape edging to keep the stones contained and add large, flat pavers as stepping stones for a comfortable path. This approach is perfect for creating a zen-like atmosphere. You can even use different colored stones to create patterns or borders. Gappsi offers a variety of natural stone options that are perfect for creating a simple yet elegant spa foundation.

Get a High-End Look with Porcelain or Stone Pavers

If you want to achieve a luxurious, permanent feel, pavers are a fantastic investment. Materials like natural stone or porcelain create a sophisticated and durable surface that elevates your entire backyard. While more expensive than gravel or wood, pavers offer unmatched longevity and require very little maintenance. They provide a solid, level base and a seamless transition from your spa to the rest of your patio or landscape. With a wide selection of porcelain and natural stone pavers, you can design a surround that perfectly complements your home’s style, giving you a resort-quality finish that will last a lifetime.

How Can Landscaping Transform Your Spa Area on a Budget?

The right landscaping is what turns a simple swim spa installation into a personal backyard retreat. It’s the final layer that adds personality, softness, and a sense of escape. But creating that oasis doesn’t have to drain your wallet. With a bit of planning and some smart choices, you can achieve a high-end look that complements your home and lifestyle without overspending. The key is to focus on elements that deliver a big visual impact for a small investment.

Thoughtful landscaping can frame your spa, create privacy, and tie the entire space together. Instead of just having a spa sitting on a slab, you can integrate it into a cohesive design that feels intentional and beautiful. From lush greenery and textured stone to simple pathways, there are plenty of budget-friendly ways to make your spa area feel like a destination. Let’s explore a few ideas that will help you get a polished, professional look for less.

Plant Native, Low-Maintenance Greenery

Plants are one of the easiest ways to soften the hard edges of a swim spa and make it feel like a natural part of your yard. To keep your budget and to-do list in check, focus on native and low-maintenance greenery. Choosing plants that thrive in Long Island’s climate means less watering, less fuss, and less money spent replacing them. Ornamental grasses, ferns, and hardy succulents are excellent choices because they add texture and color without demanding constant attention. A professional landscape designer can help you select the perfect plants that will flourish around your spa, giving you a lush look that lasts.

Create a Rock Garden with Decorative Stone

If you want a sophisticated look with almost zero upkeep, a rock garden is a fantastic option. Using a mix of decorative stones, gravel, and a few hardy plants, you can create a visually interesting landscape that won’t require mowing or watering. This approach is perfect for adding texture and a modern feel to your spa area. You can use larger stones to frame the spa or create a clean, defined border with smaller pebbles. Integrating different sizes and colors of natural stone helps build a space that feels layered and thoughtfully designed, giving you a major style upgrade for a minimal investment.

Install Stylish, Low-Maintenance Synthetic Turf

A lush green lawn around your spa looks beautiful, but the upkeep can be a hassle. Constant mowing, watering, and fertilizing add up over time. A great budget-friendly alternative is synthetic turf. It gives you that perfect, vibrant green look year-round without any of the maintenance. This is a smart long-term investment that saves you time and money. Plus, you won’t have to worry about grass clippings or mud getting into your spa. Gappsi offers high-quality synthetic turf and sports games courts that provide a clean, durable, and beautiful surface for any backyard design.

Add Mulch, DIY Garden Beds, and Simple Paths

Sometimes the simplest additions make the biggest difference. Applying a fresh layer of mulch to your garden beds is an inexpensive way to make your entire spa area look neat and polished. It also helps suppress weeds and retain moisture for your plants. You can also define the space by creating simple pathways using affordable materials like gravel or individual stepping stones. These paths not only add charm but also guide foot traffic, protecting your lawn. Combining mulch with well-placed garden beds and a simple path can completely transform your spa’s surroundings, creating a cohesive and inviting aesthetic on a tight budget.

Privacy and Ambiance Solutions That Won’t Break the Bank

Creating a private, relaxing oasis around your swim spa is just as important as the spa itself. After all, you want a space where you can truly unwind. The good news is that you don’t need to spend a fortune to achieve a sense of seclusion and style. With a few smart choices, you can build an inviting atmosphere that feels like a high-end retreat. From simple structures to natural screens and creative lighting, here are some budget-friendly ways to enhance your swim spa’s privacy and ambiance.

Install a Pergola or Lattice Panels

A pergola is a fantastic way to define your spa area and add a touch of architectural elegance without completely closing it in. It creates the sense of an outdoor room and provides a perfect structure for hanging string lights, climbing vines, or flowing curtains for extra privacy. If a full pergola is outside your budget, consider installing simple lattice panels. You can place them strategically to block views from neighbors or the street. They are affordable, easy to install, and can be painted or stained to match your home’s exterior. Gappsi offers beautiful pavilions and pergolas that can be customized to fit your space and budget.

Consider Different Fencing Options

Fencing is a classic and effective way to create a private sanctuary around your swim spa. You have plenty of affordable options, from traditional wood fences to low-maintenance vinyl. A decorative fence not only blocks sightlines but also adds to the overall aesthetic of your backyard. One crucial tip: make sure any permanent structure leaves enough room to access the spa’s equipment panels. You don’t want to be stuck with costly demolition just to perform routine maintenance. A well-planned fence installation ensures both privacy and practicality, giving you a peaceful retreat designed for total comfort.

Plant Fast-Growing Hedges for Natural Privacy

For a softer, more organic approach, use plants to create a living privacy screen. Fast-growing evergreen hedges like Arborvitae or Privet can form a dense wall of green in just a few seasons, offering year-round seclusion. Planting hedges is often more affordable than building a fence, and it adds natural beauty and texture to your backyard. You can also use large potted plants or tall ornamental grasses to create flexible privacy around your spa. A thoughtful landscape design not only enhances privacy but also turns your spa area into a lush, tranquil garden escape.

Set the Mood with Affordable Lighting

Lighting has a massive impact on ambiance, and you can create a magical atmosphere without a big investment. Simple string lights draped over a pergola or nearby trees cast a warm, inviting glow perfect for evening relaxation. Solar-powered path lights are another great option for illuminating walkways around the spa safely and affordably. For a DIY touch, you can hang mason jar candles or use flameless LED candles placed around the spa surround. The right lighting transforms your swim spa from a simple water feature into a captivating focal point of your backyard after the sun goes down.

What DIY Projects Offer the Biggest Savings?

While certain parts of a swim spa installation, like electrical work, should always be left to the professionals, there are plenty of projects you can tackle yourself to save money. Getting your hands dirty with a few DIYs is the perfect way to add a personal touch to your backyard oasis without stretching your budget. These projects focus on the surround, landscaping, and ambiance, which are the elements that truly make the space your own. By handling these finishing touches, you can allocate more of your budget to the spa itself and the essential site prep, ensuring a high-quality foundation for your new favorite spot.

It’s about being smart with your resources. You get the satisfaction of building something with your own hands while still relying on expert craftsmanship for the critical components. This hybrid approach gives you the best of both worlds: a professionally installed, reliable spa and a beautifully personalized setting that reflects your style, all while keeping your finances in check. Focusing your DIY efforts on aesthetics lets you create a custom look that feels luxurious and complete, proving that a dream backyard doesn’t have to come with an impossible price tag.

Build Your Own Deck Surround

A deck is a fantastic way to seamlessly integrate your swim spa into your backyard, and building it yourself can cut labor costs dramatically. With some basic carpentry skills, you can create a beautiful and functional surround. Consider creative designs like a multi-level deck to add dimension or build in bench seating for extra lounging space. Pressure-treated wood is a durable and cost-effective material to start with. You can also combine your DIY deck with professionally installed elements for a truly custom look. For example, adding a small masonry retaining wall or stone accents can create a stunning mixed-material design that feels incredibly high-end.

Create DIY Privacy Screens and Planters

Privacy is essential for creating a tranquil and relaxing swim spa environment. Instead of investing in a full fence right away, you can create stylish and effective privacy screens yourself. Simple lattice panels from a home improvement store can support climbing vines, creating a living wall of green. You can also build large planter boxes to fill with tall grasses or shrubs, which act as a natural and beautiful barrier. These DIY solutions not only save you money but also add a soft, organic feel to your space. If you later decide you want a more permanent structure, Gappsi offers a variety of beautiful fences and netting options.

Design Simple Container Gardens

You don’t need a massive landscaping budget to surround your swim spa with lush greenery. Container gardening is an easy and affordable way to add color and life to your spa area. You can start with just a few pots and add more over time. Choose a variety of container sizes and styles to create visual interest. Good plant choices for poolside containers include palms, ornamental grasses, succulents, and colorful annuals like coleus. The best part about container gardens is their flexibility; you can move them around to change the look of your space whenever you want. For a more permanent design, our landscape design team can help you integrate your containers into a cohesive plan.

Add Finishing Touches on a Budget

The small details are what transform a simple spa installation into a personalized retreat. Luckily, these finishing touches are often the most affordable and fun to do yourself. Set the mood with outdoor string lights draped over a pergola or between trees. You can create your own charming candle holders using mason jars or recycled glass bottles for a warm, inviting glow. A small, painted side table can hold drinks and towels, while a simple DIY towel rack keeps things organized. These little projects add character and charm without a significant cost. For more inspiration, check out the Gappsi YouTube channel to see how we finish our custom projects.

Common Budgeting Mistakes to Avoid

Bringing a swim spa home is an exciting project, but it’s easy for your budget to get off track if you don’t account for the full scope of work. The price of the spa itself is just the starting point. Thinking through the entire installation process helps you create a realistic budget and avoid stressful surprises. Let’s walk through a few common financial missteps and how you can sidestep them.

Don’t Underestimate Site Prep Costs

One of the biggest budgeting oversights is underestimating the cost of preparing your site. The installation alone can range from a couple of thousand dollars to over twenty thousand, completely separate from the spa unit. A simple setup on a flat, accessible yard is on the lower end. However, if your plan involves recessing the spa, requires a crane to lift it into place, or needs an electrical panel upgrade, the costs will be higher. A solid, level foundation is non-negotiable, and creating one often requires professional masonry work. This base is critical for the stability and longevity of your spa, so it’s an area where you want to invest in quality craftsmanship.

Avoid Skipping Professional Installation

Trying to save money by skipping a professional installation can lead to much bigger expenses down the road. A swim spa is a heavy, complex piece of equipment that requires expert handling. It’s crucial to use a certified electrician to install a dedicated, correctly rated circuit for both safety and energy efficiency. A professional team ensures your spa is level, secure, and compliant with all local codes. When you work with experts, you’re not just paying for labor; you’re investing in peace of mind and the long-term health of your swim spa.

Remember to Plan for Electrical and Drainage

Forgetting to plan for water and power is another frequent mistake. Your swim spa needs a dedicated electrical circuit, and its location must be planned with that in mind. Just as important is drainage. Installing the spa in a low spot where rainwater collects can damage its components and your yard. A proper drainage plan is essential for protecting your investment. This is where integrated landscape design becomes so valuable, as it ensures water flows away from your spa and home foundation.

Measure Twice Before Choosing a Location

Before you fall in love with a specific spot, get out your measuring tape. You need to measure your gates, side yards, and any other access points to make sure the spa can actually get to its final destination. If the path is too narrow, you may need to rent a crane, which adds a significant cost. Planning your access route ahead of time saves a lot of money and stress on delivery day. You can see how our professional crews handle these logistics by watching our project videos to get a better sense of the process.

How to Keep Your Ongoing Swim Spa Costs Low

Your swim spa installation is just the beginning of your journey. Once it’s in place, you’ll want to keep the running costs as low as possible without sacrificing enjoyment. The good news is that a few smart choices and simple habits can make a huge difference in your monthly utility bills. By focusing on heat retention and routine care, you can ensure your swim spa remains an affordable luxury for years to come. These strategies are especially effective in Long Island, where chilly fall and winter temperatures can put your spa’s heater to the test.

Invest in a High-Quality Insulated Cover

Think of your swim spa cover as the roof of your house; it’s your first line of defense against the elements. A well-fitting, insulated cover is essential for stopping heat from escaping, particularly during cold weather. If your cover is worn, waterlogged, or doesn’t create a tight seal, your heater will have to work overtime just to maintain the water temperature, driving up your energy costs. Investing in a durable, high-quality cover from the start is one of the most effective ways to manage your expenses. It’s a purchase that quickly pays for itself in energy savings and helps protect your swim spa investment.

Use Proper Insulation to Cut Energy Use

The quality of your swim spa’s built-in insulation plays a massive role in its energy efficiency. Models with full-foam insulation in the walls can reduce energy consumption significantly, sometimes by up to 40%. This insulation fills the entire cabinet, preventing heat from seeping out and cold air from getting in. When you’re shopping for a swim spa, ask about the type and density of its insulation. A well-insulated model might have a slightly higher upfront cost, but the long-term savings on your electricity bill make it a worthwhile feature. It’s a key factor in keeping your spa ready for a warm, relaxing dip without breaking the bank.

Heat Your Spa During Off-Peak Hours

Many utility companies offer time-of-use rates, charging less for electricity during off-peak hours, which are typically late at night. You can take advantage of this by heating your swim spa when energy is cheapest. Most modern spas come with programmable controls that allow you to set a heating schedule automatically. Simply program your spa to heat during these off-peak windows, and it will be warm and ready when you want to use it. Check with your local Long Island utility provider to see if they offer these rates. It’s a simple adjustment that can lead to noticeable savings on your monthly bills.

Adopt Simple Habits to Extend Your Spa’s Life

Consistent maintenance is key to keeping your swim spa running efficiently and avoiding costly repairs. While it might be tempting to stretch the time between water changes, it’s a counterproductive habit. Old water requires more chemicals to stay balanced, which adds to your expenses. Instead, stick to a regular schedule for draining and refilling your spa. You should also clean your filters regularly to ensure proper water flow, which allows your heater and pumps to operate smoothly. These simple acts of upkeep not only save you money on chemicals but also extend the life of your spa’s components, protecting your overall home and property value.

Related Articles

Frequently Asked Questions

What is the biggest “hidden cost” I should plan for with a swim spa? The most significant cost outside of the spa unit itself is the site preparation and installation. This includes creating a solid, level foundation like a reinforced concrete pad, which is essential to support the spa’s immense weight. It also covers the necessary electrical work to install a dedicated circuit, which must be done by a certified electrician. If you choose a semi-recessed or in-ground style, you will also need to budget for excavation, which can be a major expense.

Can I really put a swim spa on my existing patio to save money? Using an existing patio can be a fantastic way to save on foundation costs, but only if the patio is up to the task. A filled swim spa can weigh nearly 20,000 pounds, so the slab must be perfectly level and structurally engineered to handle that load without cracking. Before you proceed, it is critical to have a professional inspect the patio to confirm its strength and stability. This step ensures your investment is safe and prevents damage to both your spa and your property.

How much should I actually budget for running my swim spa each year? You can generally expect to spend between $1,000 and $3,000 annually on running costs. This figure covers electricity for the heater and jets, water care chemicals, and occasional filter replacements. The single best thing you can do to keep these costs on the lower end of that spectrum is to invest in a high-quality, well-fitting insulated cover. It dramatically reduces heat loss, meaning your heater works less and your energy bills stay down.

Do I really need a permit for a swim spa on Long Island? Yes, it is very likely you will need a permit. Most towns and villages across Nassau and Suffolk counties have specific regulations for swim spas. These permits typically cover the electrical installation and may also dictate how far the spa must be from your property lines or home. Working with an experienced local installer is the best way to make sure all the necessary permits are secured and your project is fully compliant with local codes from the start.

What’s the smartest way to get a high-end look without a high-end budget? The key is to invest your money in the essentials and get creative with the finishes. Prioritize a quality spa unit and professional installation for the foundation and electrical work. You can then save significantly by handling some of the aesthetic elements yourself, like building a simple wood deck surround or creating a modern landscape with gravel and pavers. Planting fast-growing hedges for privacy is another great way to get a lush, custom feel for less than the cost of a fence.

Share this page: