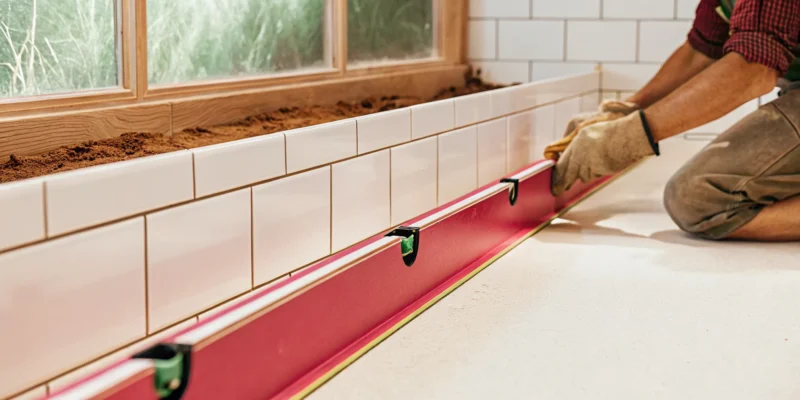
Kitchen tile installer leveling white subway tiles in a Long Island kitchen.

Find the Best Kitchen Tile Installer in Long Island

Planning a kitchen renovation often brings up a key question: should you hire individual specialists for each job or partner with a full-service remodeler? Juggling a plumber, an electrician, and a tile setter can feel like a full-time job, with plenty of room for miscommunication. An integrated approach, however, ensures every part of your project works in harmony. When your kitchen tile installer in Long Island is part of a cohesive team, the entire process becomes smoother. This guide explores the benefits of working with a comprehensive remodeling partner who can manage every detail, ensuring your new kitchen is built seamlessly from the ground up.

Key Takeaways

  • Vet your installer thoroughly: The success of your project depends on the pro you hire. Always confirm they are licensed and insured, review their portfolio for details like clean grout lines, and ask about their surface preparation methods.
  • Understand the full cost of installation: Your budget needs to include more than just the tile itself. Remember to factor in labor costs, which vary with design complexity, and essential supplies like mortar, grout, and waterproofing materials.
  • A full-service partner simplifies the process: For a complete kitchen renovation, using one team to manage everything from tile to plumbing ensures a cohesive result and saves you the stress of coordinating different contractors.

What Does a Kitchen Tile Installer Do?

When you think of a kitchen remodel, tile is often a star player. A kitchen tile installer is the skilled professional who brings your vision to life, ensuring every piece is perfectly placed. Their job is about more than just laying tiles; it’s about precision, craftsmanship, and creating a durable, beautiful surface that will last for years. From preparing the area to grouting the final joint, a great installer handles every step with expertise. Understanding their role helps you appreciate the skill involved and know what to look for when hiring a pro for your Long Island home.

Key services a tile installer offers

A professional tile installer’s work covers a wide range of applications throughout your home. While you might be hiring them for your kitchen, their skills are versatile. They expertly install tiles for kitchen floors, walls, and the ever-important backsplash behind your sink or stove. Their services often extend to other areas, including bathroom floors, shower walls, and even fireplace surrounds. A seasoned installer handles the entire process, from preparing the surface and creating a flawless layout to cutting tiles precisely and applying grout for a clean finish. This expertise is a crucial part of any successful home remodeling project.

Popular tile materials for Long Island kitchens

Choosing the right material is just as important as the installation itself. Long Island kitchens often feature a beautiful mix of classic and modern styles. For a timeless and durable option, many homeowners select porcelain and natural stone. Materials like marble and travertine add a touch of natural elegance and texture. If you love the warmth of wood but need the resilience of tile, wood-look porcelain is an incredibly popular choice. For a more contemporary feel, large-format tiles create a seamless look with fewer grout lines, while patterned or geometric tiles like hexagons can make a bold statement on your floor or backsplash.

Kitchen Tile Trends for Your Long Island Home

Choosing the right tile is one of the most exciting parts of a kitchen remodel. It sets the tone for the entire space, acting as a backdrop for everything from family dinners to morning coffee. Your tile choice can make your kitchen feel classic and elegant, modern and sleek, or uniquely personal. While trends come and go, the best approach is to find a style that you’ll love for years to come. Let’s look at some popular and enduring tile trends that work beautifully in Long Island homes, from timeless materials to creative patterns that make a statement.

Timeless choices: Porcelain and natural stone

You can never go wrong with a classic. Porcelain and natural stone are enduring favorites in kitchen design because they offer a perfect blend of durability and sophisticated style. These materials bring an inherent elegance to a room and are tough enough to handle the demands of a busy kitchen, from spills to heavy foot traffic. Natural stones like marble, granite, and travertine each have unique veining and character, ensuring no two kitchens are exactly alike.

Meanwhile, porcelain and natural stone tiles offer incredible versatility. They can mimic the look of other materials while providing a non-porous, low-maintenance surface that’s easy to clean. Opting for these materials is a sure way to create a look that feels both current and classic.

Creative backsplashes: Styles and patterns

If you want to inject some personality into your kitchen, the backsplash is the perfect place to do it. Think of it as your kitchen’s accent wall, where you can get creative without overwhelming the space. Backsplashes are taking center stage with bold patterns and vibrant colors that turn the wall into a work of art. Intricate mosaics, geometric shapes, and classic patterns like herringbone or chevron can add visual interest and texture.

This is your chance to play with color or choose a unique material that might be too much for an entire floor. A well-designed backsplash can tie all the elements of your kitchen together, from the countertops to the cabinets, creating a cohesive and stylish focal point.

Modern looks: Large-format and wood-look tiles

For a clean, contemporary feel, many homeowners are turning to large-format tiles. These oversized tiles create a seamless and spacious look because they require fewer grout lines. The result is a smooth, uninterrupted surface that makes any kitchen feel bigger and more open. This minimalist aesthetic is perfect for modern homes and simplifies cleaning, which is always a welcome bonus.

Another popular choice for a modern yet warm kitchen is wood-look porcelain tile. It gives you the cozy, inviting appearance of hardwood floors without the worry of water damage or scratches. This makes it an ideal material for a complete kitchen remodel, offering the best of both worlds: the beauty of wood and the durability of tile.

How Much Does Kitchen Tile Installation Cost in Long Island?

Understanding the budget for your kitchen tile project is one of the first and most important steps. The final price tag can vary quite a bit, so it’s helpful to know what factors into the total cost. From the type of tile you fall in love with to the complexity of the pattern you envision, every choice plays a role. Think of it less as a single price and more as a combination of materials, labor, and the unique requirements of your space. Breaking down these elements will help you plan your budget effectively and make informed decisions for your Long Island kitchen renovation.

What influences the final cost?

Several key factors determine the final cost of your kitchen tile installation. The type of tile you select is a major one; for example, standard ceramic is often more affordable than high-end marble or custom glass. The complexity of your design also matters. A simple, straightforward grid pattern will cost less in labor than an intricate herringbone or mosaic design that requires more cuts and precision. Finally, the condition of the existing surface, or substrate, is crucial. If your walls or floors aren’t perfectly level or require old tile removal and repair, this necessary prep work will add to the overall labor costs.

Breaking down material costs

When you budget for materials, it’s about more than just the tile itself. While the tiles are the main event, you also need to account for everything that holds them in place. This includes thin-set mortar, grout, and sealant to protect your investment from stains and moisture. Depending on the project, you might also need backer board to create a stable and waterproof surface. The cost of these essential materials can add up, so it’s important to include them in your initial calculations. Exploring different porcelain and natural stone options can give you a better sense of the price range for the tiles you like best.

How design and labor impact your budget

The relationship between your design choices and labor costs is direct. The more complex the installation, the more time and skill it requires from your installer, which is reflected in the price. Intricate patterns, mixing different tile sizes, or creating a custom backsplash mural all increase labor hours. The size of the tile can also affect the cost. While you might think large-format tiles are quicker to install, they can be heavy and difficult to handle, requiring specialized tools and expertise. A professional masonry and design team will have the experience to execute these complex designs flawlessly, ensuring the final result is worth the investment.

Getting an accurate quote for your project

To get a true sense of your project’s cost, you need a detailed, written quote. A professional installer’s price reflects their training, insurance, and commitment to quality work. A trustworthy quote should clearly itemize everything: the cost of materials, labor rates, site preparation, debris removal, and a projected timeline. Be wary of quotes that seem too good to be true or lack specific details. For a complete picture, consider working with a full-service partner who can provide a comprehensive estimate for your entire kitchen remodeling project, ensuring there are no surprises along the way.

How to Choose the Right Kitchen Tile Installer in Long Island

Finding the right person for your kitchen tile project is about more than just getting a good price. You’re trusting someone to bring your vision to life in the heart of your home. A great installer combines technical skill with an artistic eye, ensuring your new tile looks beautiful and lasts for years. Taking the time to vet your options carefully will help you find a true professional who respects your home, communicates clearly, and delivers a flawless finish. Here’s what to focus on to make sure you hire the best installer for your Long Island kitchen.

Check for experience, licensing, and insurance

Before you even talk about tile patterns, make sure your potential installer is properly licensed and insured. It’s a common mistake for homeowners to skip this step, but it’s one of the most important. Licensing proves they meet state and local standards, while insurance protects you from liability if an accident happens on your property. A reputable contractor will gladly provide proof of both. This isn’t just a formality; it’s your first indicator that you’re dealing with a professional who takes their business seriously. A company with a long history of home remodeling will have this documentation ready for you.

Review their portfolio and past projects

Words are one thing, but seeing is believing. Always ask to see a portfolio of their previous work. Don’t just glance at the photos; look closely at the details. Are the grout lines straight and consistent? Are the cuts around outlets and corners clean? Look for projects that are similar to what you have in mind, whether it’s a complex mosaic backsplash or large-format floor tiles. This helps you gauge their skill and determine if their style aligns with your vision. Many installers now have extensive galleries on their websites or social media, making it easy to do your research. You can even check out a company’s YouTube channel to see their craftsmanship in action.

Read customer reviews and testimonials

What did past clients have to say about their experience? Checking online reviews and testimonials is a great way to get an unfiltered look at a contractor’s work ethic and customer service. Look for feedback on their communication, punctuality, and how they handled any challenges that came up during the project. While a single negative review isn’t necessarily a deal-breaker, a pattern of complaints about missed deadlines or messy job sites should give you pause. Positive reviews that consistently mention professionalism and high-quality results are a strong sign that you’ve found a reliable installer.

Key questions to ask a potential installer

Once you’ve narrowed down your list, it’s time to ask some specific questions to ensure you’re on the same page. A clear contract is essential, so don’t be shy about clarifying the details. Ask about their projected timeline, who will be performing the work, and how they plan to protect your home from dust and debris. It’s also smart to ask what types of porcelain and natural stone they have experience with and if they offer a warranty on their workmanship. Getting these answers upfront helps prevent misunderstandings and ensures a smooth process from start to finish.

Red Flags to Avoid When Hiring a Tile Installer

Knowing what to look for in a tile installer is half the battle. The other half is knowing which red flags to run from. Spotting these warning signs early can save you from headaches, unexpected costs, and a project you’re not happy with. Keep an eye out for these deal-breakers to ensure your kitchen remodel is in capable hands.

Lack of licensing or insurance

A professional installer will have no problem showing you their license and proof of insurance, so don’t be shy about asking. This is one of the most important steps for your protection. In Long Island, contractors must be licensed by Nassau County or Suffolk County, and this confirms they meet local standards. Insurance is just as critical. If an uninsured worker gets injured on your property, you could be held liable. A reputable company will carry both liability insurance and worker’s compensation, giving you peace of mind that you and your home are protected from start to finish.

Unclear contracts and hidden fees

Your contract is the single most important document for your project, so make sure it’s crystal clear. A major red flag is a contractor who offers a vague agreement or relies on verbal promises. A proper contract should spell everything out in detail: the full scope of work, a list of materials, a payment schedule, and a projected timeline. This document protects both you and the installer by setting clear expectations. Be wary of anyone who pressures you to sign quickly or asks for a large cash deposit upfront. A professional home remodeling partner will provide a transparent, comprehensive contract before any work begins.

Poor communication and vague timelines

Pay attention to how a potential installer communicates from the very first interaction. Are they responsive to your calls and emails? Do they answer your questions clearly and thoroughly? If they’re hard to get ahold of or seem evasive before you’ve even hired them, imagine what it will be like once they have your deposit. A vague timeline is another warning sign. An experienced installer should be able to provide a realistic schedule for your project. Poor planning can lead to sloppy mistakes that are difficult and expensive to fix, so it’s best to work with someone who values clear communication and meticulous masonry design and execution.

What Makes a Tile Installation Great, Not Just Good?

You can spot a decent tile job from a mile away, but what separates a good installation from a truly great one? The difference is in the details, the things you might not notice right away but that contribute to a flawless finish that lasts for years. A great installation is a perfect blend of technical skill and artistry. It’s about more than just sticking tiles to a wall; it’s about creating a durable, beautiful surface that becomes an integral part of your kitchen’s design.

An exceptional installer focuses on three key areas: meticulous preparation, thoughtful planning, and reliable post-project support. They understand that the work done before a single tile is laid is just as important as the final grout line. They take the time to map out a vision for the space, ensuring every cut and placement is intentional. And finally, they stand behind their work, giving you confidence that your investment is protected. When you’re planning a kitchen remodel, finding a team that masters these elements is the key to getting a result you’ll love for a lifetime.

The importance of proper prep and waterproofing

The secret to a long-lasting tile installation lies beneath the surface. Before any beautiful tiles are set, a great installer dedicates significant time to preparation. This means ensuring the surface is perfectly clean, level, and stable. Any imperfections in the wall or floor will show through in the final product, leading to lippage (uneven tiles) or cracks down the line.

In a kitchen, proper waterproofing is non-negotiable. Your installer should apply a waterproof membrane to protect the underlying structure from spills, splashes, and moisture. Skipping this step can lead to serious issues like mold, mildew, and water damage that can compromise your walls and subfloor. Careful prep work is the foundation of a durable installation and a hallmark of true masonry craftsmanship.

Precision layouts and smart planning

A truly skilled tile installer is also a designer at heart. They know that a beautiful outcome requires smart planning before the first tile is even cut. Instead of starting in a random corner, they will map out the entire layout to create a balanced and symmetrical look. This means centering the pattern on a focal point, like behind the stove or sink, and planning cuts to be as discreet as possible.

Precision matters, especially when working with intricate patterns or high-end porcelain and natural stone. An expert will take their time laying out the pattern to ensure grout lines are consistent and the design flows seamlessly around outlets, cabinets, and corners. This thoughtful approach prevents awkward, sliver-thin cuts and results in a polished, professional finish that elevates the entire room.

Look for warranties and post-installation support

A contractor’s confidence in their work is often reflected in the warranty they offer. A great installer will always stand behind their craftsmanship with a clear, written guarantee. This isn’t just a formality; it’s your assurance that they used quality materials and proper techniques. It shows they are committed to the longevity of their work and are not just looking to complete a job and disappear.

Before you sign a contract, ask about the specifics of the warranty. What does it cover, and for how long? A reputable company will be transparent about their policies and provide post-installation support should any issues arise. This peace of mind is invaluable and is a clear indicator that you’re working with a true professional who values their reputation and your satisfaction.

Should You Hire a Specialist or a Full-Service Remodeler?

When you’re planning a kitchen remodel, one of the biggest decisions is how to manage the project. You could hire a tile specialist and then separately find a plumber, an electrician, and a cabinet installer, acting as your own general contractor. Or, you could partner with a full-service remodeler who handles every detail from start to finish. The right choice depends on your project’s complexity and how much time you want to spend coordinating different teams. Let’s look at the advantages of working with a single team for your entire project.

The benefits of a full-service contractor

A full-service contractor can manage all aspects of your kitchen remodel, from the initial design to the final installation. This ensures a cohesive look and feel throughout the project. Instead of you having to juggle multiple contacts, they coordinate all the different trades, like plumbing and electrical work. This approach saves you valuable time and reduces the risk of miscommunication between teams. When one company oversees the entire process, you get a smoother experience and a more unified result for your home remodeling project. It simplifies a complex process, letting you focus on the excitement of your new kitchen.

The Gappsi approach to kitchen remodeling

At Gappsi, we combine the precision of a specialist with the scope of a full-service remodeler. Our approach to kitchen remodeling centers on providing a comprehensive service that includes careful preparation, a clean layout, and a durable installation for every element, especially our porcelain and natural stone work. We believe clear communication is the foundation of a successful project, so we make sure you are involved and informed at every step. From the initial design consultation to the final walkthrough, our team manages every detail to bring your vision to life seamlessly. This integrated process guarantees that your new kitchen is not only beautiful but also built to last.

Finding a Premier Kitchen Remodeling Partner in Long Island

Choosing a partner for your kitchen remodel is one of the biggest decisions you’ll make for your home. You’re not just hiring someone to lay tiles; you’re trusting a team with the heart of your home, the place where memories are made and shared. The right partner simplifies the entire process, managing all the moving parts so you don’t have to juggle multiple contractors, timelines, and budgets. They should have a proven track record in Long Island, a deep understanding of high-quality materials, and the ability to see your project through from the initial design sketch to the final, polished touches.

A premier contractor doesn’t just do the job, they create a space you’ll love for years. They offer a seamless experience, combining design expertise with skilled execution. Imagine having one point of contact who understands your vision completely, someone who can advise on the best porcelain and natural stone for your floors and then coordinate the plumbing and electrical work without a hitch. This integrated approach prevents communication breakdowns and ensures every element of your new kitchen works together in harmony. When you find a team that can handle everything from intricate tile backsplashes to a complete home remodeling project, you know you’re in good hands. This is where a full-service approach truly shines, providing peace of mind and a cohesive final result that is both beautiful and built to last.

Why Gappsi is a trusted choice for homeowners

Gappsi stands out as a trusted partner because we combine decades of design experience with a commitment to flawless execution. We aren’t just tile installers; we are a comprehensive home remodeling company. This means we can manage your entire kitchen project, from installing gorgeous new floors and backsplashes to handling all the underlying construction and masonry work. Our team of skilled professionals understands the nuances of a high-quality installation, ensuring every detail is perfect. We pride ourselves on careful work, clear communication, and using the best materials available, making the remodeling process smooth and stress-free for homeowners across Long Island. Our goal is to deliver a kitchen that exceeds your expectations in both beauty and function.

How to Prepare Your Kitchen for Tile Installation

Once you’ve chosen the perfect tile and hired a trusted installer, it’s time to get ready for the transformation. A little preparation on your end can make a huge difference, ensuring the project runs smoothly and finishes on time. Getting your kitchen ready for a tile installation involves more than just clearing a path for the crew. It’s about creating a clean and accessible workspace so your installers can focus on what they do best: creating a beautiful, durable surface for your home.

Prepping your space: Clearing and protecting surfaces

Before your installation team arrives, the most helpful thing you can do is clear the area completely. This means removing all appliances, furniture, and personal items from the kitchen. It’s also a good idea to take down any wall art or curtains. Your installers will protect surrounding surfaces like cabinets and countertops, but clearing your belongings prevents accidental damage and gives them ample room to work. A clean, level surface is key to a flawless installation, and that starts with an empty room. This simple step is a crucial part of any home remodeling project and helps your installers create a perfect foundation for your new tile.

What to expect during and after installation

The installation itself is a multi-step process. Your team will handle the careful surface preparation, material selection, and meticulous layout planning needed for a lasting result. Expect some noise and dust, it’s all part of the process of creating something beautiful. Once the tiles are set and grouted, patience is key. You’ll need to let the area cure, which means staying off new floors or avoiding contact with a new backsplash for a period your installer will specify. This is critical because mistakes are difficult to hide, and fixing them can be a major undertaking. With expert planning and professional installation using quality porcelain and natural stone, your tile will completely transform your space, creating a fresh look that’s built to last.

Related Articles

Frequently Asked Questions

How long does a kitchen tile installation typically take? The timeline for a kitchen tile project really depends on the size of your space and the complexity of the job. A simple backsplash might only take a day or two, while a large kitchen floor with an intricate pattern could take several days. The process includes preparation, setting the tile, and then waiting for the mortar and grout to cure properly. A professional installer will give you a clear, realistic timeline in their quote so you know exactly what to expect.

Can I save money by tiling directly over my old floor or backsplash? While it might seem like a tempting shortcut, tiling over an existing surface is rarely a good idea. A lasting installation depends on a perfectly stable and level foundation. Tiling over old material can lead to cracks, uneven surfaces, and adhesion problems down the road. A true professional will always recommend removing the old tile to properly prepare the surface, ensuring your new kitchen tile looks great and lasts for decades.

What’s the best way to care for my new tile after it’s installed? Caring for your new tile is simpler than you might think. The most important step is to follow your installer’s instructions for letting the grout fully cure before you clean it or expose it to heavy use. For routine cleaning, a pH-neutral cleaner and water are usually all you need. Avoid harsh, acidic cleaners that can damage the grout or the finish on natural stone. Sealing your grout lines periodically will also help protect them from stains and moisture.

Why is hiring a full-service remodeler better than just a tile specialist for my kitchen? When you’re remodeling a kitchen, the tile is just one piece of the puzzle. You also have to think about plumbing, electrical, cabinets, and countertops. Hiring a full-service company like Gappsi means one team coordinates everything for you. This prevents communication gaps between different contractors and ensures a cohesive design. It simplifies the entire process, giving you a single point of contact and peace of mind that every element of your project is managed professionally.

Besides the tile itself, what are the most important materials in a quality installation? The materials you don’t see are just as crucial as the beautiful tile you do. A quality installation relies on a waterproof membrane, especially behind a sink or on a floor, to protect your home’s structure from moisture. The right adhesive, or thin-set mortar, ensures the tiles bond securely to the surface. Finally, a high-quality grout and sealant are essential for creating durable, stain-resistant joints that complete the polished look of your project.
Share this page:
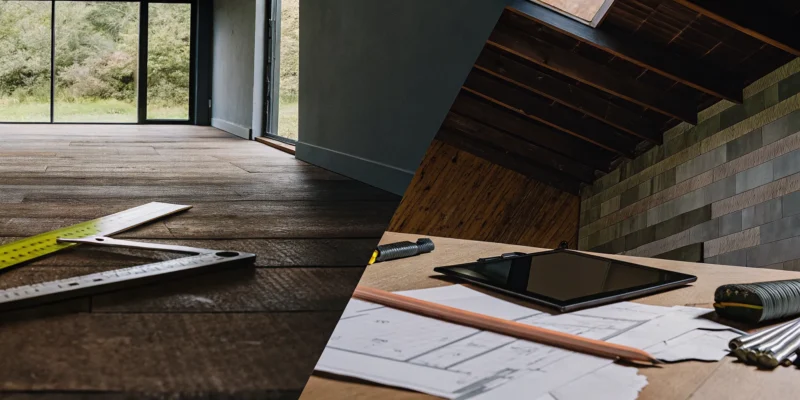
Renovation plans and tools on an unfinished basement floor to budget the cost to finish a basement.

Cost to Finish a Basement: A Complete Price Guide

When you look at your unfinished basement, you might see a concrete box. We see a blank canvas. Transforming that space into a functional, beautiful part of your home is an exciting process, but it begins with a practical plan. The most common question we hear is, “What is the actual cost to finish a basement?” The answer depends on your goals. Are you dreaming of a simple playroom for the kids or a high-end guest suite? This article will break down the costs associated with different levels of renovation, helping you see what is possible within your budget and turning that concrete box into your family’s new favorite room.

Key Takeaways

  • Define Your Project Tier: Your total cost depends on your vision, so decide if you want a simple finish, a mid-range upgrade with a bathroom, or a luxury space with custom features. This choice is the biggest factor in your budget.
  • Prioritize a Solid Foundation: Before you think about paint colors, budget for the essentials like waterproofing, proper permits, and egress windows. Addressing these foundational needs first protects your entire investment from future problems.
  • Invest in Quality, Save on Cosmetics: A finished basement adds significant value, but you can be smart about your spending. Splurge on professional work for plumbing and electrical systems, but save money by handling cosmetic tasks like painting yourself.

How Much Does It Cost to Finish a Basement?

Thinking about finishing your basement is exciting. That unused space is full of potential, whether you’re dreaming of a cozy family room, a quiet home office, or the ultimate entertainment zone. One of the first questions that comes up is, of course, about the cost. The truth is, there’s a huge range. A basement finishing project can cost anywhere from $20 to over $130 per square foot. The final price tag depends entirely on your vision, the materials you choose, and the features you want to include.

To make sense of the numbers, it helps to think about the project in three general tiers: basic, mid-range, and luxury. A basic finish will give you a clean, functional room that’s ready for furniture. A mid-range project adds more personality and specific features, like a bathroom or a wet bar. A luxury transformation turns your basement into a high-end living space that could include a home theater or a personal gym. Each level of investment comes with different possibilities for your home. As you explore your options, working with an experienced home remodeling team can help you align your budget with your goals to create a space you’ll love for years to come.

Basic Finishes

A basic basement finish is the most straightforward way to add usable living space to your home. You can generally expect this to cost between $25 and $45 per square foot. This price typically covers all the essentials needed to transform a concrete shell into a finished room. It includes building the wall frames, installing insulation, putting up drywall, and adding a simple ceiling. You’ll also get basic electrical work, like standard outlets and overhead lighting, along with durable, budget-friendly flooring such as carpet or vinyl planks. This approach gives you a clean, bright, and comfortable room that’s ready for you to furnish and enjoy.

Mid-Range Upgrades

If you want more than just the basics, a mid-range project offers a great balance of custom features and value. These projects often range from $30,000 to $75,000, depending on the size of your basement and the upgrades you select. This budget allows for higher-quality materials, like engineered hardwood floors or upgraded lighting fixtures. You can also start incorporating dedicated spaces, such as a home office, a separate laundry room, or even a simple wet bar. Many mid-range remodels also include a half or full bathroom, which significantly adds to the convenience and functionality of the space. This is the sweet spot for many homeowners, creating a personalized area that truly feels like an extension of their home.

Luxury Transformations

For a truly show-stopping space, a luxury basement transformation is the way to go. These high-end projects can start at $90 per square foot and often exceed $150,000 in total. At this level, you’re creating a custom-designed environment tailored to your lifestyle. Think about features like a complete home theater with tiered seating and surround sound, a full kitchen or an elaborate bar for entertaining, or a guest suite with a spa-like bathroom. You might also incorporate premium materials like natural stone flooring, custom cabinetry, and even a personal wine cellar or a relaxing home sauna. A luxury remodel is all about bringing your biggest ideas to life without compromise.

What Factors Affect the Cost?

When you start planning your basement project, you’ll quickly see that the total cost is a mix of several different factors. The final price tag depends on everything from the size of your space to the specific features you want to include. Understanding these key cost drivers will help you create a realistic budget and make informed decisions as you design your new lower level. Think of it as building a custom package, where each choice influences the final outcome.

Size and Layout

It makes sense that the bigger your basement, the more it will cost to finish. Costs are often calculated per square foot, so a sprawling 1,500-square-foot space will naturally require a larger investment than a cozy 700-square-foot area. Beyond just the total square footage, the layout you choose plays a big role. An open-concept design with one large room is generally more budget-friendly than a layout with multiple rooms. Creating separate spaces for a bedroom, bathroom, and living area requires more materials for framing, drywall, and doors, which adds to the overall project cost. Our team can help you design a layout that maximizes your space while aligning with your budget.

Materials and Finishes

Your choice of materials and finishes is one of the biggest variables in your basement budget. This is where you can really personalize the look and feel of your space. Basic, builder-grade options like standard carpet and simple paint will keep costs down. However, if you’re dreaming of more luxurious touches, the price will go up. Upgrading to hardwood floors, luxury vinyl plank, or high-end tile can make a huge impact. The same goes for custom cabinetry, stone accent walls, or designer lighting fixtures. Exploring different porcelain and natural stone options, for example, can give you a beautiful, durable finish for a bar area or bathroom.

Plumbing and Electrical

If your plans include adding a bathroom, a wet bar, or a laundry room, you’ll need to budget for plumbing work. Running new water and drain lines is a complex job that adds a significant amount to the project cost. Similarly, your electrical needs will influence the price. Basic wiring for outlets and overhead lights is standard, but a home theater with surround sound or a gym with special equipment will require more extensive electrical work. These are not DIY tasks; for safety and code compliance, all plumbing and electrical work should be handled by licensed professionals as part of a comprehensive home remodeling project.

Permits and Labor

Don’t forget to account for the behind-the-scenes costs of permits and labor. Nearly all basement finishing projects require building permits from your local municipality on Long Island. While it might seem like a hassle, getting the proper permits is essential. It ensures the work is done to code, which is crucial for your family’s safety and for the future resale value of your home. Labor typically makes up a large portion of the total budget. Hiring a full-service design and construction company like Gappsi means you have a dedicated team of experts handling every step, from securing permits to coordinating skilled tradespeople, ensuring a smooth and professional process.

Custom Features

This is where you can truly make your basement your own. Custom features are what transform a finished basement into your family’s favorite hangout spot. The possibilities are endless, but they also add to the cost. Popular additions include a wet bar for entertaining, a dedicated home theater for movie nights, or a personal gym. You could also consider a custom wine cellar with beautiful masonry work or even a relaxing sauna to create a spa-like retreat right at home. These special features increase the complexity and cost of the project, but they also deliver a huge return in terms of enjoyment and lifestyle.

What Does a Basement Finish Include?

Finishing a basement transforms it from a concrete shell into a functional, beautiful part of your home. While every project is unique, a standard finish involves several key construction phases. These stages build upon each other to create a safe, comfortable, and polished living area. Understanding what a typical project includes will help you plan your budget and vision for the space. It’s the difference between a storage area and a true extension of your living space.

Framing and Insulation

This is the first major step in giving your basement its new shape. Framing involves building the wooden or metal skeleton for your walls, which defines the layout of your new rooms, closets, and spaces. Once the frames are up, insulation is installed within the wall cavities and along the concrete foundation walls. Proper insulation is essential in a basement. It helps maintain a comfortable temperature year-round, reduces energy bills, and provides a crucial moisture barrier to keep the space dry and healthy. This foundational work is a key part of any quality home remodeling project and sets the stage for everything that follows.

Electrical and Plumbing

With the framing in place, the next step is to run the wires and pipes that bring your basement to life. Electrical work includes installing wiring for outlets, switches, and all your lighting fixtures. This is also the time to plan for any special electrical needs, like dedicated circuits for a home theater or a home gym. If your design includes a wet bar, bathroom, or laundry room, this is when the plumbing is installed. Roughing in pipes for sinks, toilets, and showers is a critical step that requires precision. Because of the safety codes and complexities involved, this work is best left to licensed professionals who ensure everything is installed correctly and safely.

Flooring, Walls, and Ceilings

This is the phase where your basement truly starts to feel like a room. After inspections, drywall is hung over the framing, then taped, mudded, and sanded to create smooth, paint-ready walls. For the ceiling, you might choose a traditional drywall finish or a drop ceiling, which allows easy access to pipes and wiring. Finally, your flooring choice goes down. Options like luxury vinyl plank, engineered hardwood, and carpet are popular for their durability and comfort. Using high-end materials like porcelain and natural stone for a bathroom or bar area can also add a touch of elegance and lasting value to the space.

Lighting and HVAC

Proper lighting and climate control are what make a basement feel welcoming instead of like an afterthought. A good lighting plan often includes a mix of recessed overhead lights for general brightness, along with task and accent lighting to define different zones. For heating, ventilation, and air conditioning (HVAC), the goal is to ensure consistent temperature and fresh air circulation. This might involve extending your home’s existing ductwork or installing a separate, dedicated system for the basement. Good ventilation is especially important below ground to control humidity and maintain healthy air quality, making your new space comfortable for everyone.

Basement Remodel Ideas and Costs

Once you have a clear budget, the fun part begins: deciding what to do with your newfound space. Your basement can become anything from a quiet workspace to the ultimate entertainment zone. The cost will naturally vary depending on the complexity of your vision. Whether you’re dreaming of a simple playroom or a fully equipped guest apartment, a thoughtful home remodeling plan is the key to bringing it to life. Let’s explore some popular basement transformations and what they might cost.

Home Office

With more people working from home, a dedicated office is a top priority. A basement home office gives you separation from the rest of the house, which is why it has become a major basement remodeling design trend. This separation helps create a focused and productive environment away from daily household distractions. The cost for a home office is often more manageable than other remodels. Your budget will primarily focus on electrical work for your computer and equipment, excellent lighting to keep the space bright, and potentially custom built-ins for storage. It’s a practical investment that adds daily function to your home.

Home Theater

Imagine a movie night experience without leaving your house. A basement home theater can be a fantastic escape for the whole family. The key to a successful theater room is creating the right atmosphere. Good lighting is what makes a basement feel bright and welcoming instead of dark and dingy, and your electrical budget will need to cover more than just a few ceiling fixtures. Think about recessed lighting on dimmers, sconces for ambiance, and wiring for a high-quality sound system. Costs can climb with features like tiered seating, soundproofing, and custom cabinetry for your media, but the result is a truly special space for entertainment.

Guest Suite

A basement guest suite offers privacy and comfort for visiting family and friends. This remodel is more involved, creating a self-contained living area with a bedroom and bathroom. Because this project is more complex, the costs are higher. While finishing a basic basement can cost $20 to $50 per square foot, a full remodel with a bathroom can range from $50 to $150 or more per square foot. This is because it requires extensive plumbing for the bathroom, proper egress windows for safety, and separate living and sleeping zones. It’s a significant project, but it adds incredible value and functionality to your home.

Wet Bar or Game Room

Transform your basement into the go-to spot for entertaining with a wet bar or game room. This is a popular feature, and homeowners often budget heavily for their basement bar, entertainment center, and premium flooring. A wet bar requires plumbing for a sink and potentially an ice maker or dishwasher, while custom cabinetry and countertops define the look. For flooring, you’ll want something durable and stylish, like luxury vinyl or porcelain and natural stone. This is a space where you can really show off your style, perhaps with a stone accent wall or unique lighting to create the perfect hangout spot.

What Are the Hidden Costs?

A detailed budget is your best friend in any renovation, but even the most perfect plan can have surprises. When finishing a basement, some of the biggest expenses are not the fun things like flooring or paint. They are the necessary, foundational tasks that protect your investment. Thinking about these potential costs upfront helps you create a more realistic budget and ensures your finished basement is safe, dry, and built to last for years of enjoyment.

Waterproofing

Before any walls go up, you have to be certain your basement is completely dry. A damp basement is a recipe for mold, mildew, and costly water damage that can ruin your new space. This is a non-negotiable first step. It might involve sealing cracks in the foundation, applying a waterproof coating to the walls, or even installing a sump pump. Tackling moisture issues from the start is a crucial part of any home remodeling project. It protects your new floors, drywall, and furniture, ensuring your beautiful new living area stays that way.

Egress Windows and Code

Did you know that if you plan to add a bedroom in your basement, you are required by law to have an egress window? These windows are large enough for a person to exit through in an emergency, like a fire. Local building codes are in place to ensure all renovations are safe, and failing to get the right permits can lead to fines or having to redo the work. While adding an egress window adds to the cost, it is an essential safety feature. Working with a professional who understands Long Island’s specific building codes is key to making sure your project is done right and, most importantly, keeps your family safe.

Structural Repairs

Sometimes, the source of a basement problem is actually outside the house. Issues like poor grading that slopes toward your home, clogged gutters, or cracks in the foundation can all direct water right where you do not want it. These problems must be addressed before you invest in finishing the interior. A professional can assess your property for any underlying issues and perform the necessary masonry or landscape work to correct them. It is much easier and cheaper to fix a foundation crack from the outside before it becomes a major interior problem.

Planning for Surprises

No matter how carefully you plan, surprises can and do happen during a renovation. You might open a wall and find unexpected electrical issues, old plumbing that needs updating, or hidden mold. That is why it is smart to include a contingency fund in your budget. Most professionals recommend setting aside an extra 10% to 15% of your total project cost for these unforeseen expenses. This financial cushion means that when a surprise pops up, you can handle it without derailing your entire project or making compromises on your vision.

Does a Finished Basement Add Value to Your Home?

Finishing your basement is one of the smartest ways to add value to your home. It’s a project that not only gives you more usable square footage but also offers a fantastic return on investment. Many homeowners see an ROI between 70% and 86%, meaning you can expect to get back a large chunk of what you put in when it’s time to sell. Think of it as converting an underused storage area into a vibrant, functional part of your home, whether that’s a cozy family room, a guest suite, or a dedicated home gym.

Beyond the numbers, a finished basement makes your home more appealing to potential buyers. It provides flexible space that can adapt to a family’s changing needs, which is a huge selling point. A well-executed home remodeling project in the basement can be the feature that makes your property stand out. It’s an investment in your home’s future marketability and your family’s current quality of life. By transforming this space, you’re not just adding a room; you’re adding potential and creating a more complete, comfortable home.

Calculating Your ROI

To figure out your potential return on investment, you first need a clear picture of the costs. On average, finishing a basement can cost anywhere from $22,000 to $55,000. The price per square foot typically falls between $20 and $50 for a basic finish, but it can climb to $150 or more for a full remodel with high-end materials and custom features. Your final ROI will depend heavily on how much you invest and the specific choices you make for the space. A simple, clean finish will have a different cost basis and return compared to a luxury build-out with a wet bar and custom cabinetry.

Comparing Home Improvement Projects

It’s helpful to look at a basement project in the context of other home improvements. While finishing your basement is a valuable upgrade, it’s true that most renovations don’t pay back 100% of their cost at resale. However, the real value often lies in the added lifestyle benefits. Creating a functional living area where there was once just concrete and storage is a massive win for your family’s daily life. When you compare it to other major projects, like adding a swimming pool or building a new patio, a finished basement provides year-round, all-weather space, making it an incredibly practical and enjoyable addition to your home.

How to Budget for Your Basement Project

Creating a budget is the first and most important step in your basement finishing journey. It helps you set clear expectations, make smart decisions, and avoid financial stress. A well-planned budget acts as your roadmap, guiding you from a concrete foundation to a comfortable living space. It’s not just about the total cost; it’s about understanding where every dollar goes and ensuring you get the most value from your investment. With a clear financial plan, you can confidently move forward with creating a basement you’ll love for years to come.

Set a Realistic Budget

Let’s talk about setting a budget that actually works for you. On average, finishing a basement can range from $15,000 to $75,000, but this number can shift based on your vision and the size of your space. A good starting point is to think in terms of square footage, which typically runs from $7 to $23 per square foot for a basic finish.

The best practice is to create a detailed plan and then add a contingency fund of 10% to 20%. This buffer is a lifesaver for those unexpected surprises, like discovering a hidden pipe or deciding you can’t live without that extra outlet. A professional can help you create a precise estimate for your home remodeling project, ensuring your budget aligns with your dream design from day one.

Where to Save and Where to Splurge

Knowing where to allocate your funds can make a huge difference. You can save money by keeping an open floor plan, which reduces framing and drywall costs. It’s also smart to work with your basement’s existing layout to avoid the expense of moving plumbing or electrical lines. You might also consider leaving a small section unfinished for storage to cut down on initial costs.

So, where should you splurge? Focus on features that have a big impact on daily use and enjoyment. This could mean investing in high-quality, durable flooring like beautiful porcelain or natural stone, which stands up to foot traffic and potential moisture. It’s also wise to invest in professional installation for complex systems like HVAC, plumbing, and electrical work to ensure everything is safe, efficient, and up to code.

DIY vs. Professional Work

Deciding what to do yourself versus hiring a professional is a key budgeting decision. Finishing a basement yourself can cost around $20 to $50 per square foot, while a full-service remodel by a pro can range from $50 to $150 or more. If you’re handy, you can definitely save money by tackling tasks like painting or installing simple flooring.

However, some jobs are best left to the experts. Electrical work, plumbing, and any structural changes require specialized knowledge to be done safely and correctly. Hiring a professional for these complex tasks not only ensures the job is done right but also protects your home’s value and your family’s safety. A contractor can manage the entire home remodeling process, giving you peace of mind and a polished final result.

Common Budgeting Mistakes

A few common missteps can quickly derail your basement budget. One of the biggest is poor layout planning, which can result in a space that feels awkward or underutilized. Another major error is ignoring moisture issues. That musty smell is a red flag for water problems that, if left unaddressed, can lead to mold, mildew, and costly damage down the road.

Other mistakes include skimping on lighting, which can leave your basement feeling dark and gloomy, or choosing materials that aren’t suitable for a below-ground environment. Working with an experienced team helps you avoid these pitfalls. They can identify potential issues early, recommend the right materials, and provide professional restoration and sealing services to ensure your new space is dry, bright, and built to last.

How to Find the Right Contractor

Choosing the right contractor is the single most important decision you’ll make for your basement project. This is the person or team you’re trusting with your home, your budget, and your vision. A great partnership leads to a smooth process and a beautiful result, while the wrong one can cause headaches and costly delays. Finding a professional who is experienced, communicative, and transparent is key. You want someone who not only has the technical skills but also understands your goals and respects your home. Taking the time to vet your options thoroughly will pay off in the long run, ensuring your finished basement is everything you hoped it would be.

What to Look for in a Contractor

When you start your search, focus on finding a contractor with a proven track record of quality work and happy clients. Don’t just settle for the first name you find. It’s a good idea to get several estimates from different builders to compare their pricing, proposed timelines, and overall expertise. Look for a team with a strong portfolio of completed projects, like the transformations you can see on our YouTube channel. A reputable contractor will also be fully licensed and insured. They should be knowledgeable about local building codes and prepared to secure all required permits before any work begins, which protects you and ensures the project is done right.

Questions to Ask Potential Contractors

Before you sign a contract, it’s important to ask the right questions to make sure you’re aligned on expectations. Start by asking for a detailed, itemized estimate that reflects all parts of the project so there are no financial surprises later. A clear contract should also outline the payment schedule and connect payments to specific project milestones. Ask about their process for handling changes or unexpected issues. It’s also helpful to know who your main point of contact will be and how they prefer to communicate updates. These conversations will give you a feel for their professionalism and help you choose a partner for your home remodeling project.

Finishing Your Basement on Long Island

On Long Island, the cost to finish a basement can vary. Generally, you can expect to invest between $20 and $50 per square foot for a standard finish. If you’re planning a more extensive remodel with high-end materials or custom features, that figure can range from $50 to $150 or more per square foot. While the national average cost is around $32,000, many projects fall between $15,000 and $75,000 depending on the scope. Working with a local contractor is a major advantage here. An experienced Long Island team understands the specific building codes in Nassau and Suffolk counties and can provide a more accurate estimate based on your home’s unique needs and your town’s requirements.

Related Articles

Frequently Asked Questions

How long does a typical basement finishing project take? The timeline for finishing a basement can vary quite a bit. For a straightforward, basic finish in a smaller space, you might be looking at around 6 to 8 weeks. For more complex projects that include custom features like a bathroom, a wet bar, or a home theater, the process could take 10 to 12 weeks or even longer. Factors like permit approvals, the complexity of your design, and material availability all play a role in the final schedule.

Do I really need a permit to finish my basement on Long Island? Yes, almost certainly. Any project that involves adding walls, electrical wiring, or plumbing requires permits from your local town or village. While it might seem like an extra step, getting the proper permits is for your protection. It ensures all the work is inspected and meets current safety codes, which is crucial for your family’s well being and for maintaining your home’s value when you eventually sell.

What’s the most important thing to spend money on in a basement remodel? If you have to prioritize, put your money into the things you can’t see. Start with comprehensive waterproofing to ensure the space stays dry and healthy for years to come. After that, focus on quality insulation, proper HVAC for air circulation, and professional installation of all electrical and plumbing systems. Getting these foundational elements right is essential for creating a safe, comfortable, and durable living space.

Is adding a bathroom to the basement worth the extra cost? Adding a bathroom definitely increases the budget, but it also adds tremendous value and convenience. If you plan to use the basement as a guest suite, an entertainment area, or even just a regular family hangout spot, having a bathroom downstairs is a game changer. It makes the space far more functional and self sufficient. Plus, an extra bathroom is a highly desirable feature that can give you a great return on your investment.

What is the very first step I should take if I’m considering finishing my basement? Before you start picking out paint colors, the best first step is to get a professional assessment of your space. An experienced contractor can evaluate your basement for any existing moisture issues, check the foundation, and discuss the structural possibilities. From there, you can work together to create a realistic plan and budget that aligns with your vision, ensuring you start your project on the right foot.

Share this page:
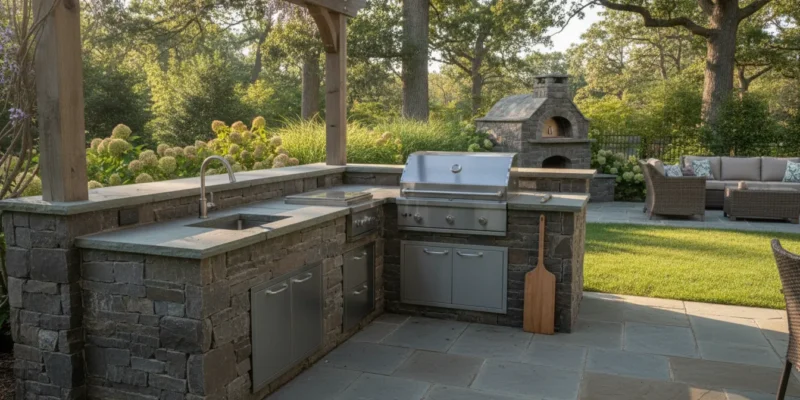
Outdoor kitchen countertop beside a Long Island patio

Outdoor Kitchen Countertops: Best Materials for Long Island

Choosing outdoor kitchen countertops for a Long Island home involves more than matching a color to the patio. The surface must stand up to sun, rain, humidity, seasonal temperature changes, food spills, hot cookware, and regular cleaning. It also has to work with the grill, sink, storage, masonry base, shade structure, and the materials already used around the property.

Contact Gappsi through our contact page

The best material depends on the kitchen’s exposure, how you cook, the maintenance you will provide, and the design you want to create. Granite, quartzite, porcelain, concrete, stainless steel, and aluminum each offer a different balance of weather response, heat tolerance, stain resistance, fabrication needs, and visual character.

This guide compares those options without treating one surface as the right answer for every property. Use it to narrow the shortlist, then review the slab, support, cutouts, drainage, edge details, and surrounding landscape as one coordinated design.

What Should Outdoor Kitchen Countertops Handle on Long Island?

An outdoor kitchen countertop is a working surface, a weather-exposed finish, and a visible part of the yard. In Nassau and Suffolk County, an open island may receive strong sun, wind-driven rain, humidity, and winter freeze-thaw cycles. A covered kitchen has a different exposure profile, but it still needs materials and construction details intended for outdoor use.

Environmental research on stone durability identifies moisture, salt, heating and cooling, freeze-thaw cycles, and biological activity as factors that can affect service life. That does not mean every stone performs the same way or that a sealer solves every problem. It means the material and the installation should be selected together. Review the government-recorded stone durability study when comparing the conditions your site must handle.

Start with exposure and water management

Record whether the counter is fully exposed, protected by a roof, or partially shaded by a pergola. Note nearby trees, sprinklers, pool water, coastal air, and places where rain or wash water could collect. These details affect the surface, the base, the joints, and the way the finished counter should be cleaned and protected.

Drainage is part of countertop performance. Water should not be directed toward cabinet interiors, appliance openings, electrical components, or vulnerable joints. The supporting base must be stable and appropriate for the selected material. A durable slab can still develop problems if it is poorly supported, has an unsuitable overhang, or is installed without a plan for water movement.

Plan around cooking and food preparation

Measure the areas needed for cutting, plating, serving, and setting down groceries. A grill, sink, refrigerator, burner, or pizza oven creates different work zones, so the countertop should not be planned as one uninterrupted decorative surface. Leave a practical landing area beside hot appliances and confirm clearances before the slab is fabricated.

Even a material described as heat resistant benefits from sensible use. Trivets, heat-resistant landing areas, and a clear plan for hot cookware reduce avoidable damage. The Iowa State University Extension stone countertop care guidance is a useful reference for cleaning and heat-related precautions.

Contact Gappsi through our contact page

How Do Granite and Quartzite Compare for Outdoor Kitchens?

Granite and quartzite are natural-stone choices with distinct colors, patterns, and fabrication considerations. Both can suit an outdoor kitchen, but a slab should be evaluated on its own characteristics rather than selected only by the name of the stone. Thickness, porosity, finish, support, seams, edge profile, and exposure all matter.

Granite: a practical natural-stone starting point

Granite is often shortlisted for outdoor kitchens because it can provide a strong, heat-tolerant surface with substantial visual variety. Dark, light, and patterned slabs can be coordinated with masonry, pavers, pool coping, or the home exterior. Its appearance also works across traditional, transitional, and contemporary designs.

Granite is not maintenance-free. The specific slab may need sealing, and sealing improves resistance to stains without making the surface immune to spills. Food oils, wine, acidic ingredients, and standing moisture should be addressed promptly. Use a cleaner recommended for the selected stone, and confirm the resealing schedule with the fabricator or installer. Iowa State University Extension cautions against acidic cleaners, ammonia, and window cleaners for granite care.

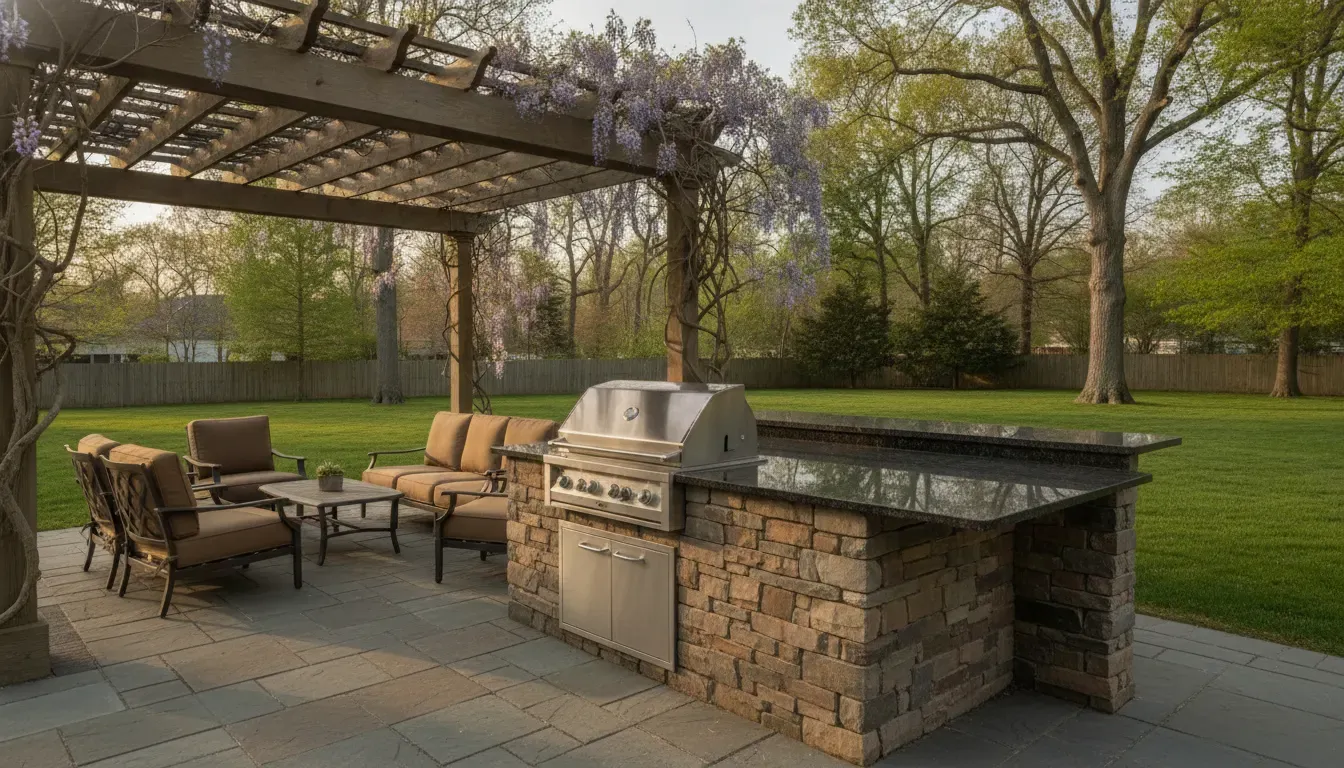
Granite outdoor kitchen countertop with a masonry island
Granite can connect an outdoor kitchen countertop to a masonry island and surrounding patio.

Quartzite: natural pattern with a different selection process

Quartzite can appeal to homeowners who want a natural stone with a lighter, more layered appearance. It is often considered for a sun-exposed counter because many quartzite slabs offer good resistance to scratching and weathering. The performance of a particular slab still needs to be confirmed, especially when the surface will receive heavy cooking use or direct weather.

Ask where the stone was quarried, how it was classified, whether it has been treated, and what care the fabricator recommends. A well-chosen slab can be a strong design feature, but the decision should include the stone’s porosity, the finish, cutouts, seams, overhangs, and support. Appearance alone is not enough to determine whether a slab belongs in a fully exposed kitchen.

Granite or quartzite: which should you shortlist?

Choose between them by comparing the actual slabs and the actual installation conditions. Granite may offer a broader range of familiar outdoor applications and colors. Quartzite may be attractive when the design calls for a more pronounced natural pattern or a marble-like direction. Both require the installer to resolve support, hot-pan use, cleaning, sealing, and water management before installation.

For a closer look at how granite can be used in an outdoor kitchen, read Gappsi’s granite outdoor kitchen countertop guide. The broader comparison here is still the right place to weigh granite against porcelain, concrete, stainless steel, and aluminum.

Why Is Porcelain a Popular Choice for Outdoor Kitchen Countertops?

Porcelain is often selected when homeowners want a consistent, contemporary surface with low porosity and a wide range of colors or stone-inspired patterns. Outdoor-rated porcelain can be considered for sun, stains, and routine cleaning, but the exact product and installation method must be confirmed before fabrication.

Porcelain can be a useful choice around food preparation because it does not absorb spills in the same way as a more porous surface. It can also coordinate with porcelain pavers used on a patio, pool deck, or walkway. Review the available porcelain and natural stone selections alongside the countertop slab so the colors, textures, and scale work together.

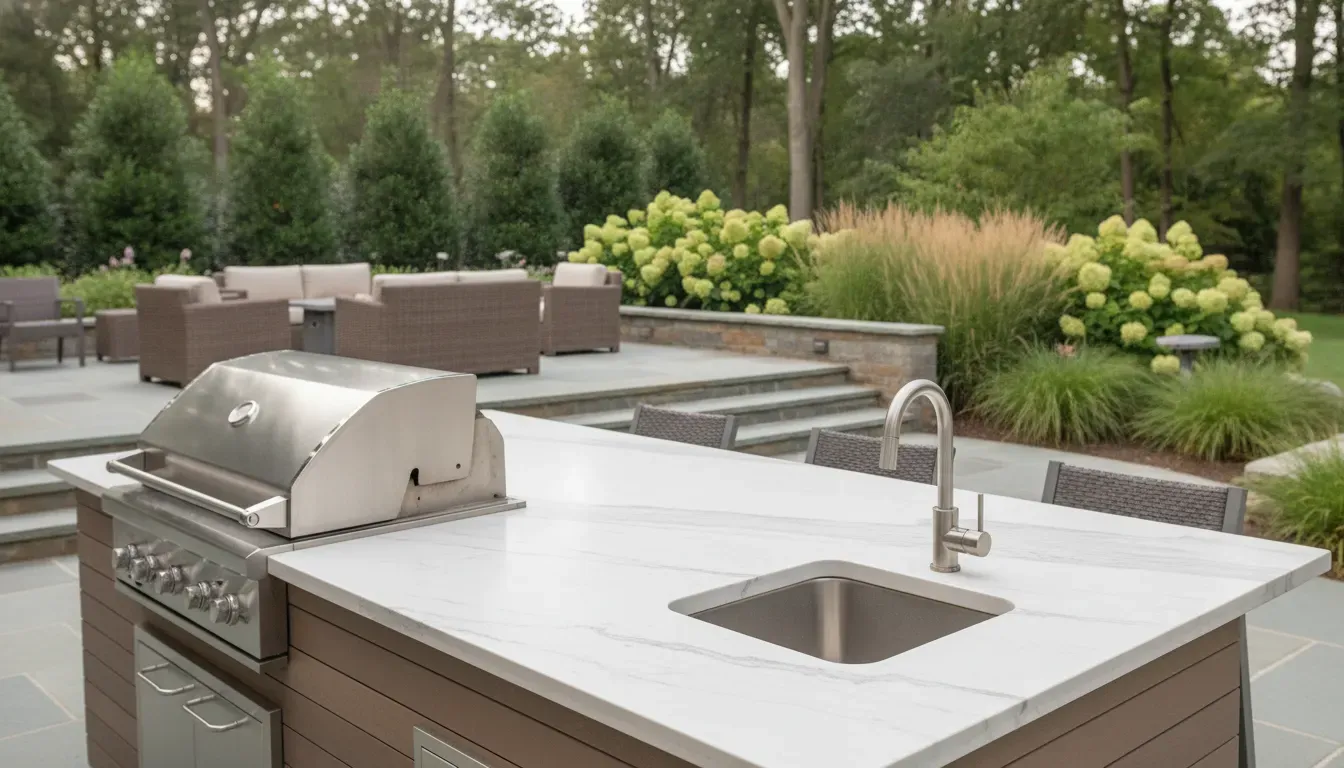
Porcelain outdoor kitchen countertop with grill and sink
A porcelain countertop can provide a clean work surface around a grill and sink.

Large porcelain slabs require careful handling. The design team should coordinate transport, access to the property, slab support, seams, corners, sink openings, grill cutouts, and exposed edges. Porcelain is rigid, so an opening or unsupported overhang cannot be treated as a minor detail. Confirm the manufacturer’s installation requirements and the fabricator’s plan for the exact slab.

View samples in both sun and shade. A surface that looks quiet indoors may show more contrast outdoors, while a bold pattern can compete with a busy paver layout. The best result comes from treating the countertop, cabinet fronts, masonry, appliances, and nearby paving as one material palette.

When Do Concrete, Stainless Steel, or Aluminum Make Sense?

Concrete, stainless steel, and aluminum can solve different design and performance needs. One may be right for a custom shape, another for a work-centered cooking area, and another where lower weight or rust resistance matters. Each choice still depends on the base, the exposure, the joints, and the way the kitchen will be used.

Material Useful strengths Important planning point
Concrete Custom-poured shapes, integrated forms, and a substantial architectural appearance. Sealing and moisture management should be part of the care plan. Confirm crack, stain, edge, and repair expectations.
Stainless steel Work-focused appearance, straightforward cleanup, and strong association with professional cooking areas. Coordinate the grade, finish, fasteners, drainage, edges, and nearby cabinetry for the actual exposure.
Aluminum Lower weight and natural resistance to rust can suit certain modular or moisture-prone applications. Review the support, joints, finish, movement, and connection details with the installer.

Concrete: useful when the shape is part of the design

Concrete can follow a curved bar, a broad serving ledge, a radiused corner, or a layout that does not fit a standard slab. Its ability to be formed around a design can make it appealing for a masonry-led outdoor room. The tradeoff is that concrete needs a clear maintenance and repair discussion before it is installed.

Because concrete can absorb moisture and develop stains or cracks, ask which sealer is intended, how often it should be renewed, what cleaners are allowed, and how the surface will be protected during winter. The finish, color variation, edges, sink openings, and support should be approved as part of the same sample and drawing process.

Stainless steel: suited to active cooking and frequent cleanup

Stainless steel can make sense when grilling, prep, and cleanup are the center of the outdoor kitchen. Its reflective surface creates a direct, commercial-style appearance, and it can be wiped clean after use. Select the appropriate outdoor-rated product and review the actual exposure, especially near a pool, salt air, or sources of standing water.

Stainless steel does not eliminate design coordination. Appliance openings, fasteners, corners, seams, drainage, and the transition to the base should be resolved before fabrication. Fingerprints, water marks, and surface scratches may also be more visible on some finishes, so compare samples and ask how the selected finish should be maintained.

Aluminum: an option when weight and moisture are important

Aluminum is worth considering when a lighter surface or component can simplify an installation. Its resistance to rust and moisture can be useful in damp settings, but the material still needs a sound support system and well-designed connections. Review how the finish will respond to sun, how edges will be fabricated, and how the countertop will meet cabinets, masonry, and appliances.

Do not choose aluminum only because it is light. The full assembly must be stable, level, properly supported, and compatible with the intended cooking equipment. A project-specific review is more reliable than a general claim about any countertop category.

Which Countertop Details Improve Cooking and Cleaning?

Material selection is only one part of a successful outdoor kitchen countertop. Daily comfort and long-term service also depend on the details that are easy to overlook in a showroom. Plan the work zones, edges, overhangs, cutouts, seams, drainage, and maintenance routine before the final slab is ordered.

How should stains, heat, and daily cleanup be handled?

Match the cleaning routine to the surface. Granite and other natural stones may need periodic sealing and a cleaner appropriate for the stone. Concrete may need more consistent protection because moisture and food oils can penetrate an unprotected surface. Porcelain and stainless steel may be simpler to wipe down, but they still need product-specific care. Remove spills promptly, especially around grills, marinades, wine, and cooking oils.

Give hot cookware a designated landing area. Use trivets or another heat barrier where the surface manufacturer recommends it. Plan where cutting boards, serving trays, paper towels, and small appliances will sit so food preparation does not happen at the edge of a walkway or directly beside a burner.

What fabrication details prevent water and layout problems?

Resolve appliance dimensions before the countertop is cut. A grill, sink, refrigerator, burner, or pizza oven opening can affect the slab’s support and the location of seams. Confirm the final specifications, access route, cabinet openings, and service clearances with the appliance supplier and installer.

Edge profiles and overhangs also need practical attention. A softened edge can be more comfortable beside a busy passage. A seating overhang needs adequate support and should not interfere with doors, walkways, or appliance ventilation. Drainage should move water away from the work surface, cabinet interiors, and masonry base rather than leaving moisture at a joint.

How Do You Match the Countertop to the Rest of the Yard?

A countertop should look connected to the property without making every surface identical. Start with the fixed elements that will remain in place, such as the home exterior, retaining walls, pool coping, patio, walkways, and shade structure. Then compare the countertop against those materials in the light where it will actually be used.

Build a consistent material palette

A bluestone setting may pair with a quieter gray surface, while warm travertine or sandstone can support beige, cream, or earth-toned tones. A patterned granite or quartzite can become the focal point when the surrounding paving is restrained. A more uniform porcelain slab may provide a visual break when the yard already contains several strong textures.

Use full-size samples when possible. Small samples can hide natural variation, seam placement, and the way a color changes from shade to direct sun. A material palette should include the countertop, masonry base, cabinet fronts, appliance finish, pavers, pool deck, and any wall or pergola finish that will be visible from the seating area.

Coordinate the kitchen structure and appliances

Cabinet doors, appliance fronts, hardware, and countertop edges should read as one group. Stainless steel can become a deliberate accent when it is repeated in hardware or lighting. Dark cabinet fronts can be balanced with a lighter surface, while a deeper stone can ground a pale structure. Keep the working layout in view so the design does not prioritize appearance over comfortable use.

Gappsi’s outdoor kitchen masonry design and construction service can be considered when the base, countertop, paving, and surrounding hardscape need to be coordinated as one project. A pergola or pavilion can also change the way the counter is experienced. Review pavilions, pergolas, and gazebos as part of the larger outdoor room rather than selecting the countertop in isolation.

A Practical Selection Checklist for Your Outdoor Kitchen

Use this checklist before choosing among outdoor kitchen countertops. It keeps the decision focused on the conditions the surface will actually face.

  1. Assess exposure: note sun, rain, humidity, nearby landscaping, coastal conditions, sprinklers, and the protection provided by a roof or pergola.
  2. Describe cooking habits: list the grilling, prep, serving, and storage tasks that will happen on the counter.
  3. Shortlist materials: compare granite, quartzite, porcelain, concrete, stainless steel, and aluminum against the site rather than a generic ranking.
  4. Review the supporting base: confirm that the structure, cabinets, masonry, and slab support are appropriate for the chosen material.
  5. Map appliances and utilities: mark the grill, refrigerator, sink, burners, gas, water, drainage, electrical access, and service panels before fabrication.
  6. Choose edges and overhangs: account for seating, traffic, corners, support, appliance doors, and the comfort of people moving around the island.
  7. Plan care: write down approved cleaners, sealing or treatment requirements, hot-pan precautions, and winter protection before installation.
  8. View samples outdoors: compare the slab beside the pavers, pool deck, siding, cabinet finish, appliances, and shade structure in sun and shade.
  9. Review the whole installation: have the countertop, base, appliances, utilities, drainage, and surrounding masonry checked together before the first cut.

Contact Gappsi through our contact page

Frequently Asked Questions

What is the best countertop for an outside kitchen?

There is no single best surface for every Long Island outdoor kitchen. Granite, quartzite, porcelain, concrete, stainless steel, and aluminum each involve different tradeoffs in weather exposure, heat, stains, cleaning, fabrication, and design. Start with the property’s exposure and cooking habits, then compare actual products and installation details.

What can I use for outdoor countertops?

Common options include natural stone such as granite and quartzite, outdoor-rated porcelain, concrete, stainless steel, and aluminum. The best shortlist depends on the support structure, drainage, appliance cutouts, edge profile, maintenance routine, and the materials already used around the property.

What is the cheapest option for outdoor countertops?

The lowest overall project cost depends on the material, slab or fabrication requirements, cutouts, support, access, site work, and installation. A surface that appears simple may require additional reinforcement or maintenance. Compare the complete installed scope and the care you are prepared to provide instead of choosing on material name alone.

What type of countertop is best for an outdoor bar?

An outdoor bar countertop should be selected around the exposure, seating overhang, spill risk, edge comfort, and the way drinks will be served. Porcelain, natural stone, concrete, stainless steel, and aluminum can all be considered when the support and drainage are designed correctly. Bring the surface sample next to the cabinetry and surrounding patio before approving the final material.

Gappsi can help Long Island homeowners connect countertop selection with outdoor kitchen design, masonry, appliances, and surrounding outdoor living materials. To discuss the conditions and design goals for your Nassau or Suffolk County property, visit the Gappsi contact page.

Contact Gappsi through our contact page

Share this page:
Smithtown home remodeling company workspace with design plans, material samples, and a contractor.

How to Hire a Smithtown Home Remodeling Company

Thinking about a home remodel often brings to mind the stress of juggling multiple contractors for different jobs, from masonry to plumbing to landscaping. It doesn’t have to be that complicated. A full-service design and construction firm can manage every detail of your project under one roof, ensuring a cohesive design and a smooth process from start to finish. This integrated approach is the secret to a stress-free renovation. Finding a Smithtown home remodeling company that offers comprehensive services means you get one expert team dedicated to your entire vision. Let’s explore how this model works and how to find the right all-in-one partner for your home.

Key Takeaways

  • Vet your contractor thoroughly: Always verify their license and insurance, check references, and review their portfolio. A detailed contract is non-negotiable; it protects you by outlining the project scope, timeline, and costs, preventing surprises later.
  • Plan your project before you start: Define your must-haves and set a realistic budget that includes a 10-20% contingency fund for surprises. Working with your contractor to create a clear timeline is key to keeping your project on track and stress-free.
  • Consider a full-service local remodeler: A local team understands Smithtown’s building codes and offers personalized service. A full-service company can manage everything from indoor renovations to outdoor projects like swimming pools or sports games courts, ensuring a cohesive and streamlined process.

Who Are the Best Home Remodelers in Smithtown?

Finding the right remodeler in Smithtown is the first step toward creating the home you’ve always wanted. Your choice will shape your entire experience, from the initial design to the final reveal. The best professionals combine expert craftsmanship with a deep understanding of your vision. Let’s look at some top options and what makes a remodeler truly stand out.

Gappsi: Premier Design and Construction

Gappsi stands out in Smithtown as a comprehensive design and construction company. Instead of juggling multiple contractors for different parts of your project, you can work with one expert team from start to finish. We handle everything from complete home remodeling to creating stunning outdoor retreats. Our services include custom swimming pool installations, expert masonry, and lush landscape design. We also specialize in designing and installing unique sports games courts, so you can add a basketball, tennis, or pickleball court right in your backyard. By managing every detail under one roof, we ensure a smooth, streamlined process and a beautiful, cohesive result for your home.

What to Look for in Other Local Remodelers

While you explore your options in Smithtown, it’s smart to know what defines a great remodeler. You can use websites like Houzz to find a list of local professionals and read reviews from other homeowners. Many local contractors offer specialized services like kitchen renovations, bathroom updates, and home additions. The most important step is to verify their credentials. Always confirm that any contractor you consider is licensed, bonded, and insured. This protects you from liability and ensures they meet professional standards. A local remodeler will also have essential knowledge of Smithtown’s building codes, which helps your project run smoothly and avoid delays.

What Services Do Smithtown Remodelers Offer?

When you start looking for a remodeler in Smithtown, you’ll find that their services can cover nearly every inch of your property. From updating a single room to completely reimagining your backyard, the right team can handle it all. Most contractors specialize in a few key areas, while full-service design and construction firms can manage comprehensive projects from start to finish. Understanding the common offerings can help you narrow down your search and find the perfect partner for your vision. Let’s look at some of the most common services you’ll find.

Kitchen and Bathroom Renovations

Kitchen and bathroom remodels are some of the most popular projects, and for good reason. These are the rooms where you start and end your day. A great contractor can help you design a beautiful, functional kitchen with custom cabinets, modern appliances, and durable countertops that fit your lifestyle. The same goes for bathrooms, where the goal is often to create a relaxing, spa-like retreat. A full home remodeling project can completely change how you feel about your home, adding significant value and daily enjoyment.

Basement Finishing and Home Additions

If you need more room, finishing your basement or building an addition can be a game-changer. Many Smithtown homeowners are turning unused basements into functional living areas like home gyms, media rooms, or private guest suites. It’s a fantastic way to expand your home’s footprint without building out. For those who need even more space, a home addition can create that extra bedroom, home office, or expanded family room you’ve been dreaming of. A skilled remodeler can ensure the new space blends seamlessly with your existing home’s architecture and style.

Outdoor Living and Entertainment Spaces

Your property doesn’t end at your back door. Local remodelers, especially those with landscape design expertise, can create stunning outdoor living spaces. This goes far beyond simple patios. Think about custom outdoor kitchens for summer barbecues, cozy fire pits for cool evenings, and even complete swimming pool installations that turn your backyard into a private resort. A well-designed outdoor area acts as a true extension of your home, giving you more space to relax, entertain, and make memories with family and friends.

Custom Installations and Specialty Projects

For a home that is truly one-of-a-kind, look for a remodeler who handles custom and specialty projects. This is where true craftsmanship shines. These projects can include installing elegant pavilions and pergolas for shade and style, or building custom outdoor sports games courts for family fun. Other specialty services involve expert masonry with natural stone and porcelain pavers, creating intricate patios, walkways, and even custom outdoor ovens. If you have a unique idea, the right full-service company will have the design expertise and construction skill to bring it to life.

Why Go Local for Your Smithtown Remodel?

When you decide to remodel your home, you’re faced with a lot of choices, and one of the first is whether to hire a local company or a large, national chain. While big names might seem appealing, choosing a contractor right here in the Smithtown area offers some serious advantages. Working with a local remodeler means partnering with someone who understands our community, from its specific building regulations to its unique style. It’s about more than just convenience; it’s about getting better results, personalized service, and supporting the place we all call home.

Expertise in Local Building Codes

Every town has its own set of rules, and Smithtown is no exception. A local contractor brings extensive knowledge of Long Island’s specific building codes, zoning laws, and permit processes. This inside expertise is invaluable. It means your project, whether it’s a new swimming pool or a basement remodel, will be planned correctly from the start, avoiding costly delays or violations. Instead of you having to learn complex regulations, your contractor handles the red tape seamlessly. This local know-how ensures your renovation is not only beautiful but also fully compliant, giving you complete peace of mind.

Get Personalized Service and Clear Communication

With a local remodeler, you are a neighbor, not just a project number. This proximity makes a huge difference in the quality of service you receive. It’s easy to schedule in-person meetings to discuss progress, review materials, or resolve any issues that pop up. This direct line of communication keeps you in the loop and ensures your vision is being executed perfectly. Local companies like Gappsi also have strong relationships with nearby suppliers, which can lead to better material sourcing and more reliable delivery schedules for your home remodeling project.

Benefit from a Strong Community Reputation

Local contractors have a vested interest in maintaining a stellar reputation right here in Smithtown. Their name is on every project they complete, and their work is visible throughout the community. This accountability is a powerful motivator for delivering high-quality craftsmanship and excellent customer service. A local remodeler’s success depends on word-of-mouth referrals from satisfied neighbors. You can often see their work firsthand around town, giving you tangible proof of their skill and reliability. This deep community connection means they are committed to your satisfaction because their business depends on it.

Support Smithtown’s Local Economy

Choosing a local remodeler is an investment in your own community. When you hire a Smithtown-based company, the money you spend tends to stay local. It supports area jobs, helps other small businesses thrive, and contributes to the local economy that we all rely on. These contractors often source materials from a local stone and porcelain supplier, further strengthening the network of neighborhood businesses. Your home renovation becomes more than just a personal upgrade; it becomes a way to contribute directly to the vitality and prosperity of Smithtown and the surrounding Long Island area.

What to Look for in a Smithtown Remodeling Contractor

Choosing the right remodeling contractor is the most important decision you’ll make for your project. The right team will not only bring your vision to life but also make the process smooth and stress-free. To find a reliable partner for your Smithtown home, focus on a few key areas that separate the pros from the rest. Here’s what you should always look for before signing on the dotted line.

Verify Their License, Insurance, and Credentials

This is a non-negotiable first step. A professional contractor must be licensed and insured in New York. A license proves they meet state and local requirements, while insurance protects you from liability in case of accidents on your property. Don’t just take their word for it; ask for copies of their license and insurance certificates and verify them. This simple check ensures you’re working with a legitimate business that takes its responsibilities seriously. A company that is transparent about its credentials, like a premier home remodeling company, sets a foundation of trust from the very beginning.

Review Their Experience and Portfolio

You wouldn’t hire a portrait artist to paint your landscape, right? The same logic applies to remodeling. Look for a contractor with a strong portfolio of projects similar to yours. If you’re planning a modern kitchen renovation, you want to see examples of their work in that style. Ask to see before-and-after photos, read case studies, and check out their project galleries. This helps you gauge their skill, style, and ability to deliver the quality you expect. A robust video portfolio can give you an even better sense of their craftsmanship and the scope of their work.

Ask for Transparent Pricing and a Detailed Contract

A handshake is nice, but a detailed contract is essential. A trustworthy contractor will provide a comprehensive written agreement that outlines every aspect of the project. This should include a clear scope of work, a list of materials, a projected timeline, a payment schedule, and the total cost. Be wary of bids that seem too good to be true, as they often lead to surprise costs later. A transparent contract protects both you and the contractor, ensuring everyone is on the same page. This is especially important for complex projects like custom masonry where material and labor details are critical.

Look for Clear Communication and Responsiveness

A remodeling project is a partnership. You’ll be communicating with your contractor regularly, so you need someone who is responsive, clear, and easy to work with. Pay attention to their communication style from your very first inquiry. Do they return your calls promptly? Do they answer your questions thoroughly and patiently? Good communication is the key to a smooth project and helps resolve any issues quickly. You’re looking for a team that listens to your ideas and collaborates with you, especially on creative projects like landscape design, where your vision is central to the outcome.

How to Find a Reputable Remodeler in Smithtown

Finding the right contractor for your Smithtown home can feel like searching for a needle in a haystack, but it doesn’t have to be overwhelming. With a clear strategy, you can confidently find a professional who will bring your vision to life. Focusing on local recommendations, online feedback, and in-person visits will help you narrow down your options and connect with a team you can trust. These simple steps will guide you toward a successful partnership and a beautiful remodel.

Ask Friends and Neighbors for Referrals

One of the most reliable ways to find a great contractor is through word-of-mouth. Start by talking to friends, family, and neighbors in the Smithtown area who have recently completed a remodel. Personal referrals give you honest insight into a contractor’s reliability, work quality, and overall process. Ask them about their experience: Was the team professional? Did they stick to the timeline and budget? How did they handle unexpected issues? Hearing directly from someone you trust provides a layer of confidence that you just can’t get anywhere else.

Read Online Reviews

After gathering some names, your next step is to do some online research. Reviews and ratings on sites like Google and Houzz offer a window into a contractor’s history and customer satisfaction. Don’t just look at the star rating; read through the comments to understand the context. Look for patterns in the feedback, both good and bad. Pay attention to how the company responds to criticism, as it shows their commitment to customer service. You can also check out a company’s YouTube channel to see video testimonials and examples of their finished projects.

Visit a Local Showroom

There’s no substitute for seeing a company’s work up close. Visiting a local showroom is one of the best ways to gauge the quality of materials and craftsmanship a remodeler offers. This gives you a chance to touch the stone, feel the textures, and see how different elements come together. It’s also an excellent opportunity to meet the team in person, ask questions, and get a feel for their customer service style. A well-maintained and thoughtfully designed showroom is often a reflection of the company’s commitment to quality and attention to detail.

Mistakes to Avoid When Hiring a Remodeler

Finding the right remodeler is a huge step, but a few common pitfalls can turn your dream project into a headache. Knowing what to watch out for can help you choose a contractor with confidence. By avoiding these simple mistakes, you can ensure a smoother process and get the beautiful results your home deserves. Let’s walk through some of the most important things to keep in mind.

Don’t Just Choose the Lowest Bid

It’s tempting to go with the lowest price, but this is often a mistake when it comes to home remodeling. A bid that seems too good to be true usually is. It could signal that the contractor is cutting corners, using subpar materials, or lacks the experience for your specific project. Every remodel is unique, and you want a team with the right expertise. Instead of focusing only on the price tag, consider the value you’re getting. A slightly higher bid from an experienced company often means better craftsmanship, durable materials, and a project that’s completed correctly the first time. Quality home remodeling is an investment in your property, so it pays to work with someone you trust.

Always Check Backgrounds and References

Before you hire anyone, do your homework. One of the biggest mistakes homeowners make is not verifying a contractor’s credentials. Always ask for proof that they are licensed and insured in New York. This is for your protection. If an uninsured worker gets injured on your property, you could be held liable. Reputable companies will be happy to provide this information. Don’t stop there, ask for references from past clients in the Smithtown area and look at their portfolio. You can often see examples of their work on their website or social media channels, which gives you a real sense of their quality and style. Watching videos of completed projects on a platform like YouTube can also offer great insight into a remodeler’s capabilities.

Get Every Detail in Writing

A handshake and a verbal agreement are not enough for a remodeling project. A detailed, written contract is essential to protect both you and the contractor. Before any work begins, make sure you have a signed document that clearly outlines every aspect of the job. This includes the full scope of work, a list of specific materials and products to be used, a clear payment schedule, and an estimated start and completion date. The contract should also specify how changes to the project will be handled. Taking the time to get everything in writing helps prevent misunderstandings down the road and ensures everyone is on the same page. This step is crucial for complex projects like installing swimming pools or building home additions.

How to Plan Your Smithtown Home Remodeling Project

A successful remodel starts long before the first hammer swings. Proper planning is your best tool for ensuring your project runs smoothly, stays on budget, and ends with a space you absolutely love. It transforms a big, intimidating idea into a series of manageable steps. By thinking through your goals, finances, and schedule ahead of time, you set yourself and your contractor up for success. Let’s walk through the key planning stages that will make your Smithtown home renovation a positive experience from start to finish.

Define Your Project Goals and Budget

Before you call a contractor, get clear on your vision. Start by making two lists: one for your absolute must-haves and another for your “would be nice to have” features. This simple exercise helps you prioritize what truly matters and gives you a solid foundation for every decision that follows. Are you dreaming of a more open kitchen for entertaining, or do you desperately need more storage? Knowing your priorities makes it easier to communicate your vision and helps your contractor suggest the best solutions. This list will also be your guide when setting a realistic budget, ensuring you allocate funds to the elements that will make the biggest impact on your daily life. Exploring different home remodeling projects can also provide inspiration for your own lists.

Create a Contingency Fund

Even with the most detailed plan, surprises can happen during a remodel, especially in older homes. That’s why setting aside a contingency fund is one of the smartest moves you can make. Think of it as a financial safety net for the unexpected, like discovering outdated wiring behind a wall or needing to reinforce a floor joist. Most experts recommend setting aside 10% to 20% of your total project cost for this fund. Having this buffer in place prevents the stress of going over budget and allows you to handle unforeseen issues without compromising on your original vision. It’s not a sign of poor planning; it’s a hallmark of a well-prepared homeowner. This is especially true for complex masonry work where the existing foundation can hold surprises.

Establish a Clear Timeline with Your Contractor

A timeline is more than just a start and end date; it’s a roadmap for your entire project. Establishing a clear timeline with your contractor is crucial for keeping everything on track. A detailed schedule should outline each phase of the project, from demolition and structural work to inspections and final finishes. This helps you understand the flow of the work and what to expect at each stage. A professional contractor will work with you to create a realistic schedule that accounts for material orders, subcontractor availability, and potential delays. You can even watch project videos to get a better sense of how different phases come together and how long they might take, helping you ask informed questions when creating your own project calendar.

Related Articles

Frequently Asked Questions

What’s the difference between a general contractor and a full-service design and construction company? A general contractor is typically hired to manage the construction phase of a project that has already been designed. A full-service design and construction company, however, handles your entire project from the very first idea to the final installation. This means you work with one cohesive team for the architectural plans, interior design, material selection, and the build itself, which ensures a smoother process and a more unified result.

How do I create a realistic budget for my remodeling project? Start by creating a detailed list of your non-negotiable needs and a separate list of your wants. This helps you prioritize where to spend. Research the average costs for similar projects in our area to get a general idea, then get detailed quotes from a few reputable remodelers. Most importantly, always include a contingency fund of about 10% to 20% of your total budget to cover any unexpected issues that might come up.

Can I combine indoor and outdoor projects, like a new kitchen and a new pool, with one company? Yes, and it’s often the best approach. Hiring a single company that specializes in both interior and exterior remodeling ensures your entire property has a consistent style and level of quality. It also simplifies your life immensely, as you only have one point of contact and one team to coordinate. This integrated approach is perfect for creating a seamless flow from your indoor living spaces to your outdoor retreat.

What’s the single most important document I need before work begins? Without a doubt, it’s the detailed written contract. This document is your project’s blueprint and your primary form of protection. It should clearly outline the complete scope of work, a specific list of materials, a projected timeline with key milestones, a clear payment schedule, and the total cost. A thorough contract prevents misunderstandings and ensures you and your contractor are aligned on every detail.

My project is pretty unique. How do I find a contractor who can handle custom work? When you have a special project in mind, like a custom sports games court or intricate masonry, look for a contractor with a diverse and detailed portfolio. Ask to see examples of past work that required creative problem-solving or specialized skills. Companies with in-house design teams and their own showrooms are often best equipped to handle custom requests because they have the resources and expertise to bring a unique vision to life.

Share this page:
Homeowners meeting with a local Long Island remodeling contractor to plan their renovation.

How to Choose a Long Island Remodeling Contractor

Planning a major home renovation often feels like you need to become a general manager overnight. You might need a mason for the patio, a different company for the swimming pool, and yet another for the kitchen remodel. Juggling all those teams can be a logistical nightmare. This is why many homeowners seek a single, unified solution when they search for a ‘remodeling contractor near me Long Island.’ A design-build firm that handles everything, from indoor spaces to outdoor living areas, simplifies the entire process. It ensures a cohesive vision and one point of contact, making your renovation journey smooth and stress-free.

Key Takeaways

  • A Good Contractor is More Than a Builder: Finding the right partner is crucial. Make sure you verify their credentials, check references, and look through their past projects to feel confident in their ability to manage your renovation from start to finish.
  • Preparation is Your Best Tool: Before the work begins, get clear on your goals and budget. A pre-project inspection and an understanding of local permits will help you and your contractor create a realistic plan and avoid costly surprises.
  • A Unified Team Simplifies Everything: Choosing a company that handles everything from design to construction means you have one point of contact. This integrated approach prevents miscommunication and ensures a cohesive look across your entire property, indoors and out.

What Does a Long Island Remodeling Contractor Do?

A Long Island remodeling contractor does more than just swing a hammer. They are your partner in turning your vision for your home into a reality, managing every detail from the initial design to the final touches. Whether you’re dreaming of a modern kitchen, a backyard oasis, or a complete home overhaul, a skilled contractor orchestrates the entire process. They are the creative problem-solvers and logistical experts who make sure your project runs smoothly.

This means they coordinate specialized tradespeople like plumbers and electricians, source high-quality materials that fit your budget and style, and ensure your project stays on track and meets all local building codes. Think of them as the conductor of your home renovation symphony, bringing all the moving parts together to create a beautiful, functional space you’ll love for years to come. Their expertise is crucial for handling the complexities of any renovation. Their work typically falls into three main categories: transforming indoor spaces, creating outdoor living areas, and managing full-home renovations.

Transforming Indoor Spaces

A great remodeling contractor helps you reimagine the inside of your home. This often starts with high-traffic areas like kitchens and bathrooms, but it can include any room you want to update. They work with you to create a layout that flows better, adds storage, and reflects your personal style. A key part of this process is material selection. Instead of just guessing from a catalog, a good contractor ensures you can see and touch materials like tiles and countertops in person. This hands-on approach helps you feel confident in your choices and guarantees the final look is exactly what you envisioned for your home remodeling project.

Creating Outdoor Living Areas

Your home’s potential doesn’t stop at your back door. A remodeling contractor with local expertise can help you design and build incredible outdoor living spaces that feel like a natural extension of your house. This could be anything from a simple patio for weekend barbecues to a luxurious backyard retreat complete with an outdoor kitchen, a custom swimming pool, and cozy seating areas. They handle all the details, including expert masonry for patios and retaining walls, ensuring your outdoor space is not only beautiful but also durable enough to withstand Long Island’s seasons. It’s all about making your property more functional and enjoyable.

Managing Full-Home Renovations

For larger projects, a remodeling contractor acts as your single point of contact, managing the entire renovation from start to finish. This is especially important for full-home remodels, which involve complex scheduling, multiple teams of specialists, and a whole lot of moving parts. A reputable contractor oversees every phase, from securing permits to managing subcontractors and timelines, ensuring a smooth and cohesive process. Their ability to handle extensive projects, like a complete kitchen and living room overhaul, is what sets them apart. This comprehensive management removes the stress from your shoulders, allowing you to focus on the excitement of seeing your dream home come to life.

Why Choose Gappsi for Your Long Island Remodel?

Choosing a contractor for your Long Island home remodel is a big decision. You need a partner you can trust to bring your vision to life, manage the complexities of the project, and respect your home and budget. With so many moving parts, from design and permits to construction and finishing touches, having a single, experienced team makes all the difference. At Gappsi, we combine decades of local experience with a comprehensive, all-in-one approach to make your renovation journey smooth and successful. We are committed to transforming your space with quality craftsmanship and clear communication every step of the way.

Our Unique Design-Build Approach

Our design-build model simplifies the entire remodeling process by bringing designers and builders together under one roof. This means you have one team and one point of contact from the initial concept to the final walkthrough. This collaborative method prevents the communication gaps and scheduling conflicts that often happen when you’re juggling separate firms. A key part of our process is ensuring you are completely happy with every choice. We invite you to our Smithtown showroom, where you can see and select materials in person before any work begins. This hands-on approach eliminates guesswork and guarantees the final result matches your vision perfectly.

Local Expertise in Suffolk and Nassau County

As a home improvement company that has served Long Island for over 30 years, we have an intimate understanding of Nassau and Suffolk County. This local expertise is invaluable. We know the specific building codes, permitting requirements, and environmental considerations unique to our communities. Whether it’s handling town regulations for a new pool or choosing materials that can withstand coastal weather, our deep-rooted knowledge ensures your project is completed correctly and efficiently. When you work with Gappsi, you’re partnering with a team that is not only skilled in construction but also deeply familiar with the place you call home.

One Cohesive Team for Your Entire Project

Gappsi is an all-inclusive home improvement company, which means we can handle every aspect of your project, both indoors and out. You won’t need to coordinate with a separate landscaper, mason, and pool installer. Our in-house experts manage everything, from home remodeling and masonry to landscaping and swimming pool installations. This unified approach ensures a consistent level of quality and a cohesive design across your entire property. Imagine adding a beautiful new kitchen that flows seamlessly into a custom patio and outdoor living area, all created by one dedicated team. This is the Gappsi difference: a single, trusted partner for your complete home transformation.

Explore Our Home Remodeling Services

When you partner with a design-build firm, you gain access to a comprehensive team of experts who can handle every aspect of your project. At Gappsi, we manage everything from initial designs to final installations, covering a wide range of home improvement services. This integrated approach means your entire project, whether indoors or out, is managed by one cohesive team. We are a full-service home improvement company serving Nassau and Suffolk counties, ready to transform your property with our extensive expertise.

Swimming Pools and Water Features

Imagine stepping into your backyard and finding a personal oasis. We design and install custom swimming pools and water features that turn that vision into a reality. Whether you dream of a classic vinyl pool for family fun or an elegant gunite design with a cascading waterfall, our team handles the entire process. We work with you to create a unique layout that complements your home and landscape, ensuring your new pool is not just a place to swim, but the stunning centerpiece of your outdoor living space. From sleek, modern designs to naturalistic lagoons, we build water features that bring tranquility and beauty to your Long Island home.

Masonry, Patios, and Stonework

The foundation of any great outdoor space is expert craftsmanship. Our leading masonry services provide the structure and style for beautiful, durable patios, walkways, retaining walls, and outdoor kitchens. We work with a wide selection of high-quality materials, including stunning imported Italian porcelain and a variety of natural stones. This allows us to create custom designs that match your home’s aesthetic perfectly. Whether you want a rustic stone fire pit for cozy evenings or a sophisticated porcelain patio for entertaining, our team designs and builds custom outdoor living features that are made to last and look incredible for years to come.

Pavilions, Pergolas, and Outdoor Structures

Extend your living space into the great outdoors with a custom-built structure. A pavilion can create a sheltered spot for an outdoor dining room, while a pergola can define a cozy lounge area with dappled sunlight. We design and install a variety of pavilions and pergolas that add function and architectural interest to your backyard. These structures provide shade, define specific zones for relaxation or entertainment, and create a seamless transition between your indoor and outdoor areas. Let us help you build a beautiful and practical outdoor room that you and your family can enjoy throughout the seasons.

Synthetic Turf and Sports Games Courts

A lush, green lawn that requires no mowing or watering sounds like a dream, and with our imported synthetic turf, it’s completely achievable. Our high-quality turf and sports games courts are perfect for creating beautiful, low-maintenance lawns, dog runs, and personal putting greens. We also design and install a variety of sports games courts for active families. Imagine having your own backyard basketball, tennis, pickleball, or bocce court. We can build a custom court that fits your space and provides endless opportunities for fun and fitness right at home.

Landscaping and Gravel Driveways

A thoughtful landscape design ties your entire property together. Our team provides comprehensive landscape design and installation services to create a beautiful and functional environment around your home. From planting lush garden beds to installing efficient irrigation systems, we handle all the details. We also offer modern and eco-friendly driveway solutions, like our innovative Gravel-Fix system. These permeable gravel driveways offer a stylish alternative to traditional asphalt or concrete, providing excellent drainage and a clean, contemporary look that enhances your home’s curb appeal.

Fences, Saunas, and Restoration

The final details are what make a house feel like a home. We offer a range of services to complete your project, including the installation of wood, vinyl, and aluminum fences and netting for privacy and security. For those focused on wellness, we can install a personal sauna to create a spa-like retreat in your home. To keep your property looking its best, we also provide professional restoration services. Our team can clean and seal your existing stone patios and driveways, protecting them from the elements and restoring their original beauty.

How Much Does a Long Island Remodel Cost?

It’s the big question on every homeowner’s mind: what will my dream remodel actually cost? While there’s no simple answer, understanding the factors that shape the budget is the first step toward making your vision a reality. The cost of a Long Island remodel varies widely because every project is unique. A kitchen refresh will have a different price tag than a full backyard transformation with a new swimming pool and patio. Think of it less as a fixed price and more as a custom quote built around your specific goals, materials, and home.

What Influences Your Project’s Cost?

The final price of your remodel depends heavily on what you want to accomplish. The single biggest factor is the scope of your project. Are you updating a single bathroom or undertaking a full-scale home remodeling project? Other key factors include the size of the space, the complexity of the work (like moving walls or plumbing), and the quality of materials you choose. For example, opting for high-end natural stone will have a different budget impact than more standard finishes. Thinking through these elements will help you clarify your priorities and build a more accurate budget from the start.

Typical Cost Ranges by Project

To give you a general idea, a full home remodel on Long Island can range from $50,000 to over $250,000. The final number depends on the level of renovation. A basic refresh with cosmetic updates might land closer to the $100,000 mark. If your project involves significant functional changes, like altering the layout of your home, you could be looking at $200,000 or more. These figures are just a starting point, but they can help you set realistic expectations as you begin planning your project and exploring different financing options.

How to Plan for Unexpected Expenses

One of the most common surprises during a renovation is the total investment required. Even with careful planning, unexpected issues can arise, from discovering hidden structural problems to material delivery delays. That’s why it’s smart to set aside a contingency fund of about 10% to 20% of your total project cost. This buffer gives you peace of mind and ensures that a small surprise doesn’t derail your entire project. Working with an experienced team that provides detailed estimates and transparent communication can also help minimize unforeseen costs and keep your project on track.

How to Find the Right Remodeling Contractor

Choosing a contractor is one of the most important decisions you’ll make for your home renovation. This is the team you’ll be trusting with your vision, budget, and property. Taking the time to find the right partner ensures your project runs smoothly and results in a space you love. Here are the essential steps to follow when vetting a potential contractor for your Long Island home.

Verify Licenses, Insurance, and Credentials

Think of this as your first line of defense. A qualified contractor should readily provide proof of their licenses and insurance, including general liability and worker’s compensation. This is a crucial step that confirms their competency and protects you from liability in case of accidents on your property. A professional company will have these documents organized and available for you to review. Don’t be shy about asking; it’s a standard part of the process and a major red flag if a contractor is hesitant to share them.

Read Online Reviews and Ask for References

Online reviews offer a window into a contractor’s history and customer satisfaction. Look for detailed feedback on communication, timeliness, and the quality of the finished work. Beyond online ratings, ask the contractor for a list of references from recent projects similar to yours. Speaking directly with past clients gives you a chance to ask specific questions about their experience. A contractor who is proud of their work will be happy to connect you with satisfied homeowners. You can also explore a company’s project galleries, like the Gappsi YouTube channel, to see their craftsmanship firsthand.

Prioritize Local Long Island Experience

A contractor with deep roots in Long Island brings invaluable local knowledge to your project. They understand the specific building codes and permitting processes in Nassau and Suffolk counties, which can prevent costly delays. A local team also has established relationships with area suppliers and subcontractors, ensuring your project stays on schedule. Choosing a Long Island remodeling contractor means you’re partnering with someone who is invested in the community and familiar with the unique character and style of its homes. This local expertise is key to a successful and stress-free renovation.

How to Review a Contractor’s Portfolio

Think of a contractor’s portfolio as your window into their world. It’s more than just a collection of pretty pictures; it’s a visual resume that showcases their skills, style, and the quality of their work. Taking the time to carefully review a portfolio helps you determine if a contractor’s vision aligns with yours and if they have the expertise to bring your project to life. A strong portfolio should give you a clear sense of the contractor’s capabilities and leave you feeling confident and inspired.

Look for a gallery that is easy to access and filled with high-quality images of completed projects. Pay attention to the details in each photo, from the overall design to the small finishing touches. This step is crucial for vetting potential partners and ensuring you find a team that can deliver the results you envision for your Long Island home. A well-curated portfolio demonstrates professionalism and a deep pride in their craftsmanship, which are exactly the qualities you want in a remodeling contractor.

Assess Their Design Style and Range

When you start looking through a portfolio, first check for a design style that resonates with you. Do you see projects that reflect the aesthetic you want for your own home, whether it’s modern, traditional, or something in between? A contractor with a wide range of designs shows versatility and an ability to adapt to different client tastes. At Gappsi, we believe in a collaborative process, which is why we allow clients to see and select materials in person before any work begins. This approach eliminates guesswork and ensures your complete satisfaction with the final result. A portfolio should give you a sense of this same commitment to client vision.

Examine the Quality of Materials and Work

Beyond the overall design, zoom in on the details to gauge the quality of the work. Look for clean lines, precise fits, and high-end finishes. Are the materials used in their projects durable and well-suited for their purpose? A portfolio should highlight superior craftsmanship. For example, when looking at photos of masonry and stonework, check for tight, even joints. A consistent pattern of positive feedback from past clients is another great sign that you’ve found a reputable company that cares about quality. This combination of visual evidence and client testimonials gives you a complete picture of their commitment to excellence.

Look for a Mix of Indoor and Outdoor Projects

A contractor who can handle a variety of project types demonstrates broad expertise and a well-rounded skill set. Gappsi is an all-inclusive home improvement company, offering residential services that include home remodeling, swimming pool installations, landscape design, and sports games courts design. A portfolio that showcases this kind of diversity, from stunning kitchens to expansive outdoor living areas, proves the contractor can manage projects of different scales and complexities. This versatility is especially valuable for large-scale renovations, ensuring one cohesive team can handle every aspect of your project from start to finish.

Mistakes to Avoid When Hiring a Contractor

A home remodel is a significant investment of your time and money, so finding the right partner is everything. While it’s exciting to imagine the final result, rushing the hiring process can lead to headaches, unexpected costs, and a finished product that doesn’t meet your expectations. Taking the time to carefully select your contractor is the most important step you can take. By avoiding a few common pitfalls, you can ensure your project runs smoothly from the initial consultation to the final reveal.

Don’t Choose Based on Price Alone

It’s natural to focus on the bottom line, but choosing a contractor based only on the lowest bid is one of the biggest mistakes you can make. An unusually low price can be a red flag for subpar materials, inexperienced labor, or a contractor who has underbid the project and may cut corners later. This often leads to poor workmanship and additional costs to fix mistakes. Instead of just comparing prices, think about the overall value. A quality contractor’s bid will reflect their experience, high-quality materials, and commitment to craftsmanship. Investing a little more upfront for a reputable team often saves you money and stress in the long run.

Never Skip the Vetting Process

Before you sign any contracts, it’s essential to do your homework. Skipping the vetting process can leave you vulnerable to unqualified or uninsured workers. A professional contractor should be transparent and ready to provide their credentials. Ask for proof of their New York State license and make sure they carry both general liability insurance and worker’s compensation. This protects you from being held liable for accidents or property damage during the project. Don’t forget to ask for a list of recent references you can speak with. A confident remodeling contractor will always be proud to share their past work and connect you with happy clients.

Always Get a Detailed Written Estimate

A verbal agreement or a simple one-page quote isn’t enough to protect your investment. A common mistake that leads to budget overruns and disputes is not getting a detailed, written estimate. This document should clearly outline the entire scope of work, from demolition to the final touches. It needs to include a breakdown of material and labor costs, a specific project timeline with key milestones, and a clear payment schedule. This level of detail ensures everyone is on the same page and prevents misunderstandings. A comprehensive contract for your swimming pool or patio installation is a sign of a professional and organized team.

How to Prepare for Your Remodeling Project

A successful remodel begins long before the first wall comes down. Taking the time to prepare properly sets the stage for a smooth and enjoyable process, helping you and your contractor stay aligned from start to finish. When you have a clear vision and a solid plan, you can move forward with confidence, knowing that every decision contributes to the beautiful, functional space you’ve been dreaming of. These initial steps are your project’s foundation, ensuring everything from the budget to the final touches meets your expectations.

By thinking through your goals, inspecting your property, and understanding local requirements, you can avoid common pitfalls and keep your project on track. This preparation not only saves you time and money but also makes the entire experience less stressful. It allows our team at Gappsi to step in and bring your well-defined vision to life with precision and care. Let’s walk through the three most important things you can do to get ready for your home remodeling project.

Define Your Goals and Budget

Before you start any project, it’s essential to clearly define your objectives. What are you hoping to achieve with this remodel? Are you looking for a more open kitchen, an updated primary bathroom, or a complete outdoor oasis? Write down your must-haves and your wish-list items. This clarity will guide every decision you make. Alongside your goals, establish a realistic budget. Knowing your numbers helps you prioritize features and ensures your project stays on track financially. A well-defined scope and budget create a clear roadmap that your contractor can follow, turning your vision into a tangible plan without costly surprises.

Inspect Your Home for Potential Issues

Sometimes, the biggest challenges in a remodel are the ones you can’t see. Once a project begins and you see what is behind the drywall or under old flooring, you may find problems you didn’t know existed. A thorough inspection of your home before construction starts can uncover potential issues like hidden water damage, outdated wiring, or structural concerns. Identifying these problems early saves you from unexpected delays and expenses down the road. A professional contractor will include this inspection as part of their initial assessment, giving you a complete picture of the work required and allowing for a more accurate and comprehensive project plan.

Research Local Permits and Building Codes

Home remodeling projects on Long Island are subject to local building codes and permit requirements that vary between towns in Suffolk and Nassau County. It’s important to ensure all work complies with these regulations to avoid fines and project delays. Researching the necessary permits ahead of time is a critical step. While this can feel like a complex task, you don’t have to do it alone. An experienced local contractor will be familiar with the specific requirements in your area and can manage the entire permitting process for you. This expertise ensures your project is not only beautiful but also safe and fully compliant.

The Gappsi Process: Collaboration and Communication

A successful remodel is about more than just the beautiful final result; it’s also about the journey to get there. A project can quickly become stressful if you feel out of the loop or unheard. That’s why we’ve built our entire process around partnership and transparency. We believe that you should be an active participant in your home’s transformation, not a bystander. From the first design conversation to the final walkthrough, our team works with you, ensuring your vision is understood and your questions are always answered.

This collaborative approach is what sets Gappsi apart. We combine our decades of local Long Island expertise with your unique goals and style. We’ve found that keeping you involved and informed at every stage is the key to a smooth project and a result you’ll love for years to come. It eliminates surprises, builds trust, and makes the entire experience feel less like a construction project and more like a creative partnership. Our process is designed to give you confidence and peace of mind, knowing a dedicated team is bringing your dream space to life, exactly as you imagined it.

Select Materials in Our Smithtown Showroom

Making design decisions from a tiny sample or a picture online can be nerve-wracking. We take the guesswork out of the equation by inviting you to our Smithtown showroom. Here, you can see and touch the materials for your project, from porcelain and natural stone pavers to tiles for your new bathroom. This hands-on experience allows you to compare textures, colors, and finishes in person, ensuring the final look is exactly what you envisioned. It’s the perfect place to gather ideas and feel confident in your choices before any work begins.

Receive Regular Updates and Clear Communication

Nothing is more frustrating than being left in the dark during a home renovation. We are committed to maintaining open and consistent communication throughout your entire project. You will always know what’s happening, what to expect next, and who to call with questions. Our clients’ positive feedback often highlights our clear communication, which we believe is the foundation of a great working relationship. This commitment means you get regular progress updates and a direct line to our team, ensuring a transparent and stress-free experience from start to finish.

Partner With Us From Start to Finish

When you work with Gappsi, you aren’t just hiring a contractor; you’re gaining a dedicated partner for your entire project. Our design-build model means we are with you from the initial spark of an idea all the way through to the final installation and cleanup. Having one cohesive team manage your home remodeling project ensures that the design intent is perfectly executed and that quality is maintained at every step. This seamless approach simplifies the process for you, providing a single point of contact and a consistent vision from beginning to end.

Ready to Start Your Long Island Remodel?

Choosing the right contractor is the most important decision you’ll make for your home renovation. After learning what to look for, you’re ready to take the next step and find a partner who can turn your vision into a beautiful, functional space. At Gappsi, we combine design expertise with construction excellence to manage your entire project from the first sketch to the final walkthrough. If you’re ready to begin, here are a few simple ways to get started with us.

Schedule Your Consultation

The best way to see if we’re the right fit for your project is to have a conversation. During a consultation, we’ll listen to your ideas, discuss your goals, and walk you through the possibilities for your space. This initial meeting is all about collaboration. We want to understand your style and needs so we can create a plan that you’re excited about. This process eliminates guesswork and ensures we’re aligned from day one. You can schedule a consultation with our team to begin shaping your dream home.

Visit Our Smithtown Showroom

Sometimes you need to see and touch materials to truly know what you want. We invite you to visit our recently updated Smithtown showroom to get inspired. It’s a space designed for you to explore different textures, colors, and finishes for everything from kitchen countertops to patio pavers. Seeing the quality of our materials in person can help you visualize your project more clearly and make confident decisions. A trip to the showroom is a fantastic way to gather ideas and see firsthand our commitment to quality and design.

Explore the Gappsi Store

For an even wider selection of high-quality products, you can browse the Gappsi Store. Our store is a curated collection of the premium materials we use in our projects, including beautiful natural stone, durable porcelain pavers, and unique outdoor living accessories. It’s another resource we provide to help you find the perfect components for your renovation. Exploring our store gives you a sense of our standards and the level of quality you can expect when you partner with our team for your Long Island home improvement project.

Related Articles

Frequently Asked Questions

What’s the main advantage of using a design-build firm like Gappsi? The biggest advantage is simplicity and accountability. Instead of you having to manage a separate architect and construction crew, a design-build firm provides one unified team for your entire project. This means your designer and builder are collaborating from day one, which prevents miscommunication, streamlines the schedule, and ensures your original vision is executed perfectly. You have a single point of contact, making the whole process much less stressful.

Do I need to hire separate contractors for my indoor remodel and my new backyard patio? Not at all, and you’ll get a more cohesive result if you don’t. When you work with an all-inclusive company like Gappsi, our in-house experts can manage both your interior home remodeling and your complete outdoor transformation. This ensures a seamless flow between your indoor and outdoor living spaces and a consistent level of quality, all managed under one roof by one dedicated team.

I have no idea what my remodel will cost. Where do I even begin with budgeting? A great first step is to define your goals by making two lists: one for your absolute must-haves and another for your wish-list items. This exercise helps you clarify your priorities. Once you have a clear idea of what you want to achieve, you can schedule a consultation. A professional contractor can then discuss your vision, assess your space, and provide a detailed estimate that gives you a realistic financial roadmap for your project.

Why does it matter if my contractor is local to Long Island? A contractor with deep roots in Long Island brings invaluable knowledge to your project. They are experts on the specific building codes and permit requirements for towns across Nassau and Suffolk County, which helps prevent costly delays. They also understand which materials are best suited to withstand our coastal weather, ensuring your investment is beautiful and durable for years to come.

What if I’m overwhelmed by material choices and don’t know what to pick? That is a very common feeling, which is why we believe seeing is better than imagining. We invite all our clients to our Smithtown showroom to explore materials in person. You can see and touch different options for pavers, tiles, and countertops, making it much easier to visualize how they will look in your home. This hands-on approach removes the guesswork and helps you feel confident in your selections.

Share this page: