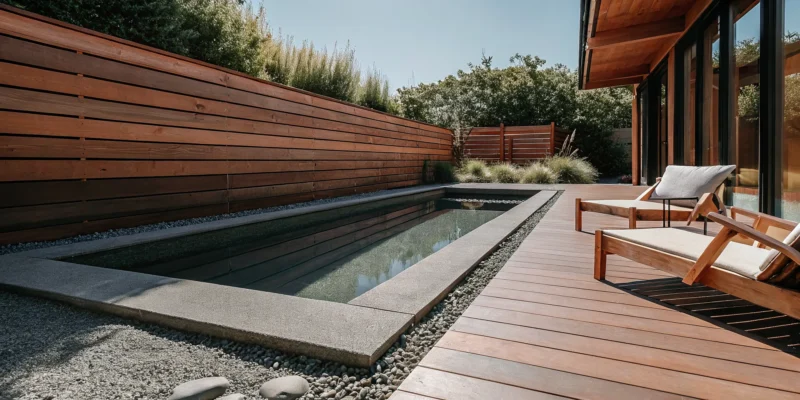
Modern wellness backyard design in Long Island with a pool, wood deck, and lounge chairs.

How to Plan a Wellness Backyard Design in Long Island

Your backyard holds so much more potential than just being a patch of grass. It can be your personal escape, a place designed specifically to help you relax, recharge, and reconnect with yourself. This is the core idea behind a wellness backyard: transforming your outdoor space into a functional sanctuary that supports your mental and physical health. It’s about making intentional choices, from adding a calming water feature to creating a quiet nook for meditation. For those of us here on the island, a thoughtful wellness backyard design Long Island also means working with our unique coastal climate. This guide will walk you through the essential features and design principles for creating a restorative retreat right outside your door.

Key Takeaways

  • Define Your Wellness Vision: Go beyond aesthetics and choose features that actively support your well-being, whether it’s a sauna for de-stressing, a quiet corner for reflection, or a dedicated space for your fitness routine.
  • Work with the Long Island Climate: For a lasting and low-maintenance sanctuary, select materials and native plants that are already adapted to our local seasons, sandy soil, and salty air.
  • Start with High-Impact Features: To make your project manageable and enjoy the benefits sooner, prioritize the one or two elements that will make the biggest difference to your well-being, then add other features over time.

What Is a Wellness Backyard?

A wellness backyard is more than just a beautifully landscaped area. It’s an outdoor space intentionally designed to be your personal sanctuary for health and rejuvenation. Think of it as an extension of your home that actively supports your mental and physical well-being. Instead of just looking pretty, every element is chosen to help you relax, recharge, and connect with nature. It’s about creating a private retreat right outside your door, tailored specifically to what helps you feel your best.

This kind of space transforms your yard from a simple lawn into a functional haven. Whether you want to de-stress after a long week, find a quiet corner for reflection, or have a dedicated spot for your fitness routine, a wellness backyard makes it possible. It’s about designing with purpose to improve your daily life.

Defining Your Outdoor Sanctuary

Your outdoor sanctuary is a space that draws on the healing qualities of nature to become a therapeutic retreat. It’s a yard designed for self-improvement, where you can add elements that cater directly to your wellness goals. This might include a dedicated platform for yoga or meditation, a quiet garden for reflection, or an invigorating outdoor shower. The key is to create a space that feels restorative to you.

You can incorporate features like saunas and plunge pools for contrast therapy or a simple water feature for its calming sounds. An aromatherapy garden with fragrant herbs and flowers can soothe your senses, while a designated fitness area on soft synthetic turf gives you a perfect spot for exercise. It’s all about personalizing your yard to create a haven for health.

Why Create a Wellness Space in Long Island?

Creating a wellness space in your Long Island backyard is an investment in your quality of life. It gives you a personal escape for relaxation and rejuvenation, a place to disconnect from the demands of daily life without ever having to leave home. Integrating wellness-focused elements into your landscape design results in an outdoor living area that promotes your holistic well-being year-round.

Here, beauty and wellness go hand in hand. Features like hot tubs, cozy fire pits, and layered landscape lighting don’t just look stunning; they also create an atmosphere that encourages you to slow down and relax. Having this personal retreat provides a consistent, accessible way to manage stress and focus on your health, making your home a true sanctuary for mind and body.

How to Design for the Long Island Climate

Creating a backyard that lasts means working with, not against, our local environment. Long Island has a distinct climate with four full seasons, sandy soil, and salty coastal air. Designing your wellness space with these elements in mind from the start ensures your garden will thrive and your structures will stand strong for years to come. A thoughtful landscape design considers these local factors from the very beginning, helping you select the right materials and plants that are perfectly suited for our area. By planning for our specific weather patterns and soil conditions, you create a more sustainable, lower-maintenance, and beautiful outdoor sanctuary. It’s about making smart choices that pay off every season, giving you more time to relax and enjoy your space.

Plan for Local Soil, Seasons, and Weather

Long Island’s climate, which falls into USDA hardiness zones 6b and 7a, gives us cold winters and lovely warm summers. This means you’ll want to select plants that can handle a winter freeze and flourish in the summer heat. Hardy native plants like beach grass and bayberry are excellent choices because they are already adapted to these conditions. Our region is also known for its sandy soil, which drains water very quickly. While this is great for preventing puddles, it can leave plants thirsty. An easy fix is to mix compost into your garden beds to improve the soil’s structure and help it hold more moisture for your plants.

Choose Salt-Tolerant Plants and Wind Protection

If you live near the coast, salty air and strong winds are a big part of your backyard’s environment. Choosing salt-tolerant plants is key to a successful garden. Varieties like beach plum and the beautiful rugosa rose are tough enough to handle the salt spray while adding color and life to your space. To create a more tranquil environment for relaxation, you can also incorporate windbreaks. Strategically placed fences and netting can shield more delicate plants and create sheltered pockets perfect for a seating area or meditation spot. This protects your garden and makes your wellness space feel much more comfortable and secluded.

Essential Features for Your Wellness Backyard

Once you have a vision for your wellness backyard, it’s time to think about the specific features that will bring it to life. The right elements can transform a simple yard into a personal retreat designed for relaxation, health, and connection. These features serve as the building blocks of your sanctuary, each adding a unique layer of comfort and function. From creating shaded spots for quiet afternoons to adding sources of warmth for cool evenings, every choice helps shape your ideal outdoor experience. Let’s explore some essential features that can make your Long Island backyard a true wellness destination.

Create Relaxation Zones with Pavilions and Pergolas

A well-placed pavilion or pergola is perfect for creating a dedicated relaxation zone. These structures define a space, turning an open patio or a corner of your yard into an inviting outdoor room. They offer a welcome escape from the sun, providing a shaded spot to read a book, enjoy a meal, or simply sit in quiet contemplation. Gappsi can help you design and install custom pavilions and pergolas that complement your home’s architecture and your backyard’s layout. By adding comfortable seating and perhaps some climbing plants, you can craft a beautiful and functional area that encourages you to spend more time unwinding outdoors.

Add Saunas and Hot Tubs for Year-Round Use

Imagine stepping into a warm sauna on a crisp autumn day or soaking in a hot tub under the stars. Adding these features brings a spa-like experience right to your home, offering incredible benefits for both mind and body. They provide a powerful way to de-stress, soothe sore muscles, and improve circulation. Because they can be used in any season, saunas and hot tubs make your wellness backyard a year-round destination. This investment in your well-being provides a consistent and accessible way to relax and rejuvenate without ever having to leave your property.

Designate a Space for Yoga and Outdoor Fitness

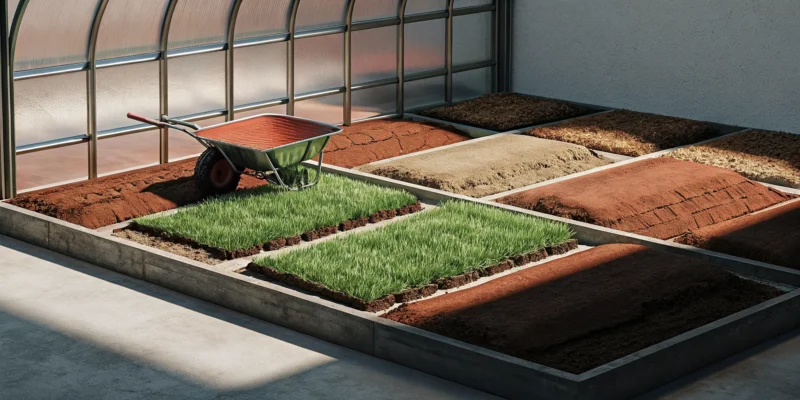
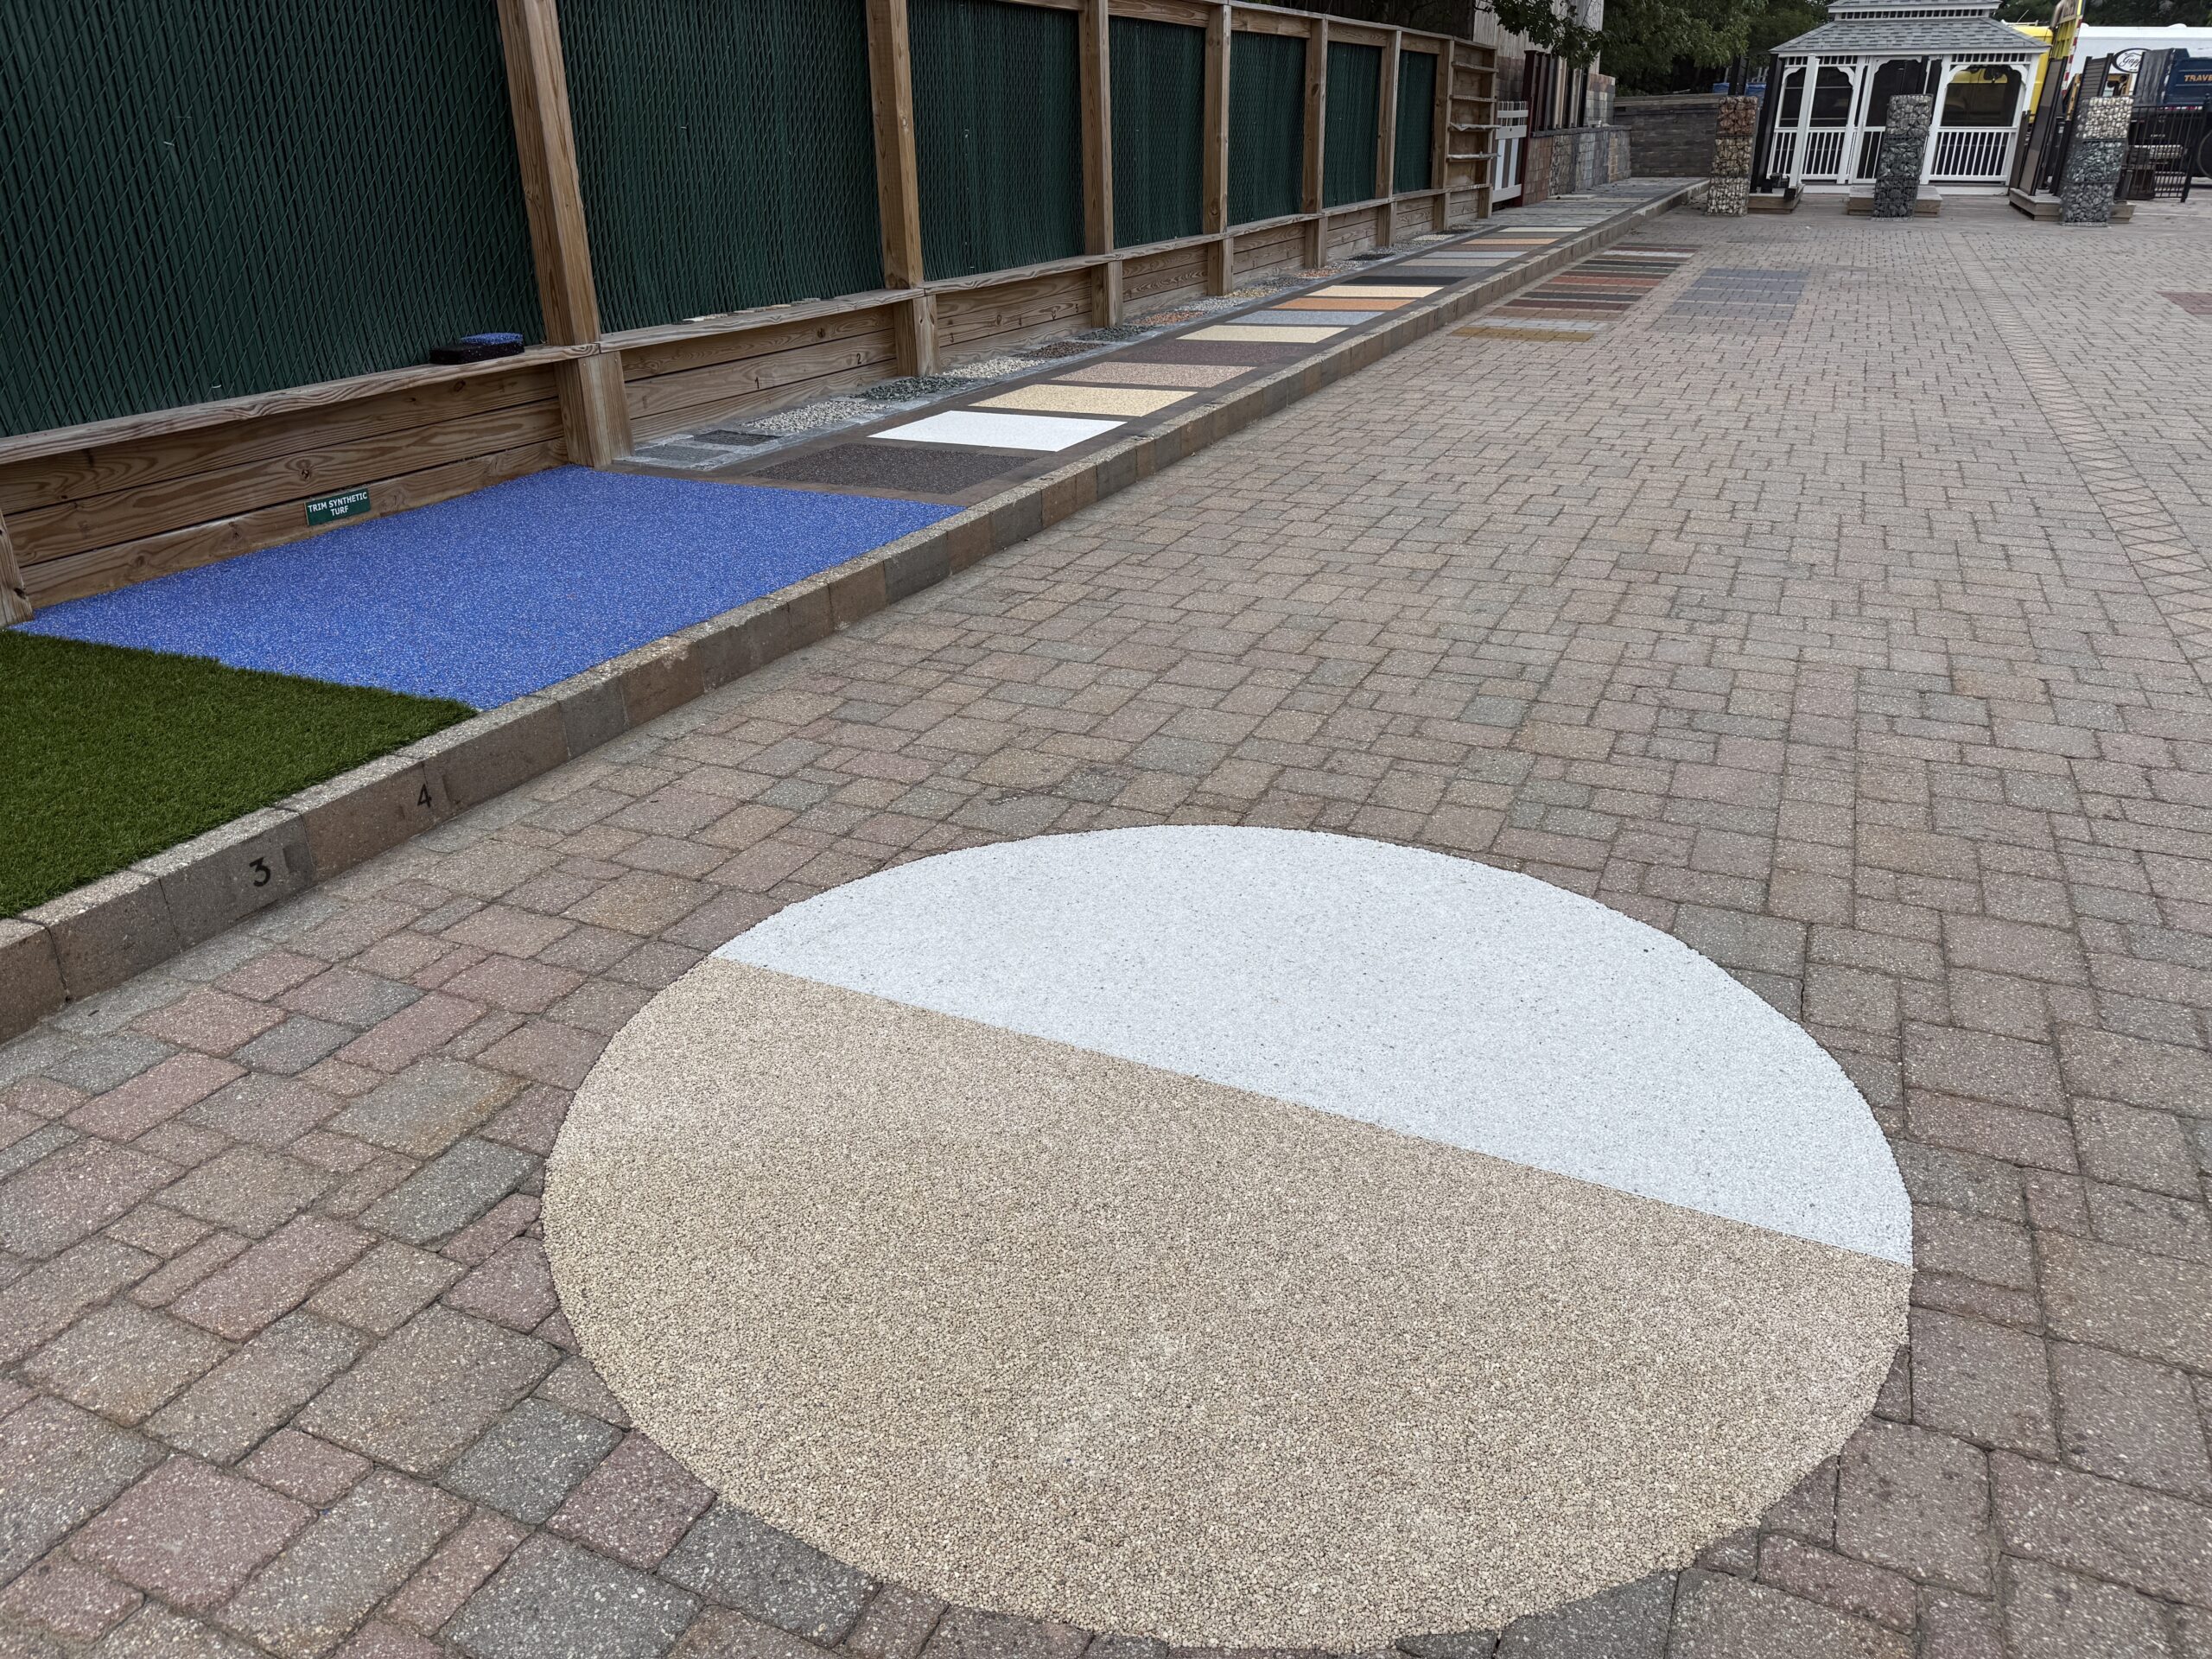
Creating a dedicated area for movement is a wonderful way to support your physical and mental health. This doesn’t have to be complicated; it can be a simple, level platform for yoga, a space for stretching, or an area for outdoor workouts. Practicing fitness in the fresh air can make your routine feel less like a chore and more like a restorative activity. We can install a beautiful, low-maintenance surface using synthetic turf or smooth pavers to create the perfect spot. Having a designated fitness area encourages you to connect with nature while you move your body, enhancing the overall wellness benefits.

Gather Around a Cozy Fire Pit

A fire pit naturally becomes the heart of a backyard, drawing people together with its warmth and mesmerizing flames. It creates an inviting atmosphere for evening conversations with family and friends or for quiet moments of reflection alone. A fire feature extends the usability of your outdoor space into the cooler months, providing a cozy focal point for social gatherings. As part of our masonry services, we can build a custom fire pit that fits seamlessly into your patio design. It’s a simple addition that offers a powerful sense of comfort and community.

Build Privacy with Fencing and Secluded Nooks

To create a true sanctuary, you need a sense of privacy and seclusion. Feeling unobserved is key to fully relaxing and disconnecting from the outside world. Thoughtfully placed fencing and netting can screen your yard from neighbors and create a peaceful enclosure. You can also design secluded nooks with strategic plantings or small partitions. These intimate spaces are perfect for a hidden bench or a single lounge chair, offering a private spot to escape and recharge. Establishing privacy helps transform your backyard from just an open space into a personal, therapeutic retreat where you can feel completely at ease.

Incorporate Calming Water Features

The sound of moving water has a naturally soothing effect on our minds. It can mask distracting neighborhood noise and create a peaceful bubble in your own backyard. From the gentle trickle of a fountain to the mirror-like surface of a still pool, water features bring a sense of tranquility and life to any outdoor space. Incorporating water is one of the most effective ways to transform your yard into a true wellness retreat. It engages the senses and provides a focal point for relaxation and reflection, making your backyard feel like a private escape from the everyday hustle.

Design a Pool for Ultimate Relaxation

A pool can be so much more than a place for summer fun; it can be the centerpiece of your personal sanctuary. Imagine a serene plunge pool designed specifically for unwinding after a long day. These smaller, more intimate pools create a tranquil environment perfect for quiet contemplation or a refreshing dip. We can design custom swimming pools with features that enhance relaxation, like gentle waterfalls that provide a calming soundtrack, built-in benches for comfortable seating in the water, and subtle lighting for peaceful evening swims. The goal is to create a beautiful and restorative water feature that invites you to slow down and de-stress right at home.

Add Fountains, Ponds, or Reflecting Pools

If a full pool isn’t part of your plan, you can still introduce the calming presence of water with a fountain, pond, or reflecting pool. The gentle sound of flowing water is incredibly effective at creating a peaceful atmosphere. A sleek reflecting pool can add a modern, meditative quality to your patio, while a bubbling fountain can become a beautiful focal point in a garden bed. Our masonry experts can craft these features from a variety of materials to perfectly match your home’s style, turning a simple corner of your yard into a destination for quiet moments and reflection.

Install an Outdoor Shower to Connect with Nature

An outdoor shower brings a touch of spa-like luxury to your backyard and deepens your connection with nature. There’s something uniquely refreshing about rinsing off under the open sky, surrounded by the sights and sounds of your garden. It’s a perfect addition next to a pool or hot tub, or near your designated fitness area for a post-workout cool-down. We can help you design a private and beautiful outdoor shower using materials like natural stone for the flooring and walls, creating a seamless blend with your landscape. It’s a simple feature that offers a powerful way to feel refreshed and grounded in your outdoor space.

Choose Plants and Landscaping for a Healing Garden

The right plants do more than just make your yard look pretty; they are the heart of a true wellness garden. A thoughtfully designed landscape can transform your backyard from a simple patch of grass into a restorative sanctuary that calms your mind and nurtures your spirit. By carefully selecting and arranging plants, you can create a space that reduces stress, engages your senses, and offers a powerful connection to the natural world right outside your door. This isn’t just about gardening; it’s about curating an environment that supports your mental and physical health every time you step outside.

A healing garden uses the power of nature to promote well-being. This involves choosing plants that thrive in our Long Island climate, arranging them to create private and peaceful zones, and incorporating elements that appeal to all your senses. From the scent of blooming flowers to the rustle of leaves in the breeze, your garden can become a daily source of tranquility. A professional landscape design is the foundation for bringing this vision to life, ensuring every plant serves a purpose in your personal oasis. It helps you think through the entire ecosystem of your yard, from sun exposure to soil type, so your healing garden flourishes for years to come.

The Best Native Plants for Long Island Gardens

For a garden that is both beautiful and low-stress, start with native plants. These are the species that have adapted over centuries to thrive in Long Island’s specific climate, which includes our cold winters and warm, humid summers. Plants like sturdy beach grass or fragrant bayberry are naturally resilient and well-suited for our local environment. Choosing native plants means you’ll spend less time worrying about maintenance and more time simply enjoying your space. They require less water, fertilizer, and pest control, making your garden more sustainable and giving you a landscape that feels effortlessly beautiful and in harmony with its surroundings.

Plant a Sensory or Aromatherapy Garden

Creating a garden that engages all your senses is a wonderful way to deepen your relaxation. An aromatherapy garden, filled with fragrant herbs and flowers, can turn a simple stroll through your yard into a therapeutic experience. Consider planting lavender for its calming scent, mint for a refreshing aroma, or roses for a classic, sweet fragrance. You can place these plants in raised garden beds built with beautiful masonry, along pathways where you can brush against them, or near a seating area to enjoy their scent while you rest. Combining these fragrant plants with the gentle sound of a water feature creates a multi-sensory experience that melts stress away.

Use Greenery to Create Privacy and Calm

Your backyard should feel like a private escape, and plants are one of the best tools for creating that sense of seclusion. You can use layers of greenery to build a living wall that provides privacy and a feeling of calm. Tall shrubs like arborvitae or boxwood can form a dense screen, blocking views and muffling neighborhood noise. Climbing vines on a trellis or pergola can create a lush, green ceiling for a secluded nook. By strategically placing trees and hedges, you can design a space that feels like your own secret garden. This natural enclosure helps you disconnect from the outside world and fully immerse yourself in your tranquil outdoor retreat.

Unify Your Space with Smart Hardscaping

Hardscaping forms the foundation of your backyard, creating the structure that connects all your wellness zones. Think of it as the skeleton that holds everything together, from patios and pathways to retaining walls and decorative features. A thoughtful hardscape design ensures your outdoor space flows logically and feels cohesive, guiding you effortlessly from your relaxation lounge to your meditation garden. The right materials and layout are key to establishing a sense of harmony and permanence in your sanctuary.

By using beautiful, durable materials, you create a backyard that is not only visually stunning but also practical for your lifestyle. Well-planned masonry can define different areas for various activities, like a quiet nook for reading or an open patio for morning yoga. It’s about creating a seamless transition between your home and your outdoor retreat. This foundational work allows your softscaping, like plants and gardens, to truly shine, resulting in a balanced and inviting environment. The goal is to build a space that feels like a natural extension of your home, where every element has a purpose and contributes to the overall feeling of peace and well-being.

Lay Pathways with Natural Stone and Porcelain

Pathways do more than just get you from one place to another; they guide the eye and create a journey through your landscape. Laying pathways with porcelain and natural stone adds an element of timeless elegance while providing a sturdy, reliable surface. Imagine a gently curving stone path leading to a secluded bench or a clean, modern porcelain walkway connecting your patio to the pool. These materials are incredibly durable and can withstand Long Island’s changing seasons, ensuring your backyard looks beautiful for years. Professional installation is important for making sure your pathways are level, safe, and built to last, creating a truly polished look for your outdoor sanctuary.

Install Synthetic Turf for a Low-Maintenance Lawn

A lush, green lawn is calming, but the constant mowing, watering, and fertilizing can add to your to-do list. For a truly low-maintenance wellness space, consider installing synthetic turf. It gives you the vibrant look of a perfect lawn year-round without any of the demanding upkeep. This means more time for you to actually relax and enjoy your yard. Synthetic turf provides a soft, consistent surface that’s ideal for a yoga platform, a play area for kids, or simply a patch of green to rest your eyes on. It’s a practical solution that helps you spend less time working on your yard and more time finding your calm in it.

Design a Layout for a Meditation Garden

Carving out a small corner of your yard for a meditation garden can have a huge impact on your mental well-being. This space doesn’t need to be large, just intentional. You can use hardscaping to define the area, perhaps with a small, circular stone patio or a simple wooden platform. Enclosing the space with a low stone wall or a border of smooth river rocks can help it feel like a secluded retreat. The right landscape design can help you integrate this feature seamlessly, creating a dedicated spot for mindfulness, reflection, or just a few moments of quiet breathing amid the beauty of your own backyard.

How Much Does a Wellness Backyard Cost in Long Island?

Let’s talk about the budget. Creating your dream wellness backyard is an exciting prospect, and it’s also a significant investment in your home and daily life. In Long Island, the cost can vary widely based on your vision. A simple project, like adding a small patio and some thoughtful landscaping, might start in the $15,000 to $35,000 range. A more involved outdoor living room with features like a pergola and dedicated seating could fall between $25,000 and $75,000. For a complete transformation that overhauls your entire yard with multiple zones, a pool, and high-end finishes, costs can easily reach $150,000 or more.

Think of it less as a single price tag and more as a flexible budget that scales with your ambitions. The final cost depends entirely on the scope of your project, from the size of the space to the specific features you choose to include. Whether you’re dreaming of a quiet corner for meditation or a fully equipped space for entertaining and relaxation, there are ways to make it happen. A comprehensive home remodeling project, whether indoors or out, is a journey, and understanding the potential costs is the first step in planning it effectively. The key is to balance your desires with a realistic financial plan, ensuring your new outdoor sanctuary brings you peace of mind in every sense.

What Factors Influence Your Project’s Cost?

The total cost of your wellness backyard is a sum of its parts. The biggest factors are the materials you select and the complexity of the features you want to add. For example, choosing premium porcelain and natural stone for your patio will have a different price point than standard pavers. Similarly, installing a simple fire pit is less involved than building a custom outdoor kitchen under a large pavilion. Site preparation, like grading for proper drainage, and the intricacy of the landscape design also play a major role. Every element, from a tranquil water feature to a state-of-the-art sauna, contributes to the final investment.

How to Prioritize Features to Fit Your Budget

Feeling a little overwhelmed by the numbers? The best approach is to prioritize. Start by making two lists: one for your “must-have” features and another for your “nice-to-have” wishes. Your must-haves are the core elements that will define your wellness experience, like a secluded patio for yoga or a cozy fire pit for evening gatherings. A professional design can help you map out a plan that incorporates these priorities first. This allows you to establish a strong foundation with quality masonry and hardscaping, then layer in other elements over time as your budget allows. This phased approach makes your dream backyard more attainable without compromising on quality.

Where Should You Start?

It’s exciting to imagine your complete wellness backyard, but figuring out where to start can feel overwhelming. The best strategy is to think in phases. Prioritizing the features that matter most allows you to build your dream sanctuary over time, which helps manage your budget and lets you enjoy the space sooner. By focusing your initial investment on the elements that will make the biggest difference in your daily life, you can start experiencing the benefits of your outdoor haven right away. This approach makes the entire process more manageable and rewarding from the very beginning.

Begin with High-Impact Features

To feel the effects of your new space immediately, start with the core elements that will anchor your wellness experience. Think about what “relaxation” or “rejuvenation” truly means to you. Is it soaking in a hot tub after a long week? Or maybe it’s having a dedicated, quiet space for meditation or yoga. Features like a personal sauna or a small plunge pool can instantly transform your yard into a private retreat. By focusing on one or two high-impact additions first, you create a strong foundation for the rest of your design and can start enjoying the wellness benefits right away.

Layer in Other Elements Over Time

Once your main features are in place, you can gradually add other elements that enhance the atmosphere. A wellness garden isn’t a static project; it’s a space that can evolve with you. You might start with your new pool and later decide to add a winding path made of beautiful natural stone to a secluded seating area. You could also introduce a sensory garden with fragrant herbs or build a cozy fire pit for evening gatherings. This layered approach allows you to thoughtfully design your landscape over time, adding personal touches that make the space uniquely yours as your needs and tastes change.

Why Partner with a Long Island Design-Build Expert?

Bringing a wellness backyard to life involves more than just picking out a few plants and a patio set. It requires a cohesive vision that considers Long Island’s unique climate, your personal lifestyle, and how different elements like pools, patios, and plantings will work together. This is where partnering with a local design-build expert makes all the difference. A design-build firm handles your entire project from the initial sketch to the final construction, ensuring a seamless process with one team and one point of contact.

An expert with deep roots in Long Island understands our local environment. They know which materials can withstand the salty air and which plants will thrive through our four distinct seasons. This specialized knowledge prevents costly mistakes and ensures your outdoor sanctuary is built to last. A unified team also means your project stays on track and on budget, as the designers and builders work together from day one. This eliminates the communication gaps that often happen when you’re managing separate contractors. Gappsi’s comprehensive landscape design and construction services ensure every detail aligns with your vision.

Ultimately, a design-build partner is focused on creating a space that truly fits your life. They can help you integrate everything from a relaxing swimming pool and a shaded pergola to functional hardscaping and calming water features. Instead of juggling multiple vendors, you can rely on one experienced team to manage every detail, from securing permits to laying the last stone. This holistic approach guarantees that your wellness backyard is not only beautiful but also a practical and enduring extension of your home.

Related Articles

Frequently Asked Questions

What’s the first step I should take to plan my wellness backyard? The best place to start is by defining what “wellness” means to you personally. Before you think about specific features, ask yourself what you want to feel in your new space. Are you seeking quiet solitude, a place for physical activity, or a spot for social connection? Once you have your core goal, you can prioritize one or two high-impact features that support it, like a hot tub for de-stressing or a simple stone patio for morning yoga. This helps you focus your budget and create a foundation you can build upon over time.

My yard is small. Can I still create a meaningful wellness space? Absolutely. A wellness space is about intention, not size. You can create a powerful sanctuary in a small footprint by being selective. Consider vertical elements like a living wall or a trellis with climbing vines to add greenery without taking up ground space. A compact water feature, like a bubbling urn, can provide calming sounds, while a single, comfortable lounge chair tucked into a private corner can become your go-to spot for reflection. The key is to create a dedicated zone that feels separate and special, no matter how small.

How can I make my wellness backyard usable all year, even with Long Island winters? The goal is to incorporate elements that invite you outside regardless of the season. A fire pit or an outdoor fireplace provides warmth and a cozy focal point for crisp autumn and winter evenings. Features like a sauna or hot tub are even more enjoyable when the air is cool, offering a spa-like escape at home. For the landscape, choosing a mix of evergreen plants and those with interesting winter bark or berries ensures your garden has visual appeal year-round, making it a beautiful view even from inside.

How do I balance creating a beautiful space with one that’s actually low-maintenance? This is a great question, because your sanctuary shouldn’t become another chore. The secret is in making smart choices from the start. Opting for native plants that are already adapted to Long Island’s climate means less watering and fussing. For your lawn, synthetic turf gives you a perfect green look without any mowing or fertilizing. When it comes to patios and walkways, using durable materials like porcelain or natural stone ensures they will look great for years with minimal upkeep. A thoughtful design focuses on creating lasting beauty, not constant work.

What’s the real benefit of a design-build firm versus hiring separate contractors? Think of it as having one trusted partner guiding your entire project. When you work with a design-build firm, the team that designs your space is part of the same company that builds it. This creates a seamless process where everyone is on the same page from start to finish. It eliminates the communication gaps and blame games that can happen when you’re managing a separate designer, mason, and landscaper. The result is a more cohesive project that stays on budget and truly reflects your original vision, without the headache of coordinating it all yourself.
Share this page:
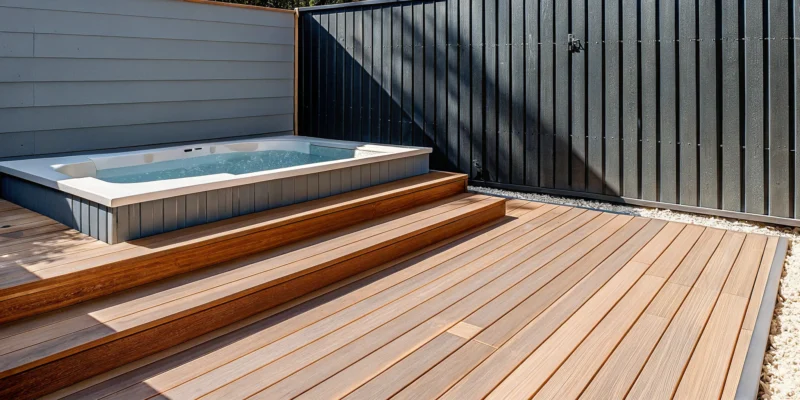
Small swim spa installation idea with modern decking in a tiny backyard.

Small Swim Spa Installation Ideas for Tiny Backyards

If you live on Long Island, you know that a spacious backyard can be a rare luxury. Many homeowners dream of having a pool but quickly dismiss the idea, thinking their yard is simply too small to accommodate one. I have some great news for you. A compact swim spa delivers the best of both worlds: a place for a great low-impact workout and a spot for total relaxation, all in a footprint that fits surprisingly tight spaces. It’s a versatile, year-round solution that brings fitness and fun right to your doorstep. This guide is here to show you how it’s possible, exploring creative small swim spa installation ideas that can turn even a narrow side yard into a private, beautiful oasis.

Key Takeaways

  • Enjoy year-round wellness in one unit: A small swim spa fits perfectly in compact yards and combines a low-impact swimming workout with relaxing hydrotherapy jets, giving you a versatile space for fitness and fun throughout the year.
  • Prioritize the technical details: A smooth installation requires planning ahead, which means preparing a reinforced concrete foundation, hiring a licensed electrician for the 240V hookup, and mapping out a clear path for delivery and maintenance access.
  • Create a complete retreat and follow the rules: Transform your spa into an oasis by designing the surrounding patio, adding privacy fencing, and incorporating lighting, but first check local permit and safety regulations to ensure a compliant installation.

Why a Small Swim Spa Is Perfect for Your Yard

If you think your Long Island backyard is too small for a pool, I have some great news for you. A compact swim spa offers the best of a swimming pool and a hot tub, all in a footprint that can fit into surprisingly tight spaces. It’s a versatile, year-round solution that brings exercise, relaxation, and family fun right to your doorstep, without requiring a massive yard. Let’s look at why a small swim spa might be the perfect addition to your home.

Get Exercise, Relaxation, and Therapy in One

A swim spa is a complete wellness center packed into a single unit. On one end, powerful jets create a continuous current you can swim against, providing an amazing low-impact workout without needing the length of a traditional lap pool. After your swim, you can move to the other end, where comfortable seating and hydrotherapy jets work to soothe sore muscles and melt away stress. It’s the perfect combination of fitness and relaxation. These versatile hot tubs and swim spas deliver a full-body experience, offering everything from a challenging workout to a therapeutic soak after a long day.

Enjoy the Benefits of a Pool, Without the Footprint

One of the biggest advantages of a small swim spa is its size. Models as short as 10 to 13 feet can easily fit into narrow side yards, small patios, or other compact areas where traditional swimming pools would be impossible. This means you don’t have to sacrifice your entire yard to enjoy the water. Plus, swim spas offer incredible installation flexibility. You can place them above ground for a simple setup, build a deck around them for an integrated look, or even install them partially or fully in-ground for a sleek, custom appearance that blends seamlessly with your landscape design.

Use It All Year, Even in Long Island

Unlike a traditional pool that you have to close up for the winter, a swim spa is designed for year-round enjoyment. Thanks to excellent insulation, efficient heaters, and high-quality covers, you can keep your swim spa running through fall, winter, and spring. Imagine soaking in the warm, bubbling water on a crisp autumn evening or watching the snow fall from the comfort of your spa. To make it even more comfortable, you can install one under a custom-built structure. Adding one of Gappsi’s pavilions and pergolas provides shelter from the elements, giving you a private, all-season retreat right in your own backyard.

Explore Your Swim Spa Installation Options

One of the most exciting parts of planning for your new swim spa is deciding how it will fit into your backyard. The installation style you choose will define the entire look and feel of your space, so it’s worth taking the time to explore your options. The three main approaches are above-ground, semi-recessed, and fully recessed. Each one offers a different aesthetic, level of accessibility, and budget consideration.

Think about what you want your finished yard to look like. Are you aiming for a quick and simple setup, or do you dream of a seamless, built-in oasis that looks like it has always been there? Your choice will depend on your personal style, your property’s layout, and your overall project budget. We can help you visualize how each option would work in your space, ensuring your new hot tub or swim spa becomes a beautiful and functional extension of your home. No matter the size of your Long Island yard, the right installation can transform it into a private retreat.

Above-Ground: Freestanding or Integrated with a Deck

The above-ground installation is the most popular and cost-effective way to add a swim spa to your home. Because it doesn’t require major excavation, the setup is fast, often taking less than a day once the foundation is ready. You can simply place the spa on a reinforced concrete slab and you’re good to go. This freestanding approach is perfect if you want to start enjoying your spa as soon as possible.

For a more custom feel, you can integrate the spa with a new or existing deck. Building a deck around the swim spa creates a cohesive look and makes getting in and out a breeze. It also gives you a dedicated space for lounge chairs, towels, and drinks. Using beautiful porcelain or natural stone pavers for the surrounding patio can create a truly stunning and durable outdoor living area.

Semi-Recessed: A Sleek Profile with Easy Access

If you love the integrated look but want something a little different, a semi-recessed installation is a fantastic middle ground. This style involves setting the swim spa partially into the ground, which lowers its profile and gives it a sleek, built-in appearance. It’s a great way to make a small yard feel more open while still providing easy access, since you won’t have to climb as high to get in.

A semi-recessed spa is also an excellent solution for yards with a slight slope, as it can be built into the hillside to create a beautiful, terraced effect. By surrounding it with thoughtful landscape design, you can make the spa feel like a natural part of your garden. This option combines the convenience of an above-ground model with the custom aesthetic of a fully recessed one.

Fully Recessed: Create a Seamless, Built-In Look

For the ultimate in elegance, a fully recessed installation is the way to go. This method involves placing the swim spa completely in the ground, so it sits flush with your patio or lawn. The final result is incredibly seamless, resembling a small, luxurious in-ground pool that blends perfectly with your landscape. This option is ideal for creating a sophisticated and minimalist backyard design.

A fully recessed spa requires more significant site work, including excavation and careful planning for drainage and access panels. The process is similar to installing our custom swimming pools, ensuring a stable and long-lasting foundation. While it’s the most involved option, a fully recessed swim spa offers an unmatched level of integration and turns your backyard into a truly high-end retreat.

Plan Your Space: Foundation and Site Prep

Before you can soak in your new swim spa, you need to prepare the ground it will sit on. Proper site preparation is the single most important step for a successful and long-lasting installation. A swim spa is a significant investment, and a solid foundation protects that investment by ensuring it remains stable, level, and accessible for years to come. This isn’t the place to cut corners. Planning the location, foundation, and access ahead of time will prevent major headaches down the road and help the entire installation process go smoothly. From pouring the right base to planning for future maintenance, every detail matters.

Think of it like building a house; you wouldn’t build on shaky ground, and the same principle applies here. A well-prepared site accounts for the immense weight of the spa, ensures water drains away properly, and provides easy access for service. Our team approaches every installation with a comprehensive plan, considering everything from the delivery path to the final electrical hookup. By focusing on a flawless foundation, we make sure your swim spa is a source of enjoyment, not a series of problems. This initial planning phase is where our expertise in home remodeling and construction truly shines, as we integrate your new spa perfectly into your backyard vision.

The Importance of a Concrete Foundation

Your swim spa needs a solid, level surface to rest on, and a standard deck or patio usually isn’t strong enough. A filled swim spa is incredibly heavy, which is why a reinforced concrete pad is the gold standard for a secure foundation. Most manufacturers require a concrete pad that is at least four to six inches thick to support the spa’s weight and prevent shifting or cracking over time. Attempting to place it on an unprepared surface or an old patio can lead to serious structural issues for both the spa and your property. Our expert masonry team can design and pour a concrete foundation that is perfectly sized and leveled for your specific swim spa model, giving you total peace of mind.

Why Proper Weight Support Is Crucial

It’s hard to picture just how heavy a swim spa is until you see the numbers. When filled with water and people, a small swim spa can weigh between 12,000 and 20,000 pounds. That’s more than three or four cars combined. This immense weight is why a professionally installed, reinforced concrete pad is non-negotiable. Without it, the ground could settle unevenly, putting stress on the spa’s shell and potentially causing cracks or leaks. Ensuring your foundation is built to handle the load is a critical part of the swimming pool and spa installation process and guarantees your spa remains safe and functional for years of enjoyment.

Plan for Clearance and Maintenance Access

When choosing the perfect spot for your swim spa, think about future access. You’ll need to leave enough room around the spa for any potential maintenance or repairs. We recommend leaving about three feet of clear space on the side where the main equipment panel is located. This allows a technician to easily access the pumps, heaters, and electrical components without any trouble. Boxing in your spa without planning for this clearance can turn a simple repair into a major, costly project. Factoring this space into your initial landscape design ensures that your spa is not only beautiful but also easy to service, saving you time and money if it ever needs a tune-up.

Make It Fit: Ideas for Tight or Awkward Spaces

Even in a small backyard, you have several creative options for installing a swim spa. You can place it above ground, which is the simplest method, or integrate it with a custom deck for a built-in feel. For a more seamless look, consider a semi-recessed or fully recessed installation. Partially sinking the spa into the ground can make it feel more like a natural part of the landscape and visually expand a smaller yard. You can frame the space with a beautiful stone patio and a custom pavilion or pergola to create a true backyard oasis that feels both luxurious and intimate, no matter the size of your space.

Manage Grading and Drainage

Proper drainage is essential, especially for semi-recessed or fully recessed swim spas. You need a plan for where rainwater and splashed water will go so it doesn’t pool around the spa’s base or equipment. Poor drainage can lead to water damage, erosion, and create a hazardous, slippery environment. Our team carefully grades the site to direct water away from the spa area. We can also install effective drainage solutions as part of our masonry and site work, protecting your spa and the surrounding patio from water-related issues. This thoughtful planning prevents future problems and keeps your backyard sanctuary safe and beautiful.

Design a Swim Spa That Feels Like a Getaway

Your swim spa is more than just a place to exercise or relax; it’s the centerpiece of your personal backyard retreat. The real magic happens when you design the surrounding space to feel like a true getaway. With thoughtful planning, you can transform even a compact area into a luxurious oasis that complements your home and lifestyle. It’s about creating a complete experience, from the moment you step outside.

Integrating your swim spa into a larger outdoor living area with features like a kitchen, fire pit, or special lighting makes the space more functional and inviting. Think about how you want to use the area. Do you envision quiet morning workouts, fun family afternoons, or relaxing evenings with friends? By adding structures for shade, a beautiful patio, cozy gathering spots, and the right landscaping, you can create a destination you’ll never want to leave.

Add Shade with Pavilions and Pergolas

A swim spa is a year-round investment, and adding a structure overhead helps you get the most out of it. A pavilion or pergola provides welcome shade on hot summer days and offers protection from light rain, extending your spa season. More than just a practical addition, these structures define your spa area, making it feel like a dedicated outdoor room. We can help you design custom pavilions and pergolas that match your home’s architecture and create a stunning focal point in your backyard. Imagine a beautiful wood pergola with climbing vines or a classic pavilion with space for lounge chairs, turning your spa into a resort-style escape.

Design a Beautiful Patio Surround

The surface around your swim spa is just as important as the spa itself. A well-designed patio provides a safe, non-slip area for getting in and out, and it seamlessly integrates the spa into your landscape. Forget about plain concrete slabs. You can create a high-end look with materials like elegant porcelain and natural stone pavers that stay cool underfoot and offer incredible durability. Our expert masonry designers can help you choose the perfect materials and layout to create a beautiful, functional surround. This solid foundation not only looks great but also gives you a clean, stable space for patio furniture and planters.

Incorporate Fire Pits, Gardens, and Dining Spaces

Even a small backyard can become a multi-functional entertainment hub. You can combine your swim spa with a cozy dining area, a warm fire pit, or vertical gardens to make the most of every square foot. A fire pit adds ambiance and warmth, making evening soaks feel extra luxurious, especially during cooler Long Island nights. Adding a small dining set nearby creates the perfect spot for a post-swim meal or drinks with friends. Our landscape design team can help you arrange these elements to create a natural flow and a cohesive, inviting atmosphere for entertaining.

Use Landscaping and Lighting to Set the Mood

The right plants and lighting are the finishing touches that bring your swim spa oasis to life. Strategic landscaping with lush greenery, flowering shrubs, and ornamental grasses can soften the edges of the spa and add natural beauty and texture. Consider planting aromatic flowers like lavender or jasmine nearby to create a sensory experience. At night, lighting sets the mood. A layered lighting scheme, including path lights for safety, uplighting on trees for drama, and integrated LED lights in the spa itself, can create a truly magical ambiance. This thoughtful approach to landscaping and lighting will make your spa area feel enchanting after the sun goes down.

Create Privacy with Fencing and Screens

Privacy is a key ingredient for a relaxing spa experience. You want to feel completely at ease, without worrying about prying eyes from neighbors. There are many stylish ways to create a secluded atmosphere. A well-designed privacy fence not only blocks the view but can also serve as a beautiful backdrop. You can also use decorative screens, trellises with climbing plants, or a row of tall, slender evergreens to form a living wall. Our team can install a variety of fences and netting solutions that provide the seclusion you need while enhancing your backyard’s overall design. These barriers also help block wind, making your time in the spa even more comfortable.

What to Plan for Before Installation Day

With your swim spa chosen and the location picked, it’s time to focus on the details that ensure a smooth installation day. A little planning now prevents major headaches later, so you can start enjoying your new backyard oasis as soon as possible. Working with a professional team like Gappsi means we handle the heavy lifting, but thinking through these key logistics will make the entire process seamless. Here’s what you need to sort out with your project manager before your swim spa arrives.

Plan Your Electrical Hookup

Your new swim spa is a powerful machine, and it needs the right electrical supply to run safely and efficiently. Unlike a simple appliance you can plug into any wall socket, a swim spa requires a dedicated 240V electrical hookup. This is a job for a licensed electrician, who will ensure everything is up to code. You’ll need to plan where the wiring will run from your home’s electrical panel to the spa. We’ll work with you and the electrician to place the connection point discreetly and conveniently, making sure it’s properly installed for safe, all-weather use. Proper electrical planning is a critical step for any swimming pool or spa installation.

Map Out the Delivery Path

Getting your swim spa from the truck to its final resting place is a major part of the installation. Take a walk from the curb to your backyard and imagine a large, heavy object making the same trip. We’ll need a clear path, free of obstacles like narrow gates, low-hanging tree branches, or air conditioning units. In some cases, especially for tight Long Island properties, a crane may be needed to lift the spa over the house and into the backyard. Our team will perform a thorough site inspection to map out the safest and most efficient delivery path, but it’s always helpful for you to be aware of the plan.

Plan for Proper Drainage

Water is going to splash out of your swim spa, and you’ll eventually need to drain it for maintenance. It’s essential to plan for where all that water will go. Your spa’s foundation should be prepared to direct water away from the spa’s equipment and your home’s foundation. For semi-recessed or fully recessed installations, a drainage system is even more critical to prevent water from pooling around the spa after it rains. Our expertise in creating beautiful and functional patios with porcelain and natural stone pavers includes designing effective drainage solutions that protect your investment and your property.

Consider Noise and Your Neighbors

Being a good neighbor is part of enjoying your home, and your new swim spa is no exception. While modern swim spas are designed to be quiet, the pumps and heaters do produce a low hum. Think about how that sound might travel, especially if your neighbors are close by. We can help you choose a quieter pump model or use special pads to reduce vibrations. Strategic placement of the spa can also make a big difference. You might also consider adding privacy features like fencing and screens or landscaping, which can help buffer sound while creating a more intimate setting for you to relax.

Know the Rules: Permits, Zoning, and Safety

Getting a swim spa is exciting, but before you can start relaxing, there’s some important homework to do. Installing a swim spa involves more than just picking a spot in your yard. You’ll need to consider local rules for permits, zoning, and safety. It might sound like a bit of a hassle, but these regulations are in place to protect you, your family, and your investment. They ensure your spa is installed correctly and safely, preventing future problems and helping maintain your property value.

Navigating these requirements can feel overwhelming, especially since every town on Long Island has its own set of rules. From electrical hookups and concrete pads to property line setbacks and safety barriers, there are several details to get right. Thinking about these things early on will save you from potential fines, delays, or even having to move your spa after it’s installed. The good news is you don’t have to figure it all out on your own. This section will walk you through what you need to know. Working with a team that knows the local landscape can make this part of the process completely stress-free, turning a potentially complicated task into a simple checklist.

Understand Local Long Island Permit Rules

Before any work begins, you need to look into your local building permits. Each town and village in Nassau and Suffolk County has its own specific requirements for swim spa installations. You will likely need permits for the electrical work and the concrete foundation your spa sits on. Some municipalities may even have specific zoning laws that dictate how close your spa can be to your house or property line. Taking the time to understand these rules upfront is essential for a smooth project. It ensures your installation is fully compliant and avoids any unwelcome surprises from your local building department down the road.

Follow Safety Rules for Fencing and Covers

Safety is the most important part of any home improvement project, and swim spas are no exception. If you have children or pets, this is especially critical. Most local codes require specific safety measures, like installing a secure, locking cover to prevent anyone from using the spa unsupervised. You may also be required to install fencing and netting around the spa area to create a secure barrier. It’s also a great idea to make sure the spa is visible from your house. Following these safety rules gives you peace of mind, knowing your backyard getaway is a safe space for everyone to enjoy.

Hire a Pro Who Knows Local Regulations

The simplest way to handle all these rules is to work with a professional who has done it all before. An experienced installer will be familiar with the specific codes and permit processes for towns across Long Island. A team like Gappsi can manage the entire process, from filing the initial paperwork to ensuring the final installation passes inspection. By hiring experts who specialize in hot tubs and swim spas, you can relax and focus on the fun parts of the project, confident that all the technical details and local regulations are being handled correctly.

Avoid These Common Installation Mistakes

A swim spa is an incredible addition to your home, but the installation process has a few moving parts. Getting it right from the start ensures you can relax and enjoy your new oasis without any headaches down the road. A little bit of planning goes a long way. By working with an experienced team and knowing what to look out for, you can sidestep these common installation mistakes and ensure your project goes off without a hitch.

Forgetting to Measure Twice

The old saying “measure twice, cut once” is especially true for a swim spa installation. Before you fall in love with a specific model, you need to know your exact backyard dimensions. Small swim spas are typically 7 to 8 feet wide and 10 to 15 feet long, but that’s not the only measurement to consider. You must plan for at least two to three feet of clear space around the entire spa for maintenance access. Any walkways should be at least 30 to 36 inches wide to ensure safe and easy movement around the area.

Ignoring How It Will Get into Your Yard

A swim spa doesn’t just magically appear in your backyard. You need a clear and practical plan for how it will get from the delivery truck to its final spot. Depending on your property’s layout, this can be a complex logistical challenge. In tight spaces or yards with limited access, a crane is often necessary to lift the spa over your house or other obstacles. This is a crucial detail to sort out well in advance, not on delivery day. Planning the delivery path is a key step that prevents costly delays and property damage.

Neglecting the Foundation and Drainage

A filled swim spa is incredibly heavy, and your existing deck probably isn’t built to handle that kind of weight. A proper foundation is non-negotiable. In most cases, you will need a new, reinforced concrete pad to provide adequate support. For recessed or semi-recessed installations, you also have to think about water. You need a solid plan for how water will drain away from the spa after it rains or from splashing. Proper masonry and drainage work prevents water from pooling around the structure, which could cause serious damage over time.

Overlooking Electrical and Safety Needs

Swim spas have specific power requirements, usually a 240V electrical hookup, which is different from a standard household outlet. You’ll need a licensed electrician to run the proper wiring, so it’s important to plan where the electrical lines will go. Safety is another top priority. Local regulations often require specific safety measures, such as locking covers and secure fencing. Thinking about these elements early on helps you integrate them seamlessly into your design while keeping your family and guests safe.

Keep Your Swim Spa in Top Shape

Your swim spa is a fantastic investment in your health and happiness, so keeping it in great condition is key to enjoying it for years to come. A little routine maintenance goes a long way in ensuring your water is always sparkling clean and ready for a swim or a relaxing soak. Think of it not as a list of chores, but as a simple rhythm that protects your backyard oasis. By following a few easy steps, you can prevent common issues and make sure your spa runs efficiently, saving you time and money. This consistent care ensures your swim spa remains the beautiful, inviting centerpiece of your yard.

Balance Your Water Chemistry

Keeping your swim spa’s water balanced is one of the most important things you can do. Plan to test the water two to three times a week to check the sanitizer, pH, and alkalinity levels. This quick check helps you maintain a healthy environment that’s safe and comfortable for swimming while preventing issues like algae growth before they start. Staying on top of your water chemistry means you can spend less time troubleshooting problems and more time enjoying your spa. If you ever need advice or supplies, Gappsi can help you find exactly what you need for your specific hot tub or swim spa.

Clean and Replace Filters Regularly

Your spa’s filters work hard to keep the water clear, so they need regular attention. Make it a habit to rinse your filters about once a month to remove loose debris. For a deeper clean, you should remove and wash them every two to four weeks. This simple task ensures your spa’s circulation system runs smoothly and efficiently. It’s also a good idea to completely drain and refill your spa with fresh water three to four times a year. This resets your water chemistry and gets rid of any built-up contaminants, giving you a perfectly fresh start.

Care for Your Spa and Cover

A good cover is your swim spa’s best friend. Always keep your spa covered when you’re not using it. This simple step does so much: it helps maintain the water temperature (which saves on energy costs), keeps out leaves and other debris, and protects the spa’s shell from sun damage. Taking care of your cover by cleaning it periodically will also extend its life. For even more protection from the elements, consider adding one of Gappsi’s custom pavilions or pergolas to create a beautiful, shaded spot for your spa.

Get the Most Out of Your Spa’s Features

To keep your swim spa running at its best, it’s helpful to create a simple maintenance schedule. For example, you can set a reminder to rinse your filters on the first of every month. This makes the task easy to remember and ensures it gets done consistently. Understanding how all the features of your spa work, from the jets to the heating cycles, also helps you use it more efficiently. Taking a little time to learn the ins and outs of your specific model will help you enjoy every feature to the fullest and keep it operating perfectly.

Is a Small Swim Spa Right for Your Long Island Home?

So, you’re wondering if a small swim spa is the right fit for your Long Island home. Let’s figure it out. The biggest advantage is how little space they require. If you have a compact backyard, a narrow side yard, or even just a 20-by-20-foot patio, a swim spa can bring that resort-like feel home. Models as small as 10 to 13 feet long offer the benefits of a pool without needing a huge footprint.

One of the best parts is their year-round usability. Unlike a traditional pool you have to close for the season, a swim spa can be enjoyed through crisp autumn evenings and even snowy winter days. They are incredibly versatile, offering a space for exercise, relaxation, and family fun all in one. Plus, you have options for installation: you can place it above ground, build it into a deck, or have it fully recessed for a seamless, integrated look.

Before you get too far, there are a few practical things to keep in mind. You’ll need a dedicated 240V electrical hookup and a solid, level foundation to support the weight. It’s also smart to leave about two to three feet of clearance around the unit for easy maintenance access. While the initial investment is significant, a swim spa can completely transform your backyard into a private wellness retreat you can use any day of the year.

Related Articles

Frequently Asked Questions

How much space do I actually need for a small swim spa? You might be surprised by how little space you need. While you should always measure your specific area, many compact swim spas are about 10 to 13 feet long and 8 feet wide. The key is to also plan for about three feet of clearance on at least one side for maintenance access. This means even a narrow side yard or a small patio can often accommodate a swim spa, giving you a pool experience without needing a huge yard.

Is a swim spa just a big hot tub, or can I really swim in it? It’s the best of both worlds. A swim spa has a dedicated swim lane with powerful jets that create a continuous current you can swim against, which provides a great low-impact workout. Then, in a separate section, you have jetted hydrotherapy seats just like a hot tub for relaxation and muscle recovery. It’s a complete fitness and wellness system in one unit.

What kind of foundation does a swim spa need? Can I just put it on my patio? A swim spa is incredibly heavy when filled with water, often weighing over 15,000 pounds, so your existing patio or deck likely isn’t strong enough. It requires a solid, level foundation, and the best option is a reinforced concrete pad that is at least four to six inches thick. Placing it on an unprepared surface is a common mistake that can cause serious damage to the spa and your property, so getting the foundation right is the most important step.

Can I really use a swim spa all year in Long Island, even in the snow? Absolutely. Unlike a traditional pool, swim spas are designed for year-round use. They are built with excellent insulation and come with high-quality, thick covers that trap heat efficiently. This means you can keep the water warm and inviting even through the fall and winter. Soaking in the hot, bubbling water while snow falls around you is a pretty amazing experience.

What’s the first step I should take if I’m considering a swim spa? Do I need to worry about permits? The best first step is to have a professional site consultation. This helps you figure out the perfect model and placement for your specific yard. And yes, you will likely need permits for the installation, particularly for the electrical work and the concrete foundation. Every town on Long Island has different rules, so working with an experienced installer who knows the local regulations will make the entire process smooth and stress-free.

Share this page:
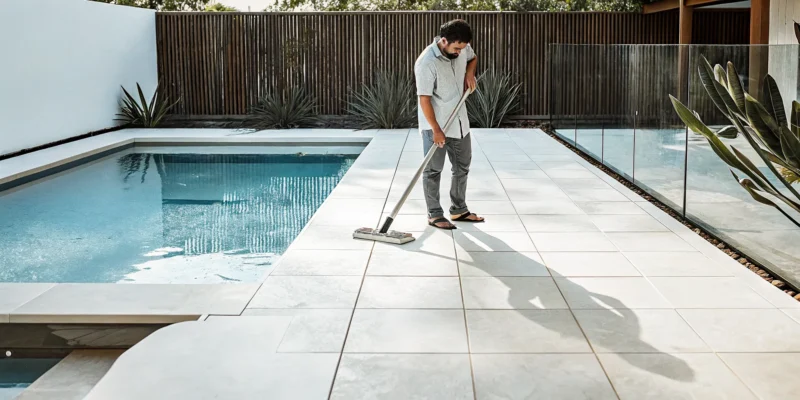
Man scrubbing the stone, showing how to clean a travertine pool deck.

How to Clean a Travertine Pool Deck in 6 Steps

A travertine pool deck is the ultimate statement in outdoor luxury. Its rich, earthy tones and unique texture create a stunning foundation for your entire backyard oasis, turning a simple swimming pool into a personal resort. But as a natural stone, it requires a specific kind of care to maintain its beauty. You wouldn’t use a harsh scrub brush on a silk shirt, and the same principle applies here. Knowing how to clean a travertine pool deck correctly is less about hard work and more about using the right, gentle techniques. This guide will walk you through the simple, safe steps to protect your investment, ensuring your beautiful stone looks as pristine as the day it was installed.

Key Takeaways

  • Gentle Cleaning is Non-Negotiable: Travertine is a sensitive natural stone, so you must avoid acidic or harsh chemicals like vinegar and bleach. Always use a pH-neutral cleaner and a soft-bristled brush to prevent permanent etching and scratches.
  • Sealing Creates a Protective Shield: Because travertine is porous, applying a penetrating sealer is essential to block stains, repel moisture, and make cleaning easier. You can test your sealer by splashing water on the stone; if it beads up you are protected, but if it soaks in, it is time to reseal.
  • Proactive Maintenance Prevents Major Problems: Small, consistent habits like sweeping regularly and wiping up spills immediately are your best tools for everyday care. For deep-set stains or widespread damage, calling a professional restoration service is the safest way to protect your investment.

Why Choose Travertine for Your Pool Deck?

If you’ve ever admired a stunning, high-end pool area, there’s a good chance you were looking at a travertine deck. This natural stone is a top choice for creating luxurious outdoor spaces, and for good reason. Travertine brings an earthy, timeless elegance that transforms a simple backyard into a personal resort. Its beautiful, subtle variations in color and texture mean no two decks are exactly alike, giving your space a truly custom feel that feels both organic and sophisticated. It’s the kind of detail that makes a property stand out.

Beyond its good looks, travertine is incredibly practical. It’s a durable material that stands up well to the elements, ensuring your investment lasts for years with the right care. One of its most celebrated features is its ability to stay cooler to the touch than many other paving materials, a welcome relief for bare feet on hot summer days. When you’re designing your dream backyard, choosing the right materials is key to achieving the perfect blend of beauty and function. Travertine is a fantastic option that complements gorgeous swimming pools and creates a cohesive, upscale environment. But like any natural material, its unique character comes with specific care requirements. Understanding these needs is the first step to keeping your deck looking pristine for every pool party and quiet afternoon.

Understanding Travertine’s Unique Needs

So, what makes travertine special? Think of it as a cousin to marble. It’s a porous natural stone, meaning it has tiny, microscopic holes in its surface. This porosity is what helps it absorb water and stay cool, but it’s also what makes it sensitive. Travertine is composed mainly of calcite, a mineral that reacts poorly with acids and harsh chemicals. Using the wrong cleaner, like vinegar or a citrus-based product, can cause “etching,” which looks like a dull, discolored spot on the stone’s surface. This doesn’t mean it’s a high-maintenance material, just that it requires a gentle touch. Knowing how to properly clean and protect it is all it takes to maintain its beauty. If you ever feel unsure, professional restoration and sealing services can ensure it’s done right.

Gather Your Cleaning Supplies

Getting your travertine ready for a good cleaning is a lot like prepping for a recipe. You want to have all your ingredients and tools laid out before you begin. This simple step makes the whole process smoother and ensures you’re not scrambling for something mid-scrub. Having the right supplies on hand is the key to cleaning your deck effectively without accidentally causing any damage. It’s all about working smarter, not harder, to protect the beautiful natural stone you invested in. Let’s walk through exactly what you’ll need to get the job done right.

The Right Tools for the Job

First, let’s assemble your cleaning kit. You don’t need a lot of fancy equipment, just the right items to treat your stone with care. Grab a soft-bristled broom or brush, a garden hose with a spray nozzle, and a bucket of warm water. You will also need a gentle, pH-neutral cleaner specifically designed for natural stone. A few soft cloths or a mop will be useful for application and drying. For any stubborn, stuck-on gunk, a plastic scraper is a great tool to have, since metal can easily scratch the travertine. If you have a pressure washer, you can use it, but only on its lowest possible setting to avoid damaging the stone’s surface.

Choosing a Safe, pH-Neutral Cleaner

This is the most important part of your supply list. When you’re choosing a cleaner, you must use one that is pH-neutral. This simply means the formula is not acidic, like vinegar, or highly alkaline, like bleach and ammonia. Harsh cleaners can etch the stone, which means they chemically burn the surface and leave behind permanent dull spots or discoloration. Think of it like using the wrong product on your skin, it can cause a bad reaction. Always read the label to confirm a cleaner is safe for natural stone like travertine. Protecting your investment starts with using products that gently clean without stripping away the stone’s natural finish.

Chemicals That Can Damage Travertine

To keep your travertine looking its best, it’s just as important to know what not to use. Steer clear of any generic household cleaners that contain acid, ammonia, or bleach. While these are great for disinfecting other areas of your home, they are your travertine’s worst enemy. These chemicals will corrode the calcium carbonate within the stone, causing it to break down over time. This damage is often irreversible and can ruin the luxurious look of your pool deck. When in doubt, stick to water or a dedicated stone cleaner. If you encounter a particularly tough stain, our professional restoration and sealing services can help without risking damage to your deck.

Your Step-by-Step Guide to Cleaning a Travertine Deck

Keeping your travertine pool deck looking pristine is easier than you might think. With the right approach and a little routine care, you can protect your investment and ensure it remains a stunning centerpiece for your backyard. This simple, six-step process will guide you through a safe and effective cleaning that preserves the natural beauty of your stone. Forget harsh chemicals or aggressive scrubbing, the key is a gentle touch. Following these instructions will help your beautiful natural stone pavers look their best for every pool season.

Step 1: Prep the Area

Before you get started, the first step is to completely clear the deck. Move all your patio furniture, lounge chairs, planters, and pool toys to another area, like the lawn. This gives you an empty canvas to work with and ensures you can clean every inch of the stone without obstruction. It also prevents any cleaning solution from accidentally splashing onto your belongings. Think of it as a fresh start for your entire pool area. This is also a great opportunity to wipe down your furniture and check for any dirt or mildew that could transfer back onto your newly cleaned deck.

Step 2: Sweep Away Debris

Next, you’ll want to remove all the loose dirt and debris. You can use a leaf blower for a quick clear, or grab a soft-bristle push broom. Using a soft-bristled broom is important, as stiff or wire bristles can easily scratch the surface of the travertine. Start at one end of your deck and work your way methodically to the other, sweeping away leaves, twigs, and dirt. Pay special attention to the corners and the edge along your swimming pool, as this is where debris loves to collect. A thorough sweep is essential for preventing scratches during the scrubbing phase.

Step 3: Give It a Good Rinse

Once the deck is clear of debris, give the entire surface a good rinse with a garden hose. You don’t need a high-pressure nozzle for this, just a gentle, steady spray is perfect. The goal is to wash away any fine dust left over from sweeping and to wet the stone. Rinsing also helps cool the surface of the travertine, which is especially important on a sunny day. A cooler surface prevents your cleaning solution from evaporating too quickly, giving it the time it needs to work effectively without drying onto the stone.

Step 4: Apply Your Stone Cleaner

Now it’s time to apply your cleaner. It is critical to use a pH-neutral cleaner that is specifically formulated for natural stone like travertine. Acidic or highly alkaline products, including vinegar or bleach, can etch and permanently damage the stone’s surface. To avoid having the cleaner dry before you can scrub it, work in small, manageable sections of about five by five feet. Mix your cleaner according to the manufacturer’s instructions and apply it evenly to your first section. If you’re unsure which product to use, our team can help you with professional cleaning and sealing services.

Step 5: Gently Scrub the Surface

With the cleaner applied to your first section, it’s time for a gentle scrub. Use a soft-bristle brush or a deck brush with nylon bristles, never a wire brush. Scrub the surface in soft, circular motions to lift dirt out of the stone’s natural pores and textures. This gentle agitation is usually all you need to remove everyday grime without harming the travertine. Apply light, consistent pressure, and pay a little extra attention to any grout lines or areas that seem to hold more dirt. A little bit of elbow grease here goes a long way in restoring your deck’s clean appearance.

Step 6: Rinse Thoroughly and Let It Dry

As soon as you finish scrubbing a section, rinse it thoroughly with your garden hose. You want to make sure you wash away all the cleaning solution and the dirt you just loosened. Any residue left behind can leave a hazy film or become sticky, attracting more dirt later on. Rinse until the water runs completely clear, then you can move on to apply cleaner to the next section. Once you have cleaned and rinsed the entire deck, simply let it air dry completely. Step back and enjoy your beautifully clean travertine.

Avoid These Common Travertine Cleaning Mistakes

Your beautiful travertine deck is an investment, and keeping it looking its best means knowing what not to do. Following the right cleaning steps is important, but avoiding common mistakes is just as critical to prevent accidental damage. Even with the best intentions, using the wrong tool or chemical can cause permanent etching, scratching, or staining. Before you start scrubbing, let’s walk through a few pitfalls to sidestep so you can protect the natural beauty of your stone for years to come. Taking a moment to understand these common errors will save you from costly repairs down the road.

Using Harsh or Acidic Cleaners

The number one rule of travertine care is to avoid anything acidic. Cleaners containing lemon, vinegar, or other acids will react with the calcium carbonate in the stone, causing a chemical burn known as etching. This creates dull, discolored spots that can’t simply be wiped away. The same goes for harsh, alkaline cleaners like ammonia or bleach, which can also strip the sealer and damage the stone’s surface. Always stick with a pH-neutral cleaner specifically formulated for natural stone to ensure you’re cleaning your deck safely without compromising its finish.

Pressure Washing with Too Much Force

While a pressure washer can seem like a quick fix for a dirty deck, it can do more harm than good if you’re not careful. Travertine is a porous and relatively soft stone, and a high-pressure stream of water can easily etch the surface, blast out the joint sand, or even chip the edges of the pavers. If you decide to use a pressure washer, use the widest fan tip available and keep it on the lowest possible pressure setting. A gentle rinse is all you need. When in doubt, it’s often safer to let professionals handle the deep cleaning and restoration work.

Scrubbing with Abrasive Brushes

Put down that wire brush. Using abrasive scrubbing tools, including stiff nylon bristles or scouring pads, is a fast way to create fine scratches all over your travertine deck. These scratches will dull the stone’s finish and collect dirt, making your deck look perpetually grimy. Instead, always choose a soft-bristled brush or a microfiber mop for any scrubbing you need to do. This will be effective enough to lift dirt from the stone’s pores without scratching the surface. Gentle but consistent effort is the key to keeping your travertine looking pristine.

Letting Cleaner Dry on the Stone

When you’re cleaning your deck, especially on a warm or sunny day, it’s easy for the cleaning solution to dry before you have a chance to rinse it off. This is a mistake you’ll want to avoid, as dried cleaner can leave behind a hazy film, streaks, or soap scum that is difficult to remove. To prevent this, work in small, manageable sections. Apply your cleaner, gently scrub the area, and rinse it thoroughly before the solution has a chance to dry. Then, you can move on to the next section, ensuring a clean, residue-free finish across the entire deck.

Skipping Regular Sealing and Maintenance

Sealing your travertine isn’t a one-and-done task. A high-quality sealer is your deck’s best defense against stains, water damage, and fading, but it wears down over time. Skipping this crucial maintenance step leaves your porous stone vulnerable to everything from spilled drinks to mold growth. You can perform a simple water test to check your sealer: just splash a little water on the surface. If it beads up, your sealer is still working. If it soaks in and darkens the stone, it’s time to reseal. Regular cleaning and sealing is the most effective way to protect your investment.

How to Remove Tough Stains from Travertine

Even with the most diligent cleaning routine, tough stains can happen. A tipped-over glass of red wine, grease from the grill, or a rusty planter can leave a mark that a simple wash won’t fix. Don’t worry, your beautiful travertine deck isn’t ruined. Most stubborn stains can be managed with the right technique and a little patience. The key is to identify the type of stain and use a targeted approach that is safe for natural stone. Below are methods for tackling the most common culprits, from oily spots to mineral deposits. For anything that seems too set-in, our professional restoration and sealing services can handle even the most difficult stains.

Getting Rid of Oil and Grease

Oil and grease from sunscreen, lotions, or barbecue splatters can quickly penetrate porous travertine, leaving dark, unsightly spots. To draw these deep-set stains out, you can create a poultice. Simply mix an absorbent powder like baking soda with a pH-neutral stone cleaner until it forms a thick paste, similar to the consistency of peanut butter. Apply a thick layer of the paste directly onto the stain, extending it slightly beyond the edges. Cover the area with plastic wrap and tape down the sides to keep the poultice moist. Let it sit for 24 to 48 hours, which gives it time to pull the oil out of the stone. Afterward, remove the plastic, let the paste dry completely, and then gently scrape it off and rinse the area thoroughly with water.

Removing Algae, Mold, and Mildew

Organic stains from algae, mold, or mildew are common in damp, shady areas of a pool deck. These green or black blemishes not only look bad but can also make the surface slippery. To treat them, use a stone-safe cleaner specifically designed for removing algae, or create your own solution with water and hydrogen peroxide. Apply the cleaner to the affected area and gently scrub with a soft-bristled brush. Avoid using wire brushes, as they can easily scratch the travertine. Working the cleaner into the stone will help lift the stains. Once you’re finished scrubbing, rinse the area completely with clean water to wash away all residue and loosened grime. Regular cleaning helps prevent these organic growths from taking hold.

Treating Rust Stains

Rust stains, often caused by metal patio furniture, planters, or forgotten tools, can leave behind stubborn orange and brown marks. It’s important to use a rust remover that is specifically formulated for use on porcelain and natural stone. Standard rust removers are typically highly acidic and can etch or permanently damage your travertine. Before you begin, always test the product on a small, inconspicuous spot to ensure it doesn’t discolor the stone. Carefully follow the manufacturer’s instructions, apply the product to the rust stain, and let it work for the recommended time. Once the stain has lifted, rinse the area thoroughly with water to neutralize and remove all traces of the chemical cleaner.

Dealing with Efflorescence

Have you ever noticed a hazy, white, powdery substance on your travertine? That’s efflorescence. It’s a deposit of natural mineral salts that are carried to the surface by water and left behind when the water evaporates. While it’s not harmful, it can cloud the beauty of your stone. Luckily, it’s usually easy to remove. You can often scrub it away with a soft, dry brush. If that doesn’t work, use a mild, pH-neutral stone cleaner and a soft brush to gently wash the area. It is crucial to rinse the surface thoroughly afterward to remove any loosened salt residue. Persistent efflorescence can sometimes point to an underlying moisture issue, so if it keeps returning, it may be time to consult with a masonry professional.

Why Sealing Your Travertine Deck Is a Must

Think of cleaning your travertine deck as the first step and sealing it as the essential follow-up. Travertine is a beautiful, natural stone, but it’s also porous. This means it has tiny, microscopic holes that can absorb liquids. Around a pool, that includes chlorinated water, sunscreen, spilled drinks, and oils. Over time, this absorption can lead to stubborn stains, discoloration, and even the growth of mold or algae within the stone itself. Sealing your deck creates a protective barrier that helps keep your investment looking pristine for years to come.

Sealing doesn’t just prevent stains; it also makes your regular cleaning routine much easier. When your deck is properly sealed, dirt and spills sit on the surface instead of soaking in, allowing you to simply wipe or rinse them away. It’s a proactive step that saves you from intensive scrubbing later on. If you want to ensure your beautiful travertine continues to be the centerpiece of your backyard, sealing is a non-negotiable part of its maintenance plan.

How a Penetrating Sealer Works

A penetrating sealer is your travertine’s best friend. Unlike a topical sealer that just forms a film on the surface, a penetrating sealer soaks into the stone and blocks its pores from the inside out. This process creates an invisible shield that stops liquids from seeping deep into the travertine. It effectively repels water, oils, and other potential staining agents without changing the stone’s natural texture or appearance. This is why professional restoration and sealing is so crucial for protecting the longevity and beauty of your outdoor surfaces. By blocking moisture, it also helps prevent freeze-thaw damage during cold Long Island winters.

Signs It’s Time to Reseal

Sealer isn’t a one-and-done application; it wears down over time due to foot traffic, weather exposure, and UV rays. As a general rule, you should plan to reseal your travertine deck every one to three years. The exact timing depends on your specific circumstances. A deck that gets a lot of direct sun and heavy use during the summer will likely need sealing more often than one that’s partially shaded. Instead of just marking a date on the calendar, pay attention to how your deck looks and feels. If you notice it’s getting harder to clean or that water spots are lingering, it’s probably time to think about resealing.

The Water Test: Is Your Deck Protected?

If you’re not sure whether your sealer is still doing its job, there’s a simple test you can perform in seconds. Just sprinkle a few drops of water onto a few different areas of your dry travertine deck. If the water beads up on the surface like it would on a freshly waxed car, your sealer is still working effectively. However, if the water quickly darkens the stone and soaks in, it’s a clear sign that the protective barrier has worn off. This means your deck is vulnerable to stains and moisture damage, and it’s definitely time to apply a fresh coat of sealer.

How to Seal Your Travertine Pool Deck

Sealing your travertine is the final, crucial step to protect your investment. Think of it as a shield for your beautiful stone, guarding it against stains, water damage, and the effects of weather. While it might sound intimidating, sealing is a straightforward process that you can handle with a little patience and the right technique. Following these steps will ensure your sealer goes on smoothly and provides long-lasting protection, keeping your pool deck looking pristine for years. If you’d rather leave it to the experts, our team offers professional restoration and sealing services to get the job done perfectly.

Step 1: Start with a Clean, Dry Surface

You can’t seal over dirt. Before you even think about opening a can of sealer, your travertine deck must be completely clean and dry. Any dust, stains, or moisture you trap under the sealer will be locked in, which can lead to discoloration and other issues down the road. Follow the cleaning steps we outlined earlier and then give your deck at least 24 hours of good, dry weather to air out. The stone needs to be dry not just on the surface, but all the way through. This ensures the sealer can penetrate deeply into the pores of the travertine and bond correctly, giving you the best possible protection.

Step 2: Apply the Sealer Evenly

The goal of sealing is to fill the microscopic pores of the travertine, which stops liquids from soaking in. Always read the instructions on your specific sealer, as application methods can vary. Generally, you can use a low-pressure garden sprayer, a paint roller with a short nap, or even a microfiber cloth to apply a thin, even coat. Work in small, manageable sections to maintain a wet edge and prevent lap marks or streaks. Don’t try to apply a thick layer; you want the stone to absorb the sealer, not for it to sit on top like paint. You can find high-quality sealers and application tools at the Gappsi Store.

Step 3: Remove the Excess and Let It Cure

Some penetrating sealers require you to wipe away any excess product that hasn’t soaked into the stone after about 10 to 15 minutes. Check your product’s directions. This step is important because it prevents a sticky or hazy film from forming on the surface as it dries. Once your application is complete, the final step is to simply let it cure. Curing time is critical, so follow the manufacturer’s instructions carefully. This usually means keeping all foot traffic, furniture, and pets off the deck for at least 24 to 48 hours. This allows the sealer to fully harden and create a durable, protective barrier for your natural stone pavers.

Your Travertine Cleaning and Sealing Schedule

Keeping your travertine pool deck looking its best does not require a complicated calendar. Think of it as a simple routine, much like landscaping or pool maintenance. By staying on top of a few key tasks, you protect your investment and ensure your outdoor space is always ready for relaxation or entertaining. A consistent schedule for cleaning and sealing is the secret to preserving that beautiful, natural stone finish for years to come. Here’s a straightforward timeline you can follow.

How Often to Clean

For everyday upkeep, a quick sweep once a week is usually enough to handle leaves, dust, and other loose debris. If your deck sees a lot of action, like after a pool party, it’s a good idea to give it a rinse with a garden hose. This washes away any sunscreen, oils, or spilled drinks before they have a chance to settle. We recommend a more thorough cleaning twice a year. A deep clean in the spring gets your deck ready for summer, while another in the fall clears away the season’s grime. This simple routine prevents buildup and keeps your travertine looking fresh.

How Often to Seal

Sealing is your deck’s best defense against stains and moisture. A good rule of thumb is to reseal your travertine every one to three years, but this can vary based on sun exposure and foot traffic. There’s a simple way to check if your sealer is still working: the water test. Just splash a little water on the surface. If it beads up, you’re still protected. If the stone darkens and absorbs the water, it’s time to reseal. When you do, remember to apply the sealer only after a deep clean, once the deck is completely dry. This ensures you get the best possible protection for your beautiful natural stone.

Simple Tips for Everyday Travertine Care

Keeping your beautiful travertine deck looking its best doesn’t have to be a huge chore. With a few simple habits, you can prevent stains and damage before they happen, making your seasonal deep cleans much easier. These small steps go a long way in preserving the natural elegance of your stone and protecting your investment for years to come. It’s all about working smarter, not harder, to maintain that stunning poolside look.

Sweep and Rinse Often

This might sound basic, but a quick daily sweep is your travertine’s best friend. Loose dirt, fallen leaves, and gritty debris can act like sandpaper underfoot, causing tiny scratches that dull your stone’s finish over time. By sweeping them away regularly, you stop potential stains and scratches in their tracks. After sweeping, giving the deck a quick rinse with your garden hose washes away any fine dust left behind. This simple routine takes just a few minutes but is one of the most effective ways to protect your deck. Consistent care is the secret to keeping your outdoor surfaces looking pristine, and it’s a core part of our approach to restoration and sealing.

Tackle Spills Right Away

Picture this: you’re enjoying a barbecue, and a splash of red wine lands on your deck. Don’t wait. Travertine is a porous natural stone, which means it can absorb liquids and stain easily. The key is to act fast. Gently blot the spill with a clean cloth, working from the outside in to avoid spreading it. Then, clean the spot with a little water and a pH-neutral stone cleaner. Always remember to test any new cleaning product on an inconspicuous area first. Quick action prevents a small mishap from becoming a permanent mark on your beautiful porcelain and natural stone surfaces.

Use Furniture Pads to Prevent Scratches

Your patio furniture helps create a perfect outdoor oasis, but it can also be a primary source of scratches on your travertine deck. Heavy metal chairs or tables dragged across the surface can leave deep, unsightly gouges that are difficult to repair. An easy fix is to place felt or rubber pads on the bottom of all furniture legs. This allows you to move chairs and loungers without worrying about scratching the stone. It’s also a good habit to lift furniture instead of dragging it whenever you rearrange your space. Protecting your deck this way ensures it remains a beautiful backdrop for all your outdoor structures, like pavilions and pergolas.

Know When to Call in the Pros for Restoration

While regular cleaning is key to maintaining your travertine deck, some situations require a professional touch. Think of it as protecting your investment. A beautiful travertine deck is a major feature of your home, and bringing in an expert for tough jobs ensures it stays that way for years to come. Ignoring serious issues or trying to fix them with the wrong methods can lead to permanent damage and much costlier repairs. If you spot deep-set stains, widespread discoloration, or damage to the stone itself, it’s time to consider professional help. Experts have the tools and experience to tackle problems that household cleaners can’t handle, restoring your deck’s original beauty safely and effectively.

When Your Deck Shows Signs of Serious Wear

If your travertine deck has been neglected for a while or has visible damage, a professional assessment is your best first step. Look for issues like cracked or loose pavers, widespread mold that comes back quickly after cleaning, or stains that have soaked deep into the stone. A professional can determine if individual tiles need to be replaced or if a more comprehensive renovation is in order. For these bigger jobs, an expert can provide a full restoration and sealing service that goes far beyond a surface clean, addressing the root of the problem and preventing future issues.

The Risk of Etching and Permanent Damage

One of the biggest risks of DIY restoration is “etching.” This happens when an acidic or harsh chemical cleaner reacts with the calcium carbonate in the travertine, creating dull spots that look like chemical burns on the stone’s surface. Unfortunately, this damage is permanent and can’t be scrubbed away. High-pressure washing can also cause pitting or strip away the stone’s natural finish. Fixing etched travertine is a delicate process that requires specialized polishing and honing techniques. Trusting an expert who understands the nuances of natural stone is crucial to avoid making a small problem much worse.

Why Professional Equipment and Knowledge Matter

Professionals bring more than just a pressure washer to the job. They have access to commercial-grade, pH-neutral cleaners and specialized equipment designed for delicate stone. They know exactly what pressure levels are safe for travertine and how to treat specific stains, from rust to oil, without harming the stone. A seasoned masonry expert can also spot underlying issues, like poor drainage causing mildew growth, and recommend a lasting solution. Their expertise ensures the job is done right the first time, saving you time, money, and the stress of potentially damaging your beautiful pool deck.

Frequently Asked Questions

How often should I be deep cleaning versus just sweeping my travertine deck? Think of it in two parts: daily upkeep and seasonal resets. A quick sweep or rinse a few times a week is perfect for handling everyday dust and leaves that can cause scratches. For a deep clean with a stone-safe cleaner, plan on doing it twice a year, once in the spring to get ready for summer and again in the fall to clear away grime before winter. This routine prevents major buildup and makes maintenance feel much more manageable.

Can I really damage my travertine with the wrong cleaner? What should I use instead? Yes, absolutely. This is the most important thing to remember. Travertine is a natural stone that reacts badly to acids and harsh chemicals. Cleaners with vinegar, lemon, bleach, or ammonia will chemically burn the surface, leaving permanent dull spots called etching. Always use a cleaner that is specifically labeled as pH-neutral and safe for natural stone. When in doubt, warm water and a soft brush are your safest bet.

Is it safe to use a pressure washer on my travertine deck? You need to be extremely careful with pressure washers. While they seem like a fast solution, the high-pressure stream can easily damage the soft, porous surface of travertine, causing pitting or chipping. If you choose to use one, you must set it to the lowest possible pressure setting and use a wide fan tip. A gentle rinse is always a safer alternative, but if you must pressure wash, proceed with caution.

My sealer test failed and water is soaking in. What’s my next step? If water is soaking into your stone instead of beading up, it’s a clear sign your deck is no longer protected and it’s time to reseal. Your next step is to first give the deck a thorough cleaning using the methods we discussed. After it is completely clean and has had at least 24 hours to dry, you can apply a fresh coat of a high-quality penetrating sealer. This will restore its protective barrier against stains and moisture.

I have a stain that won’t come out with regular cleaning. Is my deck ruined? Don’t panic; your deck is almost certainly not ruined. Many tough stains like oil, rust, or deep-set organic growth just need a more targeted approach than a general cleaning can provide. You can try creating a poultice for oil stains or using a specialized rust remover for stone. However, if you’re hesitant or the stain won’t budge, it’s a perfect time to call a professional restoration service. They have the tools and expertise to remove stubborn spots without risking damage to the stone.

Share this page:
A leveled ground base is prepared with a wheelbarrow for artificial turf installation.

How to Prepare Ground for Artificial Turf in 4 Steps

So, you’re ready to trade your lawnmower for a pristine green lawn that looks perfect year-round. Taking on a synthetic turf installation yourself is an ambitious project, and the success of it hinges on one key phase: the ground preparation. This is by far the most labor-intensive part of the job, requiring digging, leveling, and compacting. Before you decide to go the DIY route, it’s important to understand exactly what’s involved. This article will give you a realistic, step-by-step look at how to prepare ground for artificial turf, helping you make an informed decision on whether to tackle it yourself or bring in a professional team.

Key Takeaways

  • A Perfect Foundation is Crucial: Your turf’s final look and longevity depend on the initial prep work. This means completely clearing the area of old grass, digging down about four inches, and grading the ground with a slight slope to ensure proper water runoff.
  • The Right Base Material Matters: For a stable and durable surface, use a three to four-inch layer of crushed aggregate. This material must be spread evenly and compacted firmly with a plate compactor to prevent your turf from sinking or developing lumps.
  • Plan for Your Specific Needs: Always consider drainage, especially for flat yards where a French drain might be necessary. If you have pets, it is best to skip the weed barrier, which can trap odors, and rely on a thick, compacted base to stop weeds instead.

What is Ground Prep for Artificial Turf?

Before you can roll out that beautiful green lawn, you have to get the ground ready. Ground preparation is the process of creating a perfectly smooth, stable, and well-draining foundation for your artificial turf. It’s the most critical phase of the entire installation, involving clearing the area, excavating soil, adding a base layer, and compacting everything until it’s solid. Think of it as building the perfect foundation for your new lawn. A flawless installation is impossible without it, which is why we’re going to walk through exactly what it takes to get it right.

Why this first step is so important

Putting in the effort now saves you from major headaches later. Proper ground prep is essential because it directly impacts how your new lawn looks, feels, and lasts. A well-prepared base ensures your synthetic turf lies perfectly flat without any lumps or bumps. It also guarantees that water drains away efficiently, preventing puddles and soggy spots after it rains. Without a solid foundation, you might see sinking areas, weed growth, or seams pulling apart over time. Taking this step seriously is the best way to protect your investment and make sure your turf stays beautiful and functional for years to come.

How long does ground preparation take?

Honestly, this isn’t a quick afternoon job. The time it takes to prepare the ground depends on the size of your yard, the current condition of the soil, and how many obstacles like rocks or roots you need to remove. For a typical DIY project, plan on dedicating at least a full weekend to the task. As experts will tell you, it’s crucial not to rush the digging and leveling steps. This is by far the most labor-intensive part of installing artificial turf. The heavy lifting and meticulous leveling are why many homeowners decide to hire a professional team to ensure the foundation is flawless from the start.

Step 1: Clear the Area

Before you can roll out that gorgeous green turf, you need to create a clean slate. This first step is all about removing the existing lawn and any other organic material to prepare a perfectly clear foundation. Think of it like prepping a canvas before you paint. A smooth, clear surface is the key to a professional-looking installation that will last for years. Rushing this stage can lead to lumps, bumps, and drainage problems later on, so it’s worth taking the time to get it right from the start. This initial cleanup sets the stage for everything that follows.

Remove old grass, weeds, and roots

Your first task is to get rid of all the existing grass, weeds, and their root systems. You want to clear the area down to the bare soil. If you leave any grass or roots behind, they will eventually decompose under your turf, creating soft spots and an uneven surface. This can compromise the entire installation.

For most lawns, the most efficient way to do this is with a sod cutter. You can rent one from a local hardware store, and it makes removing large sections of grass much easier than digging by hand. Set the blade to cut about one to two inches deep to ensure you get the bulk of the root system. Once the sod is cut, you can roll it up and remove it from the area, leaving you with a clean patch of dirt to begin your synthetic turf project.

Herbicide or manual removal: Which is best?

When it comes to clearing the area, you have two main options: manual removal or using an herbicide. Using a sod cutter, as we just discussed, is a form of manual removal. It’s effective, immediate, and avoids the use of chemicals, which is a big plus for many homeowners. This method is perfect if you want to get started on the next step right away.

Alternatively, you can use a non-selective herbicide to kill the existing grass and weeds. This approach is very thorough but requires more patience. You’ll likely need to apply it two or three times over a couple of weeks, and it works best in warmer weather. If you choose this route, always read and follow the manufacturer’s instructions carefully for your own safety and to protect surrounding plants. This is just one part of a total yard transformation, which often involves comprehensive landscape design.

What to do with your sprinkler system

This is a critical step that’s easy to overlook. If you have an in-ground sprinkler system, you must address any sprinkler heads or pipes located within the planned turf area. You cannot simply leave them and install the turf over them. An old pipe that cracks or a sprinkler head that leaks can saturate the base layer under your turf, causing it to sink and become unstable.

You’ll need to cap any sprinkler lines that run into the area and remove the heads. In some cases, you might choose to reroute the plumbing around the perimeter of your new turf lawn. If you’re not comfortable working with irrigation lines, this is a great time to call in a professional. An expert can ensure your system is properly modified without causing future issues, protecting your investment in a beautiful new lawn.

Step 2: Excavate and Grade

Once your project area is completely clear, it’s time to start shaping the foundation for your new lawn. This step involves some serious digging and careful leveling, but it’s one of the most important parts of ensuring your turf looks professional and lasts for years. Proper excavation and grading create a stable, even surface and, most importantly, prevent water from pooling where it shouldn’t. Think of it as building the perfect canvas before the masterpiece is laid down. Getting this right means you won’t have to worry about lumps, bumps, or soggy spots later on. While it requires a bit of muscle, taking your time here will pay off in a big way.

How deep to dig for your turf base

For a stable and durable artificial turf installation, you’ll need to excavate the area to a depth of about three to four inches. This might seem deep, but this space is essential for the base material we’ll add in the next step. This crushed rock base provides the structural support for your entire turf system, keeping it level and secure through all seasons. Removing this amount of soil ensures your new synthetic turf will sit flush with surrounding patios or walkways, creating a seamless and professional look. Use a shovel or a sod cutter for this process, and make sure the depth is consistent across the entire area.

Grade the area for proper drainage

After you’ve excavated the soil, the next task is to grade the area. Grading simply means shaping the underlying ground to create a gentle slope that directs water away from your house, patio, or other structures. Proper drainage is absolutely critical for the health and longevity of your turf. Without it, rainwater can collect underneath, leading to a squishy surface, unpleasant odors, and potential damage to the base. A subtle slope of about 2% (a quarter-inch drop for every foot) is usually enough to guide water effectively. This small adjustment ensures your investment stays dry and stable, protecting your home’s foundation and your beautiful new masonry.

Remember to call 811 before you dig

Before you break ground with that first shovel, please make this essential phone call. Dial 811 at least a few days before you plan to start digging. This is a free, nationwide service that contacts local utility companies to mark the approximate location of underground lines, including gas, water, and electrical cables. Accidentally hitting one of these lines is incredibly dangerous and can cause serious injury, service outages for your neighborhood, and expensive repairs. The Call 811 service is simple to use and is a non-negotiable safety step for any excavation project, big or small. It’s the smartest way to protect yourself and your property.

Step 3: Add the Base Layer

With the old lawn gone and the ground properly graded, you’re ready to build the foundation for your new turf. This base layer is what gives your artificial grass its structure, ensuring it stays smooth, drains correctly, and feels solid underfoot for years to come. Think of it as the unsung hero of your project. A well-installed base prevents sinking, shifting, and puddles, creating a durable and beautiful surface for everything from backyard lounging to energetic games. Getting this step right is non-negotiable for a professional-looking result.

The goal is to create a porous yet firm layer that can support the turf and withstand regular use and changing weather. We use a specific blend of materials to achieve this balance, providing a stable foundation that also allows rainwater to drain through efficiently. This prevents your beautiful new lawn from turning into a swamp after a storm. For homeowners looking to install a putting green or one of our custom sports games courts, a perfectly prepared base is even more critical for proper performance. A solid base ensures the ball rolls true on a putting green and provides the consistent, safe surface needed for athletic activities. It’s the difference between a good DIY project and a great, long-lasting investment in your home.

Your options for base materials

The best base material for artificial turf is a type of crushed stone aggregate. At Gappsi, we typically use a blend of ¾ inch clean stone and stone dust, often referred to as RCA or crushed aggregate base. This mixture is ideal because it compacts into a very firm, stable surface while still having enough space between the particles for water to drain through effectively. You want to avoid materials like sand or plain topsoil, which can shift over time and hold too much moisture, leading to dips and mold growth.

Choosing a high-quality aggregate ensures your turf installation will last. The right base material provides the strength needed to support foot traffic, patio furniture, and play equipment without developing low spots. You can find these materials at landscape supply stores, and they are the same types of products we use for creating solid foundations for patios and walkways.

How thick should the base layer be?

For most residential lawns, your base layer should be about three to four inches deep. This thickness provides the perfect balance of stability and drainage for typical Long Island soil and weather conditions. A base this deep creates a solid foundation that won’t heave during freeze-thaw cycles and can easily manage heavy rainfall. It’s substantial enough to prevent the turf from developing wrinkles or depressions over time, keeping your lawn looking pristine.

If your yard has particularly poor drainage or is made of heavy clay, you might consider going a bit deeper, perhaps up to five inches. However, for the vast majority of projects, three to four inches is the sweet spot. This depth ensures a long-lasting, durable surface that feels great to walk on and performs exactly as it should.

Spread and level the materials

Once you have your base material on site, it’s time to spread it evenly across the excavated area. Use a wheelbarrow to move the aggregate and a sturdy landscape rake or shovel to distribute it. Your goal is to create a consistent layer that matches the depth you decided on, typically three to four inches. As you work, pay attention to maintaining the gentle slope you established during the grading step to ensure water continues to flow away from your home.

After the material is spread, use the back of the landscape rake to smooth the surface as much as possible. This process, called screeding, helps create a flat plane. For a truly professional finish, you can drag a 2×4 across the surface to find and fill any low spots. Taking your time here is key, as any imperfections in the base will be visible once the turf is installed.

A Closer Look at Proper Drainage

Getting your drainage right is one of the most important parts of preparing the ground for artificial turf. Without a proper plan for water, you can end up with puddles, a squishy base, and even damage to your home’s foundation. Good drainage ensures that rainwater flows away from the surface, through the turf’s backing, and into the sub-base, where it can be safely directed away. This is crucial for the longevity and performance of your new lawn, keeping it usable and beautiful no matter the weather.

Whether you’re installing a small patch of green for your pets or a full backyard putting green, thinking about water flow from the start will save you major headaches later. A well-drained base keeps your turf looking and feeling great for years, preventing mold, mildew, and unpleasant odors from developing. It’s the unseen foundation of a successful installation, and taking the time to do it correctly makes all the difference. The right landscape design incorporates drainage as a fundamental element, not an afterthought, ensuring your entire outdoor space functions as beautifully as it looks.

Shape the ground to guide water away

The easiest way to manage water is to use gravity. By shaping the underlying soil, you can create a gentle slope that naturally guides water away from your home, patio, or walkways. You don’t need a steep hill; a subtle grade of just one or two percent is usually enough to keep water moving in the right direction. Think of it as creating a slight, almost unnoticeable tilt across the area. This simple step is a proactive way to prevent water from pooling on your turf or seeping toward your foundation, protecting your entire property.

Drainage solutions for flat spots

What if your yard is completely flat? You still need a strategy for drainage. If your property doesn’t have a natural slope, you may need to install a drainage system beneath the turf. A common solution is a French drain, which is a perforated pipe in a gravel-filled trench that collects and redirects water away from the area. This is especially important on Long Island, where heavy rain can quickly overwhelm a flat yard. The main goal is always to move water away from your house to prevent any risk of basement flooding or foundation issues.

Should you use a weed barrier?

A weed barrier, or geotextile fabric, can be a great addition under your base layer to stop stubborn weeds from growing through your turf. It’s an effective way to keep your lawn looking pristine. However, if you have pets, you might want to skip it. Weed barriers can trap moisture and pet urine, which can lead to persistent odors that are very difficult to get rid of. So, if your furry friends will be using the turf as their bathroom, it’s often best to rely on a thick, well-compacted base to prevent weeds instead of using a barrier.

Tips for pet-friendly turf areas

If you’re creating a space for your pets, a few extra steps will ensure it stays fresh and clean. First, choose the right infill. There are special pet-friendly infills designed to neutralize odors from urine and are completely safe for animals. This type of infill helps the turf blades stand up while also absorbing and fighting odors. Additionally, a proper synthetic turf installation for pets often includes a membrane that promotes maximum drainage. Regular rinsing with a hose will also help wash away any residue and keep your turf looking and smelling great for everyone to enjoy.

Step 4: Compact the Base

Why you can’t skip this step

You’ve made it to the final and most critical step of ground preparation: compaction. It might be tempting to rush through this part, but creating a firm, solid base is essential for a beautiful and long-lasting lawn. Proper compaction ensures your synthetic turf has excellent drainage, a smooth surface, and the durability to withstand years of foot traffic and fun. Skipping this step can lead to an uneven, lumpy surface or areas that sink over time, which is definitely not the look you’re going for. Taking the time to compact the base properly is your best insurance for a professional-looking result that you’ll be proud of for years to come.

How to use a plate compactor correctly

A plate compactor is the best tool for this job. You can typically rent one from a local hardware store if you don’t own one. Start at one edge of your project area and slowly guide the compactor across the entire surface. The machine’s weight and vibrations will do the heavy lifting, pressing the base material down firmly. You’ll want to make several passes over the whole area, overlapping each pass slightly to ensure consistent compaction. The goal is to create a base that feels completely solid underfoot, with no soft or spongy spots. This process prevents the ground from shifting or settling unevenly after your turf is installed.

Check for a solid, even surface

Once you believe the area is fully compacted, it’s time for a quality check. Grab a spirit level or a long, straight board to verify that the surface is flat and maintains the gentle slope you created for drainage. Place the level on different parts of the base to look for any high or low spots. If you find any uneven areas, you can easily fix them. Just add a small amount of your base material to the low spots or scrape away excess from the high spots, then tamp it down and recheck with your level. This final check ensures your turf will lay perfectly flat without any visible imperfections.

Install edging to lock in the base

Edging acts as a sturdy frame for your artificial turf, holding the base material in place and creating a clean, defined border. If your turf area is next to a concrete patio, driveway, or walkway, that existing structure can serve as a natural edge. However, if your turf meets up with a garden bed, fence, or another part of your lawn, you will need to install a dedicated border. Bender board is a popular choice, but you can also use decorative pavers or stones. This not only secures the installation but also creates a beautiful transition to other landscape elements, like a patio built with expert masonry.

DIY or Hire a Pro for Ground Prep?

After learning what goes into a proper ground preparation, you might be wondering if this is a project you can tackle yourself. While a DIY approach can be tempting, the base of your artificial turf is not the place to cut corners. The success and longevity of your entire project depend on a perfectly prepared foundation. Before you grab a shovel, it’s worth considering what a professional team brings to the table. The decision often comes down to weighing upfront cost savings against the guarantee of a flawless, long-lasting result.

What a professional installation includes

When you hire a professional, you’re getting more than just an extra set of hands. A professional installation begins with a comprehensive site assessment. An expert will evaluate your soil, check for proper drainage, and ensure the area is perfectly graded to prevent water issues down the line. They have the knowledge to make any necessary adjustments to irrigation systems before laying the turf. This expert oversight ensures that every detail, from clearing roots to establishing the perfect slope, is handled correctly from the start. This is a key part of Gappsi’s process for installing synthetic turf and Sports Games Courts.

The value of expert tools and experience

Professionals arrive with specialized, high-grade equipment like plate compactors and power brooms that are essential for a smooth, durable installation. More importantly, they bring years of experience. An experienced installer can spot potential issues a DIYer might easily miss, like subtle dips in the ground that could lead to puddles or areas that require extra reinforcement. This foresight is invaluable. Their training ensures the base is compacted to the perfect density for a stable, even surface that will support your turf for years to come. This level of construction expertise is what separates an okay result from a truly exceptional one.

Related Articles

Frequently Asked Questions

Do I really need to dig up my old lawn? Can’t I just lay the turf on top? I know it’s tempting to look for a shortcut, but you absolutely must remove the old lawn. If you lay turf directly over existing grass, the organic material underneath will decompose, creating soft spots and an uneven, lumpy surface. Proper ground preparation involves creating a stable, non-organic base of crushed stone. This is the only way to ensure your new lawn looks perfectly smooth and stays that way for years.

What’s the most common mistake people make when preparing the ground themselves? The biggest mistake I see is underestimating the importance of drainage and compaction. Many people don’t create a sufficient slope during the grading phase, which leads to puddles and a soggy base after it rains. The other major issue is not compacting the base layer enough. Simply tamping it down by foot isn’t enough; you need a plate compactor to create a rock-solid foundation that won’t sink or shift over time.

My yard is completely flat. How do I handle drainage? Even on a flat property, you still need to guide water somewhere. The best approach is to create a very subtle slope (about a quarter-inch drop per foot) during the excavation and grading steps, directing water toward a safe runoff area away from your house. If creating a slope isn’t possible, you may need to install a drainage system, like a French drain, beneath the turf to collect and carry water away.

I have a dog. Should I do anything differently for the ground prep? Yes, there are a couple of key adjustments for a pet-friendly installation. I strongly recommend skipping the weed barrier fabric. While it’s great for preventing weeds, it can trap pet urine and lead to persistent odors. Instead, rely on a thick, well-compacted base to block weeds. Also, be sure to choose a specialized pet-friendly infill, which helps neutralize odors and keeps the area fresh.

How firm does the base need to be, and is a plate compactor essential? The base needs to be incredibly firm and solid, almost like the foundation for a stone patio. A plate compactor is absolutely essential to achieve this. The machine’s weight and vibrations lock the crushed stone particles together, creating a stable surface that won’t settle or develop low spots. Using a hand tamper or just walking on it won’t provide nearly enough force, and you’ll likely end up with an uneven lawn down the road.

Share this page:

Resin Bound Stone Displays at the Gappsi Showroom on Long Island, NY

View Gappsi’s YouTube Channel to view Resin Bound Stone Displays at the Gappsi Showroom on Long Island, NY

When choosing materials for a new driveway, walkway, patio, pool surround, or outdoor living area, seeing a material in person can make all the difference. At Gappsi, we understand that homeowners want to see, touch, and experience the materials before investing in their property. That is why we recently completed a new resin-bound stone display at the Gappsi showroom in Smithtown, Long Island, NY.

Our new showroom display gives customers the opportunity to see the many colors, stone sizes, textures, and applications available with resin-bound stone systems. With 21 different natural stone color options on display, homeowners can get a much better idea of how this unique surface can look when installed on their own property.

What Is Resin Bound Stone?

Resin-bound stone is a decorative surfacing system that combines natural aggregate stones with a specially formulated resin. The stone and resin are thoroughly mixed together before being installed, creating a durable, attractive, and relatively seamless surface.

Unlike loose stone surfaces, resin-bound aggregate is held together by the resin. This creates a stable walking and driving surface while still providing the natural appearance of stone.

At Gappsi, the resin used for our stone systems is manufactured in Italy, while we import the natural stones used for our projects. The combination allows us to offer homeowners a wide selection of colors and aggregate options for different applications.  The result is a surface that can be both functional and decorative.

Our New Resin Bound Stone Display in Smithtown

We recently completed two circular resin-bound stone displays in the parking lot at our Smithtown showroom. These displays serve an important purpose beyond simply showing customers what the material looks like.

We designed the circles so that cars and trucks can drive over them.

This gives us the opportunity to demonstrate and test the strength and durability of the resin-bound stone surface under real-world conditions. Customers visiting our showroom can see firsthand that this material is not simply a decorative surface intended for light foot traffic.

Depending on the system and application, resin bound stone can be used for a variety of residential and commercial projects.

Seeing the surface in an actual driving area allows homeowners to better understand how the material performs when subjected to everyday use.

21 Different Natural Stone Colors

One of the most exciting parts of our new showroom display is the collection of different stone colors.

We created individual square displays to showcase 21 different colors of natural aggregate that are available for projects. Each display allows customers to compare colors side by side rather than choosing a stone color from a small photograph or catalog.

Natural stone can have variations in color and appearance, and seeing the aggregate in person can make the selection process much easier.

Homeowners can compare lighter and darker tones, warmer and cooler colors, and different combinations of natural stone to find an appearance that complements their home and outdoor environment.

The stone can also be mixed in different combinations to create a custom appearance.

resin-bound-stones---display---showrooms---long-island---ny

Different Stone Sizes for Different Looks

Color isn’t the only choice when designing a resin-bound surface.

The natural aggregate is also available in different sizes, allowing homeowners to achieve different visual effects depending on the project.

Smaller aggregate can create a more refined appearance, while larger stone can provide a more pronounced natural-stone look. The appropriate size depends on the application, the desired appearance, and the overall design of the property.

At the Gappsi showroom, customers can see examples of the different aggregate options and discuss which type may be appropriate for their particular project.

This is especially helpful when coordinating a new surface with an existing patio, pool area, landscaping, driveway, or architectural features.

Resin Bound Stone for Driveways

One potential application for resin bound stone is a residential driveway.  A driveway needs to withstand considerably more abuse than a decorative walkway. Vehicles constantly travel over the surface, and the material needs to be installed properly for the intended use.  That is one of the reasons our showroom driving displays are so valuable.  Instead of simply looking at a sample board, customers can see resin bound stone installed as an actual surface and watch vehicles drive over it.

For homeowners considering alternatives to traditional concrete, asphalt, or other driveway materials, a resin bound system can provide a more decorative option while incorporating natural stone into the design.

Walkways, Patios and Pool Areas

Resin bound stone isn’t limited to driveways. The material can also be considered for walkways, patios, pool surrounds, entrances, courtyards, and other outdoor areas.

Because there are numerous color and aggregate combinations available, resin bound stone can be incorporated into a variety of landscape designs.

For example, a homeowner may choose a natural-looking aggregate that complements the stonework around a swimming pool. Another customer may prefer a contrasting color for a walkway that helps define the path through a landscaped yard.

The design possibilities make the material particularly interesting for homeowners who want something different from a standard concrete surface.

Resin Bound Stone for Play Areas

Another interesting application demonstrated at our showroom is the combination of resin bound stone with a rubber resin material to create a softer surface for playground areas.

This display provides customers with a cross-section showing how different materials can be used for different applications.

Playground surfaces have different requirements than driveways or patios. A softer rubberized surface can provide a more appropriate solution for areas where children are playing.

By displaying these materials at our showroom, we can show customers how the composition and installation approach can change depending on the intended use.

Why Visit the Gappsi Showroom?

Selecting outdoor materials from photographs can be difficult.  Colors can look different depending on lighting, photography, computer monitors, and surrounding materials. A color that appears perfect online may look completely different when placed next to your home’s siding, brick, pavers, landscaping, or other outdoor features.

That’s why we encourage homeowners to visit the Gappsi showroom in Smithtown, NY.  You can see our resin-bound stone options in person, compare the 21 available colors, look at different aggregate sizes, and see actual installed examples.

Our showroom helps you better understand the materials before deciding which direction you want to take with your project.

Natural Stone Imported for Gappsi Projects

The aggregate used in our resin-bound stone systems consists of natural stone, giving each surface its own character and appearance.

Gappsi imports these stones for use in our projects, providing customers with access to a broad selection of materials and colors.

The stones can be selected and combined according to the look the homeowner wants to achieve. Whether the goal is a subtle, natural appearance or a more distinctive decorative surface, there are multiple options to consider.

Our team can help you determine which stone, size, and color combination makes sense for your property and the intended application.

See Resin Bound Stone in Person on Long Island

Our new resin bound stone showroom display is designed to do more than showcase colors. It demonstrates the versatility of the material and gives homeowners a chance to see how resin bound stone can be used in real-world applications.

From driveways and walkways to patios, pool areas and specialty surfaces, resin-bound stone offers an opportunity to incorporate natural aggregate into an attractive outdoor design.

With 21 different colors, multiple aggregate sizes, and different application possibilities, homeowners have plenty of options to explore.

If you’re considering resin-bound stone for your Long Island property, visit the Gappsi showroom in Smithtown, NY to see the materials for yourself. Walk through the displays, compare the colors and stone sizes, and talk with our team about your project.

Seeing the material in person can make it much easier to envision what the finished surface could look like at your home.

Gappsi serves homeowners throughout Long Island and specializes in custom outdoor living, hardscaping, landscaping, sports courts, patios, pool areas, and specialty outdoor surfaces. Contact Gappsi to learn more about resin-bound stone and other options for transforming your outdoor space.

Contact Gappsi Today

📍 Serving all of Long Island, NY — Nassau & Suffolk Counties
🌐 https://www.gappsi.com/
📞 Call now for a free consultation and estimate

SCHEDULE A MEETING TODAY WITH GAPPSI

Share this page: