Resin Bound Stone Displays at the Gappsi Showroom on Long Island, NY

View Gappsi’s YouTube Channel to view Resin Bound Stone Displays at the Gappsi Showroom on Long Island, NY

When choosing materials for a new driveway, walkway, patio, pool surround, or outdoor living area, seeing a material in person can make all the difference. At Gappsi, we understand that homeowners want to see, touch, and experience the materials before investing in their property. That is why we recently completed a new resin-bound stone display at the Gappsi showroom in Smithtown, Long Island, NY.

Our new showroom display gives customers the opportunity to see the many colors, stone sizes, textures, and applications available with resin-bound stone systems. With 21 different natural stone color options on display, homeowners can get a much better idea of how this unique surface can look when installed on their own property.

What Is Resin Bound Stone?

Resin-bound stone is a decorative surfacing system that combines natural aggregate stones with a specially formulated resin. The stone and resin are thoroughly mixed together before being installed, creating a durable, attractive, and relatively seamless surface.

Unlike loose stone surfaces, resin-bound aggregate is held together by the resin. This creates a stable walking and driving surface while still providing the natural appearance of stone.

At Gappsi, the resin used for our stone systems is manufactured in Italy, while we import the natural stones used for our projects. The combination allows us to offer homeowners a wide selection of colors and aggregate options for different applications.  The result is a surface that can be both functional and decorative.

Our New Resin Bound Stone Display in Smithtown

We recently completed two circular resin-bound stone displays in the parking lot at our Smithtown showroom. These displays serve an important purpose beyond simply showing customers what the material looks like.

We designed the circles so that cars and trucks can drive over them.

This gives us the opportunity to demonstrate and test the strength and durability of the resin-bound stone surface under real-world conditions. Customers visiting our showroom can see firsthand that this material is not simply a decorative surface intended for light foot traffic.

Depending on the system and application, resin bound stone can be used for a variety of residential and commercial projects.

Seeing the surface in an actual driving area allows homeowners to better understand how the material performs when subjected to everyday use.

21 Different Natural Stone Colors

One of the most exciting parts of our new showroom display is the collection of different stone colors.

We created individual square displays to showcase 21 different colors of natural aggregate that are available for projects. Each display allows customers to compare colors side by side rather than choosing a stone color from a small photograph or catalog.

Natural stone can have variations in color and appearance, and seeing the aggregate in person can make the selection process much easier.

Homeowners can compare lighter and darker tones, warmer and cooler colors, and different combinations of natural stone to find an appearance that complements their home and outdoor environment.

The stone can also be mixed in different combinations to create a custom appearance.
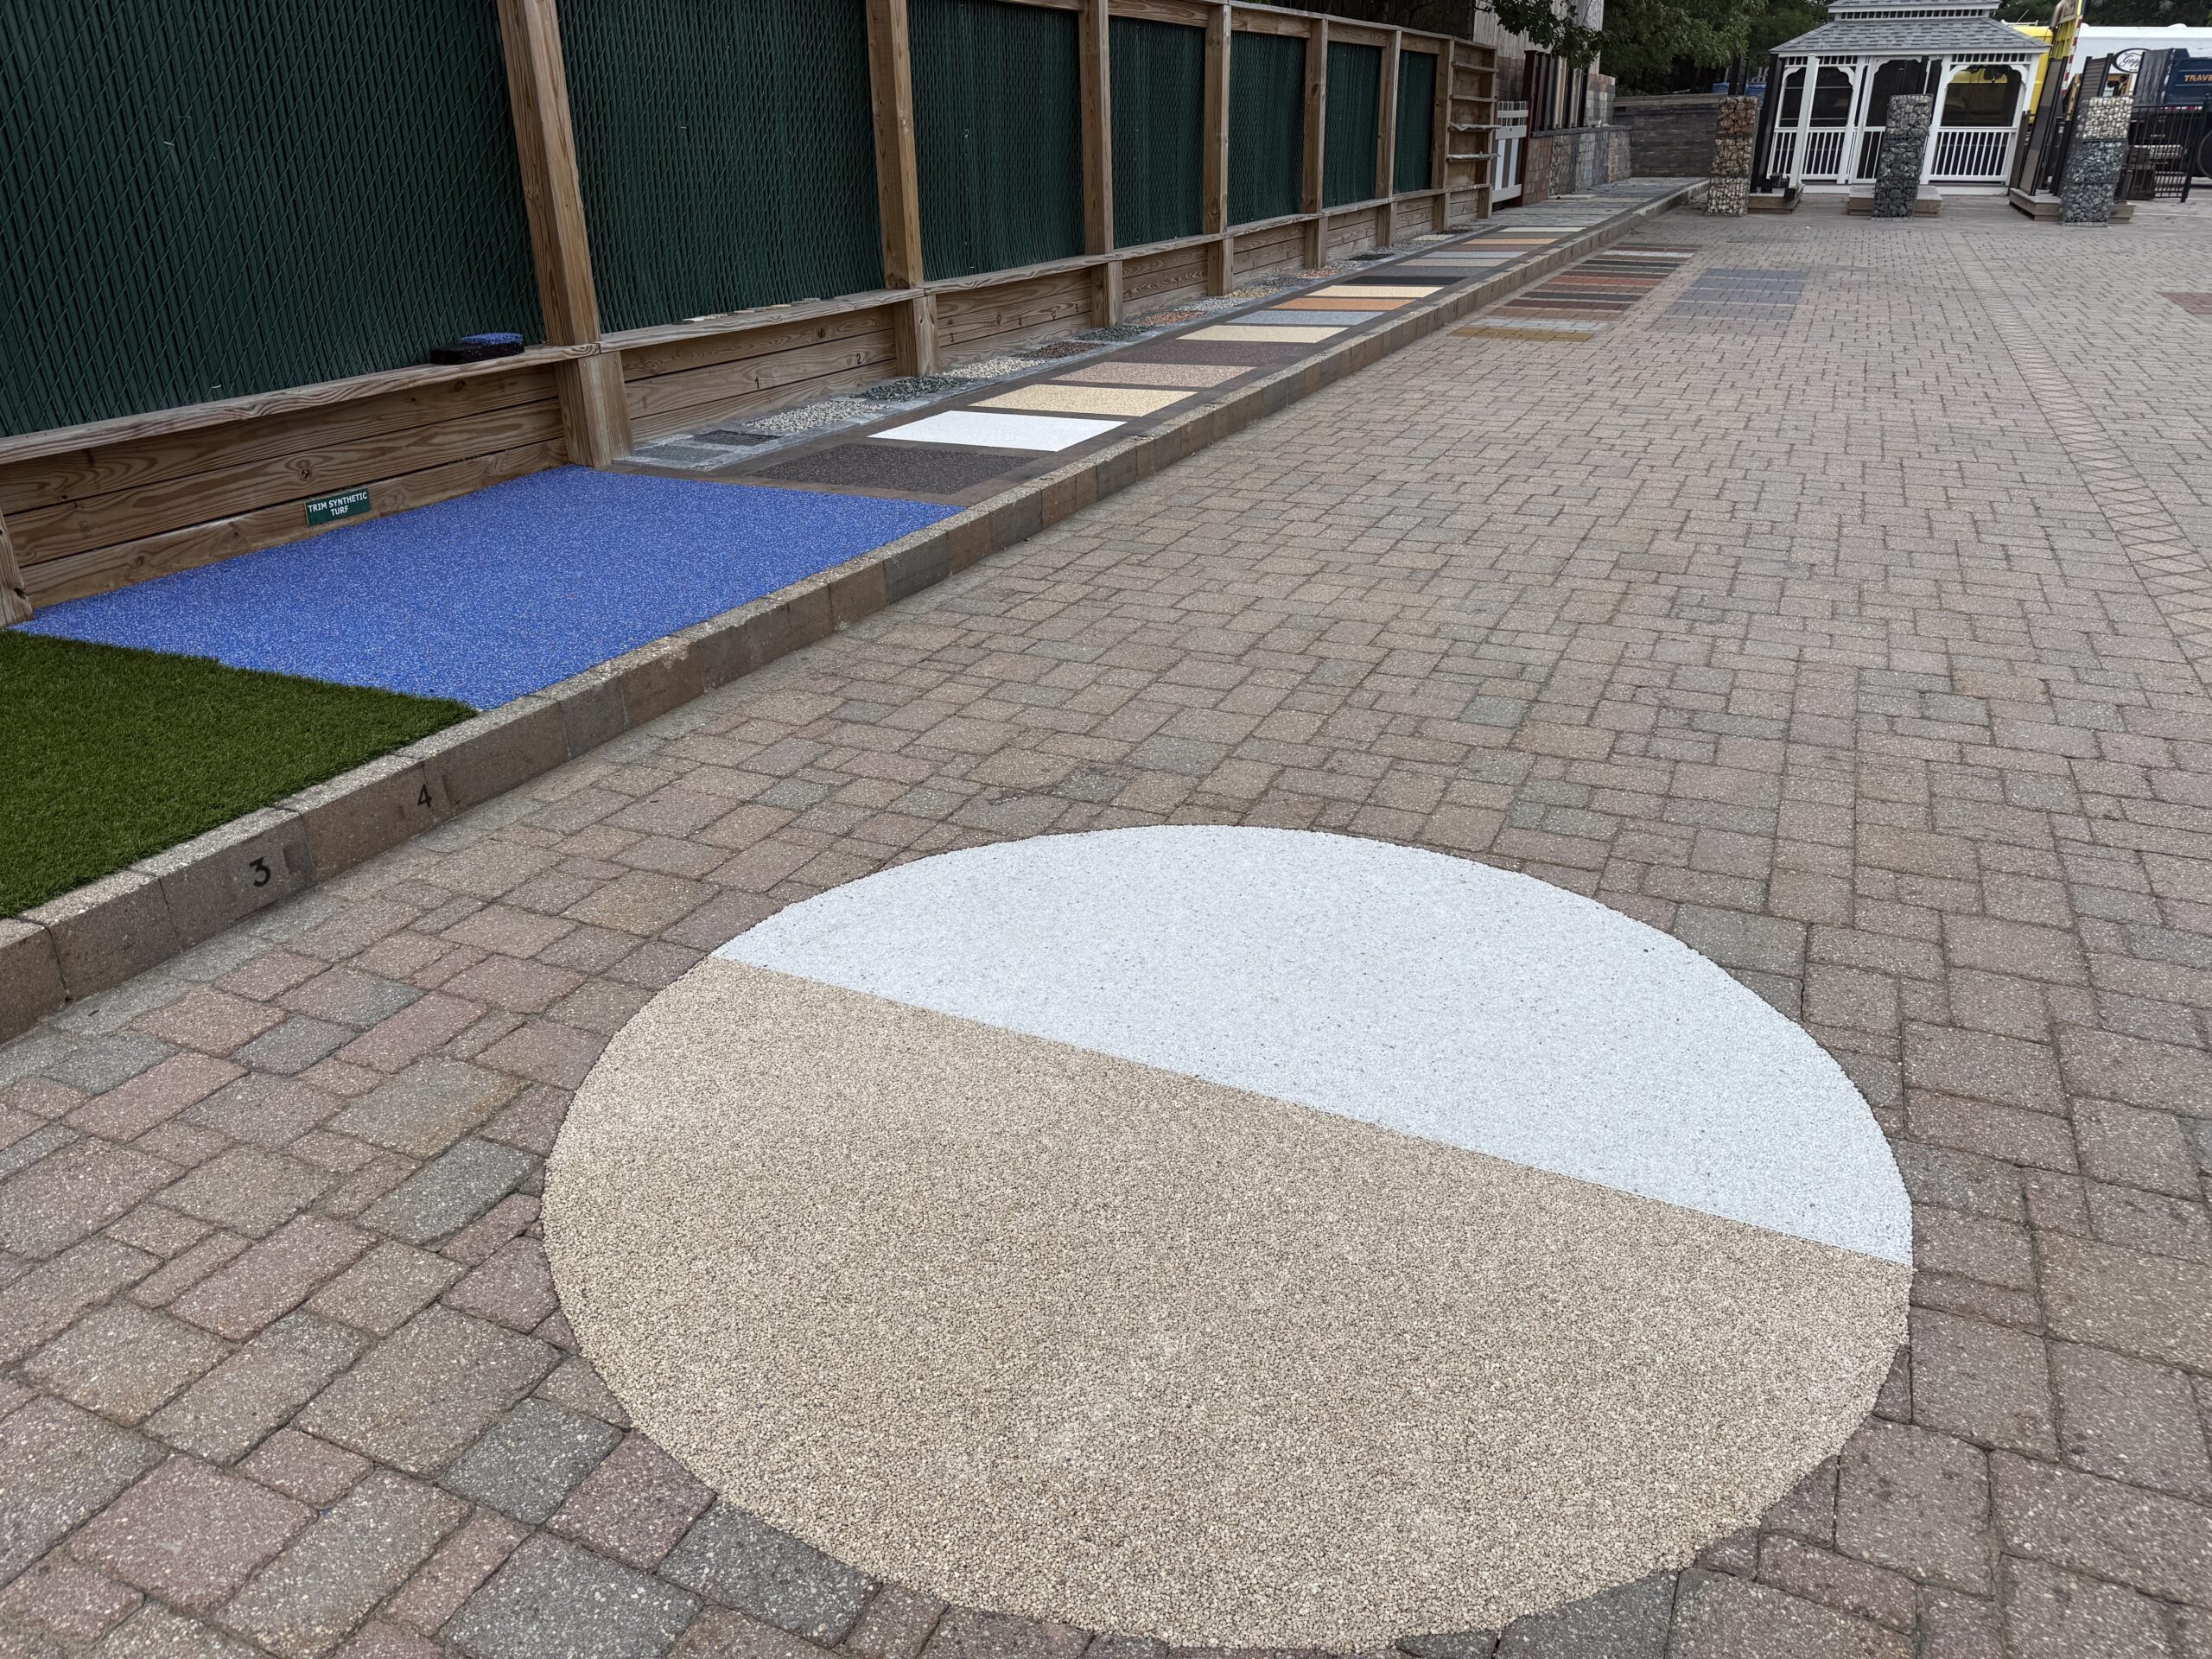
resin-bound-stones---display---showrooms---long-island---ny

Different Stone Sizes for Different Looks

Color isn’t the only choice when designing a resin-bound surface.

The natural aggregate is also available in different sizes, allowing homeowners to achieve different visual effects depending on the project.

Smaller aggregate can create a more refined appearance, while larger stone can provide a more pronounced natural-stone look. The appropriate size depends on the application, the desired appearance, and the overall design of the property.

At the Gappsi showroom, customers can see examples of the different aggregate options and discuss which type may be appropriate for their particular project.

This is especially helpful when coordinating a new surface with an existing patio, pool area, landscaping, driveway, or architectural features.

Resin Bound Stone for Driveways

One potential application for resin bound stone is a residential driveway.  A driveway needs to withstand considerably more abuse than a decorative walkway. Vehicles constantly travel over the surface, and the material needs to be installed properly for the intended use.  That is one of the reasons our showroom driving displays are so valuable.  Instead of simply looking at a sample board, customers can see resin bound stone installed as an actual surface and watch vehicles drive over it.

For homeowners considering alternatives to traditional concrete, asphalt, or other driveway materials, a resin bound system can provide a more decorative option while incorporating natural stone into the design.

Walkways, Patios and Pool Areas

Resin bound stone isn’t limited to driveways. The material can also be considered for walkways, patios, pool surrounds, entrances, courtyards, and other outdoor areas.

Because there are numerous color and aggregate combinations available, resin bound stone can be incorporated into a variety of landscape designs.

For example, a homeowner may choose a natural-looking aggregate that complements the stonework around a swimming pool. Another customer may prefer a contrasting color for a walkway that helps define the path through a landscaped yard.

The design possibilities make the material particularly interesting for homeowners who want something different from a standard concrete surface.

Resin Bound Stone for Play Areas

Another interesting application demonstrated at our showroom is the combination of resin bound stone with a rubber resin material to create a softer surface for playground areas.

This display provides customers with a cross-section showing how different materials can be used for different applications.

Playground surfaces have different requirements than driveways or patios. A softer rubberized surface can provide a more appropriate solution for areas where children are playing.

By displaying these materials at our showroom, we can show customers how the composition and installation approach can change depending on the intended use.

Why Visit the Gappsi Showroom?

Selecting outdoor materials from photographs can be difficult.  Colors can look different depending on lighting, photography, computer monitors, and surrounding materials. A color that appears perfect online may look completely different when placed next to your home’s siding, brick, pavers, landscaping, or other outdoor features.

That’s why we encourage homeowners to visit the Gappsi showroom in Smithtown, NY.  You can see our resin-bound stone options in person, compare the 21 available colors, look at different aggregate sizes, and see actual installed examples.

Our showroom helps you better understand the materials before deciding which direction you want to take with your project.

Natural Stone Imported for Gappsi Projects

The aggregate used in our resin-bound stone systems consists of natural stone, giving each surface its own character and appearance.

Gappsi imports these stones for use in our projects, providing customers with access to a broad selection of materials and colors.

The stones can be selected and combined according to the look the homeowner wants to achieve. Whether the goal is a subtle, natural appearance or a more distinctive decorative surface, there are multiple options to consider.

Our team can help you determine which stone, size, and color combination makes sense for your property and the intended application.

See Resin Bound Stone in Person on Long Island

Our new resin bound stone showroom display is designed to do more than showcase colors. It demonstrates the versatility of the material and gives homeowners a chance to see how resin bound stone can be used in real-world applications.

From driveways and walkways to patios, pool areas and specialty surfaces, resin-bound stone offers an opportunity to incorporate natural aggregate into an attractive outdoor design.

With 21 different colors, multiple aggregate sizes, and different application possibilities, homeowners have plenty of options to explore.

If you’re considering resin-bound stone for your Long Island property, visit the Gappsi showroom in Smithtown, NY to see the materials for yourself. Walk through the displays, compare the colors and stone sizes, and talk with our team about your project.

Seeing the material in person can make it much easier to envision what the finished surface could look like at your home.

Gappsi serves homeowners throughout Long Island and specializes in custom outdoor living, hardscaping, landscaping, sports courts, patios, pool areas, and specialty outdoor surfaces. Contact Gappsi to learn more about resin-bound stone and other options for transforming your outdoor space.

Contact Gappsi Today

📍 Serving all of Long Island, NY — Nassau & Suffolk Counties
🌐 https://www.gappsi.com/
📞 Call now for a free consultation and estimate
SCHEDULE A MEETING TODAY WITH GAPPSI

Share this page:
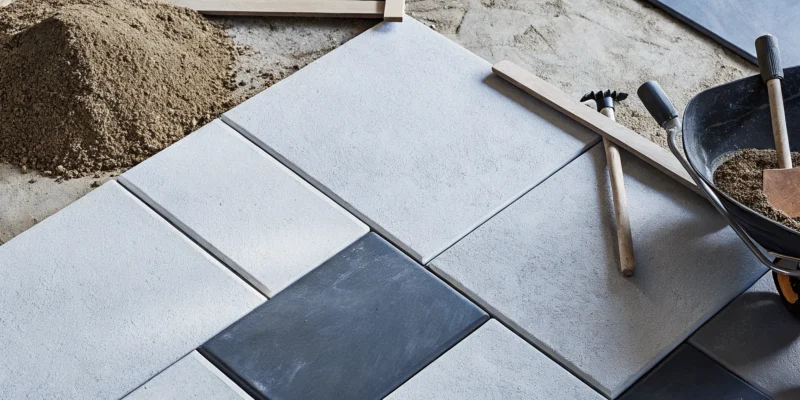
Cost to install a bluestone patio during the site preparation phase.

Cost to Install Bluestone Patio: A Full Breakdown

Bluestone is a premium natural stone, and its price reflects its quality, beauty, and durability. If you’ve started your research, you know it’s a bigger investment than concrete or basic pavers, which naturally leads to the question: what exactly are you paying for? The answer lies in the stone itself, the meticulous site preparation required, and the skilled craftsmanship needed for a flawless installation that withstands Long Island’s weather. Understanding the components that make up the total cost to install bluestone patio helps you appreciate the value behind the price. This article will demystify the budget, breaking down each element so you can see where every dollar goes.

Key Takeaways

  • Know What Shapes Your Budget: Plan for a cost between $18 and $38 per square foot for a professional installation. Your final price comes down to a few key things: the patio’s size, the quality of the bluestone you choose, and the prep work your yard requires.
  • Professional Installation is Non-Negotiable: A patio’s longevity is determined by its foundation, not just the stone. Hiring a pro ensures proper drainage and a solid base, preventing common issues like shifting or cracking and protecting your investment.
  • Bluestone Pays for Itself in Value: While the initial cost is higher than concrete, a bluestone patio adds significant curb appeal and property value. You are paying for a durable, timeless feature that will not fade or require frequent replacement.

What Is a Bluestone Patio?

When you picture a classic, elegant stone patio, you’re probably thinking of bluestone. A bluestone patio is an outdoor space made from a type of sandstone that’s famous for its durability and good looks. It’s one of those materials that instantly adds a sense of quality and value to your home. And while the name suggests one color, it actually comes in a beautiful range of tones, including deep blues, greens, grays, and even hints of lilac. This natural variation means every patio is completely unique.

Creating a stunning outdoor area starts with choosing the right materials, and bluestone is a choice that stands the test of time. As experts in masonry design, we’ve seen how it transforms a simple backyard into a sophisticated retreat. It provides a perfect foundation for everything from quiet morning coffees to lively family gatherings.

A Quick Look at Bluestone Types

Not all bluestone is the same, and the type you choose affects both the look and function of your patio. The most common options you’ll encounter are thermal and natural cleft. Thermal bluestone, also called flamed, has a uniform, textured surface that provides excellent slip resistance, making it a great choice for pool surrounds and walkways. Natural cleft bluestone has a more rustic, uneven surface that highlights the stone’s organic texture.

You might also see honed bluestone, which is sanded to a smooth, matte finish for a very sleek and modern appearance. Selecting a premium bluestone ensures your patio can handle Long Island’s changing weather and years of foot traffic without issues. We can help you explore our wide selection of porcelain and natural stones to find the perfect fit for your project.

Why Long Island Homeowners Love Bluestone

There’s a reason bluestone is such a popular choice across Long Island. Its timeless, natural beauty complements any architectural style, from a classic colonial in Nassau County to a modern home in the Hamptons. While it is a premium material with a higher price point, that’s because it’s a sought-after natural stone that isn’t always easy to source. Homeowners see it as a worthwhile investment, not just an expense.

A professionally installed bluestone patio significantly enhances your home’s curb appeal and overall value. It creates a durable, high-end finish that you’ll enjoy for decades. Investing in proper masonry construction from the start is the key to avoiding costly repairs down the road and ensuring your outdoor living space looks beautiful for years to come.

How Much Does a Bluestone Patio Cost?

Let’s talk numbers. Planning your budget is one of the most important first steps in any home improvement project, and a bluestone patio is no exception. Because bluestone is a premium, natural material, its price tag is higher than manufactured pavers, but its beauty and durability are unmatched. The final cost can vary quite a bit based on your specific project, from the size of your patio to the complexity of the design. Think of it less as a fixed price and more as a custom investment in your home’s future. Understanding the key factors that influence the price will help you create a realistic budget and plan a project that you’ll love for years to come. We’ll walk through the average costs, what you can expect to pay per square foot, and how the size of your dream patio will shape your budget.

A Look at the Average Cost

To get a general idea, it’s helpful to look at what homeowners typically spend. On average, a standard 288-square-foot bluestone patio installation can cost around $6,000. This figure usually includes both the cost of the bluestone itself and the professional labor needed to install it correctly. Think of this as a starting point for your own calculations. Your project might cost more or less depending on the unique layout of your Long Island property and the specific design you have in mind. This average cost provides a solid baseline, but a detailed quote from a professional will give you the most accurate picture for your home.

Breaking Down the Cost Per Square Foot

Looking at the cost per square foot gives you a more flexible way to estimate your budget. For a professionally installed bluestone patio, you can generally expect the price to fall somewhere between $18 and $38 per square foot. This range accounts for both the materials and the installation. Why the wide range? The final price depends on factors like the quality and thickness of the stone, the pattern you choose (like irregular vs. thermal cut), and the specific requirements of your site. Gappsi offers a wide selection of beautiful porcelain and natural stone pavers, and our team can help you find the perfect bluestone to fit your vision and budget.

How Patio Size Affects Your Budget

It’s a simple rule: the bigger the patio, the higher the overall cost. Since pricing is often calculated per square foot, you can easily see how size impacts your budget. A small, intimate 10×12 foot (120 sq. ft.) patio will naturally cost much less than a sprawling 20×30 foot (600 sq. ft.) space designed for large gatherings. When you’re dreaming up your outdoor space, keep this relationship in mind. You can play with different dimensions to find a size that fits both your lifestyle and your financial plan. Our expert masonry designers can work with you to design a patio that maximizes your space without breaking the bank.

What Determines the Final Price?

When you start budgeting for a new bluestone patio, it’s helpful to know that the final quote is more than just the cost of the stone. Several key factors come together to determine the total investment. From the specific type of bluestone you choose to the unique layout of your backyard, each element plays a part. Understanding these components will help you plan your budget effectively and ensure there are no surprises along the way. Think of it as building a recipe: the quality of your ingredients and the complexity of the dish both affect the final result. Let’s walk through the main factors that will shape the cost of your beautiful new patio.

The Stone Itself: Quality, Thickness, and Type

The star of the show, the bluestone itself, is a major component of the total cost. As a highly sought-after natural stone, its price is influenced by availability and demand. Not all bluestone is created equal, either. You’ll find variations in color, grade, and finish, all of which affect the price. Thicker stones, which offer greater durability, will cost more than thinner ones. At Gappsi, we source a wide variety of high-quality natural stone pavers, ensuring you find the perfect material that fits both your aesthetic goals and your budget. We’ll help you understand the differences so you can make a confident choice.

Your Patio’s Size and Design

It makes sense that the bigger your patio, the more it will cost. Most contractors price bluestone patios per square foot, with estimates often falling between $18 and $38 for materials and installation. But size isn’t the only design factor. A simple square or rectangular patio will be more straightforward to install than one with intricate curves, complex patterns, or multiple levels. These custom designs require more precise cuts and additional labor, which will be reflected in the final price. Our masonry design experts can create a plan that maximizes your space while keeping your budget in mind.

Getting the Ground Ready: Site Prep and Grading

A beautiful patio is only as good as the foundation it’s built on. Proper site preparation is a critical step that you absolutely cannot skip. This process involves excavating the area, creating a stable base of compacted aggregate, and ensuring the site is graded correctly for drainage. Without a solid, well-drained foundation, your patio could shift, sink, or hold water, leading to costly repairs down the road. The amount of prep work needed depends on your property’s current condition, including its slope and soil type. You can see examples of our team’s meticulous process on the Gappsi YouTube channel.

Understanding Labor Costs on Long Island

Labor is a significant portion of any patio installation budget, and costs can vary based on your location. Here on Long Island, labor rates reflect the high level of skill required to install a bluestone patio correctly. A typical 288-square-foot patio might have a total cost of around $6,048, including both materials and professional labor. While it might be tempting to cut corners here, experienced installers are worth the investment. They have the expertise to handle challenges, ensure a flawless finish, and build a patio that will last for decades. Our landscape construction company is staffed by seasoned professionals dedicated to exceptional craftsmanship.

How Our Local Climate Plays a Role

Long Island’s weather, with its freezing winters and humid summers, has a direct impact on your patio. The freeze-thaw cycle can be tough on outdoor surfaces, causing improperly installed pavers to heave, crack, or become uneven. That’s why choosing the right materials and using climate-appropriate installation techniques are so important. An experienced local contractor knows how to build a patio that can withstand our specific weather patterns. This includes creating a proper base and using jointing materials that allow for slight movement without compromising the structure. Proper patio restoration and sealing also becomes key to protecting your investment from the elements over time.

Clearing the Way: Removing Old Structures

Before your new patio can be installed, the site needs to be clear. If your project involves removing an old wooden deck, a cracked concrete slab, or large shrubs, this will add to the overall cost. Demolition, hauling, and disposal require time and equipment, so it’s important to account for this in your initial budget. Discussing the current state of your property with your contractor upfront will help you get a complete and accurate estimate. This is a common part of many home remodeling projects and is a necessary first step toward creating the outdoor space you’ve envisioned.

Don’t Forget to Budget for These Extras

When you’re planning your beautiful new bluestone patio, it’s easy to focus on the big-ticket items like the stone and the installation labor. But a successful project that stands the test of time involves more than just laying down pavers. Several smaller, yet crucial, elements can impact your final budget and the longevity of your patio. Thinking about these extras from the start helps you create a realistic budget and ensures there are no surprises down the road.

From handling local building codes to selecting the right materials for the finishing touches, these details are what separate a good patio from a great one. A professional team will always account for these factors, but it’s smart for you as a homeowner to understand what they are and why they matter. Planning for things like proper drainage, sealing, and future maintenance isn’t just about adding costs; it’s about making a wise investment in your home that you can enjoy for decades. At Gappsi, we handle all these details, ensuring your project is built correctly from the ground up.

Handling Permits and Local Rules

Before the first stone is ever laid, it’s important to check with your local municipality about building permits. Depending on the size and scope of your patio project, you may need official approval to begin construction. Trying to figure out these local regulations can feel a bit overwhelming, and failing to get the right permits can lead to fines or even project delays. This is an area where working with an experienced local contractor really pays off. We understand the specific requirements here on Long Island and can manage the entire permitting process for you, making sure your project is fully compliant from day one.

Proper Drainage for a Lasting Patio

One of the most critical aspects of a durable patio is something you’ll never see: the drainage system. Without a plan for water runoff, your patio can suffer from erosion, shifting stones, and water damage to your home’s foundation. A properly installed patio should always include a slight slope that directs water away from your house. In some cases, more complex drainage solutions might be needed. This is a non-negotiable step for ensuring the structural integrity of your investment, and it’s a standard part of our masonry construction process.

The Details: Choosing Jointing Materials

The material that fills the gaps between your bluestone pavers, known as jointing material, plays a huge role in the stability and appearance of your patio. Using the wrong type of sand or bonding adhesive can lead to weeds sprouting up, insect infestations, or stones shifting and becoming uneven over time. Certain types of bluestone also require specific adhesives to ensure a strong bond that won’t crack or lift. We help you select the perfect jointing material that not only complements the look of your natural stone patio but also provides the best long-term performance.

Protecting Your Investment: Sealing and Finishing

Once your bluestone patio is installed, the final step is to protect it. Applying a quality sealant is one of the best things you can do to preserve its beauty and durability. A good sealant helps prevent stains from spills, protects the stone from water penetration, and can even enhance its natural color. While this adds a small amount to the initial cost, it’s a worthwhile investment that will save you money on future repairs and cleaning. We offer professional cleaning and sealing services to keep your patio looking brand new for years to come.

Planning for Future Maintenance

While bluestone is incredibly durable, every patio requires some basic upkeep to stay in top condition. This doesn’t have to be a major chore, but it’s something to plan for. Regular sweeping and occasional rinsing will keep it clean, but you should also budget for a professional deep cleaning and re-sealing every few years. This routine maintenance will protect the stone from the elements, prevent fading, and ensure your patio remains a beautiful and functional part of your outdoor living space for a very long time. Thinking about this long-term care from the beginning helps you protect your investment.

Getting the Installation Right

A bluestone patio’s beauty is more than skin deep. The real secret to a stunning, long-lasting outdoor space lies beneath the surface in the quality of the installation. Getting this part right is what separates a patio that looks good for a year from one that becomes a cherished part of your home for decades. It’s about creating a solid, stable surface that can handle everything from summer barbecues to Long Island’s winter freezes without shifting, cracking, or becoming a puddle-prone mess.

Proper installation protects your investment and the stone itself. When laid correctly, bluestone retains its gorgeous color and texture, and the risk of chips or cracks drops significantly. It all comes down to a combination of the right foundation, smart drainage, and expert techniques. While it might seem like a lot to consider, understanding these key steps helps you know what to look for in a quality installation, ensuring your vision for the perfect patio becomes a durable reality. Gappsi’s masonry experts have been perfecting this process for years, creating patios built to last.

The Foundation Matters: Concrete vs. Sand

Think of your patio’s foundation as the unsung hero of the entire project. You have two main options here: a compacted gravel and sand base or a solid concrete slab. A base of sand or stone dust is a traditional method, often used for a more rustic, permeable look. However, for maximum durability, many professionals recommend a wet-laid installation on a concrete foundation. By setting the bluestone with mortar on a poured concrete slab, you create an incredibly strong and stable patio that is built to last a lifetime. This method provides the ultimate defense against shifting and settling over time.

Why Drainage and Slope Are Crucial

Water is the number one enemy of any patio. Without a proper escape route, rainwater and melting snow can pool on the surface, seep into the joints, and erode the base, leading to shifting stones and costly damage. That’s why creating a slight, almost unnoticeable slope is one of the most critical steps in any patio installation. By grading the area to direct water away from your home’s foundation, a professional installer protects both your house and your new patio. This simple step is essential for preventing erosion and ensuring your bluestone patio remains stable and beautiful for years to come.

Installation Methods: Dry-Laid vs. Wet-Laid

The way your bluestone is set in place defines both its final look and its long-term performance. A dry-laid patio involves setting the stones over a compacted gravel and sand base, then sweeping sand into the joints. This method offers a slightly more natural, classic feel. A wet-laid patio, on the other hand, involves setting the stones in mortar over a concrete slab, creating a solid, seamless surface. While both methods can produce beautiful results, a wet-laid installation generally offers more permanence and stability, especially in a climate with freeze-thaw cycles like ours on Long Island. Gappsi’s team can help you choose the best method for your specific natural stone project.

Selecting the Best Adhesives and Joints

The materials used to hold your patio together are just as important as the stones themselves. For a wet-laid patio, using the right adhesive or mortar is essential for a strong bond that prevents stones from lifting or cracking. Certain types of bluestone are more porous and require specific bonding agents that can handle moisture effectively. For a dry-laid patio, the material used to fill the joints makes a huge difference. Using a high-quality polymeric sand, which hardens after being wet, helps lock the stones in place, prevent weed growth, and resist erosion from rain.

Why Professional Installation Beats DIY Every Time

While the satisfaction of a DIY project is tempting, a bluestone patio installation is a job best left to the professionals. This is a complex project that involves heavy lifting, precise measurements, and specialized knowledge of grading, drainage, and materials. An experienced team ensures the site is prepared correctly and that every stone is laid perfectly. Hiring a professional isn’t just about convenience; it’s an investment in quality that saves you from the potential headaches and high costs of fixing mistakes down the road. With a project this important, you want the peace of mind that comes from knowing it was done right the first time by a trusted home improvement company.

Is a Bluestone Patio a Good Investment?

Deciding on a new patio involves more than just picking a pretty stone; it’s about making a smart choice for your home’s future. A bluestone patio is a significant project, so it’s natural to ask if the cost translates into real value. When you look at its durability, impact on your home’s worth, and how it compares to other materials, the answer becomes clear. It’s not just an expense, it’s an investment in your property and your lifestyle.

Built to Last: Durability and Longevity

A bluestone patio is more than just a beautiful addition; it’s a long-term feature of your home. This natural stone is incredibly dense and hard-wearing, capable of withstanding Long Island’s changing seasons, from hot summers to freezing winters. But the stone’s inherent strength is only part of the equation. A truly durable patio depends on expert installation. The stone’s long-term performance depends heavily on the quality of the preparation and workmanship beneath it. This is why proper site prep, a solid base, and correct jointing are non-negotiable. When installed correctly, your bluestone patio will resist shifting and cracking, giving you a gorgeous outdoor space that lasts for decades with minimal fuss. Proper restoration and sealing can further extend its life.

Adding Value and Curb Appeal to Your Home

A well-designed bluestone patio is a fantastic way to increase your property’s value and curb appeal. Potential buyers see it as a premium, move-in-ready feature, which can make your home stand out in the market. The timeless, elegant look of bluestone complements any architectural style, from classic to modern, creating a seamless transition between your indoor and outdoor living areas. It’s an attractive outdoor space that can definitely add value to your home. Imagine pairing it with a beautiful garden or a cozy fire pit. This kind of thoughtful landscape design not only gives you a personal oasis but also makes a powerful statement to anyone visiting or considering buying your property. It’s an investment in your lifestyle and your home’s future.

Bluestone vs. Other Patio Materials: A Quick Comparison

When planning your patio, it’s helpful to see how bluestone stacks up against other options. Materials like gravel or basic concrete are less expensive upfront but often require more maintenance and lack the high-end finish of natural stone. Bluestone’s cost, typically between $18 and $38 per square foot installed, is more comparable to other premium materials like high-end pavers or travertine. While the initial investment is higher than concrete, you’re paying for unparalleled durability and a classic look that never goes out of style. Unlike manufactured pavers that can fade over time, bluestone maintains its rich color and character for generations. We work with a wide range of porcelain and natural stone, and bluestone consistently proves to be a top choice for homeowners seeking lasting value.

Bring Your Bluestone Patio Vision to Life with Gappsi

After exploring all the details, from stone types to installation methods, you are probably feeling excited about the possibilities for your own backyard. Turning that vision into a beautiful, functional patio is the next step, and it’s where having the right partner makes all the difference. A bluestone patio is a significant investment in your home, and you want to feel confident that every dollar is put to good use, creating a space your family will love for years to come.

Here on Long Island, our team at Gappsi has spent decades helping homeowners create stunning outdoor spaces. We believe a successful project starts with a clear plan. That’s why we work with you to understand your goals, design a patio that fits your lifestyle, and provide a detailed breakdown of the costs involved. Our expert masonry services ensure that every aspect of your project, from the foundation to the finishing touches, is handled with precision and care.

A bluestone patio is more than just the stone itself. It’s about the expert site preparation, the correct drainage, and the meticulous installation that ensures it will last for years. Because we manage the entire process, we can guarantee a seamless experience and a flawless result. We source high-quality porcelain and natural stone pavers and use proven techniques to build patios that are as durable as they are beautiful.

Whether you are just starting to dream or are ready to break ground, we are here to help. Our team can walk you through the material selection at the Gappsi showroom, refine your design ideas, and create a plan that respects your budget. When you are ready to take the next step, reach out to the Gappsi team. Let’s build the outdoor oasis you have always wanted.

Related Articles

Frequently Asked Questions

Why is there such a wide price range for a bluestone patio? The final cost of a bluestone patio is shaped by several factors beyond just the square footage. The specific type and quality of the stone you choose, the complexity of your design, and the amount of site preparation your property requires all play a role. A simple rectangular patio on a flat surface will naturally have a different price point than a large, curved patio on a sloped yard that needs significant grading and a concrete base.

What’s the difference between thermal and natural cleft bluestone? The main difference comes down to the stone’s surface texture. Thermal bluestone is treated with heat to create a uniform, lightly textured finish that provides excellent slip resistance, making it a popular choice for pool surrounds. Natural cleft bluestone is split along its natural layers, resulting in a more rustic, uneven surface that highlights the stone’s organic character. Your choice really depends on the aesthetic you prefer for your outdoor space.

How can I ensure my new bluestone patio lasts for decades? The secret to a long-lasting patio is expert installation. A solid foundation with proper grading for drainage is the most critical element, as it prevents water damage and shifting over time. Once installed, a little maintenance goes a long way. Having your patio professionally cleaned and sealed every few years will protect the stone from the elements and keep it looking beautiful for years to come.

Is professional installation really necessary for a bluestone patio? While it can be tempting to try a DIY approach, installing a bluestone patio is a complex job that requires specialized skills. Professionals have the equipment and expertise to properly grade the site, build a stable foundation that can handle our local climate, and lay the heavy stones correctly. Investing in a professional installer is the best way to avoid costly mistakes and ensure you get a beautiful, durable patio that was built right the first time.

Why should I choose bluestone over less expensive materials like concrete pavers? While materials like concrete pavers have a lower initial cost, bluestone is an investment in lasting value and timeless style. The natural color variations and unique texture of bluestone create a high-end, authentic look that manufactured products can’t quite match. It is incredibly durable and maintains its beauty for generations, which significantly enhances your home’s curb appeal and overall value.

Share this page:
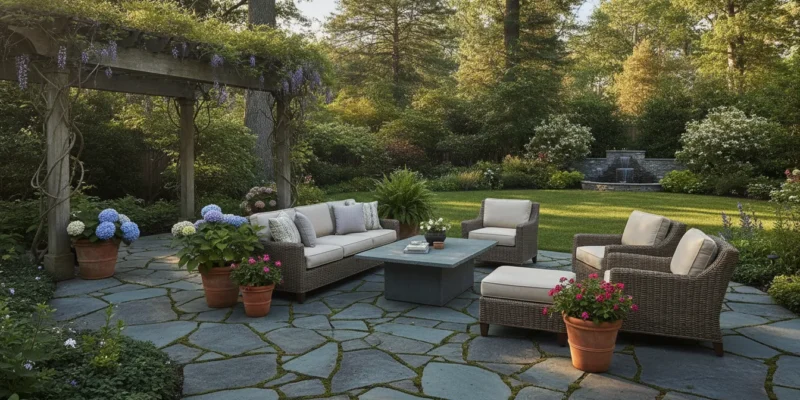
Natural bluestone patio in a lush Long Island backyard with grey-blue flagstones and outdoor seating

Bluestone Patio Cost and Design on Long Island

Long Island winters will crack and shift cheap concrete pavers within a few short seasons. Natural stone offers a stronger way to build a backyard living space that lasts for decades.

A bluestone patio is a durable, natural sandstone outdoor living area quarried in New York and Pennsylvania that resists the harsh local freeze-thaw winter climate.

A professional installation on Long Island costs between $20 and $40 per square foot, depending on the chosen stone thickness, size, pattern, and backyard layout. Installing this natural stone over a solid, compacted aggregate base prevents shifting, making it one of the best patio materials for Long Island for homeowners. It lasts for decades with simple power washing and resists stains when properly sealed. Homeowners can choose textured natural cleft or smooth thermal finishes to match their personal design style and outdoor landscaping.

Before building your dream backyard, you should understand the budget needs and design choices of this natural stone. You might ask yourself: How much does a bluestone patio cost on Long Island? Finding the right answers and planning properly helps you avoid surprises, and here is how.

Call (631) 831-3177 today to talk with a Gappsi masonry expert about planning your own natural bluestone patio on Long Island.

How much does a bluestone patio cost on Long Island?

Key cost drivers for a bluestone patio

A new bluestone patio is a great way to add outdoor living space to your home. But how much you pay depends on a few factors. First, the size of your patio will change your price. Some homeowners start small and later grow their patio to 400 square feet to wrap around the home.

Second, the type of stone you buy will change the cost. Bluestone is a natural sandstone from quarries in New York and Pennsylvania. Because it is very strong, bluestone often costs less than other imported stone options over time. This makes it a great pick among the best patio materials for Long Island.

Material finish and cut

The finish of your stone also drives the bluestone patio cost. Natural cleft bluestone has a textured surface with minor changes in thickness. It has a rustic look that fits nicely in many gardens. Thermal finish bluestone is heated to create a smooth, flat surface, which costs more because of the extra quarry work.

The shape of the stone matters too. Uneven flagstone shapes can take longer to fit together, which adds to your total labor bill. Patterned, pre-cut blocks are faster to set up but have a higher stone cost, while thicker slabs cost more to ship.

Site preparation and base materials

Long Island has a tough freeze-thaw climate. This weather causes the ground to move during the winter. To prevent your patio from cracking or shifting, you must prepare the site well. Masonry teams dig out the soil first, and then they lay down a strong base before setting the stone.

According to Iowa State paving design standards, you need a stable base of compacted stone to prevent settling and movement. Proper drainage is also key. The Environmental Protection Agency notes that aggregate bases help manage water flow and protect your patio from runoff.

Site prep, base stone, and labor are major parts of your total cost. A skilled team has the right tools to grade the land and pack the stone. While doing the work yourself might seem cheap, poor base prep can lead to high repair bills later. If you want a lasting backyard space, hiring an expert is your best path.

Natural cleft or thermal finish: which bluestone is right for you?

When you plan a bluestone patio, you must choose the texture of the stone. Natural bluestone comes in two main finishes. These finishes are natural cleft and thermal finish. Your choice affects the look, feel, safety, and cost of your outdoor space on Long Island.

Texture and look of natural cleft

A natural cleft finish comes from the natural splitting of the stone along its seam during quarrying. This process gives each stone a unique, rugged face. Since bluestone is a natural sandstone, no two pieces are the same. According to Archatrak, bluestone is quarried as a natural cleft stone, which gives each piece a unique texture not found in uniform manufactured pavers.

This finish offers a rustic, organic look with varying depths. You can see and feel the natural ridges of the earth. But this texture can cause slight unevenness underfoot. For some families, this rugged look is what makes it one of the best patio materials for Long Island.

Benefits of a thermal finish

A thermal finish bluestone offers a flat, clean surface. To create this finish, workers wet the stone and pass a hot flame over the face. The heat causes the stone to flake. This flame process creates a smooth, flat face.

It has a slight texture but lacks deep ridges, making a thermal finish bluestone patio look neat and modern. This flat surface is great for placing patio tables, so chairs and dining sets sit level without shaking. The flat stones are also easy for bare feet.

Selecting for safety and cost

Your choice between these finishes also depends on slip safety and cost. The rough face of a natural cleft stone provides excellent traction. This makes it a safe choice near pools where water can make stone slick. But the flat face of thermal finish bluestone is also slip resistant because of its sand texture.

In terms of price, thermal stone costs more because it needs extra labor to heat and cut. Cleft stone is often cheaper since it is split naturally at the quarry. A study by Archatrak shows that cleft bluestone has a rough, split texture. In contrast, thermal bluestone is heat-finished to a smooth, flat face.

Both finishes need a strong base to last in the Long Island freeze-thaw climate. According to design standards from Iowa State University, bluestone paving needs durable bedding and base layers. This stable base of compacted stone prevents settling and movement over time. A skilled mason will make sure your patio has the proper slope and drainage.

Bluestone patio vs concrete pavers: which should you choose?

Choosing the right surface for your yard is a big choice. On Long Island, homeowners often weigh a natural bluestone patio against manufactured concrete pavers. Both options have benefits, but they differ in look, feel, and long term value. Knowing how they perform helps you find the best patio materials for Long Island backyards.

Material aesthetics and cleft texture

We must look at how each stone is made. Concrete pavers are manufactured units with uniform shapes and colors, while bluestone is a natural quarried stone with unique colors and textures. Natural cleft bluestone offers a rustic, split surface with unique ridges. This cleft texture feels solid and earthy underfoot. Pavers, by contrast, are cast in molds and offer a more even, flat look.

Long Island climate durability

Long Island winters bring severe freeze-thaw cycles. These rapid temperature changes shift the ground and can crack thin or poorly laid materials. To prevent this movement, both choices need excellent site prep. A stable patio relies on a compacted stone base to handle drainage and support the surface. This engineered stone base manages stormwater and reduces runoff to keep the stones flat. Natural bluestone holds up well to these climate forces when installed correctly.

Project costs and maintenance

Cost is another key factor for homeowners. Natural stone often costs more upfront than concrete. This is due to quarrying and hard labor to cut the stone. However, natural stone offers a timeless appeal that can increase your home value. Upkeep is simple for both options. Pavers can be swept and washed easily, but they may need joint sand refills. A bluestone patio requires regular sealing to prevent stains and moisture damage. Once sealed, it can last for decades in your backyard.

Feature Natural Bluestone Concrete Pavers
Durability Lasts for decades; highly resistant to freeze-thaw cycles. Strong and durable, but colors can fade over time.
Appearance Unique cleft texture; rich natural blue-grey shades. Uniform shapes; wide range of artificial colors.
Heat reflection Stays cooler underfoot in hot summer sun. Absorbs more heat; can become hot to touch.
Slip resistance Excellent grip due to natural cleft surface. Varies by texture; can be smooth or textured.
Upkeep Needs periodic sealing to prevent stains and weathering. Low maintenance; may need joint sand refills.
Project cost Higher upfront cost due to natural stone quarrying. More budget-friendly; lower material and labor costs.

Ready to move forward? Call (631) 831-3177 and request a bluestone patio quote from the Gappsi team.

How is a bluestone patio installed over compacted stone?

On Long Island, winters bring hard freeze-thaw cycles that can ruin outdoor stone. These quick weather shifts are a leading cause of stress on local masonry, and they create a big need for a stable, well-drained base. Using the best patio materials for Long Island is only half the job. Your project must start with a proper base to keep the stones from shifting or cracking over time.

The need for a stable foundation

To keep the heavy stone from shifting or sinking, you must build a strong, tight layer of crushed rock below. Indeed, a proper bluestone paving design needs a stable base of compacted stone to support heavy loads. You can see detailed design criteria for these layers in the Iowa State paving design standards. This careful site work is the true base of a strong bluestone or paver patio. Proper site work stops water from pooling under the stones, which prevents the ground from shifting when it freezes.

The five steps of patio construction

Building a dry-laid stone patio is a clear, step-by-step job that needs time and skill. Each step must be done with care to ensure the final surface is flat, safe, and built to last for decades. Here is how our team builds a strong patio on Long Island.

  1. Excavation. First, crew members dig the patio site down six to eight inches. This depth leaves enough room for the base stone and the bluestone itself. We make sure the ground slopes away from your home to prevent water from pooling.
  2. Compaction. Next, the team packs the soil flat and adds a layer of crushed gravel. A heavy power machine packs this stone tight to make a hard bed that will not sink over time. This layer is the core of your base prep.
  3. Bedding. The crew spreads a thin, even layer of coarse sand or stone dust over the gravel base. This bedding layer lets the builders set each stone at the right height and level.
  4. Laying bluestone. Craftsmen place the heavy natural stones one by one on the sand bed. They tap each piece with a rubber mallet to make sure it sits flat and stays tight.
  5. Joint filling. Finally, the team sweeps fine sand or joint dust into the gaps. This locks the stones in place and helps stop weeds from growing between them.

Why professional masonry matters

While the work sounds simple, laying a flat stone patio needs true hand skills. Natural stone has small shifts in thickness that a mason must fix by hand. Expert builders know how to slope the surface to shed water away from your home. This expert touch ensures your patio remains clean, safe, and stable through every change of the season.

How do you maintain a bluestone patio on Long Island?

A bluestone patio adds classic charm to any backyard. When looking at the best patio materials for Long Island, this stone stands out for its strength. Proper care keeps this natural stone in top shape for decades. Long Island weather brings temperature shifts that can stress the stone, but simple steps will keep it beautiful.

Sealing the stone

Sealing a bluestone patio protects the natural stone from stains and moisture, helping it last longer. The stone is porous, so it drinks in liquids fast. Spilled food, grease, and wet leaves can leave dark marks. A good sealer forms a barrier that keeps stains on the surface. You should seal your stone soon after you lay it. It is best to add more sealer every three to five years. Before you seal the patio, make sure the surface is dry and clean. Sealing also helps the stone resist winter stress, which can lead to fine cracks.

Power washing and stain care

A well-kept bluestone patio can last for many decades when you seal and clean it. To care for it, you can sweep away dirt and leaves with a stiff broom. You can also wash the stone with a garden hose and mild dish soap. If you need extra help, you can hire local bluestone restoration services to deep clean the stone. A light power washing every few years is great for deep cleaning. But you must use the right pressure, as too much force can carve paths in the sandstone or wash away joint sand. Keep the nozzle at least twelve inches from the stone. Move the spray in steady, sweeping strokes to avoid damage.

Protecting joints and managing moss

Moss and weeds often grow in the joints between the stones. This is common in damp or shady areas. You can pull weeds by hand or use a safe weed killer. A mix of water and vinegar works well to clear moss without harm. Keeping the joints full of sand or gravel prevents weeds from taking root while blocking water from pooling under the stones. To avoid movement, a bluestone patio requires a stable base of compacted stone. Without this base, winter weather can shift the stones. Proper joint care protects the base and ensures your patio stays flat and level.

Bluestone patio design ideas for your Long Island backyard

Planning a bluestone patio is a great way to improve your yard. This natural stone is a top pick for Long Island homes because of its strong wear and classic look. Our stone team creates classic outdoor living spaces using these stones. We have built custom stone yards across Long Island for many years.

Popular stone layout patterns

You can lay your stone tiles in many ways to fit your style. A running bond pattern uses offset rows of same-sized stones. This simple look makes small yards feel much larger.

For a rustic feel, an ashlar pattern uses squares and rectangles of different sizes. This mix creates a unique look that feels relaxed and custom. Natural bluestone is one of the best patio materials for Long Island homes because of these choices. Our mason team helps you pick the layout that matches the scale of your house.

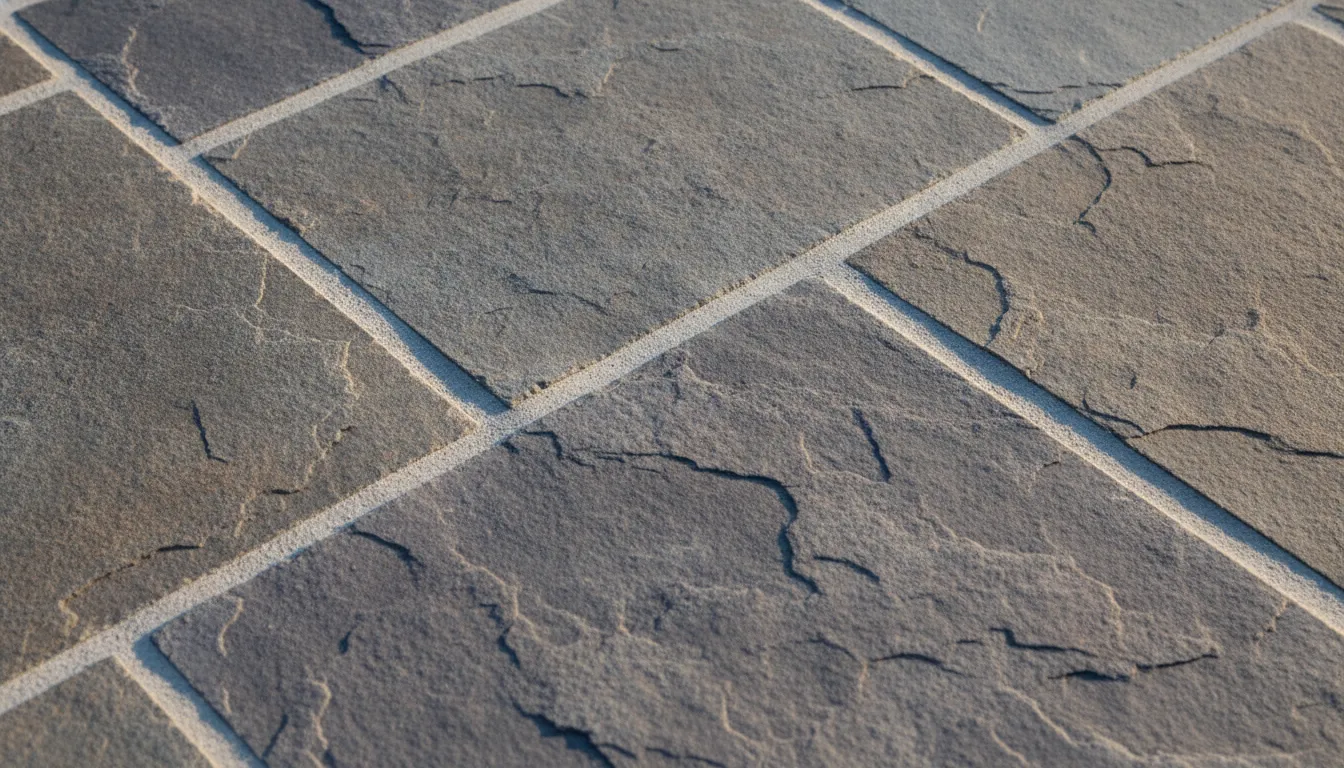
Close-up of a natural cleft bluestone patio surface with grey-blue sandstone texture and clean masonry joints

Custom borders and backyard features

Our stone team plans every detail to blend the paved area with your lawn. These patios blend well with the surrounding land and can include borders, patterns, and inset features. A border frames your paved area and keeps the edge clean. You can use a dark stone border to outline the space.

A raised border also works as a seating wall to host more guests. Our stone plans follow strict Iowa State paving design standards to support foot traffic. Raised seating walls are also great to put around custom fire pits. They give you extra room to sit without adding bulky chairs.

Complementing pools and outdoor kitchens

Our custom stone designs blend natural stone with your pool area. You can blend your paved yard with pools and outdoor kitchens. A bluestone patio looks great next to water or a grill station. When planning your yard, you can pick from several stone patio materials for your project.

You must also pick the right stone finish for your project. Natural cleft bluestone has a rough, split face with natural depth. Thermal bluestone is heat treated to have a flat, smooth surface. A smooth surface is the best choice near swimming pools where kids often run barefoot.

Each type of finish has its own good points that you should think about. A natural cleft face gives a rustic look that hides dirt and wear. A thermal face gives a clean, flat surface that is easy to sweep. Choosing the right finish ensures your family enjoys the patio for decades.

Have questions about your own yard? Call (631) 831-3177 to speak with Gappsi about bluestone patio options for your home.

Frequently Asked Questions

Is bluestone good for a patio?

Yes. Natural bluestone is very strong and lasts a long time. It works well on Long Island because it can handle cold winters and hot summers. It has a pretty blue-grey color that looks great in any backyard. The stone has a natural texture that helps keep people from slipping when it is wet.

Is bluestone cheaper than pavers?

The team at Gappsi notes that natural bluestone often costs more than concrete pavers. Pavers are made in a factory, but natural stone must be dug from the ground. This work makes the stone cost more. Still, natural stone lasts much longer and adds real value to your home.

What are the disadvantages of using bluestone?

One big issue is that bluestone can get very hot in the summer sun. It can also crack if water gets under it and freezes during cold winters. To stop stains and water damage, you must seal the stone. A report on Chrissy Marie Blog notes that sealing is key to help it last.

How long will a bluestone patio last?

A bluestone patio can last for many decades when it is put in the right way. You must place the stone on a strong, packed gravel base. This base stops the stone from shifting when the ground freezes. Sealing the patio and keeping it clean will also help it last a lifetime.

Ready to schedule your bluestone patio consultation?

Delaying your custom backyard masonry project means you will miss the warm outdoor season and face rising local material and labor costs next year. Waiting to schedule also delays the custom design phase, which must begin months in advance to beat the busy spring and summer construction rush. Starting your design-build process now ensures Gappsi can apply authentic Italian craftsmanship to finish your natural bluestone patio before the warm weather arrives.

Ready to get started on your backyard design? Call (631) 831-3177 to contact Gappsi today. We will schedule a bluestone patio consultation with our expert team to plan your dream outdoor space. Our builders are ready to help you create a custom masonry feature that enhances your home.

Share this page:
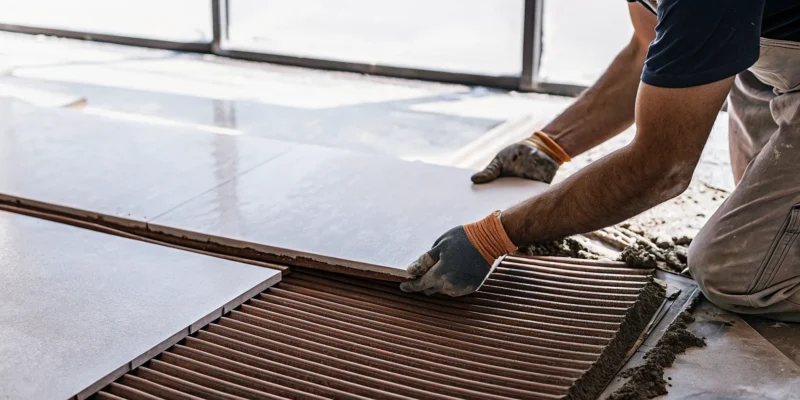
A top-rated tile pro installs a large format porcelain tile on a floor.

How to Find Top-Rated Porcelain Tile Installers

On Long Island, our homes face everything from humid summers to freezing winters. When installing porcelain tile, especially for an outdoor patio or swimming pool deck, you need an installer who understands our specific climate. A local expert knows how to properly prepare surfaces to prevent shifting and cracking, ensuring your investment withstands the seasons. Finding a contractor with a solid reputation in Nassau or Suffolk County is key. This guide is tailored for Long Island homeowners, helping you identify the questions to ask and the credentials to verify when searching for the best Porcelain Tile Installers – Top Rated Tile Pros in our community.

Key Takeaways

  • Confirm an installer’s credentials and past work: Before hiring, always ask to see a valid license, proof of insurance, and a portfolio of recent porcelain tile projects. This simple step protects you and helps verify their skill level.
  • Recognize that professional installation adds long-term value: Paying for an expert is an investment in your home. A pro has the right tools and knowledge to prepare surfaces correctly, preventing costly issues like cracks and water damage later on.
  • Insist on a detailed contract and clear communication: A trustworthy contractor will provide a written agreement that outlines the project scope, timeline, and total cost. This prevents misunderstandings and ensures the project runs smoothly.

How to Spot a Top-Rated Porcelain Tile Installer

Finding the right person to install your porcelain tile is just as important as picking the perfect design. The quality of the installation determines how your new patio, walkway, or floor will look and how long it will last. A great installer brings your vision to life with precision and skill, while a poor one can lead to cracked tiles and costly repairs down the road. To make sure you hire a true professional, focus on three key areas: their credentials, their past work, and their communication style. These elements will give you a clear picture of who you’re trusting with your home.

Verify Licenses, Insurance, and Certifications

Before you even look at a portfolio, a good first step is to confirm that any potential installer has the proper credentials. This means they should be fully licensed to work in your area and carry current liability insurance and workers’ compensation. This protects you from any liability in case of accidents on your property. Beyond the basics, look for certifications from respected industry groups. Membership in an organization like the National Tile Contractors Association (NTCA) is a strong indicator that an installer is committed to their craft and stays current on the best installation practices. Don’t be shy about asking for copies of these documents; a reputable professional will have them ready.

Review Their Experience, Portfolio, and Customer Feedback

Experience with porcelain tile specifically is crucial. It’s a durable material, but it requires specialized tools and techniques to cut and lay correctly. Ask installers about their experience with projects similar to yours. A great way to see their skill level is by reviewing their portfolio. Look for high-quality photos of completed porcelain and natural stone projects, paying attention to clean grout lines, level surfaces, and intricate cuts. Customer reviews on their website or third-party sites can also provide valuable insight into their professionalism and the quality of their work. A proven track record is one of the best predictors of a successful project.

Prioritize Clear Communication and Transparency

A project can get off track quickly if there isn’t clear communication from the start. Your installer should be able to explain their process, timeline, and pricing in a way that you understand. They should be open to your questions and provide transparent answers. Before work begins, make sure you have a detailed contract that outlines the full scope of the project, the materials being used, the payment schedule, and the total cost. This helps manage expectations and prevents misunderstandings later. A professional who communicates clearly and honestly is more likely to deliver a final result that you love, making the entire masonry construction process smoother.

Pro vs. DIY: Should You Install Your Own Porcelain Tile?

Tackling a home project yourself can be incredibly rewarding. There’s a real sense of pride that comes from standing back and admiring your own hard work, not to mention the potential cost savings. But when it comes to installing porcelain tile, it’s worth pausing to consider if a DIY approach is the right fit. Porcelain isn’t just any tile; its durability and density make it a fantastic choice for your home, but also a uniquely challenging material to work with.

A flawless tile installation requires more than just a good eye and a steady hand. It demands specific tools, extensive knowledge of material preparation, and a level of precision that professionals spend years perfecting. One small mistake can lead to uneven surfaces, water damage, or cracked tiles, turning your dream project into a costly repair job. Choosing between a professional installer and a DIY weekend project is really a decision about balancing upfront costs against long-term quality and peace of mind. When you invest in high-quality porcelain and natural stone, you want an installation that honors that investment.

The Difference in Workmanship and Specialized Tools

Let’s be honest, porcelain is tough. Its incredible density, which makes it so resistant to stains and wear, also makes it difficult to cut and handle without the right equipment. Most DIY toolkits don’t include the wet saw with a diamond blade needed for clean, precise cuts. A sloppy job with the wrong tools can easily lead to chipped edges and wasted material.

Beyond the tools, professional workmanship makes a huge difference. An experienced installer knows exactly how to prepare the subfloor, mix the mortar to the perfect consistency, and set each tile for a perfectly level surface. This expertise prevents common issues like lippage (uneven tiles) and future cracks. A pro understands the nuances of working with hard materials, a skill essential for any quality masonry or tile project.

Considering Time, Effort, and Long-Term Value

A professional can often complete a tile installation in a fraction of the time it would take a DIYer. Think about the disruption to your home life. A project that takes a pro a few days could stretch into weeks or even months for someone learning as they go. It’s a physically demanding job that requires hours of kneeling, lifting, and meticulous placement.

While you might save on labor costs upfront, a DIY installation can cost you more in the long run. Mistakes often require tearing out tiles and starting over, which means buying more materials and spending more time. A professional installation is an investment in your home’s long-term value. It ensures your beautiful new tile looks flawless for decades and contributes to the overall quality of your home remodeling project.

Find Top-Rated Porcelain Tile Installers on Long Island, NY

When you’re ready to bring the beauty and durability of porcelain tile into your Long Island home, finding the right installer is everything. It’s not just about picking a pretty tile; the quality of the installation is what truly determines how your new patio, walkway, or floor will look and how long it will last. A sloppy job can lead to uneven surfaces, cracked tiles, and water damage, turning your dream project into a costly headache. This is especially true for outdoor projects, where installers need to account for Long Island’s specific weather patterns and ground conditions to prevent heaving and cracking.

A top-rated installer does more than just lay tile. They are craftsmen who understand the entire process, from preparing the surface correctly to ensuring every cut is precise. They see how your new porcelain tile fits into the larger vision for your home, whether it’s a sleek new bathroom floor or a sprawling patio for summer gatherings. Choosing a local expert means you’re getting someone who not only has the technical skills but also a reputation to uphold within your community. They understand the value of a job well done because their next project could be for your neighbor. They can also provide valuable insight on the best materials and techniques for our unique coastal environment, ensuring your investment stands the test of time.

Gappsi: Your Local Porcelain Experts

With over three decades of experience serving Nassau and Suffolk County, Gappsi has built a reputation for exceptional craftsmanship. We know that a flawless tile installation requires precision, specialized tools, and a deep understanding of how to prepare surfaces to prevent cracks and water damage down the line. Our team doesn’t just install tile; we design and build complete living spaces. This means we see the bigger picture, ensuring your porcelain surfaces integrate perfectly with your overall home remodeling goals. Whether it’s for an indoor floor or an outdoor patio, we bring a level of expertise that guarantees a beautiful, durable, and lasting result for your home.

Where Can You Use Porcelain Tile in Your Home?

Porcelain tile is one of the most versatile materials you can choose for your home improvement project. Because it’s fired at extremely high temperatures, it’s incredibly dense and durable, making it a fantastic choice for nearly any surface, inside or out. Whether you’re dreaming of a sleek, modern kitchen or a rustic, inviting patio, there’s a porcelain style that fits your vision. Its resistance to water, stains, and scratches means it holds up beautifully in high-traffic areas and demanding environments.

The key is knowing where and how to use it. For indoor spaces, you’ll typically use classic porcelain tiles. For outdoor projects, thicker and even more robust porcelain pavers are the go-to option. Gappsi often recommends porcelain and natural stone to our clients because they represent a smart long-term investment. Their longevity and simple maintenance mean you spend less time worrying about upkeep and more time enjoying your home. From floors and walls to patios and pool decks, porcelain offers a seamless blend of beauty and performance.

Indoor Ideas: Floors, Walls, and Bathrooms

Inside your home, porcelain tile is a true workhorse. Its strength and durability make it perfect for floors in busy areas like kitchens, entryways, and hallways, as it easily resists chips and scratches from daily life. Because it’s non-porous, it’s also an excellent choice for moisture-prone rooms like bathrooms and laundry rooms. You can use it to create stunning, water-resistant shower walls, backsplashes, or entire bathroom floors. A flawless tile installation requires precision and a deep understanding of how to prepare surfaces, which is why professional home remodeling expertise is so important for preventing future cracks or water damage.

Outdoor Ideas: Patios, Pool Decks, and Driveways

Porcelain pavers extend this durability to your outdoor living spaces. They are engineered to withstand harsh weather, from scorching sun to freezing temperatures, without fading or cracking. This makes them ideal for creating beautiful and long-lasting patios, walkways, and pool decks. Their slip-resistant texture provides a safe surface around your swimming pool, and they won’t get as hot underfoot as some other materials. At Gappsi, we don’t just install pavers; we create entire outdoor living environments. As a complete backyard designer, we can integrate porcelain into a cohesive plan that transforms your property into a true oasis.

How to Find and Vet Local Tile Installers

Finding the right tile contractor is a huge step toward bringing your vision to life. With so many options out there, it’s easy to feel overwhelmed. A great installer does more than just lay tile; they ensure the foundation is solid, the lines are perfect, and the finished project lasts for years. Choosing the wrong person for the job can cost you time, money, and a lot of stress. The good news is that with a clear process, you can confidently find a professional who will treat your home with care and deliver beautiful results.

Your search will likely take you down a few different paths, from online searches to asking your neighbors for recommendations. The key is to gather a small list of potential candidates and then vet them thoroughly. This means checking their credentials, looking at their past work, and making sure you have a good rapport. Think of it as conducting interviews for an important role, because that’s exactly what it is. A little diligence upfront saves you from major headaches down the road. Let’s walk through how to find and evaluate local installers so you can hire with confidence.

Using Online Platforms and Review Sites

Online platforms can be a great starting point for your search. Websites like Angi and Thumbtack allow you to enter your zip code and get matched with local tile installers. You can typically see ratings, read reviews from people in your community, and request free estimates from several professionals at once. This helps you quickly create a shortlist of potential candidates without spending hours on search engines.

While these sites are useful for gathering names, think of them as a launchpad, not a final destination. Use them to identify a few highly-rated installers in your area, then plan to do your own deeper research. Instead of relying solely on a directory, you can also work with a comprehensive home remodeling company that has its own team of vetted, expert installers, simplifying the process for you.

Tapping into Local Directories and Word-of-Mouth

Never underestimate the power of a good old-fashioned recommendation. Asking friends, family, and neighbors for referrals is one of the most reliable ways to find a trustworthy contractor. Homeowners who have had positive experiences are usually happy to share the details, giving you firsthand insight into an installer’s professionalism, work quality, and reliability. This is often how you find the true hidden gems in the industry.

Beyond your personal network, consider visiting local tile showrooms or building supply stores. The staff often knows which installers are frequently hired for high-end projects and can provide recommendations. Tapping into these local resources helps you find professionals who are already trusted within the Long Island community. Many established companies are known for their expertise, making them a go-to for homeowners looking for reliable porcelain paver installers.

How to Effectively Compare Ratings and Feedback

Once you have a list of potential installers, it’s time to dig into the reviews. While a high star rating is a good sign, it doesn’t tell the whole story. Take the time to read individual reviews, both positive and negative. Positive reviews can highlight an installer’s strengths, like their attention to detail or excellent communication. Negative reviews are just as valuable, as they can reveal potential red flags or patterns of issues.

Look for how a contractor responds to criticism. Do they address the problem professionally, or do they become defensive? This can tell you a lot about their customer service. Ultimately, knowing what you want is just as important as spotting the warning signs of a bad fit. Following a few key tips for finding porcelain tile installers can help you make a more informed decision. Trust your instincts; if something feels off during your initial conversations, it’s probably best to move on.

What Does Porcelain Tile Installation Cost?

Understanding the cost of a porcelain tile installation is a key step in planning your home renovation. While it’s exciting to imagine the finished product, knowing the numbers helps you create a realistic budget and make informed decisions. The total price tag isn’t just one number; it’s a combination of three main factors: the cost of labor, the price of the tiles and materials you choose, and the specific complexities of your project. Breaking down these components will give you a much clearer picture of what to expect and help you plan your project with confidence. Let’s look at what goes into the final cost.

Breaking Down Labor Costs

When you hire a professional for your tile installation, a significant portion of your budget will go toward labor. This cost covers the installer’s expertise, time, and precision, which are all essential for a beautiful, long-lasting result. Generally, you can expect labor costs to range from about $4 to $32 per square foot. Some professionals may also charge an hourly rate, typically between $30 and $120. For an average project, homeowners often spend around $1,930 on installation, though the total can fall anywhere between $880 and $3,000. This investment ensures your tile is laid correctly, preventing future headaches and repairs.

How Tile Quality and Materials Affect Price

The tiles you select will play a huge role in your project’s overall cost. The market offers a vast array of options, from budget-friendly ceramic tiles at around $1 per square foot to luxurious natural stone that can be much more. Gappsi offers a beautiful selection of high-quality porcelain and natural stone pavers to fit various styles and budgets. Beyond the tiles themselves, you also need to account for other necessary materials. Adhesives, grout, and sealers are crucial for a proper installation and can add another $6 to $9 per square foot to your material costs. Your choice of materials is where you have the most control over the budget.

Factoring in Project Complexity and Prep Work

No two tile projects are exactly alike, and the unique details of your space will influence the final price. A straightforward installation on a flat, prepared surface will cost less than a project with intricate patterns or an uneven subfloor. Preparing the area is a critical step that can add to the cost. For example, if old flooring needs to be removed, you might see an additional charge of $2 to $7 per square foot. If your subfloor isn’t perfectly level, correcting it can cost anywhere from $2 to $30 per square foot. While these preparatory steps add to the upfront cost, they are vital for ensuring your new porcelain tile floor looks great and lasts for years.

Your Pre-Hiring Checklist: Questions for a Tile Installer

Once you have a shortlist of potential installers, it’s time to start the interview process. Finding the right person is just as important as picking the perfect tile, since the quality of the installation determines how your new space will look and how long it will last. Being prepared with a list of questions helps you compare candidates consistently and hire with confidence. Think of this as a job interview where you are the hiring manager for your home.

Questions About Their Experience and Credentials

First, you need to confirm you’re dealing with a legitimate professional. Start with the basics to verify their qualifications and specific experience with porcelain. A true expert will be happy to provide this information.

Ask these questions to gauge their background:

  • Are you licensed and insured to work on Long Island?
  • Can you share a portfolio of your recent porcelain tile projects?
  • Do you have any advanced certifications, for example, from the Ceramic Tile Education Foundation?
  • Can you provide references from recent clients in my area?

Don’t be shy about asking to see their work. Looking at photos of completed porcelain paver projects will give you a clear idea of their skill and style.

Questions About Timelines, Warranties, and Payment

With credentials confirmed, you can move on to the project specifics. This conversation is all about setting clear expectations for how the project will run from a logistical and financial standpoint. Getting everything in writing is essential.

Use these questions to clarify the details:

  • What is the estimated timeline for this project, from prep to completion?
  • What is your payment schedule?
  • Do you offer a warranty on your workmanship, and what does it cover?
  • Will you provide a detailed contract that outlines all costs, materials, and the full scope of work?

A great company’s commitment doesn’t end when the installation is done. Ask if they offer services to protect your investment long-term, like professional restoration and sealing.

Questions About How They Handle Unexpected Issues

Even with the best planning, surprises can happen. A seasoned professional knows this and has processes in place to handle them smoothly. How an installer answers these questions reveals a lot about their communication skills and problem-solving abilities.

Ask these questions to understand their process:

  • How do you handle unexpected problems, like discovering subfloor damage?
  • What is the process for a change order if I want to make an adjustment mid-project?
  • Who will be my main point of contact, and how will we communicate throughout the installation?

Clear answers to these questions can prevent the misunderstandings that often lead to project friction. A contractor who can confidently explain their process is one you can trust to manage your project effectively.

Hiring Red Flags: When to Walk Away

Choosing an installer is a big decision, and knowing what to watch out for is just as important as knowing what to look for. While it’s exciting to get your project started, hiring the wrong person can lead to costly mistakes, frustrating delays, and a finished product you’re not happy with. Trusting your intuition is key. If a potential installer gives you a bad feeling or raises any doubts, it’s often best to walk away. Pay close attention to these major red flags during the hiring process to protect your home and your investment.

Missing a License, Insurance, or Verifiable Portfolio

This is a non-negotiable. A professional installer must have a valid license and current insurance, including liability and worker’s compensation. If they don’t, you could be held financially responsible for any accidents or injuries that happen on your property. Don’t just take their word for it; ask to see the documents and verify that they are up to date. A portfolio is just as important, as it’s proof of their skill and experience. An installer who is proud of their work will be eager to show you examples of their completed porcelain and natural stone projects. If they can’t provide a portfolio or their examples seem questionable, consider it a sign to look elsewhere.

Vague Pricing, Unclear Contracts, or Poor Communication

Clear communication is the foundation of a successful project. From your very first conversation, a professional should be responsive, transparent, and willing to answer all your questions. Be wary of anyone who provides a vague quote without a detailed breakdown of costs for labor and materials. A legitimate bid will be itemized and clear. Similarly, never move forward without a written contract that outlines the full scope of work, a project timeline, the payment schedule, and specific materials to be used. If an installer is hesitant to put everything in writing or pressures you to agree to a verbal deal, it’s a major red flag. Your home remodeling project deserves a clear and professional approach from start to finish.

Get Your Space Ready for Tile Installation

Once you’ve chosen your installer, you’re one step closer to your beautiful new porcelain tile space. Before the team arrives, there are a few things you can do to prepare your home and ensure the installation process is as smooth as possible. A little prep work goes a long way in helping the project run on time and lets the professionals focus on what they do best: creating a flawless finish. Knowing what to expect will also give you peace of mind as your vision comes to life.

Preparing Your Subfloor and Surfaces

A beautiful tile installation starts with a strong foundation. Your installer will tell you that porcelain and natural stone tile requires a completely stiff and rigid surface to prevent cracks and movement over time. Depending on your home’s structure, this might mean adding extra subflooring or bracing to the walls. This step is non-negotiable for a long-lasting result.

A professional installer has the expertise to properly prepare these surfaces, ensuring everything is perfectly level, clean, and ready for tile. This meticulous prep work is what prevents future headaches like water damage or loose tiles. While your installer handles the technical work, clearing the room of furniture and personal items beforehand will help them get started right away.

What to Expect on Installation Day

On installation day, your project team will arrive ready to transform your space. Before they begin, they will likely inspect the tiles. While manufacturers have a grading process, an occasional blemished tile can slip through. A good installer catches these things before they are permanently set in your floor or wall.

After the last tile is laid and the area is cleaned up, you’ll have a final walkthrough with the project manager. This is your opportunity to review the finished work and make sure every detail meets your expectations. A reputable company will not consider the job done until you are completely satisfied. This final check ensures your new home remodeling project is exactly what you envisioned.

Related Articles

Frequently Asked Questions

What’s the real difference between porcelain tile and porcelain pavers? Think of them as siblings designed for different environments. Porcelain tiles are made for indoor use on floors and walls. Porcelain pavers, on the other hand, are much thicker and specifically engineered to handle the outdoors. They can withstand harsh weather, temperature swings, and direct sunlight without cracking or fading, which makes them perfect for patios, pool decks, and walkways.

Is porcelain tile difficult to take care of? Not at all, which is one of its biggest selling points. Because porcelain is non-porous, it naturally resists stains, water, and scratches. For day-to-day cleaning, a simple sweep and occasional mopping with a pH-neutral cleaner is all you need to keep it looking new. This low-maintenance quality makes it a practical and beautiful choice for busy households.

Why can’t I just hire the cheapest installer I find? While saving money is always tempting, a low price can often signal bigger problems. The cheapest bid might come from an installer who cuts corners on crucial prep work, uses subpar materials, or lacks proper insurance. These shortcuts can lead to cracked tiles, uneven surfaces, and water damage, costing you far more in repairs down the road. A quality installation is an investment in your home’s long-term value.

How long will my home be under construction during a tile installation? The timeline really depends on the size and complexity of your project. A small, straightforward backsplash might only take a day or two, while a large floor with extensive prep work could take a week or more. Factors like removing old flooring, leveling the subfloor, and allowing proper drying time for mortar and grout all play a role. Your installer should give you a clear, detailed timeline before any work begins.

Besides the tile itself, what other costs should I budget for? It’s smart to plan for more than just the tile. Your total cost will also include labor, setting materials like mortar and grout, and any necessary prep work. This could involve removing old flooring, repairing or leveling the subfloor, or adding waterproofing membranes in wet areas like bathrooms. A detailed contract from your installer should outline all these potential costs so there are no surprises.

Share this page:
Large-format porcelain pavers forming a modern stone-look patio on Long Island

Long Island Porcelain Pavers: Patio & Driveway Guide

On Long Island, a patio or driveway has to handle more than summer foot traffic. Freeze-thaw cycles, salt, rain, vehicle weight, and changing light all test the materials and the installation beneath them. The right paving system starts with choosing a format suited to the space, then matching the base, drainage, and joint treatment to its intended use.

Schedule a free porcelain paver design consultation with Gappsi today.

Porcelain pavers can provide a practical surface for patios and properly designed driveways when the product and installation method match the application. In particular, 20mm Italian porcelain is engineered for exterior residential and commercial use, while vehicle-rated installations require a reinforced concrete base to help prevent cracking. Its dense composition also supports very low water absorption, which can simplify long-term care. Research on porcelain densification links high-temperature firing with reduced water absorption.

From large-format stone-look finishes to thresholds, drainage, and winter performance, the best choice depends on how the surface will be used. The material benefits become clearer when viewed alongside the comfort, appearance, and climate demands shaping Long Island outdoor projects.

Why Long Island Homeowners Are Switching to Porcelain Pavers

Long Island patios and walkways need to handle bright summer sun, wet weather, and repeated winter freeze-thaw cycles. Porcelain pavers give homeowners a way to combine a deliberate design with practical outdoor performance. Their dense surface can reproduce the appearance of wood, slate, or natural stone, while the material avoids some of the upkeep associated with those finishes. For a broader look at available materials and applications, explore these porcelain and natural stone pavers.

Schedule a free porcelain paver design consultation with Gappsi at 631-831-3177.

Design flexibility without a busy surface

Porcelain makes it easier to coordinate a patio with the rest of an outdoor living project. A wood-look finish can add warmth around a seating area, while a slate or stone-look surface can connect a patio to masonry, planting beds, or a pool surround. Large-format pavers reduce the number of visible joints, creating a cleaner, more continuous field across a patio. That proportion can make a compact Nassau or Suffolk yard feel more organized without relying on decorative patterns that compete with the landscape.

The material also offers a consistent appearance from one piece to the next. Natural stone can vary in color and texture, which some homeowners appreciate, but porcelain provides more control when the goal is a coordinated installation. It can support a restrained palette across patios, walkways, and other connected surfaces.

More comfortable surfaces in direct sun

Outdoor paving should be comfortable as well as attractive. Porcelain pavers have a low thermal mass compared with natural stone, so they stay cooler to the touch in direct sunlight. That difference can matter around outdoor dining areas, lounge furniture, and paths used by children and guests during the hottest part of the day. Shade, color, and site orientation still affect surface temperature, but material selection is an important part of the planning process.

Built for Long Island weather

Winter performance is a central consideration for any Long Island hardscape. 20mm porcelain pavers offer frost resistance, helping them withstand freeze-thaw conditions when the system is designed and installed correctly. Their resistance to frost-thaw damage helps reduce the risk of winter cracking or flaking. This does not eliminate the need for proper grading, drainage, edge restraint, and base preparation. Instead, it gives the installation a material suited to the local climate, whether the project is a patio, walkway, or another low-traffic outdoor surface.

Porcelain Pavers vs. Concrete Pavers: Which Is Right for You?

The better surface depends on how you use the space, the base beneath it, and how much maintenance you want to handle. Porcelain pavers offer a dense, non-porous surface with a consistent appearance, while concrete pavers provide a familiar, adaptable option for patios, walkways, and other hardscape applications. The comparison below highlights the practical differences that matter on Long Island properties.

Porcelain pavers compared with concrete pavers
Consideration Porcelain pavers Concrete pavers
Water absorption Non-porous and highly resistant to water absorption, stains, mold, and moss. See the technical background on porcelain paving. More porous than porcelain, so surface exposure and joint condition can influence staining and moisture management.
Sealing Does not require sealing to maintain its appearance or functional properties. May require sealing depending on the selected product, finish, and the owner’s maintenance preference.
Maintenance Routine cleaning with soap and water is generally sufficient. Exterior-grade or polymeric sand in the joints helps inhibit weeds. Maintenance can include cleaning, joint care, and periodic attention to stains or surface wear.
Lifespan 20mm porcelain is rated for commercial-grade use because of its breaking strength and abrasion resistance. Service life depends heavily on product quality, base preparation, drainage, traffic, and freeze-thaw exposure.
Freeze-thaw performance 20mm porcelain is frost-resistant and designed to withstand Long Island winter freeze-thaw cycles when correctly installed. Performance varies with the concrete mix, installation, drainage, and winter exposure. Poor preparation can increase cracking or movement risk.
Vehicle rating Vehicle-rated porcelain can serve driveways, but it must be installed over a reinforced concrete base to help prevent cracking under vehicle weight. Concrete pavers are commonly used for driveways, but the base, edge restraint, drainage, and installation method still determine performance.
Aesthetics Large-format pieces create fewer joints, with looks that can mimic stone, slate, or wood. Porcelain also provides consistent color and texture. Offers broad shape, color, and pattern flexibility, though color consistency and surface appearance depend on the selected product.

Porcelain also has practical advantages around entertaining areas. It resists heat and grease stains from grills, making it a useful surface for an outdoor kitchen. Its 20mm thickness is approximately 3/4 inch, compared with traditional 2 to 3 inch concrete pavers. So it can integrate more easily with existing door thresholds when the assembly and drainage are properly planned.

In short, choose porcelain when low absorption, no sealing, freeze-thaw resistance, and a refined large-format look are priorities. Concrete may be the better fit when a different pattern, thickness, or installation budget aligns with the project. The right decision should account for the complete system, not just the paver material.

What Makes 20mm Porcelain Pavers Different for Patios and Driveways?

The 20mm specification is more than a measurement. It identifies a thick, dense porcelain paving product engineered for exterior residential and commercial applications, rather than a thin indoor tile adapted for outdoor use. Italian porcelain paving in this format is designed to provide load-bearing performance when the installation system matches the intended use. You can review material options in a porcelain paver showroom on Long Island before choosing a surface for a patio, walkway, or driveway.

That distinction matters because the paver and the base work together. A 20mm slab can be suitable for demanding outdoor areas, but a driveway still requires a properly designed foundation and vehicle-rated installation. For vehicle applications, the pavers should be installed over a reinforced concrete base to help prevent cracking under the weight of a car. Patios and pedestrian areas may use different systems depending on soil conditions, drainage, traffic, and the finished elevation.

High density for busy outdoor spaces

High density gives 20mm porcelain pavers strong resistance to weight and impact, which is useful on patios that hold dining furniture, grills, planters, and regular foot traffic. The same properties support commercial-grade use in public spaces, where abrasion and repeated traffic place greater demands on the surface. This does not eliminate the need for correct handling or installation. The sub-base, slab, bedding material, edge restraints, and joints must all be selected for the site.

Resistance to stains, mold, and moss

Porcelain pavers are highly resistant to staining, mold, and moss. Their non-porous composition also means they do not require sealing to maintain their appearance or functional properties. Occasional cleaning with soap and water can remove surface debris before it builds up. This makes the material a practical choice for outdoor dining areas and patios where food, soil, and seasonal moisture are part of normal use.

Slip resistance around water

For pool decks and other wet areas, look for an R11 slip-rated finish. This rating supports safer footing where water is frequently present. Porcelain is also resistant to salt and chlorine exposure, which can be important around pools. The finish, slope, drainage, and installation details still matter, so the paver should be evaluated as part of the complete outdoor surface rather than as an isolated product.

How Do You Install Porcelain Pavers Over Gravel or a Concrete Base?

The right installation method depends on the surface, expected traffic, drainage needs, and finished elevation. A low-traffic garden path may use a dry-lay approach, while a driveway requires a structural base designed for vehicle loads. In every case, the installer should confirm grading, account for water movement, and protect the finished height at doors and other thresholds.

Modern stone-look porcelain paver installation on a Long Island patio

Compacted Granular Sub-Base

For a driveway or a heavily used patio, base preparation is the part that determines long-term stability. The typical assembly includes a compacted granular sub-base, a geotextile layer, and a rigid concrete slab where the application requires it. The granular material must be placed and compacted evenly rather than left loose beneath the pavers. Proper grading should direct water away from the foundation, and the edge restraint should keep the installation from shifting laterally.

Vehicle-rated porcelain pavers must be installed over reinforced concrete to help prevent cracking under the weight and movement of vehicles. A gravel-only installation is not an appropriate substitute for a reinforced structural base in a driveway. The paver specification, slab design, drainage plan, and joint treatment should be reviewed together before installation begins.

Dry-Lay Over Grass or Gravel

A dry-lay application can work for a temporary or low-traffic landscape path. Porcelain pavers may be set directly onto prepared grass or gravel, creating stepping areas without the same structural assembly used for a driveway. This approach is useful when the goal is a flexible garden route or a surface that can be adjusted later. It is not the right choice for vehicle traffic, concentrated loads, or areas where unstable soil may cause movement.

Spacing, level transitions, and drainage still matter. The pavers should sit firmly, remain reasonably flush with surrounding surfaces, and avoid locations where runoff can undermine the supporting material. An installer can recommend whether the site needs excavation, additional aggregate, or a more rigid system.

Thin-Set Over a Stable Concrete Slab

When an existing concrete slab is stable and level, 20mm porcelain can be installed with a thin-set mortar system. The slab should be evaluated for cracking, settlement, drainage, and bond suitability before mortar is applied. This method can simplify a renovation because the 20mm thickness integrates more easily with existing doors and thresholds than thicker concrete pavers. It still requires appropriate exterior-rated materials, sound surface preparation, and movement-joint planning.

Pedestal Systems for Elevated Decks

For elevated decks or rooftop-style outdoor areas, a pedestal system supports the pavers above the structural surface. The open assembly can conceal drainage pipes and leave access for utility maintenance without removing the entire surface. Pedestal height, spacing, edge detailing, and load requirements must be designed for the specific deck. This system is best handled as a coordinated design and installation project rather than treated as a simple gravel placement.

Are Porcelain Pavers a Good Choice for a Long Island Driveway?

Yes, porcelain pavers can be used for a driveway, but only when the product and installation system are designed for vehicle traffic. A driveway is not the place for a casual dry-lay installation over soil, grass, or loose gravel. Gappsi offers residential and commercial vehicle-rated porcelain pavers, with installation planned around the loads, drainage, and winter conditions specific to the property.

The base matters as much as the paver

For vehicle-rated applications, 20mm porcelain pavers must be installed over a reinforced concrete base. The rigid slab distributes the weight of cars and helps prevent cracking. Without that structural support, even a strong paver can be exposed to movement or concentrated loads that the surface system was not designed to handle.

Proper driveway preparation typically includes a compacted granular sub-base, a geotextile layer where appropriate, and a reinforced concrete slab. The base should also be properly graded so water moves away from the home rather than collecting beneath the paving. If an existing concrete driveway is stable, level, and structurally sound, 20mm porcelain may be installed over it with a thin-set mortar system. The condition of that slab must be evaluated before selecting this approach.

Why 20mm porcelain works for vehicle areas

At 20mm, these large-format pavers provide a practical balance between exterior durability and finished elevation. Their thin profile integrates more easily with thresholds than traditional 2 to 3 inch concrete pavers, which can simplify transitions at a garage, walkway, or front entry. Larger formats can also reduce the number of joints across the driveway, creating a cleaner surface with fewer joint lines to coordinate.

Look for a product with a commercial-grade load and abrasion rating, not simply a decorative outdoor tile. High-density 20mm porcelain is engineered for exterior residential and commercial applications. And its resistance to weight and impact makes it suitable for high-traffic areas when installed over the correct base.

What about stains, winter weather, and joints?

Porcelain’s non-porous surface is highly resistant to oil stains, mold, and moss, and it does not require sealing to preserve its functional properties. However, the joints and drainage details still matter. Exterior-grade or polymeric joint material helps stabilize the surface and inhibit weeds. On Long Island, frost resistance is another important consideration, since freeze-thaw cycles can expose weak installation systems.

The right answer is therefore conditional but clear: vehicle-rated porcelain pavers are a sound Long Island driveway option when installed over a reinforced concrete base. Product rating, slab design, slope, joints, and transitions should be reviewed together before work begins.

How Do You Maintain Porcelain Pavers to Keep Them Looking New?

Do porcelain pavers require maintenance? Yes, but the routine is straightforward. Their non-porous surface does not absorb moisture or common spills the way porous concrete and natural stone can. So they do not need periodic sealing to preserve their appearance or performance. For homeowners who use a patio, pool deck, or outdoor kitchen regularly. That difference can reduce both upkeep and the risk of a surface that becomes difficult to clean.

Clean spills before they become surface buildup

For ordinary care, sweep away leaves, soil, and other loose debris, then wash the surface occasionally with soap and water. This removes surface residue before it accumulates in textured areas or joints. Porcelain is highly resistant to staining, so common outdoor messes such as food, oil. And wine are less likely to leave a permanent mark than they would on an unsealed porous surface. Its dense finish also helps resist acids and pool chemicals, although wiping up concentrated spills promptly is still a sensible practice.

Unlike tinted concrete, porcelain pavers maintain color stability under intense UV exposure, so sunlight does not cause the same type of gradual fading. The material also contains no organic binders, which means it does not provide a food source for mold or fungus. That resistance helps keep the surface cleaner between washings, particularly in shaded or damp parts of a Long Island property.

Keep the joints stable and weed-resistant

Maintenance also depends on what surrounds each paver. Joints should be filled with an appropriate exterior-grade or polymeric sand. This helps stabilize the surface and inhibits weed growth, reducing the need for repeated hand removal or chemical treatments. Check the joints after heavy rain, winter weather, or pressure washing. If sand has been displaced, have the affected areas replenished using the correct joint material rather than sweeping in ordinary loose sand.

Use the right approach for seasonal care

Long Island freeze-thaw cycles make sound installation important, but 20mm porcelain is designed for frost resistance and should not crack or flake simply because of severe winter conditions. Use a broom or a suitable plastic shovel for snow removal, and avoid striking the pavers with metal tools. For pool areas, porcelain’s resistance to salt and chlorine supports easier seasonal care. For a patio or driveway with a persistent stain, consult the installer before using an abrasive cleaner or aggressive pressure-washing setting. In most cases, occasional gentle cleaning, sound joints, and prompt attention to spills are enough to keep the surface looking consistent for years.

Request your free porcelain paver consultation for a Long Island patio or driveway.

Frequently Asked Questions

Can porcelain pavers be used for driveways?

Yes, but a driveway requires vehicle-rated 20mm porcelain pavers installed over a reinforced concrete base. A compacted granular sub-base, geotextile layer, and rigid slab help support vehicle loads and reduce the risk of cracking. Dry-laying directly on grass or gravel is intended for temporary or low-traffic paths, not driveways.

What installation methods are available for porcelain pavers?

The right method depends on the site and traffic level. Low-traffic landscape paths may use a dry-lay installation over grass or gravel. Patios can be installed over a properly prepared base or set with thin-set mortar over a stable existing concrete slab. Pedestal systems are useful for elevated decks because they provide hidden drainage and access to utilities.

Are 20mm porcelain pavers suitable for Long Island winters?

20mm porcelain is designed for exterior use and offers frost resistance suited to Long Island’s freeze-thaw cycles. The installation still needs proper drainage, a stable base, and correctly prepared joints. The paver itself cannot compensate for settlement or trapped water beneath the surface.

Do porcelain pavers require sealing or extensive maintenance?

No sealing is typically required because porcelain is non-porous. Regular cleaning with soap and water removes surface debris, while exterior-grade or polymeric sand in the joints helps stabilize the installation and inhibit weeds. The surface also resists staining, mold, and moss.

Are porcelain pavers slippery when wet?

Choose a product with an appropriate slip-resistance rating for the intended location. An R11-rated porcelain paver is suited to areas frequently exposed to water, including pool decks. Surface texture, slope, drainage, and professional installation also affect how safely the finished area performs when wet.

Schedule Your Porcelain Paver Consultation

A thoughtful plan can help match your patio or driveway installation to the right paver thickness, base, drainage approach, and finish. Schedule a free porcelain paver design consultation with Gappsi for your Long Island project. Call 631-831-3177 to discuss your goals and next steps with the team.

Share this page: