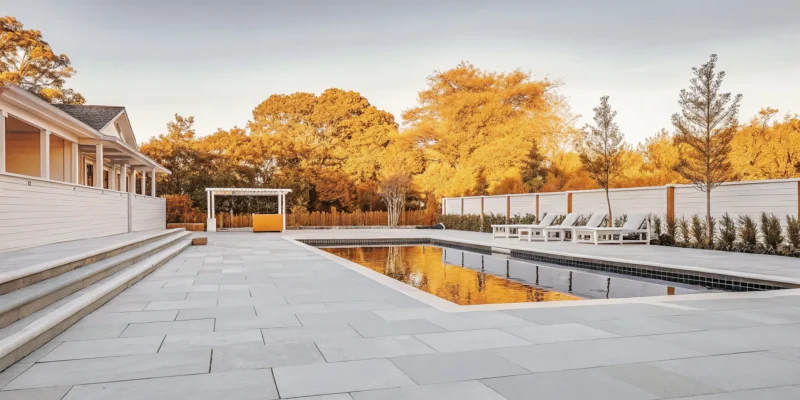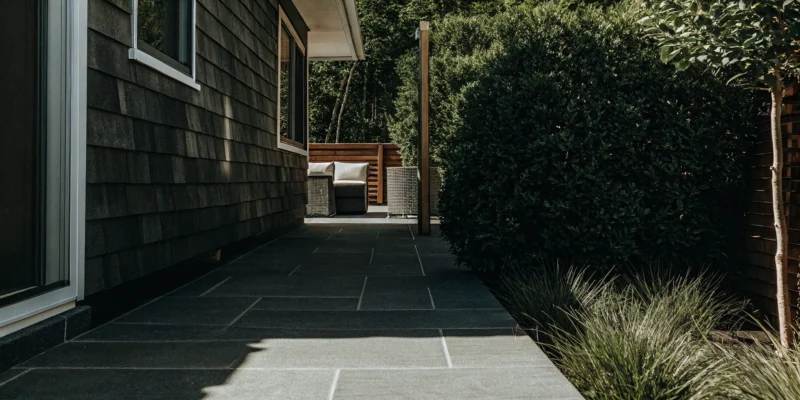
Outdoor tile patio installed by a Long Island contractor with modern stone pavers and seating.

Outdoor Tile Contractor Long Island: A Buyer’s Guide

You have a vision for your backyard: a beautiful, inviting space perfect for summer barbecues and quiet mornings. But turning that vision into reality can feel overwhelming. With so many choices for materials, from sleek porcelain to rustic natural stone, where do you even begin? And how can you be sure the finished project will last through Long Island’s tough seasons? This is where a professional comes in. Finding the right outdoor tile contractor Long Island has to offer is the key to a stress-free process and a flawless result. This guide breaks down the entire process into simple, actionable steps to help you plan with confidence.

Key Takeaways

  • Prioritize the foundation for a lasting project: Before choosing a tile pattern, focus on the essentials. Proper site preparation and a plan for water drainage are the most important steps for creating an outdoor space that will not shift, crack, or pool water over time.
  • Match the tile to your lifestyle: Select a tile material by balancing looks with real-world use. Think about durability for Long Island weather, slip resistance for safety around pools, and the maintenance level you are comfortable with to find the perfect surface for your home.
  • Vet your contractor to protect your investment: Choosing the right installer is as crucial as choosing the right tile. Always confirm they are licensed and insured, look through their portfolio of past projects, and compare detailed quotes to find a true professional who guarantees quality workmanship.

What Does an Outdoor Tile Contractor Do?

An outdoor tile contractor does more than just lay down pavers. They are skilled professionals who manage your project from the initial idea to the final, beautiful result. Think of them as your expert partner in transforming your outdoor space. Their work typically falls into three main categories: installation, design, and maintenance. Understanding what they do helps you know what to expect and how to work together to create the backyard of your dreams.

Tile Installation Services

The most visible part of a contractor’s job is, of course, the installation. This is where their technical skill really shines. A professional contractor ensures your project is built on a solid foundation, handling all the necessary prep work to prevent shifting or cracking down the line. They specialize in installing a wide range of materials, from elegant porcelain pavers to classic natural stone. Their expertise guarantees that every tile is perfectly placed, properly grouted, and ready to withstand Long Island’s weather for years to come. It’s this attention to detail that separates a DIY job from a lasting, professional installation.

Design and Consultation

Before a single tile is laid, a great contractor provides design and consultation services. This is where your vision starts to take shape. They work with you to understand your style, how you plan to use the space, and what your budget looks like. A contractor will help you sort through the vast world of tile options, explaining the pros and cons of different materials, colors, and patterns. This collaborative process ensures the final design is not only beautiful but also practical for your family’s needs. Gappsi’s approach to custom masonry design focuses on creating a space that is uniquely yours, blending seamlessly with your home and landscape.

Restoration and Sealing

A contractor’s work doesn’t have to end once the installation is complete. To protect your investment, many professionals also offer maintenance services. Over time, outdoor tiles are exposed to foot traffic, weather, and potential stains. Professional restoration and sealing services are key to keeping your patio or walkway looking brand new. This can involve deep cleaning to remove grime and moss, repairing any minor damage, and applying a high-quality sealant. Sealing helps guard against water damage, stains, and fading from the sun, preserving the beauty of your tiles for the long haul.

What Types of Outdoor Tiles Are There?

Choosing the right tile for your outdoor space can feel like a big decision, but it’s also where the fun begins. The material you select sets the tone for your entire patio, walkway, or pool deck. From the sleek, modern look of porcelain to the timeless elegance of natural stone, each option offers a unique combination of style, durability, and feel. Understanding the differences will help you find the perfect match for your Long Island home and lifestyle. Let’s walk through some of the most popular choices so you can feel confident in your selection.

Porcelain Pavers

If you’re looking for a material that combines sophisticated style with incredible strength, porcelain pavers are an excellent choice. Unlike indoor porcelain tiles, these pavers are thicker and built to withstand the elements. They are highly durable, non-porous, and resistant to water, stains, and fading from the sun. This makes them a fantastic, low-maintenance option for high-traffic areas like patios and pool decks.

Because they absorb very little water, porcelain pavers are also frost-resistant, a must-have feature for Long Island’s freeze-thaw cycles. Plus, their natural slip resistance provides peace of mind for families with children. With a huge variety of colors and patterns available, including designs that beautifully mimic natural stone and wood, you can achieve almost any look without compromising on performance. Gappsi offers a wide selection of high-quality porcelain and natural stone pavers to fit your design vision.

Natural Stone

There is something truly special about natural stone. Each piece is completely unique, with its own distinct colors, textures, and patterns shaped by the earth over millions of years. This one-of-a-kind character brings an unmatched sense of luxury and permanence to any outdoor project. As a leading Long Island masonry design firm, Gappsi specializes in creating stunning outdoor living spaces with custom-carved natural stone.

Popular options like granite, bluestone, and limestone are known for their durability and classic appeal. While natural stone is a premium investment, its beauty is timeless and can last a lifetime with proper care. It creates a seamless connection between your home and the natural landscape, adding significant value and curb appeal. Whether you envision a rustic flagstone patio or a formal bluestone walkway, natural stone delivers an authentic, high-end finish.

Travertine and Slate

Within the world of natural stone, travertine and slate are two standout options with distinct personalities. Travertine, a type of limestone, is prized for its warm, earthy tones and soft, elegant appearance. One of its most celebrated qualities is its ability to stay cool to the touch even in direct sunlight, making it a perfect material for pool surrounds and patios where you’ll be walking barefoot. Its naturally porous surface gives it a beautiful texture, though it does require sealing to protect against stains.

Slate offers a more dramatic and richly colored alternative. Available in shades of blue, gray, green, and purple, its naturally layered surface provides excellent slip resistance. Slate is incredibly dense and durable, standing up well to heavy foot traffic and harsh weather. Both travertine and slate bring a touch of organic sophistication to any outdoor design, and you can explore these options in the Gappsi stone collection.

Ceramic and Concrete Tiles

While often associated with indoor applications, certain ceramic and concrete tiles are specifically engineered for outdoor use. It’s crucial to select tiles that are rated for exterior conditions, as these are made to endure extreme temperatures and moisture without cracking. Quarry tile, a type of unglazed ceramic, is a classic, hard-wearing choice that provides a rustic, practical surface for patios and walkways.

Concrete pavers are another versatile and often more budget-friendly option. They can be molded into a wide array of shapes, sizes, and colors, giving you immense design flexibility. From tiles that mimic cobblestone to large, sleek modern slabs, concrete can adapt to any style. Both ceramic and concrete tiles require proper installation and often benefit from sealing to prevent staining and weather damage, a service our restoration and sealing team can provide to ensure their longevity.

How to Choose the Right Outdoor Tile for Your Home

Selecting the perfect outdoor tile is about more than just picking a color you like. It’s a decision that balances durability, safety, and your personal style to create a space that’s both beautiful and functional. The right tile can completely transform a simple patio into a stunning outdoor living room or make a pool deck feel like a resort. On Long Island, where we experience everything from hot, sunny summers to freezing, icy winters, your choice matters even more. You need a material that can handle the elements without cracking, fading, or becoming a safety hazard.

Think of it as setting the stage for your entire outdoor area. The tile you choose will influence everything from your furniture choices to the overall mood of your backyard. By focusing on a few key factors, you can narrow down the options and find a tile that not only looks fantastic but also stands the test of time. We’ll walk through the most important considerations: how well the tile holds up to weather, how safe it is underfoot, and how it complements your home’s aesthetic. This will help you make a confident choice for your masonry project.

Durability and Weather

Your outdoor tiles will be exposed to everything our Long Island weather throws at them, so durability is non-negotiable. You need a material that can withstand freeze-thaw cycles without cracking and resist fading under the summer sun. Materials like porcelain and natural stone are excellent choices because they are specifically designed for these challenges. Porcelain, in particular, is a powerhouse for outdoor use. It’s incredibly dense and non-porous, meaning it absorbs very little water. This quality makes it highly resistant to frost damage, staining, and moisture, which is why it’s a top pick for patios, walkways, and pool surrounds. Choosing a weather-resistant tile from the start saves you from costly repairs and replacements down the road.

Slip Resistance and Safety

Safety should always be a priority, especially in outdoor areas that get wet. Patios, pool decks, and walkways can become slippery when it rains or when kids are splashing around, so choosing a tile with good slip resistance is essential. When you’re looking at tile options, check for a high coefficient of friction (COF) rating, which indicates how much grip the surface provides. Many outdoor tiles, especially porcelain, are manufactured with a slightly textured surface to provide better traction. This is a critical feature for ensuring your beautiful new outdoor space is safe for family and guests. A slip-resistant surface gives you peace of mind, allowing everyone to enjoy the swimming pool and patio area without worry.

Aesthetics and Style

Once you’ve addressed durability and safety, you can focus on the fun part: style. The tile you select is a major design element that sets the tone for your entire outdoor living space. Do you envision a sleek, modern patio or a rustic, natural retreat? Your tile choice can bring that vision to life. Start by considering the function of the space and your home’s existing architecture. You can find tiles that mimic the look of natural wood, slate, or stone, giving you endless design possibilities. Browsing different materials at the Gappsi Store can help you find a surface that supports both your design vision and the practical needs of your project, ensuring your outdoor area is a true extension of your home.

Where to Install Outdoor Tile

Outdoor tile isn’t just for patios anymore. Its versatility allows you to create cohesive, beautiful, and functional spaces throughout your entire property. From high-traffic walkways to relaxing poolside lounges, the right tile can define a space and tie your whole outdoor design together. Let’s look at some of the most popular places to install outdoor tile and why it works so well in each.

Patios and Pool Decks

Your patio and pool deck are the heart of your backyard, so they need to be both beautiful and tough. This is where outdoor tile truly shines. Materials like porcelain are perfect because they can handle Long Island’s changing seasons, from hot summer days to freezing winter nights. Many tile options are also slip-resistant, which is a must-have for safety around a swimming pool. You get a durable, safe surface that also looks incredible, creating the perfect spot for sunbathing, entertaining, or just relaxing with your family. It’s a practical upgrade that adds a touch of luxury to your outdoor living area.

Walkways and Driveways

First impressions matter, and your walkways and driveway set the tone for your entire home. Using outdoor tile in these areas creates a polished, high-end look that instantly improves curb appeal. Porcelain pavers are an excellent choice because they are incredibly strong and can withstand the weight of vehicles and heavy foot traffic. They are also resistant to water and stains, making them a low-maintenance option for a busy entryway. A well-designed masonry walkway or driveway apron made with tile not only looks fantastic but also provides a durable, long-lasting surface that will welcome you home for years to come.

Outdoor Kitchens

An outdoor kitchen is all about combining function with fun, and the right tile is key to achieving that balance. For flooring, you need something that can handle spills, foot traffic, and the occasional dropped utensil. On countertops and backsplashes, the tile must be easy to clean and resistant to heat and stains from food and grease. Porcelain and natural stone tiles are fantastic choices for all these surfaces. They provide a clean, hygienic, and durable foundation for your cooking area, allowing you to focus on grilling and entertaining without worrying about messes.

How Much Does Outdoor Tile Installation Cost on Long Island?

Understanding the budget for your outdoor tile project is one of the first and most important steps. The total cost is a blend of two main things: the materials you choose and the labor required to install them perfectly. While it’s tempting to look for the lowest number, think of this as an investment in your home’s value and your family’s enjoyment. A well-installed tile patio or walkway will last for decades, so getting it right from the start is key. On Long Island, prices can vary, but a quality contractor will give you a clear breakdown of what you’re paying for.

Material Costs

The tiles themselves are your first major expense. Material costs can range from a few dollars per square foot to much more, depending on what you select. For example, basic ceramic tiles will be on the lower end, while high-end porcelain and natural stone pavers will be a larger investment. The great thing is, you have options. Your choice affects not just the look but also the durability of your space. A premium porcelain paver, for instance, might cost more initially but its resistance to stains, frost, and wear can save you money on maintenance and replacement down the road.

Labor vs. Materials

Labor is the other half of the cost equation, and it’s just as important as the materials. You can expect labor for outdoor tile installation to range from $5 to $15 per square foot, and many professional installers have a minimum fee for smaller projects. This cost covers the skill and time of the installation team. Proper masonry work is an art, especially outdoors where the base preparation is critical for a long-lasting result. Paying for experienced labor means you’re paying for a job done right, preventing future issues like cracked tiles or an uneven surface.

What Affects the Final Price?

Several factors will influence your final quote. The total square footage of the area is a big one, of course. The type of tile you choose and the complexity of the design also play a major role; a simple grid pattern is quicker to install than an intricate mosaic. Most importantly, outdoor installations require specific preparation to withstand Long Island’s weather. This includes creating a proper base, ensuring correct drainage, and using materials that can handle freeze-thaw cycles. This expert prep work is crucial and will be factored into the cost by any reputable contractor.

How to Plan Your Outdoor Tile Project

A beautiful outdoor tile project doesn’t just happen, it’s the result of careful planning. Thinking through the details before the work begins ensures your new patio, walkway, or pool deck not only looks fantastic but also stands the test of time. From preparing the ground to setting a realistic budget, each step is a building block for a successful outcome. Let’s walk through the key stages of planning your project so you can feel confident and prepared.

Site Prep and Conditions

Before any tile can be laid, the ground beneath it needs to be perfectly prepared. Think of it as the foundation of your project, everything else rests on it. A quality installation requires proper base preparation, leveling, and compaction to ensure durability and longevity. This process often involves excavating the area, laying a sub-base of gravel, and ensuring it’s perfectly flat and compacted.

This step is critical for preventing tiles from shifting, cracking, or becoming uneven over time. A professional contractor will assess your specific site conditions, including soil type and existing landscape features, to create a stable base. Proper site preparation is truly the most important factor for a lasting outdoor tile installation.

Drainage and Slope

Water is the biggest enemy of any outdoor hardscape. Without a proper drainage plan, water can pool on the surface, seep into the grout and base, and cause major damage, especially during Long Island’s freeze-thaw cycles. This is why creating a gentle slope is a non-negotiable part of the installation process. The slope, usually unnoticeable to the eye, directs water away from your home’s foundation and prevents it from sitting on the tile.

Understanding how different materials respond to environmental stress is crucial for making choices that align with your outdoor setting. Your contractor will design a drainage system that works with your chosen tile and landscape. For areas like pool decks, effective drainage is essential for both safety and durability.

Choosing a Layout and Pattern

Now for the fun part: deciding how your tiles will look. The layout and pattern you choose have a huge impact on the overall style of your space. A simple running bond pattern can feel classic and clean, while a herringbone or basketweave design adds a touch of elegance and visual interest. The best choice often balances aesthetics with performance, ensuring the design complements your outdoor space.

Consider the size of the area. Large-format tiles can make a small patio feel more spacious, while intricate patterns can define different zones in a larger outdoor living area. We recommend browsing a gallery of porcelain and natural stone projects to find inspiration and see how different patterns work in real-world settings.

Maintenance Needs

To keep your outdoor tile looking its best, you need to consider its long-term maintenance needs. Your lifestyle and how much time you want to spend on upkeep should influence your material choice. For example, many porcelain tiles can withstand extreme outdoor conditions, making them a fantastic, low-maintenance option for outdoor living areas.

On the other hand, some beautiful natural stones may require periodic sealing to protect them from stains and weathering. Be honest with yourself about what you’re willing to commit to. Discussing the maintenance requirements of different materials with your contractor will help you select a tile that fits your home and your routine. If you do choose a material that needs upkeep, professional cleaning and sealing services can keep it in top condition.

Setting a Budget and Timeline

Finalizing your budget and timeline is the last major planning step. Your total project cost will be a combination of materials and labor. While online guides suggest labor costs for standard tile installation can range from $5 to $15 per square foot, every project is unique. Factors like site accessibility, project complexity, and the type of tile you choose will all affect the final price.

The best way to get an accurate number is to get a detailed quote from your contractor. When it comes to timeline, be sure to account for potential weather delays and material lead times. Visiting a showroom like the Gappsi Store can help you understand material costs and availability, allowing you to create a more realistic budget and schedule for your project.

How to Choose the Right Outdoor Tile Contractor

Finding the right contractor is just as important as picking the perfect tile for your patio or pool deck. The right team will bring your vision to life, ensuring your new outdoor space is not only beautiful but also durable and professionally installed. A great contractor handles everything from proper site preparation to the final sealing, giving you peace of mind. Making the right choice means your investment will last for years to come. Here’s what to focus on when you’re ready to hire a professional for your outdoor tile project.

Check for Licenses and Insurance

This is the absolute first step and it’s non-negotiable. A licensed and insured contractor is a professional who meets state and local requirements. The license proves they have the necessary qualifications, while insurance protects you from any liability if an accident happens on your property during the project. Before you even discuss project details, ask for proof of both. A reputable company will provide this information without hesitation. Think of it as your first line of defense in ensuring your project is in capable hands. You can always verify a contractor’s license to be sure.

Review Their Portfolio

Once you’ve confirmed they’re licensed and insured, it’s time to look at their work. A portfolio is your window into a contractor’s craftsmanship, style, and experience. Ask to see photos and examples of outdoor tile projects they have completed, especially ones similar to what you have in mind. Pay close attention to the details: Are the grout lines clean and consistent? Do the patterns align perfectly? Does the overall finish look polished and professional? A strong portfolio filled with high-quality masonry projects shows a track record of success and helps you visualize what they can do for your home.

Questions to Ask Your Contractor

Walking into a consultation with a list of questions shows you’re a serious homeowner and helps you compare contractors effectively. Don’t be shy about digging into the details. Consider asking questions like:

  • What is your experience with the specific tile I want to use?
  • How will you prepare the site and ensure proper drainage?
  • What waterproofing methods do you use for outdoor installations?
  • Can you provide a detailed project timeline from start to finish?
  • What kind of warranty do you offer on your workmanship and the materials? The answers you receive will reveal a lot about their expertise and the level of service you can expect.

Compare Quotes

It’s always a good idea to get quotes from at least three different contractors. However, don’t let price be your only guide. The cheapest bid is often a red flag for subpar materials or rushed labor. When you compare contractor bids, make sure each quote provides a detailed breakdown of all costs, including materials, labor, site preparation, and any potential extra fees. A transparent, comprehensive quote is a sign of a trustworthy contractor. Your goal is to find the best value for your investment, which combines fair pricing with quality materials and expert installation for a result that lasts.

Why Choose Gappsi for Your Outdoor Tile Project?

Choosing the right contractor is the most important step in bringing your outdoor vision to life. You need a team that not only understands your goals but also has the expertise to execute them flawlessly. At Gappsi, we combine decades of local experience with a comprehensive, design-to-installation approach and the highest quality materials. This unique combination ensures your outdoor tile project is not just completed, but crafted to perfection.

Decades of Local Experience

With roots in Long Island since 1987, we’ve spent decades perfecting the art of outdoor living design. Our team has an intimate understanding of the local environment, from the coastal weather to the distinct architectural styles of Suffolk and Nassau County. This isn’t just a job for us; it’s our community. As a leading masonry firm, we specialize in creating beautiful, durable outdoor spaces with custom natural stone and elegant porcelain pavers. Our long history means we’ve built a reputation for excellence one project at a time, ensuring your patio, walkway, or pool deck is built to last and designed to impress. We know what works here because we live here, too.

All-in-One Design and Installation

We believe your home improvement project should be exciting, not stressful. That’s why we offer a seamless, all-in-one process that takes you from the first sketch to the final tile. As a full-service design and construction company, we manage every detail in-house. You’ll work with one dedicated team for the entire project, which means communication is clear, and the final result is cohesive. There’s no need to juggle multiple contractors or worry about different parts of the project lining up. We handle the design, material sourcing, and expert installation, so you can simply look forward to enjoying your beautiful new outdoor space.

Quality Materials from the Gappsi Store

A beautiful design deserves materials that will stand the test of time. The durability and look of your outdoor tile project depend entirely on the quality of the products used. We are committed to using only the best, which is why we source premium materials directly for our clients. You can explore a wide selection of top-tier porcelain and natural stone options, allowing you to see and feel the materials before making a decision. This commitment to quality ensures your investment not only looks stunning on day one but continues to add value and beauty to your home for years to come.

Related Articles

Frequently Asked Questions

What is the best type of tile for Long Island’s weather? For our specific climate with its hot summers and freezing winters, porcelain pavers are an outstanding choice. They are incredibly dense and absorb almost no water, which makes them highly resistant to the cracking that can happen during freeze-thaw cycles. They also hold up beautifully against sun fading and are very easy to clean. While natural stone is also a durable and beautiful option, porcelain offers that extra layer of low-maintenance peace of mind that many homeowners here appreciate.

Can I install new outdoor tile over my old concrete patio? This is a common question, and the answer is: maybe. It really depends on the condition of your existing concrete slab. If the concrete is in great shape, with no major cracks, and has the proper slope for drainage, it can sometimes serve as a base. However, if the slab is cracked, uneven, or pitched incorrectly, laying tile over it will only lead to problems. A professional contractor needs to assess the site to determine if the existing concrete is a sound foundation or if it needs to be removed to build a proper base from scratch.

How long does a typical outdoor tile installation take? The timeline for a project can vary quite a bit. A straightforward, smaller patio might only take a few days, while a larger, more complex project with intricate patterns or extensive site preparation could take a week or two. Factors like the size of the area, the type of tile, the amount of prep work needed, and of course, the weather, all play a role. A good contractor will provide you with a realistic timeline as part of their initial project plan.

How do I clean and maintain my new outdoor tile patio? Keeping your new tile looking great is usually pretty simple. For most routine cleaning, you can just sweep away debris and occasionally wash the surface with a gentle soap and water. For tougher spots, avoid harsh chemicals that could damage the tile or grout. The biggest maintenance step to consider is sealing. While porcelain often doesn’t require it, natural stone benefits greatly from a quality sealant every few years to protect it from stains and water damage.

Besides the tile and labor, what other costs should I expect? A comprehensive quote should cover more than just the materials and the act of laying them. The most significant additional cost is usually site preparation. This includes excavating the area, bringing in and compacting the proper base materials like gravel, and hauling away any old patio materials. The complexity of the design can also affect the price; for example, a herringbone pattern takes more time and skill to install than a simple grid. Make sure your quote clearly itemizes these aspects so you know exactly what you are paying for.
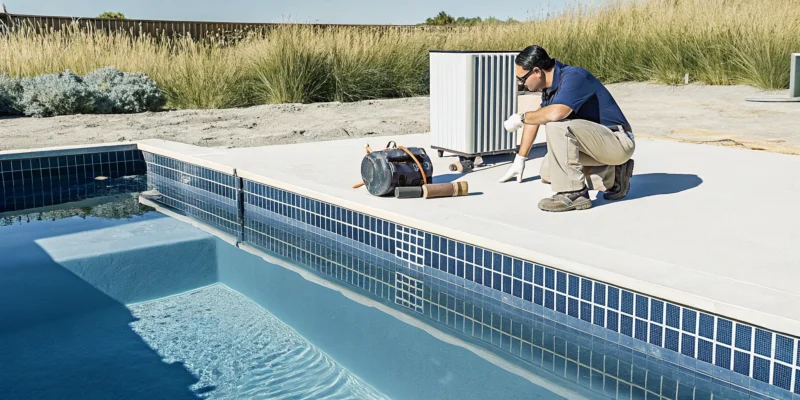
New pool equipment installation by a professional on Long Island.

A Guide to Pool Equipment Installation on Long Island

Owning a pool on Long Island comes with its own unique set of rules. Our weather, with its humid summers and freezing winters, puts specific demands on your pool’s machinery. A system that isn’t prepared for a sudden frost can lead to cracked pipes and ruined heaters. Beyond the climate, each town has its own building codes and permit requirements that must be followed perfectly. This is why local expertise is so critical. A successful pool equipment installation Long Island project depends on a team that understands these regional challenges, ensuring your system is not only efficient but also durable enough to handle whatever our seasons throw at it.

Key Takeaways

  • Professional Installation is Non-Negotiable: Hiring an experienced installer is crucial for safety, efficiency, and compliance with Long Island’s specific building codes. A professional setup protects your investment and prevents expensive future repairs.
  • Your Equipment Must Work as a System: Select a pump, filter, and heater that are correctly sized for your pool’s volume and are compatible with each other. A well-matched system runs more efficiently and lasts longer.
  • Plan for Local Long Island Factors: Your pool’s success depends on accounting for the local climate and regulations. This includes proper winterization to prevent freeze damage and securing the correct permits for your town.

What Is Pool Equipment Installation?

So, you’re dreaming of a beautiful swimming pool in your backyard. Beyond the sparkling water and stunning design, there’s a whole system working behind the scenes to keep it perfect. That’s where pool equipment installation comes in. Think of it as setting up the heart and lungs of your pool. This process involves installing all the essential components that make your pool function, from the pump that circulates water to the filter that keeps it clean and the heater that makes it comfortable.

The core equipment includes a pump, a filter, a heater, and a sanitization system like a salt chlorinator. The pump is the system’s powerhouse, moving water through the pipes. The filter acts like the kidneys, removing debris and impurities to keep your water crystal clear. A heater lets you extend your swim season into the cooler months, while the sanitization system ensures the water is safe and hygienic for your family. Proper installation means connecting all these pieces into one seamless, efficient system. It’s a technical process that ensures everything works together correctly, directly impacting your pool’s performance, your energy bills, and how long your expensive equipment will last. A well-installed system runs quietly and effectively, giving you more time to enjoy the water and less time worrying about maintenance.

Why Professional Setup Matters

While a DIY approach can be tempting, pool equipment installation is one area where professional expertise is non-negotiable. A pro setup protects your investment and ensures everything runs safely and correctly from day one. Professionals understand the technical details, like proper plumbing connections and electrical wiring, which are critical for both safety and efficiency.

More importantly, an experienced installer is familiar with Long Island’s specific building codes and permit requirements. This saves you from costly fines or the headache of having to redo work that isn’t compliant. Ultimately, investing in professional home improvement services for your pool means you’ll have an energy-efficient system that saves you money on utility bills and prevents expensive repairs down the road. It’s the smartest way to guarantee peace of mind and a perfectly functioning pool.

A Guide to Essential Pool Equipment

Think of your pool equipment as a team of specialists working together to keep your water sparkling and ready for a swim. Each piece has a specific job, and when they’re all chosen correctly and installed professionally, they create a seamless system that makes pool ownership a breeze. Understanding these essential components helps you make informed decisions for your backyard oasis, ensuring you get the most enjoyment out of your investment. Let’s look at the key players that make up your pool’s circulation and filtration system.

Pool Pumps

The pool pump is the heart of your swimming pool’s circulatory system. Its main job is to pull water from the pool and push it through the filter, heater, and chemical feeder before returning it, clean and treated, back to the pool. This constant circulation is what keeps your water from becoming stagnant and cloudy. Choosing the right size pump is critical; one that’s too small won’t clean your pool effectively, while one that’s too large wastes energy and money. We help you select a variable-speed pump that provides the perfect flow while keeping your energy bills down, making it a core part of our swimming pool installations.

Pool Filters

If the pump is the heart, the filter is the kidneys. This essential piece of equipment is responsible for capturing and removing dirt, debris, and other impurities from the water as it circulates. There are three main types of filters: sand, cartridge, and diatomaceous earth (DE), each with its own maintenance routine and filtering capabilities. A properly sized and maintained filter is your first line of defense against cloudy water and ensures a clean, safe swimming environment. During our design process, we’ll help you choose the best filter type for your pool’s specific needs and your desired level of maintenance, ensuring your water stays crystal clear all season long.

Pool Heaters

A pool heater is your ticket to a longer swimming season here on Long Island. Instead of limiting your pool days to just July and August, a reliable heater allows you to comfortably swim from early spring through the crisp days of fall. Imagine enjoying a warm dip on a cool May evening or extending your pool parties well into September. Modern heaters, including gas and electric heat pump models, are more energy-efficient than ever. We can help you select and install a heater that fits your pool size and budget, letting you maximize the time you spend enjoying your beautiful new swimming pool.

Sanitization Systems

A sanitization system is what keeps your pool water hygienic and safe by preventing the growth of algae and harmful bacteria. While traditional chlorine is a common choice, many homeowners now prefer saltwater sanitization systems. These systems use a generator to convert salt into chlorine, resulting in silky-soft water that’s gentler on your skin, eyes, and hair. It also eliminates the need to handle and store harsh liquid or tablet chlorine. We can walk you through the benefits of different sanitization options, like saltwater or advanced UV systems, to find the perfect fit for a low-maintenance and enjoyable swimming experience.

Smart Pool and Automation Systems

Smart automation brings modern convenience to your backyard, letting you manage your pool from anywhere using your smartphone. With an automation system, you can control your pump, heater, lighting, and even water features with the tap of a button. You can schedule the pump to run during off-peak hours to save energy or turn on the heater on your way home from work so the water is perfect when you arrive. This technology simplifies pool ownership, reduces manual work, and gives you more time to relax and have fun. Integrating smart features is a key part of our home remodeling and pool projects, creating a seamless experience from your house to your backyard.

How to Choose the Right Equipment for Your Pool

Selecting the right equipment is one of the most important decisions you’ll make for your new swimming pool. It’s the heart of your pool system, responsible for keeping the water clean, warm, and safe. While it’s easy to get caught up in the visual aspects like tile and coping, the gear running behind the scenes will define your day-to-day experience as a pool owner. Making smart choices here means less time on maintenance and more time enjoying the water.

The key is to find a balance between performance, cost, and convenience that fits your specific needs. You don’t necessarily need the most expensive option, but you do need the right one. Think of it as creating a custom system tailored to your pool’s size, your family’s lifestyle, and your budget. From the pump that circulates the water to the heater that extends your swimming season, every component plays a vital role. We’ll walk through the main factors to consider so you can feel confident in your equipment choices.

Consider Your Pool’s Size and Volume

Pool equipment isn’t a one-size-fits-all situation. The size and volume of your pool are the first things to consider when selecting a pump and filter. This machinery needs to be powerful enough to circulate and clean the entire volume of water in a reasonable amount of time, which is known as the turnover rate. An undersized pump will struggle to keep your water clear, while an oversized one will just waste energy and money. A professional can accurately calculate your pool’s volume and recommend equipment that is perfectly matched to its needs, ensuring your system runs efficiently from day one.

Think About How Often You’ll Use It

Be honest about your lifestyle and how you plan to use your pool. Will it be the neighborhood hotspot for kids all summer, or a quiet retreat for you to use on weekends? Your answer will help guide your equipment choices. If you anticipate heavy use, you might want to invest in a high-capacity filter that can handle a greater bather load. If you want to swim from early spring through late fall, a high-efficiency heater is a must. Thinking through your usage patterns helps you prioritize features and build a swimming pool that truly complements your life.

Look for Energy Efficiency

Your pool equipment will be one of the biggest energy consumers in your home, so choosing efficient models is a smart move. Not only is it better for the environment, but it will also save you a significant amount of money on your utility bills. For example, variable-speed pumps are now the standard for new installations because they use far less electricity than older, single-speed models. They work by running at lower speeds for longer periods, providing better filtration at a fraction of the cost. Look for the ENERGY STAR label on pumps, heaters, and lighting to ensure you’re getting top-tier efficiency.

Ensure Your Equipment Works Together

Your pool’s equipment is a connected system, and every part needs to communicate and work together effectively. A pump, filter, heater, and sanitizer from different brands can work together, but only if they are compatible. Mismatched components can lead to poor performance, strain on the system, and even voided warranties. This is where professional guidance is invaluable. An experienced installer can design a system where every piece of equipment is perfectly synchronized, creating a reliable and efficient setup. You can explore a range of compatible, high-quality products at the Gappsi Store to see how these systems come together.

Plan Your Budget

When budgeting for your pool, remember to account for the full cost of equipment, not just the sticker price. This includes the cost of installation, any necessary electrical or plumbing work, and required permits. It’s also wise to think about long-term operational costs. A cheaper pump might save you money upfront, but a more expensive, energy-efficient model will likely save you more over the life of the pool. Planning for these expenses from the beginning helps prevent surprises down the road. Discussing your budget with your installer will help them recommend the best equipment that provides value without compromising on quality.

What Does Pool Equipment Installation Cost on Long Island?

Talking about the budget is a crucial step in any home project, and installing your pool equipment is no different. The total cost on Long Island can vary quite a bit, depending on the size of your pool, the quality of the equipment you choose, and the complexity of the installation itself. While it’s a significant investment, understanding the breakdown can help you plan effectively. Think of it less as a single price tag and more as a collection of high-quality components working together to create your perfect backyard oasis. We believe in being transparent about these costs so you can make informed decisions without any surprises.

A Cost Breakdown by Equipment Type

When you budget for your swimming pool installation, the equipment is a major line item. The pump is the heart of your pool, and federal regulations now require energy-efficient variable-speed pumps for new installations. While they have a higher initial cost, they save you a lot on electricity bills in the long run. Next are filters, which come in sand, cartridge, or diatomaceous earth (D.E.) types, each with different price points and maintenance needs. Pool heaters and sanitization systems, like saltwater chlorinators, also add to the total, but they greatly improve your comfort and simplify upkeep. Each piece plays a vital role, and we can help you select a package that fits your pool and your budget.

Hidden Costs to Watch For

A good plan anticipates the unexpected. When it comes to pool equipment, some costs aren’t always obvious. Forgetting to secure the right local permits for your Long Island town can lead to fines and delays, so that’s always the first thing to check. The physical placement of your equipment also matters. An improperly placed equipment pad, often requiring professional masonry work, can lead to inefficient operation or systems overheating. Finally, remember to account for the professional electrical and plumbing work needed to safely connect everything. These aren’t areas to cut corners, as proper installation from the start prevents costly repairs later.

Trusted Pool Equipment Brands We Install

The performance and longevity of your pool depend heavily on the quality of its equipment. That’s why at Gappsi, we partner with the most trusted and reliable brands in the industry. Choosing the right equipment isn’t just about a single pump or filter; it’s about creating a cohesive system that works efficiently for your specific pool size, usage, and budget. Our team has years of experience installing and servicing equipment from leading manufacturers, and we can guide you to the perfect setup for your Long Island home. We understand that every backyard is unique, and the right combination of hardware ensures your pool is easy to maintain and enjoyable for years to come. We primarily work with three industry titans: Hayward, Pentair, and Zodiac. Each offers a unique set of strengths, from rock-solid reliability to cutting-edge smart technology. We’ll help you decide which brand aligns best with your vision for the perfect backyard oasis, ensuring every component works together seamlessly. This decision is a critical part of the overall design, just as important as choosing your porcelain and natural stone for the patio surround.

Hayward

Hayward is a household name in the pool world for a reason. It’s known for producing durable, reliable, and straightforward equipment that simply gets the job done. Their product line is extensive, covering everything from powerful pumps and efficient filters to heaters and salt chlorination systems. We often recommend Hayward for both new swimming pools and for homeowners looking to upgrade an older system with proven technology. Their equipment is built to last, providing consistent performance season after season. For those who like to be hands-on, it’s also helpful to understand the fundamentals of how a standard equipment pad works, and Hayward’s intuitive designs make that easier for homeowners.

Pentair

If you’re looking for innovation and energy efficiency, Pentair is a fantastic choice. This brand is at the forefront of smart pool technology, designing products that can save you money on your utility bills while making pool ownership easier than ever. Pentair is especially known for its variable-speed pumps, which can significantly reduce energy consumption compared to single-speed models. Their advanced automation systems allow you to control your pool’s features, like heating and lighting, directly from your smartphone. Choosing Pentair means investing in modern convenience and sustainable, long-term performance that fits perfectly with a fully updated smart home.

Zodiac

Zodiac excels at keeping your pool sparkling clean with minimal effort from you. The brand is a leader in automated pool cleaners, offering a range of robotic and suction-side models that tirelessly scrub away dirt and debris. While they also produce high-quality heaters, pumps, and control systems, their reputation is built on creating powerful cleaning solutions. Opting for Zodiac equipment is a great way to ensure your pool remains pristine and swim-ready all summer long. When paired with our professional restoration and sealing services, you can create a complete maintenance plan that protects your investment and keeps your pool looking brand new for years to come.

Your Installation, Step by Step

Seeing your new pool equipment come together is an exciting process, but it’s one that requires careful planning and execution. A professional installation follows a structured, multi-stage approach to ensure every component works flawlessly from day one. When you work with an experienced team, you can relax knowing that every detail, from the initial site check to the final handover, is being managed with precision. This step-by-step process takes the guesswork out of the equation and guarantees your investment is set up for long-term performance and enjoyment.

At Gappsi, we’ve refined our installation process over decades of building and upgrading swimming pools across Long Island. We handle the technical details so you can focus on planning your first pool party. Let’s walk through what you can expect during a professional pool equipment installation.

Site Assessment and Planning

The first step is a thorough site assessment. This is where a professional comes to your home to evaluate the proposed location for your pool equipment. It’s about more than just finding an open spot; we consider factors like proximity to utility lines, proper drainage, and sun exposure. One of the most common mistakes to avoid with pool installations is poor site selection. For example, placing equipment too close to trees can lead to constant debris and maintenance headaches down the road. A well-planned layout ensures your equipment is accessible for service, operates efficiently, and integrates seamlessly with your backyard design.

Handling Local Permits and Rules

Before any work begins, it’s essential to address local regulations. Building an inground pool and installing its equipment involves adhering to specific rules that vary between towns in Nassau and Suffolk County. Homeowners need to understand that local rules matter. Everything from permits and electrical codes to safety barriers and fencing must be handled correctly. An experienced installer will manage this entire process for you, submitting the necessary paperwork and ensuring your project is fully compliant. This step is crucial for safety and helps you avoid potential fines or project delays, giving you complete peace of mind.

Sourcing Your Equipment

Once the plan is in place, it’s time to select your equipment. A professional installer will help you choose the right pump, filter, heater, and sanitizer for your pool’s specific size and your family’s usage patterns. Many older pools still rely on outdated single-speed pumps, but modern, energy-efficient options are a much better choice. In fact, variable-speed pumps are now federally mandated for new installations because they save energy and reduce operational costs. We source high-quality, durable equipment from the industry’s most trusted brands, ensuring your system is built to last. You can explore some of the products we trust at the Gappsi Store.

Installation and Testing

This is where your vision starts to become a reality. During the installation phase, our technicians will expertly assemble and connect all your new equipment. This includes plumbing the pipes, wiring the electrical components, and integrating everything into a cohesive system. We work diligently to keep the project on schedule, but it’s important to remember that Long Island weather can be unpredictable. As one homeowner noted about their experience, “The only problem we had through the entire process was the weather; it was a very rainy spring which delayed all of their projects.” We always maintain clear communication and will keep you updated if any adjustments to the timeline are needed.

Final Inspection and Handover

After the physical installation is complete, we conduct a final inspection and rigorous testing of the entire system. We run the pumps, check the filters, and fire up the heater to confirm everything is operating at peak performance. Once we’re satisfied, we’ll walk you through your new system in a comprehensive handover. We’ll show you how to operate each component, explain the maintenance schedule, and answer any questions you have. Our team is known for being “courteous, friendly and did a great install.” Our goal is to leave you feeling confident and excited to start enjoying your brand-new, professionally installed pool equipment.

How Long Island Weather Impacts Your Pool Gear

Living on Long Island means we get to enjoy four distinct seasons, but that variety brings unique challenges for pool owners. The weather here does more than just decide your swim schedule; it directly affects your pool equipment’s performance and lifespan. From freezing winter nights that threaten your pipes to humid summer days that test your pump, the climate is a silent partner in your pool’s health. A successful installation accounts for these factors from day one.

Thinking about the weather’s impact isn’t just about preparing for storms. It’s about smart planning that saves you money and headaches down the road. This includes choosing the right spot for your equipment to ensure it runs efficiently, properly winterizing everything before the first frost, and even building some flexibility into your installation timeline. An experienced installer who knows the local climate can help you make the right choices for your swimming pool, ensuring it’s ready for whatever Long Island weather comes its way. This foresight is key to protecting your investment and enjoying your backyard oasis for years.

Winterizing and Freeze Protection

Long Island winters can be tough on pool equipment. As one local expert noted, “Long Island pool owners face unique winterization challenges with temperatures that can damage expensive heating equipment overnight.” A sudden freeze can crack pipes, damage filters, and ruin a costly heater if it’s not properly prepared. Winterizing is more than just throwing a cover over the pool; it involves draining water from the pump, filter, and heater to prevent ice expansion. It also means protecting your plumbing lines and ensuring all components are sealed off from the elements. Professional help is a wise choice here, as a small mistake during shutdown can lead to major repairs in the spring.

Proper Equipment Placement

Where you place your pool equipment matters just as much as what you buy. Your gear needs a location that allows for proper airflow and service access while protecting it from the elements. For example, large heat pumps need to be installed at least six inches from the house to function correctly. Placing equipment in a low-lying area prone to flooding is a recipe for disaster, while constant direct sun can degrade plastic housings over time. A well-designed equipment pad, sometimes shielded by attractive pavilions or pergolas, can protect your investment and keep your backyard looking clean and organized.

Planning for Weather Delays

When you’re excited about a new pool, the last thing you want is a delay. Unfortunately, Long Island’s weather can be unpredictable. As one homeowner shared, “The only problem we had through the entire process was the weather; it was a very rainy spring which delayed all of their projects.” Heavy rain can halt excavation, prevent concrete from curing properly, and make electrical work unsafe. A professional installation team will factor this in, building a realistic schedule and communicating openly about any weather-related adjustments. A little patience during the landscape design and construction phase ensures the job is done right, without cutting corners due to a few rainy days.

Common Installation Mistakes to Avoid

A successful pool equipment installation is all about the details. Getting it right from the start means you can spend more time enjoying your pool and less time dealing with frustrating and costly fixes. Even small oversights can lead to big problems, from inefficient performance to premature equipment failure. When you partner with an experienced team, you sidestep these common issues because they know exactly what to look for. A professional installer anticipates challenges and builds a system that’s reliable, efficient, and ready for years of summer fun. By understanding these potential pitfalls, you can feel even more confident in your decision to hire a pro for your swimming pool project.

Modern pool systems are more complex than they used to be, with interconnected components that need to work in perfect harmony. It’s not just about connecting a pump and a filter. It’s about creating an integrated system that includes sanitation, heating, and sometimes even automation that you can control from your phone. A DIY approach or hiring an inexperienced contractor can easily lead to a mismatched system that never quite works right. This is why we believe in a comprehensive approach, ensuring every piece of equipment is not only top-quality but also perfectly suited to your specific pool and lifestyle. Avoiding these common mistakes is the first step toward a worry-free pool ownership experience.

Choosing the Wrong Size Equipment

Bigger isn’t always better, and smaller isn’t always more economical when it comes to pool equipment. Each component, from the pump to the filter and heater, must be correctly sized for your pool’s specific volume and design. An undersized pump will struggle to circulate water effectively, leading to poor filtration and sanitation. On the other hand, an oversized pump wastes energy and can even damage your filter. The physical placement matters, too. Equipment installed too far from the pool has to work harder, which reduces its efficiency and lifespan. We carefully calculate your pool’s needs to select perfectly matched equipment that delivers optimal performance without wasting a dime.

Ignoring Energy Efficiency

Your pool equipment can be one of the biggest energy consumers in your home, but it doesn’t have to be. Many homeowners make the mistake of choosing older, less efficient models to save a little money upfront, only to pay much more in long-term utility bills. Modern technology, like variable-speed pumps, can drastically reduce energy consumption compared to outdated single-speed models. In fact, these energy-saving pumps are now federally mandated for new installations. Choosing energy-efficient equipment isn’t just a smart financial move; it’s a responsible one that ensures your pool is compliant with current standards and kinder to the environment.

Skipping Local Permits

Navigating building codes and permits can feel overwhelming, which is why some people are tempted to skip this step altogether. This is a critical mistake. Every town on Long Island has specific regulations for pool construction and equipment installation, covering everything from electrical wiring to safety fencing. Failing to secure the proper permits can result in hefty fines, legal trouble, and even an order to remove the unpermitted work. More importantly, these codes exist to ensure your pool is safe for your family and friends. A professional installer will manage the entire permitting process for you, ensuring every aspect of your project is fully compliant and secure.

Picking Incompatible Parts

Think of your pool equipment as a team where every player has a specific role. For the team to win, all the players need to work together seamlessly. It’s a common error to mix and match equipment from different brands or product lines without confirming their compatibility. This can lead to leaks, inefficient operation, and a system that just doesn’t perform as it should. You might end up needing custom adapters or workarounds that compromise the integrity of the setup. We source high-quality, compatible components from trusted brands, which you can explore at the Gappsi Store. This ensures your equipment functions as a unified, reliable system from day one.

Not Planning for Future Upgrades

Your dream backyard might be a project that evolves over time. When installing your initial pool equipment, it’s wise to think about what you might want to add later. Do you see a spa, waterfall, or automated cleaning system in your future? Perhaps you’ll want to add a beautiful pavilion or pergola for shade. Planning for these potential upgrades during the initial installation is far easier and more cost-effective than trying to retrofit them later. This could mean leaving extra space on the equipment pad or running additional electrical conduit. A little foresight ensures your backyard can grow with your vision without requiring a major overhaul down the road.

How to Find a Pro Installer on Long Island

Finding the right person to install your pool equipment is just as important as choosing the equipment itself. A great installation ensures everything runs efficiently, lasts longer, and saves you from future headaches. On Long Island, with our specific weather patterns and local codes, hiring a seasoned professional isn’t just a good idea; it’s essential for protecting your investment. When you start your search, focus on a few key areas to make sure you’re partnering with a reliable and skilled installer who will get the job done right. Taking the time to vet your options will give you peace of mind and a pool that’s ready for years of enjoyment.

Check for Licensing and Insurance

Before you even start talking about pumps and filters, your first question should always be about licensing and insurance. It’s a simple step that many people overlook, but it’s your number one protection. Any reputable installer on Long Island must have a valid license to operate in Nassau or Suffolk County. Just as important is proof of insurance, which should include both general liability and worker’s compensation. This protects you from any liability in the rare case of an accident on your property. Don’t just take their word for it; ask to see the documents. A true professional will have them ready and will be happy to provide them.

Look for Experience with Long Island Pools

Long Island isn’t just any location, and your pool installer should know that. Our coastal weather, soil types, and specific town regulations create a unique environment for construction. An installer with deep local experience will understand these nuances. They’ll know the permitting process in your specific town and how to properly winterize equipment to withstand our freezing temperatures. When you review a company’s work, look for a portfolio of projects in your area. Seeing their finished swimming pools and outdoor spaces on Long Island gives you confidence that they have the right expertise for your home.

Ask About Warranties and Support

A professional installation is about building a long-term relationship, not a one-time transaction. Before signing a contract, get a clear understanding of the warranties. This includes the manufacturer’s warranty on the equipment and, crucially, a workmanship guarantee from the installer. What happens if an issue pops up a month or a year later? A trustworthy company will stand by its work. Ask about their process for service calls and what kind of ongoing support they offer. Companies that provide comprehensive services, from installation to long-term restoration and sealing, are invested in the lasting quality of your project.

Read Reviews and Compare Services

In your search for the perfect installer, customer reviews are your best friend. Look at what past clients are saying on independent sites and on the company’s website. Pay attention to comments about communication, professionalism, and how the team handled challenges. While you’re doing your research, you can also see video testimonials and project showcases on platforms like YouTube to get a better feel for the company’s work. Remember to compare more than just the final price. Look at the full scope of what’s included, the quality of the equipment proposed, and the level of experience each company brings to the table.

Why Choose Gappsi for Your Pool Installation

Choosing the right installer for your pool equipment is just as important as selecting the equipment itself. At Gappsi, we provide a complete, stress-free experience for homeowners across Long Island. We manage every step of your project, from the initial design consultation to the final installation and testing. Our goal is to make the process of building your dream swimming pool seamless and enjoyable, ensuring every component works together perfectly from day one.

A pool is a significant investment in your home, and we believe in building things to last. We use only premium materials and proven construction techniques to ensure your pool and its equipment stand the test of time. Our team has extensive experience installing, servicing, and repairing all major brands of pool and spa equipment. This means you can trust that your system is installed correctly for optimal performance and longevity. We don’t just install your equipment; we provide the expertise to keep it running smoothly for years to come.

Beyond our technical skills, we are committed to providing exceptional customer service. Our team is known for being professional, courteous, and dedicated to your satisfaction. With decades of design and construction expertise, we understand how to integrate your new pool into a cohesive and beautiful outdoor living space. We take pride in our work and in building lasting relationships with our clients, helping you create a backyard oasis you’ll love.

Related Articles

Frequently Asked Questions

Can I install some of the pool equipment myself to save money? I completely understand the temptation to DIY a project, but this is one area where I strongly advise against it. Pool equipment involves complex plumbing and high-voltage electrical connections, where a small mistake can lead to costly damage or serious safety risks. Professionals also handle all the local permits and ensure your setup is compliant with Long Island codes, which saves you from potential fines. Investing in a professional installation is really an investment in safety, efficiency, and your own peace of mind.

How can I keep my pool’s energy costs down after the installation? The single best thing you can do is choose a variable-speed pump from the start. These pumps are now the standard for a reason; they use significantly less electricity than older models by running at lower speeds for longer periods. This results in better filtration and major savings on your utility bills. Beyond the pump, using a solar cover to retain heat and scheduling your heater to run only when needed will also make a big difference in your monthly costs.

What’s the real difference between a saltwater system and traditional chlorine? This is a great question because it’s a popular upgrade. A saltwater system doesn’t mean your pool will be salty like the ocean. Instead, it uses a generator to convert a low level of salt in the water into chlorine. The result is silky, soft water that’s much gentler on your skin and eyes. You also get to skip the hassle of buying, storing, and handling harsh chlorine tablets or liquid, which is a huge convenience for many homeowners.

How long does the installation process typically take? The timeline can vary depending on the scope of your project and other work being done. The actual physical installation of the equipment pad can often be completed in a few days. However, the entire process includes site planning, securing permits from your town, and coordinating with electricians, which adds time before we even begin. We always build a realistic schedule and communicate openly, especially since unpredictable Long Island weather can sometimes cause short delays.

My backyard gets harsh winter weather. How do you make sure my new equipment will survive? This is a critical part of our planning process. We protect your investment in two main ways: smart placement and proper winterization. We’ll help you select a location for the equipment pad that shields it from the worst of the elements and has proper drainage. More importantly, a professional winterization service is key. This involves completely draining water from the pump, filter, and heater to prevent ice from forming inside and cracking the expensive components.

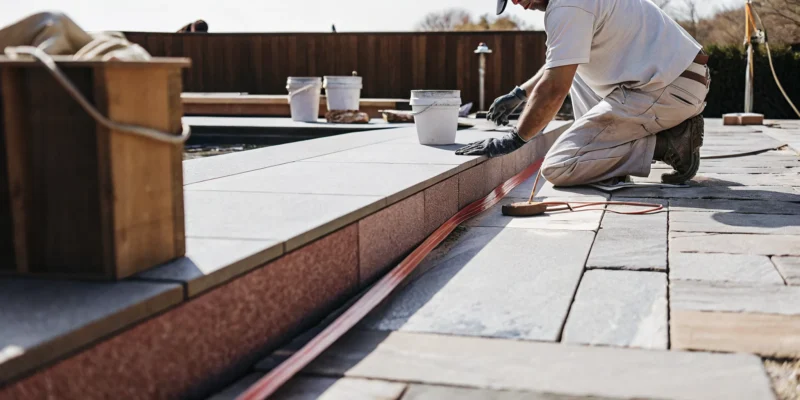
Pool coping installer laying stone pavers around a pool on Long Island.

How to Hire a Pool Coping Installer on Long Island

Your pool coping is the unsung hero of your backyard, quietly protecting your investment from the elements. But it’s not invincible. Over time, you might notice small cracks, crumbling mortar, or stones that feel loose underfoot. These aren’t just cosmetic issues; they are warning signs that water might be seeping into your pool’s structure. On Long Island, this is especially dangerous, as trapped water can freeze and expand, causing serious damage. Knowing how to spot these telltale signs early can save you from costly repairs. This article will help you identify when your coping needs attention and why calling a professional pool coping installer Long Island trusts is the best next step.

Key Takeaways

  • Coping serves two key roles: It acts as a crucial safety feature by providing a non-slip grip and protecting your pool’s structure, while also being a primary design element that frames your pool’s look.
  • Select materials that withstand Long Island weather: Your coping choice must endure our freeze-thaw cycles. Durable options like granite, cool-to-the-touch travertine, and low-maintenance porcelain are excellent for both performance and style.
  • Always hire a professional for installation: This is not a DIY project. An expert installer guarantees correct drainage, a secure fit, and a safe edge, which prevents costly structural damage and protects your investment in the long run.

What Is Pool Coping and Why Is It Important?

When you picture a beautiful swimming pool, you probably think of the sparkling water and the stylish patio. But there’s a key element that ties it all together: the pool coping. It’s the finishing touch that sits on the edge of your pool, and it does a lot more than just look good. Understanding what coping is and why it’s so important is the first step in creating a safe, durable, and stunning backyard oasis.

What Does Pool Coping Do?

Simply put, pool coping is the material used to cap the top edge of your pool shell. Think of it as the border where the pool wall meets the surrounding deck or patio. Its primary job is to create a seamless transition, but its role is twofold: function and style. Functionally, it protects the pool structure and gives swimmers a place to grab onto. Aesthetically, it frames the water and provides a polished, finished look. Choosing the right coping is a crucial decision in your swimming pool design, as it impacts both the safety and the overall vibe of your space.

How Coping Keeps Your Pool Safe

Safety is the most critical function of pool coping. A well-installed coping provides a smooth, rounded edge that prevents cuts and scrapes as people get in and out of the water. It also offers a sturdy, non-slip surface for swimmers to grip. Beyond personal safety, coping protects the pool itself. It directs water from splashes and rain away from the pool shell and into the deck drains. This prevents water from getting behind the pool wall, which could cause serious structural damage over time. Proper coping is a key part of protecting your investment and ensuring your patio and pool structure remain in great shape, avoiding the need for premature restoration and sealing.

How Coping Defines Your Pool’s Style

While safety and function are essential, let’s be honest, looks matter too. Pool coping is a major design feature that defines your pool’s personality. It’s the frame that completes the picture. The material you choose can steer your backyard’s style in any direction you want, from modern and sleek to rustic and natural. A crisp, white porcelain coping might create a chic, resort-like feel, while a rugged bluestone could give you a more organic, earthy look. By carefully selecting your porcelain and natural stone coping, you can create a cohesive design that ties your pool to the rest of your outdoor living space, making it feel truly custom.

Choosing a Pool Coping Material for Your Long Island Home

The material you choose for your pool coping does more than just frame the water. It’s the surface where you’ll dangle your feet, where kids will launch their cannonballs, and it’s a critical design choice that ties your entire backyard together. For Long Island homeowners, this decision is especially important. Our weather, from hot, sunny summers to freezing winters, requires a material that is both beautiful and incredibly resilient. The right choice will feel comfortable underfoot, provide a safe, non-slip edge, and complement your home’s style for years to come.

Your coping material is a key part of your overall swimming pool design. It needs to stand up to constant water splashes, direct sun, and changing temperatures. Luckily, there are several fantastic options that are perfectly suited for our climate. Whether you prefer the timeless look of natural stone or the sleek finish of modern pavers, there’s a material that will fit your vision and your lifestyle. Let’s explore some of the best choices for Long Island homes.

Travertine

If you dream of a pool deck that feels soft and luxurious, travertine is an excellent choice. One of its best features is that it stays remarkably cool to the touch, even on the hottest summer days. That means no more hopping around on scorching hot surfaces. Travertine is also naturally porous, which gives it a slip-resistant texture that’s perfect for families with children. It provides a sophisticated, elegant look that can transform your pool area into a resort-like retreat. You can find a variety of beautiful natural stone options that will give your pool a high-end finish.

Bluestone

For that quintessential Long Island look, nothing beats bluestone. It has been the go-to coping material across the Northeast for decades, and for good reason. Its rich, natural color variations create a timeless and classic feel that complements both traditional and contemporary homes. Beyond its good looks, bluestone is exceptionally strong and durable, making it a reliable choice that will last for years. Choosing bluestone is a nod to local tradition, creating a beautiful and enduring frame for your pool that feels right at home. Its installation is a specialty of expert masonry contractors.

Granite

When you need a material that is practically indestructible, look no further than granite. This natural stone is a true powerhouse, capable of handling anything Long Island’s climate throws at it. Granite easily withstands our harsh freeze-thaw cycles, resists damage from pool chemicals, and won’t fade in the sun. Its naturally textured surface also provides excellent grip, making it one of the safest choices for a wet pool edge. Investing in granite coping means choosing a worry-free, high-performance material that offers both rugged durability and natural beauty for your pool area.

Porcelain

If you love a clean, modern aesthetic and minimal maintenance, porcelain pavers are a fantastic option. Because porcelain is non-porous, it’s highly resistant to stains, water damage, and fading, so it will look brand new for years with very little effort. It’s also incredibly durable and can handle temperature swings without cracking. Porcelain comes in a huge variety of styles, allowing you to achieve the look of natural stone, wood, or concrete with added performance benefits. This versatility makes it easy to find a porcelain paver that perfectly matches your backyard design.

Limestone and Concrete Pavers

Both limestone and concrete pavers offer a wonderful balance of style, durability, and value. Limestone provides a beautiful, natural look with subtle textures and colors that can create a soft, organic feel around your pool. It’s a durable stone that holds up well in our climate. Concrete pavers, on the other hand, offer incredible design flexibility. They come in a vast range of colors, shapes, and styles, allowing you to create a truly custom look at an accessible price point. Both are excellent materials that can be installed by a skilled masonry designer to create a stunning and functional pool edge.

What Does Pool Coping Cost on Long Island?

Budgeting for your pool project is a big step, and understanding the cost of coping is a key piece of the puzzle. While the final price tag can vary, knowing the components that go into it will help you plan effectively. The cost is typically measured per linear foot and depends heavily on the materials you choose and the specifics of your pool. A good plan starts with understanding these variables, so you can feel confident in your investment and create a beautiful, lasting finish for your backyard oasis.

Understanding the Price Per Linear Foot

When you get a quote for pool coping, you’ll almost always see the price broken down by the linear foot. This is simply the measurement of your pool’s perimeter, or its edge. On Long Island, the cost for professional coping installation can range from $15 to over $60 per linear foot. This range accounts for different materials, from affordable concrete pavers to premium natural stone. Think of this price as a starting point. A simple rectangular swimming pool will be straightforward to measure, while a freeform design with lots of curves will require more detailed calculations. This per-foot cost generally includes both the materials and the labor for installation.

Factors That Affect Your Final Cost

Several key factors will influence your total investment. The most significant is your choice of material. Premium options like granite or travertine will cost more than standard concrete pavers. The size and shape of your pool also play a big role; a larger pool or one with intricate curves requires more material and labor. Don’t forget about the condition of your pool’s existing edge. If old coping needs to be removed and disposed of, or if the underlying bond beam needs repairs, this will add to the final cost. At Gappsi, we source high-quality porcelain and natural stone to ensure your coping is both beautiful and durable.

Breaking Down Material vs. Labor Costs

Your total project cost is a blend of material and labor expenses, and it’s wise not to cut corners on either. Choosing a high-quality material is your first line of defense against issues like cracking or slippery surfaces. Sourcing from a trusted supplier ensures you get a product that can withstand Long Island’s weather. Equally important is the installation itself. Expert masonry work guarantees that each stone is properly set, sealed, and graded for drainage. Paying for professional labor prevents costly mistakes down the road, ensuring your pool coping remains secure and beautiful for years to come.

Common Pool Coping Challenges for Long Island Homeowners

Living on Long Island means enjoying beautiful summers by the pool, but our unique coastal climate also presents specific challenges for keeping that pool in top shape. The dramatic temperature swings, salty air, and heavy precipitation can be tough on your pool’s structure, especially the coping. When coping isn’t installed correctly, it can fail, leading to costly repairs and even safety hazards around your pool area. It’s a common headache for homeowners who invest in a beautiful backyard only to see it degrade prematurely.

From the North Shore to the South Shore, every pool owner faces similar hurdles. Your coping needs to withstand harsh winters, manage water effectively, and perfectly fit the unique shape of your pool. These aren’t just minor details; they are essential for the longevity and safety of your investment. Overcoming these challenges requires a combination of the right materials and expert installation. A professional installer understands how to work with our local conditions to ensure your pool coping is beautiful, safe, and built to last for years to come. They can anticipate problems before they start, saving you stress and money down the road.

Surviving Freeze-Thaw Cycles

One of the biggest enemies of any outdoor masonry on Long Island is the freeze-thaw cycle. During late fall and winter, water seeps into the pores of stone and concrete. When the temperature drops below freezing, that water turns to ice and expands, creating immense pressure from within. This expansion can cause materials to crack, chip, and break apart over time. For pool coping, this process can be especially destructive, leading to loose stones and a compromised pool edge.

Choosing a durable, low-porosity material is your first line of defense. Materials like high-quality porcelain and natural stone are less susceptible to water absorption, making them ideal for our climate. Equally important is professional installation. An expert ensures the coping is set on a solid base with proper mortar and joints, minimizing opportunities for water to get trapped and cause damage.

Ensuring Proper Drainage and Protection

Pool coping does more than just frame your pool; it’s a critical part of your pool’s water management system. Its primary job is to direct water from splashing and rain away from the pool shell and foundation. When coping is installed with the correct slight slope away from the water, it prevents water from getting behind the pool wall. This is essential for preventing erosion and protecting the structural integrity of your pool over the long term.

Proper drainage also contributes to a safer and cleaner pool deck. By channeling water away, the coping helps prevent slippery puddles from forming where people walk. It also reduces the moisture that can lead to mold, mildew, and algae growth on your patio. Expert masonry work is key to creating this functional and protective barrier, ensuring your entire pool area remains safe and beautiful.

Fitting Custom Pool Shapes

Rectangular pools are no longer the only option. Today’s homeowners are opting for stunning freeform designs with elegant curves, integrated spas, and tanning ledges. While these custom shapes create a beautiful backyard focal point, they also make coping installation much more complex. Each piece of coping must be precisely cut and meticulously fitted to follow the pool’s unique contours without leaving wide gaps or sharp, uneven edges.

This is where the skill of a seasoned installer truly shines. A DIY attempt or a job by an inexperienced contractor on a custom swimming pool often results in a sloppy, unprofessional finish that detracts from the pool’s design. Professionals have the specialized tools and expertise to make flawless cuts, ensuring a smooth, uniform, and safe edge that perfectly complements the beauty of your custom pool.

What to Expect During a Pool Coping Installation

A professional pool coping installation is a meticulous process, not just a matter of laying down new stones. It’s a craft that ensures your pool edge is beautiful, safe, and built to withstand Long Island’s weather for years to come. When you hire an experienced team, you can expect a systematic approach that covers everything from structural checks to the final finishing touches. Knowing what to expect can make the process feel smooth and transparent, giving you confidence that the job is being done right. From preparing the foundation to sealing the final joint, every step is crucial for a lasting result. Let’s walk through the key phases of a typical installation so you can see exactly how a professional transforms your swimming pool.

Preparing the Site and Removing Old Coping

First, your installation team will focus on preparation. Before any new material is placed, a skilled contractor will inspect the pool’s structural edge, known as the bond beam, to confirm it’s solid and sound. This step is essential because the bond beam provides the foundation for the entire coping structure; without a stable base, the new coping could fail prematurely. If you’re replacing old, damaged coping, this is also when the crew will carefully remove and haul away the existing material. This initial phase ensures a clean and stable slate, which is critical for the longevity of your new masonry work and the overall success of the project.

Setting and Securing the New Coping

Once the site is fully prepped, the exciting part begins: setting the new coping. Your installer will mix a strong mortar and carefully set each stone, ensuring a secure and permanent bond. This is where true craftsmanship shines. They will pay close attention to creating a consistent overhang, which is the part of the coping that extends slightly over the pool’s edge. This detail isn’t just for looks; it also helps direct splashes away from the pool deck. For pools with curves, corners, or integrated spas, each piece of porcelain or natural stone is custom-cut to fit perfectly, creating a seamless and polished line around your entire pool.

Sealing and Applying Finishing Touches

The final stage of installation is all about protection and polish. After the coping stones are securely in place, your installer will apply a flexible, waterproof sealant in the joint between the coping and the patio. This is a critical step that prevents water from seeping into the gap, which could cause shifting or damage from freeze-thaw cycles. Once everything is sealed, the team will finish the joints and give the entire area a thorough cleaning. A professional crew leaves your poolside looking pristine and ready for you to enjoy, with no mess left behind. Proper restoration and sealing is the key to a long-lasting, beautiful finish.

Telltale Signs You Need New Pool Coping

Your pool coping is the protective cap for your pool’s edge, but it’s not meant to last forever. Over time, exposure to the elements, pool chemicals, and regular use will take a toll. Spotting the warning signs early can save you from more extensive and costly repairs down the road. Think of it as a regular health checkup for your pool. A quick walk around your pool every few weeks is all it takes to catch problems before they become serious.

Ignoring a small crack or a slightly loose stone might seem harmless, but these minor issues can allow water to seep into the pool’s structure. On Long Island, where we experience freeze-thaw cycles, that trapped water can freeze and expand, causing significant damage to your pool shell and deck. Keeping an eye out for these signs is key to protecting your investment and ensuring your pool area remains a safe and beautiful retreat for your family. If you notice any of these issues, it’s a good idea to consider professional restoration and sealing services to assess the damage and recommend a solution. Catching problems early is the best way to keep your backyard oasis in top shape for years of enjoyment.

Visible Cracks, Chips, or Wear

One of the most straightforward signs that your coping needs attention is visible damage. Look for fine hairline cracks, noticeable chips, or areas where the surface is flaking or crumbling. These aren’t just cosmetic flaws; they are entry points for water. Even a tiny crack can widen over time, compromising the bond between the coping and the pool beam. You might also notice that the color has faded unevenly or that the texture feels rough and worn down. This kind of deterioration not only looks bad but can also make the pool edge uncomfortable or unsafe for swimmers to hold onto. Different porcelain and natural stone materials show wear in different ways, so pay close attention to any changes in their appearance.

Loose or Shifting Stones

If you can feel a coping stone move or wiggle under your hands or feet, you have a problem that needs immediate attention. Loose coping is a serious trip hazard, and the last thing you want is an accident around the pool. This instability usually happens when the mortar or adhesive holding the stones in place has failed. Often, this is because water has penetrated the joints and broken down the bond. You might see crumbling grout or widening gaps between the stones. Don’t ignore this. A single loose stone can lead to a domino effect, causing neighboring stones to shift as well. A professional masonry expert can determine the cause and secure your coping properly.

Water Damage and Drainage Problems

Your pool coping has a critical job: to direct splash-out and rainwater away from the pool shell and into your deck drains. When it fails, you’ll see signs of water damage. Look for a white, chalky residue on the coping or the wall below it, a sign of mineral deposits left by evaporating water. You might also notice persistent damp spots, mold, or algae growing on or behind the coping. These symptoms indicate that water is pooling instead of draining correctly. This trapped moisture can cause immense pressure on your pool wall, especially when it freezes in the winter. Proper drainage is essential for the longevity of your entire swimming pool structure, so any sign of a drainage problem is a clear signal to call a professional.

Professional vs. DIY Installation: Why an Expert Matters

While tackling a home project yourself can be rewarding, pool coping installation is one area where expertise is non-negotiable. The process involves much more than just placing stones around the pool’s edge. It requires precision, knowledge of materials, and an understanding of how your pool structure works. A small mistake can lead to costly repairs and safety hazards down the road. Hiring a professional ensures the job is done right the first time, protecting your investment and giving you a beautiful, durable finish that lasts for years.

The Risks of a DIY Project

It’s easy to see the appeal of a DIY project, but with pool coping, the risks often outweigh the potential savings. Many homeowners choose a material based only on its appearance, which can lead to cracked edges, slippery surfaces, or stone that becomes uncomfortably hot in the sun. The installation itself is also deceptive. While it may seem straightforward, you need to know exactly what you are doing. For example, if you notice multiple cracks in your existing coping, it could indicate that the pool walls have shifted. This is a major structural problem that a DIY repair won’t fix and could lead to a complete pool deck remodel.

How a Pro Guarantees a Lasting Result

A professional installer brings years of experience to your project, guaranteeing a result that is both beautiful and built to last. Experts help you avoid common but costly mistakes related to sourcing materials, applying the right sealants, and achieving a flawless finish. They understand how different stones react to Long Island’s weather and will ensure your coping can withstand freeze-thaw cycles without cracking or shifting. Most importantly, a professional masonry contractor ensures the coping has a smooth, rounded edge. This detail is critical for the safety of everyone using the pool, preventing scrapes and providing a comfortable grip for getting in and out.

The Value of a Professional Warranty

Hiring a professional provides peace of mind that a DIY project simply can’t offer. Reputable installers are licensed and insured, protecting you from any liability during the project. At Gappsi, we handle every aspect of the installation with our in-house team, so you never have to worry about unknown subcontractors on your property. A professional company also provides clear, upfront pricing and detailed estimates, so you know exactly what to expect. Ultimately, the warranty and support you receive from an established Long Island installer are invaluable. It’s a promise that your new pool coping is a secure, long-term investment in your home.

How to Choose the Right Installer on Long Island

Choosing a contractor for your pool coping is one of the most important decisions you’ll make for your backyard project. This isn’t just about finding someone to lay down stones; it’s about finding a partner who will protect your investment and bring your vision to life with skill and care. The right installer ensures your pool’s edge is not only beautiful but also safe and durable enough to withstand Long Island’s distinct seasons.

A great contractor provides a seamless experience from the first consultation to the final cleanup. They communicate clearly, respect your property, and have a deep understanding of local building codes and environmental factors. With decades of experience transforming Long Island homes, we know that exceptional craftsmanship is built on a foundation of trust and expertise. Before you commit, it’s essential to do your homework. Taking the time to properly vet an installer will give you peace of mind and a finished product you can enjoy for years to come. Use these steps to guide your search and find a professional you can count on.

Verify Their License, Insurance, and Experience

Before you fall in love with a design, make sure you’re talking to a legitimate professional. The first step is to confirm they are fully licensed to work in Nassau or Suffolk County and carry comprehensive liability insurance. This is a non-negotiable that protects you from any potential accidents or property damage during the project. Don’t just take their word for it; ask to see the documents. Experience is just as critical. An installer with years of experience on Long Island will have a deep understanding of how to build structures that last through our freeze-thaw cycles and coastal weather, ensuring your pool coping doesn’t crack or shift prematurely.

Review Their Portfolio and Material Expertise

A portfolio is your window into an installer’s craftsmanship and style. Ask to see a gallery of their completed pool coping projects. As you look through the photos, pay close attention to the details. Are the lines clean and straight? Are the grout joints consistent? Does the overall finish look polished and professional? This is also the time to gauge their familiarity with different materials. A true expert should be able to confidently discuss the benefits of travertine versus porcelain and show you examples of their work with each. Their portfolio should prove they have the skill to execute your specific design flawlessly.

Ask About Warranties and Ongoing Support

A professional installer stands behind their work long after the project is finished. Be sure to ask detailed questions about the warranties they offer. A strong warranty should cover both the materials used and the labor performed, giving you a clear path to resolution if any issues arise. It’s also wise to inquire about ongoing support and maintenance. For instance, you can ask if they provide services like deep cleaning or sealing to keep your coping looking its best. Companies that offer restoration and sealing services are often invested in the long-term durability of their installations, which is a great sign of a quality partner.

Key Questions to Ask Before Hiring

Once you’ve narrowed down your options, it’s time for a final round of questions to ensure you’re making the right choice. Having a list ready helps you compare installers and clarifies expectations for everyone involved.

Here are a few key questions to ask:

  • Can I see your license and certificate of insurance?
  • How many years have you been installing pool coping on Long Island?
  • Do you have a portfolio of recent projects I can review?
  • Who will be my main point of contact during the installation?
  • What does your warranty cover and for how long?
  • How do you handle unexpected issues or project delays?

Their answers should give you the confidence you need to move forward with your swimming pool project.

Mistakes to Avoid When Hiring a Coping Installer

Choosing an installer for your pool coping is a big decision. The right partner will ensure your pool edge is beautiful, safe, and built to last, while the wrong one can lead to costly repairs and headaches. To help you make a confident choice, let’s walk through some common mistakes homeowners make and how you can steer clear of them. A little preparation goes a long way in guaranteeing your project is a success from start to finish.

Don’t Choose Based on Price Alone

It’s tempting to go with the lowest quote, but this can be a costly mistake in the long run. A surprisingly low price often signals subpar materials or inexperienced labor. Many homeowners focus on the initial look of the coping without considering its durability. This can lead to problems like cracked edges after a tough winter, dangerously slippery surfaces, or stone that gets uncomfortably hot in the summer sun. When you select a material, think about quality and performance first. Investing in a durable, high-quality material and a skilled installer protects your investment and ensures your pool area remains a safe, enjoyable space for years.

Don’t Skip the Vetting Process

Hiring the first installer you speak with without doing your homework is a major risk. A true professional will have a proven track record, proper credentials, and a deep understanding of local requirements. Take the time to verify their license and insurance, and ask for references from recent projects here on Long Island. A crucial part of the vetting process is confirming their familiarity with local building codes and permit requirements. An experienced masonry contractor will handle these details for you, preventing legal complications and ensuring your project is completed to standard.

Always Review Contracts and Permits

A verbal agreement isn’t enough to protect you or your investment. Before any work begins, make sure you have a detailed written contract that outlines the entire scope of the project. This document should include a clear timeline, a payment schedule, and a specific list of all materials to be used. Don’t be afraid to ask for clarification on any points you don’t understand. It’s also a great idea to take photos throughout the installation process. This documentation creates a clear record of the work and helps ensure the final result is exactly what you agreed upon. You can see examples of our finished work on our YouTube channel.

Remember to Plan for Maintenance

Your pool coping material choice has a direct impact on the longevity of your pool’s edge and the amount of upkeep it will need. Here on Long Island, it’s especially important to consider factors like freeze-thaw durability to prevent cracking during our cold winters. You should also think about slip resistance for safety and how much heat the material absorbs. Talk to your installer about the long-term maintenance requirements for the materials you are considering. A good contractor will not only install your coping correctly but also provide guidance on how to care for it, including services like professional restoration and sealing.

Tying It All Together: Coping and Your Outdoor Design

Your pool coping is much more than just the edge of your pool. Think of it as the frame for your masterpiece. It’s the critical design element that connects your sparkling swimming pool to the rest of your outdoor living space. When chosen thoughtfully, your coping can create a seamless flow between the water, your patio, and the surrounding landscape. It’s the detail that pulls your entire backyard vision together, turning a collection of separate areas into one cohesive, beautifully designed oasis. This is how you get that magazine-worthy look where everything just works together perfectly.

Making the right choice means looking beyond the pool itself. Consider the colors and textures of your home’s exterior, your patio furniture, and even the plants in your garden. The goal is to create a harmonious environment where every element feels like it belongs. This is where a holistic design approach makes all the difference. By planning how your coping will interact with other hardscape features, you ensure a polished and intentional look that feels both luxurious and inviting. It’s this attention to detail that transforms a backyard into a personal retreat, a place you’ll love spending time in for years to come.

Match Your Coping to Your Deck and Patio

The best coping choices don’t just look good on their own, they harmonize with your deck and patio. When selecting a material, think about how its color and texture will pair with your existing surfaces. For example, the warm, earthy tones of travertine coping can beautifully complement a rich wood deck, creating a soft and natural transition. If you have a modern patio made of sleek concrete or dark stone, a crisp, light-colored porcelain coping can provide a stunning contrast. On Long Island, it’s also vital to consider practical factors like slip resistance and durability through our freeze-thaw cycles to ensure your design is as safe as it is stylish.

Complement Your Look with Pavers

Using pavers that match or complement your coping is a fantastic way to create a unified and expansive feel in your backyard. Imagine a seamless flow of beautiful granite from your pool’s edge across your entire patio. This approach gives your space a high-end, custom look that can significantly increase your property’s value. Alternatively, you can create visual interest by choosing a complementary paver. A skilled masonry designer can help you pair different materials, like a smooth bluestone coping with textured concrete pavers, to add depth and character to your outdoor design while maintaining a cohesive color palette.

Create a Cohesive Backyard Oasis

Coping is the finishing touch that ties everything together. Its smooth, rounded edge provides a safe and comfortable border for your pool, but its design impact goes much further. You can use the same coping material on other features throughout your yard, like on the tops of retaining walls, garden steps, or around a fire pit. This repetition of material creates a powerful sense of unity and intention. It’s a professional landscape design secret that makes your entire backyard feel like a single, thoughtfully planned oasis. This consistency is what elevates a space from simply functional to truly extraordinary.

Related Articles

Frequently Asked Questions

How long should my pool coping last? The lifespan of your pool coping really depends on three things: the material you choose, the quality of the installation, and how well you maintain it. A high-quality, dense material like granite or porcelain that is installed by an expert can easily last for decades, even with our tough Long Island winters. On the other hand, a lower-grade material or a DIY installation might show signs of failure in just a few years. Proper installation that accounts for freeze-thaw cycles is the most important factor for a long-lasting result.

What’s the best coping material for a family with kids? When safety is your top priority, you want to focus on materials that are non-slip and don’t get too hot. Travertine is a fantastic choice because it stays remarkably cool under the summer sun, so you don’t have to worry about little feet getting burned. It also has a naturally porous texture that provides good grip. Porcelain is another excellent option; it’s incredibly durable, non-porous, and comes in many textured, non-slip finishes that are perfect for a busy and splash-heavy pool area.

Can my cracked coping be repaired, or does it all need to be replaced? This is a great question, and the answer depends on the extent of the damage. A single, small chip or a hairline crack in one stone might be repairable. However, if you have multiple cracked stones, crumbling mortar, or any loose sections, it usually points to a larger problem, like water getting behind the coping. In those cases, a full replacement is often the best solution to fix the underlying issue and prevent more serious structural damage to your pool.

How long does a typical pool coping installation take? For a standard-sized pool, a professional coping installation usually takes a few days. The total time can vary based on the size and shape of your pool, the type of material being installed, and whether we need to remove old coping first. A complex, freeform pool will naturally take longer than a simple rectangle because of the custom cuts required. A good contractor will give you a clear timeline before the project begins.

Does my coping have to match my patio pavers? Not at all. While using the same material for both your coping and patio creates a very seamless, high-end look, it’s not your only option. You can create a beautiful, intentional design by choosing a complementary material. For instance, a dark bluestone coping can create a stunning frame around a lighter-colored paver patio. The key is to select materials that share a similar style or color palette to ensure your entire outdoor space feels cohesive and thoughtfully designed.

Luxury custom gunite swimming pool with travertine coping and waterfall feature

Design Your Custom Gunite Swimming Pool Long Island Dream Backyard

Most Long Island homeowners choose a custom gunite swimming pool for its unmatched strength and complete design freedom. This building method uses a mix of sand and cement sprayed over a steel cage to create a structure that fits any property shape or size. These pools are ideal for our local area because the thick walls resist shifting soil and harsh winter frost better than vinyl or fiberglass pools. Homeowners often select gunite because it supports premium finishes such as quartz diamond brite, glass tile, and natural stone coping that lasts for years. A well-built gunite pool is a permanent investment that adds value to your home while providing a private escape for your family for decades.

Ready to build the backyard of your dreams? Explore Gappsi’s custom gunite pool designs and start planning your project today.

A custom gunite swimming pool Long Island homeowners choose offers the best long-term value for properties in Nassau and Suffolk counties. Gunite is a mixture of sand and cement sprayed over a steel-reinforced cage, creating a permanent structure that conforms to any lot shape. The thick concrete walls resist frost heave and soil movement far better than vinyl or fiberglass alternatives. With proper maintenance, these pools can last 50 years or more while supporting premium finishes like quartz diamond brite, glass tile, and natural stone coping.

Why Choose a Gunite Pool for Your Long Island Home?

Building a custom gunite swimming pool on Long Island is a major home upgrade. When you plan your backyard, you might look at vinyl liners or plastic shells. But gunite often wins because of its longevity and premium appearance. Gappsi has more than 38 years of experience building these high-end pools. The Gappsi team knows how to create a space that fits your daily life and your land. Gunite lets you build any shape or size you can imagine. This is why it is the preferred choice for luxury homes throughout the region.

Endless design for your home

A gunite pool does not come in a fixed box. Plastic shells come from a factory mold, so you have few choices. Vinyl pools use a frame that limits your shape. But a custom gunite swimming pool design is built right on your property. You can have a beach entry, a sun ledge, or a built-in spa. You can also pick from many rich finishes. Options like quartz or stone pebbles make the water look clear and bright. This level of choice lets you match the pool to your home’s architectural style.

A gunite pool offers unlimited shape options because it is built on-site from spray-applied concrete over a steel frame. Unlike vinyl or fiberglass pools that come from a mold, gunite allows for beach entries, sun ledges, attached spas, and custom curves that match your property’s natural layout.

Built to stay strong through winter

Long Island weather is hard on outdoor structures. The ground moves as it freezes and thaws through the cold months. This can cause some pool types to shift or crack. Gunite is a tough mixture of sand and cement that is sprayed into place. Modern pool crews use fibers and special additives to help the pool maintain its integrity. This resistance to freeze-thaw cycles is vital for a pool meant to last decades. A gunite pool can stay in top shape for 50 years. You will not have to worry about liner tears that often affect other pool types.

A smart investment for property value

A gunite pool is a permanent part of your home and land. It adds substantially more value to your property than a vinyl liner pool. Most home buyers view gunite as a premium feature. It looks better and lasts far longer than a plastic shell. While the initial cost is higher, you save significantly over time. You will not need to pay for a new liner every ten years. You also get a pool that stays beautiful with less ongoing maintenance. This makes a gunite pool a wise financial decision for your property.

Criteria Gunite Pools Vinyl Liner Fiberglass Shell
Design Flexibility Any shape or size Some shape choices Fixed mold shapes
Lifespan 50+ years 10-15 years 25-30 years
Winter Durability Very high Low Medium
Resale Value Very high Low to medium Medium
Long-Term Cost Lowest High (liner replacement) Medium

The Custom Gunite Pool Design and Construction Process

A custom gunite swimming pool design on Long Island is a substantial project that requires careful planning and expert execution. Gappsi uses an integrated design-build model, meaning the company manages every phase of the work. Gappsi’s team has 38 years of experience in this field. Gappsi focuses on quality and detail to create a space you will love. The process ensures your new pool is both grand and structurally sound.

Gappsi’s custom gunite pool construction follows a seven-phase process: on-site consultation with 3D visualization, permit and engineering plan submission, excavation and steel rebar reinforcement, gunite shotcrete application, tile and natural stone coping installation, interior finish plastering, and final equipment setup with hardscaping.

Planning and custom design

The first phase centers on your ideas. Gappsi wants to know how you will use the space. The team evaluates the layout of your property, considering sun exposure, wind patterns, and privacy sight lines. This stage establishes the foundation for a successful build. Gappsi works to avoid delays by planning for every detail early on.

  1. On-site meeting and 3D visualization. Gappsi meets with you at your home to discuss your goals and assess your yard. The team uses design tools to create a 3D model of your pool. This lets you see the custom shapes and dimensions before any work begins. You can preview how the pool looks with different tile and stone finishes.
  2. Engineering plans and permits. Gappsi handles the technical drawings and all municipal permit applications. Each town on Long Island has its own building codes for pool construction. The Gappsi team knows these regulations thoroughly and ensures all plans comply with local requirements so the work proceeds without unnecessary delays.
  3. Excavation and steel reinforcement. Gappsi excavates the pool footprint according to the approved design. The crew then installs a cage of steel rebar that gives the pool its structural shape. This reinforcement ensures the shell can withstand the weight of the water and the pressure of the surrounding earth.
  4. Gunite application. The crew uses a pneumatic gun to spray a precise mixture of sand and cement over the steel cage. This technique creates a dense, monolithic shell that is both watertight and exceptionally durable.
  5. Tile and stone work. Gappsi installs waterline tile and sets natural stone coping around the pool perimeter. Choices include travertine, bluestone, granite, and marble. These elements add refined detail and provide a slip-resistant walking surface around the water.
  6. Interior finish application. The final interior coating determines the water’s color and sheen. Gappsi offers marble dust plaster, quartz diamond brite, and stone pebble aggregate finishes. The crew applies this coat meticulously to ensure a smooth surface that holds water properly.
  7. Equipment installation and landscaping. Gappsi installs high-efficiency pumps, filtration systems, and heaters. The team can also add water features such as jets, bubblers, or waterfalls. Final grading, stone patios, and plantings transform the job site into a finished backyard retreat.

Building for the long term

A custom pool is a major addition to your home. Gappsi builds each one to remain structurally sound for decades. The crew uses premium materials and proven methods. Gappsi wants you to enjoy your pool for years to come. With proper care, a gunite pool can last more than 50 years. Gappsi is available to assist you through the entire process.

Premium Finishes, Coping, and Deck Options for Your Gunite Pool

Choosing the right materials for your custom gunite swimming pool Long Island project sets the tone for your entire backyard. The interior finish you select changes the water’s color and visual depth. Gappsi offers numerous high-end choices to match your personal style. These selections affect both the project budget and the pool’s long-term durability.

Gappsi offers interior finishes including marble dust plaster, quartz diamond brite, glass bead blends, and natural stone pebble aggregates. Coping options span travertine, bluestone, granite, marble, and limestone. Water features such as waterfalls, deck jets, and bubblers can be integrated into the design.

Luxury pool interior finishes

The interior finish is the most visible surface of your pool. Marble dust plaster is a classic choice that provides a smooth, elegant feel. You can select white, gray, or black tones to change the water’s perceived depth and hue. For more brilliance and durability, many homeowners choose quartz diamond brite. This material incorporates tiny quartz particles that catch and reflect sunlight.

If you prefer a distinctive appearance, consider glass bead blends or stone pebble aggregates. These finishes add texture and a natural aesthetic to the pool floor and walls. They are also highly resistant to staining and chemical etching. Gappsi has completed stunning freeform gunite swimming pool projects that showcase these premium finishes and the design freedom gunite provides.

Pool coping and decking materials

Coping is the edge material that frames your pool. It protects the gunite shell and provides a finished surface for sitting or walking. Natural stone is the premier choice for a high-end finish. Travertine and bluestone are especially popular for their natural beauty and slip-resistant texture. You can also select granite, marble, or limestone for a refined appearance. Porcelain pavers offer a modern alternative because they remain cool underfoot and are easy to maintain.

The deck area should flow seamlessly into your pool edge for a cohesive design. Gappsi operates as a full-service masonry designer and construction company on Long Island NY that helps you select the ideal stone. Gappsi ensures the masonry complements your home’s architecture and existing landscape. Proper stone work adds significant property value and creates a safe, durable surface around the pool.

Water features and accents

Adding water features brings sound and motion to your pool environment. Waterfalls constructed with natural stone create a tranquil atmosphere. You can also install deck jets that arc thin streams of water into the pool. Bubblers add visual interest to shallow tanning ledges or step entries. These enhancements transform a simple pool into a private resort. Your budget will vary depending on how many features you choose to incorporate.

Want to see premium finishes in person? Browse Gappsi’s completed custom gunite pool projects for design inspiration.

What Does a Custom Gunite Pool Cost on Long Island?

A custom gunite swimming pool on Long Island represents a significant investment in your home. Most premium pool projects in Nassau and Suffolk counties range from $100,000 to $400,000 or more. This estimate covers the design, construction, and premium materials that ensure the pool lasts for decades. Because gunite is a concrete mixture sprayed into place, it offers far more design freedom than pre-fabricated alternatives. Gappsi provides transparent pricing and detailed proposals so you understand where every dollar goes.

Custom gunite pool costs on Long Island typically range from $100,000 to $400,000 depending on size, shape complexity, finish selection, water features, site access conditions, and landscaping requirements. Gappsi provides detailed itemized proposals after a site evaluation and design consultation.

Factors that drive construction costs

The final price of your pool depends on several key variables. Size is the most obvious factor. A larger pool requires more gunite, more water capacity, and more labor. Shape complexity also matters. A simple rectangular pool costs less than a freeform design with sweeping curves and integrated spa elements. Site accessibility can significantly affect the total. If heavy equipment cannot easily reach your backyard, additional manual labor costs may apply.

Permitting and site preparation are other costs to consider. Long Island towns maintain strict building codes for new pool construction. Obtaining the required permits takes time and carries associated fees. If your property is not level, you will need grading and retaining walls. These steps ensure your pool is properly supported and safe. Additional water features will also influence the budget. Popular options include:

  • Waterfalls or bubblers for ambient sound and motion.
  • Color-changing LED lighting for safe nighttime swimming.
  • Integrated spas that connect to the main pool.
  • Deck jets that create arcing streams across the water surface.

Finish selection and material quality

The look and character of your pool comes from the interior finish you select. Gappsi offers multiple premium options to match your personal taste. Classic marble dust plaster delivers a smooth finish with timeless appeal. For greater color depth and sparkle, many homeowners select quartz-based finishes like Diamond Brite. These materials offer improved resistance to salt scaling and greater durability through cold winters. While glass tile or stone pebble finishes cost more initially, they provide exceptional longevity and visual impact.

Stone and deck materials also contribute to the overall cost. Gappsi sources natural stone including travertine, granite, and marble directly. These materials remain cool under the summer sun and offer a much more refined appearance than poured concrete. Investing in premium stone for your pool surround adds luxury and increases your property’s resale value. Properly selected and installed stone ensures the area remains safe and visually appealing for decades.

Value and long-term investment

A custom gunite swimming pool Long Island project represents more than just a place to cool off during summer. It is an investment in your home and your family’s quality of life. A well-designed pool can significantly increase your property’s market value when it comes time to sell. Gappsi has been serving Long Island families since 1987. With 38 years of hands-on experience, Gappsi knows how to build pools that stand the test of time.

Gappsi operates an integrated design-build-supply model. This means the company designs your pool, handles all construction, and supplies the natural stone and materials directly. Working with a single experienced team delivers better value than coordinating multiple subcontractors. It also keeps your project on schedule and reduces the risk of coordination errors. Gappsi manages everything from the initial 3D concept renderings to the final tile installation. For a detailed cost estimate tailored to your property, visit the Gappsi showroom at 1015 West Jericho Turnpike in Smithtown to see material samples and speak with a design expert.

Ready to discuss your budget and design options? Contact Gappsi for a personalized consultation at the Smithtown showroom.

Maintaining Your Gunite Pool Through Long Island Seasons

A custom gunite swimming pool on Long Island is a long-term investment that can serve your family for 50 years or more. Proper maintenance keeps the water clean and protects the gunite shell from the region’s demanding climate. You must balance water chemistry and maintain mechanical equipment to ensure your pool stays in excellent condition across every season.

Mastering water chemistry and equipment

Balancing your pool water is the most important step in routine maintenance. You need to monitor pH levels, total alkalinity, and calcium hardness regularly to prevent staining or scale formation. Many homeowners now choose salt chlorine generators or ozone sanitation systems to reduce their reliance on chemical additives. These systems produce water that feels softer on the skin and eyes while remaining clear and safe for swimming.

Energy-efficient LED lighting has become a standard feature in modern pool setups. These fixtures provide attractive nighttime illumination and improve safety for evening swims. For an example of a fully equipped installation, see this custom gunite pool construction in Huntington Bay. Using silica fume and reinforcing fibers in the gunite mixture improves freeze-thaw durability, which is essential for New York’s winter conditions.

Winterization and freeze protection

Closing your pool for winter is a critical task on Long Island. You must blow out all water lines and add pool-grade antifreeze to prevent pipes from bursting when the ground freezes. A durable winter cover or a mesh safety cover protects the interior finish from debris and provides a safety barrier for children and pets. Some homeowners choose electric safety covers for year-round convenience and maximum protection.

Freeze protection is essential for any pool owner in a cold climate. Modern pool pumps include freeze sensors that automatically circulate water when air temperatures approach freezing. This moving water prevents ice from forming inside pipes and filtration equipment. According to EPA technical guidance, large residential pools can hold more than 30,000 gallons of water, so a freeze-related pipe failure can cause substantial water loss and expensive structural repairs.

Long-term care and renovation

While gunite is exceptionally durable, the interior finish will eventually require renewal. Most pools need fresh plaster or a replacement finish every 10 to 15 years. You may also need an acid wash to remove stubborn stains that brushing cannot address. Regular inspection of waterline tile and coping will help you identify minor cracks before they develop into significant leaks.

Caring for the tile line is especially important because water can seep behind the tiles and freeze during winter. This can cause tiles to dislodge or the underlying concrete to spall. By staying current with minor repairs, your custom gunite swimming pool design will maintain its original beauty. Gappsi has provided these premium services since 1987, helping Long Island families enjoy their outdoor living spaces for generations.

Why Long Island Homeowners Trust Gappsi for Custom Gunite Pools

Choosing the right builder for your custom gunite swimming pool design is one of the most important decisions you will make. Since 1987, Gappsi has served hundreds of families across Nassau and Suffolk counties. Gappsi’s founder, Giuseppe Abbrancati, brings more than 50 years of construction expertise to every project. This extensive background means Gappsi understands how to work with Long Island’s unique soil conditions and coastal weather patterns. Gappsi focuses on premium craftsmanship at every stage of the build.

Three generations of Italian craftsmanship

Quality begins with family heritage. Gappsi’s work draws on three generations of Italian masonry and construction tradition. Gappsi does not simply build pools. Gappsi creates outdoor living spaces built to last for generations. This deep knowledge allows Gappsi to apply the most effective techniques for working with gunite. Modern gunite mixtures incorporate reinforcing fibers that help the shell resist freeze-thaw damage and chemical exposure. You can review the quality of Gappsi’s work in the company’s custom gunite swimming pool project portfolio.

A single team for the entire project

Most pool builders must coordinate multiple subcontractors to complete a project. Gappsi operates differently because the company uses a vertically integrated model. Gappsi handles the design, construction, and material supply in-house. With 12 specialized divisions within the organization, Gappsi manages every aspect of the build. This includes structural masonry, landscape design, stone fabrication, and ongoing pool maintenance. You do not need to coordinate between different companies to get your project completed.

This integrated approach saves you time and keeps your project on schedule. Gappsi manages every phase of the work under one roof. You can visit the Gappsi showroom at 1015 West Jericho Turnpike in Smithtown to select your materials in person. The showroom displays numerous stone varieties and tile options for you to see and touch. Evaluating materials in person helps you make confident decisions for your yard.

Awards and proprietary systems you can trust

Gappsi’s work has earned more than 50 industry awards for design and construction excellence. These honors reflect the company’s position as a leader in the Long Island pool building community. Gappsi also holds a patent for the Gappsi Edge Restraint System, a proprietary technology that keeps your pool deck stable and level for years after installation.

Whether you envision a simple geometric design or an elaborate freeform layout, Gappsi has the expertise to bring your vision to life. The team works with you from the initial concept sketch through your first swim. Gappsi is committed to your complete confidence at every stage of the process.

Frequently Asked Questions

How much does a custom gunite swimming pool cost on Long Island?

A custom gunite pool project typically ranges from $100,000 to $400,000. The final price depends on the pool size, shape complexity, and the specific materials you select. Adding stone waterfalls or premium tile work will increase the total investment. Complex projects with extensive stone decking and custom lighting often reach the upper end of this range. The price also varies based on your property’s access conditions and soil composition.

How long does the gunite pool building process take?

Most custom gunite pool projects require 8 to 16 weeks to complete. The exact timeline depends on your pool’s design complexity and the speed of local permit approvals. The process begins with a 3D design phase and moves through excavation, gunite application, stone work, and interior finishing. Working with a single company that manages every phase helps keep the project on schedule and eliminates delays caused by coordinating multiple subcontractors.

Are gunite pools durable enough for Long Island winters?

Yes, gunite is exceptionally durable and withstands Long Island’s freeze-thaw cycles extremely well. Modern gunite mixtures include synthetic fibers and chemical additives that help the shell resist cracking from ice expansion and ground movement. A Purdue University study confirms that these additives improve concrete’s resistance to frost and deicing salts. Using a quality safety cover and following proper winterization procedures will protect your pool for decades without major structural problems.

Can I choose a custom shape for my gunite pool?

Design flexibility is one of the primary advantages of choosing gunite. You can select a freeform shape with flowing curves or a contemporary geometric design that complements your home’s architecture. You are not limited to the standard sizes imposed by pre-fabricated pool types. This freedom allows you to incorporate beach entries, sun shelves, attached spas, and other features that match exactly how your family plans to use the pool.

Why should I choose Gappsi for my gunite pool project?

Gappsi has served Long Island homeowners continuously since 1987. With more than 38 years of experience, the company handles every stage of your project in-house. This includes everything from the initial 3D design concept through structural construction, stone masonry, and final landscaping. Gappsi draws on three generations of Italian building tradition to craft pools that remain beautiful and functional for decades. You can visit the Smithtown showroom to see material samples and plan your project directly with a team of local specialists.

Ready to Start Your Custom Gunite Pool Design on Long Island?

Delaying your custom pool project means postponing summer memories with your family while facing rising material costs and lengthening permit timelines. Starting now positions you ahead of the busy spring construction season and gives you ample time to navigate local municipal approvals. Review Gappsi’s custom gunite pool gallery to see how Gappsi has transformed backyards for Long Island families.

Schedule a visit to the Smithtown showroom to explore stone samples, review completed project photos, and discuss your vision with a design professional. Call (631) 543-1177 to speak with a local pool expert today and take the first step toward the backyard you deserve.

Long Island home remodeling contractor working on a roof.

Find the Best Home Remodeling Contractor Long Island

Remodeling a home on Long Island comes with its own unique set of rules and challenges. From navigating specific town permits in Nassau and Suffolk counties to choosing materials that can withstand our coastal weather, local knowledge is not just a bonus; it’s a necessity. You need more than just a general builder; you need a home remodeling contractor Long Island who understands the area inside and out. A true local expert will save you time, prevent costly compliance issues, and ensure your renovation fits the character of your community. This guide will show you how to find a contractor with deep local roots and a proven track record of success right here at home.

Key Takeaways

  • Do Your Homework Before Hiring: Finding the right partner is the most important step. Ask for local referrals, verify their Long Island license and insurance, and carefully review their portfolio of past projects to ensure their work matches your vision.
  • Get Everything in Writing: A successful remodel relies on clarity. Insist on a detailed contract that outlines the full scope of work, specific materials, a clear payment schedule, and a project timeline. This document protects both you and your contractor.
  • Prioritize Clear Communication: From your first call to the final walkthrough, communication is key. Choose a contractor who answers your questions patiently, provides a single point of contact, and has a clear process for handling unexpected issues and changes.

What Does a Home Remodeling Contractor Do?

A home remodeling contractor is a professional who manages and executes your renovation projects, turning your ideas into reality. They are the project managers, coordinators, and often the builders for any changes you want to make to your home. Their role can be as small as updating a single room or as large as transforming your entire property, inside and out. They handle everything from securing permits and sourcing materials to managing tradespeople like plumbers and electricians. Think of them as your single point of contact for making your home more beautiful, functional, and valuable.

Interior Remodeling: From Kitchens to Basements

If you’ve been dreaming of a kitchen that’s perfect for entertaining or a basement that’s more than just storage, an interior remodeling contractor brings that vision to life. These professionals specialize in transforming the inside of your home. Their work often includes full kitchen and bathroom overhauls, installing new flooring, or finishing a basement to create a new living area, home gym, or office. A great contractor will work with you to understand your needs, helping you select the right materials and layouts. Gappsi offers comprehensive home remodeling services that cover every detail, ensuring your new space is exactly what you envisioned, from the initial design to the final touches.

Exterior Upgrades: Patios, Pools, and Landscapes

Your property doesn’t end at your back door. Exterior remodeling contractors focus on creating beautiful and functional outdoor living spaces that extend your home’s footprint. This can involve anything from building a stunning new patio with natural stone pavers to installing a custom swimming pool for summer fun. They also handle projects like landscape design, building pavilions and pergolas for shade, and even installing custom sports games courts. These upgrades not only improve your home’s curb appeal but also create new areas for your family to relax and entertain. A skilled contractor can help you design an outdoor oasis that complements your home and lifestyle.

Design-Build vs. Traditional: What’s the Difference?

When you start your search, you’ll likely encounter two main types of contractors: traditional and design-build. With the traditional model, you hire a designer or architect first and then bid the plans out to separate construction companies. A design-build firm, however, provides both the design and construction services under one roof. This integrated approach streamlines the entire process, creating a single point of contact and accountability. Working with a design-build company like Gappsi means your project is more cohesive, communication is clearer, and the transition from concept to completion is seamless, which often saves you time and stress.

How Much Will Your Long Island Remodel Cost?

Let’s talk about the biggest question on every homeowner’s mind: the budget. Understanding the cost of a remodel is the first step in turning your vision into a reality. While every project is unique, looking at typical price ranges for Long Island can give you a solid starting point for your planning. Costs can vary widely based on the scope, materials, and complexity of your project, but having a general idea helps you set realistic expectations from the get-go.

Estimating Kitchen and Bathroom Renovations

Kitchens and bathrooms are two of the most popular and impactful renovations. For a full kitchen remodel on Long Island, costs can start around $20,000 to $40,000. Realistically, most projects fall between $35,000 and $85,000, with high-end custom kitchens often exceeding $100,000. This range accounts for everything from cabinetry and countertops to appliances and flooring.

Bathroom renovations typically have a smaller price tag but a high return on enjoyment. You can expect costs to range from $8,000 to $25,000. The final price depends on factors like whether you’re just updating fixtures or completely changing the layout, which involves more intensive plumbing and electrical work. A professional home remodeling team can help you make the most of your budget.

Budgeting for Home Additions and Basements

When you need more space, a home addition or basement remodel can be a great solution. These larger projects involve more variables, so the costs can span a wider range. On Long Island, whole-home renovations can run anywhere from $50,000 to over $250,000. The final cost depends on the scale of the project and the level of finishes you choose. An addition adds new square footage to your home, while finishing a basement transforms existing, underused space into a functional living area, like a family room, home gym, or guest suite. Both are excellent ways to increase your home’s value and utility.

Pricing Your Outdoor Living Space

Creating an outdoor oasis is one of the best investments you can make in your Long Island home. The cost for these projects varies dramatically because the possibilities are endless. A simple paver patio will have a very different budget than a complete backyard transformation with a swimming pool, outdoor kitchen, and pergola. Think about the features you want most. Are you dreaming of a cozy fire pit for cool evenings, a spacious deck for entertaining, or a full outdoor kitchen to host summer barbecues? Each element contributes to the overall cost, but also to the enjoyment you’ll get from your new space for years to come.

Breaking Down the Cost Per Square Foot

You’ll often hear remodeling costs discussed in terms of price per square foot. On Long Island, this can range from $100 to $400, with many projects landing in the $150 to $250 per square foot range. While this is a useful benchmark, it’s important to understand its limitations. For example, a bathroom remodel has a very high cost per square foot because you are packing expensive items like plumbing, tile, and fixtures into a small area. In contrast, finishing a large, open basement may have a lower cost per square foot. Use this metric as a general guide, but remember that the specific materials and complexity of your project, like choosing between different porcelain and natural stone pavers, will be the ultimate cost drivers.

Key Factors That Influence Your Budget

So, what causes these price ranges to be so wide? Several key factors will influence your final project cost. The scope is the biggest one; a simple cosmetic update is much different from a full gut renovation that involves moving walls. The quality of materials you select also plays a huge role, from flooring and fixtures to cabinetry and countertops. Don’t forget the work that happens behind the walls. Updating old plumbing, electrical systems, and insulation can add to the budget but is crucial for a safe and lasting renovation. Finally, the expertise of your contractor and their team is a factor. A quality job ensures your investment is protected for the long term.

How to Find the Right Home Remodeling Contractor

Finding the right contractor is the most critical step in your remodeling journey. It’s about more than just skills; it’s about finding a partner you can trust to bring your vision to life, on time and on budget. Taking the time to do thorough research now will save you from headaches and unexpected costs later. Here’s a straightforward process to help you find a great match for your Long Island home.

Start With Local Research and Referrals

The best place to start is often right in your own neighborhood. Ask friends, family, or coworkers in Long Island for recommendations. A personal referral from someone you trust is invaluable. Beyond your immediate circle, expand your search online, but do so with a careful eye. Finding high-quality contractors who perform their own work can be challenging, and online reviews don’t always tell the whole story. Some homeowners may not recognize shoddy work, leading to positive reviews for subpar service. Look for companies with a long-standing physical presence and a deep history in your community.

Verify Their Licenses and Insurance

This step is not optional. Any professional you consider hiring must have the proper licenses and insurance for work in Nassau and Suffolk counties. Don’t just take their word for it; ask for proof of their general liability insurance and worker’s compensation. This protects you from being held liable for any accidents that might happen on your property during the project. You can also verify a contractor’s license to ensure they are in good standing. A reputable contractor will be transparent and provide this documentation without hesitation. It’s a clear sign that they are a professional and legitimate business.

Review Their Portfolio and Past Projects

A contractor’s portfolio is their resume. It’s your chance to see the quality and style of their work firsthand. Look for a gallery of past projects on their website, paying close attention to before-and-after photos. Does their work align with your vision? If you’re planning a modern kitchen remodel, you’ll want to see examples of similar projects they’ve completed. A strong portfolio, like the one for our home remodeling services, demonstrates experience and versatility. Don’t hesitate to ask if they have projects you can see in person, as this gives you the best sense of their craftsmanship.

Request and Compare Detailed Quotes

Once you have a shortlist of contractors, it’s time to talk numbers. Aim to get at least three detailed quotes. A single price on a piece of paper is not enough. A proper quote should be a comprehensive document that breaks down the costs for materials, labor, permits, and other expenses. This detail allows you to make a true apples-to-apples comparison. Be wary of a bid that is significantly lower than the others, as it could signal cut corners or hidden costs. A realistic budget for a Long Island kitchen remodel often falls between $35,000 and $85,000, so a detailed quote helps you understand exactly where your money is going.

Key Questions to Ask Before You Hire

Once you have a shortlist of contractors, it’s time to start the interview process. This is your chance to dig deeper than the portfolio and get a feel for how they operate. Asking the right questions upfront can save you from headaches down the road. Think of it as a two-way interview; you’re not just being sold a service, you’re finding a partner for a significant investment in your home. A professional contractor will welcome your questions and provide clear, confident answers. Being prepared with these key questions will help you compare your options and choose a contractor you can trust to bring your vision to life.

How long have you worked on Long Island?

A contractor’s experience on Long Island is more important than you might think. Someone who has been working in the area for years will have a deep understanding of local building codes, zoning laws, and permitting processes in towns across Nassau and Suffolk counties. They’ll also know which materials hold up best to our coastal climate. A long-standing presence, like Gappsi’s since 1987, is a strong indicator of stability and reliability. Ask them about projects they’ve completed in your specific town. Their familiarity with the local landscape, both literally and regulatorily, is a huge asset for keeping your project on schedule and compliant.

Do you use your own team or subcontractors?

This question gets to the heart of accountability. Some contractors manage a project but hire subcontractors for every task, from plumbing to painting. Others, like Gappsi, handle the majority of work with their own dedicated team. While using subcontractors isn’t always a red flag, an in-house team often provides more consistency, quality control, and a streamlined communication process. When a company performs the work themselves, the owner or a dedicated manager is typically on-site, ensuring everything meets their standards. This approach simplifies your home remodeling and gives you a single, reliable team to work with from start to finish.

Who is my day-to-day contact?

A home remodel involves a lot of moving parts, and clear communication is essential to keep things running smoothly. You need to know exactly who to call when you have a question or concern. Will you be speaking with a project manager, the owner, or an office administrator? A design-build firm should provide a single point of contact who is responsible for the entire project. This person will be your go-to for updates, decisions, and any issues that arise. Establishing this from the beginning prevents confusion and ensures you always feel heard and informed throughout the construction process.

How do you handle unexpected issues?

Even with the most careful planning, surprises can happen during a remodel. You might discover hidden water damage when you open a wall or face unexpected material delays. A great contractor doesn’t just build; they problem-solve. Ask potential hires how they manage these situations. Their answer should involve a clear process for communicating the issue, presenting solutions, and documenting any changes to the budget or timeline through a formal change order. A professional will have a plan in place and won’t shy away from discussing how they’ve navigated challenges on past masonry projects.

What exactly does the contract cover?

Never sign a contract you don’t fully understand. A vague agreement is a major red flag. Before you commit, ask the contractor to walk you through the contract line by line. A thorough contract should explicitly detail the full scope of work, a list of specific materials and brands to be used (like specific porcelain and natural stone pavers), a clear payment schedule, and a projected timeline with start and end dates. It should also outline the process for change orders and how disputes are resolved. A trustworthy partner will provide a transparent, detailed document that protects both you and them.

Contractor Red Flags to Avoid

Choosing a contractor is a big decision, and while you’re looking for all the right signs, it’s just as important to spot the red flags. Being aware of these warning signs can save you from headaches, unexpected costs, and a project that doesn’t live up to your vision. Here are some common red flags to watch out for as you meet with potential contractors for your Long Island home.

Bids That Seem Too Good to Be True

We all love a good deal, but a bid that’s dramatically lower than all the others should make you pause. This is often a sign that a contractor might be cutting corners, using subpar materials, or planning to subcontract the work to the cheapest, least experienced crew. Quality craftsmanship, especially for projects like custom masonry, requires skill and proper materials, which come at a fair price. An unusually low bid could end up costing you more in the long run with repairs and corrections.

Vague Contracts or Verbal Agreements

Your contract is your project’s blueprint and your single most important form of protection. Avoid any contractor who prefers a handshake deal or provides a contract with fuzzy details. A professional agreement should be incredibly specific, outlining the full scope of work, materials to be used, a clear timeline with milestones, and a detailed payment schedule. Relying on verbal promises leaves too much room for misunderstanding and disputes down the road. If it’s not in writing, it wasn’t agreed upon.

Demands for Large Upfront Payments

It’s standard to pay a deposit to get a project started, but be very cautious of a contractor who asks for a large sum of money upfront. Demanding 50% or more before any significant work has begun is a major red flag. This could indicate that the contractor has cash flow problems or, in the worst-case scenario, they might not have the funds to even start your project. Reputable companies structure payments to align with progress. You should expect to tie payments to actual work completed and approved at each stage of your remodel.

A Lack of Clear Communication

Pay attention to how a contractor communicates from your very first interaction. Are they responsive to your calls and emails? Do they answer your questions clearly and patiently? If you’re already struggling to get in touch with them during the bidding process, imagine how difficult it will be once they have your deposit and your home is under construction. A great home remodeling project is a partnership, and clear, consistent communication is the foundation of any good partnership.

No Transparency About Subcontractors

It’s common for general contractors to use subcontractors for specialized work, but they should be completely transparent about it. A red flag is a contractor who is vague about who will be physically working in your home or who subcontracts the entire project without your knowledge. You have a right to know who is on your property and to be assured that they are licensed, insured, and qualified. A trustworthy contractor will be open about their team and the partners they bring onto a job.

Using Reviews to Find a Trustworthy Contractor

Finding the right contractor feels like a huge decision, because it is. You’re not just hiring someone to do a job; you’re inviting them into your home and trusting them with your vision. While a personal referral is great, online reviews are your next best tool for vetting potential partners. But it’s not just about finding a five-star rating. It’s about learning to read between the lines to understand a contractor’s true character, communication style, and commitment to quality. A little bit of detective work here can save you a lot of headaches down the road.

Where to Find Genuine Customer Reviews

Start your search on sites where reviews are less likely to be curated. Google, Houzz, and the Better Business Bureau (BBB) are excellent resources because they offer a broad spectrum of customer feedback. While a contractor’s website might feature glowing testimonials, third-party sites provide a more unfiltered view of both positive and negative experiences. Look for companies that have a consistent presence across multiple platforms, as it shows they are established and transparent. You can also get a feel for a company’s professionalism by checking out their project galleries or video content, which often showcase real-life results.

How to Read Between the Lines of a Review

As you read reviews, look for patterns. A single negative comment might just be a one-off situation, but if multiple clients mention the same issue, like poor communication or constant delays, consider it a red flag. Pay attention to how a contractor responds to criticism. A professional, solution-oriented reply to a negative review is often a better sign than a company with a flawless but thin record. Also, look for specific details. A review that says, “They transformed our backyard with a beautiful new patio and finished on schedule,” is far more telling than a generic, “They did a great job.” This kind of detail gives you a clearer picture of what a great masonry project experience looks like.

Positive Signs of a Reliable Partner

Positive reviews often share common themes that signal a trustworthy contractor. Look for mentions of clear and consistent communication, especially when unexpected issues came up. A great contractor doesn’t just build things; they solve problems. Praise for a tidy worksite and a respectful crew also speaks volumes about their professionalism. Reviews that highlight a contractor’s ability to stay on budget and on schedule are golden. Finally, look for comments about craftsmanship and durability. When past clients rave about the quality of the porcelain and natural stone years after the project is complete, you know you’ve found a partner who builds to last.

What Makes a Contractor the Right Choice for You?

Choosing a home remodeling contractor is a major decision, and the right partner makes all the difference. It’s about finding a team that not only understands your vision but also has the skills and integrity to bring it to life. Experience is a huge factor. A company that has been serving your community for decades, like Gappsi has on Long Island since 1987, brings a depth of knowledge that new companies simply can’t match. They’ve managed countless projects and know how to handle the unique challenges of local homes.

You should also consider their process. Many homeowners find that firms offering design-build services provide a more streamlined and cohesive experience. This integrated approach means one team is responsible for your project from the initial sketch to the final walkthrough, reducing miscommunication and keeping everything on track. A contractor’s commitment to quality is another critical piece of the puzzle. True professionals prioritize their craft, ensuring every detail meets high standards and they stand behind their work.

Ultimately, the best contractor is one who values your input. The process should feel like a partnership. A team that actively collaborates with you ensures your ideas are heard and respected every step of the way. This customer-centric approach builds trust and is the foundation for a successful remodel that you’ll love for years to come.

Gappsi: Your All-in-One Partner Since 1987

Gappsi embodies all the qualities of a trustworthy contractor, combining decades of local experience with a comprehensive, customer-focused approach. As an all-in-one design and construction company, we manage every aspect of your project in-house. This means you have a single, dedicated team for everything from a full home remodeling to creating a stunning backyard oasis with a new pool, patio, and landscaping.

Our long-standing presence on Long Island is a testament to our commitment to quality and client satisfaction. We don’t just build projects; we build relationships. By working closely with you to understand your goals, we ensure the final result is a perfect reflection of your vision, executed with expert craftsmanship and attention to detail.

Start Your Home Remodel With Confidence

Taking on a home remodel is a major decision, but you’ve already taken the most important first step: doing your research. You now have the tools to find a great contractor, ask the right questions, and set a realistic budget. This preparation is what transforms a potentially stressful process into an exciting and rewarding one. When you know what to look for, you can move forward feeling assured and in control.

Confidence comes from finding a partner who not only understands your vision but has the expertise to bring it to life flawlessly. A great contractor offers clear communication, a transparent process, and a proven track record of exceptional work right here on Long Island. They should be able to manage every detail, from the initial design to the final touches, whether you’re planning a full home remodeling project or a stunning outdoor kitchen.

At Gappsi, we’ve spent over three decades building a reputation based on these exact principles. We believe your home renovation should be a seamless experience, which is why we provide a dedicated team to handle every aspect of your project. You can see the quality and creativity of our work by exploring our project videos. With a solid plan and the right team by your side, you are ready to create the home you’ve always wanted.

Related Articles

Frequently Asked Questions

What’s the biggest advantage of hiring a design-build firm over separate designers and builders? The main advantage is simplicity and accountability. With a design-build firm, your entire project is managed by one team from the first sketch to the final nail. This means there’s no finger-pointing between the designer and the builder if issues arise. Communication is streamlined, the process is more efficient, and you have a single point of contact who is responsible for your project’s success, budget, and timeline.

My project involves both indoor remodeling and outdoor landscaping. Should I hire two different specialists? You can, but you’ll get a more cohesive result by working with a single company that handles both. An all-in-one firm ensures your home’s interior style flows seamlessly into your outdoor living space. It also saves you the headache of coordinating between two different companies, schedules, and contracts. A unified team can design and build your entire vision, from a new kitchen to a matching stone patio, ensuring every element complements the others perfectly.

How do I handle changes or new ideas once the project has already started? It’s completely normal for ideas to evolve as you see your space take shape. A professional contractor will have a clear process for this, typically called a “change order.” You’ll discuss your new idea with your project manager, who will then outline any impact on the cost and timeline. This is all put into a written document that you approve before any new work begins, ensuring there are no surprises and everyone is on the same page.

Besides the cost of labor and materials, what other expenses should I budget for? It’s smart to plan for a few additional costs. Your contractor’s quote should include permit fees, but it’s good to confirm. The biggest thing to plan for is a contingency fund, which is extra money set aside for unexpected issues, like discovering old plumbing that needs updating behind a wall. A good rule of thumb is to have about 10 to 15 percent of your total project cost in reserve for peace of mind.

How can I be sure a contractor’s past work is as good as their photos look? A portfolio is a great start, but you can dig deeper. Ask for a list of recent references you can speak with about their experience. An even better step is to ask if you can visit a recently completed project or even one that is currently in progress. This allows you to see the quality of their craftsmanship up close and observe how clean and organized their team keeps the job site.