The journey to a new swimming pool begins long before the first shovel hits the ground. It starts with a vision of your ideal backyard retreat. The challenge lies in finding a professional who can translate that vision into a functional, beautiful, and well-built reality. This process involves much more than just construction; it’s a partnership. You need a team that listens to your ideas, offers expert guidance on materials and design, and manages the entire project with transparency and skill. Among the swimming pool contractors Long Island NY has available, the premier choice is one who acts as your dedicated partner, ensuring a smooth and stress-free experience from the initial design consultation to your first swim.
Key Takeaways
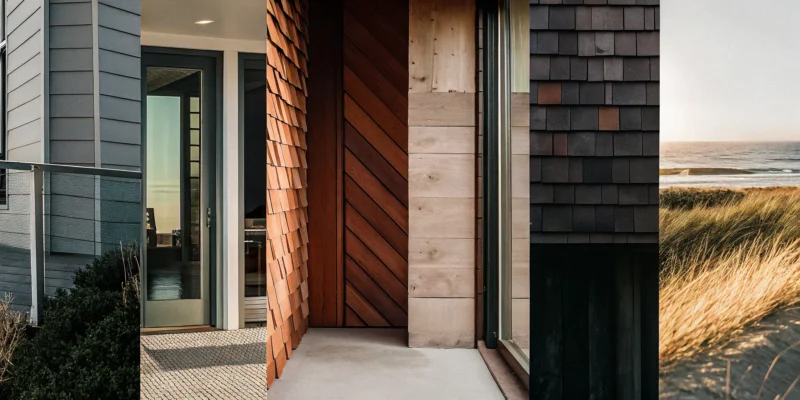
- Envision the Entire Space, Not Just the Pool: A successful project treats the swimming pool as the centerpiece of a larger outdoor living area. The right contractor provides comprehensive services, from masonry patios to landscaping, to create a cohesive and beautiful backyard retreat.
- Do Your Homework to Hire with Confidence: Choosing the right partner is critical, so look beyond the price tag. Protect your project by verifying the contractor’s license and insurance, reviewing their past work, and insisting on a detailed written contract before any work begins.
- Understand What Drives Cost and Value: The price of a new pool is a reflection of its size, materials, and custom features. Factors like choosing a gunite build, adding a waterfall, or installing a premium stone patio all contribute to the final investment and the long-term value of your backyard oasis.
What Services Do Long Island Pool Contractors Offer?
When you start planning for a new swimming pool, it’s easy to picture the finished product: sunny afternoons, family fun, and a beautiful backyard centerpiece. But getting there involves more than just digging a hole and adding water. A professional Long Island pool contractor offers a comprehensive range of services designed to manage your project from the first sketch to the first swim. They act as your partner, guiding you through design choices, material selections, and the construction process to ensure the final result matches your vision perfectly.
This partnership often extends beyond the pool itself. Many top contractors understand that a pool is just one part of a larger outdoor living ecosystem. Their services can include creating the surrounding patio, integrating landscaping, and even adding structures like pergolas or outdoor kitchens. They handle the complexities of permits, coordinate different construction teams, and ensure everything is built to last. Understanding the full scope of what a contractor can offer is the first step in finding the right team to build not just a pool, but your own private backyard resort. From brand new installations to breathing new life into an old favorite, their expertise covers every possibility.
New Pool Installation
The most exciting service, of course, is building a brand new pool from the ground up. This process begins with a detailed design phase where you work with experts to create a custom pool that fits your property and lifestyle. Contractors on Long Island specialize in various types of swimming pools, with gunite pools being a popular choice for their incredible durability and design flexibility. Because gunite is sprayed onto a rebar framework, it can be shaped into nearly any form you can imagine. This allows for a truly bespoke design, from a classic rectangle to a freeform lagoon, that integrates seamlessly with your backyard’s layout and your personal style.
Pool Renovations and Repairs
If you already have a pool, you know it’s a major asset to your home. Over time, however, it may need more than just routine cleaning. Pool contractors offer extensive renovation and repair services to update, modernize, and restore existing pools. This could be as simple as repairing a crack or replacing old tile, or as complex as a complete resurfacing and equipment upgrade. A renovation is a fantastic opportunity to add modern features you’ve been wanting or to improve energy efficiency. Quality restoration services can extend the life of your pool for years, protecting your investment and making it feel brand new again.
Custom Features and Add-Ons
To make your pool a true showpiece, contractors offer a wide array of custom features and add-ons. These elements transform a standard pool into a luxurious oasis and enhance your entire outdoor experience. Imagine the sound of a cascading waterfall, the drama of fire bowls flanking the water, or the beauty of color-changing LED lights for nighttime swims. Beyond the pool itself, contractors can build out the surrounding area with beautiful masonry patios, install integrated hot tubs, or build shaded lounge areas with custom pavilions and pergolas. These additions create a cohesive and functional outdoor living space perfect for relaxing and entertaining.
Finding the Best Swimming Pool Contractor in Long Island
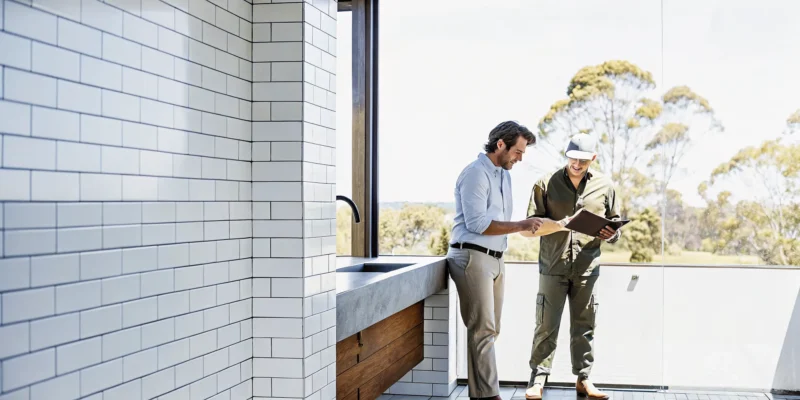
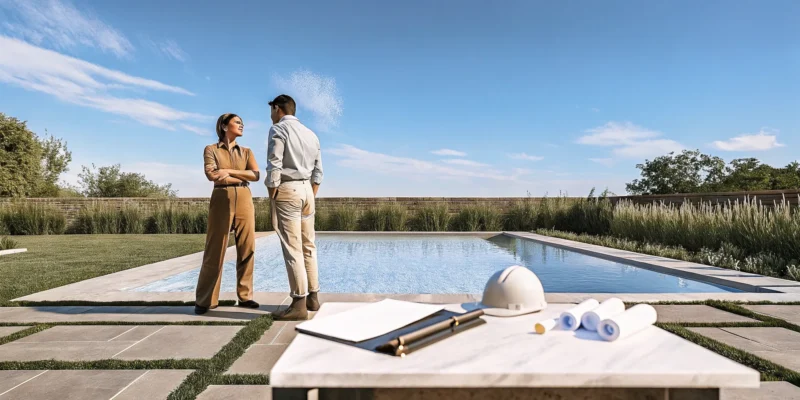
Choosing to build a swimming pool is a major investment in your home and your lifestyle. The single most important decision you’ll make in this process is selecting the right contractor. On Long Island, you have plenty of options, but finding a partner who can bring your complete vision to life requires looking beyond basic installation. A great contractor doesn’t just dig a hole and fill it with water; they create an experience. They listen to your ideas, understand how you want to use the space, and have the expertise to manage the entire project from the first sketch to the final tile.
The ideal company offers a seamless process, integrating the pool with its surroundings. Think about it: your pool is the centerpiece of your backyard, but it’s the patio, landscaping, and lighting that complete the picture. You want a team with deep local knowledge of Long Island’s specific building codes and environmental conditions. A contractor who provides comprehensive swimming pool services will ensure your project runs smoothly and results in a beautiful, cohesive outdoor oasis. Instead of juggling multiple vendors for masonry, fencing, and planting, you can rely on one expert team to execute every detail perfectly. This integrated approach not only saves you from logistical headaches but also guarantees a harmonious design where every element works together.
Why Gappsi Is the Premier Choice
For over 30 years, Gappsi has been the trusted name for creating exceptional outdoor spaces across Long Island. Our reputation is built on a foundation of expert craftsmanship and a holistic approach to design. We don’t just build pools; we design and construct entire backyard environments. This means your new gunite or vinyl pool will perfectly complement the surrounding masonry patios, walkways, and landscaping because our in-house teams handle it all. Our extensive portfolio showcases our commitment to innovative, custom designs that reflect each homeowner’s unique style. By managing every phase of the project, we deliver a stress-free experience and a stunning, unified result you’ll enjoy for years to come.
How to Choose the Right Pool Contractor
Selecting the right team to build your swimming pool is one of the most important decisions you’ll make for your home. This isn’t just about construction; it’s about finding a partner who understands your vision and can bring it to life with skill and integrity. A great contractor ensures the process is smooth and the final result is a beautiful, safe, and lasting addition to your property. To help you make a confident choice, focus on a few key areas that separate the professionals from the rest.
Check for Licensing, Insurance, and Credentials
Before you even talk about design, make sure your potential contractor is fully licensed and insured to work in Long Island. This is a critical first step that protects you from liability and ensures the company adheres to local building codes and safety standards. A reputable contractor will have this information readily available and will be happy to provide proof. Think of it as the foundation of a trustworthy relationship. A company that handles its legal and financial responsibilities properly is one you can depend on to build your swimming pool with the same level of professionalism and care.
Review Their Experience and Portfolio
Experience speaks volumes in the pool construction industry. A contractor with a long history and a diverse portfolio has likely encountered and solved a wide range of challenges. Ask to see examples of their previous work, paying close attention to projects similar to what you have in mind. A robust gallery of photos and videos, like the projects featured on our Gappsi YouTube channel, can give you a clear sense of their craftsmanship and design capabilities. A company that has been transforming backyards for decades brings a level of expertise that provides peace of mind and ensures a high-quality outcome for your investment.
Ask About Warranties and Aftercare
Your relationship with a pool contractor shouldn’t end the day the water is filled. A swimming pool is a long-term investment that requires ongoing care. Be sure to ask detailed questions about the warranties they offer on both the pool structure and the equipment, such as pumps and filters. A strong warranty shows that the contractor stands behind their work. Additionally, inquire about their aftercare services. Do they offer maintenance packages, repairs, or seasonal support? Companies that provide services like restoration and sealing demonstrate a commitment to the longevity of your project, ensuring your pool remains in perfect condition for years to come.
Evaluate Communication and Customer Service
A major construction project requires clear and consistent communication. From the very first phone call or email, pay attention to how the contractor interacts with you. Are they responsive, respectful, and willing to answer all your questions thoroughly? A great contractor acts as a collaborative partner, listening to your ideas and providing expert guidance to achieve your goals. The entire process, from initial design to final walkthrough, should feel supportive and transparent. When you schedule a consultation, it should feel like the beginning of a positive and productive partnership dedicated to creating the backyard of your dreams.
How Much Does a New Pool Cost in Long Island?
One of the first questions on every homeowner’s mind is, “What will this actually cost?” When it comes to installing a new swimming pool in Long Island, the answer isn’t a single number. Instead, it’s a range that reflects the size, materials, and complexity of your vision. Think of it less as a purchase and more as an investment in your home’s value and your family’s lifestyle. A pool is the centerpiece of your backyard, and its cost is tied to the quality of the entire outdoor living space you create around it.
At Gappsi, we specialize in luxury-level, hand-crafted construction that transforms your whole backyard. The final price tag depends on many variables, from the type of pool you choose to the custom features you add. We’ll walk you through the key factors that influence the cost so you can build a realistic budget for your dream oasis.
Key Factors That Influence Price
Several key elements will shape the total cost of your pool project. The size, depth, and shape of the pool are the most significant factors, as they dictate the amount of labor and materials required. The materials you choose also play a huge role. For example, a custom gunite pool allows for endless design possibilities but comes at a higher price point than a standard vinyl liner pool.
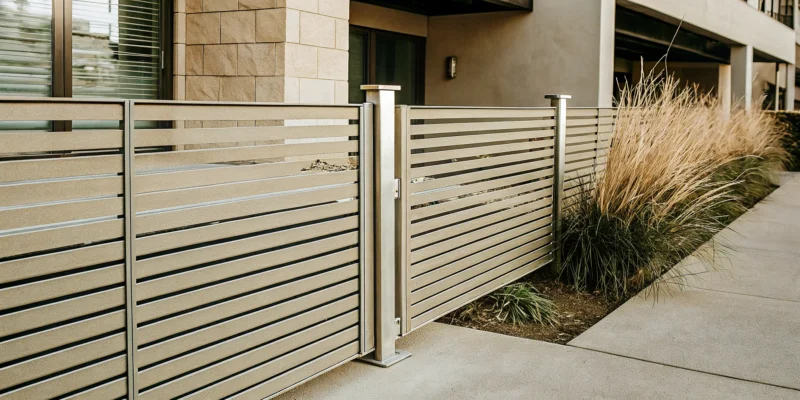
Beyond the pool itself, consider the surrounding environment. The cost includes site preparation, excavation, and any necessary grading. The patio material is another major consideration. Using high-quality porcelain and natural stone pavers creates a stunning, durable deck that complements your home. Finally, don’t forget custom features like waterfalls, integrated spas, lighting, and the required safety fencing, all of which contribute to the final investment.
Cost Estimates by Pool Type
While every project is unique, it helps to have a general idea of what to expect. For a complete, professionally installed pool project in Long Island, prices can range from $100,000 to over $400,000. The lower end of this range typically covers simpler vinyl liner pools with basic patio designs. These are a great option, but they offer less design flexibility.
For a truly custom backyard retreat, most homeowners opt for gunite swimming pools. These projects often start in the mid-to-high six figures, especially when they include premium masonry, extensive landscaping, and custom water features. This investment gives you complete control over the shape, size, and finish, resulting in a one-of-a-kind pool that is built to last. The best way to get an accurate figure is to schedule a consultation to discuss your specific goals.
Exploring Innovative Pool Features
A modern swimming pool is so much more than a place to cool off. It’s the centerpiece of your backyard, and today’s innovative features can turn it into a personalized oasis. When you start planning your project, think about how you want to use the space and what features will make it truly yours. From smart technology to stunning waterfalls, the possibilities for customizing your swimming pool are nearly endless. Here are a few popular trends to consider for your Long Island home.
Smart Automation and Energy-Efficient Systems
Imagine adjusting your pool’s temperature, lighting, and cleaning schedule right from your phone. That’s the convenience of smart automation. These systems make pool maintenance simpler and more efficient, giving you more time to actually enjoy the water. According to industry experts, smart pool technology not only provides convenience but also leads to significant energy savings by optimizing filtration cycles and heating. It’s a practical upgrade that streamlines your life and can lower your utility bills, making it a win-win for any pool owner.
Saltwater Systems and Natural Pools
If you’re looking for an alternative to traditional chlorine, a saltwater system is a fantastic option. These systems use a generator to convert salt into chlorine, resulting in softer, silkier water that’s gentler on your skin and eyes. The National Association of Realtors notes that saltwater pools are a desirable feature for their lower maintenance and more natural feel. For those wanting an even more organic approach, natural pools use plants and biological filters to keep the water clean, creating a beautiful, self-sustaining ecosystem right in your backyard.
Water Features, Infinity Edges, and Lighting
The right design elements can transform your pool from a simple rectangle into a breathtaking water feature. The gentle sound of a cascading waterfall or the sleek drama of an infinity edge adds a layer of sophistication and tranquility to your outdoor space. As noted by Pool & Spa Marketing, these additions create a soothing ambiance that makes your pool area a true retreat. Paired with modern LED lights, you can create any mood you desire, from a vibrant party atmosphere to a calm, glowing backdrop for a quiet evening swim.
Integrated Outdoor Living Spaces
The most inspiring backyards are those where the pool feels seamlessly connected to the rest of the living area. Think beyond the pool itself and envision a complete outdoor environment. Integrating your pool with a custom patio, an outdoor kitchen, a cozy fire pit, or a shaded pavilion creates a cohesive and multifunctional space for relaxing and entertaining. This approach to outdoor living turns your entire backyard into a destination, extending your home’s usable square footage and adding significant value to your property.
Mistakes to Avoid When Hiring a Pool Contractor
Building a new pool is an exciting process, but choosing the wrong contractor can quickly turn your dream into a stressful ordeal. A swimming pool is a significant investment in your home and lifestyle, so it’s important to get it right from the start. By being aware of common pitfalls, you can make a confident and informed decision. Here are some of the most critical mistakes to avoid when you begin your search for a pool contractor in Long Island.
Choosing Price Over Value
It’s always tempting to go with the lowest bid, but when it comes to pool construction, a cheap price often signals trouble. A suspiciously low estimate may mean the contractor is cutting corners on materials, using inexperienced labor, or hasn’t fully accounted for the project’s scope. These shortcuts can lead to structural problems, equipment failures, and costly repairs down the road. The American Society of Home Inspectors notes that the lowest price may not be the best deal. Instead of focusing only on the initial cost, consider the overall value. A quality contractor provides durable materials, expert craftsmanship, and a solid warranty, ensuring your swimming pool is a source of enjoyment for years to come.
Skipping Background and Reference Checks
Hiring a contractor without doing your homework is a significant risk. Before you sign anything, take the time to verify their credentials. A reputable contractor will be fully licensed and insured and happy to provide proof. Don’t just take their word for it; ask for a list of recent references and actually call them. The National Association of Home Builders emphasizes the importance of checking references to gauge reliability and quality. Ask past clients about their experience with the contractor’s communication, timeliness, and how they handled any issues that arose. Looking at their portfolio of completed projects can also give you a clear idea of their work quality.
Ignoring Local Permits and Regulations
In Long Island, pool construction is subject to strict local building codes and zoning laws. A contractor who suggests you can bypass the permitting process is a major red flag. Building without the proper permits can result in hefty fines, legal trouble, and even an order to tear down the unpermitted structure. The New York State Department of Health requires that all swimming pools comply with local codes. An experienced, professional contractor will be an expert in local regulations and will manage the entire permitting process for you. This ensures your pool is built safely and legally, giving you peace of mind.
Not Demanding a Detailed Contract
A verbal agreement or a vague, one-page estimate is not enough to protect you. A professional project requires a professional contract. This document is your most important tool for ensuring the project goes as planned. According to the Better Business Bureau, you should always get a written contract that clearly details every aspect of the job. It should include a complete description of the work, a list of all materials and equipment, a clear payment schedule, and a projected timeline with start and completion dates. The contract should also outline the warranty for both workmanship and materials. A detailed contract prevents misunderstandings and provides legal protection for both you and the contractor.
Related Articles
- Inground Pool Installation Long Island: A 2026 Guide
- Swimming Pool Builders Contractor Long Island NY – Gappsi Group
- Long Island Swimming Pool Design & Construction NY | Gappsi
- Backyard & Pool Renovation Solutions for Long Island | Gappsi Inc
Frequently Asked Questions
What’s the first step I should take if I’m considering a new pool? The best first step is to schedule a design consultation. This isn’t a high-pressure sales meeting; it’s a creative conversation where you can share your ideas and learn what’s possible for your specific property. A good designer will listen to how you plan to use the space, walk you through material options, and help you understand the entire process from start to finish. It’s the most effective way to move from a vague idea to a concrete plan.
Do pool contractors also build the patio and surrounding landscape? While some companies only focus on the pool itself, a premier contractor offers a complete, integrated solution. This means they have in-house teams or trusted partners who handle everything from the masonry patio and walkways to the landscaping, lighting, and fencing. Choosing a company that manages the entire project ensures a cohesive design where all the elements work together beautifully and saves you the headache of coordinating multiple different vendors.
How can I get an accurate cost estimate for my pool project? The only way to get a truly accurate price is through a detailed, on-site consultation. The total investment depends on many factors, including the size and shape of the pool, the materials you choose (like gunite versus vinyl), site accessibility, and any custom features you want to add, such as a waterfall or integrated spa. A professional will assess your property, discuss your vision in detail, and then provide a comprehensive proposal that outlines all the costs involved.
I already have a pool, but it looks old and tired. Can it be updated? Absolutely. A renovation can completely transform an existing pool and make it feel brand new. This can involve anything from simple cosmetic updates, like replacing the tile and coping, to major overhauls like resurfacing the interior, adding modern water features, or upgrading to more energy-efficient equipment. It’s a fantastic way to improve your pool’s appearance and functionality without starting from scratch.
How much maintenance does a new swimming pool require? Modern pools are much easier to care for than you might think. Features like saltwater systems and automated cleaning and chemical-monitoring systems can significantly reduce the time you spend on maintenance. The quality of the initial construction also plays a big role. A well-built pool with high-quality equipment will run more efficiently and require fewer repairs. Many contractors also offer seasonal opening, closing, and maintenance packages to make ownership even more effortless.