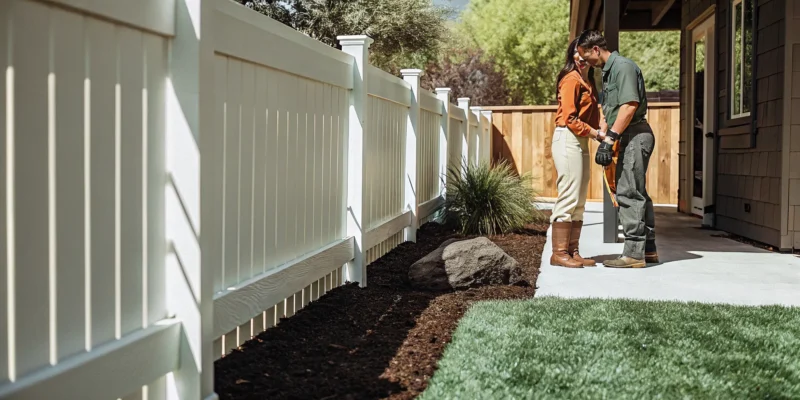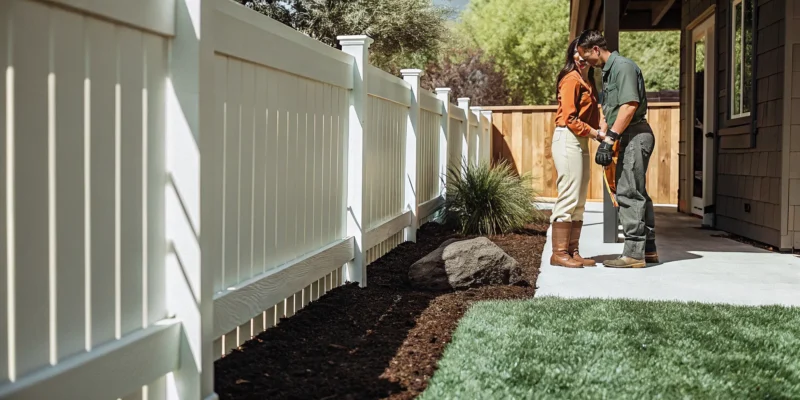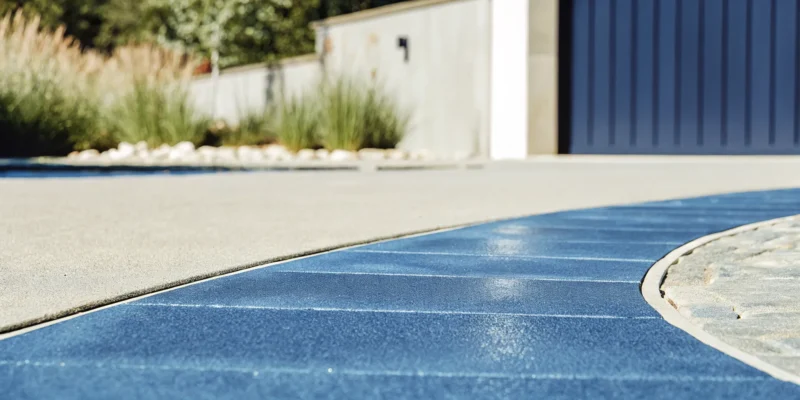
A finished vinyl inground pool installation with a modern patio and landscaping.

How Long to Install a Vinyl Inground Pool? A Full Timeline

Let’s be honest: a pool installation means your backyard will be a construction zone for a little while. It’s a reality that makes many homeowners ask, “how long to install a vinyl inground pool?” Understanding the step-by-step process makes the temporary disruption feel much more manageable. The active build, from excavation to liner installation, typically takes between four and eight weeks. However, the total timeline also includes the crucial pre-construction phases of design and permitting. Knowing what to expect each week helps you see the progress and feel confident that the temporary mess is leading to a beautiful, permanent oasis for your family.

Key Takeaways

  • Look Beyond the Construction Window: Remember that the four to eight week construction estimate is just one piece of the puzzle; the total project timeline also includes the initial design phase, permit approvals, and final landscaping to complete your backyard oasis.
  • Permits and Weather Are the Wildcards: The two factors most likely to affect your installation schedule are out of your contractor’s direct control: the time it takes for your town to issue permits and unpredictable Long Island weather. Factoring in this reality helps set clear expectations.
  • Early Planning Is Your Best Tool: You can set your project up for success by starting the process well in advance, ideally in the fall or winter. This gives you plenty of time to finalize your design and secure a spot with a trusted professional, ensuring a more relaxed and organized experience.

How Long Does Vinyl Pool Installation Take?

One of the first questions on every homeowner’s mind is, “How long will my yard be a construction zone?” It’s a great question, and the answer depends on a few moving parts. While a vinyl inground pool is one of the quickest types to install, the full process from design to your first swim involves several distinct stages.

Understanding the timeline helps you plan your summer and manage your excitement. The good news is that with a clear plan and an experienced team, the process can be surprisingly smooth. Let’s look at the typical schedule and the key factors that can influence your project’s completion date.

Understanding the Typical Timeline

From the day we break ground, you can generally expect the construction of your vinyl liner pool to take between four to eight weeks. This timeframe covers the major steps: excavation, assembling the pool structure, plumbing, electrical work, and installing the liner. It’s a faster build compared to concrete pools, which is a major reason why so many Long Island families choose vinyl. This estimate focuses on the active construction phase, so it’s important to remember that the initial design and permitting stages happen before any digging begins. Think of it as a well-orchestrated project with a clear finish line in sight for your new swimming pool.

Key Factors That Influence Your Project’s Duration

While four to eight weeks is a solid estimate, several things can affect your specific timeline. The biggest variable is often securing permits from your local town, which can take anywhere from a few weeks to a couple of months. The complexity of your design also plays a role; a custom shape with a built-in spa or waterfall will naturally take longer than a standard rectangle. Unforeseen site conditions, like rocky soil or a high water table, can also add time to the excavation phase. And, of course, Mother Nature has a say. A string of rainy days can pause progress, but an experienced construction team knows how to work efficiently around these challenges.

Your Vinyl Pool Installation: A Step-by-Step Guide

Seeing your dream pool come to life is an exciting process, and it helps to know what to expect along the way. While every project is unique, the installation of a vinyl inground pool follows a predictable path from the initial concept to your first cannonball. Think of it as a series of milestones, each one bringing you closer to your perfect backyard oasis. We’ve broken down the entire journey into five clear steps so you can feel prepared and confident.

This guide will walk you through everything from designing your pool and securing permits to the final construction and finishing touches. Understanding this sequence helps you plan your schedule, coordinate with your installation team, and feel confident as you watch your vision take shape. Each phase has its own timeline and set of tasks, but they all work together to create a beautiful, lasting addition to your home. Let’s get started with the first, and arguably most creative, step.

Step 1: Design and Planning

This is where the fun begins. The journey to your new pool starts with a detailed design and planning session where we map out the perfect layout, size, and shape for your space. We’ll also discuss all the exciting features you want to include, from custom steps and lighting to a surrounding patio or even an outdoor kitchen. Once we’ve perfected the design together, you’ll typically provide a deposit, which officially gets your project on our installation schedule. This initial phase ensures your new swimming pool is everything you’ve imagined.

Step 2: Permits and Approvals

Before we can break ground, we need to get the green light from your local municipality. Obtaining the right permits is a critical step that ensures your pool is built safely and up to code. The timeline for this can vary quite a bit, sometimes taking just a few weeks or, in some cases, several months depending on your town’s specific requirements and workload. It’s a waiting game that requires a little patience, but it’s a non-negotiable part of the process. We handle the paperwork and submissions to keep things moving as smoothly as possible for you.

Step 3: Excavation and Site Prep

With permits in hand, it’s time for the action to start in your backyard. The excavation phase is when your pool begins to take physical form. Our crew will arrive to dig the hole according to the precise specifications of your design, which is often the moment it feels real for homeowners. This stage usually takes about one to two weeks, depending on the size of the pool and the conditions of your property. We also prepare the site for any masonry work, like the foundation for your new patio, during this time.

Step 4: Pool Build and Liner Installation

Once the hole is dug, our team gets to work building the pool’s structure. This phase typically takes between four and eight weeks. We’ll assemble the wall panels, pour the concrete footing, and smooth out the pool floor to create a perfect base. After the structure is complete, we install the plumbing and electrical systems before carefully fitting the vinyl liner. This is one of the biggest advantages of a vinyl pool, as the construction timeline is often much faster than that of a concrete pool, getting you into the water sooner.

Step 5: Finishing Touches and Startup

The pool is built, but we’re not done yet. This final step is all about bringing the entire backyard vision together. We’ll complete the surrounding patio, add any custom lighting, and integrate beautiful landscape design to create a cohesive outdoor living space. Once the finishing touches are in place, we’ll fill the pool with water, start up the equipment, and balance the chemistry. This phase can take another one to four weeks, but the result is a stunning, swim-ready backyard that’s ready for you to enjoy.

A Closer Look at the Design and Planning Phase

This is where your dream pool starts to take shape. The design and planning phase is arguably the most important part of the entire process. It’s a collaborative effort where we combine your vision with our expertise to create a detailed blueprint for your backyard oasis. Taking the time to get every detail right at this stage ensures the rest of the installation goes smoothly and results in a pool you’ll love for years. This initial phase typically takes one to two weeks, depending on how quickly decisions are made.

Your Initial Consultation and Site Measurement

Everything begins with a conversation. During your initial consultation, one of our design experts will visit your home to walk the property with you. We’ll discuss your ideas, how you plan to use the pool, and your overall budget. This is also when we take precise measurements of your yard, noting any slopes, existing structures, or access points. This detailed site assessment is crucial for creating a functional and beautiful swimming pool design that fits perfectly within your space. We’ll answer all your questions and make sure we have a clear understanding of your goals before we start designing.

Developing Your Custom Pool Design

Once we have all the information from our initial meeting, our team gets to work creating a custom design for your vinyl liner pool. We’ll present you with a visual plan that shows the pool’s shape, size, and placement in your yard. This is the fun part where you can really see it all come together. We can also discuss how the pool will integrate with other backyard features, like a new patio or landscape design. We’ll work with you to refine the design until it’s exactly what you envisioned, clearing up any questions you might have about vinyl pools along the way.

Selecting and Finalizing Materials

With the design finalized, the last step in this phase is choosing your materials. One of the best things about vinyl liner pools is the incredible variety of liner patterns available, from classic blue ripples to modern geometric designs. You’ll also select the coping that frames the pool’s edge and the material for the surrounding patio or deck. We offer a wide selection of beautiful and durable options, including elegant porcelain and natural stone pavers. Making these selections helps us create a precise quote and prepare for the next step: securing permits.

What Can Cause Delays in Your Pool Installation?

Even with the best planning, some things can pop up that affect your pool installation timeline. Knowing what these potential hurdles are ahead of time can help you set realistic expectations and feel more prepared. Most of these are completely normal parts of any major construction project, and an experienced team knows exactly how to handle them. Let’s walk through the most common reasons a project might see a delay.

Weather and Seasonal Setbacks

Here on Long Island, we know the weather can be unpredictable. A week of heavy rain can turn an excavated site into a muddy pit, making it unsafe and impractical to work. A sudden cold snap can prevent concrete from curing properly, and extreme heat can be tough on the crew. While we build a buffer into our timelines for typical weather, a prolonged storm or an unusual weather event can pause progress. Pausing work during bad weather isn’t just for comfort; it ensures the quality and safety of your new swimming pool for years to come.

Unexpected Soil or Groundwater Conditions

What lies beneath your lawn is often a mystery until the excavation begins. We might encounter unexpected conditions like large boulders, exceptionally soft soil, or a high water table. These discoveries aren’t necessarily problems, but they do require a change in strategy. For example, large rocks may need to be broken up and removed, or special drainage might be needed to manage groundwater. Our team has the masonry and construction expertise to handle these situations, but they can add time to the excavation phase of the project.

Permit and Inspection Hold-Ups

Before any work begins, we need to secure permits from your local town or village. This process is a critical step, but it’s one we don’t have direct control over. The time it takes to get a permit can range from a few weeks to a few months, depending on the municipality’s workload and specific requirements. Similarly, required inspections at various stages of the build can sometimes face scheduling delays. We manage all the paperwork and communication, but it’s important to recognize that administrative slowdowns can and do happen.

Material Sourcing and Availability

Your pool is built from many different components, from the steel walls and vinyl liner to the pumps, filters, and surrounding patio pavers. While we order materials well in advance, supply chain issues can occasionally cause delays. A specific liner pattern might be on backorder, or a particular type of natural stone paver could have a longer lead time than expected. We always keep you informed about material status and can suggest excellent alternatives if a delay becomes significant, ensuring your project keeps moving forward without compromising on style.

Site Accessibility Challenges

Getting heavy equipment and materials into your backyard is a key part of the installation process. If your property has a narrow side yard, steep slopes, or established trees and gardens, access can be tricky. These challenges don’t stop a project, but they do require more careful planning and execution. We might need to use smaller machinery, build a temporary access road, or bring in materials by hand, all of which can extend the timeline. We identify these potential issues during our initial site visit and incorporate them into our overall landscape and construction plan.

Breaking Down the Permit and Excavation Timeline

This is where your project moves from a paper plan to a tangible reality. While the permitting and excavation phase can feel like it moves at a snail’s pace, it’s foundational to a smooth and successful installation. Understanding the steps involved helps set clear expectations for what’s happening in your yard and why. Let’s walk through what this critical stage looks like.

How Long Do Permits Usually Take?

Before any dirt can be moved, we need the green light from your local town or village. Securing building permits is a non-negotiable step, and the timeline can vary quite a bit. Depending on your specific location in Long Island, this process can take anywhere from a few weeks to several months. It all comes down to the local municipality’s current workload and specific requirements. While it might feel like a waiting game, this step ensures your new swimming pool is built safely and up to code. The good news is that an experienced partner handles all the paperwork and follow-up for you, so you can relax while the administrative details are sorted out.

The Excavation and Site Prep Process

Once the permits are in hand, the real fun begins. This is the day the machinery arrives and your backyard officially becomes a construction site. The excavation and site preparation phase typically takes about one to two weeks. During this time, our team will carefully dig the hole for your pool, following the precise dimensions of your design. We also prepare the ground to ensure a stable and level foundation for the structure. It’s a messy but exciting process because you can finally see the physical footprint of your future oasis taking shape right before your eyes. This careful prep work is essential for a long-lasting installation.

Assembling the Pool’s Framework

With the hole perfectly excavated, the next step is to build the pool’s skeleton. For a vinyl liner pool, this part of the process generally takes about three to four weeks. Our crew will assemble the wall panels that form the perimeter of your pool and secure them in place with a concrete footing. We then carefully shape and smooth the pool floor, creating the perfect base for the liner. This is a period of rapid, visible progress where the structure of your pool truly comes together. It’s the foundational work that supports all the beautiful masonry and finishing touches that will follow.

What to Expect During Construction and Liner Installation

This is the part of the process where you’ll see your backyard vision truly come to life. After the groundwork is laid and the pool’s structure is in place, our team moves into the construction and installation phase. This stage is all about the technical details that transform a shell into a fully functional swimming pool. It involves carefully installing the plumbing and electrical systems that will keep your water clean and clear, fitting the beautiful vinyl liner that defines your pool’s look, and setting up all the essential equipment.

While this phase involves a lot of moving parts, our Gappsi team coordinates every step with precision. We focus on quality craftsmanship to ensure your pool is not only stunning but also built to last. You’ll see specialists working on different components, from electricians to our liner installation experts. We manage the entire process, keeping you informed as we hit key milestones. This is where the structure in your yard starts to look and feel like the oasis you’ve been dreaming of. It’s a period of significant activity, but it’s also incredibly rewarding as you watch the final pieces come together. Our goal is to make this phase as smooth and transparent as possible, so you can feel confident and excited about the progress.

Installing Plumbing and Electrical Systems

Before the liner goes in, we install the circulatory and nervous systems of your pool. Think of plumbing as the veins and arteries, carrying water to and from the filtration equipment to keep it sparkling clean. Our team strategically lays a network of pipes for the main drains, skimmers, and return jets. At the same time, licensed electricians run the necessary wiring for your pool’s pump, lighting, and any special features like heaters or automated covers. Getting the swimming pool plumbing and electrical right is critical for safety and performance, so we take meticulous care to ensure everything is installed correctly and up to code.

Fitting and Securing the Vinyl Liner

This is one of the most exciting moments in the installation process. Your custom-made vinyl liner, chosen during the design phase, is now ready to be installed. Our crew carefully unfolds the liner and hangs it from the top of the pool walls. Using specialized vacuums, we suck all the air out from behind the liner, creating a tight, smooth, and wrinkle-free fit against the pool’s structure. This step requires a great deal of precision. A perfectly fitted liner not only looks fantastic but also ensures the longevity and durability of your pool’s surface. Once it’s secured, your pool’s interior is officially complete.

Setting Up and Testing Pool Equipment

With the plumbing and liner in place, the final construction step is to install and connect your pool equipment. This includes the pump, filter, heater, and any sanitization systems you’ve chosen. We set up all the components on a sturdy equipment pad, typically located in a discrete spot near the pool. Once everything is connected, we perform a series of tests to make sure the entire system is running efficiently and effectively. This quality check confirms that your pool equipment is ready to go, ensuring a seamless transition when it’s time to fill your pool with water and start it up for the first time.

How to Set Your Project Up for Success

A new vinyl pool is a fantastic addition to your home, but a smooth installation process doesn’t happen by accident. Success isn’t just about the beautiful final product; it’s also about having a positive experience along the way. It takes a bit of foresight and the right team to bring your vision to life without unnecessary stress or costly surprises. By planning ahead, choosing a trusted professional, understanding the realities of the construction process, and knowing what to expect, you can ensure your project goes off without a hitch. This proactive approach helps manage your budget, timeline, and expectations, turning a potentially overwhelming project into an exciting one.

Think of it like building a strong foundation. When you invest time in the initial stages, the rest of the project flows much more smoothly. You’ll feel more in control and confident in your decisions, from the liner pattern to the patio pavers. A well-planned project also minimizes disruptions to your daily life and ensures the final result perfectly matches your family’s needs and lifestyle. Let’s walk through a few key steps that will put you on the path to a successful and timely pool installation, so you can focus on the fun part: enjoying your new backyard oasis.

Why You Should Start Planning Early

When it comes to installing a pool, the early bird truly gets the worm. Kicking off the planning process well in advance gives you a buffer to handle potential delays, which often come from things like securing town permits or getting on a builder’s schedule. Starting early also gives you more time to thoughtfully consider your swimming pool design and material choices without feeling rushed. You can explore different shapes, sizes, and features to create a pool that truly fits your backyard. An early start means you can book your preferred installer during their peak season and have a much more relaxed and enjoyable experience from start to finish.

Choosing the Right Pool Installation Professional

Your choice of installer is the single most important decision you’ll make for your pool project. A reputable professional does more than just dig a hole; they ensure the job is done safely, correctly, and up to local codes. Look for an experienced team with a proven track record in Long Island. A great contractor will guide you through every phase, from initial design to the final walkthrough, and will handle all the complex logistics. Entrusting your project to a seasoned home improvement company gives you peace of mind that your investment is built to last and will be a source of joy for years.

Setting Realistic Timeline Expectations

While it’s exciting to imagine swimming in your new pool, it’s important to have a realistic grasp of the installation timeline. On average, a vinyl inground pool installation takes about 8 to 12 weeks from the first day of excavation to the final fill. However, this can vary based on permit approvals, weather, and the complexity of your project. A good contractor will provide a detailed schedule and keep you informed of progress. This clarity helps you plan for other backyard elements, like new masonry for your patio or landscaping, creating a cohesive outdoor living space.

Common Installation Myths, Debunked

Let’s clear up a few misconceptions about vinyl liner pools. One common myth is that they are difficult to maintain. In reality, modern vinyl liners are incredibly durable and easier to care for than other pool surfaces. Another myth is that you can save a lot of money by installing the pool yourself. While it might seem tempting, a DIY installation is incredibly complex and risky. Professional installation is essential for ensuring the pool’s structural integrity, proper plumbing, and electrical safety. Plus, a professional build protects your warranty, which is a safety net you don’t want to give up.

The Final Stretch: Finishing and Pool Startup

With the heavy machinery gone and the pool structure in place, you’re on the home stretch. This final phase is all about transforming the construction zone into your personal backyard retreat. It’s where all the details come together, from the surrounding landscape to the crystal-clear water, making your new pool officially ready for its first splash.

Installing Your Deck and Landscaping

Your beautiful new pool deserves an equally stunning setting. This is where we move beyond the pool itself and build out the surrounding environment. The decking or patio is installed, creating the perfect spot for lounge chairs and sunny afternoons. This stage can take anywhere from one to four weeks, as it often involves detailed masonry work with materials like natural stone or porcelain pavers.

We’ll also complete the landscaping, adding plants, lighting, and maybe even a water feature to complete the oasis feel. This is the step that truly integrates the pool into your backyard, making it feel like it has always been there. It’s all about creating a cohesive and inviting space for you to enjoy.

Filling the Pool and Balancing the Water

Seeing your pool fill with water for the first time is a major milestone. Once the vinyl liner is perfectly fitted, we begin filling it up. But before you can jump in, the water needs to be just right. This involves carefully balancing the water chemistry, a crucial step for both safety and the longevity of your pool.

Properly balanced water is comfortable for swimmers, preventing skin and eye irritation. It also stops problems like algae growth and equipment corrosion before they can start. Our team handles all the testing and adjustments, ensuring your swimming pool is perfectly balanced and ready for you to enjoy from day one. It’s the final touch that makes the water clear, safe, and inviting.

Your Final Inspection and Project Handover

Before we officially hand over your new backyard paradise, we conduct a thorough final inspection. This is our chance to walk through every detail of the project, ensuring that the installation meets all local codes and our own high standards for quality and safety. It’s a critical step that gives you complete peace of mind.

Once the inspection is complete, we’ll walk you through everything you need to know. We call this the project handover. We’ll show you how to operate your new pool equipment, explain the basic maintenance schedule, and answer any questions you have. Our goal is to make sure you feel confident and prepared to care for your investment. After that, there’s only one thing left to do: grab your swimsuit and enjoy.

How to Prepare for a Smooth Installation

A little preparation goes a long way in making your pool installation feel seamless. By thinking ahead about a few key details, you can help the entire process run on schedule and minimize surprises. From choosing the right season to getting your backyard ready for the crew, taking these steps will set your project up for success and get you swimming sooner. Let’s walk through what you can do to prepare for a smooth and exciting construction phase.

Picking the Best Time of Year to Build

Timing is everything, especially when it comes to outdoor construction on Long Island. The time of year can affect how long you wait for pool builders to start your project. Factors like weather and high seasonal demand can influence scheduling. Many homeowners aim for a spring installation to enjoy their pool all summer, which makes it the busiest season. To get ahead, consider starting your planning in the fall or winter. This gives you plenty of time for design and permits, so you can be first on the schedule when the ground thaws. An off-season start often means a more flexible timeline and a completed swimming pool ready for the first warm day.

Planning Your Budget and Financing

Vinyl liner pools are a fantastic choice, offering a great mix of affordability, beauty, and function. When you plan your budget, it’s helpful to think beyond the initial installation cost. Consider ongoing maintenance expenses and any upgrades you might want to add to create your perfect backyard oasis. This could include a beautiful new patio, ambient lighting, or lush landscaping around the pool area. Planning for these extras from the start helps you create a comprehensive budget. Many homeowners choose to enhance their new pool with elegant porcelain pavers for a durable and stylish finish that completes the look.

Getting Your Property Ready for Construction

Your pool installation involves several key stages, and getting your property ready can really help streamline the process. Before the crew arrives, take some time to clear the designated pool area of any furniture, toys, or decorative items. It’s also important to ensure there is a clear and wide path for construction equipment to access your backyard. This might mean temporarily removing a section of a fence. We will handle marking utility lines, but knowing where your septic system or sprinkler lines are is also very helpful. A little prep work on your end makes a big difference for the construction team and helps keep your project on track.

What to Expect Day-to-Day

Once construction begins, you can expect a structured timeline with specific tasks happening each day. The process is methodical, starting with the big job of excavation and then moving on to assembling the pool walls, plumbing, and electrical work. After that, the team will carefully install the vinyl liner and fill the pool. While it’s an exciting process, it’s also a construction zone. You can anticipate daily activity and noise in your backyard, but a professional team will work to keep the site as tidy as possible. You can even watch our team in action to get a better sense of the day-to-day progress and craftsmanship involved in bringing your pool to life.

Life During the Installation: What to Know

Having a construction crew in your backyard is a unique experience. While the end result is a stunning new pool, the process involves noise, equipment, and activity. Knowing what to expect makes the installation period much smoother. It’s all about clear communication, understanding the project’s rhythm, and looking ahead to life as a pool owner. By staying informed, you can watch your backyard transform with confidence, knowing every step is leading toward your dream oasis. Let’s walk through what daily life looks like during the build.

Communicating with Your Installation Team

Open communication is the key to a stress-free installation. It’s normal to have questions, especially since homeowners can face confusing information about different pool types. Your installation team is your best resource, so don’t hesitate to ask for clarification on anything from the daily schedule to specific materials. A professional crew provides regular updates and is available to address your concerns. We believe in a partnership approach, ensuring you feel heard and informed. Building a great relationship with your swimming pool installation team turns the process into a collaborative creation of your perfect backyard.

Tracking Milestones and Quality Checks

A vinyl pool installation follows a clear sequence of events, often taking four to eight weeks. Your project manager will provide a timeline with key milestones to watch for, including excavation, wall assembly, plumbing, and liner installation. Following along helps you see the progress firsthand and understand what’s happening. Our team performs quality checks at every critical point to ensure the work meets our high standards. You can see examples of our process on the Gappsi YouTube channel, which can help you visualize each exciting phase of the build and know what to expect.

Understanding Post-Installation Pool Care

As the project wraps up, our focus shifts to preparing you for pool ownership. Before the final handover, we’ll walk you through your new equipment and explain the basics of water chemistry and routine maintenance. Understanding how to care for your pool from day one is essential for its longevity. While a vinyl liner will eventually need replacement, proper care extends its life significantly. Think of it as learning the simple routines that will keep your pool sparkling. We also offer services to keep your entire patio area looking its best, including professional restoration and sealing.

Related Articles

Frequently Asked Questions

What is the total timeline I should expect, from signing the contract to my first swim? While the active construction in your yard typically takes four to eight weeks, the entire process from design to completion is longer. You should plan for a total of about three to five months. This includes the initial design phase, the time it takes to secure permits from your town (which can be the most variable part), the actual build, and the final landscaping and finishing touches.

What is the most common cause of delays, and is there anything I can do about it? The most common hold-up is waiting for building permits to be approved by your local municipality, a process that can take anywhere from a few weeks to a couple of months. Since this is out of everyone’s control, the best thing you can do is start the planning process early. Beginning in the fall or winter gives you a generous buffer to get all the necessary approvals in place so construction can start as soon as the weather allows.

When is the best time of year to start planning for a new pool? The ideal time to begin planning your pool project is in the fall or early winter. This gives you plenty of time to finalize your design and get your permit applications submitted before the busy spring rush. By getting ahead of the curve, you can secure a spot on your preferred installer’s schedule and have your pool ready to enjoy for the entire summer season.

Will my entire backyard be off-limits during the installation? The immediate area around the new pool will definitely be an active construction zone and should be considered off-limits for safety, especially for children and pets. However, depending on the size and layout of your yard, other areas may still be accessible. Your installation team will establish a clear work zone and access path for their equipment to minimize disruption to the rest of your property.

What are my responsibilities once the pool installation is complete? After the final inspection and handover, you become the proud captain of your new pool. Your main responsibilities will be simple, routine maintenance tasks. This includes testing the water chemistry a couple of times a week and keeping the skimmer baskets clear of debris. We will give you a complete tutorial on how to operate your equipment and a straightforward maintenance schedule, so you’ll feel confident and prepared from day one.

Share this page:
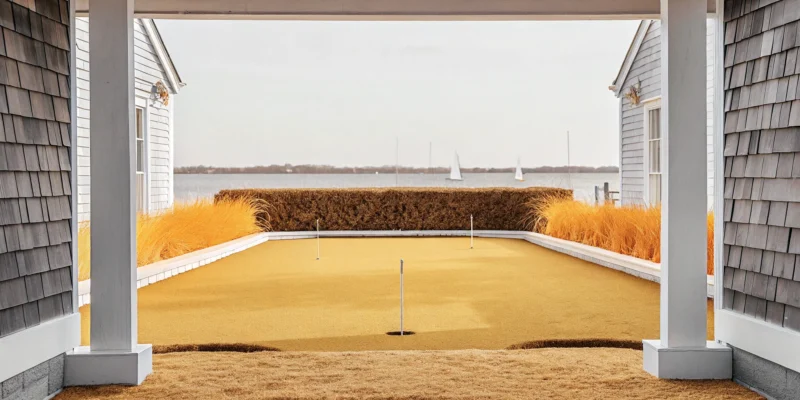
A synthetic turf backyard putting green with a golf ball next to the hole and flag.

The Essential Backyard Putting Green Buyer’s Guide

Adding a unique feature to your outdoor living space can completely change how you enjoy your home. While pools and patios are popular choices, a backyard putting green offers a special blend of recreation and sophisticated design. It’s an investment that provides endless entertainment for family and friends while also adding a distinct touch to your property. A professionally installed green is a durable, low-maintenance asset that enhances your landscape and your lifestyle. In this article, we’ll cover the key factors to consider, including space requirements, material options, and what to expect from the installation process, helping you make a smart investment.

Key Takeaways

  • Prioritize a professional installation for a green that lasts: The quality of your putting green depends on its foundation, so proper base preparation and drainage are essential for a true ball roll and long-term durability.
  • Choose synthetic turf for realistic play with less work: Synthetic turf offers an all-weather playing surface with consistent performance, saving you from the constant maintenance and expense of a natural grass green.
  • Plan your project to match your goals and budget: Before hiring a company, consider your available space and how you’ll use the green. Getting a detailed quote and asking specific questions about materials will help you make a confident and informed decision.

What is a Backyard Putting Green?

A backyard putting green is exactly what it sounds like: a dedicated space in your yard designed for practicing your golf game. Think of it as your personal golf oasis, perfect for honing your putting and chipping skills on your own schedule. These aren’t just patches of grass; they are specially designed surfaces that mimic the performance of a real golf course green. Whether you’re a serious golfer looking to lower your handicap or just want a fun new feature for family gatherings, a putting green can completely transform your outdoor space.

Modern putting greens are typically built with high-quality synthetic turf that looks and feels incredibly realistic. This means you get a consistent, professional-grade surface without the constant upkeep of a natural grass green. At Gappsi, we specialize in creating custom synthetic turf and sports games courts that fit perfectly into your landscape, giving you a beautiful and functional area to enjoy for years. The beauty of a custom green is that it can be designed to fit any space, from a small, challenging layout in a compact yard to a sprawling green with multiple holes and fringe areas. You can even add features like sand traps or gentle undulations to replicate the challenges of your favorite course. It’s a truly personalized addition that reflects your passion for the game and enhances your lifestyle.

Why Add a Putting Green to Your Backyard?

Imagine stepping outside to practice your short game whenever you have a spare moment. That convenience is one of the biggest reasons homeowners install a putting green. It saves you trips to the golf course and lets you practice in total privacy. Beyond the convenience, a synthetic putting green is a smart, sustainable choice. It requires no watering, mowing, or fertilizing, which helps conserve water and eliminates the need for harsh chemicals in your yard. This makes it an eco-friendly addition to your landscape design. Plus, it’s a unique feature that provides endless entertainment for friends and family of all ages.

Is a Putting Green Right for You?

Deciding if a putting green is a good fit for your home often comes down to one key choice: synthetic turf or natural grass. While the idea of a real grass green is appealing, the reality is that it demands an incredible amount of time, money, and expertise to maintain. Think daily watering, specialized mowing, and constant pest control. For most homeowners, a high-quality synthetic turf green is the more practical and rewarding option. It offers a consistent ball roll year-round with minimal upkeep. If you want a beautiful, always-ready practice area that lets you focus on your game instead of yard work, a synthetic green is likely the perfect solution for you.

Your Guide to Putting Green Types

Choosing the right type of putting green is the first big step in bringing your backyard golf dreams to life. The best option for you depends on your space, budget, and how much time you want to spend on upkeep. Let’s walk through the most common choices so you can find the perfect fit for your Long Island home.

Synthetic Turf Greens

If you want a picture-perfect green that’s ready for play anytime, synthetic turf is an amazing choice. Artificial turf putting greens stay smooth and green all year, so you don’t have to worry about seasonal changes, droughts, or heavy rain ruining your practice. This is a huge plus given Long Island’s variable weather. Modern synthetic turf solutions offer a realistic golfing experience with consistent ball roll, mimicking the performance of a PGA-quality surface. Best of all, they are incredibly low-maintenance. You can get that professional feel without spending a fortune on lawn care services and specialized equipment. It’s all the fun of golf with none of the yard work.

Natural Grass Greens

For the purist, nothing beats the authentic feel of a natural grass green. It’s a living surface that offers a traditional golfing experience right in your backyard. However, this authenticity comes with significant commitment. Maintaining a natural grass green requires regular mowing, watering, fertilizing, and pest control to keep it in top condition. It’s also more susceptible to the elements, which can mean less playing time throughout the year. The choice between artificial and natural really comes down to what you value more: the low upkeep and consistent play of turf or the classic, living feel of real grass.

Portable Putting Greens

Not ready for a permanent installation? A portable putting green could be the perfect starting point. These are great for anyone who wants to practice their putting skills without committing to a landscape project. You can easily set them up in a basement, on a patio, or in the yard for a few hours of practice and then store them away. They are an excellent option if you have limited space or want to get a feel for having a green at home before investing in a permanent one. While they don’t offer the same realism as a custom installation, they provide a convenient way to work on your short game.

Modular Putting Green Systems

Modular systems offer a middle ground between portable greens and a fully custom build. These often come in DIY kits with interlocking panels that you can assemble yourself. While they can be a more affordable option, it’s important to be aware of their limitations. Many modular or DIY greens don’t mimic the performance of real greens because they aren’t installed with the proper slope or grain, which are crucial for realistic practice. A professional installation ensures your green has the correct contours and base preparation, giving you a surface that truly helps improve your game.

4 Key Factors to Consider Before You Buy

A backyard putting green is an exciting addition to your home, but it’s important to think through a few details before breaking ground. Taking the time to plan now ensures you get a green that fits your space, lifestyle, and budget perfectly. From the size of your yard to how you’ll use it for practice or play, these four factors will help you make the right choices for a project you’ll love for years to come. Let’s walk through what you need to consider.

Your Available Space and Layout

First, take a good look at your yard. How much space can you realistically dedicate to a putting green? Think about size and shape, but also the condition of the ground itself. For a true and consistent roll, the surface needs to be level and clear of any debris. If your yard has a slope or uneven spots, that’s okay, but it will require professional site preparation. A well-designed green should complement your existing landscape, not compete with it. Our landscape design experts can help you map out the perfect location and ensure the groundwork is handled correctly from the start.

How You Plan to Use It

Think about who will be using the putting green and what their goals are. Are you a serious golfer looking to shave a few strokes off your game, or are you picturing a fun activity for family gatherings? Your answer will influence the design. A practice-focused green might have multiple holes and challenging contours, while a family-friendly one might be simpler and more open. Because modern synthetic turf doesn’t need soil or daily watering, you have the flexibility to install it wherever it makes sense for your home, whether that’s indoors or out.

Long Island’s Climate Conditions

Here on Long Island, we get a little bit of everything: hot summers, cold winters, and plenty of rain and snow. Your putting green needs to be able to handle it all. High-quality artificial turf is an excellent choice for our climate because it’s built for durability. With proper installation and minimal upkeep, a synthetic green can easily last 10 to 15 years or more, without the constant maintenance that natural grass requires. It drains efficiently after a storm and won’t get muddy, so you can get back to practicing much faster.

Your Budget and Long-Term Investment

A backyard putting green is an investment in your home and your enjoyment. Costs can vary, with professionally installed greens typically ranging from $15 to $40 per square foot. While DIY kits are a cheaper option, a professional installation ensures the base is prepared correctly and the turf performs at its best for years. Think of it as adding a valuable feature to your property. We can help you understand the costs involved and design a project that aligns with your budget while delivering the quality and performance you expect from a long-term home improvement.

How Much Does a Backyard Putting Green Cost?

Figuring out the budget for your backyard putting green involves looking at a few key areas. The total price is more than just the turf itself; it includes the materials, the expert installation, and the minimal long-term upkeep. Think of it as a lasting investment in your home’s value and your enjoyment. The final cost will depend on the size of your green, the complexity of the design, and the specific materials you choose. Let’s break down what you can expect to pay for.

Breaking Down Material Costs

When you start looking at prices, you’ll often see them quoted per square foot. A professionally installed putting green typically runs between $15 and $40 per square foot. The final price depends heavily on the size of your project. Interestingly, larger greens (over 400 square feet) often have a lower cost per square foot, usually around $20 to $30. Smaller, more intricate greens might cost more than $30 per square foot. For example, a 300-square-foot green could be about $9,000, while a 1,000-square-foot green might land closer to $28,000. These costs cover the high-quality synthetic turf and other necessary materials.

Understanding Installation Expenses

The installation process is where the magic really happens, and it’s a huge part of the overall cost. Proper ground preparation is absolutely essential for a green that performs well and lasts for years. This means creating a perfectly level base, clearing all debris, and ensuring you have a solid foundation. One of the most critical steps is establishing proper drainage to prevent water from pooling on your green after a Long Island rainstorm. Skipping this step can lead to major issues later. A professional masonry and installation team ensures every layer is correctly placed, giving you a smooth, consistent surface for practicing your short game.

Factoring in Long-Term Maintenance

One of the best things about a synthetic putting green is its low maintenance, which saves you money and time in the long run. A well-installed green can easily last 10 to 20 years with just a little care. Forget about mowing, watering, or fertilizing. Your main tasks will be brushing the turf fibers occasionally to keep them upright and rinsing the surface to clear away leaves or dust. This minimal upkeep means you can spend more time enjoying your green and less time working on it. It’s a durable, long-term investment in your home and your golf game.

Common Mistakes to Avoid When Choosing Your Green

Planning your own backyard putting green is an exciting project. It’s easy to get caught up in imagining your future short game practice sessions and sharing the fun with family and friends. But before you get too far, it’s important to understand the common pitfalls that can turn your dream green into a costly headache. A well-designed and properly installed putting green will bring you years of enjoyment, while one that cuts corners can lead to poor performance, constant repairs, and a lot of frustration.

The key to a successful project is getting the fundamentals right from the very beginning. This means paying close attention to the materials you choose, the foundation it’s built on, and the team you hire to put it all together. Many of the biggest issues with backyard greens stem from simple, avoidable mistakes made during the planning phase. From selecting the wrong turf to skimping on the base preparation, these errors can compromise the entire project. By learning what to watch out for, you can ensure your investment is a smart one that adds value and enjoyment to your home. Let’s walk through the four most common mistakes homeowners make so you can get your project started on the right foot.

Selecting the Wrong Type of Turf

One of the most frequent mistakes is choosing a general landscape turf instead of a specialized putting green turf. While standard artificial grass is great for creating a lush, green lawn, it’s not designed for the specific demands of golf. Putting green turf is engineered for performance, providing a smooth, consistent surface that allows the ball to roll true, just like it would on a real course. Using the wrong type will result in a slow, bumpy, and unrealistic playing experience. When you invest in a putting green, you want authentic practice, and that starts with selecting the right synthetic turf.

Forgetting About Proper Drainage

Another critical error is neglecting proper drainage. Long Island gets its fair share of rain and snow, and if that water has nowhere to go, it will pool on your green. This creates a soggy, unusable surface and can lead to mold, mildew, and premature wear. A professional installation always includes a carefully planned drainage system within the base layers. This ensures water moves away from the surface, keeping your green firm, dry, and ready for play in any weather. Proper landscape design and site preparation are essential for the longevity and performance of your green.

Skimping on Base Preparation

The performance of your putting green is only as good as the foundation it sits on. Poor putting green performance often comes down to an inadequate base. Skimping on this step can lead to significant problems down the road. A proper base requires excavating the area, laying and compacting multiple layers of aggregate, and precisely contouring the surface to create the desired breaks and slopes. If the base isn’t solid and perfectly smooth, you’ll end up with lumps, low spots, and an uneven surface that makes realistic putting impossible. This is a crucial construction step that requires expertise to get right.

Underestimating Maintenance Needs

While a synthetic putting green is much lower maintenance than natural grass, it isn’t zero maintenance. Some homeowners assume they can install it and forget it, but that’s not the case. Debris like leaves and twigs needs to be cleared, and the turf fibers should be brushed periodically to keep them upright for a consistent ball roll. Picking the wrong turf or skimping on installation will quickly hurt performance and lead to premature wear and added repair costs. Investing in high-quality materials and professional installation from the start will minimize your long-term maintenance tasks and protect your investment.

What to Expect During the Installation Process

Once you’ve chosen your perfect putting green, the installation brings your vision to life. This stage is just as critical as selecting the right materials. A flawless installation ensures your green not only looks fantastic but also performs correctly for years of enjoyment. The process involves careful ground preparation, precise turf placement, and finishing touches that create a smooth, consistent playing surface.

Understanding the steps involved helps you know what to expect and why professional expertise matters. From excavating the site to laying the final grain of sand, each phase builds upon the last. A well-executed installation by an experienced team, like the one at Gappsi, prevents common issues like poor drainage or an uneven base, which can affect ball roll and the green’s longevity. Our synthetic turf and sports games courts solutions are always installed with precision and care.

Preparing the Site and Base

The foundation of a great putting green is, quite literally, its foundation. Proper site preparation is the most important step for ensuring durability and performance. The process begins with clearing the designated area of all grass, rocks, and debris. Next, we establish a solid, compacted base, typically using a mix of crushed stone and sand.

A crucial part of this stage is creating a slight slope, usually around one to two percent, to allow for proper drainage. This prevents water from pooling on the surface after it rains, protecting your investment and keeping the green playable. A level, well-draining base is essential for a true and consistent ball roll, giving you a professional-quality practice surface right in your backyard.

Professional vs. DIY Installation

While a DIY project can be tempting, installing a putting green requires specialized knowledge and tools. A common mistake is using standard landscaping turf, which is too thick and soft for a realistic putting experience. Putting green turf is specifically designed for a short, true roll. Professionals have access to the right materials and the equipment needed to compact the base properly, cut the turf precisely, and secure the seams for an invisible finish.

Hiring an experienced installer ensures every detail is handled correctly, from the sub-base composition to the final infill application. This expertise prevents costly errors and guarantees your green will look and play its best for years. Think of it as an investment in quality that pays off every time you step onto your flawless green.

Timeline and Quality to Expect

The timeline for a putting green installation can vary depending on the size and complexity of your project, but a professional team typically completes the work within a few days. Rushing the process can lead to long-term problems. Poor performance often comes down to an inadequate base, neglected drainage, or shoddy installation work.

When you work with a reputable company, you can expect a high-quality result that stands the test of time. A premium green will have a firm yet receptive surface that mimics the feel of a real golf course. You can see examples of our completed projects on the Gappsi YouTube channel. Investing in a quality installation means you get a durable, low-maintenance green that provides a consistent and enjoyable practice experience.

How to Maintain Your Backyard Putting Green

One of the best things about a synthetic putting green is how little work it takes to keep it looking and playing its best. Unlike a natural grass green, you can forget about mowing, watering, and fertilizing. However, low maintenance doesn’t mean no maintenance. A little bit of care will protect your investment and ensure your green provides a true, consistent roll for every putt. With proper installation and basic upkeep, you can expect your artificial turf putting green to last 15 years or even longer.

Think of maintenance as a simple routine that keeps your green ready for practice anytime you are. It’s mostly about keeping the surface clean and the turf fibers standing tall. Following a few easy steps will prevent debris from building up, stop the turf from matting down in high-traffic areas, and preserve the realistic performance you love. We’ll walk through the daily, weekly, and seasonal tasks that will keep your backyard oasis in pristine condition for years of enjoyment. Gappsi’s synthetic turf solutions are designed for durability, and this guide will help you maximize their lifespan.

Daily and Weekly Care Tips

Your regular maintenance routine is incredibly simple. A synthetic grass putting green only needs occasional brushing to keep the fibers upright and periodic rinsing to remove debris. On a daily basis, it’s a good idea to quickly pick up any leaves, twigs, or other debris that falls onto the surface. Once a week, give the green a quick sweep with a stiff, non-metal broom. This helps fluff up the turf fibers, especially in the spots where you stand most often, ensuring a consistent ball speed across the entire green. A quick rinse with a garden hose will wash away any dust, pollen, or smaller particles, keeping the surface clean and vibrant.

A Seasonal Maintenance Checklist

A simple seasonal plan will address any deeper cleaning needs and prepare your green for the changing Long Island weather. In the spring, give your green a thorough brushing and rinsing to clear away any debris that settled over the winter. During the fall, be sure to remove fallen leaves regularly with a leaf blower to prevent them from getting ground into the turf. If it snows in the winter, it’s best to let it melt on its own. Avoid using metal shovels or harsh de-icing chemicals, as they can damage the turf. This is also a great time to inspect the surrounding patio or walkways, as Gappsi offers restoration and sealing services to keep your entire outdoor space looking its best.

Essential Equipment and Supplies

You don’t need a shed full of special equipment to care for your putting green. A few basic tools are all it takes. Using the right tools ensures your green will look great for years to come. We recommend having a stiff-bristled broom (with synthetic, not metal, bristles), a leaf blower, and a garden hose with a spray nozzle. These items will handle nearly all of your cleaning and maintenance needs. Remember, not all turf is the same, and selecting a high-quality product from the start is crucial for easy maintenance. Gappsi uses premium materials designed for realistic play and long-term durability, giving you a head start on a beautiful, low-effort green.

What Makes a High-Quality Putting Green?

A great backyard putting green is more than just a patch of green turf. It’s an investment in your home, your family’s enjoyment, and your golf game. So, what separates a top-tier green from one that will leave you frustrated? It comes down to a combination of superior materials, expert craftsmanship, and a design that delivers a true-to-the-course experience. A high-quality green should feel realistic underfoot and provide a consistent ball roll every single time you practice. It needs to be tough enough to withstand Long Island’s changing seasons, from hot summer sun to chilly winters, without fading, tearing, or falling apart.

The secret lies in the details that you can’t always see. It starts with the type of synthetic turf used, which should be specifically engineered for golf to control ball speed and roll. It also depends heavily on the preparation of the base underneath, which ensures proper drainage and a smooth, stable surface. Finally, the skill of the installation team brings it all together. When all these elements are perfectly aligned, you get a putting green that not only looks fantastic but also helps you genuinely improve your game for years. Gappsi specializes in creating these durable and high-performing synthetic turf and sports games courts, ensuring your investment pays off with every single putt.

Durability and Realistic Performance

When you invest in a putting green, you want it to last. A high-quality synthetic green isn’t a temporary feature; it’s a permanent upgrade to your home that can last 15 to 20 years with proper care. The key is using turf specifically designed for putting greens, which is far more resilient than generic artificial grass. This specialized turf is built to handle constant foot traffic and resist UV rays. Beyond just lasting a long time, it needs to perform realistically. This means the ball rolls true and at a consistent speed, just like it would at your favorite golf course. A quality installation ensures the surface is perfectly smooth, giving you a reliable place to practice your short game.

Common Myths About Artificial Turf

Let’s clear up a few things about artificial turf. One common myth is that it’s completely maintenance-free. While it’s incredibly low-maintenance compared to a natural grass green, it does need a little attention. You’ll want to occasionally use a brush to keep the fibers standing upright and rinse it off to clear away leaves or debris. Another myth is that synthetic greens don’t last very long. The truth is, a professionally installed green made with quality materials is a long-term investment. You can expect many years of use without the constant mowing, watering, and fertilizing that a natural green demands. It’s the perfect balance of lasting performance and minimal upkeep.

Factors That Affect Its Lifespan

Three main things determine how long your putting green will last: the quality of the materials, the skill of the installation, and how well you maintain it. Using cheaper, low-grade turf might save money upfront, but it will likely fade, tear, and wear out much faster. The installation process is just as critical. A poorly prepared base can lead to bumps, uneven surfaces, and drainage problems that ruin the playing experience and damage the turf over time. Finally, simple, consistent care makes a huge difference. By choosing a reputable installer who uses premium materials, you are setting your green up for a long and healthy life. An expert installation ensures every layer is perfect, from the base to the final grain of infill.

How to Choose the Right Putting Green Company

Finding the right partner for your putting green project is just as important as choosing the right materials. A great company guides you from design to installation, ensuring the final result matches your vision and lasts for years. You’re investing in a long-term addition to your home, so you need a team with local expertise and a commitment to quality. They should listen to your needs and answer your questions clearly. Here’s what to look for in a professional installer and the key questions to ask before making a decision.

Gappsi’s Synthetic Turf and Sports Game Court Solutions

Choosing a company with a proven track record is key. At Gappsi, we offer premium synthetic turf and sports games courts designed for a realistic golfing experience. Our synthetic putting greens also conserve significant water compared to traditional grass, making them a sustainable choice for your Long Island home. We focus on providing durable solutions that let you enjoy the game you love right in your backyard. Our team helps you design a green that perfectly fits your space and playing style, ensuring every detail is just right.

What to Look For in a Professional Installer

A great putting green starts with a solid foundation. When vetting installers, look for a team experienced in creating level surfaces and managing proper drainage. A reputable installer understands these technical details are essential for long-term performance and playability. Ask to see their past projects and read reviews from other local homeowners. A true professional will be proud to show you their work and will be knowledgeable about local building codes, ensuring your project is done right from the start.

Questions to Ask Before You Hire

Before signing a contract, have a clear conversation with your potential installer. Ask about the specific type of turf they use, since generic landscaping turf is too soft for a true ball roll. Inquire about their specialized putting green turf and why they recommend it. Other key questions include: What does your base preparation involve? What is the estimated project timeline? Do you offer a warranty on materials and labor? Can you provide an itemized quote? Getting clear answers will help you feel confident in your choice.

How to Finance Your Putting Green Project

A backyard putting green is a fantastic investment in your home and your hobbies, but it’s also a significant project. The good news is you don’t have to pay for it all at once. Thinking through the financial side of your project ahead of time can make the entire process smoother and more manageable. With a little planning, you can find a payment strategy that fits your budget, allowing you to get the putting green you’ve always wanted without financial stress.

Many homeowners are surprised to learn about the different options available to fund their dream backyard. From dedicated payment plans offered by installers to smart budgeting strategies, there are several paths you can take. Let’s walk through a few key ways to approach financing so you can feel confident and prepared as you move forward with your installation.

Exploring Payment Plans and Financing

Many professional installers understand that a putting green is a major purchase, so they offer financing options to make it more accessible. These plans allow you to spread the cost of your project over several months or years, turning a large one-time expense into predictable monthly payments. When you start talking to companies, always ask about their financing partners and the terms they offer. Look for flexible plans with reasonable interest rates that fit your financial situation. Exploring a home improvement loan can be another great way to secure the funds you need with clear repayment terms.

Finding Seasonal Promotions and Discounts

Timing can be everything when it comes to managing your project’s cost. Keep an eye out for seasonal promotions or special discounts that installation companies may offer. Sometimes, you can find great deals during the off-season when business is a bit slower. It’s always a good idea to ask your potential installer if they have any upcoming promotions. Planning your project around these sales events can help you save a considerable amount of money on materials and labor, making your investment even more valuable. A little patience and strategic planning can really pay off.

Smart Ways to Manage Project Costs

Getting a clear and detailed quote is one of the best ways to manage your budget. When you receive an estimate, make sure it breaks down all the costs, including site preparation, materials, and labor. This transparency helps you avoid unexpected expenses later on. Don’t hesitate to ask questions about anything that seems unclear. Understanding the full scope of your project allows you to compare offers effectively and make an informed decision. At Gappsi, we provide comprehensive quotes for all our synthetic turf and Sports Games Courts to ensure you know exactly what to expect.

Related Articles

Frequently Asked Questions

How much space do I really need for a putting green? You might be surprised by how flexible putting greens can be. You don’t need a huge, sprawling lawn to create a great practice area. A smaller, well-designed green of around 200 to 500 square feet can provide plenty of challenging practice with a few different holes. The key is to work with the space you have. A professional designer can help you create a layout that fits your yard’s unique shape and size, ensuring it feels like a natural part of your landscape.

Will a synthetic green actually help my golf game like a real one? Absolutely. The technology behind synthetic turf has come a long way, and modern putting greens are engineered to mimic the performance of a high-end golf course. The ball roll is true and consistent, which is exactly what you need for effective practice. Unlike natural grass, which can have unpredictable bumps and bare spots, a quality synthetic green gives you a reliable surface year-round. This consistency allows you to focus entirely on your technique and build muscle memory that translates directly to the course.

My yard isn’t perfectly flat. Can I still get a putting green? Yes, and in fact, a yard with some natural slope can make for a more interesting and challenging green. The most important part of any installation is the base preparation. A professional team will excavate the area and build a solid, compacted foundation that creates a perfectly smooth surface for the turf, regardless of the yard’s original contours. They can even incorporate gentle breaks and undulations into the design to mimic the challenges you’d find on a real course.

How long does the installation process usually take from start to finish? For a standard residential putting green, a professional installation team can typically complete the entire project in just a few days. The exact timeline depends on the size and complexity of your design, as well as weather conditions. The process involves several key steps, including site excavation, base construction, turf placement, and infill application. A quality installer will never rush the foundation work, as that is the key to a green that performs well for years.

Is the artificial turf safe for my kids and pets to play on? High-quality synthetic turf is completely safe for the whole family, including children and pets. The materials used are non-toxic and durable enough to handle regular foot traffic and play. Plus, since the turf doesn’t require any pesticides, fertilizers, or other harsh chemicals to stay green, you can feel good about creating a healthier environment in your backyard. It’s a soft, resilient surface perfect for both serious golf practice and casual family fun.

Share this page:
A blue SUV parked on a modern driveway constructed with permeable pavers.

Permeable Pavers: The Ultimate Homeowner’s Guide

If you’re a homeowner on Long Island, you know that a heavy rainstorm can turn your driveway or patio into a shallow pond. All that water has to go somewhere, and with traditional surfaces, it runs off into the street, carrying pollutants with it. This is where permeable pavers offer a smarter, more elegant solution. Instead of creating a solid barrier, these innovative systems are designed to let rainwater soak directly into the ground beneath them. This simple change mimics nature’s own drainage process, helping to prevent puddles, reduce runoff, and protect our local waterways. It’s a beautiful and practical upgrade for any home.

Key Takeaways

  • Manage rainwater the smart way: Permeable pavers work by allowing water to drain through the surface into a specialized base, which helps prevent runoff, reduces puddling, and naturally filters water back into the ground.
  • Get style and long-term value: Choosing a permeable system doesn’t limit your design choices; options range from classic concrete to natural stone. This is a wise investment that can save you money on separate drainage systems and add lasting value to your home.
  • Keep maintenance simple and straightforward: Caring for permeable pavers is easier than you think. The main task is to regularly sweep the surface clear of leaves and debris to keep the joints open, ensuring the system continues to drain water effectively.

How Do Permeable Pavers Work?

If you’ve ever seen water pool on a driveway or patio after a Long Island rainstorm, you’ve witnessed the problem with traditional hardscaping. Permeable pavers offer a smart solution by working with nature, not against it. Instead of creating a solid, non-porous surface that forces water to run off into storm drains, permeable systems allow rain and snowmelt to soak directly into the ground below. This simple yet brilliant design mimics the way natural soil absorbs water, helping to reduce runoff, prevent erosion, and replenish local groundwater sources. It’s an elegant approach that combines beautiful design with practical, eco-friendly function for your home.

The Secret to Smart Water Drainage

The magic of permeable pavers lies in their design and installation. Unlike standard concrete or asphalt, these pavers are created with small gaps between them. When it rains, water flows through these joints instead of pooling on the surface. Think of it as a built-in drainage system for your patio or driveway. This design effectively manages stormwater right where it falls, preventing excess water from overwhelming your yard or the local sewer system. By allowing water to soak into the ground, you’re not just keeping your surfaces dry; you’re also helping to filter out pollutants and recharge the natural aquifer beneath your property.

The Layers of a Permeable System

A permeable paver system is much more than what you see on the surface. The real work happens in the carefully constructed base underneath. Below the pavers, our expert masonry teams install several layers of different-sized crushed stone and aggregate. This multi-layered foundation acts like a natural filter. As water drains through the paver joints, it passes through these stone layers, which clean it of debris and impurities. The open spaces within the aggregate base also create a reservoir, temporarily holding the water before it slowly and safely percolates back into the soil. This thoughtful engineering is key to the system’s long-term success and durability.

Best Uses: Driveways, Patios, and Pool Decks

Permeable pavers are incredibly versatile and are an excellent choice for almost any outdoor surface. They are particularly effective for driveways, walkways, and patios, where managing runoff from a large, flat area is crucial. Around swimming pools, they are a fantastic safety feature, as their drainage capabilities prevent slippery puddles from forming on the deck. As homeowners become more conscious of stormwater management, permeable pavers have become a popular and responsible choice. They offer a durable, beautiful, and environmentally friendly alternative for any hardscape project, adding both function and style to your outdoor living space.

Why Choose Permeable Pavers Over Traditional Ones?

When planning a new driveway, patio, or walkway, traditional pavers might seem like the default choice. However, permeable pavers offer a smarter, more sustainable alternative with a surprising number of benefits. They do more than just look good; they actively manage rainwater, can save you money down the road, and are built to withstand the test of time. Choosing a permeable system is an investment in your property’s beauty, functionality, and environmental health.

Eco-Friendly Stormwater Management

The standout feature of permeable pavers is how they handle rain. Instead of letting water pool on the surface or run off into storm drains, they allow it to soak through the joints and into the ground below. This process mimics natural soil, reducing runoff that can cause flooding and carry pollutants into Long Island’s waterways. By filtering rainwater naturally, a permeable paver system helps replenish local groundwater. Proper masonry installation is key to ensuring this system functions perfectly for years to come.

Long-Term Value and Cost Savings

While the initial cost of permeable pavers can be higher than traditional options, they often prove more economical over time. Because they manage stormwater on-site, you may be able to avoid installing expensive and complex drainage systems, such as catch basins or French drains. This can lead to significant savings on your overall project cost. For Long Island homeowners, this is a practical benefit that adds lasting value to your property by creating a more resilient and cost-effective landscape.

Beautiful and Flexible Design Options

Choosing an eco-friendly option doesn’t mean you have to compromise on style. Permeable pavers are available in a vast array of shapes, colors, and textures that are just as beautiful as their non-permeable counterparts. You can find everything from classic cobblestone looks to sleek, modern slabs to complement your home’s architecture. Whether you’re designing an elegant patio or a charming garden path, there are plenty of porcelain and natural stone pavers that offer both permeability and stunning visual appeal. You get all the environmental benefits without sacrificing your design vision.

Built to Last: Durability and Strength

Permeable pavers are engineered to be incredibly strong and durable. They are designed to handle heavy foot traffic on patios and the weight of vehicles on driveways without a problem. The interlocking system creates a stable, robust surface that resists shifting and cracking over time, even with Long Island’s freeze-thaw cycles. These systems are built for longevity and can last for decades with minimal upkeep. With professional restoration and sealing services available for long-term care, you can trust that your investment is not only green but also incredibly resilient.

What Are Your Permeable Paver Options?

When you hear “permeable pavers,” you might picture just one specific type of stone. The reality is much more exciting. You have a variety of materials to choose from, each offering a unique aesthetic and set of benefits for your Long Island home. Whether you prefer the classic look of interlocking pavers, the seamless finish of modern concrete, or the green appeal of a grass-filled grid, there’s a permeable solution that fits your style. Let’s explore the most popular options so you can find the perfect match for your project.

Interlocking Concrete Pavers (PICPs)

Permeable Interlocking Concrete Pavers, or PICPs, are a top choice for durability and design flexibility. Unlike standard pavers that fit tightly together, these are engineered with wider joints. These spaces are filled with tiny, clean stones that allow rainwater to filter through them and into a prepared stone base below. This design effectively prevents runoff while providing a strong, stable surface for driveways, walkways, and patios. With a huge range of colors, shapes, and textures available, you can achieve a custom look that complements your home’s architecture. Our masonry experts can help you design a pattern that is both beautiful and functional.

Porous Asphalt and Pervious Concrete

If you prefer a smooth, uniform surface, porous asphalt and pervious concrete are excellent alternatives. These materials look very similar to their traditional counterparts but are mixed with minimal fine particles, creating a web of interconnected voids. This structure allows water to flow directly through the pavement itself, not just around it. This makes them a great option for modern driveways or large patio areas where you want a seamless finish. An expertly installed system includes an underlying layer of loosely packed aggregates that holds the water before it soaks into the ground, making it a powerful tool for managing stormwater on your property.

Grid Systems with Grass or Gravel

For a solution that blends beautifully with your landscape, consider a permeable grid system. These are typically made of durable, recycled plastic or concrete and form a honeycomb-like structure. You can fill the open cells with either gravel for a crisp, modern path or topsoil and grass seed for a lush, green surface that you can drive on. These systems provide the structural support needed for driveways and parking areas while maximizing green space. They are fantastic for managing rainwater, preventing soil erosion, and helping to replenish local groundwater. This approach perfectly merges hardscaping with thoughtful landscape design.

Natural and Eco-Friendly Stone

You don’t have to give up the timeless beauty of natural stone to get the benefits of a permeable surface. You can use materials like granite, bluestone, or fieldstone and simply have them installed with permeable techniques. The key is setting the stones with wider, open joints filled with a clear crushed stone aggregate. This method allows water to drain between the stones into the prepared base below. This gives you the high-end, elegant look of a classic stone patio or walkway while still being environmentally responsible. You can explore a wide variety of porcelain and natural stone pavers to find the perfect material for your home.

How Much Will Permeable Pavers Cost?

Let’s talk numbers. When planning any home improvement project, the budget is always a top consideration. Permeable pavers often have a higher initial cost than traditional materials like asphalt or standard concrete pavers, but it’s important to understand what you’re paying for. The price reflects a more complex system that manages water, protects your property, and adds long-term value.

Instead of just a simple surface, you’re investing in an engineered solution that includes a specialized base, high-quality pavers, and expert installation. This system is designed to last for decades while actively preventing common issues like puddling, ice buildup, and runoff. We’ll break down the costs so you can see exactly where your money goes and why it’s a smart investment for your Long Island home.

Breaking Down Material and Installation Costs

The total cost of your project can be split into two main categories: the materials themselves and the complete installation. For high-quality permeable pavers, you can generally expect the materials to cost between $5 and $10 per square foot. This price varies based on the style, color, and type of natural stone or porcelain you choose.

When you factor in the specialized multi-layered sub-base, all materials, and professional labor, the total project cost typically ranges from $10 to $18 or more per square foot. This comprehensive price covers the excavation, the installation of the drainage layers, and the precise placement of the pavers, ensuring the system functions perfectly from day one.

What Factors Influence the Final Price?

Unlike a standard patio, a permeable paver system has several components that contribute to the final cost. The price isn’t just about the pavers on top; it’s about the entire system underneath. Key factors that can influence your project’s price include the size and complexity of the area, how easy it is for our crew to access the site, and whether we need to remove an old driveway or patio first.

Your property’s soil type can also play a role, as it may require adjustments to the sub-base design. The expert masonry and installation techniques required for these systems are crucial for their performance and longevity, making professional installation a critical part of the investment.

Is the Initial Investment Worth It?

While permeable pavers may cost more upfront, they can save you significant money over time. By managing stormwater on-site, they often reduce or completely eliminate the need for expensive, separate drainage systems like French drains or dry wells. This is a huge benefit, especially on properties with drainage challenges.

Furthermore, these systems can increase your property’s value and may even lead to faster project approvals from local municipalities. Think of it as a long-term investment in your home’s durability and functionality. You get a beautiful, high-performance surface that prevents water damage, reduces maintenance headaches, and contributes to a healthier local environment.

What Maintenance Do Permeable Pavers Really Need?

When you hear about a specialized system like permeable pavers, it’s natural to wonder if they come with a complicated maintenance routine. The good news is, they don’t. Keeping your permeable pavers in top shape is surprisingly straightforward and not that different from caring for traditional surfaces. Most of your maintenance tasks, like cleaning, clearing away leaves, and pulling the occasional weed, are things you’d be doing anyway with a standard concrete or asphalt driveway. The main goal is simply to keep the joints between the pavers clear so water can drain through as intended.

The key is consistency. A little bit of regular upkeep prevents debris from building up and clogging the system. By staying on top of a few simple tasks, you ensure your pavers function beautifully and effectively for years. And if you ever feel like your pavers need a deeper clean or a refresh, Gappsi’s professional restoration and sealing services are always available to bring them back to pristine condition. This simple care routine protects your investment and keeps your outdoor space looking its best.

Your Simple Routine Cleaning Checklist

Keeping your permeable pavers working correctly really comes down to one thing: making sure water can still flow through the gaps. When leaves, dirt, and other debris build up, they can clog these essential drainage channels. A simple cleaning routine is all you need to prevent this.

Just add these quick tasks to your regular outdoor cleanup:

  • Sweep the surface: Regularly sweep away leaves, twigs, and dirt with a stiff-bristled broom.
  • Use a leaf blower: For a faster cleanup, a leaf blower is great for clearing loose debris from the surface.
  • Rinse occasionally: A gentle rinse with a garden hose can wash away fine dust and sediment. Avoid using a high-pressure washer, as it can dislodge the aggregate in the joints.

Seasonal Upkeep for Lasting Results

A little seasonal attention goes a long way in preserving the function and beauty of your permeable pavers. In the fall, be diligent about clearing fallen leaves to prevent them from decomposing and clogging the joints. Come winter, you’ll notice a major benefit: because permeable surfaces prevent water from pooling, there’s less ice buildup, making your walkways and driveway safer. If you need to de-ice, use salt sparingly and avoid sand, which can clog the system. In the spring, it’s a great time to give your pavers a thorough cleaning to wash away winter grime and check that the joints are still filled properly. This simple seasonal care ensures lasting performance year after year.

Common Maintenance Myths, Busted

Let’s clear up a few common misconceptions about permeable paver maintenance. The biggest myth is that they are difficult to care for. As we’ve covered, the routine is simple and very similar to that of any other paver surface. Another myth is that permeable pavers aren’t as strong as traditional options. In reality, permeable pavements are designed to be just as durable. When installed correctly by experts, they can easily handle the weight of vehicles on a driveway and heavy foot traffic on a patio. With basic, consistent care, your permeable pavers will prove to be a strong, reliable, and beautiful choice for your home.

Related Articles

Frequently Asked Questions

Are permeable pavers really strong enough for a driveway? Absolutely. Don’t let the gaps between the stones fool you; these systems are engineered for serious strength. The interlocking pavers combined with the deep, layered stone base create an incredibly stable surface that distributes the weight of vehicles effectively. They are designed to handle daily traffic and withstand Long Island’s freeze-thaw cycles without shifting or cracking.

How do permeable pavers handle snow and ice during the winter? They perform exceptionally well in winter, which is a major advantage for homeowners here. Because water drains through the surface instead of pooling on top, there is much less opportunity for dangerous ice sheets to form. Snow also tends to melt and drain away more quickly. This natural drainage makes your driveway and walkways significantly safer during icy weather.

Do I have to sacrifice style if I choose a permeable option? Not at all. You have just as many beautiful design choices with permeable pavers as you do with traditional ones. They are available in a huge variety of colors, textures, and styles, from classic cobblestone to sleek, modern slabs. The functional part of the system is in the joints and the base underneath, so the surface you see and enjoy is just as stylish as any conventional patio or driveway.

Can I install permeable pavers myself to save money? While it might seem like a way to cut costs, installing a permeable paver system is a complex job that really requires professional expertise. The system’s success depends entirely on the correct excavation and installation of the multi-layered base. This is more of an engineering project than a simple paver-laying job. An incorrect installation can lead to failure, so investing in expert masonry ensures your system works perfectly for decades.

How long does a permeable paver system last compared to a traditional one? With professional installation and simple, regular maintenance, a permeable paver system is built to last for 20 to 30 years, or even longer. Their lifespan is very comparable to that of high-quality traditional pavers. In fact, because the system prevents water from sitting on the surface and eroding the base, it can reduce wear from weathering, helping it maintain its strength and beauty over time.

Share this page:
Wood burning stove and oven combination from a dealer on Long Island, New York.

How to Find the Best Stove Oven Dealer on Long Island

Long Island winters can be unpredictable, and having a reliable source of heat and a way to cook during a power outage provides incredible peace of mind. A wood-burning stove and oven combo offers a completely off-grid solution, keeping your family warm and fed using a single, renewable fuel source. Modern units are incredibly efficient, burning cleaner and longer than older models, making them a practical choice for everyday use and emergency preparedness. This level of self-sufficiency starts with finding the right appliance, and a trusted wood burning stove and oven combination dealer on Long Island new york can help you select a high-performance model that meets your family’s needs.

Key Takeaways

  • Combine heating and cooking: A wood burning stove and oven combo serves two functions at once, providing an efficient way to warm your home and prepare meals, which is especially useful during power outages.
  • Focus on the right features: Look for key specifications like EPA certification for efficiency, the correct heating capacity for your room size, and durable materials to guarantee your stove performs well and is safe.
  • Partner with a trusted expert: The right dealer is as important as the right stove, so choose a local company that provides expert advice, certified installation, and ongoing support to ensure you get the most from your investment.

What is a Wood Burning Stove and Oven Combo?

A wood burning stove and oven combo is a single, hardworking appliance that heats your space and cooks your food. Think of it as the ultimate two-for-one for your home. These units combine the cozy warmth of a traditional wood stove with the practical function of an oven, making them a fantastic addition to any kitchen, living area, or even a covered outdoor patio. They offer a unique, rustic charm while providing a reliable source of heat and a way to prepare delicious meals, from roasted chicken to freshly baked bread. It’s a piece that feels both nostalgic and incredibly practical.

Unlike separate appliances, a cookstove is designed to be a centerpiece. It brings people together and creates a warm, inviting atmosphere that becomes the heart of your home. Whether you’re looking to add a functional statement piece as part of a home remodeling project or want a reliable off-grid cooking solution, these combos are incredibly versatile. Modern designs are much more efficient and cleaner-burning than the old-fashioned ranges you might picture. Some models reach up to 80% efficiency, meaning they can heat a significant portion of a home while providing consistent cooking temperatures. They truly blend timeless appeal with modern performance.

Why Choose a Stove and Oven Combo?

Choosing a stove and oven combo is about embracing efficiency and a unique way of life. These units are masters of multitasking. They use the heat generated from burning wood to both warm your home and cook your meals, which means you get more value from a single fuel source. This is perfect for anyone interested in reducing their reliance on electricity or gas, especially during a power outage. Plus, there’s nothing quite like the taste of food cooked with a real wood fire. It adds a distinct flavor that you just can’t replicate with a conventional oven. It’s a practical choice that also adds a lot of heart to your home.

How Do They Work?

The way these combos work is brilliantly simple. Inside the unit, there’s a firebox where you burn the wood. This fire generates heat that radiates out from the stove’s body, warming the surrounding room just like a standard wood stove. At the same time, the design cleverly channels a portion of that heat into an insulated oven compartment. This allows you to bake, roast, or warm food using the same fire. Since the entire unit is powered by wood, it operates completely without electricity or gas, giving you a steady, reliable source of heat for both cooking and comfort.

Key Features to Look For

When you start shopping for a wood-burning stove and oven combo, you’ll quickly see that there are many options available. It’s easy to feel a bit overwhelmed, but focusing on a few key features will help you find the perfect fit for your Long Island home. Think about how you plan to use your stove. Is it for heating a large open-plan living area, supplementing your current heating system, or creating a cozy cooking hub in your kitchen? Your answers will guide you toward the right model. Let’s break down the most important features to consider so you can make a choice you’ll be happy with for years to come.

Heating Capacity

The first thing to consider is how much space you need to heat. Wood stoves come in various sizes, designed to heat anything from a single room to an entire house. For chilly Long Island winters, you’ll want a stove with an adequate BTU (British Thermal Unit) rating to keep your space comfortable. A higher BTU rating means more heat output. Before you shop, measure the square footage of the area you want to heat. This information will help your dealer recommend a stove that’s powerful enough to do the job efficiently without being excessive for the space.

Efficiency and EPA Certification

A modern wood stove should be both powerful and efficient. An efficient stove burns less wood to produce the same amount of heat, saving you money on fuel and reducing your environmental impact. Look for the EPA certification label, which guarantees the stove meets strict federal air quality standards. The best models have an efficiency rating of 70% or higher and can offer long burn times, sometimes up to 12 hours on a single load of wood. This means less time spent loading the stove and more time enjoying its consistent, steady warmth.

Oven Size and Cooking Features

The oven is what makes this appliance so special, so think about how you’ll use it. These stoves are fantastic for everything from baking bread and roasting chickens to simmering stews, all while warming your home. Consider the oven’s size. Do you need enough space for a large holiday meal, or will you mostly be making smaller dishes? Some models also come with features like a built-in thermometer or a cooktop surface for even more versatility. A stove and oven combo can be a beautiful and functional centerpiece for any home remodeling project.

Quality Materials and Safety Clearances

Finally, pay close attention to the stove’s construction and safety requirements. High-quality materials like cast iron and heavy-gauge steel ensure durability and excellent heat retention. Safety is also a top priority. Every stove has specific clearance requirements, which is the minimum safe distance it must be from walls and other combustible materials. A professional installer will ensure these clearances are met. When you visit a showroom, ask about the materials and the installation process to ensure your new stove is both beautiful and safe. You can find a great selection of high-quality options at the Gappsi Store.

Top Brands and Models on Long Island

Once you know what features matter most, you can start exploring specific brands and models. The market has some fantastic options, but it helps to know which names are trusted for quality and performance. Here on Long Island, we have access to some of the best, so let’s look at what you should consider as you shop.

Explore Gappsi’s Premium Selection

At Gappsi, we’ve carefully selected a range of wood-burning stove and oven combos that blend timeless appeal with modern performance. A wood-burning cookstove can warm your living space while you cook a meal, combining the function of a wood stove with a fully operational oven. This makes them a wonderful solution for daily use and a reliable off-grid option for cooking and heating. Our collection at the Gappsi Store features models designed to fit your home’s aesthetic while delivering powerful, dual-purpose functionality. We focus on products that are not only beautiful but also built to last.

Popular Brands to Consider

As you do your research, you’ll come across a few key brands that are well-regarded in the industry. It’s a good idea to look for North American-made options, which are often recognized for their solid construction. For example, brands like Drolet offer models such as the Bistro and Chic-Choc, known for their quality Canadian manufacturing and long burn times. These brands have built a reputation for reliability, so they are a great starting point in your search. Keeping an eye out for established names with positive reviews gives you confidence in your investment.

Compare Key Models and Specifications

When comparing models, a few key specifications will tell you a lot about performance. Modern wood ranges are far more efficient and cleaner-burning than older versions, with some reaching up to 80% efficiency. One of the most important things to look for is an EPA certification label, which is usually on the back of the stove. This certification ensures the unit meets clean air standards. Also, check the burn time, which should ideally be between 8 to 12 hours, and aim for a real-world efficiency of over 70%. These factors together ensure you get the most value from your investment.

Understanding the Costs

When you start shopping for a wood-burning stove and oven, you’ll see a range of price points. The final cost involves more than just the appliance itself. It’s a combination of the unit’s quality, features, and the professional installation required to get it running safely in your home. Thinking about the total investment from the beginning helps you set a realistic budget and find a stove that delivers value for years to come. Let’s break down the key factors that contribute to the overall price.

What Affects the Price?

The sticker price of a stove oven is directly tied to its construction and capabilities. A well-built stove made from high-quality materials will naturally cost more upfront but often proves more durable and efficient over time. Key factors influencing the price include the heating capacity, which determines how large a space it can warm, and the oven size. North American-made models are often praised for their solid construction and long burn times, making them a worthwhile investment. When you browse the options at the Gappsi Store, you’ll notice how these features impact the final cost.

Ask About Promotions and Financing

Don’t hesitate to ask your dealer about any current promotions or financing options they might offer. These can make a premium stove more attainable for your budget. A great dealer wants to build a relationship with you and will be transparent about ways to make your purchase work. It’s also helpful to work with a company that provides a wide range of services. For instance, if your new stove is part of a larger kitchen update, a full-service provider can streamline your entire home remodeling project, which can be a huge advantage.

Factor in Installation and Service

Professional installation is a critical part of your stove’s total cost, and it’s not an area where you want to cut corners. A reputable dealer provides comprehensive support, from helping you choose the right model to ensuring it’s installed correctly and safely. This often involves specialized work, like custom masonry for the hearth and surround. Having knowledgeable staff guide you through the process saves you time and prevents potential issues later on. This end-to-end service is a key part of the value you receive from a trusted local dealer.

Finding the Best Dealer on Long Island

Choosing the right dealer is just as important as choosing the right stove. You want a partner who understands your vision, offers high-quality products, and provides expert guidance from start to finish. On Long Island, finding a local dealer you can trust makes the entire process smoother and more enjoyable. A great showroom will not only display a variety of models but will also have a team ready to answer your questions and help you find the perfect match for your home’s unique needs and style.

Why Gappsi is Your Go-To Showroom

When you’re ready to bring the warmth and charm of a wood-burning stove into your home, finding the right partner is key. At Gappsi, we pride ourselves on being more than just a showroom. We offer a wide range of high-quality wood-burning ovens from popular brands known for their incredible efficiency and beautiful designs. Our team isn’t just here to sell you a product; we’re here to help you find the perfect fit for your home and lifestyle. With years of experience, our knowledgeable staff can walk you through every option, answering your questions and making sure you feel confident in your choice. We believe the selection process should be exciting, not overwhelming.

What to Look for in a Local Dealer

As you explore your options on Long Island, there are a few key things to look for in any dealer. First, make sure they offer EPA-certified wood stoves. This certification is your assurance that the stove meets important standards for efficiency and environmental compliance, which is good for your wallet and the planet. A great resource for this is the EPA’s guide on choosing the right wood-burning stove. Also, consider the variety of stoves they have available. A good dealer should present a solid range of options that cater to different heating needs, cooking styles, and aesthetic preferences, so you never feel like you have to settle.

Prepare for Your Consultation

To get the most out of your visit to a showroom, a little preparation goes a long way. Before you go, take a few minutes to measure the space you plan to heat. Having these dimensions handy will help the experts find a stove with the right capacity for your home. It’s also helpful to think about your primary heating needs and how you envision using the oven. Are you looking for a primary heat source or supplemental warmth? A reputable dealer will offer a free consultation to discuss these details, helping you understand all your options and make a truly informed decision without any pressure.

How to Get Started

Once you have a short list of potential dealers, it’s time to take the next step. Moving forward with confidence comes down to knowing what to look for and what to ask. A great dealer will be a partner in your project, guiding you from the initial showroom visit to the final installation. Here’s how you can prepare to make the best choice for your home.

Reaching Out to a Dealer

Your first conversation with a dealer sets the tone for the entire experience. Look for a team that listens to your vision and helps you find a stove and oven combo that truly fits your home’s style. A quality dealer won’t just sell you a product; they will work with you to find the perfect fit for your space and needs. Think of them as a key part of your home remodeling team. They should be able to answer your questions clearly and provide personalized recommendations that make sense for your project.

Questions to Ask During Your Visit

Walking into a showroom prepared with questions will help you make an informed decision. Start by asking about the stove’s efficiency and environmental compliance. You can look for the EPA certification label on the unit or ask the dealer to show you which models are on the current list of EPA-certified wood stoves. Next, discuss the size of the space you need to heat. A stove that’s too small won’t be effective, while one that’s too large can be inefficient. Getting answers to these questions will help you compare your options and find a model that performs well for years to come.

The Installation Process and Ongoing Support

Your purchase is just the beginning. A crucial factor in your decision should be the dealer’s installation process and the support they offer after the sale. Ask if they have certified staff who handle the installation. A professional installation is essential for safety and proper performance. You should also clarify what the service includes, from delivery and setup to any ongoing maintenance support or warranties. Choosing a dealer who provides comprehensive service ensures you have a reliable resource to turn to, giving you complete peace of mind as you enjoy your new stove.

Related Articles

Frequently Asked Questions

Can a wood-burning stove and oven combo really heat my whole house? It certainly can, but it depends on the stove’s power and your home’s layout. The key is to choose a model with the right BTU rating for your square footage. A properly sized stove can easily serve as the primary heat source for a large, open-plan area or even a well-insulated home, providing consistent warmth all winter. During a consultation, an expert can help you match a stove’s heating capacity to your specific needs.

How difficult is it to cook with one of these ovens? There is a bit of a learning curve compared to a standard electric or gas oven, but most people find it enjoyable and rewarding. Modern designs are built for better heat control and often include built-in thermometers to help you maintain a consistent temperature. The process becomes intuitive with a little practice, and the delicious, subtly smoky flavor it gives to everything from baked bread to roasted vegetables is something a conventional oven just can’t match.

Do these stoves require electricity to operate? No, they don’t. A wood-burning stove and oven combo operates completely off the grid. It uses only wood to generate heat for both warming your home and cooking your food. This makes it an incredibly reliable appliance, especially during power outages, ensuring you can stay warm and prepare hot meals no matter what the weather brings.

What does the installation process typically involve? Professional installation is essential for safety and performance. The process starts with finding a suitable location that meets the stove’s specific clearance requirements from walls and other flammable materials. It also involves installing a proper chimney or flue system to vent smoke outside. Often, the installation includes creating a non-combustible base, or hearth, which might require custom masonry work to create a beautiful and safe foundation for your new stove.

Are modern wood stoves better for the environment than older models? Absolutely. Modern wood stoves that are EPA-certified are significantly more efficient and cleaner-burning than older, uncertified units. They are designed to burn wood more completely, which means they use less fuel to produce the same amount of heat. This process releases far fewer particulates into the air, making them a much more responsible and environmentally friendly choice for heating your home.

Share this page:
Modern outdoor kitchen with a grill and bar seating designed by a Long Island NY contractor.

Your Guide to Outdoor Kitchen Contractors on Long Island

If you love hosting, you know the routine: you’re stuck running between the grill outside and the kitchen inside, missing out on conversations with your guests. An outdoor kitchen solves this problem completely. It creates a seamless entertainment space where you can prep, cook, and socialize all in one place. Everything you need, from a refrigerator for cold drinks to a sink for quick cleanups, is right at your fingertips. This transforms hosting from a chore into a genuine pleasure. To create this effortless experience, you need a space designed for function and flow. That’s where an expert Outdoor Kitchen Designer Installer Contractor Long Island NY comes in, turning your backyard into the ultimate destination for friends and family.

Key Takeaways

  • Hire a professional to manage the entire process: A qualified contractor handles every phase of your project, from creating a functional design and securing permits to coordinating the full installation, which takes the stress of project management off your plate.
  • Select materials built for the outdoors: The longevity of your outdoor kitchen depends on choosing durable, weather-resistant options. Prioritize materials like natural stone and marine-grade appliances that can withstand Long Island’s climate and protect your investment for years to come.
  • Vet your contractor carefully to ensure quality: The right partner makes all the difference. Be sure to review a contractor’s portfolio of past work, confirm they are fully licensed and insured, and speak with recent references to feel confident in their ability to deliver a high-quality result.

What Can an Outdoor Kitchen Contractor Do for You?

Thinking about adding an outdoor kitchen is exciting, but turning that vision into a reality involves more than just picking out a grill. A professional outdoor kitchen contractor is your partner in the process, managing everything from the big picture design to the smallest installation details. They bring the expertise needed to create a space that’s not only beautiful but also functional, safe, and built to last. Let’s walk through exactly what a contractor can handle for you.

Design Your Dream Kitchen

A great contractor does more than just build; they design. They’ll help you create a well-planned space that functions as a cohesive system rather than just a collection of parts. This means thinking through the ideal layout for how you cook and entertain, ensuring easy access to utilities, and selecting materials that complement your home’s style. With their experience, a contractor can help you visualize the final product and make smart decisions that ensure your outdoor kitchen is a joy to use for years to come. Their expert design and construction knowledge is key to a successful project.

Source the Best Materials

Choosing the right materials is critical for an outdoor kitchen, especially with Long Island’s variable weather. A contractor has the expertise to guide you toward the best options that can withstand sun, rain, and snow. They have established relationships with suppliers and know which materials offer the best value and durability. Whether you’re considering durable outdoor cabinets, stainless steel appliances, or beautiful porcelain and natural stone countertops, your contractor will ensure every component is suited for outdoor use. This guidance helps you avoid costly mistakes and ensures your kitchen remains in great shape.

Handle the Full Installation

One of the biggest benefits of hiring a contractor is having a single point person to manage the entire project. From the initial site prep to the final installation, they coordinate every step. This includes working with electricians, plumbers, and other tradespeople to ensure everything is done correctly and on schedule. A contractor makes sure your new kitchen fits seamlessly with your existing patio, deck, or swimming pool area, taking the stress of project management completely off your shoulders. You get to sit back and watch your dream kitchen come to life without juggling multiple vendors.

Manage Permits and Codes

Building an outdoor kitchen often involves connecting utilities like water, gas, and electricity, which means you’ll likely need permits. A knowledgeable contractor understands local building codes and will handle the entire permitting process for you. This is a crucial step that ensures your kitchen is built safely and legally. They’ll manage the paperwork, schedule inspections, and make sure every aspect of the installation, from plumbing and drainage to electrical wiring, is up to code. This expertise provides peace of mind, knowing your investment is protected and your family is safe.

Choosing the Right Materials and Features

Your outdoor kitchen should be an extension of your home, which means it needs to be both beautiful and functional. The materials and features you select play a huge role in achieving that balance. It’s not just about picking a grill; it’s about creating a cohesive space that can handle backyard parties, family dinners, and the unpredictable Long Island weather. From the countertops where you’ll prep your meals to the lighting that sets the mood, every detail matters. Let’s walk through the key components that will make your outdoor kitchen a lasting and enjoyable part of your home.

Durable Countertops: Stone, Concrete, or Steel?

The right countertop is the workhorse of your outdoor kitchen. You need a surface that can stand up to sun, rain, and snow without staining, cracking, or fading. Natural stone, like granite, is a classic choice for its durability and timeless look. For a more modern feel, stainless steel offers a sleek, professional-grade surface that’s easy to clean. Concrete countertops can be custom-poured for a unique, industrial-chic vibe. We often recommend high-quality porcelain and natural stone because they are incredibly dense, non-porous, and resistant to the elements, making them a perfect fit for an outdoor cooking space.

Must-Have Appliances for Outdoor Cooking

A great outdoor kitchen is so much more than just a grill. To create a truly functional space, think about how you like to cook and entertain. A built-in grill is the centerpiece, but consider adding a side burner for simmering sauces or boiling corn. An outdoor refrigerator is a game-changer, keeping drinks and ingredients cold and saving you trips inside. A sink with running water makes prep and cleanup a breeze. For those who love to host, a pizza oven or a smoker can turn your backyard into the neighborhood’s favorite restaurant. The Gappsi Store offers a selection of high-performance appliances designed to handle the demands of outdoor cooking.

Smart Storage and Cabinetry

Nothing clutters a beautiful kitchen faster than having nowhere to put things. Ample storage is essential for keeping your cooking tools, serving dishes, and cleaning supplies organized and protected from the weather. Outdoor cabinets need to be tough. Stainless steel is a popular option because it resists rust and corrosion. Marine-grade polymer cabinets are another excellent choice, as they won’t warp, fade, or rot. Often, the best solution is to integrate storage directly into the kitchen’s structure with durable masonry that seamlessly matches your home’s aesthetic while providing weatherproof compartments for all your essentials.

Lighting and Power for Ambiance and Function

Proper lighting ensures your outdoor kitchen is usable and safe long after the sun goes down. A good lighting plan includes multiple layers. Task lighting, like spotlights over the grill and prep areas, is crucial for safety. Ambient lighting, such as string lights, under-counter lights, or sconces, creates a warm and inviting atmosphere for your guests. Don’t forget about power. You’ll need strategically placed, weatherproof outlets for blenders, speakers, or charging phones. Integrating lighting into your overall landscape design helps create a cohesive and magical backyard experience.

Built to Last: Weatherproofing for the Long Island Climate

Here on Long Island, our weather can be tough on outdoor structures. From humid, sunny summers to freezing winters with snow and ice, your kitchen needs to be built from materials that can handle it all. Choosing materials that withstand our specific climate, especially the damaging freeze-thaw cycles, is essential for the longevity of your investment. This means selecting frost-proof stone, marine-grade stainless steel appliances, and durable cabinetry. Proper construction techniques are just as important. Applying a protective sealant can also extend the life of your surfaces, and our restoration and sealing services can keep your kitchen looking new for years to come.

From Concept to Completion: The Installation Process

Seeing your outdoor kitchen come together is an exciting process. While every project is unique, a professional contractor will follow a clear, step-by-step plan to ensure everything goes smoothly. Understanding this process helps you know what to expect and feel confident from the first conversation to the final reveal. Here’s a look at the typical journey from a simple idea to a fully functional outdoor kitchen right in your Long Island backyard.

Step 1: The Initial Consultation

This first meeting is all about discovery. It’s a conversation where you share your vision, your must-have features, and your budget. A great contractor will listen carefully, ask questions about how you plan to use the space, and assess your property to discuss what’s possible. This is the perfect time to bring your inspiration photos and ideas to the table. At Gappsi, we see this as the foundational step where we align our expertise with your dream, ensuring the final project truly reflects your lifestyle. This initial planning is a key part of any successful home remodeling project.

Step 2: Bringing Your Design to Life

Once we have a clear understanding of your goals, the creative work begins. Using advanced design software, we transform your ideas into a detailed 3D rendering. This allows you to virtually walk through your new outdoor kitchen before construction even starts. You can see how the layout flows, experiment with different materials for countertops and finishes, and decide on the perfect placement for your grill, refrigerator, and sink. This collaborative design phase is crucial for making adjustments and finalizing every detail, ensuring the finished space is both beautiful and perfectly functional for your needs. You can see examples of our finished work on the Gappsi YouTube channel.

Step 3: Prepping the Site and Securing Permits

With a final design in hand, it’s time to prepare the site. This important phase involves all the groundwork, like clearing and leveling the area, creating a solid foundation, and running utility lines for water, gas, and electricity. One of the biggest advantages of working with an experienced contractor is that we handle all the logistics, including securing the necessary building permits for your town in Long Island. We make sure your project complies with all local codes and regulations, so you can have peace of mind knowing everything is being done correctly and safely.

Step 4: The Build and Installation

This is when your vision truly starts to take shape. Our team of skilled craftsmen gets to work, constructing the framework of your kitchen with expert masonry. We then meticulously install your chosen cabinets, countertops, and appliances with precision and care. We believe in using only high-quality, durable materials that are built to last. Whether you’ve chosen sleek stainless steel or gorgeous porcelain and natural stone, our focus on expert craftsmanship ensures your outdoor kitchen will be a beautiful and enduring addition to your home.

Step 5: The Final Walkthrough

Once the last appliance is in place and the final touches are complete, we’ll do a final walkthrough with you. This is your opportunity to inspect every detail of your new outdoor kitchen and make sure you are completely happy with the result. We’ll show you how to operate all your new equipment, from the grill to the outdoor refrigerator, and provide you with tips on how to care for the new surfaces. Our job isn’t finished until you are 100% satisfied and ready to start hosting barbecues and making memories in your stunning new space.

Why an Outdoor Kitchen Is a Great Investment

An outdoor kitchen is more than just a place to grill burgers. It’s a functional, beautiful extension of your home that completely changes how you use your backyard. Think of it as a long-term investment in your property and your lifestyle. It creates a central point for gatherings, makes hosting feel effortless, and allows you to enjoy the fresh Long Island air more often. From a practical standpoint, it adds significant appeal and functionality to your home, making it a smart choice for any homeowner looking to enhance their outdoor living space.

Add Value to Your Home

When it comes to home improvements, not all projects offer a great return. An outdoor kitchen, however, is a feature that consistently catches the eye of potential buyers. On Long Island, where outdoor living is a huge part of the lifestyle, a well-designed kitchen is a major selling point. It suggests a home that’s perfect for entertaining and family life. By investing in quality masonry and durable appliances, you’re not just building a space for today, you’re adding tangible value that will pay off down the road. It’s a functional upgrade that also makes your property more competitive on the market.

Create the Ultimate Entertainment Hub

Imagine hosting a party where you’re not stuck inside, away from your guests. An outdoor kitchen becomes the heart of your backyard, a natural gathering spot for friends and family. You can chat with everyone while you cook, and the open layout keeps the party flowing. Modern designs often include features like a bar or cocktail station, turning your patio into the go-to spot for evening get-togethers. By creating a multi-functional space, you can cook, dine, and relax without ever leaving the fresh air. It transforms your backyard from a simple lawn into a true entertainment destination.

Enjoy Your Backyard All Year Long

Many people think of outdoor kitchens as a summer-only feature, but that doesn’t have to be the case. With smart design choices, you can extend your outdoor season well into the spring and fall. Incorporating elements like a fire table, built-in patio heaters, or a covered pergola can create a cozy and inviting atmosphere even when the weather is cool. This allows you to get so much more use out of your investment. Instead of packing everything away after Labor Day, you can enjoy crisp autumn evenings and sunny spring afternoons in your beautiful outdoor space.

Make Outdoor Living Effortless

A thoughtfully designed outdoor kitchen makes everything easier. Instead of running back and forth to your indoor kitchen for supplies, everything you need is right at your fingertips. A great contractor will plan for utilities, layout, and materials to work together as a single, efficient system. This isn’t just about adding a grill; it’s about creating a complete outdoor living area that feels like a natural part of your home. When your landscape design seamlessly integrates your kitchen, patio, and garden, outdoor living becomes simple, comfortable, and a part of your daily routine.

Finding the Best Outdoor Kitchen Contractor for Your Project

Choosing the right contractor is the single most important decision you’ll make for your outdoor kitchen project. This is the team you’ll trust to turn your vision into a beautiful, functional space that lasts for years. A great partnership means clear communication, quality craftsmanship, and a smooth process from start to finish. But with so many options out there, how do you know who to choose? It comes down to finding a team that not only understands your aesthetic but also has the technical expertise to build a structure that can handle Long Island’s unique climate. The right contractor acts as your partner, guiding you through material selections, appliance choices, and layout decisions to create a space that truly works for your family. To find the best fit for your home, you’ll want to focus on a few key areas that separate the true professionals from the rest. By asking the right questions, reviewing their past work, and checking their credentials, you can feel confident you’re hiring a team that will deliver the outdoor oasis you’ve been dreaming of.

Look for Proven Experience and Credentials

Your outdoor kitchen needs to be more than just beautiful; it has to withstand hot summers, freezing winters, and everything in between. That’s why it’s so important to find a contractor with a long history of building durable outdoor living spaces specifically on Long Island. Look for a company that specializes in this type of work, not a generalist who does it on the side. A team with decades of experience in everything from masonry to landscaping will understand the unique challenges of our climate and how to select materials that won’t crack, fade, or warp. Proven expertise is your best guarantee of a kitchen that will host family barbecues for years to come.

Review Their Portfolio and Past Projects

A portfolio is your window into a contractor’s style and quality of work. Don’t just glance at the photos; study them. Do their projects have the look and feel you’re going for? Look for a variety of designs that show their range, from sleek, modern setups to rustic, traditional kitchens. Pay close attention to the details, like the stonework, appliance integration, and overall finish. A great way to see their craftsmanship up close is to check out videos of their completed work. Visiting a contractor’s YouTube channel can give you a much better sense of the scale and quality of their projects than static images alone.

Get Clear on Pricing and Timelines

Transparency is key when it comes to the project’s budget and schedule. A trustworthy contractor will provide a detailed, itemized quote that breaks down the costs for materials, labor, appliances, and permits. Be wary of anyone who gives you a single, vague number without explaining what it includes. You should also have a clear conversation about the project timeline. While unexpected delays can happen (especially with weather), an experienced contractor should be able to give you a realistic schedule and commit to keeping you updated on their progress. This open communication helps manage expectations and ensures there are no surprises along the way.

Always Check for Licenses, Insurance, and References

This step is non-negotiable. A reputable contractor must be fully licensed to work in your area and carry both liability insurance and worker’s compensation. This isn’t just about following rules; it’s about protecting you. If an accident happens on your property, their insurance ensures you aren’t held financially responsible. Don’t just take their word for it, ask to see the documents. Finally, ask for a list of recent references and take the time to call them. Hearing directly from past clients is one of the best ways to learn about a contractor’s communication skills, professionalism, and the quality of their finished home remodeling projects.

Common Pitfalls to Avoid When Hiring a Contractor

Choosing a contractor is one of the biggest decisions you’ll make for your home improvement project. It’s exciting to get started, but moving too quickly can lead to headaches down the road. Taking the time to find the right partner ensures your project is a success from start to finish. Let’s walk through a few common missteps homeowners make and how you can sidestep them to get the beautiful outdoor kitchen you’ve been dreaming of.

Mistake #1: Choosing Price Over Quality

It’s always tempting to go with the lowest bid, but when it comes to your home, price shouldn’t be the only factor. An unusually low estimate can be a red flag for subpar materials or inexperienced labor. Investing in quality from the start means you’ll have an outdoor kitchen that not only looks fantastic but also withstands Long Island’s weather for years to come. Skimping on materials often leads to an inferior product you’ll be unhappy with later. A reputable contractor will be transparent about costs and help you select durable, high-quality porcelain and natural stone that fits your vision and budget.

Mistake #2: Not Doing Your Homework

Before you start collecting quotes, take some time to research what you want and who you want to work with. Having a clear idea of your goals, style, and must-have features will help you communicate effectively with potential contractors. Look at their past projects, read client reviews, and check their credentials. Planning ahead allows you to properly research your options and find a company whose work resonates with you. Exploring a contractor’s project gallery is a great way to see their craftsmanship firsthand and gather inspiration for your own outdoor space. This preparation helps you make informed decisions and find the perfect team for your project.

Mistake #3: Forgetting to Talk About Long-Term Care

Your beautiful new outdoor kitchen is built, the last tool is packed away, and you’re ready to start grilling. But what happens next? It’s easy to forget about maintenance in the excitement of a finished project, but discussing long-term care is essential. Ask your contractor about the upkeep required for the materials and appliances you’ve chosen. A good partner will provide clear instructions for cleaning and care to ensure your investment remains a source of enjoyment for years. Understanding these needs upfront helps you protect your outdoor kitchen and keep it looking its best. Some companies even offer restoration and sealing services to help with upkeep.

Mistake #4: Overlooking Local Building Codes

Building codes and permits can feel complicated, but they are a non-negotiable part of any major home renovation. Every town on Long Island has its own set of regulations for things like plumbing, electrical work, and structural additions. Ignoring these rules can result in fines, project delays, or even having to tear down completed work. An experienced local contractor will be well-versed in these requirements and manage the entire permitting process for you. This ensures your project is not only beautiful and functional but also safe and fully compliant. This is where hiring a professional masonry and construction company makes all the difference.

Related Articles

Frequently Asked Questions

How long does it take to build an outdoor kitchen? The timeline for an outdoor kitchen project can vary quite a bit, but you can generally expect it to take several weeks to a few months from our first conversation to your first cookout. The initial design and material selection phase is followed by securing any necessary permits, which can sometimes take a few weeks on its own. Once the groundwork is ready, the actual construction is often the fastest part of the process.

What are the most important features for a kitchen that will last in Long Island’s weather? For a kitchen to endure our coastal climate, you need to focus on materials that can handle moisture and dramatic temperature swings. This means choosing non-porous countertops, like high-quality porcelain or granite, that won’t absorb water and crack in a freeze. It also means selecting cabinetry and appliances made from marine-grade stainless steel or other weatherproof materials that resist rust and corrosion.

Do I need to have a complete design idea before I call a contractor? Not at all. It’s helpful if you have a general sense of what you like and how you plan to use the space, but you don’t need a finished blueprint. A good contractor will work with you during the initial consultation to turn your rough ideas into a functional, beautiful design. We see it as a partnership where we bring the technical expertise to help shape your vision.

How much should I expect to invest in a quality outdoor kitchen? The cost of an outdoor kitchen depends heavily on the size, complexity, materials, and appliances you choose. A simple setup with a built-in grill and some counter space will be very different from a large, fully equipped kitchen with a refrigerator, sink, and pizza oven. The best approach is to think about it as a long-term investment in your home’s value and your family’s lifestyle, and a good contractor can help you design a project that aligns with your budget.

What is the biggest mistake homeowners make when planning an outdoor kitchen? One of the most common pitfalls is underestimating the importance of a functional layout. It’s easy to get focused on the grill or the countertops, but a great outdoor kitchen flows well and has a smart “work triangle” just like an indoor one. Thinking through where you’ll prep, cook, and serve is crucial. A specialized contractor has the experience to design a space that is not only beautiful but also incredibly practical to use.

Share this page: