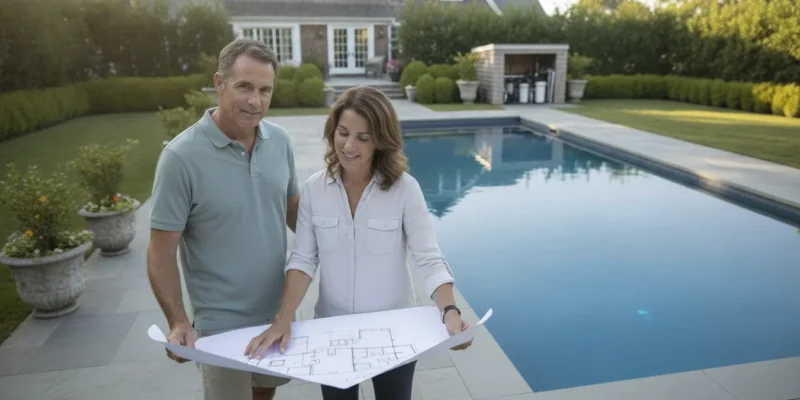
A shade structure contractor discusses plans with a client on a Long Island patio.

Find the Best Shade Structure Contractor in Long Island

Your backyard has so much potential, but turning it into a true outdoor oasis requires a central feature to anchor the space. A beautiful shade structure does just that, creating a focal point for relaxation and entertainment. Whether you envision a classic wood pergola draped in climbing roses or a modern pavilion with a full outdoor kitchen, the right structure defines how you live outdoors. This guide will help you explore all the possibilities, from custom lighting and motorized screens to the perfect stone pavers for your foundation. Let’s start planning the details that will make your backyard the favorite room of your house with a premier shade structure contractor Long Island.

Key Takeaways

  • Define Your Goal First: Decide if you want partial shade or full protection. A pergola uses an open-lattice roof to define a space with dappled sunlight, while a pavilion has a solid roof to create a true outdoor room shielded from sun and rain.
  • Build for the Long Island Climate: Your structure’s longevity depends on choosing the right materials and contractor. Select weather-resistant options like treated wood or aluminum, and partner with a local expert who understands coastal conditions and specific town building codes.
  • Personalize with Practical Features: Go beyond the basic structure by adding elements that fit your lifestyle. Integrating lighting for evening gatherings, electrical outlets for convenience, and landscaping to blend the structure into your yard will make the space a true extension of your home.

Your Guide to Long Island Shade Structures

Choosing the right shade structure is about more than just escaping the sun. It’s about creating a functional, beautiful extension of your home where you can relax, entertain, and make memories. From classic pergolas that dapple your patio with sunlight to sturdy pavilions that house an entire outdoor kitchen, the options are vast. Each type of structure offers a unique blend of style, function, and protection. Understanding the key differences will help you select the perfect centerpiece for your Long Island backyard, one that complements your home’s architecture and fits how you want to live outdoors. Let’s walk through the most popular choices to find the right fit for your space.

Pergolas

A pergola is an elegant way to define an outdoor area and add architectural interest without completely blocking the sun. Characterized by its open-lattice roof supported by columns, a pergola provides partial shade, creating a comfortable space that still feels bright and airy. They work beautifully over patios, walkways, or garden areas, serving as a support for climbing plants like wisteria or roses. We can design and build custom pavilions and pergolas from materials like wood, vinyl, or aluminum to perfectly match your home’s style. A pergola creates a distinct “room” in your backyard, making it an inviting spot for dining or lounging.

Pavilions and Gazebos

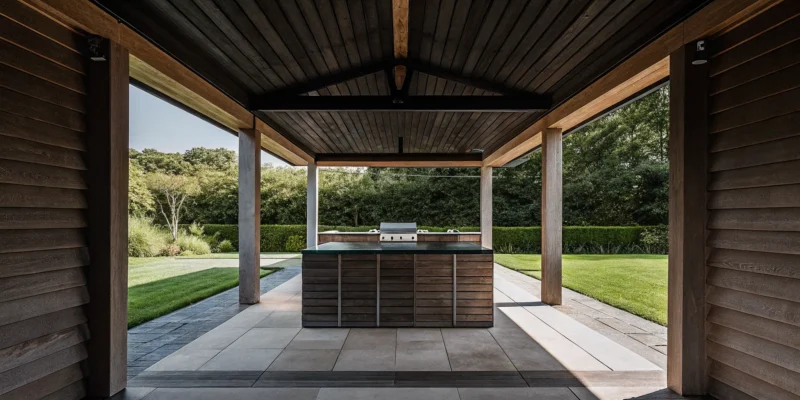
If you’re looking for complete protection from sun and rain, a pavilion or gazebo is an excellent choice. A pavilion features a solid roof and is typically larger, making it the ideal structure to cover an outdoor kitchen, living room, or dining set. It essentially creates a year-round outdoor room. A gazebo is a freestanding, often octagonal structure with a solid roof that acts as a charming focal point in a garden or by a pool. Both options provide a reliable escape from the elements, allowing you to enjoy your backyard oasis no matter the weather.

Sail Shades and Canopies

For a modern and flexible shading solution, consider sail shades or canopies. These are made from durable, UV-resistant fabric stretched between several anchor points to create a sculptural and stylish cover. Sail shades are perfect for placing over pools, patios, or play areas, offering significant sun protection with a contemporary, minimalist look. They can be layered in different colors and shapes to create a unique design statement. As part of a comprehensive landscape design, we can integrate these fabric structures to provide targeted shade exactly where you need it most, adding both function and flair to your outdoor space.

Retractable Awnings and Covers

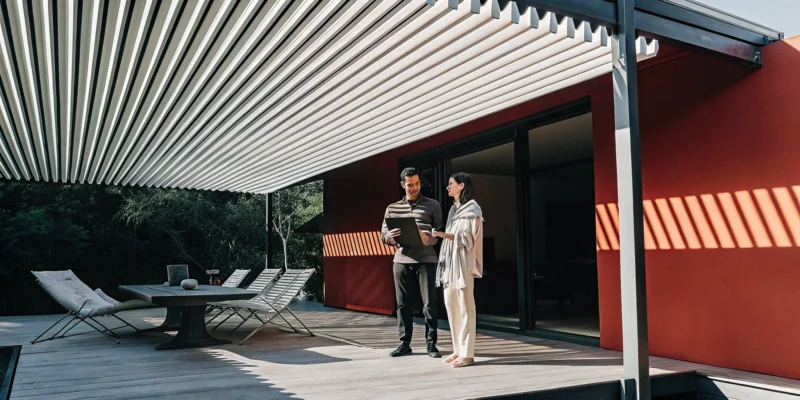
Retractable awnings offer the ultimate blend of convenience and control, giving you shade at the touch of a button. Mounted directly to your house, these awnings can extend over a patio or deck to provide instant relief from the sun and can be retracted when you want to enjoy the open sky. This flexibility is perfect for Long Island’s changing weather. Motorized versions make operation effortless, and they come in a wide variety of durable, weather-resistant fabrics to match your home’s exterior. A retractable awning is a practical addition that enhances your home’s usability and can be seamlessly included in a home remodeling project.

Why Hire a Local Long Island Contractor?

When you’re investing in a significant home improvement project, like a new shade structure, the contractor you choose makes all the difference. While a big national company might seem appealing, there are distinct advantages to working with a local Long Island expert. A local contractor is more than just a builder; they’re your neighbor. They have a firsthand understanding of the area and a reputation to maintain right here in our community. This local connection translates into a smoother process and a better final product for your home.

Expertise in Long Island’s Climate and Salt Air

Long Island has a unique coastal environment, and that salty air we love can be tough on building materials. A local contractor understands these specific challenges. They know which types of wood resist moisture and humidity, which metals require special coatings to prevent corrosion, and which natural stones will withstand our freeze-thaw cycles without cracking. This familiarity with the local environment means they can guide you toward durable, long-lasting materials for your pavilion or pergola, ensuring your investment looks great for years to come. Their expertise helps you avoid costly repairs and premature replacements down the road.

Local Codes and Permitting Knowledge

Handling building codes and permits can be one of the most stressful parts of any construction project. Regulations can vary from one town to the next across Nassau and Suffolk counties. A seasoned Long Island contractor has an in-depth understanding of these local rules. They know the specific setback requirements, height limitations, and structural standards for projects like pavilions and pergolas. This expertise is crucial for keeping your project on schedule and avoiding potential legal issues or fines. By managing the paperwork and inspections, they give you peace of mind and let you focus on the fun parts of designing your new outdoor space.

Faster, Clearer Communication

Working with a contractor who is just a short drive away makes the entire process more personal and efficient. When your project manager is local, it’s much easier to schedule face-to-face meetings and quick site visits. This greater accessibility means questions get answered faster and any issues can be addressed immediately, right on site. A local company is also deeply invested in its community reputation. They rely on word-of-mouth and positive reviews from your neighbors, so they are highly motivated to ensure you are completely happy with their work. This commitment to client satisfaction builds trust and leads to a more collaborative and positive experience from start to finish.

How to Choose the Right Shade Structure

Picking the right shade structure is about creating an outdoor space you’ll love for years to come. It’s more than just choosing a design you like; it’s about finding a solution that fits your home, your lifestyle, and your backyard’s unique layout. Before you fall in love with a specific style, take a step back and consider a few key factors. Thinking through these points will help you clarify your vision and ensure your new addition is both beautiful and functional.

Start by looking at your property and how a new structure will fit into the existing flow. Then, think about the materials. On Long Island, durability is essential for getting the most from your investment. Your home’s architectural style should also guide your choice, creating a cohesive look that feels intentional. Finally, get clear on how you plan to use the space. Whether you envision a quiet retreat or a lively entertainment hub, your answer will shape the final design. By working through these questions, you can confidently select one of Gappsi’s pavilions or pergolas that perfectly suits your needs.

Evaluate Your Outdoor Layout and Size

First, take a good look at your yard. Where will the structure go? Consider how it will connect to your existing patio, deck, or swimming pool. Measure the available area to get a realistic idea of what size structure will fit comfortably without overwhelming the space. It’s also smart to observe how the sun moves across your yard throughout the day. This will help you determine the best placement for maximum shade when you need it most. A well-placed structure should enhance your outdoor flow, not disrupt it, creating a natural and inviting transition from one area to the next.

Focus on Materials and Durability

On Long Island, our weather can be tough on outdoor structures. Between the summer humidity and the salty air, choosing the right materials is critical for longevity. Look for high-quality, resilient options like treated wood, low-maintenance aluminum, or durable composites that are built to withstand the elements. A professional contractor will prioritize quality materials and expert installation methods to ensure your shade structure is not only beautiful but also built to last. This focus on durability protects your investment and gives you a reliable outdoor space to enjoy season after season.

Match the Style to Your Home’s Aesthetic

Your new shade structure should feel like a natural extension of your home. Consider your house’s architectural style, color scheme, and overall character. A modern home might call for a sleek aluminum pergola with clean lines, while a traditional colonial could be complemented by a classic wood pavilion. The goal is to create a harmonious look where the new structure complements your home’s existing design. Working with a team that understands how to blend new construction with your home’s aesthetic, much like in a home remodeling project, ensures the final result is seamless and polished.

Define How You’ll Use the Space

How do you dream of using your new shaded area? Picture your ideal afternoon. Are you hosting large family dinners, lounging with a book, or watching the kids play? Your intended use is a major factor in determining the best type of structure. A large pavilion is perfect for an outdoor dining room, while a smaller pergola might create an intimate seating area. If you need flexibility, a retractable canopy could be the answer. Defining the function of the space first will help you customize a solution that perfectly fits your lifestyle and daily routines.

Pergolas vs. Pavilions: Which Is Right for You?

Choosing between a pergola and a pavilion can feel like a big decision, but it gets much easier when you focus on one simple question: how do you want to live in your outdoor space? Both structures add beauty and function to your yard, but they serve very different purposes. A pergola offers an airy, romantic feel with partial shade, while a pavilion creates a true outdoor room with complete protection from the elements. Let’s look at the key differences to help you find the perfect fit for your Long Island home.

Comparing Design and Function

Think of a pergola as a framework for your outdoor area. It has a slatted or latticed roof that lets sunlight and breezes filter through, casting beautiful shadows and creating a sense of openness. This design is perfect for defining a walkway, framing a patio, or supporting climbing plants like wisteria or ivy. A pavilion, on the other hand, is a more substantial structure. It features a solid, continuous roof that provides full protection from direct sun and rain. This makes it an enclosed, sheltered space, almost like an extension of your home but set in the beauty of your backyard.

When to Choose Each Structure

Your lifestyle is the best guide here. If you dream of a sunny garden nook where you can enjoy a morning coffee with dappled light, a pergola is an ideal choice. It adds architectural interest without completely blocking the sky. However, if you plan on hosting family dinners, setting up an outdoor living room with electronics, or needing a guaranteed shady retreat on hot summer days, a pavilion is your answer. Its solid roof ensures your plans are never ruined by a sudden downpour or the intense midday sun. Gappsi offers a range of pavilions and pergolas to match any backyard vision.

What Are the Best Materials for Long Island Shade Structures?

Choosing the right materials for your shade structure is one of the most important decisions you’ll make. Here on Long Island, our structures face a unique combination of sun, humidity, and salty air, so durability is just as critical as style. The material you select will determine not only how your new pergola or pavilion looks but also how much maintenance it will need over the years and how well it stands up to the coastal climate.

From the classic warmth of natural wood to the sleek, low-maintenance appeal of modern composites, each option has its own set of benefits. We work with a variety of high-quality materials to build beautiful and resilient pavilions and pergolas that are designed to last. Thinking about how each material fits your home’s aesthetic and your lifestyle will help you create an outdoor space you’ll love for years to come.

Wood

Wood is a timeless choice for shade structures, offering a natural warmth and classic beauty that blends seamlessly into any backyard. It’s perfect for creating a rustic pavilion or a traditional pergola that complements your garden’s landscape design. For outdoor use on Long Island, we always recommend treated wood, which is specifically prepared to resist moisture, decay, and insects. While wood provides an unmatched organic aesthetic, it does require periodic maintenance like staining or sealing to protect it from the elements and preserve its rich color. This upkeep ensures your wooden structure remains a stunning and sturdy centerpiece in your yard.

Aluminum and Vinyl

If you’re looking for a low-maintenance solution that can easily handle Long Island’s salt air, aluminum and vinyl are excellent choices. Aluminum is lightweight yet incredibly strong and will not rust or corrode, making it ideal for coastal properties. Vinyl is another durable powerhouse, as it resists fading from UV rays and won’t chip, crack, or peel. Both materials offer a clean, modern look and come in a variety of colors, so you never have to worry about painting. These materials are perfect for homeowners who want a durable, long-lasting shade structure without the need for regular upkeep.

UV-Resistant Fabrics

For shade sails, canopies, and retractable awnings, the fabric you choose is key to providing effective sun protection and lasting durability. High-quality, UV-resistant fabrics are designed to block the sun’s harmful rays while resisting fading and degradation over time. Acrylic fabrics are a popular choice because they hold their color well and are highly resistant to UV radiation. For even greater performance, some polyester fabrics are treated with a PVC coating, which adds a layer of water resistance and makes them exceptionally durable. These advanced fabrics ensure your canopy or sail shade remains both functional and beautiful through seasons of use.

How to Customize Your Shade Structure

Your new shade structure is a blank canvas. Beyond providing shelter, it’s an opportunity to create a true outdoor room that reflects your style and meets your family’s needs. Customization is what transforms a simple pergola or pavilion into the centerpiece of your backyard. From high-tech features to thoughtful design details, you can tailor every element to create a space that’s functional, beautiful, and uniquely yours. Think about how you want to use the space day and night, and let that guide your choices.

Add Motorized and Adjustable Features

Imagine controlling the sun and shade with the push of a button. Modern pavilions and pergolas can be equipped with motorized louvers that let you adjust the amount of sunlight filtering through. You can open them for a bright, airy feel or close them completely for full shade or protection from a passing shower. This flexibility makes your outdoor space comfortable and usable in almost any weather. You can also add retractable screens for privacy or to keep insects out, turning your open-air structure into a cozy, enclosed room whenever you wish.

Incorporate Lighting and Electrical

Don’t let sunset put an end to your outdoor enjoyment. Integrating lighting and electrical components is one of the best ways to extend the usability of your shade structure. Built-in LED lighting can create a warm, inviting ambiance for evening dinners or gatherings. You can also install ceiling fans for a cooling breeze on hot summer days. Consider adding electrical outlets so you can charge your phone, plug in a speaker for music, or even set up an outdoor television. These thoughtful additions make your space more functional and ensure it’s the go-to spot for relaxation, day or night.

Integrate Landscaping and Greenery

A shade structure should feel like a natural extension of your yard, not something that was just dropped into place. Thoughtful landscape design is key to achieving this. You can soften the lines of your new structure by surrounding it with lush garden beds, planters filled with colorful flowers, or even a small water feature. For pergolas, consider training climbing plants like wisteria or clematis to grow up the posts and over the top, creating a beautiful living canopy. Integrating greenery helps your structure blend seamlessly with its surroundings, creating a tranquil and organic backyard retreat.

Select Complementary Flooring and Pavers

The surface beneath your shade structure is just as important as the structure itself. The right flooring grounds the space and creates a cohesive look that ties into your home and landscape. You have many beautiful and durable options to choose from. Porcelain and natural stone pavers offer a sophisticated and timeless look that is perfect for Long Island homes. They are incredibly durable and come in a wide range of colors and textures. A skilled masonry team can help you select the perfect material and create a flawless installation that complements your home’s architecture and completes your outdoor living area.

What to Expect from the Design and Installation Process

Bringing a new shade structure to life is an exciting process, but it can feel a little overwhelming if you don’t know what’s involved. A great contractor will guide you through every step, making sure the project runs smoothly from the first conversation to the final walkthrough. Think of it as a partnership. You bring the vision for your backyard, and your design team brings the expertise to make it a reality. The entire process is designed to be transparent and collaborative, ensuring the final structure is exactly what you imagined.

The journey typically breaks down into four main phases: the initial chat and site visit, the design and material selection, handling permits and setting a schedule, and finally, the installation itself. Each stage builds on the last, turning your initial idea into a beautiful and functional part of your home. With an experienced team, you’ll have a clear understanding of what’s happening at every point. Gappsi’s comprehensive design and construction services ensure that every detail, from the foundation to the finishing touches, is handled with care. This integrated approach means your new pavilion or pergola will blend perfectly with your existing landscape and home architecture.

Initial Consultation and Site Assessment

The first step is a conversation. During an initial consultation, your contractor will visit your home to see the space and, more importantly, learn about you. We’ll discuss how you envision using the area. Is it for quiet morning coffees, lively family dinners, or poolside lounging? Understanding your lifestyle helps us tailor the design to your specific needs. We’ll also perform a thorough site assessment, taking measurements, evaluating sun exposure throughout the day, and noting any existing features like trees or patio slopes. This ensures the final structure not only looks great but functions perfectly within your yard.

Design Planning and Material Selection

This is where your vision starts taking shape. Based on our initial consultation, our designers will create detailed plans, often including 3D renderings, so you can visualize the final product. We’ll work with you to refine the design, balancing aesthetics with practical considerations like shade coverage and traffic flow. Next, we’ll explore materials. Whether you’re drawn to the classic warmth of wood or the modern look of aluminum, we’ll present you with high-quality options. We can also help you select complementary porcelain and natural stone pavers to create a cohesive and polished outdoor living area.

Permitting and Construction Timeline

Before any construction begins, we need to handle the paperwork. Most permanent shade structures in Long Island require permits to ensure they meet local building codes and safety standards. An experienced local contractor will manage this entire process for you, from preparing the necessary documents to submitting them to your town’s building department. Once the permits are approved, we’ll provide you with a clear and realistic construction timeline. This schedule will outline every phase of the project, so you’ll know exactly what to expect and when. Our experience with complex home remodeling projects means we are well-versed in handling these local requirements efficiently.

Installation Day: What to Expect

When installation day arrives, our professional crew will get to work bringing your design to life. The team will start by preparing the site, ensuring the area is ready for construction and that your property is protected. From there, they will build the structure according to the exact specifications of the approved design. A project manager will oversee the entire installation, ensuring every detail is executed correctly and efficiently. We pride ourselves on maintaining a clean and organized worksite and minimizing disruption to your daily routine. You can see our teams in action on the Gappsi YouTube channel to get a feel for our professional process.

How to Vet a Long Island Shade Structure Contractor

Choosing the right contractor is just as important as choosing the right shade structure. The right partner will bring your vision to life smoothly, while the wrong one can cause headaches, delays, and budget issues. Taking the time to properly vet your options ensures you find a skilled, reliable professional who will build a beautiful and lasting addition to your home. Here’s what to look for when making your decision.

Check Credentials, Licensing, and Insurance

Before you even talk about design, make sure your contractor is properly licensed and insured. On Long Island, this is a non-negotiable legal requirement. A valid license proves they meet local standards, while insurance protects you from any liability if an accident happens on your property. Ask for proof of their Nassau or Suffolk County home improvement license, general liability insurance, and worker’s compensation. A professional contractor will have this information ready and will be happy to provide it. You can also verify a license with your local consumer affairs office to be certain. Don’t just take their word for it; this step is your first line of defense.

Review Their Portfolio and Past Projects

A picture is worth a thousand words, especially when it comes to construction. A contractor’s portfolio is your window into the quality of their work. Look for a collection of projects that showcases their craftsmanship and experience with shade structures similar to what you want. Pay attention to the details in their photos. Do the lines look clean? Are the materials high quality? Selecting a contractor without seeing their past work can lead to disappointing results. A great contractor will have an extensive gallery on their website and may even be able to provide addresses of past projects you can see for yourself. Gappsi, for example, showcases a wide range of completed pavilions and pergolas to give you confidence in their abilities.

Ask About Warranties and Maintenance

A shade structure is a significant investment, so you want it to last. A reputable contractor will stand behind their work with a solid warranty. Ask potential contractors what kind of warranties they offer on both the materials and their labor. Make sure you get these details in writing so you know exactly what is covered and for how long. It’s also a good idea to discuss long-term maintenance. Ask what kind of upkeep your new structure will need and if the company offers maintenance plans or services. Companies that provide ongoing care, like restoration and sealing, are often more invested in the long-term quality of their projects.

Red Flags to Watch For

Knowing what to avoid is as important as knowing what to look for. Be cautious of any contractor who presents red flags during the vetting process. An unusually low bid is often a sign that a contractor may be cutting corners on materials or labor. High-pressure sales tactics or demands for a large cash deposit upfront are also major warning signs. A professional will give you a detailed, written estimate and a clear payment schedule. Also, be wary of anyone who can’t provide a physical business address or seems difficult to communicate with. The Federal Trade Commission offers helpful advice on how to hire a contractor and avoid scams. Trust your gut; if something feels off, it probably is.

Why Choose Gappsi for Your Shade Structure?

Choosing the right contractor for your shade structure is just as important as selecting the structure itself. You need a partner who understands your vision, respects your property, and has the expertise to deliver a beautiful, lasting result. At Gappsi, we combine decades of local experience with a comprehensive, all-in-one approach to design and construction. This means you get a seamless process from the first sketch to the final installation, all handled by a single, dedicated team. We pride ourselves on being more than just builders; we are design partners committed to creating outdoor spaces that perfectly suit your lifestyle. Our extensive portfolio, which includes everything from custom swimming pools to intricate masonry, showcases our dedication to quality craftsmanship across every project we undertake. When you work with us, you’re not just hiring a contractor, you’re collaborating with a team that has been transforming Long Island backyards for generations.

Decades of Local Experience

With over 38 years of serving homeowners across Long Island, Gappsi has a deep understanding of what it takes to build enduring outdoor structures in our unique environment. Our long history in Nassau and Suffolk counties means we’re intimately familiar with local architectural styles, weather patterns, and building regulations. This isn’t just about knowing how to build a pergola; it’s about knowing how to build one that will withstand coastal air and complement a Long Island home. Our experience extends across all facets of home improvement, giving us a holistic perspective on how your new shade structure will integrate with your entire property for a cohesive and polished look.

All-in-One Design and Installation

One of the biggest challenges in any home improvement project is managing multiple vendors. Gappsi simplifies everything by offering a complete, in-house solution for your entire outdoor project. From the initial design of your pavilion or pergola to the final touches of landscaping and lighting, our team handles it all. This integrated approach ensures a consistent vision and quality throughout the project, saving you the headache of coordinating different contractors. Whether you want to pair your new gazebo with a beautiful natural stone patio or add a custom outdoor kitchen, we provide a streamlined process from concept to completion. This allows you to enjoy the creative process while we manage the complexities of construction.

Start Designing Your Shade Structure with Gappsi

Your backyard should be a reflection of your personal style, and our design process is built around making that happen. We don’t just offer standard models; we work with you to create custom pavilions and pergolas that fit your space and needs perfectly. Our design experts help you select the right materials, features, and layout to bring your ideas to life. We use our extensive construction knowledge to ensure your new structure is not only beautiful but also functional and durable. We believe the design phase is a collaboration, and we are dedicated to providing personalized service and innovative solutions that will enhance your outdoor living experience for years to come.

Related Articles

Frequently Asked Questions

What’s the real difference between a pergola and a pavilion for my backyard? Think of it this way: a pergola defines a space, while a pavilion creates a room. A pergola has a slatted roof that lets in dappled sunlight, making it perfect for adding architectural style over a patio or walkway. A pavilion has a solid roof, giving you complete protection from sun and rain, which is ideal if you want to create a true outdoor living room or dining area that you can use regardless of the weather.

Do I need a permit for a new shade structure on Long Island? For most permanent structures like a pavilion or a large pergola, the answer is yes. Building codes can differ between towns in Nassau and Suffolk counties, and a permit ensures your project is safe and compliant. A key benefit of working with an experienced local contractor is that they handle the entire permitting process for you, so you don’t have to worry about the paperwork.

Which material is the most low-maintenance for our coastal weather? If your main goal is to avoid yearly upkeep, aluminum and vinyl are your best options. They are incredibly durable and stand up well to Long Island’s salt air and humidity without rusting, fading, or chipping. While wood offers a beautiful, classic look, it does require regular staining or sealing to protect it from the elements and keep it looking its best.

How long does the entire process take, from design to installation? The timeline for a new shade structure can vary quite a bit. It depends on the complexity of your design, the materials you choose, and how long it takes to get permit approval from your local town. Once we finalize the design and secure the permits, we will give you a clear and detailed construction schedule so you know exactly what to expect from start to finish.

Can you build a shade structure over my existing patio or pool deck? Yes, absolutely. Integrating a new shade structure with an existing outdoor feature is a very common project. During our initial site visit, we will assess your current patio or deck to make sure it can properly support the new structure. Our goal is to make the new addition look like it was always part of the original design, creating a seamless flow in your backyard.
Share this page:
Long Island backyard swimming pool planned with integrated water treatment equipment

Salt Water Pool vs Chlorine Pool on Long Island

Choosing a pool sanitation system is not simply a matter of picking the option that sounds easier. Long Island homeowners should weigh installation requirements, ongoing chemical management, water feel, equipment care, and the demands of closing a pool through cold weather.

Contact Gappsi through our contact page

The best salt water pool vs chlorine pool choice depends on how you want to manage maintenance. A salt system uses a generator to produce chlorine from dissolved salt, while a traditional chlorine pool relies on adding and monitoring chlorine directly. Both systems still require balanced water, routine testing, equipment care, and professional winterization.

Understanding how each system sanitizes the water makes the differences in cost, maintenance, and equipment easier to evaluate. Start with the chemistry behind both options.

How Do Salt Water and Chlorine Pools Sanitize Water?

The central difference in a salt water pool vs chlorine pool comparison is how chlorine enters the water. Both systems rely on chlorine as the active sanitizer. A traditional chlorine pool receives chlorine through manually measured additions. A salt water pool uses a salt chlorine generator, which applies electrolysis to convert dissolved salt into chlorine as water passes through the cell. The generator automates production, but it does not replace water testing or proper pool operation.

In either system, sanitation depends on maintaining the right relationship between chlorine concentration and pH. Chlorine can kill most bacteria quickly when its concentration and pH are maintained according to established guidance. The CDC recommends a pool pH of 7.0 to 7.8 and at least 1 part per million of chlorine for effective treatment. You can review the CDC’s home pool water treatment and testing guidance for the technical recommendations.

Contact Gappsi through our contact page

What happens to chlorine in the water?

Chlorine is consumed as it reacts with contaminants introduced by swimmers, including sweat, dirt, and other organic material. Sunlight can also reduce available chlorine. In a traditional system, the owner or service professional adjusts the dose as testing shows a need. In a salt system, the generator produces chlorine over time, and its output can be adjusted to match the pool’s use and conditions. Either approach still requires attention when the pool has unusually heavy use, receives intense sunlight, or experiences changing weather.

Chlorine does not simply disappear after it performs its job. When it binds with body wastes, it can form chloramines, also called combined chlorine. Chloramines are associated with the familiar strong pool odor and may irritate the skin, eyes, and respiratory tract. That odor is not a reason to assume that more chlorine should be added without testing. It is a signal to evaluate the water chemistry and operating conditions. The CDC explains chloramines and their effects in its chloramines and pool operation guidance.

Why does balanced water matter?

Balanced water supports more than a clear appearance. Keeping pH between 7.0 and 7.8 helps balance disinfection performance, plumbing protection, and swimmer comfort. If pH rises too high, chlorine becomes less effective at killing germs. If chemistry is allowed to drift, the pool may also place unnecessary stress on piping and other components. This applies to gunite, vinyl liner, and fiberglass pools alike.

  • Salt system: chlorine generation is automated, but pH and chlorine still need routine checks.
  • Traditional system: chlorine is added manually, so accurate testing and dosing are central to maintenance.
  • Both systems: balanced chemistry and proper circulation are essential to consistent sanitation.

The practical choice is therefore not chlorine versus no chlorine. It is whether chlorine production is automated or manually dosed, and which maintenance process fits the household, pool design, and service plan.

What Is the Cost Difference Between Salt Water and Chlorine Pools?

The cost difference between a salt water pool and a traditional chlorine pool is less about one universal price and more about when and how the project requires spending. A salt water design usually adds a salt chlorine generator, related plumbing or electrical work, and a cell that will need inspection and eventual replacement. A traditional chlorine setup generally has simpler initial equipment, but the owner buys and adds sanitizer manually over the life of the pool.

That distinction matters when comparing a new installation with a renovation or retrofit. The right choice depends on pool size, swimmer load, sunlight exposure, equipment layout, preferred maintenance routine, and whether existing plumbing and electrical service can support the selected system.

Cost considerations when comparing salt water and traditional chlorine pools
Cost consideration Salt water system Traditional chlorine system
Initial equipment Includes a salt chlorine generator, control components, and compatible installation planning. Typically uses a conventional feeder or chemical-dosing arrangement with fewer specialized components.
Installation scope May require additional plumbing, electrical connections, equipment-pad space, and system configuration. Often has a more familiar installation path, although the pool design and equipment location still affect labor.
Sanitizer purchasing The generator produces chlorine from dissolved salt, reducing the need for frequent manual chlorine additions. Requires recurring purchases and manual dosing of chlorine and other balancing chemicals.
Testing and adjustments Still requires routine testing, water balancing, and attention to generator settings. Requires routine testing and more direct manual adjustments as chlorine is consumed.
Equipment care Includes cell cleaning, inspections, and replacement planning for the generator cell. Requires maintenance of the feeder and related equipment, without a salt cell.
Electricity and operating conditions Uses electricity to operate the generator. Pool size, run time, and swimmer use affect operating needs. Electrical demands depend on the pump and other equipment, while chemical use varies with pool conditions.
Retrofit considerations Existing pools may need an equipment, plumbing, electrical, and material-compatibility review before conversion. May fit existing equipment more directly, but the current feeder, circulation system, and condition still require evaluation.

Neither system eliminates ownership costs. A salt system can make chlorine production more consistent, but it does not remove the need for testing, balancing, cell cleaning, or electricity. Traditional chlorine can offer a straightforward equipment arrangement, yet its recurring chemical handling and manual dosing require consistent attention. During planning, compare the total operating routine, not only the initial equipment scope. A professional review can also identify whether pool size, expected usage, and existing infrastructure change the balance for your Long Island property.

Which System Requires More Pool Maintenance?

The practical difference is not maintenance versus no maintenance. It is manual chemical handling versus automated chlorine production. A salt chlorine generator uses electrolysis to produce chlorine from dissolved salt, which can reduce the frequency of adding sanitizer by hand. However, the owner still needs to monitor the water and service the equipment. A traditional chlorine pool requires more direct attention to testing, dosing, and balancing, but its routine is straightforward when performed consistently.

What salt water pool maintenance still involves

Salt automation helps with routine chlorine production, but it does not independently manage every part of water chemistry. The water still needs regular testing for chlorine and pH, along with alkalinity checks and adjustments when readings move outside the appropriate range. The generator cell also requires inspection and periodic cleaning. Scale or buildup on the cell can interfere with performance, so cleaning should follow the equipment manufacturer’s instructions rather than a one-size-fits-all schedule.

The salt level and control settings also deserve attention. Pool owners should confirm that the generator is operating, review any alerts, and check whether chlorine output matches the pool’s use, sunlight exposure, and weather. Heavy use or a period of unusually hot weather can change demand even when the generator is running. Automation reduces repetitive dosing, but it does not replace observation.

What traditional chlorine pool maintenance requires

With a traditional chlorine system, the owner typically measures sanitizer and pH, then adds the appropriate chemicals manually. Chlorine levels can be reduced by sunlight, sweat, dirt, and other organic material introduced by swimmers, so the CDC recommends routine testing of pool water. The same guidance places responsibility on residential pool owners to check chlorine concentration and pH regularly.

Chlorine stabilizer, also called cyanuric acid, can help protect chlorine from sunlight, but its concentration must be managed carefully. The CDC’s water-treatment guidance explains that pH and sanitizer levels work together. If pH drifts too high, chlorine becomes less effective. Maintaining pH between 7.0 and 7.8 supports disinfection, piping longevity, and swimmer comfort. Poor balance in either type of pool can create avoidable water-quality and equipment problems.

Recurring maintenance checklist:

  • Test chlorine and pH on a regular schedule.
  • Check alkalinity and adjust water balance as needed.
  • Inspect filters, pumps, and other circulation equipment.
  • For salt systems, check salt level, generator output, and cell condition.
  • For traditional chlorine systems, measure and add sanitizer manually as required.
  • Record test results so gradual changes are easier to identify.

For most homeowners comparing a salt water pool vs chlorine pool, salt is often more convenient for routine dosing, while traditional chlorine offers a simpler equipment setup. Neither system is zero-maintenance, and neither guarantees a lower total cost. The better choice depends on how consistently the household wants to test, balance, inspect, and maintain the pool.

What Equipment and Materials Should Long Island Homeowners Plan For?

A salt chlorine system is not a stand-alone add-on. It becomes part of the pool’s circulation, electrical, and equipment-pad plan. During design, homeowners should identify where the generator will sit, how water will pass through it, and how the system will be serviced after installation. Gappsi works with salt chlorine generators, ozone systems, and equipment from brands such as Pentair. Hayward, and Autopilot, so the selection can be coordinated with the overall pool design.

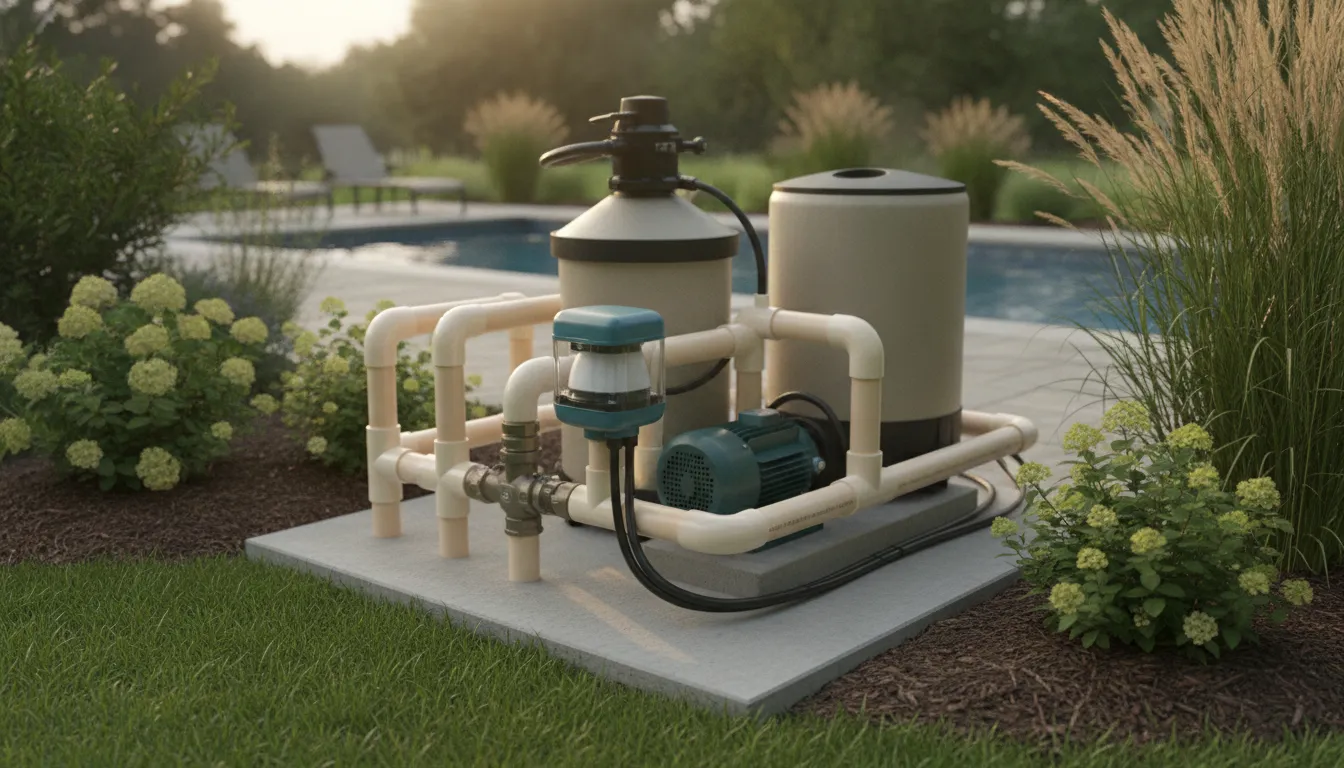
Start with the equipment pad. A salt chlorine generator is typically installed as a component of the pad and requires dedicated plumbing and electrical connections. The pad should leave practical access around the pump, filter, controls, and generator. A crowded arrangement can make routine inspection or future service more difficult. Your installer should also confirm that the proposed equipment layout works with the pool’s circulation design, automation, and available electrical service.

For a new pool, these decisions can be made before excavation and rough-ins begin. For an existing-pool retrofit, ask whether the current pad has sufficient space. Whether the plumbing route matches the generator requirements, and whether the electrical panel and disconnect arrangement are appropriate. It is also worth confirming how the generator will interact with any existing automation, heater, ozone equipment, or other treatment components. The goal is a coordinated system, not simply a new device inserted into an old layout.

Pool equipment pad with pump, filter, and salt chlorine system connections

Which materials deserve closer attention?

Salt exposure makes material selection important. Poorly managed salt conditions can contribute to corrosion on equipment and nearby stone surfaces, but the risk depends on the installation, water balance, exposure, and materials used. Do not assume that every fixture or finish will respond the same way. Review proposed metals, fasteners, light niches, handrails, coping, tile, and natural stone with the installer, especially in areas where splash-out or overspray is likely.

Water balance remains part of material protection. The CDC notes that maintaining pH between 7.0 and 7.8 helps balance disinfection, piping lifespan, and swimmer comfort. That means a generator does not remove the need for owner testing or professional commissioning. Ask how salt concentration, pH, chlorine output, and equipment inspections will be monitored after the pool is opened.

For a practical review of pad layouts, treatment components, and installation considerations, see Gappsi’s pool equipment guide. A detailed equipment plan helps Long Island homeowners compare a salt water pool vs chlorine pool on the basis of integration. Access, and long-term care rather than the generator alone.

How Does Winterization Work for Each Pool System on Long Island?

On Long Island, winterization is necessary for both salt water and traditional chlorine pools. The sanitation method changes some equipment checks, but it does not remove the need to prepare plumbing, equipment, and water for freezing weather. A safe closing plan must match the pool’s construction, circulation layout, cover, accessories, and the equipment manufacturer’s directions.

Start with water balance before closing. The pH range of 7.0 to 7.8 helps balance disinfection, swimmer comfort, and the service life of pool piping, according to the CDC’s pool water guidance. Balanced water also supports the pool’s plumbing, liner, and other infrastructure through the off-season. The specific closing chemistry and timing should be determined by the pool professional and product instructions, rather than by a generic checklist.

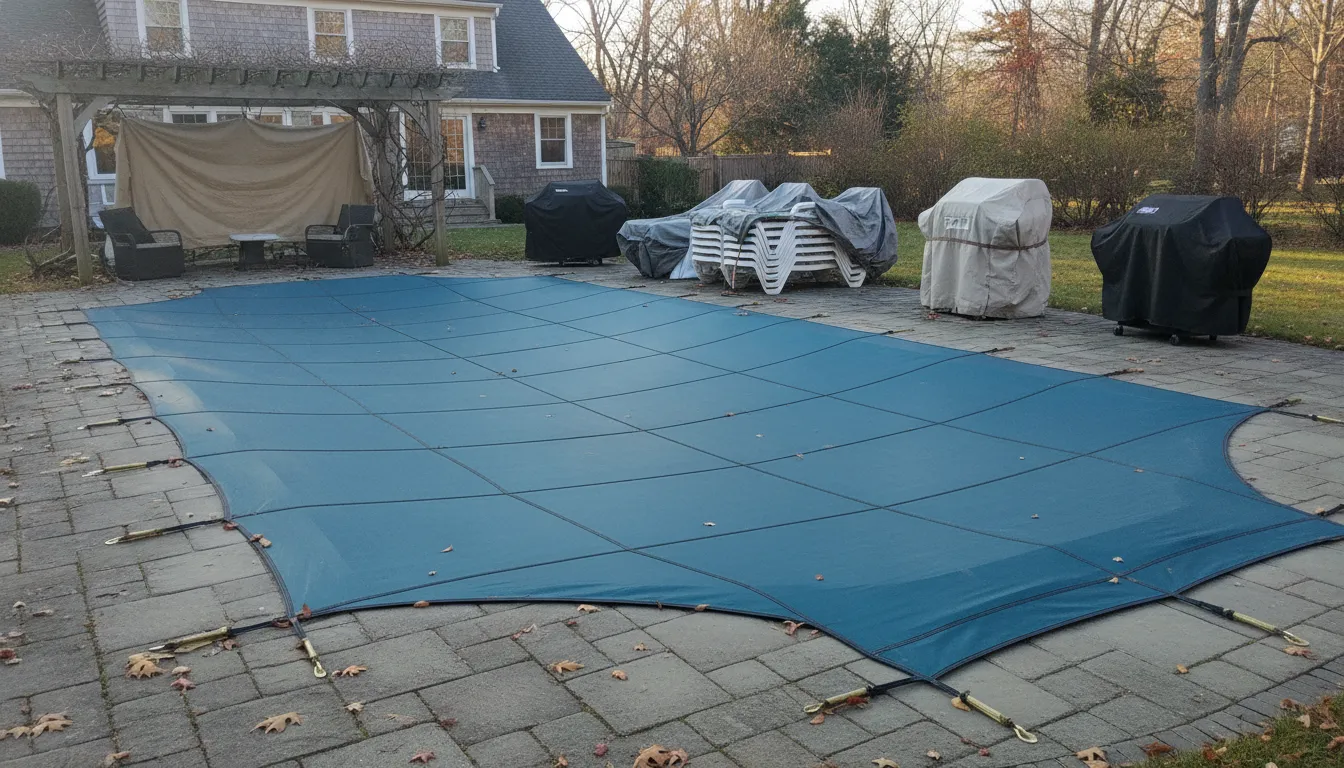
Winterized pool with a protective cover and covered pool equipment

What changes between salt and chlorine systems?

Both systems need protection from freezing temperatures. Closing work may include preparing the lines, pump, filter, heater, and other equipment as specified for that installation. Water may need to be lowered or removed from selected components, but the correct approach depends on the pool design and the installer or equipment manufacturer’s directions. Improper draining or air-pressure procedures can create avoidable damage, so homeowners should not copy instructions from a different pool.

A salt system adds a generator and cell to the inspection. The closing record should document the generator and cell condition, including visible buildup, damage, connections, and any service recommendation. The cell should be handled according to its manufacturer’s instructions. A traditional chlorine system does not have that cell, but its feeder, chemical storage, circulation equipment, and lines still require a careful inspection.

How should spring startup be planned?

Good winterization creates a useful spring-startup record. Note the equipment condition, cover condition, water level, repairs to schedule, and any generator-cell issue before the pool is closed. At opening, inspect the cover and equipment first, then restore circulation and test the water before swimming. Both salt and chlorine pools still require owner monitoring after startup. A salt generator can automate chlorine production, but it does not replace testing or water-balance decisions.

Contact Gappsi through our contact page

Which Pool System Is the Better Fit for Your Long Island Home?

The right choice depends less on a simple salt water pool vs chlorine pool verdict and more on how you use the pool. How much automation you want, and where you are in the project. A salt chlorine generator can appeal to homeowners who prefer a steadier, more automated way to produce chlorine. Conventional chlorine equipment may suit owners who want a familiar setup with fewer specialized components at the outset.

Think about your maintenance habits honestly. Salt water automation can reduce the need to manually add chlorine day to day, but it does not make pool care hands-off. You still need to monitor water chemistry, including chlorine and pH, and the generator cell requires periodic inspection and cleaning. The CDC states that residential pool owners are responsible for regularly checking chlorine concentration and pH, regardless of the sanitation system used. Learn more about routine pool water testing from the CDC.

Conventional chlorine systems may be a practical fit when you prefer direct control over chemical additions. Already have an established maintenance routine, or are replacing equipment in an existing pool. A salt system may be more attractive during a new build or major renovation. When the generator, plumbing, electrical connections, equipment pad, and surrounding materials can be coordinated together. Salt exposure also makes thoughtful material selection and water-balance management important around equipment and stone surfaces.

Project stage matters because sanitation equipment is part of a larger design decision. Gappsi provides 3D design and engineering for gunite, vinyl liner, and fiberglass pools, helping align circulation, equipment, access, drainage, and outdoor features before construction begins. Its Gappsi swimming pool design and installation service can address the system as part of the complete layout rather than as an afterthought. Homeowners considering a custom shape or integrated patio should also review this custom gunite pool design resource.

For Nassau and Suffolk County properties, the decision also carries into the off-season. Both systems need planned winterization in Long Island conditions. Ask how the selected equipment will be closed, protected, inspected, and reopened, and confirm which maintenance tasks remain yours after installation. Properly balanced water supports the service life of pool plumbing and other infrastructure, so convenience should never replace a clear care plan.

  • Choose salt water automation if you value reduced manual dosing and are prepared to test, balance, and service the generator.
  • Choose conventional chlorine if you prefer familiar equipment, direct chemical control, and a simpler initial system.
  • Plan early if you are building or renovating, so equipment, materials, access, and winterization details work together.
  • Ask for a maintenance plan that clearly assigns testing, balancing, cell care, chemical handling, and seasonal service.

Contact Gappsi through our contact page

Frequently Asked Questions

Do salt water pools use chlorine?

Yes. A salt chlorine generator uses electrolysis to convert dissolved salt into chlorine, so the pool is still sanitized with chlorine. The main difference is how chlorine is introduced: the generator produces it on site instead of requiring the owner to add every dose manually.

Is a salt water pool better than a chlorine pool?

Neither system is universally better. A salt system may suit homeowners who want more automated chlorine production and a different water feel. A traditional chlorine system may suit owners who prefer simpler equipment and direct control over chemical dosing. Both require testing, water balancing, and equipment care.

What are the disadvantages of salt water pools?

The main trade-offs are higher installation complexity, periodic generator-cell cleaning or replacement, and the need to manage salt exposure. Poorly managed salinity can contribute to corrosion concerns for some equipment, fixtures, or surrounding stone, so material selection and water balance matter.

Are salt water pools gentler on the skin and eyes?

Many swimmers report that salt water feels gentler, but comfort depends on the whole water chemistry, not salt alone. Improper pH or chloramine buildup can cause irritation in either system. The CDC recommends keeping pool pH between 7.0 and 7.8 and testing chlorine and pH routinely. CDC pool water guidance

How does maintenance differ between salt and chlorine pools?

A salt system automates chlorine generation, but it does not make the pool maintenance-free. Owners still monitor chlorine and pH, balance the water, inspect the generator, and clean the cell as recommended. Traditional chlorine pools require the same routine water checks, with more manual chemical dosing when chlorine levels need adjustment.

Ready to Plan the Right Pool System?

A thoughtful comparison of salt and chlorine can help you coordinate water treatment with your pool design, equipment, materials, and maintenance preferences. For guidance tailored to your Long Island project, Contact Gappsi through our contact page to discuss the options and get started with a system plan that fits your home.

Share this page:
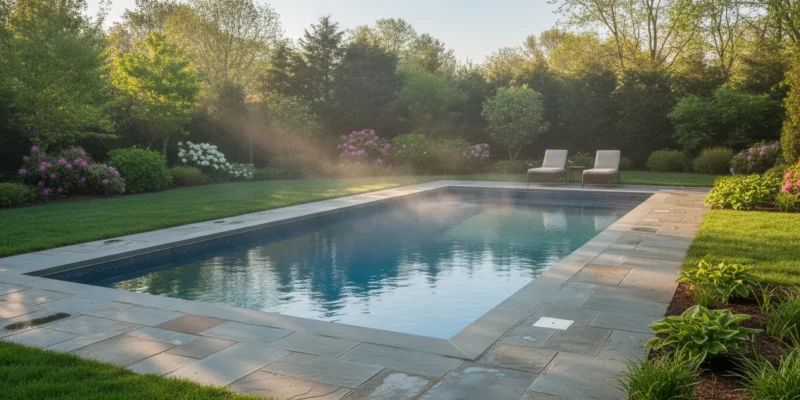
Warm residential Long Island swimming pool on a cool evening

Pool Heater Guide for Long Island Pools

Long Island pool season is shaped by more than the calendar. Cool nights, wind, water loss, and pool size all affect comfort. They also affect how long your family can use the water. Choosing the right heating approach means balancing desired temperature, swimming schedule, available utilities, and the way the pool fits into the property.

Contact Gappsi through our contact page

A pool heater raises or maintains water temperature so a Long Island pool can be more comfortable during spring, fall, and cool summer evenings. Gas systems heat water quickly, while air-source heat pumps move heat from outdoor air into the pool. Solar collectors can support seasonal heating, but each option must be matched to the pool’s surface area, local conditions, and planned use.

Before comparing equipment, it helps to separate heating from circulation and understand what the system contributes to the rest of the pool equipment. That foundation makes later decisions about sizing, installation, and seasonal operation more practical.

What Does a Pool Heater Do for a Long Island Pool?

A pool heater adds controlled warmth to swimming-pool water so your family can use the pool beyond the hottest part of summer. It works with the circulation system, but it does not replace the pump, filter, or sanitizer. Instead, water moves through the heater, gains heat, and returns to the pool. That distinction matters when planning a complete system. For broader equipment context, review Gappsi’s essential pool equipment guide.

Contact Gappsi through our contact page

On Long Island, heating can make the difference between an unused pool and one that supports more of your outdoor schedule. The need often appears during the shoulder seasons, such as late spring and early fall. Sunny afternoons can still give way to cold evenings. A heater can help bring the water to a comfortable temperature before use, then maintain that temperature while the system is operating.

Heating demand is not determined by the calendar alone. The pool’s surface area exposes water to the surrounding air, and a larger exposed surface generally creates more opportunity for heat loss. Wind can carry warmth away from the water, while humidity and cool night temperatures also affect the outdoor-pool heating load. These factors should be considered alongside the pool’s shape, location, and expected use.

Heating is different from circulation

The circulation system keeps water moving through filtration and treatment equipment. The heater addresses water temperature. Both functions need to be coordinated so heated water reaches the pool efficiently and the controls match how you use the space. A pool used for occasional weekend gatherings may need a different operating approach from one used every evening.

That is why there is no single best heater for every Long Island pool. Gas heaters can heat water quickly, while heat pumps transfer heat from outdoor air and depend more on air temperature. The right direction depends on your preferred swimming schedule, pool size, available utilities, wind exposure, and whether you plan to use a cover. Considering those details during design or an equipment upgrade helps create a system that supports actual use instead of adding capacity without a clear purpose.

Which Pool Heater Type Fits Your Swimming Schedule?

The right pool heater depends less on a universal ranking and more on when you swim, how quickly you want the water to warm, and how consistently you want to hold a set temperature. A family that uses the pool on occasional weekends may value fast recovery. A household that swims several times each week may prioritize steady operation and seasonal efficiency.

Contact Gappsi through our contact page

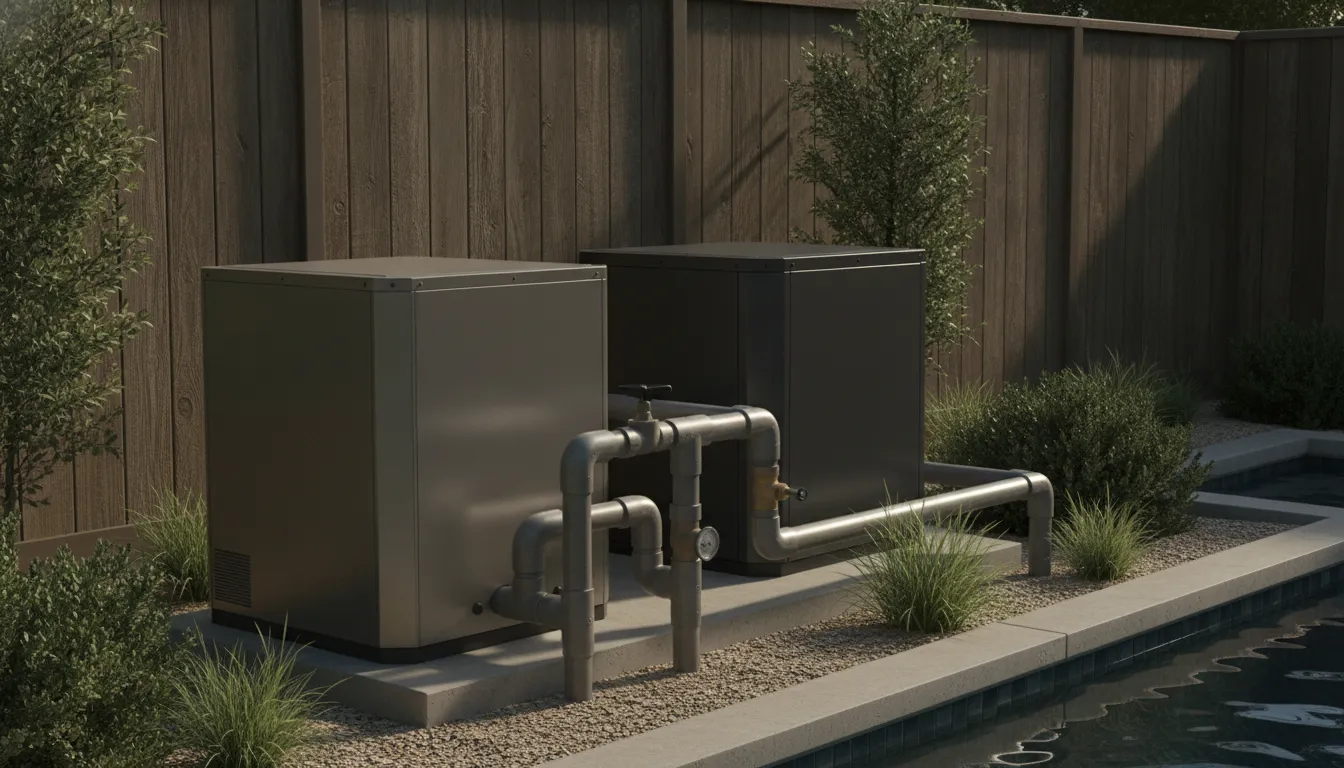
Organized pool heater equipment beside a residential swimming pool
Pool heating equipment should be planned with circulation, utilities, and service access in mind.
Pool heating options at a glance
Pool heater type How it works Best fit Important tradeoff
Gas heater Uses gas to heat pool water directly. Periodic use, quick warm-up, and weather-independent temperature control. It is a strong choice for fast heating, but the system should be sized and integrated carefully for the pool and intended schedule.
Air-source heat pump Transfers heat from outdoor air into the pool water using electricity. Frequent swimming and homeowners who want a measured, ongoing heating approach during suitable weather. Performance is strongest when outdoor air is above 50 degrees Fahrenheit, so cooler conditions can affect the heating experience.
Solar pool heating Uses solar collectors to capture energy for pool heating. Season extension where collector placement, sunlight, and a flexible swimming schedule align. Output depends on available sunlight and correct collector sizing. It is less predictable than gas when weather changes.

When does a gas heater make sense?

A gas system suits swimmers who want to warm the pool for specific occasions rather than maintain one temperature every day. Gas pool heaters are commonly used for quick heating and periodic use. Gas can also maintain a desired temperature in changing weather, which matters during cool Long Island evenings or a short-notice swim day.

Why choose a heat pump or solar system?

An air-source heat pump moves existing heat from outdoor air into the water instead of generating heat directly. It can be a practical match for a household that uses the pool regularly and plans operation around the warmer portion of the season. Solar heating can also support season extension with very low annual operating costs. Its results depend on collector area and location, so the system needs to be planned around the pool’s surface area and available solar exposure.

Schedule matters as much as equipment. Occasional swimmers often benefit from rapid heating, while frequent swimmers may prefer a system designed for consistent, planned operation. A pool cover can help retain heat with any heating method, and proper sizing should account for surface area, average air temperature, wind exposure, humidity, and cool nights.

How Do You Size a Pool Heater Correctly?

Choosing a pool heater by equipment label alone can produce disappointing results. The right size reflects how much water is exposed to heat loss, how warm you want the pool, and when you plan to swim. Sizing begins with the pool’s surface area and the difference between the water temperature and average air temperature.

Start with the pool’s exposed surface

Water loses heat across its surface, so a broad pool, attached spa, tanning ledge, or other open water feature can increase the heating demand. A designer should review the complete water layout rather than sizing from the main pool dimensions alone. The intended water temperature also matters. A larger difference between the desired water temperature and the surrounding air creates a greater load for the heater to overcome.

Account for Long Island weather and your season

Average air temperature is only a starting point. Wind exposure, humidity, and cool night temperatures also affect the heating load for an outdoor pool, according to the Department of Energy. An exposed pool may need a different approach from a sheltered pool, even when their surface areas are similar. Explain whether you want occasional warm weekends, regular spring and fall use, or a longer swimming season. Your schedule helps determine how quickly the system needs to recover heat and how consistently it will operate.

Do not overlook the cover and equipment system

A pool cover is one of the most effective ways to reduce heating costs, regardless of the heating system selected. When the pool is covered between uses, less heat is lost from the water surface. That can change the practical sizing discussion, but it does not eliminate the need to evaluate the pool’s exposure and desired temperature.

Sizing should also be coordinated with the existing or planned gas, electrical, plumbing, and control capacity. These components must work together with the heater, pump, filter, and any automation. For broader equipment context, review this guide to essential pool equipment.

Practical sizing checklist:

  • Measure the pool’s total exposed water surface, including connected features.
  • Identify the preferred water temperature and the average air conditions during use.
  • Note wind exposure, humidity, and cool nighttime conditions.
  • Define the swimming season and how quickly you expect the pool to warm.
  • Confirm whether a pool cover will be used consistently.
  • Review gas or electrical service, plumbing, controls, and equipment compatibility.

A qualified pool professional can use these details to compare heater options and recommend a system that fits the actual pool and schedule. Rather than relying on a one-size-fits-all assumption.

What Should You Plan Before Pool Heater Installation?

A successful installation begins with the space around the heater, not just the heater itself. Decide where the equipment pad will sit so technicians can service the unit, connect it to the pool plumbing. And route gas or electrical service without creating conflicts with walkways, planting beds, doors, or future improvements. The location should also account for manufacturer-required clearances and safe airflow. Exact clearance requirements vary by equipment, so they should be confirmed for the selected model rather than guessed.

Plan the utility connection early. A gas heater may require a suitable gas supply, while a heat pump needs electrical service and adequate airflow around the outdoor unit. Your installer should review the available capacity, connection route, shutoffs, and controls before equipment is ordered. This avoids discovering late in construction that the planned location or service path will not support the selected pool heater.

How Will the Heater Connect to the Pool System?

Heating depends on more than the cabinet on the pad. The plumbing layout must provide a clear path through the filter, heater, and return system, with valves and unions positioned for maintenance. Controls should be selected at the same time. Automation can coordinate filtration, heating, temperature settings, and scheduling, but the equipment must be compatible with the control system and wired correctly.

Also plan for drainage and operating conditions. Water from maintenance or equipment discharge should not collect beside the pad or flow toward the home. Gas-heater exhaust and heat-pump airflow can affect nearby walls, windows, fences, and seating areas. Discuss operating noise and airflow with the installer, especially when the pad is near a bedroom, patio, or property line.

What Changes When the Pool Is New?

For a new pool, heater planning belongs in the complete construction sequence. Coordinating each stage helps the plumbing, electrical or gas route, equipment pad, drainage, cover, deck, and landscape plan work together. It is easier to reserve service access and conceal utilities during design than after concrete and hardscape are finished.

  1. Design: Set the pool dimensions, equipment location, cover strategy, and utility routes.
  2. Permits and excavation: Confirm the project requirements before the site is opened.
  3. Steel, plumbing, and finishing: Build the pool shell and connect the planned circulation path.
  4. Equipment and startup: Install the heater and controls, then check the complete system before use.

Gappsi can coordinate heating decisions with a custom swimming pool design for homeowners in Nassau and Suffolk counties. Bring your expected swimming schedule, preferred controls, pool cover plans, and any concerns about noise or utility access to the design conversation. Those details help shape an integrated system instead of treating the heater as an afterthought.

How Can You Extend the Pool Season Efficiently?

Extending a Long Island pool season is less about running a heater continuously and more about controlling when heat is added and when it is allowed to escape. Start with the pool cover. The U.S. Department of Energy identifies a pool cover as one of the most effective ways to reduce heating costs, regardless of which heating system you use. Cover the water whenever the pool is not in use, especially overnight and during windy conditions. This limits heat loss at the surface and reduces the effect of evaporation.

Weather should guide the operating schedule. Wind exposure, humidity, and cool night temperatures all affect the heating load for an outdoor pool. On a calm, mild day, you may need less heating than after a cool night or a stretch of windy weather. A practical schedule can prioritize heating before planned use instead of maintaining the same temperature around the clock. The right approach depends on the pool’s construction, cover, equipment controls, and how often your household swims.

Solar heating can also be considered as a seasonal or supplemental option. Solar pool heaters can have very low annual operating costs, but their performance depends on available sunlight and proper collector sizing. The required solar collector area is calculated from the pool’s surface area and a factor based on geographic location, according to the Department of Energy. A pool professional can evaluate roof or ground placement, orientation, shading, and how solar collection would work with the rest of the equipment.

Maintenance supports consistent operation throughout the shoulder seasons. Keep the cover clean and functioning, maintain water chemistry, inspect visible plumbing connections, and follow the heater manufacturer’s service recommendations. A dirty filter or restricted flow can affect the overall system, while neglected equipment may be harder to evaluate when temperatures drop. For broader planning, review this guide to essential pool equipment and how the heating system fits into the complete pool setup.

  • Cover the pool when it is not in use, with particular attention to overnight periods.
  • Adjust the schedule for wind, cool nights, weather, and planned swimming times.
  • Evaluate solar based on sunlight, collector area, shading, and geographic location.
  • Maintain the system with clean filters, balanced water, and recommended inspections.

These steps help you use a pool heater as part of a coordinated system rather than treating it as the only tool for extending the season.

When Should Long Island Homeowners Replace or Upgrade a Pool Heater?

A pool heater does not need replacement simply because it is no longer new. The better question is whether it still heats reliably, suits the way your household uses the pool, and can be serviced safely. A professional inspection can separate a repairable fault from a broader equipment mismatch.

Slow heating is one reason to investigate. If the water takes substantially longer to reach the desired temperature, the cause may involve the heater. Sizing, water flow, a control setting, wind exposure, or heat loss from an uncovered pool. Heater sizing depends partly on pool surface area and the difference between water and average air temperatures, while wind, humidity, and cool nights also affect the heating load. See this guide to essential pool equipment for more system context.

Repeated faults or shutdowns deserve more than repeated resets. Ask the technician to document the fault code, inspect connections and water flow, and identify whether the problem is isolated or recurring. Visible corrosion, cracking, leaking, or damaged wiring should also prompt a timely inspection. Do not open gas components or electrical covers yourself. Safety concerns can change the decision from repair to replacement.

Has your pool use changed?

An equipment upgrade may make sense when your schedule is different from the one the original system was selected for. A gas heater can be useful when you heat the pool quickly for periodic use and can maintain a desired temperature in changing weather. A heat pump transfers heat from outdoor air into the water and may better fit a homeowner seeking a different operating approach. Although it works most efficiently when outdoor air is above 50 degrees Fahrenheit. These tradeoffs should be evaluated alongside your season, preferred water temperature, available utilities, and cover use.

Parts availability is another practical consideration. If a heater requires obsolete components, repairs may become slower, less predictable, or dependent on a substitute part. That does not automatically make replacement necessary, but it is a reason to compare the cost and reliability of continued repairs with a correctly integrated new system. A pool contractor can also check whether the existing plumbing, controls, gas service, or electrical capacity suit the proposed equipment.

Quick diagnostic checklist

  • Is heating noticeably slower than before?
  • Are fault codes or shutdowns happening repeatedly?
  • Do you see corrosion, leaks, cracks, or unusual noises?
  • Are replacement parts difficult to source?
  • Does the heater match your current pool schedule and desired season?

Bring these observations to an inspection rather than choosing a replacement by brand name alone. The right recommendation should account for the pool, equipment pad, cover, utilities, and how your family actually uses the water.

Planning a Pool Heater With a Custom Pool Project

A pool heater works best when it is planned as part of the entire swimming pool system. It should not be added after the deck and equipment areas are finished. During a new project, the pool’s dimensions, surface area, cover strategy, and expected season of use all help determine the heating approach. The same decisions also affect plumbing routes, utility connections, controls, and the space required around the equipment.

Planning a custom pool? Contact Gappsi through our contact page

Coordinate the heater with the pool and equipment pad

The pool’s size and shape should be considered before selecting a heater. A larger water surface can require a different heating capacity than a compact pool. While a planned cover can reduce heat loss when the pool is not in use. Wind exposure, cool nights, and the location of surrounding structures also belong in the design conversation.

The equipment pad should have enough room for the heater, pump, filter, valves, controls, and future service access. Its location should be coordinated with the home’s gas or electrical service, the plumbing run, drainage, and the outdoor areas where equipment sound may be noticeable. These choices are easier to resolve on paper than after a deck, retaining wall, or planting bed has been installed. For broader system planning, review Gappsi’s guide to essential pool equipment.

Include the deck, landscape, and cover in the layout

A heater is one part of a larger outdoor living plan. Deck elevations and pathways need to leave practical access to the equipment pad. Landscape screening can improve the appearance of the installation, but it should not prevent ventilation, inspection, or maintenance. The cover system should also be considered alongside coping, automatic-cover components, storage, and the finished pool edge.

Gappsi’s design-build process can connect these decisions before construction begins. Homeowners can explore custom swimming pool design and review the planning considerations involved in gunite swimming pool design. This coordination helps align the pool shell, plumbing, equipment, hardscape, and landscape rather than treating each installation as a separate project.

Plan permits, installation, and startup as one sequence

For a new Gappsi pool project, the work can proceed through design, permits, excavation, steel and plumbing, finishing, equipment installation, and startup. Heater decisions should be made early enough to support the plumbing and utility plan, rather than waiting until the final construction stage. At startup, the system can be checked as a complete installation, including circulation, controls, water flow, and the heater’s relationship to the rest of the equipment.

Serving Nassau and Suffolk counties, Gappsi can help homeowners evaluate the pool heater alongside the pool design, site layout, and intended use. The right plan is the one that fits the pool’s physical requirements and the way the household expects to use it.

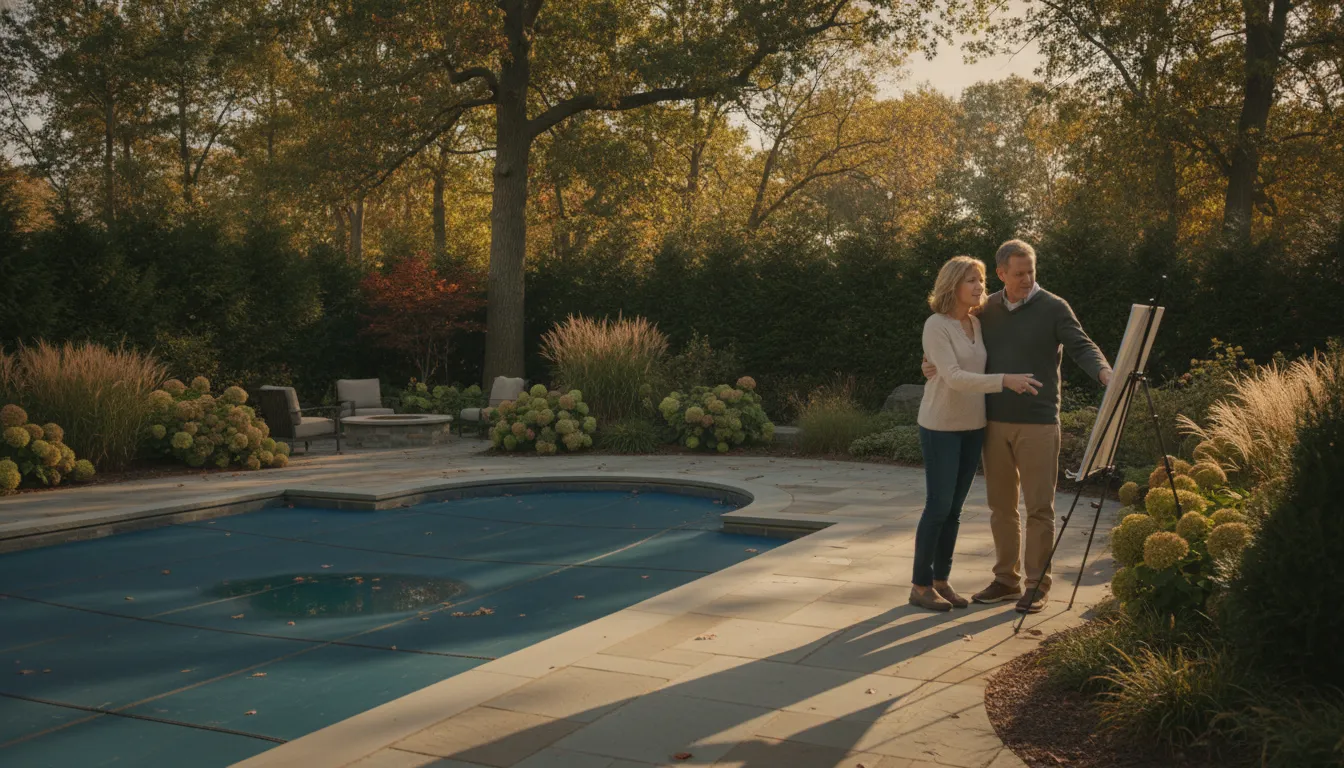
Homeowner planning a heated backyard swimming pool with a designer
Early planning connects pool heating with the finished outdoor living layout.

Contact Gappsi through our contact page

Contact Gappsi through our contact page

Frequently Asked Questions

Which heater is best for occasional pool use?

A gas heater is often a practical choice when you swim periodically and want the water warmed quickly before use. Gas heaters are commonly used for intermittent swimming because they can heat water quickly.

Will a heat pump work during a cool Long Island spring?

It can operate in cool weather, but its efficiency decreases as the air gets colder. Heat pumps are most efficient when outdoor air is above 50 degrees Fahrenheit. Seasonal use, desired water temperature, and operating schedule should guide the decision.

Is solar pool heating a good option for my property?

Solar heating can help extend the swimming season with very low annual operating costs, but its performance depends on available sun and correctly sized collectors. Collector area is based on pool surface area and a factor for geographic location. The roof or ground layout needs to be evaluated before installation.

What information is needed to size a pool heater?

Start with the pool surface area, the desired water temperature, and the difference between pool water and average air temperatures. Wind exposure, humidity, cool nights, pool-cover use, and the length of your swimming season also affect the heating load.

Does a pool cover really improve heating performance?

Yes. A cover helps retain heat and is useful with gas, heat pump, and solar systems. A pool cover is one of the most effective ways to reduce heating costs, making it an important part of the overall heating plan.

Talk With Gappsi About Your Pool Heating Plan

A pool heater works best when its capacity, controls, plumbing, cover, and overall pool design are considered together. Gappsi can help you discuss the right approach for your Long Island project. Whether you are planning a new pool or improving an existing system in Nassau or Suffolk County.

Contact Gappsi through our contact page to discuss a custom pool heating plan.

Share this page:
Antique brick fireplace idea with a simple mantel and light stone surround.

18 Antique Brick Fireplace Ideas for Your Next Project

When you hear “antique brick fireplace,” you might picture a dark, rustic cabin. But what if I told you this classic feature is one of the most versatile elements you can add to your home? From sleek, modern spaces to cozy, traditional living rooms, an antique brick fireplace adds a layer of texture and soul that new materials just can’t replicate. The key is knowing how to style it to fit your vision. This guide is packed with antique brick fireplace ideas that break the mold, showing you how to mix old-world charm with contemporary design. We’ll cover everything from whitewashing techniques to pairing brick with unexpected materials, helping you create a stunning focal point that feels both timeless and perfectly you.

Key Takeaways

  • Embrace Versatility in Your Design: An antique brick fireplace works with nearly any style, from rustic farmhouse to modern minimalist. Create a striking contrast by pairing it with clean white walls, or lean into its warmth by adding a reclaimed wood mantel for a cozier feel.
  • Update Your Fireplace with Simple Techniques: You can give your fireplace a fresh look without a major renovation. Try DIY methods like whitewashing for a soft, airy finish or a German schmear for rich, old-world texture, but remember to call a professional for structural repairs like repointing.
  • Preserve and Personalize with the Right Details: Protect your fireplace’s historic character with routine cleaning and sealing to prevent stains and damage. Personalize the look by pairing the brick with complementary materials like natural stone, wood, and metal for the mantel and hearth.

What Is an Antique Brick Fireplace?

An antique brick fireplace is more than just an old hearth; it’s a piece of history that brings incredible warmth and character into your home. Before central heating, these fireplaces were the functional and social center of the house, providing essential heat and a place for cooking. Today, we cherish them for their timeless appeal and the story they tell through their unique materials and dedicated craftsmanship. The term “antique” can mean a few things. It might refer to a fireplace built with reclaimed, centuries-old bricks, or it could describe a design style that reflects a specific historical period, like the grand designs of the Georgian era or the simpler forms of Colonial times.

Whether you’re lucky enough to have an original fireplace in your Long Island home or you’re looking to build a new one with an old-world feel, understanding what makes these structures special is key. It’s all about capturing a sense of authenticity. This comes from the unique texture of each brick, the subtle variations in color, and the classic design of the mantel and surround. An antique brick fireplace serves as a stunning focal point, grounding your living space with a connection to the past while offering a cozy spot for family to gather.

Key Characteristics to Look For

What sets an antique brick fireplace apart is its beautifully weathered appearance. Unlike the uniform look of modern bricks, antique ones often have rounded edges, surface imperfections, and a rich patina developed over decades or even centuries. You’ll notice variations in color and texture that reflect the materials and firing techniques of the past. Early designs from the Georgian and Regency periods often featured grand, ornate details, while later styles became more classic and understated. This history of the fireplace shows a clear evolution in design, but the common thread is the unique character that simply can’t be replicated with new materials. Look for these signs of age and craftsmanship to identify a truly special piece.

Common Historical and Architectural Styles

Historically, the fireplace was the heart of the home out of pure necessity. Early American homes were built around a central hearth that provided all the warmth and served as the kitchen’s primary cooking station. As architectural styles evolved, so did the fireplace. The lavish, highly decorated fireplaces of the Georgian period, for example, were status symbols. Later, designs became more streamlined, often featuring classic elements like Greek columns and reeding. Understanding these different styles helps you choose a design that feels authentic to your home’s architecture. You can gather inspiration from historic fireplaces to see how they served as the hub of the house for centuries.

Unique Materials and Craftsmanship

The beauty of an antique brick fireplace often lies in the details beyond the brick itself. Many historic fireplaces were trimmed with other natural materials, like blocky ashlar stones, which created a handsome and sturdy frame. It was also common to see handmade inserts made of beaten copper or cast iron, showcasing the incredible skill of the artisans. This level of detail highlights a commitment to quality and artistry that stands in contrast to some modern, minimalist designs. The combination of brick, stone, and metal tells a story of true craftsmanship. Gappsi’s masonry services honor this tradition by using high-quality materials to create lasting, beautiful fireplace structures.

Popular Design Styles for Antique Brick Fireplaces

An antique brick fireplace is a fantastic architectural feature because it’s so versatile. It can be the star of the show in a cozy farmhouse living room or a subtle, textural element in a modern space. The key is to choose a design style that complements your home’s overall aesthetic while letting the character of the brick shine through. Whether you’re restoring an existing fireplace or building a new one with reclaimed materials, understanding these popular styles can help you create a look you’ll love for years.

Our team of masonry experts can help you bring any of these visions to life, ensuring the final result is both beautiful and structurally sound. Let’s explore some of the most beloved design approaches for antique brick fireplaces.

Rustic and Farmhouse

The rustic and farmhouse styles are all about creating a warm, inviting, and unpretentious atmosphere. An antique brick fireplace is a natural fit here, providing a sense of history and comfort. For a classic farmhouse look, you can pair the warm red tones of the brick with a chunky, reclaimed wood mantel. To give it a more modern farmhouse twist, consider surrounding the brick with clean, white shiplap walls and adding sleek black metal accents. This combination feels fresh and current while still honoring the cozy, rustic charm that makes this style so popular.

Traditional and Colonial

Traditional and Colonial designs draw inspiration from historical periods, and the fireplace is often the centerpiece of the room. Depending on the era you want to channel, your antique brick fireplace can be grand or understated. Early Colonial and Georgian styles often featured large, ornate fireplaces with detailed mantels and surrounds. Later periods, like the Regency era, favored more subtle and classic designs. An experienced home remodeling team can help you integrate these historical details authentically, making the fireplace feel like an original part of your home’s architecture.

Cottage and Arts and Crafts

The Arts and Crafts movement celebrated craftsmanship, natural materials, and simplicity, making it a perfect match for the humble brick. In a cottage or Arts and Crafts style home, the fireplace is truly the heart of the house. It’s a gathering spot that radiates warmth and character. The focus here is on the beauty of the materials themselves. An antique brick fireplace in this setting should feel sturdy and authentic, often featuring a simple wood mantel or built-in shelving that highlights the craftsmanship. This style embraces the textures of natural materials to create a space that feels handmade and deeply personal.

Modern and Transitional

You might not immediately think of antique brick for a modern home, but it can provide a stunning textural contrast to clean lines and minimalist decor. A floor-to-ceiling brick fireplace can become a dramatic focal point in an otherwise simple room. For a more industrial vibe, you could mix different brick colors or even paint the brick a bold, unexpected color like charcoal gray or deep navy. In a transitional space, which blends modern and traditional elements, an antique brick fireplace acts as a bridge between old and new. A professional restoration can refresh the brick and mortar, making it feel intentional within your modern design.

DIY Makeover Ideas for Your Brick Fireplace

If your brick fireplace feels more like a relic than a feature, you don’t have to start from scratch. A simple DIY makeover can completely change its personality and refresh your entire room. These projects are a fantastic way to put your personal stamp on your home’s centerpiece. Whether you want a subtle change or a dramatic transformation, there’s a technique that fits your style and skill level. From a simple coat of paint to a more involved veneer application, you have plenty of options for updating your brick fireplace and making it a focal point you truly love.

Whitewash for a Soft, Airy Finish

Whitewashing is a go-to technique for a reason. It instantly brightens a dark, heavy-looking brick fireplace, giving it a soft and airy feel. The process involves applying a watered-down paint mixture, which allows some of the brick’s natural color and texture to show through. This creates a charming, rustic look that’s less opaque than a solid coat of paint. It’s a forgiving project for DIY beginners and works beautifully in homes with farmhouse, coastal, or shabby-chic decor. With just a little bit of effort, you can learn how to whitewash brick and give your living room a fresh, clean focal point over a single weekend.

Use German Schmear for an Old-World Texture

If you love the look of historic, old-world masonry, the German schmear technique might be perfect for you. This method involves applying wet mortar over the face of the brick and then removing some of it, creating an irregular, textured finish. Unlike whitewashing, which just colors the brick, a German schmear adds dimension and a storybook feel. It’s inspired by the centuries-old cottages and castles of Germany, giving your fireplace an authentic, rustic character. This technique is ideal for anyone wanting to make a bold statement and add a touch of European charm to their space. It’s a bit more involved than painting, but the stunning, one-of-a-kind result is well worth the effort.

Try Limewashing for a Weathered Look

For a soft, matte finish that looks like it has been there for generations, consider limewashing. Limewash is a unique, breathable coating made from limestone that has been crushed, burned, and mixed with water. When applied to brick, it creates a beautiful, chalky patina that gets better with age. Because limewash soaks into the brick instead of sitting on top like paint, it won’t peel or chip. It also allows the natural texture of the brick to remain visible, resulting in a soft, organic look. This technique is perfect for achieving a weathered, antique appearance that feels both timeless and elegant.

Apply a Thin Brick Veneer for a Classic Refresh

If you want to completely change the style of your brick without tearing out the fireplace, applying a thin brick veneer is an excellent solution. These are real bricks that have been sliced thin, so you get the authentic look and feel of a classic brick fireplace. This method allows you to cover up old, damaged, or simply outdated brick with a fresh new face. You can choose from a wide range of colors and styles to perfectly match your vision, from traditional red brick to a more modern white.

While it’s a more intensive DIY project, adding an antique brick veneer can dramatically transform your fireplace into a stunning architectural feature. For a flawless installation, our masonry experts can ensure a professional result.

How to Mix Antique Brick With Modern Decor

An antique brick fireplace is a beautiful, character-rich feature, but it doesn’t mean you’re stuck with a strictly traditional design. In fact, the opposite is true. Mixing antique brick with modern decor creates a layered, personal, and incredibly stylish space. The key is to create a thoughtful balance where the old and new elements complement each other instead of competing. Think of your fireplace as the soulful anchor of the room, a piece of history that adds warmth and texture to a contemporary setting. It’s a look that feels collected over time, not decorated in a day.

Achieving this look is all about making deliberate choices with your color scheme, furniture, and lighting. When done right, the rustic charm of the brick enhances the clean lines of modern pieces, and the modern elements make the brick feel fresh and relevant. It’s a design strategy that celebrates contrast, bringing together the best of both worlds. If you’re planning a larger renovation, our team has years of experience with home remodeling projects and can help you seamlessly integrate your fireplace into an updated living space. Let’s walk through a few simple ways you can make this timeless combination work in your home.

Choose the Right Color Palette

The colors you put on the walls surrounding your fireplace will have a huge impact on the room’s overall feel. To lean into the brick’s inherent warmth, consider earthy tones like harvest gold, rust, or a soft burnt orange. These colors create a cozy, inviting atmosphere. For a more modern and dramatic contrast, pair red brick with cool grays or crisp, clean whites. A white wall can make the brick’s texture and color variations pop, turning your fireplace into a true focal point. Don’t be afraid to experiment with a few paint samples to see how they look next to your brick throughout the day as the light changes.

Pair Furniture and Materials

Creating a bridge between antique and modern styles is easy when you mix materials and furniture. For a modern farmhouse look, you could pair your red brick fireplace with a clean-lined mantel and white shiplap walls. Introducing sleek metal accents through light fixtures or decor also adds a contemporary touch. When choosing furniture, look for modern silhouettes that won’t feel too heavy. For example, a pair of streamlined accent chairs in a bold color can look stunning against the rustic brick. The goal is to create a visual conversation between the different elements in the room. Our masonry design experts can even help you craft a custom mantel that perfectly suits your vision.

Highlight Brick Texture With Lighting

Proper lighting is one of the most effective ways to showcase the unique texture of your antique brick. Instead of relying solely on overhead lighting, which can cast shadows, use multiple light sources to create ambiance. Wall sconces placed on either side of the fireplace can cast a warm, inviting glow. Another great technique is uplighting, where a light is placed on the floor and aimed up at the brick. This method, known as grazing, beautifully highlights every crack and crevice, adding depth and drama. You can find plenty of visual inspiration for how lighting transforms a space on the Gappsi YouTube channel.

Accessorize Your Antique Brick Fireplace

An antique brick fireplace is already a stunning focal point, but the right accessories can truly make it the heart of your home. Think of the brick as your canvas and the mantel, hearth, and surrounding area as your opportunity to add personality and function. From the mantel you choose to the way you display your favorite art, every detail contributes to the final picture. These finishing touches are what transform a simple fireplace into a curated and inviting centerpiece for your living space.

Select Mantels, Surrounds, and Trim

The mantel is your fireplace’s crown, and it sets the tone for the entire wall. A thick, reclaimed wood beam can add a rustic, earthy feel, while a sleek, custom-milled piece of natural stone offers a more polished and modern contrast to the rough brick. Your surround can be just as impactful. You might extend the brick for a classic, uniform look or frame it with custom trim that matches your home’s architectural style. Our expert masonry services can help you design and install a mantel or surround that perfectly suits your vision, ensuring it’s both beautiful and structurally sound.

Place Artwork, Mirrors, and Lighting

What you place above the mantel is just as important as the mantel itself. A large, ornate mirror is a classic choice that can make your room feel brighter and more spacious by reflecting light. Alternatively, you can use this space to display a favorite piece of art that complements the warm tones of the antique brick. Don’t forget about lighting. A pair of elegant sconces flanking the fireplace or a picture light focused on your artwork can add a layer of warmth and sophistication. Integrating these elements thoughtfully is a key part of any successful home remodeling project, creating ambiance and drawing attention to your beautiful fireplace.

Decorate Your Hearth and Layer Textures

The hearth is the foundation of your fireplace, so give it the attention it deserves. You can keep it simple with a set of stylish fireplace tools and a basket of logs, or you can use it to display large floor vases or a collection of plants. Consider the material of the hearth itself. A beautiful slab of slate or another natural stone can create a durable and elegant base. To add coziness, layer textures around the area with a plush rug, a soft throw blanket draped over a nearby chair, and a mix of decorative objects on the mantel.

Add Built-In Shelving for Function and Style

If you have space on either side of your fireplace, built-in shelving is a fantastic addition. It’s a practical solution for storage and a beautiful way to frame your fireplace, making it feel more integrated into the room. You can use the shelves to create a mini library, display family photos, or showcase a collection of decorative objects. Custom built-ins can be designed to match your home’s style, providing a seamless look that adds both character and value. This type of custom woodwork is a perfect way to complete a major home remodeling project and create a truly personalized living space.

What Materials Complement Antique Brick?

Choosing the right materials to pair with your antique brick fireplace is all about creating balance. You want to highlight the brick’s unique character, texture, and history, not compete with it. The best combinations create a thoughtful contrast, adding layers of texture and style that make your fireplace the true heart of the room. By mixing different elements, you can craft a look that feels both timeless and personal.

Pair Brick With White Molding and Trim

One of the most classic and effective ways to make antique brick stand out is by framing it with crisp, white molding. This combination creates a beautiful contrast between the rustic, textured brick and the clean, smooth lines of the trim. Think of it as putting a perfect frame around a piece of art. The white brightens the space and adds a touch of elegance, preventing the brick from feeling too heavy or dark. This approach works wonderfully for creating a traditional or modern farmhouse look. Our expertise in home remodeling can help you design and install custom molding and built-in shelving that seamlessly integrates with your fireplace.

Combine Brick With Wood, Stone, and Metal

Don’t be afraid to mix materials to create a rich, layered design. Combining antique brick with elements like wood, stone, and metal adds depth and personality to your fireplace. A chunky, reclaimed wood mantel introduces natural warmth and a rustic touch that beautifully complements the brick. For the hearth, consider a solid slab of slate or bluestone to ground the design. You can also introduce metal accents, like a wrought-iron screen or a copper insert, to nod to historical craftsmanship. Our expert masonry services can help you source and install the perfect combination of materials to achieve a cohesive and interesting look.

Know When to Use Porcelain or Natural Stone

The materials you choose for the hearth and surround can either echo the brick’s history or provide a modern counterpoint. Natural stone, like limestone or fieldstone, enhances the old-world feel of an antique brick fireplace, creating a look rooted in tradition. On the other hand, large-format porcelain tiles can offer a sleek, contemporary contrast that makes the brick’s texture pop. Porcelain is also incredibly durable and easy to clean, making it a practical choice for a high-use area. Gappsi offers a wide selection of high-quality porcelain and natural stone, and we can help you select the perfect material that fits your home’s style and functional needs.

Should You Restore or Replace Your Fireplace?

Deciding what to do with an old brick fireplace can feel like a huge undertaking. Do you embrace its history and restore it, or is it time for a complete replacement? The answer really depends on the fireplace’s current condition, its historical value, and your vision for the space. An antique fireplace is often the heart of a room, holding decades of stories within its bricks. Before you make any decisions, it’s important to assess the structure for safety and stability. This will help you figure out if a simple repair will do the trick or if a more involved project is needed.

Signs You Need a Professional

Your fireplace might be telling you it needs help. If you spot large cracks in the brick or mortar, crumbling brick faces (a condition called spalling), or a white, powdery substance on the surface, it’s time to pay attention. These are more than just cosmetic flaws; they can point to underlying moisture problems or structural issues. Another major red flag is poor ventilation. If smoke billows into your room instead of going up the chimney, your flue could be blocked or damaged. A professional masonry assessment is essential to diagnose these problems correctly and ensure your fireplace is safe to use. Ignoring these signs can lead to bigger, more expensive repairs down the road.

Repoint and Repair Damaged Mortar

If your fireplace’s mortar is crumbling but the bricks are mostly intact, repointing might be the perfect solution. Repointing is the process of carefully removing the damaged mortar from between the bricks and replacing it with fresh mortar. This isn’t just a cosmetic fix. It restores the fireplace’s structural integrity, prevents water and pests from getting into the gaps, and dramatically improves its appearance. Using the correct type of mortar is crucial, as modern mortars can be too hard for older, softer bricks and can cause them to crack. This delicate restoration technique is often the key to preserving the authentic character of your antique fireplace for many more years.

How Gappsi’s Masonry Services Can Help

Navigating a fireplace project can be complex, but you don’t have to do it alone. Our team specializes in high-quality masonry services and understands the unique challenges of working with antique brick. We can provide a thorough inspection to help you decide if restoration or replacement is the right choice for your home and budget. From careful repointing that matches the original character to a complete, structurally sound rebuild, we handle every aspect of the project. We ensure your fireplace is not only a stunning focal point but also a safe and functional part of your home for years to come.

How to Maintain Your Antique Brick Fireplace

An antique brick fireplace is a stunning focal point, but it needs a little care to keep it looking its best. Proper maintenance not only preserves the beautiful, historic character of the brick but also ensures your fireplace remains safe and functional for years to come. With a few simple routines and an understanding of when to call for backup, you can easily protect your investment.

Follow Routine Cleaning Best Practices

Regular cleaning is the first step to maintaining your fireplace’s charm. Before you start, lay down drop cloths to protect your floors and furniture. You can begin by using a vacuum with a brush attachment to gently remove surface dust and loose debris from the bricks and mortar. For a deeper clean, especially to tackle soot, a simple mixture of dish soap and water with a nylon scrub brush can work wonders. Avoid wire brushes, as they can damage the surface of older, softer bricks. A quick wipe-down keeps your fireplace fresh between more thorough cleanings.

Seal and Protect the Brick Surface

To give your antique brick extra protection, consider applying a sealant. Brick is porous, meaning it can absorb moisture and stains over time. A good quality, vapor-permeable sealant creates a protective barrier that repels water and grime without trapping moisture inside the brick, which is key to preventing long-term damage. This simple step can help preserve the color and integrity of the brick, making future cleanings much easier. Our team can help you with professional cleaning and sealing services to ensure the job is done right.

Know When to Call a Pro for Maintenance

While routine cleaning is manageable, some issues require an expert eye. If you notice the mortar between the bricks is crumbling, or if there are deep, persistent stains that your cleaning efforts can’t remove, it’s time to call a professional. These can be signs of underlying moisture problems or structural wear that need to be addressed to ensure your fireplace is safe and stable. A specialist can assess the condition of your fireplace and perform necessary repairs. Gappsi’s expert masonry services can restore your fireplace’s beauty and structural integrity.

Related Articles

Frequently Asked Questions

How can I tell if my old brick fireplace needs professional repair? You should definitely call a professional if you notice significant issues beyond a little soot. Look for large cracks in the bricks or mortar, crumbling brick faces, or a persistent white, powdery film, as these can indicate moisture or structural problems. Another major red flag is if smoke regularly escapes into your room instead of going up the chimney. These signs suggest it’s time for an expert assessment to ensure your fireplace is safe.

My home has modern decor. Will an antique brick fireplace look out of place? Not at all, in fact, this combination can be incredibly stylish. The key is to create a deliberate contrast. The rustic texture of antique brick looks fantastic next to the clean lines of modern furniture and decor. You can make the fireplace a stunning focal point by painting the surrounding walls a crisp white or a cool gray, which makes the brick’s warm color and texture pop. It’s all about creating a balance where the old and new elements complement each other.

What’s the difference between whitewashing, limewashing, and German schmear? These are three distinct techniques for changing the look of your brick. Whitewashing uses a thinned paint to give the brick a lighter, semi-transparent finish that softens its color. Limewashing involves a special limestone-based coating that soaks into the brick, creating a soft, chalky, and naturally weathered patina. German schmear is a more textured technique where you apply wet mortar to the brick face to achieve a rustic, old-world look inspired by historic European cottages.

What’s the best way to clean my antique brick fireplace without damaging it? The gentlest approach is always best for older brick. Start by vacuuming the surface with a soft brush attachment to remove loose dust and debris. For soot and grime, use a nylon scrub brush (never a wire one) with a simple solution of warm water and mild dish soap. Work in small sections and rinse with a clean, damp cloth. Avoid using harsh, acidic cleaners, as they can damage the surface of the brick and mortar.

My fireplace’s mortar is crumbling. Does that mean I need to replace the whole thing? Not necessarily. If the bricks themselves are still in good shape, crumbling mortar can often be fixed through a process called repointing. This involves carefully removing the old, damaged mortar and replacing it with a new mixture that’s appropriate for the age of your bricks. Repointing restores the fireplace’s structural stability and appearance without requiring a complete and costly replacement, preserving its original character.

Share this page:
Custom outdoor living pavilion with a built-in kitchen in a Suffolk County backyard.

Outdoor Living Pavilion Suffolk County: The Complete Guide

Extending your living space doesn’t always mean adding a new room to your house. Sometimes, the best addition has no walls at all. A pavilion creates a seamless transition from your home to your garden, providing a comfortable, sheltered destination right in your own backyard. It becomes the central hub for family life, from weekend barbecues to quiet morning coffees. Unlike a gazebo, which is often a separate focal point, a pavilion is designed to integrate with your patio and pool area, creating one cohesive and inviting environment. For a truly functional outdoor living pavilion Suffolk County families will love, thoughtful design ensures it feels like a natural and essential part of your home.

Key Takeaways

  • A Pavilion Offers All-Weather Functionality: Unlike a pergola, a pavilion’s solid roof provides complete protection from sun and rain, allowing you to comfortably use your outdoor space regardless of the Long Island forecast.
  • Prioritize Materials and Proper Construction: The longevity of your pavilion depends on choosing the right material (like wood, vinyl, or aluminum) and ensuring it has a proper foundation built to withstand local weather, including our winter frosts.
  • Customize Your Space for How You Live: Transform your pavilion into the heart of your backyard by adding features that fit your lifestyle, such as an outdoor kitchen for entertaining, a fireplace for cozy evenings, or integrated lighting for ambiance.

What Is an Outdoor Pavilion?

If you’re dreaming of creating a true outdoor living room, a pavilion might be exactly what you need. Think of it as a permanent, freestanding structure with a solid roof held up by sturdy posts. But it’s so much more than just a roof. A well-designed pavilion is a lasting architectural feature that adds both function and style to your backyard, creating a seamless transition between your home and your garden.

Pavilion vs. Pergola vs. Gazebo: What’s the Difference?

It’s easy to get these terms mixed up, but they each serve a different purpose. The key difference is the roof. A pavilion has a solid, continuous roof designed to offer full protection from direct sun and rain, which completely changes how you can use your outdoor space in any weather. A pergola, on the other hand, has an open, slatted roof that provides filtered shade but won’t keep you dry during a downpour. It’s more of an aesthetic feature that adds architectural interest. A gazebo is typically a smaller, freestanding octagonal or hexagonal structure with a solid roof, often used as a charming focal point in a garden rather than an extension of a patio living space.

Why Pavilions Are Perfect for Suffolk County Homes

A pavilion is an ideal addition for any Long Island homeowner who wants to get more use out of their yard. Our local climate is known for its hot, humid summers and sudden thunderstorms, and a pavilion makes your outdoor space usable despite these challenges. Its solid roof provides a permanent, covered area that works in every season. This allows you to maximize your investment in other outdoor features, like a swimming pool or patio, by creating a comfortable, sheltered spot for lounging and entertaining. You can host a barbecue without worrying about a passing shower or relax in the shade on the hottest July afternoon, making your backyard truly functional all year long.

The Benefits of Adding a Pavilion to Your Backyard

Adding a pavilion to your backyard is about more than just creating shade; it’s about fundamentally changing how you experience your outdoor space. Think of it as adding a new room to your home, one without walls, that serves as the heart of your backyard. For homeowners in Suffolk County, a pavilion transforms an open lawn or a simple patio into a true destination for relaxing, dining, and entertaining. It provides a permanent, architectural focal point that anchors your entire landscape, tying together your pool, garden, and patio into one cohesive and inviting environment.

Unlike a temporary umbrella or a simple pergola, a pavilion is a substantial structure that offers reliable shelter and a sense of permanence. It’s the difference between having a place to sit outside and having a dedicated outdoor living room. Whether you envision a quiet corner for your morning coffee, a vibrant hub for summer barbecues, or a cozy, fire-lit retreat on a cool evening, a pavilion provides the framework. It’s an investment in your home’s comfort and your family’s lifestyle, creating a space where memories are made. By adding one, you’re not just improving your yard; you’re expanding your home and enriching the time you spend in it.

Enjoy Your Yard All Year Long

Here on Long Island, we know the weather can be unpredictable. A perfect sunny day can turn into a sudden downpour, and the intense summer sun can make your patio unusable. A custom pavilion turns your backyard into a functional outdoor space you can enjoy almost all year long, protecting you from the elements. Its solid roof offers complete shelter from rain and a cool refuge from direct sunlight, allowing you to relax outdoors comfortably, no matter the forecast.

This protection helps you get more use out of your other outdoor investments. A pavilion can cover your outdoor kitchen, protect your patio furniture, and provide a shady spot for swimmers to dry off. You can plan family dinners and parties with confidence, knowing a little rain won’t send your guests running inside. It extends the seasons, making your swimming pools and patios more versatile than ever.

Add Value and Style to Your Home

A beautifully designed pavilion is one of the best ways to add significant value and style to your property. It’s a permanent architectural feature that potential homebuyers see as a major asset, a luxurious outdoor living area that’s ready to enjoy. This makes it a smart financial investment that you also get to appreciate every day. Homeowners looking to enhance their outdoor living space should consider the immediate and long-term advantages of adding a pavilion.

Beyond the financial return, a pavilion adds a powerful design element to your home’s exterior. With Gappsi, you can create custom pavilions and pergolas that perfectly match your home’s architectural style, from classic to modern. Using complementary materials and colors creates a seamless transition between your indoor and outdoor spaces. It’s a statement piece that shows attention to detail and a commitment to quality living.

Create Your Go-To Spot for Fun and Relaxation

A pavilion is more than just a roof and posts; it’s the setting for your life’s best moments. It quickly becomes the go-to spot for everything from quiet mornings with a book to lively weekend gatherings with friends and family. It provides the perfect blend of shelter, style, and open-air freedom for any occasion, creating a comfortable and defined space for connection and relaxation. Imagine hosting effortless dinners, watching the kids play in the yard from a shady spot, or unwinding after a long day in your own private retreat.

This structure gives you the comfort of an indoor room with the refreshing feeling of being outside. It’s a versatile space that adapts to your needs, whether you’re setting up an outdoor movie night or simply enjoying a peaceful evening. By creating a central hub for activity, a pavilion encourages you to spend more quality time outdoors, making your backyard the most popular “room” in the house.

Choosing the Right Materials for Your Pavilion

The material you choose for your pavilion does more than just define its look; it determines how much maintenance it will need and how well it stands up to Long Island’s weather. Getting this right is key to creating a structure you’ll love for years. We primarily work with three fantastic options: wood, vinyl, and aluminum. Each has its own unique benefits, and we partner with top suppliers to ensure every structure is built with strong, reliable materials. Let’s walk through each one so you can find the perfect fit for your backyard.

Wood

There’s a reason wood is a timeless choice for outdoor structures. It has a warm, natural beauty that blends perfectly into any landscape design, creating a classic and inviting atmosphere. To make sure your pavilion lasts, it’s important to use high-quality, pressure-treated wood that can handle moisture and resist pests. We build our wood pavilions to be both beautiful and durable, so you get that traditional look without worrying about its longevity. A well-built wood pavilion offers a sturdy, charming centerpiece for your yard that feels like it has always been there.

Vinyl

If you love the idea of a beautiful pavilion but want to keep maintenance to a minimum, vinyl is an excellent option. Vinyl structures offer a clean, polished look that stays fresh without needing to be stained or painted. It’s incredibly durable and won’t rot, fade, or fall victim to insects, which is a huge plus. This makes it a practical, set-it-and-forget-it choice for busy homeowners. You can see how we integrate these low-maintenance structures with other backyard features like patios and walkways to create a cohesive and carefree outdoor living space.

Aluminum

For a sleek, modern aesthetic combined with serious strength, aluminum is a fantastic material for your pavilion. It’s lightweight yet incredibly sturdy, and its natural resistance to rust and corrosion makes it ideal for Long Island’s humid summers and coastal air. An aluminum pavilion provides a sharp, contemporary profile that complements modern home styles perfectly. Because it’s so resilient, you can trust it to look great for years with very little upkeep. You can explore our project videos to see how different materials come to life in our custom designs.

The Best Materials for Long Island Weather

Choosing a material is only half the battle; the structure itself must be designed for Long Island’s specific climate. From heavy winter snow to driving rain, your pavilion’s roof needs the right pitch, proper drainage, and a strong frame to handle it all. We don’t just build pavilions; we engineer them for Suffolk County. This means considering everything from the foundation to the final shingle to ensure your investment is safe and secure year-round. Proper construction also helps protect your entire outdoor space, which is why we also offer restoration and sealing services to keep everything looking its best.

Designing Your Perfect Pavilion

Creating your dream pavilion is about more than just picking a pretty design from a catalog. It’s about thoughtfully planning a structure that truly fits your home, your yard, and your lifestyle. A well-designed

To get started, we’ll walk through four key areas that will shape your project. We’ll look at the essential structural elements like roofing and foundations, which are critical for safety and longevity here on Long Island. We will also explore how to choose the right size and location to get the most out of your new space. Finally, we’ll touch on the local regulations you’ll need to follow. Thinking through these details early on is the secret to a smooth project and a stunning outcome. It ensures your finished pavilion is not only beautiful but also practical and built to last for years of enjoyment.

Roofing and Structural Support

Unlike a pergola with its open-slat roof, a pavilion features a solid, continuous roof. This is its defining feature and its biggest advantage. A solid roof provides complete protection from direct sun and passing rain showers, dramatically increasing the time you can spend enjoying your backyard. To support this roof, especially with the potential for heavy snow, the structure needs to be properly engineered. The posts and beams must be strong enough to handle the load without sagging or shifting. This is why professional design and construction are so important for creating a safe and durable outdoor room for your family.

Foundations Built for Long Island Winters

A pavilion is a permanent addition to your home, so it needs a foundation that can stand up to Long Island’s weather. The structure rests on footings, which are concrete bases buried deep in the ground. Here, footings must extend about 36 to 42 inches below the surface to get beneath the frost line. This prevents a phenomenon called “frost heave,” where freezing and thawing soil can push the structure upward and cause it to become unstable. Proper masonry work ensures your pavilion remains level and secure for decades, no matter how cold the winter gets.

Size, Placement, and Privacy

The first question to ask yourself is: what is the main purpose of your pavilion? Will it be a cozy lounge area, a dining space for entertaining, or a shady retreat by the pool? Your answer will help determine the ideal size. From there, think about placement. You want it to be easily accessible from your house but perhaps set back enough to create a sense of a private getaway. Consider the sun’s path throughout the day, the direction of prevailing winds, and the best views from your yard to make the location both functional and beautiful.

Understanding Local Suffolk County Rules

Before breaking ground, it’s essential to understand the local building codes and requirements in your specific town or village in Suffolk County. Permanent structures like pavilions almost always require a permit. Zoning laws will dictate factors like how close you can build to your property line (setbacks), maximum height, and how much of your lot can be covered by structures. If you live in a community with a homeowners association (HOA), there may be additional rules to follow. Working with an experienced local builder simplifies this process, as they can manage the permits and ensure your design complies with all regulations.

What Custom Features Can You Add?

A pavilion is so much more than just a roof. It’s a blank canvas for creating the outdoor living space you’ve always wanted. The real magic happens when you start adding custom features that reflect your lifestyle, whether you’re a master entertainer, a family looking for a relaxing retreat, or someone who wants to enjoy their backyard in every season. This is your chance to design a space that works perfectly for you.

From a fully equipped outdoor kitchen to a cozy fireplace for chilly evenings, the possibilities are endless. You can integrate lighting and ceiling fans for comfort, add screens for bug-free nights, or connect your pavilion seamlessly to your pool deck. The key is to think about how you want to use the space and then build it with those functions in mind. At Gappsi, we specialize in bringing all these elements together into one cohesive design, ensuring your new pavilion feels like a natural and beautiful extension of your home. We handle everything, so you can focus on planning your first get-together.

Outdoor Kitchens, Bars, and Pizza Ovens

Turn your pavilion into the ultimate destination for entertaining by adding a custom outdoor kitchen or bar. Imagine grilling for friends and family without being stuck inside, all while being protected from the sun or a passing shower. We can design a setup that includes everything you need, from high-end Fire Magic grills to Summit refrigerators. For a truly special touch, an Alfa 4 Pizze Wood Fired Oven can transform your backyard into an authentic pizzeria. A pavilion with an outdoor kitchen not only makes hosting easier but also keeps the party outside where it belongs.

Integrated Lighting, Fans, and Power

To make your pavilion truly functional, it’s important to plan for lighting, fans, and power from the start. The right lighting can completely change the mood of the space, allowing you to enjoy it long after the sun goes down. We can install everything from ambient string lights for a soft glow to task lighting over a kitchen or dining area. On hot Long Island summer days, a ceiling fan provides a welcome breeze, making your pavilion a comfortable escape. We’ll also make sure you have plenty of outlets for charging devices, plugging in speakers, or powering other small appliances, ensuring your outdoor room is as convenient as any room inside.

Fireplaces and Heaters

Don’t let cooler weather send you indoors. Adding a heat source is one of the best ways to extend the use of your pavilion through spring, fall, and even mild winter days. A custom-built stone fireplace serves as a stunning focal point, providing both warmth and a cozy ambiance for evening gatherings. Our expert masonry team can design a fireplace that perfectly complements your pavilion’s style. For a more modern and space-efficient option, we can install mounted electric or infrared heaters that provide targeted warmth at the flip of a switch. These features make your pavilion a true four-season destination.

Screens, Curtains, and Weather Protection

While a solid roof protects you from sun and rain, adding screens or curtains can provide an extra layer of comfort and privacy. Retractable screens are a fantastic option for keeping mosquitos and other insects out during summer evenings without obstructing your view of the yard. Outdoor curtains can be drawn to block the setting sun, provide a bit of privacy from neighbors, or simply add a soft, decorative touch to the structure. These additions help you control the environment within your pavilion, making it a comfortable and protected space no matter the weather or time of day.

Connecting to Your Pool or Patio

A great pavilion design doesn’t just stand on its own; it connects with the rest of your backyard. We can design your structure to feel like a natural extension of your existing patio or pool area, creating a seamless flow between spaces. Imagine a pavilion that serves as a shaded poolside cabana for relaxing after a swim or one that opens directly onto your natural stone patio for easy entertaining. By using complementary materials and thoughtful placement, we ensure your pavilion enhances your entire outdoor living area, making it feel like one complete and unified retreat.

Is a Pavilion a Good Investment?

Adding a pavilion to your backyard is one of the smartest investments you can make in your home and your lifestyle. Think of it less as an expense and more as a permanent upgrade that pays you back in countless ways. A pavilion creates a dedicated outdoor room, giving you a comfortable, sheltered space to relax, entertain, and enjoy your yard, no matter the weather. It’s the perfect spot for family dinners, hosting friends, or simply unwinding with a book while staying protected from the sun or a light rain.

Unlike temporary solutions like tents or awnings, a pavilion is a solid, lasting structure. When built with quality materials, it requires very little maintenance and stands strong for years, making it a practical and durable addition. For homeowners in Suffolk County, where we love our outdoor spaces, a pavilion significantly increases your property’s usability and appeal. It extends your living area into the outdoors and adds a touch of elegance that can increase your home’s overall value. A well-designed pavilion becomes a central feature of your backyard, creating a beautiful and functional focal point for years of enjoyment.

Understanding Pavilion Costs

When you’re thinking about a pavilion, it’s helpful to understand what goes into the final cost. The price can vary quite a bit based on a few key factors: size, materials, and any custom features you choose. A larger, more elaborate pavilion made from premium wood or incorporating a full outdoor kitchen will naturally cost more than a simple vinyl structure. The complexity of the design and the labor involved also play a role. While the initial investment might seem significant, remember that you are paying for a permanent, high-quality structure. The long-term value comes from its durability and the countless hours of enjoyment it provides, making it a worthwhile addition to your home.

Custom vs. Pre-Built: Which Is for You?

You generally have two paths when choosing a pavilion: a pre-built kit or a custom design. Pre-built kits can be a straightforward option, but they often limit your choices in size, style, and materials. A custom-built pavilion, on the other hand, is designed specifically for you and your property. This approach allows you to create a structure that perfectly matches your home’s aesthetic and fits seamlessly into your landscape. Gappsi specializes in building custom outdoor pavilions that can include everything from a full outdoor kitchen to a cozy fireplace, creating a complete outdoor living space tailored to your vision. A custom build ensures your pavilion is a true extension of your home.

Common Myths About Pavilion Cost and Upkeep

Two common misconceptions about pavilions are that they are incredibly expensive and require constant maintenance. While a pavilion is a significant investment, its cost is a reflection of its permanence and quality. Unlike a flimsy canopy, a pavilion is a solid structure built to last. As for upkeep, modern materials have made maintenance easier than ever. While wood requires some care, materials like vinyl and aluminum are incredibly durable and need little more than an occasional cleaning. Some people also worry a pavilion might overwhelm their yard, but a thoughtful design ensures it complements the space beautifully, unlike some gazebos which can feel bulky and enclosed.

How to Choose a Pavilion Builder in Suffolk County

Finding the right builder for your pavilion is just as important as choosing the perfect design. You’re not just hiring a contractor; you’re partnering with a team that will bring your vision for outdoor living to life. The best builders combine technical skill with a deep understanding of your personal style and the unique demands of the Long Island environment. They listen to your ideas, offer expert guidance, and manage the project from the first sketch to the final nail, ensuring the result is a beautiful, durable extension of your home.

Local Climate Expertise

A builder who understands Suffolk County’s climate is essential. Our weather, from humid summers and coastal breezes to heavy winter snow, puts any outdoor structure to the test. A knowledgeable builder will design a pavilion that can handle these challenges, making your outdoor space usable all year. They will recommend appropriate materials and structural reinforcements to ensure your investment stands strong for decades. A team with deep local roots can build pavilions that are not only beautiful but also perfectly suited for Long Island living, giving you a reliable and comfortable retreat no matter the season.

Custom Design and Expert Advice

Your pavilion should be a reflection of you. A great builder offers more than just a standard kit; they provide custom design services to create a space that fits your lifestyle. As one expert notes, “Incorporating beautiful outdoor structures into a landscape design offers not just functionality, but also a personal touch that can reflect the homeowner’s style and preferences.” A true design partner will help you integrate the pavilion with your existing patio, pool, or garden, creating a cohesive and inviting backyard. Their landscape design expertise ensures your new pavilion feels like it was always meant to be there.

High-Quality Materials and Craftsmanship

A pavilion is a permanent addition to your home, so durability is key. The quality of the materials and the skill of the builders will determine how well your structure ages. At Gappsi, we use pavilion kits from Country Lane Gazebos, which are custom-built to your exact needs. They are “made from strong materials like wood, vinyl, and aluminum, and come with a 10-year warranty.” This commitment to quality ensures your pavilion is built to last. Excellent craftsmanship is visible in the details: clean joints, a flawless finish, and a solid foundation that will support your structure for years of enjoyment.

Let’s Build Your Dream Pavilion in Suffolk County

Building a pavilion is one of the most rewarding ways to transform your backyard, and it’s an exciting project to take on. Think of a pavilion as a permanent, freestanding structure with a solid roof held up by posts. It’s your dedicated spot for outdoor living, giving you a beautiful, sheltered space to enjoy your yard without worrying about a sudden rain shower or the intense summer sun. By working with experienced professionals, you can create a stunning structure that perfectly suits your home and lifestyle.

The first step is to think about its purpose. How do you see yourself using this new space? Will it be a cozy spot for family dinners, a large area for entertaining guests, or a poolside lounge for relaxing after a swim? Your answer will help determine the best size and location. You’ll want it to be easily accessible from your home but also positioned to offer the right amount of privacy and the best views of your yard. Gappsi specializes in creating custom pavilions and pergolas that are designed specifically for your needs.

Many homeowners in Suffolk County are taking their pavilions to the next level by adding custom features. We build stunning outdoor kitchen pavilions that become the true heart of the backyard, complete with everything you need for cooking and entertaining. If you aren’t the do-it-yourself type, it’s important to choose a builder who handles the entire process from design to installation. This ensures your vision comes to life exactly as you imagined, creating a durable and beautiful extension of your home that you’ll enjoy for years.

Related Articles

Frequently Asked Questions

What’s the main difference between a pavilion and a pergola? The simplest way to tell them apart is to look at the roof. A pavilion has a solid, continuous roof that provides complete protection from both direct sun and rain, essentially creating a true outdoor room. A pergola, however, has a slatted or open-lattice roof that offers partial, filtered shade but won’t keep you dry during a downpour.

How much maintenance does a pavilion actually require? The level of upkeep really depends on the material you choose for your structure. A classic wood pavilion will need some periodic care, like staining or sealing, to keep it protected from the weather. If you prefer a more hands-off approach, vinyl and aluminum are fantastic choices. They are extremely durable and typically only require an occasional cleaning to keep them looking brand new.

Do I really need a permit to build a pavilion in Suffolk County? Yes, a permanent structure like a pavilion almost always requires a building permit. Each town and village on Long Island has its own specific zoning laws that regulate things like the structure’s size, height, and distance from your property lines. An experienced local builder can handle this entire process for you, ensuring your project is designed and built according to all local codes.

Can a pavilion be added to my existing patio or pool deck? Of course. A custom-designed pavilion can be planned to feel like a natural extension of your current outdoor living areas. We can create a design that connects seamlessly with your patio to form one large, cohesive space for entertaining, or we can position it poolside to act as a shaded cabana for relaxing after a swim.

What is the first step I should take if I’m considering a pavilion? The best first step is to think about how you want to use the space. Do you envision a cozy dining area, a large entertainment hub, or a quiet spot to relax? Having a clear purpose will help guide all the other decisions, like size, location, and what custom features you might want to include. Once you have an idea, we can help you refine the vision and design a structure that fits your yard and your lifestyle perfectly.

Share this page: