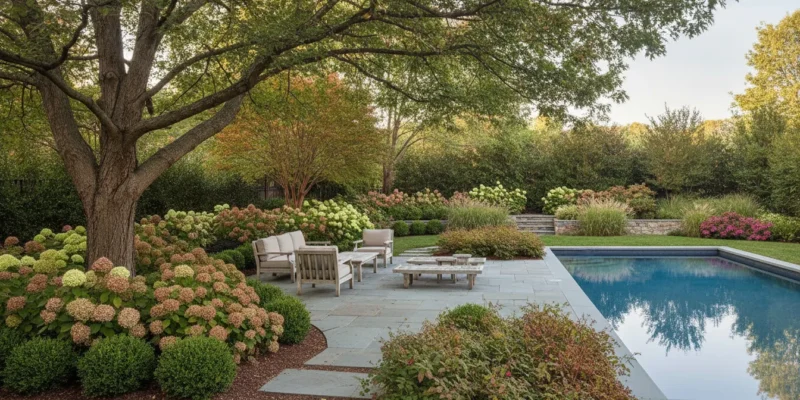
Tree and shrub planting framing a Long Island patio and pool

Tree Planting Service for Long Island Yards

Planting around a Long Island pool or patio is not simply a matter of choosing attractive greenery. Nassau and Suffolk properties can present compact planting areas, changing grades, coastal exposure, drainage concerns, and mature-size limits. These conditions affect plant health and the way an outdoor room feels. The right plan considers those conditions before a shovel reaches the soil. Contact Gappsi through our contact page

A tree planting service helps Long Island homeowners match trees and shrubs to local site conditions. Set root flares at the proper depth, allow room for mature growth, and coordinate grading with patios, pools, privacy screens, and walkways.

That coordinated approach starts with understanding why professional planning can be a better fit than treating each planting as an isolated task.

What Makes a Tree Planting Service a Better Fit for Long Island Yards?

Planting a tree is not simply a matter of choosing a species and digging a hole. On a Long Island property, the planting plan needs to work with the home’s architecture, existing grades, patios, pools, walkways, and the space available for future growth. A coordinated professional approach helps homeowners make these decisions before a tree becomes difficult to move or begins competing with nearby features. Site-specific selection is one of the clearest advantages. Professional tree planting guidance considers the local climate, soil conditions, and available space when matching a tree to a property. Davey describes this as placing the right tree in the right place for local climate and soil conditions: professional tree selection guidance. That evaluation can also account for the intended role of the planting, such as creating privacy screening, softening a masonry wall, framing a view, or adding structure beside an outdoor room. Timing is another practical consideration. The best planting season depends on local climate conditions and the specific species. A professional can help determine when installation is appropriate rather than relying on a universal calendar. This matters when planting is part of a larger project, because grading, irrigation, hardscape construction, and plant installation need to be sequenced thoughtfully. The goal is not to force every part of the yard to happen at once. It is to make each phase support the next one. Gappsi approaches planting as part of a broader design-build process. Its scope includes 3D landscape design, grading, planting installation, tree supply and installation, privacy screening, irrigation, and integrated hardscape planning. That coordination gives the planting plan a direct relationship to the rest of the yard. For example, tree placement can be considered alongside pool circulation, patio edges, drainage paths, and the sightlines from the house instead of being treated as an isolated add-on. This approach is especially useful for homeowners in Nassau and Suffolk Counties planning a substantial backyard update. A single coordinated plan makes it easier to discuss the intended function of each planting, the space available at maturity, and how the landscape should relate to the built elements. It also gives the homeowner one design conversation for the connected outdoor environment rather than separate decisions that may conflict later. Contact Gappsi through our contact page

How Should You Choose Trees and Shrubs for a Long Island Property?

The right planting plan begins with the property, not a catalog photograph. Long Island sites can vary by slope, exposure, soil type, compaction, available light, drainage, and the amount of space around a home, patio, or pool. UMass Extension recommends evaluating these conditions, along with hardiness zone and soil nutrient availability, before choosing plant material. Review the full site-evaluation guidance when planning a new bed or screening area. That evaluation helps connect the planting design to the way you use the property. A tree near a patio may provide shade and structure, while a shrub grouping can soften a masonry edge or create privacy along a boundary. Near a pool, the design should account for circulation, sightlines, maintenance access, and the relationship between the planting beds and hardscape. Gappsi incorporates planting into broader landscape planning, so trees and shrubs can support the same layout as the patio, pool, and outdoor living areas. Explore Long Island landscape planning for a coordinated approach.

Use the site and the plant’s mature form as your starting point

Before selecting a species, assess the conditions that will remain after installation. Then compare each candidate’s mature characteristics with the intended function. A plant that fits its location at installation may become crowded, shade nearby beds, or interfere with views as it grows. UMass Extension identifies growth habit, ultimate size, maintenance needs, pest and disease resistance, function, and potential invasiveness as important selection considerations.

  • Mature size and growth habit: Allow room for the eventual height, width, canopy, and root zone instead of choosing only for the plant’s current appearance.
  • Sun and exposure: Match the plant’s light requirements to the conditions at the planting location, including changes caused by buildings, fences, and existing trees.
  • Soil and drainage: Consider soil type, compaction, pH, nutrients, and how water moves through the bed. A low area beside a retaining wall may require a different selection than a well-drained raised site.
  • Maintenance: Account for pruning, watering, leaf cleanup, pest monitoring, and access. Choose a level of upkeep that fits the household and the rest of the landscape.
  • Privacy and screening: Use the desired sightline, screening height, bed depth, and mature spread to guide the layout rather than placing plants at an arbitrary interval.
  • Seasonal interest: Combine foliage, structure, flowering, and other seasonal characteristics to keep the landscape engaging beyond one short bloom period.

There is no universal list of guaranteed choices for every Nassau or Suffolk County property. A thoughtful tree planting service should review the site, clarify the purpose of each planting area, and select material that suits the conditions and the design. That process protects sightlines, preserves usable space, and helps the landscape mature as part of one cohesive outdoor setting.

Planting Depth and Spacing: What Prevents Early Problems?

Correct placement is more than setting a tree in a hole and filling around it. A new tree may have only 5% to 20% of the fine absorbing roots found on an established tree of the same size. So the planting process should protect the remaining root system while giving it room to recover. Colorado State University Extension explains why transplant shock matters, especially when the root ball is disturbed or the tree is installed at the wrong grade. For a Long Island property, the installation sequence should also account for utilities, compacted soil, drainage, mature canopy, and nearby patios or pools. Use this checklist as a practical framework for coordinating a tree planting service with the rest of your outdoor plan:

  1. Mark utilities before any digging. Call 811 before breaking ground so underground electric, gas, water, sewer, and communication lines can be located. Seattle’s tree guidance recommends calling at least two days before digging and marking the proposed planting area in white. Confirm the marked route against your design, then adjust the tree location if needed. This safety step applies whether the work is performed by a homeowner or a professional crew.
  2. Find the root flare. Locate the point where the trunk visibly widens and the first structural roots begin. Do not use a graft union or a small root emerging from the trunk as the reference point. The root flare should sit slightly above existing ground level because roots need oxygen. Colorado State Forest Service guidance on locating the root flare provides the right visual distinction.
  3. Inspect the root ball. Remove or correct circling and crossing roots when appropriate, and keep the root ball intact during handling. The goal is to establish roots outward, not leave a constricting pattern against the trunk.
  4. Set the hole depth and width to the root ball. The root ball should rest on firm, undug soil so settling does not cause the tree to sink or tilt. Digging too deep is a common planting error and can contribute to trunk-girdling roots and early decline. The hole should provide room for the root ball to be positioned correctly and for roots to move into the surrounding soil, rather than simply creating a narrow underground cavity.
  5. Plan spacing around mature growth. Place trees and shrubs according to their expected canopy, root zone, privacy function, and relationship to structures. Avoid invented one-size-fits-all spacing rules. Instead, evaluate the available space, light, drainage, slope, compaction, and soil conditions, as recommended by UMass Amherst’s planting guidance. This is especially important when framing an outdoor living area. Gappsi’s outdoor living design approach can coordinate planting locations with paths, seating, and hardscape edges.
  6. Support establishment without changing the grade. Backfill carefully, keep soil off the trunk, and provide the watering and follow-up care appropriate for the species and site. Watch for settling, leaning, drainage problems, or stress during establishment. Correcting a depth issue early is far easier than managing decline after roots and trunk tissue have been affected.

How Do Grading and Drainage Affect New Plantings?

Water movement is one of the most important site conditions to address before installing trees and shrubs around a Long Island patio or pool. Gappsi approaches planting as part of the larger landscape plan, coordinating topsoil grading, ground preparation, drainage, irrigation, and planting installation rather than treating each task as a separate project. Grading shapes how rainwater and irrigation move across the property. A well-planned grade can guide water away from structures and hardscape while allowing planting areas to receive the moisture they need. The goal is not simply to move as much water as possible. It is to create a site where water does not routinely collect around a root ball, wash soil away from a bed, or leave newly installed plants competing with saturated soil.

Why does drainage matter during establishment?

New trees and shrubs are adjusting to a disturbed root environment, so the planting bed must support consistent care. Water that remains trapped around the roots can reduce the air available in the soil. At the other extreme, runoff can carry away topsoil and leave roots without dependable moisture. Before choosing plant material, review the site conditions. The University of Massachusetts Amherst outlines key factors including slope, soil type, compaction, light, drainage, available space, and soil nutrients in its site evaluation guidance for trees and shrubs. That evaluation is especially relevant beside a pool or patio. Masonry, coping, walkways, and other hard surfaces change where water travels. A planting bed placed along those edges needs to work with the surrounding grade, not create a low spot that receives uncontrolled runoff. Drainage planning can also help preserve clean bed edges and reduce the need for repeated soil correction after heavy rain. Trees and shrubs framing a Long Island pool
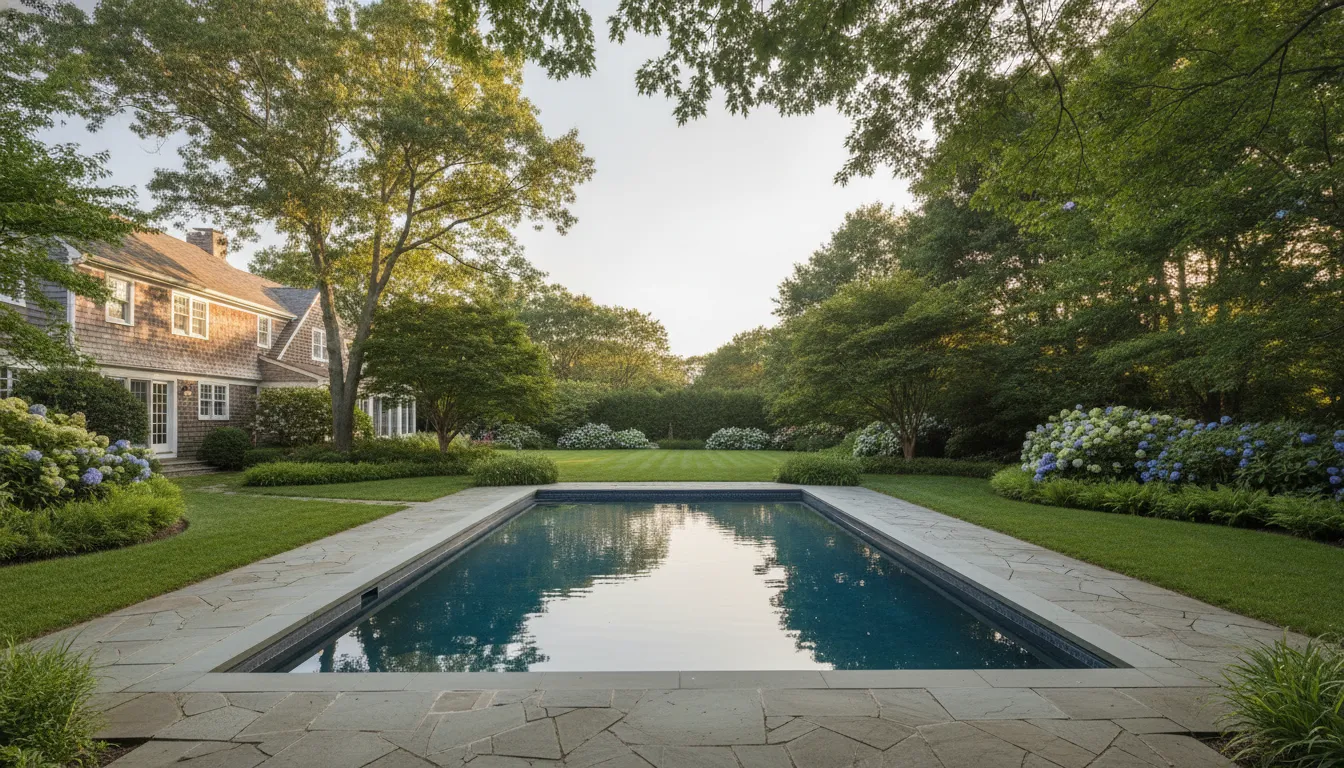
How are grading and irrigation coordinated?

Grading and irrigation should be planned together. Grading establishes the basic movement of water, while irrigation supports the planting areas after installation. Gappsi can coordinate both with the planting design, including the placement of trees and shrubs that frame outdoor rooms, screen selected views, or soften a hardscape transition. This coordinated approach helps the landscape relate to the patio or pool instead of appearing added after construction. For a property-wide plan, review Gappsi landscape design and planting to see how grading, drainage, irrigation, and planting can be considered alongside the rest of the outdoor design.

Using Plantings to Frame Patios, Pools, and Outdoor Rooms

Planting design gives a hardscape project a sense of proportion and connection. Rather than placing trees and shrubs wherever space remains, an integrated plan uses them to define edges, soften masonry, guide movement, and shape views across the yard. On Long Island, that plan should account for the relationship between the planting bed, the pool deck, patio, grading, drainage, and the mature size of each plant. Plantings should support how the space is used. A layered bed can make a patio feel more private without closing it in. A carefully positioned canopy can provide shade near an outdoor seating area, while lower shrubs preserve sightlines around a pool. The CDC notes that strategic tree placement can enhance curb appeal, provide shade, and reduce cooling costs. Read the CDC guidance on strategic tree placement. Layered planting bed beside a stone patio
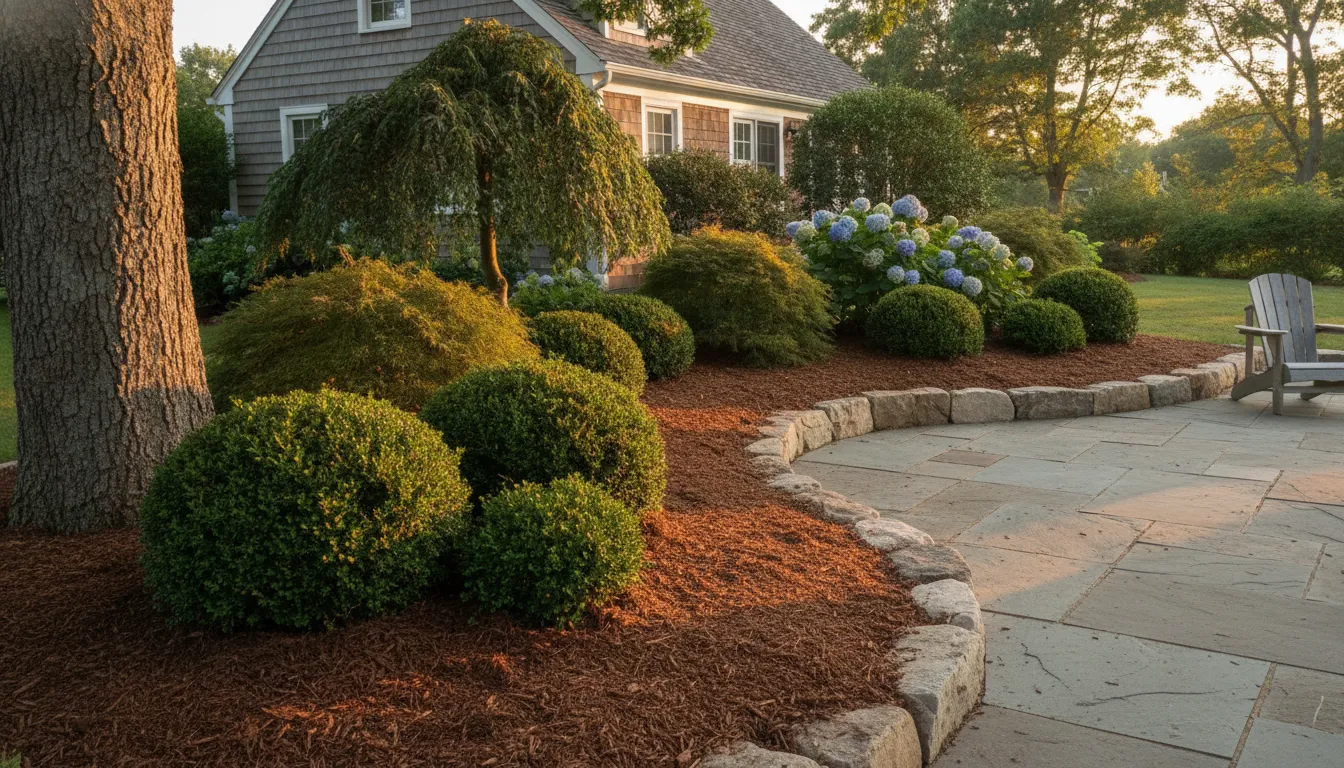
How planting design supports different outdoor settings
Setting Planting role Planning priority
Patio. Soften bed edges and shape privacy. Preserve seating space, views, and access.
Pool. Frame the water and connect it to the yard. Coordinate mature size, maintenance, drainage, and circulation.
Boundary. Build layered screening and define the property line. Match plants to available space, exposure, and growth habit.
Entry. Guide arrival and emphasize the home approach. Balance visibility, scale, and year-round structure.

Coordinate the planting plan with the hardscape

Gappsi approaches planting as part of the broader design-build process. Its landscape planning can integrate 3D landscape design, grading, planting installation, tree supply and installation, privacy screening, irrigation, and hardscape planning. That coordination matters because a tree canopy, privacy screen, or planting bed should be considered alongside paving lines, retaining conditions, drainage paths, and the clearances needed for pool equipment and outdoor circulation. For example, a pool landscape may need openness near the water and stronger screening at the property boundary. A patio may benefit from planting that creates enclosure while leaving room for furniture and maintenance. The best arrangement is not simply the densest one. It is the one that fits the site and the way your household uses the room. Explore custom pool planning as part of a connected backyard design, or discuss the broader plan with a Long Island landscape team serving Nassau and Suffolk Counties.

What Does Professional Tree Planting Include After Installation?

Installation is only one part of a successful planting project. After the tree or shrub is in the ground, a professional team reviews how the new material relates to the surrounding landscape, including the grade, drainage, irrigation, hardscape, and future canopy. That final review helps ensure the planting is not treated as an isolated feature, especially when it sits near a patio, pool, walkway, or outdoor room. On Long Island properties, this coordination matters because the planting bed may be connected to several other systems. Gappsi can align planting installation with grading and irrigation planning, so water movement and access are considered alongside the placement of trees and shrubs. The goal is a landscape that functions as one design, rather than a collection of unrelated improvements. Explore Gappsi landscape design and planting for more information about that broader approach.

What watering guidance should homeowners receive?

Newly installed plants need clear, property-specific watering guidance. The right approach depends on the species, season, soil, exposure, root-ball condition, and whether an irrigation system serves the bed. A professional review can explain where water should be applied and how to observe the soil and plant for signs that conditions need attention. It is better to follow guidance based on the actual site than to rely on a fixed schedule that may not suit every planting location.

How are mulch and bed finishes handled?

A finished planting bed should protect the root zone while fitting the design of the property. Mulch can help moderate soil conditions and give the bed a defined appearance, but it should be placed carefully around the plant. Keep the trunk and root flare visible rather than piling material against them. The surrounding finish may also include a clean bed edge or a transition to pavers, lawn, or another landscape material. These details affect both appearance and long-term observation of the planting.

What does establishment monitoring involve?

Monitoring means checking the new planting as it settles into its location, watching for changes in soil moisture, stability, foliage, and overall condition. It also provides an opportunity to identify conflicts with irrigation, drainage, foot traffic, or nearby construction before they become harder to address. Professional tree planting does not guarantee a particular result. It gives homeowners a clearer process for supporting the plant during establishment and responding to site conditions as they develop. Contact Gappsi through our contact page

Frequently Asked Questions

How do I choose the right trees and shrubs for my Long Island property?

Start with the site, not the plant catalog. Review sun exposure, soil type, drainage, slope, available space, and mature size, then match those conditions to the plant’s growth habit, maintenance needs, function, and resistance to local pests. This approach helps a planting work with your patio, pool, privacy goals, and existing grade. The University of Massachusetts lists these factors as core parts of a tree and shrub site evaluation: site evaluation guidance.

How deep should a newly planted tree be?

The root flare, where the trunk begins spreading into roots, should remain visible and sit slightly above finished ground level. The root ball should rest on firm, undisturbed soil so it does not settle and tilt. Planting too deeply can restrict oxygen around the roots and contribute to trunk-girdling roots, a known cause of decline. Colorado State University explains the importance of locating the root flare and setting proper planting depth in its tree-planting guidance.

How far should trees be spaced from patios, pools, and structures?

Spacing depends on the selected species’ mature canopy and root-ball size, along with utilities, sightlines, drainage, and the maintenance access required around the hardscape. A planting plan should leave room for mature growth rather than spacing trees by their nursery size. Near a pool or patio, the goal is to frame the space without blocking circulation, interfering with equipment, or creating a future conflict with paving and structures.

What should happen before digging for a tree planting project?

Underground utilities should be located before any hole is excavated. Call 811 before digging, and allow the required marking time for your area. This applies whether the homeowner or a professional crew is doing the work. Colorado State University recommends calling before you dig, while Seattle’s tree guidance advises calling 811 at least two days before planting: digging safety guidance.

Ready to Plan Your Long Island Planting?

A coordinated planting plan can help connect trees, shrubs, patios, pools, grading, and the rest of your outdoor space. Gappsi can discuss the right planting approach for your property and how each element should work together. Contact Gappsi through our contact page to talk through tree and shrub planting, grading, and a coordinated Long Island landscape plan.
Share this page:
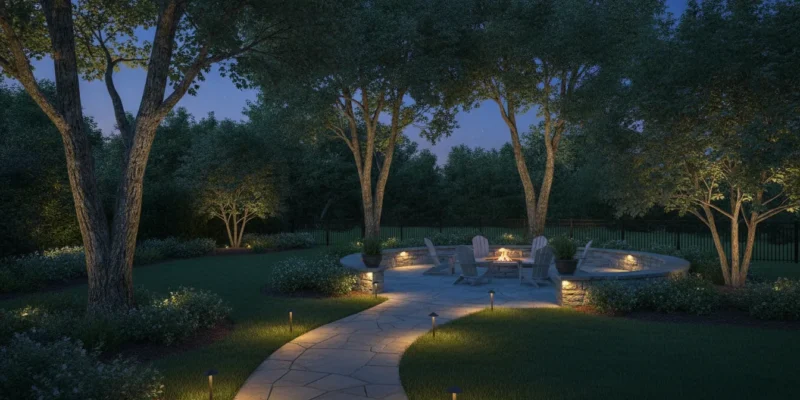
Low-voltage landscape lighting along a Long Island stone patio and walkway

Landscape Lighting Design on Long Island

Outdoor spaces on Long Island change character after sunset. A front walk, patio, planting bed, retaining wall, or pool approach can lose the structure that makes it useful during the day. A thoughtful plan restores visibility while preserving comfortable darkness and the character of the property.

Contact Gappsi through our contact page

Landscape lighting uses carefully positioned, low-voltage LED fixtures to guide movement, highlight architecture and planting, and extend the practical use of outdoor living areas. Gappsi plans these systems around light distribution, fixture placement, hardscape details, controls, and maintenance rather than treating lighting as a collection of isolated fixtures.

This guide explains how low-voltage systems work, which fixture types serve common outdoor spaces, how to plan a layout, what affects installation cost, and how lighting can be coordinated with patios, walls, pools, and planting.

What Is Low-Voltage Landscape Lighting and Why Use It?

A low-voltage landscape lighting system uses a transformer to supply outdoor fixtures with reduced electrical voltage. It commonly powers efficient LED lamps along paths, planting beds, walls, patios, steps, and other exterior features. The system should be designed around how people use the property, not placed wherever an outlet happens to be available.

The result depends on matching the light source, fixture position, beam direction, and control schedule to each task. A walkway may need soft, even guidance. A mature tree may need a narrower accent. A retaining wall may benefit from a controlled wash that shows texture without shining into nearby windows. The National Park Service explains that choosing the task area, fixture height, and light distribution helps limit glare and unwanted spill through its outdoor lighting principles.

How can landscape lighting improve safety and security?

Thoughtful lighting can make steps, changes in grade, walkways, and entry transitions easier to read during evening use. It can define the route from a driveway to a front door and make a patio or pool approach easier to navigate. It can also make the exterior of a home more visible from the approach. These effects can support a safer-feeling arrival, but lighting alone does not guarantee security.

Gappsi’s existing landscape lighting design guidance describes the relationship between safety, security, and appearance. The practical goal is balanced visibility, not maximum brightness.

Why choose LED and an integrated design?

LED fixtures use energy efficiently and can provide focused output for paths, trees, walls, and gathering areas. Responsible placement also reduces unnecessary light trespass. A professional plan considers the home’s facade, mature planting, masonry, circulation routes, and evening routines together. Lighting can be coordinated with Gappsi hardscaping and masonry services so steps, seat walls, patios, and retaining walls support the same nighttime composition.

Contact Gappsi through our contact page

Which Fixtures and Techniques Work Best?

The best fixture is the one that serves a clear purpose in the layout. Path lights should orient people without creating a bright runway. Uplights can give a tree or column more height. Downlights can illuminate a walking surface from above. Accent fixtures can draw attention to a specimen plant or textured masonry, while wall washes spread softer light across broader surfaces.

  • Path lights: Guide walkways, steps, and planting-bed edges with controlled illumination.
  • Uplights: Aim a managed beam into a tree canopy, column, or architectural feature to add depth.
  • Downlights: Cast light toward steps, paving, seating, or paths from an elevated position.
  • Accent lights: Focus attention on a specimen tree, planting group, or stone detail.
  • Wall wash fixtures: Spread light across a facade or retaining wall instead of creating a hot spot.
  • Well lights: Sit flush with the ground where an in-ground fixture can illuminate a tree or wall discreetly.
  • Hardscape lights: Fit beneath caps, benches, ledges, or steps to add concealed illumination.
  • Shielded fixtures: Limit direct views of the lamp and help keep light out of windows, seating areas, neighboring properties, and the sky.

Technique matters as much as hardware. Uplighting should reveal the branching structure of a tree without aiming glare toward guests. Downlighting is useful for a walking surface because the beam follows the task area. Wall washing works best when the fixture distributes light evenly. A narrower accent can create contrast on textured stone or a focal plant.

Glare control should guide every decision. Hide fixtures behind planting where practical, shield the light source, and use the lowest output that serves the area. This lets the eye move between lit features and darker areas. Gappsi can coordinate fixture placement with Long Island landscape design, patios, masonry, planting, and circulation routes.

How Should You Plan a Landscape Lighting Layout?

A successful layout begins before fixtures are selected. Walk the property after sunset and identify where light supports a real activity, guides movement, or reveals a feature worth seeing. The task-first approach described by the National Park Service is useful on Long Island properties where paths, planting beds, patios, and masonry share a limited footprint.

  1. Map task areas. Mark the front walk, driveway edge, steps, patio, outdoor kitchen, seating area, pool approach, and routes between the house and backyard. Make changes in elevation easy to read without shining fixtures toward a person’s eyes.
  2. Choose focal points. Identify the tree, specimen planting, retaining wall, entry, architectural detail, or masonry feature that should anchor the nighttime view. Add softer nearby illumination so the composition does not become one bright spot surrounded by darkness.
  3. Connect architecture and planting. Consider the facade, columns, rooflines, trees, shrubs, and beds as one composition. Account for future plant growth, views from interior rooms, and sightlines from outdoor seating.
  4. Find dark zones and control glare. Look for abrupt gaps near gates, steps, paths, and transitions between hardscape and lawn. Fill only the areas that need visual continuity. Keep light away from bedrooms, roads, neighboring properties, and the sky.
  5. Plan the transformer and load. Count fixtures by type and group them by zone. Paths, architectural accents, entertaining areas, and security-oriented locations may need separate controls or schedules.
  6. Test the design at night. Inspect the property from the sidewalk, driveway, patio, and primary interior viewpoints. Move or shield anything that causes glare, hot spots, or unwanted spill before final positions are fixed.

For a Long Island project, Gappsi can coordinate the layout with existing or planned outdoor construction. Homeowners can also review the landscape design and construction guide when planning a larger outdoor environment.

How Much Does Landscape Lighting Installation Cost?

There is no responsible one-size-fits-all price for landscape lighting installation. A professional estimate is site-specific because the scope depends on the property, desired nighttime use, access, and how the system must work with existing or planned construction. Gappsi evaluates the layout before recommending equipment, wiring, and controls rather than presenting an unsupported generic range.

The number of fixtures is one cost driver, but it is not the only one. A small group of path lights may require less labor than a broader design with uplighting. Wall washing, stair illumination, concealed hardscape fixtures, multiple zones, and restoration around established planting or paving can also change the scope. See Gappsi’s professional low-voltage LED landscape lighting service.

Landscape lighting cost drivers and planning questions
Cost driver Planning question
Fixture count and type Which paths, trees, walls, steps, beds, or gathering areas need light, and what effect should each fixture create?
Transformer and wiring Will the transformer support the planned load, and can wiring be routed efficiently while keeping connections protected?
Trenching and access Will installation cross established planting, lawn, paving, masonry, or areas requiring careful restoration?
Hardscape coordination Should lighting be planned with a patio, retaining wall, outdoor kitchen, pool edge, or steps before construction?
Controls and maintenance Do you need timers or zones, and who will clean lenses, check connections, and adjust fixtures?

Scope matters more than a fixture count alone. Planning lighting with masonry and planting can reduce disruptive rework and produce a more consistent result. Shielded fixtures and appropriate distribution direct light toward the task area while limiting glare and spill. A consultation can connect lighting priorities with existing conditions and future outdoor plans.

How Can Lighting Be Integrated Into Patios, Walls, and Pools?

Lighting works best when planned with the hardscape rather than added after construction. A patio, retaining wall, outdoor kitchen, pergola, or pool edge already has lines, steps, material changes, and gathering points that can guide fixture placement. Gappsi’s hardscaping and masonry work can be coordinated with low-voltage lighting so the finished backyard remains useful after sunset.

Patios and outdoor kitchens need layers that match each activity. Low-profile fixtures can provide subtle illumination beneath a seat wall, counter edge, or step. A covered patio may need a separate source for a dining table or food-preparation surface. Wall-mounted fixtures can define entries, while accent lights can reveal stone, brick, or stucco texture without flooding the area.

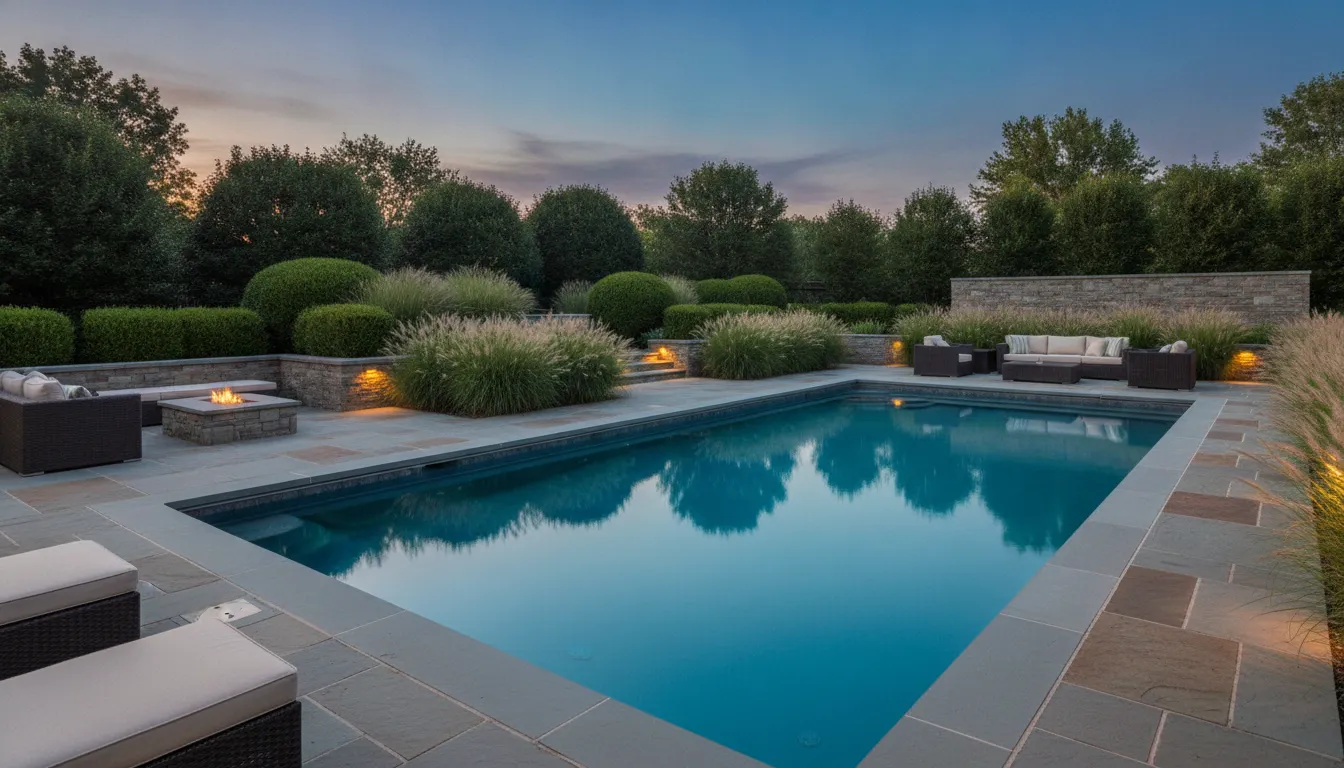
Warm low-voltage landscape lighting along a Long Island patio walkway

Walkways, steps, and retaining walls require attention to transitions. Small indicator or path fixtures can mark an edge without creating a bright line of evenly spaced lamps. Concealed hardscape fixtures under caps and steps can show changes in elevation while preserving the material’s daytime appearance. A wall wash can reveal texture, but the fixture must not shine directly into nearby windows or seating.

Pool edges and planting beds should be designed as one visual composition. Lighting can support movement around the deck, identify a change in grade, and highlight selected planting without creating reflections across the water. The plan should account for views from the house, seating areas, and paths. See the Gappsi swimming pool service for broader pool-project context.

Contact Gappsi through our contact page

What Maintenance Does Landscape Lighting Need?

Outdoor lighting needs periodic attention because fixtures live among soil, pollen, leaves, salt residue, irrigation, and changing plants. Maintenance should be part of the original plan. Clean lenses and housings, check connections, and confirm that fixtures still point toward their intended task area.

  • Clean lenses and housings: Remove dirt, pollen, leaves, and residue that reduce useful output.
  • Check alignment: Re-aim fixtures after planting grows, soil shifts, or seasonal work changes the view.
  • Inspect wiring: Look for damage, loose connections, or areas exposed by erosion or digging.
  • Review controls: Adjust timers and zones as sunset times change or outdoor routines evolve.
  • Manage planting: Trim growth that blocks a beam or causes unwanted shadows.

Long Island properties may need attention after storms, heavy rain, landscaping work, and winter conditions. A maintenance check is also a useful time to reassess glare, light trespass, and whether the original layout still matches how the property is used.

Frequently Asked Questions

What is the cost of professional landscape lighting installation?

Professional landscape lighting installation is priced by site and scope. Fixture types, fixture count, transformer capacity, wiring routes, access, trenching, controls, hardscape coordination, and restoration all affect the estimate. Gappsi reviews the property and intended nighttime use before recommending a project-specific system.

What are the benefits of low-voltage landscape lighting?

Low-voltage landscape lighting can improve visibility on paths and steps, highlight architecture and planting, and extend the use of patios and other outdoor areas after dark. LED fixtures can provide focused output, while shielding and careful placement help limit glare and unwanted spill.

How do you choose the right outdoor lighting fixtures?

Choose fixtures by task, not by appearance alone. Path lights guide movement, uplights add height, downlights illuminate surfaces from above, accent lights focus attention. Wall washes spread light across broad surfaces, and hardscape fixtures add concealed illumination to steps or caps.

Can landscape lighting be integrated into existing hardscapes?

Yes. Existing patios, walls, steps, outdoor kitchens, pergolas, and pool edges can be assessed for discreet fixture placement and safe wiring routes. The installer should account for material protection, access, sightlines, and glare before cutting, trenching, or attaching fixtures.

What is the typical maintenance requirement for outdoor lighting?

Maintenance usually includes cleaning lenses, checking connections, re-aiming fixtures, adjusting timers, inspecting wiring, and managing plants that block the light. Frequency depends on the landscape, weather, irrigation, salt exposure, and how much the planting changes.

Contact Gappsi through our contact page

Share this page:
Above ground swim spa landscaping idea with a modern stone paver patio and evergreen shrubs.

9 Inspiring Above Ground Swim Spa Landscaping Ideas

The height and bulk of an above ground swim spa can feel like a design challenge, but it’s actually a creative opportunity. Instead of trying to hide it, you can work with its structure to create a dynamic, multi-dimensional space. Building a deck up to its edge can give it a seamless, built-in look, while surrounding it with raised stone planters can make it feel like a natural part of the garden. The goal is to make the spa look intentional and beautifully integrated. We’ve gathered our favorite above ground swim spa landscaping ideas to help you solve this design puzzle and turn your spa into a stunning architectural feature in your yard.

Key Takeaways

  • Design around your spa, not just next to it: Make your swim spa look intentional by building a deck, patio, or garden beds that connect it to your yard. This approach helps manage the spa’s height and turns it into a beautiful, integrated feature instead of a standalone object.
  • Plan for low-maintenance enjoyment: Think about the practical details from the start to save yourself headaches later. This means ensuring a solid foundation, proper drainage for splashes, non-slip surfaces for safety, and choosing plants that will not make a mess in your water.
  • Layer privacy for a stylish retreat: Create a secluded oasis by layering different privacy solutions. Combine stylish fencing with vertical elements like a pergola or trellis, and use lush, year-round plants to build a natural screen that feels beautiful, not boxy.

What Makes Swim Spa Landscaping Unique?

Landscaping around a swim spa is a unique project that blends the best of pool design and garden planning. Unlike a traditional in-ground pool, a swim spa often sits above ground, creating a significant vertical element in your yard. Its compact size allows it to fit in spaces where a full pool might not, but its year-round usability means the surrounding area needs to be functional and beautiful in every season. The key is to create a design that feels intentional, making the spa a seamless and integrated feature of your outdoor living space rather than an afterthought.

Thinking about your swim spa landscaping requires a different approach. You have to consider how to manage its height, ensure the surrounding area is safe and accessible, and choose materials that complement the spa without causing damage. It’s a wonderful opportunity to create a personal retreat, whether that’s a lush garden oasis, a sleek modern patio, or a cozy, private corner. With the right planning, you can transform the area around your swim spa into your favorite spot to relax, exercise, and entertain.

Design Around the Height and Structure

An above-ground swim spa’s height is one of its most defining features, and your design should work with it, not against it. You can place a swim spa in several ways: completely above ground, partially recessed into the earth, or fully built into a multi-level deck. Each choice creates a different look and feel. A fully above-ground spa, for instance, requires stairs or a small deck for access, which can be designed to add architectural interest.

A partially recessed spa can soften the spa’s profile, making it feel more connected to the ground. This approach works beautifully with surrounding porcelain or natural stone pavers that create a smooth transition from the lawn or patio to the water’s edge. Building the spa into a larger deck structure is another popular option, creating a cohesive entertainment area with distinct zones for lounging, dining, and swimming. The goal is to make the spa look like it truly belongs in your yard.

Plan for Drainage, Safety, and Access

Practicality is just as important as aesthetics when it comes to swim spa landscaping. First, you need a solid, perfectly level foundation that can support the immense weight of the spa when filled with water, which can be around 20,000 pounds. This usually means a reinforced concrete slab or a specially engineered deck. Our expert masonry and construction teams can ensure your foundation is built to last.

Water will inevitably splash out, so proper drainage is critical. The surface around your spa should be slightly sloped to direct water away from the foundation and prevent pooling. It’s also vital to choose non-slip materials for decking and patios to keep the area safe. Finally, think about access. You’ll need easy entry and exit from the spa, but don’t forget about the equipment panel. Make sure your design leaves enough clear space for a technician to perform routine maintenance without having to tear up your beautiful landscaping.

Avoid These Common Landscaping Mistakes

A little foresight can help you avoid common mistakes that create extra work or even damage your investment. For example, never place sharp rocks, loose gravel, or stones directly against the acrylic shell of your swim spa. Over time, these materials can shift, potentially scratching the finish or putting pressure on the structure. It’s better to create a border a few inches away from the spa’s base.

You should also be mindful of what you plant nearby. Avoid trees and large shrubs with aggressive root systems that could disrupt the spa’s foundation over time. It’s also wise to steer clear of plants that drop a lot of leaves, flowers, or needles, as this debris will end up in your water and filter system. Working with a professional landscape designer can help you select the right plants and materials from the start, ensuring your swim spa area remains a low-maintenance sanctuary.

9 Landscaping Ideas for Your Above Ground Swim Spa

An above ground swim spa is a fantastic addition to any backyard, but it can look a bit stark sitting on its own. The right landscaping can transform it from a simple container of water into a stunning, integrated feature of your outdoor living space. This process is about creating a seamless transition between your home, your yard, and your new relaxation spot. With a thoughtful design, you can make your swim spa area beautiful, functional, and uniquely yours. Here are nine ideas to get you started on creating a beautiful and functional area around your swim spa.

1. Build a Wraparound Deck or Elevated Platform

One of the best ways to make an above ground swim spa feel like a permanent, luxurious part of your yard is to build a deck around it. A multi-level or wraparound deck can completely hide the sides of the spa, giving it the appearance of an in-ground installation. This approach also provides easy, safe access and creates usable space for lounge chairs, planters, or a small table. You can use materials like wood or low-maintenance composite decking to match your home’s style. A well-designed deck makes your swim spa the true centerpiece of your backyard oasis, perfect for both relaxing and entertaining.

2. Lay a Stone or Porcelain Paver Patio

Creating a solid, stylish foundation around your swim spa is essential for both looks and function. A patio made from porcelain or natural stone pavers provides a durable, slip-resistant surface that stands up to splashes and foot traffic. Unlike grass, a paver patio means no mud or grass clippings getting tracked into your spa. With a huge variety of colors, shapes, and textures available, you can design a patio that perfectly complements your home and landscape. This creates a clean, polished look and a stable area for furniture, turning your spa zone into a complete outdoor room.

3. Add a Pergola or Pavilion for Shade and Style

A structure like a pergola or pavilion does more than just look great; it adds function and a sense of enclosure to your swim spa area. These structures provide welcome shade on sunny days and offer protection from light rain, extending the time you can enjoy your spa. You can hang string lights for evening ambiance, grow climbing vines for a touch of green, or add outdoor curtains for extra privacy. A pavilion or pergola adds a vertical architectural element that defines the space and makes it feel like a true outdoor retreat.

4. Use Raised Garden Beds and Flower Borders

To soften the hard lines of a swim spa, surround it with life and color. Building raised garden beds around the base is a clever way to conceal the spa’s exterior while adding lush greenery. You can construct the beds from stone, wood, or composite materials to match your deck or patio. Fill them with a mix of flowering plants, textured foliage, and fragrant herbs to create a sensory experience. This approach helps your swim spa blend more naturally into your yard’s landscape design and turns it into a vibrant, beautiful focal point.

5. Plant Evergreen Shrubs and Ornamental Grasses

For year-round beauty and privacy, choose your plants wisely. Evergreen shrubs like boxwood or arborvitae provide a consistent green screen that hides the spa and blocks views from neighbors. They look great in all seasons and require minimal upkeep once established. To add texture and movement, mix in some ornamental grasses. Their feathery plumes catch the breeze and create a soft, natural look that contrasts nicely with the hardscape. Choosing the right plants for your landscape ensures your spa area looks beautiful and feels private throughout the year.

6. Create Pathways with Decorative Stone or Gravel

Well-defined pathways are key to a functional and polished landscape design. A path leading to your swim spa keeps feet clean and protects your lawn from wear and tear. You can create beautiful walkways using materials like flagstone, pavers, or decorative gravel. A winding gravel path can add a rustic, organic feel, while a straight paver walkway offers a more formal, modern look. Using Gravelfix stabilization grids ensures your gravel path stays neat and tidy. These pathways connect your swim spa to other areas of your yard, like the patio or back door, creating a cohesive flow.

7. Install Synthetic Turf for a Low-Maintenance Lawn

If you want the look of a lush lawn without the constant upkeep, synthetic turf is an excellent choice for the area around your swim spa. It provides a soft, comfortable surface for bare feet and stays perfectly green all year long with no mowing, watering, or fertilizing. Best of all, you won’t have to worry about mud or grass clippings getting into your spa water. Synthetic turf is incredibly durable and drains quickly, making it a practical and attractive solution for creating a clean, usable space for relaxation and play.

8. Add Lighting for Evening Ambiance

Don’t let the sunset end your swim spa enjoyment. Thoughtful outdoor lighting can transform your space into a magical retreat after dark while also improving safety. You can hang elegant string lights from a pergola, install subtle path lights along your walkway, or use uplighting to highlight beautiful trees and plants. In-deck lighting can define the spa’s perimeter and prevent trips. A well-planned landscape lighting scheme creates a warm, inviting atmosphere, making your evening soaks feel even more special and extending the usability of your entire backyard.

9. Incorporate a Soothing Water Feature

Why stop at just one water feature? Adding a small fountain or a cascading waterfall near your swim spa can greatly enhance the relaxing atmosphere. The gentle sound of moving water is incredibly soothing and can help mask unwanted background noise from neighbors or traffic. This feature can be a standalone piece or integrated into the surrounding patio or garden beds. It adds another layer of sensory enjoyment to your space, complementing the main attraction of your swim spa or pool and turning your backyard into a true sanctuary of tranquility.

What Are the Best Plants and Materials for a Swim Spa?

Choosing the right plants and materials to surround your swim spa is about more than just looks. It’s about creating a functional, safe, and low-maintenance environment so you can spend more time relaxing and less time on upkeep. The right combination of softscaping and hardscaping will frame your spa beautifully and make the entire space more enjoyable. From lush greenery to elegant stone, let’s explore the best options for your backyard oasis.

Choose Low-Maintenance Shrubs and Grasses

You want plants that look great without demanding all your free time. Evergreen shrubs are a fantastic choice because they provide year-round color and structure, effectively hiding the spa’s walls while adding a touch of green. Consider planting varieties like boxwood or dwarf arborvitae. Ornamental grasses, such as fountain grass or feather reed grass, are another excellent option. They add soft texture and movement to the landscape and are incredibly resilient. The goal is to create a beautiful backdrop that doesn’t shed leaves into your spa, which is why an expert landscape design often prioritizes these clean, hardy plants.

Add Color with Water-Tolerant Flowers

While shrubs provide the foundation, flowers bring your spa area to life with vibrant color. Layering colorful flowering plants in front of your evergreens creates depth and visual interest. Choose perennials that are known to be water-tolerant, like daylilies, hostas, or black-eyed Susans, as they can handle occasional splashes from the spa. Before planting, it’s a good idea to lay down a layer of mulch. Mulch helps the soil retain moisture, reduces weed growth, and gives the garden beds a clean, finished look. This simple step makes your flower borders much easier to maintain throughout the season.

Select the Right Base: Pavers, Gravel, and Stone

The material you choose for the area immediately surrounding your swim spa is critical for safety and style. A patio provides a stable, slip-resistant surface for getting in and out of the spa. Porcelain and natural stone pavers are top-tier choices because they offer endless design possibilities and incredible durability. They create a sophisticated, high-end look that stands up to the elements. For pathways leading to the spa or as a decorative accent, consider using gravel. Modern stabilized gravel systems keep the stones in place, creating a tidy and comfortable walking surface that adds a natural, rustic texture to your design.

Know What to Avoid Planting Nearby

Just as important as what you plant is what you don’t plant. Avoid trees or shrubs that drop a lot of flowers, fruit, or needles, as they will create constant cleanup work in and around your spa. Also, steer clear of plants with aggressive root systems that could damage the spa’s foundation or surrounding patio over time. When it comes to materials, never place loose rocks, stones, or gravel directly against the spa wall. These materials can trap moisture and may even chip or corrode the spa’s exterior. Instead, use proper masonry techniques to build a small, supportive retaining wall or raised border to keep these materials contained.

How Do You Add Privacy Without Losing Style?

Your swim spa should be a personal retreat, a place where you can relax without feeling like you’re on display. Creating privacy is essential, but it doesn’t mean you have to build a fortress around your yard. The key is to blend privacy solutions into your landscape design so they feel intentional and beautiful. Instead of just blocking views, think about creating a secluded sanctuary. With the right combination of structures, fencing, and plants, you can screen your swim spa from neighbors while adding depth, texture, and style to your entire outdoor living space. This approach turns a practical need into a design opportunity, making your backyard feel more like a cohesive and intimate escape. When privacy is part of the overall vision, it enhances the sense of luxury and tranquility. It allows you to fully immerse yourself in the experience, whether you’re exercising, unwinding after a long day, or spending time with family. The goal is to make your private space feel expansive and inviting on the inside, not closed off and restrictive from the outside.

Choose Fencing That Complements Your Design

Fencing is often the first solution that comes to mind for privacy, and for good reason. It’s effective and clearly defines your space. But a fence doesn’t have to be a plain, solid wall. Think of it as a backdrop for your swim spa oasis. You can choose materials and styles that match your home’s architecture and your garden’s aesthetic. For example, a horizontal wood fence can create a modern, spa-like feel, while a classic white vinyl fence offers a clean, traditional look. There are many modern fencing options available, from aluminum to composite materials, that provide privacy without sacrificing style. Consider a fence with integrated lattice at the top to add visual interest while still blocking sightlines.

Use Pergolas and Lattices for Vertical Privacy

Sometimes, privacy is needed from above, especially if your yard is overlooked by neighboring windows. This is where vertical structures shine. A custom pergola not only adds an elegant architectural element but also creates a sense of place around your swim spa. You can add retractable shades, outdoor curtains, or fixed slats to the roof for adjustable privacy and sun protection. Lattice panels can also be incorporated into the sides of a pergola or used as standalone screens. These are perfect for supporting climbing vines like clematis or jasmine, which will eventually form a beautiful, living wall that offers natural screening and a lovely fragrance while you relax.

Plant for Natural, Year-Round Screening

For a softer, more organic approach, nothing beats using plants to create a natural privacy screen. The goal is to build layers that look lush and intentional. Start with a backbone of evergreen shrubs or trees, like Arborvitae or Holly, which provide dense, year-round coverage even in winter. This is a key part of a strategic landscape design. Then, you can layer in ornamental grasses, flowering shrubs, and perennials to add texture, color, and seasonal interest. Planting in staggered rows rather than a single straight line creates a more natural and effective visual barrier. This method not only hides your swim spa from view but also integrates it beautifully into the surrounding garden.

How Do Budget and Yard Size Affect Your Design?

Your budget and the size of your yard are the two main factors that will shape your swim spa project. But don’t think of them as limitations. Instead, see them as creative starting points. A smaller budget encourages smart, high-impact choices, while a compact yard challenges you to be efficient and clever with your design. On the other hand, a larger budget or yard opens up a world of possibilities for creating a true backyard resort. No matter your circumstances, a thoughtful plan is the key to creating a space you’ll love.

Ideas for a Modest Budget

Creating a beautiful setting for your swim spa doesn’t have to break the bank. You can achieve a polished look by focusing on simple, elegant materials. For example, creating a clean, modern patio area with affordable and durable gravel solutions can define the space beautifully. Instead of complex garden beds, consider using large, attractive planters filled with low-maintenance greenery. This adds color and texture without the cost of extensive garden installation. Smart planning allows you to build a stylish and functional swim spa environment that feels luxurious, proving that a great design is more about creativity than cost.

High-End and Luxury Upgrades

If your budget allows, you can transform your swim spa into the centerpiece of a luxurious outdoor retreat. Imagine your spa surrounded by an expansive patio made from exquisite porcelain and natural stone pavers, seamlessly connecting to a custom outdoor kitchen. You can integrate high-end features like powerful swimming jets or self-cleaning systems into the spa itself. For ultimate comfort and style, adding a custom pavilion or pergola provides shade and a stunning architectural element. You could even create a complete wellness zone by installing a sauna nearby, offering a perfect escape right in your backyard.

Landscaping a Small Backyard

In a smaller yard, the goal is to make the space feel open and uncluttered while maximizing functionality. A great strategy is to build vertically. A privacy fence, a trellis with climbing vines, or tall, slender shrubs can draw the eye upward and create a sense of seclusion. A line of evergreen shrubs is an excellent choice because it can hide the walls of the swim spa and provides beautiful greenery all year. Using light-colored pavers for your patio can also make the area feel larger and brighter. For a green, no-fuss lawn area, synthetic turf is a perfect space-saving solution that always looks pristine.

Designing for a Large Backyard

A large backyard gives you the freedom to dream big and create distinct “zones” for different activities. Your swim spa can be the heart of a dedicated relaxation zone, perhaps built into a multi-level deck or surrounded by a sprawling stone patio. You can connect these areas with grand, winding pathways made from natural stone or decorative gravel. With more space, you can incorporate larger structures, like a complete outdoor kitchen or a dining area under a large pavilion. You could even add other recreational features, like a putting green or one of our Sports Games Courts, to create the ultimate entertainment hub for family and friends.

What Landscaping Style Is Right for You?

Your swim spa is the main attraction, but the right landscaping style sets the entire mood for your backyard. Think about the feeling you want to create. Do you dream of a tropical getaway, a serene Zen retreat, or a space that feels like a natural extension of your Long Island home? Choosing a theme helps guide your decisions on plants, materials, and decor, ensuring every element works together to create a cohesive and beautiful outdoor oasis. Let’s explore a few popular styles to find the perfect fit for you.

Create a Tropical or Mediterranean Escape

To make your backyard feel like a permanent vacation, a tropical or Mediterranean theme is a fantastic choice. For a lush, tropical vibe, surround your swim spa with large-leafed plants like elephant ears and canna lilies. Layering is key here. You can use evergreen shrubs to hide the spa’s structure and keep things green all year, then add pops of vibrant, colorful flowers in front. For a Mediterranean feel, think about materials like travertine or light-colored porcelain pavers. These options create a bright, sun-drenched look that pairs beautifully with lavender, rosemary, and ornamental grasses. It’s all about creating a rich, inviting atmosphere that feels worlds away.

Embrace a Modern or Zen Garden Approach

If you prefer clean lines and a sense of calm, a modern or Zen-inspired design is ideal. This style focuses on simplicity and the beauty of natural elements. Think minimalist. Decorate the area around your swim spa with carefully chosen plants, smooth stones, and sleek wood or tile accents. A limited color palette of greens, grays, and whites creates a tranquil feeling. A structured pavilion or pergola can add a strong architectural element that complements the modern aesthetic while providing shade. The goal is to design an uncluttered, peaceful space where you can truly unwind and escape from the everyday hustle.

Design a Naturalistic, Seamless Landscape

For a swim spa that looks like it has always been part of your yard, a naturalistic approach is perfect. This style aims to blend the spa seamlessly into its surroundings. Use local plants and materials that feel native to Long Island to create a cohesive look. You can place large, natural stones around the base of your above ground swim spa to give it a rustic, integrated feel. Our expert masonry services can help you build a custom stone surround that makes your spa look like a natural hot spring. This approach turns your backyard into a beautiful, functional space for family time and entertaining.

Frequently Asked Questions

How can I make my above-ground swim spa look more integrated and less like it was just dropped in my yard? The key is to build up the surrounding landscape to meet the height of the spa. Creating a multi-level deck or a raised stone patio around it can make the spa appear built-in, giving it a permanent and polished look. You can also use raised garden beds built against the spa’s base to soften the edges with lush greenery. These strategies help blend the spa into your yard, making it feel like a cohesive and intentional part of your outdoor living space.

What is the most critical first step before any landscaping begins? Before you think about plants or patios, you must ensure you have a proper foundation. A swim spa is incredibly heavy when filled with water, so it needs a perfectly level and reinforced concrete slab or a specially engineered deck to support it. Proper site preparation also includes planning for drainage to direct splash-out away from the spa and your home’s foundation. Getting this step right is essential for the safety and longevity of your entire project.

I have a small backyard. Will landscaping around a swim spa make it feel even more cramped? Not at all, if you design it thoughtfully. In a smaller space, the trick is to think vertically. Using tall, slender plants like arborvitae or installing a stylish privacy screen can draw the eye upward and create a sense of seclusion without taking up much ground space. Choosing light-colored pavers for a small patio can also make the area feel more open and bright. A smart design will make your small yard feel like a functional and intimate retreat.

How do I choose plants that won’t create a huge mess or damage the spa? You want to select plants that are clean and have non-aggressive root systems. Evergreen shrubs and ornamental grasses are excellent choices because they provide year-round color and texture without dropping a lot of leaves into your water. Avoid planting large trees nearby, as their roots can disrupt the foundation over time. Also, steer clear of plants that shed a lot of flowers or fruit to minimize your cleaning duties and keep your filter system happy.

Can I landscape my swim spa area myself, or should I hire a professional? While you can certainly handle smaller tasks like arranging container plants or adding decorative lights, the core elements of a swim spa installation often require professional expertise. Projects involving a concrete foundation, extensive masonry, multi-level decking, and proper drainage are best left to experienced contractors. A professional designer can also help you create a cohesive plan that pulls all the elements together, ensuring your investment is both beautiful and built to last.

Share this page:
Laying concrete blocks to build a retaining wall on a level gravel base.

How to Build a Retaining Wall with Blocks: A DIY Guide

A sloped yard can feel like a wasted opportunity, a tricky incline that’s difficult to mow and even harder to enjoy. A retaining wall is the perfect solution, transforming that challenging grade into beautiful, usable space for a garden, patio, or play area. This guide will walk you through how to build a retaining wall with blocks, covering everything from planning and site prep to the final capstone. We’ll focus on the critical steps, like creating a solid foundation and managing drainage, that ensure your wall is built to last. Understanding these fundamentals is key, whether you plan to tackle the project yourself or want to know what to expect when working with our expert masonry team.

Key Takeaways

  • Focus on a flawless first row: Your entire wall’s stability depends on the base course. Make sure to bury the first row of blocks partially and use a level on each one, both front to back and side to side, to create a perfect foundation.
  • Create a path for water to escape: Heavy, waterlogged soil is a wall’s worst enemy. Protect your investment by installing a perforated drainage pipe and backfilling with at least a foot of clean gravel to relieve pressure and prevent collapse.
  • Know when to call a professional: Always check local building codes before starting your project. If your wall is over three feet tall, built on a steep slope, or involves a complex design, hiring an expert is the best way to guarantee a safe and durable structure.

Plan Your Retaining Wall Project

A successful retaining wall starts long before you lay the first block. Proper planning is the most important step to ensure your wall is strong, beautiful, and built to last. Taking the time to choose the right materials, understand your site, and check local rules will save you from headaches down the road. Think of this phase as creating the blueprint for your project. It’s where you make the key decisions that will define the look and function of your new landscape feature.

Choose the Right Blocks

The blocks you choose are about more than just strength, they define the style of your wall. Block retaining walls come in a huge variety of colors, textures, and patterns, making it easy to find a look that complements your garden and home. Do you want a rustic, natural feel or something more modern and sleek? Consider the existing materials in your landscape. Matching your wall to your patio pavers or home’s stone veneer can create a cohesive, professionally designed look. Our Gappsi team can show you a wide range of porcelain and natural stone options to help you find the perfect match for your vision.

Concrete vs. Interlocking vs. Natural Stone

Your wall’s height and purpose will help you decide on the best material. Interlocking concrete blocks are a popular choice for DIY projects because they are engineered to fit together securely. For shorter walls, typically under three feet, these are a great option. If your design calls for a taller structure, you’ll need to consider structural blocks or even poured concrete, which often requires a professional. While you might be able to install a short concrete block wall yourself, taller and more complex projects should be handled by an expert masonry construction company to ensure they are engineered for safety and longevity.

Gather Your Materials and Tools

Before you start digging, make sure you have everything you need. A typical project requires the retaining wall blocks, capstones for a finished top, and construction adhesive to secure them. You will also need materials for the foundation and drainage, including gravel and a perforated drainage pipe. For tools, you’ll want a sturdy shovel, a wheelbarrow, a tape measure, a string line, a level, and a hand tamper or plate compactor to create a solid base. Having all your materials and tools ready on-site makes the entire building process go much more smoothly and helps you avoid interruptions.

Check Local Building Codes and Permits

This is a step you absolutely cannot skip. Many towns on Long Island require a permit for retaining walls, especially for any wall over three or four feet high. These building codes exist to ensure your wall is safe and won’t fail under pressure. A collapsing wall is a serious safety hazard and can cause major property damage. For any wall taller than four feet, you will likely need a licensed engineer to approve the design. We always recommend checking with your local building department in Suffolk or Nassau County before you begin. If it seems complicated, our team can help manage the entire process for you.

Prepare the Site for Your Wall

You’ve planned your project, and now it’s time to get your hands dirty. Site preparation is arguably the most important part of building a retaining wall that lasts. A little extra effort here prevents a lot of headaches later. Think of it as building the perfect foundation for your project. A strong start ensures your wall will stand straight and true for years, handling everything Long Island weather throws at it. This process involves marking your layout, digging a precise trench, and creating a solid base. It’s physical work, but seeing that clean, prepped space ready for your first row of blocks is incredibly satisfying.

Before you break ground, take a final look at your plan. Double-check your measurements and make sure you have all your tools ready to go. Proper preparation is about more than just digging; it’s about working smart to create a stable structure that enhances your property’s beauty and function. If you start digging and find the scope is bigger than you expected, or you run into unexpected pipes or roots, don’t panic. Remember that our team of masonry experts are always here to help guide you or take over if needed. Let’s walk through each step together.

Mark and Measure the Wall’s Location

First things first, let’s create a clear guide for your wall. Grab some wooden stakes and a string line. Hammer the stakes into the ground at both ends of where your wall will be, then run the string tightly between them. This simple line will be your best friend, keeping your trench and your wall perfectly straight. For curved walls, you can use a garden hose or marking paint to outline the shape on the ground. Take a step back and look at your outline from different angles. Does it look right? Making adjustments now is much easier than after you’ve started digging. This visual guide is essential for accuracy.

Dig the Trench to the Proper Depth

With your path marked, it’s time to start digging. Your goal is to create a trench for the base course of blocks. A good rule of thumb is to make the trench about twice as wide as your retaining wall blocks. For depth, you’ll want to dig deep enough to bury about half of your first block, plus space for a 4 to 6-inch gravel base. For most standard blocks, this means digging a trench about 8 to 12 inches deep. This ensures the base of your wall is locked firmly into the ground, giving it the stability it needs. The exact dimensions will depend on the natural stone or concrete blocks you’ve chosen, so always check their specifications.

Compact the Soil and Add a Gravel Base

Once your trench is dug, don’t just start laying blocks. You need to create a solid, level footing. First, use a hand tamper to compact the soil at the bottom of the trench until it’s firm. Next, add a layer of crushed stone or gravel, about 4 to 6 inches deep. This gravel base is critical for drainage and preventing the ground from shifting. Spread the gravel evenly and then compact it with the tamper until it’s tightly packed and, most importantly, perfectly level. Use a carpenter’s level to check it from side to side and front to back. Your entire wall depends on this first layer being flawless.

Understand How Soil Type Affects Stability

Here on Long Island, we have a mix of soil types, from sandy loam to denser clay. The type of soil in your yard plays a big role in your wall’s stability. Sandy soils drain well but can be less stable, while clay soils hold water and can create immense pressure when they freeze and thaw. If you dig your trench and find very soft, mucky, or loose soil, it’s best to remove it. Dig a little deeper and replace that unstable dirt with more compacted gravel. This creates a stronger footing for your wall to rest on. Understanding your specific ground conditions is a key part of a successful landscape design and construction project.

Lay the Foundation Row

This is it, the moment of truth. Laying the first row of blocks, also known as the foundation or base course, is the single most important step in building a retaining wall. Everything you do from here on out depends on getting this part right. A perfectly straight and level foundation row sets you up for a stable, strong wall that looks professionally built. Rushing this stage is a recipe for a crooked, unstable wall, so grab your level, take a deep breath, and let’s focus on creating a flawless base for your project.

Bury the First Row to the Correct Depth

To give your wall the stability it needs to stand strong for years, you must bury the first row of blocks partially below ground. This anchors the entire structure and prevents it from sliding forward under pressure. A good rule of thumb is to bury at least half of the first block. For example, if you’re using a standard 6-inch-tall block, your trench should be deep enough to bury at least 3 inches of it. This means your initial trench, including the gravel base, should be about 9 inches deep from the final grade. Getting this depth right is a non-negotiable part of building a lasting wall, and it’s a detail our masonry experts never overlook.

Level the Foundation for a Stable Base

Once your trench is ready, it’s time to place the first blocks. Your goal here is perfection. Each block must be perfectly level, both from side to side and from front to back. Use a torpedo level to check each block as you place it, and a longer 4-foot level across several blocks to ensure they are all aligned. If a block isn’t level, use a rubber mallet to gently tap it into the gravel base until it is. Any imperfection here will be magnified as you add more rows, resulting in a visibly crooked wall. Take your time, because as many installation guides will tell you, a flawless first course is the key to a beautiful finish.

Avoid Common First-Row Mistakes

The most common mistake DIYers make is underestimating how much time and patience the foundation row requires. It’s easy to get frustrated and want to move on, but rushing will derail your project. Don’t be surprised if getting the first few blocks perfectly level takes a while. Another pitfall is not following the manufacturer’s instructions for the specific blocks you’re using. Different systems, whether they are interlocking concrete or natural stone blocks, can have unique requirements for setup and alignment. Always read the guide that comes with your materials. Taking the time to get this first row right will save you from major headaches and a wobbly wall later on.

Manage Drainage Behind the Wall

Water is a retaining wall’s greatest enemy. When soil becomes saturated, it gets incredibly heavy and exerts immense force, known as hydrostatic pressure, against the back of your wall. Without a proper escape route, this pressure can cause a wall to bulge, crack, or even collapse. Creating a solid drainage plan is not just a good idea; it is the most critical step for ensuring your wall remains strong and stable for years to come. Think of it as building a hidden system that gives water an easy path to follow, guiding it away from your wall so it never has a chance to cause damage.

The following steps will show you how to create a complete drainage system using a perforated pipe, the right backfill material, and structural reinforcement. Taking the time to manage water correctly from the start will protect your investment and prevent future problems. Ignoring drainage can lead to significant damage, which is why our restoration and sealing services are often called to fix issues caused by poor water management. A little extra effort now will save you from major headaches down the road.

Install a Perforated Drainage Pipe

A perforated drainage pipe is your wall’s primary tool for collecting and redirecting water. This is a flexible or rigid pipe with small holes or slits designed to let water in. Place the pipe on the gravel base directly behind your first row of blocks. To keep it from getting clogged with silt and debris, it’s a great idea to cover the pipe with a fabric filter sock. This simple addition ensures water can flow freely for the life of the wall. The pipe should be laid with a slight downward slope, about an eighth of an inch per foot, to let gravity carry the water away. Make sure the end of the pipe, or the “daylight,” opens to a location where water can drain safely, like a downslope area or a dry well.

Backfill with Gravel for Proper Water Flow

The material you place directly behind your wall is crucial for effective drainage. Do not use the soil you excavated. Instead, you need to backfill with a layer of 3/4-inch clean, crushed gravel. This angular stone locks together to form a stable, porous mass that allows water to flow freely down to the drainage pipe at the base. This gravel zone should be at least 12 inches wide, creating a clear channel for water to travel without building up pressure against the wall blocks. At Gappsi, we rely on high-quality aggregates for everything from durable gravel driveways to solid foundations because we know proper materials are the key to lasting results.

Use Geogrid Reinforcement for Taller Walls

If your retaining wall will be taller than three to four feet, you must include geogrid reinforcement. Geogrid is a strong, synthetic mesh that stabilizes the soil behind the wall, effectively tying the wall structure into the earth it is holding back. This reinforcement is laid horizontally across the top of the blocks and extends several feet back into the gravel fill. As you add more courses to your wall, you will add more layers of geogrid according to the block manufacturer’s specifications. This step is essential for preventing taller walls from leaning or failing under pressure. For any wall of significant height, geogrid is a critical safety feature that our professional masonry team incorporates into every project.

Know Your Wall’s Height Limitations

Not all retaining wall blocks are created equal, and it’s important to know their limits before you start building. Smaller, solid concrete blocks sold at big-box stores are typically designed for simple garden walls under three feet tall. For anything higher, you will need to use larger, engineered interlocking blocks designed to handle greater structural loads. These systems are specifically designed for taller walls and often have their own requirements for setbacks and reinforcement. Pushing a block system beyond its engineered height limit is a recipe for failure. If your project involves a tall or complex wall, it is always best to consult with a professional to ensure it is designed and built safely.

Build and Finish Your Wall

With your foundation set and drainage in place, you’re ready for the most rewarding part: building the wall itself. As you stack the blocks, you’ll see your project come to life. This stage is all about precision and patience. Taking your time with each row ensures your wall will be strong, stable, and straight for years to come. Pay close attention to staggering the joints, keeping everything level, and finishing the top with care.

Stagger Joints in a Running Bond Pattern

As you begin your second row, avoid placing the blocks directly on top of the ones below so the seams line up. Instead, you’ll want to create a running bond pattern. This means staggering the joints on each new row, similar to a brick wall. The vertical seam of a block on an upper row should sit over the center of the block below it. This simple technique is crucial because it distributes pressure across the entire wall, making it significantly stronger and more stable. Many block systems are designed for this, and you may need to cut a block in half to start a new row correctly.

Check for Level and Setback as You Build

After you place each block, check that it’s level from front to back and side to side. A small mistake on a lower row will become a very noticeable problem by the time you reach the top. It’s also important to follow the manufacturer’s instructions for setback. Many retaining wall blocks are designed with a lip or pin system that creates a slight, consistent step back with each new course. This backward lean helps the wall resist pressure from the soil behind it. Our expert masonry team knows that consistent checks are the key to a professional-looking and structurally sound wall.

Apply Adhesive to Secure the Capstones

The capstones, or coping, are the flat blocks that create the finished top surface of your wall. They provide a polished look and protect the wall structure from water. Before you place them, make sure the top row of your wall is clean and completely dry. Apply a generous bead of concrete or masonry adhesive to the top of the wall blocks, then firmly press the capstones into place. This final step secures the entire structure, preventing the top blocks from shifting over time and giving your wall a beautiful, completed appearance.

Add Finishing Touches for a Polished Look

A retaining wall doesn’t have to be just a functional structure. Think of it as a new feature in your yard. You can integrate lighting into the wall for a beautiful evening glow or build in planters to create a tiered garden space. Consider planting cascading flowers or lush greenery behind the wall to soften its edges and blend it into the surrounding environment. A well-designed wall can completely transform a sloped yard into a multi-level outdoor living area. If you need ideas, our landscape design services can help you visualize how to best integrate your new wall into your property.

Know When to Call a Professional

While tackling a retaining wall yourself can be incredibly rewarding, some projects are best left to the pros. Knowing when to step back and call for help isn’t admitting defeat; it’s making a smart, informed decision to protect your investment and ensure your family’s safety. Complexities like wall height, challenging terrain, and local regulations can quickly turn a weekend project into a major headache with long-term consequences if not handled correctly. Think about the sheer weight of the soil your wall will hold back. A small miscalculation in the base or drainage can lead to bulging, cracking, or even a complete collapse down the road.

A professionally built wall is an asset that adds lasting value to your home. When you bring in an expert, you’re not just paying for labor. You’re investing in years of experience, technical knowledge, and the peace of mind that comes from knowing the job was done right. Our team has the expertise to design and build retaining walls that are both beautiful and structurally sound, handling every detail from start to finish. We ensure the final structure is built to last, giving you a functional and gorgeous addition to your landscape.

Signs Your Project Needs an Expert

It can be tough to gauge a project’s difficulty from the outset. Here are a few clear signs that your retaining wall requires a professional touch. If your planned wall is taller than three or four feet, it will need special reinforcement and possibly an engineer’s approval to handle the immense pressure behind it. Building on a steep slope or dealing with poor drainage also adds significant complexity. These situations require expert planning to prevent erosion and structural failure. Finally, if you have an intricate, multi-tiered, or curved design in mind, a professional can ensure the final result matches your vision without compromising stability.

The Benefits of Hiring a Masonry Pro

Hiring a professional mason offers benefits that go far beyond simply getting the wall built. An experienced team brings a level of craftsmanship that ensures your wall is not only strong but also visually stunning. We provide expert masonry construction that stands the test of time. Professionals also take the stress of logistics off your plate. We understand local building codes and will secure all the necessary permits for your project, saving you from potential fines or safety issues. Ultimately, hiring a pro guarantees a high-quality, durable, and compliant structure that enhances your landscape for years to come.

Related Articles

Frequently Asked Questions

How high can I build a retaining wall myself? Generally, most DIY-friendly block systems are designed for walls under three or four feet tall. Once you go higher than that, the project becomes much more complex. Taller walls must support an incredible amount of soil pressure, so they require professional engineering, specific reinforcement like geogrid, and almost always a building permit to ensure they are constructed safely.

Why is proper drainage so essential for a retaining wall? Water is the biggest threat to a retaining wall’s stability. When soil behind the wall gets saturated with rain, it becomes extremely heavy and pushes against the blocks with immense force. A proper drainage system, which includes a gravel backfill and a perforated pipe, gives that water an escape route. Without it, the pressure can build up and cause your wall to bulge, crack, or even collapse over time.

What makes the first row of blocks so important? The first row, or foundation course, sets the standard for the entire wall. It must be partially buried to anchor the structure and prevent it from sliding forward. More importantly, it has to be perfectly level. Any small error or tilt in this first row will become much more obvious as you build higher, resulting in a crooked, unstable wall. Taking your time here is the best thing you can do for your project.

How do I know when to call a professional for my wall project? You should consider hiring a professional if your wall will be taller than four feet, if you are building on a very steep slope, or if you notice the soil is extremely soft or mucky. Complex designs with deep curves or multiple tiers are also best handled by an expert. Calling a pro isn’t giving up; it’s a smart move to ensure the safety, longevity, and beauty of your investment.

How do I choose the right material for my wall? Your choice of material depends on your wall’s height and your home’s style. Interlocking concrete blocks are a fantastic, user-friendly option for shorter walls and come in many colors and textures. For a more unique or high-end look, natural stone offers timeless beauty. The best approach is to consider your existing landscape and home exterior, and choose a material that complements them to create a cohesive, polished look.

Share this page:
Workers begin the landscape construction phase of a new design project.

Your Guide to the Landscape Design Construction Process

Your yard should be a true reflection of you. Whether you dream of a quiet garden retreat, a fun-filled area with a pool and sports games court, or a sophisticated space for entertaining, it can all be achieved. The art of creating these personalized environments is landscape design construction. It’s a collaborative process that combines your unique vision with a designer’s expertise and a builder’s skill. This partnership ensures your outdoor space is not just another project, but a custom-built oasis that perfectly matches your lifestyle, needs, and personal taste, making your home truly one-of-a-kind.

Key Takeaways

  • Plan your project before you build: A successful landscape transformation begins with a detailed plan that covers design, materials, and budget; this initial phase is crucial for preventing costly surprises and ensuring the final result aligns with your vision.
  • Choose a unified team for a smoother process: Partnering with a full-service firm simplifies everything because one team handles both design and construction, which ensures clear communication, total accountability, and a better overall experience.
  • Design for how you actually live: Think beyond aesthetics to create functional outdoor rooms that suit your needs, whether that means a low-maintenance patio, a custom swimming pool, or a family-friendly sports games court that you will enjoy for years.

What Is Landscape Design and Construction?

Landscape design and construction is the art and process of transforming your outdoor area into a space that is both beautiful and functional. It’s about creating a thoughtful plan that brings together all the elements of your yard, from the plants and trees to the patios and walkways, into one cohesive vision. Think of it as interior design, but for the outside of your home. A great landscape project doesn’t just happen; it’s carefully planned and expertly built.

This process involves two major phases: the design, where ideas are born and plans are drawn, and the construction, where those plans are brought to life. It’s a collaboration between your vision and a designer’s expertise to create an outdoor environment that suits your lifestyle, whether you dream of a quiet garden retreat, a lively entertainment hub, or a safe place for your kids to play. A professional landscape design and construction firm handles everything from the initial sketch to the final installation, ensuring every detail is perfect.

Hardscaping vs. Softscaping

Every great landscape has a balance of two key components: hardscaping and softscaping. Hardscaping includes all the non-living, structural elements in your yard. Think of things like stone patios, walkways, retaining walls, and even gravel driveways. These features create the foundation and define the layout of your outdoor space. Softscaping, on the other hand, is all the living, horticultural stuff, like flowers, shrubs, trees, and grass. It adds color, texture, and life to the landscape.

According to design experts, both are essential for creating a balanced and functional outdoor space. A yard with only hardscaping can feel cold and sterile, while one with only softscaping might lack structure and usability. The real magic of professional landscape design is in how these two elements are woven together. A winding stone path through a vibrant garden or a beautiful wooden pergola covered in climbing roses are perfect examples of hardscape and softscape working in harmony.

Water Features and Specialty Installations

Beyond the basic structure, specialty installations can truly personalize your landscape. Water features are a fantastic way to add a dynamic and sensory element to your yard. This can be anything from a classic tiered fountain to a modern waterfall cascading into a custom swimming pool. The gentle sound of moving water creates a peaceful, soothing atmosphere that can mask neighborhood noise and turn your backyard into a serene escape.

These installations do more than just look pretty; they create a focal point and enhance the entire experience of your outdoor space. As noted by industry trend reports, water features add a unique aesthetic and auditory experience that can transform a simple yard into a luxurious retreat. Other specialty installations, like custom fire pits or even outdoor saunas, can also be integrated into your design to create a one-of-a-kind environment tailored specifically to how you want to relax and unwind at home.

Outdoor Living Spaces

One of the most popular goals in modern landscape design is to create true outdoor living spaces. This is all about extending your home’s functional area into the backyard by designing dedicated zones for relaxing, cooking, and entertaining. Think of it as adding another room to your house, just without the walls. These spaces can include fully equipped outdoor kitchens, cozy lounge areas with fire pits, and dining spots set under a beautiful pavilion or pergola.

This trend is all about making your yard an inviting and practical part of your daily life. By creating these functional environments, you get more usable square footage and a perfect setting for making memories with family and friends. Well-designed outdoor living spaces seamlessly connect your indoor and outdoor worlds, encouraging you to spend more time enjoying the fresh air right at home.

The Landscape Design Process: Step by Step

Bringing a landscape design to life is an exciting journey that transforms your property from its current state into the outdoor oasis you’ve always wanted. While every project is unique, the process generally follows a structured path from initial idea to final installation. Understanding these steps helps you know what to expect and allows for a smooth, collaborative experience with your design and construction team. At Gappsi, we manage every detail, ensuring a seamless transition from one phase to the next. This approach means you don’t have to juggle different contractors; our integrated landscape design team handles everything from the first sketch to the final stone laid. We believe that clear communication and a transparent process are the foundation of a successful project and a happy client. Let’s walk through the five key steps to creating your dream outdoor living space.

Step 1: Initial Consultation and Site Review

This first meeting is all about your vision. It’s our opportunity to listen to your ideas, understand your lifestyle, and learn how you want to use your new outdoor space. We’ll discuss your goals, whether you’re dreaming of a serene garden, a lively entertainment area with a swimming pool, or a functional outdoor kitchen. During this consultation, our team will also conduct a thorough site review. We’ll assess your property’s existing conditions, including its size, topography, sun exposure, and soil type. This initial step is crucial for creating a design that is not only beautiful but also practical and perfectly suited to your home’s specific environment.

Step 2: Design and Material Selection

After the initial consultation, our designers get to work turning your vision into a tangible plan. We create detailed designs, often including 2D layouts and 3D renderings, that allow you to visualize the final result before construction even begins. This is the creative phase where we map out everything, from the placement of patios and walkways to the selection of plants and lighting. You’ll also explore material options for your project. We’ll guide you through our extensive selection of high-quality materials, including beautiful porcelain and natural stone, to find the perfect textures and colors that match your home’s aesthetic and your personal style.

Step 3: Permits and Local Approvals

Before any ground is broken, it’s essential to secure all necessary permits and approvals from your local municipality. Navigating town codes and regulations can be a complex and time-consuming task, but it’s a critical part of the process. A professional landscape company will handle this for you. Our team is experienced with the specific requirements in towns across Long Island, from Suffolk to Nassau County. We manage all the paperwork and submissions to ensure your project is fully compliant with local zoning laws and building codes. This step protects your investment and ensures the construction process can proceed without any unexpected delays or legal issues.

Step 4: Construction and Installation

With the design approved and permits in hand, it’s time to bring your project to life. Our skilled construction crews will begin the installation process, managed by a dedicated project leader who oversees every detail. Because Gappsi is a full-service firm, we handle every aspect of the build in-house, from excavation and masonry to planting and the installation of specialty features like pergolas or sports games courts. Having one team responsible for the entire project ensures a consistent level of quality and efficient coordination. We work diligently and respectfully on your property, aiming to complete the construction with minimal disruption to your daily life.

Step 5: Final Walkthrough and Maintenance Plan

Once the construction is complete, we’ll conduct a final walkthrough with you to ensure every element of your new landscape meets your expectations. This is your opportunity to review the finished project and ask any questions you may have. Our commitment to you doesn’t end when the job is done. We’ll provide you with a customized maintenance plan to help you care for your new outdoor space, including tips for plant care and hardscape upkeep. For continued care, we also offer professional restoration and sealing services to keep your patios, driveways, and stonework looking pristine for years to come.

Overcoming Common Landscape Project Hurdles

Any major home improvement project can feel a bit daunting, and landscaping is no exception. From budgets to permits, a few common hurdles can pop up along the way. But don’t worry, a little bit of planning and the right professional partner can make the entire process feel smooth and straightforward. Knowing what to expect is the first step, so let’s walk through some of the typical challenges and how an experienced team helps you sidestep them, ensuring your project stays on track from start to finish.

Sticking to Your Budget

One of the biggest concerns for any homeowner is keeping the project within budget. A good starting point is to understand that landscape design and construction costs typically range from 10% to 15% of your home’s total value. To avoid surprises, it’s also wise to set aside a contingency fund. Experts recommend allocating an extra 10% to 20% of your total budget for any unexpected issues, like difficult site conditions that need extra work. A transparent contractor will provide a detailed, itemized quote, so you know exactly where your money is going before any work begins. This clarity helps you make informed decisions about materials and features for your masonry and patio work.

Working with Site and Soil Conditions

Your property is unique, and sometimes the ground beneath it holds a few surprises. Poor drainage, rocky soil, or buried debris can complicate a project if they aren’t discovered early. One of the biggest risks to your budget and timeline comes from incomplete or unclear designs that don’t account for these site-specific issues. An experienced landscape design team will conduct a thorough site analysis at the very beginning. By understanding Long Island’s specific soil types and topography, they can anticipate challenges and create a solid plan that prevents costly changes down the road. This proactive approach ensures a smoother construction phase and a more durable, beautiful result.

Handling Permits and Regulations

Depending on your project’s scope, you will likely need permits from your local town. Projects like swimming pools, pavilions, and major retaining walls almost always require municipal approval. The process for getting permits in the different regulations across Nassau and Suffolk County can be a complex and time-consuming task. The cost of a building permit can also vary, often ranging from a few hundred to several thousand dollars based on your project’s size and location. Working with a full-service firm like Gappsi is a huge advantage here, as our team manages the entire permitting process for you. We handle the paperwork and inspections, so you can focus on the exciting parts of your project.

Ensuring Clear Communication

Clear and consistent communication is the foundation of a successful project. You should feel informed and confident every step of the way. From the initial design consultation to the final walkthrough, having a single point of contact who provides regular updates can make all the difference. Effective client communication is about more than just progress reports; it’s about building a trusting relationship. It ensures your vision is understood and that any questions or concerns are addressed promptly. This open dialogue helps guarantee that the finished landscape is exactly what you dreamed of, without any misunderstandings along the way.

How Much Does Landscape Design Cost?

Let’s talk about one of the biggest questions on every homeowner’s mind: what is this going to cost? The truth is, landscape design pricing isn’t one-size-fits-all. The cost depends entirely on your vision, your property, and the scope of the work. Think of it like commissioning a piece of art for your yard; the final price reflects the complexity and materials involved. Understanding the potential costs upfront helps you plan a realistic budget and ensures you can create the outdoor space you’ve been dreaming of without any financial surprises along the way.

Understanding Typical Cost Ranges

When you start looking for professional help, you’ll find that designers and landscape architects often charge either by the hour or a flat fee for the entire design project. Hourly rates can range from $50 to $150, depending on the professional’s experience and the services included. For a full project, the average landscape design cost can fall anywhere between $2,200 and $6,200. A simple planting plan for your front yard will be on the lower end, while a comprehensive master plan for your entire property with detailed construction drawings will be at the higher end. This initial design fee is your investment in a solid plan, which is the most important step to a successful project.

What Affects the Final Price?

Several key factors will influence the total cost of your landscape project. The size of your property is a major one, as a larger area requires more materials and labor. The complexity of your design also plays a huge role. A simple lawn with a few garden beds is very different from a backyard that includes a custom swimming pool, an outdoor kitchen built with intricate masonry, and a shaded pergola. Your choice of materials is another significant variable. Using high-end porcelain and natural stone for your patio will cost more than standard concrete pavers, but it also provides a more luxurious and durable finish.

Hidden Costs to Look For

To keep your project on track, it’s helpful to know about potential costs that might not be obvious at first. One of the biggest risks comes from making significant design changes after construction has already started. It’s best to finalize your plan before the work begins. Another area to consider is site preparation. This can include costs for demolition of old structures, hauling away debris, and grading the land to ensure proper drainage. These steps are critical for a lasting installation but are sometimes overlooked in initial homeowner budgets. Finally, remember that permits and inspections have associated fees that you’ll need to account for.

How to Budget for Your Project

Creating a budget you’re comfortable with is the key to a stress-free renovation. Start by making a list of your must-haves and your wish-list items. This helps you prioritize where to allocate your funds. If your dream landscape is more than you want to spend at once, consider phasing the project over a couple of years. You could install the patio and pool this year and add the outdoor kitchen and plantings next year. Most importantly, always set aside a contingency fund. Experts recommend allocating an extra 10% to 20% of your total budget for unexpected issues, like discovering a buried boulder during excavation or dealing with weather delays. This safety net ensures a small surprise doesn’t derail your entire project.

How to Choose the Right Landscape Company

Selecting the right landscape company is the most important decision you’ll make for your project. The right partner will not only bring your vision to life but also make the entire process smooth and enjoyable. A great company acts as your guide, helping you navigate material choices, design decisions, and construction logistics with confidence. They should have a proven track record, be fully insured, communicate clearly, and stand behind their work. Think of it as hiring a creative partner for your home. You want someone whose style you admire and whose process you can trust. Before you commit, take the time to research your options thoroughly. Look at their past projects, ask the tough questions, and make sure you feel a genuine connection. This initial effort will pay off tenfold when you’re relaxing in a beautiful outdoor space that was completed on time, on budget, and exactly as you imagined.

Review Their Portfolio and Experience

A company’s portfolio is more than just a collection of pretty pictures. It’s a visual resume that showcases their design style, craftsmanship, and the types of projects they excel at. As you browse their work, look for examples that resonate with your own goals. Do you see stunning swimming pools or intricate masonry that matches your aesthetic? A quality portfolio will show consistency and attention to detail across different projects. Don’t just look at the photos; ask for more context. Inquire about the materials used and how the project has held up over time. A company proud of its work will be happy to share the story behind each project, giving you a better sense of their capabilities and client experiences.

Verify Licensing and Insurance

This step is non-negotiable. Before hiring any contractor, you must verify that they have the proper licensing and insurance. This is for your protection. A licensed company has met the state and local requirements to operate legally. More importantly, adequate insurance, including general liability and workers’ compensation, shields you from financial responsibility in case of accidents or property damage during the project. A professional and reputable firm will readily provide you with copies of their credentials. If a company hesitates or cannot produce these documents, consider it a major red flag and walk away. Your peace of mind is worth it.

Understand Their Communication Process

Clear and consistent communication is the foundation of a successful landscape project. A breakdown in communication can lead to misunderstandings, delays, and budget overruns. Before signing a contract, ask about the company’s communication plan. Who will be your primary point of contact? How often will you receive updates on progress? How are potential issues or changes addressed? A great team will have a structured process for keeping you informed every step of the way. This open dialogue ensures that everyone is on the same page, from the initial design to the final walkthrough, and helps build a strong, trusting relationship throughout your home remodeling journey.

Ask About Warranties and Guarantees

A warranty is a company’s promise that they stand behind their work. It’s a clear indicator of their confidence in the quality of their materials and craftsmanship. Be sure to ask for specifics about what their warranty covers and for how long. Does it apply to plants, hardscaping materials like porcelain and natural stone, and labor? Understanding the terms of the warranty upfront gives you long-term assurance. A company that offers a solid guarantee is invested in building lasting relationships and ensuring your satisfaction long after the project is complete. It shows they care about their reputation and the durability of their work.

Popular Trends in Landscape Design

Your outdoor space is an extension of your home, and just like interior design, landscape trends evolve to reflect our lifestyles and priorities. The best designs today are not just beautiful; they are also functional, sustainable, and tailored to how you want to live. It’s about creating a space that feels personal and works for your family, whether that means a quiet retreat for morning coffee, a lively area for weekend barbecues, or a safe place for kids to play. This isn’t about chasing fads, but about thoughtfully shaping your environment to support the life you want to lead.

We’re seeing a big shift toward making yards more inviting and enjoyable. This means thinking about the environment, reducing weekend chores, and using materials that last. From creating eco-friendly gardens that attract butterflies to installing a personal putting green, the goal is to build a landscape that adds real value to your life. As you plan your project, thinking about these trends can help you create an outdoor space you’ll love for years to come. A professional landscape designer can help you incorporate these ideas into a cohesive plan that fits your property and your vision, ensuring the final result is both stylish and practical.

Sustainable and Eco-Friendly Designs

Creating a sustainable landscape is one of the most rewarding trends right now. It’s all about working with nature, not against it. This approach focuses on making your yard more environmentally friendly by choosing native plants that thrive in the Long Island climate, which reduces the need for water and fertilizers. It also involves smart water management, like using permeable pavers for your driveway or patio to help rainwater return to the ground. An eco-friendly design can also support local wildlife by providing food and shelter for birds and pollinators. It’s a beautiful way to create a landscape that is both low-impact and full of life.

Low-Maintenance Yards

Let’s be honest, you want to spend your weekends enjoying your yard, not working in it. That’s why low-maintenance designs are more popular than ever. This trend is all about smart choices that reduce the time you spend on upkeep. Think about replacing a patch of needy lawn with a beautiful stone patio, or choosing hardy, slow-growing shrubs instead of plants that require constant pruning. Automated irrigation systems and durable hardscaping materials also play a big role. A well-designed, low-maintenance yard gives you back your free time, allowing you to relax and make memories in your outdoor space without a long list of chores.

Natural Stone and Porcelain Hardscaping

The materials you choose for your patios, walkways, and pool surrounds have a huge impact on both the look and longevity of your landscape. Homeowners are increasingly choosing high-quality materials like natural stone and porcelain pavers. These materials offer a timeless, high-end look that complements any style of home. Porcelain is incredibly durable, resisting stains and fading, while natural stone offers unique character and texture. Using these materials is a long-term investment in your property, creating stunning and resilient outdoor living areas that stand up to weather and daily use with grace.

Synthetic Turf and Game Courts

A backyard should be a place for fun, and that’s why functional recreation spaces are a top trend. Synthetic turf is a game-changer for busy families, offering a lush, green lawn all year round with none of the mowing, watering, or fertilizing. It’s perfect for play areas, personal putting greens, or just creating a flawless patch of green. Taking it a step further, many homeowners are adding dedicated Sports Games Courts for everything from basketball to pickleball. These additions transform your yard into a hub of activity, encouraging everyone to get outside and play together.

Landscaping for Long Island Homes

Creating a beautiful landscape on Long Island means working with our unique environment. From the salty air along the South Shore to the wooded hills of the North Shore, every property has its own character. A thoughtful landscape plan considers the distinct four-season climate, coastal conditions, and local style to create an outdoor space that feels like a natural extension of your home. It’s about designing a yard that not only looks stunning but also thrives in our specific region. By embracing these local factors, you can build a personal oasis that you’ll enjoy year after year.

Designing for the Local Climate and Terrain

Long Island’s climate presents both opportunities and challenges. Our hot, humid summers and cold, snowy winters demand resilient plants and durable materials. When planning your project, it’s wise to consider how the local terrain will influence your design and budget. A good rule of thumb is to allocate about 10% to 15% of your home’s value to your landscaping project, as this helps account for site-specific needs. For example, properties near the water may require salt-tolerant plants and corrosion-resistant materials for patios and walkways.

Choosing the right materials is key to a long-lasting design. We often recommend high-quality porcelain and natural stone pavers because they stand up beautifully to our freeze-thaw cycles without cracking or fading. An experienced landscape design team can guide you toward selections that are not only gorgeous but also perfectly suited for the Long Island environment, ensuring your investment endures for years to come.

Popular Features in Nassau and Suffolk County

Long Island homeowners are increasingly focused on creating a seamless flow between their indoor and outdoor living areas. This trend involves more than just a simple patio; it’s about designing fully functional outdoor rooms. Think of covered outdoor kitchens perfect for summer dinners, cozy fire pit areas for cool autumn nights, and elegant pavilions and pergolas that define a space for relaxation or entertainment. Strategic outdoor lighting also plays a huge role, making your yard usable after dark while highlighting its best features.

Many homeowners are also adding features that cater to family fun and an active lifestyle. A custom swimming pool often becomes the centerpiece of the backyard, providing a beautiful focal point and a hub for summer activity. For year-round enjoyment, many families are opting for low-maintenance synthetic turf and sports games courts. These additions create a resort-like feel right at home, making your property the go-to spot for making memories.

Why a Full-Service Firm Makes a Difference

When you decide to transform your backyard, you can either act as a general contractor yourself, hiring and managing separate designers, masons, and installers, or you can partner with a full-service firm. Juggling multiple contractors can quickly become a full-time job filled with scheduling conflicts, communication gaps, and blame games when issues arise. A full-service design and construction company simplifies this entire process by providing a single, unified team to handle your project from the first sketch to the final cleanup.

This integrated approach means you have one point of contact and one team accountable for the entire outcome. The design, material sourcing, permits, and construction are all managed under one roof, ensuring every element works together harmoniously. Whether you’re dreaming of a complete backyard overhaul with a pool and pavilion or a simple patio refresh, working with a single firm ensures a cohesive vision and a much smoother journey. You can see the stunning results of this unified process in Gappsi’s extensive portfolio of Long Island projects. This model turns a potentially stressful renovation into an exciting and streamlined experience, letting you focus on the fun parts, like envisioning your first pool party.

The Advantage of One Team from Start to Finish

The biggest benefit of a single team is clear communication and total accountability. When one company manages the project from start to finish, there is no finger-pointing between the designer and the builder. The team that helps you design your new swimming pool is in constant communication with the crew that excavates and installs it. This seamless workflow prevents costly mistakes and delays. You have one phone number to call for updates and questions, giving you peace of mind. This structure ensures that the entire team is invested in the final result and is fully responsible for delivering your project on time and on budget, just as it was envisioned.

Combining Design Expertise with Construction Skill

A great landscape plan is only as good as the team that builds it. In a full-service firm, designers and builders work side-by-side, which means your project is designed with practical construction realities in mind from day one. The designers understand material costs, site limitations, and building techniques, so they create plans that are not only beautiful but also buildable and within your budget. This synergy prevents the disappointment of falling in love with a design that is impossible to execute. This collaborative approach ensures that the creative vision for your landscape design is perfectly translated into a well-crafted, durable, and beautiful outdoor living space.

Start Your Landscape Transformation

Thinking about what your yard could be is exciting. Maybe you’re picturing a cozy fire pit area for cool evenings, a beautiful stone patio for summer barbecues, or a complete garden overhaul. That vision is the perfect starting point. Turning those daydreams into a functional, beautiful outdoor space is more straightforward than you might think, and it all begins with a simple conversation.

The first step is to connect with a design team. A professional consultation isn’t just about getting a price quote; it’s a creative session to explore what’s possible for your property. A well-planned landscape design does more than just look good. It adds real value to your home and makes your outdoor areas more functional for the way you live. It’s an investment in your home’s future and your family’s enjoyment.

During an initial meeting, you can share all your ideas, talk through your budget, and discuss your specific needs. This is your chance to ask questions and make sure you and the design team are on the same page from the very beginning. A great designer will listen to your vision and then use their expertise to create a plan that works for your space, your lifestyle, and your budget. This collaborative process ensures the final result is a true reflection of what you want, with no surprises along the way. If you’re ready to see what your yard can become, scheduling that first chat is the best way to get started.

Related Articles

Frequently Asked Questions

How long does a typical landscape project take from start to finish? The timeline for a landscape project really depends on its size and complexity. A straightforward patio and planting installation might only take a few weeks, while a full backyard transformation with a pool and outdoor kitchen can take several months. Factors like weather and the local permit approval process also play a big role. A professional firm will give you a realistic timeline during the design phase so you know exactly what to expect before any work begins.

What should I prepare for my initial design consultation? The best thing you can bring to a first meeting is your imagination. Spend some time thinking about how you want to use the space. Do you see yourself hosting big family barbecues, or do you prefer a quiet spot for morning coffee? It’s also helpful to gather a few inspiration photos that capture the look and feel you’re going for. Having a general idea of your budget is also important, as it helps the designer create a plan that aligns with your financial goals from the start.

Can I still create a great outdoor space if I have a limited budget? Absolutely. A beautiful landscape doesn’t have to happen all at once. A great strategy is to phase your project over time. We can create a complete master plan for your entire property, and then you can decide to build it in logical stages. For example, you might install the hardscaping, like a patio, this year and then add the outdoor kitchen or planting beds next year. This approach allows you to achieve your dream yard at a pace that feels comfortable for your budget.

Once my project is done, what kind of maintenance should I expect? The amount of maintenance your new landscape requires will depend entirely on the design choices you make. If you opt for low-maintenance features like synthetic turf, porcelain pavers, and native plants, your upkeep will be minimal. A yard with a large lawn and intricate flower beds will naturally require more attention. A good landscape company will provide you with a detailed care plan and can also offer services like sealing your stonework to keep it protected and looking its best.

Why is using one company for both design and construction a better choice? When one team handles your project from the initial sketch to the final installation, it creates a much smoother process. The designers and builders are in constant communication, which means the creative vision is always grounded in practical construction knowledge. This prevents costly mistakes and ensures there are no communication gaps. You have a single point of contact, which simplifies everything and guarantees the team is fully accountable for delivering the beautiful, high-quality result you were promised.

Share this page: