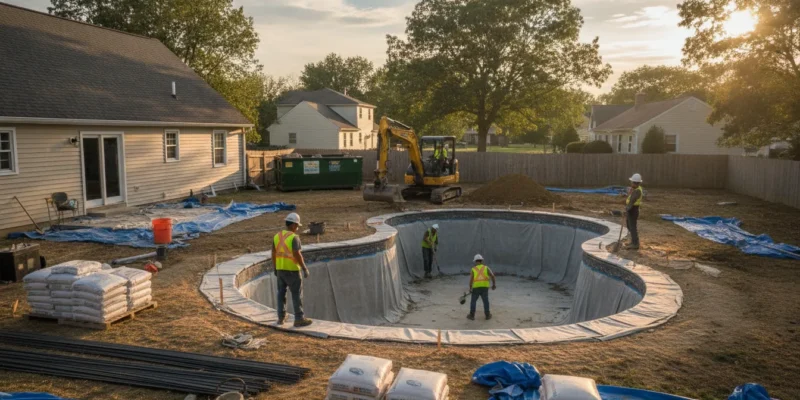
Fiberglass swimming pool installation underway in a sunny Long Island backyard with a crane placing the shell

Fiberglass Pool Cost on Long Island: What to Expect

Planning an inground pool on Long Island means looking beyond the shell price. Excavation, access to the backyard, equipment, permits, coping, decking, and water features can all change the final investment, especially on properties with tight lots or difficult soil conditions.

Call Gappsi at (631) 831-3177

In practical terms, fiberglass pool cost commonly falls between $45,000 and $85,000 before more extensive upgrades. While larger pools, challenging installations, heating, lighting, and landscaping can push a project toward $100,000 or more. Those figures are broad national benchmarks, not a quote for a Long Island property, so the right estimate starts with the actual site and the scope you want.

Fiberglass also brings a faster installation timeline and generally requires less maintenance time and chemicals than gunite. Understanding the local price range, then separating shell costs from site work and selected features. Gives you a clearer basis for comparing proposals and planning the backyard you want.

What Does a Fiberglass Pool Cost on Long Island in 2026?

A fiberglass pool cost on Long Island typically starts around $45,000 and can reach $85,000 for the shell and basic installation. Larger pools, difficult excavation, upgraded equipment, and outdoor-living features can push a complete project to $90,000-$120,000 or more. The final number depends less on a single statewide average than on the size of the pool. The conditions of your backyard, and how you plan to use the space.

As a broad industry reference, Latham Pool Products places the average fiberglass pool range at $45,000-$85,000. With additional features and installation complexity capable of pushing the project to $100,000 or more. Review the Latham fiberglass pool pricing guide for its published cost factors.

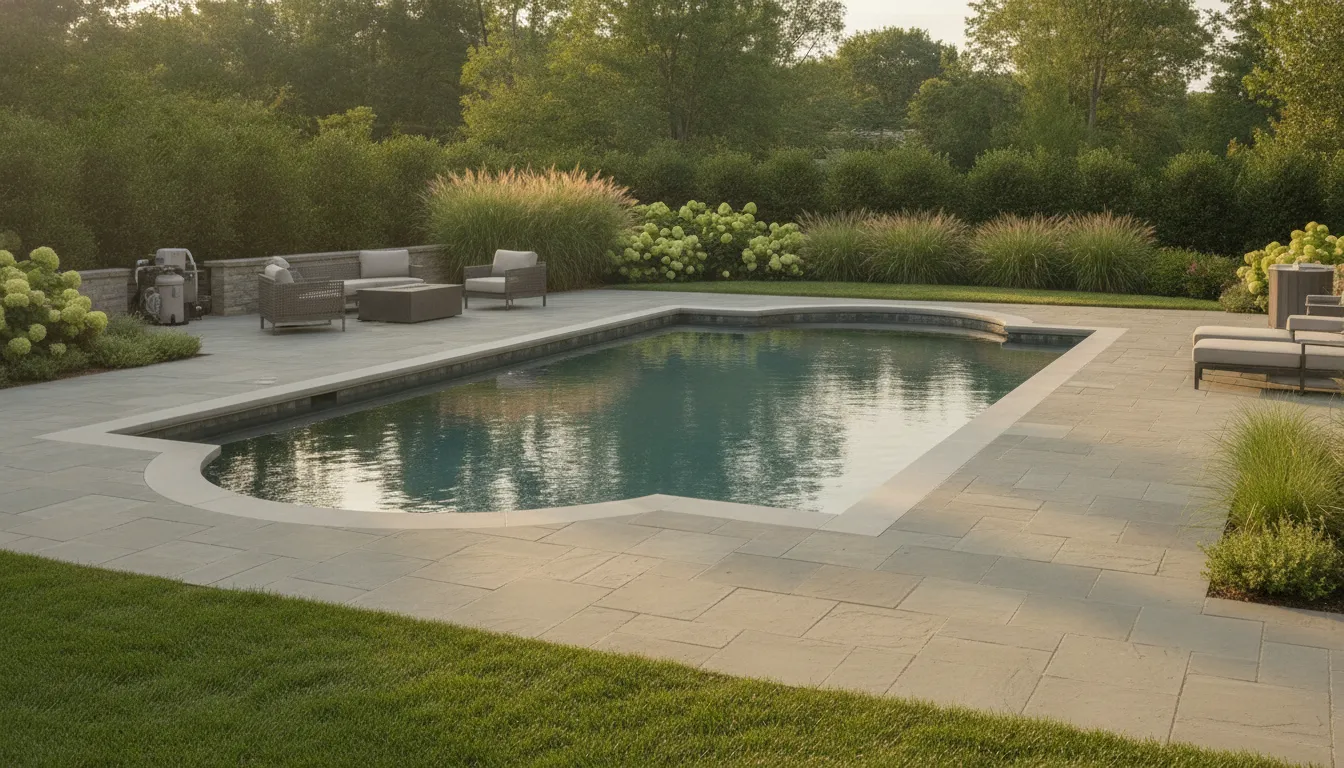
Finished fiberglass swimming pool in a landscaped Long Island backyard

Regional pricing gives a useful reality check

A 2026 survey of independent fiberglass pool builders in the Thursday Pools dealer network reported standard installation averages in North Carolina. That survey put a small pool near $80,000, a medium pool near $99,286, and a large pool near $112,143. The survey reflects North Carolina installations, not Long Island projects, so these figures should be treated as a regional reference rather than a quote. Still, they show why a large, fully installed fiberglass pool can cost considerably more than the shell-only numbers many homeowners see online. See the Thursday Pools dealer survey.

On Long Island, site access and existing conditions can materially change the budget. A narrow side yard may require smaller excavation equipment or additional labor. Rock, poor drainage, steep grades, retaining walls, utility conflicts, and limited access for delivery can also add work that is not included in a basic pool package. These conditions need to be evaluated before anyone can give a responsible project figure.

What is included in a typical fiberglass pool price?

A basic installed range commonly accounts for the fiberglass shell, excavation, placement, plumbing, backfill, and standard filtration equipment. It may not include every item needed to finish the backyard. Heating, automation, upgraded coping, concrete or paver decking, lighting, fencing, drainage, landscaping, and masonry can substantially increase the total. The design also matters. A compact plunge pool and a large family pool require different excavation, circulation, and finishing specifications.

Gappsi installs fiberglass pools on Long Island and evaluates the pool, property, access, and surrounding design together. That approach helps separate the pool installation cost from the broader backyard construction budget. So you can compare proposals based on the same scope instead of comparing an incomplete package with a finished outdoor-living plan. See Gappsi’s swimming pool construction services or contact the Gappsi team to discuss your property.

What Factors Drive Fiberglass Pool Pricing in New York?

A fiberglass pool estimate reflects far more than the shell itself. On Long Island, the final fiberglass pool cost depends on the pool package, the property, the required site work, and the finish choices that turn an installation into a usable backyard. Two homes with the same pool model can receive different estimates if one has narrow side-yard access, dense tree roots, shallow bedrock, or a more complicated drainage plan.

The shell, freight, size, and shape

The shell is the starting point, and its price changes with length, width, depth, steps, benches, tanning ledges, and the complexity of the shape. Freight and delivery also matter because a one-piece shell must reach the property and be positioned safely with the right equipment. A larger pool may require more excavation, stone, backfill, water, and labor in addition to the higher shell price. Custom features can improve how the pool functions, but they should be selected around the family’s actual use rather than added automatically.

Excavation and Long Island site conditions

Excavation is one of the most variable parts of a New York pool project. Soil removal, disposal, grading, dewatering, and backfill all affect the budget. Rock, buried concrete, mature tree roots, sloped ground, and limited equipment access can add labor or require specialized work. Trees deserve particular attention during design. Guidance from Texas A&M AgriLife Extension advises avoiding pool locations under trees because roots can damage hard pool structures: site planning guidance. On Long Island, a property visit helps identify these conditions before an estimate is treated as final.

Equipment, coping, decking, and permits

The equipment package may include a pump, filter, heater, automation, salt chlorine generator, and lighting. Heating and automation can extend the swimming season and simplify operation, while lighting changes both nighttime use and electrical requirements. Coping and decking add another major design layer. Natural stone, concrete pavers, porcelain, or other surfaces vary in material cost, preparation, edge detail, and installation labor. Drainage, retaining walls, fencing, planting, and outdoor kitchens may also be part of the broader backyard plan.

Finally, local permits, inspections, code requirements, utility coordination, and engineering needs must be included. Optional features such as heating, specialized lighting, and custom landscaping can increase total project costs by 20% to 50%, according to River Pools and Spas: fiberglass pool pricing factors. A detailed Long Island estimate should separate the shell, site work, equipment, finishes, permits, and options so you can see exactly what is driving the investment.

Fiberglass vs Gunite vs Vinyl: Long-Term Value Compared

The right pool type depends on more than the initial invoice. Installation time, routine maintenance, expected service life, and resurfacing requirements all affect what the project costs to own over many years. A lower starting price can become less attractive if the surface needs frequent attention. While a higher investment may make sense when it delivers the shape, finish, and durability your property requires.

For context, Gappsi builds fiberglass, gunite, and vinyl pools on Long Island. The figures below are planning references, not guaranteed quotes. Access, excavation, engineering, pool dimensions, equipment, finishes, and surrounding hardscape can change the final scope.

Long-term comparison of fiberglass, gunite, and vinyl pools
Factor Fiberglass Gunite Vinyl
Upfront cost Often mid-range, with broader project pricing shaped by size, site work, and features. Gappsi’s published Long Island baseline is approximately $90,000 to $140,000. An older published example for a 16×34 pool with concrete walls was about $21,000 to $23,000.
Install time Typically faster after excavation because the manufactured shell arrives ready to set. Usually a longer construction schedule because the structure is formed and finished on site. Schedule varies with the wall system, excavation, liner, and surrounding work.
Maintenance Generally requires less chemical maintenance and time than gunite. Routine water and surface care can be more involved. The liner and water chemistry require consistent monitoring and care.
Expected lifespan Designed to last for decades with proper maintenance. Can provide long service life when maintained and periodically renewed. The liner is a replaceable component, so total ownership depends partly on future liner work.
Resurfacing needs Does not typically require the same recurring resurfacing cycle as gunite. May require resurfacing as the interior finish ages. Usually does not involve resurfacing, but the liner may eventually need replacement.

Fiberglass pool cost is therefore only one part of the decision. Fiberglass can offer a balance of predictable installation, lower ongoing chemical demand, and decades of use. Gunite provides broad design flexibility and a durable concrete structure, but its Long Island baseline reflects a larger initial investment. Vinyl can reduce the starting cost in some designs, although future liner replacement should be included in the ownership plan. The older $21,000 to $23,000 example is useful for context, but it should not be treated as a current universal price.

Features such as heating, lighting, and landscaping can add 20% to 50% to a fiberglass project, according to River Pools and Spas. Compare complete scopes rather than shell prices alone, and ask what each proposal includes for excavation, equipment, permits, drainage, coping, and patio work.

Call Gappsi at (631) 831-3177 to compare pool options for your Long Island property.

What Are the Long-Term Costs of Owning a Fiberglass Pool?

The purchase price is only one part of the fiberglass pool cost. Long-term ownership usually includes water treatment, routine cleaning, electricity for circulation, seasonal heating, and a reserve for equipment repairs. For a typical Long Island backyard, a practical planning range is roughly $1,500 to $4,000 per year for regular operation, before major renovations or unusually high heating use. The actual figure depends on pool size, water temperature, use, cover selection, and how much maintenance the homeowner handles personally.

Where does the annual maintenance budget go?

Chemicals and water care are recurring expenses. Fiberglass surfaces are smooth and nonporous, so they generally require less maintenance chemicals and time than gunite pools, according to Latham Pool. That can reduce brushing, balancing, and chemical demand, although every pool still needs regular testing and adjustment. A reasonable household allowance for chemicals, test supplies, and small cleaning items is often about $400 to $1,000 per year, depending on the season and whether service is included.

Cleaning costs vary more than many homeowners expect. A robotic cleaner may require an upfront purchase but reduce weekly labor. A professional service plan can add approximately $1,000 to $2,500 annually for seasonal visits, depending on frequency and scope. Owners who skim, vacuum, inspect baskets, and test water consistently can often keep this category lower.

How do energy use and equipment affect ownership cost?

The circulation pump runs regularly, while a heater can become the largest operating expense. Electricity for the pump and normal equipment may add roughly $300 to $900 per season. Heating can add several hundred dollars more, especially when the pool is uncovered, kept at a high temperature, or used well into the shoulder seasons. A fitted cover helps limit heat loss and evaporation, which makes the heating budget easier to control.

Set aside an equipment reserve of approximately $500 to $1,500 per year, even when all components are functioning. This is not a yearly bill. It is a way to prepare for eventual replacement of a pump, filter, heater component, salt system, cleaner, or cover. Keeping equipment accessible and following the manufacturer’s maintenance schedule can reduce avoidable failures.

Can planning the site reduce future costs?

Yes. Location decisions affect both maintenance and repair risk. Texas A&M guidance recommends avoiding placement under trees because roots can crack hard pool structures. Trees also add leaves, pollen, and shade-related debris, increasing cleaning demands. A thoughtful layout with service access, suitable drainage, and a practical equipment location can reduce labor over the pool’s life.

Water chemistry also protects the system. Chlorine can degrade under solar ultraviolet radiation, which is why cyanuric acid is used in outdoor pools to help protect chlorine from that degradation. As described in research indexed by the National Institutes of Health. Testing regularly and maintaining the recommended balance supports sanitation and helps protect finishes and equipment. With consistent care, fiberglass pools are designed to last for decades, making maintenance discipline an important part of their long-term value.

What Does the Gappsi Fiberglass Pool Installation Process Look Like?

A fiberglass pool project involves more than placing a shell in a hole. Gappsi approaches the backyard as a complete design-build environment, coordinating the pool, hardscape, planting, outdoor entertaining areas, and visual connection to the home. That approach helps ensure the finished pool feels integrated into the property rather than added as a separate feature.

Consultation, site evaluation, and pool selection

The process starts with a consultation about how your household plans to use the pool, how much space is available, and which features matter most. Gappsi then evaluates the site, including access for equipment, grade changes, soil conditions, setbacks, existing utilities, drainage, and the relationship between the proposed pool and the house.

These details guide the selection of a fiberglass shell size, shape, depth, and entry design. The right shell is not simply the largest model that fits the yard. It must work with the site and leave room for safe circulation, coping, decking, planting, and other outdoor-living elements. Early planning also clarifies how excavation, permits, plumbing, electrical work, and finish materials will affect the total fiberglass pool cost.

Excavation, delivery, and crane placement

After the design and logistics are approved, the installation area is marked and excavated to the required dimensions. The excavation must account for the shell, its support base, plumbing runs, and final elevations. A level, properly prepared base is essential because the shell needs consistent support as it is set and connected.

The finished shell is delivered to the property. When access requires it, a crane lifts the shell over a home, fence, or other obstruction and lowers it into the excavation. The installation team checks the pool’s position, level, and elevation before connection work.

Plumbing, equipment, and structural support

Once the shell is placed, the crew connects the circulation plumbing and installs the equipment needed for filtration, sanitation, heating, lighting, or water features included in the design. The pool is filled in a controlled sequence while suitable material is placed around the shell. This coordinated process helps balance the water pressure inside the pool with the support provided by the surrounding backfill.

Fiberglass installation is notably fast once excavation begins. Latham Pool notes that fiberglass pools can often be installed in three to five days after excavation starts. The complete project timeline may be longer when permitting, access preparation, weather, custom decking, or landscaping is involved. Learn more about fiberglass installation timing and cost factors.

Coping, decking, and the finished backyard

With the pool shell and systems in place, Gappsi completes the visible layers that define the space. Gappsi’s pool construction experts install coping at the pool edge, followed by the selected decking or patio surface. Grades and drainage are refined so water moves away from the home and pool structure. The final stage may include planting, lawn transitions, lighting, outdoor kitchens, retaining elements, and other landscape details that make the pool area functional beyond swimming.

The result is a coordinated outdoor-living project, with the pool serving as one part of a larger plan. Design-build coordination is valuable when several trades, materials, and elevations must meet cleanly.

How to Get an Accurate Fiberglass Pool Cost Estimate for Your Backyard

A useful estimate starts with more than the price of a fiberglass shell. The final project total reflects the pool design, the work required to prepare your Long Island property, the equipment you select, and the surrounding deck and landscape. Gather the right information before requesting quotes so each builder is pricing a similar scope.

  1. Define the pool size and shape you want. Start with the dimensions that fit your backyard, the number of swimmers you expect, and how you plan to use the pool. A compact plunge-style layout will have different excavation, water-volume, and decking needs than a large family pool. Note any preferred entry steps, tanning ledge, bench, or custom shape. A clear design starting point helps the builder explain how shell selection affects the fiberglass pool cost.
  2. Evaluate excavation needs and site access. A builder needs to understand the property before assigning a dependable installation number. Check the intended location for slopes, retaining walls, rock, drainage concerns, existing structures, and utility lines. Also consider how excavation equipment and the delivered pool shell will reach the backyard. Narrow side yards, fences, overhead wires, or limited staging space can change the labor and logistics. An on-site evaluation is more reliable than an estimate based only on photos or a street address.
  3. Choose equipment and features. List the systems and features you want included, rather than leaving them as vague allowances. Discuss heating, automation, lighting, a salt chlorine generator, steps, safety features, and any water or energy management equipment. Ask how each selection changes installation and operating costs. Features added later can require additional plumbing, electrical work, or demolition, so including them in the initial scope produces a more useful comparison.
  4. Request a written, itemized quote. The proposal should identify the shell, excavation, setting and backfill, plumbing, electrical work, equipment, permits, inspections, coping, and decking. It should also state what is excluded, such as difficult soil removal, drainage improvements, fencing, landscaping, or restoration of access areas. An itemized quote makes it easier to distinguish a complete project price from a low initial number that leaves major work unpriced. Confirm the proposed schedule, payment terms, warranty coverage, and allowance amounts in writing.
  5. Compare several licensed Long Island builders. Compare builders on scope, licensing, experience with local site conditions, communication, and the clarity of their proposals, not just the lowest total. Ask each company to review the same design goals and property constraints. Gappsi can evaluate the backyard in person and explain how the design, site, and selected features shape the estimate. That visit gives you a more accurate number and a clearer basis for deciding which proposal fits your project.

When you prepare these details in advance, the estimate becomes a planning tool instead of a rough shell price. It also gives you a practical way to identify differences between proposals before construction begins.

Before you go, here are the questions Long Island homeowners ask most often about fiberglass pool costs. Call Gappsi at (631) 831-3177 if you want a figure tailored to your property.

Frequently Asked Questions

How much does a fiberglass pool cost installed?

A typical fiberglass pool project can fall in the $45,000 to $85,000 range. Larger pools, difficult access, site work, and added features can push the total to $100,000 or more. These figures are a planning range, not a quote for every Long Island property. Your final estimate should account for excavation, the shell, plumbing, equipment, permits, decking, and backyard access. Latham’s fiberglass pricing guide provides the published range.

What factors have the biggest effect on fiberglass pool pricing?

Pool size and depth are major cost drivers. Excavation conditions, soil, access for equipment, plumbing runs, coping, decking, and the filtration and heating equipment selected also matter. Optional heating, lighting, and landscaping can increase a project total by roughly 20% to 50%, according to River Pools and Spas. A site visit is the best way to identify costs that a size-only estimate misses.

Are fiberglass pools cheaper than gunite pools?

They can be, especially when a project benefits from faster installation and lower ongoing chemical and maintenance demands. For context, Gappsi’s published baseline for Long Island gunite pools is $90,000 to $140,000. Fiberglass pricing depends on the same site and design variables, so the right comparison is a complete installed proposal, not the shell price alone.

How long does fiberglass pool installation take?

Once excavation begins, the installation phase can often be completed in three to five days. Permitting, preparation, inspections, weather, decking, landscaping, and other finish work can extend the full project timeline. Latham reports the three-to-five-day figure for fiberglass installation, so ask your builder which parts of the schedule it includes.

Ready to Plan Your Fiberglass Pool?

A personalized estimate helps connect your preferred pool size, site conditions, equipment, and backyard plans to a more useful project budget. Gappsi can discuss your Long Island property and outline the next practical steps for your fiberglass pool project.

Call Gappsi at (631) 831-3177 for a personalized fiberglass pool estimate on Long Island.

A natural swimming pool with aquatic plants and natural stone edging in a Long Island backyard

Natural Swimming Pool Design on Long Island

For Long Island homeowners, a pool can be more than a separate rectangle of treated water. It can be designed as part of the landscape, with stone, plants, and circulation working together to create a quieter, more natural setting. The key is understanding how that system fits your yard, maintenance expectations, and plans for using the pool.

Schedule a free consultation for your natural swimming pool project

A natural swimming pool uses biological filtration and a plant-based regeneration zone instead of conventional chlorine treatment. Water circulates between the swimming area and the regeneration zone, where gravel, beneficial bacteria, and aquatic plants help support water quality. The regeneration zone commonly takes about 30 to 50 percent of the pool’s surface area, so its design must be considered from the beginning.

That balance of swimming space and living filtration is what separates this approach from simply adding landscaping around a standard pool. Before choosing materials or features, it helps to see how the circulation and regeneration zones function together.

What Is a Natural Swimming Pool, and How Does It Work?

A natural swimming pool is a designed swimming environment that uses biological filtration and a planted regeneration zone instead of relying on conventional chemical treatment alone. The swim area is separated from, or connected to, a shallow area filled with plants, gravel, and other filtration media. The result is a pool that combines a defined place to swim with a landscape feature that supports water treatment. For Long Island homeowners, the design must account for available yard space, drainage, circulation, and the relationship between the pool and surrounding hardscape.

The regeneration zone is a central part of the system, not an optional planting bed. It commonly occupies about 30 to 50 percent of the pool’s surface area, creating enough room for the biological processes that help maintain water quality. Submerged plants take up nutrients, while beneficial bacteria colonize the gravel bed and other media. Together, these elements form the living filtration system. The regeneration-zone concept and its typical proportions are documented in Gappsi’s natural swimming pool guidance at gappsi.com.

How does water move through the system?

A pump continuously circulates water between the swimming area and the regeneration zone. Water leaves the swim area, moves through the planted and gravel filtration zone, and returns cleaner to the pool. This circulation keeps the system active and helps distribute water throughout the biological media. Proper site planning is important because poor flow can leave portions of the regeneration zone underused.

Unlike a conventional pool system that depends primarily on chemical dosing and mechanical equipment, a natural pool works as a closed-loop system. Water is repeatedly cleaned as it passes through the filtration medium, rather than being sent away after each cycle. The approach can also reduce dependence on external filtration devices when the system is correctly designed, although pumps and routine maintenance remain part of responsible ownership.

Gappsi provides a design-build approach for Long Island projects, coordinating the pool, regeneration zone, planting, circulation, and surrounding masonry as one plan. That integration matters because the pool’s appearance and performance depend on the entire site, not just the swimming basin.

Call (631) 831-3177 to discuss your natural swimming pool project

How a Natural Pool Filters Water Without Chlorine

A natural pool replaces routine chemical disinfection with a living filtration system. Water moves through a planted regeneration zone, where submerged aquatic plants work alongside gravel or other stone media. The media bed provides a surface for beneficial bacteria, while the plants take up nutrients and help support the wider aquatic ecosystem. A pump keeps water moving between the swimming area and the regeneration zone so the system can continually process the water rather than leaving it stagnant.

This is biological filtration, not simply a decorative pond placed beside a pool. The size, depth, circulation path, planting plan, and filtration media must work together. In a properly engineered design, organic material is broken down as water passes through the biological environment, then the cleaner water returns to the swim area. The result is a closed-loop approach that uses the regeneration zone as an active part of the pool infrastructure.

Illustration of a natural swimming pool regeneration zone with aquatic plants and gravel filtration

How does biological filtration differ from chlorine treatment?

Chlorine systems disinfect by adding an active chemical to the water. That approach can be effective, but chlorine reacts with organic contaminants and can form disinfection by-products. An EPA study on biological filtration in engineered natural ponds describes biological treatment as a viable way to maintain water quality while minimizing disinfection by-product formation: EPA research on biological filtration.

A chlorine-free system also avoids chloramines, the compounds associated with the familiar pool smell and with skin or eye irritation. This does not mean a natural pool is unmanaged or automatically safe under every condition. Water quality depends on sound circulation, appropriate plant and media selection, debris control, and ongoing observation. Research has characterized microbial populations associated with natural swimming pools, reinforcing why the biological system must be designed and maintained as an engineered water environment: PubMed microbial characterization study.

For Long Island homeowners, the practical difference is a swimming environment shaped by plants, stone, and circulation instead of a chlorine dosing routine. Gappsi can plan the filtration zone as part of the complete landscape, coordinating the pool structure with the surrounding hardscape and planting design.

Natural Pool vs Gunite Pool: Which Fits Your Backyard?

The right pool depends on more than the shape of the swimming area. It also depends on how you want water treated, how much landscape you can dedicate to the system, and how you plan to maintain the property. A natural swimming pool uses biological filtration and a plant-based regeneration zone, while a traditional gunite pool typically relies on a chlorine treatment system. Both can be carefully designed for a Long Island backyard, but they create distinctly different outdoor experiences.

Natural pool and gunite pool comparison
Consideration Natural pool Gunite pool
Water treatment Biological filtration through a regeneration zone with plants, gravel, and beneficial bacteria. The water circulates through a closed-loop system without routine chlorine treatment. A pump and filtration system work with chlorine or another sanitizer to control water quality. Chemical levels require regular testing and adjustment.
Water feel Soft, natural-feeling water without chloramines, the chlorine by-products associated with eye and skin irritation. This can suit homeowners who are sensitive to pool chemicals. Clean, familiar swimming water managed through a conventional sanitation program. The experience depends on maintaining the treatment system within its recommended ranges.
Appearance A pond-like setting with aquatic plants, natural stone, and a separate regeneration zone. The larger overall footprint can make the pool feel like part of the landscape. A highly customizable swimming area with flexible shapes, depths, finishes, coping, lighting, and surrounding hardscape. The design can be formal, contemporary, or integrated with an existing yard.
Maintenance Maintenance centers on balancing the ecosystem, monitoring plant health, removing debris, and keeping water levels consistent. A well-designed system may reduce reliance on external filtration devices and energy over time. Maintenance includes testing and balancing sanitizer and pH levels, cleaning filters, managing debris, and servicing mechanical equipment. Seasonal closing and opening procedures are also part of ownership.
Upfront cost Costs vary with site conditions, size, and filtration complexity. Natural pools often cost more than a comparable swimming area because they need a larger surface and a dedicated filtration zone. Gappsi’s published Long Island baseline for gunite swimming pools is $90,000 to $140,000. The final price depends on dimensions, finishes, access, excavation, equipment, and hardscape.
Winterization The ecosystem can go dormant during cold months, so the system does not require winterization chemicals. Seasonal care still matters, including debris management and inspection. Typically requires a conventional winter closing, including lowering or managing water, protecting equipment, and adding the products specified for the sanitation system.

How should Long Island homeowners choose?

Choose a natural pool when chemical-free swimming, a softer visual transition into the landscape, and an ecological water system are central to the project. Allow enough room for the regeneration zone and plan for an experienced design team, since circulation and grading affect performance. Choose gunite when you want maximum control over the pool’s geometry, finishes, depth changes, and compact backyard layout. Reviewing swimming pool construction materials can also help clarify how construction choices affect the final project. Gappsi can evaluate the site, compare the two approaches, and coordinate the pool with the surrounding landscape.

How Much Does a Natural Swimming Pool Cost on Long Island?

There is no responsible one-size-fits-all price for a natural swimming pool on Long Island. Construction costs vary with the size of the swimming area, the size and complexity of the biological filtration system, and the conditions of the property. A narrow, straightforward site may require a very different plan from a sloped backyard with limited access, extensive excavation, or substantial surrounding masonry.

As a useful local reference point, Gappsi’s published baseline for a gunite pool on Long Island is $90,000 to $140,000. That range is not a quote for a natural system, but it helps establish the starting scale for a professionally designed pool project. A natural swimming pool will typically trend higher than a comparable gunite pool because it requires additional surface area and a dedicated filtration system.

How does the regeneration zone affect the budget?

The regeneration zone is one of the defining cost factors. It uses plants, gravel, and beneficial bacteria to support biological filtration, rather than relying on a conventional chemical treatment approach. In many natural pool designs, this zone accounts for approximately 30% to 50% of the total surface area. That means the project includes more excavation, waterproofing, edging, planting, circulation equipment, and finish work beyond the area used for swimming.

The exact proportion depends on the design and filtration strategy. A larger or more complex system can increase both installation time and equipment requirements. The goal is not simply to add a planted bed, but to create a balanced circulation system that moves water between the swimming area and regeneration zone. This is why filtration design should be evaluated alongside pool size, not treated as an afterthought.

Which site conditions change the cost?

Long Island properties can vary significantly in access, grade, soil, drainage, existing hardscape, and available yard space. A site assessment may reveal the need for retaining structures, revised drainage, difficult material delivery, tree protection, or careful integration with patios and planting beds. These conditions can influence the construction sequence and the amount of supporting work required.

When comparing proposals, ask what is included in the excavation, filtration, circulation, coping, planting, and surrounding hardscape allowances. Reviewing swimming pool construction materials can also clarify how different systems affect the broader project. Gappsi provides swimming pool services from design through construction, allowing the site, water system, and finished landscape to be planned as one project.

Design Considerations for a Long Island Backyard

Designing a natural swimming pool for a Long Island property requires more than selecting a shape and finish. The pool, regeneration zone, grading, planting, and surrounding hardscape must work as one system. That matters in both Nassau and Suffolk County, where backyard dimensions, drainage patterns, mature landscaping, and coastal weather conditions can vary significantly from one property to the next.

Start with the site, grading, and water circulation

A site assessment should establish how water moves across the property before excavation begins. Proper grading and drainage help protect the swimming area from unwanted runoff, while the layout must support consistent circulation between the swim zone and regeneration zone. Site design is critical because inadequate circulation can undermine the biological filtration process. The pump and flow paths should be planned around the property’s slope, available space, access points, and relationship to the house.

Long Island homeowners may need to balance a compact backyard with the space required for planted filtration. A regeneration zone commonly occupies a substantial portion of the overall system. So the design should resolve circulation and usable swimming space together rather than treating the planted area as an afterthought.

Use native planting to support the regeneration zone

Native aquatic and marginal plants can strengthen the ecological function of the regeneration zone while giving the pool a landscape-led appearance. Plants work alongside the gravel or other filtration media, where beneficial bacteria support water purification. Selecting plant material suited to the local climate can also make seasonal care more predictable and help the pool feel connected to the surrounding Long Island landscape.

The planting plan should be practical as well as attractive. It needs clear maintenance access, controlled edges, and enough separation between planted areas and the primary swimming space. A thoughtful arrangement can create a natural transition without allowing the regeneration zone to overwhelm a smaller property.

Integrate stone coping and the surrounding hardscape

Natural stone coping provides a durable edge at the waterline and helps connect the pool to patios, walkways, retaining walls, and outdoor living areas. Hardscape integration also influences how people enter the water, move through the yard, and use the space when they are not swimming. Materials should be selected for their texture, drainage behavior, durability, and relationship to the home’s existing architecture.

Many natural pools are designed to suggest a pond or lake, but the finished project still needs deliberate transitions and safe, comfortable circulation. Gappsi manages these details as an integrated design-build project, coordinating the concept, pool construction, planting, masonry, and finishing work from one plan to completion. Review Gappsi’s custom swimming pool designs to see how the pool can become part of a complete backyard rather than a separate feature.

Maintaining a Chemical-Free Natural Pool

Maintenance follows a different logic when the pool relies on living filtration instead of chlorine. Rather than repeatedly adjusting chemical levels, the goal is to keep the regeneration zone healthy and functioning. Plants, gravel, beneficial bacteria, circulation, and water level all work together as one managed ecosystem. This approach still requires attention, but the work is focused on supporting the system instead of treating the water after the fact.

Healthy aquatic plants are central to that balance. Native plants selected for the site can support filtration and add ecological value, but they should not be allowed to become overgrown or unhealthy. Routine care includes checking plant condition, trimming or thinning when needed, and watching for changes that could affect water movement through the regeneration zone. The maintenance principle is simple: preserve enough healthy plant growth to support filtration while keeping the zone open and active.

Gardener caring for aquatic plants around a natural swimming pool

Debris is another practical concern. Leaves, fallen branches, and excess organic material should be removed from the swimming area and regeneration zone before they accumulate. Regular observation makes this easier, particularly after storms or during heavy fall leaf drop. A maintenance plan should also include checking pumps, skimmers, and circulation paths so water continues moving between the swim area and the regeneration zone. Proper circulation can help minimize unwanted wildlife activity, although a natural setting may still attract some local animals.

A simple seasonal routine can keep the system balanced:

  1. Inspect the swimming area and regeneration zone each week and remove debris as it appears.
  2. Check plant condition, trimming or thinning growth that blocks water movement.
  3. Verify pumps, skimmers, and circulation paths are clear and working.
  4. Monitor water levels and restore them to the design level after evaporation or heavy rain.

Consistent water levels matter because the filtration system must remain properly connected across the regeneration zone. Seasonal evaporation and heavy rainfall can change the balance, so levels should be monitored and corrected according to the system design. A well-designed natural pool may also use less external filtration equipment, which can reduce energy consumption over time. The exact savings depend on the equipment and design, but minimizing unnecessary mechanical filtration is one benefit of a functioning biological system.

Cold weather maintenance is different as well. The ecosystem goes dormant, so the pool does not need the same chemical winterization approach used for a conventional pool. Owners should still follow the builder’s recommendations for protecting pumps, circulation equipment, and physical components, while avoiding the assumption that winterizing chemicals are required. Gappsi can coordinate the design and ongoing considerations as part of a complete outdoor project. For related guidance, see our swimming pool maintenance guide.

Call (631) 831-3177 to plan your natural swimming pool installation

Frequently Asked Questions

How does a natural swimming pool work?

A natural swimming pool circulates water between the swimming area and a separate regeneration zone. Submerged plants and gravel provide a setting for beneficial bacteria, creating a biological filtration process instead of relying on routine chlorine treatment. The regeneration zone commonly occupies about 30 to 50 percent of the pool’s surface area, so the site plan must allow enough room for effective circulation.

How expensive is it to build a natural pool?

There is no single price because the investment depends on pool size, filtration complexity, excavation, drainage, access, and the existing site. Natural systems may cost more than a conventional pool because they require a larger filtration landscape and more specialized design. Gappsi can evaluate the Long Island property and develop a scope around the homeowner’s goals.

Do natural swimming pools work?

They can work well when the swimming area, regeneration zone, pump system, plants, and filtration media are designed as one system. Biological filtration has also been studied in aquatic applications, including research on microbial populations associated with natural swimming pools (https://pubmed.ncbi.nlm.nih.gov/22608714/). Results depend on correct sizing, circulation, and ongoing ecosystem maintenance.

Do natural swimming pools attract mosquitoes?

Any outdoor water feature can affect local wildlife, but a properly designed natural pool uses circulation to reduce stagnant areas. Good site planning, moving water, plant management, and routine debris removal help limit mosquito-friendly conditions. Gappsi should review drainage, sun exposure, and surrounding landscape before construction.

What are the drawbacks of a natural pool?

The main tradeoffs are the larger footprint, higher design complexity, visible plant zones, and need to balance the living filtration system. Owners still monitor plant health, remove debris, and maintain water levels. The reward is a chemical-free swimming environment integrated with natural stone, planting, and the surrounding Long Island landscape.

Schedule Your Natural Swimming Pool Design Consultation

A natural swimming pool should balance the swim area, filtration zone, planting, and surrounding hardscape from the beginning. Gappsi can help you evaluate how a chlorine-free design may fit your Long Island backyard and priorities. To schedule a free consultation, call Gappsi at (631) 831-3177.

Outdoor wood burning sauna in a Long Island backyard.

Wood Burning Sauna Long Island: A Homeowner’s Guide

There’s something deeply satisfying about creating warmth with your own hands. In a world of instant gratification, the ritual of a wood-burning sauna feels like a welcome return to basics. The process of stacking the wood, tending the fire, and waiting for the heat to build becomes a meditative practice in itself. It’s an experience that engages all your senses, from the crackle of the logs to the rich, earthy scent of the wood. For those looking to add a truly authentic wellness feature to their home, a wood burning sauna Long Island installation offers more than just relaxation; it provides a hands-on connection to a timeless tradition of self-care.

Key Takeaways

  • Focus on the ritual, not just the heat: A wood-burning sauna is an experience, from tending the fire to feeling the unique, radiant warmth. This hands-on process is a key part of its relaxation and wellness benefits.
  • Choose your path based on your lifestyle: Consider your long-term goals and budget. Renting a mobile sauna is perfect for trying it out or for special events, while buying or building a custom unit is a smart investment for regular, long-term use.
  • Get the details right for lasting enjoyment: Your sauna’s performance and safety depend on key features. Invest in a quality stove, ensure proper ventilation and insulation, and always follow local building codes to create a secure and comfortable retreat.

How Do Wood-Burning Saunas Compare to Other Types?

When you’re thinking about adding a sauna to your Long Island home, you’ll find a few different heating options, like electric and infrared. While those are great choices, a wood-burning sauna offers something special. It’s more than just a way to get warm; it’s an authentic, hands-on experience that connects you to a long-standing tradition. Choosing a wood-fired model means embracing a ritual that is as relaxing as the heat itself.

The Classic Wood-Fired Heat Experience

A wood-burning sauna provides a deep, radiant heat that many feel is superior to other types. Unlike the consistent temperature of an electric heater, a wood fire creates a more natural heat with gentle variations, warming your body in a way that feels incredibly soothing. The experience begins long before you step inside. The simple acts of gathering the wood, starting the fire, and tending to the stove become a calming ritual. This process helps you disconnect from daily stress and prepares your mind for relaxation, making the eventual heat even more rewarding. Gappsi can help you design the perfect one as part of our custom saunas and spa installations.

Health Benefits of a Wood-Burning Sauna

Regular sauna use is a fantastic way to support your physical and mental well-being. Studies show it can help lower your risk of heart issues, ease joint pain, and even reduce chronic tiredness. The deep sweat induced by the heat helps your body release toxins and can lead to clearer skin. Beyond the physical perks, taking time for a sauna session is a powerful form of self-care. It reduces stress, calms the mind, and can significantly improve your sleep quality. Incorporating a sauna into your home is a wonderful wellness upgrade, much like a full home remodeling project.

Sourcing Wood Sustainably

To get the best performance from your wood-burning sauna, the type of wood you use matters. Hardwoods like oak, maple, and birch are excellent choices because they burn slowly and cleanly, producing consistent heat with less smoke. It’s best to avoid softwoods like pine for regular use, as they burn up too quickly. The most important factor is using properly seasoned, dry wood with a moisture content below 20%. Dry wood ensures an efficient, clean burn that heats your sauna effectively. Sourcing the right firewood is a small but essential part of the authentic sauna experience and complements your overall landscape design.

How to Buy, Build, or Rent a Sauna on Long Island

Bringing the warmth and wellness of a sauna to your Long Island home is an exciting project, and you have several great options to make it happen. Whether you’re ready to create a permanent backyard escape or just want to try it out for a weekend, you can choose the path that fits your lifestyle and budget. You can build a completely custom

Build a Custom Sauna with Gappsi

If you dream of a sauna that fits your home’s aesthetic and your personal wellness routine perfectly, a custom build is the way to go. Working with a team like Gappsi means you can design every detail, from the type of wood to the size and seating arrangement, creating a true sanctuary. A fully installed home sauna is a significant investment in your property and your health, with projects typically ranging from $3,500 to over $15,000. By choosing a custom build, you get a high-quality, permanent feature that you can enjoy for years to come, tailored exactly to your vision.

Find Mobile Sauna Rentals

Not quite ready to commit to a permanent installation? Mobile sauna rentals offer a fantastic way to experience the benefits without the long-term commitment. Companies on Long Island and across New York can deliver a wood-burning sauna right to your driveway for a day, a weekend, or even longer. This is a perfect option for special occasions, wellness retreats, or simply to see how much you enjoy it before making a purchase. Daily rental costs generally fall between $300 and $600, giving you a flexible and convenient way to rent a sauna and bring the spa experience home.

Should You Rent or Buy?

Deciding between renting and buying really comes down to your budget and how often you see yourself using the sauna. If you’re a frequent user, investing in your own unit is often the more economical choice over time. With custom builds starting around $6,000 and prefab kits available for less, ownership makes sense if a sauna is part of your regular routine. However, if you think you’ll only use it a few times a year for special events or a seasonal treat, renting is a practical and affordable alternative. Think of it as one part of a larger home wellness project and decide which path aligns best with your goals.

What Does a Wood-Burning Sauna Cost on Long Island?

Figuring out the budget for a new sauna is a big step, and the final price tag can vary quite a bit. The total cost depends on whether you choose a prefabricated kit or a fully custom build, the materials you select, and the complexity of the installation. A wood-burning sauna is an investment in your home and your well-being, so it’s helpful to understand the different costs involved before you begin. From the initial purchase to ongoing fuel expenses, let’s break down what you can expect to spend on bringing a wood-burning sauna to your Long Island home.

Purchase and Installation Costs

When you decide to buy a sauna, you’ll find a wide range of prices. A basic prefabricated kit might start around $3,500, but for a high-quality, professionally installed unit, most homeowners on Long Island spend between $6,000 and $15,000. If you have a specific vision, a custom-built sauna is a fantastic option. While these can cost more, sometimes exceeding $30,000, they are designed to perfectly fit your space and style. At Gappsi, we specialize in creating beautiful, bespoke saunas that become a true centerpiece of your home’s wellness area.

Mobile Sauna Rental Prices

Not quite ready to commit to buying? You can still enjoy the experience by renting a mobile sauna. This is a great way to test the waters or add a unique touch to a party or weekend retreat. On Long Island, daily rental prices typically fall between $300 and $600, depending on the sauna’s size, features, and how long you book it for. You can find local companies that will deliver a wood-fired sauna right to your driveway. Exploring mobile sauna rentals in New York can give you a feel for the experience before you make a long-term investment.

Factors That Influence Cost

Beyond the initial purchase, several other factors affect the total cost. The wood-burning stove itself is a major component, and the price can vary based on its size and efficiency. You’ll also want to budget for firewood, which can cost around $4 to $8 per session. The complexity of the installation also plays a role. A simple setup might be straightforward, but if your project requires extensive site preparation or electrical work, the cost will increase. Understanding the typical installation costs can help you create a more accurate budget from the start.

Key Features to Look for in a Wood-Burning Sauna

Choosing the right wood-burning sauna is an exciting process, but it involves more than just picking a style you like. To create a truly relaxing and lasting retreat, you need to consider the core components that define its quality, safety, and performance. From the type of wood used to the efficiency of the stove, every detail plays a part in your overall experience. Thinking about these key features will help you design a sauna that perfectly fits your home and lifestyle, ensuring you get the most out of your investment for years to come.

Size, Capacity, and Wood Type

First, think about where your sauna will go and who will be using it. Whether you have a small corner in your basement or a dedicated spot in your backyard, the size will determine the right fit. Consider how many people you’d like to enjoy it with at once, as this dictates the capacity. The type of wood is just as important, influencing everything from the sauna’s scent to its durability. Woods like cedar and hemlock are popular choices for their natural resistance to moisture and their pleasant aroma. The materials and features you select will shape the final look and feel, creating a personalized wellness space right at home. Gappsi offers a wide range of saunas to match any space and preference.

Stove Quality and Heating Efficiency

The stove is the heart of your wood-burning sauna, so its quality is essential. A well-made stove not only heats the space more effectively but also provides a consistent and comfortable warmth. While the cost of firewood, which can be around $4 to $8 per session, is a factor, a highly efficient stove can help manage these running costs over time. Investing in a superior stove from the start means you’ll spend less time waiting for the sauna to heat up and more time enjoying it. It’s a key component for a reliable and satisfying sauna experience, ensuring every session is as good as the last.

Ventilation, Insulation, and Safety

Safety should always be your top priority with a wood-burning sauna. For any indoor installation, a carbon monoxide detector is a must, and you should always have a fire extinguisher nearby. It’s also crucial to never leave the sauna unattended while the fire is active. Proper ventilation ensures a steady flow of fresh air, which is vital for both safety and comfort. Good insulation works hand in hand with ventilation, helping the sauna retain heat efficiently. Before starting, it’s wise to check local building codes to ensure your installation is compliant. Our expertise in home remodeling ensures every project is built to the highest safety standards.

Customizations and Add-On Features

This is where you can truly make the sauna your own. Do you envision a classic indoor cabin style, or would an outdoor barrel sauna complement your landscape better? You can choose from various designs to match your home’s aesthetic. Beyond the structure, you can add features like multi-level seating, ambient lighting, or premium sound systems to enhance your experience. Brands like Finnmark, SaunaLife, and Auroom offer a variety of innovative options to create a personalized oasis. You can explore different styles and accessories at the Gappsi Store to find the perfect combination of features for your dream sauna.

What to Know Before Installing Your Sauna

Deciding to add a sauna to your home is exciting, but a little planning goes a long way. Before you start picking out features, it’s important to think through the logistics of placement, local rules, and what it takes to keep your sauna running perfectly for years to come. Thinking about these details now ensures a smooth installation and a relaxing experience later.

Indoor vs. Outdoor Placement

Where you put your sauna is one of the first big decisions you’ll make. An indoor sauna can turn a spare room or a large bathroom into a personal wellness retreat. You’ll need a dedicated space with proper ventilation and a floor that can handle moisture, like concrete or tile. An outdoor sauna, on the other hand, offers a more traditional experience, connecting you with nature. They are often easier to install and ventilate. When placing one outside, choose a level spot with good drainage and keep it at least a few feet from other structures. Gappsi can help you find the perfect location for your new sauna as part of your overall landscape design.

Permits and Local Regulations

Before you break ground, it’s essential to check with your local municipality on Long Island about building permits and regulations. Every town has slightly different rules, and a professional installation team can help you understand what’s required. Safety is also a top priority. For an indoor wood-burning sauna, a carbon monoxide detector is a must. For any sauna, it’s wise to keep a fire extinguisher nearby and never leave a wood-burning stove unattended while it’s active. Following these guidelines ensures your sauna is not only a relaxing escape but also a safe one for your family.

Maintenance, Chimney Care, and Firewood

A well-maintained sauna can be a source of enjoyment for decades. The wooden structure itself is built to last, while the stove may need more attention. Wood-burning stoves require regular cleaning to function efficiently and safely, but they can last over 30 years with proper care. The type of wood you burn also matters. Hardwoods like oak, maple, and birch are excellent choices because they burn longer and cleaner than softwoods. Avoid using pine, which can create excess smoke and creosote buildup in your chimney. Regular chimney sweeping is another key part of your maintenance routine.

Using Your Sauna in the Winter

One of the best parts of owning a sauna is having a warm, peaceful retreat during the cold Long Island winters. Regular sauna use can have wonderful health benefits, from reducing stress and chronic pain to improving sleep. Imagine stepping out of the cold and into the enveloping warmth of your own private sauna. It’s a fantastic way to practice self-care and create a cozy sanctuary right in your backyard. Integrating a sauna into your property transforms it into a year-round destination for wellness and relaxation, enhancing your entire landscape design.

Related Articles

Frequently Asked questions

Why should I choose a wood-burning sauna over an electric or infrared model? A wood-burning sauna offers a completely different kind of experience. While electric and infrared saunas provide consistent, controlled heat, a wood-fired model connects you to a more traditional and hands-on ritual. The process of building and tending the fire becomes part of the relaxation itself. Many people also find that the radiant heat from a wood stove feels deeper and more enveloping, creating a uniquely soothing atmosphere that’s hard to replicate.

What are the ongoing costs I should expect with a wood-burning sauna? Beyond the initial purchase and installation, your main recurring cost will be firewood. A typical session might use between $4 and $8 worth of quality hardwood. You will also want to factor in periodic professional chimney sweeping to keep everything safe and efficient. While the stove itself is very durable, thinking about these small, regular expenses will give you a clear picture of the long-term cost of ownership.

Is a wood-burning sauna difficult to maintain? It requires a bit more attention than an electric model, but the maintenance is quite straightforward. The most important tasks are regularly cleaning out ash from the stove and scheduling a professional to sweep the chimney to prevent buildup. You’ll also want to keep the interior wood clean with a simple wipe-down. With this basic care, your sauna stove can last for decades, and the structure itself is built for longevity.

Do I need a special permit to install a sauna on my Long Island property? It’s very likely that you will. Most towns and villages on Long Island have specific building codes and permit requirements for structures like saunas, especially if they involve a wood-burning stove or new electrical work. Before you begin your project, it is essential to check with your local municipality. A professional installer, like our team at Gappsi, can help you with this process to ensure your new sauna is both safe and fully compliant with all local regulations.

I’m interested in a custom sauna. What is the first step I should take? The best first step is to think about where you envision your sauna and how you plan to use it. Consider whether an indoor or outdoor placement works best for your home and how many people you’d like it to accommodate. Once you have a general idea, the next step is to consult with a design and build expert. We can walk you through material options, stove choices, and custom features to help bring your vision to life and create a sauna that perfectly fits your space and wellness goals.

Retaining wall construction showing a worker laying the concrete block foundation.

Retaining Wall Construction: A Step-by-Step Guide

A retaining wall is in a constant battle with gravity and water. Its entire purpose is to safely manage the immense pressure exerted by the soil behind it, a job that requires smart engineering. A successful wall isn’t just about stacking blocks; it’s about the unseen systems working behind the scenes. This includes a compacted gravel base that prevents settling, a robust drainage system that relieves hydrostatic pressure, and, for taller walls, geogrid reinforcement that anchors the structure to the earth. Getting these details right is the core of proper retaining wall construction. Skipping these steps can lead to structural failure, turning your beautiful new wall into a dangerous liability. This article will explain these critical engineering principles so you can ensure your project is built for safety and longevity.

Key Takeaways

  • Planning Prevents Problems: A successful retaining wall depends on the prep work, which includes creating a solid drainage plan to manage water, understanding your property’s soil type, and checking local Long Island building codes for permits.
  • Function and Style Go Hand in Hand: The type of wall you build (like gravity or segmental) depends on your slope and structural needs, while the material you choose (from natural stone to concrete blocks) will define your landscape’s aesthetic and overall budget.
  • Build it Right and Know Your Limits: Key construction steps, like creating a level, compacted base and backfilling with gravel for drainage, are essential for a long-lasting wall. While small walls can be a DIY project, you should always call a professional for large projects or if you see signs of failure like bulging or major cracks.

What Is a Retaining Wall?

A retaining wall is a structure built to hold back, or retain, soil. Think of it as a barrier that prevents soil from moving downhill due to gravity and erosion. When your property has changes in elevation, a retaining wall creates a stable, vertical boundary between the different levels. This simple concept is a powerful tool in landscaping, turning sloped, unusable ground into valuable, functional space. Whether you dream of a flat lawn for your kids to play on, a level base for a new patio, or a series of terraced garden beds, a retaining wall makes it possible.

These structures are much more than just a stack of blocks. They are carefully engineered systems designed to withstand immense pressure from the earth behind them. Proper construction is critical for safety and longevity, which is why professional masonry expertise is so important. A well-built retaining wall manages soil and water, protecting your home’s foundation and preventing landscape damage. At the same time, it serves as a beautiful design element that can define the character of your entire outdoor living area, adding depth, texture, and structure to your yard.

The Purpose of a Retaining Wall in Landscaping

A retaining wall serves two main purposes in your yard: it’s both a workhorse and a showpiece. Functionally, its primary job is to prevent soil erosion. On a sloped property, rain can wash away valuable topsoil and cause damage to your landscape. A retaining wall holds everything in place and can even help redirect water runoff to protect your home’s foundation. It also creates flat, usable areas where none existed before, giving you the perfect spot for a patio, garden, or fire pit.

From a design perspective, a retaining wall adds incredible visual appeal. It introduces clean lines, texture, and a sense of order to your landscape. You can use one to create stunning terraced gardens, build a raised flower bed, or frame a walkway. The materials you choose, from rustic natural stone to sleek concrete blocks, help define your home’s aesthetic. A thoughtfully designed wall becomes a central feature of your overall landscape design, not just a structural necessity.

Signs You Might Need One

You might need a retaining wall if you notice a few key issues around your property. The most obvious sign is soil erosion. If you see dirt washing away from hillsides or creating gullies in your yard after it rains, a retaining wall can solve the problem. Another clear indicator is having a sloped yard that is difficult to use or maintain. If you struggle to mow a steep hill or wish you had a level spot for outdoor activities, a retaining wall can reclaim that space for you.

Consider a retaining wall if you want to add new features to your property. Creating a flat surface is often the first step for installing a swimming pool, a patio for entertaining, or even a driveway. If your home is built on a hill and you have concerns about soil pressing against its foundation, a retaining wall can provide crucial protection. It effectively manages the earth and gives your home the support it needs.

Explore the Main Types of Retaining Walls

Retaining walls are not a one-size-fits-all solution. The right type for your Long Island property depends on the height of the slope, soil conditions, and the look you want to achieve. Understanding the main construction styles will help you have a more informed conversation with your contractor and choose a wall that is both beautiful and built to last. Let’s break down the four most common types you’ll encounter.

Gravity Retaining Walls

A gravity wall is the classic workhorse of retaining walls. It uses its own sheer weight and mass to hold back the soil, just as the name suggests. These walls are often built from heavy materials like large boulders, concrete blocks, or even gabions, which are wire cages filled with rocks. Because they rely on mass, they are typically built with a wide base that tapers toward the top. This type of retaining wall is straightforward and effective for walls up to about 10 feet high. We love using beautiful natural stone for gravity walls to create a timeless, organic look that blends perfectly with your landscape.

Cantilevered Retaining Walls

When you need a taller wall without the massive footprint of a gravity wall, a cantilevered design is an excellent choice. These walls are engineered with an L-shaped foundation made of reinforced concrete that extends into the soil behind it. The weight of the backfill on top of this base, or “heel,” helps anchor the entire structure, giving it incredible strength. This design uses steel rebar for reinforcement, making it more efficient than a gravity wall for higher slopes. It’s a sophisticated solution that requires precise engineering, making it a job best left to experienced masonry professionals.

Anchored Retaining Walls

For the most challenging situations, like very tall slopes or tight spaces, an anchored retaining wall provides maximum support. This design works by securing the wall to the earth behind it with a series of cables or rods. These anchors are drilled deep into the soil or rock and mechanically fastened, creating a strong brace against immense pressure. This method allows for thinner, taller walls than other systems might permit. Because of its complexity and the need for specialized equipment, an anchored wall is a project that absolutely requires an expert design and construction team to ensure it is installed safely and correctly.

Segmental Retaining Walls

Segmental retaining walls, or SRWs, are a popular and versatile option for many residential projects. They are built using high-quality, mortarless concrete blocks that interlock with each other. Their stability comes from this interlocking system and their own mass. For taller walls, they are often reinforced with layers of geogrid, a strong polymer mesh, placed in the soil behind the wall. SRWs come in a huge variety of colors, textures, and styles, making them an aesthetically pleasing choice for any landscape design. While smaller versions can be a DIY project, a properly engineered wall is crucial for ensuring long-term stability and safety.

Choose the Best Materials for Your Wall

The material you choose for your retaining wall does more than just hold back soil; it defines the entire look and feel of your landscape. Your decision will influence the wall’s durability, maintenance needs, and overall budget. From the classic beauty of natural stone to the engineered precision of concrete blocks, each option has its own set of benefits and considerations. Let’s walk through the most common materials so you can find the perfect fit for your home.

Concrete Blocks

If you’re looking for a reliable and versatile option, concrete blocks are an excellent choice. Specifically designed for this purpose, Segmental Retaining Wall (SRW) blocks are a popular solution because they are easy to work with, incredibly strong, and built to last a long time. These blocks are engineered to interlock, creating a powerful, unified structure that can handle immense pressure. They also come in a huge variety of colors, textures, and sizes, allowing you to achieve a custom look that complements your home’s style. Gappsi’s masonry experts can help you select a design that provides both structural integrity and aesthetic appeal for your landscape.

Natural Stone

For a truly timeless and elegant retaining wall, nothing compares to natural stone. As some experts note, using stones or boulders “can look very beautiful but can be expensive and hard to install.” Each stone is unique, giving your wall a one-of-a-kind character that blends seamlessly with the natural environment. While the cost and labor are higher than with other materials, the result is a stunning, durable feature that adds significant value and curb appeal to your property. Whether you prefer the rustic charm of fieldstone or the clean lines of cut stone, our team can source and install a wide range of porcelain and natural stone to create your vision.

Timber and Wood

Wood retaining walls, often built from railroad ties or timbers, can offer a rustic look at a lower initial cost. However, it’s important to consider their lifespan. According to retaining wall experts, wood is “often cheap and easy to use at first, but rots and breaks down quickly, so the wall won’t last long.” In Long Island’s climate, with its moisture and seasonal changes, wood is particularly vulnerable to rot, decay, and insect damage. While it might seem like a budget-friendly choice for a quick project, a timber wall will likely require replacement much sooner than one built from stone or concrete, making it a less permanent solution for your landscape.

Poured Concrete

Poured concrete walls, also known as cast-in-place walls, are known for their strength and can be finished with decorative textures or veneers. While they offer a solid and durable structure, they have a key drawback. These walls are very stiff and “don’t move with changes in weather or ground shifts, which can cause cracks.” Unlike segmental walls that have small joints allowing for minor movements, a rigid poured concrete wall can develop significant cracks over time as the ground freezes, thaws, and settles. This makes them a less forgiving option in climates with fluctuating temperatures. A professional can help determine if this is the right choice for your specific site conditions.

What to Plan Before You Build

A successful retaining wall project starts long before the first shovel hits the dirt. Proper planning is the single most important factor in building a wall that is not only beautiful but also strong and long lasting. Taking the time to think through these key details will save you from costly headaches and potential structural failures down the road. Let’s walk through the essential planning steps you need to consider before you begin construction.

Assess Your Soil and Slope

First things first, you need to understand the ground you’re working with. The type of soil and the slope of your yard will dictate much of your wall’s design. Is your soil sandy, or is it dense with clay? Sandy soil drains well but can be less stable, while clay holds water and can put immense pressure on a wall. The slope, or grade, of the land above and below the wall also adds pressure. A professional masonry designer can properly assess these conditions to ensure your wall is built to handle the specific forces of your landscape.

Determine Wall Height and Structural Needs

The height of your retaining wall is a critical decision. A short, decorative garden wall under two feet tall is a relatively simple project. However, as the height increases, so does the pressure behind the wall. Any wall taller than four feet typically requires reinforcement, such as a geogrid mesh. This special material is layered within the backfill to anchor the wall into the earth, creating a stronger, more stable structure. For these taller walls, it’s essential to work with an expert who understands the engineering required to keep your property and family safe.

Create a Drainage Plan

Water is the number one enemy of a retaining wall. Without a proper escape route, water from rain and runoff will collect behind the wall, creating what’s known as hydrostatic pressure. This force is powerful enough to cause a wall to bulge, crack, or even collapse. A solid drainage plan is non negotiable. This usually involves a layer of gravel behind the wall and a perforated pipe at the base to channel water away safely. Skipping this step is one of the most common and costly mistakes, which is why our restoration services often involve fixing walls built without proper drainage.

Review Long Island Building Codes and Permits

Before you start building, you need to do your homework on local regulations. Many towns across Long Island, in both Nassau and Suffolk counties, have specific building codes for retaining walls. Generally, walls over a certain height, often three or four feet, require a building permit and plans from a licensed engineer. Checking with your local village or town building department is a crucial first step. Working with an experienced company like Gappsi ensures that all necessary permits are secured and that your project is fully compliant with local codes from start to finish.

Gather Your Essential Tools and Equipment

Before you break ground, let’s talk tools. Having everything you need on hand before you start makes the entire process smoother, safer, and a lot more enjoyable. Think of it like preparing your ingredients before you start cooking. A well-built retaining wall starts with the right equipment. While you might have some of these items in your garage, others, like heavy-duty compaction equipment, are often worth renting for a day. Getting organized now will save you from making frustrating trips to the store mid-project. Let’s walk through exactly what you’ll need to get the job done right.

Tools for Digging and Excavation

This is where the real work begins, so you’ll want a few key items to handle the digging and soil moving. A round-point shovel is perfect for breaking into compacted earth, while a square-point shovel is better for scooping and moving loose material. A sturdy wheelbarrow is a must-have for hauling away soil and bringing in gravel for your base. You will also need a heavy-duty hand tamper to begin compacting your foundation. These basic tools are the foundation of your project, so make sure they are in good condition before you start.

Tools for Leveling and Measuring

Accuracy is everything when building a retaining wall. Even a small error at the base can become a big problem by the time you lay the top course. Your essential toolkit should include a tape measure, a string line with stakes, and a 4-foot level. These will help you keep your lines straight and your layers perfectly horizontal. If you’re working with concrete blocks or natural stone, you may also need a circular saw with a masonry blade or a hammer and chisel for making precise cuts. This is where professional-grade tools make a huge difference in the final look.

Compaction Equipment

Creating a stable, compacted base is a non-negotiable step for a wall that lasts. While you can use a hand tamper for very small projects, we highly recommend using a plate compactor. You can typically rent one from a local equipment supplier. This machine uses vibration and weight to tightly pack the gravel base, removing air pockets and creating a solid foundation that won’t settle over time. Skipping this step is one of the biggest mistakes DIY builders make, so do yourself a favor and get the right tool for this critical task.

Safety Gear

Last but certainly not least, let’s talk about safety. Construction projects come with inherent risks, but you can protect yourself by using the right personal protective equipment (PPE). At a minimum, you should have sturdy, closed-toe work boots, heavy-duty gloves to protect your hands from blisters and cuts, and safety glasses to shield your eyes from flying debris, especially when cutting blocks or stone. Building a beautiful retaining wall is the goal, but ensuring you do it safely is the most important part of the project. Don’t start working until you have your safety gear ready.

How to Build a Retaining Wall: A Step-by-Step Guide

Building a retaining wall is a rewarding project that can completely reshape your yard, but it requires careful planning and a good amount of physical work. This guide breaks down the construction process into manageable steps. While many homeowners can tackle smaller, decorative walls, remember that walls over a few feet high often require professional engineering and construction to ensure they are safe and long-lasting. For larger or more complex projects, working with an experienced masonry team is the best way to guarantee a beautiful and structurally sound result.

Before you grab a shovel, it’s important to have a solid plan. You should already have your materials selected, your design finalized, and any necessary permits from your local Long Island municipality in hand. Once you have all your ducks in a row, you can get started on the build. We’ll walk through each phase, from digging the first trench to placing the final capstone. Following these steps will help you create a wall that not only looks great but also functions correctly for years to come.

Step 1: Mark and Excavate the Site

First, you need to outline exactly where your wall will go. Use wooden stakes and a string line to create a clear guide for your trench. This simple step ensures your wall will be straight and positioned correctly. Once your outline is set, it’s time to start digging. You’ll need to excavate a trench that is deep and wide enough to hold your gravel base and the first course of blocks. A good rule of thumb is to dig the trench deep enough to bury about half of your first block, which provides a strong anchor. Make sure the bottom of the trench is as level as possible before moving on.

Step 2: Lay the Gravel Base and Foundation

With your trench dug, the next step is to create a solid foundation. This involves laying a base of crushed gravel. This base is critical for both stability and drainage, preventing the ground from shifting and water from pooling. Pour a layer of natural stone gravel, about four to six inches deep, into the trench. Spread it out evenly and then use a hand tamper or plate compactor to pack it down firmly. You need this base to be completely solid and level. Use a carpenter’s level to check it from front to back and side to side, adding or removing gravel as needed until it’s perfect. This is the foundation for your entire wall, so take your time to get it right.

Step 3: Build Up the Wall Courses

Now you can start laying the blocks. Place the first course of blocks directly on your compacted gravel base, making sure each one is level. Gently tap them into place with a rubber mallet. After the first row is set, sweep off any debris before starting the next. For added strength, you should stagger the joints of each new row, similar to a brick pattern. This means the block on top should sit over the seam of the two blocks below it. Depending on the type of retaining wall system you’re using, you may need to apply a concrete adhesive between each course for extra stability.

Step 4: Backfill With Gravel and Compact

As you build your wall higher, you need to backfill the space behind it. This isn’t just about filling a hole; it’s a key part of your wall’s drainage system. Directly behind the wall blocks, add a layer of crushed gravel at least 12 inches wide. This creates a drainage zone that allows water to flow down to the drain pipe at the base. Add the gravel backfill in layers, about six inches at a time, and compact each layer thoroughly. This prevents the fill from settling later, which could put pressure on your wall. Continue this process of building a course and then backfilling until you reach your desired height.

Step 5: Install Your Drainage System

Proper drainage is what separates a wall that lasts for decades from one that fails in a few years. To manage water, you’ll need to install a perforated drain pipe behind the first course of blocks at the base of the wall. Lay the pipe on the gravel base and make sure it has a slight downward slope to direct water away from the wall. You can have it daylight at one end or connect it to another drainage system. Cover the pipe with a filter fabric or “drain sleeve” to prevent soil from clogging the holes. This pipe will collect water that seeps through the backfill and safely carry it away, relieving the hydrostatic pressure that can cause walls to bulge or collapse and require future restoration services.

Step 6: Cap and Finish the Wall

The final construction step is to add the capstones. These are the flat, finished blocks that sit on the very top of your wall, giving it a polished look and protecting the structure below. Before placing them, make sure the top course of your wall is clean and level. Apply a generous amount of high-strength concrete adhesive, which you can find at the Gappsi Store, to the top of the wall blocks. Carefully set each capstone in place, ensuring it’s aligned correctly. The adhesive will secure the caps and tie the whole wall together. After the adhesive has cured, your wall is complete. You can then finish the landscaping around it, like adding topsoil and plants.

How to Maintain Your Retaining Wall

Once your retaining wall is built, a little routine care will ensure it stays strong and beautiful for years to come. Think of it like any other major feature of your home; regular check-ins help you catch small issues before they become big, expensive problems. Proper maintenance protects your investment and keeps your outdoor space safe and functional. Most of these tasks are simple and just require you to pay attention to your wall throughout the seasons. By staying on top of upkeep, you can enjoy the peace of mind that comes with a secure and well-maintained landscape feature.

Inspect Your Wall Regularly

Making a habit of inspecting your retaining wall a few times a year is the single best thing you can do for its longevity. After a big storm or as the seasons change are perfect times for a quick walk-around. Look closely for any new cracks, especially ones that are widening. Check if any part of the wall is bulging outward or seems to be leaning. Also, take note of any stones or blocks that have shifted out of place. Spotting these changes early gives you the chance to address them right away. A small crack is often a simple fix, but if left alone, it can lead to much more serious structural problems down the road.

Keep Drainage Clear and Working

Proper drainage is the secret hero of a long-lasting retaining wall. Its job is to channel water away, preventing pressure from building up behind the wall. When this system gets clogged, that water has nowhere to go, and the resulting force can cause bulging, cracking, or even failure. Check the drainage outlets, like weep holes or pipes, to make sure they are clear of dirt, leaves, and other debris. After it rains, look for areas where water might be pooling at the base or top of the wall, as this can signal a blockage. A simple cleaning with a wire or a blast from a garden hose is often all it takes to keep things flowing freely.

Clean and Seal the Wall’s Surface

Keeping your wall clean not only helps it look its best but also prevents the buildup of moss, mold, or algae that can hold moisture against the surface. For most materials, a simple spray with a garden hose or a gentle scrub with a brush and mild soap is enough. For tougher stains, a pressure washer on a low setting can work wonders. After cleaning, applying a high-quality sealant can provide an extra layer of protection against moisture and stains. Our team offers professional restoration and sealing services to help preserve the integrity and appearance of your stone or concrete wall for the long term.

Avoid These Common DIY Mistakes

While the drive to DIY is admirable, retaining walls are complex structures where small mistakes can have big consequences. Many failures happen because the immense pressure from soil and water is underestimated. Building on an unstable base, forgetting proper backfill, or skipping reinforcement are common errors that may not be obvious at first. These issues often remain hidden until a major bulge or crack appears, leading to repairs that are far more costly and difficult than getting it right the first time. If you notice signs of stress in a wall you’ve built, it’s wise to stop and assess before the problem gets worse.

Know When to Call a Professional

It’s important to know the difference between a simple maintenance task and a problem that needs an expert. If you see significant leaning, large or growing cracks, or widespread bulging, it’s time to call for professional help. These are signs of potential structural failure that go beyond a simple DIY fix. An experienced masonry construction company can accurately diagnose the root cause, whether it’s a drainage failure, a foundation issue, or something else entirely. Trying to fix major structural problems yourself can be unsafe and may lead to a complete collapse. A professional can ensure the repair is done correctly and safely, securing your property for the future.

Related Articles

Frequently Asked Questions

How high can I build a retaining wall myself? As a general guideline, many homeowners can comfortably build a decorative wall up to about two or three feet high. Once you start planning for a wall that’s four feet or taller, the project becomes much more complex. These taller walls hold back a tremendous amount of weight and pressure, so they almost always require professional engineering, a building permit from your local town, and specific reinforcement like geogrid to be safe and stable.

What is the single biggest mistake to avoid when building a retaining wall? The most common and costly mistake is failing to plan for proper drainage. Water that gets trapped behind a wall creates immense hydrostatic pressure, which is powerful enough to make the wall bulge, crack, or even collapse completely. A correctly installed system, including a gravel backfill and a perforated pipe at the base, is not an optional step; it is absolutely essential for the wall’s long-term survival.

How long should a professionally built retaining wall last? A retaining wall built by an experienced professional using high-quality materials like natural stone or segmental concrete blocks can last for many decades, often for the lifetime of the home. The key factors are a solid, compacted foundation, a well-designed drainage system, and proper construction techniques. In contrast, a material like wood may only last for about 10 to 15 years before it begins to rot and fail.

Can a retaining wall actually increase my property value? Yes, a well-designed retaining wall can certainly add value to your home. Functionally, it can transform a sloped, unusable yard into a flat, valuable space for a patio, garden, or play area. Aesthetically, a beautiful stone or block wall adds significant curb appeal and a high-end, finished look to your landscape. It’s an investment that improves both the usability and the appearance of your property.

My old retaining wall is starting to lean. Can it be repaired? Whether a leaning wall can be repaired depends entirely on the cause of the problem. Sometimes, minor shifting can be corrected. However, significant leaning often indicates a serious, underlying issue with the wall’s foundation or a complete failure of its drainage system. In these cases, a simple fix won’t work, and the wall may need to be rebuilt. The only way to know for sure is to have a professional assess the situation to diagnose the root cause and recommend a safe solution.

Modern sauna showroom on Long Island displaying models with wood benches and glass doors.

What to Look For in a Sauna Showroom Long Island

The world of home saunas can seem a little confusing at first. You’ll hear terms like traditional, infrared, steam, and löyly, and it can be hard to know which type is right for you. The truth is, the best sauna is the one that aligns with your personal health goals, whether you’re seeking muscle relief, stress reduction, or better skin. Instead of getting lost in online research, the most effective way to learn is by seeing the options in person. A visit to a sauna showroom Long Island lets you compare models side-by-side and get clear answers from experts who can guide you to your perfect match.

Key Takeaways

  • A Sauna Is More Than a Luxury: Think of a home sauna as an investment in your daily wellness. Regular use can help support your heart health, soothe sore muscles, reduce stress for better sleep, and even improve your skin’s appearance.
  • Match the Sauna to Your Lifestyle: To find the perfect fit, consider your personal health goals and your home’s layout. Decide between the intense heat of a traditional sauna or the gentle warmth of an infrared model, and be sure to plan for space, budget, and electrical needs ahead of time.
  • Find a Partner, Not Just a Retailer: The right showroom makes all the difference. Look for a team that offers a wide selection of display models, provides expert advice without pressure, and includes professional installation and after-sale support to ensure you love your sauna for years.

What Are the Health Benefits of a Home Sauna?

Adding a sauna to your home is more than just a luxurious upgrade; it’s a meaningful investment in your daily health and wellness. Think of it as creating your own personal retreat, a space where you can unwind and recharge your body and mind. Regular sauna sessions can become a cornerstone of a healthy lifestyle, offering a wide range of benefits that go far beyond simple relaxation. From supporting your heart to helping you get a better night’s sleep, the positive effects can be truly transformative. Integrating a sauna into your routine gives you a powerful tool for self-care, right in the comfort of your own home.

Support Cardiovascular Health

You might be surprised to learn that a sauna session can give your heart a gentle workout. As your body heats up, it works to cool itself down. Your heart rate increases and your blood vessels widen, improving circulation throughout your body. This process is similar to the effects of light to moderate exercise. While it’s not a substitute for your regular fitness routine, this passive cardiovascular activity helps keep your heart healthy and your circulatory system functioning well. Incorporating regular visits to your home sauna can be a relaxing and effective way to support your overall cardiovascular wellness.

Relieve Muscle and Joint Pain

There’s nothing quite like the deep, penetrating heat of a sauna to soothe sore muscles and aching joints. The warmth helps increase blood flow, which delivers more oxygen to tired or injured areas and helps carry away metabolic waste products. This process can significantly reduce muscle tension, alleviate stiffness, and speed up recovery after a workout or a long day of physical activity. For anyone who enjoys an active lifestyle, perhaps on their own backyard sports game courts, a sauna provides a natural and enjoyable way to manage pain and keep your body feeling its best.

Reduce Stress and Improve Sleep

In our busy lives, finding a moment of true peace can be a challenge. A sauna offers a quiet, warm sanctuary where you can disconnect from daily stressors. The heat encourages your body to release endorphins, the “feel-good” hormones that naturally reduce stress and improve your mood. This deep relaxation can have a profound effect on your sleep quality. Using your sauna in the evening helps signal to your body that it’s time to wind down, leading to a deeper, more restorative night’s sleep. Creating a personal wellness escape with a sauna can completely change your approach to managing stress and prioritizing rest.

Promote Healthy, Glowing Skin

A sauna session is like a mini-facial for your entire body. As you sit in the warm, steamy air, your pores open up and you begin to sweat. This natural process helps cleanse your skin from the inside out, flushing away impurities and dead skin cells. The increased circulation also brings more oxygen and nutrients to your skin’s surface, which can improve your complexion and give you a healthy, natural glow. Over time, regular sauna use can lead to clearer, softer, and more radiant skin. It’s a simple yet effective way to support your skin’s health as part of your overall wellness routine.

Explore Different Types of Saunas

When you picture a sauna, you might imagine a classic wood-lined room with hot rocks. While that’s a great starting point, the world of saunas has expanded quite a bit. Understanding the main types will help you decide which experience best fits your wellness goals and lifestyle. From the intense, steamy heat of a traditional setup to the gentle, deep warmth of an infrared model, each offers a unique path to relaxation and health. Let’s look at the most popular options you’ll find.

Traditional Finnish Saunas

This is the classic sauna experience many people know and love. Traditional Finnish saunas use a heater to warm a compartment of stones. When the stones are hot, you can ladle water over them to create a burst of steam, or “löyly,” which temporarily increases the humidity. These saunas operate at high temperatures, typically between 150 and 195 degrees Fahrenheit. The result is a powerful, enveloping dry heat that induces a deep sweat. It’s an invigorating experience perfect for those who enjoy intense heat and the ritual of creating steam.

Modern Infrared Saunas

If you find the high heat of a traditional sauna a bit overwhelming, an infrared model might be perfect for you. Instead of heating the air around you, infrared saunas use special lamps to generate radiant heat that warms your body directly. This allows you to enjoy a deep, detoxifying sweat at a much lower and more comfortable temperature, usually between 120 and 140 degrees Fahrenheit. This gentle warmth is great for soothing sore muscles and joints, making it a popular choice for post-workout recovery and general relaxation.

Soothing Steam Rooms

While often grouped with saunas, steam rooms offer a completely different environment. Instead of dry heat, a steam room, or steam shower, is all about moist heat. A generator boils water and pumps steam into the sealed space, creating a high-humidity environment (nearly 100%) with temperatures around 110 to 120 degrees Fahrenheit. The warm, wet air can be wonderful for respiratory comfort and skin hydration. Gappsi can help you design and install a variety of saunas and steam rooms to create a personal spa right in your home.

Portable and Modular Options

You don’t need a dedicated, custom-built room to enjoy the benefits of a sauna. Today’s market includes a wide range of modular and portable options designed to fit different spaces and budgets. You can find compact one-person units that can tuck into the corner of a home gym or basement, as well as larger models for the whole family. These freestanding saunas are designed for easy assembly and can be a great way to add a touch of luxury without committing to a major home remodeling project.

How to Choose the Right Long Island Sauna Showroom

Finding the right sauna is about more than just picking a model from a catalog. It’s an investment in your home and your well-being, and the showroom you choose to work with is your partner in that process. A great showroom doesn’t just sell you a box; they guide you toward the perfect wellness retreat for your space and lifestyle. When you start visiting showrooms on Long Island, you’ll want to look beyond the products and consider the overall experience. Think of it as finding a trusted advisor for your wellness journey.

You want a team that understands your goals, offers high-quality options, and provides support long after the installation is complete. From the moment you walk in the door to your first relaxing session, the right partner makes all the difference. A showroom visit should feel exciting and informative, not overwhelming or high-pressure. Keep an eye out for a few key qualities that separate an average retailer from a truly exceptional one. These factors, from the variety of products on display to the expertise of the staff, will help ensure you feel confident and happy with your decision for years to come.

Extensive Product Displays

Seeing a sauna in person is completely different from looking at pictures online. A top-tier showroom will have extensive product displays, allowing you to step inside different models, feel the texture of the wood, and compare sizes. This hands-on experience is invaluable. A diverse selection of premium brands means you can find the perfect fit for your personal style, available space, and budget. Whether you’re dreaming of a classic Finnish sauna or a modern infrared unit, having options to explore helps you make a more informed choice. At Gappsi, you can discover our range of Tylo® saunas and custom designs to find the ideal match for your home.

Knowledgeable and Helpful Staff

The quality of customer service can make or break your experience. When you’re exploring your options, you’ll likely have a lot of questions. The staff should be friendly, attentive, and incredibly knowledgeable about every product they carry. They should be able to explain the differences between sauna types, discuss the benefits of various features, and offer practical advice based on your specific needs. A great team listens to your wellness goals and guides you to the right solution, giving you the confidence you need before and after your purchase. This kind of expert guidance is a clear sign that you’re in the right place.

Professional Installation Services

A sauna is not a simple piece of furniture; its installation requires precision and technical skill, especially concerning electrical and ventilation needs. A reputable showroom should offer professional installation services to ensure your sauna is set up correctly and safely. A trusted provider will manage the entire process for you, from confirming your model selection to handling the complete setup. This gives you total peace of mind, knowing that your investment is in the hands of experts who understand the product inside and out. With a company that has a long history of expert construction, you can be sure the job is done right.

After-Sale Support and Guidance

Your relationship with the showroom shouldn’t end the day your sauna is installed. Look for a company that offers strong after-sale support. What happens if you have a question about the controls a few months down the line? Or if you need help with routine maintenance? A showroom that values its customers will be available to provide ongoing guidance and service. This commitment shows they are invested in your long-term satisfaction and want you to get the most out of your new wellness tool. It’s a sign of a business that truly stands behind its products and its work.

Clear Pricing and Financing Options

A sauna is a significant purchase, and you deserve complete transparency when it comes to cost. A trustworthy showroom will provide clear, upfront pricing that details every aspect of the purchase, including the unit itself, delivery, and installation fees. There should be no surprises or hidden charges along the way. Many premier showrooms also offer financing options to help make your investment more manageable. This flexibility allows you to prioritize your health and wellness without compromising your budget. Clear pricing and accessible financing are hallmarks of a professional company that respects its customers.

What to Consider Before Buying a Sauna

Adding a sauna to your home is an exciting step toward creating a personal wellness retreat. It’s more than just a luxury item; it’s an investment in your health, relaxation, and your home’s value. Before you jump in, it’s smart to think through a few key details to make sure you choose the perfect sauna for your space and lifestyle. Making the right choice from the start ensures you’ll enjoy every moment of warmth and tranquility for years to come.

From figuring out the best location to understanding the technical requirements, a little planning goes a long way. You’ll want to consider where the sauna will fit, whether an indoor or outdoor model is right for you, and what your home’s electrical system can handle. Of course, your budget is also a major factor, as is thinking about what you hope to gain from your sauna sessions. Are you looking for muscle relief after workouts, a quiet space to de-stress, or a way to improve your skin? Answering these questions will help you find the ideal model among the many saunas available. Let’s walk through the most important things to consider.

Available Space and Sizing

First things first: where will your new sauna live? You might be surprised by how versatile modern saunas are. They can be installed in a spacious primary bathroom, a basement, a garage, or even a converted spare room. The main requirements are a level floor and adequate ventilation. As a general rule, you’ll need a ceiling height of at least seven feet to ensure proper airflow and a comfortable experience. Before you start shopping, take some precise measurements of your intended area. Remember to account for some clearance space around the unit for installation and maintenance. This simple step will help you narrow down your options and ensure a perfect fit.

Indoor vs. Outdoor Installation

Next, decide whether you prefer the convenience of an indoor sauna or the rustic charm of an outdoor one. An indoor sauna offers easy access and privacy, seamlessly integrating into your daily routine. An outdoor model, like a classic barrel or cabin-style sauna, can transform your backyard into a stunning wellness oasis. Imagine stepping out of your sauna and into a cool evening, or pairing it with a swimming pool for the ultimate hot-and-cold therapy experience. Gappsi offers beautiful indoor and outdoor designs, allowing you to choose the option that best complements your home and lifestyle.

Electrical and Ventilation Needs

Let’s talk technicals. Different types of saunas have different power requirements. For example, most infrared saunas can run on a dedicated 15 or 20-amp outlet, similar to a standard appliance. Traditional Finnish saunas, which use electric heaters to warm rocks, often require more robust 240-volt wiring, similar to an electric stove. It’s crucial to have a licensed electrician assess your home’s capacity to ensure a safe installation. Proper ventilation is also non-negotiable for managing heat and moisture. Our team at Gappsi handles all these details, coordinating with electricians to guarantee your sauna is installed safely and correctly.

Your Budget and Long-Term Investment

A home sauna is a significant purchase, so it’s important to establish a clear budget. Costs can vary widely based on the type of sauna, its size, the materials used, and any custom features you choose. When planning your budget, remember to account for the total cost, which includes the unit itself, delivery, professional installation, and any necessary electrical work. While it’s tempting to focus on the initial price tag, think of your sauna as a long-term investment in your well-being and your property’s appeal. You can explore different options and finishes at the Gappsi store to find a high-quality sauna that aligns with your financial plan.

Your Personal Health Goals

Finally, think about why you want a sauna. Your personal health and wellness objectives can guide you to the perfect model. Are you an athlete looking to soothe sore muscles and speed up recovery? The deep-penetrating warmth of an infrared sauna might be ideal. If your goal is to de-stress, improve circulation, and enjoy a traditional social experience, a Finnish steam sauna could be the right fit. Identifying your primary motivation, whether it’s for relaxation, pain relief, or better skin, will help you select a sauna with the features that will benefit you most.

Common Sauna Myths vs. Facts

As you explore adding a sauna to your home, you’ll likely come across a lot of conflicting information. It can be tough to know what to believe. Let’s clear the air and separate some common myths from the facts, so you can make a confident choice for your wellness routine and find the perfect fit for your Long Island home.

Myth: The hotter, the better

Many people think you need to crank the heat to the absolute maximum to get any real benefits from a sauna. The truth is, effective thermal therapy is about achieving a consistent, therapeutic temperature, not enduring scorching heat. While a lukewarm room won’t do the trick, going too hot can be uncomfortable and even unsafe without adding extra health perks. Traditional saunas typically operate between 150°F and 195°F. The goal is to find a temperature within that range that allows you to relax and sweat comfortably for a sustained period, which is where the real health benefits of saunas30275-1/fulltext) come from.

Myth: Infrared and traditional saunas are the same

While both offer amazing health benefits, infrared and traditional saunas work in fundamentally different ways. A traditional Finnish sauna heats the air around you, creating that familiar hot, steamy environment. An infrared sauna, on the other hand, uses infrared light to heat your body directly at a lower ambient temperature. This makes it a great option for those who find the high heat of traditional saunas too intense. When considering an infrared model, it’s important to look at the quality of the technology, including both electric and magnetic fields (EMF). We offer premium Tylo® saunas and custom designs that prioritize safety and performance, ensuring you get a therapeutic experience you can trust.

Myth: Saunas are only for relaxing

Relaxation is definitely a major perk, but a sauna session is so much more than just a quiet moment. Think of it as a passive workout. As your body works to cool itself down in the heat, your heart rate increases and your circulation improves. This process can help with everything from relieving sore muscles after a workout to supporting your cardiovascular health over time. It’s an active process that engages your body’s natural systems to promote detoxification through sweat, soothe joint pain, and leave your skin with a healthy glow. It’s a powerful tool for your overall wellness, not just a fancy way to unwind.

Myth: Saunas are a solo activity

While a quiet, solo sauna session can be a wonderful escape, saunas have deep cultural roots as communal spaces for connection. In Finland, where saunas are a way of life, they are places for families and friends to gather, talk, and relax together. Bringing a sauna into your home can create a unique social hub for your family or a relaxing ritual to share with friends. Imagine it as part of a complete backyard retreat, a perfect complement to your patio and masonry work. Whether you want a cozy two-person model or a larger design for entertaining, a sauna can be a beautiful way to bring people together.

Find Your Perfect Sauna at Gappsi

When you’re ready to bring the wellness benefits of a sauna into your Long Island home, finding the right partner is just as important as choosing the right model. At Gappsi, we combine an extensive selection of world-class saunas with the personalized design and construction expertise our community has trusted for decades. We’re here to guide you through every step, from exploring different styles in our showroom to the final installation, ensuring your new home spa is a perfect fit for your space and lifestyle.

Discover Our Tylo® Saunas and Custom Designs

Your home is unique, and your sauna should be too. We offer a wide range of options to suit any preference, including traditional Finnish wood-burning saunas, modern electric dry saunas, and gentle infrared models. We are proud to feature premium Tylo® saunas, known for their exceptional quality and innovative design. If you have a specific vision, our team specializes in creating custom saunas that integrate seamlessly into your home’s design. Whether you’re looking for a classic cedar cabin feel or a sleek, contemporary steam room, we have the materials and expertise to bring your ideal wellness retreat to life.

Get a Personalized Consultation With Our Experts

Choosing a sauna involves more than just picking a model from a catalog. We encourage you to visit the Gappsi Store to experience the different options firsthand and speak with our team. Our knowledgeable staff is here to listen to your goals, answer your questions, and help you understand the practical considerations for your home. During a personalized consultation, we’ll discuss everything from sizing and placement to electrical needs, making sure you feel confident in your decision. Our goal is to provide a seamless and enjoyable experience, helping you find the perfect sauna that will bring you relaxation and wellness for years to come.

Related Articles

Frequently Asked Questions

What’s the real difference between a traditional sauna and an infrared one? Think of it as the difference between sitting in a hot room versus standing in the sun. A traditional Finnish sauna uses a heater to warm the air around you to a high temperature, creating that classic, intense heat. An infrared sauna uses special lamps to send radiant heat directly to your body, allowing you to sweat deeply at a much lower, gentler air temperature. The choice really comes down to personal preference: do you enjoy the powerful, enveloping heat of a traditional sauna, or do you prefer the deep, soothing warmth of an infrared model?

How much maintenance does a home sauna require? You’ll be happy to hear that maintaining a home sauna is surprisingly straightforward. The main tasks involve keeping it clean and dry to ensure its longevity. After a session, you can leave the door open to air it out. Regularly wiping down the benches and floor with a damp cloth is a good habit. It’s a small amount of upkeep that protects your wellness investment and ensures every session is fresh and inviting.

Do I need a lot of space or special wiring for a sauna? Not necessarily, as it depends entirely on the model you choose. There are compact, one or two person infrared saunas that can fit comfortably in the corner of a room and plug into a dedicated standard outlet. Larger, traditional saunas will require more space and typically need a 240-volt connection, similar to an electric oven. The best first step is to measure your available space and then have a professional help you assess your home’s electrical setup to see which options are the best fit for you.

How long should I stay in a sauna to get the health benefits? Consistency is more important than duration. If you are new to using a sauna, it is best to start with shorter sessions of about 10 to 15 minutes and see how your body feels. As you become more accustomed to the heat, you can gradually extend your time. The goal is to feel relaxed and refreshed, not exhausted. Listening to your body is the most important rule, so always step out if you begin to feel uncomfortable.

Can I try a sauna before I decide to buy one? Absolutely, and we highly recommend it. Visiting a showroom is the best way to truly understand the differences between models. It allows you to step inside, feel the quality of the materials, and get a sense of the space. Seeing them in person helps you visualize how a sauna will fit into your home and your life, making you feel much more confident in your final decision.