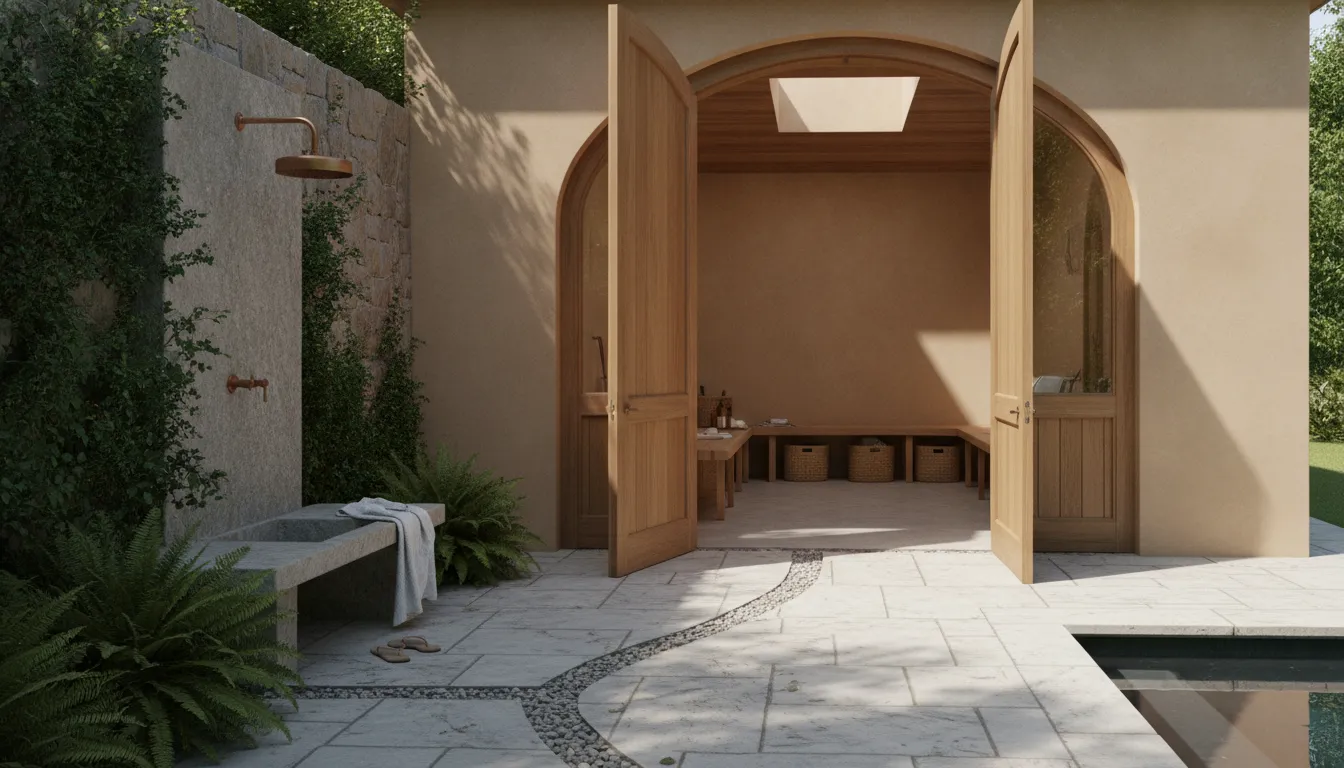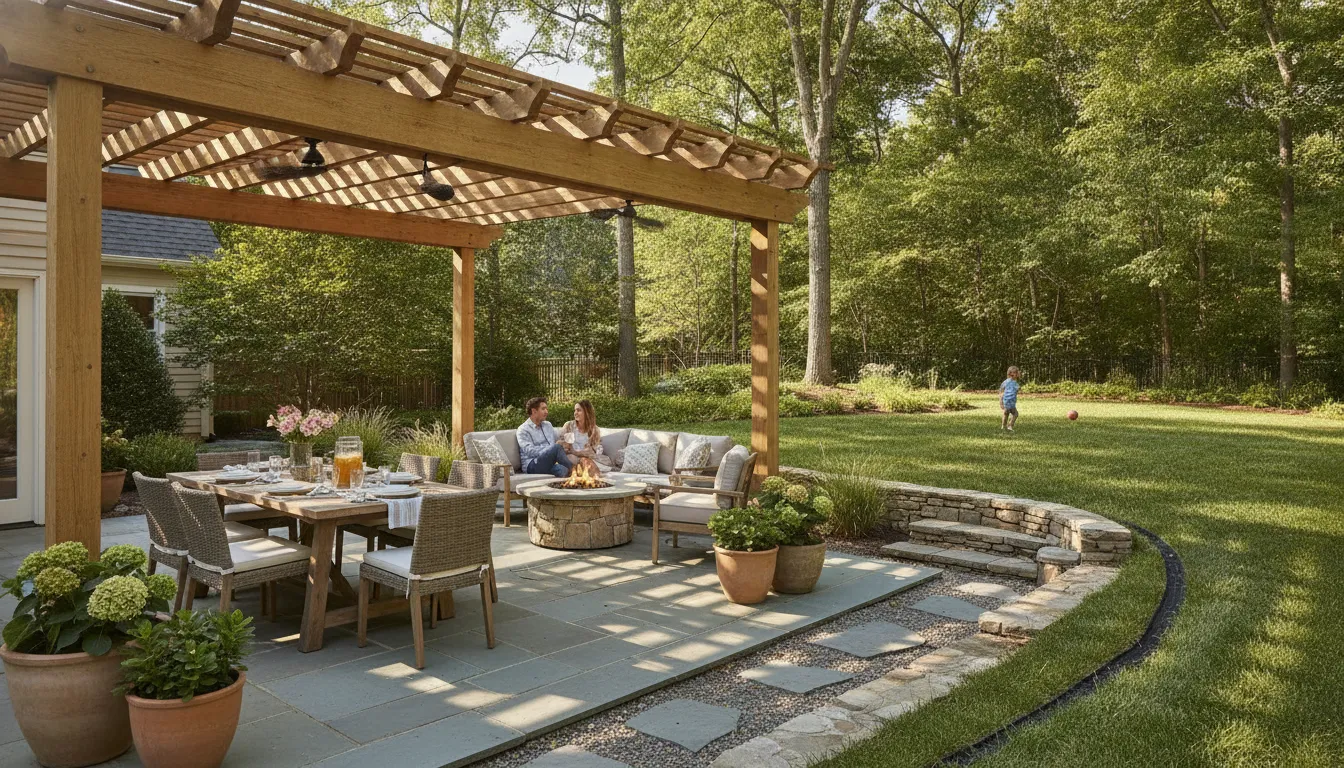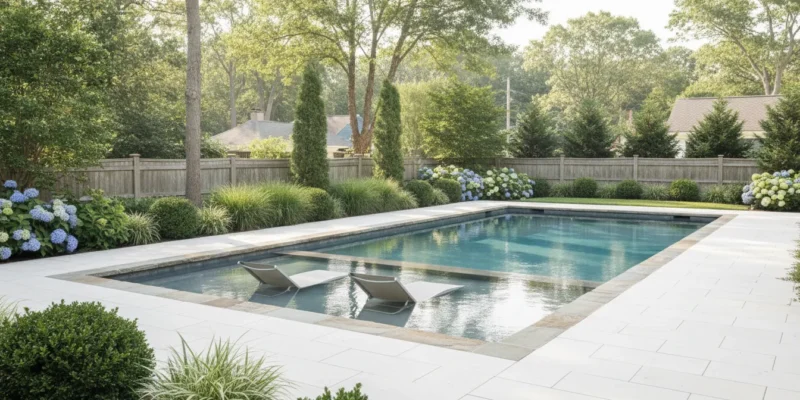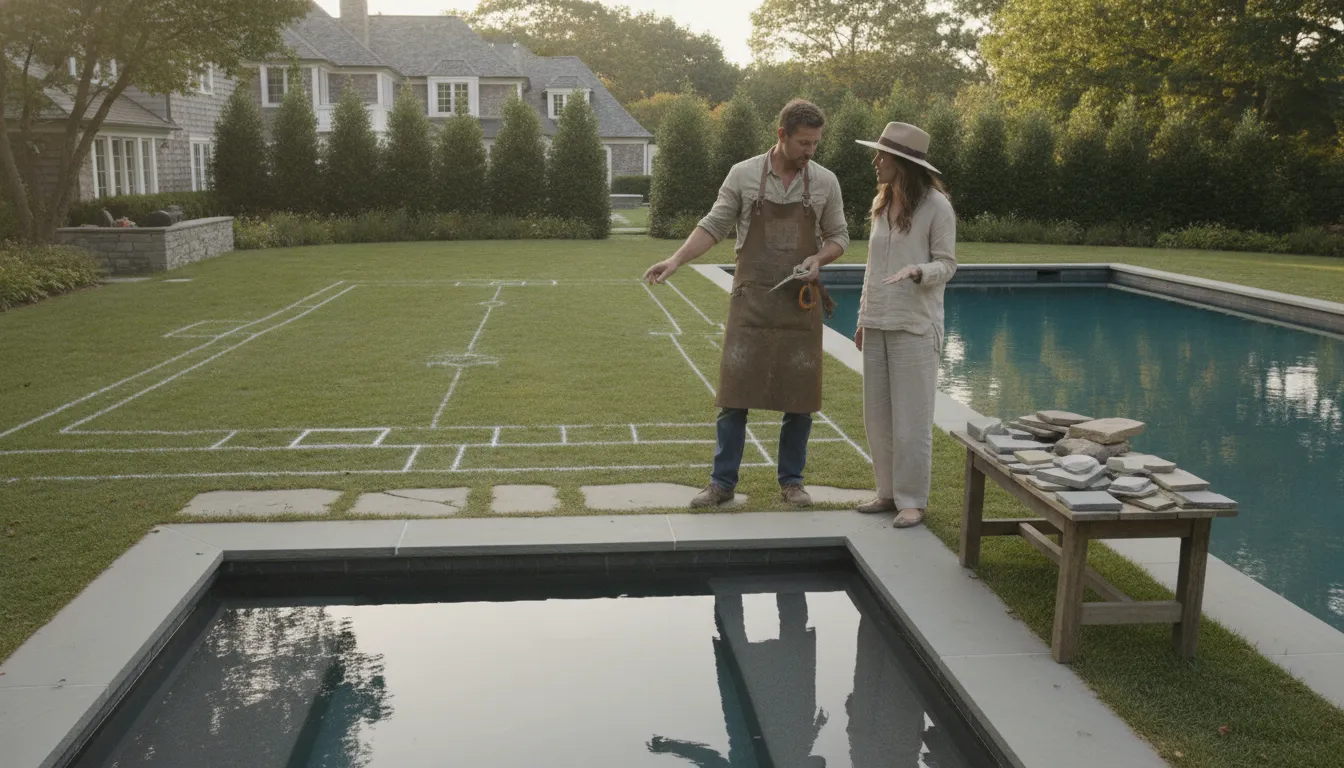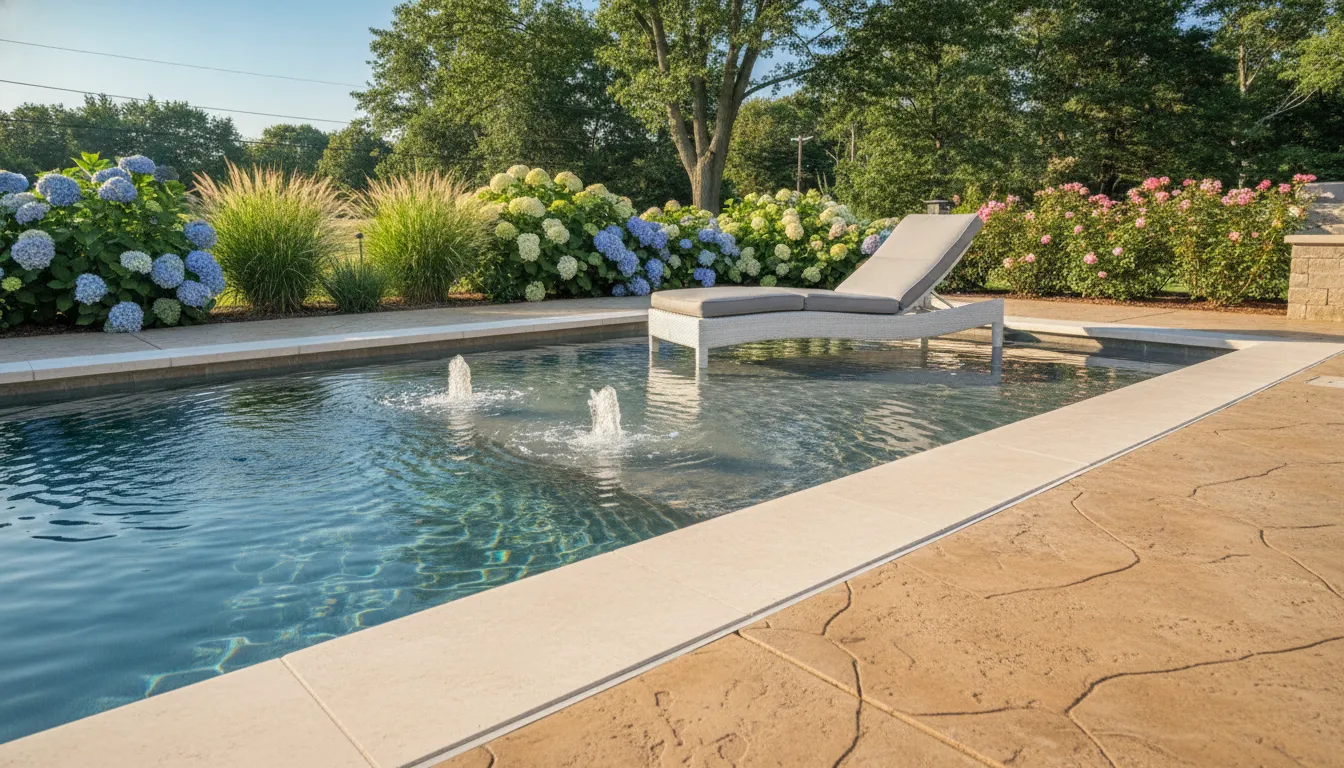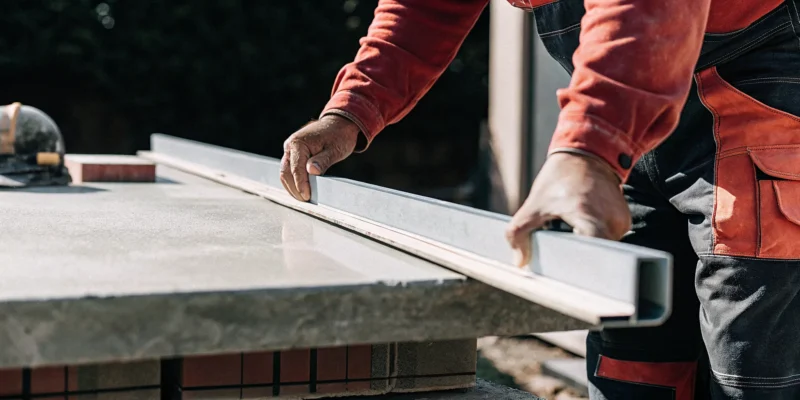
Tile contractor installing an indoor-outdoor tile transition for a Long Island home.

Find the Right Tile Installation Contractor on Long Island

If your tile project is part of a larger kitchen remodel, a basement finishing, or a new bathroom addition, you know how quickly the moving parts can add up. Coordinating plumbers, electricians, and painters is already a challenge, and your tile work needs to fit into that puzzle perfectly. The last thing you need is a contractor who only sees their small piece of the project. A successful renovation depends on seamless integration and clear communication across the board. Finding a tile installation contractor on Long Island who can work within a larger team or, even better, is part of a full-service company, is key to a stress-free experience and a cohesive final result.

Key Takeaways

  • Prioritize Value Over Price: The cheapest bid can be a red flag for cut corners and low-quality work. Focus on finding a contractor whose price reflects proven experience and a commitment to a durable, long-lasting installation.
  • Vet Your Contractor Thoroughly: Protect your home and investment by doing your due diligence. Always confirm a contractor is licensed and insured, check their references, and get a detailed written contract before any work begins.
  • Insist on Proper Surface Preparation: A beautiful tile job is only as good as the foundation beneath it. A top-tier contractor will have a clear plan for surface prep and waterproofing, which is the most critical step for preventing future cracks and water damage.

What Does a Tile Installation Contractor on Long Island Actually Do?

When you think of a tile contractor, you probably picture someone on their knees, carefully laying down a new kitchen floor. While that’s certainly part of the job, their expertise covers a much wider range of services. A professional tile installation contractor is a skilled artisan who works on projects for both homes and businesses, handling everything from intricate designs and installations to essential repairs and long-term maintenance. They are specialists who ensure your tiled surfaces are not only beautiful but also durable and correctly installed to last for years. They help select materials, prepare surfaces, and execute the installation with precision. Understanding the full scope of what they do can help you find the right expert for your specific project, whether it’s a small bathroom update or a large-scale commercial renovation.

Tile Installation for Your Home

For homeowners, a tile contractor brings your vision for indoor and outdoor living spaces to life. Their work is central to creating functional and stylish kitchens, bathrooms, and living areas. This includes installing everything from classic subway tile backsplashes to elegant porcelain floor tiles and custom-designed showers. A great contractor helps you select the right materials and ensures every tile is perfectly placed for a flawless finish. Because tile is a key element in many renovations, these contractors often play a vital role in larger home remodeling projects, working to create cohesive and stunning results throughout your property.

Tile Installation for Your Business

Tile installation in a commercial setting comes with its own set of demands. Contractors working on business properties focus on durability, safety, and aesthetics that align with a brand’s image. They handle tile installation, waterproofing, repairs, and regrouting for spaces like retail stores, restaurants, and office buildings. These projects often require materials that can withstand heavy foot traffic and frequent cleaning. An experienced commercial contractor understands the importance of proper substrate preparation to prevent issues down the line, ensuring the tile installation is a long-lasting investment that adds professional polish to the business environment.

Tile Repair, Restoration, and Sealing

A tile contractor’s job doesn’t always end after the installation. Over time, tiled surfaces can face issues like cracked grout, settling floors, or leaking seals. Professional contractors are equipped to handle these common problems, restoring the integrity and appearance of your tile. To prevent damage and keep your surfaces looking their best, many contractors also offer specialized services. For example, applying a high-quality sealant is a crucial step that protects your investment from stains and moisture. Gappsi provides expert restoration and sealing to maintain your tile and stone surfaces for years to come.

What Types of Tile Do Long Island Contractors Work With?

When you start thinking about a tile project, you quickly realize just how many options are out there. From sleek and modern to rustic and natural, the material you choose sets the entire tone for your space. Experienced Long Island contractors work with a wide range of tiles, and understanding the key differences will help you make a choice you’ll love for years. It’s not just about looks; it’s also about finding the right material for the job, whether it’s for a busy kitchen floor, a serene bathroom shower, or a durable outdoor patio.

Porcelain and Ceramic Tile

Porcelain and ceramic are two of the most popular choices for home projects, and for good reason. Porcelain is a superstar when it comes to durability. Because it’s non-porous, it’s incredibly resistant to moisture and stains, making it a perfect fit for bathrooms, kitchens, and mudrooms. If you’re worried about spills or humidity, porcelain offers fantastic peace of mind. Ceramic tile is another excellent option, often coming in at a more budget-friendly price point. It offers a huge variety of colors, textures, and styles, so you don’t have to sacrifice aesthetics to stay on budget. Both materials are versatile enough for floors, walls, and backsplashes.

Natural Stone Tile

If you’re looking for a touch of luxury and one-of-a-kind beauty, natural stone is hard to beat. Materials like marble, limestone, travertine, and slate bring organic patterns and rich color variations that simply can’t be replicated. Each tile has unique veining and character, meaning your floor or shower will be completely unique to your home. Homeowners love using natural stone for everything from grand entryways to elegant bathroom countertops and backsplashes. While it often requires a bit more maintenance, like sealing, the timeless appeal and inherent beauty of natural stone make it a worthwhile investment that adds significant value and sophistication to any space.

Choosing Tile for Indoor vs. Outdoor Spaces

The location of your tile is one of the biggest factors in your decision. For indoor spaces like a kitchen backsplash or a shower wall, you can focus on aesthetics and ease of cleaning. But for high-traffic floors or outdoor areas, durability is king. When planning an outdoor patio or pool deck, you need a material that can withstand Long Island’s changing weather and provide good slip resistance. Many porcelain tiles are designed for this, offering a textured finish and frost-proof durability. Natural stone is also a classic choice for outdoors, creating a seamless flow from your indoor living areas to your backyard oasis.

What to Look for in a Tile Installation Contractor

Choosing the right tile contractor is arguably the most important decision you’ll make for your project. It’s an exciting process, picking out the perfect style and color, but even the most beautiful tile can be a disappointment if it’s not installed with skill and precision. A poor installation can lead to uneven surfaces, wide or inconsistent grout lines, and even bigger problems down the road like cracked tiles or water damage. Your tile project is a significant investment in your home’s value and your daily enjoyment, so you want it done right the first time.

Finding a great contractor isn’t just about hiring someone to lay tile. It’s about finding a partner who will guide you through the process, respect your home, and deliver a finished product that looks incredible for years to come. When you begin your search for a contractor on Long Island, focusing on a few key qualifications will help you identify a true professional. Think of this as your checklist for finding a team you can trust with your vision.

Proven Experience and Craftsmanship

You want a contractor who has a history of successful projects, especially ones similar to yours. Don’t just take their word for it; ask to see a portfolio of their work. Pay close attention to the details in the photos. Are the grout lines consistent and clean? Are the cuts around outlets and corners precise? An experienced installer understands the nuances of different materials and can anticipate potential challenges before they become problems. A contractor with deep roots in the community has built a reputation on quality, ensuring their masonry and tile work speaks for itself and showcases a clear commitment to excellence.

Proper Licensing, Insurance, and Warranties

This part is completely non-negotiable. Any professional contractor you consider must be fully licensed and insured in New York. Licensing proves they meet state and local requirements, while insurance protects you and your property from liability in case of an accident during the job. Always ask for a copy of their license and certificate of insurance. Furthermore, a contractor who is confident in their work will offer a warranty for their craftsmanship. This is your assurance that they stand behind their installation and are committed to your long-term satisfaction, which is essential for any home remodeling project.

Expert Surface Prep and Waterproofing

A beautiful tile installation can quickly fail if the surface underneath isn’t properly prepared. A top-tier contractor knows that the most critical work happens before the first tile is even laid. This includes making sure the substrate is perfectly level, clean, and stable. For areas exposed to moisture like bathrooms, kitchens, or outdoor patios, a robust waterproofing system is absolutely essential. This isn’t just about the grout; it’s about a special membrane or barrier behind the tile that prevents water from seeping through and causing damage. Ask potential contractors about their waterproofing methods to ensure your investment is protected. Proper restoration and sealing techniques are also a sign of a knowledgeable pro.

Clear Communication and Project Transparency

Your contractor should be a partner you can easily talk to. From the initial consultation to the final walkthrough, communication should be open, clear, and consistent. A good contractor will listen to your ideas, answer your questions thoroughly, and provide regular updates on the project’s progress. They should also give you a detailed, written contract that clearly outlines the full scope of work, materials, timeline, and costs, so there are no surprises along the way. Feeling comfortable with your contractor and confident in their process is key to a positive renovation experience and a hallmark of a company that values the long-term relationships they build with clients.

Common Mistakes to Avoid When Hiring a Tile Contractor

Finding the right tile contractor is a huge step toward bringing your vision to life. But with so many options out there, it’s easy to make a misstep that could cost you time, money, and a lot of stress. To help you feel confident in your choice, let’s walk through some common pitfalls homeowners experience and how you can sidestep them. A little preparation goes a long way in ensuring your project is a success from start to finish.

Choosing Based on Price Alone

It’s completely understandable to have a budget, but choosing a contractor based only on the lowest bid is one of the biggest mistakes you can make. An unusually low price can be a red flag for subpar work, cheap materials, or cut corners on essential steps like surface preparation. This often leads to more costs down the line to fix cracked tiles, failing grout, or water damage.

Instead of focusing on the cheapest price, think about the best value. A reputable contractor’s price reflects their expertise, the quality of their materials, and the assurance that the job will be done right the first time. Investing in quality porcelain and natural stone is only worth it if the installation is flawless. A professional installation ensures your new tile will look beautiful and last for decades.

Skipping the Credentials Check

Before you hire anyone, it’s crucial to verify their credentials. This means checking for proper licensing and insurance. Failing to do this can leave you working with unqualified individuals who don’t follow industry standards, which can put your entire project at risk. A valid license shows the contractor has met the local requirements to operate legally.

More importantly, always confirm they have both liability insurance and workers’ compensation. Liability insurance protects your home from damage, while workers’ compensation covers you if a worker gets injured on your property. Without it, you could be held financially responsible. A professional home remodeling company will always provide proof of their credentials without hesitation, giving you essential peace of mind.

Forgetting to Get a Written Contract

A verbal agreement or a simple handshake is never enough for a home improvement project. Not having a detailed written contract can lead to serious misunderstandings about the scope of work, project costs, and timelines. A contract is your best tool for ensuring everyone is on the same page before any work begins. It protects you and the contractor equally.

Your contract should clearly outline every detail, including the specific tiles and materials to be used, a breakdown of labor and material costs, a payment schedule, and an estimated start and completion date. It should also include information on warranties for both materials and workmanship. For complex jobs like custom masonry, a thorough contract is non-negotiable.

Overlooking Past Reviews and References

Reviews and references offer a real-world glimpse into a contractor’s work ethic, reliability, and the quality of their finished product. Don’t just rely on the glowing testimonials featured on their website. Dig a little deeper by checking independent review sites and asking the contractor for a list of recent references you can actually speak with.

When you call references, ask specific questions. Were they happy with the final result? Did the project stay on schedule and on budget? How did the contractor handle unexpected issues? Seeing a contractor’s portfolio is also helpful. Visuals of their past work, like the projects on the Gappsi YouTube channel, can give you a strong sense of their craftsmanship and style.

Why Choose Gappsi for Your Long Island Tile Installation

Choosing a contractor for your tile installation is a big decision. You’re not just hiring someone to lay down tiles; you’re trusting them with the look, feel, and longevity of your space. At Gappsi, we understand that. We combine decades of experience with a commitment to quality and a process designed to give you peace of mind. From a simple kitchen backsplash to a full bathroom renovation, we treat every project with the same level of care and precision. Our goal is to make your vision a reality, ensuring the final result is not only beautiful but also built to last.

Our Full-Service Approach: From Design to Installation

One of the biggest challenges in any renovation is coordinating different specialists. With Gappsi, you don’t have to. Our comprehensive home remodeling division manages your entire project from the initial design to the final installation. Whether you’re updating your kitchen, finishing your basement, or creating a spa-like bathroom, our team handles every detail. This integrated approach means your project runs smoothly, stays on schedule, and results in a cohesive, professionally executed space. You get one point of contact and a dedicated team working together to bring your ideas to life, saving you time and eliminating stress.

Expertise in Porcelain, Natural Stone, and Custom Tile

The right material can transform a room, and our team has the expertise to work with a wide variety of high-quality tiles. We specialize in installing beautiful and durable porcelain and natural stone, perfect for creating stunning floors, walls, and custom features. Our deep knowledge of different materials allows us to recommend the best options for your specific needs, whether it’s for a high-traffic entryway or a luxurious outdoor patio. We help you select tiles that not only match your aesthetic but also provide the performance and durability your home deserves, ensuring a perfect finish for any indoor or outdoor project.

A Legacy of Trust with Long Island Homeowners Since 1987

For over three decades, Gappsi has been a trusted name in home improvement across Nassau and Suffolk County. Our roots in the community go back to 1987, and this long history is a testament to our unwavering commitment to quality craftsmanship and customer satisfaction. Long Island homeowners choose us because they know we stand behind our work. This legacy is built on countless successful projects and the relationships we’ve formed along the way. When you work with Gappsi, you’re partnering with a company that has a proven track record and a deep understanding of what it takes to create exceptional masonry and tile work.

Seamless Management of Large-Scale Projects

A successful tile installation, especially as part of a larger renovation, involves more than just setting tiles. It requires careful planning, technical drawings, and navigating local building codes. Gappsi excels at managing these complexities. We provide professional guidance from the start, offering architectural and engineering design drawings to ensure every detail is perfect. We can also assist with the permit process, working with our associates to make sure your project meets all regulations without causing you headaches. This level of project management is crucial for large-scale jobs, like installing new swimming pools or undertaking major additions, ensuring everything is completed correctly and efficiently.

Related Articles

Frequently Asked Questions

What’s more important: the tile I choose or the contractor who installs it? That’s a great question, and the honest answer is that they are equally important. You can pick the most stunning natural stone, but if it’s installed poorly with uneven lines or improper sealing, the final result will be a disappointment. A skilled contractor ensures your investment in beautiful materials pays off by delivering a flawless, durable finish. Think of them as partners; the material provides the beauty, and the installer provides the precision and longevity.

My budget is tight. Is it okay to go with the cheapest contractor? It’s tempting to choose the lowest bid, but this is one area where that can backfire. An unusually low price often signals that a contractor might be cutting corners, perhaps on crucial steps like surface preparation or by using lower-quality setting materials. These shortcuts can lead to costly repairs later on. A better approach is to look for the best value, which means finding a fairly priced, reputable contractor who guarantees their work and has the credentials to prove their expertise.

What does “surface preparation” involve, and why is it so important? Surface preparation is the critical foundation of any tile job. It means ensuring the floor or wall is perfectly level, clean, and structurally sound before any tile is laid. For wet areas like bathrooms or kitchens, it also includes applying a professional waterproofing system. Skipping these steps can cause tiles to crack, grout to fail, and moisture to seep into your walls, leading to mold and rot. A great contractor knows that the work you don’t see is just as important as the finished surface.

Can a tile contractor help with more than just laying the tile, like design or other parts of a renovation? Absolutely. While some contractors focus only on installation, a full-service company can be a partner in your entire project. They can help you with the initial design, select the right materials for your lifestyle, and manage how the tile work fits into a larger renovation, like a kitchen or bathroom remodel. This integrated approach ensures a cohesive look and a much smoother process, since you have one team overseeing all the moving parts.

How do I know if a tile is right for an outdoor space like a patio? Choosing tile for the outdoors requires a few special considerations. You need a material that can handle Long Island’s weather, including freezing and thawing cycles, without cracking. Porcelain tile is often an excellent choice because it’s non-porous and frost-resistant. You also want to look for a tile with a textured surface to provide good slip resistance, which is essential for safety around pools and on rainy days. An experienced contractor can guide you to specific products designed for outdoor performance.

A high-quality barrel sauna from the best barrel sauna company in Long Island.

Best Barrel Sauna Company in Long Island: A Guide

The allure of a low-priced barrel sauna kit can be tempting, but that initial savings often hides future problems. We’ve seen it happen: flimsy wood warps, improper roofs leak, and undersized heaters fail to deliver a true sauna experience. A quality barrel sauna is an outdoor structure that needs to withstand our Long Island climate, from humid summers to freezing winters. Making the right choice from the start saves you from costly repairs and disappointment. This article will show you how to spot the red flags of a low-quality sauna and highlight the essential features of a durable, long-lasting model, so you can confidently determine what is the best barrel saunas company in Long Island for your investment.

Key Takeaways

  • Prioritize the build for longevity: Your sauna’s lifespan depends on its construction. Choose thick, high-quality wood, like thermally modified options, to prevent warping and insist on a proper, weatherproof roof to avoid leaks and rot.
  • Match the heater and layout to your goals: The right heater is essential for reaching ideal temperatures, while a smart interior layout with good ventilation ensures a comfortable and effective session. These details define your sauna experience.
  • Look beyond the initial price: A low price often signals poor quality that leads to future problems. Instead, partner with a reputable company that provides professional installation, a strong warranty, and ongoing support for a truly lasting investment.

What Defines a Quality Barrel Sauna?

Barrel saunas are a fantastic addition to any Long Island backyard, offering a cozy and authentic wellness retreat just steps from your door. They deliver a true sauna experience with high heat, the satisfying steam that comes from pouring water on hot rocks (a practice called loyly), and refreshing air. But not all barrel

The best barrel saunas are defined by a few key characteristics that separate them from lower-quality options. The type and thickness of the wood are the most critical factors, as they determine the sauna’s durability, efficiency, and maintenance needs. A well-built sauna will resist warping and hold heat effectively, giving you a better experience every time. The heater, ventilation, and overall construction also play significant roles. Understanding these elements will help you choose from the many saunas available and find one that perfectly fits your wellness goals and stands up to our local climate.

Why Wood Type Matters: Cedar vs. Thermally Modified

When looking at barrel saunas, you’ll mainly see two wood options: cedar and thermally modified wood. While cedar is a traditional choice known for its pleasant aroma, thermally modified wood offers superior performance. This wood is treated with a special process using only heat and steam, which makes it incredibly durable and resistant to rot and insects. In fact, it often lasts twice as long as standard cedar and requires much less maintenance, which is a huge plus for busy homeowners. This treatment gives the wood a beautiful, rich color and ensures it remains stable through Long Island’s changing seasons.

The Importance of Wood Thickness

The thickness of the wood staves, or planks, that form the barrel is a clear indicator of quality. Some companies cut costs by using thin wood, sometimes less than 1.5 inches thick. This can lead to problems down the road, as thinner wood is more likely to twist or warp over time, creating gaps that let heat escape. For a long-lasting and efficient sauna, look for staves that are at least 1.65 inches thick. This thicker construction provides better insulation, ensures a tighter seal, and gives the sauna the structural integrity it needs to withstand years of use and exposure to the elements.

How the Barrel Shape Creates Faster, Even Heat

The iconic barrel shape isn’t just for looks; it’s a brilliant piece of engineering. A barrel sauna’s rounded design is highly efficient because it eliminates the unused air space you’d find in the corners of a square sauna. With less area to heat, the sauna warms up faster, saving you time and energy. The curved walls also promote natural heat circulation. As the hot air rises from the heater, it flows along the ceiling and down the curved sides, creating a consistent and enveloping warmth throughout the space. This means no more cold spots, just a perfectly even and enjoyable sauna session.

A Look at Top Barrel Sauna Companies on Long Island

When you start looking for a barrel sauna, you’ll find a few key players that consistently come up. It’s helpful to know who they are and what makes each one unique. Some companies specialize in traditional designs, while others offer a wider range of wellness products. Understanding these differences will help you narrow down your options and find the perfect fit for your Long Island home. We’ll look at three top companies, including a local expert and two respected national brands, to give you a clear picture of what’s available.

Gappsi

As a premier Long Island home improvement company, Gappsi offers a fantastic range of wellness solutions, including several types of saunas. You can choose from traditional outdoor barrel saunas, custom cabin-style models, indoor saunas, and even modern infrared units. This variety is great because it lets you pick an experience that matches your specific health goals, whether you love intense heat or prefer a gentler warmth. Gappsi focuses on smart design elements that prevent moisture buildup, which helps your sauna last longer. Their excellent reputation is built on years of dedicated service and attention to detail, making them a trusted local choice for any backyard transformation.

Almost Heaven Saunas

Almost Heaven Saunas is a well-known American manufacturer that has been crafting saunas since 1977. They are recognized for their signature barrel saunas and DIY kits, which appeal to homeowners who enjoy a hands-on project. The company blends traditional Finnish sauna building with quality American craftsmanship, using durable woods like Western red cedar and Nordic spruce. Their long history in the industry speaks to their reliability and commitment to creating an authentic sauna experience. If you’re looking for a company with a deep-rooted history in sauna manufacturing, Almost Heaven Saunas is a name you will definitely encounter in your research.

Barrel Sauna Company

As their name suggests, the Barrel Sauna Company specializes in one thing: creating cozy and affordable outdoor barrel saunas. They focus on delivering an authentic experience, with models that can reach over 180 degrees Fahrenheit for that classic high-heat session. Their saunas also allow for “Loyly,” the Finnish tradition of pouring water over hot stones to create steam. To ensure their products are a smart investment, the best barrel sauna kits from this company use thermally modified wood or high-quality cedar. These materials are known for their enhanced durability and lower maintenance needs, making them a practical choice for many sauna enthusiasts.

How Do the Top Brands Compare on Quality?

When you start looking at barrel saunas, you’ll quickly notice they aren’t all the same. While the charming barrel shape is a common feature, the real differences lie in the details that you can’t always see in a picture. The quality of a barrel sauna comes down to a few critical factors: the wood and its construction, the efficiency of the heater, and how well it’s designed to handle the weather. Getting these things right is the difference between a sauna that lasts for decades and one that causes headaches after just a few seasons.

Think of it like building any other part of your home. You wouldn’t choose flimsy materials for a deck, and the same logic applies here. The top brands distinguish themselves by using superior materials and thoughtful engineering. They understand that a sauna is an investment in your home and your wellness. As we look closer at these elements, you’ll learn how to spot a high-quality sauna that will provide a genuine, relaxing experience for years to come. Gappsi offers a curated selection of saunas designed with these principles in mind, ensuring every detail contributes to a lasting and enjoyable addition to your home.

Evaluating Wood and Construction

The wood is the soul of your sauna, and its origin matters. The best barrel saunas are typically made from wood sourced from Europe, Canada, or the US, where quality control is stringent. Be cautious of kits where the wood has been shipped all over the world for processing, as this can compromise its integrity. A well-built barrel sauna should feel cozy and solid, creating the perfect environment for high heat and that wonderful steam you get from pouring water on the rocks. The overall construction quality, from the thickness of the staves to the strength of the steel bands, determines how well your sauna will hold its shape and retain heat over time.

Comparing Heater Options and Efficiency

The heater is the engine of your sauna, and it’s a major factor in your overall experience. Some companies sell their saunas without a heater, which can add a significant hidden cost of $1,500 to $3,500 to your project. When comparing brands, always check if the heater is included and what type it is. Electric heaters are convenient and easy to use, while wood-fired heaters offer a more traditional, rustic experience. A quality heater will warm up efficiently, maintain a consistent temperature, and contribute to the sauna’s overall aesthetic. It’s important to choose a complete system from a supplier who understands how to pair the right heater with the right sauna for optimal performance.

Weatherproofing for the Long Island Climate

Here on Long Island, our weather can be tough on outdoor structures. From humid summers to freezing winters, your sauna needs to be built to withstand the elements. This is where many off-the-shelf barrel saunas fall short. We’ve seen firsthand how a sauna with an improper roof can suffer from leaks, rot, and serious deterioration in just a few years. True weatherproofing involves more than just a cover. It requires smart design elements that prevent standing water and a high-quality roof that can handle rain and snow. Proper sealing and protection are essential to extend the life of your sauna and protect your investment from our coastal climate.

Understanding Barrel Sauna Prices on Long Island

When you start looking at barrel saunas, one of the first things you’ll notice is the wide range of prices. It’s helpful to think of a sauna not just as a purchase, but as an investment in your home and your well being. The final cost depends on several key factors, including the quality of the materials, the size of the unit, the type of heater, and any custom features you choose. While you can find basic kits online, the sticker price often doesn’t tell the whole story of what you’re getting, especially when it comes to durability and long-term performance.

For a sauna to last through Long Island’s changing seasons, quality construction is essential. The price reflects the craftsmanship and materials needed to prevent issues like leaks or warping over time. A higher initial investment in better wood and a more robust build can save you from costly repairs down the road. When you work with a full-service company, the price typically includes expert guidance, delivery, and professional installation, ensuring your sauna is set up correctly and safely from day one. This comprehensive approach gives you peace of mind and a beautiful, functional wellness space for years to come.

Entry-Level vs. Premium Models

Barrel sauna kits generally start around $4,500 and can go up to $8,500 or more, which gives you a good idea of the spectrum from entry-level to premium. An entry-level model is a fantastic way to bring the sauna experience home without a huge initial investment. These saunas are typically made from standard woods like spruce or hemlock and come with a basic electric heater. They are functional and provide all the core health benefits.

A premium model, on the other hand, is designed for luxury and longevity. These saunas often feature superior materials like clear Western Red Cedar or thermally modified wood, which offer better durability and heat insulation. They might also include more powerful heaters, upgraded interior benches, and other refined details that create a more spa-like experience right in your backyard.

What Features Increase the Cost?

The single biggest factor influencing a sauna’s price is the wood. While standard spruce is common in more affordable models, premium options like grade-A thermo-aspen or clear cedar cost more for a reason. These woods are exceptionally durable, resist moisture and decay, and often stay cooler to the touch, making your sauna session more comfortable. The thickness of the wood also plays a role, as thicker staves provide better insulation and structural integrity.

Beyond the wood, the heater is another significant variable. A simple electric heater is standard, but upgrading to a more powerful unit, a Wi-Fi controlled model, or a traditional wood-burning stove will add to the cost. Other features like panoramic windows, multi-level benches, and custom lighting also contribute to the final price, transforming a simple sauna into a stunning backyard feature.

How Customizations Affect the Final Price

One of the best parts of buying a new sauna is tailoring it to your exact preferences. Customizations allow you to design a space that fits your aesthetic and wellness needs perfectly, but they also directly affect the final cost. You can choose everything from the wood type and heater to the style of the door and the placement of windows. An all-glass panoramic back wall, for example, creates a breathtaking view but will be more expensive than a standard solid-wood wall.

Working with a design and construction expert allows you to think beyond the sauna itself. You can integrate it into a larger backyard vision, perhaps by adding a custom deck, a stone walkway, or placing it next to a new patio. These thoughtful additions ensure your sauna doesn’t just sit in your yard but becomes a seamless part of your home’s landscape.

The Health Benefits of Owning a Barrel Sauna

A barrel sauna is more than just a beautiful addition to your backyard; it’s a powerful tool for your long-term health and well-being. Creating a dedicated space for relaxation and recovery at home allows you to invest in yourself every single day. From supporting your heart to helping you sleep better, the advantages of owning a sauna are both immediate and lasting, making it one of the most rewarding additions you can make to your home.

Improve Heart Health and Reduce Stress

Regular sauna sessions can have a profound impact on your cardiovascular system. Research shows that using a sauna just a few times a week can lower your risk of heart disease by over 20 percent. If you make it a more frequent habit, that number can jump to an impressive 50 percent. The benefits don’t stop there. Studies also link consistent sauna use to a reduced risk for high blood pressure, stroke, and even dementia. Investing in one of Gappsi’s high-quality saunas is a proactive step toward protecting your heart and mind for years to come.

Soothe Muscles and Sleep Better

Imagine stepping into a warm, calming space after a long day, feeling your muscles relax and the tension melt away. That’s the experience a barrel sauna offers. The deep, penetrating heat is fantastic for soothing sore muscles and easing joint pain, whether you’re an athlete, a weekend warrior, or someone dealing with chronic aches. This profound relaxation does more than just feel good in the moment. It helps quiet your mind and prepare your body for a truly restful night. Many people find that regular sauna use leads to deeper, more restorative sleep, helping them wake up feeling refreshed and ready for the day. It’s the perfect complement to an active lifestyle, especially if you have a backyard Sports Games Court.

Why More Long Islanders Are Investing in Home Wellness

It’s no surprise that more homeowners across Long Island are creating personal wellness retreats right in their own backyards. A barrel sauna is often the centerpiece of these spaces, and for good reason. They combine stunning design with genuine function, providing an authentic sauna experience that includes high heat and the satisfying steam, or Loyly, that comes from splashing water on hot rocks. This isn’t just about adding a luxury item; it’s about investing in a lifestyle of health and relaxation. A sauna can be the final piece of your dream backyard, seamlessly integrating with your patio, pool, and garden to create a complete oasis.

Common Barrel Sauna Problems (And How to Solve Them)

A barrel sauna can be a wonderful addition to your home, but it’s important to know what to look for to ensure you’re making a lasting investment. Like any outdoor structure, barrel saunas face challenges from the elements, and not all are built to withstand them. Understanding a few common issues will help you spot a high-quality sauna and avoid the frustration of a product that fails within a few years.

By focusing on key areas like water protection, wood quality, ventilation, and heater performance, you can confidently choose a sauna that will provide relaxation for years to come. Let’s walk through the most frequent problems and, more importantly, how to solve them from the start.

Preventing Leaks and Water Damage

The biggest threat to a barrel sauna’s longevity is water. A poorly designed roof is a recipe for disaster. We’ve seen firsthand how a client’s previous sauna, which had an improper shingle roof, suffered from leaks that led to rot and serious deterioration in just three years. The round shape of a barrel sauna requires a specialized roofing solution that can effectively shed water without letting it seep into the wood staves.

When you’re shopping, look beyond the sauna itself and inspect the roof design. A quality build will feature a dedicated, weatherproof covering that protects the entire structure. This is a non-negotiable feature for the wet and varied climate on Long Island. Investing in a sauna with a robust, integrated roof system from a reputable installer ensures your backyard oasis won’t turn into a maintenance headache.

Avoiding Warping with Thicker, Quality Wood

The beautiful wood construction of a barrel sauna is its main appeal, but it can also be its weak point if the materials aren’t up to par. Thin, low-quality wood is prone to twisting and warping as it expands and contracts with changes in temperature and humidity. This can create gaps between the staves, leading to heat loss and potential leaks.

To avoid this, always choose a sauna built with thicker wood, ideally around 1.65 inches. This substantial thickness provides the structural integrity needed to resist warping and keep the barrel perfectly sealed. Companies that prioritize quality materials understand that this is crucial for durability. At Gappsi, we apply this principle to all our projects, from selecting durable porcelain and natural stone for patios to using the best wood for our custom structures.

The Role of Proper Ventilation

Ventilation might not be the first thing you think of, but it’s essential for the health of your sauna. Without proper airflow, moisture from steam and sweat gets trapped inside the wood, causing it to shift, develop cracks, and eventually leak. A sauna that can’t breathe properly is one that will be neglected over time because it won’t perform well.

A well-designed sauna will include adjustable vents that allow you to control the airflow. This not only helps maintain a comfortable and fresh environment during your session but also allows the sauna to dry out completely afterward. This simple feature prevents moisture buildup and protects the wood from long-term damage. Proper construction, including details like ventilation, is a hallmark of our home remodeling and building philosophy.

Choosing the Right Heater Size

The heater is the heart of your sauna, and its size is critical for performance. A common mistake is purchasing a sauna from a company that doesn’t help you select the right heater for your specific needs and climate. Since barrel saunas typically don’t have traditional insulation, the heater has to be powerful enough to bring the space to temperature and maintain it, especially during a cold Long Island winter.

An undersized heater will struggle to get hot enough, leading to disappointing sauna sessions and inefficient energy use. A knowledgeable supplier will ask about your location and help you choose a heater with the right kilowatt (kW) rating for your sauna’s volume. This ensures your sauna heats up quickly and efficiently, so it’s always ready when you are. Exploring high-quality saunas from an experienced provider is the best way to get expert guidance on this crucial component.

What to Know Before You Buy a Barrel Sauna

Bringing a barrel sauna home is an exciting decision, but a little planning ensures the process is as relaxing as the sauna itself. Beyond choosing the right wood and heater, there are a few practical steps every Long Island homeowner should consider. Thinking through the logistics of placement, delivery, and long-term support will help you avoid common issues and protect your investment. Getting these details right from the start means you can focus on what really matters: enjoying years of wellness and tranquility in your own backyard.

Figuring Out Local Permits and Placement

Before you get too far in the process, it’s smart to check your local regulations. Different towns across Nassau and Suffolk County have their own zoning laws or building codes that might influence where you can place a sauna on your property. You’ll want to think about the perfect spot, one that is both convenient and compliant. This might involve rules about how far the structure needs to be from your property line or home. Working with a company that handles comprehensive home remodeling projects can be a huge help, as they are already familiar with local requirements and can guide you through the process.

What to Expect from Delivery and Installation

When your sauna arrives, the delivery and installation are just as important as the quality of the sauna itself. First, you’ll need a solid, level foundation ready for it, like a concrete slab or a paver patio. You also need to make sure the delivery team has clear access to your yard. A professional installation is critical. We’ve seen issues with saunas installed by others where improper roofing led to leaks and wood damage over time. Choosing a reputable company that guarantees a quality installation ensures your sauna is assembled correctly from day one, so it stays protected from the elements and ready for you to enjoy.

How to Evaluate Warranties and Customer Support

A good warranty is a clear sign that a company stands behind its product. When you’re comparing saunas, look closely at what the warranty covers, including the wood, the heater, and other components, and for how long. But a warranty is only as good as the company offering it. That’s why customer support is so important. You want a team that will be there for you if you have questions or need assistance down the road. We’re proud of our reputation for excellent customer support, which reflects our commitment to making sure every client is happy with their investment long after the installation is complete.

Common Mistakes to Avoid When Buying a Sauna

Investing in a sauna is an exciting step toward enhancing your home and wellness routine. But with so many options out there, it’s easy to make a misstep that could lead to disappointment. To make sure you get a sauna you’ll love for years, let’s walk through a few common pitfalls and how you can sidestep them.

Picking the Wrong Wood or Thickness

The type and quality of wood are the most important factors in your sauna’s longevity and performance. Cheaper saunas often use untreated wood that can quickly develop rot or water stains, especially with Long Island’s humid summers and wet winters. Instead, look for saunas built with high-quality cedar or thermally modified wood, which are naturally resistant to decay and moisture. Wood thickness also matters. Thicker staves provide better insulation, helping the sauna heat up faster and maintain its temperature more efficiently. They also contribute to a sturdier, more durable structure that won’t warp over time. When you choose a sauna, always ask about the wood source and its thickness.

Forgetting a Protective Roof

One of the biggest mistakes new barrel sauna owners make is assuming the rounded design is enough to shed water. The truth is, all barrel saunas can leak if they are left exposed to the elements without a proper roof. We’ve seen it happen firsthand. One of our clients had a barrel sauna from another company that suffered from leaks, rot, and serious deterioration in just three years because it had an improper shingle roof. A quality roof or a specially designed rain jacket is not an optional upgrade; it’s essential for protecting your investment from water damage. Proper protection ensures your sauna remains a beautiful, functional retreat instead of a maintenance headache that requires extensive restoration and sealing.

Prioritizing a Low Price Over Quality

It can be tempting to go for the cheapest option, but a low price tag on a sauna is almost always a red flag. Be cautious of companies that sell very low-quality saunas alongside a random assortment of home and garden items, as they often lack specialized knowledge. These budget models typically cut corners by using thin, untreated wood, inefficient heaters, and flimsy hardware. While you might save money upfront, you’ll likely face issues with performance, durability, and safety down the road. Think of your sauna as a long-term investment in your health and home. It’s better to purchase from a reputable sauna provider that stands behind its products with quality materials and craftsmanship.

Ignoring Maintenance and Support Needs

Your relationship with a sauna company shouldn’t end once the delivery truck pulls away. Before you buy, ask about the warranty, what maintenance is required, and what kind of customer support is available. What happens if you have a question about the heater or notice a board is out of place? Buying from a faceless online retailer can leave you stranded with no one to call for help. Choosing an established, local company like Gappsi means you have a team of experts in your corner. From professional installation to ongoing support, having a reliable partner provides peace of mind and ensures you can enjoy your sauna worry-free for many years to come.

How to Choose the Best Barrel Sauna for Your Home

Choosing a barrel sauna is an exciting step toward creating your own backyard wellness retreat. But with so many options out there, it’s easy to feel overwhelmed. To make sure you invest in a sauna that you’ll love for years to come, it helps to look beyond the aesthetics and focus on a few key components. Think of it less like buying a product and more like designing a permanent feature for your home. From the type of wood to the power of the heater, every detail matters. Here’s what you should consider to find the perfect barrel sauna for your Long Island home.

Focus on High-Quality Materials

The wood used to build your sauna is the single most important factor for its longevity and performance. While cedar is a popular choice, thermally modified wood offers superior durability. This wood is treated with heat and steam, making it highly resistant to rot and warping, which is a huge plus for our Long Island climate. It also requires less maintenance over time. You should also check the thickness of the wood. Look for staves that are at least 1.65 inches thick, as this robust construction prevents twisting and ensures your sauna remains a beautiful, functional escape for years. Quality materials are the foundation of a lasting investment.

Select the Right Heater for Your Needs

The heater is the heart of your sauna, responsible for creating the immersive heat you’re looking for. A common mistake is choosing a sauna with an underpowered heater. To get that authentic Finnish sauna experience, you need a unit that can consistently reach and maintain temperatures over 180°F. This level of heat is what allows you to create a satisfying steam, or “löyly,” when you sprinkle water over the hot stones. When you explore different saunas, make sure the heater is appropriately sized for the space, ensuring efficient heating and a perfect session every time.

Consider the Interior Design and Layout

A well-designed sauna does more than just look good; it functions beautifully. The interior layout directly impacts your comfort and the effectiveness of your sauna session. Look for designs with multi-level benches, which allow you to experience different heat intensities. Ideally, the main bench should be high enough to place your whole body above the level of the hot stones, ensuring you are enveloped in even, consistent heat. Thoughtful design also maximizes usable space, making the sauna feel comfortable and relaxing rather than cramped.

Look for Strong Warranties and Support

Your relationship with a sauna company shouldn’t end once the delivery truck pulls away. A strong warranty and accessible customer support are signs of a company that stands behind its product. Before you buy, ask about the warranty coverage for the wood, the heater, and other components. It’s also beneficial to work with a team that offers expert guidance from the start. Having a professional help you choose the right model and plan the installation ensures your new sauna perfectly fits your space and your wellness goals, giving you peace of mind for years to come.

Related Articles

Frequently Asked Questions

What is the most important feature to look for in a quality barrel sauna? The wood is without a doubt the most critical element. Pay close attention to both its type and its thickness. While cedar is traditional, thermally modified wood offers superior durability and resistance to rot, making it a smarter long-term choice for our climate. Just as important is the thickness of the wood staves. Look for planks that are at least 1.65 inches thick, as this provides better insulation and structural strength to prevent warping over time.

Why is a protective roof so critical for a barrel sauna on Long Island? A barrel sauna’s rounded top is not enough to protect it from rain and snow. Without a proper, dedicated roof, water will eventually seep between the wood staves, leading to leaks, rot, and significant damage. We have seen saunas deteriorate in just a few years because of an improper roof. A well-designed roof system is an essential feature that shields your investment from our weather, ensuring it remains a beautiful and functional retreat for years.

Is it better to choose a sauna with thermally modified wood or cedar? While both are good options, thermally modified wood generally offers better performance for an outdoor sauna. This wood goes through a heat and steam treatment that makes it incredibly durable and resistant to moisture and insects, often lasting much longer than standard cedar. It also requires less maintenance to keep it looking great. Cedar offers a classic look and a wonderful aroma, but if longevity and low upkeep are your top priorities, thermally modified wood is the superior choice.

How much does a barrel sauna cost, and what affects the price? The price for a barrel sauna can range from around $4,500 for a basic kit to over $8,500 for a premium model. The biggest factors influencing the cost are the type and quality of the wood, with options like clear cedar or thermo-aspen being more expensive. The size of the sauna, the power and type of heater, and any custom features like panoramic windows or upgraded benches will also affect the final price.

Can I install a barrel sauna myself, or should I hire a professional? While DIY kits are available, professional installation is highly recommended to protect your investment. A professional team ensures the sauna is assembled correctly on a proper foundation, which prevents future issues. They will also correctly install crucial elements like the roof and heater, ensuring everything is safe, weatherproof, and functions efficiently. Choosing a company that provides expert installation gives you peace of mind and guarantees your sauna is ready to enjoy from day one.

Driveway pavers installed by a professional contractor for a home in Nassau County.

Top 3 Driveway Paver Contractors in Nassau County

When you think about your home’s exterior, your driveway probably isn’t the first thing that comes to mind for a creative outlet. But it can be. Instead of a simple slab of gray concrete, your driveway can be a beautiful, patterned surface that complements your home’s architecture and landscaping. Pavers give you the freedom to design an entrance that is uniquely yours, using materials like classic brick, sleek porcelain, or elegant natural stone. Turning that creative idea into a finished project requires a partner with expertise. To get started, you need to know which contractor installs driveway pavers in Nassau County who can execute your design flawlessly.

Key Takeaways

  • View pavers as a long-term upgrade: A paver driveway is a smart investment that adds significant curb appeal and outlasts traditional surfaces, thanks to its superior strength and simple, localized repair process.
  • Match your material to your budget and vision: The final look and cost of your project are determined by your paver choice, so it is important to understand the unique benefits of concrete, brick, natural stone, and porcelain.
  • A great contractor is your most important asset: Protect your investment by carefully vetting any potential installer; verify their license and insurance, review past projects, and insist on a detailed contract that includes a warranty.

Why Choose Pavers for Your Driveway?

When you think about upgrading your driveway, you might picture simple asphalt or concrete. But what if your driveway could be a standout feature of your home? Choosing pavers is about more than just a surface to park on; it’s an investment in your home’s beauty, function, and long-term value. Unlike solid surfaces that can crack and stain over time, a paver driveway offers a unique combination of strength and style that is perfectly suited for Long Island’s climate. From classic brick to elegant natural stone, the options are nearly endless. Let’s look at a few key reasons why pavers are such a popular and smart choice for homeowners.

Enjoy Long-Lasting Durability

A professionally installed paver driveway doesn’t just look great, it also outperforms concrete and asphalt in strength and longevity. Pavers are incredibly resilient and can handle the weight of vehicles without cracking under pressure. Because they are individual units interlocked together, they can flex with the ground’s natural movement during freeze-thaw cycles. This prevents the large, unsightly cracks you often see in solid concrete slabs. The durability of high-quality porcelain and natural stone pavers provides exceptional long-term value, saving you money on future repairs and replacements.

Enhance Your Home’s Curb Appeal

Your driveway is one of the first things people see, and a well-planned paver project instantly improves the look of your property. Pavers give you the creative freedom to design a driveway that truly reflects your personal style and complements your home’s architecture. You can choose from a wide variety of materials, colors, and laying patterns to create a custom look. Whether you prefer the timeless appeal of brick or the sophisticated look of natural stone, a paver driveway adds a touch of elegance that significantly improves your home’s curb appeal. A beautiful entrance can even increase your property’s overall value, making it a wise and attractive investment.

Benefit from Better Drainage and Simpler Repairs

Water is one of the biggest culprits behind driveway problems, but pavers offer a smart solution. The small gaps between each paver allow rainwater to permeate the surface and drain into the ground below. This is a huge advantage over solid surfaces, where water pools and creates runoff. Proper drainage helps prevent slippery spots and dangerous ice patches from forming in the winter. Plus, if a paver ever becomes stained or damaged, the repair process is simple. Instead of a costly patch job, you can just lift and replace the individual paver, making long-term driveway maintenance much more manageable.

Nassau County’s Top Driveway Paver Contractors

Choosing the right contractor is the most important step in bringing your vision for a new driveway to life. A great contractor ensures the job is done right, using quality materials that will last for years. To help you start your search, we’ve highlighted three of the top driveway paver contractors known for their excellent work in Nassau County.

1. Gappsi

With a legacy stretching back to 1987, Gappsi brings decades of design and construction expertise to every project. We aren’t just paver installers; we are complete outdoor living specialists. This means we approach your driveway as an integral part of your home’s overall landscape and aesthetic. Our team handles everything from initial design to final installation, ensuring a seamless process. We specialize in a wide range of high-quality materials, including stunning porcelain and natural stone pavers that offer unmatched elegance and durability. Our extensive masonry services guarantee that your new driveway will be a beautiful, long-lasting investment.

2. Mighty Pavers

Mighty Pavers has built a strong reputation in Nassau County since 2001. They specialize in a variety of outdoor masonry projects, making them a solid choice for driveway installations. Their experience covers patios, walkways, and pool decks, showcasing their skill with paver materials. As a well-regarded patio contractor, they understand how to create functional and attractive outdoor surfaces that stand up to the elements. Mighty Pavers focuses on delivering durable construction and ensuring their clients are happy with the final result, making them a reliable option for your home improvement needs. You can learn more about their work at Mighty Pavers.

3. JT Masonry

JT Masonry is another excellent choice, with over 15 years of experience serving Nassau County homeowners. They offer a complete service for asphalt, concrete, and paver driveways, managing your project from the initial concept to the finished installation. What sets them apart is their detailed approach to planning. They conduct on-site visits to create a custom design and pay close attention to crucial elements like proper water drainage. As a licensed and insured contractor, JT Masonry provides homeowners with confidence and peace of mind. Learn more about their process at JT Masonry.

A Guide to Driveway Paver Materials

Choosing the right material for your driveway is one of the most important decisions you’ll make in your project. It sets the tone for your home’s entire exterior, impacting everything from curb appeal to long-term maintenance. The great thing about pavers is the sheer variety of options available. You can achieve a classic, traditional look or go for something sleek and modern. Your choice will depend on your personal style, your home’s architecture, and your budget.

Understanding the differences between materials like concrete, natural stone, porcelain, and brick will help you make a confident decision. Each one has its own unique set of benefits related to durability, appearance, and cost. Think of this as your personal guide to finding the perfect fit for your driveway. We’ll walk through the most popular choices so you can feel fully prepared when you discuss your vision with a masonry contractor. Let’s explore what makes each material special.

Concrete Pavers

Concrete pavers are a fantastic all-around choice, which is why they are so popular for driveways. They are engineered for strength and durability, so they can easily handle the weight of vehicles and the changing Long Island weather. One of the biggest advantages of concrete pavers is their versatility. They come in a huge range of shapes, sizes, and colors, allowing you to create custom patterns and designs that are difficult to achieve with other materials. If you want a specific look without the higher price tag of natural stone, concrete pavers are an excellent, cost-effective solution that doesn’t compromise on quality.

Natural Stone Pavers

If you’re looking for a driveway with undeniable elegance and a one-of-a-kind look, natural stone is the perfect choice. Materials like granite, travertine, and bluestone bring a unique beauty that simply can’t be replicated, since no two stones are exactly alike. Beyond their stunning appearance, natural stone pavers are incredibly dense and durable, making them a long-lasting investment for your home. While they are at a higher price point and may require sealing to maintain their color, the result is a luxurious and timeless driveway that significantly enhances your home’s curb appeal.

Porcelain Pavers

Porcelain pavers are a modern marvel in the world of outdoor surfaces. Because they are manufactured in a highly controlled process, they are extremely dense and non-porous. This means they are exceptionally resistant to stains, scratches, and fading from UV rays. For Long Island homeowners, their low water absorption rate is a huge plus, as it makes them resistant to frost and freeze-thaw cycles. Porcelain pavers are available in a wide array of styles that can convincingly mimic the look of natural stone or wood, giving you a high-end aesthetic with minimal maintenance.

Brick Pavers

There’s a reason brick pavers have been a favorite for centuries, they offer a classic, charming look that feels both warm and inviting. Their rich color and traditional feel complement many architectural styles, from colonial to Tudor. Brick is known for its durability and ability to hold its color for decades. A key benefit of a brick driveway is the ease of repair. If a single brick cracks or becomes stained, it can be individually replaced without having to redo the entire surface. This makes them a practical and beautiful choice for a long-term driveway solution.

What’s the Cost of Driveway Paver Installation in Nassau County?

Figuring out the budget for a new paver driveway is a top priority for most homeowners. While it’s a significant home improvement project, the final price tag can vary quite a bit. The total cost depends on a few key elements, including the materials you select, the complexity of the job, and the expertise of the installation team. Understanding these factors will help you set a realistic budget and know exactly what you’re paying for when you start gathering quotes from contractors.

How Material Choice Affects Cost

The type of paver you choose is one of the biggest drivers of your project’s cost. On average, you can expect to invest between $15 and $25 per square foot for a professionally installed paver driveway. For a standard two-car driveway of about 600 square feet, this puts the typical budget between $7,500 and $18,000. If you have your heart set on premium materials like historic cobblestone or elegant natural stone pavers, the cost can increase to $35 to $50 per square foot. While concrete pavers are a durable and budget-friendly option, the unique beauty of natural stone offers a level of sophistication that can completely transform your home’s entrance.

Other Factors That Influence Price

Beyond the pavers themselves, the quality of the installation plays a crucial role in the final cost and long-term performance of your driveway. Choosing the right contractor is a critical decision that affects the integrity and appearance of your property for years to come. An experienced masonry team knows how to properly prepare and compact the base, ensuring your driveway remains level and stable. A lower price can sometimes signal shortcuts in site preparation or material quality, leading to costly repairs down the road. Project size, site accessibility, and the complexity of your chosen paver pattern will also influence the final price.

How to Choose a Nassau County Paver Contractor

Selecting the right contractor is just as important as picking the perfect pavers for your driveway. This is a significant investment in your home, so you want a team that is skilled, reliable, and professional. Think of it as hiring a partner for your project. A great contractor will guide you through every step, from design and material selection to installation and aftercare. Taking the time to vet your options ensures your new driveway not only looks fantastic on day one but also stands strong for years to come. To make it easier, I’ve put together a simple checklist to help you find a qualified and trustworthy paver installer in Nassau County. Following these steps will give you the confidence that your project is in the right hands.

Verify Their Credentials: Licensing and Insurance

First things first, make sure any contractor you consider is properly licensed and insured. This is a non-negotiable step that protects you from liability and ensures a baseline of professionalism. A valid license from Nassau County proves the contractor has met local requirements and has the necessary knowledge for the job. Just as important is insurance. Ask for proof of both general liability insurance, which covers property damage, and worker’s compensation, which covers injuries on site. Without it, you could be held financially responsible for accidents. A reputable contractor will have no problem providing you with these documents.

Confirm Their Material Expertise

A top-tier contractor is more than just an installer; they are a material expert. They should be able to walk you through the differences between porcelain, natural stone, and concrete pavers, explaining the benefits and drawbacks of each for your specific needs and budget. Their knowledge should also cover the entire installation system. Ask them about their process for base preparation, the type of sand they use for bedding, and how they finish the joints. A contractor who can confidently explain these technical details is one who understands how to build a driveway that lasts.

Ask About Site Assessment and Drainage

What happens beneath the pavers is critical for a long-lasting driveway. Before any work begins, a professional contractor will conduct a thorough site assessment. This involves evaluating your property’s soil conditions, grading, and slope to create a solid plan. One of the most important parts of this plan is drainage. Proper water management is essential for preventing pavers from shifting, cracking, or developing icy patches in the winter. Ask potential contractors how they plan to handle water runoff. A well-thought-out drainage strategy shows that a contractor is focused on creating a durable, high-quality result.

Review Contracts, Warranties, and Support

Never start a project on a handshake alone. A professional contractor will provide a detailed written contract that outlines the entire scope of work. This document should include a project timeline, a breakdown of costs, the specific materials being used, and payment terms. It’s your roadmap for the project and protects both you and the contractor. You should also ask about warranties. A company that is confident in its work will offer a guarantee on both its craftsmanship and the materials used. This commitment shows they stand behind their projects and will be there to support you if any issues arise.

Check Reviews and Ask for References

Finally, do a little homework to see the contractor’s track record. Start by reading online reviews, but don’t stop there. Ask the contractor for a portfolio of their work, which you can often find on their website or social media channels. Gappsi, for example, has a YouTube channel showcasing completed projects. For even more insight, request a list of recent references. Speaking directly with a few past clients is one of the best ways to get an honest assessment of a contractor’s communication, professionalism, and the quality of their finished work. Hearing about their positive experience can give you the final piece of confidence you need.

Key Questions to Ask Your Paver Contractor

Choosing a contractor can feel like the biggest decision of your project. To make sure you find the right partner, it helps to have a list of questions ready. Think of it as a friendly interview where you get to learn about their process and they get to show off their expertise. A great contractor will welcome your questions and provide clear, confident answers. Getting these details sorted out upfront ensures everyone is on the same page and helps your project run smoothly from start to finish.

Their Experience and Portfolio

You wouldn’t hire someone for a job without looking at their resume, right? The same logic applies here. A contractor’s portfolio is their resume, showcasing their skills and style. Ask to see photos and videos of recent driveway projects they’ve completed. This gives you a real-world look at their craftsmanship. Don’t be shy about asking for references from homeowners they’ve worked with in the last year or two. Speaking to past clients is one of the best ways to gauge a contractor’s reliability, communication, and the quality of their finished work. You can often find examples of a company’s work on their YouTube channel.

The Project Plan: Materials, Drainage, and Timeline

Once you’ve seen their work, it’s time to talk specifics for your project. A detailed plan is a sign of a true professional. Ask about the installation process, especially how they handle grading for proper drainage. This is critical in Long Island, where poor drainage can lead to water pooling, shifting pavers, and ice patches in the winter. Inquire about the base material they use, as a solid foundation is key to a durable driveway. Finally, get a clear timeline for the project. Understanding the step-by-step plan will give you peace of mind and help you know what to expect while the masonry construction is underway.

Long-Term Care: Warranties and Maintenance

Your new driveway is a significant investment, so it’s smart to think about its long-term care from the very beginning. Ask potential contractors if they offer a written guarantee on both the materials and their workmanship. Be sure you understand exactly what the warranty covers and for how long. A contractor who stands behind their work with a solid warranty is showing confidence in their quality. You should also ask about recommended upkeep. Knowing how to properly care for your pavers will keep them looking beautiful for years, and it’s helpful to know if the company offers restoration and sealing services for future maintenance.

Related Articles

Frequently Asked Questions

How much longer will a paver driveway last than a traditional concrete one? A professionally installed paver driveway can easily last for 30 years or more, which is often double the lifespan of a typical concrete slab. The secret is in the interlocking system. Pavers can shift slightly with ground movement and temperature changes, which prevents the large, deep cracks that often ruin concrete driveways. While concrete might seem like a solid choice, it’s that very rigidity that becomes its weakness over time.

Are paver driveways difficult to take care of during Long Island winters? Not at all, in fact, they often perform better than solid surfaces. The joints between pavers help channel melting snow and ice away, reducing slippery spots. You can use a snowblower and plastic shovel just like you would on any other surface. When it comes to de-icing salts, high-quality pavers like porcelain and sealed natural stone are very resilient. Plus, if a paver ever gets damaged by a snowplow, you can simply replace that single stone instead of dealing with an ugly patch job.

I love the look of natural stone, but I’ve heard porcelain is a good option too. What’s the main difference? This is a great question because both are fantastic, high-end choices. Natural stone offers a unique, organic beauty since every single piece is different. It creates a truly one-of-a-kind, luxurious look. Porcelain, on the other hand, is a manufactured product engineered for performance. It’s incredibly dense, making it almost completely resistant to stains, scratches, and water absorption. You can get porcelain that beautifully mimics natural stone but with less required maintenance over its lifetime.

Why is the installation process so important? Can’t I just pick the prettiest pavers? While choosing a beautiful paver is the fun part, the work done underneath is what guarantees your driveway will last. A proper installation involves excavating the area and building a multi-layered base of compacted aggregate. This foundation is what prevents the pavers from sinking or shifting over time. A contractor who rushes this step might give you a lower price, but you will likely face expensive problems like an uneven, unstable driveway within a few years.

What does the typical installation process look like from start to finish? A professional project follows a clear path. It begins with a site assessment and design plan. Next, the team will excavate the old driveway and prepare the sub-base, ensuring it’s properly graded for drainage. They then lay and compact the aggregate base, add a sand setting bed, and carefully place the pavers in the chosen pattern. After cutting pavers to fit the edges, they install edge restraints, sweep sand into the joints to lock everything together, and perform a final compaction and cleanup.

Paver driveway quote for a new installation at a home in Long Island.

How to Get a Paver Driveway Quote in Long Island

One of the best things about choosing pavers for your driveway is the incredible design freedom. Unlike a plain slab of concrete, pavers allow you to create a truly custom look with unique patterns, borders, and rich colors that complement your home’s style. This creative potential is exciting, but it also means the cost can vary significantly. An intricate herringbone pattern with a decorative border will naturally have a different price tag than a simple, straightforward layout. To turn your design ideas into an actionable plan, you need to understand the budget. This is the point where you ask, “where can I get a quote for driveway pavers in Long Island?” to see how your vision aligns with the investment.

Key Takeaways

  • Understand the Full Scope of Costs: A paver driveway quote involves more than the price of the pavers; it includes site preparation, labor, and your specific material choice. Expect a range of $20 to $55 per square foot, and know that a detailed, itemized quote is the sign of a transparent contractor.
  • Vet Your Contractor Thoroughly: The success of your project depends on your contractor’s skill. Always verify their license and insurance, ask for references you can speak with, and get a detailed contract that specifies their base preparation process, which is essential for a long-lasting driveway.
  • Choose Pavers for Both Style and Durability: Select a material that not only matches your home’s aesthetic but can also withstand Long Island’s freeze-thaw cycles. High-density options like porcelain and natural stone offer superior resistance to weather, while routine maintenance like sealing will protect your investment for years.

How Much Does a Paver Driveway Cost in Long Island?

When you’re planning a new driveway, one of the first questions you’ll have is about the cost. It’s a significant investment in your home’s curb appeal and functionality, so it’s smart to understand the budget you’ll need. For a professionally installed paver driveway in Long Island, you can generally expect the cost to range from $20 to $55 per square foot. This is a broad estimate because the final price tag depends on several important factors, including the materials you choose, the size of your driveway, and the specific conditions of your property.

This price is higher than what you might pay for a basic poured concrete or asphalt driveway, but pavers offer unmatched durability, design flexibility, and long-term value. Unlike a solid slab that can crack over time, individual pavers can be replaced if one gets damaged, making repairs much simpler. The key is to get a detailed quote that breaks down every aspect of the project, so you know exactly what you’re paying for. A quality masonry contractor will walk you through these details to ensure there are no surprises.

Average Cost Per Square Foot by Material

The type of paver you select is one of the biggest factors driving the overall cost. Just like tile for a kitchen backsplash, pavers come in a wide variety of materials, styles, and price points. Concrete pavers are often the most budget-friendly option and offer a huge range of colors and shapes. On the higher end, you’ll find premium materials like natural stone and porcelain. These options provide a luxurious, high-end look that can transform your home’s entrance. For example, elegant porcelain and natural stone pavers are incredibly dense and resistant to stains and frost, making them a fantastic long-term investment for Long Island’s climate.

How Driveway Size Impacts the Total Cost

It might seem counterintuitive, but larger driveways can sometimes have a slightly lower cost per square foot. This is due to an economy of scale. Certain project costs are fixed, like transporting equipment to your home and setting up the worksite. When these initial expenses are spread out over a larger area, the price per square foot can decrease. Of course, the total project cost will still be higher for a 1,000-square-foot driveway than for a 500-square-foot one. Think of it like buying in bulk; you get a better unit price, even though your final bill is larger. This is just one reason why getting a custom quote is so important.

Additional Costs to Consider: Labor and Site Prep

The materials are just one piece of the puzzle. A significant portion of your paver driveway’s cost comes from the labor and extensive site preparation required for a lasting installation. Proper prep work is non-negotiable. It involves excavating the area, removing any old driveway material, grading the land for proper drainage, and installing a multi-layered base of compacted aggregate. This solid foundation is what prevents pavers from sinking, shifting, or becoming uneven over time. If your property has challenges like a steep slope or poor soil drainage, more intensive prep work may be needed, which can also influence the final cost.

What Factors Influence Your Paver Driveway Price?

When you start budgeting for a new paver driveway, you’ll quickly find that the final cost is more than just the price of the pavers. Several key factors come together to determine your total investment. Understanding these elements will help you set a realistic budget and make informed decisions as you plan your project. From the specific materials you fall in love with to the unique conditions of your property, each choice plays a role in the final quote. Let’s walk through the main components that will shape the price of your Long Island paver driveway.

Your Choice of Material

The material you select is one of the biggest drivers of your project’s cost. On Long Island, installed driveway pavers can range from around $20 to $55 per square foot, and this wide variation is almost entirely due to the type of paver you choose. For example, high-quality concrete pavers offer durability and a classic look at a more accessible price point. On the other hand, premium materials like natural stone or porcelain pavers will be at the higher end of the price spectrum due to their unique beauty and exceptional strength. At the Gappsi Store, you can explore a wide variety of options to find the perfect balance between your aesthetic goals and your budget.

Driveway Size and Shape

It makes sense that a larger driveway requires more materials and labor, which naturally increases the overall cost. However, there’s a small silver lining for bigger projects. The price per square foot can sometimes decrease slightly on very large driveways because fixed costs, like equipment delivery, are spread over a larger area. The shape of your driveway also matters. A simple, rectangular layout is generally more straightforward and cost-effective to install. If you’re dreaming of a driveway with elegant curves, intricate turns, or a unique shape, expect the cost to go up. These designs require more precise cuts and additional labor from skilled masonry experts to execute perfectly.

Site Conditions and Prep Work

What lies beneath your pavers is critical for a long-lasting driveway. Proper site preparation is a non-negotiable part of the process, and its complexity will influence the cost. A driveway must support the weight of vehicles, so it requires a much deeper and more robust base, typically 8 to 12 inches deep, compared to a simple patio. This involves excavating the area, possibly removing an old driveway, grading the land for proper drainage, and installing a strong aggregate base. If your property has significant slopes, poor soil quality, or drainage issues, your contractor will need to perform additional work to ensure the foundation is stable, which will be reflected in the final price.

Design Complexity

If you want to add a personal touch to your driveway, custom design elements can create a stunning first impression. However, this added flair comes with an increased cost. Features like decorative borders, intricate patterns such as herringbone or basket weave, and inlaid accents require a higher level of craftsmanship and more time to install. The more complex the pattern, the more cuts are needed, which adds to the labor involved. You might also consider integrating other features into your driveway design, such as landscape lighting or heated systems for melting snow. A comprehensive landscape design can incorporate all these elements into one cohesive plan.

Project Timing

Believe it or not, the time of year you schedule your installation can affect the price. The peak season for outdoor construction projects on Long Island is typically late spring through summer. During these busy months, contractors have full schedules, and their availability can be limited. If your timeline is flexible, consider booking your project during the shoulder seasons, like early spring or late fall. Contractors may have more openings in their schedules during these periods, and you might find more competitive pricing as a result. Planning ahead is always a smart move, so it’s a good idea to start reaching out for consultations well before you intend to begin the work.

Popular Driveway Paver Materials in Long Island

Choosing the right material for your paver driveway is one of the most exciting parts of the process. It’s also one of the biggest factors that will shape your project’s final cost and appearance. Your driveway is the first thing guests see, so you want a material that reflects your home’s style and can stand up to Long Island’s weather. From classic and budget-friendly to modern and luxurious, there’s a perfect paver for every home.

The options can feel endless, but they generally fall into a few key categories. Concrete pavers offer incredible versatility, while natural stone provides a one-of-a-kind, high-end look. Porcelain is a fantastic modern choice known for its strength, and brick or Belgian block deliver timeless charm. At Gappsi, we work with a huge selection of porcelain and natural stone pavers, so we can help you find the ideal match for your vision and budget. Let’s look at some of the most popular choices for Long Island driveways.

Concrete Pavers

If you’re looking for a great balance of quality, style, and value, concrete pavers are an excellent choice. They are the most common material for a reason: they’re durable, affordable, and come in a massive range of colors, shapes, and textures. This versatility allows you to create a look that’s uniquely yours, whether you prefer a smooth, modern finish or a textured, rustic appearance. Because they are manufactured, they offer consistency in size and color, which makes for a clean and uniform installation. With an installed cost typically between $20 and $32 per square foot, concrete pavers provide a high-quality look without the premium price tag of natural stone.

Natural Stone Pavers

For a truly luxurious and unique driveway, nothing compares to natural stone. Materials like bluestone, granite, and travertine bring an organic beauty and elegance that manufactured products can’t replicate. Each stone has its own distinct color variations and textures, meaning your driveway will be completely one-of-a-kind. While natural stone is a premium option, with costs generally ranging from $35 to $55 per square foot, its durability and timeless appeal make it a worthwhile investment. The installation requires skilled masonry expertise to handle the unique characteristics of each stone, but the stunning result is a driveway that makes a powerful statement.

Porcelain Pavers

Porcelain pavers are a fantastic choice for homeowners who want a sleek, modern aesthetic combined with incredible performance. One of porcelain’s biggest advantages is its durability. It’s extremely dense, making it resistant to stains, scratches, and fading from UV rays. This material is also non-porous, so it won’t absorb water, which is a huge plus for withstanding Long Island’s freeze-thaw cycles without cracking. Porcelain pavers come in a wide variety of styles, including designs that convincingly mimic natural stone or wood. They are a premium, low-maintenance option that will keep your driveway looking pristine for years to come.

Brick and Belgian Block

If you love a classic, traditional look, brick or Belgian block pavers are perfect options. Brick offers a warm, timeless charm that complements historic or colonial-style homes beautifully. It’s incredibly durable, and its rich color holds up well over time. Belgian block, on the other hand, delivers the ultimate in old-world luxury and durability. While it is one of the most expensive materials, a Belgian block driveway can last for generations, creating a sense of permanence and grandeur. Both options provide a classic, high-end look that adds significant curb appeal and character to any property.

How Does Long Island’s Climate Affect Your Paver Choice?

Living on Long Island means we get to enjoy beautiful seasons, but our weather can be tough on home exteriors. From humid, salty summer air to harsh winter freezes, the climate is a major factor to consider when choosing materials for your driveway. The right pavers won’t just look great on day one; they will withstand the elements for decades, saving you from future headaches and costly repairs. Making a weather-wise choice is one of the smartest investments you can make in your property’s curb appeal and long-term value.

Understanding Freeze-Thaw Cycles and Durability

One of the biggest challenges for any outdoor surface on Long Island is the freeze-thaw cycle. During late fall, winter, and early spring, moisture seeps into the tiny pores and joints of driveway materials. When temperatures drop, that moisture freezes and expands, putting immense pressure on the material. As it thaws, the water contracts, often leaving behind wider cracks and gaps. This repeated process can cause concrete to crack, asphalt to crumble, and lesser-quality pavers to spall or shift. That’s why selecting a durable material with low water absorption is critical to building a driveway that lasts. Expert masonry techniques ensure your driveway base is also prepared to handle these shifts.

The Best Paver Materials for Local Weather

So, what works best here? Paver systems are naturally better suited for our climate than solid surfaces like poured concrete. The joints between individual pavers allow for micro-movements during freeze-thaw cycles, reducing the risk of widespread cracking. For maximum performance, you’ll want to look at materials specifically designed to resist moisture and temperature swings. High-density porcelain and natural stone pavers are excellent choices because they absorb very little water, giving ice no place to form and expand. These materials maintain their integrity and color year after year, making them a reliable and beautiful option for any Long Island home.

Finding the Right Paver Driveway Contractor in Long Island

Your driveway is the first impression your home makes, so a beautiful paver installation is more than just a functional upgrade; it’s a statement. But turning that vision into reality depends almost entirely on the contractor you hire. Choosing the right partner is crucial for ensuring your new driveway is built to last, looks stunning, and withstands Long Island’s weather. A great contractor doesn’t just lay pavers. They guide you through the entire process, from selecting the perfect materials to creating a design that complements your home’s architecture and preparing the site correctly for a durable foundation.

With so many companies on Long Island, finding the right one can feel overwhelming. The key is to know what to look for and where to start your search. A reputable contractor will have a proven track record, transparent communication, and a portfolio that speaks for itself. Taking the time to vet your options will save you from headaches down the road and ensure your investment pays off for years to come. It’s about finding a team that not only has the technical skill but also shares your commitment to quality and detail. This is the single most important decision you’ll make for your project, so it’s worth putting in the effort upfront.

Where to Look for Reputable Companies

Start your search close to home. Ask friends, family, and neighbors for recommendations, especially if you admire their driveways. Word-of-mouth referrals are often the most reliable. You can also explore local online directories and community forums for Suffolk and Nassau counties. A company with a physical showroom or design center, like the Gappsi Store, is a strong indicator of an established and trustworthy business. It gives you a chance to see materials in person and speak directly with experts. Ultimately, choosing the right driveway contractors is the most important step in guaranteeing your project is a success from start to finish.

Checking Reviews and Portfolios

Once you have a shortlist of potential contractors, it’s time to do some homework. Don’t just glance at star ratings; read detailed reviews on independent sites like Trustpilot, Google, and Houzz. Past customer experiences offer invaluable insight into a company’s professionalism, communication, and quality of work. Pay attention to comments about timeliness, cleanliness, and how the team handled any unexpected issues. Next, carefully review their portfolio. A contractor’s past projects are the best evidence of their skill. Look for a gallery that showcases a variety of styles and materials, and make sure their work aligns with your vision for your home.

Why Gappsi Is a Premier Choice

Gappsi stands out as a premier choice for Long Island homeowners because we combine decades of experience with an unwavering commitment to quality. Since 1987, our team has specialized in creating stunning and durable outdoor spaces. We handle every aspect of your project in-house, from initial design to final installation, ensuring a seamless experience. Our clients consistently praise our “impeccable workmanship, timeliness, and nonstop attention to detail.” We offer a wide range of custom masonry projects, including driveways, patios, and walkways, using only the highest quality materials. Our extensive portfolio and positive reviews reflect our dedication to transforming your vision into a beautiful reality.

How to Get a Paver Driveway Quote

Once you have an idea of the paver driveway you want, it’s time to get a quote. This step helps you create a realistic budget and find the right team for the job. Taking a few different approaches will give you a clear picture of your project’s potential cost and timeline. Here’s how you can get a detailed and accurate estimate for your Long Island paver driveway.

Using Online Quote Forms

Many contractors offer online forms as a simple way to start a conversation. It’s a low-pressure first step you can take any time of day. You can fill out a form with your basic contact information and a brief description of your project, and a representative will get back to you to discuss the details. This method is perfect if you’re in the early stages of planning or prefer to communicate in writing. To begin the process with our team, you can request a consultation through our website, and we’ll reach out to schedule a discussion about your vision.

Calling for a Consultation

If you prefer a more direct approach, picking up the phone is a great option. Calling a contractor allows you to ask initial questions and get a feel for their customer service and expertise. A direct conversation can often clarify details faster than back-and-forth emails. You can explain what you’re looking for, whether it’s a simple replacement or an intricate new design, and get immediate feedback. This personal touch helps you gauge if a company is the right fit for you and your project before you schedule an in-person visit. It’s an efficient way to move your project forward with confidence.

What to Prepare Before You Reach Out

To get the most accurate quote, it helps to do a little homework first. Before you call or fill out a form, gather some basic information. Know the approximate size of your driveway and have an idea of the materials you like. Browsing different types of porcelain and natural stone can give you inspiration. It’s also smart to get at least three written estimates from different licensed and insured contractors. This allows you to compare not just the price but also the scope of work, proposed materials, and project timeline. Having these details ready ensures you have a productive conversation and receive a quote that truly reflects your needs.

What Should a Paver Driveway Quote Include?

Once you’ve requested estimates, you’ll notice that not all quotes are created equal. A detailed, professional quote is your first sign that you’re dealing with a reputable contractor. It’s more than just a final price; it’s a roadmap for your project that provides transparency and sets clear expectations from the start. A vague or confusing quote can be a red flag, so it’s important to know what to look for. A comprehensive estimate should always break down the project into three key areas: the costs, the timeline and process, and the long-term guarantees. This level of detail protects you as a homeowner and ensures there are no surprises down the road. By understanding these components, you can confidently compare different offers and choose the best partner for your paver driveway installation.

An Itemized List of Material and Labor Costs

A paver driveway is a significant investment, so your quote should clearly show where every dollar is going. Insist on an itemized list that separates the cost of materials from the cost of labor. The materials section should specify the type, brand, and quantity of pavers, such as the exact porcelain or natural stone you selected. It should also list costs for the base aggregate, sand, and edge restraints. The labor portion should detail the costs associated with excavation, base preparation, installation, and cleanup. This transparency is crucial because it allows you to accurately compare different bids and understand the value each contractor is providing. Without it, you’re just comparing final numbers without knowing if one contractor is using superior materials or a more thorough process.

The Project Timeline and Base Preparation Details

Your quote should provide a clear project timeline, including a start date, key milestones, and an estimated completion date. More importantly, it must detail the base preparation process. For a driveway, the base is everything. A proper quote will specify an excavation depth of 8 to 12 inches to create a strong foundation that can handle vehicle weight and Long Island’s weather. Contractors who cut corners on the base to lower their price will leave you with a driveway that settles, shifts, or cracks prematurely. The quote should explicitly outline the layers of aggregate material and the compaction methods used, as this expert masonry work ensures your driveway will last for decades.

Warranty and Aftercare Information

A trustworthy contractor stands behind their work, and the quote is where they should put that promise in writing. Look for specific warranty information covering both the paver materials (often provided by the manufacturer) and the contractor’s workmanship. A strong workmanship warranty shows the company is confident in its installation process and will address any issues that may arise, like settling or loose pavers. The quote should also mention aftercare. Does the company offer professional cleaning and sealing services to protect your investment? Knowing the contractor is committed to your long-term satisfaction provides invaluable peace of mind and is a hallmark of a true professional.

Key Questions to Ask a Paver Driveway Contractor

Choosing a contractor is one of the most important decisions you’ll make for your paver driveway project. This isn’t just about finding someone to lay down stones; it’s about partnering with a professional who will build a durable, beautiful entrance to your home that lasts for decades. A great contractor will welcome your questions and provide clear, confident answers. Think of this conversation as your first quality check. Asking the right questions helps you vet their experience, understand their process, and ensure there are no surprises down the road. It empowers you to compare quotes accurately and choose a company you can trust to bring your vision to life. Before you sign any contract, make sure you’ve covered these essential points.

Are You Licensed and Insured in New York?

This should be the very first question you ask, and the answer needs to be a clear “yes.” A valid license proves the contractor meets New York’s requirements to perform the work, while insurance protects you from liability. If a worker gets injured on your property or your home is damaged during construction, their insurance should cover it, not your homeowner’s policy. Don’t just take their word for it; ask to see copies of their license and insurance certificates. A professional company will have this information ready to share. Hiring an uninsured or unlicensed contractor is a huge risk that can lead to shoddy work and serious financial trouble.

What Is Your Base Preparation Process?

A paver driveway is only as strong as its foundation. A beautiful surface can quickly fail with sinking, shifting, or heaving if the base isn’t prepared correctly. Ask the contractor to walk you through their entire process, step by step. A thorough job involves excavating the old driveway and soil, laying and compacting a sub-base of crushed stone, adding a sand setting bed, and ensuring the entire area has a proper slope for drainage. Water is the biggest enemy of any pavement, so a solid masonry plan for managing runoff is critical for longevity, especially with Long Island’s freeze-thaw cycles.

Can I See References from Past Clients?

Online reviews are helpful, but nothing beats speaking directly with a past client. Ask for a list of references, preferably from homeowners who had similar projects completed. This gives you a chance to ask about their experience with the contractor’s communication, timeliness, and professionalism. You can also ask to see a portfolio of their work. A contractor who is proud of their craftsmanship will be eager to show you completed driveways. Seeing their projects on YouTube or in a gallery can help you gauge the quality of their work and confirm they can achieve the style you want for your home.

Do You Handle Permits and Design?

Installing a new driveway often requires a permit from your local town or village, and the rules can vary across Long Island. Ask if the contractor will handle the entire permitting process for you. A full-service company will be familiar with local codes and manage the paperwork, saving you a significant amount of time and stress. It’s also worth asking about their design capabilities. A premier contractor can provide design services to help you select the right materials, colors, and patterns to complement your home’s architecture and landscape, ensuring a cohesive and high-end result.

What Warranty Do You Offer?

A warranty is a contractor’s promise to stand behind their work. Reputable companies will offer a warranty that covers both the paver materials and their labor for a set period. This gives you peace of mind that if any issues arise from a faulty installation, like sinking or loose pavers, the contractor will return to fix it. Be sure to ask for the warranty details in writing. Understand what is covered, what is excluded (like damage from misuse), and how long the warranty lasts. A strong warranty shows that the contractor is confident in their materials and installation methods.

How to Spot a Fair Paver Driveway Quote

Once you have a few paver driveway quotes in hand, the real work begins. It’s about more than just comparing the final numbers; it’s about understanding the value behind the price. A fair quote reflects quality materials, expert craftsmanship, and a contractor you can trust. It’s your roadmap to a beautiful driveway that lasts for decades, not just a few seasons. Here’s how to read between the lines and identify a quote that promises true quality and peace of mind for your Long Island home.

Why You Should Get at least Three Estimates

Getting multiple estimates is a crucial step in any major home improvement project. I always recommend getting at least three written quotes from different licensed and insured contractors. This practice isn’t about finding the absolute lowest price. Instead, it helps you establish a realistic budget by giving you a clear sense of the current market rate for a quality paver driveway in your area. Comparing detailed proposals allows you to see what different companies include for their price, from the depth of the base preparation to the specific materials they plan to use. This process also gives you a feel for each contractor’s professionalism and communication style, which are just as important as the final cost.

Red Flags to Watch For

A price that seems too good to be true almost always is. While everyone appreciates a good deal, an unusually low bid is one of the biggest red flags in the paving industry. It often indicates that a contractor is cutting corners, whether on the quality of the pavers, the depth of the foundation, or by hiring uninsured labor. You should also be wary of vague quotes that don’t break down the costs for materials and labor. High-pressure sales tactics are another warning sign. A trustworthy professional will provide a detailed estimate and give you the space you need to make a confident decision, not rush you into signing a contract.

Common Mistakes to Avoid When Hiring

One of the most common mistakes homeowners make is choosing their contractor based on price alone. The lowest bid often comes from the contractor with the least incentive to keep you happy for the long term, which can lead to subpar work and costly repairs down the road. Another frequent misstep is skipping the vetting process. Always take the time to verify a contractor’s license and insurance. Ask to see a portfolio and speak with recent clients. A reputable company will be proud to showcase their past masonry projects and provide references. Finally, never proceed without a detailed written contract that clearly outlines the project scope, materials, timeline, and payment schedule.

How to Maintain Your New Paver Driveway

A beautiful paver driveway is a significant investment in your home’s curb appeal, so you’ll want to keep it looking its best. With a little routine care, your driveway will continue to welcome you home with style for years to come. Proper maintenance protects the pavers from stains, weather damage, and daily wear and tear. It also prevents small issues, like weeds or shifting stones, from turning into bigger problems that require more extensive repairs down the road. Think of it as simple preventative care for one of your home’s most prominent features.

Most of the upkeep is straightforward. Regular sweeping and rinsing can handle everyday dirt and debris, keeping the surface looking fresh. However, the most important step for long-term durability is periodic sealing, which shields the surface and keeps the colors vibrant. While you can certainly handle some cleaning yourself, tasks like professional-grade sealing and repairing sunken pavers are often best left to the experts. They have the right equipment and expertise to do a thorough job, ensuring your driveway remains a durable and attractive feature of your property. Gappsi offers expert restoration and sealing services to help you protect your investment without the hassle.

Sealing and Cleaning Your Pavers

Think of sealant as a protective shield for your driveway. Sealing your pavers is crucial for preventing stains from oil, dirt, and leaves, and it helps keep the colors from fading under the sun. For natural stone, it also provides essential protection against water damage. A good quality sealant makes cleaning easier and helps inhibit weed growth between the joints. Generally, you should plan to have your driveway resealed every three to five years, depending on the type of sealer used and how much traffic your driveway gets.

For routine cleaning, a simple sweep with a broom and a rinse from your garden hose will usually do the trick. For more stubborn spots, you can use a gentle, pH-neutral cleaner designed for pavers. Always test a cleaning product on a small, inconspicuous area first to make sure it doesn’t discolor the stone.

When to Call a Professional for Maintenance

While regular cleaning is a manageable task, there are times when calling a professional is the smartest move. If you notice deep-set stains that don’t come out with simple cleaning, or if pavers have started to sink or become uneven, it’s time to get an expert opinion. Widespread weed or moss growth can also be a sign of underlying issues with the joint sand. Choosing the right contractor for maintenance makes all the difference. A professional will have the proper equipment and knowledge to diagnose the problem correctly and perform a lasting repair.

As one of our clients shared, “Had my paving stone driveway and pool deck cleaned and sealed by Gappsi. They have the right equipment products and people to do a thorough job.” When it’s time for a deep clean and reseal, trusting a team with proven customer testimonials ensures your driveway will look great and last for many more seasons.

Related Articles

Frequently Asked Questions

Why should I choose pavers over a cheaper option like asphalt or concrete? While the upfront cost for pavers is higher, they provide far greater long-term value and durability. Unlike a solid slab of concrete that can develop large, unsightly cracks, individual pavers can be easily replaced if one gets damaged or stained. This makes repairs simple and cost-effective. Pavers also offer endless design possibilities with different colors, shapes, and patterns, allowing you to create a truly custom look that enhances your home’s curb appeal in a way that basic asphalt just can’t match.

How long does a typical paver driveway installation take? The timeline for a paver driveway project can vary, but for an average-sized residential driveway, the process usually takes about three to seven days from start to finish. This includes time for excavation, extensive base preparation, the actual laying of the pavers, and the final steps like adding joint sand and cleaning up the site. The schedule can be influenced by factors like the project’s complexity, the size of the driveway, and of course, the weather.

How long can I expect my new paver driveway to last? A professionally installed paver driveway is built for the long haul. When the foundation is prepared correctly by an expert contractor and you perform basic maintenance, you can expect your driveway to last for 25 to 50 years, or even longer. The key is the robust base underneath, which prevents the sinking and shifting that can ruin a driveway over time. This impressive lifespan is one of the main reasons pavers are such a smart investment for your home.

Do I really need to seal my paver driveway? Yes, I highly recommend it. Sealing your pavers is the single best thing you can do to protect your investment. A quality sealant acts as a protective barrier, making it much harder for oil, dirt, and other debris to cause permanent stains. It also helps protect the pavers from fading due to sun exposure and can inhibit weed growth in the joints. Think of it as sunscreen for your driveway; reapplying it every three to five years will keep it looking vibrant and new.

What’s the biggest mistake homeowners make when getting a paver driveway? The most common mistake is choosing a contractor based on the lowest price alone. An unusually low bid is almost always a red flag that corners are being cut, and the first thing to go is usually the most critical part: the foundation. A shallow or poorly compacted base will lead to a driveway that sinks, shifts, and fails within a few years, costing you much more in the long run to fix. It’s always better to invest in a reputable contractor who guarantees a proper installation from the ground up.

Synthetic turf multi-sport games court in a Long Island backyard with basketball and pickleball markings surrounded by landscaping

Synthetic Turf Sports Games Courts: Install and Maintenance

Keeping a natural grass sports surface playable on Long Island requires constant mowing, watering, and reseeding. Nassau and Suffolk County homeowners need a more reliable play surface for year-round backyard games.

Synthetic turf sports games courts are custom, all-weather backyard play areas built on Long Island. They support sports like basketball, tennis, and pickleball. These flat, cushioned surfaces drain heavy rainwater quickly. Families can play on a clean space without dealing with standing water or mud.

Unlike natural grass, these courts do not need constant mowing or reseeding. This makes them an excellent choice for busy Nassau and Suffolk County homeowners. However, studies from research journals show that routine brushing and infill care are still needed. This keeps the surface soft, safe, and playable. By working with Gappsi Group, local homeowners can build durable synthetic turf sports games courts that stay safe and look great for years.

Contact Gappsi for a free consultation to design your synthetic turf Sports Games Courts. Call 631-543-1177 today.

Many homeowners are unsure about how artificial grass surfaces are designed, built, and maintained on Long Island. To help you choose the right setup for your yard, we should first answer the main question: What Are Synthetic Turf Sports Games Courts? The path begins with an explanation of these backyard play areas.

What Are Synthetic Turf Sports Games Courts?

Homeowners on Long Island often want to turn their backyard spaces into active play zones. A synthetic turf sports games courts setup is a custom outdoor area built for backyard games. These courts use durable artificial grass instead of natural sod or hard concrete. These low-maintenance spaces let families play many sports on a single, tough surface right at home.

Multi-sport play areas for Long Island backyards

These modern backyard courts support a wide range of sports, letting families host fast games of basketball, tennis, and pickleball on the same day. The soft turf is also great for slower games like bocce or horseshoes. Some families even use these setups for soccer, volleyball, badminton, or as a private putting green. The custom design lets you combine many layouts on one surface.

Turf surfaces compared to natural grass and concrete

Synthetic turf differs from both natural grass and hard court surfaces. Real grass looks nice, but you must mow, water, and weed it. Natural turf also gets muddy after a heavy rain and wears out from constant play. On the other side, hard surfaces like concrete or asphalt can be tough on your joints, and falling can cause painful scrapes.

An artificial court solves these issues by giving you a flat, cushioned surface. The synthetic turf has a springy backing that helps absorb shocks when you run and jump. It also allows water to drain away quickly so you can play right after a storm. Research on synthetic turf fiber types shows that different yarn shapes keep the surface strong and flexible.

Turnkey design and installation process

Setting up one of these courts requires expert planning. Gappsi is a full-service provider that builds Gappsi’s synthetic turf sports games courts from start to finish. The team handles the entire process, including layout design, local permits, base preparation, turf installation, and final accessories. They use strong turf systems like Italgreen athletic surfaces that are built to withstand heavy play and cold Long Island winters.

Expert installation is key to make sure the court performs well over time. Proper base preparation and a strong drainage system are essential for year-round use and longevity. Without a solid base, the turf can shift, wrinkle, or pool water after a storm. With professional site work, your court remains flat, safe, and ready for action in every season.

What Are the Key Benefits of Synthetic Turf for Backyard Courts?

Adding a court to your Long Island home can change how your family plays. Choosing the right surface is the key step to creating a great game area. Many people now choose synthetic turf sports games courts because they perform well and last a long time. Explore the key benefits of synthetic turf for Long Island homeowners to learn why.

Easy care and durability

Natural grass needs constant mowing, watering, and feeding to stay healthy. A synthetic court does not need these chores to look great. This makes it a great low maintenance choice for busy Long Island families.

Still, these systems are not totally free of care. You will need some routine maintenance to keep the surface safe for play and to help it last. Simple brushing and clearing away fall leaves will keep the turf clean and flat.

Heavy use can wear out natural grass in just one season. It can lead to bare dirt spots and uneven ground across the field. Synthetic turf has high durability and can handle constant sports play without damage.

It will not wear down when your kids practice soccer, basketball, or hockey on a daily basis. It stays green and level even under the heaviest foot traffic from guests. This strength means you do not have to worry about changing the turf after a few seasons of hard play.

All-weather playability and drainage

Long Island weather can change fast and bring heavy rain during any season. Muddy yards often stop outdoor games and keep kids inside for days.

A synthetic turf court offers great all-weather playability because of how it is built. Rain water drains through the surface almost instantly, which means no puddles and no mud. You can go out and play on the turf just minutes after a heavy storm.

Proper drainage is key to keeping your backyard court in good playing shape. Expert installers lay down a strong stone base and drainage pipes beneath the turf. This expert setup ensures year-round use even during cold and wet winter months.

When you design backyard multisport games courts, this solid base is the secret to a court that lasts for decades. It prevents water from pooling and keeps the court clean and ready for any sport.

Enhanced safety and shock absorption

Hard surfaces like concrete can be tough on growing leg and knee joints. Falls on hard ground can also cause more pain and worse injuries.

Synthetic turf provides extra safety because of its soft and cushioned layer. This soft base absorbs shock and helps prevent slips and falls during fast-paced games. It gives parents great peace of mind while their kids run and jump outside.

You must monitor your backyard court to ensure the surface stays safe over time. Over time, heavy foot traffic can pack down the infill under the turf.

Homeowners should track their court to ensure it stays below unsafe surface hardness thresholds. Keeping the court below the 200 G limit set by ASTM will protect your family from hard falls. Routine checkups and infill top-ups will keep the surface soft and springy for a long time.

How to Plan Your Long Island Synthetic Turf Sports Games Court

Planning a backyard court is a great project for your home. To make sure you get the best results, you must start with a clear plan. From checking your lawn space to picking the right sports, each step shapes how your family will use the area. Gappsi is a full-service team that handles the whole process, from custom design to base work and turf setup.

Yard size and sport choice

First, you need to look at your outdoor space. You must measure the flat areas of your yard to find the best spot for your court. Think about which sports your family wants to play. If you want to play tennis, soccer, or basketball, you will need to plan for specific sizes and turf styles. Our guide on essential planning for sports games courts shows how much space each game needs. Choosing the right spot early saves time and helps avoid problems when building.

Turf types and base systems

Choosing the right turf is the next big step in your plan. Gappsi’s full range of synthetic turf sports games courts uses different types of turf for each game. For instance, we use Italgreen 52 Double X turf for soccer, and Green HD 17 turf for tennis.

We also have custom synthetic grass for golf putting greens, basketball, and bocce. Proper base prep and drainage are key to make sure your court lasts. A solid base keeps the ground flat and drains water fast. While synthetic turf lasts long, synthetic turf systems still need routine upkeep to keep players safe and perform well over time. Expert setup ensures that your base and drainage are done right, which is needed for year-round use and long court life.

Six steps for court design.

Here are the primary steps to plan your synthetic turf sports games courts:

  1. Measure your yard space: Check your property lines and find a flat area with enough room for your chosen sports.
  2. Select your family sports: Decide if you want a single-use court or a multi-game area for soccer, basketball, and tennis.
  3. Choose your turf type: Match your sports with the right turf styles like Italgreen 52 Double X or Green HD 17.
  4. Plan the base and drainage: Design a strong base of asphalt, concrete, or stone to keep the playing surface flat and dry.
  5. Obtain local town permits: Work with Gappsi to submit plans and get the right building permits for Nassau or Suffolk county.
  6. Install the final extras: Plan for extras like game nets, rebound nets, safe fences, and outdoor lights to complete the court.

The Synthetic Turf Sports Games Court Installation Process

Professional design and planning

Planning is the first step to build a court that lasts. Gappsi has designed and installed custom outdoor projects on Long Island for over 38 years. Our team knows how to design and construct professional sports games courts that fit your yard. We handle the entire job from permits to the final build. This means you do not have to deal with other crews or town rules.

A solid base is the secret to a court that stays flat. If you do not prep the ground, water will pool and ruin your court. Gappsi uses strong stone layers and proper sloped grading to shed water quickly. This deep base work keeps your court safe and ready for play during any season.

Seven steps to a perfect court

Our crew follows a clear, strict process to set up your backyard court. A strong base is needed for year-round play. We make sure each step is done right so your court lasts for many years.

  1. Digging and grading: We dig out the area and grade the soil to make a smooth slope for drainage.
  2. Installing base layers: Our crew adds layers of crushed stone and fine granite to create a strong foundation.
  3. Packing and leveling: We pack the stone layers down with heavy tools so the ground does not shift over time.
  4. Laying the turf membrane: We lay down high-end turf systems, including Italgreen athletic surfaces. Your choice of fiber, such as slit-film or monofilament, affects how the surface wears over time. Penn State University studies show these fibers change how the court looks and performs.
  5. Applying the infill: We spread sand or rubber infill across the turf to add weight and cushion. Research from Michigan State University shows that infill can lose its bounce over time. Proper setup is vital to keep the court soft and safe.
  6. Seaming and brushing: Our team joins the turf sections with strong glue and brushes the fibers so they stand upright.
  7. Adding sports lines: We paint or tuft the lines for your favorite games so they stay bright and clear.

Court accessories and finishing touches

A great court needs the right gear to be complete. Gappsi does not just lay the turf. We also install all the accessories you need for your games. Our crew can set up strong fences, safety nets, bright lights, and goals. We make sure every piece is safe and solid so you can play without worry.

Synthetic Turf vs. Hard Court Surfaces for Long Island Backyard Sports

Choosing the right surface for your backyard is a key decision when you plan to build synthetic turf sports games courts. The surface you pick affects how games play, safety, and long-term costs. While hard courts like concrete and asphalt are common, synthetic turf offers unique benefits for active families on Long Island.

Pros and cons of synthetic turf

Synthetic turf provides a cushioned surface that is soft on joints and helps prevent injuries. This makes it ideal for running, soccer, and family play. But a common myth is that synthetic turf is maintenance free. In fact, these surfaces require routine maintenance to ensure safety and long-term performance.

Over time, turf fields can get harder if you do not care for them the right way. The infill can lose its bounce, which might lead to a harder surface that is less safe. To keep your court safe for play, you must monitor the surface hardness. It is important to keep the court below the unsafe surface hardness limit of 200 G’s set by ASTM. Regular brushing and cleaning will keep the infill soft and bouncy.

You must also prevent leaves and dirt from building up on the turf. Excessive debris can reduce infill bounce and make the court too hard. We can integrate your court into a larger backyard plan with our masonry design and construction services to match your patio or pool deck.

Asphalt and concrete hard courts

Asphalt and concrete are the most common surfaces for backyard courts. They offer a flat, fast bounce that is perfect for games like basketball and tennis. Concrete is very strong and resists cracking when built on a solid base. Asphalt has a slightly lower initial cost but needs sealing every few years to prevent wear.

The main drawback of these hard surfaces is the impact on your body. Running on concrete or asphalt can stress your joints and lead to sore muscles. They also absorb a lot of solar heat during hot summer days. This makes the court area very hot to play on, unlike cooler synthetic turf.

Modular tile court options

Modular plastic tiles, such as Matflex, are another popular choice for backyard play. These tiles snap together over a concrete or asphalt base. They provide better shock absorption than bare hard courts, which helps protect your joints during fast games. They also dry quickly after rain because water drains through the small gaps in the tiles.

But plastic tiles can get slippery when wet or covered in morning dew. They also tend to expand and contract during extreme weather changes on Long Island. Over time, this movement can cause the tiles to buckle or warp if the base is not perfectly flat.

Surface Type Initial Cost Maintenance Safety & Cushion Drainage Best Sports
Synthetic Turf Moderate to high Low (needs brushing) Excellent cushion Excellent drainage Soccer, bocce, golf, multi-sport
Asphalt Low to moderate Medium (needs sealing) Low cushion Poor (needs slope) Basketball, tennis
Concrete Moderate Low (high durability) Very low cushion Poor (needs slope) Basketball, tennis
Modular Tile (Matflex) Moderate to high Low to medium Moderate cushion Good drainage Basketball, hockey, multi-sport

How to Maintain Your Synthetic Turf Sports Games Court

Many people think synthetic turf is maintenance free. In fact, these courts need routine care to stay safe and play well. A study in a National Institutes of Health journal shows that synthetic turf needs routine upkeep to keep athletes safe (F001). While they are much less work than natural grass, they still need some key chores to keep them nice.

The myth of maintenance-free turf

If you do not care for your turf, it can lose its bounce and get hard. The tiny pieces of crumb rubber or sand inside the turf are called infill. Over time, this infill can pack down or wash away. Research from Michigan State University shows that turf surfaces can get too hard if you do not care for them (F002). This can lead to minor injuries if an athlete falls on the hard court surface. Routine care keeps the court soft and safe for your kids to use.

Routine grooming and debris removal

You must keep your court clean to protect the playing surface. Leaves, twigs, and dirt can build up on the turf. This debris can break down and ruin the turf infill. Research shows that too much debris can harm the infill and make the court too hard (F009). You can use a leaf blower or a soft rake to remove this trash. You should also brush the turf fibers often to keep them upright. Brushing also helps to spread the infill well across the whole play area.

For homes with pets, you must manage waste quickly. Rain will wash away some dust, but you should rinse pet areas with a hose. You can use mild soap or simple cleaners to remove smells and keep the turf fresh. Gappsi Group can help you design and construct professional sports games courts with good drainage for pets.

Essential maintenance steps

To keep your court in top shape, you should follow these simple steps:

  • Routine brushing to keep fibers upright and spread the infill.
  • Debris removal to clear leaves and twigs with a leaf blower or soft rake.
  • Infill top-ups every twelve to twenty-four months to keep the court soft.
  • Weed control through regular spray treatments around the court edges.
  • Pet waste care by rinsing pet areas with water and using mild cleaners.
  • Winter care like clearing snow with a plastic shovel on your synthetic turf sports games courts.

Each of these steps helps protect your yard. By spending just a few minutes each month, you can keep your play area safe and fun for years.

How Much Do Synthetic Turf Sports Games Courts Cost on Long Island?

Many homeowners on Long Island want to know the price of building synthetic turf sports games courts in Nassau or Suffolk County. There is no single price tag because every yard is different. The total cost of your build depends on several key things that make your project unique. To get a clear price, you need an expert to check your yard first. Gappsi provides a full-service approach to design and construct professional sports games courts with transparent pricing.

Key site preparation cost factors

Before laying any turf, the ground must be ready. The first main cost factor is court size and shape, as larger courts need more work and materials. Next, the base preparation complexity will change your price. This work includes grading to level the land and setting up a proper drainage system.

Proper base prep is vital because wet soil can ruin a court over time. Your yard’s site conditions play a major role too. Workers must deal with issues like a steep slope, hidden tree roots, or tight access to your backyard. If heavy machines cannot get into your yard easily, prep work will take more time and labor.

Turf grades and court accessories

The materials you choose also change the price. Your turf grade selection determines the quality and feel of the court. Special turf grades cost more than basic turf. While high-grade turf is strong, all synthetic surfaces need regular care to stay safe. A study on synthetic turf system safety shows that routine upkeep is needed to keep the surface safe.

Beyond the turf itself, additional features will add to your total cost. These features include security fencing, custom lighting for night play, and protective netting. You must also budget for sports gear like goals, painted line markings, and any local permit fees.

Expert quotes and site evaluations

Because so many factors affect the final cost, we do not give generic price lists. Gappsi believes in giving transparent quotes only after a full site check. Our team will visit your Long Island home, check your land, and discuss your goals. We want to help you design backyard multisport games courts that fit your budget and needs perfectly. To start your project, contact us today to set up your free consultation.

Frequently Asked Questions

Do synthetic turf sports games courts require regular maintenance?

Yes. Some believe these systems need no care, but regular upkeep is needed to keep them safe. A study from the National Institutes of Health shows that synthetic turf needs routine care to ensure player safety. This work includes brushing fibers, clearing debris, and keeping infill levels even to stop the surface from getting too hard.

Can pets use synthetic turf sports games courts?

Yes, pets can safely play on these surfaces. Gappsi installs pet-friendly systems that feature fast drainage to handle waste and prevent odors. The synthetic turf is durable and resists damage from digging or claws. Homeowners just need to rinse the area with water and use mild soap once in a while to keep the turf clean and fresh.

How does rain affect synthetic turf sports games courts?

Rain does not pool on these surfaces because they are built with rapid drainage systems. Water flows quickly through the porous turf backing and into a stone base beneath the court. This design prevents standing water and muddy spots, which lets you play soon after a heavy storm. It also prevents ice from forming on the surface during cold winter months.

How long does synthetic turf for sports games courts last?

A well-built court can last between fifteen and twenty years with proper care. The exact lifespan depends on the fiber type and how much the court is used. Research from Penn State University shows that fiber choice affects how the turf wears and looks over time. Regular brushing helps extend its life.

Do I need professional installation for a backyard sports games court?

Yes, professional installation is highly recommended for these projects. Building a proper court requires complex excavation, precise grading, and the placement of deep stone drainage bases. Gappsi handles the entire process from permits and site prep to turf installation and adding custom accessories like nets and lighting. This full service ensures your court drains well and lasts for decades.

Ready to Build Your Synthetic Turf Sports Games Courts?

Leaving your backyard as plain grass means you will miss out on months of fun games, healthy outdoor play, and happy family gatherings. If you wait to build, wet ground and freezing winter weather will delay your plans and keep your family stuck inside even longer next season. Booking your custom court setup now secures your spot on our work schedule so our expert team can complete your build before spring starts. Our expert team handles every single step from grading the soil and preparing the base to laying the turf and putting up your game nets.

Ready to get started? Call 631-543-1177 to schedule a free consultation for your synthetic turf Sports Games Courts today.