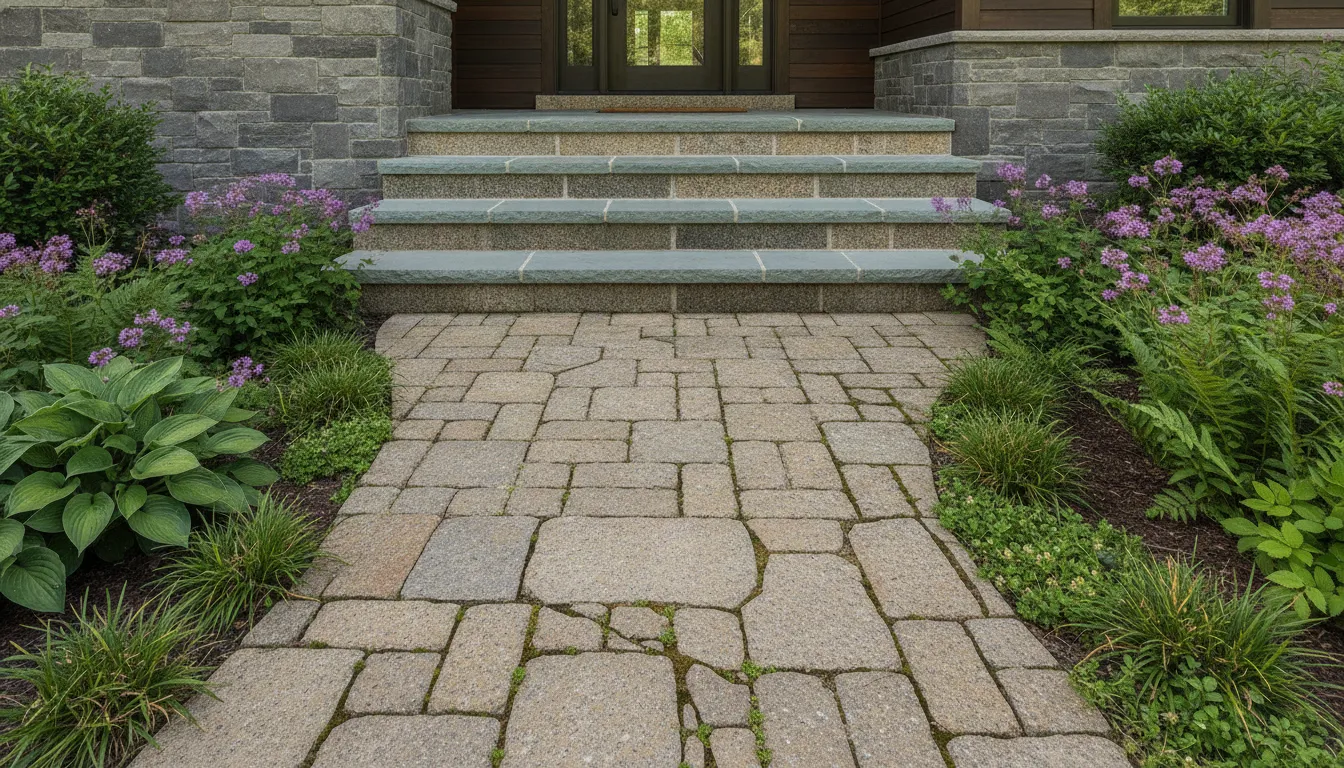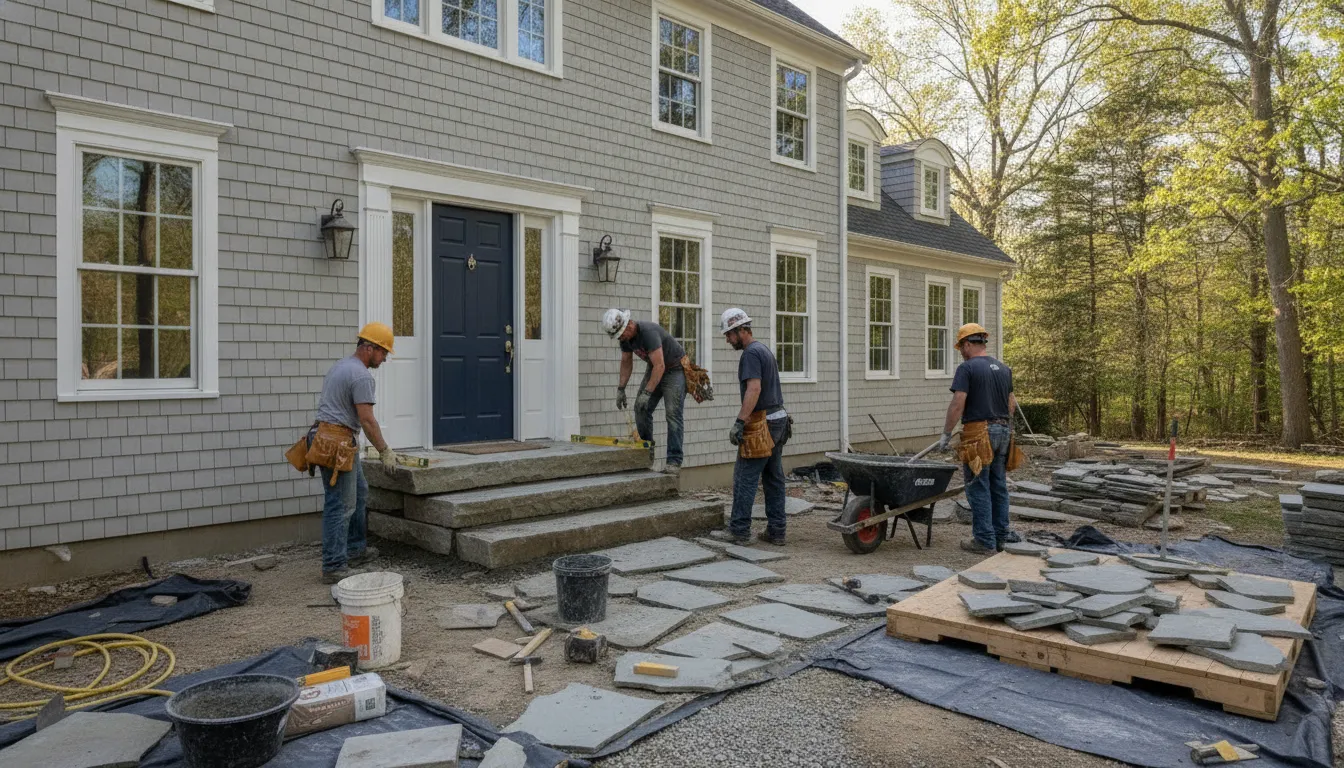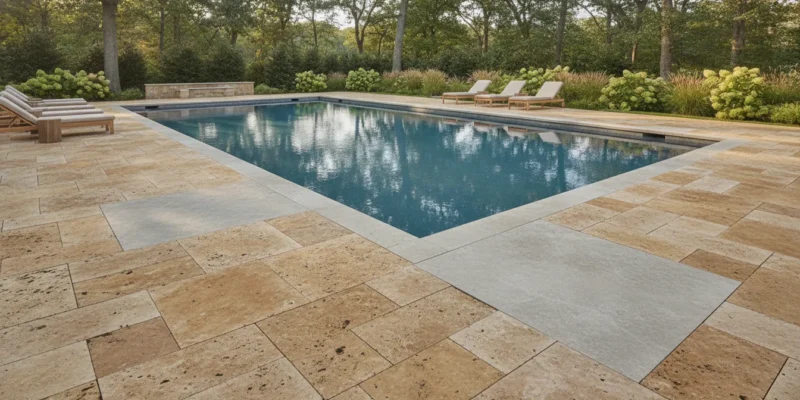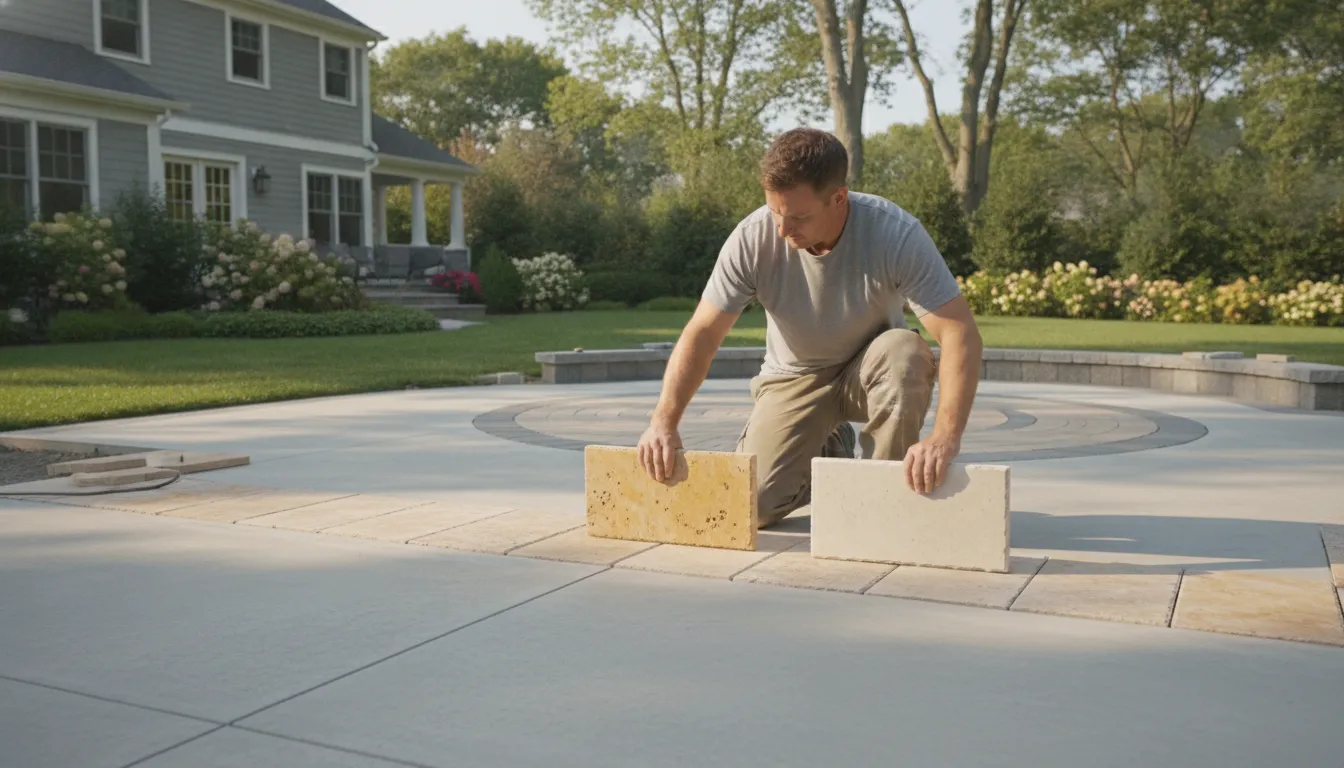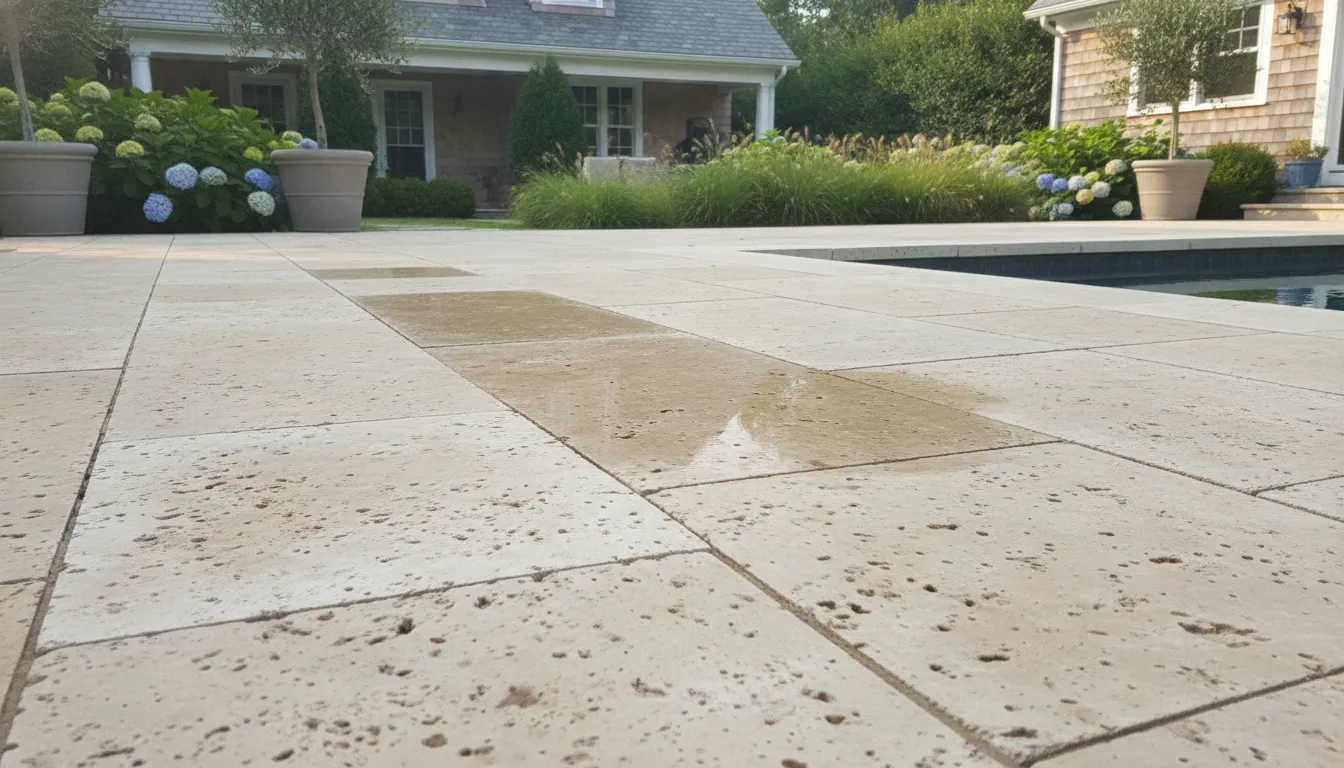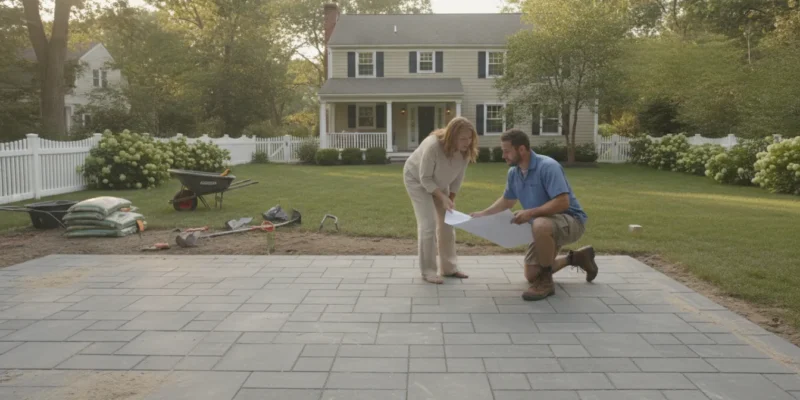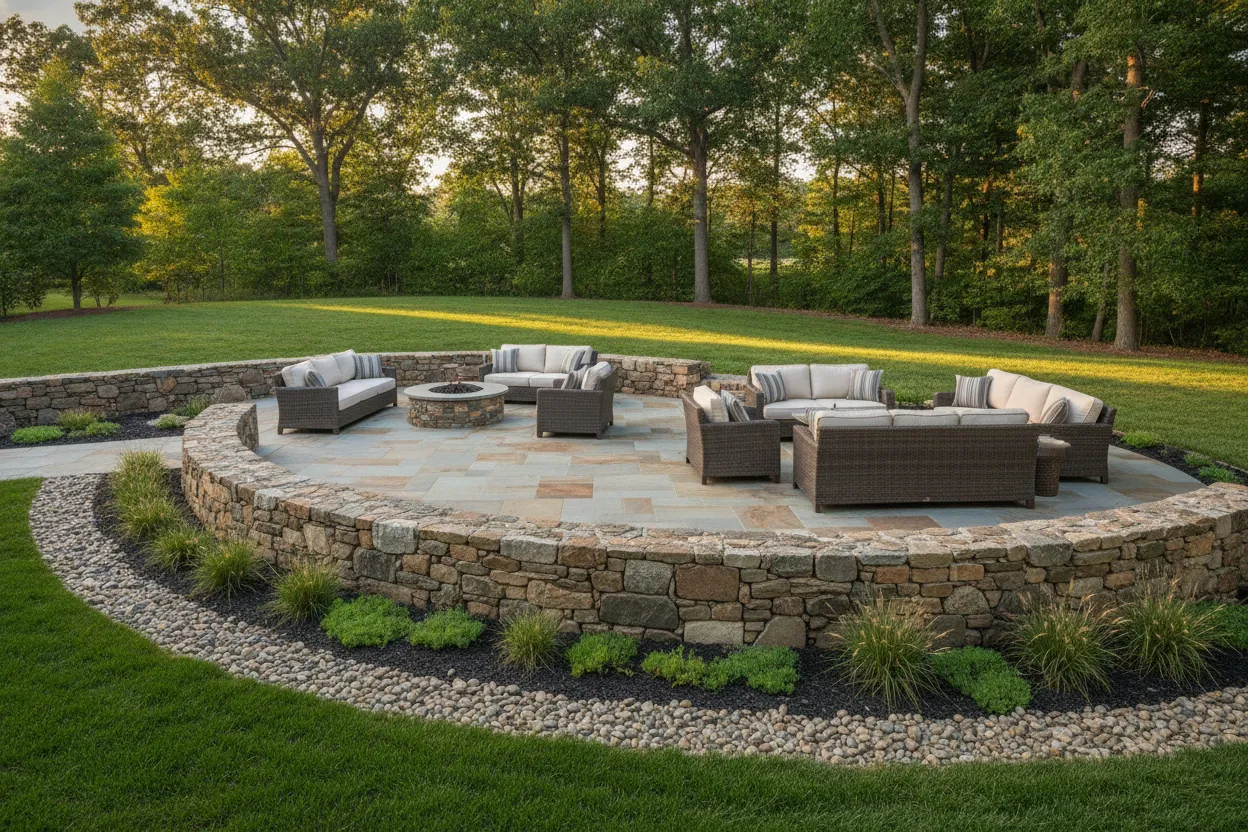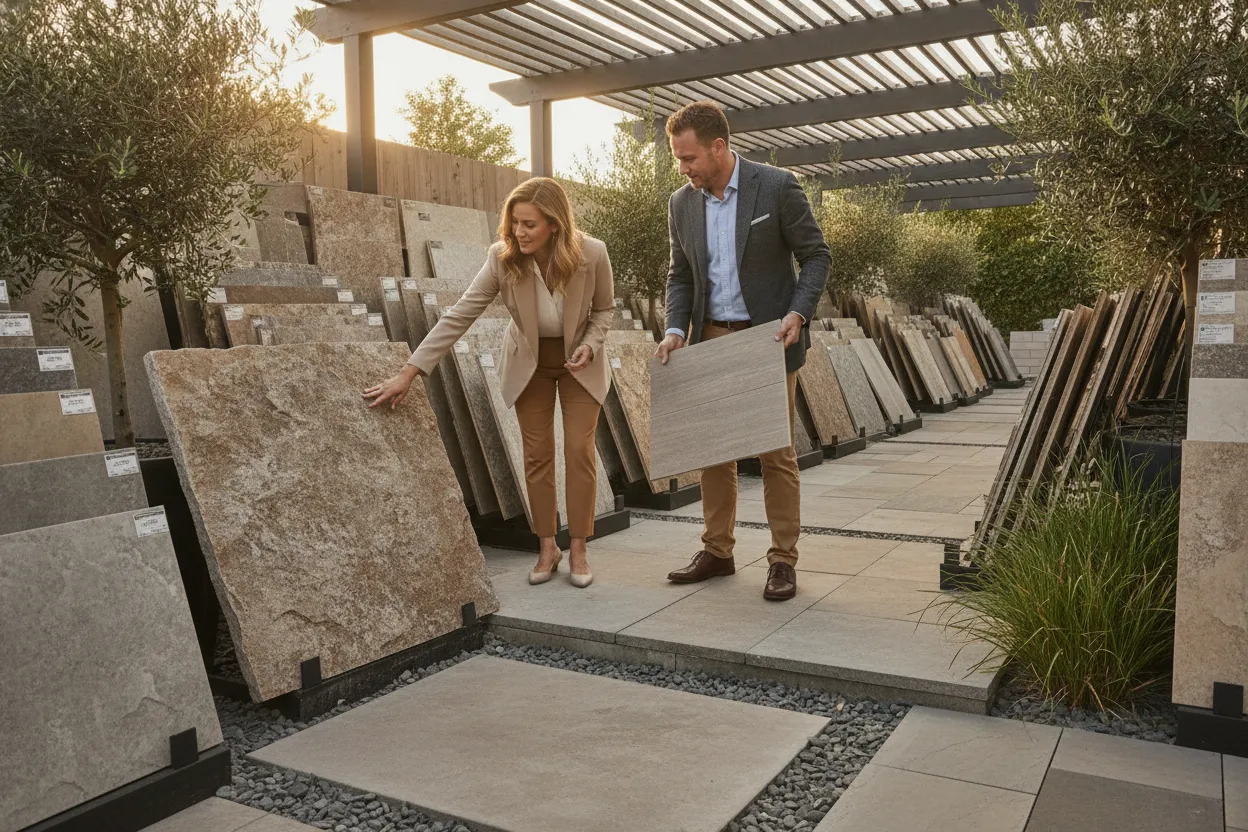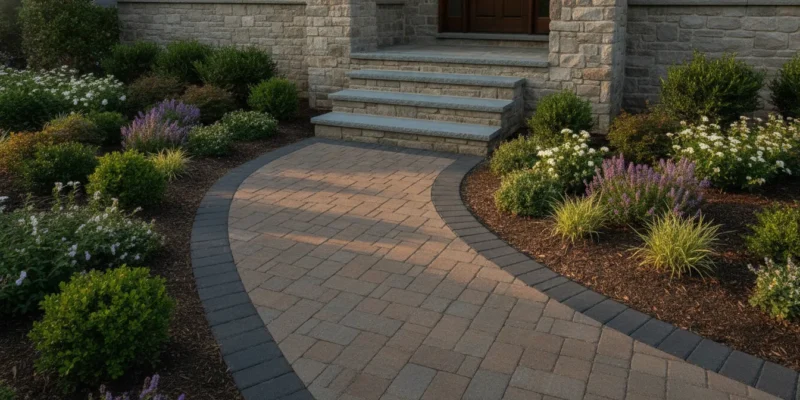
Italian-inspired stone patio with natural stone pavers and outdoor kitchen on Long Island

Italian Masonry Craftsmanship: Why It Matters for Your Patio

Precision stonework from a trained Italian mason turns a simple patio into a permanent piece of art. Giuseppe Abbrancati began learning these skills in Italy at age seven before bringing his work to Long Island.

Ready to bring Italian masonry craftsmanship to your Long Island home? Call (631) 486-4662 or schedule your free consultation with Gappsi today.

Italian masonry craftsmanship is the unique blend of precision engineering and artistic vision that makes outdoor structures both beautiful and strong. This tradition relies on centuries of refined skills passed through generations of master builders. These methods create patios, walkways, and fireplaces that stand up to harsh Long Island weather while maintaining their beauty for decades. Gappsi carries this heritage forward with Long Island masonry design that adds lasting value to home remodel projects across Suffolk and Nassau Counties.

Many homeowners wonder why certain stone structures stay perfect for years while others crumble after a few seasons. The answer lies in the deep history and rigorous training required to master these timeless building methods.

What Makes Italian Masonry Craftsmanship Different from Standard Construction?

Italian masonry craftsmanship stands apart through its emphasis on structural intelligence and artistic precision. Unlike standard construction that prioritizes speed, Italian-trained masons cut every stone to create tight bonds with clean lines. This method prevents gaps where water might settle and cause freeze-thaw damage, which is essential for Long Island’s climate.

The difference comes down to training and technique. Italian masons learn to balance load distribution, material density, and geometric precision from the start of their careers. This produces structures that not only look refined but also resist cracking, shifting, and weathering far longer than conventional builds.

  • Precision cutting: Each stone is shaped by hand to fit its neighbors with minimal mortar gaps
  • Load distribution: Weight is spread evenly through the structure to prevent stress points
  • Material selection: Only dense, low-absorption stones are chosen for outdoor use
  • Foundation depth: Proper excavation and compacted bases prevent settling over time

These principles trace back to rules documented by Italian architects like Carlo Fontana in 1694. Fontana used mathematical formulas to determine how shapes affect structural strength. Bernardo Antonio Vittone later expanded these rules in 1760 to allow taller and steeper dome designs. According to research from MDPI Applied Sciences, these same geometric methods underpin the stability of iconic structures like Brunelleschi’s Dome in Florence, which has remained intact since 1436.

The Heritage of Italian Masonry Craftsmanship

The history of Italian masonry craftsmanship goes back hundreds of years. This legacy bonds art and hard science together. For generations, master builders in Italy have refined their trade, passing down secrets from fathers to sons. These skills changed how we approach stone and brick construction today.

Italian masonry heritage is rooted in an unbroken chain of apprenticeship that stretches back to the Renaissance. Master builders like Brunelleschi developed techniques that allowed massive stone structures to support themselves without internal framing. Modern builders on Long Island still apply these same engineering principles to patios, outdoor kitchens, and fireplaces.

The science of Renaissance domes

One of the best demonstrations of Italian masonry skill appears in the great domes of the Renaissance. Builders created massive curved roofs without using wooden centering frames to hold the weight during construction. They used a double-helix brick pattern that lets the dome support itself as it rises. This technique combines sophisticated geometry with meticulous hand craftsmanship.

The science relies on the way bricks lock together at specific angles. Masons tilted each brick to create a self-supporting curve, eliminating the need for huge timber scaffolds. A 2021 study in Applied Sciences confirmed that Brunelleschi’s design distributes thrust evenly through supporting piers, keeping all sections compressed at safe stress levels. The UNESCO World Heritage Centre recognizes the Historic Centre of Florence for preserving these original building techniques and traditional materials like pietra serena stone.

Bringing Italian skills to America

In the late 1800s and early 1900s, skilled Italian masons brought their tools and knowledge to the United States. Their work appears in the stone facades of historic downtown buildings and the cobblestone paths of older neighborhoods. They taught their children the value of precise cutting and patient craftsmanship, keeping the tradition alive across generations.

Today, this heritage guides how Gappsi builds outdoor spaces on Long Island. Whether constructing a custom patio or a stone fireplace, the old rules still apply. Modern masons combine power tools with old-world care to ensure each project meets the quality standards established centuries ago, while coordinated landscape design services connect masonry to the surrounding yard.

How Italian Craftsmanship Elevates Outdoor Masonry Design

Italian masonry craftsmanship produces structures that are both structurally superior and visually striking. The method requires exact cutting to create stone surfaces that look refined and last for decades.

Italian-trained masons apply geometric principles to every project, ensuring that retaining walls, patios, and fireplaces distribute weight correctly and resist shifting. This engineering mindset, combined with an artistic eye for stone color and texture, produces outdoor spaces that function flawlessly while enhancing the home’s appearance.

Natural stone patio with Italian-style precision stonework and outdoor kitchen on Long Island

Precision in every stone cut

In Italian design, masons shape each stone to create tight bonds and clean lines. This level of detail prevents gaps where water might settle and cause freeze-thaw damage during Long Island winters. By following geometric rules first established by Renaissance architects, masons ensure that every arch and wall remains stable for generations.

Strength through smart engineering

Building for the Long Island climate demands durability above all else. Italian-trained masons use techniques that allow walls to support their own weight without relying solely on mortar adhesion. This self-supporting approach was first perfected in the great domes of Italy, which have stood for over 500 years without structural failure.

Research from MDPI Applied Sciences confirms that Brunelleschi’s brick-herringbone pattern creates self-bracing during construction. When applied to residential masonry, these same principles ensure that patios and fireplaces remain stable through decades of freeze-thaw cycles, heavy rain, and seasonal ground movement.

Premium Materials Define the Italian Masonry Standard

The heart of Italian masonry craftsmanship lies in the quality of the materials used. To meet enduring standards, builders must select stones and bricks that offer both beauty and strength.

Gappsi uses premium natural stone like bluestone, travertine, and granite alongside top paver brands such as Cambridge, Nicolock, Techo-Bloc, Belgard, and Renox. These materials are chosen for their density, low water absorption, and resistance to Long Island’s freeze-thaw climate.

Authentic Italian bricks and stone

High-end masonry projects often start with materials that have deep historical roots. Biscotto di Sorrento bricks, sourced from the Sorrento region of southern Italy, are prized for their heat retention and durability under thermal stress. These bricks have been used for centuries in Italian pizza ovens and fireplaces.

For patios and walkways, homeowners can choose from marble, travertine, granite, and bluestone. Each stone offers distinct texture and color that adds depth to an outdoor space. Granite provides exceptional hardness and longevity, while travertine stays cool under direct sun. According to Corsino Construction’s research on natural stone patios in Suffolk County, properly installed natural stone can last 30 to 50 years when base preparation and drainage are handled correctly.

Partnerships with top paver brands

Gappsi works with leading paver manufacturers to give clients a wide range of options. These partners include Cambridge Pavers, Nicolock, Techo-Bloc, Belgard, and Renox. These brands offer many colors and shapes that replicate the look of natural stone while providing consistent sizing for easier installation across large areas.

Each paver is engineered to handle heavy loads and resist weather damage. They are formulated to withstand road salt and ice melt, which is critical for Long Island driveways and walkways. A properly built base with compacted gravel layers and correct drainage slope prevents the settling and shifting that causes premature failure in lesser installations.

  • Cambridge Pavers: Known for large-format stones with tight joint systems
  • Nicolock: Wide color selection with high compressive strength
  • Techo-Bloc: Premium textures that mimic natural cleft stone
  • Belgard: Interlocking designs for superior edge retention
  • Renox: European-style pavers with antique finishes

The Gappsi Difference: Italian Craftsmanship on Long Island

The Gappsi story began in Italy long before the company opened its doors in Smithtown. Giuseppe Abbrancati started learning the trade at seven years old in 1974, working alongside his father and grandfather to master traditional masonry skills.

With over 38 years of experience, Gappsi bridges old-world Italian training with modern construction methods. The company’s 10 divisions handle everything from initial 3D design through permitting and final installation. The Smithtown showroom displays the full range of materials and design options available to Long Island homeowners.

A legacy of skilled masonry

Giuseppe founded Gappsi at age 21 with a focus on quality and trust. The company has since grown to include 10 divisions, offering full-service coverage from the first 3D design concept through obtaining municipal permits and final construction. The Smithtown showroom lets homeowners see premium masonry and paver installations in person before making decisions about their own projects.

True Italian masonry relies on precise cutting and engineered strength to last for decades. Renaissance architects like Fontana and Vittone used mathematical rules to create stone structures that remain standing today. Gappsi applies these same core principles to ensure every patio, outdoor kitchen, and fireplace is both beautiful and structurally sound.

Built for the Long Island climate

Long Island’s weather can be extremely hard on outdoor stonework. Salty coastal air and repeated freeze-thaw cycles cause cheap masonry to crack, shift, or spall within a few years. This is why proper drainage, deep base preparation, and dense materials are non-negotiable for lasting results.

Choosing the right materials is central to the Gappsi process. The team uses top paver brands alongside natural stone, combining old-world installation methods with modern material science. Every project balances artistic vision with the structural strength needed to survive many seasons of coastal weather.

Italian outdoor kitchen and stone fireplace with travertine and bluestone on Long Island

What Sets Italian-Trained Masonry Apart for Patios and Fireplaces

Italian masonry craftsmanship takes years to master. It starts with deep respect for the stone and the tools used to shape it. For homeowners on Long Island, this means choosing a team that values artistry as much as structural integrity.

Italian-trained masons bring generational knowledge that standard crews cannot replicate. The difference shows in tight stone joints, thoughtful material selection, and structures that remain level and crack-free for decades. Investing in proper training and technique produces outdoor spaces that add lasting value to the home.

Focus on precision and artistry

True Italian masonry is defined by exact cutting and artistic stone placement. Each piece is selected for its color, shape, and fit within the overall design. This attention to detail ensures that patios and fireplaces function as cohesive works of art that complement the landscape.

When a mason understands the natural flow and grain of the stone, the result is a structure with tight joints and balanced visual weight. This level of craftsmanship is increasingly rare in an industry that often prioritizes speed over quality.

Feature Italian-Trained Masonry Standard Masonry Approach
Attention to Detail Hand-cut stone with precision fitting Power tools with批量 cuts and wider joints
Longevity Designed for 30-50 year service life Often needs repairs within 5-10 years
Material Selection Natural stone and premium imported brick Standard pavers and common concrete
Visual Integration Custom designs matched to the home’s architecture Template layouts reused across projects
Quality Control Master mason oversees every stage Split between multiple crews with less oversight

Training and the legacy of the craft

A mason’s training directly affects the quality of the finished work. In Italy, the craft has traditionally been passed from master to apprentice over many years. This stands in contrast to standard crews that prioritize speed over precision. Research from Oxford Brookes University documents that traditional drystone walling in Italy relies on apprenticeship-style transmission where knowledge is passed through hands-on practice rather than written manuals alone.

Gappsi’s founder learned directly from his father and grandfather, starting at age seven. This type of generational training instills a sense of pride that appears in every finished project. When homeowners choose a mason with this background, they get more than a contractor. They get a craftsman who treats every stone patio and fireplace as a legacy piece.

How to Choose the Right Masonry Contractor for Long Island

Selecting the right contractor determines whether your outdoor investment lasts for decades or needs replacement within a few years.

The best masonry contractor for Long Island combines old-world training with local climate knowledge. Look for a team that sources premium materials, manages projects from design through completion. And has a portfolio of work that demonstrates precision stone joints and thoughtful material selection.

Heritage and background

When evaluating masonry contractors, start with their training roots. A mason who understands Italian masonry craftsmanship brings a level of care developed over generations. This style of work is more than laying stones. It reflects centuries of refined technique passed down through families and apprenticeships.

In Italy, masons learn to balance artistry and structural engineering from the beginning of their training. A true expert will explain how their background influences every cut and joint. They treat each project as a bespoke creation rather than a routine job.

Portfolio and material knowledge

A reliable contractor should show a portfolio of completed projects. Look for stone patios, outdoor kitchens, retaining walls, and fireplaces with tight joints and balanced proportions. Pay attention to the stone types used and how they have weathered over time.

A skilled mason knows which materials work best for Long Island’s specific conditions. Some stones resist freeze-thaw damage better than others. Granite and bluestone have very low water absorption rates, making them ideal for outdoor use in cold climates. Travertine stays cooler underfoot for pool surrounds. A knowledgeable contractor will explain why each material suits its intended location.

Key questions to ask

  • How do you prepare the base for freeze-thaw resistance?
  • What stone types do you recommend for Long Island’s climate and why?
  • Can you show examples of projects that are 5+ years old and still in good condition?
  • Do you handle permits, 3D design, and project management in-house?
  • What warranty do you offer on materials and workmanship?

A contractor who answers these questions with specific, technically grounded answers is more likely to deliver lasting results than one who gives vague assurances.

Frequently Asked Questions

What is Italian masonry craftsmanship?

Italian masonry craftsmanship is a building tradition that combines precise stone cutting, structural engineering, and artistic design. It emphasizes tight joints, load-balanced construction, and the use of dense natural materials. The methods trace back to Renaissance builders like Brunelleschi and have been preserved through family apprenticeships over centuries.

How long does an Italian-style stone patio last on Long Island?

A properly installed natural stone patio with Italian masonry techniques can last 30 to 50 years on Long Island. The key factors are deep base preparation, correct drainage slope, dense stone selection, and precise joint work that prevents water infiltration and freeze-thaw damage.

What makes Gappsi different from other masonry contractors on Long Island?

Gappsi was founded by Giuseppe Abbrancati, who began his Italian masonry training at age seven under his father and grandfather. With over 38 years of experience and 10 in-house divisions covering design, permitting, and installation, Gappsi provides full-service project management rooted in multi-generational Italian craftsmanship. The Smithtown showroom lets clients view materials in person before construction begins.

What materials are best for Italian masonry on Long Island?

The best materials for Long Island’s climate include bluestone, granite, and travertine for natural stone, plus premium pavers from Cambridge, Nicolock, Techo-Bloc, Belgard, and Renox. These materials offer the density and low water absorption needed to resist freeze-thaw cycles and salt air exposure.

Do Italian masonry techniques work for outdoor kitchens and fireplaces?

Yes. Italian masonry techniques are especially suited for outdoor kitchens and fireplaces because they emphasize heat management, structural stability, and weather resistance. Biscotto di Sorrento bricks are commonly used for pizza oven interiors due to their heat retention, while natural stone surrounds provide durability and aesthetic appeal.

Ready to Start Your Italian Masonry Project?

Italian masonry craftsmanship delivers outdoor spaces that are built to last for generations. Gappsi brings three generations of Italian building heritage to every project on Long Island, from custom patios and outdoor kitchens to stone fireplaces and retaining walls. Visit the Smithtown showroom to explore materials, view completed projects, and speak with the design team.

Call (631) 486-4662 or schedule a free consultation online to discuss your custom masonry project. From the first 3D rendering to the final stone placement, Gappsi handles every detail so you can start enjoying your outdoor living space sooner.

Modern Long Island patio with slip resistant pavers, steps, and outdoor seating.

A Guide to Slip Resistant Patio Pavers in Long Island

Does your current patio feel more like a liability than a luxury? Many Long Island homeowners struggle with outdoor surfaces that become slick with morning dew or after a brief summer storm. You might also be dealing with pavers that are cracked and uneven after just a few harsh winters. These problems aren’t just an eyesore; they’re safety risks. The good news is that these issues are not inevitable. They are often the result of choosing materials that simply aren’t suited for our specific climate. By upgrading to professionally installed slip resistant patio pavers Long Island families can rely on, you can eliminate these headaches for good. This guide will explain how the right materials and expert masonry installation create a durable, safe, and beautiful patio that lasts.

Key Takeaways

  • Choose Materials for Safety and Durability: Select pavers like porcelain or natural stone because their built-in texture provides grip when wet, and their low water absorption prevents cracking during Long Island winters.
  • Invest in Professional Installation: The stability of your patio depends on expert base preparation and proper drainage. A professional installer prevents sinking, shifting, and water pooling, ensuring your patio remains a safe, level surface for years.
  • Perform Simple Maintenance for Lasting Results: Keep your pavers safe and looking great with easy, routine care. Regularly sweep the surface, check the joint sand each year, and consider resealing every few years to protect against stains and preserve the paver’s texture.

Why Your Long Island Patio Needs Slip-Resistant Pavers

Your patio is more than just an extension of your home; it’s where you host summer barbecues, watch your kids play, and unwind after a long week. But creating that perfect outdoor oasis on Long Island means planning for two major factors: our unpredictable weather and the safety of your loved ones. A slippery patio can quickly turn a fun gathering into a trip to the emergency room, especially after a summer rain shower or a splash from the pool. That’s why selecting the right pavers is one of the most critical decisions you’ll make.

Choosing slip-resistant pavers isn’t just a practical upgrade; it’s an investment in peace of mind. These materials are specifically designed to provide better traction, even when wet, reducing the risk of falls. Beyond safety, the right pavers also need to be tough enough to handle Long Island’s demanding climate, from humid summers to harsh, icy winters. The constant freezing and thawing can wreak havoc on lesser materials, leading to cracks and an uneven surface. By prioritizing slip resistance and durability from the start, you ensure your patio remains a beautiful, safe, and lasting centerpiece of your backyard for years to come. We can help you find the perfect porcelain and natural stone pavers that offer both safety and style.

How Long Island Weather Affects Your Patio

Living on Long Island means enjoying beautiful seasons, but our weather can be tough on outdoor surfaces. The biggest challenge is the freeze-thaw cycle. Throughout the winter, moisture seeps into porous pavers, freezes, expands, and then thaws. This repeated process creates internal pressure that can cause pavers to crack, chip, and shift over time. Add in the salty air from the coast, which can accelerate wear and tear, and you have a recipe for a deteriorating patio. Choosing materials with low water absorption, like porcelain, is key. Because they absorb very little water, there’s almost no moisture to freeze and cause damage, ensuring your patio withstands our harsh winters.

The Safety Risks of a Slippery Patio

A beautiful patio loses its charm the moment it becomes a safety hazard. Standard pavers can become incredibly slick when wet, creating a dangerous environment for anyone walking on them. This is especially true for areas around swimming pools, where splashing is inevitable, but it’s also a concern for any patio after a rainstorm. For families with young children who love to run and play, or for households with older adults who may be less steady on their feet, the risk of a slip-and-fall accident is a serious concern. Slip-resistant pavers are made with textured surfaces that provide essential grip, giving you the confidence that your outdoor space is safe for everyone to enjoy, no matter the weather.

What Are the Best Materials for Slip-Resistant Pavers?

Choosing the right material is the most important decision you’ll make for a slip-resistant patio. The texture, porosity, and durability of a paver all contribute to how safe it will be when wet. For Long Island homeowners, this is especially critical, as your patio will see everything from summer pool splashes to icy winter mornings. A slippery surface is more than just an inconvenience; it’s a safety hazard for kids running around, guests at a barbecue, or even just you carrying a tray of drinks. The goal is to create a space where you can relax without worrying.

The three most popular and effective materials for this are porcelain, natural stone, and concrete. Each has its own set of benefits and characteristics that make it suitable for different needs and aesthetic preferences. Understanding the differences between them will help you select the perfect foundation for your outdoor living space, ensuring it’s not only beautiful but also safe for your family and friends year-round. Let’s look at what makes each material a great candidate for your project.

Porcelain Pavers

Porcelain pavers are a fantastic choice for slip resistance, especially around pools and in uncovered areas. Made from super-heated clay, they are incredibly dense and hard. This process makes them almost waterproof, as they absorb less than 0.5% of water. On Long Island, this is a huge advantage. With so little water absorption, there’s almost no risk of the pavers cracking during a freeze. This low porosity also helps maintain grip. Outdoor-rated porcelain pavers are manufactured with a textured surface that provides excellent traction. Since they don’t hold water, the surface stays gritty and safe even after a rainstorm. Plus, they come in a huge variety of styles that can mimic natural stone or wood, giving you both top-tier safety and design flexibility.

Natural Stone: Bluestone and Granite

If you love a timeless, organic look, natural stone is an excellent option. Materials like bluestone and granite are not only beautiful but also naturally slip-resistant. Their inherent textures and slightly uneven surfaces provide great traction underfoot. These stones are formed by nature to be incredibly strong and durable, so they can easily handle Long Island’s weather cycles without fading or degrading. A patio built with high-quality natural stone masonry requires very little upkeep to maintain its appearance and safety. The natural grip is built right in, so you get a surface that is both elegant and practical for any outdoor setting, from a rustic garden path to a sophisticated poolside lounge.

Concrete Pavers

Concrete pavers are a durable and versatile option that can be a good fit for many outdoor projects. They are built to withstand heavy foot traffic and tough weather conditions. Many concrete pavers are manufactured with a textured finish specifically to enhance traction, making them a reliable choice for patios and walkways that get wet. However, it’s important to know that concrete is more porous than porcelain, absorbing about 5% to 8% of water. Over time, this can lead to wear, especially if the pavers aren’t sealed correctly. To keep them looking and performing their best, regular maintenance is key. Properly sealing your pavers will protect them from water damage and help preserve their slip-resistant qualities through the seasons.

What to Look for in a Slip-Resistant Paver

Once you have an idea of the material you want, it’s time to get into the details. Not all pavers are created equal, even within the same category. The specific features of a paver, from its surface texture to its water absorption rate, will determine how safe and durable it is. Paying attention to these factors ensures your new patio, walkway, or pool deck is built to last and keeps your family safe, no matter the weather.

Understanding Slip Resistance Ratings (COF)

When you’re shopping for pavers, you might hear the term “Coefficient of Friction,” or COF. This is simply a technical rating for how slip-resistant a surface is. A higher COF means better grip. You don’t need to become an expert on the numbers, but it’s good to know that this is something manufacturers test for. Outdoor porcelain and natural stone pavers, for example, are specifically designed with textured surfaces and are rated to be very slip-resistant, even when wet. When working with a contractor, just ask them about the slip resistance of the pavers you’re considering, especially for pool decks or other areas that will see a lot of water.

Choosing the Right Texture and Finish

The look of your paver is important, but the feel is what provides safety. A smooth, polished stone might look beautiful indoors, but it can become a hazard on an outdoor patio. For slip resistance, you should choose slabs with a rough or uneven surface. This texture creates more friction for your feet and helps provide stability, preventing slips when the surface is wet from rain or splashes from the pool. Many modern pavers offer finishes that are both stylish and textured, so you don’t have to sacrifice aesthetics for safety.

Evaluating Thickness and Durability

The thickness of a paver is a key indicator of its strength and where it can be used. Thicker pavers are necessary for surfaces that need to bear heavy loads, like driveways. For a patio or walkway, you may have more flexibility. Durability is also about how the material handles our Long Island climate. Porcelain is excellent in cold weather because it absorbs very little water. With almost no water to freeze and expand, the material is far less likely to crack, chip, or flake from frost damage during the winter months.

How Waterproofing Prevents Freeze-Thaw Damage

The freeze-thaw cycle is a patio’s worst enemy on Long Island. When water seeps into porous materials, it freezes, expands, and creates tiny cracks. Over time, this process breaks down the paver. This is why a paver’s water absorption rate is so important. Materials like porcelain pavers are a great solution because they don’t soak up water. This quality means you don’t have to worry about freeze damage. It also makes them resistant to salt damage and stains, keeping your patio looking great for years. Proper restoration and sealing can also protect more porous stones.

Porcelain vs. Natural Stone for Long Island Patios

Choosing the right material for your patio is a big decision. It sets the tone for your entire outdoor space and determines how much time you’ll spend enjoying it versus maintaining it. For Long Island homeowners, the choice often comes down to two premium options: porcelain pavers and natural stone. Both create beautiful, long-lasting patios, but they have key differences in durability, maintenance, and cost that are worth considering. Porcelain offers modern engineering and incredible resilience, while natural stone provides timeless, organic beauty that has been a staple in landscape design for centuries. Your decision will shape not just the look of your yard, but also how it functions through every season. Understanding these distinctions will help you select the perfect foundation for your backyard oasis. Gappsi offers a wide selection of high-quality porcelain and natural stone pavers, and our team has decades of experience guiding homeowners to the ideal match for their home and lifestyle. For a broader material review, see our patio material comparison. Let’s compare them side by side so you can make a confident choice for your outdoor living space.

Durability Through the Seasons

Here on Long Island, our patios face everything from summer sun to winter ice. Your pavers need to withstand these temperature swings without cracking or chipping. Porcelain is engineered for this challenge. Because it absorbs almost no water, there’s no risk of moisture freezing, expanding, and causing damage. This makes it exceptionally resistant to the freeze-thaw cycles that can wear down other materials.

Natural stone also has a long history of enduring harsh weather. Stones like bluestone and granite are incredibly dense and have proven their strength in our region for generations. While they are more porous than porcelain, their natural durability makes them a reliable choice for a patio that will last for decades.

Comparing Maintenance Needs

Your patio should be a place for relaxation, not constant work. When it comes to maintenance, porcelain pavers are hard to beat. Their non-porous surface resists stains from things like spilled wine, oil, or fallen leaves. Mold and mildew also have a tough time taking hold. A simple cleaning with water and mild soap is usually all that’s needed to keep them looking new.

Natural stone is also a very practical and low-maintenance option. It’s incredibly strong and doesn’t require much daily upkeep. However, because it is a natural material, it can be more susceptible to staining if spills aren’t cleaned up quickly. Periodic cleaning and sealing can help protect its surface and preserve its beauty, a service our restoration and sealing team can handle for you.

Upfront Cost vs. Long-Term Value

Budget is always a factor in a home improvement project. Generally, porcelain pavers come with a higher upfront cost for both the material and the specialized installation they require. This initial investment, however, pays off over time through its extreme durability and minimal maintenance needs, giving it excellent long-term value.

The cost of natural stone can vary widely depending on the type of stone you choose, its rarity, and where it’s sourced from. While some options can be quite expensive, its timeless appeal and proven longevity make it a worthwhile investment that adds significant value to your property. Our masonry design and construction experts can provide a detailed estimate based on the specific material and design you have in mind.

Where to Use Slip-Resistant Pavers

Choosing the right paver is about more than just looks; it’s about creating a safe and functional outdoor space. Slip-resistant pavers are a smart investment for almost any area of your property, but they are especially crucial in places prone to moisture or heavy foot traffic. By strategically placing these materials, you can significantly reduce the risk of slips and falls, ensuring your backyard is a safe haven for family and friends. Let’s look at the key areas where slip-resistant pavers make the biggest impact.

Pool Decks and Wet Areas

Safety around the pool is non-negotiable. Pool decks are constantly splashed with water, creating a slick surface that can be hazardous. This is where slip-resistant pavers are an absolute must. Materials like outdoor porcelain pavers are designed with textured surfaces that provide excellent grip, even when wet. Choosing a paver with a high slip-resistance rating for your pool deck and any surrounding wet areas, like outdoor showers or spa surrounds, gives you peace of mind. You can relax and enjoy your beautiful swimming pool without worrying about your kids or guests taking a tumble on a slippery surface. It’s the perfect blend of safety and style.

Patios and Outdoor Living Spaces

Your patio is the heart of your backyard, a place for everything from summer barbecues to quiet morning coffees. While it may not be as constantly wet as a pool deck, it’s still exposed to morning dew, unexpected rain showers, and the occasional spilled drink. A slip-resistant surface ensures your main entertaining area remains safe for everyone. Pavers with a subtle texture offer great traction without feeling rough underfoot. This allows you to create a beautiful and inviting outdoor living space where you and your guests can move around confidently. A well-designed masonry patio built with the right materials ensures your get-togethers are memorable for all the right reasons.

Walkways and Driveways

Walkways and driveways are the workhorses of your landscape. They guide you to your front door and welcome you home every day, through every season. On Long Island, that means they need to stand up to rain, snow, and ice. Choosing slip-resistant pavers for these high-traffic paths is essential for year-round safety. Concrete pavers, for example, are incredibly durable and often feature a textured surface that provides reliable traction in all weather conditions. A secure footing on your main pathways prevents slips when you’re carrying groceries or rushing out the door. Investing in a quality paver installation for these areas ensures your home is safe and accessible from the moment you step onto your property.

Does Professional Installation Really Make a Difference?

When you’ve invested in beautiful, high-quality pavers, it’s tempting to think about installing them yourself to save some money. But the truth is, the long-term success and safety of your patio have less to do with the pavers themselves and more to do with the expert preparation and installation underneath. Professional installation isn’t just a luxury; it’s the single most important factor in creating a patio that lasts for decades instead of just a few seasons. A properly installed patio will withstand Long Island’s weather, drain correctly, and provide a stable, even surface for you and your family to enjoy.

The difference between a DIY project and a professional one often lies in the technical details that are invisible in the finished product. An experienced masonry contractor understands the nuances of our local soil, the physics of water drainage, and the precise techniques required for a flawless finish. They have the commercial-grade equipment and deep knowledge to prevent the common pitfalls that can turn a dream patio into a recurring headache. Opting for professional installation is an investment in peace of mind, ensuring your outdoor space remains a beautiful and functional asset to your home for years to come.

Why Base Preparation Is Crucial for Long Island Soil

Think of your patio’s base as the foundation of a house. If it isn’t solid, everything built on top of it will eventually fail. This is especially true on Long Island, where soil conditions and freeze-thaw cycles can cause the ground to shift. A professional begins by excavating the area to the proper depth before laying and compacting a gravel base. This step is critical for creating a firm, stable layer that won’t sink or heave.

Next, a layer of bedding sand is carefully spread and leveled. A common DIY mistake is using too much sand or the wrong type, which can cause pavers to shift and become uneven over time. A professional knows the exact thickness required to cushion the porcelain or natural stone pavers and allow for proper settling, ensuring a perfectly flat and durable surface from day one.

The Importance of Proper Drainage and Slope

Water is the number one enemy of any paver patio. Without a plan for drainage, rainwater and snowmelt can pool on the surface, leading to slippery spots, staining, and even structural damage. Over time, standing water can seep into the joints and erode the base, causing pavers to sink and become unstable. In winter, this trapped moisture can freeze and expand, creating hazardous ice patches and potentially cracking your pavers.

A professional installer prevents these issues by building a subtle, precise slope into the patio. This gentle grade, usually unnoticeable to the eye, directs water away from your home’s foundation and into a designated drainage area. Calculating and executing this slope requires expertise. It ensures your patio dries quickly after a storm and helps you avoid the costly need for future restoration and sealing due to water damage.

Common DIY Installation Mistakes to Avoid

The difference between an amateur and a professional patio is often in the details. Even small mistakes during installation can compromise the entire project’s look and longevity. One of the most obvious signs of a DIY job is an improper pattern layout or poor alignment. This can result in uneven gaps and crooked lines that detract from the patio’s beauty. Another frequent error is leaving too much space between pavers, creating an unstable surface and an open invitation for weeds.

Other common mistakes include failing to properly compact the sand base or skimping on the filler sand used in the joints. Jointing sand is what locks the pavers together into a single, strong surface. Without it, pavers can easily shift or wobble underfoot. You can see examples of meticulous, professional work on the Gappsi YouTube channel, which highlights the precision that prevents these exact problems.

How to Maintain Your Slip-Resistant Pavers

You’ve invested in beautiful, safe pavers for your Long Island home, and keeping them in top condition is simpler than you might think. With a little routine care, you can protect their slip-resistant texture and ensure they look stunning for years. A well-maintained paver surface not only looks better but also performs better, especially in high-traffic areas or around the pool. Following a straightforward maintenance schedule will preserve the safety and beauty of your patio, walkway, or driveway. Here’s a guide to help you care for your investment through every season.

Seasonal Cleaning and Care

Regular, gentle cleaning is the easiest way to keep your pavers looking fresh. Start by sweeping away leaves, dirt, and other debris with a stiff-bristle broom. This simple step prevents organic materials from staining the surface. For a deeper clean, rinse the area with a garden hose. If you encounter stubborn spots, use a pH-neutral cleaner designed for pavers and a soft brush. It’s important to avoid harsh chemicals or acid-based cleaners, as they can etch the paver’s surface and damage the protective sealant. This gentle approach ensures the textured finish that provides grip remains intact and effective.

How to Inspect and Refill Joint Sand

The sand in the joints between your pavers is crucial for stability. It locks them in place and prevents them from shifting. Once a year, take a walk around your patio and inspect these joints. Look for areas where the sand is low or has washed away. You might also see weeds or moss starting to grow, which is a clear sign that it’s time for a touch-up. To fix this, simply sweep new polymeric sand into the gaps until they are full. This small task goes a long way in preventing wobbly pavers and maintaining a solid, uniform surface. For larger repairs, Gappsi offers expert masonry services to restore your patio’s integrity.

When and How to Reseal Your Pavers

Think of sealant as a protective shield for your pavers. It guards against stains, UV rays that can cause fading, and the damaging effects of Long Island’s freeze-thaw cycles. While not required every year, resealing your pavers every three to five years is a smart move. A fresh coat of sealant will renew the paver color and, most importantly, reinforce its water-repellent and slip-resistant qualities. Because the application process needs to be done correctly to avoid a slick or cloudy finish, we recommend professional restoration and sealing. Our team ensures the right type of sealant is used and applied perfectly for lasting protection.

How to Clean Pavers Without Harming Their Grip

While a pressure washer can be a powerful tool for cleaning, it must be used with caution. High pressure can easily damage the surface of your pavers, stripping away the textured finish and compromising its grip. If you choose to use a pressure washer, always start with the widest-angle tip and the lowest pressure setting. Keep the nozzle at least a foot away from the surface and move in a sweeping motion. Never aim the jet directly into the joints, as this will blast out the essential jointing sand. For most grime, a garden hose and a gentle cleaner are sufficient and much safer for preserving the integrity and slip resistance of your pavers.

How to Find the Right Paver Contractor on Long Island

What to Look for in a Paver Contractor

Choosing your pavers is only half the equation; finding the right contractor to install them is just as critical. A properly installed paver patio can last for decades, but a poor installation can lead to cracking, shifting, and expensive repairs down the road. The best contractors understand that their work is just as important as the materials you choose. They prevent common mistakes like improper alignment and poor base preparation, which can ruin the look and integrity of your patio. When you’re vetting contractors, ask to see a portfolio of their work, inquire about their experience with Long Island’s specific soil and weather conditions, and always verify that they are licensed and insured. A professional’s portfolio will showcase their masonry skills and attention to detail.

Why Choose Gappsi for Your Paver Installation

When you work with Gappsi, you’re partnering with a team that understands the unique demands of Long Island properties. We recommend and install products that are proven to perform well in our climate, like Nicolock pavers. Nicolock has been a trusted manufacturer in the Northeast since 1959 and, even better, their products are made right here in Lindenhurst, New York. Their pavers offer excellent slip resistance with a beautiful, smooth appearance, making them perfect for patios, pool decks, and walkways. Our installation expertise ensures that these high-quality porcelain and natural stone pavers are laid correctly for maximum durability and beauty, giving you a stunning outdoor space that’s built to last.

Related Articles

Frequently Asked Questions

Which material is truly the best for a slip-resistant patio on Long Island? Both porcelain and natural stone are top-tier choices, so the “best” one really depends on your personal style and priorities. Porcelain is an engineered powerhouse, offering incredible durability and almost zero water absorption, which makes it a champion against our freeze-thaw cycles. Natural stone, like bluestone or granite, provides a timeless, organic beauty with a texture that is naturally slip-resistant. You can’t go wrong with either, so the decision often comes down to the specific look you want for your outdoor space.

Do I have to seal my new pavers? And if so, how often? Sealing is a great way to protect your investment, but whether it’s necessary depends on the material. For more porous pavers like concrete or certain natural stones, sealing every three to five years is a smart move. It acts as a protective barrier against stains, water damage, and fading. Porcelain, on the other hand, is so dense and non-porous that it doesn’t require sealing for protection. However, some people choose to seal it anyway to make cleaning even easier.

My kids are always running around the pool. Are slip-resistant pavers really that much safer? Yes, they make a significant difference. Standard pavers can become dangerously slick when wet, but pavers designed for pool decks have a specific textured surface that provides crucial grip for little feet. Materials like outdoor-rated porcelain are especially effective because they absorb very little water, meaning the surface itself dries faster and is less likely to develop slick spots. It’s a safety feature that brings a lot of peace of mind.

Can I save money by installing the pavers myself? While it might seem like a way to cut costs, installing a paver patio correctly is a highly technical job. The most critical part of a long-lasting patio is the foundation, which involves excavating and compacting a base to prevent sinking and shifting. Professionals also build in a precise, subtle slope to ensure proper drainage, which is essential for preventing water damage on Long Island. Investing in professional installation is the best way to guarantee your patio will look great and remain stable for decades.

Will a slip-resistant paver feel rough on bare feet or look less stylish? Not at all. This is a common concern, but modern pavers are designed to be both safe and beautiful. The term “slip-resistant” refers to a surface with a subtle texture, not a coarse, uncomfortable finish like sandpaper. You can find countless elegant options in both porcelain and natural stone that feel great underfoot while providing the traction you need. You definitely don’t have to choose between having a stylish patio and a safe one.

Modern outdoor cabin sauna with a glass door for a home on Long Island.

Outdoor Cabin Sauna Long Island: The Ultimate Guide

Not all saunas are created equal, and the experience you desire will guide your choice. Do you crave the rustic, authentic ritual of a wood-burning stove, or do you prefer the modern convenience of an electric heater that’s ready with the push of a button? Perhaps the gentle, deep-penetrating warmth of an infrared sauna is more your style. Understanding these differences is the first step to finding your perfect match. Your lifestyle, wellness goals, and personal taste all play a role in selecting the ideal outdoor cabin sauna Long Island has available. Let’s explore the distinct types to help you decide which one will become your personal backyard sanctuary.

Key Takeaways

  • Choose the right heat source for your needs: Your first decision is how you want to heat your sauna. A traditional wood-burning model offers a rustic experience, an electric heater provides simple convenience, and an infrared unit delivers gentle, deep-penetrating warmth.
  • A successful installation requires professional planning: Before you buy, remember to check local Long Island permit requirements, prepare a solid foundation with good drainage, and hire a licensed electrician for a safe and compliant setup.
  • A sauna is an investment in your health and home: Beyond being a luxury feature, an outdoor sauna is a tool for wellness. Regular use can support heart health, reduce stress, and improve sleep, all while increasing your property’s overall appeal and value.

What Are the Different Types of Outdoor Cabin Saunas?

Choosing the right outdoor cabin sauna for your Long Island home is an exciting step, and it all starts with understanding the different heating methods available. Each type offers a distinct experience, from the rustic feel of a wood-burning stove to the modern convenience of an electric heater. Your choice will depend on your personal preferences, wellness goals, and how you envision your sauna fitting into your daily routine. Think about whether you crave a traditional, ritualistic experience or prefer a simple, push-button start. Gappsi offers a variety of high-quality saunas to match any lifestyle, ensuring you find the perfect fit for your backyard oasis. Let’s explore the most popular options to help you decide.

Traditional Wood-Burning Saunas

If you love the idea of a truly authentic and rustic retreat, a traditional wood-burning sauna is an incredible choice. This type of sauna provides a unique experience, defined by the natural aroma of burning wood and the hands-on process of tending the fire. You have complete manual control over the heat and humidity, allowing you to create the perfect environment by adding water to the hot stones. This option is perfect for those who appreciate tradition and want an off-grid setup that doesn’t rely on electricity. The authentic experience connects you to the deep-rooted history of sauna culture, making each session feel like a special ritual.

Electric Saunas

For homeowners seeking convenience and simplicity, electric saunas are the most popular choice. They are incredibly easy to use, heating up quickly with just the push of a button or a turn of a dial. An outdoor sauna buying guide will often highlight that electric heaters offer precise temperature control, so you can get a consistent and reliable experience every time. This modern alternative delivers all the classic health benefits without the work of managing a fire. It’s an ideal solution for busy individuals who want to seamlessly integrate a sauna session into their daily wellness routine without any extra effort. Just set your desired temperature, and your personal escape is ready in minutes.

Infrared Saunas

Infrared saunas offer a different kind of heat that many people find more comfortable than traditional saunas. Instead of heating the air around you, infrared heaters emit radiant heat that is absorbed directly by your body. This process allows you to work up a great sweat at lower temperatures, making it a great option for those who are sensitive to intense heat. According to a best outdoor sauna guide, this gentle warmth is still highly effective for promoting detoxification and deep relaxation. If you’re looking for a modern wellness tool that provides a deep, penetrating heat without the high temperatures of a traditional sauna, an infrared model is an excellent choice.

Steam Saunas

Often called steam rooms, steam saunas create a completely different atmosphere using moist heat. A steam generator boils water to produce a thick, humid vapor that fills the space, creating an environment with nearly 100% humidity. This moist heat is wonderful for respiratory health, helping to clear sinuses and soothe throat irritation. It’s also fantastic for skin hydration, leaving your skin feeling soft and refreshed. The therapeutic effects of steam create a deeply relaxing and cleansing experience. A steam sauna is perfect if you enjoy the feeling of a tropical rainforest and want to focus on respiratory and skin benefits.

What Are the Benefits of an Outdoor Cabin Sauna?

Adding an outdoor cabin sauna to your Long Island home is about so much more than just having a luxurious new feature. A sauna is a powerful tool for your health and well-being, offering a personal sanctuary to relax and recharge. Think of it as an investment in your daily wellness routine. From the moment you step inside, the gentle heat begins to work its magic, providing a host of benefits that touch on everything from heart health to stress levels.

Regular sauna sessions can become a cornerstone of a healthy lifestyle. The practice offers a quiet escape from the demands of daily life, giving you a dedicated space to unwind and focus on your body and mind. Whether you’re looking to soothe sore muscles after a workout, find a moment of peace, or simply warm up on a chilly day, an outdoor sauna provides a unique and effective way to care for yourself. Let’s explore some of the specific advantages you can expect.

Cardiovascular Health and Circulation

One of the most significant benefits of regular sauna use is its positive effect on your cardiovascular system. When you’re in a sauna, the heat raises your body temperature, which in turn increases your heart rate and improves blood circulation. This process is similar to the effects of light to moderate exercise. This improved blood flow can help lower blood pressure over time and support overall heart health.

Some studies suggest that the high temperatures can also help your body’s natural defense systems. The heat can encourage your body to produce more white blood cells, which are essential for fighting off illness. A consistent sauna routine can be a great, relaxing way to support your immune function30275-1/fulltext) and keep your circulatory system working efficiently.

Stress Relief and Better Sleep

In our busy lives, finding a true moment of peace can be a challenge. An outdoor sauna provides a perfect retreat. The warm, quiet environment helps calm your nervous system and encourages the release of endorphins, your body’s natural feel-good chemicals. This deep relaxation helps melt away the stress of the day, leaving you feeling refreshed and centered.

This profound sense of calm has a direct impact on your sleep quality. Using a sauna in the evening can help signal to your body that it’s time to wind down. As your body cools down after leaving the sauna, it naturally prepares for rest, making it easier to fall asleep and enjoy a deeper, more restorative night’s sleep. It’s a simple, natural way to improve your sleep patterns without any medication.

Skin Health and Detoxification

A sauna session can feel like a mini-facial for your entire body. As the heat causes you to sweat, your pores open up, helping to cleanse your skin of impurities and dead skin cells. This deep sweating can leave your skin feeling softer and looking more radiant. The increased blood circulation also plays a role, delivering more oxygen and nutrients to your skin cells for a healthy, natural glow.

While the term “detox” is often used, the primary benefit comes from this cleansing sweat. Regular sessions can help clear out clogged pores, which may reduce breakouts for some people. It’s a simple and enjoyable way to support your skin’s natural processes and maintain a clear, vibrant complexion as part of your regular wellness routine.

Increased Property Value and Curb Appeal

An outdoor cabin sauna is not just a personal benefit; it’s also a smart addition to your property. A beautifully designed and well-integrated sauna adds a unique touch of luxury that can significantly increase your home’s appeal and market value. It transforms your backyard from a simple outdoor area into a complete wellness retreat, a feature that is highly attractive to potential buyers.

When thoughtfully placed, a sauna can enhance your entire outdoor living space. Imagine it nestled among the trees or connected to a patio or pool area. At Gappsi, we specialize in creating cohesive designs that blend your new sauna perfectly with your existing landscape and masonry. It becomes more than just a sauna; it becomes a key element of your beautiful and functional backyard oasis.

How to Choose the Right Outdoor Cabin Sauna

Picking the perfect outdoor sauna is an exciting step toward creating your dream backyard retreat. With so many options available, it’s smart to think through a few key details before you buy. Considering your lifestyle, your property, and how you plan to use your sauna will ensure you choose a model that you’ll love for years to come. It’s not just about buying a product; it’s about designing an experience. Let’s walk through the most important factors to help you find the right fit for your Long Island home.

Size, Capacity, and Customization

First, think about who will be using your sauna. Are you picturing quiet, solo sessions or relaxing with a partner? Or do you love hosting friends and family? Outdoor cabin saunas come in various sizes, designed to accommodate different group sizes for a comfortable experience. A smaller sauna is perfect for one or two people and will heat up more quickly, while a larger model can become a social hub in your backyard. At Gappsi, we can help you find the right size and even explore custom designs to perfectly match your vision and the scale of your outdoor space, ensuring it feels like a natural extension of your home.

Choosing Materials for the Long Island Climate

Living on Long Island means your outdoor sauna needs to withstand everything from humid summers to snowy winters. The right materials are essential for durability. A well-built outdoor cabin sauna with quality insulation can last for decades, making it a worthwhile investment. Look for woods like cedar or hemlock, which are naturally resistant to rot and insects. Proper insulation is also key, as it helps the sauna heat efficiently and retain warmth, saving you money on energy bills. We specialize in building outdoor structures that last, using high-quality porcelain and natural stone for foundations and surroundings that protect your investment from the ground up, ensuring your sauna stands strong through every season.

Key Features and Upgrades to Consider

Modern saunas offer much more than just a hot room. Think about what features would make your experience truly special. Popular outdoor sauna upgrades include covered entryways, soft LED lighting, integrated sound systems, and expansive glass panels. A covered porch provides a convenient place to cool down between sessions, while custom lighting and music can set a relaxing mood. Large windows can make the space feel open and connected to your garden. You can even create a seamless flow from your sauna to your other backyard features. Many homeowners integrate their saunas with pools and patios, creating a complete wellness oasis right at home.

Understanding Maintenance for Long Island Weather

Proper care is the key to your sauna’s longevity, and it starts with a solid installation. A professional installation ensures your sauna has a strong, level base and is properly sealed, which is the first line of defense against Long Island’s variable weather. Routine maintenance is straightforward: regularly clean the interior benches, check your heater, and consider treating the exterior wood every few years to protect it from sun and moisture. Gappsi’s expertise in restoration and sealing for outdoor structures means we understand how to protect your investment. By starting with a quality build and following a simple care routine, you can ensure your sauna remains a beautiful retreat for years.

Your Guide to Sauna Installation on Long Island

Bringing a sauna to your Long Island home is an exciting project, but the installation process can feel a little daunting. Don’t worry, I’m here to walk you through it. Proper planning is the key to a smooth installation and a sauna that you’ll love for decades. From picking the perfect spot to connecting the power, here’s what you need to know to get your backyard retreat set up correctly.

Permits, Zoning, and Local Regulations

Before you even break ground, it’s important to understand the local rules. Every town on Long Island has its own zoning laws and building codes, so what’s required in Suffolk County might be different from Nassau County. Outdoor saunas often require a building permit, especially if they are a certain size or need new electrical wiring. Checking with your local municipality first will save you from potential fines or having to make changes later. Working with an experienced team that understands these local regulations can make this step much easier, as they can handle the paperwork and ensure your installation is fully compliant from day one.

Site Selection, Drainage, and Foundation

Choosing the right location is about more than just the view from the window. Your sauna needs a solid, level base to sit on. A concrete slab or a paver patio are excellent options for a foundation. Proper drainage around the site is also critical to prevent water from pooling and damaging the sauna’s structure over time. Think about privacy and how you’ll access the sauna from your home. A well-built outdoor cabin sauna with a strong foundation and good maintenance can last for 30 to 50 years. Our masonry experts can help you create the perfect, durable base for your new wellness escape.

Electrical and Utility Connections

Most outdoor saunas, particularly electric and infrared models, require a dedicated electrical connection. This isn’t a DIY job. You’ll need a licensed electrician to run the proper wiring and install a dedicated circuit to handle the power load safely. Outdoor saunas typically require more work to install, especially if they require an electrical hook-up. This ensures your sauna operates efficiently and meets all safety codes. If you opt for a wood-burning sauna, you won’t need electricity for the heat, but you might still want it for lighting. Planning your home remodeling project with a professional team ensures all utility connections are handled correctly.

Integrating Your Sauna with Your Outdoor Space

Your sauna shouldn’t just be an add-on, it should feel like a seamless part of your backyard oasis. Think about how it connects to your other outdoor features. You can create a beautiful walkway from your back door or connect it to your pool deck for a post-swim steam. Popular upgrades include soft LED lighting, integrated sound systems, and large glass panels that connect you to the nature outside. Consider adding a small deck or patio around the sauna with seating, or surround it with thoughtful landscape design to create a private, tranquil atmosphere. This is your chance to build a complete wellness retreat right at home.

Where to Find Outdoor Cabin Saunas on Long Island

Finding the right outdoor sauna for your Long Island home can feel like a big task, but it doesn’t have to be. When you know where to look, you can find high-quality brands and expert installation all in one place. We’ve put together a list of top-tier sauna brands and suppliers available right here, making it easier for you to start planning your backyard wellness retreat. From traditional Finnish designs to modern infrared cabins, the perfect option for your home is closer than you think. Exploring these trusted names is the first step toward creating a personal sanctuary just a few steps from your back door.

Gappsi

As a central hub for home improvement on Long Island, Gappsi is your go-to for finding the perfect sauna. We sell, deliver, and install a wide variety of saunas and hot tubs. Whether you’re dreaming of a traditional Finnish wood-burning sauna, a modern infrared model, or a classic steam room, we have you covered. Our selection includes indoor, outdoor, barrel, and cabin styles from the best brands in the industry, ensuring you find exactly what you need for your space. Our team handles the entire process, so you can relax and look forward to your new wellness feature.

Finnmark

If you’re looking for a brand that specializes in authentic sauna experiences, Finnmark is an excellent choice. As one of the premium brands offered by Gappsi, Finnmark provides a range of sauna types that are perfectly suited for outdoor installation. Their designs focus on quality craftsmanship and creating an ideal environment for relaxation and health. Choosing a Finnmark sauna means you are investing in a durable and beautiful addition to your outdoor living area, turning your backyard into a year-round escape.

SaunaLife

To complete your sauna experience, you need high-quality heaters and accessories, and that’s where SaunaLife comes in. Gappsi proudly provides a selection of SaunaLife products, known for their reliability and innovative features. From powerful heaters that provide the perfect amount of steam to comfortable benches and stylish lighting, SaunaLife offers everything you need to customize your sauna. Their wide variety of models and accessories ensures you can tailor every detail to your personal preferences, creating a truly bespoke wellness space.

Auroom

For a touch of true luxury, consider the Auroom Mira L Cabin Sauna. We recently installed one of these stunning Auroom models in Wainscott, and it perfectly captures the trend of creating wellness-focused outdoor living spaces. Auroom is known for its sophisticated design and exceptional quality, blending elegant aesthetics with advanced functionality. An Auroom sauna is more than just a wellness feature; it’s a statement piece that enhances the beauty and value of your property while providing an unparalleled relaxation experience.

Haljas

Haljas is another fantastic brand available through Gappsi, offering beautifully designed saunas that make a stylish addition to any backyard. Known for their modern and often unique shapes, Haljas saunas are crafted to create a serene outdoor retreat. Whether you envision a cozy cabin nestled in your garden or a sleek, contemporary unit by the pool, Haljas provides options that combine form and function. Their commitment to quality materials ensures your sauna will not only look great but will also stand the test of time.

Financing and Payment Options

Investing in an outdoor cabin sauna is a significant home improvement project, and we believe it should be as stress-free as possible. Gappsi offers flexible ways to finance your project, making it easier to bring your vision to life without financial strain. We provide clear, comprehensive pricing before you commit, so you know exactly what to expect. Our goal is to help you invest in your home and well-being with confidence, knowing you have a supportive partner every step of the way.

Related Articles

Frequently Asked Questions

What’s the main difference in feel between a traditional sauna and an infrared one? Think of it as the difference between sitting in a hot room versus standing in the sun. A traditional sauna uses a heater to warm the air around you, creating that classic, intense heat that you can make steamy by adding water to the rocks. An infrared sauna uses special heaters that emit light to warm your body directly, which allows you to sweat deeply at a lower, gentler air temperature. It really comes down to whether you prefer a hot, enveloping heat or a deep, radiant warmth.

Can I really use an outdoor sauna during a cold Long Island winter? Absolutely, and it’s one of the best times to use it. Outdoor saunas are built with quality insulation specifically for four-season use. Stepping into a warm, cozy sauna on a snowy day is an incredible experience. A well-built sauna will heat up efficiently even in the cold, providing a perfect escape and a wonderful way to warm up after being outside.

How much maintenance is involved with an outdoor sauna? It’s more straightforward than you might think. The most important part is starting with a professional installation to prevent issues down the road. On a regular basis, you’ll just want to wipe down the benches and floor to keep them clean. Depending on the exterior wood, you may want to apply a protective sealant every few years to shield it from sun and moisture, which is a simple weekend task.

Do I need a special foundation for my sauna? Yes, a solid and level foundation is essential for the stability and longevity of your outdoor sauna. This prevents structural issues and ensures proper door alignment. Common choices include a concrete slab or a sturdy paver patio. Our team can build the perfect base for your sauna, ensuring it has the support it needs to stand strong for decades.

How long does the installation process typically take? The timeline can vary depending on a few factors, such as the site preparation needed and the type of sauna you choose. If your site is ready, a pre-fabricated cabin can often be installed in just a few days. However, if the project involves creating a new foundation, running electrical lines, and integrating it with a larger landscape design, it might take a couple of weeks. We can give you a precise timeline once we discuss your specific project.

Outdoor tile patio installed by a Long Island contractor with modern stone pavers and seating.

Outdoor Tile Contractor Long Island: A Buyer’s Guide

You have a vision for your backyard: a beautiful, inviting space perfect for summer barbecues and quiet mornings. But turning that vision into reality can feel overwhelming. With so many choices for materials, from sleek porcelain to rustic natural stone, where do you even begin? And how can you be sure the finished project will last through Long Island’s tough seasons? This is where a professional comes in. Finding the right outdoor tile contractor Long Island has to offer is the key to a stress-free process and a flawless result. This guide breaks down the entire process into simple, actionable steps to help you plan with confidence.

Key Takeaways

  • Prioritize the foundation for a lasting project: Before choosing a tile pattern, focus on the essentials. Proper site preparation and a plan for water drainage are the most important steps for creating an outdoor space that will not shift, crack, or pool water over time.
  • Match the tile to your lifestyle: Select a tile material by balancing looks with real-world use. Think about durability for Long Island weather, slip resistance for safety around pools, and the maintenance level you are comfortable with to find the perfect surface for your home.
  • Vet your contractor to protect your investment: Choosing the right installer is as crucial as choosing the right tile. Always confirm they are licensed and insured, look through their portfolio of past projects, and compare detailed quotes to find a true professional who guarantees quality workmanship.

What Does an Outdoor Tile Contractor Do?

An outdoor tile contractor does more than just lay down pavers. They are skilled professionals who manage your project from the initial idea to the final, beautiful result. Think of them as your expert partner in transforming your outdoor space. Their work typically falls into three main categories: installation, design, and maintenance. Understanding what they do helps you know what to expect and how to work together to create the backyard of your dreams.

Tile Installation Services

The most visible part of a contractor’s job is, of course, the installation. This is where their technical skill really shines. A professional contractor ensures your project is built on a solid foundation, handling all the necessary prep work to prevent shifting or cracking down the line. They specialize in installing a wide range of materials, from elegant porcelain pavers to classic natural stone. Their expertise guarantees that every tile is perfectly placed, properly grouted, and ready to withstand Long Island’s weather for years to come. It’s this attention to detail that separates a DIY job from a lasting, professional installation.

Design and Consultation

Before a single tile is laid, a great contractor provides design and consultation services. This is where your vision starts to take shape. They work with you to understand your style, how you plan to use the space, and what your budget looks like. A contractor will help you sort through the vast world of tile options, explaining the pros and cons of different materials, colors, and patterns. This collaborative process ensures the final design is not only beautiful but also practical for your family’s needs. Gappsi’s approach to custom masonry design focuses on creating a space that is uniquely yours, blending seamlessly with your home and landscape.

Restoration and Sealing

A contractor’s work doesn’t have to end once the installation is complete. To protect your investment, many professionals also offer maintenance services. Over time, outdoor tiles are exposed to foot traffic, weather, and potential stains. Professional restoration and sealing services are key to keeping your patio or walkway looking brand new. This can involve deep cleaning to remove grime and moss, repairing any minor damage, and applying a high-quality sealant. Sealing helps guard against water damage, stains, and fading from the sun, preserving the beauty of your tiles for the long haul.

What Types of Outdoor Tiles Are There?

Choosing the right tile for your outdoor space can feel like a big decision, but it’s also where the fun begins. The material you select sets the tone for your entire patio, walkway, or pool deck. From the sleek, modern look of porcelain to the timeless elegance of natural stone, each option offers a unique combination of style, durability, and feel. Understanding the differences will help you find the perfect match for your Long Island home and lifestyle. Let’s walk through some of the most popular choices so you can feel confident in your selection.

Porcelain Pavers

If you’re looking for a material that combines sophisticated style with incredible strength, porcelain pavers are an excellent choice. Unlike indoor porcelain tiles, these pavers are thicker and built to withstand the elements. They are highly durable, non-porous, and resistant to water, stains, and fading from the sun. This makes them a fantastic, low-maintenance option for high-traffic areas like patios and pool decks.

Because they absorb very little water, porcelain pavers are also frost-resistant, a must-have feature for Long Island’s freeze-thaw cycles. Plus, their natural slip resistance provides peace of mind for families with children. With a huge variety of colors and patterns available, including designs that beautifully mimic natural stone and wood, you can achieve almost any look without compromising on performance. Gappsi offers a wide selection of high-quality porcelain and natural stone pavers to fit your design vision.

Natural Stone

There is something truly special about natural stone. Each piece is completely unique, with its own distinct colors, textures, and patterns shaped by the earth over millions of years. This one-of-a-kind character brings an unmatched sense of luxury and permanence to any outdoor project. As a leading Long Island masonry design firm, Gappsi specializes in creating stunning outdoor living spaces with custom-carved natural stone.

Popular options like granite, bluestone, and limestone are known for their durability and classic appeal. While natural stone is a premium investment, its beauty is timeless and can last a lifetime with proper care. It creates a seamless connection between your home and the natural landscape, adding significant value and curb appeal. Whether you envision a rustic flagstone patio or a formal bluestone walkway, natural stone delivers an authentic, high-end finish.

Travertine and Slate

Within the world of natural stone, travertine and slate are two standout options with distinct personalities. Travertine, a type of limestone, is prized for its warm, earthy tones and soft, elegant appearance. One of its most celebrated qualities is its ability to stay cool to the touch even in direct sunlight, making it a perfect material for pool surrounds and patios where you’ll be walking barefoot. Its naturally porous surface gives it a beautiful texture, though it does require sealing to protect against stains.

Slate offers a more dramatic and richly colored alternative. Available in shades of blue, gray, green, and purple, its naturally layered surface provides excellent slip resistance. Slate is incredibly dense and durable, standing up well to heavy foot traffic and harsh weather. Both travertine and slate bring a touch of organic sophistication to any outdoor design, and you can explore these options in the Gappsi stone collection.

Ceramic and Concrete Tiles

While often associated with indoor applications, certain ceramic and concrete tiles are specifically engineered for outdoor use. It’s crucial to select tiles that are rated for exterior conditions, as these are made to endure extreme temperatures and moisture without cracking. Quarry tile, a type of unglazed ceramic, is a classic, hard-wearing choice that provides a rustic, practical surface for patios and walkways.

Concrete pavers are another versatile and often more budget-friendly option. They can be molded into a wide array of shapes, sizes, and colors, giving you immense design flexibility. From tiles that mimic cobblestone to large, sleek modern slabs, concrete can adapt to any style. Both ceramic and concrete tiles require proper installation and often benefit from sealing to prevent staining and weather damage, a service our restoration and sealing team can provide to ensure their longevity.

How to Choose the Right Outdoor Tile for Your Home

Selecting the perfect outdoor tile is about more than just picking a color you like. It’s a decision that balances durability, safety, and your personal style to create a space that’s both beautiful and functional. The right tile can completely transform a simple patio into a stunning outdoor living room or make a pool deck feel like a resort. On Long Island, where we experience everything from hot, sunny summers to freezing, icy winters, your choice matters even more. You need a material that can handle the elements without cracking, fading, or becoming a safety hazard.

Think of it as setting the stage for your entire outdoor area. The tile you choose will influence everything from your furniture choices to the overall mood of your backyard. By focusing on a few key factors, you can narrow down the options and find a tile that not only looks fantastic but also stands the test of time. We’ll walk through the most important considerations: how well the tile holds up to weather, how safe it is underfoot, and how it complements your home’s aesthetic. This will help you make a confident choice for your masonry project.

Durability and Weather

Your outdoor tiles will be exposed to everything our Long Island weather throws at them, so durability is non-negotiable. You need a material that can withstand freeze-thaw cycles without cracking and resist fading under the summer sun. Materials like porcelain and natural stone are excellent choices because they are specifically designed for these challenges. Porcelain, in particular, is a powerhouse for outdoor use. It’s incredibly dense and non-porous, meaning it absorbs very little water. This quality makes it highly resistant to frost damage, staining, and moisture, which is why it’s a top pick for patios, walkways, and pool surrounds. Choosing a weather-resistant tile from the start saves you from costly repairs and replacements down the road.

Slip Resistance and Safety

Safety should always be a priority, especially in outdoor areas that get wet. Patios, pool decks, and walkways can become slippery when it rains or when kids are splashing around, so choosing a tile with good slip resistance is essential. When you’re looking at tile options, check for a high coefficient of friction (COF) rating, which indicates how much grip the surface provides. Many outdoor tiles, especially porcelain, are manufactured with a slightly textured surface to provide better traction. This is a critical feature for ensuring your beautiful new outdoor space is safe for family and guests. A slip-resistant surface gives you peace of mind, allowing everyone to enjoy the swimming pool and patio area without worry.

Aesthetics and Style

Once you’ve addressed durability and safety, you can focus on the fun part: style. The tile you select is a major design element that sets the tone for your entire outdoor living space. Do you envision a sleek, modern patio or a rustic, natural retreat? Your tile choice can bring that vision to life. Start by considering the function of the space and your home’s existing architecture. You can find tiles that mimic the look of natural wood, slate, or stone, giving you endless design possibilities. Browsing different materials at the Gappsi Store can help you find a surface that supports both your design vision and the practical needs of your project, ensuring your outdoor area is a true extension of your home.

Where to Install Outdoor Tile

Outdoor tile isn’t just for patios anymore. Its versatility allows you to create cohesive, beautiful, and functional spaces throughout your entire property. From high-traffic walkways to relaxing poolside lounges, the right tile can define a space and tie your whole outdoor design together. Let’s look at some of the most popular places to install outdoor tile and why it works so well in each.

Patios and Pool Decks

Your patio and pool deck are the heart of your backyard, so they need to be both beautiful and tough. This is where outdoor tile truly shines. Materials like porcelain are perfect because they can handle Long Island’s changing seasons, from hot summer days to freezing winter nights. Many tile options are also slip-resistant, which is a must-have for safety around a swimming pool. You get a durable, safe surface that also looks incredible, creating the perfect spot for sunbathing, entertaining, or just relaxing with your family. It’s a practical upgrade that adds a touch of luxury to your outdoor living area.

Walkways and Driveways

First impressions matter, and your walkways and driveway set the tone for your entire home. Using outdoor tile in these areas creates a polished, high-end look that instantly improves curb appeal. Porcelain pavers are an excellent choice because they are incredibly strong and can withstand the weight of vehicles and heavy foot traffic. They are also resistant to water and stains, making them a low-maintenance option for a busy entryway. A well-designed masonry walkway or driveway apron made with tile not only looks fantastic but also provides a durable, long-lasting surface that will welcome you home for years to come.

Outdoor Kitchens

An outdoor kitchen is all about combining function with fun, and the right tile is key to achieving that balance. For flooring, you need something that can handle spills, foot traffic, and the occasional dropped utensil. On countertops and backsplashes, the tile must be easy to clean and resistant to heat and stains from food and grease. Porcelain and natural stone tiles are fantastic choices for all these surfaces. They provide a clean, hygienic, and durable foundation for your cooking area, allowing you to focus on grilling and entertaining without worrying about messes.

How Much Does Outdoor Tile Installation Cost on Long Island?

Understanding the budget for your outdoor tile project is one of the first and most important steps. The total cost is a blend of two main things: the materials you choose and the labor required to install them perfectly. While it’s tempting to look for the lowest number, think of this as an investment in your home’s value and your family’s enjoyment. A well-installed tile patio or walkway will last for decades, so getting it right from the start is key. On Long Island, prices can vary, but a quality contractor will give you a clear breakdown of what you’re paying for.

Material Costs

The tiles themselves are your first major expense. Material costs can range from a few dollars per square foot to much more, depending on what you select. For example, basic ceramic tiles will be on the lower end, while high-end porcelain and natural stone pavers will be a larger investment. The great thing is, you have options. Your choice affects not just the look but also the durability of your space. A premium porcelain paver, for instance, might cost more initially but its resistance to stains, frost, and wear can save you money on maintenance and replacement down the road.

Labor vs. Materials

Labor is the other half of the cost equation, and it’s just as important as the materials. You can expect labor for outdoor tile installation to range from $5 to $15 per square foot, and many professional installers have a minimum fee for smaller projects. This cost covers the skill and time of the installation team. Proper masonry work is an art, especially outdoors where the base preparation is critical for a long-lasting result. Paying for experienced labor means you’re paying for a job done right, preventing future issues like cracked tiles or an uneven surface.

What Affects the Final Price?

Several factors will influence your final quote. The total square footage of the area is a big one, of course. The type of tile you choose and the complexity of the design also play a major role; a simple grid pattern is quicker to install than an intricate mosaic. Most importantly, outdoor installations require specific preparation to withstand Long Island’s weather. This includes creating a proper base, ensuring correct drainage, and using materials that can handle freeze-thaw cycles. This expert prep work is crucial and will be factored into the cost by any reputable contractor.

How to Plan Your Outdoor Tile Project

A beautiful outdoor tile project doesn’t just happen, it’s the result of careful planning. Thinking through the details before the work begins ensures your new patio, walkway, or pool deck not only looks fantastic but also stands the test of time. From preparing the ground to setting a realistic budget, each step is a building block for a successful outcome. Let’s walk through the key stages of planning your project so you can feel confident and prepared.

Site Prep and Conditions

Before any tile can be laid, the ground beneath it needs to be perfectly prepared. Think of it as the foundation of your project, everything else rests on it. A quality installation requires proper base preparation, leveling, and compaction to ensure durability and longevity. This process often involves excavating the area, laying a sub-base of gravel, and ensuring it’s perfectly flat and compacted.

This step is critical for preventing tiles from shifting, cracking, or becoming uneven over time. A professional contractor will assess your specific site conditions, including soil type and existing landscape features, to create a stable base. Proper site preparation is truly the most important factor for a lasting outdoor tile installation.

Drainage and Slope

Water is the biggest enemy of any outdoor hardscape. Without a proper drainage plan, water can pool on the surface, seep into the grout and base, and cause major damage, especially during Long Island’s freeze-thaw cycles. This is why creating a gentle slope is a non-negotiable part of the installation process. The slope, usually unnoticeable to the eye, directs water away from your home’s foundation and prevents it from sitting on the tile.

Understanding how different materials respond to environmental stress is crucial for making choices that align with your outdoor setting. Your contractor will design a drainage system that works with your chosen tile and landscape. For areas like pool decks, effective drainage is essential for both safety and durability.

Choosing a Layout and Pattern

Now for the fun part: deciding how your tiles will look. The layout and pattern you choose have a huge impact on the overall style of your space. A simple running bond pattern can feel classic and clean, while a herringbone or basketweave design adds a touch of elegance and visual interest. The best choice often balances aesthetics with performance, ensuring the design complements your outdoor space.

Consider the size of the area. Large-format tiles can make a small patio feel more spacious, while intricate patterns can define different zones in a larger outdoor living area. We recommend browsing a gallery of porcelain and natural stone projects to find inspiration and see how different patterns work in real-world settings.

Maintenance Needs

To keep your outdoor tile looking its best, you need to consider its long-term maintenance needs. Your lifestyle and how much time you want to spend on upkeep should influence your material choice. For example, many porcelain tiles can withstand extreme outdoor conditions, making them a fantastic, low-maintenance option for outdoor living areas.

On the other hand, some beautiful natural stones may require periodic sealing to protect them from stains and weathering. Be honest with yourself about what you’re willing to commit to. Discussing the maintenance requirements of different materials with your contractor will help you select a tile that fits your home and your routine. If you do choose a material that needs upkeep, professional cleaning and sealing services can keep it in top condition.

Setting a Budget and Timeline

Finalizing your budget and timeline is the last major planning step. Your total project cost will be a combination of materials and labor. While online guides suggest labor costs for standard tile installation can range from $5 to $15 per square foot, every project is unique. Factors like site accessibility, project complexity, and the type of tile you choose will all affect the final price.

The best way to get an accurate number is to get a detailed quote from your contractor. When it comes to timeline, be sure to account for potential weather delays and material lead times. Visiting a showroom like the Gappsi Store can help you understand material costs and availability, allowing you to create a more realistic budget and schedule for your project.

How to Choose the Right Outdoor Tile Contractor

Finding the right contractor is just as important as picking the perfect tile for your patio or pool deck. The right team will bring your vision to life, ensuring your new outdoor space is not only beautiful but also durable and professionally installed. A great contractor handles everything from proper site preparation to the final sealing, giving you peace of mind. Making the right choice means your investment will last for years to come. Here’s what to focus on when you’re ready to hire a professional for your outdoor tile project.

Check for Licenses and Insurance

This is the absolute first step and it’s non-negotiable. A licensed and insured contractor is a professional who meets state and local requirements. The license proves they have the necessary qualifications, while insurance protects you from any liability if an accident happens on your property during the project. Before you even discuss project details, ask for proof of both. A reputable company will provide this information without hesitation. Think of it as your first line of defense in ensuring your project is in capable hands. You can always verify a contractor’s license to be sure.

Review Their Portfolio

Once you’ve confirmed they’re licensed and insured, it’s time to look at their work. A portfolio is your window into a contractor’s craftsmanship, style, and experience. Ask to see photos and examples of outdoor tile projects they have completed, especially ones similar to what you have in mind. Pay close attention to the details: Are the grout lines clean and consistent? Do the patterns align perfectly? Does the overall finish look polished and professional? A strong portfolio filled with high-quality masonry projects shows a track record of success and helps you visualize what they can do for your home.

Questions to Ask Your Contractor

Walking into a consultation with a list of questions shows you’re a serious homeowner and helps you compare contractors effectively. Don’t be shy about digging into the details. Consider asking questions like:

  • What is your experience with the specific tile I want to use?
  • How will you prepare the site and ensure proper drainage?
  • What waterproofing methods do you use for outdoor installations?
  • Can you provide a detailed project timeline from start to finish?
  • What kind of warranty do you offer on your workmanship and the materials? The answers you receive will reveal a lot about their expertise and the level of service you can expect.

Compare Quotes

It’s always a good idea to get quotes from at least three different contractors. However, don’t let price be your only guide. The cheapest bid is often a red flag for subpar materials or rushed labor. When you compare contractor bids, make sure each quote provides a detailed breakdown of all costs, including materials, labor, site preparation, and any potential extra fees. A transparent, comprehensive quote is a sign of a trustworthy contractor. Your goal is to find the best value for your investment, which combines fair pricing with quality materials and expert installation for a result that lasts.

Why Choose Gappsi for Your Outdoor Tile Project?

Choosing the right contractor is the most important step in bringing your outdoor vision to life. You need a team that not only understands your goals but also has the expertise to execute them flawlessly. At Gappsi, we combine decades of local experience with a comprehensive, design-to-installation approach and the highest quality materials. This unique combination ensures your outdoor tile project is not just completed, but crafted to perfection.

Decades of Local Experience

With roots in Long Island since 1987, we’ve spent decades perfecting the art of outdoor living design. Our team has an intimate understanding of the local environment, from the coastal weather to the distinct architectural styles of Suffolk and Nassau County. This isn’t just a job for us; it’s our community. As a leading masonry firm, we specialize in creating beautiful, durable outdoor spaces with custom natural stone and elegant porcelain pavers. Our long history means we’ve built a reputation for excellence one project at a time, ensuring your patio, walkway, or pool deck is built to last and designed to impress. We know what works here because we live here, too.

All-in-One Design and Installation

We believe your home improvement project should be exciting, not stressful. That’s why we offer a seamless, all-in-one process that takes you from the first sketch to the final tile. As a full-service design and construction company, we manage every detail in-house. You’ll work with one dedicated team for the entire project, which means communication is clear, and the final result is cohesive. There’s no need to juggle multiple contractors or worry about different parts of the project lining up. We handle the design, material sourcing, and expert installation, so you can simply look forward to enjoying your beautiful new outdoor space.

Quality Materials from the Gappsi Store

A beautiful design deserves materials that will stand the test of time. The durability and look of your outdoor tile project depend entirely on the quality of the products used. We are committed to using only the best, which is why we source premium materials directly for our clients. You can explore a wide selection of top-tier porcelain and natural stone options, allowing you to see and feel the materials before making a decision. This commitment to quality ensures your investment not only looks stunning on day one but continues to add value and beauty to your home for years to come.

Related Articles

Frequently Asked Questions

What is the best type of tile for Long Island’s weather? For our specific climate with its hot summers and freezing winters, porcelain pavers are an outstanding choice. They are incredibly dense and absorb almost no water, which makes them highly resistant to the cracking that can happen during freeze-thaw cycles. They also hold up beautifully against sun fading and are very easy to clean. While natural stone is also a durable and beautiful option, porcelain offers that extra layer of low-maintenance peace of mind that many homeowners here appreciate.

Can I install new outdoor tile over my old concrete patio? This is a common question, and the answer is: maybe. It really depends on the condition of your existing concrete slab. If the concrete is in great shape, with no major cracks, and has the proper slope for drainage, it can sometimes serve as a base. However, if the slab is cracked, uneven, or pitched incorrectly, laying tile over it will only lead to problems. A professional contractor needs to assess the site to determine if the existing concrete is a sound foundation or if it needs to be removed to build a proper base from scratch.

How long does a typical outdoor tile installation take? The timeline for a project can vary quite a bit. A straightforward, smaller patio might only take a few days, while a larger, more complex project with intricate patterns or extensive site preparation could take a week or two. Factors like the size of the area, the type of tile, the amount of prep work needed, and of course, the weather, all play a role. A good contractor will provide you with a realistic timeline as part of their initial project plan.

How do I clean and maintain my new outdoor tile patio? Keeping your new tile looking great is usually pretty simple. For most routine cleaning, you can just sweep away debris and occasionally wash the surface with a gentle soap and water. For tougher spots, avoid harsh chemicals that could damage the tile or grout. The biggest maintenance step to consider is sealing. While porcelain often doesn’t require it, natural stone benefits greatly from a quality sealant every few years to protect it from stains and water damage.

Besides the tile and labor, what other costs should I expect? A comprehensive quote should cover more than just the materials and the act of laying them. The most significant additional cost is usually site preparation. This includes excavating the area, bringing in and compacting the proper base materials like gravel, and hauling away any old patio materials. The complexity of the design can also affect the price; for example, a herringbone pattern takes more time and skill to install than a simple grid. Make sure your quote clearly itemizes these aspects so you know exactly what you are paying for.

New pool equipment installation by a professional on Long Island.

A Guide to Pool Equipment Installation on Long Island

Owning a pool on Long Island comes with its own unique set of rules. Our weather, with its humid summers and freezing winters, puts specific demands on your pool’s machinery. A system that isn’t prepared for a sudden frost can lead to cracked pipes and ruined heaters. Beyond the climate, each town has its own building codes and permit requirements that must be followed perfectly. This is why local expertise is so critical. A successful pool equipment installation Long Island project depends on a team that understands these regional challenges, ensuring your system is not only efficient but also durable enough to handle whatever our seasons throw at it.

Key Takeaways

  • Professional Installation is Non-Negotiable: Hiring an experienced installer is crucial for safety, efficiency, and compliance with Long Island’s specific building codes. A professional setup protects your investment and prevents expensive future repairs.
  • Your Equipment Must Work as a System: Select a pump, filter, and heater that are correctly sized for your pool’s volume and are compatible with each other. A well-matched system runs more efficiently and lasts longer.
  • Plan for Local Long Island Factors: Your pool’s success depends on accounting for the local climate and regulations. This includes proper winterization to prevent freeze damage and securing the correct permits for your town.

What Is Pool Equipment Installation?

So, you’re dreaming of a beautiful swimming pool in your backyard. Beyond the sparkling water and stunning design, there’s a whole system working behind the scenes to keep it perfect. That’s where pool equipment installation comes in. Think of it as setting up the heart and lungs of your pool. This process involves installing all the essential components that make your pool function, from the pump that circulates water to the filter that keeps it clean and the heater that makes it comfortable.

The core equipment includes a pump, a filter, a heater, and a sanitization system like a salt chlorinator. The pump is the system’s powerhouse, moving water through the pipes. The filter acts like the kidneys, removing debris and impurities to keep your water crystal clear. A heater lets you extend your swim season into the cooler months, while the sanitization system ensures the water is safe and hygienic for your family. Proper installation means connecting all these pieces into one seamless, efficient system. It’s a technical process that ensures everything works together correctly, directly impacting your pool’s performance, your energy bills, and how long your expensive equipment will last. A well-installed system runs quietly and effectively, giving you more time to enjoy the water and less time worrying about maintenance.

Why Professional Setup Matters

While a DIY approach can be tempting, pool equipment installation is one area where professional expertise is non-negotiable. A pro setup protects your investment and ensures everything runs safely and correctly from day one. Professionals understand the technical details, like proper plumbing connections and electrical wiring, which are critical for both safety and efficiency.

More importantly, an experienced installer is familiar with Long Island’s specific building codes and permit requirements. This saves you from costly fines or the headache of having to redo work that isn’t compliant. Ultimately, investing in professional home improvement services for your pool means you’ll have an energy-efficient system that saves you money on utility bills and prevents expensive repairs down the road. It’s the smartest way to guarantee peace of mind and a perfectly functioning pool.

A Guide to Essential Pool Equipment

Think of your pool equipment as a team of specialists working together to keep your water sparkling and ready for a swim. Each piece has a specific job, and when they’re all chosen correctly and installed professionally, they create a seamless system that makes pool ownership a breeze. Understanding these essential components helps you make informed decisions for your backyard oasis, ensuring you get the most enjoyment out of your investment. Let’s look at the key players that make up your pool’s circulation and filtration system.

Pool Pumps

The pool pump is the heart of your swimming pool’s circulatory system. Its main job is to pull water from the pool and push it through the filter, heater, and chemical feeder before returning it, clean and treated, back to the pool. This constant circulation is what keeps your water from becoming stagnant and cloudy. Choosing the right size pump is critical; one that’s too small won’t clean your pool effectively, while one that’s too large wastes energy and money. We help you select a variable-speed pump that provides the perfect flow while keeping your energy bills down, making it a core part of our swimming pool installations.

Pool Filters

If the pump is the heart, the filter is the kidneys. This essential piece of equipment is responsible for capturing and removing dirt, debris, and other impurities from the water as it circulates. There are three main types of filters: sand, cartridge, and diatomaceous earth (DE), each with its own maintenance routine and filtering capabilities. A properly sized and maintained filter is your first line of defense against cloudy water and ensures a clean, safe swimming environment. During our design process, we’ll help you choose the best filter type for your pool’s specific needs and your desired level of maintenance, ensuring your water stays crystal clear all season long.

Pool Heaters

A pool heater is your ticket to a longer swimming season here on Long Island. Instead of limiting your pool days to just July and August, a reliable heater allows you to comfortably swim from early spring through the crisp days of fall. Imagine enjoying a warm dip on a cool May evening or extending your pool parties well into September. Modern heaters, including gas and electric heat pump models, are more energy-efficient than ever. We can help you select and install a heater that fits your pool size and budget, letting you maximize the time you spend enjoying your beautiful new swimming pool.

Sanitization Systems

A sanitization system is what keeps your pool water hygienic and safe by preventing the growth of algae and harmful bacteria. While traditional chlorine is a common choice, many homeowners now prefer saltwater sanitization systems. These systems use a generator to convert salt into chlorine, resulting in silky-soft water that’s gentler on your skin, eyes, and hair. It also eliminates the need to handle and store harsh liquid or tablet chlorine. We can walk you through the benefits of different sanitization options, like saltwater or advanced UV systems, to find the perfect fit for a low-maintenance and enjoyable swimming experience.

Smart Pool and Automation Systems

Smart automation brings modern convenience to your backyard, letting you manage your pool from anywhere using your smartphone. With an automation system, you can control your pump, heater, lighting, and even water features with the tap of a button. You can schedule the pump to run during off-peak hours to save energy or turn on the heater on your way home from work so the water is perfect when you arrive. This technology simplifies pool ownership, reduces manual work, and gives you more time to relax and have fun. Integrating smart features is a key part of our home remodeling and pool projects, creating a seamless experience from your house to your backyard.

How to Choose the Right Equipment for Your Pool

Selecting the right equipment is one of the most important decisions you’ll make for your new swimming pool. It’s the heart of your pool system, responsible for keeping the water clean, warm, and safe. While it’s easy to get caught up in the visual aspects like tile and coping, the gear running behind the scenes will define your day-to-day experience as a pool owner. Making smart choices here means less time on maintenance and more time enjoying the water.

The key is to find a balance between performance, cost, and convenience that fits your specific needs. You don’t necessarily need the most expensive option, but you do need the right one. Think of it as creating a custom system tailored to your pool’s size, your family’s lifestyle, and your budget. From the pump that circulates the water to the heater that extends your swimming season, every component plays a vital role. We’ll walk through the main factors to consider so you can feel confident in your equipment choices.

Consider Your Pool’s Size and Volume

Pool equipment isn’t a one-size-fits-all situation. The size and volume of your pool are the first things to consider when selecting a pump and filter. This machinery needs to be powerful enough to circulate and clean the entire volume of water in a reasonable amount of time, which is known as the turnover rate. An undersized pump will struggle to keep your water clear, while an oversized one will just waste energy and money. A professional can accurately calculate your pool’s volume and recommend equipment that is perfectly matched to its needs, ensuring your system runs efficiently from day one.

Think About How Often You’ll Use It

Be honest about your lifestyle and how you plan to use your pool. Will it be the neighborhood hotspot for kids all summer, or a quiet retreat for you to use on weekends? Your answer will help guide your equipment choices. If you anticipate heavy use, you might want to invest in a high-capacity filter that can handle a greater bather load. If you want to swim from early spring through late fall, a high-efficiency heater is a must. Thinking through your usage patterns helps you prioritize features and build a swimming pool that truly complements your life.

Look for Energy Efficiency

Your pool equipment will be one of the biggest energy consumers in your home, so choosing efficient models is a smart move. Not only is it better for the environment, but it will also save you a significant amount of money on your utility bills. For example, variable-speed pumps are now the standard for new installations because they use far less electricity than older, single-speed models. They work by running at lower speeds for longer periods, providing better filtration at a fraction of the cost. Look for the ENERGY STAR label on pumps, heaters, and lighting to ensure you’re getting top-tier efficiency.

Ensure Your Equipment Works Together

Your pool’s equipment is a connected system, and every part needs to communicate and work together effectively. A pump, filter, heater, and sanitizer from different brands can work together, but only if they are compatible. Mismatched components can lead to poor performance, strain on the system, and even voided warranties. This is where professional guidance is invaluable. An experienced installer can design a system where every piece of equipment is perfectly synchronized, creating a reliable and efficient setup. You can explore a range of compatible, high-quality products at the Gappsi Store to see how these systems come together.

Plan Your Budget

When budgeting for your pool, remember to account for the full cost of equipment, not just the sticker price. This includes the cost of installation, any necessary electrical or plumbing work, and required permits. It’s also wise to think about long-term operational costs. A cheaper pump might save you money upfront, but a more expensive, energy-efficient model will likely save you more over the life of the pool. Planning for these expenses from the beginning helps prevent surprises down the road. Discussing your budget with your installer will help them recommend the best equipment that provides value without compromising on quality.

What Does Pool Equipment Installation Cost on Long Island?

Talking about the budget is a crucial step in any home project, and installing your pool equipment is no different. The total cost on Long Island can vary quite a bit, depending on the size of your pool, the quality of the equipment you choose, and the complexity of the installation itself. While it’s a significant investment, understanding the breakdown can help you plan effectively. Think of it less as a single price tag and more as a collection of high-quality components working together to create your perfect backyard oasis. We believe in being transparent about these costs so you can make informed decisions without any surprises.

A Cost Breakdown by Equipment Type

When you budget for your swimming pool installation, the equipment is a major line item. The pump is the heart of your pool, and federal regulations now require energy-efficient variable-speed pumps for new installations. While they have a higher initial cost, they save you a lot on electricity bills in the long run. Next are filters, which come in sand, cartridge, or diatomaceous earth (D.E.) types, each with different price points and maintenance needs. Pool heaters and sanitization systems, like saltwater chlorinators, also add to the total, but they greatly improve your comfort and simplify upkeep. Each piece plays a vital role, and we can help you select a package that fits your pool and your budget.

Hidden Costs to Watch For

A good plan anticipates the unexpected. When it comes to pool equipment, some costs aren’t always obvious. Forgetting to secure the right local permits for your Long Island town can lead to fines and delays, so that’s always the first thing to check. The physical placement of your equipment also matters. An improperly placed equipment pad, often requiring professional masonry work, can lead to inefficient operation or systems overheating. Finally, remember to account for the professional electrical and plumbing work needed to safely connect everything. These aren’t areas to cut corners, as proper installation from the start prevents costly repairs later.

Trusted Pool Equipment Brands We Install

The performance and longevity of your pool depend heavily on the quality of its equipment. That’s why at Gappsi, we partner with the most trusted and reliable brands in the industry. Choosing the right equipment isn’t just about a single pump or filter; it’s about creating a cohesive system that works efficiently for your specific pool size, usage, and budget. Our team has years of experience installing and servicing equipment from leading manufacturers, and we can guide you to the perfect setup for your Long Island home. We understand that every backyard is unique, and the right combination of hardware ensures your pool is easy to maintain and enjoyable for years to come. We primarily work with three industry titans: Hayward, Pentair, and Zodiac. Each offers a unique set of strengths, from rock-solid reliability to cutting-edge smart technology. We’ll help you decide which brand aligns best with your vision for the perfect backyard oasis, ensuring every component works together seamlessly. This decision is a critical part of the overall design, just as important as choosing your porcelain and natural stone for the patio surround.

Hayward

Hayward is a household name in the pool world for a reason. It’s known for producing durable, reliable, and straightforward equipment that simply gets the job done. Their product line is extensive, covering everything from powerful pumps and efficient filters to heaters and salt chlorination systems. We often recommend Hayward for both new swimming pools and for homeowners looking to upgrade an older system with proven technology. Their equipment is built to last, providing consistent performance season after season. For those who like to be hands-on, it’s also helpful to understand the fundamentals of how a standard equipment pad works, and Hayward’s intuitive designs make that easier for homeowners.

Pentair

If you’re looking for innovation and energy efficiency, Pentair is a fantastic choice. This brand is at the forefront of smart pool technology, designing products that can save you money on your utility bills while making pool ownership easier than ever. Pentair is especially known for its variable-speed pumps, which can significantly reduce energy consumption compared to single-speed models. Their advanced automation systems allow you to control your pool’s features, like heating and lighting, directly from your smartphone. Choosing Pentair means investing in modern convenience and sustainable, long-term performance that fits perfectly with a fully updated smart home.

Zodiac

Zodiac excels at keeping your pool sparkling clean with minimal effort from you. The brand is a leader in automated pool cleaners, offering a range of robotic and suction-side models that tirelessly scrub away dirt and debris. While they also produce high-quality heaters, pumps, and control systems, their reputation is built on creating powerful cleaning solutions. Opting for Zodiac equipment is a great way to ensure your pool remains pristine and swim-ready all summer long. When paired with our professional restoration and sealing services, you can create a complete maintenance plan that protects your investment and keeps your pool looking brand new for years to come.

Your Installation, Step by Step

Seeing your new pool equipment come together is an exciting process, but it’s one that requires careful planning and execution. A professional installation follows a structured, multi-stage approach to ensure every component works flawlessly from day one. When you work with an experienced team, you can relax knowing that every detail, from the initial site check to the final handover, is being managed with precision. This step-by-step process takes the guesswork out of the equation and guarantees your investment is set up for long-term performance and enjoyment.

At Gappsi, we’ve refined our installation process over decades of building and upgrading swimming pools across Long Island. We handle the technical details so you can focus on planning your first pool party. Let’s walk through what you can expect during a professional pool equipment installation.

Site Assessment and Planning

The first step is a thorough site assessment. This is where a professional comes to your home to evaluate the proposed location for your pool equipment. It’s about more than just finding an open spot; we consider factors like proximity to utility lines, proper drainage, and sun exposure. One of the most common mistakes to avoid with pool installations is poor site selection. For example, placing equipment too close to trees can lead to constant debris and maintenance headaches down the road. A well-planned layout ensures your equipment is accessible for service, operates efficiently, and integrates seamlessly with your backyard design.

Handling Local Permits and Rules

Before any work begins, it’s essential to address local regulations. Building an inground pool and installing its equipment involves adhering to specific rules that vary between towns in Nassau and Suffolk County. Homeowners need to understand that local rules matter. Everything from permits and electrical codes to safety barriers and fencing must be handled correctly. An experienced installer will manage this entire process for you, submitting the necessary paperwork and ensuring your project is fully compliant. This step is crucial for safety and helps you avoid potential fines or project delays, giving you complete peace of mind.

Sourcing Your Equipment

Once the plan is in place, it’s time to select your equipment. A professional installer will help you choose the right pump, filter, heater, and sanitizer for your pool’s specific size and your family’s usage patterns. Many older pools still rely on outdated single-speed pumps, but modern, energy-efficient options are a much better choice. In fact, variable-speed pumps are now federally mandated for new installations because they save energy and reduce operational costs. We source high-quality, durable equipment from the industry’s most trusted brands, ensuring your system is built to last. You can explore some of the products we trust at the Gappsi Store.

Installation and Testing

This is where your vision starts to become a reality. During the installation phase, our technicians will expertly assemble and connect all your new equipment. This includes plumbing the pipes, wiring the electrical components, and integrating everything into a cohesive system. We work diligently to keep the project on schedule, but it’s important to remember that Long Island weather can be unpredictable. As one homeowner noted about their experience, “The only problem we had through the entire process was the weather; it was a very rainy spring which delayed all of their projects.” We always maintain clear communication and will keep you updated if any adjustments to the timeline are needed.

Final Inspection and Handover

After the physical installation is complete, we conduct a final inspection and rigorous testing of the entire system. We run the pumps, check the filters, and fire up the heater to confirm everything is operating at peak performance. Once we’re satisfied, we’ll walk you through your new system in a comprehensive handover. We’ll show you how to operate each component, explain the maintenance schedule, and answer any questions you have. Our team is known for being “courteous, friendly and did a great install.” Our goal is to leave you feeling confident and excited to start enjoying your brand-new, professionally installed pool equipment.

How Long Island Weather Impacts Your Pool Gear

Living on Long Island means we get to enjoy four distinct seasons, but that variety brings unique challenges for pool owners. The weather here does more than just decide your swim schedule; it directly affects your pool equipment’s performance and lifespan. From freezing winter nights that threaten your pipes to humid summer days that test your pump, the climate is a silent partner in your pool’s health. A successful installation accounts for these factors from day one.

Thinking about the weather’s impact isn’t just about preparing for storms. It’s about smart planning that saves you money and headaches down the road. This includes choosing the right spot for your equipment to ensure it runs efficiently, properly winterizing everything before the first frost, and even building some flexibility into your installation timeline. An experienced installer who knows the local climate can help you make the right choices for your swimming pool, ensuring it’s ready for whatever Long Island weather comes its way. This foresight is key to protecting your investment and enjoying your backyard oasis for years.

Winterizing and Freeze Protection

Long Island winters can be tough on pool equipment. As one local expert noted, “Long Island pool owners face unique winterization challenges with temperatures that can damage expensive heating equipment overnight.” A sudden freeze can crack pipes, damage filters, and ruin a costly heater if it’s not properly prepared. Winterizing is more than just throwing a cover over the pool; it involves draining water from the pump, filter, and heater to prevent ice expansion. It also means protecting your plumbing lines and ensuring all components are sealed off from the elements. Professional help is a wise choice here, as a small mistake during shutdown can lead to major repairs in the spring.

Proper Equipment Placement

Where you place your pool equipment matters just as much as what you buy. Your gear needs a location that allows for proper airflow and service access while protecting it from the elements. For example, large heat pumps need to be installed at least six inches from the house to function correctly. Placing equipment in a low-lying area prone to flooding is a recipe for disaster, while constant direct sun can degrade plastic housings over time. A well-designed equipment pad, sometimes shielded by attractive pavilions or pergolas, can protect your investment and keep your backyard looking clean and organized.

Planning for Weather Delays

When you’re excited about a new pool, the last thing you want is a delay. Unfortunately, Long Island’s weather can be unpredictable. As one homeowner shared, “The only problem we had through the entire process was the weather; it was a very rainy spring which delayed all of their projects.” Heavy rain can halt excavation, prevent concrete from curing properly, and make electrical work unsafe. A professional installation team will factor this in, building a realistic schedule and communicating openly about any weather-related adjustments. A little patience during the landscape design and construction phase ensures the job is done right, without cutting corners due to a few rainy days.

Common Installation Mistakes to Avoid

A successful pool equipment installation is all about the details. Getting it right from the start means you can spend more time enjoying your pool and less time dealing with frustrating and costly fixes. Even small oversights can lead to big problems, from inefficient performance to premature equipment failure. When you partner with an experienced team, you sidestep these common issues because they know exactly what to look for. A professional installer anticipates challenges and builds a system that’s reliable, efficient, and ready for years of summer fun. By understanding these potential pitfalls, you can feel even more confident in your decision to hire a pro for your swimming pool project.

Modern pool systems are more complex than they used to be, with interconnected components that need to work in perfect harmony. It’s not just about connecting a pump and a filter. It’s about creating an integrated system that includes sanitation, heating, and sometimes even automation that you can control from your phone. A DIY approach or hiring an inexperienced contractor can easily lead to a mismatched system that never quite works right. This is why we believe in a comprehensive approach, ensuring every piece of equipment is not only top-quality but also perfectly suited to your specific pool and lifestyle. Avoiding these common mistakes is the first step toward a worry-free pool ownership experience.

Choosing the Wrong Size Equipment

Bigger isn’t always better, and smaller isn’t always more economical when it comes to pool equipment. Each component, from the pump to the filter and heater, must be correctly sized for your pool’s specific volume and design. An undersized pump will struggle to circulate water effectively, leading to poor filtration and sanitation. On the other hand, an oversized pump wastes energy and can even damage your filter. The physical placement matters, too. Equipment installed too far from the pool has to work harder, which reduces its efficiency and lifespan. We carefully calculate your pool’s needs to select perfectly matched equipment that delivers optimal performance without wasting a dime.

Ignoring Energy Efficiency

Your pool equipment can be one of the biggest energy consumers in your home, but it doesn’t have to be. Many homeowners make the mistake of choosing older, less efficient models to save a little money upfront, only to pay much more in long-term utility bills. Modern technology, like variable-speed pumps, can drastically reduce energy consumption compared to outdated single-speed models. In fact, these energy-saving pumps are now federally mandated for new installations. Choosing energy-efficient equipment isn’t just a smart financial move; it’s a responsible one that ensures your pool is compliant with current standards and kinder to the environment.

Skipping Local Permits

Navigating building codes and permits can feel overwhelming, which is why some people are tempted to skip this step altogether. This is a critical mistake. Every town on Long Island has specific regulations for pool construction and equipment installation, covering everything from electrical wiring to safety fencing. Failing to secure the proper permits can result in hefty fines, legal trouble, and even an order to remove the unpermitted work. More importantly, these codes exist to ensure your pool is safe for your family and friends. A professional installer will manage the entire permitting process for you, ensuring every aspect of your project is fully compliant and secure.

Picking Incompatible Parts

Think of your pool equipment as a team where every player has a specific role. For the team to win, all the players need to work together seamlessly. It’s a common error to mix and match equipment from different brands or product lines without confirming their compatibility. This can lead to leaks, inefficient operation, and a system that just doesn’t perform as it should. You might end up needing custom adapters or workarounds that compromise the integrity of the setup. We source high-quality, compatible components from trusted brands, which you can explore at the Gappsi Store. This ensures your equipment functions as a unified, reliable system from day one.

Not Planning for Future Upgrades

Your dream backyard might be a project that evolves over time. When installing your initial pool equipment, it’s wise to think about what you might want to add later. Do you see a spa, waterfall, or automated cleaning system in your future? Perhaps you’ll want to add a beautiful pavilion or pergola for shade. Planning for these potential upgrades during the initial installation is far easier and more cost-effective than trying to retrofit them later. This could mean leaving extra space on the equipment pad or running additional electrical conduit. A little foresight ensures your backyard can grow with your vision without requiring a major overhaul down the road.

How to Find a Pro Installer on Long Island

Finding the right person to install your pool equipment is just as important as choosing the equipment itself. A great installation ensures everything runs efficiently, lasts longer, and saves you from future headaches. On Long Island, with our specific weather patterns and local codes, hiring a seasoned professional isn’t just a good idea; it’s essential for protecting your investment. When you start your search, focus on a few key areas to make sure you’re partnering with a reliable and skilled installer who will get the job done right. Taking the time to vet your options will give you peace of mind and a pool that’s ready for years of enjoyment.

Check for Licensing and Insurance

Before you even start talking about pumps and filters, your first question should always be about licensing and insurance. It’s a simple step that many people overlook, but it’s your number one protection. Any reputable installer on Long Island must have a valid license to operate in Nassau or Suffolk County. Just as important is proof of insurance, which should include both general liability and worker’s compensation. This protects you from any liability in the rare case of an accident on your property. Don’t just take their word for it; ask to see the documents. A true professional will have them ready and will be happy to provide them.

Look for Experience with Long Island Pools

Long Island isn’t just any location, and your pool installer should know that. Our coastal weather, soil types, and specific town regulations create a unique environment for construction. An installer with deep local experience will understand these nuances. They’ll know the permitting process in your specific town and how to properly winterize equipment to withstand our freezing temperatures. When you review a company’s work, look for a portfolio of projects in your area. Seeing their finished swimming pools and outdoor spaces on Long Island gives you confidence that they have the right expertise for your home.

Ask About Warranties and Support

A professional installation is about building a long-term relationship, not a one-time transaction. Before signing a contract, get a clear understanding of the warranties. This includes the manufacturer’s warranty on the equipment and, crucially, a workmanship guarantee from the installer. What happens if an issue pops up a month or a year later? A trustworthy company will stand by its work. Ask about their process for service calls and what kind of ongoing support they offer. Companies that provide comprehensive services, from installation to long-term restoration and sealing, are invested in the lasting quality of your project.

Read Reviews and Compare Services

In your search for the perfect installer, customer reviews are your best friend. Look at what past clients are saying on independent sites and on the company’s website. Pay attention to comments about communication, professionalism, and how the team handled challenges. While you’re doing your research, you can also see video testimonials and project showcases on platforms like YouTube to get a better feel for the company’s work. Remember to compare more than just the final price. Look at the full scope of what’s included, the quality of the equipment proposed, and the level of experience each company brings to the table.

Why Choose Gappsi for Your Pool Installation

Choosing the right installer for your pool equipment is just as important as selecting the equipment itself. At Gappsi, we provide a complete, stress-free experience for homeowners across Long Island. We manage every step of your project, from the initial design consultation to the final installation and testing. Our goal is to make the process of building your dream swimming pool seamless and enjoyable, ensuring every component works together perfectly from day one.

A pool is a significant investment in your home, and we believe in building things to last. We use only premium materials and proven construction techniques to ensure your pool and its equipment stand the test of time. Our team has extensive experience installing, servicing, and repairing all major brands of pool and spa equipment. This means you can trust that your system is installed correctly for optimal performance and longevity. We don’t just install your equipment; we provide the expertise to keep it running smoothly for years to come.

Beyond our technical skills, we are committed to providing exceptional customer service. Our team is known for being professional, courteous, and dedicated to your satisfaction. With decades of design and construction expertise, we understand how to integrate your new pool into a cohesive and beautiful outdoor living space. We take pride in our work and in building lasting relationships with our clients, helping you create a backyard oasis you’ll love.

Related Articles

Frequently Asked Questions

Can I install some of the pool equipment myself to save money? I completely understand the temptation to DIY a project, but this is one area where I strongly advise against it. Pool equipment involves complex plumbing and high-voltage electrical connections, where a small mistake can lead to costly damage or serious safety risks. Professionals also handle all the local permits and ensure your setup is compliant with Long Island codes, which saves you from potential fines. Investing in a professional installation is really an investment in safety, efficiency, and your own peace of mind.

How can I keep my pool’s energy costs down after the installation? The single best thing you can do is choose a variable-speed pump from the start. These pumps are now the standard for a reason; they use significantly less electricity than older models by running at lower speeds for longer periods. This results in better filtration and major savings on your utility bills. Beyond the pump, using a solar cover to retain heat and scheduling your heater to run only when needed will also make a big difference in your monthly costs.

What’s the real difference between a saltwater system and traditional chlorine? This is a great question because it’s a popular upgrade. A saltwater system doesn’t mean your pool will be salty like the ocean. Instead, it uses a generator to convert a low level of salt in the water into chlorine. The result is silky, soft water that’s much gentler on your skin and eyes. You also get to skip the hassle of buying, storing, and handling harsh chlorine tablets or liquid, which is a huge convenience for many homeowners.

How long does the installation process typically take? The timeline can vary depending on the scope of your project and other work being done. The actual physical installation of the equipment pad can often be completed in a few days. However, the entire process includes site planning, securing permits from your town, and coordinating with electricians, which adds time before we even begin. We always build a realistic schedule and communicate openly, especially since unpredictable Long Island weather can sometimes cause short delays.

My backyard gets harsh winter weather. How do you make sure my new equipment will survive? This is a critical part of our planning process. We protect your investment in two main ways: smart placement and proper winterization. We’ll help you select a location for the equipment pad that shields it from the worst of the elements and has proper drainage. More importantly, a professional winterization service is key. This involves completely draining water from the pump, filter, and heater to prevent ice from forming inside and cracking the expensive components.