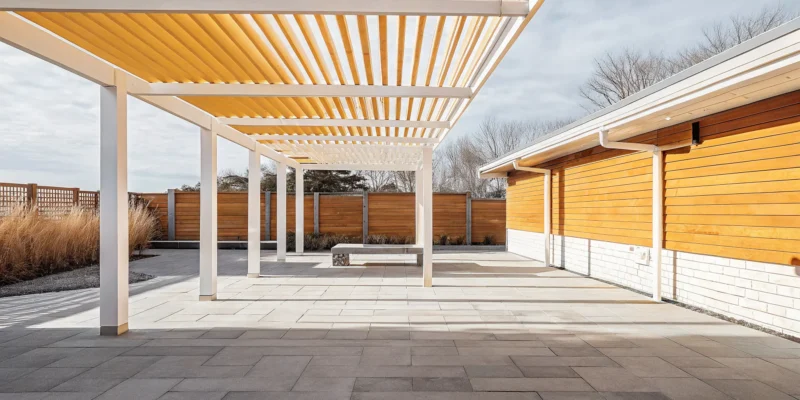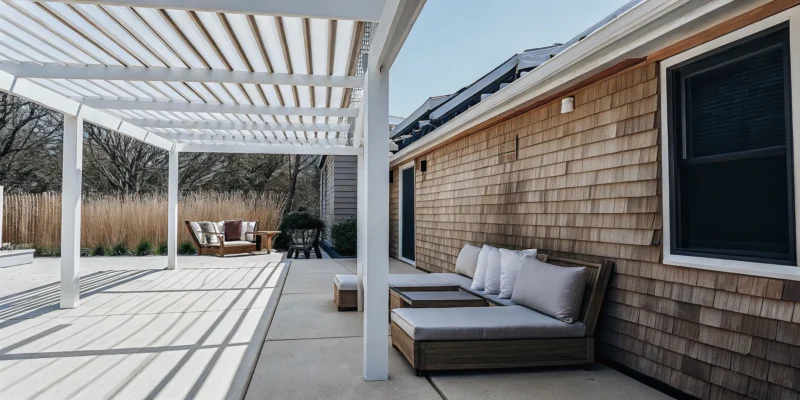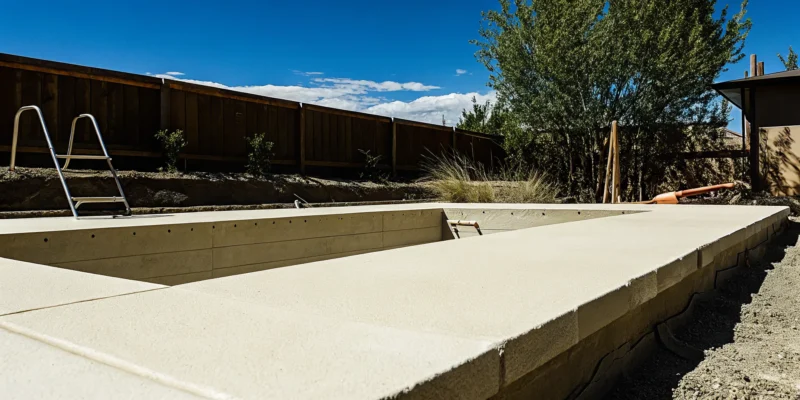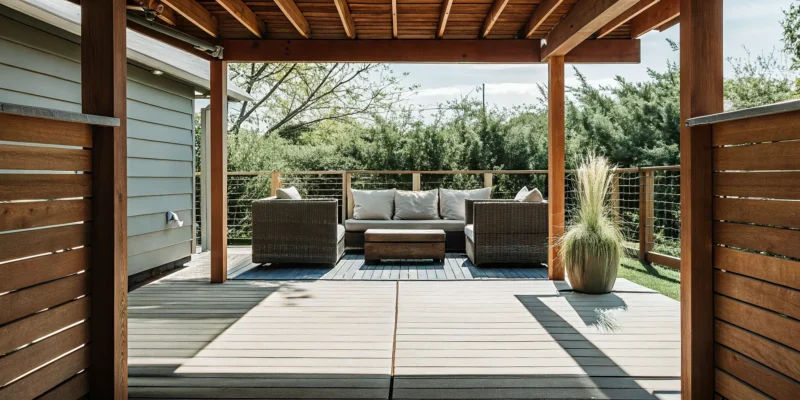
Custom cedar pergola on a Long Island deck, built by an expert pergola builder.

Cedar Pergola Builder Long Island: A Buyer’s Guide

You have a vision for your backyard: a beautiful, functional space where you can relax, entertain, and make memories. A custom cedar pergola often serves as the heart of that vision, creating a defined outdoor room that feels both elegant and inviting. It’s the perfect spot for dining al fresco, lounging by the pool, or enjoying a quiet morning coffee. But how do you turn that dream into a reality? The process starts with a great plan and an even better partner. Choosing an experienced cedar pergola builder Long Island families rely on is the first step. This article covers everything you need to know, from design possibilities to the building process, to create your perfect outdoor oasis.

Key Takeaways

  • Choose cedar for lasting beauty and strength: Cedar is a premium material that naturally resists rot and pests, making it a durable, long-term investment for Long Island’s weather compared to other materials.
  • A successful project balances vision with a great builder: The final cost is shaped by size, design, and custom features, making it essential to partner with a vetted, professional builder who can bring your specific ideas to life within your budget.
  • Plan for simple maintenance and long-term protection: While cedar is low-maintenance, a yearly cleaning preserves its look. Ensure your investment is secure by understanding the simple care options and confirming your builder provides a strong warranty.

Why Choose Cedar for Your Pergola?

When you start planning a new pergola, one of the first big decisions is choosing the right material. While you have a few options, cedar consistently stands out as a premium choice for good reason. It offers a perfect blend of natural beauty, impressive durability, and practical benefits that make it an ideal investment for any Long Island backyard. A well-built cedar pergola does more than just provide shade; it creates a stunning architectural focal point that enhances your entire outdoor living space.

Choosing cedar means you are selecting a material that is built to last and looks incredible while doing it. Its warm tones and classic wood grain bring an organic elegance that synthetic materials just can’t match. Whether your home’s style is rustic, modern, or traditional, a cedar structure can be designed to fit in seamlessly. We often design pavilions and pergolas to complement a home’s existing features, creating a cohesive flow from your house to your yard. This natural appeal makes it a favorite for homeowners who want to create a truly inviting and high-end outdoor retreat.

It Naturally Resists Rot and Pests

One of cedar’s most significant advantages is its built-in defense system. The wood contains natural oils and preservatives that make it inherently resistant to rot, decay, and insect infestations. This is a huge plus for any outdoor structure, especially here on Long Island where moisture and pests can be a constant battle. Because your pergola will be exposed to the elements 24/7, having a material that can protect itself is key to its longevity. This natural resistance means you don’t have to rely on harsh chemical treatments to keep your pergola in great shape, making it a safer and more eco-friendly choice for your family and pets.

How Cedar Handles Long Island Weather

Long Island weather can be tough on outdoor structures, with its humid summers, rainy springs, and cold, snowy winters. Cedar is uniquely equipped to handle these fluctuations. It’s known for being “dimensionally stable,” which is a technical way of saying it doesn’t swell, shrink, or warp easily when the temperature and humidity change. This stability ensures that your pergola will maintain its structural integrity and appearance for years to come. Cedar wood is built to be strong, so you can trust it to stand firm through coastal storms and seasonal shifts without losing its form or strength, making it a reliable foundation for your outdoor oasis.

Cedar vs. Other Pergola Materials

When comparing materials, it’s helpful to look at the long-term picture. A cedar pergola is more expensive upfront than one made from pressure-treated pine, but you’ll typically get a longer serviceable lifespan from cedar. Pressure-treated wood often requires more maintenance to prevent warping and rot, while cedar’s natural durability reduces those concerns. Compared to vinyl or composite materials, cedar offers an authentic beauty that simply can’t be replicated. While low-maintenance alternatives have their place, they lack the rich character and classic feel of real wood. Proper restoration and sealing can further extend cedar’s life, making it a superior value over time.

The Unique Beauty and Scent of Cedar

Beyond its practical benefits, cedar is chosen for its undeniable aesthetic appeal. Cedar wood offers a classic, natural wood look with rich, warm color tones and a beautiful grain that adds a touch of sophistication to any backyard. It has a warm, fancy feel that instantly makes a space more inviting. Plus, it comes with a distinct, pleasant aroma that enhances the experience of relaxing outdoors. You can let your cedar pergola weather naturally to a beautiful silvery-gray patina for a rustic look, or apply a stain to preserve its vibrant reddish-brown hue. This versatility allows you to customize its appearance to perfectly match your landscape design.

What Does a Custom Cedar Pergola Cost in Long Island?

When you start dreaming about adding a pergola to your backyard, one of the first questions you’ll ask is, “What’s this going to cost me?” The honest answer is: it depends. While that might not be the straightforward number you were hoping for, the final price tag for a custom cedar pergola on Long Island is shaped by a few key factors. Your vision, your backyard’s specific needs, and the materials you choose all play a part. Understanding these elements will help you set a realistic budget and partner with a builder to create the perfect outdoor space.

Understanding the Average Price

While you might see general pergola costs ranging from $2,500 to $4,500, it’s important to view this as a starting point. This range often reflects pre-fabricated kits or very basic designs using standard materials. For a custom-built cedar pergola on Long Island, the investment will be different. Cedar is a premium wood, and a custom project involves personalized design, professional labor, and high-quality craftsmanship. The final price will reflect the durability and beauty of a structure that is built specifically for your home, rather than a one-size-fits-all solution. Think of it as the difference between buying off the rack and getting a tailored suit.

How Size and Design Affect Your Cost

The size and complexity of your pergola are two of the biggest factors influencing its final price. A simple, freestanding 10×10 foot square pergola will naturally cost less than a large, 20×30 foot structure that attaches to your home and covers a multi-level patio. More intricate designs, such as those with arched beams, decorative cuts, or unique shapes designed to fit a specific area, require more material and skilled labor. The complexity of the pergola design plays a crucial role in the overall cost, but it’s also what makes your outdoor space truly one-of-a-kind and perfectly suited to your landscape.

Pricing for Custom Features and Add-Ons

Custom features are what transform a simple cedar frame into a luxurious outdoor living room. Each add-on will influence the total project cost, so it’s helpful to consider what’s most important for your lifestyle. Do you envision hosting evening dinners? Integrated lighting is a must. Want relief from the summer sun? A retractable canopy or fixed roofing might be perfect. Other popular custom options include privacy walls, built-in seating, or even mounting for an outdoor television or heaters. These design and material choices allow you to create a beautiful and functional environment that you can enjoy for years to come.

How to Budget for Your Pergola Project

Budgeting for your project starts with defining your priorities. Make a list of your “must-haves” and your “nice-to-haves.” Your must-haves might include a specific size to cover your patio dining set and a durable cedar material. The nice-to-haves could be decorative post bases or a built-in sound system. Having this list ready will help you have a productive conversation with your builder. At Gappsi, we can walk you through the options for pavilions and pergolas and help you understand how different choices affect the price. An open discussion about your budget allows us to suggest creative solutions that align with your vision and financial plan.

How to Choose the Right Pergola Builder

Finding the right builder is just as important as choosing the perfect design for your cedar pergola. The right partner will turn your vision into a beautiful, lasting structure, while the wrong one can lead to headaches and disappointment. You’re not just hiring someone to assemble a kit; you’re collaborating with a craftsperson who will create a custom centerpiece for your backyard. A great builder brings expertise, clear communication, and a commitment to quality to the table. Taking the time to vet your options carefully ensures your investment is in good hands and that the final result is exactly what you dreamed of. This process is about finding a team you can trust to manage your project from the first sketch to the final walkthrough.

Review Their Experience and Past Work

Before you commit, take a close look at a builder’s portfolio. You want to see a proven track record of building high-quality outdoor structures, especially the type of pergola you have in mind. A seasoned builder will have an extensive gallery of completed projects that showcases their craftsmanship and design versatility. As you review their work, ask yourself if their style aligns with your vision. Do their past projects look sturdy and well-integrated into the landscape? A company with deep roots in the community often has a reputation to uphold, which translates to more reliable service and a better final product. Look for a builder who proudly displays their pavilions and pergolas as a testament to their skill.

Verify Their Licensing and Insurance

This step is non-negotiable. Always confirm that any builder you consider is fully licensed and insured to work in Long Island. Proper licensing proves they meet local and state requirements, while insurance protects you from any liability in the unlikely event of an accident on your property. A professional contractor will have this information readily available and should be happy to provide you with copies of their credentials. Think of it as a crucial safety net that provides peace of mind. Hiring an uninsured builder might seem cheaper upfront, but it puts you and your home at significant financial risk. Reputable home improvement companies always prioritize safety and compliance.

Evaluate Their Design and Communication Process

A beautiful pergola begins with a clear and collaborative plan. Pay close attention to how a builder communicates during your initial conversations. Are they attentive listeners who are genuinely interested in your ideas? A great partner will walk you through their entire process, from the initial design consultation to securing permits and the final installation. They should provide a detailed, transparent estimate and be able to answer all your questions clearly. The best builders offer a seamless design and build experience, managing every detail so you don’t have to. This level of organization and open communication is a strong indicator of a smooth, stress-free project ahead.

Common Red Flags to Avoid

Knowing what to watch out for can help you steer clear of potential problems. Be cautious of any builder who gives you a vague estimate, pressures you into making a quick decision, or asks for a large cash deposit upfront. Another red flag is a contractor who suggests you can save money by having a separate, unqualified person handle the installation. Proper installation is critical for the safety and longevity of your pergola. A trustworthy builder will stand behind their work and will never recommend cutting corners. They should also be willing to provide references from past clients. Ultimately, trust your gut. If something feels off, it’s always best to walk away and find a builder who values quality and long-term durability.

How Can You Customize a Cedar Pergola?

A cedar pergola is more than just a structure; it’s a canvas for your personal style. The beauty of a custom build is that you can tailor every detail to fit your home’s architecture and your family’s lifestyle. From its placement in your yard to the amount of shade it provides, customization is what transforms a simple wooden frame into the heart of your outdoor living space. Thinking through these options is the first step toward creating a pergola that feels like it was always meant to be there.

Attached vs. Freestanding Designs

One of the first decisions you’ll make is whether your pergola will be attached to your home or stand on its own. An attached pergola acts as a seamless extension of your house, creating a beautiful transition from indoors to outdoors. It’s perfect for covering a patio just outside your back door, providing shade and architectural interest. A freestanding design, on the other hand, can be placed anywhere in your yard to create a destination. It can define an intimate dining area, create a focal point in a garden, or offer a relaxing retreat by the pool. The choice really depends on how you envision using your outdoor space.

Options for Roofing, Shade, and Lighting

While traditional pergolas have an open-roof design with cross beams for partial shade, modern pavilions and pergolas give you much more control. You can choose a design with more substantial rafters for deeper shade or opt for a louvered roof system. These adjustable roofs can be opened to let the sun in or closed to provide complete protection from rain, often with an integrated gutter system to manage water. We can also incorporate custom lighting, from elegant string lights to recessed fixtures, to ensure your pergola is just as inviting after the sun goes down. These features make your pergola a true all-weather outdoor room.

Integrating Your Pergola with Other Outdoor Features

A pergola truly shines when it works in harmony with the rest of your backyard. Think of it as the centerpiece that connects different elements of your landscape. You can position it to create a shaded lounge area next to your swimming pool or place it over an outdoor kitchen built with beautiful custom masonry. A pergola can also create a stunning frame for a dining space on a patio made from elegant porcelain and natural stone. By integrating your pergola with other features, you create a cohesive and functional outdoor living environment that flows beautifully from one area to the next.

What Is the Pergola Building Process Like?

Building a custom cedar pergola is an exciting project, but it’s natural to wonder what the process actually involves. When you work with an experienced team, it should feel collaborative and straightforward, not overwhelming. A great builder will guide you through each stage, from the first sketch to the final installation, ensuring your vision comes to life exactly as you imagined. Understanding the steps ahead of time helps you feel confident and prepared. Here’s a look at what you can expect when you decide to add a beautiful cedar pergola to your Long Island home.

Step 1: The Initial Design Consultation

This is where the fun begins. Your first meeting with a designer is all about sharing your vision. Before you meet, I suggest gathering some inspiration. Create a Pinterest board or save photos of pergolas you love. Think about how you plan to use the space. Will it be a cozy spot for morning coffee, a shaded area over a dining table, or a relaxing lounge by the swimming pool? Bring photos of your yard and any existing materials or colors you want to complement. This initial conversation helps the design team understand your goals, style, and the unique layout of your property, ensuring your new pergola feels like a natural extension of your home.

Step 2: Choosing Materials and Custom Features

While this guide focuses on cedar, this is the stage where you confirm your material choices and explore all the ways you can personalize your pergola. You’ll discuss everything from the exact stain of the cedar to the style of the support posts. This is also the time to think about custom add-ons. Do you want integrated lighting for evening gatherings, a ceiling fan for warm summer days, or a retractable canopy for adjustable shade? A skilled builder can also design your pergola to work seamlessly with other outdoor elements, like a natural stone patio or an outdoor kitchen, creating a complete and cohesive backyard retreat.

Step 3: Finalizing Plans and Permits

Once the design is perfected, the next step is to finalize the technical plans and handle any necessary paperwork. Navigating local building codes and permit applications can be a complicated part of any home improvement project. This is where a full-service builder truly shines. Instead of leaving you to figure out the requirements for your town in Nassau or Suffolk County, an experienced team will manage the entire permitting process for you. They know the local regulations and will ensure your project is fully compliant, saving you time and preventing potential headaches. This allows you to relax, knowing all the details are being handled correctly and professionally.

Step 4: Construction and On-Site Installation

With the plans approved and materials ordered, it’s time for the build. Most of the precise cutting and preparation of the cedar happens off-site to make the installation process as efficient and clean as possible. On installation day, the professional crew will arrive ready to assemble your pergola. They work carefully to protect your property and landscaping during the build. You’ll be amazed at how quickly the structure takes shape. Once the pergola is built, the team will do a final walkthrough with you to ensure every detail is perfect and that you are completely happy with the result.

How Long Will the Project Take?

While the on-site installation of a pergola can often be completed in just a day or two, the entire project timeline is a bit longer. The full process includes the initial design and revision phase, waiting for any necessary permits to be approved by your town, and the time it takes to order and prepare your custom materials. A realistic timeline from your first consultation to project completion can range from a few weeks to a couple of months, depending on these factors. An all-in-one design and build firm like Gappsi helps keep the project moving efficiently, as there’s no need to coordinate between separate designers, suppliers, and installers.

How Much Maintenance Does a Cedar Pergola Need?

One of the best things about choosing cedar for your pergola is that it delivers stunning natural beauty without demanding a ton of your time. Thanks to its inherent properties, cedar is a fantastic low-maintenance wood. It contains natural oils that make it resistant to decay and insects, which is a huge advantage for any outdoor structure here on Long Island. This natural durability means you can spend more time enjoying your backyard and less time worrying about upkeep.

However, “low-maintenance” doesn’t mean “no-maintenance.” To keep your cedar pergola looking its best and ensure it lasts for decades, a little bit of annual care goes a long way. Think of it as a small investment to protect your beautiful outdoor centerpiece. The good news is that the process is straightforward and doesn’t require a huge commitment. With a simple routine, you can preserve the wood’s integrity and appearance, making sure it remains a highlight of your backyard for years to come.

Simple Tips for Routine Upkeep

You can keep your cedar pergola in excellent shape with just one dedicated maintenance day each year. The goal is to clean off the grime from the seasons and give the structure a quick inspection. Start by gently washing the wood with a simple solution of mild soap and water, using a soft-bristle brush to scrub away any dirt or mildew. Avoid using a high-pressure power washer, as it can be too harsh and damage the wood fibers.

Once it’s clean, take a walk around and check all the hardware, connections, and joints to make sure everything is still secure. Finally, look over the condition of the wood and its finish. If this sounds like a task you’d rather not handle, our professional teams offer restoration and sealing services to keep your outdoor structures in pristine condition.

Cedar Compared to Low-Maintenance Alternatives

When you explore pergola materials, you’ll see options like vinyl and aluminum advertised as virtually maintenance-free. While they don’t require staining or sealing, they can’t replicate the authentic warmth and character of real wood. Cedar offers a perfect balance. It provides the timeless, organic beauty that only wood can, without the constant upkeep required by less durable woods like pressure-treated pine.

While a cedar pergola might have a higher initial cost than one made from pressure-treated wood, its extended lifespan makes it a smarter investment over time. It naturally withstands the elements far better, so you spend less time and money on repairs. You can see a variety of these beautiful structures on our pavilions and pergolas page.

Sealing, Staining, and Long-Term Protection

Cedar’s natural resistance to rot is your first line of defense, but you have choices when it comes to its long-term appearance. If you love the look of weathered wood, you can let your pergola age naturally. Over time, it will develop a beautiful, silvery-gray patina. This is a popular aesthetic choice and doesn’t harm the wood’s structural integrity.

Alternatively, if you want to preserve cedar’s rich, warm color, you can apply a protective finish. A high-quality sealant or stain will shield the wood from moisture and UV rays, which helps prevent discoloration and cracking. This finish typically needs to be reapplied every few years. The exact timing depends on the product you use and how much direct sun and rain your pergola gets.

Do You Need a Warranty for Your Pergola?

When you invest in a beautiful cedar pergola, you’re not just buying a structure; you’re creating a new centerpiece for your outdoor life. Thinking about a warranty might not be the most exciting part of the process, but it’s one of the most important. A solid warranty is a builder’s promise to you. It shows they stand behind the quality of their materials and their craftsmanship, giving you peace of mind that your investment is protected for years to come.

A warranty isn’t just a piece of paper. It’s your assurance that if something unexpected happens, like a defect in the wood or an issue with the construction, you won’t be left with the bill. It separates the professional, confident builders from the rest. Before you sign any contract, understanding the warranty is a non-negotiable step. It reflects the long-term value of your project and ensures your beautiful new pergola remains a source of joy, not stress. A builder who is proud of their work will always back it up with a clear and comprehensive warranty.

What a Strong Warranty Should Cover

A strong warranty should be straightforward and cover the two most critical parts of your pergola: materials and workmanship. The cedar itself should be protected against issues like premature rot or insect damage that go beyond normal wear. Since the quality of the wood is a major factor in the pergola’s lifespan and cost, this coverage is essential. The warranty should also cover the labor or workmanship. This protects you from any problems that might arise from the construction process itself, like joints that loosen or a structure that doesn’t remain level. While you’ll still have simple annual maintenance tasks, a good warranty ensures you’re covered for defects, not for neglect.

Key Questions to Ask Your Builder

Before you commit, it’s vital to have a clear conversation about the warranty. Don’t be shy about asking direct questions, as the answers will reveal a lot about the builder’s process and integrity. Start with the basics: How long does the warranty last, and what does it specifically cover? Ask if it includes both the cedar materials and the construction labor. You should also find out what the process is for filing a claim. A reputable builder will have a simple and clear procedure. Understanding these details upfront helps you compare builders and ensures your project is handled by a professional design and construction company you can trust.

Why Partner With Gappsi for Your Cedar Pergola?

Choosing the right builder for your cedar pergola is just as important as selecting the wood itself. You need a partner who not only understands construction but also has a vision for creating beautiful, functional outdoor spaces. A great builder listens to your ideas, respects your budget, and manages the project smoothly from start to finish. At Gappsi, we pride ourselves on being that partner for homeowners across Long Island. Our approach is built on a foundation of deep expertise, a streamlined process, and a genuine commitment to our local community.

Decades of Outdoor Living Expertise

Our experience speaks for itself. Since 1987, Gappsi has been a premier home improvement company on Long Island, specializing in outdoor living solutions that enhance the beauty and functionality of your home. We don’t just build pergolas; we create comprehensive outdoor environments. Our team’s expertise extends to every facet of backyard design, from masonry and landscaping to swimming pools and patios. This holistic knowledge ensures your new cedar pergola will feel like a natural and intentional part of your overall landscape, not just an afterthought. We understand how all the pieces fit together to create a truly stunning and cohesive outdoor retreat for you and your family to enjoy for years.

A Seamless, All-in-One Design and Build Process

One of the biggest headaches with any home improvement project can be juggling multiple contractors. With Gappsi, you don’t have to. As a full-service outdoor construction company, we handle everything in-house. Our team can design and build your pool, patios, outdoor kitchens, and of course, your beautiful cedar pergola. This integrated approach guarantees a cohesive look and feel for your entire outdoor space. Having one point of contact from the initial design consultation to the final installation means clear communication, a streamlined timeline, and a final result that perfectly matches your vision. We ensure every element, from the porcelain pavers on your patio to the beams of your pergola, works in harmony.

Proudly Serving Homeowners in Nassau and Suffolk County

We aren’t just a company that works on Long Island; we’re part of the community. We live here, we work here, and we are dedicated to enhancing the homes in our neighborhoods across Nassau and Suffolk County. This local focus means we have an intimate understanding of regional building codes, climate considerations, and the specific architectural styles that define our area. When you work with us, you’re partnering with a team that is invested in your satisfaction and the value of your property. Our commitment to quality craftsmanship and customer happiness is evident in every project we complete, from a simple walkway to complete backyard transformations that include stunning pavilions and pergolas.

Related Articles

Frequently Asked Questions

How long will a cedar pergola actually last on Long Island? A well-built cedar pergola is a long-term investment. With professional installation and some simple annual care, you can expect it to last for 20 to 30 years, sometimes even longer. Cedar’s natural resistance to rot and insects gives it a huge advantage against the humid Long Island climate. The key is starting with high-quality wood and solid construction, which ensures your structure can stand up to our coastal weather for decades.

Do I need a permit to build a pergola? Most of the time, yes. Permit requirements can vary quite a bit between towns and villages across Nassau and Suffolk County. The rules often depend on the pergola’s size, height, and whether it’s attached to your house. It can be a confusing process, but it’s a step you don’t want to skip. A professional builder will know the specific codes for your area and will handle the entire permitting process for you, making sure your project is built safely and legally.

What’s the real difference between a pergola and a pavilion? The main difference is the roof. A traditional pergola has an open, slatted roof structure designed to provide partial shade while still letting in plenty of light and air. A pavilion, on the other hand, has a solid, continuous roof that offers full protection from both sun and rain. If you want to create a true all-weather outdoor room that keeps you and your furniture dry, a pavilion is likely the better choice. If you’re looking for an elegant architectural feature that defines a space and offers dappled sunlight, a pergola is perfect.

Can a pergola be built on my existing patio or deck? Absolutely. In fact, adding a pergola is one of the best ways to enhance an existing patio or deck, making the space more usable and comfortable. During the design process, a builder will assess the condition of your current surface to make sure it can properly support the weight of the new structure. The posts can often be anchored directly to a concrete patio, or new footings can be installed to create a secure and lasting foundation.

How do I decide between staining my cedar pergola or letting it weather naturally? This is purely a matter of personal taste, as both options are great for the wood. If you love the rich, warm tones of new cedar, applying a high-quality stain every few years will preserve that color and provide extra protection from UV rays. If you prefer a more rustic, coastal look, you can simply let it be. Over time, the cedar will gracefully age to a beautiful silvery-gray patina without compromising its strength or durability.
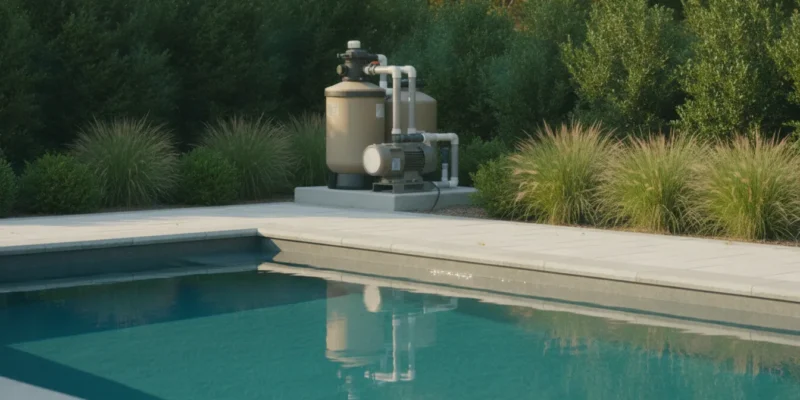
Inground pool equipment system beside a Long Island swimming pool

Pool Equipment Guide for Long Island Inground Pools

Choosing equipment for an inground pool is not simply a matter of picking a pump from a catalog. Your circulation, filtration, sanitation, heating, cleaning, and control systems must work together with the pool’s size, plumbing layout, usage, and Long Island weather. A mismatch can create avoidable maintenance and operating problems.

Contact Gappsi through our contact page

The right pool equipment system typically includes a pump, filter, sanitation method, cleaner, and controls, with a heater, cover, lighting, or swim-jet features selected around how your household will use the pool. A design-build team can coordinate those choices before installation.

Understanding what each component does makes it easier to evaluate proposals and identify the systems your project actually needs. Start with the core equipment that keeps an inground pool circulating, clean, comfortable, and ready to use.

What Pool Equipment Does an Inground Pool Need?

An inground pool depends on several connected systems, not one piece of equipment. The pump moves water through the plumbing, the filter removes suspended debris, and the sanitation system helps keep the water suitable for swimming. Heating, cleaning, lighting, and covering systems then shape how comfortable and convenient the pool is to use. For a Long Island homeowner, those choices should be planned with the pool shell, plumbing layout, electrical service, gas availability, climate, and intended swimming season in mind.

Gappsi approaches this as one design and construction project rather than a product list. Its Long Island swimming pool design and construction service can coordinate the pool structure with the equipment pad, controls, finish details, and startup process.

The core circulation and water-care systems

Circulation begins with the pump, skimmer, drains, return lines, valves, and controls. Together, these components move water from the pool, through the treatment equipment, and back into the basin. Correct plumbing design matters because the equipment must work as a connected system, not as isolated devices.

Filtration catches particles that sanitation alone does not remove. Common filter categories include cartridge, sand, and diatomaceous earth, often called DE, filters. The right choice depends on the pool design, expected use, available service access, and the homeowner’s preferred maintenance routine.

Sanitation manages microorganisms and water chemistry. Gappsi’s equipment scope includes salt chlorine generators and ozone systems. A salt chlorine generator still supports chlorine-based sanitation, so it should not be presented as a chlorine-free system. Ozone can be selected as part of a broader water-care plan, with the final setup coordinated with the primary sanitation method and the pool’s controls.

Heating, cleaning, and everyday comfort

Heating extends the practical swimming season and improves comfort during cooler weather. Gas heaters and heat pumps are both options, but the best fit depends on how often the pool will be used, the desired season, the site’s gas and electrical planning, and the overall project design.

Cleaning equipment may include skimmers, brushes, vacuums, and robotic cleaners. These tools address leaves, dust, and settled debris that circulation and filtration may not remove by themselves. LED lighting supports evening visibility and changes the appearance of the pool area without relying on oversized fixtures. A pool cover can also help protect the water between uses, while reducing exposure to leaves and weather.

Some homeowners may also consider optional comfort equipment, such as swim jets for resistance swimming or upgraded automation for scheduling and monitoring. These additions should be evaluated alongside the pool’s purpose, available space, and long-term service needs.

  • Pump and circulation plumbing: moves water through the system.
  • Filter: captures suspended particles using cartridge, sand, or DE media.
  • Sanitation system: supports water care through chlorine generation, ozone, or a coordinated combination.
  • Heater or heat pump: adds water-temperature control for the intended swimming season.
  • Cleaning tools or robotic cleaner: handles debris that the main circulation system leaves behind.
  • LED pool lighting: improves visibility and supports the evening design.
  • Cover: protects the pool between uses and simplifies routine care.
  • Optional automation or swim jets: adds control or exercise features when appropriate.

The equipment pad should remain accessible for inspection and maintenance, with enough room for safe connections and future service. Planning these details before construction helps prevent a crowded layout, awkward plumbing, or equipment that does not match the way the household expects to use the pool.

How Do You Choose the Right Pool Pump and Filter?

The pump and filter are the working core of a swimming pool circulation system. Choosing them is not simply a matter of matching a product to the pool’s gallon capacity. The correct pool equipment must work with the pool’s dimensions, plumbing layout, water features, heater, sanitizer, expected use, and available service space.

Start with the idea of turnover. Turnover describes how long the circulation system takes to move the pool’s water through the filter. It is a design concept, not a universal pump setting. A professional evaluates the pool volume, intended circulation schedule, pipe diameter, fittings, elevation changes, and features such as waterfalls or spa jets. The goal is a system that provides appropriate circulation without forcing the pump to work against unnecessary resistance.

Flow resistance comes from the entire hydraulic path. Long pipe runs, narrow plumbing, elbows, valves, heaters, filters, and water features all affect how readily water moves. A pump selected without considering that resistance may circulate inadequately, operate noisily, or require more maintenance. Oversizing can also create problems, including excessive flow through equipment that was not designed for it. The equipment schedule should therefore be based on the complete plumbing design rather than a product label alone.

Filter selection depends on the water-quality goals and the homeowner’s preferred maintenance routine. The main media categories include:

  • Cartridge filters use removable elements that can be taken out and cleaned. They are often considered when straightforward maintenance and a practical equipment layout are priorities.
  • Sand filters use graded filter media and are cleaned through a backwashing process. The installation must account for the plumbing and drainage requirements of that process.
  • DE filters use diatomaceous earth to provide fine filtration. They require careful handling of the media and a maintenance plan suited to the property.

There is no single best filter for every Long Island pool. A cartridge design may suit one household’s cleaning preferences, while a DE or sand system may make more sense for another pool’s layout and operating plan. The same applies to pumps. Gappsi’s documented equipment brands include Pentair, Hayward, Raypak, Jandy, Sta-Rite, Autopilot, Dolphin, and Waterways. These names are examples of supported equipment categories, not a claim that one brand or model is universally right.

Service access deserves attention before construction begins. Filters need room for removal and cleaning, pumps need safe access, and valves and controls should remain reachable after the surrounding patio, planting, and enclosure work is complete. Ask for the equipment location, plumbing plan, electrical requirements, and startup responsibilities to be explained as part of the proposal.

Contact Gappsi through our contact page

For a closer look at the installation process, review Gappsi’s professional pool equipment installation guidance. Coordinating sizing, plumbing, controls, and access during the design stage helps the finished system operate as one connected part of the pool rather than as a collection of separate products.

Which Pool Heater Is Best for Your Long Island Backyard?

Heating decisions should begin with how your household will use the pool, not with a single product label. On Long Island, a pool may be used for a short period in spring and fall, throughout the warmer months, or on a more deliberate schedule for family gatherings and frequent swimming. The right pool equipment plan depends on the desired season, target water temperature, pool size, available utilities, and the physical layout of the equipment area.

Gas heaters are often considered when homeowners want responsive, on-demand heating for planned swims or occasional temperature changes. They can fit a use pattern where the pool is not heated continuously, but the installation must account for the appropriate gas supply, venting, clearances, and local requirements. Those details belong in the design phase, especially when the equipment pad is being placed near the home, a patio, or property boundaries.

Heat pumps draw heat from the surrounding air, so outdoor conditions matter. They can make sense for homeowners who plan to maintain a comfortable temperature over a longer period instead of heating the pool only before a specific event. Their suitability depends on the local weather, the intended swimming season, electrical planning, equipment location, and the homeowner’s expectations for heating response. A heat pump should be evaluated as part of the complete circulation and control system, not as an isolated appliance.

Pool heater considerations for a Long Island backyard
Consideration Gas heater Heat pump
Best fit Planned swims, occasional heating, or a preference for responsive temperature changes. Longer seasonal use with a plan to maintain a set temperature.
Weather relationship Less dependent on the immediate outdoor air temperature. Performance and heating response depend on outdoor air conditions.
Utility planning Requires evaluation of gas availability, sizing, venting, and clearances. Requires evaluation of electrical capacity, placement, airflow, and clearances.
Design questions How often will the pool be heated, and how quickly should it respond? How long will the season last, and what temperature should be maintained?

A solar-ready approach may also be worth discussing during planning, even when solar heating is not part of the immediate installation. Space, plumbing routes, controls, and future access can influence whether a later addition is practical. The same principle applies to a pool cover, which can support heat retention and should be considered alongside the heater rather than after the equipment pad is finalized.

There is no universal best heater for every backyard. Gappsi evaluates the pool’s dimensions, usage pattern, weather exposure, utility connections, equipment location, and broader design before recommending a system. That integrated process helps align the heater with the pumps, filters, automation, and startup plan instead of forcing one component to compensate for another.

What Do Salt, Ozone, and Automation Systems Do?

Sanitation equipment helps keep pool water clear and suitable for swimming, but it does not replace the basic work of circulation, filtration, and water testing. Each system addresses a different part of pool operation. A salt chlorine generator produces chlorine from dissolved salt as water passes through its cell. It is still a chlorine-based system, not a chlorine-free alternative. The generator can make chlorine production more consistent, while the pool owner or service professional still needs to monitor the water and maintain the equipment.

An ozone system adds another sanitation support process. It introduces ozone into the circulation line, where the gas can help oxidize certain contaminants before the water returns to the pool. Ozone is best understood as a supplement to the primary sanitizer, not a reason to stop maintaining appropriate chlorine levels. The generator, cell, and related plumbing also need inspection so the system continues operating as designed.

How do these systems work with filtration and circulation?

Circulation moves water through the pump, filter, heater, and treatment equipment. Filtration removes suspended particles, such as dirt and other debris that the filter can capture. Sanitation systems address microorganisms and organic contaminants that filtration alone does not remove. If the pump is not moving water effectively, a salt cell or ozone unit cannot treat the full pool properly. A dirty filter can also restrict flow and place additional strain on the circulation system.

This is why equipment selection should be planned as a connected system rather than as a list of individual products. Pump capacity, plumbing layout, filter type, sanitation method, heater, and control equipment all need to work together. Gappsi’s documented pool equipment scope includes pumps, filters, heaters, salt chlorine generators, ozone systems, and modern automation systems. The right combination depends on the pool design, expected use, available utilities, and the homeowner’s preferred maintenance routine.

What does pool automation control?

Automation controls can place routine equipment functions in one interface. Depending on the installed system, controls may coordinate pump schedules, filtration, heating, lighting, and sanitizer support equipment. This can make it easier to adjust settings and identify an operating issue than managing each component separately. Automation does not mean the pool runs without oversight. Sensors can drift, chemical feed components can require service, and a programmed schedule may not suit every change in weather or usage.

Regular testing remains essential. Check the water according to the equipment manufacturer’s guidance, keep the water balanced, clean or backwash the filter as required, and inspect the circulation and sanitation components. A salt system can simplify chlorine production, and ozone can provide additional treatment support, but neither system excuses skipped testing. During a new pool installation or equipment upgrade, Gappsi can evaluate the complete equipment plan so sanitation, filtration, circulation, and controls are matched to the project.

How Can Pool Equipment Reduce Maintenance and Energy Waste?

Efficient operation starts with matching each component to the pool’s design and the way your household uses it. An oversized pump can move more water than the plumbing and filter require, while an undersized system may need longer run times to maintain circulation. A properly planned setup supports clean water without making every operating decision a daily chore.

Programmed schedules help keep circulation consistent. Your installer can coordinate pump operation, filtration, heating, sanitation, and cleaning around typical use patterns. Seasonal adjustments may also make sense. A pool used frequently in July may need a different schedule than one used occasionally in early spring or fall. Automation can make those changes easier to manage, but it still needs sensible settings and periodic review.

Clean filters are another essential part of efficient pool equipment. As debris accumulates, water has a harder time passing through the filter. Watch the pressure indicator and follow the filter manufacturer’s cleaning guidance rather than waiting for cloudy water or weak circulation. The correct cleaning method depends on whether the system uses cartridge, sand, or DE filtration.

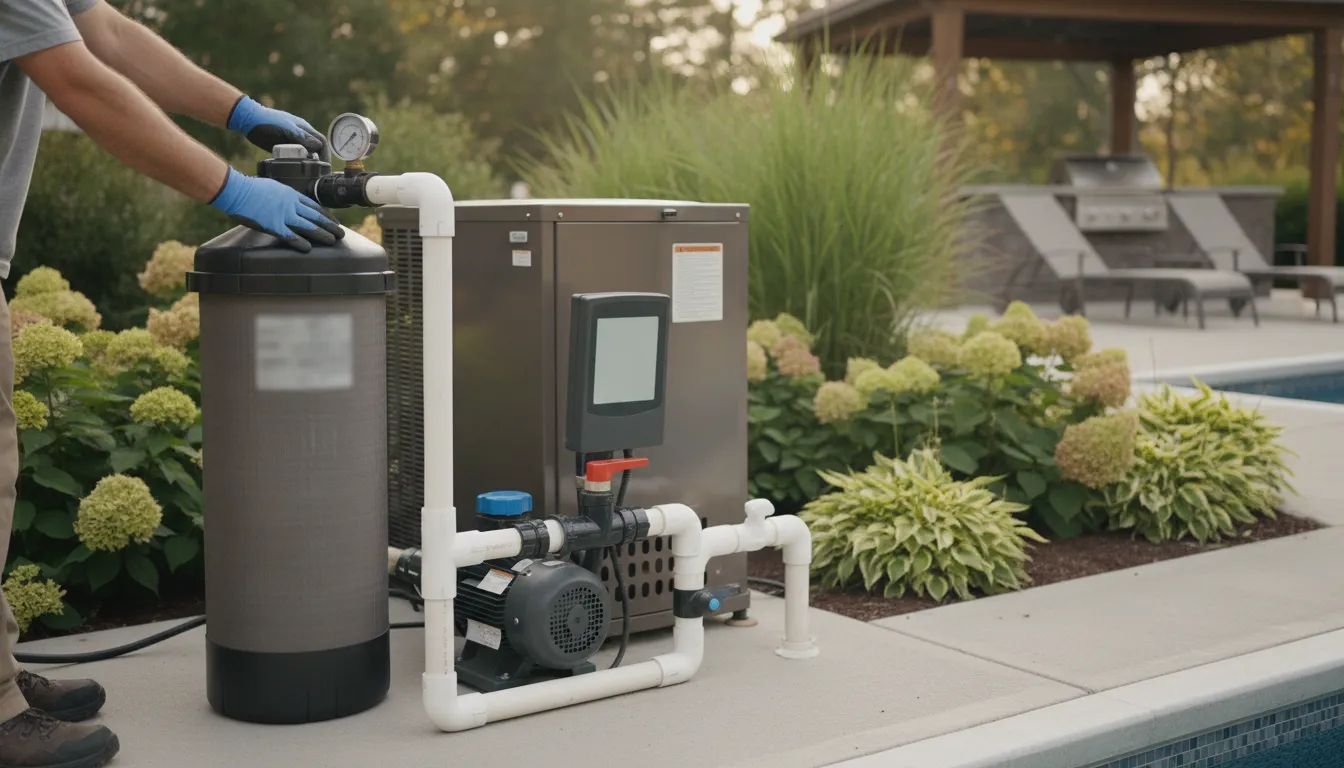
Technician checking inground pool equipment controls in a Long Island backyard

Several supporting choices can reduce routine work as well. A properly fitted pool cover can limit debris entering the water and reduce exposure when the pool is not in use. LED lighting provides clear evening illumination with a lower operating demand than older lighting designs. A robotic cleaner can handle regular debris collection, reducing the amount of manual brushing and vacuuming required between service visits.

Service access should be planned before construction is complete. Pumps, filters, heaters, automation controls, and valves need enough room for inspection, cleaning, and eventual replacement. Crowding equipment into an inaccessible corner may save space at first, but it can make ordinary maintenance slower and more disruptive. Good plumbing layouts and labeled controls also help technicians diagnose issues without unnecessary adjustments.

For an existing pool, start with an evaluation rather than replacing components at random. A technician can review the pump, filter, plumbing, controls, cleaner, and lighting as one system. If the equipment is aging or poorly matched, see this guide to upgrading older pool equipment before deciding what should change. The goal is a system that is easier to operate, service, and maintain over its useful life.

What Should You Budget for Pool Equipment Planning?

Pool equipment should be budgeted as part of the complete installation, not treated as a last-minute shopping list. The right allowance depends on the pool’s design, the way your household will use it, and the infrastructure required to operate each system safely. A small pool with limited features will have different requirements from a larger gunite pool with heating, automation, lighting, and an automatic cover.

Equipment is only one part of a complete pool project. Homeowners should request a written scope rather than compare isolated pump, heater, or filter figures that may not include installation or supporting work.

Which variables affect the equipment allowance?

A proposal should connect every equipment choice to the physical design and intended use of the pool. Ask the builder to explain how the following items affect the project:

  • Pool type, dimensions, and features: Water volume, depth changes, spas, tanning ledges, waterfalls, and swim jets influence circulation and equipment requirements.
  • Plumbing and circulation: The scope should identify the pump, filter, plumbing runs, valves, and equipment pad, including access for future service.
  • Electrical and fuel needs: Heating, pumps, automation, lighting, and other components may require electrical planning. Gas heaters also require appropriate gas-line coordination, while heat pumps have their own electrical requirements.
  • Sanitation and water control: Ask whether the design includes a salt chlorine generator, ozone system, conventional chlorine approach, automation, sensors, and any dosing equipment.
  • Comfort and protection: Heating, LED lighting, covers, and cleaning equipment should be listed separately so you can see which are essential, optional, or planned for a later phase.
  • Permits, startup, and service: Confirm that permits, inspections, commissioning, water balancing, owner instruction, and service access are included or clearly excluded.

What should a complete proposal show?

Request model or category details for the pump, filter, heater, sanitation equipment, automation controls, lights, cover, and cleaner. The proposal should also show labor, delivery, electrical and gas work, plumbing, permits, startup, warranty responsibilities, and any site preparation. Brand options may include manufacturers such as Pentair, Hayward, Raypak, Jandy, or Sta-Rite, but the most recognizable name is not automatically the correct fit. Sizing, compatibility, placement, and access matter just as much.

For a Nassau or Suffolk County project, an integrated design-build plan helps keep these dependencies visible from the beginning.

Contact Gappsi through our contact page

Frequently Asked Questions

What equipment is needed for an inground pool?

An inground pool needs a pump for circulation, a filter for removing suspended debris, and a sanitation system to manage water quality. Most projects also require plumbing controls, skimmers, returns, and a method for cleaning the pool. Depending on how you plan to use the pool, you may add a gas heater or heat pump, cover, LED lighting, automation, or a robotic cleaner.

What is the best pool equipment for a Long Island home?

The best setup depends on the pool’s size, plumbing design, usage schedule, desired swimming season, available gas or electrical service, and maintenance preferences. A properly matched system from a documented brand such as Pentair, Hayward, Raypak, Jandy, or Sta-Rite can be a sound starting point, but brand selection alone does not replace project-specific sizing.

What are the must-haves for a pool?

The essential components are circulation, filtration, sanitation, safe electrical and plumbing connections, and controls that let the system operate correctly. Heating, automatic cleaning, lighting, and a cover are practical additions rather than universal requirements. Planning service access at installation is also important because technicians need room to inspect, clean, and replace components.

What are the names of common pool equipment components?

Common components include the circulation pump, filter, skimmer, return jets, salt chlorine generator, ozone system, heater, heat pump, cleaner, automation controller, LED light, and pool cover. Filters are commonly categorized as cartridge, sand, or diatomaceous earth, often called DE. The right combination should be selected as one coordinated system, not as unrelated products.

Plan Your Pool Equipment With Gappsi

The right pool equipment should fit your backyard, pool design, comfort preferences, and plans for maintenance. Gappsi can help you review those needs as part of a coordinated Long Island pool project.

Contact Gappsi through our contact page

Modern covered patio structure with a white pergola on Long Island.

A Guide to Covered Patio Structures in Long Island

Many of us wish we had more room to spread out, but a full home addition isn’t always practical. A covered patio offers a brilliant solution, creating a new living area without the cost or disruption of major construction. It seamlessly connects your indoor and outdoor spaces, making your backyard feel like a true extension of your home. This creates a comfortable, sheltered “room” with fresh air and great views, perfect for everything from daily meals to special occasions. By selecting the right covered patio structure Long Island homeowners can effectively expand their living space and change the way they experience their property.

Key Takeaways

  • Define Your Patio’s Purpose First: Decide how you want to use your space to choose the right structure. A pergola creates an open, defined area with partial shade, perfect for framing a view, while a pavilion provides a fully-roofed outdoor room for complete weather protection.
  • Weigh Material Benefits and Maintenance: The material you choose determines your patio’s long-term look and upkeep. Wood offers timeless charm but requires annual care, whereas aluminum and vinyl provide a durable, low-maintenance solution for a more modern style.
  • Plan for a Cohesive Final Look: A successful project considers more than just the structure. Assess your yard’s sun exposure, match the design to your home’s architecture, and partner with a professional to ensure everything is built correctly and to code.

What Are Your Covered Patio Options?

Choosing the right cover for your patio is about more than just shade. It’s about defining how you want to live in your outdoor space. Do you envision a cozy reading nook, a grand dining area for family gatherings, or a simple, protected spot to enjoy your morning coffee? Each type of structure offers a different blend of style, function, and protection. Understanding the key differences will help you find the perfect match for your Long Island home and lifestyle. Let’s walk through the most popular options to see which one fits your vision.

Pergolas: Defining Your Space

Think of a pergola as an architectural outline for your outdoor room. These structures use posts and crossbeams to create a distinct area, adding a sense of purpose and style to a patio or garden path. While a traditional pergola has an open-lattice roof that provides partial shade, you can customize the design for more coverage. They are perfect for supporting climbing plants like wisteria or ivy, which can create a beautiful, natural canopy. A well-placed pergola can frame a beautiful view and make your outdoor living area feel more finished and inviting without completely blocking the sun.

Pavilions: Complete Outdoor Coverage

If you want a true outdoor room with total protection from the elements, a pavilion is your answer. Unlike a pergola, a pavilion has a solid, continuous roof, offering complete shelter from both the hot summer sun and unexpected rain showers. This makes them the ideal choice for housing an outdoor kitchen, a full dining set, or a comfortable living area with plush furniture. With open sides, you still get to enjoy the breeze and surrounding landscape. A pavilion essentially gives you a durable, roofed structure that extends your home’s usable living space into the backyard.

Patio Covers & Awnings: Simple Shade Solutions

A patio cover is a straightforward and effective way to add shade and protection directly adjacent to your home. These structures are attached to the house on one side and supported by posts on the other, creating a seamless transition from indoors to out. It’s like extending your roofline over your deck or patio. Awnings offer a similar benefit but with more flexibility, as many are retractable. This allows you to enjoy the sun when you want it and get instant shade when you need it, making them a practical part of any home remodeling project.

Gazebos: A Classic Backyard Centerpiece

Gazebos are timeless, freestanding structures that act as a destination in your landscape. Often designed in an octagonal or round shape with a solid roof and partial walls or railings, a gazebo creates a charming focal point in a garden or by a pool. It’s the perfect spot for quiet relaxation, intimate conversations, or simply enjoying a different perspective of your yard. A gazebo feels like a small retreat, inviting you to step away from the main house and enjoy a peaceful moment outdoors. Its classic design adds a touch of elegance to any backyard.

Why Add a Covered Patio to Your Home?

A covered patio is so much more than just a roof over your deck. It’s an extension of your home, a dedicated space for making memories, and a smart investment that pays off in both lifestyle and property value. By adding a permanent structure, you’re not just getting shade; you’re creating a true outdoor room that you can enjoy for years. Whether you envision a cozy spot for morning coffee or a grand space for entertaining, a covered patio provides the foundation for your ideal backyard retreat.

Create More Usable Outdoor Space

Let’s be honest, a bare patio is only useful on perfect-weather days. Adding a cover transforms that space into a reliable outdoor living area. Think of it as adding a new room to your house, one with fresh air and great views. A well-designed pavilion or pergola defines the space, turning an open yard into a designated spot for dining, lounging, or hosting guests. It creates a comfortable hub that connects your indoor living area with other backyard features like a swimming pool or outdoor kitchen. This simple addition can completely change how you use your backyard, giving you a go-to spot for relaxation and fun.

Get Year-Round Weather Protection

Long Island weather can be unpredictable, with scorching sun one day and surprise showers the next. A covered patio gives you control over the elements. A solid roof structure offers complete protection from rain and harsh UV rays, meaning your barbecue does not have to be canceled because of a little drizzle. This protection extends the life of your outdoor furniture, too. Structures with louvered or retractable roofs offer the best of both worlds, letting you choose between sun and shade with the push of a button. This means you can comfortably use your patio from early spring through late fall, not just during the peak summer months. It ensures your beautiful masonry patio remains a functional space all season long.

Increase Your Home’s Value

A beautiful and functional outdoor living area is a major selling point for any home, and a covered patio is a fantastic investment. It’s a feature that buyers in Long Island actively look for. A professionally built structure not only adds significant curb appeal but also tangible value to your property. A well-designed patio cover can increase your home’s value, making it a smart financial move. This kind of addition is seen as a premium upgrade that enhances the entire property. As part of a larger home improvement strategy, a covered patio can provide a strong return when it comes time to sell.

Choosing Materials and Custom Features

Once you’ve settled on a structure, it’s time for the fun part: choosing the materials and features that will bring your vision to life. The materials you select will define your patio’s style, durability, and how much maintenance it will need down the road. From classic wood to modern aluminum, each option has its own benefits. Then, you can layer in custom features like lighting, fans, and stonework to create a truly personalized outdoor living space.

Wood: Timeless Charm, Higher Upkeep

There’s no denying the classic beauty of a wooden patio structure. It offers a warm, natural, and timeless look that blends seamlessly with any backyard landscape. However, that beauty comes with a bit of homework. Wooden structures require regular maintenance to keep them looking their best and protect them from Long Island’s weather. You’ll need to plan for annual sealing or staining to prevent rot, warping, and insect damage. While it requires more effort, many homeowners find the rich aesthetic of real wood is well worth the upkeep. For those who love the look, a well-maintained wooden pavilion or pergola can be a stunning backyard centerpiece for years.

Aluminum: Modern and Low-Maintenance

If you’re looking for a set-it-and-forget-it option, aluminum is an excellent choice. It’s incredibly durable, lightweight, and resistant to rust and corrosion, making it a practical material that stands up to sun, rain, and wind with very little effort. Aluminum offers a sleek, modern look and can be finished in various colors to match your home’s exterior. Because it’s so low-maintenance, you won’t have to worry about the annual sealing or painting that wood requires. This makes aluminum a popular and cost-effective choice for homeowners who want to spend more time enjoying their patio and less time working on it.

Vinyl: Durable and Versatile

Vinyl offers a great middle ground, combining durability with minimal maintenance requirements. Modern vinyl composites are strong, long-lasting, and won’t rot, fade, or peel, giving you a clean look that lasts for years. It’s a versatile material that comes in a variety of colors and styles, including finishes that mimic the appearance of real wood without the demanding upkeep. When choosing vinyl, it’s important to select a high-quality grade to ensure it holds up over time. A well-built vinyl structure from a trusted installer like Gappsi provides a reliable and attractive shade solution that lets you enjoy your outdoor space without the extra work.

Customizing Your Roof and Coverage

The roof of your covered patio does more than just provide shade; it defines the space’s character and function. You can choose a solid roof for complete protection from rain and sun, making it a true outdoor room. Or, you might prefer a slatted or lattice roof, like those on many pergolas, which offers partial shade while still letting in a pleasant amount of light. For even more flexibility, consider adding retractable canopies or screens. These features allow you to control the amount of sun or privacy you get at any given moment, adapting the space to your needs throughout the day.

Finishing Touches: Lighting, Fans, and Stone Accents

The right finishing touches can transform a simple patio cover into a luxurious outdoor retreat. Integrated lighting, such as recessed LEDs or elegant string lights, extends the usability of your space into the evening. Ceiling fans are a must for humid Long Island summers, creating a comfortable breeze that keeps you cool. You can also incorporate stunning masonry by adding stone or porcelain paver bases to the support columns. These details not only add functional comfort but also create a high-end, custom look that ties your new patio structure into your home’s overall design.

How to Choose the Right Patio Structure

Picking the perfect covered patio structure feels like a big decision, but it doesn’t have to be overwhelming. When you break it down, it’s all about matching your vision to your home and lifestyle. Think of this as a checklist to guide you toward a choice you’ll be happy with for years to come. The goal is to create an outdoor space that feels like a natural extension of your home, whether you’re dreaming of a cozy pergola for quiet mornings or a grand pavilion for entertaining.

A well-chosen structure should do more than just provide shade; it should complement your home’s architecture, fit your budget, and stand up to Long Island’s weather. By thinking through a few key factors, you can confidently select a design that works for your family. We’ll walk through everything from assessing your yard to understanding local codes, so you can move forward with your project. Gappsi offers a wide selection of pavilions and pergolas to suit any style, and our team is here to help you find the ideal fit.

Consider Long Island’s Climate

Here on Long Island, we get to experience all four seasons, from sunny summer days to chilly winter evenings. Your patio structure needs to be ready for anything. A durable design built with high-quality materials will provide cool shade in July, shelter from April showers, and stand strong under the weight of a winter snowfall. Think about how you want to use the space year-round. A louvered roof, for example, can be adjusted to let the sun in or keep the rain out, giving you total control. Choosing a structure built for our specific climate ensures you get a lasting investment, not a seasonal accessory.

Assess Your Yard’s Size and Layout

Before you fall in love with a specific design, take some time to get to know your yard’s unique personality. A common mistake is only looking at the space in the morning. Watch how the sun moves across your property throughout the day to find the best spot for consistent shade and comfort. This will help you decide on the ideal placement and orientation for your structure. You’ll also want to ensure the structure’s size is proportional to your yard and patio. It should feel like a destination, not an obstruction that makes the space feel cramped.

Match Your Home’s Architecture

Your new patio structure should feel like it was always part of your home’s original design. The best way to achieve this is by choosing a style that complements your home’s architecture. A rustic wood pergola might be perfect for a traditional colonial, while a sleek aluminum pavilion could be the ideal match for a modern home. You can create a cohesive look by coordinating colors and materials. For example, incorporating natural stone pillars that match your home’s foundation can tie the whole space together beautifully.

Plan Your Budget

When planning your budget, it’s helpful to think about the total cost of ownership, not just the initial price tag. Some materials, like wood, may have a lower upfront cost but require annual sealing and maintenance to keep them looking their best. Other options, such as aluminum or vinyl, might cost more initially but are virtually maintenance-free, saving you time and money down the road. Our team can walk you through the pros and cons of each material, helping you make a smart, long-term investment that aligns with your budget and lifestyle.

Check Local Building Codes

Dealing with local building codes can seem complicated, but it’s a crucial step in any home improvement project. Different towns across Nassau and Suffolk County have their own zoning laws and regulations that may affect your structure’s height, size, or distance from your property line. The good news is you don’t have to figure this out on your own. A professional team will handle the permits and ensure your new patio structure is fully compliant with all local requirements, giving you complete peace of mind.

Professional Installation vs. DIY

While a DIY project can be tempting, installing a large outdoor structure is a job best left to the professionals. A proper installation starts with a solid foundation, something that requires expertise to get right. Small mistakes during a DIY installation can lead to big problems, like poor water drainage or even structural instability. By working with an experienced team, you can be sure your covered patio is built safely and correctly, ensuring it will be a secure and beautiful addition to your home for many years.

Bring Your Covered Patio Vision to Life with Gappsi

Choosing the right structure and materials can feel like a big decision, but you don’t have to make it alone. At Gappsi, we specialize in turning your ideas for the perfect outdoor space into a beautiful, functional part of your home. We’ve been helping homeowners across Long Island design and build their dream backyards for decades, and we bring that experience to every project. Whether you’re envisioning a grand pavilion for entertaining or a simple, elegant pergola for quiet afternoons, our team is here to guide you through the process from start to finish.

We believe a great covered patio starts with a solid plan and the right materials. That’s why we offer a wide selection of high-quality options, from classic wood to modern, low-maintenance composites. Our expertise in masonry design allows us to create stunning stone pillars and flooring that perfectly complement your new structure. We’ll help you select materials that not only match your home’s style but also stand up to Long Island’s weather, so you can spend more time enjoying your patio and less time on upkeep.

A covered patio is more than just a roof; it’s an extension of your living space. We can help you customize your structure with all the finishing touches that make it uniquely yours. Think about adding integrated lighting for evening gatherings, ceiling fans for warm summer days, or even connecting your new patio to a beautiful swimming pool area. Our goal is to create a seamless flow between your indoor and outdoor living areas, giving you a versatile space for relaxation and entertainment. Let’s work together to build the covered patio you’ve always wanted.

Related Articles

Frequently Asked Questions

What’s the real difference between a pergola and a pavilion? The simplest way to think about it is the roof. A pergola has a slatted or lattice-style roof that provides partial shade, defining an outdoor space without completely blocking the sun. A pavilion, on the other hand, has a solid, continuous roof that offers full protection from rain and sun, creating a true outdoor room. If you want a structure to support climbing plants and create an airy feel, a pergola is perfect. If you need a reliable shelter for an outdoor kitchen or living room set, a pavilion is the better choice.

Which material is the most practical for Long Island weather? While wood has a classic, natural beauty, it does require annual sealing to protect it from our humid summers and wet winters. For a more hands-off approach, aluminum and high-quality vinyl are fantastic options. They are extremely durable and won’t rust, rot, or require repainting, so they stand up to the coastal air and changing seasons with almost no upkeep. They offer a clean, modern look and let you spend your time enjoying your patio instead of maintaining it.

Can I add a covered structure to the patio I already have? Yes, absolutely. Adding a pergola or pavilion to an existing patio is a very common project. A professional team can assess your current patio’s condition to ensure it provides a solid foundation for the new structure. The key is to design a cover that integrates seamlessly with your existing layout and home architecture, making it feel like it was part of the original plan all along.

Do I really need a permit to build a covered patio? In most cases, yes. Towns across Nassau and Suffolk County typically have regulations regarding the size, height, and placement of permanent backyard structures like pavilions and large pergolas. These rules are in place for safety and zoning purposes. While it might sound like a hassle, working with an experienced company like Gappsi means we handle the entire permitting process for you, ensuring your project is fully compliant from the start.

How can I make sure my new structure doesn’t look like an afterthought? This is a great question, and the answer lies in cohesive design. The goal is to make the new structure look like a natural extension of your home. We achieve this by carefully selecting materials and colors that complement your house’s exterior. For example, we can incorporate stone bases for the support columns using masonry that matches your home’s foundation or choose a roof style that echoes your home’s architecture. These thoughtful details are what create a polished, fully integrated look.

Custom white pergola built by a local Long Island company for an outdoor patio.

Find the Best Pergola Company Near Me Long Island

Building on Long Island comes with its own unique set of rules. Our coastal environment, with its salt air, high winds, and seasonal storms, demands more from our outdoor structures. A pergola that looks great in a catalogue might not be built to withstand a tough winter in Suffolk or Nassau County. This is why local expertise is non-negotiable. When you search for a “pergola company near me Long Island,” you need more than a general contractor; you need a specialist. You need a team that understands regional building codes, uses materials proven to last in our climate, and has a long track record of successful installations right here in our community. This guide will show you what to look for.

Key Takeaways

  • Choose an all-in-one design and build team: Working with a single company that handles everything from 3D designs and permits to the final installation saves you headaches and ensures your pergola is built correctly for Long Island’s specific weather and building codes.
  • Select materials based on your budget and maintenance style: Your choice of wood, vinyl, or aluminum determines the pergola’s look, upfront cost, and future upkeep, so consider how much time you want to spend on maintenance, not just the initial price.
  • Plan for features that fit your lifestyle: The true value of a pergola comes from custom additions like motorized roofs, integrated lighting, and privacy screens, which make the space truly functional and should be factored into your overall budget.

How to Choose the Best Pergola Company on Long Island

Finding the right partner to build your pergola is just as important as choosing the right materials. You want a team that not only understands your vision but also has the local expertise to bring it to life beautifully and durably. A pergola is a significant addition to your home, so it’s worth taking the time to find a company that will get it right. When you start your search, focus on two key things: a company with a deep-rooted local presence and one that can handle your entire project from start to finish. This approach simplifies the process and ensures you end up with a stunning outdoor feature that you’ll enjoy for years.

Look for a Proven Local Expert

When you’re investing in an outdoor structure, you need a company that truly understands the Long Island environment. Look for an installer with a long history of building in your area. A proven local expert will have a deep understanding of regional building codes and the specific challenges our coastal weather presents, from humid summers to winter storms. They should also be fully insured, giving you peace of mind that your property is protected throughout the project. A company with a strong local reputation has a vested interest in quality craftsmanship because their name is on the line with every structure they build right here in our community.

Seek a One-Stop Shop for Design and Build

Choosing a company that offers a complete design-and-build service makes the entire process smoother and more cohesive. Instead of juggling a separate designer, materials supplier, and construction crew, you have one dedicated team managing every detail. This integrated approach ensures your vision is carried through from the initial 3D design to the final installation. At Gappsi, we specialize in creating custom pavilions and pergolas that are tailored to your home and lifestyle. A one-stop shop can seamlessly integrate your new pergola with existing patios, outdoor kitchens, or landscaping, creating a unified and functional outdoor living space without the headache of coordinating multiple contractors.

What Are My Pergola Options?

Choosing a pergola is an exciting step in creating your dream backyard. Before you get lost in design ideas, it’s helpful to understand the fundamental options available. The right choice depends on your home’s layout, your personal style, and how much time you want to spend on upkeep. From the placement to the material, each decision shapes how you’ll enjoy your new outdoor space. Let’s walk through the most popular choices to help you find the perfect fit for your Long Island home.

Freestanding or Attached: Which Style Fits Your Home?

Your first big decision is where your pergola will live. An attached pergola connects directly to your house, creating a seamless extension of your indoor living area. It’s perfect for covering a patio or deck just outside your back door, offering a shaded, convenient space for dining and relaxing. On the other hand, a freestanding pergola can be placed anywhere in your yard. This offers incredible flexibility, allowing you to create a destination spot, like a poolside lounge, a garden retreat, or a focal point for your outdoor entertainment space. Think about how you want to use your yard to decide which style works best for you.

Wood Pergolas: Timeless Beauty and Natural Charm

If you love a classic, traditional look, a wood pergola is a fantastic choice. Materials like cedar or pressure-treated pine bring a natural warmth and beauty that blends beautifully with gardens and landscaping. Wood can be stained in a variety of colors, from rich mahogany to warm cedar tones, allowing you to customize it to match your home’s exterior. A wooden structure feels organic and timeless, creating a cozy and inviting atmosphere. It’s the perfect way to add architectural interest that complements the natural elements of your landscape design and creates a truly enchanting outdoor haven.

Vinyl Pergolas: Effortless Style That Lasts

For the look of wood without the regular maintenance, a vinyl pergola is an excellent solution. These structures are built with a strong, pressure-treated wood core that is completely covered in a durable, maintenance-free vinyl layer. This means you get the best of both worlds: the strength of wood and the easy-care convenience of vinyl. You’ll never have to worry about staining or sealing it. Vinyl pergolas come in several styles, from traditional to more modern designs, so you don’t have to sacrifice aesthetics for practicality. They are a smart, long-lasting choice for busy homeowners who want a beautiful pergola that looks great year after year.

Aluminum Pergolas: Modern, Durable, and Weather-Ready

When it comes to modern style and durability, nothing beats an aluminum pergola. These are especially well-suited for Long Island’s coastal environment, as they are built to withstand high winds, salt air, and heavy snow without rusting or deteriorating. Aluminum offers a sleek, clean look that complements contemporary homes and can be customized with features like motorized louvered roofs for ultimate control over sun and shade. While it can be a larger initial investment, an aluminum pergola’s resilience and minimal maintenance needs make it a worthwhile choice for a structure that will stand strong and look great for decades.

What Custom Features Can I Add to My Pergola?

A pergola is so much more than just four posts and a roof. Think of it as the foundation for your dream outdoor retreat. The real magic happens when you start adding custom features that reflect how you want to live, relax, and entertain outside. Modern pavilions and pergolas can be equipped with everything from automated roofs to integrated sound systems, turning a simple structure into a high-tech, comfortable, and beautiful extension of your home. It’s all about choosing the elements that will make the space uniquely yours.

Control Sun and Shade with a Motorized Louvered Roof

Imagine controlling the exact amount of sun or shade on your patio with just the push of a button. That’s the beauty of a motorized louvered roof. These advanced aluminum systems are built to withstand Long Island’s coastal weather, including strong winds, salt air, and even seasonal snow. On a bright, sunny day, you can angle the louvers to let in gentle light, and if a surprise shower rolls in, you can close them completely for full protection. This feature gives you total control over your environment, ensuring your outdoor space is comfortable and usable no matter what the weather has in store.

Set the Mood with Integrated Lighting, Fans, and Audio

The right ambiance can turn a nice evening into a memorable one. Many modern pergolas are designed with hidden channels for wiring, allowing for the seamless integration of custom features. You can add recessed LED lighting to cast a warm glow for late-night conversations or install a ceiling fan to create a gentle breeze on a warm summer afternoon. You can even build in an outdoor sound system to play your favorite music during a party. These thoughtful additions are built directly into the structure, creating a clean, polished look that feels like it was always meant to be there. You can see some stunning examples on the Gappsi YouTube channel.

Create the Ultimate Hub for Outdoor Entertaining

A pergola naturally creates an inviting atmosphere, making it the perfect centerpiece for outdoor gatherings. It defines a specific area for activity, transforming a simple patio into a designated outdoor dining room, a cozy lounge, or a poolside cabana. This structure provides a beautiful focal point that anchors your entire outdoor living space. When paired with a beautiful masonry patio and an outdoor kitchen, your pergola becomes the ultimate hub for hosting everything from casual family barbecues to elegant evening get-togethers with friends. It’s a practical and beautiful way to encourage connection and make lasting memories.

Add Privacy and Protection from the Elements

Sometimes you want your outdoor oasis to feel a little more secluded. Custom additions like retractable screens, curtains, or even solid drop-down walls can provide an extra layer of privacy from nearby neighbors. These features also offer fantastic protection from the elements, blocking harsh afternoon sun, gusty winds, or pesky insects. By enclosing one or more sides of your pergola, you can create a cozier, more intimate setting that feels like a three-season room without the cost and commitment of a full home remodeling project. This versatility ensures you can enjoy your outdoor space in comfort for more of the year.

What Does the Pergola Installation Process Look Like?

Bringing a pergola to life is more than just a weekend project. A professional installation ensures your new outdoor feature is beautiful, safe, and built to last for years. From the initial design sketches to the final bolt, a seamless process involves careful planning, expert craftsmanship, and a deep understanding of your specific property. When you work with an experienced team, you can relax knowing every detail is handled correctly, from securing the right permits to building a foundation that can handle Long Island’s coastal weather. This lets you focus on the fun part: dreaming about how you’ll enjoy your new space.

Understanding Local Permits and Building Codes

Before any construction begins, it’s essential to address local regulations. Most towns on Long Island, including those in Nassau and Suffolk County, require building permits for structures like pergolas. This process can feel a bit overwhelming, as it involves paperwork, site plans, and knowledge of specific zoning laws. The good news is that you don’t have to figure it out alone. At Gappsi, we manage the entire permitting process for you. Our team has decades of experience working with local building departments, ensuring your project is fully compliant from the start. This saves you time and prevents any potential issues down the road, giving you complete peace of mind.

Our Process: From 3D Design to Flawless Installation

We believe your pergola should be a perfect reflection of your vision. That’s why our process begins with a collaborative design phase. Using advanced 3D design software, we help you visualize exactly how your new pergola will look in your backyard. During this stage, we’ll explore all your options, from the overall style and dimensions to the specific materials you want to use. You can see how a freestanding structure looks by the pool or how an attached one complements your home’s architecture. This detailed approach ensures there are no surprises, and the final custom pergola we build is the one you’ve always wanted.

Building a Strong Foundation for Coastal Weather

Living on Long Island means your outdoor structures need to be tough enough to handle salty air, strong winds, and seasonal storms. A lasting pergola starts with a solid foundation. We pay close attention to building secure footings that anchor your structure firmly to the ground, preventing any shifting or instability over time. The materials we use are also chosen for their durability in our coastal environment. For example, aluminum offers incredible strength and corrosion resistance, making it a fantastic maintenance-free option. Our expert masonry services ensure that whether your pergola sits on a patio or its own footings, the base is built for maximum stability and longevity.

How a Pro Handles Common Installation Hurdles

A successful pergola installation is all about precision. Even a small mistake, like a layout that is slightly off-square, can create bigger problems as the build progresses. An experienced installer knows how to avoid these common pitfalls. Our professional crew ensures every post is perfectly plumb, every beam is level, and all connections are secure. We anticipate challenges, like uneven ground or tricky attachment points to your home, and have the expertise to solve them correctly. This attention to detail is what separates a professional job from a DIY attempt and guarantees your pergola not only looks flawless but is also structurally sound for decades of enjoyment.

How Much Does a Pergola Cost on Long Island?

Figuring out a budget for your new pergola is one of the most important first steps. While there isn’t a single price tag, the cost on Long Island is shaped by a few key factors. Think of it less like buying a product off the shelf and more like commissioning a custom piece of furniture for your backyard. The final price depends on the size of the structure, the materials you choose, the complexity of the installation, and any special features you want to include. A simple, standard-sized wood pergola will have a very different price point than a large, custom aluminum pergola with a motorized roof and built-in lighting.

Understanding these variables will help you set a realistic budget and make informed decisions. At Gappsi, we specialize in creating beautiful and functional pavilions and pergolas that are tailored to your home and lifestyle. We believe in transparency, so let’s walk through the main elements that influence the cost. By breaking it down, you can get a clearer picture of the investment required to bring your dream outdoor living space to life.

The Impact of Size and Customization

It makes sense that the bigger the pergola, the more it will cost. A larger footprint requires more materials and more labor to build. A cozy 10×10 foot structure for a small patio will be much more affordable than an expansive 20×30 foot pergola designed to cover an entire outdoor kitchen and dining area. Beyond just the dimensions, customization plays a huge role. If you’re looking for a unique shape to fit an awkward corner of your yard or want intricate, decorative details, these custom touches will add to the overall project cost compared to a standard, pre-designed kit.

How Your Material Choice Affects the Price

The material you select is one of the biggest factors in your pergola’s final cost. Classic wood pergolas offer timeless appeal and are often a mid-range option, but they do require regular maintenance. Vinyl is a durable, low-maintenance alternative that can be very budget-friendly. For a truly modern and long-lasting structure, aluminum is a premium choice. While it comes with a higher initial price, its incredible durability and 40-plus year maintenance-free lifespan make it a worthwhile investment for many Long Island homeowners. Each material offers a different look and level of upkeep, directly influencing both the upfront and long-term costs.

Factoring in Site Prep and Installation

Professional installation is about more than just putting the pieces together. It starts with proper site preparation. Your yard might need grading to create a level surface, or you may need a foundation like a concrete slab or footings to ensure the structure is stable, especially with our coastal weather. These preparatory steps are crucial for a safe and long-lasting installation and are factored into the project cost. Our expert masonry and construction teams handle all of this, ensuring your pergola is built on a solid foundation from the ground up.

Budgeting for Custom Features and Add-Ons

This is where you can truly make your pergola your own. Custom features are what transform a simple structure into a luxurious outdoor retreat, but they also add to the budget. Popular add-ons include motorized louvered roofs that let you control sun and shade with the touch of a button, integrated LED lighting for evening ambiance, and ceiling fans to keep you cool on warm summer days. You can even incorporate outdoor speakers or heaters. As you can see on our Gappsi YouTube channel, these features create an incredible experience, and we can help you prioritize which ones best fit your lifestyle and budget.

Thinking About Long-Term Maintenance Costs

When planning your budget, it’s smart to think about the total cost of ownership, not just the initial price. A wood pergola, for example, might have a lower upfront cost, but it will need to be stained or sealed every few years to protect it from the elements. Over the life of the pergola, these maintenance costs can add up significantly. In contrast, materials like aluminum and vinyl are virtually maintenance-free. They won’t rot, warp, or rust, saving you time and money for years to come. We even offer restoration and sealing services to keep all your outdoor surfaces looking their best.

Related Articles

Frequently Asked Questions

How long does the entire pergola installation process usually take? The timeline for a pergola project can vary quite a bit because every job is custom. Generally, you can expect the process to take several weeks from start to finish. This includes the initial design and 3D rendering phase, securing the necessary town permits, which we handle for you, and the actual construction. The complexity of the design and the specific materials you choose will also influence the schedule, but we keep you informed every step of the way.

Can a pergola be built on my existing patio? Yes, in many cases, we can absolutely build a pergola on an existing patio. The most important factor is the condition and strength of your patio’s foundation. Our team will carefully inspect the site to ensure the current base is stable enough to support the weight of the new structure. If any adjustments are needed, our masonry experts can seamlessly integrate the new footings to guarantee a safe and secure installation.

What’s the difference between a pergola and a pavilion? That’s a great question, as the terms are often used together. The main difference is the roof. A pergola is designed with a slatted or louvered roof that allows for partial sun and shade, creating a beautiful interplay of light. A pavilion, on the other hand, has a solid, continuous roof that offers full protection from both sun and rain, much like an open-air room.

How much maintenance should I expect with different pergola materials? The material you choose directly impacts your future to-do list. A classic wood pergola requires the most upkeep, needing to be re-stained or sealed every few years to protect it from the weather. A vinyl pergola is much easier, typically just needing a good cleaning to look its best. For a truly hands-off option, an aluminum pergola is the winner, as it requires virtually no maintenance to withstand the elements for decades.

Can these pergolas really stand up to Long Island’s weather? Absolutely, and this is precisely why professional installation and quality materials are so important. We build our pergolas with Long Island’s coastal weather in mind. This means creating deep, secure footings and using materials, like heavy-duty aluminum, that are engineered to handle high winds, heavy snow, and salt air without rusting or failing. A well-built pergola is a permanent and durable addition to your home.

A level concrete pad built to meet USA swim spa requirements.

Your Guide to Swim Spa Concrete Pad Requirements USA

Nothing jeopardizes the excitement of a new swim spa faster than a foundation failure. The most common and costly mistake we see homeowners make is underestimating the importance of the concrete pad. Placing a 20,000-pound structure on an unlevel or poorly constructed base is a recipe for disaster, potentially causing the spa’s shell to crack under the uneven pressure. This kind of damage is almost never covered by a manufacturer’s warranty. While a quick search for swim spa concrete pad requirements usa will give you the minimum thickness, it won’t explain the crucial role of steel reinforcement or a compacted gravel base. This guide details how to avoid these pitfalls and ensure your masonry foundation is built correctly from the start.

Key Takeaways

  • Go Beyond the Minimum for Your Pad: A swim spa’s immense weight requires more than a standard 4-inch pad. For true stability, your foundation should be a 6-inch thick concrete pad reinforced with steel rebar and built upon a compacted gravel base.
  • Plan Before You Pour: Careful site preparation is essential for a successful installation. This includes confirming a clear delivery path, professionally leveling the ground for proper drainage, planning for electrical work with a licensed pro, and securing all necessary local permits.
  • Don’t Risk Your Warranty on a Weak Foundation: An improper pad can cause structural damage, create safety hazards, and void your spa’s warranty. Investing in a professional installation is the best way to protect your new spa and ensure it lasts for years.

How Big and Thick Should Your Swim Spa Pad Be?

Getting a swim spa is incredibly exciting, but before you can start dreaming of your first dip, we need to talk about the foundation. The concrete pad your swim spa sits on is more than just a slab of concrete; it’s the support system that protects your investment for years to come. A pad that is too small or too thin can lead to serious problems, including damage to the spa itself.

The right foundation depends on the size of your spa, your local climate, and your property’s specific conditions. Getting these details right from the start is the most important step in a successful installation. Think of it as building a solid base not just for your spa, but for countless hours of relaxation and fun. Let’s walk through exactly what you need to know to create a durable and safe foundation for your new hot tub or swim spa.

What Is the Minimum Thickness?

When you start researching, you’ll often see a minimum thickness of four inches recommended for a reinforced concrete pad. While that’s a common industry baseline, it’s important to think of it as just that: a minimum. For a heavy-duty item like a swim spa, especially in a climate like Long Island’s with its freezing and thawing cycles, simply meeting the minimum might not be enough for long-term stability.

We generally advise our clients to consider a thicker pad for greater peace of mind. A slightly thicker foundation provides an extra margin of safety and durability, ensuring your pad won’t crack or shift under the immense weight. The exact thickness will depend on your specific spa model and site conditions, which is why professional guidance is so valuable.

Accounting for Your Spa’s Size and Weight

It’s easy to underestimate just how heavy a swim spa is. When filled with water and people, a swim spa can weigh over 20,000 pounds. That’s more than three large SUVs combined. This incredible weight is why a standard 4-inch concrete patio slab just won’t do the job. To properly support that load, the best choice is a 6-inch thick concrete pad that is reinforced with steel bars, or rebar. This combination creates a powerful foundation that can handle the pressure without failing.

The pad should also be slightly larger than the swim spa’s base, extending at least six inches on all sides. This provides a stable, level surface and makes it easier and safer to get in and out of the spa. Our masonry experts always plan for this extra space during the design phase.

Why You Need Expansion and Control Joints

Concrete looks solid, but it actually moves. It expands in the heat and contracts in the cold. Here on Long Island, where we experience all four seasons, this movement can cause a large, solid slab of concrete to crack. That’s where control joints come in. These are planned cuts made in the concrete surface that encourage cracking to happen in a neat, straight line within the joint, rather than in a jagged, uncontrolled way across the pad.

Expansion joints are similar, but they create a complete separation between the new pad and other structures, like your house foundation or an existing patio. This prevents the two slabs from pushing against each other and causing damage. Including these joints is a critical step for ensuring your swim spa pad survives our seasonal temperature swings.

How Long to Let the Concrete Cure

After your concrete pad is poured, the waiting game begins. It’s tempting to want to get your swim spa delivered and set up right away, but patience is essential. Concrete doesn’t just dry; it cures. Curing is a chemical process where the concrete hardens and gains its full strength. Placing a 20,000-pound spa on a pad that hasn’t fully cured can cause it to crack or settle, ruining the foundation before you’ve even used it.

While the surface may feel hard to the touch within a day or two, it takes about 28 days for most concrete mixes to reach their optimal strength. This timeline can vary based on the weather and the specific mix used. Proper installation is crucial for the safety and longevity of your spa, and allowing for adequate curing time is a non-negotiable part of that process.

What Materials Create a Durable Concrete Pad?

Creating a concrete pad that will last for years involves more than just pouring some cement and calling it a day. The real secret to a long-lasting foundation for your swim spa is using the right combination of high-quality materials. Think of it as a complete system where each component, from the ground up, plays a vital role in providing strength and stability. A properly constructed pad will prevent cracking, shifting, and sinking, ensuring your investment is protected for the long haul. When you get the materials right from the start, you’re building a base that can easily handle the immense weight of a swim spa filled with water and people, giving you total peace of mind.

Choosing the Right Concrete Mix

The concrete mix itself is the star of the show, and not just any mix will do. Your swim spa needs a solid, level surface that can support its significant weight, so a high-strength concrete is essential. We recommend a mix rated for at least 4,000 PSI (pounds per square inch) to provide the necessary durability. This ensures the pad won’t crumble or crack under the constant pressure. Using a standard, lower-strength mix might save a little money upfront, but it risks failing over time, leading to costly repairs. Our expert masonry team always uses the appropriate mix to create a foundation that’s built to last.

Rebar vs. Wire Mesh: Which Is Better?

To give your concrete pad extra strength and prevent it from cracking, it needs internal reinforcement. The two most common options are steel rebar and wire mesh. While wire mesh can help control small surface cracks, rebar is the superior choice for supporting a heavy structure like a swim spa. Rebar consists of thick steel rods arranged in a grid pattern, providing significant structural integrity and preventing large, deep cracks from forming. It helps the concrete slab resist the tension and flexing that can occur with ground movement or temperature changes. For the ultimate in durability and support, we always recommend reinforcing your swim spa pad with rebar.

The Importance of a Compacted Gravel Base

What lies beneath your concrete pad is just as important as the concrete itself. A properly prepared base of compacted gravel is critical for stability and drainage. This gravel layer, typically 4 to 6 inches deep, creates a solid, level foundation for the concrete to be poured on. More importantly, it allows water to drain away from the underside of the pad, preventing soil erosion and damage from frost heave during Long Island’s cold winters. Without a compacted base, the ground can shift and settle unevenly, causing your concrete pad to crack, sink, or tilt. Our landscape construction process always includes meticulous site preparation to ensure your foundation is secure.

How to Prepare Your Site Before Pouring Concrete

Before a single drop of concrete is poured, careful site preparation is the most critical step for a successful swim spa installation. This foundational work is what guarantees your spa will have a stable, secure home for decades of enjoyment. Rushing this stage can lead to frustrating and expensive issues later, from a damaged spa shell to persistent drainage problems. Think of it like the foundation of your house; you wouldn’t cut corners there, and the same logic applies to your backyard investment. We’ll walk through the essential steps you need to take, from ensuring the spa can actually get into your yard to planning for safe electrical connections. Taking the time to prepare your site correctly is the best thing you can do to protect your new oasis. At Gappsi, our teams handle this entire process, making sure every detail is covered.

Picking the Perfect Spot for Access and Delivery

First things first: can the swim spa physically get to its final destination? Before you get too attached to a specific spot, grab a tape measure. Swim spas are large, typically eight feet wide, and the delivery path needs a clear, wide berth from the street to the pad. You’ll need to measure gates, side yards, and any tight corners. Don’t forget to look up, as overhanging tree limbs, roof eaves, and utility lines can stop a delivery in its tracks. Planning the route ahead of time prevents a stressful and potentially costly surprise on installation day. Our swimming pool installation teams are experts at logistical planning and can help you assess the best path for a smooth delivery.

Leveling the Ground and Ensuring Proper Drainage

A perfectly level surface is non-negotiable for your swim spa. If the pad is uneven, it places imbalanced stress on the spa’s shell, which can lead to cracks and even void your warranty. The site must be professionally graded and compacted to create a solid, flat footing. Beyond being level, the area needs proper drainage. Water from splashing, rain, and routine maintenance has to go somewhere. A gentle slope directing water away from your home’s foundation and the spa’s equipment is essential. Proper site preparation and masonry work are key to preventing pooling water and potential moisture damage down the line.

Considering Soil Conditions and Frost Lines

The ground beneath your spa pad plays a huge role in its stability. On Long Island, soil conditions can vary, so it’s important to create a base that won’t shift or settle over time. This usually involves excavating the area and laying a compacted gravel base before pouring concrete. You also have to account for the frost line. During our cold winters, the ground freezes and expands, and a shallow pad can heave and crack. The foundation must be designed to withstand these seasonal shifts. This is where professional landscape design and construction expertise becomes invaluable, as we understand how to build lasting structures in our local climate.

Planning for Electrical Needs and GFCI Protection

A swim spa requires a significant amount of power, so electrical planning is a major safety consideration. This is not a DIY project. Most swim spas need a dedicated 240V circuit, which must be installed by a licensed electrician to meet local and national codes. A critical component of this installation is a Ground Fault Circuit Interrupter, or GFCI. This device is designed to quickly shut off power if it detects any electrical imbalance, protecting you and your family from shock. Coordinating with professionals for your home improvement projects ensures all electrical work is done safely and correctly from the start.

Checking Local Permits and Regulations

Before you break ground, you need to know the rules. Most towns in Nassau and Suffolk County require a permit for a swim spa installation. These local regulations often dictate exactly where you can place your spa, including setback requirements from property lines, your house, and septic systems. There may also be specific rules regarding safety barriers, like fencing or a locking cover, to prevent accidents. Navigating these codes can be confusing, but it’s a necessary step. Working with an experienced local contractor like Gappsi simplifies the process, as we are familiar with the permit requirements across Long Island and can manage the paperwork for you.

What Happens If Your Swim Spa Pad Is Built Incorrectly?

Investing in a swim spa is a fantastic decision for your home and well being, but the excitement can quickly turn into a costly headache if the foundation isn’t right. A properly constructed concrete pad is not just a suggestion; it’s a requirement for the safety, function, and longevity of your spa. Cutting corners on the pad might seem like a way to save a little money upfront, but it almost always leads to much bigger, more expensive problems down the road. From structural damage to serious safety risks, a faulty foundation can jeopardize your entire investment. Let’s walk through exactly what can go wrong and, more importantly, how to make sure it’s done right from the start.

Risks to Your Warranty and Spa Structure

An unlevel or unstable pad is your swim spa’s worst enemy. The spa’s shell is designed to hold thousands of pounds of water, but it needs to be perfectly supported to do so. If the pad is uneven, it creates pressure points and puts immense stress on the acrylic shell. Over time, this uneven load can cause the shell to warp or even develop cracks, leading to leaks that are difficult and expensive to repair. Even worse, most manufacturer warranties are very clear that damage caused by an improper foundation is not covered. This means a simple mistake during installation could void your warranty and leave you responsible for all repair costs on your brand new swim spa.

Potential Electrical and Safety Hazards

Beyond structural damage, a poorly built pad introduces serious safety concerns, especially regarding the electrical system. Your swim spa requires a dedicated, high-voltage electrical connection. If the pad shifts, settles, or cracks, it can strain or damage the electrical conduit and wiring. This creates a significant risk of electrical shorts or, in the worst case, electrical shock. For this reason, all electrical work must be completed by a licensed electrician who can install the necessary GFCI (Ground Fault Circuit Interrupter) protection. A professional home improvement team ensures the entire setup, from the pad to the wiring, meets strict safety codes to protect you and your family.

Avoiding Long-Term Drainage and Maintenance Problems

Proper site planning goes beyond just the pad itself. Think about where all the water will go. An incorrectly graded site can cause rainwater or splash out to pool around the base of your swim spa, which can erode the soil under the pad and lead to instability. It also creates a mess in your yard and can damage surrounding landscaping. Furthermore, you will need to drain your spa periodically for maintenance. A well-designed installation includes a plan for where this large volume of water can be safely directed. Without proper landscape and drainage planning, a routine task can become a major logistical problem.

How to Avoid Common Installation Mistakes

The good news is that all these problems are completely avoidable with a professional installation. The most common mistakes come from trying to cut corners. Never install a swim spa directly on grass, soil, or an uneven patio. You should also never try to “shim” a spa by placing blocks of wood or other objects underneath it to make it level; this creates dangerous pressure points. The only correct method is to start with a properly leveled site and a professionally poured concrete pad. By working with an experienced masonry and construction company, you can be confident that your foundation is built to last and will provide a safe, stable base for years of enjoyment.

How Much Does a Swim Spa Concrete Pad Cost?

Let’s talk numbers. Budgeting for a new swim spa is exciting, but it’s easy to focus only on the price of the spa itself. The foundation it sits on is just as important, and its cost is a key part of your total investment. Think of the concrete pad as the unsung hero of your backyard oasis. A properly installed pad ensures your swim spa remains stable, safe, and functional for years to come. Cutting corners here can lead to serious headaches and costly repairs down the road, so it’s wise to get it right from the start.

The final price tag for a concrete pad can vary quite a bit. While there’s a general cost per square foot for concrete, the total expense depends on several factors unique to your property and project. Things like the size of your spa, the condition of your yard, and any special requirements for installation will all play a role. We’ll break down these costs so you can create a realistic budget and feel confident in your planning. From the concrete itself to site preparation and those little details you might not have thought of, we’ve got you covered. Gappsi has been building incredible outdoor spaces since 1987, and we know that a solid foundation is the first step to creating your dream swimming pool or spa area.

Breaking Down the Cost Per Square Foot

When you start looking at quotes, you’ll often see the cost of concrete broken down per square foot. Generally, you can expect a concrete slab to cost between $3 and $7 per square foot for the material and basic installation. So, for a typical 8-foot by 15-foot swim spa, you’d need a pad that’s at least 120 square feet. This puts your starting cost somewhere between $360 and $840.

Keep in mind, this is just a baseline. This price range usually covers the concrete itself and the labor to pour and finish it. It doesn’t typically include the necessary groundwork, reinforcement like rebar, or any complex finishing touches. It’s a helpful starting point for your budget, but the final price will be higher once all the essential components of a durable foundation, like those used in professional masonry, are added.

What Factors Affect the Final Price?

Several key factors can influence the final cost of your swim spa pad, moving it beyond the basic price per square foot. First is the size of your swim spa. A larger spa requires a larger, thicker pad, which naturally increases material and labor costs. Second is site preparation. If your chosen spot isn’t perfectly level or has poor soil, significant work may be needed to grade the land and create a stable base. Accessibility is another big one; if your backyard is hard to reach, a crane might be needed to place the spa, which is an additional rental fee.

Finally, don’t forget the electrical and plumbing work. A licensed electrician must run a dedicated circuit to power your spa safely, and this is a crucial part of the installation budget. These elements are all part of a comprehensive home remodeling project and contribute to the final price.

Budgeting for Sealing, Inspections, and Maintenance

Beyond the concrete and labor, there are a few other costs to plan for. Sealing the concrete pad is a smart move. A good sealant protects the concrete from water, chemicals, and the freeze-thaw cycles we experience on Long Island, extending its life. This is a small upfront cost that prevents bigger problems later. You can explore professional restoration and sealing services to ensure the job is done right.

You should also budget for any necessary permits and inspections required by your local town. These fees vary but are essential for ensuring your installation is up to code. Lastly, think about drainage. Proper site preparation includes planning where water will go when you eventually drain your spa. A good drainage plan prevents water from pooling around the foundation or creating a swampy mess in your yard.

Related Articles

Frequently Asked Questions

Can I just put the swim spa on my existing concrete patio? This is a common question, but unfortunately, the answer is almost always no. Most standard patios are only about four inches thick and lack the steel reinforcement needed to support the immense weight of a filled swim spa. Placing a 20,000-pound spa on a typical patio slab is a recipe for cracks in both the patio and your new spa, which would likely void your warranty. A dedicated, professionally built pad is the only way to ensure a safe and stable foundation.

Is a 6-inch thick pad really necessary if the minimum is 4 inches? While some sources mention a four-inch minimum, we strongly recommend a six-inch thick, rebar-reinforced pad for any swim spa installation on Long Island. Think of the extra two inches as an investment in long-term stability. Our climate’s freeze and thaw cycles put a lot of stress on concrete, and the extra thickness provides superior strength to prevent cracking and shifting under the spa’s heavy, constant load.

How much will site preparation add to the total cost? The cost for site preparation can vary significantly because it depends entirely on your property’s current condition. A yard that is already flat and clear will require much less work than a sloped or uneven site that needs extensive excavation, grading, and the addition of a compacted gravel base. The only way to get a precise figure is to have a professional assess the site, which is a standard part of our planning process.

Do I need to worry about permits for a swim spa in Long Island? Yes, you absolutely do. Most towns across Nassau and Suffolk County require permits for swim spa installations. These regulations are in place for your safety and dictate important details like how far the spa must be from property lines and your house. They also ensure all electrical work is performed to code. Working with an experienced local company simplifies this, as we can manage the permit process for you.

What happens if I don’t let the concrete cure for the full 28 days? It is incredibly tempting to rush this step, but patience is key. Concrete gains its strength through a chemical curing process, and the surface hardening in a day or two is deceptive. Placing a heavy swim spa on the pad before it has reached its optimal strength can cause the foundation to crack or settle unevenly. This can permanently damage the pad and compromise the support for your spa, potentially voiding its warranty.