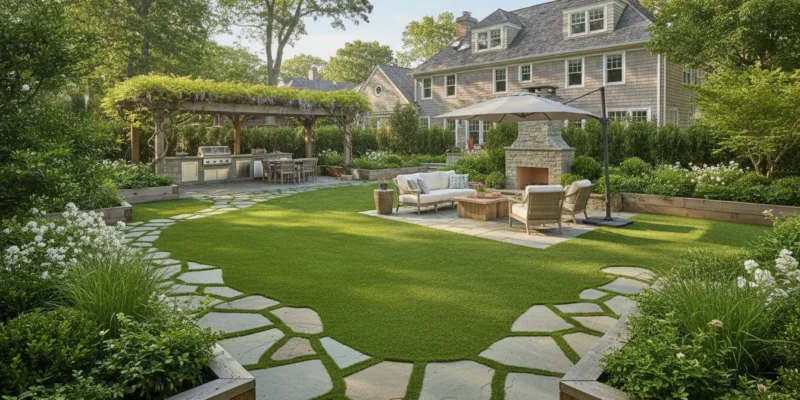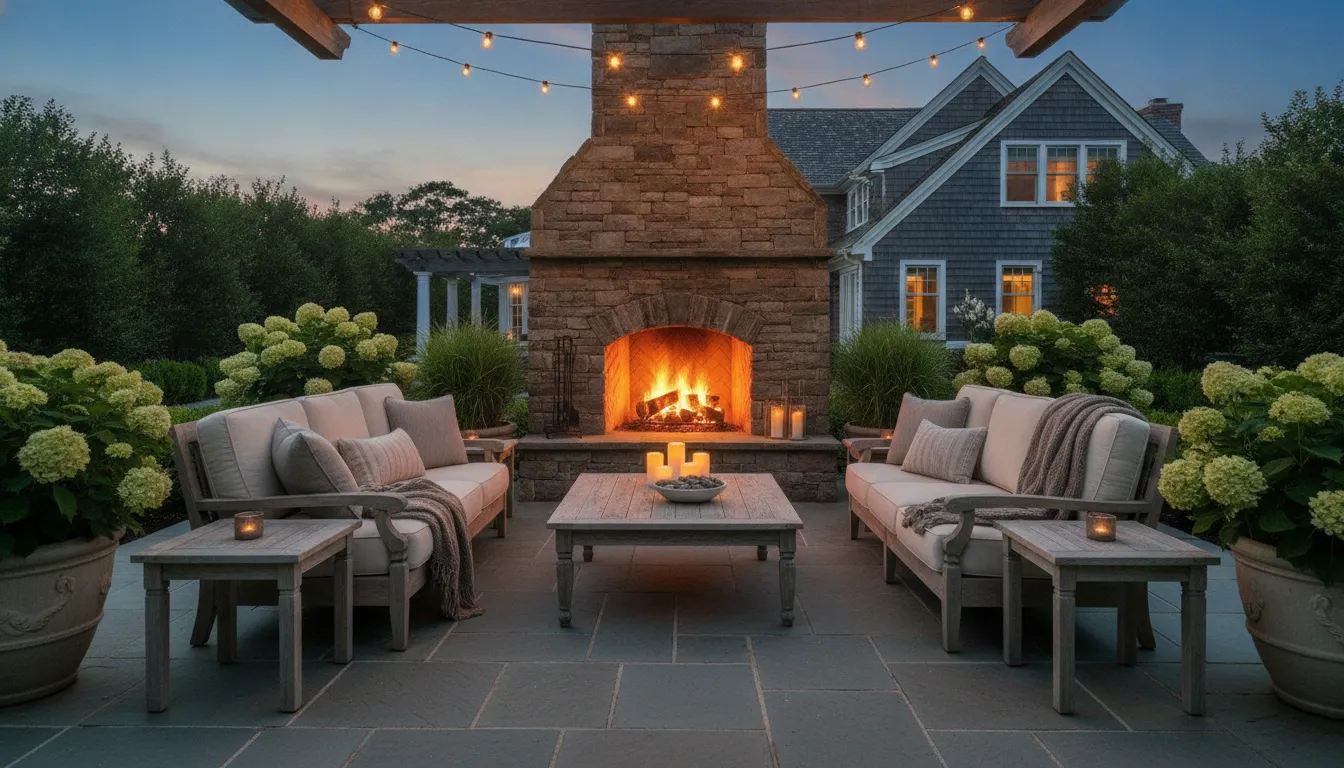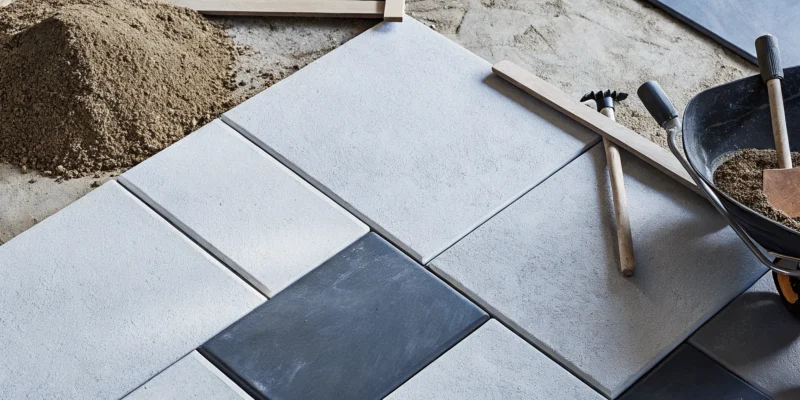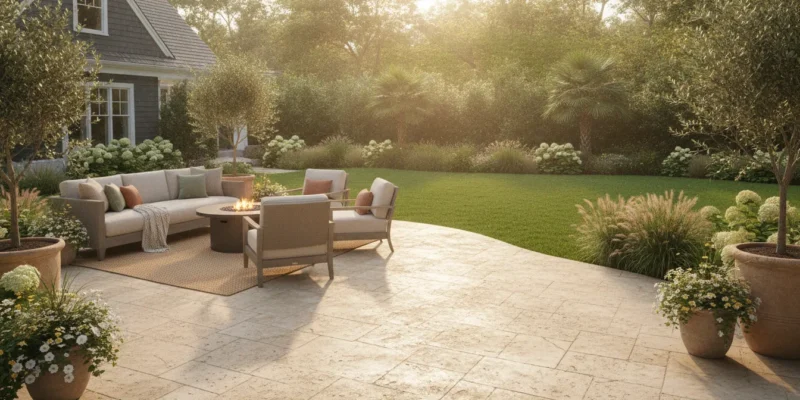
Custom outdoor kitchen with a pergola built by a professional construction company.

Custom Outdoor Kitchen Construction Company: A Hiring Guide

If you love to cook and entertain, a simple patio grill can feel limiting. A fully equipped outdoor kitchen opens up a whole new world of culinary possibilities right in your backyard. Think beyond burgers and hot dogs to wood-fired pizzas, slow-smoked brisket, and cocktails mixed at your own outdoor bar. This space becomes the heart of your social life, creating a relaxed and inviting atmosphere for friends and family. A specialized custom outdoor kitchen construction company can help you design a layout tailored to your specific cooking style, incorporating everything from high-performance grills to sinks and refrigeration, making outdoor entertaining truly effortless and enjoyable.

Key Takeaways

  • Hire a professional for end-to-end management: A design-build expert handles everything from creating a custom layout and securing permits to overseeing construction, ensuring a cohesive project and saving you from managing multiple contractors.
  • Plan for longevity and practical use: Choose durable, weather-resistant materials like porcelain and stainless steel, and design a functional layout with a smart workflow to ensure your kitchen is both beautiful and easy to use for years.
  • Think beyond the grill to create an experience: A custom outdoor kitchen is an investment that increases your home’s value, expands your living space, and creates a central hub for entertaining and making memories outdoors.

What Does a Custom Outdoor Kitchen Builder Do?

A custom outdoor kitchen builder does much more than just assemble appliances in your backyard. Think of them as your partner in creating a functional and beautiful outdoor living space from the ground up. Their job is to guide you through every stage of the project, from the initial idea to the final installation. They combine the skills of a designer, a project manager, and a construction expert to bring your vision to life.

A great builder ensures your new kitchen not only looks amazing but also works perfectly for your lifestyle. They handle the complex logistics, like coordinating different trades, securing permits, and making sure every detail is just right. This comprehensive approach transforms a potentially stressful renovation into a smooth and exciting process. They are responsible for planning the layout, sourcing the best materials for the job, and managing the entire build so you don’t have to. You can see examples of these transformations on the Gappsi YouTube channel.

Plan and Design Your Space

The first thing a builder does is get to know you. They’ll ask about how you like to cook, who you entertain, and what kind of vibe you want for your space. This conversation is key to creating a kitchen that truly fits your needs. They work with you to develop a custom design that complements your home’s style and makes the most of your available yard space. A professional helps you think through the workflow, ensuring your grill, sink, and prep areas are arranged for maximum convenience.

This collaborative design process is all about creating a space that is uniquely yours. Your builder will provide expert advice on layout and features, helping you craft a kitchen that is both practical and beautiful. With their experience in landscape design, they can integrate your kitchen seamlessly into your overall outdoor environment, making it feel like a natural extension of your home.

Select High-Quality Materials

Choosing the right materials is critical for an outdoor kitchen, especially with Long Island’s variable weather. A good builder will guide you toward durable, weather-resistant options that can handle sun, rain, and snow without losing their appeal. They have the expertise to recommend materials that offer the perfect balance of style, function, and longevity. This includes everything from the base structure to the countertops and cabinetry.

They’ll introduce you to high-quality choices like stainless steel for appliances and cabinets, which resist rust and corrosion. For countertops and veneers, they might suggest beautiful and resilient options like natural stone or modern porcelain pavers. By using top-tier masonry and other materials, your builder ensures your investment is protected and your kitchen remains a stunning feature for years to come.

Build and Install Your Kitchen

Once the design is finalized and materials are chosen, your builder takes on the role of project manager. They oversee the entire construction and installation process, making sure everything runs smoothly and on schedule. This includes preparing the site, running utility lines for gas, water, and electricity, and constructing the kitchen’s framework. They coordinate all the moving parts, so you have a single point of contact and peace of mind.

A full-service builder also handles the administrative details, like securing necessary building permits and navigating any homeowner association rules. Their team of skilled craftspeople then brings the design to life, installing everything from the cabinets and countertops to the grill and refrigerator. This end-to-end management is what makes working with a professional home remodeling company so valuable, ensuring a high-quality result without the headache.

Why Build a Custom Outdoor Kitchen?

Thinking about adding an outdoor kitchen? It’s one of the most rewarding home improvement projects you can take on. This isn’t just about adding a grill to your patio. A custom outdoor kitchen is a fully functional space that extends your home into the backyard, creating a new hub for cooking, dining, and entertaining. It’s an investment that pays off in multiple ways, from making your home the go-to spot for gatherings to adding significant value to your property.

Imagine hosting a summer barbecue without constantly running inside for supplies, or enjoying a quiet dinner under the stars with everything you need right at your fingertips. A well-designed outdoor kitchen transforms your backyard from a simple patch of grass into a true outdoor living room. It blends the beauty of nature with the comfort and convenience of your indoor space. With the right design, materials, and appliances, you can create a beautiful and practical area that enhances your daily life and makes your home a more enjoyable place to be. This project is a key part of a complete home remodeling vision, seamlessly connecting your indoor and outdoor living areas.

Enjoy Your Yard Year-Round

An outdoor kitchen fundamentally changes how you use your property. It expands your living space, making it easier to host parties and family gatherings without feeling cramped. Instead of guests crowding into your indoor kitchen, they can gather in the fresh air while you cook. This creates a more relaxed and open atmosphere for everyone.

With the right planning, your outdoor kitchen isn’t just for summer. Adding a pavilion or pergola provides shelter from the sun and rain, while features like built-in heaters can make the space comfortable on cooler evenings. You’ll find yourself drawn outside more often, enjoying your yard through spring, summer, and fall. It’s about maximizing your property and creating a functional, beautiful space for every season.

Increase Your Home’s Value

A custom outdoor kitchen is more than just a lifestyle upgrade; it’s a smart financial investment. In desirable areas like Long Island, a well-designed outdoor kitchen can significantly increase your home’s resale value. In fact, for many homeowners, the return on investment can be substantial. Outdoor luxury kitchens have become a highly sought-after feature that buyers actively look for, making your home stand out in a competitive market.

Investing in high-quality materials and craftsmanship ensures your kitchen not only looks great but also adds lasting value. Beautiful masonry work, durable countertops, and top-of-the-line appliances signal quality to potential buyers. Think of it as an investment in your property’s future, one that you get to enjoy every day until it’s time to sell.

Upgrade Your Entertainment and Lifestyle

An outdoor kitchen is more than just a grill; it’s a designed living space that improves your outdoor lifestyle. These spaces are about creating memories using elements you can’t easily add indoors, like wood-fired pizza ovens and smokers. Imagine hosting pizza nights where everyone gets to build their own pie, or slow-cooking brisket for a weekend gathering. It opens up a whole new world of culinary possibilities.

This space becomes the heart of your backyard, a natural gathering spot that complements other features like a patio or swimming pool. It encourages you to spend more time outdoors with the people you love, turning ordinary evenings into special occasions. It’s about creating a lifestyle centered on good food, great company, and the simple pleasure of being outside.

Key Materials and Appliances for Your Outdoor Kitchen

Building a beautiful and functional outdoor kitchen comes down to choosing the right components. The materials you select need to withstand Long Island’s weather, while the appliances should match your cooking and entertaining style. A well-designed space uses premium materials and expert craftsmanship to create a kitchen that is not only stunning but also durable for years of enjoyment. From the countertops to the grill, every choice plays a role in creating your perfect outdoor culinary hub. Let’s explore the key elements that will bring your dream kitchen to life.

Durable Surfaces: Stone, Masonry, and Porcelain

Your outdoor kitchen surfaces face the elements year-round, so durability is non-negotiable. For the kitchen’s structure and facade, materials like natural stone, brick, and stucco are excellent choices that offer a timeless look and incredible resilience. When it comes to countertops, you need a non-porous, tough material that can handle hot pans, spills, and changing temperatures. We often recommend high-quality porcelain and natural stone pavers or granite because they resist staining, fading, and cracking. Investing in quality masonry and surfaces ensures your kitchen remains a beautiful focal point in your backyard for decades.

Weatherproof Cabinetry and Finishes

Proper storage is essential for a functional outdoor kitchen, but you can’t just use indoor cabinets. Outdoor cabinetry must be completely weatherproof to protect your cookware and supplies from moisture, pests, and temperature swings. Stainless steel is a popular and durable option, offering a sleek, modern look that resists rust and corrosion. For a warmer aesthetic, you might consider marine-grade polymer cabinets, which are engineered to repel water and will not warp or fade in the sun. Choosing the right weatherproof cabinetry ensures your outdoor kitchen stays organized and protected, reducing maintenance and preserving its beauty.

Essential Cooking Appliances: Grills, Smokers, and Pizza Ovens

The heart of any outdoor kitchen is its cooking appliances. A high-performance built-in grill is usually the centerpiece, but your options don’t stop there. Think about how you love to cook and entertain. If you’re a barbecue enthusiast, a dedicated smoker can help you perfect your brisket and ribs. For family-friendly fun, nothing beats a wood-fired pizza oven, which can also be used for baking bread or roasting vegetables. You can find a wide range of high-quality appliances at the Gappsi Store to fit your specific culinary needs. Selecting the right appliances transforms your space from a simple patio to a true chef’s paradise.

Must-Haves: Refrigeration, Sinks, and Storage

To make your outdoor kitchen truly self-sufficient, you need more than just a grill. An outdoor-rated refrigerator is a game-changer, keeping drinks cold and ingredients fresh without constant trips back inside the house. A built-in sink is another must-have, providing a convenient spot for washing hands, prepping food, and cleaning up. When paired with weatherproof cabinets, these features create a complete, functional workspace. This level of convenience is especially valuable when your kitchen is part of a larger entertainment area, perhaps next to one of Gappsi’s custom swimming pools, making outdoor living seamless and enjoyable.

Add a Pavilion or Pergola for Cover

To get the most use out of your outdoor kitchen, you need protection from the elements. A pavilion or pergola not only provides shade on sunny days and shelter from light rain but also defines the kitchen as a distinct “room” within your backyard. A sturdy roof protects your expensive appliances and countertops from weather damage, extending their lifespan. Plus, it allows you to cook and entertain comfortably, no matter the forecast. Gappsi designs and builds beautiful pavilions and pergolas that integrate perfectly with your outdoor kitchen, creating a cohesive and inviting space for year-round use.

How Your Choices Affect the Budget

The cost of an outdoor kitchen can vary widely, and your material and appliance selections are the biggest factors. A simple setup with a basic grill and standard countertops will be more affordable than a large, custom kitchen with high-end appliances, a pizza oven, and exotic stone finishes. It’s helpful to think about your priorities. Are you a gourmet chef who needs a professional-grade grill, or do you value having a large bar for entertaining? Understanding how each choice impacts the overall cost allows you to make informed decisions. Working with our design team helps you balance your wish list with your budget to create a space you love.

Your Outdoor Kitchen Project: Step by Step

Bringing an outdoor kitchen to life is an exciting process, but it can feel like a huge undertaking. When you work with a design-build team, they guide you through every phase, turning a complex project into a series of clear, manageable steps. From the first conversation to the final walkthrough, a structured approach ensures your vision is executed perfectly. Here’s a look at what you can expect when you partner with a professional builder for your custom outdoor kitchen.

Step 1: Initial Consultation and Site Review

The journey begins with an initial consultation where you share your ideas, inspiration, and goals. This is the time to discuss how you envision using the space, whether it’s for quiet family dinners or large-scale entertaining. A designer will visit your home to conduct a thorough site review, taking measurements and assessing the landscape. They’ll also evaluate access to essential utilities like water, gas, and electricity. This first meeting is crucial for establishing a realistic budget and timeline, ensuring the project starts on a solid foundation. The entire design-build process, from this first review to material selection, is designed to be collaborative and transparent.

Step 2: Custom Design and Layout

After the initial meeting, your ideas start taking shape. A professional designer treats your outdoor kitchen as a true extension of your home, not just an accessory dropped onto a patio. They create a custom layout that is both beautiful and highly functional, considering workflow and how the kitchen will connect with other outdoor areas like your pool or lounge seating. Using 3D renderings, you can visualize the entire space before construction begins. This allows you to make adjustments to the design, from appliance placement to countertop materials, ensuring the final result perfectly matches your expectations for home remodeling and outdoor living.

Step 3: Permits, Prep, and Construction

With a finalized design, your builder handles the technical details, including securing necessary permits and any required HOA approvals. This step saves you from dealing with complex paperwork and local regulations. Next, the construction crew prepares the site, which may involve excavation, grading, and running utility lines. Then, the building begins. Experienced contractors will construct the kitchen’s foundation and structure, followed by the installation of porcelain and natural stone countertops, weatherproof cabinetry, and appliances. Working with a skilled team makes a significant difference in the quality and durability of your project, ensuring it’s built to last.

Step 4: Final Walkthrough and Finishes

As construction wraps up, the team adds the finishing touches that bring your outdoor kitchen to life. This includes installing lighting fixtures, connecting the sink, adding cabinet hardware, and applying any necessary sealants to protect your new surfaces. Once everything is complete, your project manager will conduct a final walkthrough with you. They will demonstrate how to use your new appliances, answer any questions you have, and confirm every detail meets your approval. This commitment to craftsmanship and customer satisfaction ensures you are completely happy with the finished space and ready to start enjoying it.

Popular Outdoor Kitchen Design Trends

Thinking about what you want your outdoor kitchen to look like is one of the most exciting parts of the process. While your personal style is always the most important factor, looking at current trends can give you some great ideas for creating a space that is both beautiful and functional. Today’s outdoor kitchens are so much more than just a grill on a patio. They are sophisticated, comfortable, and designed to be the heart of your backyard. From creating a smooth flow between your indoor and outdoor spaces to incorporating smart technology, these popular trends focus on making your outdoor kitchen a true extension of your home.

Seamless Indoor-Outdoor Living

The line between inside and outside is beautifully blurring. Modern outdoor kitchens are designed to feel like a natural extension of your indoor living area, creating one large, cohesive space for relaxing and entertaining. This trend is about more than just placing a kitchen outside; it’s about matching the style and comfort of your home’s interior. Using complementary materials like porcelain and natural stone for both your indoor flooring and outdoor patio can create a visual connection that makes the transition feel effortless. The goal is to build a space for making memories, complete with all the comforts you expect inside but with unique outdoor features like a pizza oven or a smoker.

Smart Tech and Entertainment

Your outdoor kitchen can be just as connected as the rest of your home. Homeowners now expect their outdoor spaces to include smart technology for convenience and better entertainment. Imagine adjusting your patio lights with your phone, playing your favorite playlist through integrated, all-weather speakers, or turning on a motorized screen to block the afternoon sun. These tech-forward features make hosting gatherings simpler and more enjoyable. Integrating this technology requires careful planning, which is why working with a builder who understands both home remodeling and outdoor construction is key to getting it right.

Sustainable Materials

Homeowners are increasingly looking for beautiful, durable, and environmentally friendly materials for their outdoor kitchens. Sustainability can mean a few different things here. It might involve choosing materials that are responsibly sourced or using products that are incredibly long-lasting, which reduces the need for future replacements. High-quality porcelain pavers, for example, are not only stunning but also resistant to stains and weather, ensuring they look great for decades. This focus on sustainability doesn’t mean you have to compromise on style. There are many eco-conscious options that deliver a high-end look while giving you peace of mind.

All-in-One Entertainment Spaces

An outdoor kitchen is no longer just a spot for cooking. It’s the functional hub of a complete outdoor entertainment zone. The best designs consider how the kitchen relates to everything around it, from the dining area and lounge seating to the swimming pool or even a backyard putting green. You can create the ultimate destination by placing your kitchen under a pavilion or pergola, which provides shelter and defines the space. By thinking about the entire backyard as one big picture, you can design a layout that encourages connection and makes your home the go-to spot for family fun and social gatherings.

How to Choose the Right Outdoor Kitchen Builder

Finding the right builder is just as important as choosing the perfect grill or countertop. This partnership will shape your entire experience, from the initial design sketches to the final toast in your new space. The right team will not only bring your vision to life but also ensure the project runs smoothly and results in a beautiful, functional kitchen that lasts for years. Working with an experienced outdoor kitchen contractor can make a huge difference in how your project turns out. To make sure you find the best fit, focus on a few key areas: their experience, the quality of their work, their credentials, and what past clients have to say. Taking the time to vet your builder thoroughly is the best investment you can make in your project.

Review Their Experience and Portfolio

When you start looking for a builder, their portfolio is your first window into their work. You want to see a proven track record of designing and constructing outdoor kitchens specifically. Look for a gallery of completed projects that showcases a range of styles and complexities. Does their work align with your vision? Pay close attention to the details in their photos, like the precision of the stonework and the seamless integration of appliances. A robust portfolio demonstrates not just skill but also experience in tackling the unique challenges of outdoor construction, from layout and materials to utilities and long-term usability. An experienced team will have the foresight to guide you through every decision.

Assess Their Services and Craftsmanship

Creating a stunning outdoor kitchen requires a blend of thoughtful design, premium materials, and expert craftsmanship. The ideal builder offers comprehensive services, managing the project from concept to completion. This integrated approach means you have one point of contact, which simplifies communication and ensures a cohesive final product. Ask potential builders about their process. Do they handle everything in-house, including masonry, appliance installation, and utility connections? High-quality craftsmanship is visible in the finished product, so look for a builder who takes pride in their attention to detail and uses durable, top-tier materials designed to withstand the elements.

Confirm They Are Licensed and Insured

This step is non-negotiable. Before you sign any contracts, confirm that your builder is fully licensed and insured to work in your area. A valid license proves they meet local and state regulations for construction, while insurance protects you from liability. Ask for copies of their general liability insurance and worker’s compensation certificates. The biggest mistake homeowners make is assuming every construction company is qualified for specialized work. A professional builder will gladly provide their credentials. You can also verify a contractor’s license with the state to ensure everything is current and in good standing, giving you peace of mind that your investment is protected.

Get Clear Pricing and a Realistic Timeline

A trustworthy builder will be transparent about costs and timelines from the start. Instead of a single lump-sum price, ask for a detailed, itemized proposal that breaks down the costs for materials, labor, appliances, and permits. This clarity helps you understand exactly what you are paying for and where you can make adjustments if needed. Similarly, a realistic timeline is crucial. Your builder should outline each phase of the project and provide an estimated completion date, while also being upfront about potential delays due to weather or supply issues. A clear contract that documents the full scope of work, payment schedule, and timeline is essential for keeping everyone on the same page.

Check Reviews and Ask for References

Online reviews and client testimonials offer honest insight into what it’s like to work with a builder. Look for feedback that speaks to the company’s communication, professionalism, and quality of work. According to customer feedback, Gappsi, Inc. consistently impresses with its high standards and attentive staff, which is the kind of reputation you want. Don’t stop at online reviews, though. Ask the builder for a list of recent references you can contact directly. Speaking with a past client allows you to ask specific questions about their experience, from how the team handled unexpected issues to whether the project stayed on budget. You can read reviews to get a feel for a company’s track record.

Common Mistakes to Avoid When Planning Your Outdoor Kitchen

Building an outdoor kitchen is an exciting project, but a few common missteps can turn your dream into a headache. Planning is everything. Without a solid approach, it is easy to overlook details that affect your kitchen’s performance, durability, and your overall satisfaction. Thinking through these potential issues ahead of time ensures your investment is one you’ll enjoy for years. Working with an experienced outdoor kitchen builder can make a significant difference in how well your project turns out, as they can help you sidestep these common mistakes from the very beginning.

Forgetting About Utilities and Permits

One of the first things to consider is how you’ll run utilities to your outdoor kitchen. You’ll need plumbing for a sink, electrical lines for refrigeration and lighting, and a gas line for the grill. These elements are foundational to your kitchen’s design and function, so they can’t be an afterthought. A professional team will map out all the necessary utility connections during the design phase. They will also handle the required local permits for construction, plumbing, and electrical work, ensuring your project is safe, compliant, and built to last. This is a critical step where professional home remodeling expertise becomes invaluable.

Picking Materials That Can’t Handle the Weather

Your outdoor kitchen will be exposed to everything Long Island weather throws at it, from hot summer sun to freezing winter temperatures. Selecting materials that can’t withstand the elements is a recipe for disappointment. Countertops can crack, cabinets can warp, and metal fixtures can rust if they aren’t rated for outdoor use. We recommend durable surfaces like porcelain and natural stone, which resist moisture, stains, and temperature changes. Weatherproof cabinetry and stainless steel appliances are also essential for creating a beautiful kitchen that endures season after season with minimal maintenance.

Ignoring Kitchen Layout and Workflow

A beautiful outdoor kitchen that’s frustrating to use isn’t much of a success. Overlooking the importance of layout and workflow is a frequent mistake. Think about how you use your indoor kitchen; the same principles apply outside. A functional design often includes work zones for prepping, cooking, and cleaning. Consider the classic “kitchen triangle” to keep the grill, sink, and refrigerator within easy reach of each other. A thoughtful layout makes cooking and entertaining feel effortless. You can explore Gappsi’s YouTube channel to see how our designs create a seamless flow in outdoor living spaces.

Not Setting a Clear Budget

An outdoor kitchen is a significant investment, and it’s easy for costs to spiral without a clear budget. Before you begin, decide what you are comfortable spending and communicate that to your builder. A common mistake is assuming every construction company can deliver the same quality for the same price. A trustworthy partner will provide transparent pricing and help you make smart decisions about materials and appliances that fit your budget. They can suggest where to invest for the biggest impact and where you might be able to save, ensuring you get the best possible value without any surprise expenses along the way.

Build Your Dream Outdoor Kitchen with Gappsi

Turning your backyard into a culinary destination is an exciting project, and you don’t have to do it alone. At Gappsi, we specialize in creating custom outdoor kitchens that are as functional as they are beautiful. Our design-build process begins with a personal consultation to understand your vision. We then create a detailed 3D layout, allowing you to see and refine your dream kitchen before we even break ground. This careful planning ensures every detail, from appliance placement to countertop height, is exactly right for you.

We build kitchens that last, using only top-tier materials designed to handle Long Island’s weather. Our team will guide you through selecting the best options, from durable porcelain and natural stone surfaces to weatherproof cabinetry and professional-grade outdoor appliances. We partner with leading brands to offer innovative systems that combine stylish design with practical function, giving you a cooking space you’ll love for years to come.

Our reputation is built on more than just quality materials; it’s built on trust and exceptional service. We manage every aspect of the construction with professionalism and a sharp eye for detail, ensuring a smooth process from start to finish. Homeowners across Long Island consistently praise our team’s craftsmanship and commitment to bringing their ideas to life. You can read what our clients have to say about their experience with Gappsi and see the results for yourself. When you’re ready to build the ultimate outdoor entertaining space, our team is here to make it happen.

Related Articles

Frequently Asked Questions

How much should I budget for a custom outdoor kitchen? The cost of an outdoor kitchen varies quite a bit because it’s tailored to your specific choices. The final price depends on the size of the kitchen, the materials you select for countertops and veneers, and the appliances you want to include. A simple layout with a high-quality grill and basic storage will be more budget-friendly than a large, complex kitchen with a pizza oven, refrigerator, sink, and premium stone finishes. We work with you to create a detailed proposal that aligns with your budget, helping you decide where to invest for the best results.

How long does the entire process take from design to completion? A typical custom outdoor kitchen project can take several weeks to a few months. The timeline depends on a few factors, including the complexity of your design, the time it takes to get permits, and the availability of your chosen materials. The initial design and planning phase is followed by site preparation and construction. We provide a realistic timeline upfront and keep you informed throughout the process, so you always know what to expect.

What kind of maintenance is required for an outdoor kitchen? Since outdoor kitchens are built with durable, weather-resistant materials, the maintenance is surprisingly straightforward. We recommend regular cleaning of countertops and appliances, just as you would with your indoor kitchen. It’s also a good idea to cover your grill and other appliances when they aren’t in use for long periods. At the end of the season, we can guide you on how to properly winterize your kitchen, which usually involves shutting off water lines to prevent freezing.

Can I really use an outdoor kitchen during a Long Island winter? While you might not be hosting large parties in January, your outdoor kitchen can still be used on milder winter days. The key is having the right setup. A pavilion or covered structure provides protection from snow, and built-in heaters can make the space comfortable enough for grilling a quick meal. Many homeowners find they enjoy using their grill year-round, and a well-designed space makes that possible even in a colder climate.

I don’t have a huge backyard. Can I still have a custom outdoor kitchen? Absolutely. A custom kitchen doesn’t have to be massive to be functional and beautiful. We specialize in creating smart designs that make the most of any space. By focusing on an efficient layout and choosing compact, high-performance appliances, we can design a stunning kitchen that fits perfectly on a smaller patio or in a cozy corner of your yard. It’s all about creative planning to give you the features you want without overwhelming the space.

Luxury gunite pool builders planning a custom design with a client on a laptop.

How to Hire the Best Luxury Gunite Pool Builders

Your backyard should be more than just a patch of grass; it should be a personal retreat, a place where you can relax and entertain. A custom swimming pool often becomes the heart of this outdoor oasis. When it comes to creating a truly unique and lasting pool, gunite construction stands out. Unlike other pool types, gunite offers complete design freedom, allowing you to build a pool that perfectly fits your space and style. This durability and flexibility are why so many homeowners on Long Island choose this method. The key to bringing this vision to life is partnering with experienced luxury gunite pool builders who understand how to blend artistry with engineering. This guide will walk you through why gunite is the top choice and how to select the right team for your project.

Key Takeaways

  • Gunite Offers Unmatched Durability and Design Freedom: As the strongest pool construction method, gunite provides a lasting investment. Its on-site building process allows for any shape, size, or custom feature you can envision, from tanning ledges to integrated spas.
  • Choosing the Right Builder is Crucial: Your project’s success hinges on your contractor. Protect your investment by verifying their credentials, checking references from past clients, and securing a detailed written contract that covers all project specifics and warranties.
  • Know the Process from Design to Finish: A custom pool build involves several key stages, including design, permitting, excavation, curing, and finishing. Understanding this timeline helps you plan effectively and ensures a smoother experience from start to finish.

Why Are Gunite Pools a Top Choice for Luxury?

When you picture a truly luxurious backyard, a stunning, custom-designed swimming pool is often the centerpiece. More often than not, that pool is made of gunite. Gunite pools have become the gold standard for high-end residential properties, and for good reason. They represent a perfect blend of strength, flexibility, and beauty, allowing you to create a personal oasis that is built to last. Unlike other pool types that come with design limitations, a

This construction method involves spraying a high-velocity mixture of sand and cement over a steel-reinforced frame, creating a solid, monolithic shell. This process allows for incredible customization while providing a structure that can endure for decades. Investing in a gunite pool means you’re not just adding a feature to your home; you’re creating a lasting experience and a significant asset that enhances your lifestyle and property value. Gappsi specializes in designing and building custom swimming pools that transform your outdoor living space into a luxurious retreat. From the initial design to the final touches, the focus is on creating a pool that is uniquely yours, reflecting your taste and complementing your home’s architecture.

Unmatched Durability

One of the biggest reasons homeowners choose gunite is its incredible strength. Gunite is the most durable pool construction method available, creating a dense, steel-reinforced shell that can withstand the test of time. This resilience makes it an ideal choice for the varied climate of Long Island, as it holds up well against ground shifts and changing weather conditions. A properly installed and maintained gunite pool can last a lifetime, making it a wise long-term investment for your property. This durability ensures your backyard oasis remains a source of enjoyment for your family for many years to come.

Complete Design Freedom

If you can dream it, you can build it with gunite. Because gunite pools are built on-site, they offer the most flexibility in shape, depth, and integrated features. You are not limited to standard shapes or sizes. Whether you envision a free-flowing lagoon that blends with your landscape, a sleek geometric design for a modern aesthetic, or a multi-level pool with varying depths, gunite makes it possible. This complete design freedom allows you to create a pool that perfectly complements your home’s architecture and your personal style, ensuring the final result is a true one-of-a-kind masterpiece.

Beautiful Finish Options

The final finish of your pool is what brings your vision to life, and gunite offers a spectacular range of options. With a vast array of interior finishes, from classic plaster to shimmering pebble aggregates and elegant glass tiles, you can achieve the exact look and feel you desire. These finishes determine the water’s color, texture, and sparkle, allowing for true personalization. You can also integrate custom features like waterfalls, spas, and tanning ledges seamlessly into the design. The ability to select from beautiful porcelain and natural stone for the coping and surrounding patio further enhances the luxurious aesthetic, increasing your property’s value.

Popular Custom Features for Your Gunite Pool

One of the best parts of choosing a gunite pool is the incredible design flexibility. You aren’t limited to a standard shape or size. Instead, you can create a custom swimming pool that perfectly matches your home’s style and your family’s lifestyle. From serene water features to practical additions, these custom touches are what make a pool truly yours. Thinking about what features you want early in the design process helps your builder create a cohesive and functional backyard retreat. Let’s look at some of the most popular custom features homeowners are adding to their gunite pools.

Add Infinity Edges and Tanning Ledges

An infinity edge, also known as a vanishing edge, creates a stunning visual effect where water flows over one or more sides of the pool, making it seem as if it merges with the horizon. This feature is perfect for properties with a view, adding a touch of resort-style luxury. Another popular addition is a tanning ledge, which is a large, shallow area perfect for lounging in a few inches of water. It’s an ideal spot for sunbathing, relaxing with a book, or providing a safe space for small children to splash and play. Gunite construction allows for these architectural details, along with custom steps and benches, to be seamlessly integrated into your swimming pool design.

Integrate Spas and Water Features

Why limit your relaxation to just the pool? Integrating a custom spa or hot tub is a fantastic way to extend your pool’s usability into the cooler months and create a space for unwinding after a long day. You can design a spillover spa, where warm water cascades into the pool, creating a beautiful focal point and a soothing sound. Water features like waterfalls, deck jets, and bubblers also add movement and ambiance to your backyard. A custom gunite pool paired with a built-in spa transforms your backyard into a versatile retreat for both fun and relaxation, giving you a personal escape right at home.

Include Custom Lighting and Seating

The right lighting can completely change the mood of your pool area, turning it into a magical space once the sun goes down. Modern LED lighting offers a spectrum of colors and can be programmed to create different effects, from a tranquil glow to a vibrant party atmosphere. Thoughtfully placed lights can highlight water features, illuminate steps for safety, and make your pool inviting for an evening swim. In-pool seating, like custom-built benches along the sides, provides comfortable spots to sit and chat without having to leave the water. These features create a calming atmosphere that encourages you to slow down and enjoy your beautiful outdoor space, as you can see in our project showcases.

Create a Complete Outdoor Oasis

Your pool is the centerpiece of your backyard, but it doesn’t have to stand alone. Think of it as the anchor for a complete outdoor living environment. You can design a space that flows from the poolside to other functional areas. Imagine stepping out of the water and relaxing under a shaded pergola or enjoying a meal prepared in your outdoor kitchen. With Gappsi, you can integrate your pool with beautiful masonry patios, lush landscaping, and even a cozy fire pit. By planning these elements together, you create a cohesive and luxurious outdoor oasis that serves as a true extension of your home.

How to Choose the Right Gunite Pool Builder

Building a custom gunite pool is a significant investment in your home and lifestyle. The builder you choose is your most important partner in this project. They are responsible for turning your vision into a beautiful, functional, and lasting reality. Taking the time to carefully vet potential builders will protect your investment and ensure a smooth process from start to finish. Here’s what to look for to find a trustworthy and skilled professional for your Long Island home.

Verify Their Credentials

First things first, you need to confirm that any builder you consider is properly licensed and insured. A license shows they meet local and state regulations for construction, while insurance and bonding protect you financially from accidents or if the company can’t finish the job. A builder with years of experience constructing custom swimming pools is better equipped to handle any surprises that might pop up during excavation or construction. Don’t be shy about asking for proof of their credentials. A reputable company will be happy to provide documentation and answer your questions.

Review Their Portfolio

A picture is worth a thousand words, but a portfolio is worth even more. Go beyond the glossy photos on their website and ask to see a range of their completed projects. Look for examples that are similar in style and complexity to what you have in mind. An experienced builder should also be able to provide a list of past clients you can speak with. This is your chance to get honest feedback from other homeowners. Ask them about their experience with the communication, timeline, budget, and overall quality of the work. A builder’s video gallery can also offer a more dynamic look at their craftsmanship.

Check for Professional Memberships

Does the builder belong to any industry organizations? Membership in groups like the Pool & Hot Tub Alliance (PHTA) is a great sign. It shows a builder is committed to staying current with the latest industry standards, technologies, and best practices. These organizations often have a strict code of ethics that members must follow, which gives you an extra layer of confidence. While not a requirement, it demonstrates a level of professionalism and dedication to their craft that sets the best builders apart from the rest. It’s another piece of the puzzle that helps you find a contractor you can trust.

Clarify Project Details and Warranties

Before you sign anything, make sure you have a detailed, written contract. This document should clearly outline the entire scope of the project, including all materials, features, and a specific timeline. It should also include a clear payment schedule. A financially stable company will be transparent about all costs. Equally important is understanding the warranties. Ask what’s covered for the pool structure, the equipment like pumps and filters, and the workmanship. A strong warranty is a testament to the builder’s confidence in their own design and construction expertise. Read everything carefully and get clarification on any points you don’t understand.

The Gunite Pool Construction Process Explained

Building a custom gunite pool is an exciting project, but it’s also a significant undertaking. Knowing what to expect at each stage can make the entire experience feel more manageable and enjoyable. A professional builder will guide you through every step, but it helps to have a clear picture of the journey from start to finish. The timeline for a pool build can vary based on design complexity and local permitting, but a well-defined process ensures your project stays on track. Let’s walk through the key phases of constructing your dream gunite pool.

Step 1: Consultation and Design

This is where your vision begins to take shape. The initial consultation is a creative collaboration between you and your pool designer. You’ll discuss everything from the pool’s size and shape to custom features and how it will blend with your overall landscape. This foundational phase is all about ensuring the final plan aligns perfectly with your lifestyle and aesthetic. A great design team will provide 3D renderings to help you visualize the final result. Gappsi’s comprehensive design services ensure every detail is considered, creating a seamless transition from your home to your new outdoor oasis.

Step 2: Permitting and Excavation

Before the first shovel hits the ground, your project needs official approval. Your builder will handle the process of submitting plans and securing permits from your local municipality on Long Island. This step can sometimes take a few weeks or even longer, depending on local regulations. Once the permits are in hand, the real excitement begins with excavation. Heavy equipment will arrive to dig out the area for your pool, creating the first tangible outline of your new backyard centerpiece. This is a major milestone that prepares the site for the pool’s structure. The entire installation can take up to 90 days, so getting through permitting is a key step.

Step 3: Applying and Curing the Gunite

With the site excavated, the next step is to build the pool’s skeleton. A network of steel rebar is installed to create a durable framework. Then, the gunite, a specialized mixture of sand and cement, is pneumatically applied over the rebar to form the pool’s shell. This method creates a dense, strong, and monolithic structure. After application, the gunite must cure for about 28 days to reach its maximum strength. This curing period is absolutely essential for the long-term durability and structural integrity of your swimming pool. While it requires patience, this step ensures your pool is built to last for decades.

Step 4: Finishes and Final Walkthrough

Once the gunite shell has cured, it’s time for the finishing touches that bring your pool’s design to life. This includes installing the waterline tile, coping, and the interior finish, such as plaster, pebble, or an all-tile surface. This is also when plumbing is completed and pool equipment is installed. You can explore a variety of beautiful and durable materials, like porcelain and natural stone, for the surrounding patio and coping. The final step is a walkthrough with your project manager. This is your opportunity to inspect every detail, learn how to operate your new equipment, and ensure everything meets your expectations before the project is officially complete.

Mistakes to Avoid When Hiring a Pool Builder

Building a luxury gunite pool is a major investment in your home and lifestyle, so choosing the right partner for the job is the most important decision you’ll make. The right builder ensures a smooth process and a stunning final product, while the wrong one can lead to headaches and costly repairs. To make sure your project is a success from day one, it’s helpful to know the common pitfalls homeowners face. By avoiding these key mistakes, you can protect your investment and create the backyard oasis you’ve always wanted.

Don’t Choose Based on Price Alone

While it’s always smart to be mindful of your budget, selecting a pool builder based on the lowest bid can be a costly mistake. An unusually low price often signals that a contractor is cutting corners, whether on materials, equipment, or skilled labor. Cheap concrete, plaster, or plumbing might reduce the upfront cost, but these materials can lead to cracks, leaks, and expensive repairs down the road. A luxury gunite pool is built to last for decades, so investing in quality craftsmanship and durable materials from the start is essential. A premier builder will provide a fair price that reflects the high standards needed to construct beautiful and long-lasting swimming pools.

Never Skip Reference Checks

Any pool builder proud of their work will be happy to share a list of satisfied clients. Never skip the step of checking these references. A company’s portfolio and website are great starting points, but speaking directly with past customers gives you unfiltered insight into their experience. Ask them about the builder’s communication, professionalism, and ability to stick to the timeline and budget. Reputable builders who deliver exceptional value will have a long history of successful projects. You can also review their work on platforms like their YouTube channel to see the quality and scope of their projects for yourself. This step helps you confirm you’re hiring a team with proven expertise.

Insist on a Detailed Written Contract

A clear, comprehensive contract is your best tool for ensuring there are no surprises during construction. A verbal agreement or a simple, one-page estimate is not enough for a project of this size. Your contract should explicitly outline every detail, including the full scope of work, a complete list of materials and equipment, a clear payment schedule, and a projected timeline from start to finish. It should also specify warranty information for both labor and materials. This document protects you and the builder by setting clear expectations for the entire project. A professional company will always provide a detailed contract for complex jobs like masonry and pool construction.

Understand Your Maintenance Plan

Your relationship with your pool doesn’t end once the construction is complete. Before you sign a contract, ask potential builders about their post-installation support and what you’ll need to do to maintain your new pool. A gunite pool requires specific care to keep it looking and functioning its best. A great builder will educate you on everything from balancing chemicals to winterizing the pool and equipment. Some full-service companies even offer ongoing maintenance plans. Knowing what to expect for long-term care ensures you can enjoy your pool for years to come. It’s always a good sign when a company also offers services like patio restoration and sealing, as it shows they are committed to long-term quality.

Related Articles

Frequently Asked Questions

How long does a gunite pool actually last? A properly built and maintained gunite pool is a permanent addition to your home. Thanks to its steel-reinforced concrete shell, it’s designed to last for decades. This incredible durability is why it’s considered a lifetime investment. Unlike other pool types that may need major replacements over time, a gunite pool’s structure is built to withstand ground shifts and changing weather, making it a reliable choice for your property.

What makes gunite different from other pool types like vinyl or fiberglass? The main difference is how they are built, which directly impacts your design options. Fiberglass pools are pre-made shells that are dropped into an excavated hole, so you are limited to the manufacturer’s available shapes and sizes. Vinyl liner pools use a pre-made liner that fits into a standard frame. Gunite, however, is built completely on-site by spraying a concrete mixture over a custom steel framework. This process gives you total freedom to design any shape, size, or depth you can imagine.

How long will it take to build my gunite pool from start to finish? The timeline can vary, but a typical gunite pool project can take up to 90 days from excavation to the final walkthrough. The exact duration depends on the complexity of your design, the permitting process in your town, and weather conditions. A key part of the timeline is the curing phase, where the gunite shell needs about a month to harden and gain its full strength. While it requires some patience, this step is essential for ensuring your pool’s long-term structural integrity.

What kind of upkeep does a gunite pool need? Like any swimming pool, a gunite pool requires regular care to stay in great condition. This includes routine tasks like testing and balancing the water chemistry, cleaning filters, and brushing the pool’s interior surface to prevent algae buildup. While the structure itself is very low-maintenance, the interior finish may need to be updated every 10 to 15 years. Consistent care is the best way to protect your investment and keep your pool beautiful and ready for swimming.

Why is gunite the best choice for custom features like tanning ledges or infinity edges? Gunite is ideal for custom features because it offers complete structural flexibility. Since the pool is built from scratch on your property, features like tanning ledges, in-water benches, and integrated spas can be formed directly into the pool’s shell. This creates a seamless, high-end look that feels like it was always meant to be there. With pre-made pool types, adding these kinds of architectural details is much more difficult, if not impossible.

Custom backyard putting green at a Long Island home

Putting Green Builder Long Island: Homeowner Checklist

A backyard putting green succeeds or fails long before the turf is installed.

To choose a putting green builder on Long Island, compare more than finished-project photos. Look for a builder who evaluates grading, drainage, access, and the surrounding landscape before developing a design. Ask how the planned contours, cup locations, fringe, and chipping areas support the way you want to practice. Review material samples, base-preparation details, edge treatments, and a written scope that explains what is included. A strong builder should also show relevant local work, explain the installation sequence, and provide clear care guidance. This checklist helps Nassau and Suffolk County homeowners compare proposals based on design quality, construction detail, and fit for the property rather than price alone.

Use the following questions during consultations to find a team capable of creating a green that plays well and belongs in your outdoor space.

Putting green builder Long Island checklist: start with site planning

The first useful conversation is about your property, not turf color. A builder should walk the proposed area, note how people move through the yard, and understand nearby patios, pools, plantings, utilities, and structures. The green must work as part of the landscape while leaving practical access for installation.

Evaluate space and access

Share how you expect to use the green. A dedicated golfer may want varied putts and chipping practice, while a family may value an inviting layout for casual play. Ask how the available footprint affects shot variety, safety, and circulation. The team should also identify how equipment and materials can reach the work area without unnecessary disruption.

Discuss grading and drainage early

Long Island properties vary, so the drainage plan should respond to observed site conditions. Ask where runoff currently travels, how the proposed contours affect water movement, and whether adjacent hardscapes or planting beds need consideration. Good planning protects both playability and the surrounding yard.

  • Identify the primary practice and entertainment goals.
  • Review access from the street to the installation area.
  • Map nearby patios, pools, walkways, trees, and planting beds.
  • Confirm how grading and drainage will be addressed.

How do you compare putting green builders?

A polished portfolio is a starting point, not the entire decision. Compare how each builder thinks through your site and translates your goals into a specific plan.

What to compare What a strong proposal shows Warning sign
Local experience Relevant completed work and knowledge of Long Island properties Only generic product photos
Design process A site-specific layout tied to your practice goals A standard shape offered before evaluation
Construction scope Clear details for preparation, drainage, turf, seams, cups, and edges Important work described only as “as needed”
Communication A defined contact and clear process for decisions No explanation of who manages the project

Review comparable projects

Ask to see greens with a similar footprint, landscape setting, or practice objective. Look closely at transitions, edge finishing, and how each green fits its surroundings. If references are available, ask homeowners how the builder handled communication and the final walkthrough.

Compare scope, not just totals

Two proposals with different preparation, materials, and finish work are not directly comparable. Request enough detail to understand what each team will build and what decisions remain open.

What should your putting green design include?

A custom design should turn your golf goals into a useful sequence of shots. Before approving a layout, explain which parts of your short game you want to practice and who else will use the space.

Contours with a purpose

Breaks and slopes should create variety without making every putt frustrating. Ask the designer to explain how the contour plan supports straight putts, breaking putts, and different approaches to each cup. Cup placement should create distinct practice routes rather than repeat the same line.

Fringe and chipping options

When space allows, fringe and landing areas can expand the green beyond putting practice. Discuss the shots you want to play, the safe direction of play, and how balls will be contained within the yard. Thoughtful transitions can also make the green feel integrated with nearby lawn and planting.

Connection to the wider landscape

The most convincing greens look intentional from the patio, house, and gathering areas. Shape, stone edging, paths, lighting, and planting can help the installation complement the rest of an outdoor living plan. Explore Gappsi’s landscape design capabilities when the green is part of a larger backyard project.

Which materials and construction details matter most?

A convincing putting green starts below the visible turf. Ask each builder to explain the complete assembly, including excavation, compacted base, drainage strategy, turf system, seams, cup setting, and finished edges. The answer should be specific to your site rather than a one-size-fits-all description.

Judge the surface by how it plays

Putting turf should deliver a consistent roll that matches the way you want to practice. During the consultation, discuss preferred speed, expected shot types, and whether the green is mainly for focused practice, family play, or entertaining. Review physical samples and, when possible, completed projects. The color and texture should also complement nearby lawn, stonework, and planting beds.

Inspect the details you will not see later

Base preparation and drainage influence how well a green performs after rain and through changing Long Island seasons. Ask how the builder evaluates runoff, creates stable contours, secures edges, and keeps seams unobtrusive. If the green meets a patio, walkway, pool area, or planting bed, confirm how each transition will be finished.

  • Request the proposed turf and fringe materials in writing.
  • Ask where seams will be placed and how edges will be secured.
  • Confirm the drainage and grading plan for your property.
  • Clarify what care is recommended after installation.

What should the installation process look like?

  1. Consultation: The builder learns how you want to practice, entertain, and use the surrounding yard.
  2. Site evaluation: The team reviews measurements, access, grading, drainage, and nearby features.
  3. Design: You review the proposed shape, contours, cups, fringe, and landscape connections.
  4. Preparation: The crew excavates as required and constructs the planned base and drainage solution.
  5. Installation: Turf, cups, seams, edges, and transitions are fitted according to the approved design.
  6. Finishing: Surrounding areas are completed and the site is cleaned.
  7. Walkthrough: The builder reviews the finished green and explains recommended care.

Gappsi’s consultation-led design-build approach can help coordinate a putting green with other backyard elements. Homeowners planning a wider transformation can also review outdoor living ideas before the design meeting.

Questions to ask before signing a proposal

Use the final consultation to make sure the design, scope, and expectations are clear. A qualified putting green builder should be able to explain the reasoning behind the plan and document what is included.

  • Can I review putting greens you have completed on Long Island?
  • How will the design support the shots and practice routines I care about?
  • What excavation, base preparation, grading, and drainage work is included?
  • Which putting and fringe turf products are proposed?
  • How will the green connect to patios, walkways, pools, or planting areas?
  • Who will manage the project and communicate during installation?
  • What site access, cleanup, and care guidance are included?
  • How are design changes handled after work begins?

Compare proposals by scope and design quality, not just the bottom-line number. A detailed proposal makes it easier to see whether two builders are actually offering the same result.

Frequently asked questions

How much space does a backyard putting green need?

There is no single ideal size. A builder should shape the green around your available yard, desired shot variety, surrounding features, and safe circulation. Even a compact area can support useful practice when the design is intentional.

How long does a putting green installation take?

The schedule depends on design complexity, site access, preparation requirements, drainage work, and surrounding landscape improvements. Ask for a project-specific schedule after the builder evaluates your property.

Can a putting green include a chipping area?

Yes. A design can pair a putting surface with fringe, rough, and designated landing areas when space allows. Tell the builder which shots you want to practice so those areas can be planned together.

What maintenance does an artificial putting green require?

Artificial putting greens need less routine care than natural grass, but they are not maintenance-free. The installer should explain debris removal, brushing, inspection, and any seasonal care recommended for the selected system.

Plan a putting green that belongs in your backyard

The right putting green builder combines site planning, golf-focused design, durable construction, and thoughtful integration with the rest of your landscape. Taking time to compare those capabilities now can lead to a green that is enjoyable to practice on and attractive from every part of the yard.

Gappsi has served Long Island homeowners since 1987 with a consultation-led design-build approach. Visit the Gappsi website to schedule a consultation or plan a visit to the Smithtown showroom to discuss your Nassau or Suffolk County property.

Pickleball Court Installation in Mastic Beach NY: Custom Sports Game Court Built by Gappsi

View Gappsi’s YouTube Channel to view Pickleball Court Installation in Mastic Beach, NY

The popularity of pickleball continues to explode across Long Island and throughout the United States. As more homeowners discover the excitement, social benefits, and health advantages of the sport, the demand for professionally designed backyard pickleball courts has never been higher. Gappsi recently completed another beautiful custom pickleball court installation in Mastic Beach, NY, showcasing the quality craftsmanship and attention to detail that have made Gappsi a leader in sports game court construction on Long Island.

This latest project features a regulation-size pickleball court built with premium materials, professional-grade court surfacing systems, and industry-leading installation techniques, designed to deliver years of exceptional performance and enjoyment.

Why Pickleball Continues to Grow in Popularity

Pickleball has become one of the fastest-growing sports in America because it is easy to learn, enjoyable for all age groups, and provides excellent exercise without the intense physical demands of other racket sports. Families, retirees, fitness enthusiasts, and competitive athletes are all embracing pickleball as a fun and engaging activity.

Many homeowners are installing private pickleball courts on their properties to enjoy the convenience of playing whenever they want, without having to visit public facilities or wait for a court to become available. A professionally built backyard pickleball court can also increase property value while creating an attractive outdoor recreational space for family and friends.

As a leading sports game court builder on Long Island, Gappsi specializes in designing and constructing custom pickleball courts that meet official specifications while complementing each homeowner’s property and lifestyle.

Site Preparation and Foundation Construction

Every successful pickleball court begins with proper site preparation and foundation work. For this pickleball court installation in Mastic Beach, NY, Gappsi followed a meticulous construction process to ensure a durable and long-lasting playing surface.

The court foundation was built using recycled concrete aggregate as the base material. Recycled concrete provides excellent structural stability, proper drainage characteristics, and environmental benefits while creating a strong foundation for the asphalt surface.

After preparing and compacting the recycled concrete base, Gappsi installed four inches of compacted asphalt. Proper asphalt thickness is critical for sports game court performance because it creates a stable, smooth surface that minimizes cracking and provides consistent ball bounce.

Compaction plays an essential role in the longevity of courts. By thoroughly compacting both the base and asphalt layers, Gappsi ensures the court maintains its integrity and performance through Long Island’s seasonal weather, including freezing winters and hot summers.

Premium Court Surfacing System

One of the most important aspects of any pickleball court installation is the surfacing system. The surface must provide proper traction, consistent ball response, durability, and visual appeal.

For this Mastic Beach pickleball court project, Gappsi utilized a professional multi-layer surfacing process designed to maximize performance and longevity.

The court was first primed using New Surf, a high-quality primer that helps create a strong bond between the asphalt surface and subsequent coating applications. Proper priming is a critical step that contributes to the court’s overall durability and lifespan.

Following the primer application, two coats of black resurfacer mixed with sand were installed. The addition of sand helps create the proper texture needed for player traction while enhancing surface durability. This resurfacing layer also helps smooth minor imperfections and creates an ideal foundation for the color coating system.

Finally, three coats of premium Lykold sports game court paint were applied. Lykold is widely recognized in the sports game court industry for its durability, color retention, and performance. The multiple coats of paint provide excellent coverage, vibrant color, and long-term protection against weather and wear.

pickleball-court-installation-in-mastic-beach-ny

Custom Court Color Design

In addition to performance, aesthetics play an important role in any custom sports game court project. Homeowners want a court that enhances their property’s appearance while providing excellent playability.

For this installation, Gappsi selected a sophisticated color combination that creates visual contrast while maintaining an attractive appearance.

The outer perimeter of the court and the pickleball kitchen area were painted forest green. This rich green tone blends beautifully with the surrounding landscape and provides a professional appearance commonly found in high-end sports facilities.

The pickleball-playing boxes were painted in a desert sand color. The contrast between the forest green and desert sand creates excellent visibility for players while giving the court a distinctive and elegant appearance.

White striping was then applied in accordance with official pickleball court dimensions and regulations. Accurate court striping is essential for both recreational and competitive play, ensuring that the court meets standard specifications and provides a consistent playing experience.

The result is a visually striking court that combines functionality with curb appeal.

Regulation-Size Dominator Pickleball Net System

No pickleball court is complete without a high-quality net system. For this Mastic Beach project, Gappsi installed a regulation-size Dominator pickleball net system.

Dominator net systems are known throughout the industry for their durability, stability, and professional appearance. The posts are constructed from aluminum, providing several important advantages over other materials.

Aluminum offers exceptional resistance to rust and corrosion, making it ideal for outdoor installations exposed to changing weather conditions. It also provides structural strength while remaining lightweight and easy to maintain.

The regulation-size net system ensures that players experience the same playing conditions found on professional and tournament-quality courts. Whether the homeowners are enjoying casual family games or competitive matches, the net system delivers reliable performance and authentic gameplay.

Benefits of Installing a Backyard Pickleball Court

A custom pickleball court offers numerous benefits beyond recreation. Homeowners throughout Long Island are increasingly viewing sports game courts as valuable outdoor living investments.

A professionally installed pickleball court provides:

  • Convenient access to exercise and recreation.
  • A dedicated entertainment area for family and guests.
  • Increased property appeal and potential resale value.
  • Opportunities for social interaction and community engagement.
  • A low-maintenance outdoor activity suitable for all ages.

Unlike many outdoor recreational features, pickleball courts can be used frequently throughout much of the year, maximizing the return on investment for homeowners.

Why Homeowners Choose Gappsi

For decades, Gappsi has been one of Long Island’s most trusted names in outdoor construction, sports game court installation, landscaping, masonry, and backyard living environments.

The company’s experience in building pickleball, tennis, basketball, bocce, and multi-sport facilities enables it to deliver exceptional results tailored to each client’s needs.

Every project benefits from:

  • Professional design and planning.
  • High-quality materials.
  • Expert site preparation.
  • Precision installation techniques.
  • Industry-leading surfacing systems.
  • Attention to detail throughout construction.

The completed pickleball court in Mastic Beach demonstrates Gappsi’s commitment to craftsmanship, performance, and customer satisfaction.

Another Successful Pickleball Court Installation by Gappsi

This latest pickleball court installation in Mastic Beach, NY, showcases the quality and expertise that homeowners can expect when choosing Gappsi for their sports game court construction project. From the recycled concrete base and compacted asphalt foundation to the professional surfacing system, custom color scheme, and regulation Dominator net system, every element was carefully selected and installed to create a premium playing environment.

As pickleball continues to grow in popularity, professionally built backyard courts are becoming one of the most desirable outdoor amenities for Long Island homeowners. Whether you’re looking to create a dedicated pickleball court or a multi-sport recreational space, Gappsi has the experience, equipment, and expertise to bring your vision to life.

Contact Gappsi today to learn more about custom pickleball court installation, sports game court construction, and outdoor living projects throughout Long Island and New York.

Contact Gappsi Today

📍 Serving all of Long Island, NY — Nassau & Suffolk Counties
🌐 https://www.gappsi.com/
📞 Call now for a free consultation and estimate

SCHEDULE A MEETING TODAY WITH GAPPSI

Premium types of artificial turf in a Long Island residential backyard

Types of Artificial Turf for Long Island Home Yards

The best backyard turf is not simply the greenest sample on a shelf. The right choice has to match muddy paws, bare feet, pool water, golf balls, or everyday entertaining without becoming a maintenance headache. This guide compares the main types of artificial turf and explains which details matter for a residential yard on Long Island.

Explore Gappsi synthetic turf options and request a consultation.

Quick answer: Most residential lawns use soft polyethylene turf, while pet areas need fast drainage. Play areas benefit from an appropriate shock-absorbing system, and putting greens require a short, dense surface designed for consistent ball roll. The best system depends on use, drainage, sun exposure, surrounding materials, and installation quality.

Types of artificial turf at a glance

In short: Residential turf is best compared by its intended use, not by color alone. Lawn, pet, play, poolside, putting green, and rooftop products solve different problems.

Manufacturers can adjust fiber material, blade profile, pile height, density, backing, and drainage to create very different surfaces. A lush lawn product may feel comfortable underfoot but roll too slowly for a putting green. A dense, short pet product may be easy to clean but look less meadow-like in a front yard. Start with what the area must do every day.

Turf type Most important trait Best fit
Landscape lawn turf Natural appearance and soft feel Front and back yards
Pet-friendly turf Drainage and easy cleanup Dog runs and pet yards
Play-area turf Complete surface system designed for play Family activity zones
Poolside turf Drainage and stable edges Pool surrounds and transition areas
Putting green turf Predictable ball roll Backyard golf practice
Balcony or rooftop turf Low-profile, suitable drainage system Finished outdoor living areas
Different types of artificial turf arranged in a residential backyard with a lawn, pet area, and putting green
A residential plan can combine turf types when each zone has a different purpose.

What are the main artificial turf fiber materials?

In short: Polyethylene is common in residential landscapes because it balances softness, resilience, and appearance. Nylon and polypropylene can be useful in specialized applications, but the complete product specification matters more than a material name by itself.

Polyethylene for everyday residential lawns

Polyethylene fibers are widely used for landscape lawns. They can be manufactured in varied blade shapes and green tones, often with a contrasting thatch layer near the backing. That combination helps a finished lawn avoid the flat, uniformly bright appearance associated with older artificial grass.

For a family yard, compare how samples recover after being pressed, how they feel against skin, and how they look in direct sun and shade. A sample that appears perfect under showroom lighting can look different beside existing shrubs, masonry, or a swimming pool.

Nylon for specialized durability

Nylon fibers are known for strength and can be used where durability or shape retention is a priority. The tradeoff is that nylon can feel firmer and may not be the first choice for a soft, casual lawn. It can be useful in specialized products, including some golf applications.

Polypropylene for select low-profile uses

Polypropylene can appear in economical or specialized turf products. Because product construction varies, homeowners should not choose based on price or fiber label alone. Review the intended application, backing, drainage, warranty terms, and installer guidance together.

Which turf is best for a family lawn?

In short: Choose landscape turf that feels comfortable, springs back after foot traffic, complements the property, and works with a properly prepared base.

A residential lawn is a visual surface and a living area. It may need to support outdoor dining, children’s activities, and routes between the house, patio, and pool. For that reason, the best product is rarely the tallest or densest sample. Very long blades can look plush but may show traffic patterns or require more brushing. A balanced pile height and supportive thatch can provide a realistic appearance with practical upkeep.

Color should also fit the setting. Long Island yards often combine mature plantings with natural stone, porcelain, or concrete pavers. A nuanced blend of greens and tan thatch generally integrates more naturally than a single bright-green tone. Gappsi’s broader landscape design and construction services can help coordinate the lawn with planting beds, grading, and outdoor living zones.

How do pet, play, and poolside turf differ?

In short: Pet areas prioritize drainage and cleaning access, play zones need a surface system suited to the intended activity, and poolside turf requires careful transitions and water management.

Pet-friendly turf

Pet turf should be selected as a complete system. Permeable backing, a drainage-ready base, accessible edges, and a practical cleaning plan all matter. A shorter, resilient pile can make solid-waste pickup and brushing easier than an extra-plush lawn. The layout should also prevent trapped runoff near fences, walls, or low spots.

For homeowners planning a dedicated dog area, see Gappsi’s guide to choosing artificial grass for pets. Discuss the number and size of pets with the installer because those details influence the surface and base recommendation.

Play-area turf

A play area is more than grass fibers. Its design should reflect the age group, equipment, expected activity, and surrounding edges. Ask the project team what complete system is appropriate for the planned use rather than assuming any soft-looking lawn product is suitable.

Poolside turf

Poolside turf can create a green visual break between hard surfaces and planting areas. Good drainage, secure perimeter details, and clean transitions are essential because the area will regularly receive splash water and foot traffic. The turf plan should be coordinated with the pool deck rather than added after every edge is fixed. Homeowners considering a larger renovation can review Gappsi’s swimming pool design and construction work for integrated ideas.

Visit the Gappsi showroom in Smithtown to compare outdoor materials in person.

What makes putting green turf different?

In short: Putting green turf is designed around ball behavior, not the plush appearance of a lawn. Surface selection and contouring should support the speed, breaks, and practice experience the homeowner wants.

Backyard putting greens generally use a shorter, denser surface than landscape lawns. The design team must consider the green’s shape, cups, fringe, slopes, drainage, and approach areas as one system. A visually attractive green that does not roll consistently will quickly become frustrating.

Before selecting a product, explain how you plan to practice. A casual family green has different goals from a challenging practice area with multiple breaks and fringe shots. Gappsi’s synthetic turf design-build team can connect material selection with the finished layout.

Why does the installation system matter?

In short: Even premium turf can fail to perform if grading, base preparation, drainage, seams, edges, or infill are poorly planned.

Turf is the visible finish, but much of its performance comes from the layers and workmanship below it. The project team should inspect existing grades and runoff patterns before choosing a construction approach. Water needs a reliable path away from structures and should not collect under the surface or at perimeter edges.

Long Island conditions make that site review especially useful. Sandy areas can drain quickly, while compacted soil, low spots, and hardscape borders may restrict runoff. A design-build team can coordinate excavation depth, base preparation, and finished elevations with nearby patios, pools, planting beds, and structures. That planning helps each surface meet cleanly and keeps the turf from becoming an isolated finish selected without regard to the rest of the yard.

Professional artificial turf installation detail beside natural stone pavers
Base preparation and precise edge details help the finished turf perform as intended.

Seams and transitions deserve equal attention. They should be positioned and secured to minimize visibility and suit the direction of the blades. Edges beside pavers, planting beds, steps, fences, and pool decks need durable restraint and a neat finish. When several materials meet, an integrated design-build plan can reduce awkward gaps and afterthoughts.

Installation questions to ask

  • Drainage: How will water move through and away from this specific area?
  • Base: What preparation is recommended for the site’s soil and intended use?
  • Edges: How will turf meet pavers, planting beds, walls, and other surfaces?
  • Seams: Where will seams be located, and how will blade direction be managed?
  • Care: What brushing, rinsing, or debris removal will the finished surface require?

How to choose the right turf for your yard

In short: Define the purpose of each zone, compare complete systems, evaluate samples in realistic light, and plan turf together with drainage and surrounding materials.

  1. Map daily use. Note where pets run, children play, guests gather, and people travel between outdoor spaces.
  2. Identify site conditions. Review shade, drainage, slopes, trees, access, and the surfaces that border the future turf.
  3. Compare relevant samples. Judge feel, recovery, blade variation, and appearance in both sun and shade.
  4. Review the whole system. Discuss backing, base, drainage, edge restraint, seams, and maintenance rather than focusing only on fibers.
  5. Coordinate the design. Make sure turf, masonry, planting, pool areas, and recreation features form a coherent outdoor plan.

A consultation-led process is especially valuable for yards with several uses. One property may benefit from soft landscape turf near the patio, a drainage-focused pet zone along the side yard, and a purpose-built putting green farther from the house. The materials can look unified while performing differently.

Frequently asked questions about artificial turf

In short: The best turf choice depends on how the yard will be used and how the complete surface system is designed, installed, and maintained. Homeowners should compare samples, ask about the layers below the surface, and select the product only after drainage and surrounding materials are considered.

What type of artificial turf looks most like real grass?

Residential polyethylene landscape turf often provides a natural-looking balance of soft blades, varied green tones, and contrasting thatch. The most convincing option is the one that complements the property’s plants, light, and surrounding hardscape.

Is taller artificial grass always better?

No. Taller fibers can appear lush, but they may show traffic patterns and need more brushing. Pile height should suit the area’s use, desired appearance, density, and maintenance expectations.

Can the same turf be used for pets and a putting green?

Usually, these applications call for different surfaces. Pet areas prioritize drainage and cleanup, while putting greens prioritize consistent ball roll. Separate products can still be designed to look cohesive.

Does artificial turf need drainage?

Yes. The backing and prepared base must work with the site’s grades and runoff conditions. Drainage planning is especially important near pools, structures, fences, and pet areas.

Should I choose turf before planning the rest of the yard?

It is better to coordinate turf with the full outdoor design. Grades, planting beds, pavers, pool decks, steps, and recreation areas all affect turf edges, drainage, and appearance.

Plan a turf system built around your home

In short: The right turf is the product and installation system that fits the way your household actually uses the yard.

Gappsi has served Long Island homeowners since 1987 and brings design, material selection, and construction planning together. Visit the Smithtown showroom to compare materials, or speak with the team about a lawn. Pet area, poolside transition, or backyard putting green for a Nassau or Suffolk County property.

Contact Gappsi to request a residential turf consultation.