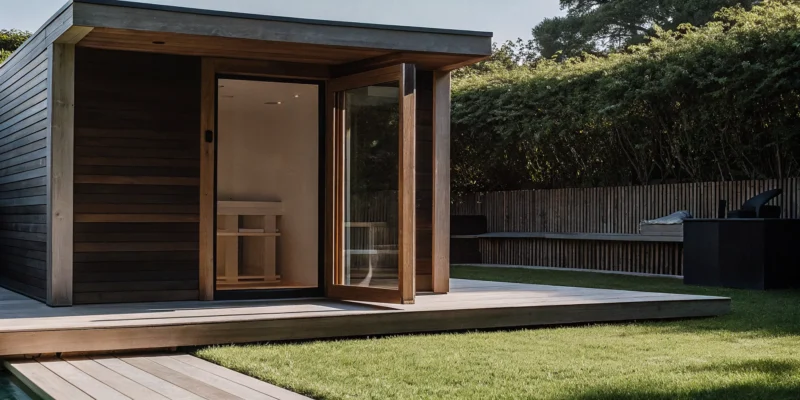
A custom-built outdoor sauna with a glass door in a Long Island backyard.

Who Builds Outdoor Saunas in Long Island? How to Choose

Your backyard has the potential to be a true personal sanctuary, a place to unwind and recharge. An outdoor sauna is a perfect centerpiece for this vision, but it’s often just one piece of a larger puzzle. Perhaps you see it connected to a new stone patio or nestled beside a swimming pool. This is why finding the right builder is so critical. When you ask who builds outdoor saunas in Long Island, you should look for a company that sees the complete picture. You need a partner who can not only construct a high-quality sauna but also design a cohesive outdoor living space around it, ensuring every element works together beautifully.

Key Takeaways

  • Prioritize Local Expertise for a Lasting Investment: Select a Long Island builder who understands our specific climate and building codes. This ensures your sauna is built with the right materials to withstand local weather and that all permits are handled correctly.
  • Match the Sauna Type to Your Wellness Goals: Decide if you prefer the intense, steamy heat of a traditional sauna or the gentler warmth of an infrared model. Your choice between a pre-fabricated kit and a custom build will depend on your timeline, budget, and desire for personalization.
  • Budget for the Complete Installation, Not Just the Unit: A realistic budget includes more than the sauna’s sticker price. Remember to account for essential costs like creating a solid foundation, running dedicated electrical wiring, and any other site preparation needed for a safe setup.

How to Choose the Right Outdoor Sauna Builder in Long Island

Finding the right builder for your outdoor sauna is the most important step in turning your backyard dream into a reality. You’re not just buying a product; you’re investing in a long-term addition to your home and wellness routine. The right partner will guide you through every stage, from design to installation, ensuring the final result is safe, beautiful, and built to last. On Long Island, this means finding a team that understands our specific climate and building codes. A great builder acts as your trusted advisor, helping you make informed decisions that fit your space, style, and budget. They will handle the complexities so you can focus on the exciting part: anticipating your first relaxing session.

Look for Local Experience and Licensing

When you’re vetting builders, start with their local experience. A company that has been working on Long Island for years will have a deep understanding of regional building codes, permit processes, and climate considerations. They know how to build structures that can handle our humid summers and cold, salty winter air. A builder with a broad portfolio in landscape design demonstrates they can create a sauna that integrates seamlessly with your overall property. Always confirm that your builder is fully licensed and insured in New York. This protects you and ensures they are accountable for their work, giving you peace of mind that your project is in capable hands from day one.

Review Their Customization Options

Your sauna should feel like a natural extension of your home, not a generic box dropped in your backyard. That’s why customization is key. A top-tier builder will offer a range of options to personalize your sauna. This includes choosing between different heating technologies, like traditional Finnish heaters or modern infrared panels. They should also provide flexibility in design, whether you prefer a classic barrel sauna, a standalone cabin, or a fully custom-built structure designed to fit a unique corner of your property. Ask to see a portfolio of their past projects to get a feel for their design style and the level of detail they bring to their work.

Check for High-Quality, Durable Materials

A sauna is an investment, and its lifespan depends entirely on the quality of the materials used. Given Long Island’s coastal environment, it’s crucial to choose a builder who prioritizes durable, weather-resistant woods like cedar, hemlock, or thermally modified pine. These materials naturally resist moisture, decay, and insects. A reputable builder will be transparent about where they source their materials and why they recommend certain options over others. Don’t hesitate to ask about the specifics, from the thickness of the wood to the type of hardware and fasteners used. Their expertise in selecting the right natural stone and other materials for outdoor construction is a great indicator of the quality you can expect.

Ask About Warranties and Support

A builder’s commitment to you shouldn’t end once the installation is complete. Before signing any contract, make sure you have a clear understanding of the warranties they offer. This should cover both the sauna unit itself (the heater and controls) and the craftsmanship of the structure. A strong warranty is a sign that the builder stands behind their work. Also, inquire about their post-installation support. Who do you call if you have a question or need service down the road? Choosing a full-service home improvement company often means you have a reliable, local team to turn to for any future needs, ensuring your sauna remains a source of relaxation for years to come.

What Are My Outdoor Sauna Options?

Thinking about adding a sauna to your backyard is exciting, but it can also feel a little overwhelming with all the choices out there. Let’s walk through the most popular types of outdoor saunas so you can find the perfect fit for your Long Island home and lifestyle. From the classic steam experience to modern, energy-efficient models, there’s a sauna for every preference. Each type offers a unique way to relax and unwind, turning a corner of your property into a personal wellness retreat.

Traditional Finnish Saunas

If you love the idea of a classic, steamy sweat session, a traditional Finnish sauna is for you. These saunas use an electric or wood-burning stove to heat a pile of rocks. When the room reaches a high temperature, often up to 195°F, you pour water over the hot rocks to create a burst of steam, or “löyly.” This process creates an intense, enveloping heat that many people find deeply cleansing and relaxing. It’s a timeless experience perfect for those who appreciate a powerful, authentic sauna session. Gappsi offers a variety of saunas that can bring this traditional wellness practice right to your backyard.

Infrared Saunas

For a gentler experience, an infrared sauna is an excellent choice. Instead of heating the air around you, infrared saunas use special heaters to emit infrared light, which warms your body directly. The air temperature stays much lower, typically between 120°F and 140°F, making it more comfortable for people who find the high heat of traditional saunas too intense. They also heat up faster and use less energy. This modern approach allows you to enjoy a deep, detoxifying sweat in a more moderate environment, making it a popular option for frequent use.

Barrel Saunas

Barrel saunas are as functional as they are beautiful. Their unique, cylindrical shape is not just for looks; it allows for efficient air circulation and quick, even heating, since there are no corners for heat to get trapped. These saunas are a stunning addition to any backyard, offering a rustic yet elegant focal point. They are specifically designed for the outdoors and are incredibly durable. You can see how these beautiful structures fit into different backyard designs by exploring Gappsi’s sauna installation gallery. A barrel sauna is a fantastic choice if you want a freestanding unit that combines performance with standout design.

Custom-Built Saunas

If you have a specific vision or a unique space to work with, a custom-built sauna offers complete freedom. This option allows you to design a sauna that fits perfectly into your backyard layout, whether it’s tucked into an awkward corner or integrated into a larger pool house or deck structure. You get to choose the size, layout, materials, and features, from the type of wood to the style of the heater and benches. Gappsi’s expertise in custom home remodeling means we can create a one-of-a-kind sauna that is tailored exactly to your needs and aesthetic preferences, ensuring it feels like a natural extension of your home.

Pre-Fabricated Sauna Kits

Pre-fabricated sauna kits offer a more streamlined path to owning a backyard sauna. These kits come with pre-built panels and components that are designed for straightforward assembly on-site. While they do not offer the same level of personalization as a custom build, there is still a wide variety of high-quality designs, sizes, and styles to choose from. A pre-fab kit can be a great solution if you’re looking for a quicker installation process and a more predictable cost. You can find excellent options at the Gappsi Store that deliver a fantastic sauna experience with the convenience of a ready-to-assemble package.

Custom-Built vs. Pre-Fabricated: Which Is Right for You?

Choosing between a custom-built sauna and a pre-fabricated kit is a key step in creating your backyard wellness retreat. Each path offers distinct advantages, and the right one for you depends on your space, budget, and personal style. A custom build offers limitless personalization, allowing you to design a sauna that fits perfectly into your life and landscape. On the other hand, a pre-fabricated kit provides a faster, more streamlined process, getting you to your first relaxing session much sooner. There’s no single right answer; it’s about what works for your home and your goals. By weighing the creative freedom of a custom project against the convenience of a kit, you can make a confident decision for your Long Island home and ensure you get the backyard oasis you’ve been dreaming of.

The Case for a Custom-Built Sauna

A custom-built sauna is the perfect choice if you have a specific vision or a unique space to work with. Think of it as a tailored suit for your home. It’s designed and assembled on-site, allowing it to fit perfectly into an awkward corner of your yard or connect seamlessly with your existing patio design. This approach gives you complete creative control over everything from the layout and bench configuration to the type of wood and heater. If you want a sauna that truly reflects your personal style and integrates flawlessly with your home’s aesthetic, a custom build is worth the investment in time and resources.

The Appeal of a Pre-Fabricated Kit

If you’re looking for a more straightforward path to your backyard oasis, a pre-fabricated sauna kit might be the ideal solution. These kits come with all the components pre-built and ready for assembly, which dramatically cuts down on installation time. In many cases, a professional team can have your new sauna up and running in just a day or two. While you’ll have fewer customization options compared to a custom build, modern kits offer a fantastic range of styles and sizes to fit most needs and budgets. They provide a high-quality experience without the longer timeline of a full construction project, making them a popular and efficient choice for many homeowners looking to add saunas to their property.

How Long Island Weather Impacts Your Choice

Here on Long Island, our weather adds another layer to the decision. The salty air and fluctuating humidity can be tough on outdoor structures. Whether you choose a custom or pre-fabricated sauna, it’s essential that it’s built with materials designed to withstand our specific climate. An outdoor sauna should be a year-round escape, holding up through humid summers and cold winters. This is where working with an experienced local builder makes a difference. They understand which woods resist moisture and how to properly protect the structure to ensure its longevity. Proper restoration and sealing knowledge is key to keeping your investment beautiful and functional for years to come.

Budgeting for Your Long Island Outdoor Sauna

Understanding the investment for an outdoor sauna is the first step toward making your backyard wellness retreat a reality. The final cost can vary quite a bit, depending on the path you choose. Think of it like buying a car; a standard model will have a different price tag than a fully loaded, custom-detailed vehicle. The same is true for saunas. Key elements like size, materials, heater type, and whether you opt for a pre-made kit or a completely custom design will all shape your budget. Let’s break down the costs so you can plan your project with confidence.

Typical Cost of Pre-Fabricated Kits

If you’re looking for a straightforward and more affordable way to bring a sauna home, a pre-fabricated kit is an excellent choice. These kits are a popular option because they deliver the wellness benefits without the price tag of a ground-up build. A simple, pre-fabricated infrared sauna kit often falls on the lower end of the cost spectrum. Because they are built in a factory with standardized designs, you benefit from the efficiency of production. This makes them a fantastic value, allowing you to enjoy the sauna experience sooner and often for a smaller initial investment. We can help you find high-quality saunas that fit your space and budget perfectly.

Typical Cost of Custom-Built Saunas

For those who have a specific vision in mind, a custom-built sauna offers limitless possibilities. This is your chance to create a truly unique structure that seamlessly integrates with your home and landscape. As you might expect, this personalized approach comes with a higher price. Outdoor or steam saunas often cost between $10,000 and $20,000 or more, depending on the complexity. This investment covers a design tailored to your exact specifications, premium materials, and the expert craftsmanship needed to bring it to life. A custom build is ideal if you want to match your sauna to existing masonry or create a cohesive outdoor living area.

What Factors Affect the Final Price?

Beyond the initial choice between a kit and a custom build, several other details will influence the final cost. Prefab saunas come pre-built and ready to install, while custom saunas are designed specifically for your space and assembled on-site, which affects labor costs. The size is a major factor; a cozy two-person sauna will naturally cost less than a spacious six-person model. The materials you select, from the type of wood to the style of the heater, also play a significant role. Finally, don’t forget site preparation. Your property may need a concrete pad, dedicated electrical work, or other adjustments, which are all part of the total project budget for any home remodeling project.

What to Expect During Sauna Installation

Once you’ve chosen your perfect outdoor sauna, the installation process begins. Working with an experienced team makes this final step straightforward and stress-free. At Gappsi, we handle every detail, from preparing the site to making the final electrical connections, so all you have to do is look forward to your first relaxing session. Understanding the process can help you feel confident as your backyard oasis comes to life. Here’s a simple breakdown of what happens during a professional sauna installation.

Site Prep and Local Permits

First, we’ll help you confirm the best location for your sauna. Whether it’s in a finished basement, a spacious garage, or a dedicated spot in your backyard, the foundation needs to be perfectly flat and solid. Concrete or tile surfaces work great, but carpet is not a suitable option. Our team ensures the site is properly prepared for a stable and secure build. We also manage the complexities of local regulations and permits here on Long Island. Navigating these requirements can be tricky, but our experience in home remodeling and construction means we know exactly what’s needed to keep your project compliant and on schedule.

Electrical Work and Finishing Details

Proper electrical work is critical for a safe and functional sauna. The power requirements vary depending on the model you choose. Most infrared saunas need a dedicated 15 to 20-amp outlet, while traditional Finnish saunas often require a more powerful 240V connection. We coordinate with licensed electricians to ensure all wiring is installed safely and meets local codes. You won’t have to worry about finding a separate contractor or managing the technical details. We handle everything to ensure your sauna operates flawlessly from day one, giving you complete peace of mind.

Delivery and Assembly

On installation day, our team will deliver all the components of your new sauna directly to your home. We take great care to protect your property during the delivery and assembly process. For most pre-fabricated kits, assembly is a streamlined process that our skilled technicians can complete in just a few hours. You can simply watch as the structure takes shape without any of the heavy lifting or complicated instructions. We carry a variety of high-quality models in the Gappsi Store, and our team is an expert at assembling each one efficiently and correctly, ensuring a perfect fit and finish.

How Long Does Installation Usually Take?

The timeline for your sauna installation largely depends on whether you’ve chosen a pre-fabricated kit or a fully custom design. A pre-fabricated sauna can often be installed in just a day or two, allowing you to enjoy your new wellness retreat almost immediately. A custom-built sauna, which is designed and constructed on-site to your exact specifications, naturally takes longer, typically from one to three weeks. No matter which path you choose, our professional team works efficiently to minimize disruption to your daily life. You can see examples of our completed projects and installation processes on our YouTube channel.

Ready to Build Your Backyard Oasis?

Adding an outdoor sauna is a fantastic step toward creating a personal retreat, but the real magic happens when it’s part of a thoughtfully designed backyard oasis. To bring this vision to life, it’s important to partner with a builder who sees the bigger picture. A team that specializes in designing and constructing complete outdoor living spaces can ensure your new sauna feels like a natural, integrated part of your home’s environment, not just a box dropped in the yard. This holistic approach protects your investment by creating a space that is both beautiful and functional for years to come.

Think beyond the sauna itself for a moment. Do you imagine stepping out onto a beautiful porcelain patio after a session? Or having your sauna nestled within a lush, professionally designed garden? This is where a full-service firm truly shines. Instead of juggling multiple contractors for your sauna, patio, and landscaping, you can work with one team to create a seamless plan. They can help you integrate elements like custom masonry, ambient lighting, and even a nearby cold plunge or outdoor shower.

Having a single point of contact simplifies the entire process, from initial design to final installation. It ensures every detail works together harmoniously, creating a cohesive look and feel. With a clear vision and the right partner, your backyard can become the sanctuary you’ve always wanted, a perfect spot for relaxation and rejuvenation.

Related Articles

Frequently Asked Questions

Which type of heat is better for me: traditional or infrared? This really comes down to personal preference and the kind of experience you’re looking for. If you love intense, enveloping heat and the ritual of creating steam by pouring water over hot rocks, a traditional Finnish sauna is a perfect fit. For a gentler session, an infrared sauna warms your body directly at a lower air temperature, which many people find more comfortable for longer periods. Neither is better than the other; they just offer two different, wonderful paths to relaxation.

Do I need a permit for an outdoor sauna on Long Island? The answer often depends on your specific town’s regulations, as well as the size and placement of your sauna. In many cases, a permit is required, especially for permanent structures with dedicated electrical work. The good news is that you don’t have to figure this out on your own. A reputable local builder will be familiar with the requirements in both Nassau and Suffolk counties and will manage the entire permit process for you.

How do I make sure my outdoor sauna survives Long Island’s weather? Protecting your investment from our coastal climate comes down to two things: high-quality materials and expert construction. Your builder should use weather-resistant woods like cedar, hemlock, or thermally modified pine, which naturally stand up to moisture and temperature changes. Just as important is how the sauna is built. An experienced local team knows the right techniques to ensure your sauna is properly sealed and assembled to handle everything from humid summers to cold, salty winter air.

What are the main things that determine the final cost of a sauna? The biggest factor influencing your budget is the choice between a pre-fabricated kit and a fully custom-built sauna. Beyond that, size plays a major role; a cozy two-person model will have a different price than a spacious six-person unit. The materials you select, the type of heater (traditional vs. infrared), and any site preparation needed, like pouring a concrete pad or running new electrical lines, will also shape the final cost.

What kind of foundation does an outdoor sauna need? An outdoor sauna must be placed on a solid, perfectly level surface to ensure its stability and structural integrity. The most common foundations are a concrete pad, pavers, or a properly reinforced deck. It’s also essential to plan for the electrical connection. A licensed electrician will need to run the correct power supply to the location, which is a foundational step for a safe and successful installation.
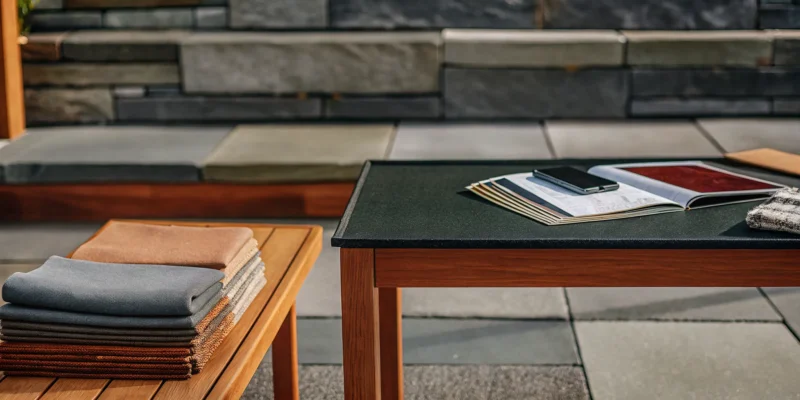
Calculating the cost of a Long Island natural stone patio with stacked stone seating and design materials.

How Much Does a Natural Stone Patio Cost in Long Island?

You can probably picture it now: a stunning stone patio, perfect for summer barbecues and relaxing evenings. Turning that vision into a reality starts with one practical step: understanding the budget. The beauty of natural stone is unmatched, but it’s important to have a clear financial picture from the beginning. Knowing how much does natural stone patios cost in Long Island is the key to planning a project without stress or surprises. This guide will break down the pricing for you, covering everything from material selection to installation hurdles, so you can confidently move from dreaming about your perfect patio to actually building it.

Key Takeaways

  • Look beyond the stone price: The total cost for a natural stone patio, typically $15 to over $31 per square foot, includes essential site preparation, a solid foundation, and expert labor, all of which are vital for a lasting installation.
  • Your choices drive the budget: The type of stone you select and the complexity of your patio’s design are the two biggest factors in your final cost; opting for a classic layout or a more common stone can help you manage your budget effectively.
  • Prioritize professional installation and care: A patio’s lifespan depends on a professional build that correctly handles site challenges like drainage and grading, while routine care like sealing is the best way to protect your investment and preserve its beauty.

How Much Does a Natural Stone Patio Cost on Long Island?

When you’re planning a new patio, the first question on your mind is usually about the price. While every project is unique, understanding the costs can help you set a realistic budget for your dream outdoor space. Natural stone is a premium material, and its price reflects its beauty, durability, and the skilled craftsmanship required for a perfect installation. The total cost depends on several factors, from the specific stone you choose to the size and complexity of your patio design. Let’s break down what you can expect.

Breaking Down the Price Per Square Foot

On Long Island, the installed cost for a natural stone patio typically ranges from $15 to over $31 per square foot. This price includes materials, site preparation, and professional labor. Natural stone carries a higher upfront cost than manufactured pavers because of the logistics involved. Sourcing unique stones and transporting them to your home adds to the expense. Furthermore, installing natural stone is an art form that requires expert masonry skills to ensure each piece fits perfectly, creating a stable and beautiful surface that lasts a lifetime. Think of it as an investment in a one-of-a-kind feature for your home.

How Stone Choice Affects Your Budget

The type of stone you select is one of the biggest factors influencing your budget. Each stone has a different price point based on its rarity, origin, and processing needs. For example, the raw material for a popular choice like large-format bluestone might start around $6 per square foot, while more exclusive types of granite or limestone can cost upwards of $15 to $20 per square foot for the stone alone. Gappsi offers a wide selection of porcelain and natural stone, giving you the freedom to find a material that matches both your aesthetic vision and your financial plan.

Choosing Your Stone: Popular Patio Materials

Picking the right stone for your patio is one of the most exciting parts of the design process. This choice sets the entire mood for your outdoor space, influencing everything from the color palette to the overall feel. The material you select is also a key factor in your total budget. On Long Island, we have a few go-to favorites that stand up beautifully to our seasons while delivering incredible style. When you work with us, we can walk you through our huge selection of porcelain and natural stone options to find the perfect match for your home and lifestyle. Let’s look at some of the most popular choices for creating a stunning and durable patio.

Bluestone

Bluestone is a true classic in the Northeast, and for good reason. This dense, durable sandstone is known for its signature blue-gray color, but it also comes in a beautiful range of earthy tones like green, brown, and lilac. Its natural texture provides good traction, making it a safe and reliable choice for patios, walkways, and pool surrounds. Bluestone holds up exceptionally well against Long Island’s freeze-thaw cycles, so you can count on it to last for years. It offers a timeless look that complements both traditional and modern home styles, making it one of the most versatile and sought-after materials for outdoor living spaces.

Granite

If you’re looking for the toughest stone on the market, granite is your answer. As an igneous rock, it’s incredibly hard and dense, making it highly resistant to scratches, heat, and stains. This makes it an ideal choice for high-traffic areas or patios that include an outdoor kitchen and grilling station. Granite comes in a wide spectrum of colors and patterns, from consistent grays and blacks to more dramatic speckled or veined varieties. While it is a premium material with a higher price point, its exceptional durability means you’re investing in a surface that will maintain its beauty with minimal upkeep for a lifetime. Our expert masonry team can craft a granite patio that is both functional and breathtaking.

Limestone

Limestone offers a soft, elegant look with a fine-grained texture that you won’t find in other stones. It typically comes in creamy whites, tans, and light grays, creating a sophisticated and uniform appearance for your patio. However, limestone is a softer, more porous stone compared to granite. This means it’s more susceptible to absorbing moisture and can be prone to staining. For this reason, limestone is often best suited for covered patios or protected outdoor living areas where it won’t be fully exposed to rain and falling leaves. With the right placement and care, it can provide a truly luxurious and refined surface for your outdoor retreat.

Slate

For a patio with rich color and unique texture, slate is an excellent option. This metamorphic rock is known for its distinct layered composition, which gives it a naturally slip-resistant surface. This quality makes it a great choice for pool decks and walkways where safety is a priority. Slate comes in a stunning array of deep, earthy colors, including dark grays, greens, purples, and even reds, allowing for a truly custom look. While durable, some varieties can be more prone to chipping or flaking over time. Proper installation and sealing are key to ensuring your slate patio remains a beautiful and functional feature of your home for years to come.

Travertine and Flagstone

Travertine has become a favorite for Long Island swimming pool patios, largely because it stays cooler to the touch than many other materials on a hot summer day. This type of limestone is formed by mineral springs, giving it a fibrous, porous appearance in beautiful earthy shades of cream, tan, and silver-gray. It provides a classic, old-world feel that is both elegant and inviting.

Flagstone, on the other hand, offers a more rustic and organic aesthetic. It isn’t one specific type of stone; rather, it’s a term for flat slabs of stone like sandstone or bluestone sold in irregular shapes. This creates a charming, mosaic-like pattern that feels timeless and natural. The unique shapes require more intricate installation, which can influence labor costs, but the result is a one-of-a-kind patio with enduring character.

What Factors Influence Your Total Patio Cost?

When you start budgeting for a new patio, it’s easy to focus only on the price of the stone itself. But the final cost is a puzzle with several pieces. The size of your patio, the condition of your yard, the materials used for the foundation, and the expert labor required all play a significant role in your total investment. Understanding these factors will help you see the full picture and plan a project that fits your vision and your budget, without any surprises along the way. Let’s break down exactly what goes into the cost of building a beautiful, long-lasting natural stone patio on Long Island.

Patio Size and Design

It’s no surprise that a larger patio will have a higher overall cost than a smaller one. What might be less obvious is how the design complexity affects the price. A simple square or rectangular patio is the most straightforward to install. However, if your heart is set on a design with intricate curves, unique patterns, or multiple levels, expect the cost to increase. These custom shapes require more precise and time-consuming cuts by skilled masons, which adds to the labor involved. While a complex design can be a stunning focal point, a classic layout is a great way to manage your budget while still creating a beautiful outdoor space.

Your Yard’s Condition and Prep Work

Before the first stone can be laid, your yard needs to be properly prepared. The existing condition of the site is a major cost factor. A perfectly flat, clear, and easily accessible backyard is the ideal scenario, but that’s not always the reality on Long Island. If your yard has a significant slope, it will require extra excavation and grading to create a level surface. Poor drainage, rocky soil, or the presence of large tree roots can also add to the prep work. Our team will assess your property to identify any challenges, ensuring your patio’s foundation is built on solid, stable ground from the start.

Building a Base That Lasts

The unseen foundation beneath your patio is just as important as the beautiful stone you see on top. A proper base is absolutely critical for the longevity of your patio, and this is not an area to cut corners. A solid base prevents stones from shifting, sinking, or becoming uneven over time, which can create tripping hazards. The process involves excavating the area and layering compacted gravel and sand to create a stable, well-draining foundation. Investing a little more in a robust base ensures your patio will withstand Long Island’s freeze-thaw cycles and remain a beautiful, functional space for decades to come.

Installation and Labor Costs

Installing a natural stone patio is a craft that requires a high level of skill and experience. Unlike uniform concrete pavers, each piece of natural stone is unique in shape, thickness, and texture. The installation cost reflects the expertise needed to select, cut, and fit these individual stones together into a cohesive and durable surface. This meticulous work is what transforms a pallet of raw material into a work of art. When you hire a professional masonry team, you are paying for their craftsmanship, precision, and the guarantee that your patio will be installed correctly and built to last a lifetime.

Common Long Island Installation Hurdles

Installing a natural stone patio is more than just laying down beautiful stones. On Long Island, our coastal geography and diverse landscapes can present unique challenges that turn a simple project into a complex one. From the rolling hills of the North Shore to the sandy soils of the South Shore, your property’s specific conditions will play a huge role in the installation process and, ultimately, the final cost.

Addressing these potential hurdles from the start is the key to a patio that lasts a lifetime. An experienced installation team knows how to anticipate these issues and design solutions that protect your investment. Ignoring them can lead to shifting stones, drainage nightmares, and costly repairs down the road. Understanding these common challenges will help you appreciate why a professional approach is so important for creating a stable, beautiful, and long-lasting outdoor space.

Sloped or Hard-to-Access Yards

Many Long Island properties have beautiful, varied elevations, but a sloped yard can complicate a patio installation. Creating a flat, usable surface on a grade requires careful excavation and planning. In some cases, a retaining wall is needed to hold back soil and create a level foundation for the patio. Another common issue is site access. If your backyard is fenced in or has narrow side yards, it can be difficult to bring in the necessary machinery for excavation and material transport. A skilled masonry team can assess these challenges and develop a plan that works, whether it involves using smaller equipment or building structural elements to support the design.

Poor Drainage and Soil Issues

Water is a patio’s worst enemy. Long Island’s soil composition can vary greatly, and poor drainage is a frequent problem that can lead to serious issues. If water pools on or under your patio, it can cause the base to erode, the stones to shift, and create trip hazards. During the winter, this trapped moisture can freeze and expand, causing stones to heave and crack. A professional installation always begins with addressing drainage. This involves properly grading the site away from your home’s foundation and installing a sufficient base that allows water to drain away effectively, preventing foundation concerns and ensuring your patio remains stable for years.

Creating a Perfectly Level Surface

A successful patio installation depends on achieving a perfectly graded surface. This doesn’t mean the patio is perfectly flat, in fact, it shouldn’t be. A slight, almost unnoticeable slope is crucial for directing rainwater away from the patio and your house. Getting this grade right is a matter of precision. If the surface is uneven, you’ll end up with puddles every time it rains and wobbly patio furniture. Professionals use laser levels and expert techniques to compact the base and set each of the natural stone pavers at the exact right height, ensuring a smooth, functional, and beautiful finish that stands the test of time.

Natural Stone vs. Other Patio Materials

Choosing your patio material is a big decision, and it often comes down to a balance of aesthetics, budget, and long-term value. While options like concrete and brick have their place, natural stone stands in a category of its own. It offers a timeless elegance and a direct connection to the natural world that manufactured materials simply can’t replicate. Let’s look at how natural stone compares to other popular choices for Long Island homes, so you can feel confident in the material you select for your outdoor living space.

Natural Stone vs. Concrete Pavers

Concrete pavers are a common sight on Long Island, largely because they are a budget-friendly option with a wide range of styles and colors. They can be a practical choice if your primary concern is keeping initial costs down. However, the main trade-off is character. While concrete pavers are manufactured to look uniform, a natural stone patio provides a unique, one-of-a-kind surface where no two stones are exactly alike. This creates a depth and authenticity that adds significant curb appeal. Think of it as the difference between a print and an original piece of art; both can be beautiful, but one has an inherent value and story that the other doesn’t.

Natural Stone vs. Brick Pavers

Brick pavers offer a classic, traditional look with warm, earthy tones and a familiar pattern. They are durable and have a long history of use in pathways and patios. The choice between brick and natural stone often comes down to the style you want for your home. Brick provides a more structured, uniform appearance, while natural stone feels more organic and integrated with the landscape. While a high-quality brick is a solid choice, the unique veining, textures, and color variations of stones like bluestone or granite deliver an unmatched level of sophistication. Our expert masonry team can help you explore which material best complements your home’s architecture.

Finding the Best Long-Term Value

While natural stone typically has a higher upfront cost, it’s an investment in longevity and timeless style. Materials like concrete can fade over time, and both concrete and brick can require more frequent repairs or replacement. Natural stone, on the other hand, endures. It ages gracefully, developing a rich patina over the years that only enhances its beauty. For homeowners who want to create an elegant and enduring outdoor space, natural stone is hard to beat. With proper installation and care, including professional restoration and sealing, your stone patio will last for decades, making it a truly worthwhile addition to your home.

Budgeting for Patio Add-Ons and Upgrades

A beautiful natural stone patio is a fantastic foundation, but the features you build around it are what transform it into your family’s favorite gathering spot. Thinking about these upgrades early in the planning process helps create a cohesive, functional, and truly personal outdoor living area. From a cozy fire pit for cool evenings to a full outdoor kitchen for the ultimate summer party, these additions are where the magic really happens.

It’s smart to consider these elements alongside your patio design, as integrating them from the start is often more efficient than adding them later. Things like gas lines for a fire pit, plumbing for a kitchen, or electrical wiring for lighting are best planned before a single stone is laid. This is where working with a comprehensive design and build team makes a world of difference. We can help you visualize the entire space and create a plan where every element works together seamlessly, from the patio itself to the surrounding landscape design. Let’s look at some popular upgrades and what you can expect to invest.

Seating Walls and Fire Pits

Seating walls are a brilliant, multi-purpose addition to any patio. They define the edge of your space, add visual interest, and provide permanent, fuss-free seating for guests. Built from complementary stone, these walls become a natural extension of your patio’s design. You can generally budget between $50 and $120 per linear foot for a seating wall. A fire pit is another popular feature, creating a natural focal point for conversation and warmth. A professionally installed, built-in fire pit can range from $2,000 to $8,000, depending on the size, material, and fuel source. These are the kinds of masonry details that make a patio feel custom and complete.

Outdoor Kitchens and Pergolas

If you love to entertain, an outdoor kitchen is the ultimate upgrade. It can be as simple as a built-in grill station or as elaborate as a full kitchen with a sink, refrigerator, and pizza oven. A basic outdoor kitchen setup might start around $5,000, while a more luxurious, feature-rich design can exceed $25,000. To add comfort and architectural flair, consider a pergola. These structures provide welcome shade and define a specific area, like a dining or lounging spot. Depending on the size, material, and complexity, you can expect to invest between $5,000 and $15,000 for one of Gappsi’s custom pavilions and pergolas.

Landscape Lighting and Built-in Steps

Don’t let the sunset end your time outdoors. A well-designed landscape lighting system adds ambiance, safety, and drama to your patio and the surrounding yard. Strategic lighting can highlight beautiful trees, illuminate pathways, and create a warm, inviting glow. A good lighting package typically costs between $2,000 and $5,000. If your yard has different elevations, built-in stone steps are essential for a safe and graceful transition. They ensure your patio is beautifully integrated into the rest of your landscape. Depending on the width and number of steps, this feature can range from $500 to $2,500, adding both function and a touch of elegance to your stone patio.

Is a Natural Stone Patio a Good Investment?

When you look at the numbers, it’s completely normal to ask if a natural stone patio is worth the initial expense. The short answer is a resounding yes. A well-built stone patio is more than just a place to put your grill; it’s a long-term feature that adds tangible value and daily enjoyment to your home. Unlike trends that come and go, the appeal of natural stone is timeless. It creates an outdoor living area that feels permanent, elegant, and seamlessly connected to your landscape.

Think of it as an investment in your property’s appeal and your family’s lifestyle. It extends your living space into the outdoors, giving you a beautiful setting for everything from quiet morning coffees to lively weekend gatherings. This is where you’ll host summer barbecues and watch the kids play. A professionally designed patio becomes a true extension of your home, a space you’ll use constantly. While the upfront cost is higher than for some other materials, the return comes back to you in property value, durability, and countless memories made right in your backyard.

Boosting Your Home’s Value

A natural stone patio is one of the best ways to improve your home’s curb appeal and overall market value. Potential buyers see it as a premium, move-in-ready feature, not a project they’ll have to tackle themselves. Materials like bluestone and granite offer a classic, high-end look that never goes out of style. While the initial investment is greater than for concrete pavers, the unique character and perceived luxury of porcelain and natural stone make a powerful first impression. It signals quality and thoughtful design, which can make your home stand out and justify a higher asking price if you ever decide to sell.

Durability and Future Maintenance

One of the biggest financial benefits of a natural stone patio is its incredible durability. These materials have been formed by nature over millions of years, so they are more than capable of handling Long Island’s weather, from hot summers to freezing winters. A properly installed stone patio can last a lifetime. This lasting quality means you won’t be spending money on frequent repairs or a full replacement in a decade. With basic upkeep, like periodic cleaning and sealing, your patio will continue to look beautiful for years. This long-term resilience makes natural stone a very smart and cost-effective choice over time.

How to Care for Your Natural Stone Patio

A natural stone patio is a beautiful, durable addition to your home, but proper care is key to keeping it looking its best for years to come. Think of it as protecting your investment. While materials like bluestone and granite are incredibly tough and well-suited for Long Island’s climate, they aren’t completely immune to the elements. A little routine maintenance goes a long way in preventing stains, damage, and the kind of wear and tear that can dull your patio’s natural beauty.

Taking care of your stone doesn’t have to be complicated. It’s mostly about gentle, consistent cleaning and being mindful of what you use on its surface. With the right approach, you can handle most of the upkeep yourself. For bigger issues or periodic deep cleaning, it’s always best to call in a professional. Following a simple care plan will ensure your outdoor space remains a stunning and safe place for your family to enjoy season after season.

Sealing and Protecting Your Stone

Sealing your natural stone patio is one of the most important steps you can take to protect it. Natural stone is porous, which means it can absorb liquids, leading to stains from things like spilled wine, oil from the grill, or even wet leaves. A quality sealer creates an invisible barrier on the surface, giving you more time to clean up spills before they soak in. Since sourcing and installing natural stone is a significant investment, sealing is a small price to pay for long-term peace of mind. We recommend having your patio professionally sealed after installation and then reapplying it every few years. Gappsi offers expert restoration and sealing services to keep your patio protected.

Everyday Cleaning and Upkeep

Keeping your patio clean on a day-to-day basis is simple. The best thing you can do is regularly sweep it with a broom to remove dirt, leaves, and other debris. This prevents organic matter from decomposing and staining the stone or promoting mold growth in damp, shady areas. For general cleaning, a bucket of water and a pH-neutral cleaner is all you need. Avoid using acidic or abrasive cleaners, like vinegar or bleach, as they can etch and damage the stone’s surface. A gentle scrub and a good rinse with your garden hose will handle most dirt and grime, keeping your patio looking fresh.

Winter Care for Long Island Weather

Long Island winters, with their freeze-thaw cycles, can be tough on any outdoor surface. When it comes to your stone patio, avoid using rock salt (sodium chloride) for de-icing. Salt can corrode the stone over time, causing it to pit and flake. Instead, opt for safer alternatives like calcium chloride or simply use sand for traction on icy spots. It’s also a good idea to gently shovel snow off your patio. Letting heavy snow sit and melt can lead to water pooling and seeping into the stone, which can cause damage when it refreezes and expands. A little extra care during the cold months will prevent costly repairs in the spring.

When to Call for Professional Restoration

While routine cleaning is manageable, some issues require an expert touch. It’s time to call a professional if you notice problems like stones becoming loose or uneven, creating a trip hazard. This can indicate a problem with the base underneath. Other signs include persistent stains that won’t lift, widespread moss or algae growth, or efflorescence, which is a white, powdery residue that can appear on the surface. If you see cracks or suspect you have drainage issues causing water to pool around your patio, it’s best to get a professional opinion. Our expert masonry team can diagnose these problems and perform the necessary repairs to restore your patio’s integrity and appearance.

Let’s Plan Your Perfect Stone Patio

Okay, we’ve talked a lot about numbers and materials. Now for the fun part: imagining your new patio. Thinking about this project is more than just choosing a stone; it’s about designing a space where you’ll make memories. Before you get too deep into the details, take a moment to picture how you want to live in this new outdoor area. Will it be your quiet spot for morning coffee, the backdrop for lively family barbecues, or an elegant setting for evening cocktails with friends? Your vision will shape every decision we make together, from the layout to the finishing touches.

Choosing natural stone is a wonderful decision. It offers a timeless beauty and durability that really stands out. While the initial cost can be higher than other materials, you’re making a long-term investment in your home’s character and value. Each stone has its own unique story, texture, and color, which means your patio will be completely one-of-a-kind. We can help you explore a beautiful selection of porcelain and natural stone to find the perfect match for your home’s style and your personal taste.

Every backyard in Long Island has its own personality, and sometimes, that includes a few challenges. You might have a sloped yard, tricky access for equipment, or specific drainage needs. Please don’t see these as roadblocks. Instead, view them as puzzles that the right team can solve. An experienced masonry designer knows how to work with the land to create a stable, beautiful, and functional patio that feels like it was always meant to be there. We handle the site prep and complex logistics so you can focus on what really matters: getting ready to enjoy your stunning new outdoor space.

Related Articles

Frequently Asked Questions

Why is there such a wide price range for a natural stone patio? The final price tag for a stone patio has a few key ingredients. The biggest factor is the stone you choose; rare or imported stones naturally cost more than more common options like bluestone. The condition of your yard also plays a huge role. A sloped or hard-to-reach property requires more site preparation, which adds to the labor costs. Finally, a complex design with curves and custom patterns requires more intricate cutting and fitting than a simple square patio, influencing the total investment.

How long does a typical natural stone patio installation take? The timeline for a patio project really depends on the scope of the work. A smaller, straightforward patio on a flat, accessible property might be completed in one to two weeks. However, larger and more complex projects, especially those requiring significant excavation, retaining walls, or intricate designs, can take several weeks. Weather is also a factor, as rain can cause delays. An experienced team will give you a realistic timeline once they have assessed your specific property and design plan.

My yard isn’t perfectly flat. Can I still get a stone patio? Absolutely. This is a very common situation on Long Island, and it’s a challenge that a skilled masonry team is well-equipped to handle. For yards with a slope, the solution often involves careful grading and sometimes the construction of a retaining wall. This not only creates the level surface needed for the patio but can also add beautiful dimension and structure to your landscape. Don’t let a sloped yard discourage you; it’s just a puzzle for a professional to solve.

Is sealing my new patio something I have to do right away? Yes, we highly recommend sealing your patio shortly after it’s installed. Think of it as the final, protective step of the installation process. Natural stone is porous, and a quality sealer creates a barrier that helps prevent stains from spills, leaves, and other elements. It makes cleaning easier and protects the stone’s natural color and beauty for the long term. It’s a simple step that provides significant peace of mind and protects your beautiful new investment.

What is the first step to get an accurate quote for my specific project? The best way to get a precise and reliable quote is to schedule an on-site consultation. Since every project is unique, an expert needs to see your space in person. During a consultation, a designer can measure the area, assess the site conditions (like soil and drainage), listen to your ideas, and discuss material options with you. This allows them to understand your complete vision and provide a detailed estimate that covers all aspects of the job, ensuring there are no surprises later on.

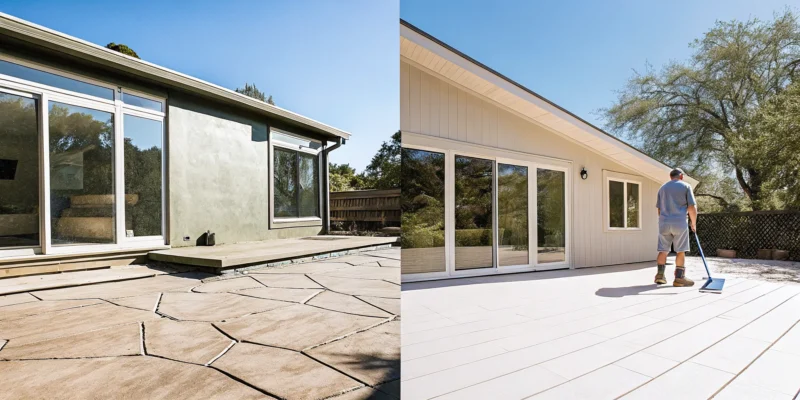
Before and after of stamped concrete installed over an old patio.

Stamped Concrete Over Old Patio: Pros, Cons & Costs

Here on Long Island, our patios have to endure a lot, from hot summer sun to the punishing freeze-thaw cycles of winter. This is a critical factor to consider when you’re thinking about putting stamped concrete over an old patio. While an overlay can provide a stunning cosmetic upgrade, its durability in our climate is a serious concern. If moisture gets between the new overlay and the old slab, freezing temperatures can cause it to crack, peel, and fail within just a few years. A thin overlay is especially vulnerable. This guide provides an honest look at the risks and limitations, helping you decide if an overlay is a durable choice for your home or if investing in a more permanent solution like pavers is the wiser long-term decision.

Key Takeaways

  • Your Existing Concrete Must Be Solid: An overlay is a fantastic cosmetic fix for a stable, sound patio, but it cannot solve underlying structural issues. If your current slab has deep cracks, is sinking, or is uneven, an overlay will only mirror those problems.
  • Weigh the Risks of Our Climate: For homeowners on Long Island, the freeze-thaw cycle is a major concern. Moisture can seep between the old and new concrete layers, freeze, and cause the overlay to crack, peel, or flake, making it a potentially short-term solution.
  • Proper Installation and Maintenance Are Key: The final look and durability of an overlay depend entirely on expert preparation and application. To keep it looking great, you must also commit to a simple maintenance routine, which includes resealing the surface every two to three years.

What Is Stamped Concrete?

Stamped concrete is a versatile and popular choice for patios, walkways, and driveways. It’s concrete that has been patterned, textured, or colored to resemble other high-end materials like brick, slate, flagstone, or even wood planks. Think of it as getting the look of natural stone without the same price tag or maintenance demands. While a fresh pour is common, many homeowners wonder if they can get this look without the hassle and cost of tearing out their old, boring concrete slab. This is where a stamped concrete overlay comes into play.

An overlay is a thin layer of a special cement mixture that goes directly on top of your existing concrete. It’s a way to completely transform the surface, covering minor imperfections and adding a beautiful new design. While it sounds like a perfect fix, it’s not a magic wand. The success of an overlay depends entirely on the condition of the concrete underneath it. For a project to last, the original slab must be structurally sound. This is why a professional assessment is so important before you commit to this type of project. At Gappsi, we can help you determine if an overlay is the right fit or if another solution, like our beautiful porcelain and natural stone pavers, would be a better long-term investment for your home.

How Do Stamped Concrete Overlays Work?

A stamped concrete overlay involves applying a special cement-based product over your existing concrete. First, the surface has to be meticulously prepared, which usually means grinding it down to create a rough texture for the new material to grip onto. After a bonding agent is applied, the overlay material is spread across the surface. While it’s still wet, large, flexible stamps with your chosen pattern are pressed into it.

The most important thing to understand is that the overlay is only as strong as the concrete it’s sitting on. If your current patio has deep, structural cracks, is sinking in spots, or is heaving from frost, an overlay will just mirror those problems. The new layer will inevitably crack and fail right along with the faulty base. A professional masonry contractor will always inspect the existing slab first to ensure it’s a suitable candidate.

Important Thickness Limitations

When it comes to overlays, thickness is a critical factor for durability, especially here on Long Island with our freeze-thaw cycles. A very thin overlay, say around two inches or less, may not hold up for more than a few years. These thin layers lack the structural integrity to withstand the expansion and contraction that happens when water freezes and thaws. This can lead to cracking and delamination, where the top layer peels away from the base.

Another major challenge is getting the new layer to bond perfectly with the old concrete. If the bond isn’t strong, moisture can get between the layers, freeze, and pop the overlay right off. This can lead to chipping and flaking almost immediately. Because of these risks, it’s crucial to have an expert evaluate your project. Sometimes, a full replacement is the more reliable and cost-effective choice in the long run.

Can You Stamp Over an Existing Concrete Patio?

If you’re looking at a dull, aging concrete patio and dreaming of something new, you might be wondering if you have to go through a full demolition. The great news is that you can often apply a stamped concrete overlay directly on top of your existing slab. This process involves pouring a thin layer of a special cement-based material over the old concrete and then stamping it with a pattern to mimic stone, brick, or other textures. It’s a fantastic way to get a fresh look without the cost and hassle of a complete tear-out. However, this method isn’t a magic fix for every situation. The success of an overlay depends entirely on the condition of the concrete underneath it.

When an Overlay Is a Good Idea (and When It’s Not)

A stamped overlay is a perfect solution when your existing concrete is structurally sound but just needs a cosmetic update. If the surface is stained, discolored, or has a few minor hairline cracks, an overlay can cover those imperfections beautifully. The key is that the underlying slab must be stable. An overlay is not a good idea if your patio has major structural problems. This includes large, deep cracks, severe crumbling, or sections that are heaving and uneven. Covering up these issues is like putting a band-aid on a broken bone; the problems will just transfer to the new surface, causing it to crack and fail quickly. A professional masonry assessment is the best way to know for sure.

The Prep Work: Cleaning, Repairs, and Bonding

Proper preparation is the most critical step for a successful and long-lasting stamped overlay. You can’t just pour new material over a dirty, damaged surface and expect it to stick. The strength of the new layer is completely dependent on the strength of the old concrete it’s bonded to. The process starts with a thorough cleaning to remove any dirt, grease, or old sealants that could prevent adhesion. Next, any minor cracks or spalling areas must be repaired and filled. Finally, a bonding agent is typically applied to the old concrete. This primer acts like double-sided tape, ensuring the new overlay forms a powerful, permanent bond with the existing slab.

Factoring in Moisture, Temperature, and Timing

Environmental conditions play a big role in how a stamped concrete overlay is installed and how well it holds up over time, especially here on Long Island. The material needs to be applied within a specific temperature range to cure correctly. Too hot, and it dries too fast; too cold, and the curing process stalls. Moisture is another critical factor. The existing slab must be dry, and the weather forecast clear. For durability, the thickness of the overlay matters. A thin overlay might not withstand our freeze-thaw cycles for long. This is why working with a team that understands the right materials and application techniques for our climate is so important. When an overlay isn’t the right fit, porcelain and natural stone pavers offer another durable and beautiful alternative.

Stamped Concrete Patterns and Design Options

One of the best parts of choosing a stamped concrete overlay is the incredible range of design possibilities. This isn’t just a simple resurfacing job; it’s a chance to completely redefine your patio’s style. You can replicate the look of high-end materials at a fraction of the cost, matching your home’s architecture and your personal taste. From the timeless appeal of classic stone to the clean lines of modern wood planks, the right pattern can transform your outdoor space.

The process involves pressing molds into the fresh concrete overlay to create texture and pattern. When combined with custom colors and finishes, the results are stunningly realistic. Whether you dream of a rustic European courtyard or a sleek, contemporary deck, there’s a stamped concrete design that can bring your vision to life. At Gappsi, our design team can walk you through the options and help you select a look that complements your home and landscape perfectly. We have the expertise to create intricate designs that truly look like authentic masonry.

Classic Looks: Brick, Stone, and Cobblestone

If you love a timeless, traditional aesthetic, you can’t go wrong with patterns that mimic classic materials. Brick patterns, like herringbone or running bond, offer a warm and familiar look that’s perfect for colonial or ranch-style homes. For a more organic feel, flagstone and slate patterns create the impression of natural, hand-laid stone, adding rustic charm to any patio. Cobblestone stamps are another popular choice, bringing a touch of old-world European elegance to walkways and patio borders. These patterns are excellent at hiding minor imperfections and provide a textured, non-slip surface. They pair beautifully with lush landscaping and traditional home exteriors, giving you a sophisticated look that never goes out of style.

Modern Styles: Wood Planks and Tiles

For those with a more contemporary taste, stamped concrete can deliver clean lines and minimalist textures. Wood plank patterns have become incredibly popular, offering the warm, inviting look of a wood deck without any of the maintenance headaches like staining or splintering. You can choose from various plank widths and grain textures to achieve a look that ranges from rustic barn wood to sleek, modern hardwood. Another modern option is a large-format tile or cut stone pattern, which creates a sophisticated and spacious feel. Seamless textures, which provide a subtle, stone-like finish without grout lines, are perfect for a truly minimalist design. These modern styles are a fantastic alternative to traditional porcelain and natural stone pavers.

Customizing Your Color and Finish

The pattern is just the beginning. What truly brings stamped concrete to life is the color. We can use integral color, which is mixed into the concrete itself, to create the base tone. Then, we apply a secondary color with a powdered “release agent” before stamping. This release agent not only prevents the stamps from sticking but also settles into the low spots of the pattern, creating realistic highlights and shadows. This technique adds incredible depth and variation, making the texture pop. For example, a fieldstone pattern with a charcoal release creates a rich contrast that looks just like natural stone. You can see examples of these beautiful finishes in our project videos on the Gappsi YouTube channel.

The Pros of a Stamped Concrete Overlay

If your existing concrete patio is structurally sound but looks a little tired, a stamped concrete overlay can be a fantastic solution. This approach offers a way to completely refresh your outdoor space without the cost and chaos of a full demolition. It’s a popular choice for homeowners who want the high-end look of materials like natural stone or wood planks but are working with a concrete slab that’s still in good shape. By applying a new layer over the old, you get a durable, beautiful surface that can transform your patio, pool deck, or driveway.

The benefits are compelling, especially when you consider the savings in time and money. An overlay project is typically much faster than a complete replacement, meaning less disruption to your daily life and more time enjoying your new space. With expert masonry design, you can achieve a custom look that perfectly matches your home’s style. From mimicking the appearance of cobblestone to creating a sleek, modern finish, the design possibilities are vast. Let’s walk through the three biggest advantages of choosing a stamped concrete overlay for your next project.

Save Money Compared to a Full Replacement

One of the most attractive benefits of a stamped concrete overlay is the potential for significant cost savings. A full replacement involves breaking up and hauling away the old concrete, preparing the base, and pouring a brand new slab, all of which adds up in labor and material costs. An overlay, on the other hand, uses your existing concrete as a foundation. This process requires fewer materials and less intensive labor, making it a more budget-friendly option. You can achieve a premium finish for a fraction of the price of installing new stone or pavers, allowing you to allocate more of your budget to other parts of your backyard oasis.

Get a Brand-New Look Without Tearing Everything Out

An overlay gives you the power to completely change the appearance of your patio without the messy and time-consuming process of demolition. Instead of living with a construction zone for weeks, the overlay process is much quicker and less invasive. This means you can get a surface that mimics beautiful porcelain and natural stone pavers, classic brick, or even rustic wood planks, all applied directly over your old concrete. It’s a design upgrade that delivers a major visual impact with minimal disruption, letting you get back to enjoying your outdoor living area much sooner. It’s the perfect way to get a fresh start without starting from scratch.

Enjoy Lower Maintenance Than Pavers or Stone

Compared to individual pavers or natural stones, a stamped concrete overlay is remarkably easy to maintain. Because it’s a solid, continuous surface, you won’t have to worry about pulling weeds from grout lines or resetting stones that have shifted over time. The surface is sealed after installation, which protects it from stains, weather, and daily wear and tear. This protective layer makes cleaning simple, as dirt and spills can usually be washed away with a hose and a mild detergent. Periodic cleaning and sealing is all it takes to keep your stamped concrete looking its best for years, giving you more time to relax and less time on upkeep.

The Cons of a Stamped Concrete Overlay

While a stamped concrete overlay might seem like a quick and budget-friendly fix, it comes with some serious potential downsides. These issues are especially important for Long Island homeowners to consider, given our specific climate. Before you decide, it’s crucial to understand the risks involved with simply covering up an old patio instead of replacing it. An overlay might not be the durable, long-term solution you’re hoping for. From structural instability to the effects of our cold winters, let’s walk through the common problems you could face so you can make the best choice for your home.

Potential Bonding and Adhesion Issues

One of the biggest gambles with an overlay is whether the new layer will properly bond to the old concrete. Think of it like trying to put a sticker on a dusty surface; it just doesn’t stick well. The new concrete overlay can struggle to adhere to the existing patio, leading to a weak bond. This often results in the new surface peeling, chipping, or developing widespread cracks not long after installation. It’s a frustrating problem because it means the money you spent on a fresh look is quickly wasted, leaving you with a patio that looks worse than before.

The Impact of Long Island’s Freeze-Thaw Cycles

Here on Long Island, we are all too familiar with harsh winters. Our freeze-thaw cycles are a major enemy of concrete overlays. When moisture seeps into tiny imperfections or cracks between the old and new layers, it freezes and expands, creating immense pressure. This process forces the layers apart, causing significant cracking and flaking. A thin, 2-inch overlay is particularly vulnerable and may only last a few years in our climate before it starts to fail. This is a critical factor that makes overlays a risky choice for any outdoor surface in our area.

Why Damaged Concrete Can’t Be Covered

Covering a damaged patio with an overlay is like putting a bandage on a broken bone. It simply hides the problem, but it doesn’t fix it. An overlay’s strength is completely dependent on the condition of the concrete beneath it. If your existing patio has major cracks, is uneven, or is sinking, those structural issues will transfer directly to the new layer. The overlay will crack and fail in the exact same spots. A truly lasting solution requires a solid foundation, which often means removing the old, damaged slab and starting fresh with professional masonry work.

Understanding Warranty Limitations

The lack of a solid warranty is a major red flag for stamped concrete overlays. Many contractors are hesitant to guarantee their overlay work for the long term because these known issues make failure so common. If a company won’t stand behind its work with a strong warranty, it suggests they don’t have confidence in the product’s durability. This leaves you, the homeowner, with all the risk. In contrast, a full patio replacement using high-quality porcelain and natural stone pavers comes with the peace of mind of a reliable installation and a product built to last.

How Much Does a Stamped Concrete Overlay Cost?

Figuring out the budget for a stamped concrete overlay is a top question for most homeowners, and the answer is that it really depends. The final price tag can vary quite a bit because every project is unique. To give you a ballpark idea, one homeowner reported receiving a quote of around $9,000 for a 550-square-foot area. While this provides a helpful reference point, your actual cost will depend on several specific factors related to your patio.

The total size of your space is the most obvious variable, but the current condition of the concrete slab and the complexity of the design you choose also play a significant role. A simple, single-color pattern on a small, well-maintained patio will naturally cost less than a multi-colored, intricate design over a larger area that needs extensive repairs first. Think of it like painting a room: a smooth, primed wall is much quicker and easier to paint than one with holes and peeling paint that needs a lot of prep work. The same principle applies here. The best way to get an accurate number for your project is to have a professional assess the site. Our team at Gappsi can provide a detailed quote based on your specific needs and design vision for any masonry project.

What Factors Influence the Price?

The biggest factor influencing the cost of an overlay is the condition of your existing concrete. Before any new layer can be applied, a contractor must prepare the surface by removing any weak or loose sections and cleaning it thoroughly. If your current patio has a lot of cracks that need filling or requires significant patching, the added labor and materials will increase the price. The complexity of your chosen stamp pattern and color scheme also affects the cost. A more detailed stamp or a design with multiple, hand-applied colors requires more skill and time, which is reflected in the final quote.

Comparing Overlay vs. Replacement Costs

When you look at the numbers, choosing a stamped concrete overlay is almost always a more affordable way to update your patio compared to a full replacement. Tearing out an old concrete slab is an expensive and labor-intensive job. The process involves demolition, hauling away heavy debris, and potentially repairing your surrounding lawn or garden beds that can get damaged during removal. An overlay allows you to get a fresh, modern look for your outdoor space without the high cost and major disruption of a complete tear-out, making it a very cost-effective solution.

Maintaining Your Stamped Concrete Overlay

A stamped concrete overlay gives you a beautiful, high-end look with less fuss than other materials, but a little upkeep is key to keeping it that way. Think of it like protecting any other investment in your home. With Long Island’s mix of sunny summers and icy winters, a simple maintenance routine will ensure your patio looks fantastic for years to come. The good news is that it doesn’t take much. Just a bit of cleaning, periodic resealing, and some common-sense precautions will preserve the color and integrity of your new surface, letting you spend more time enjoying your outdoor space and less time working on it.

Unlike pavers that can shift or grow weeds, a stamped overlay is a solid surface that simplifies your yard work. Following a few basic steps will protect your patio from the elements and daily use, keeping the pattern crisp and the color vibrant. It’s a small effort that pays off by maintaining your home’s value and curb appeal. We’ll walk through exactly what you need to do to keep your stamped concrete looking brand new, so you can feel confident in your choice for years.

Simple Cleaning and Stain Removal Tips

Keeping your stamped concrete overlay looking fresh is surprisingly simple. For general upkeep, a quick sweep with a broom or a rinse with a garden hose is often all you need to clear away leaves, dirt, and other debris. For a deeper clean, you can use a mild detergent mixed with water and a mop. This regular cleaning prevents grime from building up and dulling the surface of your patio. If you run into a tougher spot like a grease spill from the grill, it’s best to act quickly. For stubborn issues that don’t lift with simple soap and water, professional restoration and sealing services can restore your patio’s original look without damaging the surface.

Resealing: How Often and Why It’s Crucial

The sealer is your stamped concrete’s most important line of defense. It’s a protective layer that shields the surface from moisture, UV rays, stains, and daily wear and tear. Over time, this barrier wears down. To keep your overlay protected, it’s essential to reapply a high-quality sealer every two to three years. The exact timing can depend on how much foot traffic your patio gets and its exposure to the elements. Resealing not only protects the concrete but also revitalizes the color and sheen, making the pattern pop just like it did on day one. It’s a critical step that extends the life of your overlay and keeps it looking its best through every season.

Protecting Your Patio from Damage

One of the great things about a stamped concrete overlay is that you don’t have to worry about weeds growing in joints or individual pavers shifting. However, the surface itself still needs some care. You can prevent scratches by placing felt pads under the legs of heavy patio furniture and avoiding dragging sharp or heavy objects across the patio. During the winter, avoid using harsh de-icing salts, which can eat away at the sealer and damage the concrete. Sand is a much safer alternative for creating traction on icy spots. By taking a few simple precautions, you can easily protect your patio from accidental damage and ensure it remains a beautiful, functional part of your home for a long time.

Is a Stamped Concrete Overlay the Right Choice for You?

Deciding on the best way to refresh your patio involves weighing appearance, budget, and long-term durability. A stamped concrete overlay can be a fantastic solution, but it isn’t the right fit for every situation, especially with Long Island’s variable weather. Before you commit, it’s important to look at your existing concrete slab and consider your goals for the space. Are you looking for a quick cosmetic update, or do you need a solution that will stand the test of time?

Thinking through a few key questions can help you determine if an overlay is your best option or if you should explore other materials. Let’s walk through what makes a patio a good candidate for an overlay, when you might be better off with pavers, and how to find a professional you can trust to do the job right.

Signs an Overlay Is a Perfect Fit

A stamped concrete overlay is the perfect choice when your existing concrete patio is structurally sound but just needs a facelift. If your slab is free of major cracks, heaving, or crumbling but looks stained, faded, or just plain boring, an overlay can completely transform it. Think of it as a way to get a brand-new look without the cost and hassle of a full demolition. According to experts at Solomon Colors, a stampable overlay is a great method to update and improve the appearance of old concrete. It’s an ideal solution for covering minor surface imperfections and giving your outdoor space a fresh, modern design.

When to Choose Pavers or Natural Stone Instead

While an overlay sounds great, it has its limits. In climates with freeze-thaw cycles like ours on Long Island, overlays can be less durable than other options. Some homeowners have found that thinner overlays may only last a few years before showing wear. If your existing concrete has significant damage, an overlay is just a temporary fix. For a more permanent and resilient solution, you should consider installing beautiful porcelain and natural stone pavers. Pavers are incredibly durable, and if one ever gets damaged, it’s easy to replace just that single piece. This makes them a smart, long-term investment for any patio or walkway.

How to Pick the Right Contractor for the Job

Applying a stamped concrete overlay is a detailed process that requires skill and precision. While it might seem like a potential DIY project, industry professionals strongly recommend hiring an experienced contractor to ensure a high-quality finish. The prep work, mixing, application, and stamping all have to be done correctly for the overlay to bond properly and look its best. When vetting contractors, ask to see a portfolio of their previous overlay projects and check their references. A reputable home improvement company will have the expertise to assess your existing slab and execute the job flawlessly, giving you a beautiful patio that lasts.

Related Articles

Frequently Asked Questions

How long will a stamped concrete overlay really last on Long Island? The lifespan of an overlay is the biggest question, and it really depends on a few key things. In our climate, with its tough freeze-thaw cycles, a thin or poorly installed overlay might only last a few years before it starts to show signs of cracking or peeling. For a durable result, the overlay needs to be thick enough, the original concrete slab must be in great shape, and the installation has to be done perfectly. This is why a professional job is so important; it’s the best way to maximize the life of your new patio.

My patio only has a few small cracks. Can I still get an overlay? This is a great question because the type of crack matters. If you have minor, hairline cracks that are stable (meaning they aren’t getting wider or shifting), they can usually be repaired before the overlay is applied. However, if you have larger, structural cracks where the concrete is separating or one side is higher than the other, an overlay is not a good solution. The new layer will just crack right along with the faulty base, so a full replacement is a much better long-term investment.

Is a stamped concrete overlay slippery when it gets wet? This is a valid safety concern, especially for patios around pools or for families with kids. The texture created by the stamping process actually provides more grip than a perfectly smooth, troweled concrete surface. For extra peace of mind, a non-slip additive can be mixed into the final sealer coat. This creates a slightly gritty texture, much like fine sand, that gives you excellent traction without changing the look of the patio.

How is an overlay different from just painting or staining my concrete? Think of paint or stain as a purely cosmetic fix, like a coat of nail polish. They are thin coatings that sit on the surface and can easily chip, peel, and fade over time. A stamped concrete overlay is a completely different product. It’s a new, durable layer of a cement-based material that is physically bonded to your old patio. It adds real texture and thickness, creating a brand new surface that is far more resilient and long-lasting than any paint or stain could be.

Can I apply a stamped concrete overlay myself to save money? While the temptation to DIY is understandable, this is one project best left to the professionals. Applying an overlay correctly requires specialized knowledge, expensive equipment like concrete grinders and large stamps, and precise timing. The surface preparation has to be perfect for the new layer to bond, and the stamping must be done quickly before the material sets. A failed DIY job can end up looking terrible and costing you more to have it removed and fixed than it would have to hire an expert from the start.

Swimming pool skimmer opening set into stone coping beside clear pool water

When does a Long Island swimming pool need a skimmer replacement? Pool skimmer replacement Long Island

A pool skimmer draws surface water and floating debris toward the circulation system. For Long Island homeowners, pool skimmer replacement may be appropriate when the body, throat, or connected plumbing has failed and a durable repair is not practical. A crack by itself does not prove that the skimmer is causing water loss, so diagnosis should come before demolition or replacement.

Contact Gappsi through our contact page to discuss your pool concern

When should you consider replacing a pool skimmer?

Replacement is worth discussing when an inspection finds a broken skimmer body or throat, extensive cracking, failed connections, or separation that cannot be corrected with a compatible repair. A skimmer can also merit closer evaluation if water loss appears to stop near the opening, if the unit has shifted, or if the surrounding pool structure shows movement. Those are reasons to investigate, not proof of a particular failure.

Look for a pattern rather than one isolated symptom. Note the water level and when it changes, whether the pump is running, whether the water level stabilizes at a particular point, and whether the skimmer draw or equipment behavior changes. A professional can use that history alongside a physical inspection to decide what to test next. Gappsi’s pool remodeling information is a relevant starting point for discussing related pool work.

What signs can you check before arranging an assessment?

Start with what is visible and accessible. Look at the opening, lid, basket, throat, nearby coping, and the joint between the skimmer and pool surface. Do not reach into equipment or remove parts that are difficult to access. A loose lid or clogged basket is not the same as a damaged skimmer body, and each points to a different next step.

  • Cracks or broken edges: Note their location, length, and whether they appear to extend through the throat or visible body.
  • Gaps or displacement: Record any separation at the pool edge, movement of the skimmer, or nearby coping that appears raised or shifted.
  • Water-level pattern: Write down the level at the start and end of observations, along with the time interval and pump status.
  • Changes in circulation: Describe weak surface draw, air in the system, or a change in pump sound. Such symptoms can have causes elsewhere.
  • Recent changes: Mention nearby construction, freeze-thaw damage, impact, or other work if you know it occurred.

Pool professional inspecting a skimmer throat and surrounding coping

Take clear photographs in daylight, including one close view and one wider view showing the adjacent surface. If the pool is next to a pool patio, document any movement or cracking there as well. A surface defect may be related to access or surrounding conditions, but it does not identify a leak source on its own. If a pool includes a waterfall, a change in sheer descent flow can be useful background for the inspection, though it is not a skimmer test.

Could something other than the skimmer cause the same symptoms?

Yes. Pool water can be lost at another fitting, a return line, a light niche, a shell surface, or another connection. Poor surface draw may reflect a low water level, a blocked basket, a valve setting, or a circulation issue elsewhere. Water also leaves a pool through normal use, splash-out, and evaporation, so a falling level alone does not identify the source.

Tell the evaluator whether a symptom occurs only while the pump runs, after it stops, or under either condition. Also note whether the water level appears to settle near the bottom of the skimmer opening. That observation may help guide testing, but it is not a stand-alone diagnosis. If the level drops quickly, equipment loses prime, or there is a safety concern, avoid operating affected equipment and seek qualified guidance rather than repeatedly restarting it.

A simple observation log can make a site visit more useful. Record the date and time, water level relative to a fixed point such as the tile line, whether the pump was on, recent weather or heavy pool use, and any visible change near the skimmer. Take pictures from the same position when possible. Do not deliberately run equipment that is losing prime or let the water fall below a safe operating level just to collect more data. If the pool has a marked fill line, use it as a visual reference rather than relying on memory.

For example, a homeowner might notice that the level falls over several days but cannot tell whether the skimmer is responsible. Notes showing that the pump schedule changed, the pool was used heavily, or water loss continued while equipment was off can help narrow the conversation. They do not establish the source by themselves, but they give the evaluator a clearer timeline. Include the location of any crack in each photo, and avoid applying sealant before the inspection unless a qualified professional directs you to do so.

When the source is unclear, ask what observations or tests support the diagnosis and what alternatives have been considered. A careful evaluation can prevent work on the skimmer when a different component is responsible. This is especially useful before coping or deck material is disturbed.

Can a skimmer be repaired instead of replaced?

Sometimes. A limited defect in an accessible area may be suitable for repair if the surrounding body and connections remain sound and the repair material is compatible with the pool construction. Replacement becomes a stronger possibility when damage is extensive, the throat or body is broken, the connection has failed, or a repair would not provide a dependable result. The location of the defect, construction type, plumbing condition, and access all affect the decision.

What inspection finds Possible direction What to ask
Loose lid or basket problem, body intact Correct or replace the affected component Can the issue be resolved without opening the surrounding surface?
Small, accessible defect in otherwise sound material Evaluate a compatible localized repair What makes this repair suitable, and how will it be checked?
Broken throat, extensive body damage, or failed connection Assess replacement scope What coping, deck, and plumbing access will be needed?
Water loss but no confirmed skimmer defect Identify the source before selecting work What evidence connects the loss to this location?

This table is a discussion aid, not a remote diagnosis. Ask the contractor to show the defect and explain why the proposed option addresses it. If repair is not recommended, ask whether the reason is the extent of damage, the location, access, or the condition of the connection. If replacement is proposed, clarify the expected limits of work before approval.

What does pool skimmer replacement involve?

The process depends on pool construction and the way the skimmer was installed. The work generally starts by confirming the failed component and planning access. Nearby coping or deck material may have to be removed carefully to reach the skimmer and its plumbing. The damaged unit is then addressed, compatible connections are made, and the work is checked before the surface is closed and restored. The exact sequence and amount of surface work can vary by site.

  1. Confirm the diagnosis and scope. Identify what has failed, what testing supports that finding, and what parts of the pool system are included.
  2. Plan access and protect the area. Review the likely removal area, protection for nearby finishes, and how people and pets will be kept away from an open work zone.
  3. Expose and address the skimmer. Carefully open the necessary area, remove or repair the affected components, and make connections suitable for the existing system.
  4. Check the work before restoration. Ask how operation and connections will be examined before the opening is covered.
  5. Restore the surrounding finish. Review the coping or deck repair, joints, transitions, and any material match that can reasonably be achieved.

Testing before restoration matters. Once the area is closed, access to the connection may be more difficult. Ask what check will be performed and what the result will show. Clarify who handles each part of the work, including surface removal, plumbing, replacement components, testing, and finish restoration. For homeowners considering a larger pool remodeling project, discussing the sequence can help avoid disturbing newly completed work.

Pool skimmer and plumbing exposed during replacement work

How can you compare a repair proposal with a replacement proposal?

Compare the explanation and scope, not just the name of the proposed work. A clear proposal should connect the observed condition to the recommended work. It should distinguish what is known from what may be discovered after access is opened. If an estimate includes surface restoration, ask what material and area are included and how the finished edge will meet the existing surface.

For example, imagine a pool that loses water and has a visible crack near the throat. One proposal may recommend replacement immediately; another may recommend checking whether the crack extends into the body and whether a connection is leaking. The useful comparison is whether each recommendation explains its evidence, how it will address the suspected failure, and what happens if opening the area reveals additional damage. Neither the visible crack nor the estimate title answers those questions by itself.

  • Request a plain-language explanation of the confirmed defect and any remaining uncertainty.
  • Ask whether a repair is feasible and, if not, why it is not considered suitable.
  • Separate access, skimmer components, plumbing, testing, and finish restoration in the scope.
  • Clarify what is excluded and how changes will be discussed if concealed conditions appear.
  • Ask what the site will look like at the end of each work stage and when the pool can be assessed for return to use.

Photograph the existing coping and keep any information you have about its material. When the skimmer is surrounded by a broader patio area or other hardscaping, discuss sequencing and finish coordination before work begins. If a pool project includes a pool house, note access routes and any shared work area when coordinating the schedule.

How should Long Island homeowners plan the work?

Plan around access, the condition found, weather, materials, and other scheduled pool work. There is no single schedule that fits every installation. Ask when the pool may need to be lowered or equipment isolated, what areas must remain clear, and what conditions would change the sequence. Do not lower pool water or alter equipment settings unless the person responsible for the work advises it.

Before a site visit, clear loose items from the pool edge and keep children and pets away from visible damage. Share the pool construction type if known, a short timeline of symptoms, the water-level notes, and the photographs. If the pool is being prepared for a seasonal closure, coordinate the assessment with any pool safety cover planning; a cover does not diagnose or fix a skimmer. For broader yard coordination, the backyard project category may help frame related improvements, but the skimmer defect should be evaluated on its own merits.

For general pool and water safety information, homeowners can consult the New York State Department of Health. This general resource does not diagnose a skimmer or replace site-specific direction about operating a particular pool.

What should you ask before approving replacement?

Use the conversation to establish what is included and how the result will be evaluated. These questions can make a recommendation easier to understand:

  • What observation or test confirms that the skimmer is the source of the issue?
  • Which part has failed: lid, throat, body, fitting, or connected plumbing?
  • Could a repair address the condition, and what is the reason for choosing replacement instead?
  • What coping or deck material may be removed, and what restoration is included?
  • How will the connections be checked before the work area is closed?
  • What concealed conditions could change the scope, and how will those changes be explained?
  • What should remain off or inaccessible during work, and who will confirm the pool is ready for normal operation?

Clear answers help you distinguish a confirmed repair need from a provisional plan. They also set expectations for the transition between the skimmer, coping, and surrounding surface. Contact Gappsi through its contact page when you are ready to discuss the concern, and review pool patio considerations if nearby surfaces are part of the project.

Contact Gappsi through our contact page to discuss an evaluation

Frequently Asked Questions

How can I tell whether a pool skimmer is leaking?

Visible cracks or separation can raise concern, but water loss can come from several parts of a pool. Record the level, timing, and pump status, then have the suspected source assessed rather than treating one symptom as confirmation.

Does every cracked skimmer need replacement?

No. The location and extent of the crack, the condition of the body and connections, and the feasibility of a compatible repair all matter. Ask for an explanation of why repair or replacement fits the observed damage.

Will replacing a skimmer disturb the patio?

It may. Access can require removal of nearby coping or deck material, depending on the installation and connection. Before work starts, clarify what may be removed and how the area will be restored.

Can I keep using the pool while waiting for an assessment?

That depends on the damage, water level, and equipment behavior. If there is substantial water loss, exposed damage, equipment trouble, or an electrical concern, stop using affected equipment and seek qualified guidance.

Posted by Gappsi Group

Contact Gappsi through our contact page to discuss your pool skimmer

A careful diagnosis helps Long Island homeowners choose a suitable repair or replacement scope and understand what the surrounding pool area may require.

Homeowners and a remodeling professional reviewing revised project plans at a Long Island home

Home Remodeling Change Orders Long Island: How Should Homeowners Handle Them?

Home remodeling change orders Long Island homeowners receive can affect more than one selection. A request to move a wall, change a finish, or address an unexpected condition may alter the work, price, and schedule. The practical response is to pause, compare the proposal with the original scope, ask what else changes, and approve only when the revision is understandable and documented.

Contact Gappsi through our contact page

Posted by Gappsi Group

This article offers general project-planning information, not legal advice. Your signed agreement and local requirements determine the process that applies to your project. If a proposal raises a contract or dispute question, consider getting independent professional advice before you decide.

What is a remodeling change order?

A change order is a written record of a revision to the agreed project scope. It may add work, remove work, or replace an earlier specification. Examples include switching a tile selection, changing cabinetry, relocating a fixture, adding a built-in, or revising work after concealed conditions become visible.

The document should connect the proposed revision to the agreement, plans, or selection it changes. A conversation, text, or updated drawing can help explain the request, but on its own may not describe every effect. Check the contract for its change-approval procedure, required signatures, and any instructions for urgent site conditions.

It also helps to distinguish a request from an approved change. A homeowner may ask about an alternate finish without authorizing the work. Likewise, a contractor may explain a possible response to an unforeseen condition without the owner yet accepting the proposed scope or price. Keep those stages clear in messages and project records.

How should homeowners handle home remodeling change orders on Long Island?

Use a repeatable review process instead of making a rushed decision during a site conversation. The details will vary by project, but these steps create a useful basis for discussion:

  1. Pause and define the change. Write down what is different and what stays as originally planned. Name the room, feature, drawing, or selection involved. If the change responds to a site condition, ask what was found and why the current plan needs to be revised.
  2. Ask for a written proposal. Request a description of the revised work, materials or selections, price adjustment, and expected timing effect. Ask whether it supplements or replaces a specific part of the original agreement.
  3. Identify related work and exclusions. Check whether demolition, disposal, patching, painting, permits, protection, cleanup, or follow-up work is included, excluded, or unchanged. A connected task is not automatically part of the proposed change.
  4. Compare the proposal with the original scope. Locate the affected specification, drawing, allowance, or selection. If the revision was initiated by someone else, ask why it is proposed and whether there are alternatives.
  5. Resolve open questions before approval. Ask for clearer wording if the proposal leaves the quantity, finish, price basis, or schedule impact uncertain. Keep the question and answer with the proposal.
  6. Approve using the contract’s process. Follow the written procedure and retain the dated approval with the final version of the change. Avoid relying on an informal assurance that the missing details will be settled later.

For broad consumer information, the Federal Trade Commission website is a government resource. It is not a guide to the terms of your particular construction agreement, so use your contract and qualified advice for questions about your rights or obligations.

For projects that include connected indoor and outdoor work, it can be useful to make a clear list of affected spaces and decisions. Gappsi’s pages on pool remodeling and pool-house projects illustrate examples of project areas where one design choice may sit alongside other work. The relevant scope still needs to be stated in your own agreement.

Talk with Gappsi about your remodeling project

What should a change order include?

A useful change record lets someone who was not part of the conversation understand what was proposed and what was approved. Look for enough detail to identify the revision, its price effect, and its timing consequences. The following checklist can help you review the document before responding.

Review item What to verify Question to ask
Scope Work added, removed, or revised, with its location Which original item or drawing does this change?
Materials Product or agreed description, finish, size, and quantity when known Does this match the selection we discussed?
Price Added amount or credit, and what it covers Are related tasks and allowances included?
Schedule Expected effect on ordering, sequence, and milestones Which dates or stages may move?
Responsibilities Items assigned to the contractor, owner, or another party Who is responsible for each open task?
Approval Required written confirmation or signatures What method does our agreement require?

A bare total may not answer whether the amount includes the related work needed to complete the revision. If the proposal combines several tasks, ask whether it can identify the major components or explain the basis in plain language. The goal is not to demand one universal estimating format; it is to understand what you are accepting and how it relates to the agreed work.

Homeowner and remodeling professional comparing a renovation plan with written change notes

How can you evaluate cost and schedule effects?

Review the proposed work and its knock-on effects separately. A different finish may have a material cost, but it could also change ordering, preparation, installation, or coordination with the next trade. Ask the contractor to explain the added work and any credit for work no longer needed, then compare the full revised scope with the original.

  • Separate additions from credits. Ask what new work is being added, what original work is removed, and whether any allowance or deposit is being adjusted. Confirm whether the quoted figure is an increase, a replacement total, or another kind of adjustment.
  • Ask what the price covers. Clarify labor, materials, delivery, removal, protection, finishing, and any other items that matter to the particular change. Do not assume that related work is included because it seems necessary to you.
  • Trace the timing effect. Find out whether the revision affects ordering, demolition, installation, inspection, access, or later work. Ask which milestones might move and whether the schedule effect depends on a selection or delivery date.
  • Consider alternatives fairly. If the proposal is more disruptive than expected, ask whether another material or approach could meet the same goal. Compare scope, appearance, maintenance needs, coordination, and timing, not just the initial price.
  • Check dependencies. A revision in one area may affect an adjacent surface, trim, fixture, or finish. Ask what must also change so the finished result is complete, and whether those related items are in this proposal.

For example, imagine a homeowner wants to replace a specified floor tile after the installation date has been planned. Before approving, compare the original selection with the alternate, confirm the area and finish, ask whether the new material is available when needed, and clarify whether preparation or installation steps change. Then ask which following work depends on the floor being complete. This example does not predict a particular cost or delay; it shows the questions that make the proposal easier to evaluate.

When a revision crosses between indoor remodeling and exterior spaces, list the interfaces rather than assuming the scopes are interchangeable. Related Gappsi pages on patio projects and pool patios can provide context for outdoor project areas, while the proposal for your home should identify the exact work being changed.

What happens after a change is approved?

Approval is not the end of the recordkeeping. Compare the final signed version with the proposal you reviewed and make sure the approved scope, amount, and timing language are the same. If the parties revised the proposal during discussion, save the final copy and mark earlier drafts so nobody mistakes them for the current decision.

As work proceeds, use the approved change as a reference point. When the revised work begins, confirm that the room, material, or task matches the document. If the actual site condition or selected item differs from what the proposal describes, stop and ask whether another written revision is needed. Do not assume that a new difference is already covered by the earlier approval.

At closeout, check that completed changed work is reflected in the project records and that any remaining questions are resolved. This does not replace the contract’s payment or inspection procedures. It gives you a clear trail from the original scope to the approved revision and then to the work completed. A dated photo, marked drawing, or written completion note can help identify the result later, especially when the area will be covered by another finish.

When should you question or delay approval?

Ask for clarification before approving if the proposal does not identify the affected work, offers a total you cannot relate to the change, or leaves timing and dependencies unresolved. The same applies if the document conflicts with an earlier drawing, selection, or written commitment. A corrected proposal is a better decision record than a verbal promise to fill in details later.

Take particular care when the change is presented as urgent. Ask what needs attention immediately, what can wait for a written decision, and what evidence or explanation is available. If there is a condition behind a wall or beneath a finish, request a description and, where practical, photographs or a site review. Keep the discussion factual and distinguish observed conditions from proposed solutions.

If you believe a proposal conflicts with the contract, if responsibility is disputed, or if the financial effect is significant and unclear, consider pausing approval and seeking independent advice. A concise written question can keep the conversation focused: “Please identify the affected contract item and explain the revised work, price, and timing.” Avoid signing a document with blank fields or wording you do not understand.

How do selections and allowances affect changes?

A change may begin with a selection that differs from an allowance or earlier choice. First confirm what the contract says the allowance covers and which selection was included. Then ask how the replacement affects both the material and the work to install or finish it. The proposal should make clear whether the allowance is being adjusted and how the new amount is treated.

Keep selections specific enough to identify later. “Different tile” is not a complete record. Note the agreed product or description, size, finish, quantity if known, and the location where it will be used. If you are still comparing options, ask whether a decision date matters to ordering or the work sequence. Save the selection record with the related change order rather than in a separate place that is hard to find.

For a material change on a project that also includes exterior improvements, use the same discipline: identify the surface and location, record what is being replaced, and clarify the edge conditions or adjacent work. Pages about hardscaping and masonry offer examples of distinct work categories, but your change document should define your specific project rather than rely on a general category label.

How can you keep a reliable change-order record?

Use one project folder, digital or physical, for the signed agreement, drawings, selections, proposals, approvals, and related messages. Give each proposed change a date or simple reference number. Keep the approved version beside the original proposal so you can trace what was requested, what questions were answered, and what the parties accepted.

  • Record who raised the change and the reason given.
  • Save supporting photos, revised drawings, or selection details when relevant.
  • Keep the written price and schedule explanation with the proposal.
  • Mark unanswered questions and record when they are resolved.
  • Store the approval in the same folder as the final change document.
  • Compare later progress notes or invoices with the approved revision and raise differences promptly.

A short log can make a long project easier to follow. Use columns for date, change description, status, price effect, schedule effect, and file location. Mark an item as “requested,” “under review,” “approved,” or “not proceeding,” so a draft does not get confused with an authorization. For multiple decisions in one meeting, give each one a separate entry and attach the relevant drawing or selection.

Remodeling plans, material samples, and a project schedule arranged for review

Keep communication easy to search. Use a subject line or message heading that names the room and change, and refer to the same wording used in the proposal. After a meeting, send a brief recap of the decisions and open questions. If several people are involved in approvals, confirm who is authorized to make the decision under the agreement before treating a message as final.

Gappsi’s project archive and backyard project category show broader project contexts; use your own dated drawings and signed change records as the authority for your home’s agreed scope. For a remodeling conversation, the Gappsi contact page is the appropriate place to start.

What communication habits reduce confusion?

Choose a clear channel for project decisions and confirm important conversations in writing. Keep each message focused on one change where possible. Use the same names for rooms, selections, and plan details that appear in the contract or drawings. If terminology differs between a conversation and a proposal, ask the other person to confirm that both refer to the same item.

Before a meeting, prepare five questions: What is changing? Why is it proposed? What work is included or excluded? What is the price effect? What happens to timing? Add a sixth question when relevant: what decision is needed by what date? Afterward, send a short factual recap and invite corrections. This practice is especially helpful when you are comparing several options or when a change affects later work.

For example, a homeowner choosing between two cabinet finishes can record each option, the date a choice is needed, and any stated effect on ordering. That does not mean every choice changes the contract or schedule. It simply makes clear which issue is open and what information is needed to close it. If the choice changes the agreed scope, ask for the formal written record required by the contract.

Discuss your home remodeling project with Gappsi

Frequently Asked Questions

Can a homeowner request a change after work begins?

A homeowner can ask whether a revision is possible, but whether it can be accommodated and how it affects the agreement depend on the contract, project conditions, and timing. Ask for the revised scope and its cost and schedule effects before authorizing changed work.

Should I approve a change order verbally?

Follow the approval method stated in your contract and keep the decision in the required written form. A conversation can clarify the request, but it may not capture the full scope, price, schedule, and authorization in a record that can be checked later.

What if the change is needed because of a concealed condition?

Ask what was discovered, how it affects the planned work, and what response is proposed. Request available supporting information, such as photos, and review the revised scope, price, and timing. If the issue involves a disagreement about responsibility, consider independent advice before approving.

Can a change order affect the completion date?

Yes. A revision may affect ordering, work sequence, or coordination with later tasks. Ask which milestones may move and whether the stated timing depends on a selection, delivery, or other decision. Keep the explanation with the approved change record.

What should I do if a proposal is unclear?

Do not guess at missing scope or terms. Ask for a revised version that identifies the affected work, price effect, exclusions, schedule implications, and approval process. If the issue remains significant or disputed, consult an appropriate independent professional.

Plan the next step

Review each proposed revision against the agreement, ask direct questions about scope, cost, and timing, and keep the approved version with the project documents. A consistent written record helps everyone track what the project includes as work moves forward.

Contact Gappsi through our contact page to discuss your remodeling project

When every approved change is specific and easy to find, it is simpler to follow the agreed work through completion.