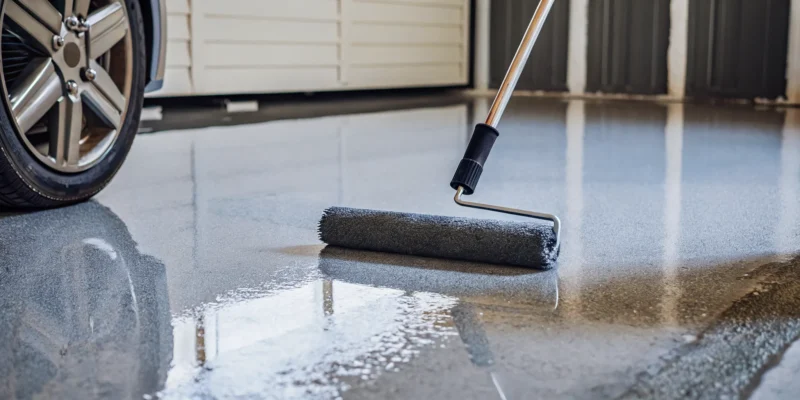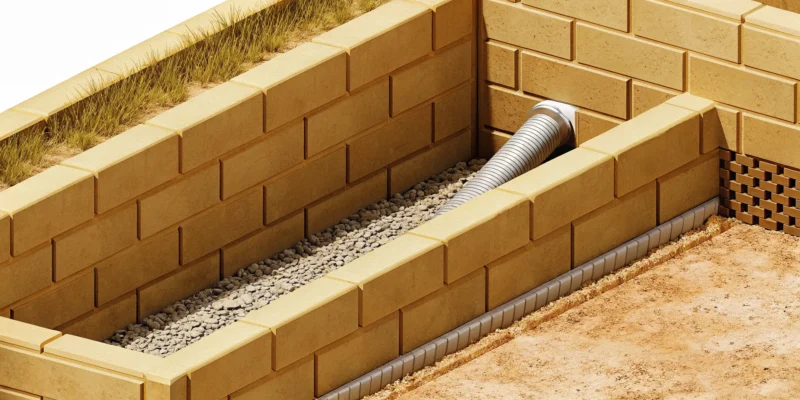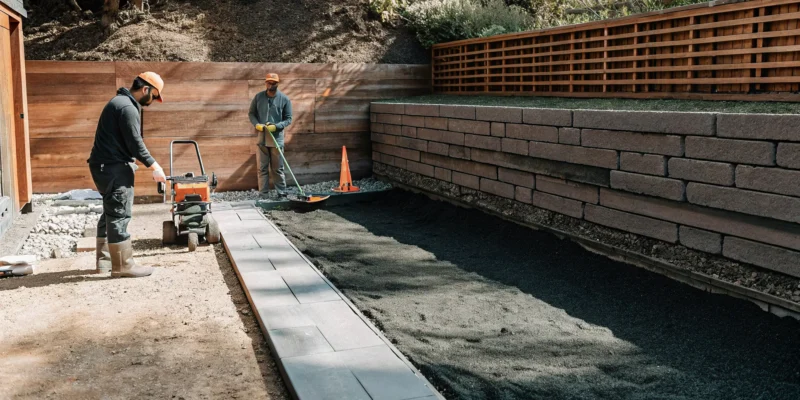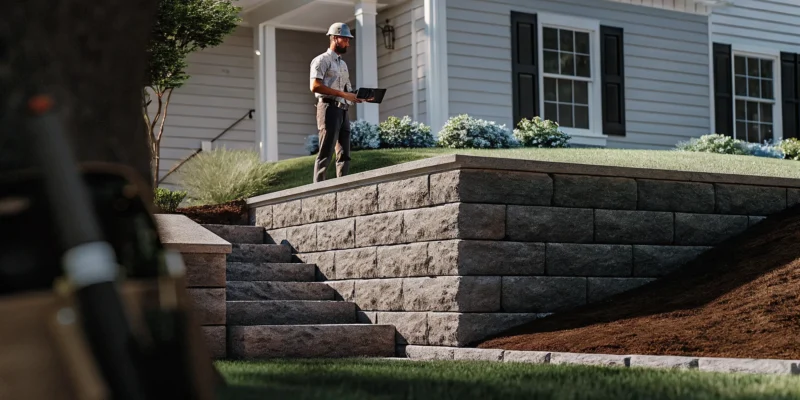
Artificial grass lawn and walkway in the front yard of a Nassau County home.

Artificial Grass Nassau County: A Homeowner’s Guide

Your yard should be a place for relaxation and fun, not a source of constant chores. For many families, however, a traditional lawn means dealing with patchy spots, muddy paws, and an endless to-do list. This is where a modern landscaping solution can completely change your outdoor experience. Today’s turf is not the fake-looking plastic of the past; it’s a premium, realistic surface that stays lush and green in every season. By choosing artificial grass in Nassau County, you are investing in more than just your property’s curb appeal. You are reclaiming your free time and creating a durable, beautiful space for your family to enjoy for years to come.

Key Takeaways

  • Invest in Your Lifestyle, Not Just Your Lawn: Choosing artificial grass is a long-term investment in your time and peace of mind. You trade the endless cycle of mowing and watering for a consistently beautiful yard and significant savings on water and maintenance costs over the years.
  • Focus on Quality for a Lasting Look: To ensure your new lawn looks great for years, examine the product’s specifications. Key features like UV resistance, a high drainage rate for pets, and the right pile height for your intended use are all indicators of a high-quality turf that will stand the test of time.
  • Choose Your Installer as Carefully as Your Turf: The best artificial grass can fail with poor installation. A professional installer’s expertise is critical, so look for a team with a strong local portfolio, a transparent process, and a solid warranty covering both the product and their workmanship.

Is Artificial Grass the Right Choice for Your Nassau County Home?

Deciding what to do with your lawn is a big part of creating a home you love. For many homeowners in Nassau County, the choice between a traditional lawn and artificial grass comes down to lifestyle, maintenance, and long-term value. A natural lawn can be beautiful, but it demands constant work, from mowing and watering to weeding and fertilizing. If you find yourself spending more time working on your yard than enjoying it, it might be time to consider an alternative.

High-quality artificial grass offers a practical and beautiful solution that gives you a perfect lawn without the endless upkeep. It’s not the plastic-looking turf of decades past. Today’s options are incredibly realistic, durable enough for the most active families, and offer surprising environmental benefits. Let’s look at what makes synthetic turf such a compelling choice for so many of your neighbors.

Enjoy Effortless Curb Appeal Year-Round

Imagine your lawn looking lush, green, and perfectly manicured every single day of the year. With Long Island’s hot summers and cold winters, keeping a natural lawn vibrant is a constant battle. You’re either watering it constantly or watching it turn brown and dormant. Artificial grass completely changes the game. Your lawn will look amazing and green no matter the season, giving your home incredible curb appeal without you having to lift a finger.

This means you can say goodbye to weekend mornings spent behind a lawnmower and afternoons spent pulling weeds. Instead of a chore list, your yard becomes a beautiful backdrop for your life. You get all the aesthetic benefits of a pristine lawn with none of the demanding labor, freeing up your time for what really matters: relaxing and making memories in your outdoor space.

Get a Realistic, High-End Look for Your Yard

One of the biggest hesitations homeowners have about artificial grass is the fear that it will look fake. That’s a valid concern, but thankfully, technology has come a long way. Most modern artificial grass is so realistic that it’s often hard to tell the difference. With varied blade shapes, thatch layers, and multi-tonal green fibers, today’s turf masterfully mimics the look and feel of a healthy, natural lawn.

This isn’t a cheap-looking shortcut; it’s a premium landscaping product that adds a clean, high-end finish to your property. You can see for yourself how seamlessly it integrates into different landscapes by watching some of our project showcases. A well-installed turf lawn stays vibrant and green year-round without the patchiness or upkeep of natural grass, providing a consistently beautiful surface that truly enhances your home.

Find a Durable Solution for Kids, Pets, and High Traffic

If you have kids or pets, you know the struggle of maintaining a natural lawn. High-traffic areas quickly get worn out, turning into patchy, muddy messes. Modern artificial grass is specifically designed with pet safety and family fun in mind. It’s a durable, non-toxic surface that can handle everything from soccer practice to a dog’s daily zoomies without showing wear and tear.

One of the best parts is the easy cleanup. Pet messes can be simply rinsed away, and you’ll never have to worry about muddy paws being tracked through your house again. Because it’s so resilient, artificial turf is also the perfect foundation for backyard putting greens or sports games courts. It provides a safe, even, and reliable surface for play, ensuring your yard is always ready for action.

Conserve Water and Reduce Your Environmental Footprint

Choosing artificial grass is also a smart move for the environment and your wallet. Think about how much water a natural lawn requires, especially during Nassau County’s dry summer months. Artificial grass eliminates the need for watering, which can significantly reduce your household water consumption and lower your utility bills. It also cuts down on ongoing maintenance costs since you won’t be buying fertilizer, pesticides, or gasoline for a mower.

Beyond water conservation, you’re also creating a healthier environment for your family. Artificial grass eliminates the need for lawn chemicals and gas-powered mowers, both of which can harm the environment. By making the switch, you reduce your carbon footprint and stop introducing potentially harmful pesticides and herbicides into your yard. It’s a sustainable choice that offers peace of mind and long-term savings, making it a responsible investment in your home.

What to Look for in an Artificial Grass Product

Once you’ve decided to make the switch, the next step is choosing the right product. It’s easy to assume all artificial grass is the same, but the quality and features can vary quite a bit. Think of it like picking out any other important material for your home, like flooring or countertops. The right choice depends on your lifestyle, your aesthetic goals, and how you plan to use the space. To make a confident decision, you’ll want to look at a few key characteristics.

From the height and shape of the blades to the materials used for backing and infill, every detail matters. A high-quality synthetic turf product will not only look incredibly realistic but will also stand up to years of family fun, pet antics, and Long Island weather. We’ll walk through the most important factors to consider so you can find the perfect artificial grass for your yard.

Pile Height and Blade Shape

The length of the grass blades, known as pile height, is one of the first things you’ll notice. A longer pile height, around 1.5 to 2 inches, creates a lush, luxurious look that’s perfect for front yards or low-traffic areas where you want maximum curb appeal. For spaces that see more action, like a play area for kids or a backyard putting green, a shorter pile height is more practical. It’s more resilient and easier to clean. The shape of the individual blades also affects the turf’s performance. Different blade shapes (like C, S, or W shapes) are engineered to be softer, more durable, or better at staying upright, giving you a lawn that always looks freshly mowed.

Drainage and Pet-Friendly Features

If you have pets, proper drainage is non-negotiable. High-quality artificial grass is designed with a permeable backing that allows liquids, like rain or pet urine, to pass through easily into the sub-base below. This prevents puddles from forming and helps keep odors at bay. When you’re shopping, ask about the drainage rate. You’ll also want to consider the infill, which is the material spread between the grass blades. Many modern infills are made from non-toxic, natural substances like coated sand, which is completely safe for pets and helps with drainage and odor control. A well-designed turf system ensures your yard stays fresh and clean for everyone in the family, including your four-legged members.

UV Resistance and Warranty

Here on Long Island, our lawns get a healthy dose of sunshine. That’s why it’s essential to choose an artificial grass product with excellent UV resistance. Look for turf that has been treated with UV inhibitors during the manufacturing process. This protection acts like sunscreen for your lawn, preventing the blades from fading or breaking down over time. A strong manufacturer’s warranty is your best indicator of a product’s durability. A comprehensive warranty that covers fading and defects for 10 years or more shows that the company stands behind its product. You can find a variety of high-quality, warrantied options at the Gappsi Store to ensure your investment is protected.

Does It Really Look Fake?

This is one of the most common questions we hear, and it’s a valid one. Early versions of artificial grass definitely had an unconvincing, plastic look. Thankfully, technology has improved dramatically. Today’s premium turf products are designed to look and feel incredibly realistic. They achieve this by blending multiple colors of green and brown fibers to mimic the natural variations in a real lawn. Many also include a textured “thatch” layer at the base of the blades. When you see these products in person, you’ll be amazed at how closely they resemble natural grass. You can see examples of our finished projects on the Gappsi YouTube channel to judge for yourself.

Is It Safe for Kids and Pets?

Absolutely. Your family’s safety is the top priority, and modern artificial grass is designed with that in mind. Reputable manufacturers produce turf that is non-toxic and lead-free, making it a safe surface for children and pets to play on. In fact, it can even be safer than a traditional lawn because it eliminates the need for chemical fertilizers, pesticides, and weed killers. For play areas, you can also install a foam under-padding for extra cushioning to help protect against falls. Choosing artificial grass means creating a beautiful, worry-free environment for your entire family to enjoy, which is a core part of any great home improvement project.

Understanding the Cost of Artificial Grass in Nassau County

Let’s talk about the budget. Deciding to install artificial grass is a big step, and it’s natural to wonder about the cost. Think of it not as an expense, but as an investment in your home and your lifestyle. While the initial price is higher than a bag of grass seed, the long-term value you get from a beautiful, low-maintenance yard is priceless. You’re buying back your weekends and creating a consistently gorgeous outdoor space for your family to enjoy for years to come. We’ll break down the numbers so you can see how it all adds up and make an informed decision for your Nassau County home.

A Breakdown of Cost Per Square Foot

When you start looking at prices, you’ll see them listed per square foot. For high-quality synthetic turf, you can expect the cost to range from $5 to $12 per square foot. This price typically includes both the turf itself and the professional installation. The final cost can vary depending on the specific type of turf you choose and the complexity of your yard. A higher price often reflects a more durable, realistic-looking product with a better warranty, which is exactly what you want for a long-term solution.

Comparing Costs: Artificial Turf vs. Traditional Lawn Care

It’s easy to see the upfront cost of turf, but what about the hidden costs of a natural lawn? Over 12 years, maintaining a traditional lawn can cost between $12,000 and $16,500 when you add up mowing, watering, fertilizing, and pest control. In contrast, the average annual maintenance for synthetic grass is significantly lower. While the initial investment is greater, you quickly start to see a return. You’re not just paying for grass; you’re paying to get rid of the constant work and expense that a natural lawn requires.

How You’ll Save Money in the Long Run

The long-term savings are where artificial grass truly shines. The most immediate impact is on your water bill. By eliminating the need for sprinklers, you could save thousands of dollars over the life of your lawn. But the savings don’t stop there. You can also say goodbye to buying and maintaining a lawnmower, purchasing fertilizer and pesticides, and paying for seasonal reseeding. When you add it all up, the initial investment in a beautiful, worry-free landscape design starts to look very attractive.

Exploring Your Financing Options

Making a significant home improvement shouldn’t feel out of reach. Many homeowners use financing to make the project more manageable. There are several great options to consider, such as installer financing programs, unsecured personal loans, or even home equity products. Some people also use introductory 0% APR credit cards to cover the cost. When you work with a professional installer, they can often walk you through the available choices. These options make it easier to move forward with your home remodeling project and start enjoying your new yard sooner.

How to Choose the Best Artificial Grass Installer

Selecting the right artificial grass is only half the battle; the quality of the installation is what truly determines the look, feel, and longevity of your new lawn. A subpar installation can lead to seams showing, poor drainage, and a lumpy surface, completely undermining your investment. The right installer acts as your partner, bringing expertise and craftsmanship to ensure your project is a success from the ground up. They should have a deep understanding of Long Island’s specific climate and soil conditions to prepare the base correctly, which is crucial for a lasting result.

When you’re ready to transform your yard, you need a team with proven experience, a wide selection of quality products, and a transparent process. A great installer will walk you through your options, from different blade shapes and pile heights to the best infill for your needs, whether you have active kids, pets, or are creating a personal putting green. Finding a company that handles everything from design to the final sweep makes the entire experience seamless and stress-free. At Gappsi, we manage the complete installation of synthetic turf and sports games courts, ensuring every detail is perfect and tailored to your home.

Key Questions to Ask Any Installer

Before you commit, it’s important to ask a few key questions to make sure you’re hiring a true professional. Think of it as a friendly interview to find the best fit for your home. Start by asking about their experience, specifically with projects in Nassau County. A portfolio of local work is a great sign.

Next, inquire about their product selection and durability. Ask, “What turf options do you offer, and which do you recommend for my needs?” A quality installer will provide a variety of choices and explain the benefits of each. Finally, get clear on their process and protection. You’ll want to know what their installation entails from start to finish and what kind of warranty they offer on both the materials and their workmanship.

Common Red Flags to Avoid

Just as there are signs of a great installer, there are also red flags that should give you pause. Be cautious if a company is unwilling to provide detailed, straightforward answers about their products, pricing, or installation process. A lack of transparency is often a sign that they are cutting corners. If they can’t clearly explain how they prepare the base or what materials they use, it’s best to walk away.

Another major red flag is a poor reputation or a complete lack of reviews. Check for online testimonials and ask for local references you can contact. A company proud of its work will be happy to share examples. You can see our projects and hear from our clients directly on our YouTube channel. Also, be wary of high-pressure sales tactics or installers who offer a very limited warranty. A confident professional will stand by their work for years to come.

The Gappsi Difference: Our Installation Process

At Gappsi, we believe a flawless installation begins long before the turf is unrolled. Our process starts with a comprehensive consultation and a thorough assessment of your property. We take the time to understand your vision and analyze your yard’s specific needs, from grading to drainage. This allows us to create a custom plan that ensures your new lawn is not only beautiful but also functional and durable.

We use only high-quality materials, from the aggregate base to the premium synthetic turf itself. Our expert team prepares the ground meticulously to create a stable, permeable foundation that will prevent sinking and puddling for years. We focus on customer satisfaction above all else, ensuring every installation meets our high standards and your expectations. Our goal is to provide you with a stunning, low-maintenance lawn that you and your family will enjoy for years to come.

Related Articles

Frequently Asked Questions

How do I actually take care of artificial grass? Caring for artificial grass is refreshingly simple. The main tasks are to rinse it with a hose periodically to wash away dust and pollen, and to use a stiff-bristled broom to fluff up the fibers in high-traffic areas. You will also want to remove leaves and other debris just as you would from a patio. It is a huge change from the constant mowing, watering, and weeding required for a natural lawn.

How does artificial grass hold up in Long Island’s weather, like snow and summer heat? High-quality turf is built to handle all four seasons. In the winter, snow can be left to melt naturally without harming the grass. During hot summer days, the surface can get warm in direct sunlight, but modern turf products are designed with technology to minimize heat absorption. A quick spray with a hose can cool it down instantly if needed, and it cools off quickly once it’s in the shade.

How long can I expect my new artificial lawn to last? A professionally installed lawn using premium, UV-protected turf is a long-term investment in your home. You can expect it to look great and perform well for 15 years or even longer. The key factors are the quality of the turf product you choose and the expertise of the installation, which is why a strong warranty is so important.

Is artificial grass safe for my kids and pets to play on? Yes, it is completely safe. Reputable artificial grass is made from non-toxic, lead-free materials, creating a worry-free play surface. It also eliminates the need for the chemical pesticides and fertilizers used on natural lawns. For extra safety in play areas, a shock-absorbent pad can be installed underneath the turf to provide extra cushioning.

What does the installation process actually involve? A professional installation is a multi-step process that ensures your lawn looks perfect and drains properly for years. The process begins with removing the existing grass and soil. Then, a base of crushed stone is installed and compacted to create a stable, permeable foundation. The turf is then rolled out, carefully cut to fit your yard, and seamed together. Finally, infill is spread across the surface and brushed into the fibers to help the blades stand up and add resilience.

Low-maintenance artificial grass in a Suffolk County backyard with a stone walkway.

Your Guide to Artificial Grass in Suffolk County

When you calculate the true cost of a natural lawn, the numbers add up quickly. There are the obvious expenses like water bills, fertilizer, and seed, but you also have to factor in the cost of lawn care equipment or professional services. It’s a recurring investment that never really ends. While the initial price of synthetic turf is higher, it represents a long-term financial solution. By eliminating watering and maintenance costs, an artificial lawn pays for itself over time while increasing your property’s value. It’s a smart investment in your home, making artificial grass in Suffolk County a financially savvy choice for a beautiful, worry-free yard.

Key Takeaways

  • Reclaim your weekends with a low-maintenance lawn: Artificial grass provides a consistently beautiful yard without the endless mowing, watering, or fertilizing. It’s a practical answer to Suffolk County’s water rules and harsh seasons, letting you spend less time on upkeep and more time enjoying your space.
  • Invest in long-term value and safety: Although the initial cost is higher, artificial turf pays for itself by eliminating expenses for water, fertilizer, and lawn care services. Plus, high-quality turf is non-toxic and requires no chemicals, creating a safer play area for children and pets.
  • Prioritize professional installation for a flawless finish: The success of your artificial lawn depends on expert site preparation. A professional installation guarantees proper drainage, a stable base, and invisible seams, ensuring your investment looks natural and performs beautifully for its entire lifespan.

Why Switch to Artificial Grass in Suffolk County?

Having a lush, green lawn is a big part of the Long Island dream. It’s the perfect backdrop for summer barbecues, kids playing, and relaxing weekends. But keeping that dream alive with a natural grass lawn can feel like a full-time job, especially here in Suffolk County. Between the demanding upkeep and our unique weather, many homeowners are finding that a perfect lawn doesn’t have to be a natural one. If you’re tired of the constant work, it might be time to consider a beautiful, low-maintenance alternative.

The Trouble with Natural Lawns on Long Island

Let’s be honest, maintaining a natural lawn is a demanding cycle. The endless mowing, fertilizing, and weeding can eat up your precious weekends. It’s not just the time, it’s the cost. Buying seed, fertilizer, and pest control products adds up quickly, and hiring a professional service is another significant expense. For many of us, the effort and money required to keep a natural lawn looking its best just isn’t sustainable. It often feels like you’re fighting a losing battle against bare patches and invasive weeds, taking away from the simple joy of your outdoor space.

Battling Water Rules, Tough Winters, and Pests

Living on Long Island means dealing with specific challenges that make lawn care even tougher. Summer often brings water restrictions, making it nearly impossible to give your thirsty grass the hydration it needs to stay green. Then come the harsh winters, which can leave your lawn looking brown and patchy by spring. On top of that, pests and critters can wreak havoc on your hard work. These factors create a constant struggle to maintain a healthy lawn. An artificial grass installation offers a practical way to get a consistently beautiful lawn that isn’t affected by watering rules or seasonal damage.

How Artificial Grass Is the Solution

This is where artificial grass really shines. It offers a stunningly realistic, green lawn without the constant maintenance. Imagine a yard that needs no mowing, watering, or fertilizing, ever. Modern synthetic turf is designed to be incredibly durable, soft to the touch, and safe for both kids and pets to play on. It provides a reliable, beautiful surface for everything from a simple backyard to a personal putting green or a play area. By making the switch, you get to reclaim your weekends and simply enjoy a perfect lawn all year round.

What Are the Benefits of Artificial Grass?

Switching to artificial grass is more than just a cosmetic upgrade; it’s a lifestyle change. For homeowners in Suffolk County, the benefits solve many of the classic frustrations that come with maintaining a natural lawn. Imagine a yard that looks perfect year-round without the constant work, worry, or expense. Artificial turf provides a reliable, beautiful, and practical foundation for your entire outdoor living space, giving you back your time and peace of mind. From saving water to creating a safer play area for your family, the advantages are clear. It’s a smart investment that pays off in curb appeal, usability, and pure enjoyment of your home.

Get Great Curb Appeal with Less Work

A lush, green lawn is the cornerstone of beautiful landscaping, but keeping it that way on Long Island can feel like a full-time job. Artificial grass gives you that vibrant, perfectly manicured look without the endless cycle of mowing, fertilizing, and weeding. It offers predictable, low-maintenance beauty, so your yard looks its best every single day. Instead of spending your weekends working on the lawn, you can spend them enjoying it. This is especially true when you integrate it into a larger outdoor plan with a new patio or swimming pool. A synthetic lawn provides a consistently beautiful backdrop for all your outdoor activities.

Save Water and Stay Green All Year

Water conservation is a growing concern, and a natural lawn is one of the thirstiest parts of any property. One of the biggest benefits of artificial grass is that it completely eliminates the need for watering. You can finally stop worrying about sprinkler systems, drought restrictions, and the high water bills that come with keeping your grass alive during hot summers. Your lawn will stay a vibrant green through every season, from the peak of August heat to the coldest days of winter. This makes synthetic turf a sustainable choice that saves a precious natural resource while keeping your property looking pristine.

A Lawn That Lasts Through Play and All Seasons

Long Island families are active, and your yard should be able to keep up. Artificial grass is designed to withstand heavy foot traffic, making it perfect for everything from backyard barbecues to energetic kids and pets. You won’t have to deal with muddy patches after a rainstorm or worn-out paths in high-traffic areas. It’s also an excellent surface for backyard Sports Games Courts, providing a durable and consistent area for play. This resilience means your lawn maintains its beautiful appearance and functionality through all four seasons, giving you a reliable outdoor space you can count on.

Safe for Kids, Pets, and Everyday Life

Your family’s safety is the top priority, and modern artificial grass is designed with that in mind. High-quality turf is made from non-toxic materials, creating a safe surface for both children and pets to play on. A huge advantage is that it eliminates the need for chemical pesticides, herbicides, and fertilizers that are often used on natural lawns. This means you can let your kids and dogs run around without worrying about what they might be exposed to. Plus, it means no more muddy paws or grass-stained clothes being tracked into your home, making life a little cleaner and easier for everyone.

Answering Your Top Questions About Artificial Grass

Switching to artificial grass is a big decision, and it’s natural to have questions. You’ve probably heard a lot of different things about it, from how it looks to how much it costs. Let’s clear up some of the most common questions we hear from homeowners in Suffolk County. We want you to feel confident and informed as you consider making the change to a beautiful, low-maintenance lawn. This section will walk you through the facts, so you can see if synthetic turf is the right fit for your home and family. We’ll cover everything from aesthetics and upkeep to the environmental impact and long-term value, giving you the straightforward answers you need.

Does It Look Fake?

This is probably the number one question we get, and it’s a fair one. Early versions of artificial turf definitely had a plastic, “too-perfect” look. But technology has come a long way. Today’s high-quality synthetic grass is designed with multiple colors, blade shapes, and even a brown thatch layer to perfectly mimic the look and feel of a healthy, natural lawn. When you see our synthetic turf options, you’ll be surprised at how realistic and lush they are. A professionally installed turf lawn blends seamlessly into your landscape, giving you a gorgeous yard that your neighbors will swear is real.

What Maintenance Is Required?

While artificial grass is incredibly low-maintenance, it isn’t “no-maintenance.” The good news is that the upkeep is minimal and easy. Forget about mowing, fertilizing, and constant watering. Instead, your main tasks will be to occasionally rinse the turf with a hose to wash away dust and pollen. You’ll also want to remove leaves and other debris, just as you would from a patio. For high-traffic areas, a quick brushing with a stiff broom will keep the blades standing upright and looking fresh. It’s a tiny fraction of the work a natural lawn demands, giving you more time to actually enjoy your yard. Proper care ensures your entire outdoor space, from patios to walkways, stays pristine, a principle we apply to all our restoration services.

Is It an Eco-Friendly Choice?

Absolutely. Choosing artificial grass is a great way to make your home more environmentally friendly. Think about all the water a natural lawn consumes, especially during Long Island’s hot summers. With synthetic turf, you eliminate the need for watering, saving thousands of gallons each year. You also say goodbye to chemical fertilizers and pesticides that can run off into our local waterways. Plus, you’ll no longer need a gas-powered lawnmower, which reduces air pollution. It’s a sustainable choice that helps you conserve resources and create a healthier environment for your family. This commitment to smart, sustainable solutions is a core part of our approach to every home remodeling project.

Does the Upfront Cost Pay Off?

The initial investment in artificial grass is higher than seeding a lawn, but it delivers significant long-term savings. Once your turf is installed, your lawn care expenses drop dramatically. You’ll save money on your water bill and eliminate costs for fertilizer, pesticides, and lawn care services or equipment. Over its long lifespan, artificial grass often pays for itself. Beyond the financial return, consider the value of your time. You get your weekends back for relaxing and making memories instead of doing yard work. Just like adding a beautiful swimming pool, investing in quality turf enhances your property value and your family’s lifestyle for years to come.

How Much Does Artificial Grass Cost in Suffolk County?

Let’s talk about one of the biggest questions homeowners have: what’s the investment? The cost of artificial grass is an important factor, and the final price depends on a few key things. While it requires a larger upfront investment than seeding a natural lawn, the long-term savings on water, fertilizer, and maintenance make it a smart financial choice for many Long Island families. The total cost is typically calculated per square foot and includes the turf itself, all necessary materials for the base, and professional installation. Understanding what goes into the price will help you plan your project with confidence.

Breaking Down Material and Installation Costs

When you receive a quote for artificial grass, the price generally covers both the materials and the labor. In Suffolk County, you can expect the cost for professionally installed landscape turf to range from about $8 to $12 per square foot, though this can vary. The material portion includes the synthetic turf you choose, the sub-base materials that ensure proper drainage, and the infill that helps the blades stand up and adds cushioning. The installation portion covers the skilled labor required for excavation, grading, and meticulously laying and securing the turf for a flawless finish.

What Factors Influence the Final Price?

Several key factors determine your project’s final cost. The quality of the turf is a major one; higher-end products with more realistic textures, denser stitching, and advanced cooling technology will be at the higher end of the price spectrum. The type of infill you select also plays a role. Beyond the turf itself, the complexity of the job site affects the labor cost. A simple, flat, rectangular area will be more straightforward to install than a yard with steep slopes, unusual shapes, or obstacles like trees and patios that require precise cutting and fitting.

Project Size, Turf Quality, and Site Prep

The overall size of your lawn is the most direct factor in your total cost. While a larger project costs more, the price per square foot can sometimes decrease with scale. For example, a typical 500-square-foot lawn installation might fall between $6,500 and $9,000. Proper site preparation is also critical and is built into the cost. This involves removing existing grass and soil, building and compacting a stone base for stability and drainage, and ensuring the entire area is perfectly graded. This foundational work, often involving expert masonry techniques, is essential for a durable and beautiful lawn that lasts for years.

What to Consider Before You Install

Before you can enjoy your new lawn, there are a few key decisions to make. The right choices in turf, preparation, and installation will ensure your investment looks great and lasts for years. Thinking through these details upfront will help you create a space that perfectly fits your lifestyle and home.

Choosing Your Turf: Pile Height, Density, and Shape

Not all artificial grass is created equal. The type you choose will depend on how you plan to use your lawn. Key factors are pile height (the length of the grass blades) and density (how tightly the blades are packed together). A taller, less dense pile can create a lush, natural look for a front yard with little foot traffic. For a play area or a path to the pool, a shorter, denser turf will be more durable and resilient. We can help you select the right synthetic turf that balances aesthetics with performance for your home.

Planning for Drainage and Odor Control

A beautiful lawn needs a solid plan for handling water and, if you have pets, odors. A professional installation includes a sub-base designed for excellent drainage, allowing rainwater and pet urine to pass through without creating puddles or lingering smells. Many modern turf options also include antimicrobial backings that neutralize odors from bacteria. This is a game-changer for pet owners, as it helps keep your yard smelling fresh and clean for everyone in the family. A well-drained lawn is a low-maintenance lawn.

The Importance of Proper Site Prep

The secret to a flawless artificial lawn is the work that happens underneath. Proper site preparation is the most critical step for a long-lasting, beautiful result. This process involves clearing the existing lawn and soil, carefully grading the area for drainage, and installing a compacted base of crushed stone. This foundation creates a stable and smooth surface that prevents sinking, ripples, and weeds. Taking the time to build a solid base ensures your turf will remain even and beautiful for years to come.

Why a Professional Installation Matters

While a DIY project might seem tempting, installing artificial grass correctly requires specific expertise and tools. A professional installer knows how to manage the large, heavy rolls of turf, create invisible seams, and securely fasten the edges to prevent lifting. We have the experience to handle complex layouts around trees, patios, and walkways for a polished finish. When you choose a professional team, you are investing in a quality outcome that looks great and performs as it should. You can even view our past projects to see the Gappsi difference for yourself.

Designing Your Complete Outdoor Space

Think of your new lawn as one part of a complete outdoor vision. Artificial grass can be beautifully integrated with other features to create a cohesive and stunning backyard. Imagine a perfect green lawn that flows seamlessly into a porcelain paver patio, surrounds a sparkling swimming pool, or sits beside a custom Sports Games Court. Because we design and build entire outdoor living spaces, we can help you create a unified plan where your new lawn complements every other element, from the landscaping to the hardscaping.

Related Articles

Frequently Asked Questions

How hot does artificial grass get in the summer? It’s true that synthetic turf can get warmer in direct sun than natural grass. However, modern turf technology has improved a lot, and many high-quality options include features designed to reduce heat absorption. If your lawn gets very hot on a peak summer day, a quick spray with a garden hose will cool it down instantly. You can also choose a lighter-colored infill, which helps reflect sunlight and keep the surface temperature more comfortable.

How long can I expect my new artificial lawn to last? A professionally installed artificial lawn is a long-term investment in your home. With proper care, you can expect high-quality synthetic turf to last anywhere from 15 to 20 years. The lifespan depends on the quality of the turf you choose and the amount of foot traffic it gets. The key to this longevity is the expert site preparation and installation, which creates a stable foundation that protects your investment for years to come.

I have dogs. Will the turf start to smell over time? This is a huge concern for pet owners, but a properly installed pet-friendly turf system is designed to prevent odors. The system works by using a fully permeable backing on the turf and a sub-base that allows liquids, including pet urine, to drain straight through. We also use a special antimicrobial infill that helps neutralize odors before they can even start. Regular rinsing with a hose is usually all you need to keep your lawn fresh and clean for both you and your furry family members.

What happens to the turf during a snowy Long Island winter? Artificial grass is built to handle all four seasons, including our tough winters. Snow and ice won’t damage the turf fibers. You can simply let the snow melt naturally, as the excellent drainage will handle the water runoff. If you need to clear a path, you can shovel the snow just like you would on a driveway, though we recommend using a plastic shovel to be safe. Once spring arrives and the snow melts, your lawn will be green and ready to enjoy without the usual muddy, patchy mess.

Can weeds still grow through the artificial grass? A professional installation is specifically designed to prevent weed growth. The process involves removing the old lawn and topsoil, then laying down a weed barrier and a compacted stone base. This foundation makes it extremely difficult for weeds to push through from underneath. While it’s possible for a stray weed to sprout near an edge from a windblown seed, it’s very rare and easy to pull. You can say goodbye to the constant battle of weeding your lawn.

Outdoor kitchen plans with measurements for a functional layout.

5 Pro Outdoor Kitchen Plans With Measurements

Every backyard is unique, and so is every family. That’s why a one-size-fits-all approach to outdoor kitchens just doesn’t work. The best designs are tailored to your specific space, your cooking style, and how you love to entertain. Whether you have a sprawling patio or a cozy, narrow side yard, the right layout can turn it into a functional culinary oasis. The first step is to create personalized outdoor kitchen plans with measurements that reflect your vision and your home’s character. This guide will help you explore different styles and layouts, empowering you to design a custom kitchen that feels like it was always meant to be there.

Key Takeaways

  • Map out your workflow first: A great outdoor kitchen starts with a smart layout. Before picking appliances, plan for an efficient work triangle between your grill, sink, and fridge, and make sure you have plenty of counter space and clear walkways for a comfortable cooking experience.
  • Select materials for both style and durability: While your design style guides the look, your material choices determine longevity. Always choose weather-resistant options like high-quality natural stone, porcelain, and stainless steel that can stand up to the seasons and keep your kitchen looking great for years.
  • Budget for the complete project, not just the parts: A realistic budget goes beyond the grill and countertops. Factor in the costs for professional installation, essential utilities like gas and plumbing, and crucial features like task lighting and weatherproof storage to create a truly finished and functional space.

What Are the Key Parts of an Outdoor Kitchen?

Planning an outdoor kitchen is about more than just picking out a grill. It’s about creating a complete, functional space where you can prep, cook, and entertain without constantly running back inside. A truly great outdoor kitchen combines several key components that work together to make your backyard the heart of your home. From the cooking station to comfortable seating, each part plays a vital role in crafting the perfect alfresco experience for your Long Island home.

The Grill and Cooking Station

The grill is the undeniable star of any outdoor kitchen. Think of it as the command center for your culinary adventures. When choosing a grill, look for high-quality, durable materials like stainless steel that can withstand the elements. You can opt for a built-in grill for a seamless, custom look, or a freestanding model if you prefer more flexibility. Beyond the grill itself, consider adding other cooking elements to expand your menu. Side burners are perfect for sauces and side dishes, while a wood-fired pizza oven can bring a whole new level of fun to your backyard gatherings. The structure housing these appliances, often built with expert masonry, defines the entire station.

Countertops for Prep Space

Every chef needs adequate counter space, and an outdoor kitchen is no exception. Your countertops are where all the action happens, from chopping vegetables to plating your finished dishes. Outdoor countertops must be incredibly durable to handle weather, high heat, and potential stains. Materials like granite, concrete, and porcelain are excellent choices because they are tough, easy to clean, and look beautiful. When planning, make sure you have plenty of “landing space” on either side of your grill. This gives you a safe spot to place hot pans and trays of food as you move them on and off the cooking surface. Gappsi offers a wide selection of porcelain and natural stone perfect for creating resilient and stylish outdoor countertops.

A Sink for Easy Cleanup

Adding a sink to your outdoor kitchen is a game-changer. It transforms the space from a simple grilling area into a fully functional kitchen, streamlining everything from food prep to cleanup. With a sink, you can wash produce, rinse utensils, and wash your hands without ever leaving the party. This simple utility makes cooking outdoors so much more convenient and hygienic. An outdoor-rated stainless steel sink is a popular choice for its durability and resistance to rust. Keep in mind that installing a sink will require a water line, so it’s an important factor to include in your initial design and construction plans.

Weatherproof Storage and Cabinets

To keep your outdoor kitchen organized and clutter-free, you need dedicated storage. Weatherproof cabinets are essential for protecting your cooking tools, dinnerware, and grilling accessories from the elements. Stainless steel cabinets are a fantastic option as they are resistant to rust, moisture, and pests, ensuring your equipment stays clean and ready to use. Integrated storage solutions like pull-out trash bins and spice racks can also make your space more efficient and enjoyable. Having everything you need within arm’s reach means less time searching for utensils and more time enjoying your beautiful backyard.

Outdoor Refrigeration

Say goodbye to running back and forth to the indoor fridge for cold drinks or ingredients. An outdoor refrigerator is a must-have for convenience and keeping your food safe. An under-counter fridge keeps beverages, marinades, and condiments perfectly chilled and right where you need them. For those who love to entertain, you might also consider a wine cooler or a kegerator. An outdoor ice maker is another popular addition that ensures you never run out of ice for cocktails and soft drinks. These amenities are what truly complete the outdoor kitchen experience, making it a self-sufficient hub for entertaining.

Comfortable Seating Areas

Your outdoor kitchen isn’t just for cooking; it’s a place for people to gather. Creating a comfortable and inviting seating area is key to making your space the go-to spot for family and friends. Bar-height seating at a countertop is a great way to let guests chat with the chef while meals are being prepared. For a more relaxed vibe, you can design an adjacent lounge area with couches and a coffee table under a pavilion or pergola. This provides shade and a cozy spot for guests to dine and socialize long after the sun has set.

Essential Measurements for a Functional Outdoor Kitchen

Getting the measurements right is the secret to creating an outdoor kitchen that’s a joy to use. It’s about more than just making sure the grill fits; it’s about crafting a space that feels intuitive, comfortable, and safe. When you nail the dimensions from the start, you create a natural flow for cooking, prepping, and entertaining. Think about it: no one wants to feel cramped while grilling or have to awkwardly reach over a counter that’s too high.

Planning your layout with precise measurements ensures every element works together. From the height of your countertops to the width of your walkways, each dimension plays a role in the kitchen’s overall function. A well-designed space considers how you’ll move between the grill, sink, and prep areas, making your time outside more efficient and enjoyable. Proper planning also helps you integrate your kitchen seamlessly with the rest of your backyard, creating a cohesive outdoor living area. With Gappsi’s home remodeling expertise, we can help you map out a design that is both beautiful and perfectly functional for your family.

Ideal Countertop Height and Depth

Your countertop height can make or break your cooking experience. The industry standard is 36 inches, which is comfortable for most people for chopping and prep work. A good rule of thumb is to make sure the counter isn’t any higher than the bottom of your bent elbow. However, if you’re including an under-counter refrigerator, you may need to raise the height to 38 inches to accommodate the appliance. For depth, a 24-inch deep countertop is standard, giving you plenty of room to work without feeling cramped. These dimensions ensure your workspace is both ergonomic and practical for all your outdoor culinary adventures.

Grill Placement and Safety Clearance

Placing your grill correctly is essential for safety and functionality. You’ll want to leave plenty of “landing space” on either side of the grill, with a minimum of 12 inches on one side and 24 inches on the other for placing platters and tools. A typical linear kitchen needs about 8 to 12 feet of length to comfortably fit a built-in grill with adequate counter space. Most importantly, keep your grill away from combustible materials like house siding or wooden fences. If your kitchen is under a covered structure, proper ventilation is a must. A well-designed pavilion or pergola can provide shade while ensuring smoke has a place to escape.

Bar vs. Dining Seating Heights

Deciding on seating height will shape how you and your guests interact in your outdoor kitchen. For a casual, bar-style atmosphere where people can stand and mingle, a 42-inch-high bar counter is ideal. This requires a 12 to 18-inch countertop overhang so guests have enough legroom. If you prefer a more traditional sit-down meal, a 30-inch-high dining table is the way to go. Your choice depends entirely on the vibe you want to create. Gappsi’s custom masonry work can create beautiful, integrated seating for either a relaxed bar setting or a formal dining space.

Landing Space Around Your Appliances

Landing space is the unsung hero of a functional kitchen. This is the open counter area next to your key appliances: the grill, sink, and refrigerator. You need a dedicated spot to place hot pans from the grill, set down ingredients you’ve just washed, or unload groceries into the fridge. A good starting point is to plan for at least 100 square feet for your entire outdoor kitchen area. This ensures you have enough room for the essentials without feeling crowded. Aim for at least 15 to 18 inches of clear counter space on either side of your sink and grill to create a truly workable outdoor kitchen.

Walkway and Traffic Flow Clearances

A great outdoor kitchen allows people to move around freely without causing a traffic jam. To achieve this, plan for walkways that are at least 36 to 48 inches wide. This gives the cook enough room to work without being bumped by guests passing through. It also ensures there’s a clear and safe path around hot surfaces like the grill. When planning your layout, consider the natural flow of traffic from the house to the yard. A thoughtful landscape design will integrate your kitchen’s walkways with the rest of your outdoor space, creating a cohesive and easy-to-use environment for everyone.

Designing Your Kitchen’s Work Triangle

The “work triangle” is a classic design principle that creates an efficient kitchen layout, and it works just as well outdoors. The concept is simple: position your three main work zones, the grill (cooking), the sink (cleaning), and the refrigerator (storage), to form a triangle. This arrangement minimizes the steps you have to take between tasks, making your cooking process smoother and more intuitive. Each leg of the triangle should be between 4 and 9 feet long. By keeping these key stations within easy reach of one another, you create a workflow that lets you focus on the food and your guests instead of running back and forth.

Which Outdoor Kitchen Layout Fits Your Space?

Choosing the right layout is the most important step in planning your outdoor kitchen. It’s the foundation that determines how you cook, entertain, and enjoy your backyard. The best design for you depends on how much space you have, your budget, and how you envision using the area. Do you see yourself hosting large family barbecues, or do you prefer quiet dinners for two under the stars? Are you a master griller who needs multiple cooking surfaces, or do you just need a simple spot to prep and serve?

Thinking about these questions will help you find a layout that feels like a natural extension of your home. From a simple straight-line setup against a wall to a grand U-shaped kitchen that becomes the heart of your patio, each design has its own unique flow and function. We’ll walk through five of the most popular outdoor kitchen layouts, complete with the typical measurements you’ll need. This will help you visualize what’s possible in your own Long Island backyard and start planning a space that’s both beautiful and incredibly functional. With the right masonry design, any of these layouts can be customized to fit your style perfectly.

The Straight-Line Linear Layout

If you’re working with a smaller patio or a long, narrow area, the straight-line layout is your best friend. As the name suggests, all your components, like the grill, counter space, and sink, are arranged in a single line. It’s a simple, clean, and space-efficient design. A typical linear kitchen runs about 8 to 12 feet long, but you can create a functional setup with as little as 6 feet to fit a built-in grill with some prep space on either side. This layout is often the most budget-friendly option and works well when placed against an existing house wall or a retaining wall, which can simplify running utility lines for water and gas.

The Versatile L-Shaped Layout

The L-shaped layout is one of the most popular choices for a reason. It’s incredibly versatile and creates a natural, efficient workflow. By arranging your counters and appliances in an “L” formation, you get a classic work triangle that separates your cooking, prepping, and cleaning zones. This layout generally requires a space of about 10 by 10 feet. The corner of the “L” is a great spot for a sink or a specialty appliance, and the extended counter often doubles as a bar with seating. This encourages guests to hang out and chat with the cook without getting in the way. The beautiful porcelain and natural stone options available for countertops can make this social hub a stunning focal point.

The All-Inclusive U-Shaped Layout

For the ultimate entertainer, the U-shaped layout is the dream. This design creates a true outdoor room, wrapping three walls of counters and appliances around you to form a self-contained kitchen. It offers the most storage and counter space, making it perfect for homeowners who want it all: a large grill, a sink, a refrigerator, a pizza oven, and plenty of room for multiple people to cook together. You’ll need a larger footprint for this design, typically a minimum of 12 by 12 feet. A U-shaped kitchen often becomes the centerpiece of a larger outdoor living area, perfectly complementing a patio and swimming pool where family and friends gather.

The Efficient Galley Layout

Inspired by the compact kitchens on ships, the galley layout features two parallel counters with a walkway in between. This design is extremely efficient for workflow, as everything you need is just a step or a pivot away. It’s an excellent solution for long, narrow spaces, like a side yard, and typically requires a length of 12 to 18 feet. One counter can serve as the primary cooking and prep area, while the other can be used for serving, seating, or additional appliances. The key is to ensure the walkway between the two counters is wide enough for comfortable movement, usually about 4 to 5 feet, so you don’t feel cramped while working.

The Freestanding Island Layout

A freestanding island brings your kitchen into the center of the action, creating a social hub that invites guests to gather around. This layout is incredibly flexible and can be designed in various shapes and sizes, though you’ll want at least a 10 by 10-foot area to ensure there’s enough room to walk around it comfortably. An island can house your grill, a sink, and even under-counter refrigeration, all while providing 360-degree access. It works beautifully on its own or can be combined with a linear kitchen against a wall for even more functionality. Placing your island under one of Gappsi’s custom pavilions or pergolas can define the space and provide welcome shade.

How Your Design Style Shapes the Plan

Your outdoor kitchen’s design style is more than just a look; it’s the blueprint for how the space will feel and function. Are you picturing a sleek, modern hub for entertaining or a cozy, rustic corner for family dinners? The style you choose will guide every decision, from the layout and materials to the appliances and lighting. It’s what turns a collection of cooking equipment into a true extension of your home and personality.

Think of your design style as the theme that ties everything together. A modern design might call for smooth porcelain countertops and stainless steel cabinets, while a traditional style may feature classic brickwork and warm wood accents. Understanding your preferred aesthetic from the start helps streamline the planning process, ensuring every element works in harmony. At Gappsi, we help you explore these styles to create a cohesive and beautiful outdoor kitchen that perfectly matches your vision for your Long Island home. By defining your style early, you create a clear path to a functional and inviting space you’ll love for years.

Sleek and Simple: Modern Designs

Modern outdoor kitchens are all about clean lines, minimalist forms, and a focus on high-quality materials. This style favors simplicity and function, creating an uncluttered and sophisticated space. Think integrated appliances, handleless cabinets, and a neutral color palette with occasional bold accents. The key is to let the materials speak for themselves. For example, your outdoor kitchen countertops must be weatherproof, visually appealing, and highly resistant to scratches and heat. Materials like polished concrete, quartz, and large-format porcelain pavers are excellent choices for achieving this sleek look while offering incredible durability. This approach creates a chic, low-maintenance area perfect for contemporary entertaining.

Warm and Natural: Rustic Designs

A rustic design aims to create a warm, inviting atmosphere that feels deeply connected to nature. This style celebrates natural textures, earthy tones, and handcrafted details. Imagine a kitchen built with stacked stone, featuring a wood-fired pizza oven and surrounded by lush landscaping. Incorporating elements like a wooden pavilion or pergola can provide shade and structure while enhancing the natural aesthetic. As one expert notes, integrating green elements and embracing the fresh air not only supports sustainability but also enhances mental well-being. This style is perfect for creating a cozy retreat right in your backyard where family and friends can gather comfortably.

Timeless and Elegant: Traditional Designs

Traditional outdoor kitchens blend classic elegance with practical function, creating a space that feels both grand and welcoming. This style often draws inspiration from classic architectural details, featuring rich materials like brick, bluestone, and detailed masonry work. The layout is typically symmetrical and well-defined, with a focus on creating a comfortable environment for cooking and dining. The heart of any outdoor kitchen lies in its features, so a traditional design emphasizes high-quality, durable elements that blend form and function. This approach turns your backyard into a timeless chef’s paradise that will never go out of style.

Matching Materials and Dimensions to Your Style

While your design style sets the aesthetic tone, it also influences practical decisions about materials and dimensions. A sprawling rustic kitchen will have a different footprint than a compact, linear modern one. While typical outdoor kitchen dimensions are about 36 inches tall and 24 inches deep, the overall length and shape will adapt to your chosen style and available space. Your material choices will also impact the final cost, with budgets often ranging from $200 to $600 per square foot. Whether you choose elegant natural stone for a traditional look or sleek porcelain for a modern one, these decisions are key to bringing your vision to life.

How Much Should You Budget for an Outdoor Kitchen?

Figuring out your budget is one of the most important first steps in planning your dream outdoor kitchen. The final cost can vary quite a bit, as it depends on the size of your space, the appliances you choose, and the materials you love. A simple grill station will naturally cost less than a sprawling culinary setup with a pizza oven, sink, and bar seating. The great news is that this flexibility allows you to create a space that truly fits your budget and lifestyle.

Think of it as an investment in your home and your family’s enjoyment for years to come. Whether you envision a cozy corner for weeknight grilling or a full-service kitchen for entertaining friends, there’s a plan that can work for you. At Gappsi, we specialize in creating custom outdoor living spaces, and our team can help you explore options that align with your financial goals. We’ll guide you through every choice, from durable countertops to high-performance grills, ensuring your new kitchen is everything you hoped for.

What a Starter Budget Covers

If you’re just beginning to explore the world of outdoor cooking, a starter kitchen is a fantastic way to get going. Nationally, a basic setup can start around $5,000, with average projects falling between $13,000 and $16,500. A starter budget typically covers a high-quality built-in grill housed in a durable frame, along with some essential counter space for food prep. This might be a straight-line or small L-shaped layout made with attractive, cost-effective materials. It gives you a dedicated, functional zone for cooking outdoors without requiring a massive investment, allowing you to add more features later if you wish.

Investing in a Mid-Range or High-End Kitchen

For those who want a more comprehensive outdoor culinary experience, a mid-range or high-end kitchen offers endless possibilities. These projects often range from $20,000 to over $40,000, reflecting the inclusion of premium appliances, extensive counter space, and custom features. You can expect to budget around $200 to $600 per square foot. This tier allows for additions like an outdoor sink, a refrigerator, dedicated storage, and even a beverage station or pizza oven. You can also select from a wider range of beautiful and resilient materials, like stunning porcelain and natural stone for your countertops and patio.

How Your Choice of Materials Affects the Price

The materials you choose for your outdoor kitchen play a huge role in both its final cost and its long-term durability. High-end options like granite countertops, stainless steel cabinets, and custom stone or brickwork will increase the initial price, but they also offer superior resistance to the elements. This means less worry about weather damage and more time enjoying your space. Our masonry design experts can walk you through the benefits of different materials, helping you find a balance between your aesthetic vision and your budget. Investing in quality materials from the start can save you money on repairs and replacements down the road.

Should You Hire a Professional?

While a DIY approach can be tempting, building an outdoor kitchen is a complex project that often requires professional expertise. Labor can account for a significant portion of your budget, but hiring a professional ensures the job is done correctly, safely, and to code. An experienced team manages everything from creating a functional design to handling utility lines for gas, water, and electricity. A professional build also guarantees that your investment is structurally sound and built to last. By partnering with a landscape design and construction company, you gain peace of mind knowing every detail is handled with expert care.

Common Outdoor Kitchen Mistakes to Avoid

Planning your dream outdoor kitchen is exciting, but a few common missteps can turn that dream into a frustrating reality. Thinking through the details from the start ensures your new space is as functional as it is beautiful. By avoiding these frequent mistakes, you can create an outdoor kitchen that you and your family will love for years to come. Let’s walk through what to watch out for so your project goes smoothly from day one.

Misjudging Your Space Needs

One of the biggest regrets we hear is from homeowners who wish they had made their outdoor kitchen larger. It’s easy to underestimate how much room you actually need. Think beyond just the grill and counters. You need comfortable walkways for people to move around, enough space for your outdoor furniture, and standing room for guests to gather without feeling cramped. A well-designed masonry layout considers the entire patio and how you’ll live in the space, not just the kitchen footprint itself.

Forgetting About Utilities

An outdoor kitchen is more than just a grill on a patio. It often requires gas lines, plumbing for a sink, and electricity for refrigeration, lighting, and outlets. A common mistake is failing to plan for these utility connections early in the design process. Integrating these systems from the start is far more efficient and cost-effective than trying to add them later. Proper utility planning is a core part of a professional home remodeling project and is essential for a fully functional outdoor kitchen.

Not Using Weather-Resistant Materials

Your outdoor kitchen will be exposed to sun, rain, and changing temperatures, so material choice is critical. While it might be tempting to cut costs, using materials that aren’t rated for outdoor use will lead to rust, rot, and discoloration. Prioritize quality and durability. This means choosing stainless steel appliances and selecting weatherproof cabinetry and durable countertops. Using high-quality porcelain and natural stone ensures your surfaces can withstand the elements and continue to look great season after season.

Ignoring Proper Lighting and Ventilation

Great lighting makes your outdoor kitchen usable and safe after the sun goes down, while proper ventilation keeps the air clear and your guests comfortable. Inadequate lighting can make evening cooking difficult, and poor airflow can trap smoke, especially under a covered structure. When planning your layout, consider task lighting over the grill and prep areas, plus ambient lighting for the seating area. If your kitchen is under a pavilion or pergola, a ventilation hood is a must-have for clearing smoke and heat.

Related Articles

Frequently Asked Questions

This is a lot of information. What’s the absolute first thing I should do? Before you start looking at grills or countertop materials, take a moment to think about how you truly want to use the space. Are you picturing large weekend parties with friends, or are you looking for a simple, functional spot for weeknight family dinners? Your answer is the foundation of your entire plan. It will help you decide on the right size, layout, and features that fit your lifestyle, which is the most important first step.

What are the true essentials for an outdoor kitchen versus the luxury add-ons? At its core, a functional outdoor kitchen needs three things: a quality grill, durable counter space for food prep, and weatherproof storage for your tools. These elements create a solid foundation for cooking outdoors. Features like a sink, an outdoor refrigerator, a pizza oven, or an ice maker are wonderful additions that increase convenience and transform your cooking station into a full-service kitchen. You can always start with the essentials and add more later.

Can I still build an outdoor kitchen if I have a small backyard? Absolutely. You don’t need a massive yard to create a beautiful and functional outdoor kitchen. For smaller patios or narrow areas, a straight-line layout is a perfect solution because it arranges all your appliances and counters along a single wall. A freestanding island is another great option, as it can be customized to fit your specific footprint while creating a central gathering spot. Smart design is all about making the most of the space you have.

How do I make sure my outdoor kitchen will last through Long Island’s weather? The key to durability is choosing materials specifically designed to withstand the elements. This means selecting stainless steel for your grill, cabinets, and other appliances, as it resists rust and corrosion. For countertops, materials like porcelain or natural stone are ideal because they can handle sun, rain, and fluctuating temperatures without cracking or fading. Investing in high-quality, weather-resistant materials from the beginning is the best way to protect your new kitchen for years to come.

How can I make my outdoor kitchen feel like a natural part of my yard? To create a seamless look, think beyond just the cooking area. Integrate a comfortable seating area nearby, such as bar-height stools at the counter or an adjacent lounge space for guests. A structure like a pavilion or pergola helps define the kitchen as an intentional “room” in your backyard while also providing valuable shade. Finally, use landscape lighting and clear walkways to connect the kitchen to your home and other parts of your yard, creating a cohesive and inviting flow.

Long Island backyard pool construction project

How Long Does It Take to Build a Pool on Long Island?

How long does it take to build a pool? On Long Island, the answer depends on which clock you mean. A straightforward project may take several weeks to several months from approved design to first swim. But the full calendar can be longer once you include design decisions, permits, inspections, scheduling, weather, and material availability. The active construction clock measures the days crews are working in your yard. The elapsed project clock starts earlier and includes planning and waiting between phases. Keeping these two timelines separate gives Nassau and Suffolk homeowners a more useful expectation than a single completion promise.

Call Gappsi at (631) 831-3177

Pool type and site conditions also shape the schedule. Gappsi builds gunite, vinyl liner, and fiberglass pools, and each follows a different sequence after the design and permit stages. A custom gunite pool may involve more curing, finish, and coordination steps, while a fiberglass installation uses a pre-manufactured shell. Your yard access, soil, groundwater, selected decking, equipment, and features such as lighting or a spa can add further planning considerations. The sections below break the process into stages so you can see where the time goes and which decisions can help keep the project moving.

How long does it take to build a pool on Long Island?

When homeowners ask how long does it take to build a pool on Long Island, the most useful answer starts with two different clocks. The active construction clock measures the days crews are working at the property. The calendar clock runs from design and permitting through the first swim, including approval queues, inspections, weather, scheduling gaps, and time between trades. Active work can be relatively predictable, while the full project takes longer.

For a straightforward residential gunite pool, published planning guidance places the period from excavation to swimming at roughly eight to fourteen weeks. That is not a guaranteed completion date. Nassau and Suffolk projects can vary because each property, municipality, access condition, and pool design is different. Permit and approval work alone may take two weeks to several months, depending on the jurisdiction and whether the submission is complete.

A practical planning overview looks like this:

Phase. Planning range.
Design and planning. 1 to 4 weeks.
Permits and approvals. 2 weeks to several months.
Excavation. 2 to 5 days.
Shell, rough-ins, and curing. Several weeks, depending on pool type.
Finishing, equipment, and startup. Several weeks, scheduled after earlier phases.

These ranges should be read as a sequence, not as separate promises that can always be added together. Excavation commonly takes two to five days, but rock, groundwater, soil conditions, or restricted access can extend that phase. After excavation, the project moves through structural work and rough-ins, followed by finishing and equipment coordination. Gunite and shotcrete projects generally include more stages and fixed curing requirements than faster shell-based installation approaches.

The pool type also changes the construction-only timeline. Published ranges place construction at about eight to fourteen weeks for concrete, four to eight weeks for vinyl liner, and three to six weeks for fiberglass. Fiberglass may move faster after approval because the shell arrives pre-built, while gunite requires more on-site stages. The best schedule is therefore based on the selected pool, site conditions, approved plans, and the builder’s current production calendar.

Call Gappsi at (631) 831-3177 to discuss your Long Island pool timeline.

What happens before pool construction begins?

Before excavation starts, a pool project moves through several planning decisions that shape the schedule, design, and approval path. The first step is a site evaluation, which reviews the yard layout, access for equipment, existing grades, drainage, utilities, property lines, and the location of the house. Soil conditions, groundwater, rock, and limited access can affect both the design and the later excavation sequence. So these conditions should be considered before a final plan is approved.

Homeowners also need to decide how the pool will function. Depths, steps, tanning ledges, spas, water features, lighting, heaters, safety covers, coping, decking, and interior finishes all influence the scope. Deciding these items early helps reduce change orders after work begins. A revised feature or equipment location can require updated drawings, new material coordination, or another review by the municipality.

Gappsi uses a three-step design process for custom pools, supported by 3D visualization and architectural planning. A three-dimensional design lets homeowners review the pool’s proportions, relationship to the house, circulation areas, and surrounding outdoor living space before construction. Homeowners considering a custom gunite pool design can use this stage to compare shapes, elevations, finishes, and features while changes are still easier to make.

Engineering and permit preparation follow the design decisions. The application may need structural information, hydraulic calculations, equipment sizing, barrier details, and code-compliance documentation. Depending on the project, the approval package can involve a building permit, electrical permit for bonding, grounding, and lighting, and plumbing information for circulation, drainage, or water features. A missing survey, barrier detail, or equipment location can cause an application to be returned, adding another review cycle.

Municipality timing varies across Nassau and Suffolk. Each town, village, or other local authority may apply its own submission requirements, review queues, inspection procedures, and property considerations. Lot dimensions, setbacks, fencing, grading, drainage, and proximity to existing utilities can all affect what must be documented. Permit assistance can make the process more organized, but no builder can guarantee the same approval timing for every municipality or site.

Utilities should be identified before excavation, including gas, electric, water, sewer, irrigation, and drainage lines. The construction plan should also establish equipment locations and access routes. Gappsi’s Long Island pool design and construction service follows the sequence of design, permit, excavation, steel and plumbing, shell, finishing, equipment, and startup. Understanding that sequence explains why the preconstruction stage matters: careful decisions, complete documents, and coordinated inspections help the physical work begin with fewer avoidable interruptions.

What are the main pool construction milestones?

A pool project moves through a sequence of construction milestones, but not every milestone takes the same kind of time. Some tasks, such as layout or excavation, may happen in a day or several working days. Other stages require curing, material lead times, or inspection windows before the next crew can proceed. Gappsi’s typical workflow follows a practical order: design, permit, excavation, steel and plumbing, shell, finishing, equipment, and startup. Understanding that sequence helps Long Island homeowners track progress without confusing active crew time with the full calendar schedule.

Homeowners reviewing a pool design plan before construction

  1. Layout and excavation: The crew marks the pool footprint, elevations, access route, and surrounding work areas before digging. Excavation can be a one-day task on a straightforward site, but many projects take several days. Rock, groundwater, tight access, soil movement, or extra hauling can extend this phase.
  2. Steel and bonding: Reinforcing steel is installed to shape and strengthen the pool structure. Electrical bonding components are also coordinated so conductive parts can be connected safely. This is active installation work, but the schedule may include an inspection window before the structure is covered. Passing that inspection matters because corrections are harder after the shell is applied.
  3. Plumbing and electrical rough-in: Circulation lines, drains, returns, skimmer lines, light niches, and other planned features are positioned before the shell. Electrical conduits and rough-in work are coordinated at this stage. The work itself may be completed quickly, but trade coordination and inspection availability affect the calendar.
  4. Shell installation: A gunite or shotcrete shell is formed around the prepared steel and plumbing. The shell placement may be completed in a focused workday, but it is not the same as being ready for water. Concrete requires a curing period, and one published planning reference allows 28 days before water is added. Weather and site conditions can also affect when shell work can proceed.
  5. Inspections, coping, and tile: Required inspections can occur at different points, depending on the municipality and permit requirements. Once the structure and rough-ins are approved, crews can install coping around the pool edge and tile at the waterline. These are separate finish stages, not automatic extensions of the shell day. Material selection, layout details, and custom features can add coordination time.
  6. Decking: Concrete, pavers, or another selected deck material is installed around the pool. This phase depends on finished elevations, access, weather, and the chosen material. A deck may be installed over active workdays, while curing or setting time can limit when adjacent work or heavy traffic resumes.
  7. Equipment and interior finish: Pumps, filters, heaters, lighting controls, and options such as salt chlorine systems are connected in the equipment area. The interior plaster, pebble, vinyl liner, or other finish is then completed according to the pool type. Equipment availability can affect timing, and the interior finish may require its own waiting period before startup.
  8. Fill and startup: After the finish is ready, the pool is filled and the system is started. Startup includes checking circulation, confirming equipment operation, and balancing the water. The water chemistry and equipment need attention before the pool is ready for normal use.

The key planning distinction is between one-day construction tasks and calendar windows that cannot be compressed. Excavation or shell placement may look fast when viewed from the driveway, while curing, inspections, weather pauses, material delivery, and trade scheduling continue in the background.

Ask which milestone is next and what must happen before it. Also ask whether the next step is active work or a required wait. This gives homeowners in Nassau and Suffolk a more accurate view of the project timeline.

How does pool type change the timeline?

Pool type changes the order and coordination of construction steps, so it can change the calendar without creating a guaranteed completion date. Gappsi builds gunite, vinyl liner, and fiberglass pools for homeowners in Nassau and Suffolk Counties. Each follows the sequence of design, permits, excavation, installation, finishing, equipment, and startup, but the work differs inside that sequence.

Published guidance commonly shows fiberglass as the fastest sequence after permit approval because its shell is manufactured before delivery. Vinyl liner construction can reduce some shell work, while gunite includes more field-built stages and curing. These are schedule factors, not promises. Permits, site access, soil, inspections, weather, materials, and features still control the calendar.

Pool type Sequence and schedule factors What can change the calendar
Gunite Excavation is followed by steel, plumbing, electrical rough-ins, the concrete shell, curing, coping, tile, decking, interior finish, equipment, and startup. The shell is built on site. Custom geometry, spas, tanning ledges, water features, finish selections, inspections, weather, and curing requirements add coordination between stages.
Vinyl liner The sequence includes excavation, wall and floor preparation, plumbing, electrical work, coping, decking, liner installation, equipment, and startup. The liner is installed after the supporting structure is ready. Panel or liner availability, site conditions, design changes, inspections, and the scope of surrounding masonry can affect when the pool reaches startup.
Fiberglass A pre-built shell arrives after the design and permit work. Excavation, base preparation, shell placement, plumbing, backfill, coping, decking, equipment, and startup then follow. Shell selection and availability, delivery access, excavation conditions, utility coordination, inspections, and finish work can still extend the project.

For perspective, published comparisons place permit-to-swim planning ranges at roughly 12 to 22 weeks for gunite. 6 to 14 weeks for fiberglass, and 8 to 16 weeks for vinyl. Another guide separates construction-only ranges at about 8 to 14 weeks for concrete, 3 to 6 weeks for fiberglass, and 4 to 8 weeks for vinyl. These are external planning references, not Gappsi schedules, and they do not replace a site-specific review. Fiberglass can move quickly after permit approval because the shell arrives pre-built, while gunite involves more stages and curing time.

Gappsi’s workflow is design, permit, excavation, steel and plumbing, shell installation, finishing, equipment, and startup. Comparing pool types early helps you discuss design flexibility, material lead times, access, and custom work. Review this vinyl pool installation timeline or the fiberglass pool design guide for more detail.

Call Gappsi at (631) 831-3177 to discuss your pool type and project timeline.

What can delay a Long Island pool project?

A Long Island pool project can move through its planned sequence without following a perfectly fixed calendar. Weather, site conditions, municipal reviews, crew availability, material lead times, and homeowner decisions can all affect the space between milestones. The most useful approach is to identify these variables early and build a schedule around approvals, site access, and confirmed selections rather than a promised swim date.

Weather can pause excavation, gunite, plaster, or other work that depends on suitable site conditions. Heavy rain may make an excavation unsafe or unstable, while cold or wet conditions can affect concrete-related work. Seasonal demand also matters. Long Island construction activity often increases in spring, so a project that enters the scheduling queue during peak demand may have less flexibility than one planned earlier.

Soil, rock, and groundwater are additional variables. Unexpected subsurface conditions can slow excavation, require water management, or change the work needed to prepare the pool structure. Site access can create a similar issue. A narrow driveway, limited staging area, fences, landscaping, or overhead obstacles may affect where equipment and materials can go. A site review that identifies these constraints before excavation gives the team more time to plan a workable approach.

Inspections and permit revisions can also extend the calendar. Municipal requirements vary across Nassau and Suffolk County, and applications may be returned when drawings, barrier details, equipment locations, or other documentation need clarification. An inspection that does not pass on the first attempt may require corrective work and a new inspection appointment. Complete drawings, coordinated plans, and prompt responses to reviewer questions can reduce avoidable back-and-forth, but they cannot eliminate municipal processing time.

Contractor scheduling and material lead times affect the handoffs between excavation, steel and plumbing, shell work, finishes, equipment, and startup. Equipment shortages, delayed coping or tile, and backordered finishes can leave a project waiting even when the site is ready. Gappsi’s documented sequence moves from design and permits through excavation, steel and plumbing. Shell work, finishing, equipment, and startup, so a delay in one phase can affect the next.

Feature complexity can add coordination. Tanning ledges, spas, water features, lighting, heaters, automatic covers, and custom finishes require additional planning and trade coordination. Finally, homeowner changes after work begins can reset portions of the schedule, especially when they affect structure, plumbing, electrical work, or ordered materials. Confirming pool dimensions, finishes, equipment, and features before construction begins is one of the simplest ways to limit avoidable changes.

Want to discuss the conditions that may affect your project?

Call Gappsi at (631) 831-3177 to plan your Long Island pool project.

How should homeowners plan around the Long Island seasons?

Seasonal planning can make a meaningful difference when you are deciding how long it takes to build a pool on Long Island. Because freezing winter temperatures limit the construction season, demand usually begins to rise in early spring. Homeowners in Nassau and Suffolk should begin design conversations, site reviews, and major selections before that rush if they want a realistic opportunity to swim during summer.

Finished Long Island backyard pool with stone coping and landscaping

Start before peak demand. The best time to contact a builder is not necessarily when the first warm days arrive. Begin early enough to review the layout, pool type, access requirements, coping, decking, equipment, and safety features. Permit and approval durations can range from about two weeks to several months because they depend on the local jurisdiction and the completeness of the submission. A missing survey, barrier detail, or equipment location can send an application back for correction. Ask which decisions must be finalized before the permit is submitted, then set a personal deadline for completing them.

Build in schedule buffers. Even after approvals, the calendar includes excavation, inspections, trade coordination, and finish work. Rain can pause excavation, gunite, and plaster work, particularly when the ground is too wet for safe or precise installation. A late-season storm, an inspection that requires correction, or a delayed piece of equipment can move later milestones. Weather is not a problem a responsible builder can simply remove from the schedule. Discuss likely decision points and communication procedures instead of relying on one optimistic date.

Plan around a range, not a promise. A builder should explain the sequence and identify the assumptions behind each milestone, but no builder should promise a fixed swim date before the project is underway. Site conditions, municipal review, material availability, weather, and homeowner changes can all affect the finish line. If you are comparing companies, choose an inground pool builder that explains these variables clearly and updates the schedule as conditions change. Early planning gives your project more room to absorb normal Long Island delays without turning a target season into a guarantee.

Call Gappsi at (631) 831-3177 before the FAQ section to discuss your project timeline.

Frequently Asked Questions

How long does it take to build a pool on Long Island?

The answer depends on whether you mean active construction or the full calendar timeline. A project also includes design, engineering, permits, inspections, scheduling, material coordination, and startup. The physical work may move through excavation, steel, plumbing, the pool shell, finishes, equipment. And startup in a defined sequence, but the elapsed schedule varies by municipality, pool type, site conditions, weather, and selections. A qualified builder should provide a project-specific schedule rather than promise one universal completion date.

Which part of a pool project usually takes the longest?

Planning and permitting are often the most variable phases because approval requirements and review times differ between Long Island municipalities. Design decisions, site documentation, engineering, barrier details, equipment locations, and permit applications all need to be coordinated before excavation begins. Once construction starts, the pool still moves through several separate milestones, including excavation, structural work. Plumbing and electrical rough-ins, shell or liner installation, coping, tile, decking, interior finish, equipment, and startup.

Does the type of pool affect the construction timeline?

Yes. Gappsi builds gunite, vinyl liner, and fiberglass pools, and each follows a different sequence. A fiberglass pool arrives with a manufactured shell, while a gunite pool is formed on site and includes more custom structural and finishing stages. Vinyl liner timing depends on the panel system, liner availability, and the surrounding work. The best choice is not based on speed alone. Shape, features, site access, finish selections, maintenance preferences, and the desired outdoor layout also matter.

What can delay a pool build?

Common schedule variables include rain and unsuitable ground conditions, groundwater, rock, restricted site access, inspection availability, material lead times, and changes made after work begins. Complex features such as tanning ledges, spas, water features, heaters, lighting, or automatic safety covers can add coordination. Homeowners can reduce avoidable delays by making finish and equipment decisions early, confirming access requirements, responding promptly during permitting, and keeping a clear schedule with the builder.

When should I start planning a Long Island pool?

Start before the season when you hope to use the pool. Spring and summer demand can increase scheduling pressure, while winter conditions limit some exterior work. An early consultation allows time for 3D design, site review, selections, permits, and realistic scheduling. Gappsi serves homeowners in Nassau and Suffolk Counties and can review the property, pool type, scope, and milestones before you commit to a target season.

Plan your Long Island pool project

A successful pool project starts with a clear conversation about how you want to use your yard. Before a consultation, gather your main yard goals, such as space for entertaining, exercise, or family time. Consider your preferred pool type, including gunite, vinyl liner, or fiberglass, along with desired features such as a tanning ledge, lighting, heater, water feature, or automatic safety cover.

It also helps to note site access, any tight gates or areas that may affect equipment, and your preferred seasonal target. These details give the design and construction team a practical starting point for discussing sequencing, permits, materials, and scheduling. Gappsi serves homeowners throughout Nassau and Suffolk and offers pool design and construction support from planning through final finishing.

Call Gappsi at (631) 831-3177

Light gray porcelain pavers on a modern outdoor patio in Long Island.

Porcelain Pavers Long Island: Cost & Benefits Guide

Your outdoor space should be a true reflection of your personal style. The foundation of any great design starts from the ground up, and the pavers you select set the tone for the entire area. In the past, you might have had to choose between the look you wanted and the durability you needed. Thanks to modern technology, you no longer have to compromise. With an incredible range of styles that mimic natural stone, warm wood, or sleek concrete, porcelain pavers, Long Island residents find, offer limitless design freedom. You can achieve a high-end, custom look that is also tough enough to last for decades.

Key Takeaways

  • Enjoy a Patio That Lasts: Porcelain is built to handle Long Island’s climate, resisting everything from winter salt and freeze-thaw cycles to summer stains. Its non-porous surface means you get a beautiful patio without the need for constant sealing or upkeep.
  • Get the Look You Want Without the Work: Porcelain pavers come in countless styles that perfectly replicate natural stone or wood. This gives you complete design freedom for your patio or pool deck without the worry of staining, sealing, or water damage.
  • Think Long-Term Value, Not Just Upfront Cost: Although porcelain has a higher initial price, its incredible durability and low-maintenance nature save you significant money and time on future repairs, making it a smarter financial choice for the long run.

Why Choose Porcelain Pavers for Your Long Island Home?

When you’re planning a new patio, walkway, or pool deck, choosing the right material is one of the most important decisions you’ll make. You need something that not only looks beautiful but can also handle everything Long Island’s weather throws at it. That’s why so many homeowners are turning to porcelain pavers. They offer a perfect combination of sophisticated style and incredible resilience, making them a smart and lasting investment for any outdoor space. Let’s look at what makes porcelain the ideal choice for your home.

What are porcelain pavers made of?

You might be surprised to learn that porcelain pavers are crafted from a very simple, natural material: clay. But this isn’t your average pottery clay. It’s a highly refined clay that is fired at extremely high temperatures. This process creates a paver that is incredibly dense, hard, and strong. Think of it as the next evolution of traditional ceramic tile, but built to withstand the outdoors.

Because they are so dense, porcelain pavers are almost completely non-porous. This quality is the secret behind their amazing resistance to stains, mold, and mildew. Unlike concrete or some natural stones that can soak up spills, porcelain keeps messes on the surface, making cleanup simple. This durable composition ensures your patio or walkway looks pristine for years with minimal effort. You can explore a wide variety of styles in Gappsi’s porcelain and natural stone collection.

How they handle Long Island’s climate

Long Island weather is anything but predictable. We get hot, humid summers, rainy springs, and freezing winters. Your outdoor surfaces need to be able to handle it all. Porcelain pavers are exceptionally well-suited for this challenge. Their secret weapon is their extremely low water absorption rate, which is less than 0.5%. This means water from rain or melting snow sits on the surface instead of seeping into the paver itself.

This is a game-changer for durability, especially when temperatures drop. In the summer, lighter-colored porcelain pavers can also stay cooler to the touch than dark-colored concrete or bluestone, making them a fantastic choice for swimming pools decks and patios where you and your family will be walking barefoot.

Surviving frost and freeze-thaw cycles

If you’ve ever seen a concrete patio or walkway crack and flake after a harsh winter, you’ve witnessed the damage caused by freeze-thaw cycles. This happens when water penetrates porous materials, freezes, expands, and breaks the paver apart from the inside. It’s a common problem on Long Island and a major reason why many materials degrade over time.

Porcelain pavers are practically immune to this issue. Because they absorb almost no water, there is nothing to freeze and expand within the paver. They won’t chip, flake, or crack due to frost, even after years of exposure to our cold winters. This exceptional durability means you won’t be spending money on frequent repairs or replacements, unlike with other materials that may require ongoing restoration and sealing to survive.

Resisting salt and coastal air

Living on Long Island means many of us are close to the coast, and even those inland deal with salt on the roads in winter. Salty air and de-icing products can be incredibly corrosive to many paving materials, causing pitting and deterioration over time. Concrete pavers and certain types of natural stone are particularly vulnerable to salt damage.

Here again, porcelain proves its superiority. The non-porous, glass-like surface of porcelain is completely resistant to salt. It won’t degrade or discolor from exposure to salty coastal air or the de-icing salts used on driveways and walkways. This makes porcelain an excellent choice for any home on Long Island, but it’s an especially smart investment for properties near the water, ensuring your beautiful masonry work stays that way.

Top Benefits of Choosing Porcelain Pavers

When you invest in your home’s outdoor living space, you want materials that are not only beautiful but also practical. Porcelain pavers have become a favorite for Long Island homeowners because they deliver on all fronts. They offer a powerful combination of strength, style, and simplicity that’s hard to beat. From their incredible durability against our coastal weather to their minimal upkeep, these pavers provide long-term value and peace of mind. Let’s look at the top benefits you can expect when you choose porcelain for your patio, pool deck, or walkway.

Built to last: durability and longevity

Porcelain pavers are incredibly strong and built to handle Long Island’s changing weather with ease. Because they are fired at extremely high temperatures, they have a dense, non-porous structure that resists almost everything nature throws at it. This means you don’t have to worry about them fading from the summer sun, staining from a spilled glass of wine, or cracking during a harsh winter freeze-thaw cycle. They stand up to heavy foot traffic and patio furniture without showing signs of wear. Choosing from Gappsi’s collection of porcelain and natural stone means you’re investing in a surface that will maintain its beauty and integrity for decades, giving you a stunning outdoor space that truly lasts.

Forget sealing: the low-maintenance advantage

One of the biggest perks of porcelain pavers is how little maintenance they require. Unlike natural stone or concrete pavers that need regular sealing to protect them from moisture and stains, porcelain’s non-porous surface takes care of that for you. Spills like oil, wine, or dirt sit on the surface instead of soaking in, making cleanup incredibly simple. Most of the time, a quick sweep and a rinse with water and mild soap are all you need to keep them looking brand new. This low-maintenance quality saves you time, effort, and money year after year. You can spend your weekends enjoying your patio, not working on it, a major win for any homeowner.

Stay safe with slip-resistant surfaces

Safety is always a top priority, especially in outdoor areas that get wet. Outdoor porcelain pavers are designed with textured surfaces that provide excellent slip resistance, even when damp. This makes them an ideal choice for pool surrounds, walkways, and patios where kids might be running around or where you entertain guests. You can relax knowing your beautiful new surface also helps prevent slips and falls. When planning your perfect backyard oasis, using a safe material around your swimming pool is a decision that offers both style and security for your family and friends. This added peace of mind is priceless.

Find your style: endless design options

Porcelain pavers give you the creative freedom to design a truly unique outdoor environment. They come in a vast array of colors, patterns, and sizes, allowing you to achieve any aesthetic you can imagine. Whether you love the classic look of natural stone, the warm feel of wood planks, or a sleek, modern finish, there’s a porcelain paver to match. You can use these versatile materials to create beautiful patterns, define different zones in your yard, or craft a seamless transition from your indoor to outdoor spaces. Our masonry design experts can help you explore the possibilities and bring your vision to life.

A sustainable choice for your yard

For homeowners who prioritize environmentally friendly choices, porcelain pavers are an excellent option. They are typically made from natural and recycled materials, including clay, feldspar, and quartz, which are sustainable resources. Their incredible durability also contributes to their green credentials; a longer lifespan means less waste and fewer resources used for replacements over time. By choosing a material that is built to last for decades, you are making a responsible decision that reduces your environmental impact. Integrating these pavers into your landscape design is a smart way to create a beautiful outdoor space that you can feel good about.

What Types and Designs of Porcelain Pavers Are Available?

One of the best parts about choosing porcelain pavers is the incredible design flexibility you get. Thanks to modern manufacturing, these pavers come in a huge variety of styles, colors, and sizes, so you can create a look that is completely your own. Whether you dream of a rustic stone patio, a sleek modern pool deck, or something totally unique, there is a porcelain paver that fits your vision.

This isn’t about settling for a one-size-fits-all solution. It’s about finding the perfect material to bring your outdoor living space to life. You can mix and match styles, create intricate patterns, and design a space that flows seamlessly from your home’s interior to your backyard. Let’s look at some of the amazing options available for your Long Island property.

Exploring sizes: from standard to large format

The size of your pavers has a big impact on the overall feel of your space. Porcelain pavers are available in a wide range of dimensions, from standard 12×24 or 24×24 inch squares to much larger formats like 24×48 or even 48×48 inches. Large format pavers are a popular choice for modern designs because they create a clean, expansive look with fewer grout lines. This can make smaller patios or pool decks feel more spacious and luxurious. Standard sizes are classic and versatile, perfect for creating more traditional patterns or for use in smaller, more intricate areas.

Get the look of natural stone

Do you love the timeless beauty of natural stone but worry about the upkeep? Porcelain is the perfect answer. Advanced printing technology allows manufacturers to create pavers that convincingly replicate the look of materials like slate, bluestone, travertine, and granite. You get all the rich color variations, textures, and character of real stone without the need for sealing or concerns about staining. You can explore Gappsi’s porcelain and natural stone collection to see just how closely these materials can mimic their natural counterparts, giving you a high-end look that’s built to last.

Enjoy the warmth of wood (without the upkeep)

A wood deck is beautiful, but the constant threat of rot, splinters, and the need for yearly staining can be a major drawback. Wood-look porcelain pavers offer the perfect alternative. They capture the warm, inviting appearance of natural wood planks in a durable, maintenance-free material. These are ideal for pool decks where you want the look of wood without the water damage. You can even use them to create a seamless transition from an indoor living area with hardwood floors to your outdoor patio, creating a beautiful and cohesive flow throughout your home.

Modern looks: geometric and bold finishes

If your style leans more contemporary, porcelain pavers offer plenty of exciting options beyond natural looks. You can find pavers that mimic the sleek, industrial feel of poured concrete, perfect for a minimalist backyard design. For a bolder statement, consider pavers with geometric patterns or unique textured finishes. These styles allow you to turn your patio or walkway into a true design feature. With so many choices, from classic stone finishes to eye-catching modern designs, you have the freedom to create a truly personalized outdoor space that reflects your unique taste.

Trending colors for Long Island homes

While neutral tones like gray, beige, and cream are always in style, many Long Island homeowners are embracing more color in their outdoor designs. Trending porcelain paver colors include deep blues and even rich, earthy reds that add a pop of personality to a patio. You can also create visual interest with patterns. An expert masonry team can install pavers in classic layouts like herringbone or checkerboard to add a touch of elegance and custom detail. Combining different colors or finishes is another great way to define spaces, like creating a border around your patio or an accent area for your outdoor kitchen.

Where to Use Porcelain Pavers on Your Property

Porcelain pavers are incredibly versatile, making them a fantastic choice for creating a cohesive and elegant look across your entire property. Because they are so durable and come in countless styles, you can use them to define different outdoor living areas while maintaining a seamless flow. From your front walkway to your backyard oasis, porcelain provides a high-performance surface that ties your whole landscape design together beautifully. You can explore a wide variety of styles in Gappsi’s porcelain and natural stone collection to find the perfect fit for your home. Let’s look at some of the most popular places to use them on a Long Island property.

Patios and pool decks

Porcelain pavers are a perfect match for patios and especially for the areas around swimming pools. Their non-porous surface means they won’t absorb water, which helps them resist stains from chlorine, salt, and algae growth. More importantly, they are manufactured to have excellent slip resistance, providing a safer surface for wet feet. You can use these durable materials to craft beautiful patterns and define specific zones, like a lounging area separate from your dining space. This improves both the look and the function of your backyard patio.

Driveways and walkways

Your driveway and walkways are the first things guests see, and porcelain pavers can make a stunning first impression. They are strong enough to handle the weight of vehicles without cracking and resist stains from oil and tire marks, keeping your driveway looking pristine. For walkways, they create a clean, durable path that guides visitors to your door or through your garden. Unlike some other materials, porcelain stands up to the de-icing salts we often use during Long Island winters, so you can count on its beauty lasting for years with minimal masonry maintenance.

Outdoor kitchens and entertainment spaces

When you’re grilling and dining outside, spills are bound to happen. Porcelain pavers are ideal for outdoor kitchens and entertainment areas because they are so easy to clean. Grease, wine, and other food stains won’t penetrate the dense surface, so you can simply wipe them away. This lets you relax and enjoy your time with family and friends without worrying about permanent marks. Pairing a porcelain paver floor with one of Gappsi’s custom pavilions or pergolas can create a true outdoor room that feels like a natural extension of your home.

Porcelain vs. Concrete Pavers: Which Is the Better Investment?

When you’re planning a new patio, walkway, or pool deck, the materials you choose are a major decision. Both porcelain and concrete pavers are popular on Long Island, but they offer very different experiences when it comes to cost, durability, and upkeep. Thinking about this choice as a long-term investment, not just an upfront purchase, will help you decide which material truly fits your home and lifestyle.

While concrete pavers often have a lower initial price tag, porcelain pavers bring incredible durability and low-maintenance benefits that can make them more valuable over time. The right choice depends on your budget, your aesthetic goals, and how much time you want to spend on maintenance versus simply enjoying your beautiful outdoor space. We’ll break down the key differences to help you compare them side-by-side. Gappsi’s team has extensive experience with both materials, and we can guide you through our collection of high-quality porcelain and natural stone options.

Comparing upfront costs

Let’s talk numbers first. There’s no getting around it: porcelain pavers have a higher initial cost. The material itself typically runs more per square foot than concrete, and the specialized installation process also adds to the price. For a standard 400-square-foot patio, choosing porcelain could mean an initial investment that is thousands of dollars higher than choosing concrete. While that initial sticker price can be a major factor, it’s important to see it as just one part of the total cost of ownership over the life of your patio or driveway.

Which one lasts longer?

This is where porcelain really starts to show its value, especially with Long Island’s weather. Porcelain is incredibly dense and absorbs almost no water (less than 0.5%). This means that during our freeze-thaw cycles, there’s virtually no water trapped inside to freeze, expand, and cause cracks or chips. Concrete, on the other hand, is more porous and absorbs more water. Even high-quality concrete pavers can show wear over many years of winter weather, and they are more likely to develop issues if they aren’t sealed properly. Our expert masonry team ensures every installation is built to last, regardless of the material.

Factoring in long-term maintenance

If you’re looking for a low-maintenance lifestyle, porcelain is the clear winner. Because its surface is non-porous, stains from things like spilled wine, oil, or fallen leaves can’t soak in. A simple wash with soap and water is usually all it takes to keep them looking new. Concrete requires more attention. It’s recommended to have it sealed every few years to prevent stains, protect the color from fading, and stop moss or algae from growing. Without that upkeep, you might find yourself needing professional restoration and sealing services to keep your patio looking its best. Over the years, the time and money saved on maintenance can make porcelain a very smart investment.

How Much Do Porcelain Pavers Cost on Long Island?

Understanding the investment for a porcelain paver project is a key first step. While porcelain pavers often come with a higher price tag than some alternatives, it’s helpful to see it as a long-term investment in your home’s beauty, function, and value. The final cost depends on a few key things: the specific pavers you choose, the size and condition of your space, and the complexity of the installation. Let’s break down what you can expect to budget for your Long Island project so you can plan with confidence.

Breaking down material costs

When you’re planning your budget, the first line item to consider is the material itself. For premium porcelain pavers, you can expect the material cost to be between $12 and $19 per square foot. To put that in perspective, traditional concrete pavers typically run from $4 to $8 per square foot. For an average 400-square-foot patio, choosing porcelain could mean an upfront material cost that is $4,000 to $8,000 higher. This price reflects the sophisticated manufacturing process and superior quality of the material. You can explore a wide variety of styles in Gappsi’s porcelain and natural stone collection to find the perfect fit for your home.

What to budget for installation

Beyond the materials, professional installation is crucial for a lasting and beautiful result. The total installed cost for porcelain pavers on Long Island typically ranges from $28 to $45 per square foot. This includes the pavers, base preparation, and all labor. In comparison, the installed cost for concrete pavers is usually between $18 and $35 per square foot. The higher installation cost for porcelain accounts for the specialized techniques and equipment required to cut and lay these dense, durable tiles properly. Expert masonry work ensures your patio, walkway, or pool deck will perform beautifully for decades.

What influences the final price?

Several factors can influence the total cost of your porcelain paver project. The condition of the installation site is a major one. If your yard has a significant slope that needs to be graded or an old patio that must be removed, expect additional site preparation costs. The soil condition can also play a role, as a stable base is essential for a successful installation. Finally, the complexity of the design itself matters. Intricate patterns, custom cuts, and the use of very large format pavers can increase labor time and, therefore, the final price. Getting a detailed quote from an experienced contractor at Gappsi will give you a clear picture of the total investment.

How to Avoid Common Porcelain Paver Installation Issues

Porcelain pavers are a fantastic investment for your home, offering incredible durability and style. However, their performance depends entirely on a proper installation. A beautiful, long-lasting patio or walkway isn’t just about the pavers you see on top; it’s about the expert work that happens underneath and during the laying process. Even the highest quality materials can fail if they aren’t installed correctly.

Getting the installation right from the start saves you from future headaches like shifting, cracking, or water damage. It’s the difference between a patio that looks great for a few seasons and one that enhances your home for decades. Understanding the potential pitfalls is the first step to ensuring your project is a success. By focusing on a few key areas, you can protect your investment and get the flawless, professional finish you expect.

Using the right tools and techniques

Porcelain is much denser and harder than concrete pavers or natural stone, which means it requires a special touch. You can’t just use any old saw blade; cutting porcelain without chipping or cracking requires a high-quality, diamond-tipped blade designed specifically for the material. An installer who tries to use the wrong equipment will leave you with rough edges and wasted pavers. The right techniques are just as important. Proper spacing is essential to allow for jointing material, and using the correct adhesive and grout ensures your pavers stay locked in place. A professional understands these nuances and has the right tools and expertise to deliver a clean, precise finish.

Why proper base preparation is critical

Here on Long Island, we know our weather can be tough. The constant freeze-thaw cycles in winter can wreak havoc on improperly installed hardscapes. This is why the foundation beneath your pavers is the most critical part of the entire project. A poorly prepared base will shift and settle over time, leading to uneven surfaces, rocking pavers, and potential cracks. A professional masonry contractor knows that building a stable base involves excavating to the right depth, using the correct aggregate materials, and compacting it in layers to create a solid, unmoving foundation. This meticulous preparation ensures your beautiful porcelain pavers stay level and stable through every season.

Managing moisture and drainage

Water is the number one enemy of any paver installation. If your patio doesn’t have a slight, carefully calculated slope, water will pool on the surface. This not only creates a slipping hazard but also encourages moss and algae to grow in the joints, making your patio look dirty and old. Even worse, standing water can eventually seep into the base material, compromising its stability and leading to sinking or heaving during a freeze. A proper installation always incorporates a drainage plan. This means grading the surface to direct water away from your home’s foundation and into a lawn or designated drainage area, keeping your pool deck or patio safe, clean, and secure.

The importance of hiring an experienced contractor

As you can see, installing porcelain pavers correctly involves much more than just laying down tiles. It requires specialized knowledge, tools, and a deep understanding of local conditions. Hiring an experienced contractor is the single best way to avoid all these common issues. A seasoned professional will manage every detail, from building a bulletproof base to ensuring perfect cuts and proper drainage. They can anticipate potential problems and address them before they happen. By investing in a qualified home improvement expert, you get the peace of mind that your project will be done right the first time, resulting in a stunning and durable outdoor space you can enjoy for years to come.

Keeping Your Porcelain Pavers Beautiful

One of the best things about porcelain pavers is how little work they require to stay looking brand new. Unlike other materials that demand constant attention, porcelain is designed for easy living. Still, a little seasonal care will ensure your patio, walkway, or pool deck remains the highlight of your yard for years to come. Taking a few simple steps each season prevents small issues from becoming bigger problems, keeping your outdoor space pristine and ready for everything from quiet morning coffees to lively family barbecues.

With the right approach, you can easily manage everyday dirt and grime yourself. However, it’s also important to know when a problem needs a professional touch. Here’s how to handle routine cleaning and spot the signs that it’s time to call for backup.

Simple cleaning tips for every season

Maintaining your porcelain pavers is surprisingly simple. For most of the year, all you need is a broom to sweep away leaves, pollen, and other debris. This quick task prevents dirt from settling into the surface. For a more thorough clean, just use a gentle soap and water solution. A simple wash-down a few times a year is usually enough to lift any accumulated grime and keep your pavers looking vibrant. There’s no need for harsh chemicals or aggressive scrubbing. This straightforward routine is one of the biggest perks of choosing porcelain and natural stone for your outdoor spaces, giving you more time to simply enjoy your beautiful home.

How to handle moss and algae

On Long Island, our humid climate can sometimes encourage moss or algae to appear, especially in shaded or damp areas of your patio. Besides being unsightly, this growth can make surfaces slippery and unsafe. Don’t worry, it’s a manageable issue. You can often treat small spots with a simple mixture of white vinegar and water. For more stubborn patches, a specialized cleaner designed for outdoor pavers will do the trick. Regularly inspecting your pavers, particularly after long rainy periods, allows you to catch and treat any growth early. This proactive step ensures your patio remains a safe and beautiful extension of your home, ready for you and your family to enjoy.

When to call for professional restoration

While DIY cleaning works for everyday upkeep, some situations are best left to the experts. If you notice widespread or stubborn stains that don’t lift with simple cleaning, it might be time to call for help. Significant moss or algae growth that keeps coming back, or any signs of shifting or cracking, could point to deeper issues with the installation or drainage. Instead of spending your weekend struggling with a pressure washer, consider professional help. Gappsi offers expert restoration and sealing services to deep clean, repair, and restore your pavers to their original condition. A professional assessment can save you time and prevent further damage, protecting your investment for the long run.

Finding the Best Porcelain Pavers on Long Island

Once you’ve decided on porcelain pavers, the next step is finding the right product and the right team for the job. This is where a little local knowledge goes a long way. Choosing a supplier isn’t just about picking out pretty stones; it’s about partnering with an expert who understands what it takes to build lasting beauty on Long Island.

How to choose a quality supplier

Building on Long Island comes with its own unique set of challenges, from our specific soil conditions to our freeze-thaw weather cycles. When selecting a supplier, it’s essential to consider their experience with these local conditions. You need a partner who can provide durable materials that withstand Long Island’s climate. Look for a company with a proven track record of successful installations in your area. An experienced supplier will guide you toward products that won’t just look good on day one but will hold up for years, preventing issues like cracking or shifting. Their deep understanding of local masonry standards is your best insurance policy for a long-lasting project.

Explore Gappsi’s porcelain and natural stone collection

For Long Island homeowners, porcelain pavers provide a wonderfully versatile option for designing distinctive outdoor environments. With so many styles, from classic stone finishes to bold geometric shapes, modern porcelain offers incredible design flexibility and can realistically mimic natural materials. You can use these durable materials to craft beautiful patterns, create visual interest, and define different zones in your yard, improving both the look and function of your patio or garden. Visiting a showroom allows you to see and feel the textures for yourself. Gappsi’s extensive porcelain and natural stone collection gives you the freedom to find the perfect match for your home’s aesthetic, whether you want a rustic retreat or a sleek, modern oasis.

Related Articles

Frequently Asked Questions

Are porcelain pavers slippery, especially around a pool? This is a great question because safety is so important. Outdoor porcelain pavers are specifically designed with a textured finish to provide excellent traction, even when they get wet. This makes them a much safer choice for pool decks and patios compared to smoother materials like some natural stones or indoor tiles. You can feel confident that you’re getting a surface that helps prevent slips and falls, giving you peace of mind while your family enjoys the backyard.

Do porcelain pavers get too hot to walk on in the summer? This is a very practical concern for any sunny Long Island backyard. The temperature of a paver is mostly influenced by its color, not just the material. Dark-colored pavers of any kind will absorb more heat from the sun. If you’re planning a pool deck or patio that gets a lot of direct sunlight, choosing a lighter-colored porcelain paver in a white, cream, or light gray shade will keep the surface much more comfortable for bare feet.

I know porcelain is durable, but what happens if one cracks or chips? While it’s very difficult to damage a porcelain paver, accidents can happen. If a single paver does get chipped or cracked, it can be replaced. An experienced installer can carefully remove the damaged paver and set a new one in its place. This is one reason why it’s always a good idea to order a few extra pavers with your initial project, ensuring you have a perfect match from the same batch if a repair is ever needed down the road.

Why is professional installation so important? Can’t I save money and do it myself? Porcelain pavers require specific tools and techniques that differ from other materials. They are extremely dense, so they need to be cut with a special diamond blade for clean edges. More importantly, the foundation beneath the pavers must be perfectly prepared and compacted to prevent shifting and cracking, especially with our freeze-thaw cycles. A professional installation ensures the base is stable and proper drainage is in place, which is what guarantees your patio will last for decades. It’s an investment in getting the job done right the first time.

Is porcelain really worth the higher price compared to concrete pavers? While the upfront cost of porcelain is higher, it often proves to be the better long-term investment. You have to consider the total cost of ownership. Porcelain pavers do not need to be sealed every few years like concrete does, which saves you significant time and money on maintenance. Their incredible resistance to stains, fading, and frost damage means they will look brand new for many years, while concrete can show wear over time. You are paying for durability and a nearly maintenance-free outdoor space.