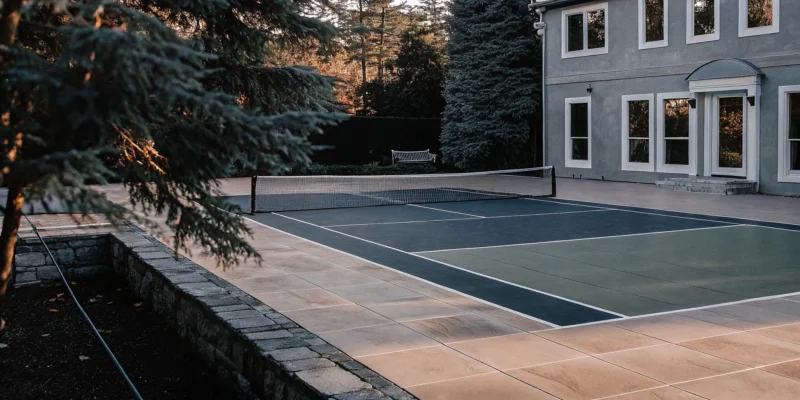
A backyard pickleball court succeeds or fails long before the first concrete pour. Long Island homeowners need a plan that fits the property, protects play quality, and prevents costly changes after work begins.
Pickleball court construction for a Long Island backyard starts with a careful review of usable space, access, drainage, sun direction, nearby homes, and the owner’s goals. The plan should define the court’s position, playing area, surface, fencing, lighting, and surrounding features before excavation begins. It must also account for how equipment and materials will reach the site, where water will move, and how players will use the court safely. A qualified builder can turn those findings into a clear scope, explain practical tradeoffs, and help the homeowner avoid choices that create poor play or added work later. With the right planning, the finished court can fit the backyard naturally while providing reliable performance for years.
The main question is not simply whether a court can fit, but whether every part of the site can support it. Planning pickleball court construction for a Long Island backyard means reviewing the property as one connected system before choosing finishes or extras. Here is how:
Planning pickleball court construction for a Long Island backyard
A lasting backyard court starts with a clear plan, not a surface color. The plan should connect play needs with grade, drainage, access, and nearby landscape features.
Site assessment and court layout
Begin by studying the full yard during the day. Note slopes, wet areas, trees, property lines, utilities, and the route construction crews can use.
Then place the court where players have useful run-off space around the marked play area. Consider sun angle, nearby windows, seating, gates, and paths before fixing the layout.
- Assess the site. Survey the grade and mark utilities, setbacks, trees, structures, and access limits. Check where rainwater moves after a storm.
- Set the layout and orientation. Fit the play area and safe run-off space into the yard. Aim to limit low sun glare during common playing hours.
- Plan the base and drainage. Choose excavation depth, base layers, edging, and drainage as one system. Direct water away from the court and neighboring property.
- Select the playing surface. Match the finish to expected use, upkeep needs, traction, and the planned base. Set colors and line locations before installation begins.
- Choose equipment and utilities. Place net posts, fencing, gates, lighting, and electrical runs on the final plan. This prevents later cuts through a finished surface.
- Connect the court to the landscape. Plan paths, seating, planting, shade, and screening around play and maintenance needs. Keep roots and irrigation away from the base.
- Confirm the build sequence. Review permits, deliveries, crew access, inspections, and weather needs. Approve each base stage before the next layer covers it.
Base and drainage decisions
The base carries the playing surface, so weak soil or poor grading can affect the finished court. Drainage should be designed before excavation, rather than added after puddles appear.
Water must have a planned route through or around the site. The EPA explains how permeable pavement helps rain soak into the ground, but the right drainage method depends on the yard and chosen court system.
Landscape and equipment integration
A backyard court works best when it feels connected to the rest of the property. Paths should reach gates without crossing planting beds, while seating should stay clear of active play.
Place fencing, lights, and net hardware before crews finish the surface. Also plan for leaf drop, root growth, irrigation spray, and mower access near the court edges.
Good pickleball court construction turns these choices into one coordinated plan. That plan gives the installer clear dimensions, materials, drainage details, equipment locations, and landscape connections before work starts.
How much backyard space does a pickleball court need?
A standard pickleball layout has playing lines that measure 20 feet wide by 44 feet long. Those lines show where play happens, but they do not define the full paved area. Players also need clear space to serve, chase a ball, and move past the sidelines without hitting a fence.
Playing lines and total surface
For most backyards, plan for a total surface of about 30 feet by 60 feet. This footprint leaves useful buffers around the 20-by-44-foot playing area. It gives players more room behind each baseline and along both sides.
A smaller surface may fit, but tight edges can limit play and create awkward movement near walls, planting beds, or fences. During pickleball court construction, measure the full clear area rather than just the painted lines. Include room for fence posts, gates, drainage edges, and any planned seating.
Orientation and site conditions
Place the long axis as close to north-south as the property allows. This layout can help reduce direct low-angle sun during common morning and evening play times. Trees and buildings may provide shade, but their roots, leaves, and runoff can affect the surface.
Check the grade before settling on a location. The area should support drainage without sending water toward the house or nearby outdoor rooms. A qualified builder can assess slope, soil, and access before setting the final footprint.
Access and outdoor living space
The court should connect to the rest of the yard without forcing guests through planting beds or active play areas. Plan a clear route from the house, patio, or pool area. Where accessibility is a goal, the U.S. Access Board explains how a firm and slip-resistant access route supports safe travel.
Keep social areas close enough for conversation, but outside the ball and player run-off zones. A gate, bench, shade feature, and storage spot each need added room. Good planning makes the court part of the backyard instead of an isolated paved rectangle.
Before approving the layout, mark the full 30-by-60-foot surface with stakes and string. Then walk its edges and test common paths through the yard. This simple step can reveal tight gates, blocked views, or lost patio space before work begins.
Choosing a surface and base for long-term play
The playing finish affects pace, footing, comfort, and upkeep. Yet the prepared base often decides how well a court lasts. Long Island weather adds freeze and thaw cycles, rain, heat, and salt air. Pickleball court construction should pair the finish with sound drainage and a stable base.
The base beneath the finish
A paved court needs firm, well-drained ground below it. The crew should remove weak soil, compact the subgrade, and build the planned stone base in even lifts. Proper grading also moves water away before it can collect beneath the slab or pavement.
Drainage deserves early attention because trapped water can weaken support and worsen cold-weather movement. The Federal Highway Administration pavement guidance explains how materials and pavement design affect asphalt performance. Site conditions still guide the final base depth, slope, and drainage plan.
Surface options at a glance
Painted asphalt is a common outdoor choice with a familiar ball response. Concrete offers a rigid base and can support several finish systems. Modular tile and cushioned coatings add comfort, but each changes feel, care needs, and repair methods.
| Option | Durability | Ball response | Comfort | Maintenance |
|---|---|---|---|---|
| Painted asphalt | Flexible, but may crack or settle | Consistent and familiar | Firm underfoot | Clean, repair cracks, and recoat as needed |
| Concrete with coating | Rigid and stable with sound joints | Fast, even bounce | Firmest option | Clean, check joints, and renew coating |
| Modular tile | Replaceable sections; base must stay even | Varies by tile design | More give than a hard coating | Clean seams and replace damaged tiles |
| Cushioned coating system | Depends on base and coating care | Controlled, with a softer feel | Added shock relief | Clean gently and renew worn layers |
No finish can hide poor grading or an unstable base for long. Cracks, low spots, and failed drainage will show through coatings. Tiles can bridge small surface flaws, but they still need a smooth and secure platform.
Matching the system to the players
Choose based on who will play, how often they will use the court, and how much care the owner expects. A private backyard court may favor comfort and easy upkeep. A busy shared court may place more weight on predictable bounce and simple repairs.
Ask the builder how the full system handles movement, water, joints, and future resurfacing. The answer should cover the base and finish as one assembly. It should also explain which repairs are possible without replacing the entire playing surface.
Color and texture matter, but they come after drainage and base preparation. A balanced plan delivers steady play while giving the owner a clear maintenance path. That approach helps the selected surface perform through changing Long Island seasons.
Why drainage and site preparation determine durability
A durable court starts below the finished surface. Paint and fencing may be more visible, but they cannot correct weak soil or trapped water. During pickleball court construction, the site plan must guide water away while keeping the playing area stable and even.
Long Island yards often connect lawns, patios, planting beds, and structures within a tight space. Each part affects where rain travels after it reaches the ground. The EPA stormwater program explains that runoff can collect pollutants as it moves across developed land.
Reading the existing grade
Site preparation begins with a close look at the yard’s current grade. The builder studies high and low areas, soil conditions, nearby paved surfaces, and the path water already follows. This review helps reveal where ponding, washout, or runoff toward a building may occur.
The court cannot be planned as an isolated rectangle. Its finished grade must work with the patio, walkways, lawn, and planting beds around it. A sound plan also considers downspouts, irrigation, and water arriving from higher parts of the property.
Drainage choices depend on those findings. In one yard, careful surface grading may direct water to a safe outlet. Another site may need drains or other controls because nearby features limit the natural route.
Building a stable base
Excavation removes unsuitable material and creates room for the supporting layers. The exposed area should be checked before the sub-base goes in. Soft pockets, disturbed soil, and buried debris can lead to movement if they remain below the court.
The sub-base spreads loads and supports the finished playing surface. It also needs consistent placement and compaction across the full area. Uneven support can create low spots where water sits, then increase stress on the surface as seasons change.
Good preparation also protects the edges. Soil beside the court must support the planned drainage route without washing away. Transitions to patios and paths should avoid abrupt low points that collect water or send runoff back toward the court.
Managing water across the whole yard
Water management works best when it is part of the full landscape plan. Drain outlets should not discharge into a planting bed that cannot handle the flow. They also should not shift a ponding problem from the court to a patio, lawn, or neighboring area.
Plants can help soften the court’s setting, but their beds must fit the drainage design. Loose soil or mulch should stay away from routes carrying concentrated water. The layout should also leave practical access for cleaning drains and checking outlets.
Before the surface work begins, the builder should confirm grades, drainage paths, and the prepared base together. That check connects every layer to the surrounding yard. It reduces the risk that hidden water issues will shorten the court’s useful life.
Integrating fencing, lighting, and landscaping
Fencing and neighbor-friendly lighting
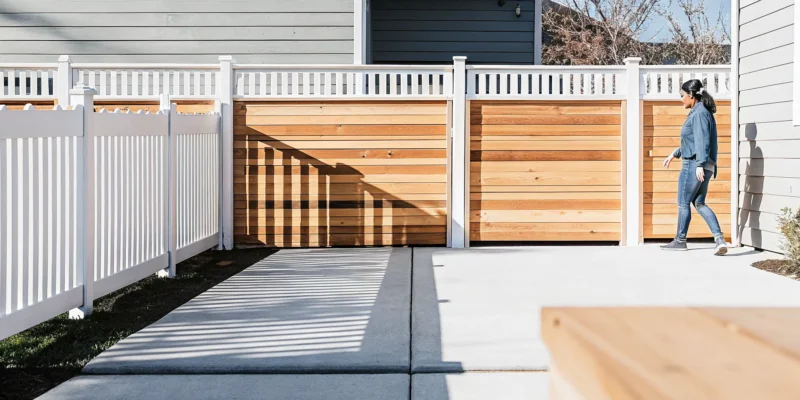
Treat fencing and lighting as part of pickleball court construction, not as extras added after the surface is complete. A well-planned enclosure keeps balls contained while leaving clear sightlines for players and guests. Include gates near the home, seating area, and main path so people can enter without crossing planted beds.
Choose fence height, mesh, and color based on the yard, nearby windows, and expected play. Dark mesh often blends into the view better than a bright finish. Where neighboring homes sit close by, add targeted screening on the sides that need it instead of closing in the full court.
Place lights to cover the playing area without sending glare toward the house or neighboring yards. Fixtures should point down and stay within the court footprint. The U.S. Department of Energy offers practical guidance for selecting and controlling outdoor lighting. Timers and simple shutoff rules can also help keep evening play considerate.
Paths, patios, and places to gather
A court works better when the route from the house feels direct and safe. Plan a firm path that stays clear of gates, drainage areas, and active play. If the yard includes a pool, outdoor kitchen, or patio, connect those areas without forcing guests to walk behind players.
Seating should offer a clear view while remaining outside the ball path. A small patio can hold chairs, a table, and shade without crowding the fence line. Keep enough open space near each gate for people carrying paddles, drinks, or folding chairs.
- Add a bench for players waiting between games.
- Provide shade with a pergola, canopy, or nearby tree placement.
- Use low-level path lights to mark steps and route changes.
- Reserve a dry spot for paddles, balls, and maintenance tools.
Landscaping, screening, and storage
Landscaping should soften the recreation zone without creating more cleanup on the playing surface. Use planting beds to frame paths, patios, and seating areas. Keep thorny plants, loose mulch, and heavy leaf drop away from the fence so routine care stays simple.
Shrubs, ornamental grasses, or fence-mounted screening can add privacy where neighbors face the court. Before choosing dense plants, consider mature size and access for fence repairs. Leave room for air movement, drainage checks, and safe passage around the enclosure.
Finish the plan with storage that matches how the space will be used. A weather-resistant cabinet near the gate keeps game supplies close and reduces trips across the yard. Larger storage can also hold a net system, cleaning tools, seat cushions, and spare lighting controls.
These features should support the court without making the yard feel divided. Review views, noise, lighting hours, and shared property lines before work starts. Early choices help the finished area serve players, guests, and neighbors as one planned backyard recreation zone.
What does a professional design-build process include?
Site evaluation and concept design
A professional pickleball court construction project starts with a close look at the property. The design team reviews access, grade, drainage, sunlight, nearby homes, and the space needed around play. This early work helps place the court where it fits the yard and supports daily use.
The concept plan then joins the court with the home’s wider landscape. It can show fencing, lighting, planting, seating, walkways, and support spaces before crews arrive. Accessibility also deserves early thought, and the U.S. Access Board recreation facilities guide explains key access topics for recreation settings.
Gappsi brings design, construction, and material supply into one coordinated process. The team has served Long Island since 1987, with experience across Nassau and Suffolk counties. Homeowners can also review materials and ideas at the Smithtown showroom before making final choices.
Materials and coordinated scheduling
Material selection goes beyond choosing a surface color. The team matches the base, playing surface, fence, gates, posts, lighting, and drainage details to the site plan. A clear specification helps each part work with the next and keeps the finished setting visually consistent.
Scheduling matters because several trades may share the same work area. Excavation, drainage, electrical work, masonry, fencing, surfacing, and landscaping must happen in the right order. Gappsi’s integrated Sports Games Courts design-build-supply service gives those related tasks one plan and one point of coordination.
- Confirm court placement, elevations, access, and drainage.
- Select surface colors, fencing, lighting, and nearby landscape materials.
- Set the work sequence for site crews and related trades.
- Review the plan, schedule, and final details before construction starts.
Construction, finishing, and handoff
Construction begins with careful layout and site preparation. Crews then build the base, manage drainage, install planned utilities, and complete surrounding features in sequence. The surface, lines, net system, fencing, and lights follow once earlier work is ready.
Finishing work brings the whole area together. Crews address edges, transitions, planting, cleanup, and small details that affect how the space looks and feels. A final review checks completed features against the approved plan and notes any items that need attention.
The handoff should also explain basic use and care. Owners need to know how to protect the surface, manage routine upkeep, and report a concern. Readers planning a dedicated play area can review Gappsi’s pickleball court construction approach before discussing site goals with the design team.
A homeowner checklist before requesting a court design
A useful design meeting starts with a clear picture of how your family will use the court. Before requesting pickleball court construction, gather the details that shape placement, materials, access, and long-term care. This preparation helps the contractor focus on a design that fits your yard and daily routine.
Define the court and its setting
Start with your main goals. Note who will play, which games matter, and whether the space will host casual play or regular practice. Also decide if the court should stand alone or connect with a pool, patio, or outdoor kitchen.
- List the games and activities the court should support.
- Describe the available footprint and nearby outdoor features.
- Choose preferred surface materials, line colors, and border colors.
- List wanted amenities, such as lighting, fencing, seating, storage, or shade.
Bring a recent property survey if one is available. Mark slopes, trees, utilities, drainage areas, and any structures near the proposed footprint. Ask the contractor how runoff will move around the planned court and nearby spaces.
Plan access and upkeep
Think beyond the finished playing area. The installation team may need a clear route for workers, tools, and materials. Note narrow gates, delicate landscaping, irrigation lines, septic areas, and any surfaces that need protection during the work.
- Measure gates and identify the most direct route from the street.
- Note parking limits and times when access may be restricted.
- Describe your preferred level of cleaning and seasonal care.
- Ask how the surface, fencing, and accessories should be maintained.
Long Island weather can expose an outdoor court to rain, leaves, freeze cycles, and strong sun. Tell the designer how often you expect to use the space through the year. Your care preferences can guide choices for surfaces, landscaping edges, and accessories.
Prepare questions for the contractor
Write down questions before the consultation, so each design choice has a clear reason. Ask how the proposed layout fits the yard, connects with nearby features, and supports safe movement around the playing area. Request examples of material and color options that suit your goals.
- What site details could change the proposed placement or footprint?
- How will drainage and surface preparation be handled?
- What access will the crew need during each stage?
- Which maintenance tasks should homeowners plan for?
- How can lighting, fencing, seating, or shade fit the design?
Keep the survey, photos, measurements, inspiration images, and question list together. A complete planning packet gives the designer useful context from the first meeting. It also makes it easier to compare layout options without losing sight of your priorities.
Frequently Asked Questions
How much backyard space do I need for pickleball court construction?
Plan for a complete playing area plus clear space around every boundary. Extra room improves player movement and allows space for fencing, gates, lighting, and landscaping. The site must also accommodate grading and drainage without directing runoff toward the house or neighboring properties. A contractor should measure the yard and confirm setbacks before finalizing the layout.
Do Long Island homeowners need permits for a backyard pickleball court?
Permit requirements vary by town, village, and property conditions across Long Island. A project may require approvals for grading, drainage, fencing, lighting, electrical work, or structures near property lines. Homeowners should also review deed restrictions and community rules. Confirm the applicable requirements with the local building department before excavation begins, since approvals can affect the design and schedule.
How should drainage be planned for a backyard pickleball court?
Drainage planning starts with the yard’s existing slope, soil conditions, and nearby structures. The finished court should move water away from the playing surface without sending runoff toward foundations or neighboring lots. Depending on the site, the plan may include careful grading, perimeter drains, or another approved system. Addressing drainage before construction helps protect the base and playing surface.
What affects the cost of pickleball court construction on Long Island?
The main cost factors include site access, excavation, grading, base preparation, surface system, drainage, fencing, and lighting. Difficult soil, limited equipment access, or a sloped yard can increase labor and material needs. Optional features such as custom colors, seating, and landscaping also change the budget. A site-specific proposal is more reliable than a general price estimate.
When is the best time to build a backyard pickleball court on Long Island?
Construction is usually easier during periods of mild, dry weather because excavation, base preparation, and surface work depend on suitable site conditions. The exact schedule also depends on contractor availability, permit timing, and the selected surface system. Planning well before the preferred completion date allows time for design decisions, approvals, weather delays, and proper curing between construction stages.
Ready to Plan Your Long Island Pickleball Court?
Waiting to plan your backyard pickleball court can leave less time to settle important local design choices, permits, site needs, and construction timing. Starting now gives you more room to carefully review priorities, compare layout options, and address key questions before your preferred project window gets closer. A clear early plan helps your family move from broad ideas toward a practical court design. It can fit the backyard, your household, and your plans for regular play.
Ready to plan your Long Island backyard? Request a pickleball court design consultation to discuss your goals and site considerations with Gappsi. Ask about preferred timing or a visit to the Smithtown showroom before choosing your project’s final details.