Planning a kitchen renovation budget with a cost estimator on a tablet and material samples.

Kitchen Renovation Cost Estimator: Plan Your Budget

One of the most exciting parts of planning a kitchen remodel is exploring all the possibilities. What if you chose stunning porcelain countertops instead of classic granite? How would custom cabinets impact the budget compared to semi-custom options? A kitchen renovation cost estimator is your personal sandbox for answering these “what-if” questions. It allows you to instantly see how different choices affect your potential spending. This interactive process helps you understand the financial trade-offs between various materials and finishes, empowering you to prioritize what truly matters to you before you even schedule your first design consultation.

Key Takeaways

  • Use Estimators for Initial Planning Only: Online calculators are a great first step for getting a rough idea of costs, but they can’t replace a professional quote that considers your specific material choices, local labor rates, and unique project details.
  • Build a Realistic Budget with a Contingency Fund: A successful renovation depends on a comprehensive budget. Plan for all major costs, including materials and labor, and always set aside a 15 to 20 percent contingency fund to cover any unexpected issues that arise.
  • Save Smartly Without Sacrificing Quality: You can achieve a beautiful kitchen on a budget by prioritizing needs over wants, exploring stylish material alternatives, and hiring professionals for critical tasks. A detailed contractor quote is the best way to get a fair price for high-quality work.

What Is a Kitchen Renovation Cost Estimator?

If you’re dreaming of a new kitchen, one of your first questions is likely, “How much will this cost?” A kitchen renovation cost estimator is a great first step to finding an answer. Think of it as a digital tool designed to give you a ballpark figure for your project. According to Reico, a kitchen estimator provides a “broad, initial estimate of product costs based on user inputs.” It’s not a final quote, but it helps you set a realistic starting budget before you dive deep into planning your home remodeling project.

These online tools are incredibly helpful for initial planning. They work by asking you for key details about your project, like the size of your kitchen and the types of materials you’re considering. Based on your answers, the calculator generates a rough cost estimate. This process helps you understand how different choices, such as opting for high-end countertops versus a more budget-friendly option, can impact your overall spending. While these estimators are useful, it’s important to remember their limitations. They often can’t account for local labor rates, permit fees, or unexpected issues that might pop up during demolition. Use an estimator to get a foundational budget, then consult with a professional for a detailed, comprehensive quote that reflects the true scope of your project.

How Does It Work?

Most online kitchen estimators are designed to be very user-friendly. You start by inputting basic information about your space, like its dimensions and layout. Some advanced tools even let you create a floor-plan sketch right on your phone or tablet, which makes visualizing the final result much easier. After you’ve defined the space, you’ll be prompted to make selections for different components of your kitchen. You can choose styles for cabinets, materials for countertops, and types of appliances. The tool then uses this information, along with pre-programmed average costs, to calculate an estimated total for your renovation. It’s a simple way to play with different ideas and see how they affect your budget in real time.

What Factors Does It Consider?

A good estimator considers several key variables to give you a reasonably accurate starting point. The most significant factors include the size of your kitchen, the quality of materials selected, and the scope of the work. For example, the tool will ask you to specify your preferences for major items like cabinets, countertops, flooring, and appliances. You might choose between standard laminate countertops or high-end porcelain and natural stone, and the estimator will adjust the cost accordingly. Some calculators also factor in approximate labor costs, though these can vary widely by location. The more specific you are with your inputs, the more tailored your estimate will be.

Know Its Limitations

While an online estimator is a fantastic planning resource, it’s crucial to understand its limitations. These tools provide a preliminary estimate, not a fixed price. They often don’t include costs for permits, which are usually required for major renovations. They also can’t predict the cost of dealing with unforeseen issues, like outdated wiring or hidden plumbing problems that are only discovered after demolition begins. According to Patscale Remodeling, estimators may not account for “temporary kitchen setup costs, and unexpected change orders that can arise during the renovation process.” Always treat the number you get as a guide, and be sure to build a contingency fund (typically 10-20% of the total) into your budget to cover these potential surprises.

What’s the Average Cost of a Kitchen Renovation?

Figuring out the average cost of a kitchen renovation can feel like trying to hit a moving target. The final price depends heavily on your vision, the size of your space, and the materials you choose. A minor refresh involving paint and new hardware will cost significantly less than a full-scale remodel with a new layout and custom features. Generally, homeowners can expect to invest anywhere from $25,000 for a smaller, mid-range project to well over $150,000 for a large, upscale renovation, especially in areas like Long Island.

The key is to understand where your money goes. The total cost is a combination of several major components: cabinets, countertops, appliances, and labor. Each of these categories has a wide range of options, from budget-friendly choices to luxurious, high-end selections. By breaking down your project into these parts, you can see where you want to save and where you feel it’s worth it to splurge. A detailed plan is the first step toward creating a realistic budget and bringing your dream kitchen to life. Our team can help you create a precise home remodeling plan tailored to your specific goals and budget.

Cabinets and Storage

Cabinets are the foundation of your kitchen’s design and often represent the largest single expense in your renovation budget. Your choice here will have a major impact on both your kitchen’s functionality and your project’s bottom line. For a more budget-conscious approach, you could refinish or reface your existing cabinets. If you’re looking for a complete change, stock or semi-custom cabinets offer a middle ground with plenty of styles.

For a truly personalized space, custom cabinetry allows you to maximize every inch of your kitchen with tailored storage solutions and unique finishes. The material, construction, and hardware all play a role in the final cost. Working with a design-build firm ensures your cabinets not only look beautiful but also fit your workflow perfectly.

Countertops and Surfaces

Your countertops are a major focal point and a hardworking surface, so choosing the right material is essential. The options are vast, with a material available for every style and budget. Laminate and butcher block are often the most affordable choices. Moving up in price, you’ll find durable and popular materials like quartz and granite, which offer a great balance of beauty and resilience.

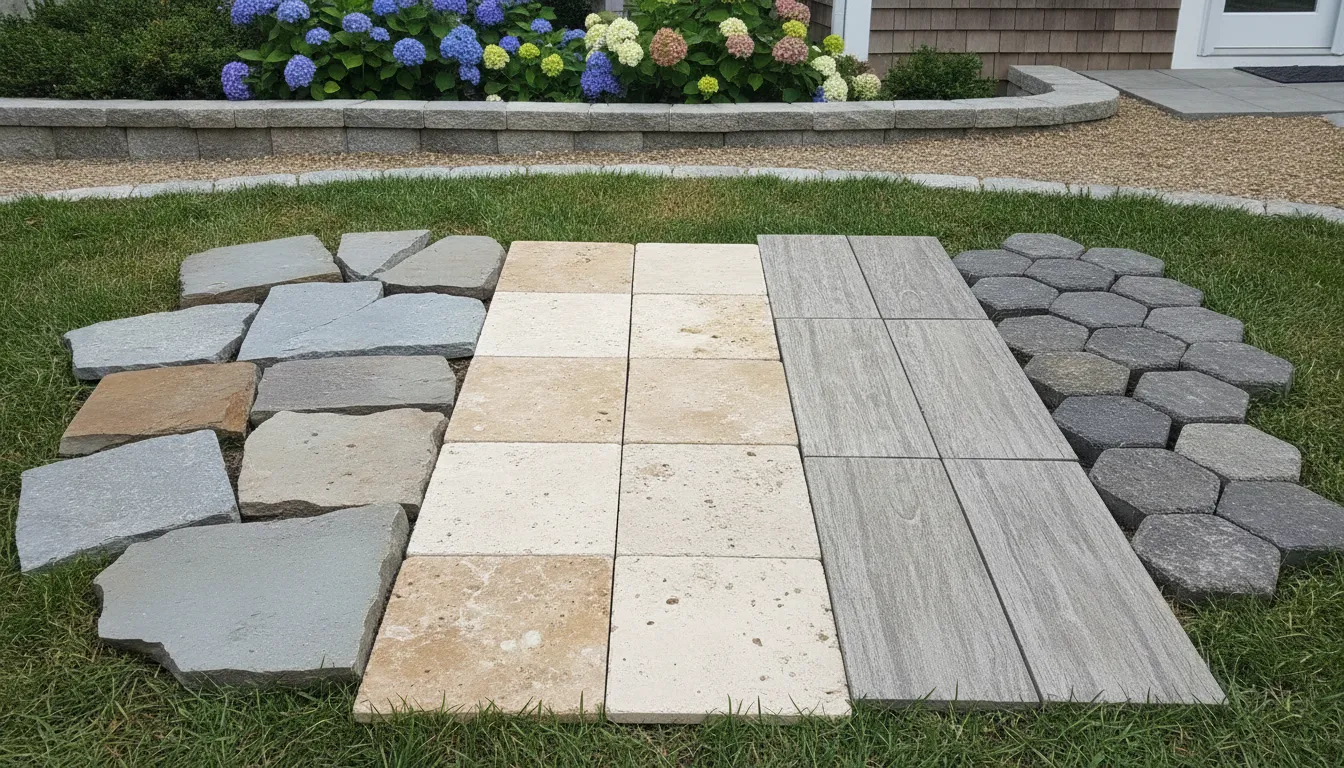
For a high-end, luxurious feel, materials like marble, quartzite, and large-format porcelain slabs make a stunning statement. When selecting a material, consider both its appearance and its maintenance requirements. Gappsi offers a beautiful selection of porcelain and natural stone that can create a durable and elegant surface for your new kitchen.

Appliances

The appliance suite is another area where costs can vary dramatically. You can find reliable, standard-finish appliance packages that are quite affordable. Mid-range options often include more features and popular finishes like stainless steel. At the high end, you’ll discover professional-grade ranges, built-in refrigerators, and smart appliances that connect to your phone, offering advanced cooking technology and convenience.

When budgeting, think about how you use your kitchen. An avid home chef might prioritize a powerful gas range, while a busy family may value a large, feature-rich refrigerator. Don’t forget to factor in smaller appliances like microwaves, dishwashers, and ventilation hoods, as these costs add up.

Labor and Installation

Labor is the invisible but essential element that brings your entire kitchen renovation together. This cost typically accounts for a significant portion of your total budget and covers everything from demolition and preparation to the precise installation of every component. This includes the work of carpenters, plumbers, electricians, tile setters, and painters.

While it might be tempting to cut costs here, hiring experienced and insured professionals is the best way to protect your investment. Proper installation prevents future problems, ensures everything is up to code, and delivers a polished, high-quality finish. A professional home remodeling company manages all these moving parts, giving you peace of mind and a beautiful result.

What Factors Drive Your Renovation Budget?

When you start dreaming up your new kitchen, it’s easy to get carried away with beautiful finishes and high-end appliances. But to keep your project grounded, it’s important to understand what actually influences the final price tag. Several key factors will shape your budget, from the size of your space to the quality of the materials you choose. Knowing what these are ahead of time helps you make informed decisions, allocate your funds wisely, and avoid surprises down the road. Let’s walk through the main elements that will drive the cost of your kitchen renovation.

Kitchen Size and Layout

It might seem obvious, but the bigger your kitchen, the more it will cost to renovate. A larger footprint requires more flooring, cabinets, countertops, and paint, which adds up quickly. Beyond just the size, any changes to the existing layout will also have a major impact on your budget. For example, if you want to knock down a wall to create an open-concept feel or move the sink to a new island, you’re adding significant labor and structural costs. Keeping your kitchen’s current layout is one of the most effective ways to manage expenses, while a complete overhaul offers more creative freedom at a higher price point. A full-service home remodeling team can help you explore layout options that fit your vision and budget.

Material Quality and Finishes

Your choice of materials and finishes is where your personal style really shines, but it’s also where costs can vary dramatically. Cabinets are a perfect example. You could refinish your existing ones for a budget-friendly update, choose from standard stock options, or invest in custom cabinetry for a truly personalized fit and finish. The same goes for countertops. There’s a wide spectrum of choices, from affordable laminate to luxurious natural stone like marble or quartz. These decisions are some of the biggest drivers of your total renovation cost, so it’s a great area to balance splurges with savings.

Plumbing, Electrical, and Structural Changes

Moving the guts of your kitchen, like pipes and wires, is a surefire way to increase your budget. If your renovation plan involves relocating the dishwasher, adding a pot filler over the stove, or installing a new island sink, you’ll need to hire a plumber. Similarly, adding new pendant lights, under-cabinet lighting, or extra outlets requires an electrician. While these professionals are essential for safe and code-compliant work, their services add to the bottom line. If you can work within your kitchen’s existing plumbing and electrical footprint, you can save a considerable amount of money. Any project involving these trades is best left to an experienced construction company that can manage the work correctly.

Permits and Hidden Costs

A successful renovation budget accounts for more than just materials and labor. Depending on the scope of your project, you may need to secure building permits from your local municipality, which come with their own fees. A good contractor can help you handle this process. It’s also smart to plan for “hidden” costs that are easy to forget. Think about the expense of eating out more often while your kitchen is out of commission or the need for a temporary kitchen setup. You should also set aside a contingency fund, typically 10% to 20% of your total budget, to cover any unexpected issues that might pop up once the walls are opened.

Local Labor and Material Costs

Where you live plays a big role in how much your kitchen renovation will cost. Labor rates and material prices can differ significantly from one city to another, and costs are generally higher in metropolitan areas like Long Island. This is why national average cost estimates can sometimes be misleading. They don’t always reflect the specific market conditions in your area. The best way to get an accurate picture of your potential expenses is to get a detailed quote from a local professional. An experienced Long Island home remodeling contractor will have a firm grasp of regional pricing and can provide an estimate that truly reflects the cost of building your dream kitchen.

Find the Best Online Kitchen Renovation Cost Estimators

Before you start scheduling consultations, it’s a great idea to get a general sense of your potential budget. Online kitchen renovation cost estimators are the perfect tool for this initial planning phase. They let you explore different scenarios, from swapping out countertops to a full-scale remodel, all without any pressure or commitment. Think of them as your digital scratchpad where you can start to see how your choices on materials and appliances will affect the bottom line.

Using one of these tools helps you walk into a conversation with a contractor feeling more prepared and informed. While they can’t replace a detailed, professional quote from a company like Gappsi, they provide an excellent ballpark figure. This initial number gives you a realistic starting point for your financial planning and helps you understand the key cost drivers in your project. We’ve gathered a few of the most reliable and user-friendly estimators to help you get started.

Home Depot Kitchen Estimator

If you’re in the very early stages of planning and just want to play with some numbers, this is a great place to start. Home Depot offers a free kitchen estimator that is incredibly easy to use, even if you don’t have exact measurements or specific products picked out yet. It’s designed to give you a quick, high-level overview of potential costs for things like cabinets, countertops, and appliances. This tool is perfect for getting a foundational budget number before you dive deeper into the details of your project.

Lowe’s Project Calculator

For those who appreciate a more guided experience, the Lowe’s project calculator is an excellent choice. This tool takes you through a clear, step-by-step process to help you think through all the different components of your kitchen remodel. It’s designed to make sure you don’t overlook any important details while planning. By answering a series of questions, you can build a more comprehensive estimate that feels tailored to your specific project, helping you move from a vague idea to a more concrete plan.

Houzz Renovation Cost Guides

Houzz is a go-to resource for home design inspiration, and its kitchen remodel cost calculator is just as helpful. This tool is a bit more detailed, allowing you to factor in variables like the quality of materials you’re considering and even local labor costs. Because it accounts for more specifics, it can provide a more nuanced estimate that reflects the realities of your project and location. It’s a fantastic resource for homeowners who have a clearer vision and want to refine their budget with greater accuracy.

What Makes a Good Estimator Tool?

So, what should you look for in an online calculator? The best tools provide a broad, initial estimate that serves as a solid starting point. An effective estimator should be flexible, allowing you to input key variables like your kitchen’s size, your preferred material quality, and other project specifics. This customization is what makes the estimate truly useful for your personal budget planning. Remember, the goal isn’t to get a final, fixed price but to create a realistic financial framework for your dream kitchen.

Avoid These Common Estimator Mistakes

Online cost estimators are a fantastic first step for getting a general idea of your kitchen renovation budget. They help you see what’s possible and start the planning process. However, relying on them too heavily can lead to some common financial missteps. Think of these tools as a compass, not a detailed map. Knowing their limitations and preparing for the true costs will help you move forward with confidence and avoid stressful surprises down the road. Let’s walk through some of the most frequent mistakes homeowners make and how you can sidestep them.

Don’t Underestimate the Total Budget

It’s incredibly common for homeowners to underestimate their final kitchen renovation costs, sometimes by as much as 20% to 40%. This isn’t because you’re bad at planning; it’s because a kitchen project involves dozens of interconnected choices. Selecting a specific type of countertop, for example, can affect your cabinet installation, sink choice, and even plumbing needs. These cascading costs aren’t always obvious at the start. Working with an experienced team can help you see the full picture from the beginning, ensuring your initial budget is realistic and comprehensive. A professional home remodeling expert can identify these hidden dependencies before they become budget problems.

Treat Estimates as a Starting Point, Not a Final Price

An online estimate is a valuable tool for initial brainstorming, but it’s not a binding quote. Consider it a ballpark figure. The final cost of your renovation will depend on a detailed, comprehensive plan that an online calculator simply can’t create. Your specific choices in porcelain and natural stone, appliances, and finishes will have a major impact on the final price. A professional quote, on the other hand, is built from an in-person consultation, precise measurements, and a complete understanding of your vision. This detailed approach is what turns a rough estimate into an actionable project budget you can truly rely on.

Always Include a Contingency Fund

No matter how well you plan, unexpected things can happen during a renovation. That’s why a contingency fund is non-negotiable. This is money you set aside, typically 15% to 20% of your total project cost, to cover unforeseen expenses. What could pop up? Think permit fees you didn’t account for, the cost of eating out while your kitchen is out of commission, or a change order you decide on mid-project. Having this financial cushion prevents a small issue from derailing your entire renovation. It’s the single best way to protect your budget and your peace of mind while creating your dream kitchen.

Remember to Factor in Local Labor Rates

Many online estimators use national averages for labor, which can be misleading. Labor is a significant portion of any renovation budget, and costs can vary dramatically depending on where you live. The rates for skilled tradespeople on Long Island will likely be different from those in other parts of the country. This is why working with a local company is so important. At Gappsi, our team has an in-depth understanding of regional material and labor costs, allowing us to provide you with a much more accurate and reliable quote for your masonry and remodeling needs from the very beginning.

How to Save Money Without Cutting Corners

A beautiful kitchen renovation doesn’t have to drain your savings. The key is to spend your money wisely, not just to spend less. Making smart, strategic decisions about where to invest and where to save can give you a high-end look without the shocking price tag. It’s all about planning carefully and knowing your options before the demolition begins. By focusing on value and long-term quality, you can create a space you love while respecting your budget. This means getting creative with materials, being realistic about what you can do yourself, and understanding how to choose the right professional partner for your project. A thoughtful approach will help you avoid common pitfalls and ensure every dollar contributes to a kitchen that is both functional and stunning for years to come.

Prioritize Your Needs Over Wants

Before you fall in love with a specific appliance or countertop, take a moment to create a list of your renovation goals. Separate this list into two columns: “needs” and “wants.” Your needs are the non-negotiables, like functional cabinets or durable flooring. Your wants are the extras, such as a wine fridge or a high-end faucet. Many homeowners underestimate their total project cost, so having this list helps you allocate your budget to the most critical areas first. If you need help defining your priorities, getting professional guidance can provide clarity and keep your project on track from the start.

Shop Smart for Materials

Materials are a huge part of your kitchen budget, but there are many ways to save without sacrificing style. Instead of immediately choosing the most expensive option, look for high-quality alternatives. For example, certain types of porcelain can mimic the look of high-end marble for a fraction of the cost. Similarly, you can find beautiful, durable laminate or butcher block countertops that offer a fantastic look without the expense of granite or quartz. The best approach is to explore different materials and finishes to find the perfect balance between your aesthetic vision and your financial plan.

Know When to DIY and When to Call a Pro

Doing some of the work yourself can be a great way to save money, but it’s important to be honest about your skill level. Simple tasks like painting or installing cabinet hardware are great DIY projects. However, jobs involving plumbing, electrical wiring, or structural changes are best left to professionals. A mistake in these areas can lead to costly repairs and significant delays, completely wiping out any initial savings. A detailed plan is essential for any successful remodel, and a professional contractor ensures that complex tasks are handled safely and correctly the first time.

Compare Contractor Quotes Effectively

When you’re ready to hire a professional, it’s wise to get quotes from a few different contractors. However, resist the temptation to simply choose the lowest bid. A quote that seems too good to be true often is, and it could signal subpar materials or inexperienced labor. A good quote is detailed and transparent, clearly outlining the scope of work, material costs, labor fees, and a project timeline. Comparing these comprehensive estimates helps you find a fair price for high-quality work. When you’re ready, you can schedule a consultation to receive a detailed proposal for your project.

Plan Your Dream Kitchen With Gappsi

Turning your kitchen dreams into reality starts with a solid plan, and that plan begins with a budget. While online kitchen remodel cost calculators can give you a general idea of expenses, it’s important to remember that these are just estimates. The final cost depends heavily on your project’s size, the quality of materials you choose, and local labor rates. A great plan helps you avoid expensive mistakes down the road, so taking the time to measure your space and really think through your needs is one of the most valuable things you can do upfront.

A realistic budget should always include a cushion for the unexpected. We recommend setting aside a contingency fund, typically around 20 percent of your total budget, to cover any surprises that might pop up during the renovation. This simple step can save you a lot of stress and keep your project on track. When it comes to materials, you have so many beautiful and durable options to consider. From stunning porcelain and natural stone countertops to custom cabinetry, we can help you find high-quality finishes that fit your style and will last for years.

While online tools are a helpful starting point, nothing compares to professional expertise. The Gappsi team brings decades of design and construction experience to every project. We work with you to create a detailed, accurate plan that reflects your vision and respects your budget. Let us handle the complexities of your home remodeling project, so you can focus on the excitement of seeing your dream kitchen come to life.

Related Articles

Frequently Asked Questions

Why is the estimate from an online calculator so different from a professional quote? Think of an online calculator as a great starting point for a conversation. It uses national averages to give you a general idea of costs. A professional quote, however, is a detailed plan tailored specifically to you. It’s based on an in-person visit, precise measurements, your exact material selections (like specific porcelain or natural stone), and the labor rates right here on Long Island. A quote also accounts for things a calculator can’t see, like the condition of your existing walls or potential plumbing and electrical needs.

What’s the most important thing to include in my budget that most people forget? Hands down, it’s a contingency fund. This is a safety net of about 15 to 20 percent of your total project cost that you set aside for the unexpected. Renovations can sometimes uncover surprises, like old wiring that needs updating or a plumbing leak behind a cabinet. This fund ensures that a small hiccup doesn’t cause a major financial scramble, giving you the peace of mind to handle it without derailing your project.

If I have a limited budget, what’s the first thing I should focus on? If you’re looking to maximize your budget, start by focusing on high-impact changes that don’t involve altering your kitchen’s current footprint. Keeping your plumbing and appliances in their existing locations is the single biggest way to save on labor costs. You can then direct your funds toward things you’ll see and touch every day, like refreshing your cabinets, upgrading countertops, or installing a new backsplash.

Is it worth it to move my sink or appliances to create a better layout? Changing your kitchen’s layout can absolutely transform its flow and function, but it does add a significant cost. Moving a sink involves a plumber, and relocating appliances often requires an electrician. While it’s a bigger investment, a new layout might be worth it if your current setup truly doesn’t work for you. The best approach is to discuss your frustrations with a design professional who can help you weigh the costs against the long-term benefits of a more efficient space.

How can I get a high-end look without paying for the most expensive materials? Achieving a luxurious look is more about smart choices than a limitless budget. You can get creative by mixing materials. For example, you could splurge on a beautiful stone for your island countertop and use a more affordable, complementary material for the perimeter counters. Many modern materials, like high-quality porcelain, do a fantastic job of mimicking the look of expensive marble or quartzite for a fraction of the price. It’s all about finding that perfect balance between style and value.

Share this page:
Cost to install a bluestone patio during the site preparation phase.

Cost to Install Bluestone Patio: A Full Breakdown

Bluestone is a premium natural stone, and its price reflects its quality, beauty, and durability. If you’ve started your research, you know it’s a bigger investment than concrete or basic pavers, which naturally leads to the question: what exactly are you paying for? The answer lies in the stone itself, the meticulous site preparation required, and the skilled craftsmanship needed for a flawless installation that withstands Long Island’s weather. Understanding the components that make up the total cost to install bluestone patio helps you appreciate the value behind the price. This article will demystify the budget, breaking down each element so you can see where every dollar goes.

Key Takeaways

  • Know What Shapes Your Budget: Plan for a cost between $18 and $38 per square foot for a professional installation. Your final price comes down to a few key things: the patio’s size, the quality of the bluestone you choose, and the prep work your yard requires.
  • Professional Installation is Non-Negotiable: A patio’s longevity is determined by its foundation, not just the stone. Hiring a pro ensures proper drainage and a solid base, preventing common issues like shifting or cracking and protecting your investment.
  • Bluestone Pays for Itself in Value: While the initial cost is higher than concrete, a bluestone patio adds significant curb appeal and property value. You are paying for a durable, timeless feature that will not fade or require frequent replacement.

What Is a Bluestone Patio?

When you picture a classic, elegant stone patio, you’re probably thinking of bluestone. A bluestone patio is an outdoor space made from a type of sandstone that’s famous for its durability and good looks. It’s one of those materials that instantly adds a sense of quality and value to your home. And while the name suggests one color, it actually comes in a beautiful range of tones, including deep blues, greens, grays, and even hints of lilac. This natural variation means every patio is completely unique.

Creating a stunning outdoor area starts with choosing the right materials, and bluestone is a choice that stands the test of time. As experts in masonry design, we’ve seen how it transforms a simple backyard into a sophisticated retreat. It provides a perfect foundation for everything from quiet morning coffees to lively family gatherings.

A Quick Look at Bluestone Types

Not all bluestone is the same, and the type you choose affects both the look and function of your patio. The most common options you’ll encounter are thermal and natural cleft. Thermal bluestone, also called flamed, has a uniform, textured surface that provides excellent slip resistance, making it a great choice for pool surrounds and walkways. Natural cleft bluestone has a more rustic, uneven surface that highlights the stone’s organic texture.

You might also see honed bluestone, which is sanded to a smooth, matte finish for a very sleek and modern appearance. Selecting a premium bluestone ensures your patio can handle Long Island’s changing weather and years of foot traffic without issues. We can help you explore our wide selection of porcelain and natural stones to find the perfect fit for your project.

Why Long Island Homeowners Love Bluestone

There’s a reason bluestone is such a popular choice across Long Island. Its timeless, natural beauty complements any architectural style, from a classic colonial in Nassau County to a modern home in the Hamptons. While it is a premium material with a higher price point, that’s because it’s a sought-after natural stone that isn’t always easy to source. Homeowners see it as a worthwhile investment, not just an expense.

A professionally installed bluestone patio significantly enhances your home’s curb appeal and overall value. It creates a durable, high-end finish that you’ll enjoy for decades. Investing in proper masonry construction from the start is the key to avoiding costly repairs down the road and ensuring your outdoor living space looks beautiful for years to come.

How Much Does a Bluestone Patio Cost?

Let’s talk numbers. Planning your budget is one of the most important first steps in any home improvement project, and a bluestone patio is no exception. Because bluestone is a premium, natural material, its price tag is higher than manufactured pavers, but its beauty and durability are unmatched. The final cost can vary quite a bit based on your specific project, from the size of your patio to the complexity of the design. Think of it less as a fixed price and more as a custom investment in your home’s future. Understanding the key factors that influence the price will help you create a realistic budget and plan a project that you’ll love for years to come. We’ll walk through the average costs, what you can expect to pay per square foot, and how the size of your dream patio will shape your budget.

A Look at the Average Cost

To get a general idea, it’s helpful to look at what homeowners typically spend. On average, a standard 288-square-foot bluestone patio installation can cost around $6,000. This figure usually includes both the cost of the bluestone itself and the professional labor needed to install it correctly. Think of this as a starting point for your own calculations. Your project might cost more or less depending on the unique layout of your Long Island property and the specific design you have in mind. This average cost provides a solid baseline, but a detailed quote from a professional will give you the most accurate picture for your home.

Breaking Down the Cost Per Square Foot

Looking at the cost per square foot gives you a more flexible way to estimate your budget. For a professionally installed bluestone patio, you can generally expect the price to fall somewhere between $18 and $38 per square foot. This range accounts for both the materials and the installation. Why the wide range? The final price depends on factors like the quality and thickness of the stone, the pattern you choose (like irregular vs. thermal cut), and the specific requirements of your site. Gappsi offers a wide selection of beautiful porcelain and natural stone pavers, and our team can help you find the perfect bluestone to fit your vision and budget.

How Patio Size Affects Your Budget

It’s a simple rule: the bigger the patio, the higher the overall cost. Since pricing is often calculated per square foot, you can easily see how size impacts your budget. A small, intimate 10×12 foot (120 sq. ft.) patio will naturally cost much less than a sprawling 20×30 foot (600 sq. ft.) space designed for large gatherings. When you’re dreaming up your outdoor space, keep this relationship in mind. You can play with different dimensions to find a size that fits both your lifestyle and your financial plan. Our expert masonry designers can work with you to design a patio that maximizes your space without breaking the bank.

What Determines the Final Price?

When you start budgeting for a new bluestone patio, it’s helpful to know that the final quote is more than just the cost of the stone. Several key factors come together to determine the total investment. From the specific type of bluestone you choose to the unique layout of your backyard, each element plays a part. Understanding these components will help you plan your budget effectively and ensure there are no surprises along the way. Think of it as building a recipe: the quality of your ingredients and the complexity of the dish both affect the final result. Let’s walk through the main factors that will shape the cost of your beautiful new patio.

The Stone Itself: Quality, Thickness, and Type

The star of the show, the bluestone itself, is a major component of the total cost. As a highly sought-after natural stone, its price is influenced by availability and demand. Not all bluestone is created equal, either. You’ll find variations in color, grade, and finish, all of which affect the price. Thicker stones, which offer greater durability, will cost more than thinner ones. At Gappsi, we source a wide variety of high-quality natural stone pavers, ensuring you find the perfect material that fits both your aesthetic goals and your budget. We’ll help you understand the differences so you can make a confident choice.

Your Patio’s Size and Design

It makes sense that the bigger your patio, the more it will cost. Most contractors price bluestone patios per square foot, with estimates often falling between $18 and $38 for materials and installation. But size isn’t the only design factor. A simple square or rectangular patio will be more straightforward to install than one with intricate curves, complex patterns, or multiple levels. These custom designs require more precise cuts and additional labor, which will be reflected in the final price. Our masonry design experts can create a plan that maximizes your space while keeping your budget in mind.

Getting the Ground Ready: Site Prep and Grading

A beautiful patio is only as good as the foundation it’s built on. Proper site preparation is a critical step that you absolutely cannot skip. This process involves excavating the area, creating a stable base of compacted aggregate, and ensuring the site is graded correctly for drainage. Without a solid, well-drained foundation, your patio could shift, sink, or hold water, leading to costly repairs down the road. The amount of prep work needed depends on your property’s current condition, including its slope and soil type. You can see examples of our team’s meticulous process on the Gappsi YouTube channel.

Understanding Labor Costs on Long Island

Labor is a significant portion of any patio installation budget, and costs can vary based on your location. Here on Long Island, labor rates reflect the high level of skill required to install a bluestone patio correctly. A typical 288-square-foot patio might have a total cost of around $6,048, including both materials and professional labor. While it might be tempting to cut corners here, experienced installers are worth the investment. They have the expertise to handle challenges, ensure a flawless finish, and build a patio that will last for decades. Our landscape construction company is staffed by seasoned professionals dedicated to exceptional craftsmanship.

How Our Local Climate Plays a Role

Long Island’s weather, with its freezing winters and humid summers, has a direct impact on your patio. The freeze-thaw cycle can be tough on outdoor surfaces, causing improperly installed pavers to heave, crack, or become uneven. That’s why choosing the right materials and using climate-appropriate installation techniques are so important. An experienced local contractor knows how to build a patio that can withstand our specific weather patterns. This includes creating a proper base and using jointing materials that allow for slight movement without compromising the structure. Proper patio restoration and sealing also becomes key to protecting your investment from the elements over time.

Clearing the Way: Removing Old Structures

Before your new patio can be installed, the site needs to be clear. If your project involves removing an old wooden deck, a cracked concrete slab, or large shrubs, this will add to the overall cost. Demolition, hauling, and disposal require time and equipment, so it’s important to account for this in your initial budget. Discussing the current state of your property with your contractor upfront will help you get a complete and accurate estimate. This is a common part of many home remodeling projects and is a necessary first step toward creating the outdoor space you’ve envisioned.

Don’t Forget to Budget for These Extras

When you’re planning your beautiful new bluestone patio, it’s easy to focus on the big-ticket items like the stone and the installation labor. But a successful project that stands the test of time involves more than just laying down pavers. Several smaller, yet crucial, elements can impact your final budget and the longevity of your patio. Thinking about these extras from the start helps you create a realistic budget and ensures there are no surprises down the road.

From handling local building codes to selecting the right materials for the finishing touches, these details are what separate a good patio from a great one. A professional team will always account for these factors, but it’s smart for you as a homeowner to understand what they are and why they matter. Planning for things like proper drainage, sealing, and future maintenance isn’t just about adding costs; it’s about making a wise investment in your home that you can enjoy for decades. At Gappsi, we handle all these details, ensuring your project is built correctly from the ground up.

Handling Permits and Local Rules

Before the first stone is ever laid, it’s important to check with your local municipality about building permits. Depending on the size and scope of your patio project, you may need official approval to begin construction. Trying to figure out these local regulations can feel a bit overwhelming, and failing to get the right permits can lead to fines or even project delays. This is an area where working with an experienced local contractor really pays off. We understand the specific requirements here on Long Island and can manage the entire permitting process for you, making sure your project is fully compliant from day one.

Proper Drainage for a Lasting Patio

One of the most critical aspects of a durable patio is something you’ll never see: the drainage system. Without a plan for water runoff, your patio can suffer from erosion, shifting stones, and water damage to your home’s foundation. A properly installed patio should always include a slight slope that directs water away from your house. In some cases, more complex drainage solutions might be needed. This is a non-negotiable step for ensuring the structural integrity of your investment, and it’s a standard part of our masonry construction process.

The Details: Choosing Jointing Materials

The material that fills the gaps between your bluestone pavers, known as jointing material, plays a huge role in the stability and appearance of your patio. Using the wrong type of sand or bonding adhesive can lead to weeds sprouting up, insect infestations, or stones shifting and becoming uneven over time. Certain types of bluestone also require specific adhesives to ensure a strong bond that won’t crack or lift. We help you select the perfect jointing material that not only complements the look of your natural stone patio but also provides the best long-term performance.

Protecting Your Investment: Sealing and Finishing

Once your bluestone patio is installed, the final step is to protect it. Applying a quality sealant is one of the best things you can do to preserve its beauty and durability. A good sealant helps prevent stains from spills, protects the stone from water penetration, and can even enhance its natural color. While this adds a small amount to the initial cost, it’s a worthwhile investment that will save you money on future repairs and cleaning. We offer professional cleaning and sealing services to keep your patio looking brand new for years to come.

Planning for Future Maintenance

While bluestone is incredibly durable, every patio requires some basic upkeep to stay in top condition. This doesn’t have to be a major chore, but it’s something to plan for. Regular sweeping and occasional rinsing will keep it clean, but you should also budget for a professional deep cleaning and re-sealing every few years. This routine maintenance will protect the stone from the elements, prevent fading, and ensure your patio remains a beautiful and functional part of your outdoor living space for a very long time. Thinking about this long-term care from the beginning helps you protect your investment.

Getting the Installation Right

A bluestone patio’s beauty is more than skin deep. The real secret to a stunning, long-lasting outdoor space lies beneath the surface in the quality of the installation. Getting this part right is what separates a patio that looks good for a year from one that becomes a cherished part of your home for decades. It’s about creating a solid, stable surface that can handle everything from summer barbecues to Long Island’s winter freezes without shifting, cracking, or becoming a puddle-prone mess.

Proper installation protects your investment and the stone itself. When laid correctly, bluestone retains its gorgeous color and texture, and the risk of chips or cracks drops significantly. It all comes down to a combination of the right foundation, smart drainage, and expert techniques. While it might seem like a lot to consider, understanding these key steps helps you know what to look for in a quality installation, ensuring your vision for the perfect patio becomes a durable reality. Gappsi’s masonry experts have been perfecting this process for years, creating patios built to last.

The Foundation Matters: Concrete vs. Sand

Think of your patio’s foundation as the unsung hero of the entire project. You have two main options here: a compacted gravel and sand base or a solid concrete slab. A base of sand or stone dust is a traditional method, often used for a more rustic, permeable look. However, for maximum durability, many professionals recommend a wet-laid installation on a concrete foundation. By setting the bluestone with mortar on a poured concrete slab, you create an incredibly strong and stable patio that is built to last a lifetime. This method provides the ultimate defense against shifting and settling over time.

Why Drainage and Slope Are Crucial

Water is the number one enemy of any patio. Without a proper escape route, rainwater and melting snow can pool on the surface, seep into the joints, and erode the base, leading to shifting stones and costly damage. That’s why creating a slight, almost unnoticeable slope is one of the most critical steps in any patio installation. By grading the area to direct water away from your home’s foundation, a professional installer protects both your house and your new patio. This simple step is essential for preventing erosion and ensuring your bluestone patio remains stable and beautiful for years to come.

Installation Methods: Dry-Laid vs. Wet-Laid

The way your bluestone is set in place defines both its final look and its long-term performance. A dry-laid patio involves setting the stones over a compacted gravel and sand base, then sweeping sand into the joints. This method offers a slightly more natural, classic feel. A wet-laid patio, on the other hand, involves setting the stones in mortar over a concrete slab, creating a solid, seamless surface. While both methods can produce beautiful results, a wet-laid installation generally offers more permanence and stability, especially in a climate with freeze-thaw cycles like ours on Long Island. Gappsi’s team can help you choose the best method for your specific natural stone project.

Selecting the Best Adhesives and Joints

The materials used to hold your patio together are just as important as the stones themselves. For a wet-laid patio, using the right adhesive or mortar is essential for a strong bond that prevents stones from lifting or cracking. Certain types of bluestone are more porous and require specific bonding agents that can handle moisture effectively. For a dry-laid patio, the material used to fill the joints makes a huge difference. Using a high-quality polymeric sand, which hardens after being wet, helps lock the stones in place, prevent weed growth, and resist erosion from rain.

Why Professional Installation Beats DIY Every Time

While the satisfaction of a DIY project is tempting, a bluestone patio installation is a job best left to the professionals. This is a complex project that involves heavy lifting, precise measurements, and specialized knowledge of grading, drainage, and materials. An experienced team ensures the site is prepared correctly and that every stone is laid perfectly. Hiring a professional isn’t just about convenience; it’s an investment in quality that saves you from the potential headaches and high costs of fixing mistakes down the road. With a project this important, you want the peace of mind that comes from knowing it was done right the first time by a trusted home improvement company.

Is a Bluestone Patio a Good Investment?

Deciding on a new patio involves more than just picking a pretty stone; it’s about making a smart choice for your home’s future. A bluestone patio is a significant project, so it’s natural to ask if the cost translates into real value. When you look at its durability, impact on your home’s worth, and how it compares to other materials, the answer becomes clear. It’s not just an expense, it’s an investment in your property and your lifestyle.

Built to Last: Durability and Longevity

A bluestone patio is more than just a beautiful addition; it’s a long-term feature of your home. This natural stone is incredibly dense and hard-wearing, capable of withstanding Long Island’s changing seasons, from hot summers to freezing winters. But the stone’s inherent strength is only part of the equation. A truly durable patio depends on expert installation. The stone’s long-term performance depends heavily on the quality of the preparation and workmanship beneath it. This is why proper site prep, a solid base, and correct jointing are non-negotiable. When installed correctly, your bluestone patio will resist shifting and cracking, giving you a gorgeous outdoor space that lasts for decades with minimal fuss. Proper restoration and sealing can further extend its life.

Adding Value and Curb Appeal to Your Home

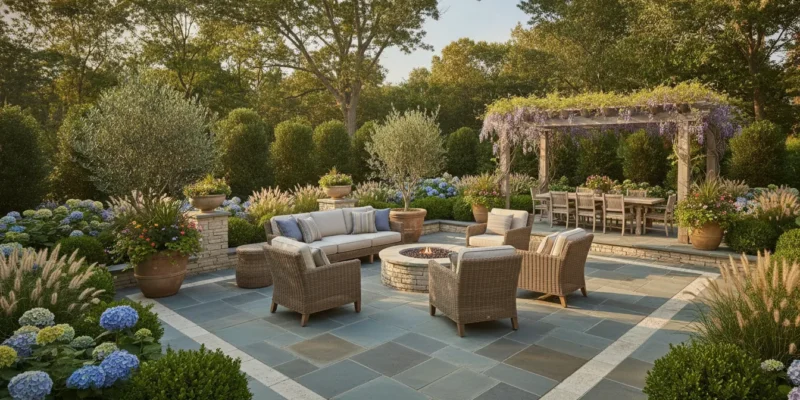
A well-designed bluestone patio is a fantastic way to increase your property’s value and curb appeal. Potential buyers see it as a premium, move-in-ready feature, which can make your home stand out in the market. The timeless, elegant look of bluestone complements any architectural style, from classic to modern, creating a seamless transition between your indoor and outdoor living areas. It’s an attractive outdoor space that can definitely add value to your home. Imagine pairing it with a beautiful garden or a cozy fire pit. This kind of thoughtful landscape design not only gives you a personal oasis but also makes a powerful statement to anyone visiting or considering buying your property. It’s an investment in your lifestyle and your home’s future.

Bluestone vs. Other Patio Materials: A Quick Comparison

When planning your patio, it’s helpful to see how bluestone stacks up against other options. Materials like gravel or basic concrete are less expensive upfront but often require more maintenance and lack the high-end finish of natural stone. Bluestone’s cost, typically between $18 and $38 per square foot installed, is more comparable to other premium materials like high-end pavers or travertine. While the initial investment is higher than concrete, you’re paying for unparalleled durability and a classic look that never goes out of style. Unlike manufactured pavers that can fade over time, bluestone maintains its rich color and character for generations. We work with a wide range of porcelain and natural stone, and bluestone consistently proves to be a top choice for homeowners seeking lasting value.

Bring Your Bluestone Patio Vision to Life with Gappsi

After exploring all the details, from stone types to installation methods, you are probably feeling excited about the possibilities for your own backyard. Turning that vision into a beautiful, functional patio is the next step, and it’s where having the right partner makes all the difference. A bluestone patio is a significant investment in your home, and you want to feel confident that every dollar is put to good use, creating a space your family will love for years to come.

Here on Long Island, our team at Gappsi has spent decades helping homeowners create stunning outdoor spaces. We believe a successful project starts with a clear plan. That’s why we work with you to understand your goals, design a patio that fits your lifestyle, and provide a detailed breakdown of the costs involved. Our expert masonry services ensure that every aspect of your project, from the foundation to the finishing touches, is handled with precision and care.

A bluestone patio is more than just the stone itself. It’s about the expert site preparation, the correct drainage, and the meticulous installation that ensures it will last for years. Because we manage the entire process, we can guarantee a seamless experience and a flawless result. We source high-quality porcelain and natural stone pavers and use proven techniques to build patios that are as durable as they are beautiful.

Whether you are just starting to dream or are ready to break ground, we are here to help. Our team can walk you through the material selection at the Gappsi showroom, refine your design ideas, and create a plan that respects your budget. When you are ready to take the next step, reach out to the Gappsi team. Let’s build the outdoor oasis you have always wanted.

Related Articles

Frequently Asked Questions

Why is there such a wide price range for a bluestone patio? The final cost of a bluestone patio is shaped by several factors beyond just the square footage. The specific type and quality of the stone you choose, the complexity of your design, and the amount of site preparation your property requires all play a role. A simple rectangular patio on a flat surface will naturally have a different price point than a large, curved patio on a sloped yard that needs significant grading and a concrete base.

What’s the difference between thermal and natural cleft bluestone? The main difference comes down to the stone’s surface texture. Thermal bluestone is treated with heat to create a uniform, lightly textured finish that provides excellent slip resistance, making it a popular choice for pool surrounds. Natural cleft bluestone is split along its natural layers, resulting in a more rustic, uneven surface that highlights the stone’s organic character. Your choice really depends on the aesthetic you prefer for your outdoor space.

How can I ensure my new bluestone patio lasts for decades? The secret to a long-lasting patio is expert installation. A solid foundation with proper grading for drainage is the most critical element, as it prevents water damage and shifting over time. Once installed, a little maintenance goes a long way. Having your patio professionally cleaned and sealed every few years will protect the stone from the elements and keep it looking beautiful for years to come.

Is professional installation really necessary for a bluestone patio? While it can be tempting to try a DIY approach, installing a bluestone patio is a complex job that requires specialized skills. Professionals have the equipment and expertise to properly grade the site, build a stable foundation that can handle our local climate, and lay the heavy stones correctly. Investing in a professional installer is the best way to avoid costly mistakes and ensure you get a beautiful, durable patio that was built right the first time.

Why should I choose bluestone over less expensive materials like concrete pavers? While materials like concrete pavers have a lower initial cost, bluestone is an investment in lasting value and timeless style. The natural color variations and unique texture of bluestone create a high-end, authentic look that manufactured products can’t quite match. It is incredibly durable and maintains its beauty for generations, which significantly enhances your home’s curb appeal and overall value.

Share this page:
Modern swim spa in a landscaped Long Island backyard

Swim Spa Cost vs. Pool: Long Island Owner’s Guide

Choosing between a swim spa and a full swimming pool is not simply a question of which installation costs less. For Long Island homeowners, the right fit depends on your available yard space. How often you will use the water, and whether your priority is private exercise, relaxation, family recreation, or entertaining. Soil conditions, local zoning requirements, winter weather, and the surrounding patio or landscape plan also affect the real project scope.

Call (631) 831-3177 to discuss your pool or swim spa plans with Gappsi.

Swim spa cost is often lower than the cost of a full pool, especially when you compare a compact installation, reduced water volume, and year-round use. A swim spa can suit a tighter yard and support fitness or hydrotherapy, while a full pool provides more room for swimming, water games, and gatherings. The better choice depends on how you plan to use the space and which long-term costs fit your budget.

Start with the numbers, then weigh them against installation requirements, seasonal use, and ongoing maintenance. That comparison gives you a more practical basis for choosing the right aquatic feature for your Nassau or Suffolk County property.

Swim Spa Cost vs. Pool Cost: The Numbers That Matter

Comparing a swim spa with a pool requires more than looking at the price on an equipment quote. The installation scope, size of the water feature, surrounding hardscape, heating needs, and expected service life all affect the final investment. For a Long Island homeowner, the same label can represent very different projects depending on whether the installation is above ground. Partially recessed, or a fully constructed gunite pool.

The figures below provide useful planning ranges, not a substitute for a site-specific proposal. Soil conditions, access for excavation equipment, permits, utility work, fencing, patios, and landscaping can change the total. They also show why the right choice depends on how you plan to use the space, not simply which option has the lower starting price.

Estimated swim spa and pool costs
Cost category Swim spa Small inground pool Long Island gunite pool
Estimated one-time installation $27,000 to $37,000 for a total estimated installation $54,000 to $69,000 for a small inground pool $90,000 to $140,000 baseline for a gunite pool on Long Island
High-performance equipment range $30,000 to $60,000 for many high-performance fitness systems Varies by pool size, structure, equipment, and finish Varies by dimensions, finish, equipment, and surrounding construction
Estimated monthly cost over 25 years $90 to $123 per month $480 to $613 per month Project-specific, and not directly interchangeable with the small-pool estimate

The first comparison is the upfront commitment. One published estimate places a swim spa installation at $27,000 to $37,000, compared with $54,000 to $69,000 for a small inground pool. High-performance swim spas can reach $30,000 to $60,000, particularly when they include stronger current systems and features designed for regular training. Those figures can overlap with the low end of a small pool project, so the equipment and site plan matter as much as the category.

Gunite construction sits in a different planning range for Long Island. Gappsi’s published baseline is $90,000 to $140,000 for a gunite swimming pool. Review the full swimming pool cost breakdown for a closer look at the components behind that range. For a separate swim spa budget discussion, the existing in-ground swim spa cost guide provides a useful related deep dive.

Long-term use can widen the gap. Over a 25-year lifespan, the supplied estimates place a swim spa at $90 to $123 per month, versus $480 to $613 per month for a small inground pool. These are planning figures that combine the stated lifespan assumptions, not guaranteed utility or service bills. A swim spa generally has less water to balance and a smaller volume to heat, while a pool provides more room for multiple swimmers, games, and entertaining. The lower monthly estimate may be attractive, but the larger pool may deliver more value for a household that expects frequent group use.

Use these numbers to establish a realistic range before comparing designs. A property review can then account for access, excavation, drainage, finishes, heating, safety requirements, and the outdoor living features that complete the installation.

How Much Space Do You Really Have for a Swim Spa or Pool?

Start with the usable part of your backyard, not the total lot size. A Long Island property may look spacious on paper, but the area available for water features can shrink quickly once you account for the house. Property lines, setbacks, fencing, patios, drainage, utilities, mature trees, and access for construction equipment. A careful site review helps you compare what will fit comfortably rather than forcing a design into an undersized area.

When does a swim spa make more sense in a smaller yard?

A swim spa is a compact option for tighter backyards. Its smaller footprint can leave room for circulation, seating, planting beds, and a walkway while still giving your household a place to exercise or relax. That can be especially useful when the main goal is regular swimming, resistance training, hydrotherapy, or a combination of those activities instead of a large recreational layout.

Do not judge the fit by the shell alone. You also need working space around the unit, a stable base, service access, electrical planning, and a practical route for delivery or future maintenance. Consider how the spa will look from the house and whether its placement protects privacy without creating an obstacle between indoor and outdoor living areas.

What extra room does a traditional pool require?

A traditional pool needs a larger overall area, but it can provide advantages that a swim spa cannot match in the same footprint. More open water accommodates multiple swimmers, games, shallow and deep zones, and poolside entertaining. If your plans include family gatherings or larger parties, reserving space for people to move between the pool. Patio, outdoor kitchen, and seating areas is as important as sizing the pool itself.

Leave room for the surrounding hardscape and safety features. A pool design may also require decking, fencing, equipment access, drainage solutions, and planting or screening. Those elements affect how much of the yard remains usable after construction. A pool that technically fits but consumes every open area can feel cramped and limit the entertaining space you wanted in the first place.

Can installation style improve the fit?

Swim spas offer more placement flexibility than many homeowners expect. Depending on the property and design, a unit can be installed above-ground, inground, or partially recessed. A partially recessed installation can reduce the visual height while retaining service access, while an inground approach can integrate the spa with surrounding paving and landscape work. The best choice depends on grading, access, drainage, structure, and the look you want from the primary living spaces.

Before comparing swim spa cost with pool cost, have the site measured and reviewed for local requirements. Gappsi can evaluate the usable yard, discuss how you plan to use the water feature. And develop a pool or swim spa layout that respects the property rather than simply filling it.

Can a Swim Spa Replace a Full Pool for Year-Round Use?

For many Long Island homeowners, the biggest difference is not the shape of the water feature. It is how often the feature fits real life. A traditional swimming pool can be the center of backyard activity during peak summer, but its practical season is limited by cool weather, shorter days, and winter preparation. A swim spa takes a different approach by keeping a smaller, heated body of water ready for exercise, relaxation, and family use through more of the year.

Swim spa in use in a Long Island backyard

A swim spa is built around daily access

Swim spas are engineered for four-season use, including mornings and evenings when a full pool would be too cold or impractical. Their contained design supports a controlled water temperature, while a swim current can provide a consistent setting for low-impact workouts. That makes the feature useful beyond recreation. A homeowner may use it for steady swimming, water exercise, or a brief recovery session without waiting for the weather to cooperate.

The smaller water volume also matters. A swim spa generally requires less energy to heat and maintain at the desired temperature than a full-sized swimming pool. That does not eliminate operating costs, and actual energy use depends on the model, cover, insulation, settings, and exposure. However, less water to heat can make frequent use more practical when compared with heating a much larger pool.

Why a full pool remains seasonal on Long Island

A full pool offers advantages a swim spa cannot fully duplicate. Its larger surface area gives multiple swimmers more room, supports pool games, and creates space for larger gatherings. If your priority is entertaining, children’s water play, or a broad area for recreational swimming, a traditional pool may be the better match. You can review Gappsi’s swimming pool installation services when comparing that broader backyard experience.

Seasonality is the tradeoff. Long Island pools need proper winterization and a protective cover during the colder months. Those steps help protect the pool through harsh winter conditions, but they also mean the water is not available for regular use during that period. A swim spa can extend the usable season, although it still requires responsible maintenance, safe access, and weather-appropriate operation.

Which option fits your routine?

Choose a swim spa when year-round exercise, compact design, and frequent personal use matter more than hosting large groups. Choose a full pool when summer entertaining, open swimming space, and water games are central to your plans. The right comparison is not simply swim spa cost versus pool cost. It is the value of a feature you will actually use across Long Island’s changing seasons.

How Long Does Installation Take for Each Option?

Installation time depends less on the equipment alone than on the scope of site preparation. A swim spa is typically faster to install than a custom inground pool because the vessel is manufactured in advance. The project may still require a prepared base, electrical work, access planning, drainage, and finish work. But it generally avoids the full excavation and structural construction sequence associated with a pool.

Why a swim spa can move from selection to use faster

Swim spas offer several placement approaches. They can be installed above ground, partially recessed, or fully inground, depending on the property, desired appearance, and landscape plan. An above-ground installation may involve a properly engineered pad, utility connections, steps, and surrounding surfaces. A recessed or inground design adds excavation, retaining or structural considerations, waterproofing details, and coordinated landscape work.

That flexibility affects the schedule. A straightforward above-ground project may have fewer construction stages, while an integrated inground installation requires more coordination. The shorter timeline often associated with a swim spa should therefore be understood as a typical advantage, not a guarantee for every property. The more extensive the surrounding hardscape and grading, the more the project resembles a broader outdoor construction job.

What can extend a Long Island pool installation?

A custom inground pool usually includes more phases: layout, excavation, structural work, plumbing, electrical systems, interior finish, coping, decking, fencing, and final landscaping. On Long Island, local zoning requirements and soil stability can influence both the design and the schedule. Property setbacks, approvals, access for excavation equipment, drainage, and the condition of the soil all need to be evaluated before construction begins. Local requirements and site conditions can vary between Nassau and Suffolk properties, so a calendar estimate made without a site review may be unreliable.

Weather and access can also affect outdoor construction. A narrow side yard, limited driveway access, or the need to protect existing patios and plantings may require smaller equipment or additional staging. Pool projects that include extensive paving, fencing, or grading naturally take longer than a basic installation with minimal surrounding work.

Planning the work from design through completion

The most useful timeline is a project-specific one that includes both approvals and construction. Gappsi handles design, permitting, and construction for aquatic projects, allowing the installation sequence to be coordinated from the beginning. During planning, ask which steps are included, when site preparation begins, how utility work is scheduled, and what finish work remains after the spa or pool is set.

For homeowners comparing swim spa cost with a full pool, installation time is part of the value calculation. A swim spa may provide a faster path to exercise and hydrotherapy. While a custom pool requires a longer build but can create more room for swimming and entertaining. The right choice depends on the intended use, property conditions, and how much construction you want to undertake.

Maintenance and Ongoing Costs of a Swim Spa vs. a Pool

The purchase price is only one part of the swim spa cost. Over time, owners also pay for water treatment, cleaning, heating, equipment care, and seasonal preparation. A swim spa generally has an advantage in day-to-day upkeep because its smaller water volume requires less water to balance and treat than a full-sized pool. That does not make it maintenance-free, but it can make the routine more manageable for a Long Island homeowner.

Chemicals and water care

Both installations need regular testing and chemical adjustments. A swim spa holds substantially less water, so there is less volume to circulate, sanitize, and rebalance after heavy use. The smaller surface area can also reduce the amount of debris that enters the water. Although the actual workload depends on the cover, surrounding landscaping, usage, and equipment selected.

A pool demands a broader maintenance routine. Leaves and debris collect across a larger water surface, filters process more water. And swimmers may introduce more contaminants when the pool is used by a family or during gatherings. Automated controls, salt-water systems, and efficient pumps can simplify that work, but they remain equipment that must be monitored and serviced.

Backyard swim spa and landscaped outdoor living area

Cleaning, heating, and seasonal care

Heating is another meaningful difference. Because a swim spa contains less water, it generally takes less energy to reach and maintain its operating temperature than a full-sized swimming pool. That can be especially relevant for owners who want frequent use beyond the hottest months. A pool may require more energy to heat, and many Long Island owners also plan for winterization, a seasonal cover, and spring reopening. Proper winter protection is essential when freezing weather arrives.

Landscaping affects ongoing costs for both choices. Trees near the water can increase skimming and filter-cleaning needs, while patios, fencing, drainage, and planting beds may require periodic care. Designing these elements together can help control debris and make access to service equipment easier.

How much can long-term ownership cost?

One comparison estimates the monthly cost of using a swim spa over a 25-year lifespan at $90 to $123 per month, including the long-term ownership assumptions in that analysis. The comparable estimate for a small inground pool is $480 to $613 per month. These figures are planning benchmarks, not guarantees. Electricity rates, repairs, water-care choices, professional service, cover replacement, and the size and features of the installation will change the result.

The practical takeaway is straightforward: a swim spa typically costs less to maintain and heat, while a pool provides more water volume and recreational space. The right comparison should account for how often your household will use the installation. How much seasonal work you are willing to manage, and whether the larger pool experience justifies its higher ongoing commitment.

Does a Swim Spa Add Home Value Like a Swimming Pool?

Resale value is not determined by the installation price alone. A swim spa can be a practical, cost-effective alternative to a full inground pool. Particularly when a buyer values year-round exercise, relaxation, and efficient use of a smaller backyard. However, a swimming pool may appeal more strongly to families who expect a large outdoor recreation area. The better choice depends on the installation’s intended primary use, not on a simple assumption that one feature always adds more value than the other.

For a homeowner comparing swim spa cost with the broader investment required for a pool, lifestyle fit is central. A swim spa can support fitness training, water-based exercise, and relaxation in a compact footprint. Many models also combine a swim current with hydrotherapy features, giving one installation more than one daily use. That versatility can make the improvement feel worthwhile to the current owner and attractive to a future buyer who has similar priorities.

When can a swim spa be the stronger lifestyle investment?

A swim spa may make more sense when the property has limited usable yard space. Or when the household expects to use the water feature throughout the year rather than mainly during summer. Its smaller water volume and compact design can reduce the physical demands of the installation compared with a full pool. The system can be configured above ground, partially recessed, or inground. Allowing the surrounding landscape to be designed around the home instead of giving the entire yard to one large basin.

That versatility matters in resale discussions, but it should not be overstated. Buyers do not all value the same features. A prospective owner who wants a dedicated workout environment or a place to unwind may see the swim spa as an advantage. Someone planning frequent family gatherings may prefer the open layout of a traditional pool. A swim spa’s value is strongest when its placement, access, privacy, and finish feel intentional rather than like an afterthought added to the yard.

When does a full swimming pool offer broader family appeal?

A full pool generally offers more room for multiple swimmers, lap swimming, and larger parties. Its large, contiguous surface also gives children space for water games that a compact swim spa cannot match. For households that picture weekends around poolside entertaining, that capacity can outweigh the swim spa’s lower space requirements and potentially lower investment.

The choice also affects the surrounding property. A pool project may include a substantial patio, deck, fencing, and other landscape improvements, creating a complete outdoor living area. Those additions can influence how buyers experience the backyard, although the return depends on workmanship, maintenance, neighborhood expectations, and whether the design fits the home. Long Island owners should evaluate the full project rather than treating the vessel itself as the only source of value.

Ultimately, choose the aquatic feature that serves the people who will use it most. A swim spa is compelling for compact, flexible wellness use. A pool is stronger for shared recreation and entertaining. A careful design review can compare both options against the home’s layout, the family’s routines, and the expectations of the local market.

Which Choice Is Right for Your Long Island Home?

The right installation starts with how you expect to use it, not with a generic answer about which option is better. A swim spa can be a strong fit when your priorities are frequent exercise, compact placement, warm-water relaxation, and more flexible installation. A full swimming pool may be the better choice when your household wants open water for recreation, long swims, children’s play, and larger gatherings.

Think about the activity that will happen most often. Swim spas use adjustable water currents, allowing swimmers to set resistance to match their ability and fitness goals. That makes them practical for steady swim training, water exercise, and repeatable workouts without requiring a full-length pool. Many models also include hydrotherapy jets, combining a swim-training area with massage-style relaxation similar to a hot tub. If you want aquatic exercise before work and warm-water recovery afterward, that combination may carry more value than a larger pool footprint.

Choose a swim spa when daily use matters most

A swim spa generally makes sense for homeowners who want to use the water throughout the year. Have a tighter yard, or prefer a focused wellness feature over a broad entertaining area. Its placement can be planned as inground, above-ground, or partially recessed, depending on the property and landscape plan. That flexibility can help the installation work with an existing patio, grade change, or limited outdoor area.

It is also worth considering the people who will use it. A couple focused on fitness, a homeowner seeking hydrotherapy, or a family that values structured exercise may use a swim spa more consistently than a large pool. The best decision is not simply the option with the lower estimated swim spa cost. It is the option that will earn regular use and support the way your household lives.

Choose a full pool when space and shared recreation lead the plan

A full pool is usually the stronger match when the backyard is intended for broad recreation. It gives swimmers room for open-water play, traditional laps, floating, and poolside gatherings. Families with children or homeowners who regularly host guests may value that larger social and activity area more than adjustable-current training or built-in hydrotherapy.

Long Island conditions should be part of that decision. Soil conditions, local zoning requirements, access, drainage, and the surrounding landscape can affect the design and construction process. Before settling on a shape or location, review the gunite and vinyl pool options and consider how each approach fits your property, intended use, and long-term plans.

Gappsi can take the project from initial design and permitting through construction for both pools and swim spas. That full-service process helps connect the practical choice to the details that determine whether the finished installation works well on your property. For a site-specific recommendation based on your yard and priorities, contact Gappsi before making a final commitment.

Still comparing swim spa and swimming pool options for your Long Island property? Call Gappsi at (631) 831-3177 to discuss your project.

Frequently Asked Questions

How much does a swim spa cost compared to a swimming pool?

Many high-performance swim spas cost about $30,000 to $60,000, while Gappsi’s published Long Island baseline for a gunite swimming pool is $90,000 to $140,000. Final pricing depends on the unit, excavation, utility work, decking, permits, and site conditions. Review the swim spa cost guide for additional planning context.

What are the hidden costs of owning a swim spa?

Budget for electrical work, water treatment, replacement filters, routine service, heating, and any platform, enclosure, or landscape work. Energy use varies with insulation, cover quality, set temperature, weather, and how often the spa is used. So an installation quote should separate the unit from site and operating costs.

Is a swim spa cheaper to maintain than a pool?

Usually, yes. A swim spa holds less water, which generally reduces chemical treatment and cleaning demands. And its smaller water volume typically takes less energy to heat than a full-sized pool. One published comparison estimates monthly use costs of $90 to $123 for a swim spa and $480 to $613 for a small inground pool over 25 years: see the comparison assumptions.

Does a swim spa increase home value like a swimming pool?

Not necessarily. A full inground pool can appeal more to buyers who want space for recreation, children, or entertaining. While a swim spa may be more practical for homeowners prioritizing fitness, hydrotherapy, compact placement, or four-season use. The better choice depends on how your household will use the backyard and how well the installation fits the property.

Deciding between a swim spa and a full swimming pool comes down to how you want to use your backyard. The space you have, and the costs you are comfortable carrying over time. A compact swim spa can support fitness and hydrotherapy while keeping installation and ongoing expenses lower. And a traditional pool offers more room for swimming, water games, and gatherings on Long Island summer days.

Gappsi has designed and built outdoor living spaces across Nassau and Suffolk Counties for decades. A Gappsi consultation covers design, permitting, excavation, materials, and the finished patio or deck that completes the project, so you can compare options against a realistic site-specific picture.

Call Gappsi at (631) 831-3177 today to discuss your swim spa or pool project.

Share this page:
Lush artificial grass lawn beside a natural bluestone paver patio on a Long Island backyard

Artificial Grass Installation Cost on Long Island Guide

Artificial turf can keep a Long Island yard green through changing weather, but the installation price depends on far more than the roll of grass. The condition of the existing lawn, the slope of the property, drainage needs, equipment access, and the intended use of the space all shape the final scope. Homeowners in Nassau and Suffolk Counties who budget only for the turf material often underestimate the base work that sits beneath the finished surface.

Call Gappsi Group at (631) 831-3177 for a free consultation and a site-specific artificial grass installation quote tailored to your property.

As a starting point, artificial grass installation cost in the United States averages about $8 to $12 per square foot. A Long Island project may move above or below that range based on excavation, grading, drainage, turf selection, and infill. A site-specific estimate is the reliable way to plan the budget because it accounts for the individual conditions of your yard rather than a blanket per-foot price.

For homeowners in Nassau and Suffolk Counties, the most useful comparison is not simply one contractor’s price per square foot. It is what the proposal includes and how the installation is engineered to handle the property. Understanding those cost drivers makes it easier to compare options and avoid paying twice for preventable drainage or base-work problems. The sections below break down turf pricing, base preparation, drainage and pet-friendly choices, long-term maintenance, and the DIY-versus-professional decision so you can plan a realistic budget.

What Drives Artificial Grass Installation Cost on Long Island

The final artificial grass installation cost for a Long Island property depends on the conditions beneath and around the turf, not only on the roll of grass selected. A straightforward replacement over a level, prepared surface requires less work than a yard with compacted soil, uneven grades, poor drainage, or established sod. For homeowners in Nassau and Suffolk Counties, an accurate estimate should account for the full installation system and the specific demands of the site.

How does yard size affect the estimate?

Contractors measure the usable lawn area in square feet before calculating materials and labor. A larger yard requires more turf, base aggregate, infill, seams, edging, and hauling. Smaller or irregularly shaped areas can also require careful cutting and produce more material waste. Curved borders, planting beds, walkways, patios. And multiple turf sections add layout time because the installation must be fitted around existing features rather than rolled out as one rectangle.

Why does existing sod removal matter?

Natural grass usually cannot remain beneath a synthetic lawn. Site preparation commonly includes removing the existing sod, excavating to the required depth, and installing a stable drainage base. The amount of labor and disposal involved depends on how much lawn must be removed. How compacted the soil is, and whether roots, rocks, old edging, or other debris are present. Proper base preparation is critical to turf longevity because it creates the support layer beneath the finished surface.

What do excavation, grading, and drainage add?

Changes in elevation are a major cost variable. Grading creates the slope needed to direct water away from the home and prevents low spots from developing under the turf. If the existing ground is uneven, additional excavation, fill, compaction, or retaining work may be needed. Drainage improvements may include correcting the base, adding drainage materials, or addressing areas where water tends to collect. Proper site drainage helps prevent pooling, which protects the turf system and the surrounding landscape.

Long Island soil and climate conditions make this evaluation especially important. A professional installation should be tailored to local soil types, slope, and expected weather so the base remains stable over time. These factors can vary between properties in Nassau and Suffolk, even when the lawns appear similar from the street. Material grade also changes the estimate. Turf varies in fiber construction, density, color, backing, and intended use. So the appropriate product depends on whether the area is a front lawn, play space, pet area, or another application. Comparing quotes is most useful when each one clearly separates turf, site preparation, grading, drainage, installation, and infill.

Artificial Grass Cost per Square Foot: What to Expect

For planning purposes, artificial grass installation cost commonly falls around $8 to $12 per square foot in the United States, according to industry pricing data from Gitnux. That range is a starting point, not a guaranteed Long Island quote. The final number depends on the turf construction, the intended use, the size and shape of the area, and the preparation required below the surface.

The table below separates the turf material ranges most homeowners encounter. It is useful for comparing products, but it does not represent a complete installed price. Excavation, base stone, drainage work, edging, seams, labor, and infill may be quoted separately or included in a project total.

Artificial grass material cost ranges by turf grade
Turf Grade Cost per Sq Ft Best For
Lawn standard $4 to $8 General lawns, play areas, and dog runs
Mid-tier turf $4 to $7 Everyday residential use with a fuller appearance
Premium-grade turf $7 to $10+ Higher-use lawns and projects needing denser fibers
Putting green or specialty turf $8.50 to $12.50 Putting greens and purpose-built recreational areas

These material bands are consistent with published comparisons. A NexGen Lawns calculator places lawn or dog grass at approximately $4 to $8 per square foot and putting green installations at $8.50 to $12.50. Another pricing breakdown lists mid-tier turf at $4 to $7 and higher-grade turf at $7 to $10 or more. Those figures help explain why two products that look similar in a small sample can produce different estimates once the entire yard is measured.

Close-up of natural-looking artificial grass turf with infill granules

Material selection should follow the way you use the space. A lawn that receives occasional foot traffic may not need the same fiber density or backing as a busy dog area. A putting green also requires a different surface specification and installation approach than a landscape lawn. Infill helps stabilize the turf, adds ballast, and keeps fibers upright, so it is part of the system rather than a cosmetic extra. The right product also has to work with the planned drainage and base.

For a realistic project budget, compare the complete scope instead of multiplying the turf price by square footage alone. On Long Island, a professional installer should account for existing sod, soil conditions, grading, drainage, transitions, and the finished edge. Ask whether each item is included in the proposal, then compare warranties, installation details, and materials on equal terms. That approach gives you a clearer view of the true artificial grass installation cost before work begins.

Call (631) 831-3177 to review your projected square footage and get a detailed, site-specific estimate from Gappsi Group.

Site Prep and Base Work: The Hidden Cost of Artificial Grass

The visible turf is only one part of an installation. Beneath it, the crew must create a stable, well-draining surface that can handle rain, foot traffic, and seasonal changes. That preparation is why two projects with similar square footage can have very different totals when homeowners compare artificial grass installation cost.

On Long Island, the first step may be removing existing sod, roots, and organic soil. Leaving that material beneath synthetic turf can create an unstable layer as it settles or decomposes. Depending on the property, preparation can also require excavating to the correct depth, clearing construction debris, and hauling the removed material away. These tasks add labor and disposal costs before the turf is ever unrolled.

Why excavation and grading matter

A level-looking yard is not always ready for turf. The subgrade must be shaped so water moves away from the home, retaining walls, patios, and other structures rather than collecting beneath the lawn. Proper grading is especially important on properties with existing low spots, transitions between hardscape and planting areas, or slopes that direct runoff toward the house.

Long Island soil and weather conditions make this assessment more than a cosmetic step. Local soil characteristics affect how quickly water moves through the site, while heavy rain and freeze-thaw cycles can expose weak areas. A base designed without those conditions in mind may settle unevenly or leave water pooling under the turf. Gappsi notes that understanding local soil and climate is important for base longevity and drainage performance across Nassau and Suffolk Counties.

What does the compacted base add to the project?

After excavation and grading, installers typically place crushed stone or gravel to form a compacted stone base. The material is spread in lifts, moistened as needed, and compacted into a firm layer. This base supports the turf system, helps maintain the finished grade, and creates a path for water to move through the installation. Proper drainage is essential because standing water can lead to soft spots, odors, and premature wear.

Base preparation commonly adds about $1.50 to $3.00 per square foot, depending on the existing site, depth required, access, disposal needs, and drainage corrections. That range is an allowance for the work, not a universal price. A small yard with clean, accessible soil may need less preparation than a larger property with compacted ground, buried debris, poor slope, or a failed existing lawn.

When reviewing a proposal, ask whether sod removal, excavation, grading, disposal, drainage, and compaction are included. A detailed scope makes the quote easier to compare and helps prevent a low initial price from becoming a series of added charges. Professional synthetic turf installation services should address the base as carefully as the turf selected for the surface.

Drainage, Infill, and Pet-Friendly Artificial Grass Options

A turf system performs best when the layers beneath the blades are designed for the site. On Long Island, that means treating drainage as part of the installation rather than an afterthought. Soil, slope, and local weather conditions can affect how quickly water moves through the area, so the base and drainage design should be planned together.

How does the drainage layer prevent pooling?

After the existing lawn is removed and the area is excavated, the installer can build a compacted base that allows water to move away from the surface. A drainage layer may include a perforated material or planned gaps that give water a path through the turf system. The goal is to prevent water from sitting below the backing or collecting in low spots. Proper site drainage is essential because pooling can create odors, soft areas, and premature wear. It is also one reason local soil conditions matter when evaluating an artificial grass installation cost. A simple, well-draining site may need less corrective work than an area with poor grading or slow-draining soil.

Drainage details should also account for nearby patios, planting beds, downspouts, and walkways. A professional assessment can identify where runoff is likely to collect and tailor the base to the slope and drainage requirements. Gappsi serves Nassau and Suffolk Counties, where familiarity with local site conditions helps support a durable base.

What does infill do for artificial grass?

Infill is spread between the turf fibers after the grass is secured. Materials such as silica sand and rubber add ballast, stabilize the surface, and help keep the fibers upright. Infill also gives the turf a more natural feel underfoot instead of leaving the blades unsupported and flat. The correct material and application depend on how the area will be used, including whether it is a lawn, play space, or pet area.

For homes with dogs, consider a pet-focused turf system paired with a sanitary infill designed to support cleaning and odor control. These options can make routine maintenance easier, but they do not eliminate the need to remove solid waste and rinse the surface as needed. Homeowners comparing artificial grass for pets should review drainage, backing, infill, and cleaning requirements together rather than choosing by blade appearance alone.

Artificial grass can provide a consistent surface without watering or mowing, while the right drainage and infill details help preserve that performance. Ask for an installation plan that explains the base, water path, infill material, and maintenance approach before comparing quotes.

How Much Do Artificial Grass Maintenance Costs Run?

One of the clearest differences between artificial grass and a natural lawn appears after installation. Synthetic turf does not need regular watering, mowing, or fertilization, so the ongoing work is limited to basic cleaning and occasional grooming. Industry estimates place annual maintenance for artificial grass at roughly $0.10 to $0.20 per square foot. That estimate gives Long Island homeowners a useful starting point when comparing the full cost of an artificial grass installation with the recurring cost of caring for living grass.

For a 500-square-foot area, that range equals approximately $50 to $100 per year for routine maintenance. A larger 1,000-square-foot lawn would be about $100 to $200 annually. Actual upkeep depends on how the space is used, the amount of debris it receives, and whether pets regularly use the turf. Removing leaves, rinsing dust or residue, brushing high-traffic areas, and addressing spills promptly can help the surface remain clean and comfortable.

Where do the savings come from?

Natural lawns bring several repeating expenses. Watering adds to utility costs, particularly during dry summer periods. Mowing requires equipment, fuel, service, or a landscaping crew. Fertilizer, weed control, reseeding, and repairs for bare or muddy areas add more over time. Artificial grass removes those routine lawn-care categories from the maintenance budget. It also helps conserve water, which is an important consideration for homeowners who want to reduce their outdoor water use. Available industry research identifies water reduction as a major benefit of synthetic turf systems.

The surface stays green through every season without the uneven growth, bare spots, and mud that can develop on natural grass. That consistency can reduce both maintenance spending and the time a homeowner gives to lawn care. The installation still needs to be done correctly, however. Proper grading, drainage, a stable base, secure seams, and suitable infill help prevent avoidable repairs. Gappsi’s synthetic turf installation services account for those site conditions during planning and construction.

How should homeowners measure the return?

Evaluate the project across an eight- to twelve-year planning period rather than looking only at the initial artificial grass installation cost. Add the expected annual maintenance, then compare it with the cumulative cost of water, mowing, fertilizer, seasonal repairs, and your own time for a natural lawn. The difference shows the potential return on investment over the life of the project. A professionally installed system may also continue providing a usable, attractive surface throughout the year, giving the savings a practical benefit beyond the spreadsheet.

DIY vs Professional Artificial Grass Installation: Which Saves More?

DIY artificial grass installation can look less expensive at first. For a straightforward lawn, material and basic installation costs may run about $4 to $8 per square foot. That figure does not automatically include every step required for a stable turf system, however. Removing sod, excavating to the right depth, building a compacted drainage base, joining seams, securing the edges, and applying infill all affect the finished result. A homeowner who skips one of those steps may save on the initial invoice while creating a larger repair expense later.

Professional installation costs more upfront because the work addresses the entire site, not only the visible turf. Proper grading and drainage help prevent water pooling, while accurate cuts and seam work reduce visible joins and premature wear. Those details are particularly important on Long Island, where local soil and climate conditions can affect base stability and drainage. Gappsi’s guidance emphasizes durability, proper grading, and site preparation as part of a complete installation.

  • DIY may make sense when: the area is small, accessible, relatively flat, and the homeowner has the tools and time to complete excavation, base compaction, cutting, seaming, and infill application correctly.
  • Professional installation is usually the safer choice when: the site has a slope, drainage concerns, compacted soil, multiple turf areas, curved edges, pets, or transitions to patios and walkways.
  • The overlooked DIY costs include: equipment rental, disposal of excavated material, replacement turf after cutting errors, additional base material, seam repairs, and time spent correcting an uneven surface.
  • The professional value includes: a properly prepared base, secured edges, consistent seams, suitable drainage, and installation methods designed to support a longer service life.

Pet-friendly synthetic grass backyard with a dog playing on the lawn

For pet areas, drainage and infill deserve additional attention. Infill helps stabilize the turf, keep fibers upright, and improve comfort underfoot. Poor drainage can leave odors, standing water, or muddy edges around the installation. These problems are difficult to correct after turf has been glued and secured. So the cheapest path is not always the lowest artificial grass installation cost over the life of the project.

Professional installation can also be more cost-effective when the comparison includes reduced watering, mowing, and fertilization expenses. Synthetic turf requires far less annual maintenance than a natural lawn, with estimated maintenance costs of roughly $0.10 to $0.20 per square foot. The right decision depends on the site, but a careful installation protects the materials and helps the system deliver its expected durability. Review how to lay artificial turf before deciding whether your project is suitable for DIY work.

Is Artificial Grass Worth the Investment for Your Home?

The right artificial grass project is more than a lawn replacement. It can create a consistent, usable outdoor area for entertaining, pets, and everyday family time while reducing the recurring work associated with mowing, watering, and fertilizing. That combination makes the investment easier to evaluate than the installation price alone.

Professional turf installation can also support property value by improving the appearance and function of an outdoor space. A neat, low-maintenance lawn is especially useful when it is designed as part of a larger plan rather than installed as an isolated rectangle. Gappsi’s project guidance identifies attractive, functional outdoor entertainment areas as a potential benefit of professional turf installation. The result depends on the property, design, and workmanship, so artificial grass should not be treated as a guaranteed return.

Where does the long-term value come from?

Durability and predictable upkeep are central to the cost-benefit calculation. A properly built turf system includes the appropriate base, secure edges, drainage, and infill. These details help reduce problems such as visible seams, premature wear, and water pooling. Artificial grass also eliminates routine mowing and can reduce water use, while annual maintenance is generally limited to cleaning and occasional care. Industry research estimates synthetic turf maintenance at approximately $0.10 to $0.20 per square foot annually, although actual costs vary by use and site conditions.

Long Island homeowners should also account for the value of correct site preparation. Local soil, slopes, and drainage conditions affect how well the base performs over time. Paying for a plan that addresses those conditions can be more cost-effective than choosing the lowest initial bid and later correcting settlement, runoff, or drainage failures.

How can turf improve the whole outdoor layout?

Turf becomes more valuable when it works with the rest of the property. It can transition cleanly into landscape design, patios, walkways, planting beds, and outdoor structures. Curved edges and coordinated materials may add design complexity, but they can produce a more natural connection between the lawn and entertainment areas. Gappsi’s complete outdoor transformation model brings planning, material supply, and construction together under one provider, which can simplify coordination across those elements.

Gappsi also uses 3D design visualization before construction so homeowners can review the proposed layout, transitions, and usable areas in advance. This helps clarify what the artificial grass installation cost includes and reduces surprises during construction. Serving Nassau and Suffolk Counties, Gappsi can evaluate the specific site before recommending a turf system. Visit the Gappsi homepage to review the broader design-build approach and decide whether artificial grass fits your property’s long-term goals.

Gappsi’s team can review your site, layout, and drainage before you commit to a turf system, so you understand exactly what the artificial grass installation cost includes.

Call Gappsi Group at (631) 831-3177 for a free consultation

Frequently Asked Questions

How much does it cost to have an artificial lawn installed?

Artificial grass installation cost depends on the turf system, square footage, site access, excavation, grading, drainage, infill, and design details. A broad U.S. reference range is $8 to $12 per square foot, but a Long Island project may fall outside that range when the existing lawn needs substantial base work. A site evaluation provides a more useful estimate than a material-only price. Industry pricing reference.

How much is 1,000 square feet of artificial grass?

Using the broad $8 to $12 per-square-foot reference, 1,000 square feet would represent approximately $8,000 to $12,000 before project-specific adjustments. The final quote should account for sod removal, excavation, drainage, edge restraints, seams, infill, labor, and disposal, not just the rolls of turf.

What factors influence artificial grass installation cost on Long Island?

The largest variables are the condition of the existing lawn, the amount of excavation and grading required. Drainage needs, turf selection, project shape, access for equipment, and integration with pavers or planting beds. Long Island soil and weather conditions also make a properly designed base and drainage plan important for long-term performance.

Is professional artificial grass installation worth the cost?

Professional installation can be worthwhile when durability, drainage, and a clean finish matter. The work includes preparing the base, securing and tensioning the turf, managing seams, and adding infill. These steps help reduce pooling, visible seams, wrinkles, and premature wear, issues that can make a low initial price more expensive to correct later.

Ready to Plan Your Artificial Grass Installation?

A site-specific review can help you choose the right turf, base preparation, and drainage approach for your Long Island property. Gappsi’s team can discuss your project, answer your questions, and prepare a free consultation and artificial grass installation quote.

Call Gappsi Group at (631) 831-3177 to get started

Share this page:
A realistic crystal-clear inground vinyl liner pool with a natural stone patio in a landscaped Long Island backyard

What Does a Vinyl Pool Cost on Long Island?

Planning an inground pool on Long Island starts with a realistic budget, not a catalog price. The final number depends on the pool’s dimensions, depth, shape, excavation, access, equipment, decking, drainage, and the structure supporting the liner. A careful estimate should also account for future liner replacement and routine water care.

Call Gappsi at (631) 831-3177 for a pool consultation and free quote.

For many Long Island homeowners, a vinyl pool cost of roughly $40,000 to $70,000 upfront is a useful planning range. Liners commonly require replacement at about $5,000 to $7,500 every 8 to 10 years, so the lowest initial bid is not always the lowest long-term cost.

Gappsi handles the design-build process, including the underlying concrete work for vinyl liners. That makes it easier to evaluate the complete project rather than comparing liner prices alone. The next step is to examine what a typical Long Island installation includes and why two pools with similar dimensions can have very different totals.

What Is the Average Vinyl Pool Cost on Long Island?

For a typical Long Island installation, a realistic vinyl pool cost is often about $40,000 to $70,000, including the pool installation. That range is consistent with published vinyl pool pricing from Leisure Pools USA, while other industry estimates place basic vinyl liner pools between $25,000 and $65,000. Broader installation estimates can reach $45,000 to $100,000 when the project includes more complex site work, upgraded equipment, difficult access, or extensive surrounding construction. Sources: Leisure Pools USA, Thursday Pools, and River Pools.

That makes vinyl the lowest-upfront-cost option among the three common inground pool types, ahead of fiberglass and concrete in many projects. Gappsi’s customer guidance identifies vinyl liner pools as a cost-effective choice for many Long Island homeowners. The important distinction is that the lowest initial quote is not automatically the best value. The pool shell, wall construction, excavation, circulation equipment, coping, steps, permits, and site conditions all affect what you receive for the price.

What would a 20×40 vinyl pool cost?

A 20×40-foot pool covers roughly 800 square feet of water surface, making it a useful example for comparing estimates. A project of this size may fall within the $40,000 to $70,000 installed range. But the final proposal can move higher or lower based on depth, shape, access for excavation equipment, soil conditions, and the selected finishes. A simple rectangular design with straightforward access generally has fewer construction complications than a pool with multiple elevations, specialty steps, retaining walls, or extensive masonry.

When comparing proposals, ask whether each quote includes the same scope. Confirm the excavation, structural walls, liner, pump and filtration equipment, electrical work, coping, permits, startup service, and any required site restoration. Gappsi provides the underlying concrete work for vinyl liners as part of an integrated design-build service, which helps keep the structural and finish decisions coordinated. Review custom vinyl pool designs before choosing a layout, then compare complete scopes rather than headline prices alone.

What Factors Drive the Price of a Vinyl Liner Pool?

A 20×40 pool is a useful reference point, but its dimensions do not determine the entire estimate. The final vinyl pool cost reflects the amount of excavation, structural work, equipment, finish materials, and site preparation required for that specific property. Two Long Island homes can choose the same pool size and receive very different project totals.

Working with an experienced Long Island vinyl pool builder helps you compare those project totals on scope rather than a single line price.

How do size, depth, and shape change the estimate?

Pool size and surface area affect excavation, wall materials, liner dimensions, plumbing, coping, and the amount of water the equipment must circulate. A 20×40 pool generally requires more of each than a smaller rectangle. Depth adds cost as well because a deeper basin means more soil removal, taller walls, additional structural considerations, and potentially larger circulation equipment.

Shape also matters. A straightforward rectangle is usually simpler to lay out, excavate, reinforce, and fit with a liner. Freeform designs can require more detailed engineering and additional liner seams, corners, steps, benches, or specialty features. Those design choices can be worthwhile, but they should be priced as part of the initial plan rather than treated as minor additions.

What site and structural conditions affect vinyl pool cost?

Excavation and site conditions can shift the budget quickly. Tight access for machinery, difficult soil, groundwater, buried utilities, rock, drainage requirements, and the need to remove excess soil all influence labor and disposal. A property with easy equipment access may require less site work than a similar pool behind a narrow home or through a constrained side yard.

The wall build type is another important decision. Steel, concrete, and other structural systems have different material and labor requirements. The wall supports the liner, so the lowest initial bid is not automatically the best value. Gappsi performs the underlying concrete work for vinyl liner pools and manages the project through an integrated design-build process, reducing the need to coordinate separate contractors.

How does finishing change the total?

Finishing choices include coping, steps, benches, lighting, automation, decking, drainage, fencing, and landscaping. These features can represent a substantial portion of the completed project. For context, Long Island gunite pools run roughly $90,000 to $140,000 at baseline, while fiberglass pools commonly fall around $55,000 to $100,000. Vinyl is generally lower for a comparable size, but a detailed site-specific plan is still necessary to explain the difference.

Why Concrete Wall Builds Matter for a Vinyl Liner Pool

A vinyl liner is the visible interior surface, but the walls behind it carry the shape and pressure of the pool. That means the structure deserves as much attention as the liner pattern, steps, coping, and surrounding patio. When comparing vinyl pool cost, ask what wall system is included in the proposal, how it will perform on your property, and who is responsible for the underlying construction.

Wall materials affect installation requirements, long-term maintenance, and how easily the pool can be adapted to a challenging Long Island site. The right choice depends on the design, soil conditions, access, drainage plan, and scope of the project, not simply the lowest initial quote.

Reviewing Gappsi’s pool construction services shows how the concrete wall build and the liner installation are handled as one accountable scope of work.

Workers installing the liner and structure of an inground vinyl pool during construction in a Long Island backyard
Common wall systems for vinyl liner pools
Wall build Cost position Durability considerations Long Island suitability
Steel wall Often a lower-cost starting point, depending on engineering, excavation, and site work. Requires appropriate corrosion protection, drainage, and installation details. The complete assembly matters more than the panel material alone. Can suit many standard layouts when the site preparation and water management plan are properly executed.
Structural polymer wall May carry a different upfront cost than steel, based on the system and design. Resists certain moisture-related concerns, but performance still depends on correct bracing, backfill, and drainage. Useful for selected designs and site conditions when specified and installed by an experienced contractor.
Poured concrete wall Typically represents a more substantial structural investment. Highly customizable and capable of lasting for decades, often more than 50 years with proper maintenance, according to Latham Pool’s comparison of pool construction types. Well suited to customized shapes, reinforced structural work, and demanding site conditions when engineered and built correctly.

Concrete wall construction does not turn a vinyl liner pool into a gunite pool. Instead, it provides a robust, customizable structure beneath the replaceable liner. This approach can support unusual dimensions, integrated steps, benches, and design details that require more than a basic rectangular shell.

Gappsi handles the underlying concrete work for vinyl liners as part of its pool construction services. Its integrated, one-stop design-build model also reduces the need to coordinate separate contractors for related outdoor work. That accountability matters because excavation, wall construction, drainage, liner installation, and finish work must function as one system. A clear proposal should identify the wall build, structural scope, and site conditions before you compare the final project price.

How Much Does It Cost to Replace a Vinyl Pool Liner?

A vinyl liner is not a one-time purchase. It is a planned maintenance expense that should be included in the long-term vinyl pool cost from the beginning, especially for a larger pool such as a 20×40. Current industry estimates place replacement at approximately $5,000 to $7,500 every 8 to 10 years, according to Leisure Pools USA.

Other published estimates show a wider range. Thursday Pools lists replacement at roughly $3,000 to $7,500 every 5 to 15 years, while River Pools estimates approximately $5,000 to $8,000 every 5 to 9 years. These figures are useful planning ranges, not a fixed quote for every Long Island property.

What affects the replacement price?

The final cost depends on the pool’s size, shape, depth, liner pattern, wall condition, and access for the installation crew. A standard rectangular pool may have a different labor requirement from a freeform design with steps, benches, coves, or other fitted features. Before installing a new liner, the contractor should also inspect the structure and identify issues that could affect fit or performance.

Deciding between a vinyl liner and a concrete build is easier when you see how the full structure is assembled, including walls and coping.

For a 20×40 pool, replacement should be treated as a real budget line item rather than an unexpected repair. A lower initial installation price can still lead to avoidable expense if the liner is damaged early or the supporting structure is not properly prepared. Gappsi provides the underlying concrete work for vinyl liners as part of an integrated design-build service, helping keep the construction and replacement considerations connected.

Can maintenance extend liner life?

Yes. Proper maintenance can extend liner lifespan and reduce total ownership costs. Keeping the water clean, maintaining balanced chemistry, preventing algae and slime, and addressing small problems before they worsen all help protect the liner. Sun exposure, pool use, water conditions, and climate also influence how long the material lasts. Planning for replacement while maintaining the liner carefully gives Long Island homeowners a more accurate picture of the pool’s total cost over time.

What Does Long-Term Maintenance Cost for a Vinyl Pool?

Plan on approximately $1,000 to $2,000 per year for routine vinyl pool maintenance, based on the range reported by Thursday Pools. Your actual vinyl pool cost over time will depend on pool size, equipment, water conditions. How often the pool is used, and whether you handle routine care yourself or hire a service company. The annual figure generally reflects recurring water treatment, cleaning, inspections, and equipment care. It does not replace the need to budget separately for eventual liner replacement or larger repairs.

Water chemistry is the first line of liner care. Test the water regularly and adjust it before an imbalance becomes a surface or equipment problem. Guidance from the University of California, Riverside recommends keeping pH between 7.2 and 8.0, with a preferred range of 7.4 to 7.6 for protecting pool surfaces and equipment. The same guidance states that free chlorine residual without stabilizer should remain at 1.0 ppm or higher. See the complete pool water quality guidance for the supporting standards.

A maintained inground vinyl liner pool with clear blue water and a natural stone patio in a landscaped Long Island backyard

Routine cleaning also protects the liner. Remove debris, brush appropriate surfaces, empty baskets, and watch for slime or algae before buildup becomes difficult to correct. Avoid harsh cleaning methods that can damage the liner. Keeping the water clean and balanced helps reduce unnecessary chemical corrections, while regular filtration and equipment checks can identify small issues before they become expensive repairs.

Liner care has a direct effect on total ownership cost. Gappsi’s customer guidance emphasizes that proper maintenance and clean water conditions can extend liner life, which is a major part of the long-term budget. A neglected liner may require replacement sooner, while consistent care can help you get more useful years from the same installation. In practical terms, the annual maintenance budget should cover both everyday service and a reserve for future liner work.

When comparing estimates, ask what is included in ongoing service. A clear plan should identify water testing, chemical balancing, cleaning, filter care, equipment checks, and seasonal opening or closing. That detail gives you a more realistic view of the total cost of ownership than comparing installation prices alone.

How to Get the Best Value on a Long Island Vinyl Pool

The lowest bid is not always the lowest vinyl pool cost over the life of the project. A durable pool depends on the structure beneath the liner, accurate coordination between trades, and a realistic plan for future maintenance. Use these steps to compare proposals on value rather than price alone.

  1. Choose one accountable design-build team. Work with a contractor that can coordinate excavation, the concrete wall build, liner installation, coping, decking, and finishing as one project. Gappsi provides an integrated, one-stop design-build service, reducing the need for a homeowner to manage several separate contractors. Its pool construction services include the underlying concrete work for vinyl liners. Explore vinyl liner pool construction services before requesting proposals. When comparing contractors side by side, the service comparison in our best Long Island pool companies roundup is a practical starting point.
  2. Verify the wall construction before signing. Ask exactly what forms the pool walls, what reinforcement is included, and who is responsible for preparing the structure before the liner goes in. A proposal that lists only a liner and excavation may leave out the work that affects long-term durability. Request a written scope, material specifications, drainage details, and warranty responsibilities. Compare those details, not just the subtotal.
  3. Price the full ownership cycle. Include water care, equipment service, repairs, and eventual liner replacement in your planning. Published estimates commonly place liner replacement in the several-thousand-dollar range, with timing varying by liner quality, use, and maintenance. Proper liner care and clean water conditions can help extend its service life, making maintenance part of the value calculation rather than an afterthought.
  4. Prioritize durable construction and clear communication. A coordinated team should explain which choices affect the initial budget and which protect the pool over time. Review the finished design, access requirements, schedule, allowances, and change-order process together. Then compare the complete scope with your intended use and budget. Call Gappsi at (631) 831-3177 to discuss your Long Island vinyl pool project.

Explore Gappsi vinyl pool construction services, from concrete wall builds to liner installation.

Frequently Asked Questions

How much does it cost to put in a vinyl pool?

On Long Island, a typical vinyl liner pool project often falls in the $40,000 to $70,000 range before unusual site conditions, extensive hardscaping, or special features. Published industry estimates vary from about $25,000 to $65,000 for basic installations and $45,000 to $100,000 for broader installation scopes. So the design and inclusions behind each quote matter. Industry comparison data supports the $40,000 to $70,000 range.

Can I get an inground pool for $30,000?

A basic pool package may approach that figure, but a complete Long Island installation at $30,000 is unlikely once excavation. Structural work, equipment, permits, coping, decking, and site access are included. Request an itemized proposal so you can distinguish the pool shell and liner from the surrounding work that makes the project usable.

Is a vinyl pool cheaper than concrete?

Vinyl usually has a lower initial installation cost than concrete, but the comparison should include liner replacement and maintenance over time. Long Island gunite pools commonly run about $90,000 to $140,000 as a baseline on Gappsi’s published site, while a vinyl pool generally requires a future liner replacement. The best choice depends on the design, structure, and ownership horizon.

How much does it cost to replace a vinyl pool liner?

Replacement commonly costs about $5,000 to $8,000, depending on pool size, liner pattern, site access, and labor. Liners often last roughly 5 to 9 years, although water chemistry, sunlight, cleaning practices, and use can change that timeline. River Pools reports these replacement and lifespan ranges.

Ready to Plan Your Vinyl Liner Pool?

A realistic estimate starts with your backyard, pool dimensions, site conditions, and the construction details that affect long-term value. Gappsi can help you review those factors and plan a vinyl liner pool that fits your Long Island property and goals. Reach out through our contact page or Call Gappsi at (631) 831-3177 to schedule a consultation and get a realistic vinyl pool cost estimate.

Share this page: