Modern swim spa in a landscaped Long Island backyard

Swim Spa Cost vs. Pool: Long Island Owner’s Guide

Choosing between a swim spa and a full swimming pool is not simply a question of which installation costs less. For Long Island homeowners, the right fit depends on your available yard space. How often you will use the water, and whether your priority is private exercise, relaxation, family recreation, or entertaining. Soil conditions, local zoning requirements, winter weather, and the surrounding patio or landscape plan also affect the real project scope.

Call (631) 831-3177 to discuss your pool or swim spa plans with Gappsi.

Swim spa cost is often lower than the cost of a full pool, especially when you compare a compact installation, reduced water volume, and year-round use. A swim spa can suit a tighter yard and support fitness or hydrotherapy, while a full pool provides more room for swimming, water games, and gatherings. The better choice depends on how you plan to use the space and which long-term costs fit your budget.

Start with the numbers, then weigh them against installation requirements, seasonal use, and ongoing maintenance. That comparison gives you a more practical basis for choosing the right aquatic feature for your Nassau or Suffolk County property.

Swim Spa Cost vs. Pool Cost: The Numbers That Matter

Comparing a swim spa with a pool requires more than looking at the price on an equipment quote. The installation scope, size of the water feature, surrounding hardscape, heating needs, and expected service life all affect the final investment. For a Long Island homeowner, the same label can represent very different projects depending on whether the installation is above ground. Partially recessed, or a fully constructed gunite pool.

The figures below provide useful planning ranges, not a substitute for a site-specific proposal. Soil conditions, access for excavation equipment, permits, utility work, fencing, patios, and landscaping can change the total. They also show why the right choice depends on how you plan to use the space, not simply which option has the lower starting price.

Estimated swim spa and pool costs
Cost category Swim spa Small inground pool Long Island gunite pool
Estimated one-time installation $27,000 to $37,000 for a total estimated installation $54,000 to $69,000 for a small inground pool $90,000 to $140,000 baseline for a gunite pool on Long Island
High-performance equipment range $30,000 to $60,000 for many high-performance fitness systems Varies by pool size, structure, equipment, and finish Varies by dimensions, finish, equipment, and surrounding construction
Estimated monthly cost over 25 years $90 to $123 per month $480 to $613 per month Project-specific, and not directly interchangeable with the small-pool estimate

The first comparison is the upfront commitment. One published estimate places a swim spa installation at $27,000 to $37,000, compared with $54,000 to $69,000 for a small inground pool. High-performance swim spas can reach $30,000 to $60,000, particularly when they include stronger current systems and features designed for regular training. Those figures can overlap with the low end of a small pool project, so the equipment and site plan matter as much as the category.

Gunite construction sits in a different planning range for Long Island. Gappsi’s published baseline is $90,000 to $140,000 for a gunite swimming pool. Review the full swimming pool cost breakdown for a closer look at the components behind that range. For a separate swim spa budget discussion, the existing in-ground swim spa cost guide provides a useful related deep dive.

Long-term use can widen the gap. Over a 25-year lifespan, the supplied estimates place a swim spa at $90 to $123 per month, versus $480 to $613 per month for a small inground pool. These are planning figures that combine the stated lifespan assumptions, not guaranteed utility or service bills. A swim spa generally has less water to balance and a smaller volume to heat, while a pool provides more room for multiple swimmers, games, and entertaining. The lower monthly estimate may be attractive, but the larger pool may deliver more value for a household that expects frequent group use.

Use these numbers to establish a realistic range before comparing designs. A property review can then account for access, excavation, drainage, finishes, heating, safety requirements, and the outdoor living features that complete the installation.

How Much Space Do You Really Have for a Swim Spa or Pool?

Start with the usable part of your backyard, not the total lot size. A Long Island property may look spacious on paper, but the area available for water features can shrink quickly once you account for the house. Property lines, setbacks, fencing, patios, drainage, utilities, mature trees, and access for construction equipment. A careful site review helps you compare what will fit comfortably rather than forcing a design into an undersized area.

When does a swim spa make more sense in a smaller yard?

A swim spa is a compact option for tighter backyards. Its smaller footprint can leave room for circulation, seating, planting beds, and a walkway while still giving your household a place to exercise or relax. That can be especially useful when the main goal is regular swimming, resistance training, hydrotherapy, or a combination of those activities instead of a large recreational layout.

Do not judge the fit by the shell alone. You also need working space around the unit, a stable base, service access, electrical planning, and a practical route for delivery or future maintenance. Consider how the spa will look from the house and whether its placement protects privacy without creating an obstacle between indoor and outdoor living areas.

What extra room does a traditional pool require?

A traditional pool needs a larger overall area, but it can provide advantages that a swim spa cannot match in the same footprint. More open water accommodates multiple swimmers, games, shallow and deep zones, and poolside entertaining. If your plans include family gatherings or larger parties, reserving space for people to move between the pool. Patio, outdoor kitchen, and seating areas is as important as sizing the pool itself.

Leave room for the surrounding hardscape and safety features. A pool design may also require decking, fencing, equipment access, drainage solutions, and planting or screening. Those elements affect how much of the yard remains usable after construction. A pool that technically fits but consumes every open area can feel cramped and limit the entertaining space you wanted in the first place.

Can installation style improve the fit?

Swim spas offer more placement flexibility than many homeowners expect. Depending on the property and design, a unit can be installed above-ground, inground, or partially recessed. A partially recessed installation can reduce the visual height while retaining service access, while an inground approach can integrate the spa with surrounding paving and landscape work. The best choice depends on grading, access, drainage, structure, and the look you want from the primary living spaces.

Before comparing swim spa cost with pool cost, have the site measured and reviewed for local requirements. Gappsi can evaluate the usable yard, discuss how you plan to use the water feature. And develop a pool or swim spa layout that respects the property rather than simply filling it.

Can a Swim Spa Replace a Full Pool for Year-Round Use?

For many Long Island homeowners, the biggest difference is not the shape of the water feature. It is how often the feature fits real life. A traditional swimming pool can be the center of backyard activity during peak summer, but its practical season is limited by cool weather, shorter days, and winter preparation. A swim spa takes a different approach by keeping a smaller, heated body of water ready for exercise, relaxation, and family use through more of the year.

Swim spa in use in a Long Island backyard

A swim spa is built around daily access

Swim spas are engineered for four-season use, including mornings and evenings when a full pool would be too cold or impractical. Their contained design supports a controlled water temperature, while a swim current can provide a consistent setting for low-impact workouts. That makes the feature useful beyond recreation. A homeowner may use it for steady swimming, water exercise, or a brief recovery session without waiting for the weather to cooperate.

The smaller water volume also matters. A swim spa generally requires less energy to heat and maintain at the desired temperature than a full-sized swimming pool. That does not eliminate operating costs, and actual energy use depends on the model, cover, insulation, settings, and exposure. However, less water to heat can make frequent use more practical when compared with heating a much larger pool.

Why a full pool remains seasonal on Long Island

A full pool offers advantages a swim spa cannot fully duplicate. Its larger surface area gives multiple swimmers more room, supports pool games, and creates space for larger gatherings. If your priority is entertaining, children’s water play, or a broad area for recreational swimming, a traditional pool may be the better match. You can review Gappsi’s swimming pool installation services when comparing that broader backyard experience.

Seasonality is the tradeoff. Long Island pools need proper winterization and a protective cover during the colder months. Those steps help protect the pool through harsh winter conditions, but they also mean the water is not available for regular use during that period. A swim spa can extend the usable season, although it still requires responsible maintenance, safe access, and weather-appropriate operation.

Which option fits your routine?

Choose a swim spa when year-round exercise, compact design, and frequent personal use matter more than hosting large groups. Choose a full pool when summer entertaining, open swimming space, and water games are central to your plans. The right comparison is not simply swim spa cost versus pool cost. It is the value of a feature you will actually use across Long Island’s changing seasons.

How Long Does Installation Take for Each Option?

Installation time depends less on the equipment alone than on the scope of site preparation. A swim spa is typically faster to install than a custom inground pool because the vessel is manufactured in advance. The project may still require a prepared base, electrical work, access planning, drainage, and finish work. But it generally avoids the full excavation and structural construction sequence associated with a pool.

Why a swim spa can move from selection to use faster

Swim spas offer several placement approaches. They can be installed above ground, partially recessed, or fully inground, depending on the property, desired appearance, and landscape plan. An above-ground installation may involve a properly engineered pad, utility connections, steps, and surrounding surfaces. A recessed or inground design adds excavation, retaining or structural considerations, waterproofing details, and coordinated landscape work.

That flexibility affects the schedule. A straightforward above-ground project may have fewer construction stages, while an integrated inground installation requires more coordination. The shorter timeline often associated with a swim spa should therefore be understood as a typical advantage, not a guarantee for every property. The more extensive the surrounding hardscape and grading, the more the project resembles a broader outdoor construction job.

What can extend a Long Island pool installation?

A custom inground pool usually includes more phases: layout, excavation, structural work, plumbing, electrical systems, interior finish, coping, decking, fencing, and final landscaping. On Long Island, local zoning requirements and soil stability can influence both the design and the schedule. Property setbacks, approvals, access for excavation equipment, drainage, and the condition of the soil all need to be evaluated before construction begins. Local requirements and site conditions can vary between Nassau and Suffolk properties, so a calendar estimate made without a site review may be unreliable.

Weather and access can also affect outdoor construction. A narrow side yard, limited driveway access, or the need to protect existing patios and plantings may require smaller equipment or additional staging. Pool projects that include extensive paving, fencing, or grading naturally take longer than a basic installation with minimal surrounding work.

Planning the work from design through completion

The most useful timeline is a project-specific one that includes both approvals and construction. Gappsi handles design, permitting, and construction for aquatic projects, allowing the installation sequence to be coordinated from the beginning. During planning, ask which steps are included, when site preparation begins, how utility work is scheduled, and what finish work remains after the spa or pool is set.

For homeowners comparing swim spa cost with a full pool, installation time is part of the value calculation. A swim spa may provide a faster path to exercise and hydrotherapy. While a custom pool requires a longer build but can create more room for swimming and entertaining. The right choice depends on the intended use, property conditions, and how much construction you want to undertake.

Maintenance and Ongoing Costs of a Swim Spa vs. a Pool

The purchase price is only one part of the swim spa cost. Over time, owners also pay for water treatment, cleaning, heating, equipment care, and seasonal preparation. A swim spa generally has an advantage in day-to-day upkeep because its smaller water volume requires less water to balance and treat than a full-sized pool. That does not make it maintenance-free, but it can make the routine more manageable for a Long Island homeowner.

Chemicals and water care

Both installations need regular testing and chemical adjustments. A swim spa holds substantially less water, so there is less volume to circulate, sanitize, and rebalance after heavy use. The smaller surface area can also reduce the amount of debris that enters the water. Although the actual workload depends on the cover, surrounding landscaping, usage, and equipment selected.

A pool demands a broader maintenance routine. Leaves and debris collect across a larger water surface, filters process more water. And swimmers may introduce more contaminants when the pool is used by a family or during gatherings. Automated controls, salt-water systems, and efficient pumps can simplify that work, but they remain equipment that must be monitored and serviced.

Backyard swim spa and landscaped outdoor living area

Cleaning, heating, and seasonal care

Heating is another meaningful difference. Because a swim spa contains less water, it generally takes less energy to reach and maintain its operating temperature than a full-sized swimming pool. That can be especially relevant for owners who want frequent use beyond the hottest months. A pool may require more energy to heat, and many Long Island owners also plan for winterization, a seasonal cover, and spring reopening. Proper winter protection is essential when freezing weather arrives.

Landscaping affects ongoing costs for both choices. Trees near the water can increase skimming and filter-cleaning needs, while patios, fencing, drainage, and planting beds may require periodic care. Designing these elements together can help control debris and make access to service equipment easier.

How much can long-term ownership cost?

One comparison estimates the monthly cost of using a swim spa over a 25-year lifespan at $90 to $123 per month, including the long-term ownership assumptions in that analysis. The comparable estimate for a small inground pool is $480 to $613 per month. These figures are planning benchmarks, not guarantees. Electricity rates, repairs, water-care choices, professional service, cover replacement, and the size and features of the installation will change the result.

The practical takeaway is straightforward: a swim spa typically costs less to maintain and heat, while a pool provides more water volume and recreational space. The right comparison should account for how often your household will use the installation. How much seasonal work you are willing to manage, and whether the larger pool experience justifies its higher ongoing commitment.

Does a Swim Spa Add Home Value Like a Swimming Pool?

Resale value is not determined by the installation price alone. A swim spa can be a practical, cost-effective alternative to a full inground pool. Particularly when a buyer values year-round exercise, relaxation, and efficient use of a smaller backyard. However, a swimming pool may appeal more strongly to families who expect a large outdoor recreation area. The better choice depends on the installation’s intended primary use, not on a simple assumption that one feature always adds more value than the other.

For a homeowner comparing swim spa cost with the broader investment required for a pool, lifestyle fit is central. A swim spa can support fitness training, water-based exercise, and relaxation in a compact footprint. Many models also combine a swim current with hydrotherapy features, giving one installation more than one daily use. That versatility can make the improvement feel worthwhile to the current owner and attractive to a future buyer who has similar priorities.

When can a swim spa be the stronger lifestyle investment?

A swim spa may make more sense when the property has limited usable yard space. Or when the household expects to use the water feature throughout the year rather than mainly during summer. Its smaller water volume and compact design can reduce the physical demands of the installation compared with a full pool. The system can be configured above ground, partially recessed, or inground. Allowing the surrounding landscape to be designed around the home instead of giving the entire yard to one large basin.

That versatility matters in resale discussions, but it should not be overstated. Buyers do not all value the same features. A prospective owner who wants a dedicated workout environment or a place to unwind may see the swim spa as an advantage. Someone planning frequent family gatherings may prefer the open layout of a traditional pool. A swim spa’s value is strongest when its placement, access, privacy, and finish feel intentional rather than like an afterthought added to the yard.

When does a full swimming pool offer broader family appeal?

A full pool generally offers more room for multiple swimmers, lap swimming, and larger parties. Its large, contiguous surface also gives children space for water games that a compact swim spa cannot match. For households that picture weekends around poolside entertaining, that capacity can outweigh the swim spa’s lower space requirements and potentially lower investment.

The choice also affects the surrounding property. A pool project may include a substantial patio, deck, fencing, and other landscape improvements, creating a complete outdoor living area. Those additions can influence how buyers experience the backyard, although the return depends on workmanship, maintenance, neighborhood expectations, and whether the design fits the home. Long Island owners should evaluate the full project rather than treating the vessel itself as the only source of value.

Ultimately, choose the aquatic feature that serves the people who will use it most. A swim spa is compelling for compact, flexible wellness use. A pool is stronger for shared recreation and entertaining. A careful design review can compare both options against the home’s layout, the family’s routines, and the expectations of the local market.

Which Choice Is Right for Your Long Island Home?

The right installation starts with how you expect to use it, not with a generic answer about which option is better. A swim spa can be a strong fit when your priorities are frequent exercise, compact placement, warm-water relaxation, and more flexible installation. A full swimming pool may be the better choice when your household wants open water for recreation, long swims, children’s play, and larger gatherings.

Think about the activity that will happen most often. Swim spas use adjustable water currents, allowing swimmers to set resistance to match their ability and fitness goals. That makes them practical for steady swim training, water exercise, and repeatable workouts without requiring a full-length pool. Many models also include hydrotherapy jets, combining a swim-training area with massage-style relaxation similar to a hot tub. If you want aquatic exercise before work and warm-water recovery afterward, that combination may carry more value than a larger pool footprint.

Choose a swim spa when daily use matters most

A swim spa generally makes sense for homeowners who want to use the water throughout the year. Have a tighter yard, or prefer a focused wellness feature over a broad entertaining area. Its placement can be planned as inground, above-ground, or partially recessed, depending on the property and landscape plan. That flexibility can help the installation work with an existing patio, grade change, or limited outdoor area.

It is also worth considering the people who will use it. A couple focused on fitness, a homeowner seeking hydrotherapy, or a family that values structured exercise may use a swim spa more consistently than a large pool. The best decision is not simply the option with the lower estimated swim spa cost. It is the option that will earn regular use and support the way your household lives.

Choose a full pool when space and shared recreation lead the plan

A full pool is usually the stronger match when the backyard is intended for broad recreation. It gives swimmers room for open-water play, traditional laps, floating, and poolside gatherings. Families with children or homeowners who regularly host guests may value that larger social and activity area more than adjustable-current training or built-in hydrotherapy.

Long Island conditions should be part of that decision. Soil conditions, local zoning requirements, access, drainage, and the surrounding landscape can affect the design and construction process. Before settling on a shape or location, review the gunite and vinyl pool options and consider how each approach fits your property, intended use, and long-term plans.

Gappsi can take the project from initial design and permitting through construction for both pools and swim spas. That full-service process helps connect the practical choice to the details that determine whether the finished installation works well on your property. For a site-specific recommendation based on your yard and priorities, contact Gappsi before making a final commitment.

Still comparing swim spa and swimming pool options for your Long Island property? Call Gappsi at (631) 831-3177 to discuss your project.

Frequently Asked Questions

How much does a swim spa cost compared to a swimming pool?

Many high-performance swim spas cost about $30,000 to $60,000, while Gappsi’s published Long Island baseline for a gunite swimming pool is $90,000 to $140,000. Final pricing depends on the unit, excavation, utility work, decking, permits, and site conditions. Review the swim spa cost guide for additional planning context.

What are the hidden costs of owning a swim spa?

Budget for electrical work, water treatment, replacement filters, routine service, heating, and any platform, enclosure, or landscape work. Energy use varies with insulation, cover quality, set temperature, weather, and how often the spa is used. So an installation quote should separate the unit from site and operating costs.

Is a swim spa cheaper to maintain than a pool?

Usually, yes. A swim spa holds less water, which generally reduces chemical treatment and cleaning demands. And its smaller water volume typically takes less energy to heat than a full-sized pool. One published comparison estimates monthly use costs of $90 to $123 for a swim spa and $480 to $613 for a small inground pool over 25 years: see the comparison assumptions.

Does a swim spa increase home value like a swimming pool?

Not necessarily. A full inground pool can appeal more to buyers who want space for recreation, children, or entertaining. While a swim spa may be more practical for homeowners prioritizing fitness, hydrotherapy, compact placement, or four-season use. The better choice depends on how your household will use the backyard and how well the installation fits the property.

Deciding between a swim spa and a full swimming pool comes down to how you want to use your backyard. The space you have, and the costs you are comfortable carrying over time. A compact swim spa can support fitness and hydrotherapy while keeping installation and ongoing expenses lower. And a traditional pool offers more room for swimming, water games, and gatherings on Long Island summer days.

Gappsi has designed and built outdoor living spaces across Nassau and Suffolk Counties for decades. A Gappsi consultation covers design, permitting, excavation, materials, and the finished patio or deck that completes the project, so you can compare options against a realistic site-specific picture.

Call Gappsi at (631) 831-3177 today to discuss your swim spa or pool project.

Share this page:
Lush artificial grass lawn beside a natural bluestone paver patio on a Long Island backyard

Artificial Grass Installation Cost on Long Island Guide

Artificial turf can keep a Long Island yard green through changing weather, but the installation price depends on far more than the roll of grass. The condition of the existing lawn, the slope of the property, drainage needs, equipment access, and the intended use of the space all shape the final scope. Homeowners in Nassau and Suffolk Counties who budget only for the turf material often underestimate the base work that sits beneath the finished surface.

Call Gappsi Group at (631) 831-3177 for a free consultation and a site-specific artificial grass installation quote tailored to your property.

As a starting point, artificial grass installation cost in the United States averages about $8 to $12 per square foot. A Long Island project may move above or below that range based on excavation, grading, drainage, turf selection, and infill. A site-specific estimate is the reliable way to plan the budget because it accounts for the individual conditions of your yard rather than a blanket per-foot price.

For homeowners in Nassau and Suffolk Counties, the most useful comparison is not simply one contractor’s price per square foot. It is what the proposal includes and how the installation is engineered to handle the property. Understanding those cost drivers makes it easier to compare options and avoid paying twice for preventable drainage or base-work problems. The sections below break down turf pricing, base preparation, drainage and pet-friendly choices, long-term maintenance, and the DIY-versus-professional decision so you can plan a realistic budget.

What Drives Artificial Grass Installation Cost on Long Island

The final artificial grass installation cost for a Long Island property depends on the conditions beneath and around the turf, not only on the roll of grass selected. A straightforward replacement over a level, prepared surface requires less work than a yard with compacted soil, uneven grades, poor drainage, or established sod. For homeowners in Nassau and Suffolk Counties, an accurate estimate should account for the full installation system and the specific demands of the site.

How does yard size affect the estimate?

Contractors measure the usable lawn area in square feet before calculating materials and labor. A larger yard requires more turf, base aggregate, infill, seams, edging, and hauling. Smaller or irregularly shaped areas can also require careful cutting and produce more material waste. Curved borders, planting beds, walkways, patios. And multiple turf sections add layout time because the installation must be fitted around existing features rather than rolled out as one rectangle.

Why does existing sod removal matter?

Natural grass usually cannot remain beneath a synthetic lawn. Site preparation commonly includes removing the existing sod, excavating to the required depth, and installing a stable drainage base. The amount of labor and disposal involved depends on how much lawn must be removed. How compacted the soil is, and whether roots, rocks, old edging, or other debris are present. Proper base preparation is critical to turf longevity because it creates the support layer beneath the finished surface.

What do excavation, grading, and drainage add?

Changes in elevation are a major cost variable. Grading creates the slope needed to direct water away from the home and prevents low spots from developing under the turf. If the existing ground is uneven, additional excavation, fill, compaction, or retaining work may be needed. Drainage improvements may include correcting the base, adding drainage materials, or addressing areas where water tends to collect. Proper site drainage helps prevent pooling, which protects the turf system and the surrounding landscape.

Long Island soil and climate conditions make this evaluation especially important. A professional installation should be tailored to local soil types, slope, and expected weather so the base remains stable over time. These factors can vary between properties in Nassau and Suffolk, even when the lawns appear similar from the street. Material grade also changes the estimate. Turf varies in fiber construction, density, color, backing, and intended use. So the appropriate product depends on whether the area is a front lawn, play space, pet area, or another application. Comparing quotes is most useful when each one clearly separates turf, site preparation, grading, drainage, installation, and infill.

Artificial Grass Cost per Square Foot: What to Expect

For planning purposes, artificial grass installation cost commonly falls around $8 to $12 per square foot in the United States, according to industry pricing data from Gitnux. That range is a starting point, not a guaranteed Long Island quote. The final number depends on the turf construction, the intended use, the size and shape of the area, and the preparation required below the surface.

The table below separates the turf material ranges most homeowners encounter. It is useful for comparing products, but it does not represent a complete installed price. Excavation, base stone, drainage work, edging, seams, labor, and infill may be quoted separately or included in a project total.

Artificial grass material cost ranges by turf grade
Turf Grade Cost per Sq Ft Best For
Lawn standard $4 to $8 General lawns, play areas, and dog runs
Mid-tier turf $4 to $7 Everyday residential use with a fuller appearance
Premium-grade turf $7 to $10+ Higher-use lawns and projects needing denser fibers
Putting green or specialty turf $8.50 to $12.50 Putting greens and purpose-built recreational areas

These material bands are consistent with published comparisons. A NexGen Lawns calculator places lawn or dog grass at approximately $4 to $8 per square foot and putting green installations at $8.50 to $12.50. Another pricing breakdown lists mid-tier turf at $4 to $7 and higher-grade turf at $7 to $10 or more. Those figures help explain why two products that look similar in a small sample can produce different estimates once the entire yard is measured.

Close-up of natural-looking artificial grass turf with infill granules

Material selection should follow the way you use the space. A lawn that receives occasional foot traffic may not need the same fiber density or backing as a busy dog area. A putting green also requires a different surface specification and installation approach than a landscape lawn. Infill helps stabilize the turf, adds ballast, and keeps fibers upright, so it is part of the system rather than a cosmetic extra. The right product also has to work with the planned drainage and base.

For a realistic project budget, compare the complete scope instead of multiplying the turf price by square footage alone. On Long Island, a professional installer should account for existing sod, soil conditions, grading, drainage, transitions, and the finished edge. Ask whether each item is included in the proposal, then compare warranties, installation details, and materials on equal terms. That approach gives you a clearer view of the true artificial grass installation cost before work begins.

Call (631) 831-3177 to review your projected square footage and get a detailed, site-specific estimate from Gappsi Group.

Site Prep and Base Work: The Hidden Cost of Artificial Grass

The visible turf is only one part of an installation. Beneath it, the crew must create a stable, well-draining surface that can handle rain, foot traffic, and seasonal changes. That preparation is why two projects with similar square footage can have very different totals when homeowners compare artificial grass installation cost.

On Long Island, the first step may be removing existing sod, roots, and organic soil. Leaving that material beneath synthetic turf can create an unstable layer as it settles or decomposes. Depending on the property, preparation can also require excavating to the correct depth, clearing construction debris, and hauling the removed material away. These tasks add labor and disposal costs before the turf is ever unrolled.

Why excavation and grading matter

A level-looking yard is not always ready for turf. The subgrade must be shaped so water moves away from the home, retaining walls, patios, and other structures rather than collecting beneath the lawn. Proper grading is especially important on properties with existing low spots, transitions between hardscape and planting areas, or slopes that direct runoff toward the house.

Long Island soil and weather conditions make this assessment more than a cosmetic step. Local soil characteristics affect how quickly water moves through the site, while heavy rain and freeze-thaw cycles can expose weak areas. A base designed without those conditions in mind may settle unevenly or leave water pooling under the turf. Gappsi notes that understanding local soil and climate is important for base longevity and drainage performance across Nassau and Suffolk Counties.

What does the compacted base add to the project?

After excavation and grading, installers typically place crushed stone or gravel to form a compacted stone base. The material is spread in lifts, moistened as needed, and compacted into a firm layer. This base supports the turf system, helps maintain the finished grade, and creates a path for water to move through the installation. Proper drainage is essential because standing water can lead to soft spots, odors, and premature wear.

Base preparation commonly adds about $1.50 to $3.00 per square foot, depending on the existing site, depth required, access, disposal needs, and drainage corrections. That range is an allowance for the work, not a universal price. A small yard with clean, accessible soil may need less preparation than a larger property with compacted ground, buried debris, poor slope, or a failed existing lawn.

When reviewing a proposal, ask whether sod removal, excavation, grading, disposal, drainage, and compaction are included. A detailed scope makes the quote easier to compare and helps prevent a low initial price from becoming a series of added charges. Professional synthetic turf installation services should address the base as carefully as the turf selected for the surface.

Drainage, Infill, and Pet-Friendly Artificial Grass Options

A turf system performs best when the layers beneath the blades are designed for the site. On Long Island, that means treating drainage as part of the installation rather than an afterthought. Soil, slope, and local weather conditions can affect how quickly water moves through the area, so the base and drainage design should be planned together.

How does the drainage layer prevent pooling?

After the existing lawn is removed and the area is excavated, the installer can build a compacted base that allows water to move away from the surface. A drainage layer may include a perforated material or planned gaps that give water a path through the turf system. The goal is to prevent water from sitting below the backing or collecting in low spots. Proper site drainage is essential because pooling can create odors, soft areas, and premature wear. It is also one reason local soil conditions matter when evaluating an artificial grass installation cost. A simple, well-draining site may need less corrective work than an area with poor grading or slow-draining soil.

Drainage details should also account for nearby patios, planting beds, downspouts, and walkways. A professional assessment can identify where runoff is likely to collect and tailor the base to the slope and drainage requirements. Gappsi serves Nassau and Suffolk Counties, where familiarity with local site conditions helps support a durable base.

What does infill do for artificial grass?

Infill is spread between the turf fibers after the grass is secured. Materials such as silica sand and rubber add ballast, stabilize the surface, and help keep the fibers upright. Infill also gives the turf a more natural feel underfoot instead of leaving the blades unsupported and flat. The correct material and application depend on how the area will be used, including whether it is a lawn, play space, or pet area.

For homes with dogs, consider a pet-focused turf system paired with a sanitary infill designed to support cleaning and odor control. These options can make routine maintenance easier, but they do not eliminate the need to remove solid waste and rinse the surface as needed. Homeowners comparing artificial grass for pets should review drainage, backing, infill, and cleaning requirements together rather than choosing by blade appearance alone.

Artificial grass can provide a consistent surface without watering or mowing, while the right drainage and infill details help preserve that performance. Ask for an installation plan that explains the base, water path, infill material, and maintenance approach before comparing quotes.

How Much Do Artificial Grass Maintenance Costs Run?

One of the clearest differences between artificial grass and a natural lawn appears after installation. Synthetic turf does not need regular watering, mowing, or fertilization, so the ongoing work is limited to basic cleaning and occasional grooming. Industry estimates place annual maintenance for artificial grass at roughly $0.10 to $0.20 per square foot. That estimate gives Long Island homeowners a useful starting point when comparing the full cost of an artificial grass installation with the recurring cost of caring for living grass.

For a 500-square-foot area, that range equals approximately $50 to $100 per year for routine maintenance. A larger 1,000-square-foot lawn would be about $100 to $200 annually. Actual upkeep depends on how the space is used, the amount of debris it receives, and whether pets regularly use the turf. Removing leaves, rinsing dust or residue, brushing high-traffic areas, and addressing spills promptly can help the surface remain clean and comfortable.

Where do the savings come from?

Natural lawns bring several repeating expenses. Watering adds to utility costs, particularly during dry summer periods. Mowing requires equipment, fuel, service, or a landscaping crew. Fertilizer, weed control, reseeding, and repairs for bare or muddy areas add more over time. Artificial grass removes those routine lawn-care categories from the maintenance budget. It also helps conserve water, which is an important consideration for homeowners who want to reduce their outdoor water use. Available industry research identifies water reduction as a major benefit of synthetic turf systems.

The surface stays green through every season without the uneven growth, bare spots, and mud that can develop on natural grass. That consistency can reduce both maintenance spending and the time a homeowner gives to lawn care. The installation still needs to be done correctly, however. Proper grading, drainage, a stable base, secure seams, and suitable infill help prevent avoidable repairs. Gappsi’s synthetic turf installation services account for those site conditions during planning and construction.

How should homeowners measure the return?

Evaluate the project across an eight- to twelve-year planning period rather than looking only at the initial artificial grass installation cost. Add the expected annual maintenance, then compare it with the cumulative cost of water, mowing, fertilizer, seasonal repairs, and your own time for a natural lawn. The difference shows the potential return on investment over the life of the project. A professionally installed system may also continue providing a usable, attractive surface throughout the year, giving the savings a practical benefit beyond the spreadsheet.

DIY vs Professional Artificial Grass Installation: Which Saves More?

DIY artificial grass installation can look less expensive at first. For a straightforward lawn, material and basic installation costs may run about $4 to $8 per square foot. That figure does not automatically include every step required for a stable turf system, however. Removing sod, excavating to the right depth, building a compacted drainage base, joining seams, securing the edges, and applying infill all affect the finished result. A homeowner who skips one of those steps may save on the initial invoice while creating a larger repair expense later.

Professional installation costs more upfront because the work addresses the entire site, not only the visible turf. Proper grading and drainage help prevent water pooling, while accurate cuts and seam work reduce visible joins and premature wear. Those details are particularly important on Long Island, where local soil and climate conditions can affect base stability and drainage. Gappsi’s guidance emphasizes durability, proper grading, and site preparation as part of a complete installation.

  • DIY may make sense when: the area is small, accessible, relatively flat, and the homeowner has the tools and time to complete excavation, base compaction, cutting, seaming, and infill application correctly.
  • Professional installation is usually the safer choice when: the site has a slope, drainage concerns, compacted soil, multiple turf areas, curved edges, pets, or transitions to patios and walkways.
  • The overlooked DIY costs include: equipment rental, disposal of excavated material, replacement turf after cutting errors, additional base material, seam repairs, and time spent correcting an uneven surface.
  • The professional value includes: a properly prepared base, secured edges, consistent seams, suitable drainage, and installation methods designed to support a longer service life.

Pet-friendly synthetic grass backyard with a dog playing on the lawn

For pet areas, drainage and infill deserve additional attention. Infill helps stabilize the turf, keep fibers upright, and improve comfort underfoot. Poor drainage can leave odors, standing water, or muddy edges around the installation. These problems are difficult to correct after turf has been glued and secured. So the cheapest path is not always the lowest artificial grass installation cost over the life of the project.

Professional installation can also be more cost-effective when the comparison includes reduced watering, mowing, and fertilization expenses. Synthetic turf requires far less annual maintenance than a natural lawn, with estimated maintenance costs of roughly $0.10 to $0.20 per square foot. The right decision depends on the site, but a careful installation protects the materials and helps the system deliver its expected durability. Review how to lay artificial turf before deciding whether your project is suitable for DIY work.

Is Artificial Grass Worth the Investment for Your Home?

The right artificial grass project is more than a lawn replacement. It can create a consistent, usable outdoor area for entertaining, pets, and everyday family time while reducing the recurring work associated with mowing, watering, and fertilizing. That combination makes the investment easier to evaluate than the installation price alone.

Professional turf installation can also support property value by improving the appearance and function of an outdoor space. A neat, low-maintenance lawn is especially useful when it is designed as part of a larger plan rather than installed as an isolated rectangle. Gappsi’s project guidance identifies attractive, functional outdoor entertainment areas as a potential benefit of professional turf installation. The result depends on the property, design, and workmanship, so artificial grass should not be treated as a guaranteed return.

Where does the long-term value come from?

Durability and predictable upkeep are central to the cost-benefit calculation. A properly built turf system includes the appropriate base, secure edges, drainage, and infill. These details help reduce problems such as visible seams, premature wear, and water pooling. Artificial grass also eliminates routine mowing and can reduce water use, while annual maintenance is generally limited to cleaning and occasional care. Industry research estimates synthetic turf maintenance at approximately $0.10 to $0.20 per square foot annually, although actual costs vary by use and site conditions.

Long Island homeowners should also account for the value of correct site preparation. Local soil, slopes, and drainage conditions affect how well the base performs over time. Paying for a plan that addresses those conditions can be more cost-effective than choosing the lowest initial bid and later correcting settlement, runoff, or drainage failures.

How can turf improve the whole outdoor layout?

Turf becomes more valuable when it works with the rest of the property. It can transition cleanly into landscape design, patios, walkways, planting beds, and outdoor structures. Curved edges and coordinated materials may add design complexity, but they can produce a more natural connection between the lawn and entertainment areas. Gappsi’s complete outdoor transformation model brings planning, material supply, and construction together under one provider, which can simplify coordination across those elements.

Gappsi also uses 3D design visualization before construction so homeowners can review the proposed layout, transitions, and usable areas in advance. This helps clarify what the artificial grass installation cost includes and reduces surprises during construction. Serving Nassau and Suffolk Counties, Gappsi can evaluate the specific site before recommending a turf system. Visit the Gappsi homepage to review the broader design-build approach and decide whether artificial grass fits your property’s long-term goals.

Gappsi’s team can review your site, layout, and drainage before you commit to a turf system, so you understand exactly what the artificial grass installation cost includes.

Call Gappsi Group at (631) 831-3177 for a free consultation

Frequently Asked Questions

How much does it cost to have an artificial lawn installed?

Artificial grass installation cost depends on the turf system, square footage, site access, excavation, grading, drainage, infill, and design details. A broad U.S. reference range is $8 to $12 per square foot, but a Long Island project may fall outside that range when the existing lawn needs substantial base work. A site evaluation provides a more useful estimate than a material-only price. Industry pricing reference.

How much is 1,000 square feet of artificial grass?

Using the broad $8 to $12 per-square-foot reference, 1,000 square feet would represent approximately $8,000 to $12,000 before project-specific adjustments. The final quote should account for sod removal, excavation, drainage, edge restraints, seams, infill, labor, and disposal, not just the rolls of turf.

What factors influence artificial grass installation cost on Long Island?

The largest variables are the condition of the existing lawn, the amount of excavation and grading required. Drainage needs, turf selection, project shape, access for equipment, and integration with pavers or planting beds. Long Island soil and weather conditions also make a properly designed base and drainage plan important for long-term performance.

Is professional artificial grass installation worth the cost?

Professional installation can be worthwhile when durability, drainage, and a clean finish matter. The work includes preparing the base, securing and tensioning the turf, managing seams, and adding infill. These steps help reduce pooling, visible seams, wrinkles, and premature wear, issues that can make a low initial price more expensive to correct later.

Ready to Plan Your Artificial Grass Installation?

A site-specific review can help you choose the right turf, base preparation, and drainage approach for your Long Island property. Gappsi’s team can discuss your project, answer your questions, and prepare a free consultation and artificial grass installation quote.

Call Gappsi Group at (631) 831-3177 to get started

Share this page:
A realistic crystal-clear inground vinyl liner pool with a natural stone patio in a landscaped Long Island backyard

What Does a Vinyl Pool Cost on Long Island?

Planning an inground pool on Long Island starts with a realistic budget, not a catalog price. The final number depends on the pool’s dimensions, depth, shape, excavation, access, equipment, decking, drainage, and the structure supporting the liner. A careful estimate should also account for future liner replacement and routine water care.

Call Gappsi at (631) 831-3177 for a pool consultation and free quote.

For many Long Island homeowners, a vinyl pool cost of roughly $40,000 to $70,000 upfront is a useful planning range. Liners commonly require replacement at about $5,000 to $7,500 every 8 to 10 years, so the lowest initial bid is not always the lowest long-term cost.

Gappsi handles the design-build process, including the underlying concrete work for vinyl liners. That makes it easier to evaluate the complete project rather than comparing liner prices alone. The next step is to examine what a typical Long Island installation includes and why two pools with similar dimensions can have very different totals.

What Is the Average Vinyl Pool Cost on Long Island?

For a typical Long Island installation, a realistic vinyl pool cost is often about $40,000 to $70,000, including the pool installation. That range is consistent with published vinyl pool pricing from Leisure Pools USA, while other industry estimates place basic vinyl liner pools between $25,000 and $65,000. Broader installation estimates can reach $45,000 to $100,000 when the project includes more complex site work, upgraded equipment, difficult access, or extensive surrounding construction. Sources: Leisure Pools USA, Thursday Pools, and River Pools.

That makes vinyl the lowest-upfront-cost option among the three common inground pool types, ahead of fiberglass and concrete in many projects. Gappsi’s customer guidance identifies vinyl liner pools as a cost-effective choice for many Long Island homeowners. The important distinction is that the lowest initial quote is not automatically the best value. The pool shell, wall construction, excavation, circulation equipment, coping, steps, permits, and site conditions all affect what you receive for the price.

What would a 20×40 vinyl pool cost?

A 20×40-foot pool covers roughly 800 square feet of water surface, making it a useful example for comparing estimates. A project of this size may fall within the $40,000 to $70,000 installed range. But the final proposal can move higher or lower based on depth, shape, access for excavation equipment, soil conditions, and the selected finishes. A simple rectangular design with straightforward access generally has fewer construction complications than a pool with multiple elevations, specialty steps, retaining walls, or extensive masonry.

When comparing proposals, ask whether each quote includes the same scope. Confirm the excavation, structural walls, liner, pump and filtration equipment, electrical work, coping, permits, startup service, and any required site restoration. Gappsi provides the underlying concrete work for vinyl liners as part of an integrated design-build service, which helps keep the structural and finish decisions coordinated. Review custom vinyl pool designs before choosing a layout, then compare complete scopes rather than headline prices alone.

What Factors Drive the Price of a Vinyl Liner Pool?

A 20×40 pool is a useful reference point, but its dimensions do not determine the entire estimate. The final vinyl pool cost reflects the amount of excavation, structural work, equipment, finish materials, and site preparation required for that specific property. Two Long Island homes can choose the same pool size and receive very different project totals.

Working with an experienced Long Island vinyl pool builder helps you compare those project totals on scope rather than a single line price.

How do size, depth, and shape change the estimate?

Pool size and surface area affect excavation, wall materials, liner dimensions, plumbing, coping, and the amount of water the equipment must circulate. A 20×40 pool generally requires more of each than a smaller rectangle. Depth adds cost as well because a deeper basin means more soil removal, taller walls, additional structural considerations, and potentially larger circulation equipment.

Shape also matters. A straightforward rectangle is usually simpler to lay out, excavate, reinforce, and fit with a liner. Freeform designs can require more detailed engineering and additional liner seams, corners, steps, benches, or specialty features. Those design choices can be worthwhile, but they should be priced as part of the initial plan rather than treated as minor additions.

What site and structural conditions affect vinyl pool cost?

Excavation and site conditions can shift the budget quickly. Tight access for machinery, difficult soil, groundwater, buried utilities, rock, drainage requirements, and the need to remove excess soil all influence labor and disposal. A property with easy equipment access may require less site work than a similar pool behind a narrow home or through a constrained side yard.

The wall build type is another important decision. Steel, concrete, and other structural systems have different material and labor requirements. The wall supports the liner, so the lowest initial bid is not automatically the best value. Gappsi performs the underlying concrete work for vinyl liner pools and manages the project through an integrated design-build process, reducing the need to coordinate separate contractors.

How does finishing change the total?

Finishing choices include coping, steps, benches, lighting, automation, decking, drainage, fencing, and landscaping. These features can represent a substantial portion of the completed project. For context, Long Island gunite pools run roughly $90,000 to $140,000 at baseline, while fiberglass pools commonly fall around $55,000 to $100,000. Vinyl is generally lower for a comparable size, but a detailed site-specific plan is still necessary to explain the difference.

Why Concrete Wall Builds Matter for a Vinyl Liner Pool

A vinyl liner is the visible interior surface, but the walls behind it carry the shape and pressure of the pool. That means the structure deserves as much attention as the liner pattern, steps, coping, and surrounding patio. When comparing vinyl pool cost, ask what wall system is included in the proposal, how it will perform on your property, and who is responsible for the underlying construction.

Wall materials affect installation requirements, long-term maintenance, and how easily the pool can be adapted to a challenging Long Island site. The right choice depends on the design, soil conditions, access, drainage plan, and scope of the project, not simply the lowest initial quote.

Reviewing Gappsi’s pool construction services shows how the concrete wall build and the liner installation are handled as one accountable scope of work.

Workers installing the liner and structure of an inground vinyl pool during construction in a Long Island backyard
Common wall systems for vinyl liner pools
Wall build Cost position Durability considerations Long Island suitability
Steel wall Often a lower-cost starting point, depending on engineering, excavation, and site work. Requires appropriate corrosion protection, drainage, and installation details. The complete assembly matters more than the panel material alone. Can suit many standard layouts when the site preparation and water management plan are properly executed.
Structural polymer wall May carry a different upfront cost than steel, based on the system and design. Resists certain moisture-related concerns, but performance still depends on correct bracing, backfill, and drainage. Useful for selected designs and site conditions when specified and installed by an experienced contractor.
Poured concrete wall Typically represents a more substantial structural investment. Highly customizable and capable of lasting for decades, often more than 50 years with proper maintenance, according to Latham Pool’s comparison of pool construction types. Well suited to customized shapes, reinforced structural work, and demanding site conditions when engineered and built correctly.

Concrete wall construction does not turn a vinyl liner pool into a gunite pool. Instead, it provides a robust, customizable structure beneath the replaceable liner. This approach can support unusual dimensions, integrated steps, benches, and design details that require more than a basic rectangular shell.

Gappsi handles the underlying concrete work for vinyl liners as part of its pool construction services. Its integrated, one-stop design-build model also reduces the need to coordinate separate contractors for related outdoor work. That accountability matters because excavation, wall construction, drainage, liner installation, and finish work must function as one system. A clear proposal should identify the wall build, structural scope, and site conditions before you compare the final project price.

How Much Does It Cost to Replace a Vinyl Pool Liner?

A vinyl liner is not a one-time purchase. It is a planned maintenance expense that should be included in the long-term vinyl pool cost from the beginning, especially for a larger pool such as a 20×40. Current industry estimates place replacement at approximately $5,000 to $7,500 every 8 to 10 years, according to Leisure Pools USA.

Other published estimates show a wider range. Thursday Pools lists replacement at roughly $3,000 to $7,500 every 5 to 15 years, while River Pools estimates approximately $5,000 to $8,000 every 5 to 9 years. These figures are useful planning ranges, not a fixed quote for every Long Island property.

What affects the replacement price?

The final cost depends on the pool’s size, shape, depth, liner pattern, wall condition, and access for the installation crew. A standard rectangular pool may have a different labor requirement from a freeform design with steps, benches, coves, or other fitted features. Before installing a new liner, the contractor should also inspect the structure and identify issues that could affect fit or performance.

Deciding between a vinyl liner and a concrete build is easier when you see how the full structure is assembled, including walls and coping.

For a 20×40 pool, replacement should be treated as a real budget line item rather than an unexpected repair. A lower initial installation price can still lead to avoidable expense if the liner is damaged early or the supporting structure is not properly prepared. Gappsi provides the underlying concrete work for vinyl liners as part of an integrated design-build service, helping keep the construction and replacement considerations connected.

Can maintenance extend liner life?

Yes. Proper maintenance can extend liner lifespan and reduce total ownership costs. Keeping the water clean, maintaining balanced chemistry, preventing algae and slime, and addressing small problems before they worsen all help protect the liner. Sun exposure, pool use, water conditions, and climate also influence how long the material lasts. Planning for replacement while maintaining the liner carefully gives Long Island homeowners a more accurate picture of the pool’s total cost over time.

What Does Long-Term Maintenance Cost for a Vinyl Pool?

Plan on approximately $1,000 to $2,000 per year for routine vinyl pool maintenance, based on the range reported by Thursday Pools. Your actual vinyl pool cost over time will depend on pool size, equipment, water conditions. How often the pool is used, and whether you handle routine care yourself or hire a service company. The annual figure generally reflects recurring water treatment, cleaning, inspections, and equipment care. It does not replace the need to budget separately for eventual liner replacement or larger repairs.

Water chemistry is the first line of liner care. Test the water regularly and adjust it before an imbalance becomes a surface or equipment problem. Guidance from the University of California, Riverside recommends keeping pH between 7.2 and 8.0, with a preferred range of 7.4 to 7.6 for protecting pool surfaces and equipment. The same guidance states that free chlorine residual without stabilizer should remain at 1.0 ppm or higher. See the complete pool water quality guidance for the supporting standards.

A maintained inground vinyl liner pool with clear blue water and a natural stone patio in a landscaped Long Island backyard

Routine cleaning also protects the liner. Remove debris, brush appropriate surfaces, empty baskets, and watch for slime or algae before buildup becomes difficult to correct. Avoid harsh cleaning methods that can damage the liner. Keeping the water clean and balanced helps reduce unnecessary chemical corrections, while regular filtration and equipment checks can identify small issues before they become expensive repairs.

Liner care has a direct effect on total ownership cost. Gappsi’s customer guidance emphasizes that proper maintenance and clean water conditions can extend liner life, which is a major part of the long-term budget. A neglected liner may require replacement sooner, while consistent care can help you get more useful years from the same installation. In practical terms, the annual maintenance budget should cover both everyday service and a reserve for future liner work.

When comparing estimates, ask what is included in ongoing service. A clear plan should identify water testing, chemical balancing, cleaning, filter care, equipment checks, and seasonal opening or closing. That detail gives you a more realistic view of the total cost of ownership than comparing installation prices alone.

How to Get the Best Value on a Long Island Vinyl Pool

The lowest bid is not always the lowest vinyl pool cost over the life of the project. A durable pool depends on the structure beneath the liner, accurate coordination between trades, and a realistic plan for future maintenance. Use these steps to compare proposals on value rather than price alone.

  1. Choose one accountable design-build team. Work with a contractor that can coordinate excavation, the concrete wall build, liner installation, coping, decking, and finishing as one project. Gappsi provides an integrated, one-stop design-build service, reducing the need for a homeowner to manage several separate contractors. Its pool construction services include the underlying concrete work for vinyl liners. Explore vinyl liner pool construction services before requesting proposals. When comparing contractors side by side, the service comparison in our best Long Island pool companies roundup is a practical starting point.
  2. Verify the wall construction before signing. Ask exactly what forms the pool walls, what reinforcement is included, and who is responsible for preparing the structure before the liner goes in. A proposal that lists only a liner and excavation may leave out the work that affects long-term durability. Request a written scope, material specifications, drainage details, and warranty responsibilities. Compare those details, not just the subtotal.
  3. Price the full ownership cycle. Include water care, equipment service, repairs, and eventual liner replacement in your planning. Published estimates commonly place liner replacement in the several-thousand-dollar range, with timing varying by liner quality, use, and maintenance. Proper liner care and clean water conditions can help extend its service life, making maintenance part of the value calculation rather than an afterthought.
  4. Prioritize durable construction and clear communication. A coordinated team should explain which choices affect the initial budget and which protect the pool over time. Review the finished design, access requirements, schedule, allowances, and change-order process together. Then compare the complete scope with your intended use and budget. Call Gappsi at (631) 831-3177 to discuss your Long Island vinyl pool project.

Explore Gappsi vinyl pool construction services, from concrete wall builds to liner installation.

Frequently Asked Questions

How much does it cost to put in a vinyl pool?

On Long Island, a typical vinyl liner pool project often falls in the $40,000 to $70,000 range before unusual site conditions, extensive hardscaping, or special features. Published industry estimates vary from about $25,000 to $65,000 for basic installations and $45,000 to $100,000 for broader installation scopes. So the design and inclusions behind each quote matter. Industry comparison data supports the $40,000 to $70,000 range.

Can I get an inground pool for $30,000?

A basic pool package may approach that figure, but a complete Long Island installation at $30,000 is unlikely once excavation. Structural work, equipment, permits, coping, decking, and site access are included. Request an itemized proposal so you can distinguish the pool shell and liner from the surrounding work that makes the project usable.

Is a vinyl pool cheaper than concrete?

Vinyl usually has a lower initial installation cost than concrete, but the comparison should include liner replacement and maintenance over time. Long Island gunite pools commonly run about $90,000 to $140,000 as a baseline on Gappsi’s published site, while a vinyl pool generally requires a future liner replacement. The best choice depends on the design, structure, and ownership horizon.

How much does it cost to replace a vinyl pool liner?

Replacement commonly costs about $5,000 to $8,000, depending on pool size, liner pattern, site access, and labor. Liners often last roughly 5 to 9 years, although water chemistry, sunlight, cleaning practices, and use can change that timeline. River Pools reports these replacement and lifespan ranges.

Ready to Plan Your Vinyl Liner Pool?

A realistic estimate starts with your backyard, pool dimensions, site conditions, and the construction details that affect long-term value. Gappsi can help you review those factors and plan a vinyl liner pool that fits your Long Island property and goals. Reach out through our contact page or Call Gappsi at (631) 831-3177 to schedule a consultation and get a realistic vinyl pool cost estimate.

Share this page:
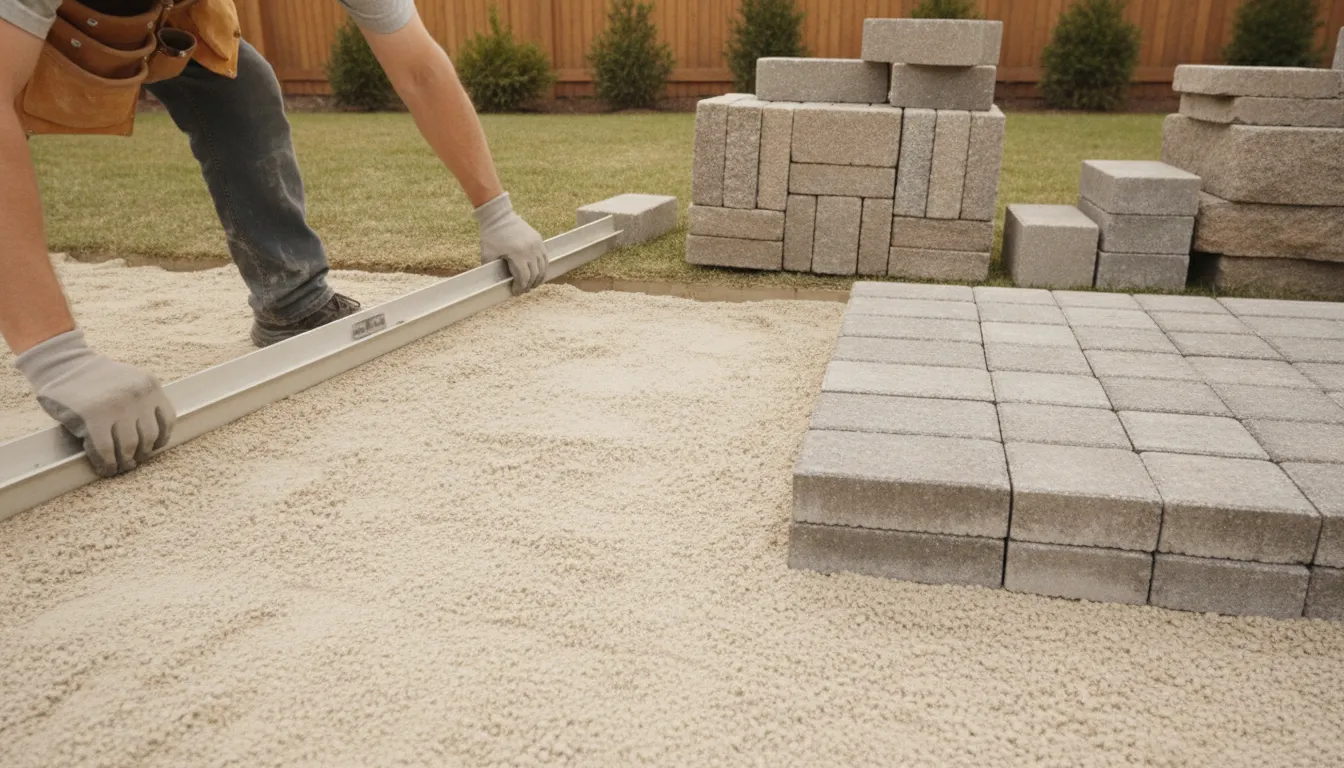
Laying concrete blocks to build a retaining wall on a level gravel base.

How to Build a Retaining Wall with Blocks: A DIY Guide

A sloped yard can feel like a wasted opportunity, a tricky incline that’s difficult to mow and even harder to enjoy. A retaining wall is the perfect solution, transforming that challenging grade into beautiful, usable space for a garden, patio, or play area. This guide will walk you through how to build a retaining wall with blocks, covering everything from planning and site prep to the final capstone. We’ll focus on the critical steps, like creating a solid foundation and managing drainage, that ensure your wall is built to last. Understanding these fundamentals is key, whether you plan to tackle the project yourself or want to know what to expect when working with our expert masonry team.

Key Takeaways

  • Focus on a flawless first row: Your entire wall’s stability depends on the base course. Make sure to bury the first row of blocks partially and use a level on each one, both front to back and side to side, to create a perfect foundation.
  • Create a path for water to escape: Heavy, waterlogged soil is a wall’s worst enemy. Protect your investment by installing a perforated drainage pipe and backfilling with at least a foot of clean gravel to relieve pressure and prevent collapse.
  • Know when to call a professional: Always check local building codes before starting your project. If your wall is over three feet tall, built on a steep slope, or involves a complex design, hiring an expert is the best way to guarantee a safe and durable structure.

Plan Your Retaining Wall Project

A successful retaining wall starts long before you lay the first block. Proper planning is the most important step to ensure your wall is strong, beautiful, and built to last. Taking the time to choose the right materials, understand your site, and check local rules will save you from headaches down the road. Think of this phase as creating the blueprint for your project. It’s where you make the key decisions that will define the look and function of your new landscape feature.

Choose the Right Blocks

The blocks you choose are about more than just strength, they define the style of your wall. Block retaining walls come in a huge variety of colors, textures, and patterns, making it easy to find a look that complements your garden and home. Do you want a rustic, natural feel or something more modern and sleek? Consider the existing materials in your landscape. Matching your wall to your patio pavers or home’s stone veneer can create a cohesive, professionally designed look. Our Gappsi team can show you a wide range of porcelain and natural stone options to help you find the perfect match for your vision.

Concrete vs. Interlocking vs. Natural Stone

Your wall’s height and purpose will help you decide on the best material. Interlocking concrete blocks are a popular choice for DIY projects because they are engineered to fit together securely. For shorter walls, typically under three feet, these are a great option. If your design calls for a taller structure, you’ll need to consider structural blocks or even poured concrete, which often requires a professional. While you might be able to install a short concrete block wall yourself, taller and more complex projects should be handled by an expert masonry construction company to ensure they are engineered for safety and longevity.

Gather Your Materials and Tools

Before you start digging, make sure you have everything you need. A typical project requires the retaining wall blocks, capstones for a finished top, and construction adhesive to secure them. You will also need materials for the foundation and drainage, including gravel and a perforated drainage pipe. For tools, you’ll want a sturdy shovel, a wheelbarrow, a tape measure, a string line, a level, and a hand tamper or plate compactor to create a solid base. Having all your materials and tools ready on-site makes the entire building process go much more smoothly and helps you avoid interruptions.

Check Local Building Codes and Permits

This is a step you absolutely cannot skip. Many towns on Long Island require a permit for retaining walls, especially for any wall over three or four feet high. These building codes exist to ensure your wall is safe and won’t fail under pressure. A collapsing wall is a serious safety hazard and can cause major property damage. For any wall taller than four feet, you will likely need a licensed engineer to approve the design. We always recommend checking with your local building department in Suffolk or Nassau County before you begin. If it seems complicated, our team can help manage the entire process for you.

Prepare the Site for Your Wall

You’ve planned your project, and now it’s time to get your hands dirty. Site preparation is arguably the most important part of building a retaining wall that lasts. A little extra effort here prevents a lot of headaches later. Think of it as building the perfect foundation for your project. A strong start ensures your wall will stand straight and true for years, handling everything Long Island weather throws at it. This process involves marking your layout, digging a precise trench, and creating a solid base. It’s physical work, but seeing that clean, prepped space ready for your first row of blocks is incredibly satisfying.

Before you break ground, take a final look at your plan. Double-check your measurements and make sure you have all your tools ready to go. Proper preparation is about more than just digging; it’s about working smart to create a stable structure that enhances your property’s beauty and function. If you start digging and find the scope is bigger than you expected, or you run into unexpected pipes or roots, don’t panic. Remember that our team of masonry experts are always here to help guide you or take over if needed. Let’s walk through each step together.

Mark and Measure the Wall’s Location

First things first, let’s create a clear guide for your wall. Grab some wooden stakes and a string line. Hammer the stakes into the ground at both ends of where your wall will be, then run the string tightly between them. This simple line will be your best friend, keeping your trench and your wall perfectly straight. For curved walls, you can use a garden hose or marking paint to outline the shape on the ground. Take a step back and look at your outline from different angles. Does it look right? Making adjustments now is much easier than after you’ve started digging. This visual guide is essential for accuracy.

Dig the Trench to the Proper Depth

With your path marked, it’s time to start digging. Your goal is to create a trench for the base course of blocks. A good rule of thumb is to make the trench about twice as wide as your retaining wall blocks. For depth, you’ll want to dig deep enough to bury about half of your first block, plus space for a 4 to 6-inch gravel base. For most standard blocks, this means digging a trench about 8 to 12 inches deep. This ensures the base of your wall is locked firmly into the ground, giving it the stability it needs. The exact dimensions will depend on the natural stone or concrete blocks you’ve chosen, so always check their specifications.

Compact the Soil and Add a Gravel Base

Once your trench is dug, don’t just start laying blocks. You need to create a solid, level footing. First, use a hand tamper to compact the soil at the bottom of the trench until it’s firm. Next, add a layer of crushed stone or gravel, about 4 to 6 inches deep. This gravel base is critical for drainage and preventing the ground from shifting. Spread the gravel evenly and then compact it with the tamper until it’s tightly packed and, most importantly, perfectly level. Use a carpenter’s level to check it from side to side and front to back. Your entire wall depends on this first layer being flawless.

Understand How Soil Type Affects Stability

Here on Long Island, we have a mix of soil types, from sandy loam to denser clay. The type of soil in your yard plays a big role in your wall’s stability. Sandy soils drain well but can be less stable, while clay soils hold water and can create immense pressure when they freeze and thaw. If you dig your trench and find very soft, mucky, or loose soil, it’s best to remove it. Dig a little deeper and replace that unstable dirt with more compacted gravel. This creates a stronger footing for your wall to rest on. Understanding your specific ground conditions is a key part of a successful landscape design and construction project.

Lay the Foundation Row

This is it, the moment of truth. Laying the first row of blocks, also known as the foundation or base course, is the single most important step in building a retaining wall. Everything you do from here on out depends on getting this part right. A perfectly straight and level foundation row sets you up for a stable, strong wall that looks professionally built. Rushing this stage is a recipe for a crooked, unstable wall, so grab your level, take a deep breath, and let’s focus on creating a flawless base for your project.

Bury the First Row to the Correct Depth

To give your wall the stability it needs to stand strong for years, you must bury the first row of blocks partially below ground. This anchors the entire structure and prevents it from sliding forward under pressure. A good rule of thumb is to bury at least half of the first block. For example, if you’re using a standard 6-inch-tall block, your trench should be deep enough to bury at least 3 inches of it. This means your initial trench, including the gravel base, should be about 9 inches deep from the final grade. Getting this depth right is a non-negotiable part of building a lasting wall, and it’s a detail our masonry experts never overlook.

Level the Foundation for a Stable Base

Once your trench is ready, it’s time to place the first blocks. Your goal here is perfection. Each block must be perfectly level, both from side to side and from front to back. Use a torpedo level to check each block as you place it, and a longer 4-foot level across several blocks to ensure they are all aligned. If a block isn’t level, use a rubber mallet to gently tap it into the gravel base until it is. Any imperfection here will be magnified as you add more rows, resulting in a visibly crooked wall. Take your time, because as many installation guides will tell you, a flawless first course is the key to a beautiful finish.

Avoid Common First-Row Mistakes

The most common mistake DIYers make is underestimating how much time and patience the foundation row requires. It’s easy to get frustrated and want to move on, but rushing will derail your project. Don’t be surprised if getting the first few blocks perfectly level takes a while. Another pitfall is not following the manufacturer’s instructions for the specific blocks you’re using. Different systems, whether they are interlocking concrete or natural stone blocks, can have unique requirements for setup and alignment. Always read the guide that comes with your materials. Taking the time to get this first row right will save you from major headaches and a wobbly wall later on.

Manage Drainage Behind the Wall

Water is a retaining wall’s greatest enemy. When soil becomes saturated, it gets incredibly heavy and exerts immense force, known as hydrostatic pressure, against the back of your wall. Without a proper escape route, this pressure can cause a wall to bulge, crack, or even collapse. Creating a solid drainage plan is not just a good idea; it is the most critical step for ensuring your wall remains strong and stable for years to come. Think of it as building a hidden system that gives water an easy path to follow, guiding it away from your wall so it never has a chance to cause damage.

The following steps will show you how to create a complete drainage system using a perforated pipe, the right backfill material, and structural reinforcement. Taking the time to manage water correctly from the start will protect your investment and prevent future problems. Ignoring drainage can lead to significant damage, which is why our restoration and sealing services are often called to fix issues caused by poor water management. A little extra effort now will save you from major headaches down the road.

Install a Perforated Drainage Pipe

A perforated drainage pipe is your wall’s primary tool for collecting and redirecting water. This is a flexible or rigid pipe with small holes or slits designed to let water in. Place the pipe on the gravel base directly behind your first row of blocks. To keep it from getting clogged with silt and debris, it’s a great idea to cover the pipe with a fabric filter sock. This simple addition ensures water can flow freely for the life of the wall. The pipe should be laid with a slight downward slope, about an eighth of an inch per foot, to let gravity carry the water away. Make sure the end of the pipe, or the “daylight,” opens to a location where water can drain safely, like a downslope area or a dry well.

Backfill with Gravel for Proper Water Flow

The material you place directly behind your wall is crucial for effective drainage. Do not use the soil you excavated. Instead, you need to backfill with a layer of 3/4-inch clean, crushed gravel. This angular stone locks together to form a stable, porous mass that allows water to flow freely down to the drainage pipe at the base. This gravel zone should be at least 12 inches wide, creating a clear channel for water to travel without building up pressure against the wall blocks. At Gappsi, we rely on high-quality aggregates for everything from durable gravel driveways to solid foundations because we know proper materials are the key to lasting results.

Use Geogrid Reinforcement for Taller Walls

If your retaining wall will be taller than three to four feet, you must include geogrid reinforcement. Geogrid is a strong, synthetic mesh that stabilizes the soil behind the wall, effectively tying the wall structure into the earth it is holding back. This reinforcement is laid horizontally across the top of the blocks and extends several feet back into the gravel fill. As you add more courses to your wall, you will add more layers of geogrid according to the block manufacturer’s specifications. This step is essential for preventing taller walls from leaning or failing under pressure. For any wall of significant height, geogrid is a critical safety feature that our professional masonry team incorporates into every project.

Know Your Wall’s Height Limitations

Not all retaining wall blocks are created equal, and it’s important to know their limits before you start building. Smaller, solid concrete blocks sold at big-box stores are typically designed for simple garden walls under three feet tall. For anything higher, you will need to use larger, engineered interlocking blocks designed to handle greater structural loads. These systems are specifically designed for taller walls and often have their own requirements for setbacks and reinforcement. Pushing a block system beyond its engineered height limit is a recipe for failure. If your project involves a tall or complex wall, it is always best to consult with a professional to ensure it is designed and built safely.

Build and Finish Your Wall

With your foundation set and drainage in place, you’re ready for the most rewarding part: building the wall itself. As you stack the blocks, you’ll see your project come to life. This stage is all about precision and patience. Taking your time with each row ensures your wall will be strong, stable, and straight for years to come. Pay close attention to staggering the joints, keeping everything level, and finishing the top with care.

Stagger Joints in a Running Bond Pattern

As you begin your second row, avoid placing the blocks directly on top of the ones below so the seams line up. Instead, you’ll want to create a running bond pattern. This means staggering the joints on each new row, similar to a brick wall. The vertical seam of a block on an upper row should sit over the center of the block below it. This simple technique is crucial because it distributes pressure across the entire wall, making it significantly stronger and more stable. Many block systems are designed for this, and you may need to cut a block in half to start a new row correctly.

Check for Level and Setback as You Build

After you place each block, check that it’s level from front to back and side to side. A small mistake on a lower row will become a very noticeable problem by the time you reach the top. It’s also important to follow the manufacturer’s instructions for setback. Many retaining wall blocks are designed with a lip or pin system that creates a slight, consistent step back with each new course. This backward lean helps the wall resist pressure from the soil behind it. Our expert masonry team knows that consistent checks are the key to a professional-looking and structurally sound wall.

Apply Adhesive to Secure the Capstones

The capstones, or coping, are the flat blocks that create the finished top surface of your wall. They provide a polished look and protect the wall structure from water. Before you place them, make sure the top row of your wall is clean and completely dry. Apply a generous bead of concrete or masonry adhesive to the top of the wall blocks, then firmly press the capstones into place. This final step secures the entire structure, preventing the top blocks from shifting over time and giving your wall a beautiful, completed appearance.

Add Finishing Touches for a Polished Look

A retaining wall doesn’t have to be just a functional structure. Think of it as a new feature in your yard. You can integrate lighting into the wall for a beautiful evening glow or build in planters to create a tiered garden space. Consider planting cascading flowers or lush greenery behind the wall to soften its edges and blend it into the surrounding environment. A well-designed wall can completely transform a sloped yard into a multi-level outdoor living area. If you need ideas, our landscape design services can help you visualize how to best integrate your new wall into your property.

Know When to Call a Professional

While tackling a retaining wall yourself can be incredibly rewarding, some projects are best left to the pros. Knowing when to step back and call for help isn’t admitting defeat; it’s making a smart, informed decision to protect your investment and ensure your family’s safety. Complexities like wall height, challenging terrain, and local regulations can quickly turn a weekend project into a major headache with long-term consequences if not handled correctly. Think about the sheer weight of the soil your wall will hold back. A small miscalculation in the base or drainage can lead to bulging, cracking, or even a complete collapse down the road.

A professionally built wall is an asset that adds lasting value to your home. When you bring in an expert, you’re not just paying for labor. You’re investing in years of experience, technical knowledge, and the peace of mind that comes from knowing the job was done right. Our team has the expertise to design and build retaining walls that are both beautiful and structurally sound, handling every detail from start to finish. We ensure the final structure is built to last, giving you a functional and gorgeous addition to your landscape.

Signs Your Project Needs an Expert

It can be tough to gauge a project’s difficulty from the outset. Here are a few clear signs that your retaining wall requires a professional touch. If your planned wall is taller than three or four feet, it will need special reinforcement and possibly an engineer’s approval to handle the immense pressure behind it. Building on a steep slope or dealing with poor drainage also adds significant complexity. These situations require expert planning to prevent erosion and structural failure. Finally, if you have an intricate, multi-tiered, or curved design in mind, a professional can ensure the final result matches your vision without compromising stability.

The Benefits of Hiring a Masonry Pro

Hiring a professional mason offers benefits that go far beyond simply getting the wall built. An experienced team brings a level of craftsmanship that ensures your wall is not only strong but also visually stunning. We provide expert masonry construction that stands the test of time. Professionals also take the stress of logistics off your plate. We understand local building codes and will secure all the necessary permits for your project, saving you from potential fines or safety issues. Ultimately, hiring a pro guarantees a high-quality, durable, and compliant structure that enhances your landscape for years to come.

Related Articles

Frequently Asked Questions

How high can I build a retaining wall myself? Generally, most DIY-friendly block systems are designed for walls under three or four feet tall. Once you go higher than that, the project becomes much more complex. Taller walls must support an incredible amount of soil pressure, so they require professional engineering, specific reinforcement like geogrid, and almost always a building permit to ensure they are constructed safely.

Why is proper drainage so essential for a retaining wall? Water is the biggest threat to a retaining wall’s stability. When soil behind the wall gets saturated with rain, it becomes extremely heavy and pushes against the blocks with immense force. A proper drainage system, which includes a gravel backfill and a perforated pipe, gives that water an escape route. Without it, the pressure can build up and cause your wall to bulge, crack, or even collapse over time.

What makes the first row of blocks so important? The first row, or foundation course, sets the standard for the entire wall. It must be partially buried to anchor the structure and prevent it from sliding forward. More importantly, it has to be perfectly level. Any small error or tilt in this first row will become much more obvious as you build higher, resulting in a crooked, unstable wall. Taking your time here is the best thing you can do for your project.

How do I know when to call a professional for my wall project? You should consider hiring a professional if your wall will be taller than four feet, if you are building on a very steep slope, or if you notice the soil is extremely soft or mucky. Complex designs with deep curves or multiple tiers are also best handled by an expert. Calling a pro isn’t giving up; it’s a smart move to ensure the safety, longevity, and beauty of your investment.

How do I choose the right material for my wall? Your choice of material depends on your wall’s height and your home’s style. Interlocking concrete blocks are a fantastic, user-friendly option for shorter walls and come in many colors and textures. For a more unique or high-end look, natural stone offers timeless beauty. The best approach is to consider your existing landscape and home exterior, and choose a material that complements them to create a cohesive, polished look.

Share this page:
Modern red louvered roof pergola with adjustable slats shading a patio seating area.

Is a Louvered Roof Pergola Right for You?

If you live on Long Island, you know how quickly a perfect sunny day can turn into a washout. Planning a backyard barbecue or a quiet afternoon on the patio often feels like a gamble against the weather. A traditional pergola offers some shade, but it won’t save your gathering from a sudden downpour. This is where a louvered roof pergola completely changes the game. It gives you the power to control your environment with an adjustable roof that can switch from open slats to a solid, waterproof cover in seconds. It’s the ultimate upgrade for your outdoor space, ensuring you can enjoy your patio, deck, or pool area comfortably, no matter what the forecast says.

Key Takeaways

  • Get Full Control of Your Outdoor Space: A louvered roof gives you complete control over your outdoor environment. Instantly adjust the slats for sun, shade, or full rain protection, turning your patio into a space you can use no matter the weather.
  • Choose a Low-Maintenance Solution: Louvered pergolas are built from high-quality aluminum for exceptional durability. This material won’t rust, warp, or rot, saving you from the constant upkeep of staining or sealing that comes with traditional wood structures.
  • Invest in Your Home and Lifestyle: A louvered pergola is a smart investment that adds real value to your home. By personalizing it with upgrades like motorized controls, built-in lighting, and heaters, you create a sophisticated and highly functional outdoor room that enhances both your property and your daily life.

What Is a Louvered Roof Pergola?

If you love the idea of a classic pergola but want more flexibility, a louvered roof pergola might be the perfect fit for your backyard. Think of it as a modern upgrade to a traditional design. Instead of a fixed, open-slat roof, a louvered pergola has a dynamic roof made of adjustable aluminum blades, often called louvers. This clever design gives you complete control over the amount of sun or shade on your patio, deck, or by your swimming pool.

With the touch of a button or a simple manual crank, you can pivot the louvers to let the sunshine in, angle them to create comfortable shade, or close them completely for total protection from the elements. It’s this adaptability that makes louvered pavilions and pergolas such a popular choice for Long Island homeowners. You get the architectural beauty of a pergola with the all-weather functionality of a solid patio cover, all in one elegant structure. This means more time spent enjoying your outdoor space, no matter what the forecast says.

How Do the Adjustable Slats Work?

The magic of a louvered roof lies in its simple yet brilliant mechanics. The individual slats, or louvers, are designed to rotate, typically up to 120 degrees. This range of motion allows you to fine-tune the exact amount of sunlight and airflow you want. On a hot day, you can angle them to block direct sun while still letting a breeze pass through. When you want to soak up some rays, you can open them fully.

When rain is on the way, the louvers close to form a solid, interlocking surface. Each slat is engineered to overlap with the next, creating a watertight seal. These systems also include a built-in, hidden gutter system. The louvers have a slight slope that directs rainwater into these channels, guiding it away from your patio furniture and down the support posts.

Louvered vs. Traditional Pergolas: What’s the Difference?

The main difference comes down to control and protection. A traditional pergola, usually made of wood, has a fixed roof with open rafters or slats. While beautiful, it only provides partial shade and offers no protection from rain. Your time outdoors is entirely dependent on the weather. A louvered pergola, on the other hand, puts you in charge. Its adjustable roof lets you decide between sun, shade, or shelter at a moment’s notice.

Louvered pergolas are also seen as a durable, low-maintenance alternative. They are typically constructed from high-quality aluminum that won’t rot, warp, or require constant staining like wood. This combination of superior functionality, modern aesthetics, and lasting durability makes them a significant improvement on older pergola designs.

Can a Louvered Roof Pergola Handle Rain?

A common question we get is whether a louvered roof pergola can actually stand up to a rainy day. The answer is a resounding yes. In fact, managing rain is one of their most impressive features. Unlike a traditional pergola that offers partial shade, a louvered roof is designed to provide complete protection from the elements, turning your patio into a true all-weather outdoor room. It all comes down to smart engineering and a seamless design that handles water and wind with ease, so you can keep enjoying your outdoor space no matter what the forecast says.

How the Built-In Drainage System Works

When rain starts to fall, you can close the louvers completely, often with just the touch of a button. The interlocking slats form a watertight seal, preventing any drips from getting through to your patio below. But where does all that water go? Each louver is precisely shaped to channel rainwater into a hidden gutter system built directly into the pergola’s frame. From there, the water flows discreetly down through the hollow support posts and is directed away from your home’s foundation. This clever design ensures the area underneath your pergola stays perfectly dry, so a sudden shower won’t send you running inside.

How It Resists Wind and Weather

Louvered pergolas are built to be incredibly durable, especially here on Long Island where we see all kinds of weather. They are typically made from high-grade aluminum, which will not rust or corrode over time. These structures are engineered to handle strong winds and even heavy snow loads, so you do not have to worry about their stability during a storm. For maximum resilience, proper installation is everything. Securing the pergola to a solid foundation, like a professionally installed stone patio, ensures it can withstand the elements for years to come. You can even leave the louvers slightly open during high winds to allow air to pass through, reducing pressure on the structure.

The Biggest Perks of a Louvered Roof Pergola

A louvered roof pergola is more than just a beautiful addition to your backyard; it’s a functional upgrade that completely changes how you experience your outdoor space. Unlike a traditional pergola with a fixed roof, a louvered system gives you total control. You can instantly adapt to changing weather, create the perfect amount of shade, and extend your outdoor season. It’s about making your patio, deck, or pool area more comfortable and usable, no matter what the Long Island weather has in store. These structures blend sophisticated design with practical innovation, making them one of the most popular additions for modern homes.

Enjoy Your Outdoor Space Year-Round

Imagine hosting a barbecue and not having to worry about a sudden sun shower sending your guests running inside. A louvered roof pergola makes that possible. With the touch of a button, you can close the louvers to create a solid, waterproof roof that keeps your outdoor living area dry and comfortable. This flexibility allows you to get so much more use out of your patio. It’s no longer just a fair-weather space. Instead, it becomes a true extension of your home that you can enjoy from early spring through late fall, helping you enhance your outdoor living experience for gatherings, relaxation, or quiet morning coffee.

Control Light, Airflow, and Energy Use

One of the best features of a louvered roof is the ability to fine-tune your environment. You can adjust the angle of the louvers with a remote control, going from fully open for maximum sunlight to fully closed for complete shade and rain protection. You can also angle them just right to allow for a gentle breeze while blocking the harsh afternoon sun. This level of control isn’t just about comfort. When attached to your home, a louvered pergola can help reduce energy costs by shading windows and glass doors from direct sunlight, keeping your home cooler in the summer and reducing the strain on your air conditioning.

Add Value to Your Property

Investing in your outdoor space is also an investment in your home’s overall value. A high-quality, permanent aluminum structure like a louvered roof pergola is a significant selling point. Unlike a fabric awning that can depreciate, a louvered roof is appraised similarly to a sunroom or a high-end deck. For potential buyers, a sophisticated outdoor living area is a major draw. Motorized louvered roofs are a game-changer, signaling a modern, luxurious home. When paired with beautiful expert masonry work for your patio, it creates a cohesive and valuable outdoor oasis that makes your property stand out.

What Are Louvered Roof Pergolas Made Of?

When you’re investing in a structure for your backyard, you want something that’s built to last. Louvered roof pergolas are almost always constructed from high-quality, powder-coated aluminum. This material is the top choice for a reason: it’s incredibly strong, lightweight, and stands up to the elements without rusting or degrading. Unlike wood, which can warp, rot, or require frequent staining, aluminum offers a durable frame that maintains its integrity and appearance for years. This makes it a perfect fit for the changing seasons on Long Island.

The focus on premium materials ensures your pergola isn’t just a fair-weather feature but a true extension of your home. The robust aluminum construction of our pavilions and pergolas provides the strength needed to support the adjustable louver system and integrated features like lighting or fans. This combination of strength and elegance means you get a structure that is both highly functional and visually stunning. It creates a sophisticated centerpiece for your patio or deck that you can enjoy without worrying about constant upkeep.

Why Aluminum Is the Best Choice

Aluminum is the ideal material for a louvered roof pergola because it’s exceptionally low maintenance. You won’t have to spend your weekends sanding, staining, or sealing it. A simple cleaning with soap and water once or twice a year is usually all it takes to keep it looking brand new. This is a huge advantage over other materials that require more intensive restoration and sealing services to stay in good condition.

Beyond being easy to care for, aluminum is also completely weather-resistant. It won’t crack under the summer sun or grow mold after heavy rains. Its powder-coated finish protects it from chipping and fading, ensuring the color stays vibrant. This durability means your investment is protected, giving you a reliable and beautiful outdoor structure for many years.

Find Your Perfect Finish, Color, and Style

One of the best parts of choosing an aluminum louvered pergola is the ability to customize it to match your home’s aesthetic. These structures come in a variety of standard colors, like white, black, and anthracite gray, that complement any design style, from modern to traditional. You can select a finish that blends seamlessly with your home’s siding, trim, or surrounding masonry.

This level of customization allows you to create a truly cohesive outdoor living space. Whether you want your pergola to make a bold statement or offer a subtle touch of elegance, there’s a color and style that will fit your vision. The clean lines and sleek design of a louvered pergola can instantly modernize your backyard, creating a polished and inviting atmosphere for relaxing and entertaining.

Features Worth the Upgrade

A modern louvered roof pergola is impressive on its own, but the right features can transform it into a truly seamless extension of your home. While a standard model offers great flexibility, certain upgrades provide a level of convenience, comfort, and automation that makes your outdoor space feel like a luxury resort. These aren’t just bells and whistles; they are thoughtful additions designed to help you get the most out of your investment, no matter the season or time of day. From automated adjustments to integrated ambiance, these are the features worth considering for your new pergola.

Motorized or Manual Louvers?

One of the first decisions you’ll make is how you want to control the louvers. Manual systems work with a simple hand crank and are a reliable, budget-friendly option. However, if you’re looking for effortless control, a motorized system is the way to go. With the press of a button on a remote or even your smartphone, you can rotate the louvers with precision, sometimes up to 170 degrees. This allows you to dial in the perfect amount of sun or shade instantly. Motorized pavilions and pergolas offer a touch of modern luxury and make it incredibly simple to adapt your space to changing weather without missing a beat.

Smart Technology and Rain Sensors

For the ultimate hands-off experience, you can integrate smart technology into your motorized pergola. Rain sensors are a popular upgrade that automatically closes the louvers the moment precipitation is detected, keeping your furniture and guests dry. This is perfect for Long Island’s unpredictable weather, as you won’t have to rush outside during a sudden downpour. Some systems also offer freeze sensors that open the louvers to prevent ice buildup and potential damage. By adding smart controls, your pergola can react to the elements for you, protecting your investment and giving you complete peace of mind.

Integrated Lighting and Heating

Why let the sunset end your time outdoors? Integrated LED lighting is a fantastic feature that adds ambiance and extends the usability of your pergola into the evening. These lights are often built directly into the frame or louvers for a clean, seamless look. For cooler nights, you can also add built-in infrared heaters. These elements provide comfortable, radiant warmth without being bulky or in the way. Combining lighting and heating turns your pergola into a true four-season outdoor room, perfect for evening dinners, entertaining friends, or simply relaxing after a long day.

Built-In Gutters for Seamless Drainage

A key feature of a high-quality louvered roof is its ability to handle rain. When the louvers are fully closed, they form a watertight seal. But where does the water go? Advanced pergolas include a hidden, built-in gutter system. Rainwater is channeled from the louvers into these gutters, which are concealed within the support posts. The water then drains away from the foundation of your home, keeping the area underneath completely dry and comfortable. This sophisticated drainage is essential for protecting your outdoor furniture and ensuring your patio remains a usable, slip-free space even after a storm.

Is a Louvered Roof Pergola Hard to Maintain?

One of the best parts about investing in a high-quality outdoor feature is knowing it won’t add a long list of chores to your weekend. If you’re worried about upkeep, I have great news for you. Louvered roof pergolas are designed to be incredibly low maintenance, giving you more time to actually relax and enjoy your backyard. Unlike traditional wood structures that need constant attention, these modern pergolas practically take care of themselves. Let’s walk through what simple cleaning looks like and what you can expect for long-term durability.

Your Guide to Simple Cleaning and Upkeep

The thought of constant upkeep can be a dealbreaker, but with louvered roof pergolas, maintenance is refreshingly simple. Because they are made from high-quality aluminum, you can say goodbye to the scraping, staining, and sealing that wooden pergolas demand. Aluminum doesn’t crack, warp, or attract mold, so it stands up beautifully to Long Island’s sun and rain. For the most part, a simple cleaning once or twice a year is all you need. Just wipe down the frame and louvers with a soft cloth and mild soapy water to remove any dust or debris that has settled. It’s a small task that keeps your outdoor living space looking pristine season after season.

What to Expect for Long-Term Durability

When you invest in your home, you want it to last, and a louvered roof pergola is built for exactly that. These structures are made from strong, corrosion-free aluminum that resists rust and fading from UV rays. This means your pergola will maintain its color and structural integrity for years without showing signs of wear. The smart design also contributes to its longevity. When the louvers are closed, they interlock to create a solid surface that directs rainwater into the built-in drainage system. This prevents water from pooling and causing damage over time. With expert craftsmanship, you can trust that your pergola is a durable, long-term addition that will enhance your home for many years.

How Much Does a Louvered Roof Pergola Cost?

Thinking about adding a louvered roof pergola is exciting, but it’s natural to wonder about the budget. The final cost depends on your vision for the space. A simple, standard-sized pergola will cost less than a large, custom-built structure loaded with premium features. Let’s walk through the main factors that will shape your project’s price tag.

What Affects the Final Price?

The cost of a louvered roof pergola varies widely based on a few key elements: size, materials, and any extra features you choose. While basic models can start in the low thousands, a fully customized 12×16 foot project with all the bells and whistles can range from $25,000 to $40,000. The biggest price driver is customization. Adding features like motorized louvers, integrated lighting, built-in heaters, or retractable screens will increase the total cost. Think of it as building a custom outdoor room; the more amenities you include, the more it will reflect in the final price. Our Gappsi team can help you explore different pavilions and pergolas to find a solution that fits your budget.

Freestanding vs. Attached Designs

You’ll also need to decide whether you want a freestanding pergola or one that attaches to your home. A freestanding design stands on its own posts, giving you flexibility to place it anywhere in your yard, like next to a pool or in a garden. An attached, or wall-mounted, design connects directly to your house, creating a seamless transition from your indoor to outdoor living areas. This choice can influence the cost, as an attached pergola may require specific structural work to ensure it integrates perfectly and safely with your home’s exterior. Our expertise in home remodeling ensures we can handle either installation flawlessly.

Is It the Right Investment for You?

A louvered roof pergola is more than just an expense; it’s an investment in your property and your lifestyle. While the initial cost can be significant, these structures are known to add tangible value to your home. Features like motorized roofs are a major draw for potential buyers, making your property more attractive on the market. More importantly, it’s an investment in how you enjoy your home. Imagine having a comfortable, stylish space for family dinners, quiet morning coffees, or evening relaxation, regardless of the weather. When integrated with other elements like a beautiful masonry patio, a pergola transforms your backyard into a true outdoor oasis.

What to Know Before You Buy

You’ve explored the benefits and features, and now you’re getting serious about adding a louvered roof pergola to your home. Before you make the final decision, there are a few practical details to sort out. Thinking through the size, location, local rules, and your installation partner will ensure your project goes smoothly from start to finish. Getting these key elements right is the first step toward creating an outdoor space you’ll love for years.

Planning Your Pergola’s Size and Placement

First, think about how you want to use your new outdoor space. Will it be a cozy spot for morning coffee, a dining area for family dinners, or a large lounge for entertaining guests? Your answer will help determine the perfect size. As a general guide, a 10×12 foot space works well for a dining set, while a 12×12 foot area is great for a comfortable lounge. It’s also smart to plan for about 18 to 24 inches of open space around the pergola for easy movement. Considering both function and your home’s architectural style will help you create a beautiful and practical extension of your living area. You can explore different pavilions and pergolas to find a design that inspires you.

Understanding Local Permits on Long Island

Because a louvered roof pergola is a permanent structure, you will likely need a permit before installation can begin. Building codes and regulations can vary quite a bit between towns in Nassau and Suffolk County, so it’s important to understand the specific requirements for your property. We always recommend checking with your local building department early in the planning phase. An experienced installer can make this process much easier by managing the paperwork and ensuring your project complies with all local rules. Working with a team that understands home remodeling and construction on Long Island can save you a lot of time and prevent headaches down the road.

How to Choose the Right Installer

The quality of your installer is just as important as the quality of the pergola itself. The right partner will not only provide a great product but will also work with you to bring your vision to life. Look for a company with a proven track record in outdoor construction, a strong portfolio of completed projects, and a commitment to customer service. A great installer will handle everything from the initial design to the final touches, including any foundational work or surrounding masonry needed to create a complete outdoor oasis. At Gappsi, we have been transforming backyards across Long Island since 1987, and we pride ourselves on our craftsmanship and collaborative approach.

The Gappsi Process for Louvered Roof Pergolas

Bringing a louvered roof pergola to your home should be an exciting process, not a stressful one. At Gappsi, we’ve refined our approach to make sure every step, from the first design sketch to the final installation, is clear, collaborative, and centered around you. We handle everything in house, which means you have one dedicated team managing your project from start to finish. This ensures a seamless experience and a final result that perfectly matches your vision for your Long Island home.

Our process begins with understanding your needs and ends with a beautiful, functional outdoor structure you can enjoy for years. We combine detailed design work with expert craftsmanship, making sure your new pergola is not just an addition to your home, but an extension of your lifestyle. We believe in building relationships as strong as our structures, and that starts with a process you can trust.

Customizing Your Pergola Design

Your outdoor space is a reflection of you, and your pergola should be too. This is why we offer so many ways to personalize your design. One of our clients put it perfectly, saying, “I really loved how it was customizable because you pick out basically three colors: you pick out the roof, the structure, and the shades every step.” This level of detail allows you to tailor their pergola to perfectly complement your home’s architecture and your personal style. From the color of the frame to the finish on the louvers, every choice is yours. We guide you through the options to create a cohesive look that feels uniquely you.

Our Commitment to Quality and Service

A beautiful design is only as good as the team that brings it to life. With decades of experience building premier outdoor living spaces on Long Island, our commitment to quality is unwavering. We’re proud of our work, and it means the world to us when our clients are happy with the results. Our “Excellent” 4.9 out of 5 rating on Trustpilot reflects our dedication to getting every detail right, from using the best materials to ensuring a flawless installation. Our extensive portfolio showcases the durable and stunning outdoor structures we’ve created for homeowners just like you, giving you peace of mind that your investment is in expert hands.

Related Articles

Frequently Asked Questions

How well does a louvered roof actually handle heavy rain and snow? They handle rain exceptionally well. When the louvers are closed, they form a solid, interlocking roof. A hidden gutter system built into the frame channels all the water away, so the space underneath stays completely dry. For snow, these aluminum structures are engineered to withstand significant weight. We always recommend keeping the louvers slightly open during a heavy snowfall to prevent excessive buildup, but you can rest assured they are built to handle tough Long Island winters.

Can I add features like lights, heaters, or screens later on? Yes, in many cases you can. While it’s often most seamless to integrate features like LED lighting or heaters during the initial installation, many systems are designed to be modular. This means you can add upgrades like retractable screens or fans down the road. If you think you might want to add features in the future, just let us know during the design phase. We can make sure the structure is prepared for easy additions later.

What’s the real difference between a louvered pergola and a retractable awning? The biggest difference is durability and functionality. A louvered pergola is a permanent architectural structure made of aluminum that adds significant value to your home. It can handle wind, rain, and snow. A retractable fabric awning, on the other hand, is less durable, must be retracted in bad weather, and offers no protection from the elements when you need it most. The pergola gives you a true, all-season outdoor room, while an awning provides only temporary shade.

How long does the installation process typically take? The installation itself is surprisingly quick. Once any necessary site preparation, like pouring a concrete foundation, is complete, the pergola structure can often be assembled in just a few days. The entire process from design to completion depends on the project’s complexity and the permit approval timeline in your town. We manage the project from start to finish to make sure everything moves along efficiently.

Do I need to handle the building permits myself? You don’t have to worry about that part of the process. Because a louvered roof pergola is a permanent structure, a building permit is almost always required on Long Island. Our team is very familiar with the local requirements in both Nassau and Suffolk County, and we handle the entire permit application process for you. This ensures your project is fully compliant and saves you from the headache of managing the paperwork.

Share this page: