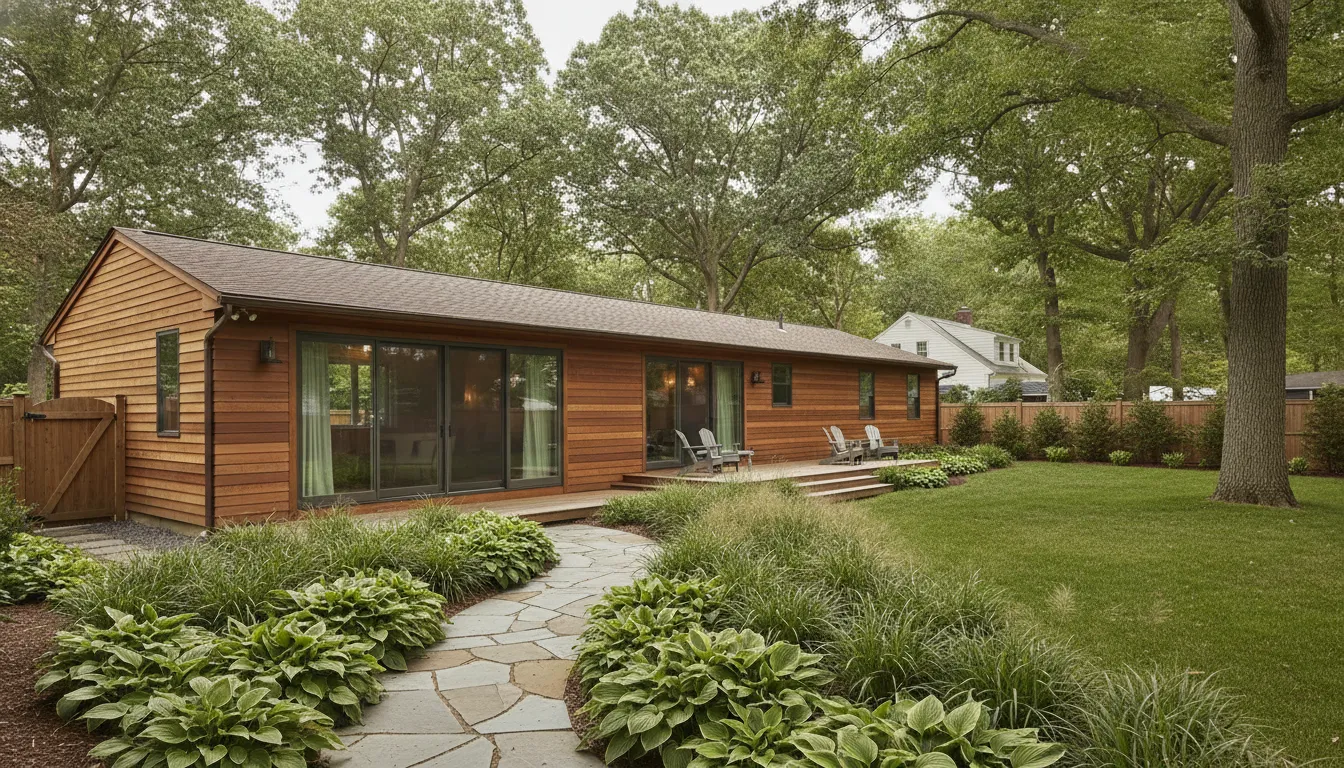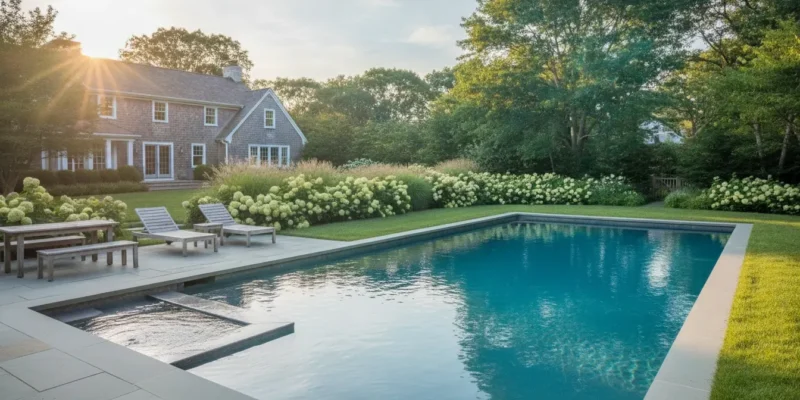
Long Island swimming pool deck with discreet drainage after rain

Pool Deck Drainage: Long Island Planning Guide

Water around a pool deck rarely comes from one isolated problem. A small low spot, a settled paver, a clogged outlet. Or a discharge path aimed at the house can turn ordinary rain into ponding, erosion, slippery surfaces, and repeated maintenance. Long Island properties also vary widely by slope, soil, groundwater, and proximity to coastal conditions. So a solution that works in one Nassau or Suffolk County yard may not fit another.

Effective pool deck drainage manages water as a connected system: grading moves runoff, drains collect it, surfaces either shed or absorb it. Joints and base layers remain stable, and discharge is directed to an appropriate location. The right combination depends on the existing deck, pool equipment, structures, and property conditions.

Call Gappsi Group at (631) 831-3177

Before choosing a channel drain or replacing a surface, start by identifying what the water is doing now and what the drainage plan must protect first.

What Should Pool Deck Drainage Solve First?

Start with the direction water takes across the property, not with a drain product. Effective pool deck drainage should move rainwater away from the pool, house, steps, equipment, and neighboring areas without creating a new ponding or erosion problem. Watch the deck during and after a storm. Note where water collects, which edges receive roof or landscape runoff, and whether discharge appears to travel toward the foundation.

Call Gappsi Group at (631) 831-3177

Trace the runoff path before choosing a solution

Grading is the first planning question because the surface needs a deliberate path for water to follow. That may lead toward a collection drain, a suitable planting area, an infiltration system, or another approved outlet. Gappsi provides landscape design, grading, and ground preparation, which can help connect the pool deck to the surrounding yard instead of treating the deck as an isolated surface.

Look for practical clues rather than trying to diagnose the underground system yourself. Darkened joints, silt lines, washed soil, mulch displaced from a bed, or water marks along the house can reveal the path of concentrated flow. Repeated ponding beside the pool may indicate that the deck does not shed water as intended. Ponding near a door, foundation wall, or pool equipment deserves attention even when the surface appears level.

Protect both the pool area and the house

A drainage plan should account for runoff arriving from beyond the deck. Roof downspouts, sloped lawns, driveways, retaining features, and neighboring grades can all change the volume and direction of water reaching the pool area. The goal is not simply to make water disappear at the nearest low point. It is to manage the flow without undermining the deck base, saturating the area near the foundation, or sending water toward another property.

Surface type and subsurface conditions also affect the plan. Some permeable pavement systems allow water to pass into a stone reservoir, where it can be temporarily stored and slowed before infiltrating or moving through underdrains. The way this system performs depends on its design, the site, and ongoing maintenance.

Account for Long Island site differences

Nassau and Suffolk properties do not share identical soil, groundwater, grades, hardscape layouts, or municipal requirements. Coastal and waterfront sites may present different drainage considerations from inland properties. A solution that works on one lot may be unsuitable on another, so discharge destinations and structural changes should receive qualified review. Begin with documented observations, then evaluate grading, soil, existing drains, and the proposed outlet as one connected system.

How Do Channel Drains and Surface Drains Work Around a Pool?

Drains around a pool deck are part of a planned water path, not a substitute for sound grading. The goal is to collect runoff before it reaches the pool coping, house, steps, equipment area, or another location where standing water creates a problem. The right layout depends on the deck material, finished elevations, soil, existing utilities, and the place where collected water can be discharged responsibly.

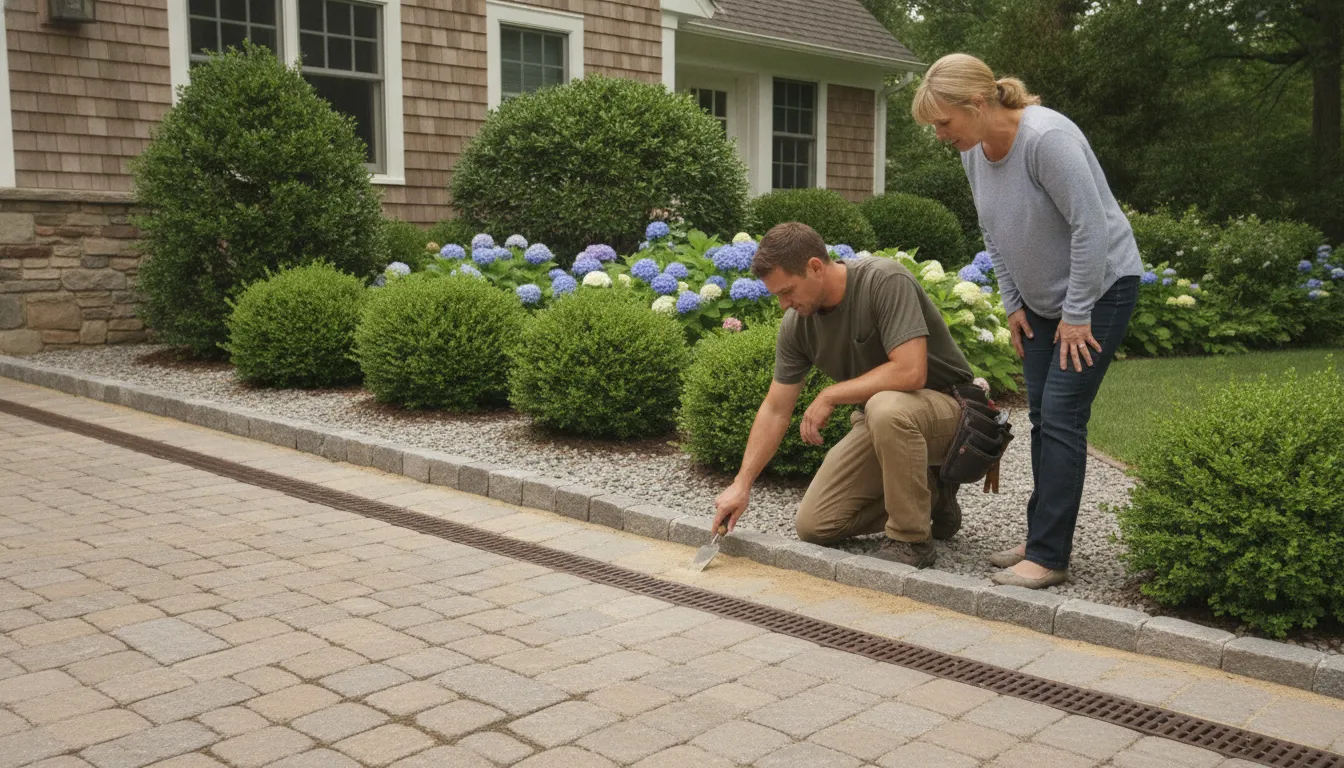
  1. Identify where water needs to be intercepted. A channel drain is a long, narrow trench-style grate that collects water along a line. It can be useful at a transition such as the low edge of a deck. Beside a house, across a walkway, or along a broad area where water moves in a predictable direction. A point drain, sometimes called a surface drain, collects water at a specific low point through a grate. It may suit a localized depression or a smaller paved area, but its placement must match the finished slope rather than simply occupy a convenient location.
  2. Coordinate the drain with the finished surfaces. The grate, surrounding concrete or pavers, pool coping, doors, gates, and equipment pads all need to work at compatible elevations. A drain that sits too high can leave water beside it. One that sits too low can collect sediment or become a trip concern. The design should also preserve access for inspection and cleaning. Covers, outlet connections, and catch points should remain reachable after construction, landscaping, furniture, and fencing are installed.
  3. Decide whether the system fits new construction or a retrofit. New pool construction allows the drainage path, deck base, pipe route, and discharge point to be coordinated before surfaces are placed. Retrofit work has to account for an existing slab or paver system, buried utilities, settlement, limited access, and the risk of disturbing a functioning area. Product limitations matter. For example, the Deck-O-Drain manufacturer describes its system for concrete pool decks and states that it is intended for new pool construction only. That is a product-specific limitation, not a universal rule for every channel-drain system, and it should not be treated as a retrofit recommendation.
  4. Trace where the collected water will go. A drain does not make water disappear. Its outlet may connect to an approved discharge point, an infiltration feature, or another designed system, depending on site conditions and local requirements. It should not casually direct water toward the house, a neighboring property, the pool equipment, or a waterway. If the water is chemically treated pool water, discharge rules require particular care. A qualified professional should confirm the destination and any required municipal review before construction.

For Nassau and Suffolk properties, maintenance access is as important as the initial layout. Leaves, soil, and other debris can restrict grates or outlets, especially near planting beds. During a site evaluation, note where water actually travels after rain, whether grates remain clear, and whether the discharge point is still functioning. Those observations help determine whether the issue is a blocked drain, an unsuitable outlet, or a broader pool deck drainage problem.

Choosing Between Solid and Permeable Pool Deck Surfaces

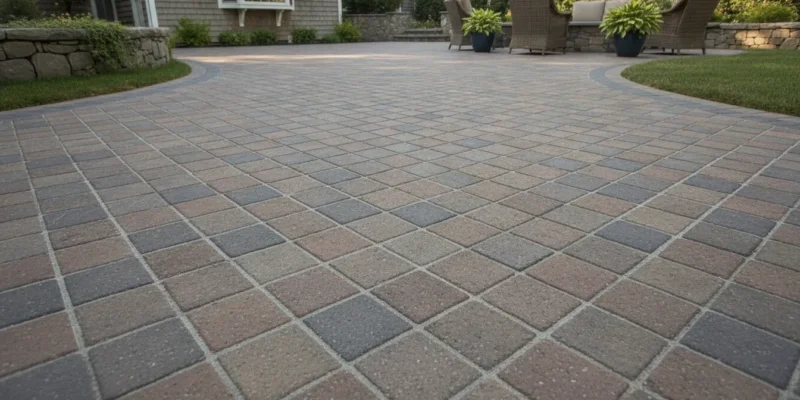
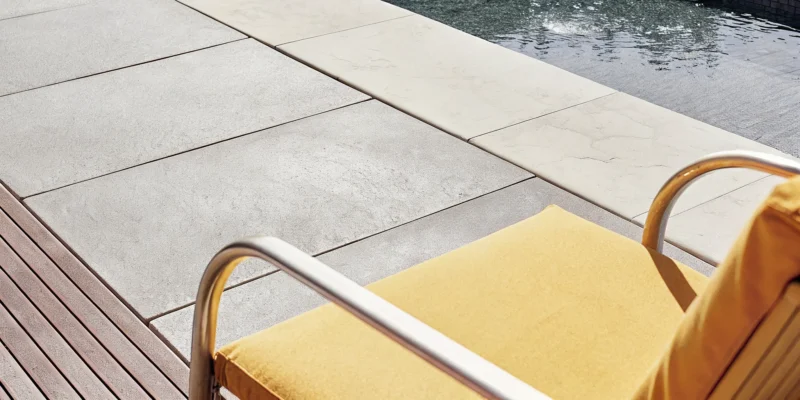
Permeable paver pool deck with a discreet drainage edge

The surface material affects how water moves, where it is stored, and how the deck should be maintained. A solid paved or concrete surface typically directs runoff across a controlled slope toward a drain, swale, or other planned outlet. A permeable system allows water to move through the surface into prepared layers below. Neither approach is automatically right for every Long Island property. Soil infiltration, groundwater, proximity to the house, existing grades, pool construction, and local requirements all matter.

According to the EPA’s permeable pavement guidance, permeable pavement includes porous asphalt, pervious concrete, and permeable interlocking concrete pavement. In the interlocking option, small openings between pavers are filled with permeable aggregate. The system can reduce impervious area while retaining a usable paved surface, but its performance depends on the design and installation below the surface.

How solid and permeable surfaces differ for pool deck drainage
Consideration Solid paved or concrete surface Permeable pavement
Runoff path Moves across the surface along planned slopes to a drain or discharge point. Moves through the surface into an open-graded base, where it may infiltrate or use an underdrain.
Base needs Requires a properly prepared, stable base suited to the selected paving or concrete assembly. Uses crushed-stone bedding and base layers that can temporarily detain water below the surface.
Inspection Check slopes, low spots, joints, drains, and signs of cracking or settlement. Check for sediment or debris that can reduce infiltration, along with clogged joints and outlet performance.
Potential fit May suit a site where runoff needs to be collected and directed away from structures or equipment. May suit a site where soil, groundwater, setbacks, and the sub-base support planned infiltration or detention.

The EPA notes that proper installation is important to the durability and maintenance of permeable pavement. A site with low-infiltration soil may need an underdrain, while infiltration may be inappropriate near some foundation walls or underground utilities. Those conditions should be evaluated before selecting the system. Homeowners comparing materials can review this guide to permeable pavers for pool decks, then discuss how the surface will work with the property’s complete pool deck drainage plan.

Why Do Pool Deck Joints, Bases, and Settlement Matter?

A pool deck can look level at installation and still develop drainage problems when its underlying layers move. The joints, bedding, and base work together to support the surface, manage small amounts of movement, and help water follow the intended path. If one part breaks down, water may collect where it should not, wash material out of the joints, or leave an uneven walking surface.

Joints are part of the surface system

Joints are not simply decorative lines between pavers or sections of hardscape. They allow individual units or sections to accommodate limited movement without forcing the entire surface to crack or shift. In permeable paver systems, joint openings can also help water move downward when they are filled with the specified aggregate. That makes clean, stable joints important to both surface performance and pool deck drainage.

Look for joint material that has washed away, widened gaps, loose pavers, or weeds and sediment collecting in spaces that once appeared open and even. These observations do not identify the cause by themselves. Surface runoff, cleaning, soil conditions, poor edge restraint, or movement below the deck can produce similar symptoms. The pattern and location matter.

What happens below the deck?

Many paver installations rely on prepared layers beneath the surface. The base needs to be placed and compacted consistently, with a drainage path that fits the property and surface design. Gappsi’s guide to paver base preparation provides additional background on this part of the installation.

When the base is uneven, becomes saturated, or loses material through washout, the finished deck may settle in isolated areas. You may notice a low spot that holds water after rain, a paver that rocks underfoot. A step between adjacent sections, or a slope that now directs water toward the pool, house, or equipment. These are observable warning signs, not a substitute for evaluating the layers below.

Movement deserves a site-specific response

Long Island properties do not all have the same soil, groundwater, grade, or exposure. Nassau and Suffolk County homes can also have different existing patios, retaining features, landscaping, and discharge constraints. A repair that addresses only the visible joint may leave the underlying movement unresolved.

Document where ponding, erosion, or settlement appears, especially after heavy rain, and avoid removing the deck or excavating around the pool without a coordinated plan. A professional evaluation can connect surface symptoms with grading, base preparation, edge conditions, and the larger drainage layout.

Planning Safe Water Discharge on a Long Island Property

A drainage system is only successful when it gives collected water a safe destination. A channel drain or low point can move water away from the pool deck, but the outlet still needs to avoid the house. Neighboring property, pool equipment, and areas where runoff can erode soil or create a slippery walkway. On Long Island, conditions can vary significantly between Nassau and Suffolk County properties, so the right discharge approach depends on grade, soil, groundwater, existing hardscape, and local requirements.

Possible destinations may include an approved drainage connection, a suitable area of the property, or an infiltration feature designed for the site. A rain garden is one concept that can capture runoff from impervious areas and nearby roofs. Allowing water to collect and infiltrate in a planted depression when the location and soil conditions are appropriate. Learn more about rain gardens and stormwater management from the U.S. Environmental Protection Agency.

Infiltration is not automatically appropriate beside every foundation or pool. A permeable system can route water through an open-graded base and temporarily hold it before infiltration or discharge through an underdrain. Low-infiltration soils may require additional drainage components, while sites near foundation walls or utilities may need a different design. These choices should be based on the property rather than on a generic diagram.

Pool water itself also requires care. Water containing chlorine, bromine, or salt can harm local water quality and wildlife if it reaches surface waters. Municipalities may regulate pool, hot tub, and fountain discharge, so confirm the applicable requirements before releasing treated water.

Keep outlets visible and maintainable. During a site review, note where downspouts, drains, and proposed discharge lines end. Watch for water flowing toward the foundation, neighboring lot, pool pump, filter, electrical equipment, or a retaining edge. Sediment, leaves, and debris can also reduce infiltration over time, making routine inspection part of the plan.

Gappsi can coordinate 3D design, stamped drawings, permit expediting, and site-to-installation planning when a pool deck or drainage change needs multiple decisions handled together. The company serves Nassau and Suffolk County homeowners and can align grading, pool-deck construction, materials, and surrounding landscape work with the existing property.

Call Gappsi Group at (631) 831-3177

When Is a Professional Pool Deck Drainage Evaluation Needed?

A site evaluation is worth considering when water behavior around the pool becomes a pattern rather than an isolated result of one storm. Homeowners can document what they see, but a lasting correction depends on the relationship between the deck surface, base, grade, outlets, soil, and nearby structures.

Look for these warning signs:

  • Recurring ponding: Water remains on the deck after ordinary rainfall, collects in the same low area, or repeatedly sits near coping, steps, or access paths. Recurring ponding can point to a grading, settlement, surface, or outlet issue that deserves closer review.
  • Flow toward a structure: Runoff moves toward the house, pool equipment, retaining wall, foundation, or another structure instead of following a planned route. The direction and volume of flow should be assessed before adding a drain or changing the grade.
  • Erosion or exposed material: Washed soil, displaced bedding, channels in planting areas, or aggregate showing near the deck may indicate concentrated runoff. Erosion can also carry sediment toward drains and reduce their effectiveness.
  • Settlement or joint failure: Pavers that dip, separated joints, loose edge pieces, or repeated joint washout can affect both walking safety and the path water takes across the surface. These symptoms may involve the base below the visible deck, not only the joint material.
  • Blocked or inaccessible outlets: Leaves, soil, mulch, or debris can obstruct grates and discharge points. If cleaning does not restore flow, the outlet, connection, or downstream discharge plan may need inspection. Do not excavate around the pool or buried utilities based only on a surface observation.
  • Unsafe slipping conditions: Persistent wet areas, algae, slick buildup, or water crossing a walking route create a practical safety concern. Mark the area, limit use during wet conditions, and arrange an assessment rather than relying on a new surface coating as a complete solution.

Conditions vary across Nassau and Suffolk County. A waterfront property, a compact suburban lot, and a sloped inland site may have different soil, groundwater, grades, and discharge constraints. A professional review should consider the whole property, including the house, pool equipment, neighboring areas, existing hardscape, and any proposed changes. Discharge modifications may also require qualified design input or municipal review.

Gappsi Group serves homeowners throughout Nassau and Suffolk and coordinates swimming pool design and construction with related deck and site-planning decisions. A site evaluation can help identify the observable problem, clarify which questions require further technical review. And establish a practical direction for the next planning step without assuming one universal drainage fix.

Call Gappsi Group at (631) 831-3177 before changing your pool deck drainage.

Frequently Asked Questions

Where do pool deck drains drain to?

They may direct runoff to an approved discharge point, an infiltration area, a dry well, or another planned drainage system. The correct destination depends on the property’s grade, soil, groundwater, nearby structures, and local requirements. Water should not be routed toward the house, neighboring property, pool equipment, or a waterway without qualified review. Municipalities may regulate pool-water discharge, so confirm the proposed outlet before construction.

What should go under a deck for drainage?

The drainage layer depends on the surface and site conditions. Permeable pavement commonly uses crushed-stone bedding and base layers that temporarily hold water before it infiltrates or reaches an underdrain. Low-infiltration soil, foundation walls, utilities, or high groundwater may require a different design, such as underdrains or an impermeable liner. A contractor should evaluate the existing base rather than treating one material as suitable for every property.

How do you replace a pool deck drain channel?

Channel replacement starts with identifying why the drain failed, where the water should go, and whether the surrounding deck has settled or shifted. The channel, connections, slope, and adjacent joints then need to be coordinated with the deck surface. A product designed for new concrete construction may not be appropriate for a retrofit. Because cutting or excavating beside a pool can affect utilities and the structure, have the repair planned and completed by a qualified professional.

What are some common problems with pool decks?

Common warning signs include recurring ponding, water flowing toward a home or equipment pad, eroded soil, blocked outlets, washed-out joints, settlement, movement, and slippery areas. These symptoms can reflect a clogged drain, inadequate grading, base failure, or a discharge problem. Photograph the area after rain and note where water travels, but avoid digging around the pool until the site has been evaluated.

Ready to Plan Your Pool Deck Drainage?

A site-specific review can help connect grading, drainage placement, surface materials, and water discharge into one practical plan for your Long Island property. Gappsi Group can discuss the conditions you are seeing and the next planning steps.

Call Gappsi Group at (631) 831-3177 to discuss your pool deck drainage and site evaluation plan.

Share this page:
A modern custom gazebo built for a backyard on Long Island.

Your Guide to a Custom Gazebo on Long Island

Your home reflects your personal style, and your backyard should be no different. When you decide to add an outdoor structure, you’re faced with a choice: a generic, off-the-shelf kit or a structure designed just for you. A prefabricated gazebo limits you to standard sizes and materials, often resulting in a feature that feels disconnected from your home. The real magic lies in personalization. A custom gazebo on Long Island gives you complete creative control to build a space that fits your lifestyle perfectly. You can choose the ideal shape, select materials that match your home, and add features like integrated lighting, screens, or a ceiling fan. This guide is for homeowners who want to create a truly unique outdoor retreat.

Key Takeaways

  • Choose Custom for a Lasting Structure: A custom-built gazebo lets you pick the right materials, like wood, vinyl, or aluminum, and a design that perfectly matches your home and stands up to Long Island’s weather, unlike a one-size-fits-all kit.
  • Hire a Pro to Handle the Headaches: A full-service builder is your best partner, managing everything from the design and materials to the tricky local permit process, which saves you time and ensures the project is done right.
  • View Your Gazebo as a Valuable Addition: Think of a custom gazebo as an investment in your lifestyle and property value, as it creates a functional outdoor room for relaxing and entertaining that makes your home more enjoyable and appealing.

Custom or Prefab Gazebo: Which Should You Choose?

When you decide to add a gazebo to your backyard, one of the first choices you’ll face is whether to go with a custom build or a prefabricated kit. While a prefab kit from a big-box store might seem like a straightforward solution, it often comes with trade-offs. A custom-designed gazebo, on the other hand, is built to your exact specifications, ensuring it perfectly complements your home and lifestyle. Let’s walk through the key differences to help you decide which path is right for your Long Island home.

The Perks of a Custom Design

A custom design gives you complete creative control. Instead of being limited to a few standard models, you can create an outdoor structure that is uniquely yours. We can help you design and build custom pavilions, pergolas, and gazebos that fit your yard, your vision, and your budget perfectly. This means choosing the ideal size, shape, and materials to match your home’s architecture and your existing landscape. A custom approach ensures your new gazebo doesn’t just sit in your yard, it becomes a seamless and functional part of your outdoor living space.

The Downsides of Prefab Kits

Prefabricated gazebo kits can seem appealing because of their lower initial price, but they have significant limitations. You’re stuck with the designs, materials, and sizes offered, which may not suit your space or style. These one-size-fits-all solutions can look out of place and often lack the durability of a professionally built structure. With a kit, you miss the opportunity to create a cohesive look that ties into your patio’s porcelain and natural stone or other landscape features. A custom build avoids these issues, giving you a high-quality, personalized structure built to last.

Choosing the Best Materials for a Long Island Gazebo

Selecting the right material for your gazebo is one of the most important decisions you’ll make. It determines not only the look and feel of your new outdoor space but also how much maintenance it will require over the years. On Long Island, our four-season climate, complete with humid summers, freezing winters, and salty coastal air, makes durability a top priority. You need a material that can stand up to the elements while matching your home’s aesthetic.

The three most popular choices are classic wood, low-maintenance vinyl, and modern aluminum or composite. Each has its own unique benefits, from the timeless charm of natural cedar to the hassle-free resilience of vinyl. Gappsi designs and builds custom pavilions, pergolas, and gazebos using a variety of high-quality materials, so you can find the perfect fit for your backyard vision and lifestyle. Let’s walk through the pros and cons of each option to help you decide.

Classic Wood Gazebos

There’s something undeniably beautiful about a classic wood gazebo. It offers a warm, natural look that blends seamlessly into any landscape. For a durable and stunning option, Western Red Cedar is an excellent choice because it contains natural oils that help it resist rot and decay. A wood structure feels traditional and authentic, creating a cozy retreat in your backyard.

While wood is gorgeous, it does require some upkeep to maintain its beauty, especially in our climate. To protect it from moisture and sun damage, you’ll need to periodically stain or seal it. For homeowners who love the rich character of natural materials and don’t mind a little seasonal maintenance, a wood gazebo is a fantastic investment that adds timeless value to your property.

Low-Maintenance Vinyl Gazebos

If your goal is to spend more time relaxing in your gazebo and less time maintaining it, vinyl is the perfect material for you. Vinyl gazebos are designed to handle Long Island’s weather with ease, from summer sun to winter snow. They won’t rot, splinter, or fade, and they are completely impervious to pests like termites. This makes them an incredibly practical choice for busy families.

Best of all, vinyl is exceptionally easy to clean. A simple wash with soap and water is all it takes to keep your gazebo looking brand new year after year. With a clean, polished appearance, a vinyl gazebo offers a crisp look that complements many modern home styles while giving you a beautiful outdoor feature without the work.

Durable Aluminum and Composite

For a sleek, contemporary structure with maximum durability, look no further than aluminum and composite materials. These options offer a modern aesthetic and are engineered for superior longevity. Gappsi can even design structures with special louvered aluminum roofs that you can adjust for sun or shade. These materials are perfect for creating a sophisticated, resort-like feel right in your own backyard.

Aluminum and composite are completely resistant to rust, corrosion, and insect damage, making them an ideal choice for coastal homes exposed to salty air. They require virtually no maintenance and will retain their structural integrity and appearance for decades. When paired with a beautiful stone patio, an aluminum or composite gazebo creates a truly stunning and durable outdoor living space.

How Long Island Weather Impacts Your Choice

Your gazebo’s material will be its first line of defense against Long Island’s demanding weather. The constant exposure to sun, rain, snow, and salt can take a toll on any outdoor structure, so choosing wisely is key to protecting your investment. For example, the high humidity in the summer can be tough on untreated wood, making a proper seal essential.

This is where a material’s inherent properties really matter. Vinyl is unfazed by moisture, making it a worry-free option for rainy seasons. Aluminum is an excellent choice for homes near the South Shore, as it won’t corrode from the salty air. Understanding how each material reacts to our local climate helps you select a gazebo that not only looks great on day one but continues to perform beautifully for years to come. Proper restoration and sealing are also part of a long-term care plan for many outdoor surfaces.

Personalize Your Gazebo: Top Custom Features

A custom gazebo is more than just a structure; it’s a personal retreat designed just for you. This is where you can move beyond a standard kit and create a space that perfectly fits your lifestyle and your backyard’s aesthetic. The real beauty of a custom build lies in the details, from the foundational shape and size to the functional features that make it comfortable and inviting year-round.

Thinking through your customization options is the most exciting part of the process. Do you envision a cozy reading nook, a lively hub for family dinners, or a serene poolside escape? By tailoring the design, you ensure your new gazebo isn’t just an addition to your yard, but the heart of your outdoor living space. Let’s explore some of the top features you can choose to make your gazebo uniquely yours.

Finding the Right Size, Shape, and Roof

The first step in personalizing your gazebo is choosing the right footprint. The ideal size depends on both your available space and how you plan to use it. A smaller, intimate gazebo might be perfect for a quiet corner of your garden, while a larger structure can comfortably host dinner parties. Common shapes like octagons, squares, and rectangles each offer a different feel and flow. An octagonal shape provides a classic, panoramic view, while a rectangular design can feel more like a defined outdoor room.

The roof is another key element that defines your gazebo’s character. You can select materials that complement your home’s existing architecture, from traditional wood shingles to durable metal or modern composite roofing. A well-chosen roof not only protects you from the elements but also completes the structure’s visual appeal.

Adding Screens, Lighting, and Power

To get the most out of your gazebo, consider features that add comfort and convenience. On Long Island, screens are a popular addition, allowing you to enjoy warm evenings without worrying about mosquitos and other insects. This simple feature can transform your gazebo into a usable three-season room.

Properly planned lighting and power can take your gazebo from a daytime spot to a 24/7 destination. We can help you design and build a structure with integrated, hidden wiring for ceiling fans, overhead lights, speakers, and outlets. Imagine having a place to charge your phone, play music, or plug in a small refrigerator for cold drinks. These thoughtful additions make the space more functional for relaxing, dining, and entertaining.

Integrating Your Gazebo with Pools, Patios, and Landscapes

A truly stunning gazebo doesn’t stand alone; it connects seamlessly with the rest of your outdoor environment. Think of it as a key feature within your overall landscape design. Placing your gazebo next to a swimming pool creates a perfect shaded lounge for drying off or watching the kids play. Connecting it to your patio with a matching stone walkway creates a natural flow between your home and garden.

Your gazebo can serve as a beautiful focal point, drawing the eye and anchoring your backyard design. By integrating it with other elements like an outdoor kitchen, a nearby fire pit, or surrounding garden beds, you create a cohesive and inviting outdoor living area. It becomes the central hub for everything from morning coffee to evening gatherings with friends and family.

How to Choose the Best Gazebo Builder on Long Island

Finding the right partner to build your gazebo is just as important as choosing the right materials and design. You want a team that understands the local landscape, has a proven track record, and can make the process feel effortless. On Long Island, your best bet is a builder with deep roots in the community and a portfolio that speaks for itself.

What to Look For in a Top-Tier Builder

The best builder is one who can bring your specific vision to life. Start by looking for a company with an extensive portfolio of completed projects in Nassau and Suffolk counties. This gives you a clear idea of their craftsmanship and design versatility. A top-tier builder should be able to create fully custom outdoor structures tailored to your yard, while also offering beautiful standard models if you prefer a more straightforward option. Don’t forget to check online reviews and ask for references. Hearing directly from past clients about their experience provides invaluable insight and helps you choose a builder with confidence.

Why a Full-Service Approach Matters

Opting for a builder with a full-service approach can make your project significantly smoother and less stressful. Instead of you juggling separate designers, suppliers, and construction crews, a full-service company manages everything for you. This means one dedicated team handles the entire project, from the initial design concepts and material selection to securing permits and the final installation. This integrated process ensures clear communication and a cohesive result, preventing costly errors and delays. You get a single point of contact and the peace of mind that comes from knowing every detail is being expertly managed from start to finish.

How Much Does a Custom Gazebo Cost on Long Island?

Let’s talk about one of the biggest questions on every homeowner’s mind: the budget. The cost of a custom gazebo isn’t a one-size-fits-all number because every project is unique. The final price depends entirely on your vision, from the size and materials to the special features you choose to include. While a simple wood pergola might cost between $4,000 and $7,000, a custom gazebo is typically a more complex structure and falls on the higher end of that spectrum. It’s not uncommon for a fully customized gazebo to cost $15,000 or more, especially when it includes high-end materials and intricate details.

Think of it as investing in a permanent, beautiful addition to your home that’s built to last. This isn’t just an outdoor accessory; it’s a functional living space designed to your exact specifications. By understanding the key cost drivers from the start, you can create a realistic budget and make informed decisions as you plan your perfect outdoor retreat. A good builder will walk you through every line item, ensuring there are no surprises and that the final result is exactly what you imagined for your Long Island backyard.

Key Factors That Affect the Price

The primary factors influencing your gazebo’s cost are its size, materials, and custom features. A larger, more elaborate structure will naturally require more materials and labor. Your choice of materials also plays a huge role. For example, premium woods like cedar or durable, low-maintenance vinyl will cost more upfront than standard pressure-treated pine. The foundation is another consideration, whether it’s a simple concrete slab or an elegant patio made from high-quality porcelain and natural stone pavers. Finally, add-ons like built-in seating, electrical wiring for lighting and fans, or integrated screens will increase the total investment. These features are what truly personalize the space and make it your own.

Budgeting and Financing Your Project

Seeing the potential price tag can feel overwhelming, but a custom gazebo is a significant home improvement project that adds lasting value. Don’t let the initial number discourage you. Many homeowners find that financing is a practical way to make their dream project a reality without depleting their savings. Some financing options allow you to break down the total cost into predictable, manageable monthly payments. This approach makes it easier to move forward with your project now instead of waiting. When you consult with a full-service builder, be sure to ask about the payment and financing solutions they recommend to help you budget effectively for your new outdoor structure.

Do You Need a Permit for a Gazebo on Long Island?

Let’s talk about one of the less glamorous, but very important, parts of building a gazebo: the paperwork. The short answer is yes, you will likely need a permit for a permanent, custom gazebo on Long Island. While the specific rules can differ from town to town across Nassau and Suffolk County, most municipalities require one for structures of a certain size and permanence. Factors like the gazebo’s square footage, its height, and whether it has electricity or is attached to a foundation all play a role in the permitting process.

Trying to figure this out on your own can feel like a full-time job. It often involves digging through your town’s building codes, filling out applications, and providing detailed plans. This is where the value of an experienced local builder really shines. A team that regularly works in your area will already know the specific requirements for your project. They understand that getting a permit isn’t just about checking a box; it’s about ensuring your new gazebo is safe, structurally sound, and a compliant addition to your property. This protects your investment and gives you confidence that the job is done right from the very beginning. Choosing a builder who is an expert in custom pavilions, pergolas, and gazebos means they will have this process down to a science.

How a Full-Service Builder Handles the Paperwork

A full-service builder manages your entire project, and that includes handling all the permit-related headaches for you. Instead of you spending hours at the town building department, your builder takes care of the entire process. They will prepare and submit all the necessary applications, architectural drawings, and site plans required by your local municipality. They act as the main point of contact with town officials, answering any questions and providing additional information as needed.

This comprehensive approach means you can focus on the exciting parts of the project, like choosing materials and design features, while your builder handles the bureaucracy. This is a standard part of a professional home remodeling or outdoor construction project. From initial submission to scheduling final inspections, a full-service team ensures every step is completed correctly, giving you total peace of mind.

Key Questions to Ask a Gazebo Builder

Choosing a builder is the most important decision you’ll make for your gazebo project. Think of it as a job interview where you’re the hiring manager. The right partner will not only build a beautiful structure but also make the entire process smooth and stress-free. Before you commit, sit down with potential builders and come prepared with a list of questions. Their answers will tell you everything you need to know about their expertise, process, and reliability.

Start with the basics to gauge their experience. Ask to see a portfolio of their completed pavilions and gazebos, paying close attention to the quality of the craftsmanship. Inquire if they offer standard models or specialize in fully custom designs. A great builder can work with you to create a structure that perfectly fits your vision and your property. Be sure to ask what materials they recommend for Long Island’s weather and why. You should also get a clear understanding of their design process, including whether they provide 3D renderings so you can visualize the final product. Finally, ask about their team, the project timeline, and how they handle the essential, and often complicated, permit process. A confident builder will have clear, direct answers that give you peace of mind.

Your Pre-Hiring Checklist

Before you sign any contracts, run through this final checklist to ensure you’re partnering with a true professional. First, verify that the builder is fully licensed and insured to work in your area. This is non-negotiable. Next, carefully review the contract to confirm it includes a detailed scope of work, a list of materials, a project timeline, and a clear payment schedule. A trustworthy builder will also manage the entire permit process for you, leveraging their experience with local regulations in towns across Nassau and Suffolk County. Finally, discuss the warranty they offer on both materials and labor. A solid warranty shows that a company stands behind its work.

Red Flags to Watch For

Knowing what to avoid is just as important as knowing what to look for. Be cautious of any builder who gives you a vague estimate or uses high-pressure sales tactics to rush your decision. A professional provides a detailed, itemized quote and respects your need to consider your options. Another major red flag is a lack of a portfolio or verifiable references. If they can’t show you their past work, they may not have the experience you need. It’s also wise to be wary of companies without a physical office or showroom. A local presence, like the Gappsi Store, provides accountability. Lastly, if a builder dismisses the need for permits or is difficult to communicate with from the start, it’s best to walk away.

Is a Custom Gazebo a Good Investment?

Absolutely. For many Long Island homeowners, a custom gazebo is a smart investment that pays off in more ways than one. It’s not just about adding a beautiful structure to your yard; it’s about creating a new area for your family to live, relax, and entertain. Think of it as an outdoor living room, a shaded retreat on a hot summer day, or the perfect spot for hosting dinner parties. This added functional space can make your entire property feel more expansive and useful.

From a financial perspective, a well-designed gazebo can offer a solid return on investment by increasing your home’s curb appeal and overall value. While the initial cost is a key consideration, the long-term benefits often outweigh it. The real magic happens with customization. Unlike a one-size-fits-all kit, a custom build allows you to design a space that perfectly fits your lifestyle. You can work with a builder to create unique pavilions and pergolas that include features like built-in lighting, ceiling fans, or even outlets for a sound system. By tailoring the gazebo to your specific needs, you create a truly personal oasis that enhances both your property’s value and your daily enjoyment of it.

Related Articles

Frequently Asked Questions

How long does it take to build a custom gazebo? The timeline for a custom gazebo project can vary quite a bit, as it depends on the design’s complexity, the materials you choose, and the local permit process. Generally, you can expect the entire process, from the initial design consultation to the final installation, to take anywhere from a few weeks to a couple of months. A full-service builder will give you a clear and realistic timeline upfront and will manage every step to keep the project moving forward efficiently.

What’s the real difference between a gazebo, a pergola, and a pavilion? It’s easy to get these terms mixed up, but they each serve a different purpose. A gazebo is typically a freestanding, often octagonal structure with a solid roof and partially enclosed sides, creating a cozy, room-like feel. A pavilion also has a solid roof but is usually larger, rectangular, and completely open on the sides, making it ideal for covering an outdoor dining area or kitchen. A pergola is the most open of the three, featuring a slatted or open-beam roof designed to provide partial shade for a walkway or patio.

How much maintenance will my new gazebo actually need? The amount of maintenance really comes down to the material you select. If you choose a vinyl, aluminum, or composite gazebo, you’re looking at very little upkeep, usually just a simple cleaning with soap and water to keep it looking fresh. A classic wood gazebo requires a bit more care. To protect it from Long Island’s weather and keep it looking its best, you will need to stain or seal it every few years.

Can I really use a gazebo for more than just the summer months? Absolutely. While a gazebo is a perfect escape from the summer sun, adding custom features can extend its use well into the spring and fall. Installing screens is a fantastic way to create a bug-free zone for relaxing on warm evenings. With proper lighting and a ceiling fan, your gazebo can become a comfortable three-season retreat for reading, dining, or just enjoying your backyard without being fully exposed to the elements.

How does the custom design process actually work? The custom design process is a collaborative effort to bring your vision to life. It starts with a consultation where we discuss how you want to use the space, your style preferences, and your budget. From there, we create initial designs, often including 3D renderings so you can see exactly what the finished structure will look like in your yard. We’ll help you select the perfect materials, colors, and features before finalizing the plans and moving on to construction.

Share this page:
How to lay a patio on concrete, setting a paver with a rubber mallet.

How to Lay a Patio on Concrete: A Beginner’s Guide

You want a beautiful paver patio, but the thought of demolishing your existing concrete slab is overwhelming. What if you didn’t have to? Laying pavers directly over concrete is a practical solution that can give your outdoor space a dramatic facelift. This method works wonderfully, provided the concrete base is in good shape and you follow the right steps. This article is your complete roadmap, detailing how to lay a patio for beginners on concrete from start to finish. We’ll cover choosing the right materials, preparing the surface correctly, and avoiding common mistakes so your new patio looks professionally installed.

Key Takeaways

  • A Solid Base is Non-Negotiable: Paving over concrete is a great time-saver, but only if the existing slab is in excellent condition. If your concrete has large cracks, is crumbling, or is uneven, you must remove it and build a proper foundation to ensure your new patio lasts.
  • Proper Technique Prevents Costly Repairs: Always use a full, continuous mortar bed under each paver for solid support, and never skip the bonding agent. These two steps work together to create a powerful adhesion that stops pavers from cracking or becoming loose over time.
  • Plan for Water and Protect Your Investment: Water is a patio’s biggest enemy, so ensure your surface has a slight slope for drainage away from your house. After installation, apply a quality sealant to protect your pavers from stains, water damage, and fading.

What You Need Before You Start

Before you get your hands dirty, let’s talk about preparation. Like any good recipe, having all your ingredients and tools laid out first is the secret to success. It saves you from making frantic trips to the hardware store mid-project and helps everything run smoothly. Getting organized now means you can focus on the fun part: bringing your beautiful new patio to life. While a DIY project can be rewarding, remember that a project of this scale requires precision. If you find the list daunting, our expert masonry team has perfected this process over decades and is always here to help.

Your Tool Checklist

Think of this as your project’s command center. Having the right tools on hand will make every step, from measuring to finishing, much easier. You don’t want to be stuck trying to level a slab with the wrong equipment. Here’s what you should gather:

  • Measuring tape, rope, and a carpenter’s square
  • Shovel and wheelbarrow
  • 2×4 lumber and steel stakes for the frame
  • Drill and 3-inch screws
  • Hand tamper or a plate compactor
  • Level and a straightedge
  • Saw (for cutting pavers)
  • Stiff broom

A plate compactor is a real game-changer for creating a solid, level base that won’t shift over time. You can often rent one from a local hardware store if you don’t own one.

Your Materials Checklist

With your tools ready, it’s time to gather your materials. The quality of these components will directly impact how durable and beautiful your finished patio will be. Don’t be tempted to cut corners here; a strong foundation is everything. You will need:

  • Gravel for the base layer
  • Concrete mix and rebar for reinforcement
  • Mortar mix
  • A bonding agent or primer
  • Jointing compound or sand
  • Concrete sealer

And of course, the star of the show: your pavers. Whether you’re dreaming of sleek porcelain or classic natural stone, choosing the right material is key to achieving your desired look. Make sure you have a solid 4-inch-thick layer of compacted gravel to ensure proper drainage and a stable base.

Is Paving Over Concrete a Good Idea?

So, you have an old concrete patio or walkway and you’re dreaming of a beautiful paver surface. The big question is, can you just lay new pavers on top of the existing concrete? The short answer is yes, you often can, and it can be a fantastic shortcut. Using your existing concrete slab as a base can save you a ton of time, money, and demolition work. However, this method only works if the concrete you’re covering is in good shape. If the foundation is flawed, you’re just putting a pretty bandage on a problem that will eventually ruin your hard work. Let’s walk through when this is a smart move and when you need to pause and reconsider.

The Pros of Laying Pavers on Concrete

When your existing concrete is stable and in good condition, using it as a base is a practical and efficient way to go. The biggest advantage is speed. Since you’re not excavating and building a new base from scratch, the project timeline gets much shorter. Once the concrete is prepped, you can get right to the fun part: laying the pavers. This approach reduces labor costs and the mess that comes with a full demolition. It’s an effective method to revitalize your outdoor spaces with beautiful new materials without the headache of a complete overhaul. Think of it as giving your patio a major facelift on a solid foundation.

When to Reconsider: Dealing with Damaged Concrete

This shortcut has one major rule: never build on a bad foundation. If your concrete slab has significant issues, paving over it will only lead to disappointment. Look for large, deep cracks, crumbling edges, or sections that are heaving or sinking. If parts of the concrete are at different levels, it’s a sign that the ground underneath is unstable. This movement won’t stop just because you’ve covered it. Your new pavers will shift, crack, and become uneven, wasting all your effort. Proper site preparation is everything. If your concrete is not a solid, stable base, you’ll need to remove it and start fresh to ensure your new patio lasts for years.

A Quick Note on Height and Damp-Proofing

Here’s a crucial detail that’s easy to overlook: the final height of your new patio. Laying a mortar bed and pavers will add about 1.5 to 2 inches of height to the surface. You need to check where this new height will sit in relation to your house. Look for your home’s damp-proof course (DPC), which is typically a thin horizontal line in the brickwork about six inches above the ground. If your new patio surface is higher than the DPC, it can create a bridge for moisture to bypass this protective layer, potentially causing serious damp issues inside your home. Always measure first to make sure your beautiful new patio doesn’t create a costly problem down the road.

How to Prepare Your Concrete Surface

Think of your existing concrete slab as the foundation for your new patio. If that foundation isn’t solid, clean, and stable, the beautiful patio you lay on top won’t last. Taking the time to properly prepare the surface is the single most important thing you can do to ensure your project is a success for years to come. It prevents future headaches like shifting pavers, water damage, and cracks. Let’s walk through exactly what you need to do.

Clean and Pressure Wash the Area

Start with a completely clean slate. Over the years, your concrete has collected dirt, moss, algae, and maybe even some oil stains. All of this has to go. A thorough cleaning ensures that the mortar and bonding agents you apply later will adhere properly. The most effective way to do this is with a pressure washer, which blasts away grime from the pores of the concrete. If you don’t own one, you can easily rent one for a day. For stubborn stains, you may need a concrete-specific cleaner. This step is so important that it’s a standard part of any professional restoration and sealing service.

Repair Cracks and Level the Surface

Next, play detective and inspect every inch of the clean concrete. Small, hairline cracks aren’t a dealbreaker, but they need to be addressed. You can fill them with a flexible concrete crack sealant. For larger cracks or low spots, use a self-leveling compound to create a smooth, even surface. Be honest with your assessment here. If your slab has major, wide cracks, is crumbling, or is severely heaved, it’s not a stable base. Paving over it will only hide the problem temporarily. In these cases, you may need to have the old slab removed and a new one poured by a masonry professional.

Plan for Proper Slope and Drainage

Water is the biggest threat to any patio. If it pools on the surface or drains toward your home’s foundation, you’re setting yourself up for major problems. Your concrete base must have a gentle slope that directs water away from your house and into your yard or a drain. The ideal slope is about a quarter-inch drop for every foot of distance. You can check this with a long level and a measuring tape. If your slab is perfectly flat or slopes the wrong way, you can correct it by applying a layer of leveling compound, making it thicker on one side to create the necessary grade for proper drainage.

Apply a Bonding Agent

This is a step many DIYers skip, but it’s your secret weapon for a long-lasting patio. A bonding agent, or primer, acts like a super-strong glue between the old concrete and the new mortar bed you’re about to lay. It ensures the two layers fuse together into a single, solid unit, preventing the pavers from shifting or coming loose over time. You’ll want to use a liquid polymer bonding agent, often called an SBR bonding agent. Following the product’s instructions, you’ll simply brush a thin, even coat onto the clean, repaired concrete surface right before you start applying your mortar. It’s a quick step that provides powerful adhesion and peace of mind.

How to Choose the Right Paving Slabs

Choosing the right paving slabs is one of the most exciting parts of planning your new patio. The material you select sets the tone for your entire outdoor space, influencing everything from the overall style to your long-term maintenance routine. Think of it as choosing the personality for your backyard. Do you want something sleek and modern, or rustic and timeless? We’ll walk through the three most popular options: porcelain, natural stone, and concrete. Each has its own unique benefits, and understanding them will help you find the perfect match for your home and lifestyle.

Porcelain Pavers

If you’re looking for a durable, low-maintenance option with a clean, contemporary feel, porcelain pavers are an excellent choice. They are incredibly tough and built to handle heavy foot traffic and harsh Long Island weather without fading or cracking. Because they are non-porous, they resist stains, mold, and mildew, making cleanup a breeze. You won’t have to worry about spilled wine during a summer barbecue. Gappsi’s collection of porcelain pavers comes in a huge variety of colors and finishes, including realistic wood and stone effects, giving you endless design possibilities without the upkeep of the real thing.

Natural Stone Pavers

For a touch of timeless elegance, nothing compares to natural stone. Materials like limestone, slate, travertine, and granite bring an organic, high-end beauty to any patio, with unique colors and textures that only nature can create. Each stone is one-of-a-kind, so your patio will have a character that is entirely its own. Natural stone is extremely durable and can last a lifetime with proper care. While it can be a bigger initial investment, the classic charm and lasting value it adds to your home are undeniable. Our expert masonry team can help you design a layout that truly highlights the stone’s natural beauty.

Concrete Pavers

Don’t underestimate the power of concrete pavers. They are the chameleons of the paving world, offering incredible versatility and durability at a budget-friendly price point. Available in a vast array of shapes, sizes, and colors, concrete pavers give you the creative freedom to design intricate patterns and unique layouts. Whether you want the look of classic cobblestone or a simple, modern grid, you can achieve it with concrete. They are engineered to be strong and resilient, making them a practical choice for any patio. You can find a wide selection of options at the Gappsi Store to get your project started.

What to Consider: Size, Thickness, Climate, and Use

Beyond the material itself, a few other factors will guide your decision. The size and shape of the pavers should complement your home’s architectural style. Larger slabs can make a small space feel bigger, while smaller pavers can create charming, intricate patterns. Thickness is also key; a simple walkway won’t need the same thick, heavy-duty pavers as a surface that might hold heavy patio furniture or a hot tub. Finally, think about long-term performance. A properly installed base is crucial to prevent shifting and sinking, which can lead to costly repairs. Investing in quality installation and periodic cleaning and sealing will ensure your patio looks great for years to come.

Your Step-by-Step Guide to Laying Pavers on Concrete

Alright, you’ve done the prep work, and your concrete slab is ready for its makeover. This is where the transformation really begins. Following these steps carefully will help you create a beautiful, durable patio that you can be proud of. Remember to work at a steady pace and not to rush the process, especially when you’re setting the first few pavers, as they will guide the rest of your layout. Let’s get those pavers down.

Step 1: Mark and Dry Lay Your Slabs

Before you mix any mortar, it’s smart to do a test run. Start by marking your layout with chalk lines directly on the concrete. Then, begin your dry lay, placing the pavers in your desired pattern without any adhesive. This lets you see exactly how the pattern will look and where you’ll need to make cuts. It’s much easier to adjust a paver now than after it’s set in mortar. This step is your best defense against ending up with an awkward sliver of a paver in a highly visible spot. A thoughtful masonry design always starts with a solid plan.

Step 2: Mix and Apply the Mortar Bed

Now it’s time to mix your mortar. You’ll be creating a full mortar bed, which provides a solid, even base for every paver. Combine your sand and cement according to the package directions, adding water slowly until you have a consistency similar to thick oatmeal. It should be stiff enough to hold its shape but wet enough to bond to the concrete and the paver. Working in small, manageable sections, spread an even layer of mortar about one inch thick. Use your trowel to create slight ridges in the mortar, which will help the paver settle in and create a stronger bond.

Step 3: Lay the First Slab and Set Your Pattern

With your mortar bed ready, it’s time to lay the first paver. Start in a corner and press the paver firmly into the mortar with a slight twisting motion. This ensures good contact and squeezes out any air pockets. Gently tap it with a rubber mallet to set it to the correct height. This first paver is your guide for the entire patio, so make sure it’s perfectly positioned. Continue laying pavers according to your pattern, using tile spacers to maintain consistent joint widths. You can see how our Gappsi pros handle different patterns on our YouTube channel for inspiration.

Step 4: Check Levels and Adjust for Drainage

As you lay each paver, constantly check your levels. Place a level across several pavers at a time to ensure the surface is flat and even. Just as importantly, you need to maintain the gentle slope you planned for drainage. A good rule of thumb is a slope of about a quarter-inch for every foot, angled away from your home’s foundation. This prevents water from pooling on the patio or running toward your house. Proper drainage is key to avoiding future issues that might require professional restoration services. Adjust the mortar underneath each paver as needed to achieve the right height and slope.

Step 5: Cut Slabs to Fit Edges

Unless your patio is a perfect grid of full-sized pavers, you will need to make cuts for the edges and to fit around obstacles like posts or vents. A wet saw with a diamond blade is the best tool for this job, as it gives you clean, precise cuts. An angle grinder also works but can create more dust. Always measure twice and cut once. Mark your cut line clearly on the paver before you begin. And please, always wear safety glasses and gloves when cutting pavers. Achieving a professional finish, whether for a patio or a full home remodeling project, is all about these finishing details.

Step 6: Fill the Joints

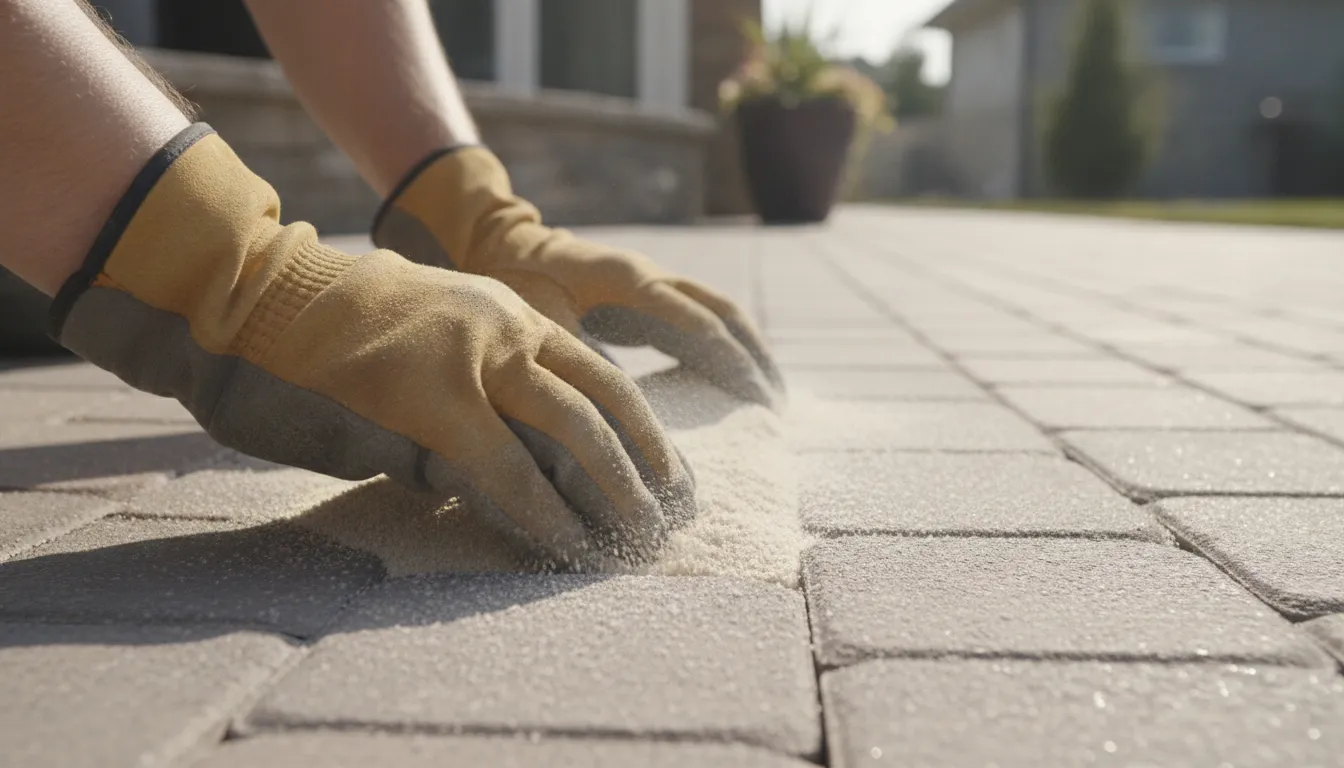
After all your pavers are laid and the mortar has had at least 24 hours to cure, you can fill the joints. This step locks the pavers together and prevents weeds from sprouting. Polymeric sand is an excellent choice because it contains polymers that harden when activated with water, creating a firm, durable joint. Sweep the sand across the dry patio surface, working it into the joints until they are completely full. Use a soft-bristle broom to avoid scratching the paver surface. You can find high-quality jointing sands and other materials at the Gappsi Store.

Step 7: Compact and Finish the Surface

Once the joints are filled, sweep any excess sand off the paver surfaces. If you used polymeric sand, follow the manufacturer’s instructions for activation, which usually involves lightly misting the patio with a garden hose. Be careful not to use too much water, as it can wash the sand out of the joints. For larger patios, using a plate compactor with a protective pad can help settle the pavers and sand for a truly professional finish. This final step ensures your new patio, much like the area around one of our custom swimming pools, is solid, stable, and ready for years of enjoyment.

Common Mistakes to Avoid

Laying a beautiful new patio is an exciting project, but a few common missteps can turn your dream outdoor space into a future headache. Taking the time to do things right from the start ensures your patio will be a source of enjoyment for years, not a constant repair job. By avoiding these frequent errors, you can build a stable, durable, and professional-looking surface that stands up to the elements and everyday life.

Using “Spot-Bedding” Instead of a Full Mortar Bed

It might seem faster to apply just a few dabs of mortar to the corners and center of each paver, a method known as “spot-bedding.” However, this is one of the most critical mistakes you can make. This technique leaves large, unsupported voids under the slab. Any pressure on these weak spots, like from foot traffic or patio furniture, can easily cause the paver to crack or rock back and forth. For a patio that lasts, you must use a full mortar bed. This provides solid, continuous support across the entire base of each paver, distributing weight evenly and locking it firmly in place.

Skipping the Bonding Agent

Think of a bonding agent as the essential primer for your project. It’s a liquid polymer that you paint onto the existing concrete and the back of your pavers before laying them in the mortar. Its job is to create a powerful chemical bond between the old concrete surface, the new mortar, and the paving slab. If you skip this step, the mortar will not properly adhere to the smooth concrete, and your pavers will eventually become loose and wobbly. It’s a simple, quick step that makes a huge difference in the long-term stability and success of your patio installation.

Forgetting About Drainage

Water is the biggest enemy of any paved surface. If you don’t plan for proper drainage, water can pool on your patio or, worse, get trapped underneath it. This can lead to a host of problems, from unsightly stains and moss growth to serious structural issues. In a climate like Long Island’s, trapped water that freezes and thaws can cause the pavers to heave and crack. A proper landscape design always includes a slight, consistent slope (about a quarter-inch drop per foot) to direct water away from your home’s foundation and off the patio surface, preventing damage before it starts.

Paving Over Unstable Concrete

Your new patio is only as strong as the foundation it’s built on. If your existing concrete slab is badly cracked, crumbling, or has significant heaving and unevenness, laying pavers directly over it is a recipe for failure. These issues are often signs of an unstable base underneath the concrete, and that movement will transfer directly to your new pavers, causing them to shift, crack, and become uneven. Before you begin, carefully inspect the slab. Minor cracks can be repaired, but if the damage is widespread, you must address the underlying problem first for a lasting result.

Missing Expansion Joints

Paving materials, like all building materials, expand in the heat and contract in the cold. Expansion joints are flexible gaps, typically filled with a silicone sealant, that are placed around the perimeter of the patio and at regular intervals in larger areas. They give the pavers room to move without pressing against each other and causing cracks or buckling. Similarly, sturdy edge restraints are essential for keeping the outer pavers from shifting outward over time. Proper masonry construction accounts for this movement, ensuring the entire system remains stable and intact through every season.

Working in Extreme Weather

The weather on installation day can have a big impact on the quality of your finished patio. Try to avoid working in extreme temperatures. If it’s too hot and sunny, the mortar can dry out too quickly before it has a chance to cure properly, resulting in a weak bond. If it’s too cold (below 40°F), the curing process will slow dramatically and can be halted entirely, compromising the strength of the mortar. Rain is also a problem, as it can wash away fresh mortar and ruin the surface finish. Always check the forecast and plan to work on a mild, dry day for the best results.

How to Seal and Maintain Your New Patio

You’ve put in the work, and now you have a beautiful new patio to show for it. To keep it looking its best for years of backyard barbecues and quiet mornings, a little maintenance goes a long way. Taking care of your patio is simple, and it protects the investment you’ve made in your home. Think of it as the final step in creating a lasting outdoor space.

Why Sealing Is a Must

Sealing your new patio is one of the most important things you can do to protect it. Think of sealant as a protective shield for your pavers. It creates an invisible barrier that guards against water damage, pesky stains from spilled drinks or grill grease, and general wear from the weather. This protective layer not only keeps your patio looking vibrant and new but also helps prevent cracks and makes cleaning much easier. By sealing your patio, you’re ensuring it remains a beautiful and durable centerpiece of your yard for many seasons to come.

How and When to Apply Sealant

Timing is everything when it comes to sealing. As a general rule, you should plan to reseal your patio every two to three years, depending on how much foot traffic it gets and its exposure to the elements. For the best results, apply the sealant on a clean, completely dry surface. It’s a good idea to check the weather forecast and pick a few dry days to ensure the sealant can cure properly without being washed away by rain. If you’d rather leave it to the experts, Gappsi offers professional restoration and sealing services to get the job done right.

Keep It Clean: Routine Washing

Regular cleaning is your first line of defense against dirt and grime buildup. A quick sweep every week or so will clear away leaves, dirt, and other debris that can accumulate on the surface. For a deeper clean, you can use a pressure washer on a low setting. Be careful not to use too much pressure, as a powerful blast can damage the paver surface or the jointing material between them. This simple routine is often all you need to keep your patio looking fresh and inviting, especially if you have durable porcelain and natural stone pavers.

Tackle Stains Immediately

Accidents happen, but they don’t have to leave a permanent mark on your patio. The key is to act fast. For most common spills and spots, a simple solution of mild detergent and water applied with a soft brush will do the trick. For tougher stains like oil or rust, you may need a specialized cleaner designed for pavers. Addressing stains as soon as you notice them prevents them from setting deep into the stone, making cleanup much easier and keeping your patio looking pristine. A properly sealed patio will also give you more time to clean up before a stain can set.

Know When to Reseal

So, how do you know when it’s time to reapply sealant? Your patio will give you a few clear signs. The easiest test is to splash a little water on the surface. If it beads up like water on a freshly waxed car, your sealant is still working. If the water soaks in and darkens the paver, it’s time to reseal. You might also notice the color of your patio looking a bit faded or dull. These are cues that the protective layer has worn down. Paying attention to these signs will help you keep your patio protected, and our professional restoration team is always here to help.

When to Call a Professional

Taking on a DIY project can be incredibly rewarding, but it’s also important to know when a job might be bigger than you can handle alone. For patio installations, calling a professional isn’t giving up; it’s making a smart investment in your home’s value and your own peace of mind. If you’re facing a large or complex project, bringing in an expert ensures the job is done right the first time, saving you from costly mistakes and future headaches.

Consider the scale and design of your project. A small, square patio on a perfectly level surface is a manageable weekend task. However, if you’re planning a large patio or a custom design with intricate patterns, curves, or multiple levels, the complexity grows quickly. Professionals have the experience to execute these detailed masonry designs flawlessly. They also understand the structural requirements for larger areas, like adding control joints to prevent the concrete from cracking over time.

The condition of your existing concrete slab is another major factor. If you notice significant cracks or areas where the concrete is uneven, it could signal that the ground underneath is unstable. Simply paving over this can lead to your new patio shifting and breaking apart. A professional can assess the root cause of the problem and properly restore and seal the foundation before any new pavers are laid. This ensures your beautiful new patio has a stable base that will last for years.

Finally, think about the logistics. Projects requiring more than a cubic yard of concrete involve a lot of heavy lifting and precise mixing. Professionals handle all the logistics, from ordering ready-mix concrete deliveries to operating heavy machinery like power mixers safely and efficiently. If the thought of coordinating material deliveries and wrestling with unfamiliar equipment sounds overwhelming, it’s a clear sign to call in a team that does it every day.

Related Articles

Frequently Asked Questions

My concrete has a few small cracks. Do I really need to tear it all out? Not necessarily. Small, hairline cracks are usually not a dealbreaker and can be repaired as part of your surface preparation. You can fill them with a flexible concrete sealant before you begin. The real red flag is significant damage, such as wide, deep cracks, crumbling edges, or sections of the slab that are heaving and uneven. If the concrete is no longer a stable, level surface, paving over it will only hide the problem temporarily, and your new pavers will eventually fail.

What is the single most common mistake DIYers make with this project? The most tempting and damaging shortcut is “spot-bedding,” which is using dabs of mortar on the corners and center of a paver instead of a full bed. This leaves hollow voids under the paver, making it incredibly weak and prone to cracking under the weight of foot traffic or furniture. Always take the time to apply a solid, full mortar bed under each paver for a durable patio that will last.

How much height will this add, and why is that important? You can expect the mortar and pavers to add about 1.5 to 2 inches of height to your existing surface. This detail is critical because you must ensure the new patio level does not end up higher than your home’s damp-proof course (DPC). The DPC is a thin, horizontal barrier in your brickwork, usually about six inches above the ground, that prevents moisture from rising into your home’s walls. If your patio bridges this barrier, it can lead to serious damp problems inside your house.

Is it really necessary to seal the pavers? What happens if I don’t? Yes, sealing is a step you shouldn’t skip. Think of unsealed pavers as being very porous, like a sponge. Without a sealant, they will absorb moisture, which can lead to cracking in freezing weather. They will also soak up any spills, from wine to oil, resulting in permanent stains. Sealing creates a protective shield that repels water, resists stains, and makes cleaning much easier, keeping your patio looking great for years.

This seems like a lot of work. When should I just call a professional? A small, simple patio can be a great DIY project. However, you should consider calling a professional if your existing concrete foundation is in poor shape, if your project is large and requires complex cuts or patterns, or if the design involves multiple levels and retaining walls. Professionals have the equipment and experience to assess and repair foundational issues and execute intricate designs flawlessly, ensuring a beautiful and long-lasting result.

Share this page:
A shade structure contractor discusses plans with a client on a Long Island patio.

Find the Best Shade Structure Contractor in Long Island

Your backyard has so much potential, but turning it into a true outdoor oasis requires a central feature to anchor the space. A beautiful shade structure does just that, creating a focal point for relaxation and entertainment. Whether you envision a classic wood pergola draped in climbing roses or a modern pavilion with a full outdoor kitchen, the right structure defines how you live outdoors. This guide will help you explore all the possibilities, from custom lighting and motorized screens to the perfect stone pavers for your foundation. Let’s start planning the details that will make your backyard the favorite room of your house with a premier shade structure contractor Long Island.

Key Takeaways

  • Define Your Goal First: Decide if you want partial shade or full protection. A pergola uses an open-lattice roof to define a space with dappled sunlight, while a pavilion has a solid roof to create a true outdoor room shielded from sun and rain.
  • Build for the Long Island Climate: Your structure’s longevity depends on choosing the right materials and contractor. Select weather-resistant options like treated wood or aluminum, and partner with a local expert who understands coastal conditions and specific town building codes.
  • Personalize with Practical Features: Go beyond the basic structure by adding elements that fit your lifestyle. Integrating lighting for evening gatherings, electrical outlets for convenience, and landscaping to blend the structure into your yard will make the space a true extension of your home.

Your Guide to Long Island Shade Structures

Choosing the right shade structure is about more than just escaping the sun. It’s about creating a functional, beautiful extension of your home where you can relax, entertain, and make memories. From classic pergolas that dapple your patio with sunlight to sturdy pavilions that house an entire outdoor kitchen, the options are vast. Each type of structure offers a unique blend of style, function, and protection. Understanding the key differences will help you select the perfect centerpiece for your Long Island backyard, one that complements your home’s architecture and fits how you want to live outdoors. Let’s walk through the most popular choices to find the right fit for your space.

Pergolas

A pergola is an elegant way to define an outdoor area and add architectural interest without completely blocking the sun. Characterized by its open-lattice roof supported by columns, a pergola provides partial shade, creating a comfortable space that still feels bright and airy. They work beautifully over patios, walkways, or garden areas, serving as a support for climbing plants like wisteria or roses. We can design and build custom pavilions and pergolas from materials like wood, vinyl, or aluminum to perfectly match your home’s style. A pergola creates a distinct “room” in your backyard, making it an inviting spot for dining or lounging.

Pavilions and Gazebos

If you’re looking for complete protection from sun and rain, a pavilion or gazebo is an excellent choice. A pavilion features a solid roof and is typically larger, making it the ideal structure to cover an outdoor kitchen, living room, or dining set. It essentially creates a year-round outdoor room. A gazebo is a freestanding, often octagonal structure with a solid roof that acts as a charming focal point in a garden or by a pool. Both options provide a reliable escape from the elements, allowing you to enjoy your backyard oasis no matter the weather.

Sail Shades and Canopies

For a modern and flexible shading solution, consider sail shades or canopies. These are made from durable, UV-resistant fabric stretched between several anchor points to create a sculptural and stylish cover. Sail shades are perfect for placing over pools, patios, or play areas, offering significant sun protection with a contemporary, minimalist look. They can be layered in different colors and shapes to create a unique design statement. As part of a comprehensive landscape design, we can integrate these fabric structures to provide targeted shade exactly where you need it most, adding both function and flair to your outdoor space.

Retractable Awnings and Covers

Retractable awnings offer the ultimate blend of convenience and control, giving you shade at the touch of a button. Mounted directly to your house, these awnings can extend over a patio or deck to provide instant relief from the sun and can be retracted when you want to enjoy the open sky. This flexibility is perfect for Long Island’s changing weather. Motorized versions make operation effortless, and they come in a wide variety of durable, weather-resistant fabrics to match your home’s exterior. A retractable awning is a practical addition that enhances your home’s usability and can be seamlessly included in a home remodeling project.

Why Hire a Local Long Island Contractor?

When you’re investing in a significant home improvement project, like a new shade structure, the contractor you choose makes all the difference. While a big national company might seem appealing, there are distinct advantages to working with a local Long Island expert. A local contractor is more than just a builder; they’re your neighbor. They have a firsthand understanding of the area and a reputation to maintain right here in our community. This local connection translates into a smoother process and a better final product for your home.

Expertise in Long Island’s Climate and Salt Air

Long Island has a unique coastal environment, and that salty air we love can be tough on building materials. A local contractor understands these specific challenges. They know which types of wood resist moisture and humidity, which metals require special coatings to prevent corrosion, and which natural stones will withstand our freeze-thaw cycles without cracking. This familiarity with the local environment means they can guide you toward durable, long-lasting materials for your pavilion or pergola, ensuring your investment looks great for years to come. Their expertise helps you avoid costly repairs and premature replacements down the road.

Local Codes and Permitting Knowledge

Handling building codes and permits can be one of the most stressful parts of any construction project. Regulations can vary from one town to the next across Nassau and Suffolk counties. A seasoned Long Island contractor has an in-depth understanding of these local rules. They know the specific setback requirements, height limitations, and structural standards for projects like pavilions and pergolas. This expertise is crucial for keeping your project on schedule and avoiding potential legal issues or fines. By managing the paperwork and inspections, they give you peace of mind and let you focus on the fun parts of designing your new outdoor space.

Faster, Clearer Communication

Working with a contractor who is just a short drive away makes the entire process more personal and efficient. When your project manager is local, it’s much easier to schedule face-to-face meetings and quick site visits. This greater accessibility means questions get answered faster and any issues can be addressed immediately, right on site. A local company is also deeply invested in its community reputation. They rely on word-of-mouth and positive reviews from your neighbors, so they are highly motivated to ensure you are completely happy with their work. This commitment to client satisfaction builds trust and leads to a more collaborative and positive experience from start to finish.

How to Choose the Right Shade Structure

Picking the right shade structure is about creating an outdoor space you’ll love for years to come. It’s more than just choosing a design you like; it’s about finding a solution that fits your home, your lifestyle, and your backyard’s unique layout. Before you fall in love with a specific style, take a step back and consider a few key factors. Thinking through these points will help you clarify your vision and ensure your new addition is both beautiful and functional.

Start by looking at your property and how a new structure will fit into the existing flow. Then, think about the materials. On Long Island, durability is essential for getting the most from your investment. Your home’s architectural style should also guide your choice, creating a cohesive look that feels intentional. Finally, get clear on how you plan to use the space. Whether you envision a quiet retreat or a lively entertainment hub, your answer will shape the final design. By working through these questions, you can confidently select one of Gappsi’s pavilions or pergolas that perfectly suits your needs.

Evaluate Your Outdoor Layout and Size

First, take a good look at your yard. Where will the structure go? Consider how it will connect to your existing patio, deck, or swimming pool. Measure the available area to get a realistic idea of what size structure will fit comfortably without overwhelming the space. It’s also smart to observe how the sun moves across your yard throughout the day. This will help you determine the best placement for maximum shade when you need it most. A well-placed structure should enhance your outdoor flow, not disrupt it, creating a natural and inviting transition from one area to the next.

Focus on Materials and Durability

On Long Island, our weather can be tough on outdoor structures. Between the summer humidity and the salty air, choosing the right materials is critical for longevity. Look for high-quality, resilient options like treated wood, low-maintenance aluminum, or durable composites that are built to withstand the elements. A professional contractor will prioritize quality materials and expert installation methods to ensure your shade structure is not only beautiful but also built to last. This focus on durability protects your investment and gives you a reliable outdoor space to enjoy season after season.

Match the Style to Your Home’s Aesthetic

Your new shade structure should feel like a natural extension of your home. Consider your house’s architectural style, color scheme, and overall character. A modern home might call for a sleek aluminum pergola with clean lines, while a traditional colonial could be complemented by a classic wood pavilion. The goal is to create a harmonious look where the new structure complements your home’s existing design. Working with a team that understands how to blend new construction with your home’s aesthetic, much like in a home remodeling project, ensures the final result is seamless and polished.

Define How You’ll Use the Space

How do you dream of using your new shaded area? Picture your ideal afternoon. Are you hosting large family dinners, lounging with a book, or watching the kids play? Your intended use is a major factor in determining the best type of structure. A large pavilion is perfect for an outdoor dining room, while a smaller pergola might create an intimate seating area. If you need flexibility, a retractable canopy could be the answer. Defining the function of the space first will help you customize a solution that perfectly fits your lifestyle and daily routines.

Pergolas vs. Pavilions: Which Is Right for You?

Choosing between a pergola and a pavilion can feel like a big decision, but it gets much easier when you focus on one simple question: how do you want to live in your outdoor space? Both structures add beauty and function to your yard, but they serve very different purposes. A pergola offers an airy, romantic feel with partial shade, while a pavilion creates a true outdoor room with complete protection from the elements. Let’s look at the key differences to help you find the perfect fit for your Long Island home.

Comparing Design and Function

Think of a pergola as a framework for your outdoor area. It has a slatted or latticed roof that lets sunlight and breezes filter through, casting beautiful shadows and creating a sense of openness. This design is perfect for defining a walkway, framing a patio, or supporting climbing plants like wisteria or ivy. A pavilion, on the other hand, is a more substantial structure. It features a solid, continuous roof that provides full protection from direct sun and rain. This makes it an enclosed, sheltered space, almost like an extension of your home but set in the beauty of your backyard.

When to Choose Each Structure

Your lifestyle is the best guide here. If you dream of a sunny garden nook where you can enjoy a morning coffee with dappled light, a pergola is an ideal choice. It adds architectural interest without completely blocking the sky. However, if you plan on hosting family dinners, setting up an outdoor living room with electronics, or needing a guaranteed shady retreat on hot summer days, a pavilion is your answer. Its solid roof ensures your plans are never ruined by a sudden downpour or the intense midday sun. Gappsi offers a range of pavilions and pergolas to match any backyard vision.

What Are the Best Materials for Long Island Shade Structures?

Choosing the right materials for your shade structure is one of the most important decisions you’ll make. Here on Long Island, our structures face a unique combination of sun, humidity, and salty air, so durability is just as critical as style. The material you select will determine not only how your new pergola or pavilion looks but also how much maintenance it will need over the years and how well it stands up to the coastal climate.

From the classic warmth of natural wood to the sleek, low-maintenance appeal of modern composites, each option has its own set of benefits. We work with a variety of high-quality materials to build beautiful and resilient pavilions and pergolas that are designed to last. Thinking about how each material fits your home’s aesthetic and your lifestyle will help you create an outdoor space you’ll love for years to come.

Wood

Wood is a timeless choice for shade structures, offering a natural warmth and classic beauty that blends seamlessly into any backyard. It’s perfect for creating a rustic pavilion or a traditional pergola that complements your garden’s landscape design. For outdoor use on Long Island, we always recommend treated wood, which is specifically prepared to resist moisture, decay, and insects. While wood provides an unmatched organic aesthetic, it does require periodic maintenance like staining or sealing to protect it from the elements and preserve its rich color. This upkeep ensures your wooden structure remains a stunning and sturdy centerpiece in your yard.

Aluminum and Vinyl

If you’re looking for a low-maintenance solution that can easily handle Long Island’s salt air, aluminum and vinyl are excellent choices. Aluminum is lightweight yet incredibly strong and will not rust or corrode, making it ideal for coastal properties. Vinyl is another durable powerhouse, as it resists fading from UV rays and won’t chip, crack, or peel. Both materials offer a clean, modern look and come in a variety of colors, so you never have to worry about painting. These materials are perfect for homeowners who want a durable, long-lasting shade structure without the need for regular upkeep.

UV-Resistant Fabrics

For shade sails, canopies, and retractable awnings, the fabric you choose is key to providing effective sun protection and lasting durability. High-quality, UV-resistant fabrics are designed to block the sun’s harmful rays while resisting fading and degradation over time. Acrylic fabrics are a popular choice because they hold their color well and are highly resistant to UV radiation. For even greater performance, some polyester fabrics are treated with a PVC coating, which adds a layer of water resistance and makes them exceptionally durable. These advanced fabrics ensure your canopy or sail shade remains both functional and beautiful through seasons of use.

How to Customize Your Shade Structure

Your new shade structure is a blank canvas. Beyond providing shelter, it’s an opportunity to create a true outdoor room that reflects your style and meets your family’s needs. Customization is what transforms a simple pergola or pavilion into the centerpiece of your backyard. From high-tech features to thoughtful design details, you can tailor every element to create a space that’s functional, beautiful, and uniquely yours. Think about how you want to use the space day and night, and let that guide your choices.

Add Motorized and Adjustable Features

Imagine controlling the sun and shade with the push of a button. Modern pavilions and pergolas can be equipped with motorized louvers that let you adjust the amount of sunlight filtering through. You can open them for a bright, airy feel or close them completely for full shade or protection from a passing shower. This flexibility makes your outdoor space comfortable and usable in almost any weather. You can also add retractable screens for privacy or to keep insects out, turning your open-air structure into a cozy, enclosed room whenever you wish.

Incorporate Lighting and Electrical

Don’t let sunset put an end to your outdoor enjoyment. Integrating lighting and electrical components is one of the best ways to extend the usability of your shade structure. Built-in LED lighting can create a warm, inviting ambiance for evening dinners or gatherings. You can also install ceiling fans for a cooling breeze on hot summer days. Consider adding electrical outlets so you can charge your phone, plug in a speaker for music, or even set up an outdoor television. These thoughtful additions make your space more functional and ensure it’s the go-to spot for relaxation, day or night.

Integrate Landscaping and Greenery

A shade structure should feel like a natural extension of your yard, not something that was just dropped into place. Thoughtful landscape design is key to achieving this. You can soften the lines of your new structure by surrounding it with lush garden beds, planters filled with colorful flowers, or even a small water feature. For pergolas, consider training climbing plants like wisteria or clematis to grow up the posts and over the top, creating a beautiful living canopy. Integrating greenery helps your structure blend seamlessly with its surroundings, creating a tranquil and organic backyard retreat.

Select Complementary Flooring and Pavers

The surface beneath your shade structure is just as important as the structure itself. The right flooring grounds the space and creates a cohesive look that ties into your home and landscape. You have many beautiful and durable options to choose from. Porcelain and natural stone pavers offer a sophisticated and timeless look that is perfect for Long Island homes. They are incredibly durable and come in a wide range of colors and textures. A skilled masonry team can help you select the perfect material and create a flawless installation that complements your home’s architecture and completes your outdoor living area.

What to Expect from the Design and Installation Process

Bringing a new shade structure to life is an exciting process, but it can feel a little overwhelming if you don’t know what’s involved. A great contractor will guide you through every step, making sure the project runs smoothly from the first conversation to the final walkthrough. Think of it as a partnership. You bring the vision for your backyard, and your design team brings the expertise to make it a reality. The entire process is designed to be transparent and collaborative, ensuring the final structure is exactly what you imagined.

The journey typically breaks down into four main phases: the initial chat and site visit, the design and material selection, handling permits and setting a schedule, and finally, the installation itself. Each stage builds on the last, turning your initial idea into a beautiful and functional part of your home. With an experienced team, you’ll have a clear understanding of what’s happening at every point. Gappsi’s comprehensive design and construction services ensure that every detail, from the foundation to the finishing touches, is handled with care. This integrated approach means your new pavilion or pergola will blend perfectly with your existing landscape and home architecture.

Initial Consultation and Site Assessment

The first step is a conversation. During an initial consultation, your contractor will visit your home to see the space and, more importantly, learn about you. We’ll discuss how you envision using the area. Is it for quiet morning coffees, lively family dinners, or poolside lounging? Understanding your lifestyle helps us tailor the design to your specific needs. We’ll also perform a thorough site assessment, taking measurements, evaluating sun exposure throughout the day, and noting any existing features like trees or patio slopes. This ensures the final structure not only looks great but functions perfectly within your yard.

Design Planning and Material Selection

This is where your vision starts taking shape. Based on our initial consultation, our designers will create detailed plans, often including 3D renderings, so you can visualize the final product. We’ll work with you to refine the design, balancing aesthetics with practical considerations like shade coverage and traffic flow. Next, we’ll explore materials. Whether you’re drawn to the classic warmth of wood or the modern look of aluminum, we’ll present you with high-quality options. We can also help you select complementary porcelain and natural stone pavers to create a cohesive and polished outdoor living area.

Permitting and Construction Timeline

Before any construction begins, we need to handle the paperwork. Most permanent shade structures in Long Island require permits to ensure they meet local building codes and safety standards. An experienced local contractor will manage this entire process for you, from preparing the necessary documents to submitting them to your town’s building department. Once the permits are approved, we’ll provide you with a clear and realistic construction timeline. This schedule will outline every phase of the project, so you’ll know exactly what to expect and when. Our experience with complex home remodeling projects means we are well-versed in handling these local requirements efficiently.

Installation Day: What to Expect

When installation day arrives, our professional crew will get to work bringing your design to life. The team will start by preparing the site, ensuring the area is ready for construction and that your property is protected. From there, they will build the structure according to the exact specifications of the approved design. A project manager will oversee the entire installation, ensuring every detail is executed correctly and efficiently. We pride ourselves on maintaining a clean and organized worksite and minimizing disruption to your daily routine. You can see our teams in action on the Gappsi YouTube channel to get a feel for our professional process.

How to Vet a Long Island Shade Structure Contractor

Choosing the right contractor is just as important as choosing the right shade structure. The right partner will bring your vision to life smoothly, while the wrong one can cause headaches, delays, and budget issues. Taking the time to properly vet your options ensures you find a skilled, reliable professional who will build a beautiful and lasting addition to your home. Here’s what to look for when making your decision.

Check Credentials, Licensing, and Insurance

Before you even talk about design, make sure your contractor is properly licensed and insured. On Long Island, this is a non-negotiable legal requirement. A valid license proves they meet local standards, while insurance protects you from any liability if an accident happens on your property. Ask for proof of their Nassau or Suffolk County home improvement license, general liability insurance, and worker’s compensation. A professional contractor will have this information ready and will be happy to provide it. You can also verify a license with your local consumer affairs office to be certain. Don’t just take their word for it; this step is your first line of defense.

Review Their Portfolio and Past Projects

A picture is worth a thousand words, especially when it comes to construction. A contractor’s portfolio is your window into the quality of their work. Look for a collection of projects that showcases their craftsmanship and experience with shade structures similar to what you want. Pay attention to the details in their photos. Do the lines look clean? Are the materials high quality? Selecting a contractor without seeing their past work can lead to disappointing results. A great contractor will have an extensive gallery on their website and may even be able to provide addresses of past projects you can see for yourself. Gappsi, for example, showcases a wide range of completed pavilions and pergolas to give you confidence in their abilities.

Ask About Warranties and Maintenance

A shade structure is a significant investment, so you want it to last. A reputable contractor will stand behind their work with a solid warranty. Ask potential contractors what kind of warranties they offer on both the materials and their labor. Make sure you get these details in writing so you know exactly what is covered and for how long. It’s also a good idea to discuss long-term maintenance. Ask what kind of upkeep your new structure will need and if the company offers maintenance plans or services. Companies that provide ongoing care, like restoration and sealing, are often more invested in the long-term quality of their projects.

Red Flags to Watch For

Knowing what to avoid is as important as knowing what to look for. Be cautious of any contractor who presents red flags during the vetting process. An unusually low bid is often a sign that a contractor may be cutting corners on materials or labor. High-pressure sales tactics or demands for a large cash deposit upfront are also major warning signs. A professional will give you a detailed, written estimate and a clear payment schedule. Also, be wary of anyone who can’t provide a physical business address or seems difficult to communicate with. The Federal Trade Commission offers helpful advice on how to hire a contractor and avoid scams. Trust your gut; if something feels off, it probably is.

Why Choose Gappsi for Your Shade Structure?

Choosing the right contractor for your shade structure is just as important as selecting the structure itself. You need a partner who understands your vision, respects your property, and has the expertise to deliver a beautiful, lasting result. At Gappsi, we combine decades of local experience with a comprehensive, all-in-one approach to design and construction. This means you get a seamless process from the first sketch to the final installation, all handled by a single, dedicated team. We pride ourselves on being more than just builders; we are design partners committed to creating outdoor spaces that perfectly suit your lifestyle. Our extensive portfolio, which includes everything from custom swimming pools to intricate masonry, showcases our dedication to quality craftsmanship across every project we undertake. When you work with us, you’re not just hiring a contractor, you’re collaborating with a team that has been transforming Long Island backyards for generations.

Decades of Local Experience

With over 38 years of serving homeowners across Long Island, Gappsi has a deep understanding of what it takes to build enduring outdoor structures in our unique environment. Our long history in Nassau and Suffolk counties means we’re intimately familiar with local architectural styles, weather patterns, and building regulations. This isn’t just about knowing how to build a pergola; it’s about knowing how to build one that will withstand coastal air and complement a Long Island home. Our experience extends across all facets of home improvement, giving us a holistic perspective on how your new shade structure will integrate with your entire property for a cohesive and polished look.

All-in-One Design and Installation

One of the biggest challenges in any home improvement project is managing multiple vendors. Gappsi simplifies everything by offering a complete, in-house solution for your entire outdoor project. From the initial design of your pavilion or pergola to the final touches of landscaping and lighting, our team handles it all. This integrated approach ensures a consistent vision and quality throughout the project, saving you the headache of coordinating different contractors. Whether you want to pair your new gazebo with a beautiful natural stone patio or add a custom outdoor kitchen, we provide a streamlined process from concept to completion. This allows you to enjoy the creative process while we manage the complexities of construction.

Start Designing Your Shade Structure with Gappsi

Your backyard should be a reflection of your personal style, and our design process is built around making that happen. We don’t just offer standard models; we work with you to create custom pavilions and pergolas that fit your space and needs perfectly. Our design experts help you select the right materials, features, and layout to bring your ideas to life. We use our extensive construction knowledge to ensure your new structure is not only beautiful but also functional and durable. We believe the design phase is a collaboration, and we are dedicated to providing personalized service and innovative solutions that will enhance your outdoor living experience for years to come.

Related Articles

Frequently Asked Questions

What’s the real difference between a pergola and a pavilion for my backyard? Think of it this way: a pergola defines a space, while a pavilion creates a room. A pergola has a slatted roof that lets in dappled sunlight, making it perfect for adding architectural style over a patio or walkway. A pavilion has a solid roof, giving you complete protection from sun and rain, which is ideal if you want to create a true outdoor living room or dining area that you can use regardless of the weather.

Do I need a permit for a new shade structure on Long Island? For most permanent structures like a pavilion or a large pergola, the answer is yes. Building codes can differ between towns in Nassau and Suffolk counties, and a permit ensures your project is safe and compliant. A key benefit of working with an experienced local contractor is that they handle the entire permitting process for you, so you don’t have to worry about the paperwork.

Which material is the most low-maintenance for our coastal weather? If your main goal is to avoid yearly upkeep, aluminum and vinyl are your best options. They are incredibly durable and stand up well to Long Island’s salt air and humidity without rusting, fading, or chipping. While wood offers a beautiful, classic look, it does require regular staining or sealing to protect it from the elements and keep it looking its best.

How long does the entire process take, from design to installation? The timeline for a new shade structure can vary quite a bit. It depends on the complexity of your design, the materials you choose, and how long it takes to get permit approval from your local town. Once we finalize the design and secure the permits, we will give you a clear and detailed construction schedule so you know exactly what to expect from start to finish.

Can you build a shade structure over my existing patio or pool deck? Yes, absolutely. Integrating a new shade structure with an existing outdoor feature is a very common project. During our initial site visit, we will assess your current patio or deck to make sure it can properly support the new structure. Our goal is to make the new addition look like it was always part of the original design, creating a seamless flow in your backyard.

Share this page:
Long Island backyard swimming pool planned with integrated water treatment equipment

Salt Water Pool vs Chlorine Pool on Long Island

Choosing a pool sanitation system is not simply a matter of picking the option that sounds easier. Long Island homeowners should weigh installation requirements, ongoing chemical management, water feel, equipment care, and the demands of closing a pool through cold weather.

Talk with Gappsi about planning your pool system: (631) 831-3177

The best salt water pool vs chlorine pool choice depends on how you want to manage maintenance. A salt system uses a generator to produce chlorine from dissolved salt, while a traditional chlorine pool relies on adding and monitoring chlorine directly. Both systems still require balanced water, routine testing, equipment care, and professional winterization.

Understanding how each system sanitizes the water makes the differences in cost, maintenance, and equipment easier to evaluate. Start with the chemistry behind both options.

How Do Salt Water and Chlorine Pools Sanitize Water?

The central difference in a salt water pool vs chlorine pool comparison is how chlorine enters the water. Both systems rely on chlorine as the active sanitizer. A traditional chlorine pool receives chlorine through manually measured additions. A salt water pool uses a salt chlorine generator, which applies electrolysis to convert dissolved salt into chlorine as water passes through the cell. The generator automates production, but it does not replace water testing or proper pool operation.

In either system, sanitation depends on maintaining the right relationship between chlorine concentration and pH. Chlorine can kill most bacteria quickly when its concentration and pH are maintained according to established guidance. The CDC recommends a pool pH of 7.0 to 7.8 and at least 1 part per million of chlorine for effective treatment. You can review the CDC’s home pool water treatment and testing guidance for the technical recommendations.

Call (631) 831-3177 to discuss the right pool sanitation system for your Long Island project.

What happens to chlorine in the water?

Chlorine is consumed as it reacts with contaminants introduced by swimmers, including sweat, dirt, and other organic material. Sunlight can also reduce available chlorine. In a traditional system, the owner or service professional adjusts the dose as testing shows a need. In a salt system, the generator produces chlorine over time, and its output can be adjusted to match the pool’s use and conditions. Either approach still requires attention when the pool has unusually heavy use, receives intense sunlight, or experiences changing weather.

Chlorine does not simply disappear after it performs its job. When it binds with body wastes, it can form chloramines, also called combined chlorine. Chloramines are associated with the familiar strong pool odor and may irritate the skin, eyes, and respiratory tract. That odor is not a reason to assume that more chlorine should be added without testing. It is a signal to evaluate the water chemistry and operating conditions. The CDC explains chloramines and their effects in its chloramines and pool operation guidance.

Why does balanced water matter?

Balanced water supports more than a clear appearance. Keeping pH between 7.0 and 7.8 helps balance disinfection performance, plumbing protection, and swimmer comfort. If pH rises too high, chlorine becomes less effective at killing germs. If chemistry is allowed to drift, the pool may also place unnecessary stress on piping and other components. This applies to gunite, vinyl liner, and fiberglass pools alike.

  • Salt system: chlorine generation is automated, but pH and chlorine still need routine checks.
  • Traditional system: chlorine is added manually, so accurate testing and dosing are central to maintenance.
  • Both systems: balanced chemistry and proper circulation are essential to consistent sanitation.

The practical choice is therefore not chlorine versus no chlorine. It is whether chlorine production is automated or manually dosed, and which maintenance process fits the household, pool design, and service plan.

What Is the Cost Difference Between Salt Water and Chlorine Pools?

The cost difference between a salt water pool and a traditional chlorine pool is less about one universal price and more about when and how the project requires spending. A salt water design usually adds a salt chlorine generator, related plumbing or electrical work, and a cell that will need inspection and eventual replacement. A traditional chlorine setup generally has simpler initial equipment, but the owner buys and adds sanitizer manually over the life of the pool.

That distinction matters when comparing a new installation with a renovation or retrofit. The right choice depends on pool size, swimmer load, sunlight exposure, equipment layout, preferred maintenance routine, and whether existing plumbing and electrical service can support the selected system.

Cost considerations when comparing salt water and traditional chlorine pools
Cost consideration Salt water system Traditional chlorine system
Initial equipment Includes a salt chlorine generator, control components, and compatible installation planning. Typically uses a conventional feeder or chemical-dosing arrangement with fewer specialized components.
Installation scope May require additional plumbing, electrical connections, equipment-pad space, and system configuration. Often has a more familiar installation path, although the pool design and equipment location still affect labor.
Sanitizer purchasing The generator produces chlorine from dissolved salt, reducing the need for frequent manual chlorine additions. Requires recurring purchases and manual dosing of chlorine and other balancing chemicals.
Testing and adjustments Still requires routine testing, water balancing, and attention to generator settings. Requires routine testing and more direct manual adjustments as chlorine is consumed.
Equipment care Includes cell cleaning, inspections, and replacement planning for the generator cell. Requires maintenance of the feeder and related equipment, without a salt cell.
Electricity and operating conditions Uses electricity to operate the generator. Pool size, run time, and swimmer use affect operating needs. Electrical demands depend on the pump and other equipment, while chemical use varies with pool conditions.
Retrofit considerations Existing pools may need an equipment, plumbing, electrical, and material-compatibility review before conversion. May fit existing equipment more directly, but the current feeder, circulation system, and condition still require evaluation.

Neither system eliminates ownership costs. A salt system can make chlorine production more consistent, but it does not remove the need for testing, balancing, cell cleaning, or electricity. Traditional chlorine can offer a straightforward equipment arrangement, yet its recurring chemical handling and manual dosing require consistent attention. During planning, compare the total operating routine, not only the initial equipment scope. A professional review can also identify whether pool size, expected usage, and existing infrastructure change the balance for your Long Island property.

Which System Requires More Pool Maintenance?

The practical difference is not maintenance versus no maintenance. It is manual chemical handling versus automated chlorine production. A salt chlorine generator uses electrolysis to produce chlorine from dissolved salt, which can reduce the frequency of adding sanitizer by hand. However, the owner still needs to monitor the water and service the equipment. A traditional chlorine pool requires more direct attention to testing, dosing, and balancing, but its routine is straightforward when performed consistently.

What salt water pool maintenance still involves

Salt automation helps with routine chlorine production, but it does not independently manage every part of water chemistry. The water still needs regular testing for chlorine and pH, along with alkalinity checks and adjustments when readings move outside the appropriate range. The generator cell also requires inspection and periodic cleaning. Scale or buildup on the cell can interfere with performance, so cleaning should follow the equipment manufacturer’s instructions rather than a one-size-fits-all schedule.

The salt level and control settings also deserve attention. Pool owners should confirm that the generator is operating, review any alerts, and check whether chlorine output matches the pool’s use, sunlight exposure, and weather. Heavy use or a period of unusually hot weather can change demand even when the generator is running. Automation reduces repetitive dosing, but it does not replace observation.

What traditional chlorine pool maintenance requires

With a traditional chlorine system, the owner typically measures sanitizer and pH, then adds the appropriate chemicals manually. Chlorine levels can be reduced by sunlight, sweat, dirt, and other organic material introduced by swimmers, so the CDC recommends routine testing of pool water. The same guidance places responsibility on residential pool owners to check chlorine concentration and pH regularly.

Chlorine stabilizer, also called cyanuric acid, can help protect chlorine from sunlight, but its concentration must be managed carefully. The CDC’s water-treatment guidance explains that pH and sanitizer levels work together. If pH drifts too high, chlorine becomes less effective. Maintaining pH between 7.0 and 7.8 supports disinfection, piping longevity, and swimmer comfort. Poor balance in either type of pool can create avoidable water-quality and equipment problems.

Recurring maintenance checklist:

  • Test chlorine and pH on a regular schedule.
  • Check alkalinity and adjust water balance as needed.
  • Inspect filters, pumps, and other circulation equipment.
  • For salt systems, check salt level, generator output, and cell condition.
  • For traditional chlorine systems, measure and add sanitizer manually as required.
  • Record test results so gradual changes are easier to identify.

For most homeowners comparing a salt water pool vs chlorine pool, salt is often more convenient for routine dosing, while traditional chlorine offers a simpler equipment setup. Neither system is zero-maintenance, and neither guarantees a lower total cost. The better choice depends on how consistently the household wants to test, balance, inspect, and maintain the pool.

What Equipment and Materials Should Long Island Homeowners Plan For?

A salt chlorine system is not a stand-alone add-on. It becomes part of the pool’s circulation, electrical, and equipment-pad plan. During design, homeowners should identify where the generator will sit, how water will pass through it, and how the system will be serviced after installation. Gappsi works with salt chlorine generators, ozone systems, and equipment from brands such as Pentair. Hayward, and Autopilot, so the selection can be coordinated with the overall pool design.

Start with the equipment pad. A salt chlorine generator is typically installed as a component of the pad and requires dedicated plumbing and electrical connections. The pad should leave practical access around the pump, filter, controls, and generator. A crowded arrangement can make routine inspection or future service more difficult. Your installer should also confirm that the proposed equipment layout works with the pool’s circulation design, automation, and available electrical service.

For a new pool, these decisions can be made before excavation and rough-ins begin. For an existing-pool retrofit, ask whether the current pad has sufficient space. Whether the plumbing route matches the generator requirements, and whether the electrical panel and disconnect arrangement are appropriate. It is also worth confirming how the generator will interact with any existing automation, heater, ozone equipment, or other treatment components. The goal is a coordinated system, not simply a new device inserted into an old layout.

Pool equipment pad with pump, filter, and salt chlorine system connections

Which materials deserve closer attention?

Salt exposure makes material selection important. Poorly managed salt conditions can contribute to corrosion on equipment and nearby stone surfaces, but the risk depends on the installation, water balance, exposure, and materials used. Do not assume that every fixture or finish will respond the same way. Review proposed metals, fasteners, light niches, handrails, coping, tile, and natural stone with the installer, especially in areas where splash-out or overspray is likely.

Water balance remains part of material protection. The CDC notes that maintaining pH between 7.0 and 7.8 helps balance disinfection, piping lifespan, and swimmer comfort. That means a generator does not remove the need for owner testing or professional commissioning. Ask how salt concentration, pH, chlorine output, and equipment inspections will be monitored after the pool is opened.

For a practical review of pad layouts, treatment components, and installation considerations, see Gappsi’s pool equipment guide. A detailed equipment plan helps Long Island homeowners compare a salt water pool vs chlorine pool on the basis of integration. Access, and long-term care rather than the generator alone.

How Does Winterization Work for Each Pool System on Long Island?

On Long Island, winterization is necessary for both salt water and traditional chlorine pools. The sanitation method changes some equipment checks, but it does not remove the need to prepare plumbing, equipment, and water for freezing weather. A safe closing plan must match the pool’s construction, circulation layout, cover, accessories, and the equipment manufacturer’s directions.

Start with water balance before closing. The pH range of 7.0 to 7.8 helps balance disinfection, swimmer comfort, and the service life of pool piping, according to the CDC’s pool water guidance. Balanced water also supports the pool’s plumbing, liner, and other infrastructure through the off-season. The specific closing chemistry and timing should be determined by the pool professional and product instructions, rather than by a generic checklist.

Winterized pool with a protective cover and covered pool equipment

What changes between salt and chlorine systems?

Both systems need protection from freezing temperatures. Closing work may include preparing the lines, pump, filter, heater, and other equipment as specified for that installation. Water may need to be lowered or removed from selected components, but the correct approach depends on the pool design and the installer or equipment manufacturer’s directions. Improper draining or air-pressure procedures can create avoidable damage, so homeowners should not copy instructions from a different pool.

A salt system adds a generator and cell to the inspection. The closing record should document the generator and cell condition, including visible buildup, damage, connections, and any service recommendation. The cell should be handled according to its manufacturer’s instructions. A traditional chlorine system does not have that cell, but its feeder, chemical storage, circulation equipment, and lines still require a careful inspection.

How should spring startup be planned?

Good winterization creates a useful spring-startup record. Note the equipment condition, cover condition, water level, repairs to schedule, and any generator-cell issue before the pool is closed. At opening, inspect the cover and equipment first, then restore circulation and test the water before swimming. Both salt and chlorine pools still require owner monitoring after startup. A salt generator can automate chlorine production, but it does not replace testing or water-balance decisions.

Plan your Long Island pool winterization with Gappsi: (631) 831-3177

Which Pool System Is the Better Fit for Your Long Island Home?

The right choice depends less on a simple salt water pool vs chlorine pool verdict and more on how you use the pool. How much automation you want, and where you are in the project. A salt chlorine generator can appeal to homeowners who prefer a steadier, more automated way to produce chlorine. Conventional chlorine equipment may suit owners who want a familiar setup with fewer specialized components at the outset.

Think about your maintenance habits honestly. Salt water automation can reduce the need to manually add chlorine day to day, but it does not make pool care hands-off. You still need to monitor water chemistry, including chlorine and pH, and the generator cell requires periodic inspection and cleaning. The CDC states that residential pool owners are responsible for regularly checking chlorine concentration and pH, regardless of the sanitation system used. Learn more about routine pool water testing from the CDC.

Conventional chlorine systems may be a practical fit when you prefer direct control over chemical additions. Already have an established maintenance routine, or are replacing equipment in an existing pool. A salt system may be more attractive during a new build or major renovation. When the generator, plumbing, electrical connections, equipment pad, and surrounding materials can be coordinated together. Salt exposure also makes thoughtful material selection and water-balance management important around equipment and stone surfaces.

Project stage matters because sanitation equipment is part of a larger design decision. Gappsi provides 3D design and engineering for gunite, vinyl liner, and fiberglass pools, helping align circulation, equipment, access, drainage, and outdoor features before construction begins. Its Gappsi swimming pool design and installation service can address the system as part of the complete layout rather than as an afterthought. Homeowners considering a custom shape or integrated patio should also review this custom gunite pool design resource.

For Nassau and Suffolk County properties, the decision also carries into the off-season. Both systems need planned winterization in Long Island conditions. Ask how the selected equipment will be closed, protected, inspected, and reopened, and confirm which maintenance tasks remain yours after installation. Properly balanced water supports the service life of pool plumbing and other infrastructure, so convenience should never replace a clear care plan.

  • Choose salt water automation if you value reduced manual dosing and are prepared to test, balance, and service the generator.
  • Choose conventional chlorine if you prefer familiar equipment, direct chemical control, and a simpler initial system.
  • Plan early if you are building or renovating, so equipment, materials, access, and winterization details work together.
  • Ask for a maintenance plan that clearly assigns testing, balancing, cell care, chemical handling, and seasonal service.

Talk with Gappsi about your Long Island pool system: (631) 831-3177

Frequently Asked Questions

Do salt water pools use chlorine?

Yes. A salt chlorine generator uses electrolysis to convert dissolved salt into chlorine, so the pool is still sanitized with chlorine. The main difference is how chlorine is introduced: the generator produces it on site instead of requiring the owner to add every dose manually.

Is a salt water pool better than a chlorine pool?

Neither system is universally better. A salt system may suit homeowners who want more automated chlorine production and a different water feel. A traditional chlorine system may suit owners who prefer simpler equipment and direct control over chemical dosing. Both require testing, water balancing, and equipment care.

What are the disadvantages of salt water pools?

The main trade-offs are higher installation complexity, periodic generator-cell cleaning or replacement, and the need to manage salt exposure. Poorly managed salinity can contribute to corrosion concerns for some equipment, fixtures, or surrounding stone, so material selection and water balance matter.

Are salt water pools gentler on the skin and eyes?

Many swimmers report that salt water feels gentler, but comfort depends on the whole water chemistry, not salt alone. Improper pH or chloramine buildup can cause irritation in either system. The CDC recommends keeping pool pH between 7.0 and 7.8 and testing chlorine and pH routinely. CDC pool water guidance

How does maintenance differ between salt and chlorine pools?

A salt system automates chlorine generation, but it does not make the pool maintenance-free. Owners still monitor chlorine and pH, balance the water, inspect the generator, and clean the cell as recommended. Traditional chlorine pools require the same routine water checks, with more manual chemical dosing when chlorine levels need adjustment.

Ready to Plan the Right Pool System?

A thoughtful comparison of salt and chlorine can help you coordinate water treatment with your pool design, equipment, materials, and maintenance preferences. For guidance tailored to your Long Island project, call Gappsi at (631) 831-3177 to discuss the options and get started with a system plan that fits your home.

Share this page: