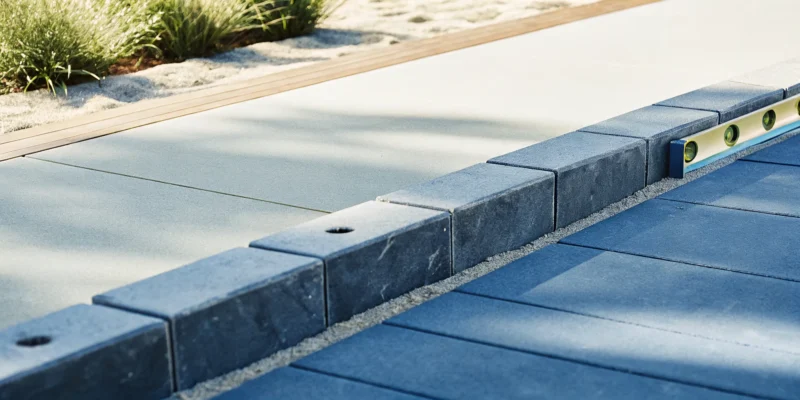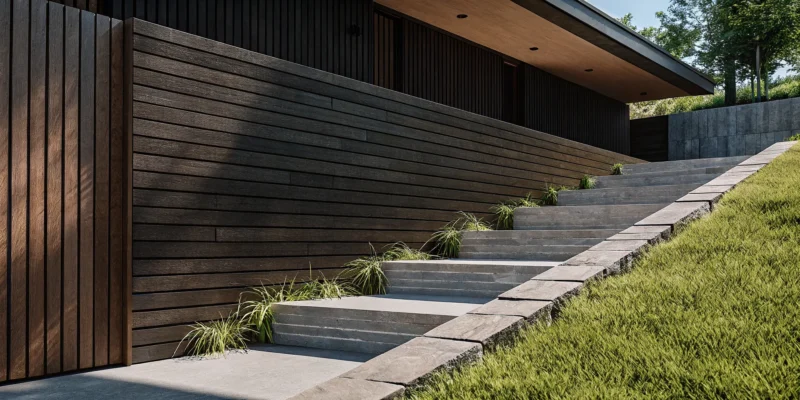
Modern concrete retaining wall on a slope with steps and landscaping.

15 Retaining Wall on a Slope Pictures & Ideas

That hill in your backyard isn’t a flaw; it’s a feature waiting to be revealed. While a slope can seem like a landscaping puzzle, it offers a unique chance to create a dynamic, multi-level outdoor space with incredible visual interest. The secret is a well-designed retaining wall. Far from being just a practical barrier, a retaining wall is a design tool that carves out new living areas from unusable ground. It allows you to build stunning terraced gardens or a cozy sunken patio. Looking at ‘retaining wall on a slope pictures’ can spark amazing ideas, showing how materials like natural stone or modern pavers can transform a property. Here, we’ll explore how to turn that inspiration into a reality.

Key Takeaways

  • Prioritize Drainage and Foundation: A retaining wall’s success depends on its ability to manage water and stand on a solid base. A proper plan includes gravel backfill, drainage pipes, and a well-prepared footing to prevent pressure buildup and failure.
  • Balance Strength with Aesthetics: Your wall’s design involves two key choices: the structural type needed for your slope (like cantilever or segmental) and the material that fits your style (like natural stone or modern pavers). Both are essential for a wall that is both effective and beautiful.
  • Respect the Slope with Proper Technique: Building on an incline is a complex job that requires specific methods for success. Using tiered levels for steep hills, creating a stepped base, and leaning the wall back (batter) are crucial for ensuring long-term stability and often require professional expertise.

Why Does Your Sloped Yard Need a Retaining Wall?

If your Long Island property has a noticeable slope, you might see it as a landscaping challenge. But with the right approach, that slope can become one of your yard’s best features. A retaining wall is more than just a stack of stones; it’s a structural solution that adds safety, function, and beauty to your outdoor space. It solves practical problems while creating new opportunities for patios, gardens, and pathways. By strategically terracing a hillside, you can completely transform the look and feel of your property, turning a difficult incline into a stunning and valuable asset.

A well-designed retaining wall serves two main purposes. First, it’s a workhorse, engineered to hold back soil and manage water. This prevents serious issues down the road, like erosion that can damage your home’s foundation or runoff that floods your lawn. Second, it’s a design element that carves out new possibilities from once-unusable ground. It’s an investment that protects your property and expands your usable living area. Whether you want to build a cozy fire pit area, install a safe play structure for the kids, or plant a tiered garden, a retaining wall provides the stable, level foundation you need to bring your vision to life.

Control soil erosion and runoff

A sloped yard is naturally susceptible to soil erosion. During heavy rain, valuable topsoil, mulch, and nutrients can wash away, damaging your lawn and garden beds. Over time, this constant erosion can even destabilize the ground around your home’s foundation. A retaining wall acts as a crucial barrier, holding the soil in place and preventing the land from shifting. This is a fundamental step in protecting your property and preserving the health of your landscape.

Beyond holding back earth, a retaining wall is a key part of managing water flow. Without a proper structure, rainwater can rush down a slope, creating drainage problems and pooling in unwanted areas. A professionally installed masonry wall helps direct this runoff safely, preventing water from building up and exerting massive pressure. This control is essential for preventing washouts and ensuring the long-term stability of your yard.

Create flat, usable space

One of the most exciting benefits of a retaining wall is its ability to reclaim unusable land. A steep, difficult-to-mow hill can be transformed into a series of flat, functional tiers perfect for outdoor living. This is your opportunity to create the space you’ve always wanted, whether it’s a level area for a stone patio, a safe play area for your kids, or a quiet garden nook.

Retaining walls also add dimension and structure to your landscape design. You can use them to build raised garden beds that are easier to tend or create terraced sections to showcase different plants and flowers. This layered effect adds visual interest and makes your yard feel more organized and intentional. By turning a challenging slope into a beautiful and practical feature, you significantly increase both your property’s value and your enjoyment of it.

What Are the Main Types of Retaining Walls?

When you start looking into retaining walls, you’ll quickly find there isn’t a one-size-fits-all solution. The best type of wall for your yard depends on the height you need, the slope of your land, and the overall aesthetic you want to achieve. Understanding the main structural types will help you have a more informed conversation with your contractor about what your property truly needs. Each design uses a different method to hold back soil, offering unique strengths for different situations. Let’s walk through the four most common types you’ll encounter.

Gravity walls

A gravity wall is the most straightforward type of retaining wall. It relies on its own sheer weight and mass to hold back the soil behind it. To do this effectively, these walls are built with a wide, heavy base that tapers as it gets taller. Think of it like a pyramid, solid and sturdy from the ground up. They are often made from heavy materials like large stones, boulders, or solid concrete. Because their strength comes from their bulk, gravity walls are an excellent and cost-effective choice for shorter walls, usually under ten feet, where soil pressure is manageable.

Cantilever walls

Cantilever walls are a bit more engineered than gravity walls. They use the principles of leverage to resist soil pressure, which allows them to be taller and thinner. This design features a vertical wall, called the stem, connected to a horizontal base slab that extends under the backfill. The weight of the soil on top of this base slab actually helps anchor the wall in place. Typically built from reinforced concrete, a cantilever design is a highly efficient solution for retaining walls that need to be taller than what a simple gravity wall can handle.

Anchored walls

For the most challenging slopes or when you need a very tall wall in a tight space, an anchored wall is often the answer. This design can look like other wall types from the front, but its real strength comes from behind the scenes. Cables or rods are driven through the wall deep into the earth behind it and secured, creating anchors. These anchors provide powerful reinforcement, actively pulling the wall back against the soil pressure. This method allows for the construction of strong, stable walls on difficult sites where other designs might not be feasible.

Segmental walls

Segmental retaining walls are incredibly popular in residential landscaping, and for good reason. They are built from modular concrete blocks that interlock with each other as they are stacked. This system creates a strong, flexible wall without needing mortar. The blocks are specifically engineered for this purpose, often with a lip on the back that ensures a consistent setback. Their versatility is a huge plus, as they can easily form straight lines or gentle curves to fit your landscape design. They are a fantastic choice for creating terraced gardens and defining outdoor spaces.

Retaining Wall Ideas for Your Sloped Yard

Choosing the right material for your retaining wall is one of the most exciting parts of the design process. The material you select determines not only the wall’s strength and longevity but also its entire personality. It’s your chance to complement your home’s architecture, match your garden’s style, and create a look that feels uniquely you. From the rustic charm of natural stone to the sleek finish of modern porcelain, each option offers a different aesthetic. Let’s explore some of the most popular materials to find the perfect fit for your Long Island landscape.

Natural stone

A natural stone retaining wall offers a timeless, organic beauty that blends seamlessly into any landscape. Using materials like fieldstone, limestone, or granite helps integrate the structure into the environment, turning a challenging slope into a lush, beautiful feature. Each stone is unique, giving your wall a one-of-a-kind character that can’t be replicated. While it requires skilled installation, the result is a durable and elegant wall that looks like it has always been part of your property. Our expert masonry team can help you select the perfect stone to create a stunning and long-lasting addition to your yard.

Concrete blocks

Concrete blocks are a practical and incredibly versatile choice for retaining walls. Known for their strength and uniformity, segmental concrete blocks are engineered to lock together, creating a very stable structure. They come in a wide variety of colors, textures, and sizes, allowing for a good deal of design flexibility. You can achieve looks ranging from a classic quarried stone face to a clean, modern finish. For larger slopes that require tiered walls, you can even mix blocks with other materials to keep the design visually interesting. Their durability makes them a reliable and cost-effective solution for almost any project.

Timber and wood

If you’re looking for a warm, rustic feel, a timber retaining wall is an excellent option. Wood lends a natural identity to your garden, and its earthy tones complement the surrounding plants and trees. Materials like pressure-treated pine or cedar are often used to reshape a sloped yard, creating defined garden beds or level terraces. While wood is a beautiful choice, it’s important to ensure it’s properly treated and installed with good drainage to prevent rot and extend its lifespan. When done right, a timber wall adds a soft, inviting character to your outdoor space.

Gabion

For a modern and industrial look, consider a gabion wall. These structures consist of wire mesh cages filled with rocks, stones, or even recycled concrete. Gabion walls are incredibly strong, durable, and provide excellent drainage, making them a highly functional choice for managing slopes. The texture of the wire and stone creates a unique visual that works well with contemporary and rugged landscape designs. You can find a variety of stones to fill the cages, allowing you to customize the color and style. They are a fantastic way to add an architectural element to your yard that is both striking and practical.

Brick

Brick offers a classic, traditional look that never goes out of style. A brick retaining wall can bring a sense of order and elegance to your landscape, perfectly complementing colonial or Tudor-style homes. The rich color and uniform shape of bricks create clean lines and a polished appearance. Proper masonry construction is key to ensuring a brick wall is strong and long-lasting, as it needs a solid foundation and good drainage to withstand the elements. Whether you opt for a simple running bond pattern or an intricate herringbone design, a brick wall adds timeless charm and structure to your property.

Porcelain and pavers

Using porcelain or concrete pavers for your retaining wall creates a sleek, cohesive, and sophisticated look. These materials are perfect for modern landscapes, offering clean lines and a uniform finish. A major advantage is the ability to match your wall to other hardscaping elements, like a nearby patio or walkway, for a seamless design. Gappsi offers a wide selection of high-quality porcelain and natural stone pavers that are durable, low-maintenance, and resistant to fading and stains. This makes them an excellent choice for creating a polished outdoor living area that feels both stylish and unified.

How to Choose the Best Materials for Your Wall

Picking the right materials for your retaining wall goes beyond just what looks good. You need a material that can handle the job, stand up to Long Island weather, and blend beautifully with your home and garden. Thinking through these key factors will help you make a choice you’ll be happy with for years to come. It’s about finding the perfect balance between strength, style, and suitability for your specific property.

Consider durability and load capacity

First and foremost, your retaining wall needs to be strong. The materials you choose must be durable enough to withstand constant pressure from the soil and the elements. Materials like concrete blocks and natural stone are excellent choices because they are built to last and resist weathering over time. The goal is to build a wall that maintains its strength and appearance for decades.

It’s also critical to account for the specific load your wall will carry. This isn’t just about the height of the wall. You have to consider the steepness of the slope and any additional weight from nearby structures, like a driveway or patio. An expert masonry team can properly calculate these forces to ensure your wall is engineered for long-term stability and safety.

Match your landscape’s aesthetic

Your retaining wall should feel like a natural part of your landscape, not an afterthought. The right material can tie your whole outdoor space together. Think about the overall style of your home and garden. A wall made from warm, rustic timber can create a soft, organic look, while sleek concrete blocks offer a more modern and structured feel. The key is to select a material that complements your home’s existing architecture and color palette.

You have a wide variety of options to create the perfect look. You could choose from many types of porcelain and natural stone to match your patio, or select a brick that echoes your home’s facade. A well-chosen material enhances your property’s curb appeal and makes your outdoor living areas feel more cohesive and intentionally designed.

Factor in your soil type

The type of soil on your property plays a huge role in the stability of your retaining wall. Different soils behave differently, especially when wet. For example, clay soils expand and contract more than sandy soils, which puts different kinds of stress on a wall. Understanding your local soil conditions is essential for planning proper drainage and preventing future problems.

A successful retaining wall project includes the right backfill, like gravel, which allows water to drain away and relieves pressure. A professional landscape design considers how the ground will naturally shift and settle over time, ensuring the wall is built to accommodate this movement. This is especially important on uneven ground, where a solid plan prevents structural issues down the road.

How to Build a Retaining Wall on a Steep Slope

Tackling a retaining wall on a steep slope is a different ball game than working with a gentle incline. The forces at play are much greater, and the margin for error is smaller. Getting the construction right from the very beginning is essential for a wall that is not only beautiful but also safe and durable for years to come. It involves specific techniques that account for the grade, soil pressure, and water drainage.

Single vs. tiered wall designs

When you’re facing a steep hill, your first instinct might be to build one tall wall to hold it all back. However, a series of shorter, tiered walls is often a much safer and more stable solution. A single tall wall puts immense pressure on its base, increasing the risk of failure. Tiered walls distribute that pressure by creating level terraces. This approach breaks up the slope, improves stability, and gives you wonderful pockets of usable space for planting gardens or creating visual interest. Deciding between a single or tiered design is a critical first step where professional masonry expertise can prevent costly mistakes.

Prepare the footing, slope, and batter

A retaining wall is a serious structural feature, and its strength starts with the foundation, or footing. This involves digging a trench below grade and filling it with compacted gravel to create a stable base. You also need to prepare the slope itself and incorporate a “batter,” which is a slight backward setback or tilt. Each course of blocks is set back a small amount from the one below it, making the wall lean into the soil it’s holding back. This simple technique dramatically increases the wall’s strength against the immense pressure of the earth. Proper preparation is the key to a wall that effectively prevents erosion and protects your property.

Build a stepped base for uneven ground

A steep slope is rarely a perfect, uniform angle. To create a stable foundation on uneven terrain, you need to build the base in steps. This method, often called “stepping up the base course,” involves digging a series of level trenches that follow the natural contour of the hill. Each step provides a solid, level platform for a section of the wall. This ensures the entire structure is properly supported from the ground up, rather than trying to build on an unstable, angled surface. This technique is fundamental for building retaining walls on slopes and is crucial for long-term stability.

How to Plan for Proper Drainage

A retaining wall is built to hold back soil, but its biggest challenge is holding back water. When rain or groundwater soaks the soil behind your wall, it creates immense force known as hydrostatic pressure. Without an escape route, this pressure can make a wall bulge, crack, or even collapse over time. Proper drainage isn’t just a good idea; it’s the single most important factor in ensuring your retaining wall stands strong for decades. A well-designed drainage plan is a complete system that manages water from every angle.

Planning for drainage involves three key strategies. First, you need to use the right backfill material to allow water to move freely behind the wall instead of getting trapped. Second, you must install a system, like weep holes or pipes, to collect that water and channel it away. Finally, you have to manage the surface water around the wall to prevent it from becoming a problem in the first place. Getting this combination right requires expertise, which is why working with a professional masonry designer is so critical. They can assess your property’s unique needs and build a wall with an integrated drainage system designed to last.

Use gravel backfill and filter fabric

The material you place directly behind your retaining wall is called backfill, and your choice here is crucial. Using the dense, native soil you excavated is a common mistake. Clay-heavy soils act like a sponge, holding onto water and creating the very hydrostatic pressure you want to avoid. Instead, you should use a free-draining material like clean gravel or crushed stone for the backfill. This creates a porous zone behind the wall, allowing water to flow down to the base instead of pushing against the structure.

To keep this gravel layer effective for the long term, it needs to be protected with a geotextile filter fabric. This special fabric is laid between the gravel backfill and the surrounding soil. It allows water to pass through but prevents fine soil particles from washing into the gravel and clogging it up. Without filter fabric, your drainage zone would eventually become a solid, water-logged mass, rendering it useless. This simple addition is a key part of a professional natural stone wall installation.

Place weep holes and perforated pipes

Once the gravel backfill directs water to the bottom of the wall, that water needs a clear exit. This is where weep holes and perforated pipes come in. Weep holes are small openings or pipes placed through the base of the wall, allowing water to drain out the front. They are a straightforward and effective way to relieve pressure. You will often see them as small, circular holes near the bottom of concrete or stone retaining walls.

For more robust drainage, especially with taller walls, a perforated pipe is the best solution. This is a pipe with small holes, often called a French drain, that is laid in the gravel at the base of the wall. As water filters down through the backfill, it enters the pipe and is channeled away from the wall’s foundation to a lower point on your property. This system is essential for preventing the buildup of hydrostatic pressure, which can cause a wall to fail. Proper drainage is also a core principle in projects like swimming pool installations, where managing water is paramount.

Manage surface grading and runoff

Controlling water behind the wall is only half the battle; you also need to manage the water on the surface. Before building, it’s wise to observe how water flows across your yard during a heavy rain. Building a wall at the bottom of a slope or in a natural drainage path without a plan is asking for trouble. The area directly behind the top of the retaining wall should be graded with a gentle slope away from the wall. This simple step encourages surface water to flow away rather than pooling and seeping into the backfill.

You should also consider other sources of runoff. Are there any roof downspouts, patios, or driveways that direct water toward the wall? If so, these need to be rerouted. A comprehensive landscape design will account for all these factors, creating swales or other features to guide water safely around your new wall. By thinking about surface water from the start, you reduce the amount of water your wall’s drainage system has to handle, ensuring its long-term stability.

What to Consider When Designing Your Wall

Designing a retaining wall is about more than just picking beautiful materials. To build a wall that lasts, you need a solid plan that accounts for the powerful forces of nature. The slope of your yard, the height of the wall, and the pressure from soil and water all play a huge role in its stability. Getting these details right from the start prevents costly failures down the road and ensures your new outdoor space is safe and secure. A professional masonry designer can help you create a plan that is both functional and beautiful.

Check wall height and building permits

It’s easy to misjudge just how steep a slope is or how tall a retaining wall needs to be. Remember that the forces acting on a wall increase significantly with height. A four-foot wall has to withstand much more pressure than a two-foot wall. Many homeowners are tempted to build one tall wall, but a series of shorter, tiered walls is often a safer and more stable solution. Before you begin, it’s critical to check your local building codes. Many towns on Long Island have regulations that require a permit and an engineer’s approval for walls over a certain height, so it’s always best to confirm the rules in your area.

Calculate hydrostatic pressure and load

One of the biggest challenges for any retaining wall is hydrostatic pressure, which is the force exerted by water-saturated soil. Underestimating this pressure is a common reason why DIY walls fail. The calculation needs to account for the wall’s height, the steepness of the slope, and any additional weight, or surcharge, from things like a nearby driveway, patio, or even large trees. A proper design ensures the wall is strong enough to handle the specific load of your property. Choosing the right porcelain and natural stone pavers also contributes to a wall’s ability to manage these forces over time.

Reinforce taller walls correctly

Taller walls require more than just a strong base; they need to be actively tied into the slope behind them. This is where reinforcement comes in. Techniques like using geogrid, a strong synthetic mesh, create a stable mass by extending back into the soil and locking everything together. This reinforcement works with your drainage system and gravel backfill to create a cohesive structure that can resist pressure. Forgetting to properly reinforce a tall wall is like building a dam without anchoring it to the canyon walls. It’s a critical step that ensures your wall becomes a permanent and reliable part of your landscape.

Common Retaining Wall Mistakes to Avoid

Building a retaining wall is a serious structural project. While it might seem like a straightforward weekend task, a few common missteps can lead to a leaning, bulging, or completely failed wall down the road. A well-built wall is an investment in your property’s safety and usability, so avoiding these pitfalls from the start is key. By understanding where things can go wrong, you can ensure your project is successful, whether you’re planning the details yourself or working with a professional.

Forgetting about drainage

One of the most frequent and damaging mistakes is overlooking water management. Many people don’t consider how water moves across their yard, especially during heavy rain. If you build a wall without a proper drainage plan, water gets trapped behind it. This saturated soil becomes incredibly heavy, creating immense hydrostatic pressure that can push the wall over. A professional masonry design always includes a strategy for drainage, like using gravel backfill and installing weep holes or pipes. This allows water to pass through freely instead of building up, protecting the structural integrity of your wall for years to come.

Preparing a poor foundation

A retaining wall is only as strong as its base. A common error is creating a foundation that is too shallow or isn’t perfectly level. The footing needs to be set on solid, undisturbed soil and deep enough to prevent shifting from frost or soil movement. Certain site conditions, like very steep slopes, loose soil, or a high water table, make a solid foundation even more critical. These challenges often require professional input to prevent long-term issues. Properly preparing the site is a non-negotiable step for a wall that needs to stand strong against the forces of nature and time.

Underestimating soil pressure

It’s easy to misjudge the sheer weight of the earth your wall will hold back. Many DIY builders underestimate the incredible load and pressure their wall will face, which can lead to structural failure. The force pushing against the wall depends on several factors, including the height of the wall, the steepness of the slope, and the type of soil. You also have to account for any additional loads, called surcharges, like a driveway or patio built on the land above the wall. Calculating these forces correctly is essential for designing a wall that is strong enough for the job.

Choosing the wrong materials

Your material choices go beyond just the blocks or stones for the wall face. The material you use for backfill is just as important. Filling the space behind the wall with the wrong type of soil, like heavy clay, is a recipe for disaster. Clay-rich soils hold water, which adds pressure and can lead to cracking and bulging. The best practice is to use a free-draining material like gravel. Of course, the wall material itself matters too. You need to select a material from a quality stone supplier that can handle the load and complements your home’s aesthetic, ensuring both function and beauty.

How to Style Your Retaining Wall

A retaining wall is much more than just a structural solution for your sloped yard. It’s a blank canvas that can become a stunning focal point in your landscape design. Once the heavy lifting of construction and drainage is complete, you can get to the fun part: styling your wall to reflect your personal taste and complement your home’s architecture. With the right finishing touches, your retaining wall can tie your entire outdoor living space together, turning a purely functional feature into a beautiful design element. Thoughtful additions like plants, lighting, and connected hardscapes will make your wall feel like an intentional and integrated part of your backyard oasis.

Add plants and terraced gardens

One of the best ways to soften the look of a stone or concrete wall is by adding greenery. If your wall is built in tiers, you have the perfect opportunity to create terraced gardens. These layered planting beds can transform a plain slope into a lush, vibrant display. You can fill them with a mix of perennial flowers for seasonal color, ornamental grasses for texture and movement, and low-growing shrubs for year-round structure. Using your retaining wall to create a beautiful landscape design not only adds visual interest but also makes gardening on a slope much more manageable. The wall becomes a backdrop that makes your plants pop.

Incorporate lighting

Don’t let your beautiful retaining wall disappear when the sun goes down. Incorporating outdoor lighting is a fantastic way to highlight its texture and form while adding a warm, inviting ambiance to your yard. You can install lights directly into the wall, such as under the capstones, to cast a gentle glow downward. Another option is to use uplighting from the base to graze the wall’s surface, emphasizing its materials and creating dramatic shadows. This not only improves safety by illuminating pathways and steps but also extends the time you can enjoy your outdoor space. You can see some great examples of how lighting transforms a project on the Gappsi YouTube channel.

Pair with patios and pathways

To create a truly cohesive outdoor living area, think about how your retaining wall connects with other hardscape features. Pairing your wall with a matching patio or walkway creates a seamless and polished look. For example, if you build a natural stone wall, you can use the same or a complementary stone for an adjoining patio floor. This design choice makes the different areas of your yard feel connected. A professional masonry designer can help you select materials that work well together, ensuring your wall, patio, and pathways form a unified and functional space for relaxing and entertaining.

Work With a Masonry Expert on Long Island

While some home projects are perfect for a weekend, building a retaining wall on a slope often isn’t one of them. These structures are critical features that play both a practical and aesthetic role in your landscape. A poorly built wall can fail, leading to costly repairs and safety hazards. This is especially true when you’re dealing with the unique challenges of sloped terrain, which requires precise planning and technique to get right from the very first step.

Certain site conditions make professional collaboration essential. If your property has steep slopes, challenging soil, a high water table, or if the wall needs to support a heavy load like a driveway, professional design is the safest path forward. An expert can correctly calculate soil pressure, plan for proper moisture management, and ensure the foundation is built to last. For any wall over four feet high, professional installation isn’t just a good idea; it’s often a requirement for safety and local building codes.

Working with a local masonry expert means you have a partner who understands Long Island’s specific environment. Our team has decades of experience designing and constructing retaining walls that are both beautiful and structurally sound. We handle everything from the initial design and material selection to securing permits and final construction. This ensures your new wall not only creates more usable space in your yard but also adds lasting value and curb appeal to your home.

Related Articles

Frequently Asked Questions

How do I know if my existing retaining wall needs to be replaced? You should look for a few key warning signs. A wall that is leaning, bulging in the middle, or has significant cracks is showing signs of stress. These are often symptoms of a bigger problem, like a poor foundation or overwhelming pressure from water-logged soil behind the wall. If you notice these issues, it is best to have a professional assess the situation to determine if a repair is possible or if a full replacement is the safest option.

Can I just build a retaining wall myself? While building a very short, simple garden border can be a manageable DIY project, constructing a structural retaining wall is a different story. These walls must hold back immense amounts of soil pressure, and a failure can be dangerous and costly. Calculating the load, preparing a proper foundation, and installing an effective drainage system all require specific expertise. For any wall over a couple of feet high, or on a steep slope, working with a professional is the best way to ensure it is built safely and correctly.

How long will my new retaining wall last? The lifespan of a retaining wall depends almost entirely on the quality of its materials and construction. A professionally installed wall made from durable materials like natural stone or high-grade concrete blocks, with a properly engineered drainage system, can last for many decades. Conversely, a wall with a poor foundation or inadequate drainage might begin to fail in just a few years. Investing in proper installation is the most important factor for longevity.

Do I really need a permit for my retaining wall? It depends on the height of the wall and your local town’s regulations. Most municipalities on Long Island require you to get a building permit for any retaining wall over a certain height, which is often around three or four feet. These rules are in place for safety reasons. A professional masonry contractor will be familiar with local codes and can manage the entire permitting process for you, ensuring your project is fully compliant.

What is the single most important factor for a successful retaining wall? Without a doubt, the most critical element is proper drainage. The biggest threat to any retaining wall is the force of water building up in the soil behind it, a force called hydrostatic pressure. A well-designed wall includes a complete system, using gravel backfill, filter fabric, and pipes or weep holes, to give water an escape route. This relieves the pressure and is the key to preventing cracks, bulges, and eventual failure.
Share this page:
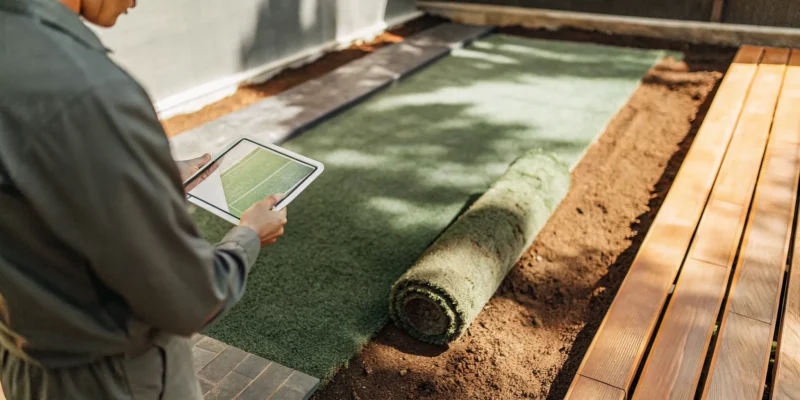
An installer lays low maintenance synthetic turf at a Long Island home.

Choosing a Low Maintenance Lawn Installer in Long Island

Your lawn shouldn’t be an isolated patch of green. It should be a seamless part of your entire outdoor living space, connecting your patio, swimming pool, and gardens into a cohesive retreat. A high-effort lawn can disrupt that flow, demanding work in the very place you’re meant to relax. A low maintenance lawn, however, serves as the perfect, easy-care foundation for your outdoor lifestyle. It provides a beautiful and functional surface that complements your home’s design and requires minimal attention. The right low maintenance lawn installer Long Island doesn’t just think about the grass; they consider how it integrates with your entire outdoor living area for a truly unified design.

Key Takeaways

  • Rethink what a lawn can be: A low maintenance yard doesn’t have to be traditional grass; options like hardy fescues, clover, native ground covers, or synthetic turf can drastically reduce your weekend chores while fitting Long Island’s environment.
  • Plan for your real life: The best lawn is one that fits how you actually use your yard, so consider your property’s sun, shade, and soil, along with your family’s activities, to select a solution that is both beautiful and practical.
  • Choose your installer wisely: Your choice of a professional is critical for success, so vet potential installers by checking their local experience, reviewing past projects, and asking detailed questions to ensure they can deliver a high-quality, lasting result.

What Is a Low Maintenance Lawn?

A low maintenance lawn is a yard designed to thrive with minimal effort on your part. It’s a shift away from the traditional, high-input grass monoculture toward a more sustainable and practical landscape. Instead of spending every weekend mowing, watering, and weeding, you get to simply enjoy your outdoor space. This approach isn’t about letting your yard go wild; it’s about making strategic choices. By selecting the right plants, grasses, and materials for Long Island’s climate, you can create a beautiful, resilient, and eco-friendly environment. A low maintenance lawn gives you back your time and reduces your home’s environmental footprint, all while adding beauty and value to your property.

Low Maintenance vs. Traditional Lawns

Traditional lawns can be resource-heavy. They often demand a lot of water, fertilizer, and pesticides to stay green, which isn’t great for the environment or your wallet. A low maintenance lawn, on the other hand, is designed to be more self-sufficient. You can have a beautiful yard that helps the planet by using plants and materials that are naturally suited to our local conditions. A thoughtful landscape design can incorporate hardy native plants, durable ground covers, and stylish hardscaping to create a stunning outdoor area without the constant upkeep. It’s about working with nature, not against it.

Common Misconceptions for Long Island Homeowners

One of the most common mistakes homeowners make is trying to maximize lawn space at the expense of everything else. A yard with nothing but turf can look flat and often requires more maintenance, not less. A great design balances green areas with other elements like patios and walkways. Another frequent oversight is ignoring how plants will grow over time. Choosing plants without considering their mature size leads to overcrowding and a constant need for pruning. A well-developed plan considers plant spacing, sun exposure, and soil health from the start, ensuring your yard matures beautifully.

Your Best Low Maintenance Lawn Options in Long Island

Dreaming of a beautiful yard without the constant weekend work? You’re not alone. A low maintenance lawn is all about choosing the right plants and materials that thrive in Long Island’s environment with less effort from you. This doesn’t mean a hands-off, wild-looking space, unless that’s what you want. It’s about making smart, sustainable choices that reduce your time spent mowing, watering, and fertilizing. The goal is to get back your weekends while still having a yard you’re proud of.

The key is to find the perfect match for your property and lifestyle. For some, that might be a hardy grass that looks traditional but asks for very little. For others, it could mean swapping out some turf for charming ground covers or even installing a pristine synthetic lawn. A thoughtful landscape design considers your home’s style, how you use your yard, and the local climate to create a space that is both beautiful and easy to manage. It’s a holistic approach that looks at the entire picture, from soil health to sun exposure, ensuring your new lawn is set up for success from day one. Let’s look at some of the best options available for your Long Island home.

Fine and Tall Fescue Grasses

If you love the look of a classic green lawn, fescue grasses are your best friend. As cool-season grasses, they are perfectly suited for Long Island’s climate. Fine fescues are a top choice because they grow slowly, which means you won’t be stuck behind the mower every Saturday. They also require very little fertilizer to stay healthy.

Tall fescue is another excellent option, known for its incredible toughness. Its deep root system makes it resilient against heat and drought, so it stays greener longer during dry summer spells. This makes it a great pick for areas that get a lot of foot traffic from kids or pets. Choosing a fescue blend gives you a lush, durable lawn that looks great without demanding all your free time.

Clover Lawns

Clover is making a huge comeback, and for good reason. This gentle, low-growing plant is a fantastic, eco-friendly alternative to a traditional grass lawn. One of its biggest perks is that it naturally fertilizes the soil by pulling nitrogen from the air, which means you can say goodbye to chemical fertilizers. Clover is also very drought-tolerant, staying green and vibrant even when summer gets hot and dry.

Beyond being practical, a clover lawn has a soft, lush feel underfoot and produces small white or purple flowers that support local pollinators like bees and butterflies. It requires much less mowing than grass and easily outcompetes weeds. It’s a wonderful way to create a healthy, green space that’s good for your family and the environment.

Native Plants, Perennials, and Ground Covers

One of the easiest ways to lower your yard work is to reduce the size of your lawn. Replacing sections of grass with native plants, perennials, and ground covers creates visual interest while cutting down on maintenance. Native plants are already adapted to Long Island’s soil and weather, so they thrive with minimal watering or fuss once established. This approach to landscaping can also attract beautiful local birds and butterflies.

Ground covers like pachysandra or creeping thyme are excellent for filling in shady spots or areas where grass struggles to grow. They form a dense mat that suppresses weeds and requires no mowing. By thoughtfully incorporating these plants, you can design a diverse, beautiful yard that works with nature, not against it.

Ornamental Grasses and Sedum

For a modern and striking landscape, consider using ornamental grasses and sedum. These plants are champions of low maintenance design, offering texture, color, and movement with very little effort. Ornamental grasses, like fountain grass or switchgrass, create a soft, dynamic effect as they sway in the breeze and remain attractive through multiple seasons. They are perfect for creating borders or adding height to garden beds.

Sedum, a type of succulent, is incredibly drought-tolerant and thrives in sunny, dry spots where other plants might fail. It comes in a wide variety of colors and forms, from low-growing ground covers to taller, upright varieties. These plants pair beautifully with hardscaping elements like natural stone patios and walkways, adding softness and color to the design.

Synthetic Turf

If your goal is a perfectly green lawn with almost zero maintenance, synthetic turf is the ultimate solution. Imagine a yard that never needs mowing, watering, or fertilizing, yet looks pristine all year long. Modern artificial grass is incredibly realistic, with a soft feel and a natural look that can fool almost anyone. It’s an ideal choice for busy homeowners who want a beautiful outdoor space without the constant upkeep.

Synthetic turf is also extremely durable, making it perfect for high-traffic areas, play spaces for kids, or even backyard sports games courts. It’s also a great option for tricky spots where real grass won’t grow, like heavily shaded areas or around swimming pools where you want to avoid grass clippings in the water.

How Long Island’s Climate Affects Your Lawn Choice

Long Island’s unique environment, with its sandy soil, salt-tinged air, and full four seasons, has a big say in what will grow in your yard. Choosing a lawn that can handle hot, humid summers and chilly winters is the first step to creating a space that looks great without demanding all your free time. Instead of fighting against nature, the goal is to select grasses, plants, or turf that are already a good fit for our local conditions. A thoughtful landscape design considers these factors from the very beginning.

Understanding your property’s specific characteristics, like its soil type, how much sun it gets, and how you plan to use the space, will guide you toward the best solution. Whether you need a durable surface for family fun or a serene green view, matching the lawn to the local climate and your lifestyle is the secret to long-term success. This approach saves you effort and resources, giving you a beautiful yard you can actually enjoy.

What Grows Best in Sandy and Loamy Soils

Much of Long Island has sandy or loamy soil, which affects how water and nutrients are retained. The key is to choose a grass that thrives in these conditions. Cool-season grasses are generally the best fit, with Tall Fescue being a standout choice. Its deep roots make it great for our coastal areas, as it can handle sandy soil and periods of heat and drought.

For shadier spots or if you want a truly hands-off lawn, Fine Fescue is an excellent option. It grows slowly, so you’ll mow less often, and it doesn’t require much fertilizer to look good. If you have a particularly sunny and dry area, Zoysiagrass, a warm-season grass, can also work well. It creates a soft, dense carpet that naturally resists weeds and stands up to summer heat.

Planning for Sun, Shade, and Seasonal Changes

Before you decide on a lawn, take some time to observe your yard. Notice which areas get drenched in sunlight all day and which ones are covered in shade by your house or trees. This simple step is crucial because different grasses have different needs. A sun-loving grass will struggle in the shade, while a shade-tolerant variety might get scorched in direct sun.

Long Island’s seasonal shifts also play a role. A lawn must be able to withstand both summer humidity and winter frost. For those tricky areas where grass refuses to cooperate, or if you want a perfect green look year-round, synthetic turf is a fantastic alternative. It looks vibrant in any season and isn’t affected by sun or shade, making it a reliable solution for a consistently beautiful yard.

High-Traffic vs. Decorative Spaces

Think about how you and your family will use your lawn. Will it be a play area for kids and pets, the site of backyard barbecues, or more of a decorative space to be admired from the patio? The answer will help determine how durable your lawn needs to be. For areas with heavy foot traffic, you’ll want a resilient grass like Perennial Ryegrass, which establishes quickly and holds up well to activity.

If you want a pristine, beautiful lawn that can handle some wear, Kentucky Bluegrass is another strong contender because it can repair itself. For the most demanding activities, however, nothing beats the durability of synthetic turf. It’s an ideal surface for play areas and even backyard Sports Games Courts, providing a safe and consistent surface that won’t turn into a mud pit after a little rain or a lot of fun.

What Does a Lawn Installer Actually Do?

Hiring a professional lawn installer is about more than just getting grass on the ground. It’s about investing in a process that sets your yard up for long-term success. A true expert doesn’t just show up with sod. They bring a deep understanding of local conditions, soil science, and plant life to create a landscape that thrives. From the initial soil test to the final watering plan, their work is a blend of science and skill.

Think of your installer as the project manager for your new lawn. They handle the complex, labor-intensive steps that are often overlooked in DIY projects but are critical for a healthy, resilient yard. This includes preparing the site, selecting the right materials for your specific needs, and ensuring everything is installed correctly for optimal growth and easy care. Whether you’re dreaming of a lush green carpet of grass or a modern yard with synthetic turf, a professional installer orchestrates the entire transformation. They ensure every detail is managed, so all you have to do is enjoy the beautiful result.

Site Assessment and Soil Prep

The first thing a professional installer does is a thorough site assessment. They don’t just glance at your yard; they evaluate the soil quality, drainage, and existing conditions to understand what they’re working with. Proper soil preparation is the foundation of a healthy lawn. Your installer will amend the soil as needed, adding nutrients and improving its structure to create an ideal environment for roots to grow deep and strong. This crucial first step, part of a comprehensive landscape design, prevents many common lawn problems before they can even start, ensuring your new grass or plants have the best possible chance to flourish.

Installing Grass, Plants, or Turf

Once the groundwork is laid, your installer will begin the installation. Based on your yard’s conditions and your maintenance preferences, they will install the best option for you. For Long Island, this often means cool-season grasses like tall fescue and fine fescues, which are well-suited to our climate. An experienced installer ensures the grass, plants, or turf is placed correctly to encourage healthy growth and a uniform appearance. They handle everything with precision, whether it’s laying sod without leaving gaps, planting ground covers at the right density, or installing turf for a perfect, evergreen finish.

Setting Up Water-Efficient Irrigation

A truly low-maintenance lawn needs a smart watering strategy, and a great installer will help you set one up. Instead of leaving you with a sprinkler and a guess, they can design and install a water-efficient irrigation system. Techniques like drip irrigation deliver water directly to the roots, which significantly reduces waste and prevents overwatering. This not only helps conserve water but also promotes deeper root growth, making your lawn more resilient to drought. By integrating an effective irrigation plan into your landscape construction, your installer ensures your new lawn stays healthy with minimal effort from you.

How Much Does a Low Maintenance Lawn Cost in Long Island?

Let’s talk about one of the biggest questions on every homeowner’s mind: the budget. The cost of installing a low maintenance lawn in Long Island isn’t a one-size-fits-all number. It’s an investment that varies based on the size of your yard, the materials you choose, and the complexity of your design. While some low maintenance options have a higher upfront cost than traditional sod, they offer significant long-term savings on water, fertilizer, and weekly upkeep.

Think of it this way: a traditional lawn comes with recurring expenses. Professional lawn mowing services in Long Island average between $35 and $50 per cut. When you add in the costs of seasonal fertilizing, watering, and pest control, the numbers add up quickly. A low maintenance lawn, on the other hand, shifts that spending from perpetual maintenance to a one-time installation cost that pays for itself over time. To understand what you might spend, it helps to break down the costs by the type of lawn you’re considering and the factors that shape the final price tag for your home improvement project.

A Look at Pricing by Lawn Type

The type of low maintenance lawn you choose is the biggest driver of your initial cost. If you opt for a lawn seeded with hardy fine or tall fescues, your primary expenses will be soil preparation, seed, and labor. For a more modern and hands-off approach, synthetic turf is an excellent choice. While the material and professional installation represent a larger upfront investment, it completely eliminates the need for mowing, watering, and fertilizing, offering a pristine look year-round. Lawns using clover or native ground covers fall somewhere in between, with costs depending on whether you start from seed or use more mature plants for faster coverage.

What Influences Your Final Cost

Beyond the material itself, several key factors will influence your total project cost. The size of your property is the most obvious one, as more square footage requires more material and labor. Site preparation is another major component. If your existing lawn needs to be removed, the soil needs significant grading, or drainage issues must be addressed, these tasks will add to the final bill. The complexity of your vision also plays a role. A simple, uniform lawn will cost less than an intricate landscape design that incorporates garden beds, walkways, or decorative grasses. Finally, the expertise of your installer is factored into the price, ensuring the job is done right for lasting results.

The Benefits of a Low Maintenance Lawn

A lush, green lawn is a classic part of the Long Island home, but the constant upkeep can feel like a second job. Between watering, mowing, and fertilizing, a traditional lawn demands a lot of time, money, and resources. A low maintenance lawn offers a smarter alternative. It gives you a beautiful outdoor space without the endless weekend chores. By choosing the right plants and materials, you can create a yard that is not only easier to care for but also better for your wallet and the local environment.

Use Less Water on Your Property

Did you know that outdoor watering can account for 30% of a home’s water use? In drier seasons, that number can jump even higher. A low maintenance lawn is designed to thrive with less water. By selecting drought-resistant grasses and native plants that are naturally suited to Long Island’s climate, you can significantly cut down on irrigation. This not only helps conserve our local water supply but also lowers your monthly water bill. A professional landscape design can incorporate these water-wise plants, creating a beautiful yard that stays green with minimal effort from you.

Cut Back on Fertilizers and Pesticides

Traditional lawns often depend on a cycle of chemical fertilizers and pesticides to stay green and weed-free. These chemicals can run off into our waterways and create a space that isn’t ideal for kids and pets to play on. A low maintenance lawn breaks this cycle. Options like clover lawns naturally add nitrogen to the soil, while native ground covers are more resistant to local pests and diseases. For a truly chemical-free solution, synthetic turf eliminates the need for any fertilizers or pesticides, giving you a perfect-looking lawn year-round with peace of mind.

Enjoy Long-Term Savings

While installing a new lawn is an investment, a low maintenance approach pays you back over time. Think about the recurring costs of a traditional lawn: high water bills, bags of fertilizer, pest control treatments, and gasoline for the mower. These expenses add up season after season. A well-planned low maintenance lawn reduces or even eliminates these costs. A thoughtful landscape plan helps align your design and outdoor living spaces from the start, ensuring you get the most value. You’ll save money on supplies and maintenance, and you’ll also get back your valuable weekend time.

How to Choose the Right Lawn Installer in Long Island

Finding the right installer is just as important as choosing the right type of lawn. You’re not just hiring someone to lay down sod or turf; you’re partnering with a team to bring your outdoor vision to life. A great installer will guide you through the process, ensuring the final result is beautiful, functional, and built to last. Taking the time to vet your options will save you from headaches and costly fixes down the road.

Check for Credentials and Local Experience

First things first, make sure any installer you consider is licensed and insured in New York. This is non-negotiable, as it protects you from liability. Beyond the basics, look for a company with deep roots in Long Island. An installer with local experience will understand our specific soil conditions, microclimates, and which low maintenance options thrive in Nassau and Suffolk counties. They should also demonstrate effective client communication, listening to your needs and setting clear expectations from the start. A true professional knows that a successful project is built on a strong client relationship.

Review Their Portfolio and References

A picture is worth a thousand words, so dive into a potential installer’s portfolio. Look for high-quality images and videos of completed projects. Pay close attention to the details. Do the edges look clean? Do the installations look seamless and professional? More importantly, look for projects that reflect the style and scope of what you want. A strong portfolio, like the projects featured on the Gappsi YouTube channel, showcases versatility and a consistent standard of excellence. Don’t be shy about asking for references from past clients. A confident installer will be happy to connect you with homeowners who can speak to their experience.

Key Questions to Ask Before You Hire

Before you sign a contract, it’s time to ask some direct questions to understand an installer’s process and professionalism. This helps you gauge their expertise and ensure they can meet your specific needs.

Start with these questions:

  • Can you provide a detailed, itemized quote for the entire project?
  • What is your process for site assessment and soil preparation?
  • Who will be the main point of contact and supervisor on-site?
  • What warranties or guarantees do you offer on materials and labor?
  • How do you handle potential issues like drainage or unexpected site conditions?

Their answers will reveal a lot about their experience and commitment to quality, especially when it comes to specialized installations like synthetic turf and sports games courts.

Common Mistakes to Avoid When Hiring

One of the biggest mistakes homeowners make is choosing an installer based on the lowest bid alone. A suspiciously low price can be a red flag for subpar materials, inexperienced labor, or hidden costs that appear later. Another common pitfall is moving forward without a comprehensive plan. A great lawn is part of a larger outdoor ecosystem. Your installer should work from a cohesive master plan that integrates your lawn with patios, walkways, and garden beds. Finally, always get everything in writing. A detailed contract that outlines the full scope of work, materials, timeline, and payment schedule protects both you and the installer.

How to Prepare for Your New Lawn Installation

A successful lawn installation starts long before the first patch of sod is laid. Taking the time to plan and communicate clearly ensures the final result matches your vision and fits your lifestyle. When you and your installer are on the same page from day one, you create a partnership that leads to a beautiful, functional outdoor space you’ll love for years. Think of it as creating a blueprint for your dream yard. These simple preparation steps will help you get organized and feel confident as you begin your project.

Create a Vision and Gather Inspiration

Before you can create your perfect lawn, you need to define what “perfect” means to you. Start by thinking about how you plan to use the space. Will it be a lush, green carpet for your kids to play on, a durable surface for backyard Sports Games Courts, or a quiet, decorative area to complement your garden? Once you have a purpose in mind, start gathering ideas. Create a Pinterest board, flip through magazines, or take photos of local yards you admire. Having a visual collection helps you articulate your style and makes it easier for your landscape designer to see your vision. This initial step is all about dreaming and discovering what you truly want.

Set a Clear Budget and Timeline

Talking about money can feel awkward, but setting a clear budget is one of the most important steps in any home improvement project. Knowing your spending limit helps your installer recommend the best materials and solutions for your price range. Whether you’re considering natural grass or low maintenance synthetic turf, having a number in mind prevents surprises and keeps the project on track. You should also think about your ideal timeline. Do you have a family event or a specific season you want the lawn ready by? Sharing these details upfront allows your installer to create a realistic schedule that works for everyone.

Communicate Your Yard’s Unique Needs

Every property has its own quirks. To get the best results, you need to share the specific details of your yard with your installer. Walk them through the space and point out areas that get a lot of sun or are always in the shade. Mention any spots with poor drainage, where water tends to pool after it rains. It’s also helpful to identify high-traffic zones, like the path from the patio to the pool. Effective client communication is the foundation of a successful project. By providing a clear outline of your yard’s conditions and your expectations, you empower your installer to create a customized plan that addresses your property’s unique challenges and opportunities.

Gappsi’s Approach to Low Maintenance Landscaping

At Gappsi, we see a low maintenance lawn as more than just grass; it’s a core component of your outdoor lifestyle. Our process is built on creating a beautiful, functional, and sustainable space that fits your specific needs, ensuring you spend more time enjoying your yard and less time working on it. It all begins with a conversation. We prioritize effective client communication to understand how you live and what you envision for your property. This allows us to set clear expectations and design a landscape that truly works for you.

A thriving, easy-care yard is the result of thoughtful preparation. That’s why we create a comprehensive master plan for every project, which prevents common design mistakes and ensures every element works together. This plan considers your property’s unique conditions, from soil type and sun exposure to how your lawn will connect with patios, walkways, and gardens. By planning holistically, we design a cohesive environment that minimizes future problems and reduces long-term upkeep.

Our expertise extends to every part of your outdoor space. We might pair a hardy, drought-tolerant grass with a water-efficient irrigation system or frame a lawn with durable porcelain pavers that require minimal cleaning. For high-traffic areas or a perfect play space, we can seamlessly integrate high-quality synthetic turf. Our goal is to deliver a complete solution that is beautiful on day one and provides lasting value for years to come, building a relationship with you through a landscape that endures.

Frequently Asked Questions

Is a low-maintenance lawn really “no maintenance”? That’s a great question. While no living landscape is completely hands-off, a low-maintenance lawn is designed to drastically reduce the time and effort you spend on it. Instead of a weekly routine of mowing, watering, and weeding, you might only have a few small tasks each season. Think of it as trading constant chores for occasional care, giving you back your weekends to actually enjoy your yard instead of just working in it.

How do I choose the best low-maintenance option for my specific yard? The best choice really depends on your property and your lifestyle. A yard that gets full sun all day has different needs than one with lots of shade from mature trees. You should also consider how you use the space, whether it’s for kids playing, dogs running, or quiet relaxation. The most effective way to decide is to have a professional assess your soil, sun exposure, and drainage to recommend a solution, like fescue grass or synthetic turf, that is perfectly tailored to you.

Is synthetic turf a good choice for families with kids and pets? Absolutely. Modern synthetic turf is designed with families in mind and is a fantastic option for play areas. High-quality turf is non-toxic, lead-free, and provides a soft, cushioned surface that can help reduce injuries from falls. It also eliminates the need for chemical fertilizers or pesticides, creating a worry-free space for everyone. Plus, it’s durable enough to handle constant foot traffic and easy to clean, so you don’t have to worry about muddy paws or grass stains.

Can I combine different low-maintenance ideas in my yard? Yes, and that’s often the key to a truly stunning and practical landscape design. You don’t have to choose just one option. A beautiful yard might feature a central area of hardy fescue grass, bordered by beds of colorful native plants and ornamental grasses. You could also integrate a synthetic turf area for a backyard sports games court or a play set, ensuring that part of your yard is always ready for fun. Mixing materials creates visual interest and allows you to match the right solution to each part of your yard.

What’s the long-term value of investing in a professional installation? Hiring a professional is about ensuring the job is done right from the very beginning. A skilled installer does more than just lay down grass or turf; they prepare the site, amend the soil, and address drainage to prevent future problems. This initial investment saves you from costly repairs and reseeding down the road. It ensures your lawn will be healthy, beautiful, and truly low-maintenance for years to come, giving you the best possible return in both property value and personal enjoyment.

Share this page:
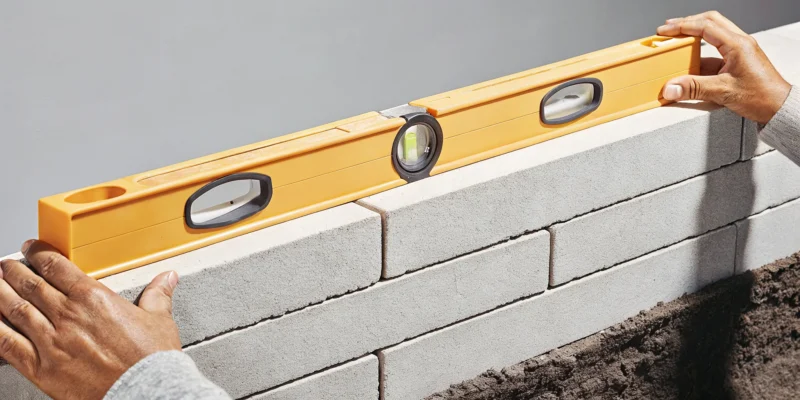
Using a level to align a course of interlocking retaining wall blocks.

How to Build with Interlocking Retaining Wall Blocks

That sloped part of your yard can feel like a puzzle you just can’t solve. It might be limiting your plans for a beautiful garden, a level patio, or a safe place for the kids to play. Instead of just living with it, you can transform that tricky terrain into one of your property’s best features. This is where interlocking retaining wall blocks come in. They are a modern, effective solution designed to create strong, stable, and attractive walls. This guide will walk you through everything you need to know, from choosing the right style to understanding the building process.

Key Takeaways

  • Focus on a Strong Base and Proper Drainage: Your wall’s longevity hinges on two things: a compacted gravel foundation and an effective drainage system. These steps are not optional; they are the best way to prevent your wall from leaning, bulging, or failing from water pressure.
  • Choose Blocks for Function First, Then Style: Look beyond just color and texture when selecting your blocks. The right choice depends on your wall’s height, so pay close attention to the block’s weight, locking mechanism, and design to ensure it provides the necessary structural support.
  • Know When to Call a Professional: While building a short, decorative garden wall can be a rewarding DIY project, it is crucial to know your limits. Any tall or structural wall that supports a significant load requires professional design and installation to ensure it is safe, compliant with local codes, and built to last.

What Are Interlocking Retaining Wall Blocks?

Think of interlocking retaining wall blocks as sophisticated, puzzle-like pieces for your landscape. They are specially engineered concrete blocks designed to fit together securely. Instead of relying on messy mortar to hold them in place, these blocks use a combination of their own weight, friction, and clever interlocking mechanisms (like pins or a lip on the back edge) to create a strong, stable structure. This innovative design makes building retaining walls faster and often simpler than traditional methods, while still delivering a professional and long-lasting result for your sloped yard or garden bed.

How They Differ From Traditional Walls

The biggest difference between interlocking blocks and traditional walls lies in the construction process and materials. While a classic masonry wall requires a skilled hand to apply mortar between each stone or brick, interlocking systems are designed for a dry-stacking method. This means no mortar is needed, which simplifies installation and creates a more forgiving building process. These blocks are engineered to be incredibly durable, often exceeding industry standards to handle tough weather and the pressures of the soil behind them. This modern approach results in a wall that is not only strong but also has the flexibility to handle minor ground shifts without cracking.

Common Materials and Designs

Most interlocking blocks are made from high-density concrete, some boasting a strength of 5000 PSI, making them exceptionally robust. The real magic, however, is in their design. Many feature a hollow-core system, which makes the individual blocks lighter and easier to handle. Once stacked, these cores can be filled with gravel to add mass and create an even more stable structure. You are not limited to a single look, either. Manufacturers offer a huge variety of faces, textures, and colors to match any home’s style. You can find everything from sleek, modern lines to blocks that mimic the rustic appearance of natural stone, giving you complete creative control over your project.

The Pros and Cons of Interlocking Blocks

Interlocking blocks are a fantastic solution for many retaining wall projects, but it’s smart to look at the full picture before you start building. Like any material, they come with a unique set of benefits and potential challenges. Understanding these points will help you decide if they are the right fit for your backyard and whether you should tackle the project yourself or bring in a professional.

The Upsides

The biggest advantage of interlocking blocks is their clever design. They fit together like puzzle pieces, using their weight and shape to create a strong, stable wall without any messy mortar. This makes installation much faster and cleaner than traditional methods. Because they don’t use rigid cement joints, these walls have a bit of flexibility. They can shift slightly with the ground during freeze and thaw cycles, which helps prevent cracking. This durability makes them a great long-term investment. Their straightforward assembly also makes them a popular choice for DIY projects, though a professional masonry team can guarantee a flawless and long-lasting result.

The Downsides

While interlocking blocks are versatile, they have limitations, especially concerning height. For any retaining wall taller than about four feet, you should consult a professional engineer and check your local building codes for permit requirements. This is a critical safety step to prevent wall failure. A common problem with improperly built retaining walls is that they can lean or bulge over time. This isn’t a flaw in the blocks themselves but is almost always due to an incorrect foundation or poor drainage. If you’re dealing with a failing wall, professional restoration services can often correct the issue and prevent further damage.

Choosing the Right Blocks: What to Look For

Picking the right interlocking blocks for your retaining wall is a bit like choosing the right ingredients for a recipe. The final result depends entirely on the quality of what you start with. While it might seem like all blocks are the same, there are key differences that impact your wall’s strength, longevity, and appearance. Getting this part right ensures your wall will not only look fantastic but also stand strong against the elements for years to come. It’s about finding the perfect balance between function and form.

A well-built retaining wall starts with a block that is engineered for your specific project, whether it’s a small garden bed or a large, terraced slope. The right choice will make the installation process smoother and prevent future headaches like bulging or cracking. Think of it as setting the foundation for a successful project that adds both value and beauty to your property. Let’s walk through the five main things you should look for when selecting your blocks, so you can feel confident in your choice. For a look at the beautiful materials available, you can explore a wide range of porcelain and natural stone options.

Size and Weight

The size and weight of the blocks you choose are directly related to the height and purpose of your wall. For a small, decorative garden wall that’s only a foot or two high, smaller and lighter blocks are perfectly fine and much easier to handle. However, if you’re building a taller wall that needs to hold back a significant amount of soil, you’ll need larger, heavier blocks. These substantial blocks provide the necessary mass and stability to resist the immense pressure from the earth behind them, ensuring your wall remains secure and upright. Think of it this way: the bigger the job, the bigger the block.

Locking Mechanisms

The “interlocking” part of the name is the most important feature. Each block is designed with a specific locking mechanism, usually a lip on the back edge or a pin system, that secures it to the blocks above and below. This creates a unified, incredibly strong structure. This system also helps create what’s known as “batter,” which is a slight, intentional lean back into the hillside. This backward tilt uses gravity to its advantage, allowing the wall to effectively brace itself against soil pressure. A solid locking mechanism is the key to a retaining wall that functions as a single, durable unit rather than just a stack of heavy stones.

Drainage Features

Water is the number one enemy of a retaining wall. Without a proper way for water to escape, pressure can build up behind the wall and cause it to fail. That’s why effective drainage is non-negotiable. Many high-quality interlocking blocks are designed with voids or cores that help channel water away. These features work as part of a larger drainage system, which typically includes a gravel backfill and a perforated pipe at the base. Choosing blocks that accommodate these elements will protect your investment from the powerful forces of water and prevent costly damage. Proper drainage is essential to the long-term health of any masonry project.

Design and Style Options

Now for the fun part: making it look great. Interlocking blocks are available in a huge variety of colors, textures, and styles, so you don’t have to sacrifice aesthetics for function. You can find blocks that mimic the look of rustic, weathered stone or choose a clean, modern design with sharp lines. This versatility allows you to select a style that perfectly complements your home’s architecture and your overall landscape design. Whether you want your wall to be a subtle backdrop for your garden or a stunning focal point, there’s a block out there that will help you achieve your vision.

Stability and Flexibility

A great retaining wall needs to be both strong and slightly flexible. Here on Long Island, the ground is constantly shifting due to freeze-thaw cycles in the winter and spring. High-quality interlocking blocks are engineered to handle these slight ground movements without cracking. The interlocking system allows the wall to move as a cohesive unit, adjusting to changes in the soil without compromising its structural integrity. This built-in flexibility is what makes interlocking walls so durable in climates with changing seasons. It ensures your wall can withstand the test of time and remain a stable, beautiful feature of your property for years.

Finding High-Quality Interlocking Blocks

Once you know what features and style you’re looking for, the next step is to find the best materials for the job. The quality of your interlocking blocks will directly impact the strength, appearance, and lifespan of your retaining wall. A wall is a significant investment, so choosing durable, well-made blocks is essential to protect it. High-quality blocks are engineered for performance and designed to withstand the elements, ensuring your wall remains stable and beautiful for years. Let’s look at what separates a premium block from a standard one and what questions you should ask to make sure you’re getting the best.

What Defines a Premium Block?

A premium interlocking block is all about smart design and proven durability. Top-tier brands often feature hollow-core designs that are engineered for superior stability. When these cores are filled with gravel and properly reinforced, they create an incredibly strong, interconnected structure that can handle immense pressure. This isn’t just a simple block; it’s part of a system designed for long-term performance. These blocks are built to last, resisting the freeze-thaw cycles we see in Long Island and preventing shifting over time. While they demand a precise and skilled installation, the result is a retaining wall you can count on for decades.

Exploring Gappsi’s Natural Stone and Porcelain Options

While engineered concrete blocks are a fantastic and reliable choice, they aren’t your only option. If you want to create a truly distinctive look, you can build a retaining wall with other high-end materials. At Gappsi, we specialize in creating custom outdoor spaces, and that includes using materials that match your home’s aesthetic. Our extensive selection of porcelain and natural stone offers a world of design possibilities. Imagine a retaining wall clad in the same beautiful porcelain as your patio, or a rustic wall built from natural fieldstone. These materials combine the structural integrity you need with the sophisticated look you want, turning a functional wall into a stunning landscape feature.

Questions to Ask Your Supplier

To make sure you’re getting a product that will last, it’s important to ask the right questions. Whether you’re talking to us or another supplier, doing your homework ensures you’re making a wise investment. Start by asking about the materials used in the blocks and the warranty offered on them. You should also inquire about the engineering support available and ask to see examples of completed projects. A reputable masonry construction company will be happy to walk you through their portfolio and explain the long-term performance you can expect. Finally, ask about the expected lifespan of the materials, especially considering our local climate.

Understanding the Costs of an Interlocking Wall

Budgeting for a new retaining wall can feel like a puzzle, but it gets a lot clearer when you know what pieces you’re working with. The total cost depends on a few key things: the materials you choose, the size of your wall, and whether you hire a professional or tackle it yourself. A well-planned budget helps you get the look you want without any surprises along the way. Let’s break down what you can expect to spend.

Factors That Influence Cost

The biggest factor in your budget will be the materials. Generally, you can expect interlocking blocks to cost between $15 and $35 per square foot. The final price depends on the style, color, and brand you select. A simple, standard block will be on the lower end of that range, while a premium block with a more detailed texture or unique color blend will cost more. The complexity of your project, like adding curves or steps, will also influence the final price, especially if you’re hiring a professional masonry designer for the installation.

Breaking Down the Price Per Block

To get more specific, it helps to look at how blocks are sold. Many are priced by the pallet, and popular systems can range from $700 to $1,250 per pallet depending on the block’s size and style. Understanding these price points can help you compare different options more easily while you shop. When you’re ready to explore materials, we can walk you through our extensive collection of porcelain and natural stone to find an option that fits both your aesthetic and your budget. Our team can explain the costs per block or pallet to make sure everything is transparent.

How to Plan Your Budget

When you’re mapping out your budget, the first question to ask is whether this is a DIY project or one for the pros. Retaining walls under four feet tall are often manageable for a skilled DIYer. However, for any wall taller than that, it’s best to get help from a professional. Taller walls require more structural planning to be safe and durable. You should always check your local Long Island building codes and permit requirements before you start. These rules can affect your design and overall cost, so it’s a step you don’t want to skip. For larger projects, working with an experienced home improvement company ensures everything is built correctly and to last.

How to Build Your Interlocking Retaining Wall

Building your own interlocking retaining wall can be a rewarding project, but it requires careful planning and execution to ensure it lasts. A well-built wall not only looks great but also functions correctly for years to come. This step-by-step guide will walk you through the process, from gathering your supplies to placing the final capstone. We’ll cover the essential techniques for creating a stable, beautiful wall and highlight when it’s best to call in a professional for your Long Island home project. Let’s get started on transforming your landscape.

Gather Your Tools and Materials

Before you break ground, having all your tools and materials ready will make the process much smoother. You’ll need a shovel and rake for digging and leveling, a wheelbarrow for moving materials, and a plate compactor for creating a solid base. For the blocks themselves, a rubber mallet helps set them in place, and a masonry saw is necessary for any cuts. Don’t forget safety gear like gloves and safety glasses. For larger projects, a laser level ensures everything is perfectly straight. You can find high-quality gravel, sand, and of course, beautiful porcelain and natural stone blocks right here at the Gappsi store to complete your material list.

Step 1: Plan Your Layout and Check for Permits

First things first: map out where your wall will go. Use stakes and string or marking paint to create a clear outline. This is also the time to check with your local municipality about building permits. Generally, any retaining wall taller than two feet, or any wall that will be holding back a significant amount of weight (what’s known as a structural wall), requires a permit and a design from a qualified engineer. Taking this step seriously from the start prevents major headaches later and ensures your wall is both safe and compliant with local regulations. Proper masonry design and construction is key to a long-lasting structure.

Step 2: Prepare the Foundation

A retaining wall is only as strong as its foundation. Start by digging a trench along your planned layout. A good rule of thumb is to make the trench deep enough to bury about half of your first block, plus an additional six inches for a gravel base. For example, if your blocks are six inches tall, you’ll need a 12-inch-deep trench. The trench should be at least twice as wide as your block to give you room to work. Once dug, add six inches of gravel and use a plate compactor to create a firm, level base. This solid footing is essential for preventing your wall from shifting or settling over time.

Step 3: Install Proper Drainage

Water is the number one enemy of a retaining wall. Without a way for it to escape, hydrostatic pressure can build up behind the wall, causing it to bulge or even fail. To prevent this, you need to install proper drainage. After laying your first course of blocks, place a 4-inch perforated drainage pipe behind it, with the holes facing down. Cover the pipe with more gravel, extending the gravel up the back of the wall as you build. It’s also a smart idea to place landscape fabric between the gravel and the soil to prevent dirt from clogging your drainage system. This step is absolutely critical for the long-term stability of your wall.

Step 4: Lay and Level the First Course

The first row of blocks, or the first course, is the most important one for the entire wall. It needs to be perfectly level, both side-to-side and front-to-back. Place your first block on the compacted gravel base, using a rubber mallet to tap it into place. Use a level to check it, and then lay the next block right beside it. Continue this process for the entire length of the wall, using a string line to keep the row straight. Take your time here, because any imperfections in this first course will be magnified as you build higher. Getting this row right sets you up for success.

Step 5: Stack and Stagger the Next Courses

Once your first course is perfectly level, building the rest of the wall is relatively straightforward. As you add the next row, stagger the blocks so the joints don’t line up, much like a brick pattern. This is called a running bond, and it creates a stronger, more stable structure. Most interlocking blocks have a lip or pin system that helps lock them together and creates a slight setback with each row. Simply place the next block, ensure it connects with the one below it, and continue building. Remember to backfill with gravel behind each course as you go to maintain proper drainage.

Step 6: Finish With Capstones

The final touch for your retaining wall is adding the capstones. These are the flat, finished blocks that sit on the top row, giving your wall a professional and polished look. Capstones often have a slight overhang for a clean edge. Lay them out on top of the wall to ensure they fit perfectly before you secure them. Once you’re happy with the alignment, remove them, apply a bead of concrete adhesive to the top of the wall blocks, and carefully set the capstones back in place. This will keep them from shifting and complete your project.

Common Mistakes to Avoid

Even with the best intentions, it’s easy to make a few common mistakes when building a retaining wall. The most frequent issue is a wall that starts to lean or bulge over time. This is almost always caused by a poor foundation or inadequate drainage. Don’t be tempted to skip the plate compactor or skimp on the gravel base. Likewise, ensuring you have a functional drainage system with a perforated pipe and plenty of gravel backfill is not optional. Following the proper building techniques from the start is the best way to ensure your wall stays straight and strong for years to come.

Know When to Call a Pro

While building a small, decorative garden wall can be a great DIY project, it’s important to know your limits. If your wall needs to be taller than two feet or will be supporting a heavy load like a driveway or patio, it’s time to call a professional. Structural walls require an engineer’s design and expert installation to ensure they are safe and built to code. At Gappsi, our team has decades of experience in masonry design and construction, and we can handle everything from design and permits to the final installation. Don’t risk the safety and value of your property; let an expert build it right.

Related Articles

Frequently Asked Questions

How long can I expect an interlocking retaining wall to last? A well-built interlocking retaining wall can easily last for decades. The key to its longevity isn’t just the quality of the blocks, but the quality of the installation. When a wall has a solid, compacted gravel foundation and a proper drainage system to manage water, it is protected from the primary forces that cause failure. Investing in a proper build from the start ensures your wall will remain a stable and beautiful part of your landscape for many years.

Do I really need to dig a deep trench and use all that gravel for drainage? Yes, absolutely. This is the one area where you should never cut corners. The gravel base creates a solid, level foundation that prevents the wall from settling or shifting over time. The gravel backfill and drainage pipe work together to relieve hydrostatic pressure, which is the force of water-saturated soil pushing against the wall. Skipping these steps is the number one reason retaining walls fail, so think of it as essential insurance for your project.

Can I build a curved wall with these blocks, or just straight ones? You can definitely create beautiful, sweeping curves with most interlocking block systems. Many blocks are designed with a slightly trapezoidal shape, which allows them to fit together tightly when building on a radius. This versatility is a major advantage, giving you the creative freedom to design a wall that flows naturally with the contours of your landscape instead of being limited to straight lines and sharp angles.

My old retaining wall is leaning. Can I just replace it with these blocks? While interlocking blocks are a great replacement, it is critical to first figure out why your old wall is failing. A leaning wall is almost always a symptom of a bigger problem, like a poor foundation or inadequate drainage. Simply rebuilding in the same spot without addressing the root cause will likely lead to the new wall failing, too. It is best to have a professional assess the site to ensure the underlying issues are corrected before you build again.

What is the real difference between a DIY wall and a professionally installed one? A skilled DIYer can certainly build a great-looking short, decorative wall. The difference with a professional installation comes down to expertise, especially for taller or more complex walls. A professional team understands how to read a landscape, plan for site-specific drainage challenges, and ensure the structure is engineered to handle the pressures of your specific property. They have the heavy equipment to create a perfectly compacted base and the experience to guarantee the wall is safe, compliant with local codes, and built to last.

Share this page:
Installation of a concrete block retaining wall, a major factor in how much it costs.

How Much Does a Retaining Wall Cost? A Budget Guide

A retaining wall is more than just a functional barrier; it’s a powerful investment in your property. It unlocks the hidden potential of your yard, transforming a steep, unusable hill into a level area for a swimming pool, a tiered garden, or an elegant stone patio. This addition not only enhances your daily life but also adds significant value to your home. Of course, planning for such a transformative project begins with the budget. Understanding how much does a retaining wall cost is the first step. We’ll break down the expenses, from materials to professional installation, so you can confidently plan your investment.

Key Takeaways

  • Budget Beyond the Blocks: Remember that your total cost includes more than just the visible materials. Account for essential, non-negotiable elements like site excavation, a proper drainage system, and professional labor to get a realistic budget from the start.
  • Know When to Hire a Professional: While a DIY project can work for a short garden wall, always hire an expert for walls over three feet tall or on a slope. Professional installation is crucial for structural safety, proper engineering, and ensuring your investment is built to last without costly failures.
  • Make Your Wall a Design Feature: A retaining wall can be a beautiful focal point, not just a structural necessity. Choosing the right materials and incorporating designs like curves, tiers, or integrated planters adds significant value and turns a functional solution into a stunning part of your landscape.

What Is a Retaining Wall and Does Your Yard Need One?

A retaining wall is much more than just a short, decorative border for your garden. It’s a structural workhorse designed to hold back soil and create level, usable ground where there was once a slope. Think of it as a way to reshape your landscape, turning a challenging hill into a functional and beautiful part of your yard. For many Long Island homeowners, these walls are essential for managing the natural contours of their property, adding both value and stability.

Functionally, retaining walls prevent soil erosion and manage water runoff, protecting your home’s foundation and preventing your yard from washing away during heavy rains. Aesthetically, they add dimension, texture, and structure to your outdoor space. You can use them to build tiered garden beds, frame a stone patio, or create a level foundation for a swimming pool. Whether you’re dealing with a steep grade or just want to add visual interest, a well-built retaining wall can completely transform your property’s potential. It’s a project that blends practical engineering with creative landscape design, offering solutions that are both smart and stylish.

Common uses for retaining walls

The most common reason to build a retaining wall is to solve a problem. If you have a slope that is washing out or a yard you cannot use because of a steep grade, a retaining wall can fix both issues. It provides crucial support for sloped land, preventing soil from sliding downhill. This is especially important in areas that get a lot of rain, as it helps control water flow and stops erosion in its tracks. By holding back the earth, a retaining wall can protect your home’s foundation from creeping soil and prevent water damage. It also creates flat, usable areas for patios, gardens, or play spaces, making your entire yard more accessible and enjoyable. Our expert masonry services can design a wall that perfectly fits your property’s needs.

Signs your property needs a retaining wall

Your yard will often give you clear signals when a retaining wall is needed. The most obvious sign is visible soil erosion. If you notice soil washing away down a hill, creating small gullies, or exposing tree roots, it’s a strong indicator that the slope is unstable. Another red flag is a “creeping” hillside that seems to be slowly moving closer to your foundation, driveway, or patio. For existing, older walls, look for signs of failure like cracks, bulging sections, or a noticeable lean. If you spot any of these issues, it’s best to address them as soon as possible to avoid more serious and costly problems down the road. A professional assessment can determine the urgency and best course of action.

How Much Does a Retaining Wall Cost?

Figuring out a budget for your retaining wall is one of the first steps in planning your project. On average, homeowners can expect to spend between $3,500 and $9,400 for a professionally installed retaining wall. Of course, this is just a ballpark figure. A smaller, simpler project could cost as little as $1,200, while a large, complex wall with premium materials might reach $13,700 or more. The final price tag depends on several key factors, including the wall’s size, the materials you choose, and the specific conditions of your property.

The cost is often calculated per square foot of the wall’s face, typically ranging from $20 to $50. This rate includes both materials and labor. To get a clear and accurate estimate for your Long Island home, it’s best to work with an experienced masonry designer who can assess your site and create a detailed plan. They can help you understand how different choices in design and materials will affect your total investment, ensuring there are no surprises along the way.

Linear foot vs. total project cost

When you start getting quotes, you might see prices listed per linear foot or per square foot. It’s important to know the difference. A linear foot measurement only considers the length of the wall, which can be misleading. A quote based on square footage, which measures the visible face of the wall (length times height), gives you a much more accurate picture for comparing different bids. For example, two walls might both be 50 feet long, but if one is two feet tall and the other is four feet tall, the second one requires far more material and labor. A square-foot price reflects this difference, while a linear-foot price does not. Always ask for quotes based on square footage to make a true apples-to-apples comparison.

Low-end vs. high-end project costs

The wide cost range for retaining walls, from around $3,500 to over $10,000, reflects the vast differences in project scope. A low-end project might involve a short, straight wall made from basic concrete blocks to create a simple garden bed. On the other hand, a high-end project could be a tall, multi-tiered retaining wall with elegant curves, built from premium natural stone, and featuring integrated lighting and planters. The complexity of the design, the quality of the materials, and the amount of site preparation required all play a significant role in determining where your project falls on this spectrum. Understanding these variables will help you set a realistic budget from the start.

How wall height impacts your budget

The height of your retaining wall is one of the biggest factors influencing its cost. A taller wall requires more than just extra materials. It needs a deeper, stronger foundation and additional reinforcement, like geogrid fabric, to safely hold back the soil. This structural demand increases both material and labor costs. Furthermore, most local regulations, including those on Long Island, require walls over four feet tall to be designed by a licensed engineer. This means you’ll need to budget for engineering plans and a building permit, which can add a significant amount to your total project cost. Because of these requirements, the price per square foot often increases for taller walls.

What Factors Drive Retaining Wall Costs?

When you start budgeting for a retaining wall, you’ll quickly find that the final price tag depends on much more than just the materials you choose. Several key factors come together to determine the total cost of your project. Think of it as a puzzle where each piece, from the wall’s size to the condition of your yard, plays a role in the final picture. The biggest drivers are the wall’s height and length, the materials you select, and the specific challenges of your property.

Understanding these elements will help you set a realistic budget and have a more productive conversation with your contractor. For example, a tall, long wall on a steep, hard-to-reach slope will naturally cost more than a short, straight wall on flat, accessible ground. Beyond the basics, things like complex designs, the need for extensive drainage systems, and local permit requirements in Long Island also add to the overall investment. By breaking down these costs, you can better plan your project and make informed decisions that balance your vision with your budget.

Wall height and length

The size of your retaining wall is the single most significant factor influencing its cost. The taller and longer the wall, the more materials and labor you’ll need. Height, in particular, has a major impact. A short, decorative wall just a foot or two high is a relatively simple project. However, once you start building taller walls, especially those over four feet, the structural requirements become much more demanding.

Taller walls must withstand immense pressure from the soil behind them. This means they need a stronger, deeper foundation, more reinforcement like rebar, and often a specialized design from an engineer to ensure they are safe and stable. These additional structural needs directly translate to higher material and labor costs. So, while a long, short wall might be pricey due to its length, a tall wall will always require a more substantial investment per square foot because of the engineering involved.

Your choice of materials

The material you choose for your retaining wall affects not only its appearance but also its cost and longevity. There’s a wide range of options, each with a different price point. For a more budget-friendly choice, pressure-treated timber is often the least expensive. Segmental concrete blocks offer a great balance of durability, versatility, and affordability, making them a very popular option for many homeowners.

If you’re aiming for a more premium, natural look, materials like natural stone will be at the higher end of the price spectrum. While more expensive, stone offers timeless beauty and incredible durability. Poured concrete is another strong, long-lasting option that falls in the mid-to-high range. When making your decision, consider both the upfront cost and the long-term maintenance required to keep your wall looking its best.

Soil and site accessibility

What’s happening in your yard behind the scenes can have a big impact on your retaining wall’s cost. The type of soil on your property is a crucial factor. Here on Long Island, soil with a lot of clay can hold water and exert significant pressure on a wall. This requires a deeper foundation and a more robust drainage system to prevent failure, adding to the project’s cost.

Another practical consideration is site accessibility. If the location for your wall is on a steep hill or in a tight backyard where heavy machinery can’t easily get in, labor costs will likely increase. When equipment access is limited, our team has to move materials and excavate soil by hand, which is more time-consuming. A professional masonry contractor will assess your site conditions early on to account for these challenges in your project estimate.

Design and drainage needs

A straight, simple wall is the most straightforward and cost-effective design. If you envision a more complex look with curves, corners, or multiple tiers, be prepared for higher labor costs. These intricate designs require more precise cuts and careful installation, which takes more time and skill. Similarly, adding features like built-in seating, planters, or lighting will also increase the total price.

More importantly, every retaining wall needs good drainage to survive. Without a proper system to channel water away, hydrostatic pressure can build up behind the wall and cause it to bulge, crack, or even collapse. A basic drainage system is standard, but if your property has significant water runoff or poor soil, a more complex system with additional pipes and gravel may be necessary. Investing in proper landscape design and drainage is essential for protecting your wall and ensuring it lasts for decades.

Long Island permits and regulations

Depending on the size and location of your retaining wall, you may need to get a building permit from your local town or village here on Long Island. Generally, any wall over four feet in height requires a permit and a formal design prepared by a licensed engineer. This is a safety measure to ensure the wall is structurally sound and won’t pose a risk to your property or your neighbors.

The cost of a building permit can vary, but it’s a necessary expense for larger projects. The process involves submitting the engineered plans for review and approval before any construction can begin. Working with an experienced contractor is a huge help here, as we can manage the entire permit application process for you. This ensures everything is done correctly and your project complies with all local building codes from the start.

Local labor costs

Labor is a major component of your retaining wall’s total cost, often accounting for half or more of the final price. The rate for labor depends on the contractor’s experience, the complexity of your project, and regional wages. Building a retaining wall correctly is a skill that requires expertise in excavation, grading, foundation work, and the specific installation techniques for your chosen material.

While it might be tempting to choose the cheapest bid, remember that quality craftsmanship is crucial for a wall that will stand the test of time. An improperly built wall can fail within a few years, leading to far more expensive repairs. Investing in skilled masonry professionals ensures your wall is not only beautiful but also structurally sound, safe, and built to last. It’s a peace-of-mind investment that protects your property for years to come.

Retaining Wall Material Costs: A Breakdown

Choosing the right material for your retaining wall is one of the biggest decisions you’ll make. It influences not just the final cost, but also the wall’s appearance, durability, and maintenance needs. From the classic look of natural stone to the modern appeal of steel, each option comes with its own price point and set of benefits. Here’s a look at what you can expect to invest in some of the most popular retaining wall materials.

Concrete blocks

Concrete blocks are a go-to choice for a reason. They are incredibly durable and versatile, making them a practical and reliable option for almost any landscape design. You can expect concrete blocks to cost between $20 to $35 per square foot. With a lifespan of over 50 years, they represent a solid long-term investment for your property. Their uniform shape allows for straightforward installation, and they provide the structural integrity needed for walls of significant height. Our masonry experts can help you design a concrete block wall that is both functional and attractive.

Natural stone

If you’re aiming for a timeless, high-end look, natural stone is an excellent choice. Each stone is unique, creating a wall with rich texture and character that blends beautifully into the landscape. The cost for natural stone typically ranges from $30 to $50 per square foot. Like concrete, a properly installed stone wall can last for more than 50 years, making it a beautiful and enduring addition to your home. We source a wide variety of porcelain and natural stone to ensure your wall perfectly matches your vision.

Timber

For a more rustic and budget-friendly approach, pressure-treated timber is a popular option. Timber walls generally cost between $15 to $25 per square foot, offering a warm, natural aesthetic that complements many garden styles. However, this lower upfront cost comes with a shorter lifespan of around 15 to 20 years. Because of this, timber is best suited for smaller projects, particularly for walls under three feet tall. It’s a great choice for decorative garden beds or simple terraces where structural demands are minimal.

Gabion walls

Gabion walls offer a unique, modern aesthetic that is both rugged and stylish. These walls consist of wire mesh cages filled with rocks or other materials, creating a permeable structure that is incredibly durable. They are an excellent fit for industrial or contemporary landscape designs and are highly effective for erosion control. The cost can vary widely depending on the type of rock fill and complexity of the installation. These structures are a creative way to incorporate natural elements, and our team can design a custom gabion wall that makes a bold statement.

Vinyl

When budget is the primary concern, vinyl retaining walls are often the most economical solution. Priced between $10 to $15 per square foot, vinyl is a lightweight and low-maintenance material that is resistant to rot and pests. Its ease of installation can also help reduce labor costs, making it a popular choice for homeowners looking for a quick and affordable way to manage slopes or create garden tiers. While it may not offer the same high-end look as stone or steel, it provides a clean and functional finish.

Steel and Corten steel

For a truly contemporary look, steel retaining walls provide clean lines and a sleek profile. Corten steel, in particular, is prized for its unique, rust-like patina that develops over time, creating a beautiful, weathered appearance that protects the steel from further corrosion. These materials are on the higher end of the price spectrum, with steel ranging from $42 to $137 per square foot and Corten steel costing $75 to $150 per square foot. While it’s a significant investment, a steel wall acts as a stunning architectural feature in any modern landscape design.

Budgeting for Hidden Costs

When you’re planning your retaining wall, it’s easy to focus on the price of materials and the cost of labor. But a successful project involves more than just building the wall itself. Several other factors can influence your final budget, and thinking about them from the start will save you from unexpected expenses down the road. These so-called “hidden costs” are a normal part of any major landscaping project, and a professional team will account for them in your initial quote.

From preparing the ground to securing the right permits, each step is essential for creating a wall that is not only beautiful but also structurally sound and built to last. A well-planned budget that includes these elements ensures a smooth process from start to finish. Working with an experienced masonry designer means you have a partner who understands the full scope of the project. They can anticipate these needs and build them into the plan, giving you a clear and comprehensive understanding of your total investment.

Site prep, grading, and excavation

Before the first block is laid, your property needs to be ready. This preparation phase is critical for the stability and longevity of your retaining wall. The process often involves clearing the area, leveling the ground, and excavating soil to create a solid base. The cost for this work can vary, with site leveling sometimes priced per square foot and grading often starting from a base price. Excavation costs depend on how much soil needs to be moved. A professional landscape designer can assess your site’s specific needs to ensure a perfect foundation for your new wall.

Proper drainage

Water is a retaining wall’s biggest enemy. Without a way for water to escape, pressure can build up behind the wall, leading to bulging, cracking, or even complete failure. That’s why every retaining wall requires a proper drainage system. This might be a simple gravel backfill for smaller walls or a more complex system of pipes and outlets for larger, more complex structures. While adding a robust drainage system increases the initial cost, it’s a non-negotiable investment that protects your wall for years to come. Skipping this step can lead to expensive restoration work in the future.

Permits and inspections

Depending on where you live in Long Island and the height of your wall, you will likely need a building permit. Many municipalities require permits for any retaining wall over four feet tall, and some have even stricter rules. The permit process often involves submitting engineering drawings to prove the wall’s design is safe and sound. Permit fees can range from under a hundred to several hundred dollars. While it might seem like a hassle, securing the right permits ensures your project is compliant with local codes and built to professional standards, protecting you and your property.

Long-term maintenance

Once your wall is built, a little care goes a long way in protecting your investment. Long-term maintenance is a hidden cost that many homeowners forget to consider. This includes performing regular inspections to check for cracks or signs of shifting, ensuring the drainage system remains clear of debris, and cleaning the wall’s surface to prevent staining or buildup. For certain materials, applying a sealant every few years can also extend the wall’s life and keep it looking its best. Planning for these simple maintenance and sealing tasks will prevent small issues from turning into major, costly repairs.

Consider These Popular Retaining Wall Designs

A retaining wall is much more than a structural solution for a sloped yard. It’s a powerful design element that can completely reshape your outdoor space. The right design adds texture, dimension, and style that complements your home’s architecture and your personal taste. Whether you prefer a clean, modern look or a more natural, rustic feel, there’s a retaining wall design that will fit your vision perfectly. Thinking about the overall aesthetic from the start helps ensure your wall is both beautiful and functional.

From the sleek lines of stacked stone to the gentle flow of curved walls, your options are wide open. You can even turn your wall into a living feature with integrated planters. Exploring different styles will help you and your designer choose a look that not only solves your property’s grading issues but also becomes a stunning focal point. A well-designed wall is a key part of a cohesive landscape design, tying together patios, walkways, and garden beds.

The look of stacked stone

If you love clean lines and a contemporary feel, a stacked stone retaining wall is an excellent choice. This design creates a sophisticated and orderly look that pairs beautifully with modern homes, but its timeless appeal also works with more traditional architecture. The stones are fitted together tightly, creating a smooth, uniform face that feels both natural and refined. It’s a popular style because it brings an element of polished charm to any backyard.

You can achieve this look with a variety of natural stone options, from slate to granite, each offering unique colors and textures. The result is a wall that feels solid and permanent, adding a touch of understated luxury to your landscape.

Elegant curves and tiers

Straight lines aren’t your only option. A curved retaining wall can introduce a soft, organic flow to your landscape, breaking up the rigid angles of a house or patio. Arched walls are not only visually appealing, but they also distribute soil pressure more effectively, adding strength to the structure. For properties with significant slopes, a multi-tiered system is a fantastic solution. Instead of one massive wall, you can create a series of shorter walls with level terraces in between.

These terraces provide perfect opportunities for planting beds, a small seating area, or simply a lush patch of lawn. This approach adds incredible depth and dimension to your yard, turning a challenging hill into a dramatic and functional feature. Expert masonry design is key to executing these complex and beautiful structures.

Modern gabion walls

For a truly unique and modern aesthetic, consider a gabion wall. These walls are made from wire mesh cages filled with rocks or other materials. The look is industrial yet natural, making it a bold statement piece in rugged or contemporary landscape designs. Gabion walls are incredibly durable and provide excellent drainage, as water can easily pass through the rock fill.

The choice of stone fill allows for customization. You can use smooth river rocks for a softer look or angular crushed stone for a more textured, industrial feel. Gappsi offers Gabion systems that provide this distinct, durable, and stylish solution for retaining walls, benches, and other landscape features.

Walls with integrated planters

Why not make your retaining wall a living part of your garden? Integrating planters directly into the wall’s structure is a brilliant way to combine function with beauty. This design breaks up a solid wall with pockets of greenery and color, softening its appearance and blending it seamlessly into the landscape. It’s an ideal solution for homeowners who want to add more gardening space, especially on a sloped property where flat ground is limited.

This layered approach allows you to plant flowers, herbs, or cascading greenery that will spill over the wall’s edge. It turns a purely structural element into a dynamic vertical garden. A thoughtful landscape plan can incorporate these features to create a stunning and practical outdoor environment.

DIY vs. Hiring a Pro: Which Is Right for You?

Deciding whether to build your retaining wall yourself or call in a professional is a major fork in the road for your project. One path can save you money, while the other saves you time and provides peace of mind. Your budget, the scale of your project, and your own experience level will all point you toward the right choice. Let’s walk through the factors to consider so you can feel confident in your decision.

When to DIY your retaining wall

If you’re comfortable with physical labor and have some construction experience, a DIY retaining wall can be a rewarding and budget-friendly project. This approach makes the most sense for short, simple garden walls, especially those under two feet high on relatively flat ground. You can save a significant amount on labor, which often accounts for a large portion of the total cost. However, be honest about the project’s demands. The most common DIY mistake is failing to install proper drainage, which can cause the wall to bulge, crack, or collapse. Fixing a failed wall will cost you far more in the long run than getting it right the first time.

Why you should hire a pro

For more complex projects, hiring a professional is the safest and most reliable option. You should always call an expert if your planned wall is over three feet tall, built on a steep slope, located near your home’s foundation, or requires a permit. While the upfront cost is higher, a professional masonry designer brings invaluable expertise. They understand Long Island’s specific soil conditions and building codes, ensuring your wall is engineered for stability and longevity. A professionally built wall offers better protection against erosion and often comes with a warranty, giving you confidence that your investment is secure for years to come.

Understanding labor costs

When you hire a professional, you’re paying for more than just materials. Labor is a significant part of the equation, and it’s important to understand what it covers. Expert labor includes the team’s skill, precision, and efficiency, which are all crucial for building a structurally sound wall. Costs can vary based on your location and the complexity of the job, but you can expect a large part of your budget to go toward the installation team. This investment covers everything from site preparation and excavation to the careful placement of each block or stone and the installation of a proper drainage system.

Avoid These Common Budgeting Mistakes

Planning your budget is an exciting step, but a few common oversights can turn your dream project into a headache. A retaining wall is more than just the visible materials; it’s a complete system that includes site preparation, drainage, and professional labor. To ensure your project stays on track, it’s helpful to be aware of the total scope from the start. Let’s walk through some frequent mistakes homeowners make so you can plan with confidence and avoid any surprises along the way.

Underestimating the total cost

It’s easy to focus on the price of the stone or blocks you love, but the final cost of a retaining wall includes much more. Homeowners sometimes forget to account for labor, delivery fees, site excavation, backfill material, and proper drainage systems. The best way to get a realistic picture is to think in terms of the total project cost, not just the price per square foot of a material. A detailed quote from a professional will break down every expense, giving you a clear understanding of where your money is going and preventing unexpected costs from appearing mid-project.

Forgetting drainage and site prep

Proper drainage is the secret to a long-lasting retaining wall. Without a way for water to escape, pressure can build up behind the wall, leading to bulging, cracking, or even total failure. Your plan must include a drainage system, which could be a simple gravel backfill or a more complex network of pipes. Similarly, preparing the site is a critical first step that involves excavating and grading the area to create a stable foundation. Factoring these essential landscape design elements into your initial budget will save you from costly repairs in the future.

Overlooking soil and engineering needs

For retaining walls over a few feet tall, you’re not just stacking stones; you’re engineering a structure to safely hold back tons of earth. The stability of the soil on your property plays a huge role in the wall’s design. In many cases, especially for taller or more complex walls, a licensed engineer may need to be involved to create professional drawings and ensure the structure is safe and sound. A professional masonry contractor will assess the site conditions and determine if engineering is required, incorporating it into the project plan from day one.

Skipping permits and inspections

Trying to save a little money by skipping the permit process can lead to big problems. Most towns on Long Island require a building permit for retaining walls over a certain height, typically around four feet. Building without a permit can result in fines, orders to tear down the work, or complications when you eventually sell your home. A reputable contractor will know the local regulations and handle the entire permitting and inspection process for you. This ensures your wall is built to code and gives you peace of mind knowing the job was done right.

Maintain Your Retaining Wall for Years to Come

A retaining wall is a significant and worthwhile investment in your property’s function and beauty. To protect that investment, a little regular maintenance goes a long way. Taking care of your wall helps extend its life, ensures it continues to do its job properly, and keeps it looking great. Simple, proactive steps can prevent small issues from turning into costly, complex repairs down the road. By staying on top of a few key tasks, you can ensure your retaining wall remains a strong and attractive feature of your landscape for many years.

Inspect regularly and repair early

One of the best things you can do for your retaining wall is to simply walk by and look at it every so often. Make it a habit to inspect it a few times a year, especially after heavy rains or freeze-thaw cycles in the winter. Look for any signs of stress, like new cracks, leaning sections, or areas that seem to be bulging outward. Catching these problems early is key. A small crack is much easier and cheaper to fix than a section of a failing wall. If you spot something that doesn’t look right, having a professional from our masonry team take a look can give you peace of mind.

Manage drainage and plant growth

Your retaining wall’s drainage system is its best friend. The small pipes or holes at the base of the wall, called weep holes, are there to relieve water pressure. Make sure they stay clear of dirt, leaves, and other debris so water can escape freely. Just like yard debris, unchecked plant growth can also cause trouble. While plants look nice, their roots can work their way into small crevices, creating larger cracks over time. Keeping nearby shrubs trimmed and pulling weeds that sprout on the wall are crucial parts of its long-term health. Thoughtful landscape design can also prevent these issues from the start.

Clean and seal for durability

Keeping your wall clean isn’t just about looks; it also prevents the buildup of moss, algae, and grime that can degrade the material over time. For most walls, a simple rinse with a garden hose or a gentle scrub with a brush and mild soap is all you need. For tougher stains on stone or concrete, a stiff brush can work wonders. After cleaning, consider applying a sealant. A quality sealant provides an extra layer of protection against moisture and UV rays, which is especially important for our Long Island weather. Our restoration and sealing services can help preserve your wall’s integrity and appearance for years to come.

Get the Most Value From Your Retaining Wall

A retaining wall is a significant investment in your property, so you want to make sure you get the best possible return. Value isn’t just about finding the lowest price; it’s about building a structure that is durable, functional, and beautiful for years to come. A well-built wall protects your landscape from erosion, creates more usable space, and adds significant curb appeal. By making smart choices about materials, design, and installation, you can create a retaining wall that truly enhances your home and lifestyle. Here’s how to ensure your project delivers lasting value.

Choose materials suited for Long Island

Living on Long Island means your outdoor structures face specific challenges, like humid summers, freeze-thaw cycles in winter, and salty air near the coast. Choosing materials that can withstand these conditions is the first step toward a long-lasting retaining wall. While a lower-cost material might seem tempting, it could lead to cracks, discoloration, or failure in just a few years.

High-quality porcelain and natural stone pavers are excellent choices because they are dense, durable, and resistant to moisture and salt. A local expert can help you select the best options for your specific location and budget. They understand which materials perform best in our soil and climate, ensuring your wall remains stable and attractive without demanding constant upkeep.

Balance beauty with function

Your retaining wall doesn’t have to be purely functional. Think of it as a canvas for your landscape design. With the right approach, it can become a stunning focal point that complements your home’s architecture. For example, many homeowners are using stacked stone to create clean, modern lines that add a touch of elegance to their backyards. This approach turns a simple wall into a sophisticated design element.

You can also integrate other features directly into the wall. Consider adding built-in planters for a terraced garden, a bench for extra seating, or subtle lighting to create ambiance in the evening. A skilled masonry designer can help you explore creative possibilities that blend form and function, transforming a structural necessity into a beautiful and practical part of your outdoor living space.

Work with a masonry and landscaping expert

The single most important factor for a successful retaining wall is proper installation. A wall that isn’t built correctly can fail, leading to expensive damage and safety hazards. This is why working with an experienced professional is not a luxury, it’s a necessity. An expert handles all the critical details, from securing permits to engineering a robust drainage system that prevents water pressure from building up behind the wall.

A professional landscape construction company will assess your property’s unique soil conditions and slope to design a wall that is structurally sound. They use high-quality materials and proven construction techniques to ensure stability and longevity. By entrusting your project to a pro, you get peace of mind knowing your investment is protected and your wall is built to last.

Related Articles

Frequently Asked Questions

How do I know if I really need a retaining wall? The clearest signs are related to soil and usability. If you see soil washing down a slope during rain, notice exposed tree roots, or have a hillside that seems to be creeping toward your patio or foundation, your property is telling you it needs support. A retaining wall solves these erosion problems. It also becomes a necessity when you want to create flat, usable ground on a sloped yard for things like a garden, patio, or play area.

Why is drainage so important for a retaining wall? Water is the single biggest threat to a retaining wall’s stability. When soil becomes saturated with rainwater, it gets heavy and exerts immense pressure (called hydrostatic pressure) on the back of the wall. Without a proper drainage system to channel that water away, the pressure can cause the wall to lean, crack, or even collapse. Investing in a good drainage plan is the most important step you can take to ensure your wall lasts for decades.

Can I save money by building a short wall myself? A DIY approach can be tempting for very small, decorative garden walls that are under two feet high and not holding back a significant amount of soil. However, for any wall that is structural, taller, or on a noticeable slope, hiring a professional is the wisest investment. The most common DIY mistake is improper site prep and drainage, which can lead to wall failure. The cost to fix or rebuild a failed wall is always much higher than the cost of professional installation from the start.

How long can I expect my new retaining wall to last? The lifespan of your wall depends almost entirely on two things: the material you choose and the quality of the installation. A pressure-treated timber wall might last around 15 to 20 years. In contrast, a professionally installed wall made from high-quality materials like natural stone or concrete blocks can easily last 50 years or more. Proper installation, especially a solid foundation and good drainage, is the key to reaching that longer lifespan.

Do I need a permit for my retaining wall project on Long Island? Most likely, yes, if the wall is of a significant height. As a general rule across Long Island, any retaining wall over four feet tall requires a building permit and plans from a licensed engineer. Some local towns have even stricter requirements. This process ensures the wall is designed safely and won’t pose a risk. A professional contractor will be familiar with your town’s specific codes and can manage the entire permitting process for you.

Share this page:
Long Island landscape designer discussing plans with clients on their patio.

How to Hire a Landscape Designer Long Island

Your backyard should be an extension of your home, but for many, it’s an underused space with untapped potential. Maybe you’re dealing with a sloped yard, a lack of privacy, or a patio that’s just too small for entertaining. These are the exact challenges a skilled professional can solve. A great landscape designer Long Island does more than just pick pretty flowers; they are creative problem-solvers who redesign spaces to improve how you live. They see the potential for functional outdoor rooms, seamless indoor-outdoor flow, and beautiful, low-maintenance solutions. This article will show you how to find a designer who can transform your property’s challenges into its best features, creating a space that is as practical as it is beautiful.

Key Takeaways

  • Simplify Your Project with a Design-Build Firm: A company that handles everything from design to construction provides a single point of contact. This integrated approach reduces stress, prevents miscommunication, and ensures your final landscape perfectly matches the original vision.
  • Look for Deep Local Knowledge: A great Long Island landscape designer understands our unique coastal climate, native plants, and complex town permit processes. This local expertise is essential for creating a beautiful outdoor space that is built to last and avoids costly compliance issues.
  • Use the Off-Season to Your Advantage: Begin the design process in the fall or winter for a project you want to enjoy by summer. Planning ahead gives you plenty of time to finalize your design, select materials, and secure a spot with a top-tier firm before their schedule fills up.

What Does a Landscape Designer Do?

Think of a landscape designer as the creative visionary for your outdoor space. Their job is to blend artistry with practical knowledge to transform your yard into a beautiful, functional extension of your home. They work with you to understand your lifestyle, tastes, and how you want to use your space, whether you’re dreaming of a quiet garden retreat, a lively entertainment area, or a safe place for your kids to play.

A great designer considers everything from the big picture layout to the smallest details. They map out where to place patios, walkways, and plantings. They also help you select the right materials and plants that will thrive in Long Island’s specific climate. Ultimately, they create a cohesive plan that brings your vision to life, ensuring the final result is not only stunning but also perfectly suited to your family’s needs.

Landscape Design vs. Landscape Architecture

While you might hear these terms used interchangeably, there are some key differences. A landscape architect is a state-licensed professional, which allows them to work on a broad range of public and commercial projects and handle complex technical challenges like large-scale grading and drainage plans.

A landscape designer, on the other hand, typically focuses on the aesthetic and horticultural elements of residential projects. Their expertise often comes from years of hands-on experience and specialized certifications. For most homeowners on Long Island, a talented landscape designer is the perfect partner. You can see a designer’s skill reflected in their portfolio. Look for experience with high-end residential landscapes, intricate masonry, and thoughtful planting designs that match the style you want for your home.

Design-Build vs. Design-Only Firms

When you start your search, you’ll find two main types of companies: design-only and design-build. A design-only firm creates the blueprints for your project. Once the design is complete, it’s up to you to find and hire separate contractors to actually build it. This can sometimes create a disconnect between the original vision and the final execution.

A design-build firm, like Gappsi, handles the entire process from start to finish. Our team provides a single, seamless experience, managing everything from the initial concept and 3D renderings to the final installation. This integrated approach ensures clear communication and accountability. Examining a design-build firm’s completed projects shows you not just their creative ideas, but also their ability to execute those ideas with quality craftsmanship. Gappsi takes a whole-property approach, designing and building stunning outdoor living spaces alongside interior renovations for a truly cohesive home.

Common Landscape Design Services on Long Island

When you hear “landscape design,” you might picture beautiful flower beds and lush green lawns. While that’s certainly part of it, the field is much broader, especially here on Long Island. A great landscape designer combines artistry with practicality, creating outdoor spaces that are not only stunning but also perfectly suited to your lifestyle. From the soft touches of a garden to the solid foundation of a stone patio, these services work together to build your personal oasis.

Understanding the different services available can help you clarify your vision and find the right professional for your project. Whether you want a quiet retreat for your family, an entertainer’s paradise, or a low-maintenance yard that still looks incredible, there’s a design solution. The goal is to create a cohesive environment that extends your living space into the outdoors. A full-service firm can bring all these elements together, offering everything from initial landscape design to the final installation, ensuring every detail is just right.

Garden and Planting Design

The heart of any landscape is its plant life. Garden and planting design is all about selecting the right flowers, shrubs, and trees for your space and arranging them beautifully. This service goes beyond just picking pretty plants; it involves preparing the ground with proper topsoil and grading, ensuring healthy growth. A designer considers Long Island’s climate, your soil type, and the amount of sunlight your yard gets. This can include planting mature trees for instant shade, laying sod for a perfect lawn, or creating vibrant seasonal flower beds that provide color all year long.

Hardscaping and Masonry

Hardscaping provides the structure and foundation for your outdoor living areas. This includes all the non-plant elements, like patios, walkways, retaining walls, and fire pits. Expert masonry is what turns a simple backyard into a functional and elegant space. A well-built stone wall can create visual interest and define different areas of your yard, while a custom patio becomes the perfect spot for dining and relaxing. These features are built to last, adding lasting value and usability to your property.

Outdoor Living Spaces and Patios

Your patio is the centerpiece of your outdoor life. It’s where you host summer barbecues, enjoy your morning coffee, and unwind at the end of the day. Designing an effective outdoor living space involves more than just laying down some pavers. It’s about creating a seamless flow from your home into your yard. You can incorporate features like outdoor kitchens, seating walls, and fireplaces to make the space truly your own. The choice of materials, from classic natural stone to modern porcelain pavers, sets the tone for the entire area.

Synthetic Turf and Game Courts

For many Long Island families, the backyard is a place for play. If you want a pristine lawn without the constant upkeep, synthetic turf is a fantastic option. It’s perfect for creating durable, green play areas, dog runs, or even personal putting greens. Beyond turf, you can add dedicated Sports Games Courts for basketball, bocce, or pickleball. These additions provide endless entertainment and encourage an active lifestyle, all within the convenience of your own backyard.

Swimming Pools and Water Features

Nothing says “backyard oasis” quite like a beautiful body of water. A custom swimming pool can transform your property into a private resort, providing a refreshing escape during hot Long Island summers. But water features don’t stop at pools. Designers can also create serene koi ponds, elegant fountains, or natural-looking rock waterfalls that add the soothing sound of moving water to your landscape. These elements become stunning focal points that enhance the tranquility and beauty of your outdoor space.

Pavilions, Pergolas, and Shade Structures

To truly enjoy your outdoor space, you need a comfortable place to escape the sun. Pavilions and pergolas provide essential shade while adding a strong architectural element to your landscape. A pavilion offers a fully covered roof, creating an outdoor room perfect for dining or lounging, rain or shine. A pergola, with its slatted roof, provides filtered sunlight and a structure for growing beautiful climbing vines. These structures define your outdoor living areas and make them more comfortable and usable throughout the day.

Fencing and Privacy Solutions

Good fences do more than just mark property lines; they are a key part of your landscape’s design and function. The right fencing can provide privacy from neighbors, keep pets and children safe, and add to the overall aesthetic of your yard. You might choose a classic wood fence for a traditional look, a low-maintenance vinyl fence, or even a “living fence” made of carefully planted evergreens. A designer can help you select a solution that meets your privacy needs while beautifully integrating with the rest of your landscape.

What Makes Long Island Landscape Design Unique?

Designing a landscape on Long Island is about more than just picking pretty plants. It’s a unique challenge that blends coastal living with four distinct seasons and a complex web of local regulations. From the salt spray of the South Shore to the rolling hills of the North Shore, every property has its own character. A successful design works in harmony with these local conditions, not against them. Understanding what makes our island special is the first step to creating an outdoor space that you’ll love for years. It requires a designer with deep local knowledge who can create a beautiful, functional, and resilient landscape that feels right at home.

Adapting to Long Island’s Climate and Soil

Long Island’s coastal climate brings sandy soil, salty air, and strong winds, which can be tough on plants. A knowledgeable designer knows how to work with these elements. With Long Island’s varied tree coverage, a great plan involves protecting existing trees while selecting new plants that will thrive in coastal conditions and handle wind exposure. This means choosing salt-tolerant species for homes near the water and understanding the specific soil type on your property. A thoughtful landscape design considers these factors from the start, ensuring your garden doesn’t just survive, but flourishes through the seasons.

Handling Local Permits, Zoning, and HOA Rules

Each town and village on Long Island has its own set of rules for construction projects. Adding a pool, patio, or pavilion often requires permits, and zoning laws dictate how and where you can build. If you live in a community with a homeowners’ association (HOA), you have another layer of guidelines to follow. This is where an experienced local firm becomes invaluable. Gappsi takes a whole-property approach, which means we can manage the entire project, from home remodeling to outdoor living spaces. Having a single point of contact simplifies project management for you and ensures your design is both beautiful and compliant from day one.

Designing for Every Season

A truly great Long Island landscape offers beauty and function all year long. Our four distinct seasons provide a wonderful opportunity for a dynamic outdoor space. Imagine spring bulbs giving way to lush summer greenery, followed by the rich colors of fall and the quiet beauty of evergreens in the snow. Seasonal landscaping keeps your outdoor space beautiful year-round. This approach also involves practical considerations, like ensuring your patio materials can withstand freeze-thaw cycles. Investing in a year-round design and proper maintenance, like professional restoration and sealing, protects your landscape investment and creates a beautiful outdoor environment for years to come.

Why Choose Gappsi for Your Long Island Landscape Design?

Choosing a landscape designer for your Long Island home is a big deal. You’re not just hiring someone to plant a few shrubs; you’re trusting them with your vision for your home’s outdoor sanctuary. It’s about creating a space where you’ll make memories, whether you’re hosting summer barbecues, watching your kids play, or just enjoying a quiet morning coffee. The right partner can make this process exciting and seamless, while the wrong one can lead to headaches and a finished project that doesn’t quite feel like you.

This is why it’s so important to look beyond just the portfolio. You need a team that understands the unique challenges and opportunities of Long Island properties, from the salty air to the specific town permits. You also want a process that feels collaborative and clear from start to finish. At Gappsi, we’ve built our entire approach around these ideas. We combine comprehensive design and construction services with a commitment to quality that simplifies the entire experience for homeowners. Instead of juggling multiple contractors, you get one dedicated team that sees your project through from the first sketch to the final walkthrough, ensuring your vision comes to life exactly as you imagined.

A Full-Service, Design-Build Approach with 3D Renderings

The term “design-build” simply means that one team handles your entire project, from the initial concept to the final installation. This integrated approach prevents miscommunications and ensures your project stays on schedule and on budget. We start with a consultation to understand your goals and then create a detailed 3D design. This allows you to see a realistic preview of your new landscape, so you can make adjustments and feel completely confident before any work begins. Our full-service landscape design covers everything from grading and planting to irrigation systems and water features, all managed by a single, cohesive team.

All Your Outdoor and Indoor Services in One Place

What truly sets Gappsi apart is our ability to manage your entire property’s transformation, both inside and out. Imagine renovating your kitchen and creating a seamless flow to a new outdoor patio and pool area. With most companies, that would mean hiring and managing separate architects, designers, and contractors. We are one of the few Long Island firms that can design and build it all. This provides you with a single point of contact and ensures a consistent design language throughout your home. It simplifies project management for you and results in a more harmonious living space, making your home remodeling project feel effortless.

Our Commitment to Quality Materials and Expert Craftsmanship

A beautiful design is only as good as the materials and craftsmanship used to build it. With over three decades of experience on Long Island, we know which materials stand up to our coastal climate and which ones don’t. We use only high-quality products, from the soil we grade to the stones we lay, ensuring your investment is built to last. Our team of expert craftsmen takes immense pride in their work, whether they are installing intricate porcelain and natural stone patios, building a custom swimming pool, or planting a privacy screen of evergreens. This commitment to quality is the foundation of every project we undertake.

How to Choose the Right Landscape Designer on Long Island

Finding the right landscape designer is the most important step in bringing your dream backyard to life. You’re not just hiring someone to plant a few shrubs; you’re looking for a partner who can see your vision and has the expertise to execute it. On Long Island, this means finding a professional who understands our unique coastal climate, local regulations, and the desire for beautiful, functional outdoor living spaces. Taking the time to carefully vet your options will ensure your project is a success from the first sketch to the final reveal.

Review Portfolios and Service Offerings

Start by exploring a designer’s portfolio. This is more than just looking at pretty pictures; it’s about seeing their range and capabilities. A strong portfolio will show a variety of styles, proving the designer is versatile and not just repeating the same design. Look for projects similar to what you have in mind. Do you see examples of creative masonry, elegant poolscapes, or innovative lighting? A diverse portfolio, like the projects showcased on the Gappsi YouTube channel, demonstrates a team’s ability to handle different challenges and deliver customized results. Also, confirm they offer the specific services you need, whether it’s hardscaping, planting design, or installing a pavilion.

Check for Licensing, Insurance, and Experience

Never underestimate the importance of proper credentials. Your landscape designer should be fully licensed and insured to work in Long Island. This protects you from liability and ensures they are accountable for their work. Don’t be shy about asking for proof of insurance. Beyond the basics, look into their experience and qualifications. Reviewing their educational background, industry certifications, and professional affiliations can give you valuable insight into their commitment to their craft. A team with decades of experience, for example, has likely managed a wide range of projects and knows how to solve problems effectively, giving you peace of mind.

Why to Choose a Full-Service Design-Build Firm

Consider the benefits of a design-build firm. Instead of hiring a separate designer and multiple contractors, a design-build company handles everything from concept to construction. Gappsi is one of the few companies on Long Island that takes this whole-property approach. We can design and build your swimming pool, patio, pavilion, and landscaping all at once, even coordinating with indoor renovations. This integrated process means you have a single point of contact, which simplifies communication and project management. It also ensures a cohesive design across your entire property, creating a seamless flow between your indoor and outdoor living spaces.

Key Questions to Ask Before You Hire

Once you’ve narrowed down your list, it’s time to interview your top candidates. This conversation is your chance to understand their process and see if your personalities click. Go beyond the portfolio and ask about their project management style, how they handle unexpected issues, and their preferred methods of communication. Will they provide regular updates? Who will be your main contact? Also, ask about their design process. For instance, do they provide 3D renderings so you can visualize the final result before construction begins? These conversations offer a glimpse into their professionalism and help you determine if they will be a true partner in creating your ideal outdoor space.

How to Know You’ve Found the Right Designer

Choosing a landscape designer is about more than just hiring someone to draw up a plan. You’re starting a partnership. The right designer will not only have the technical skills to transform your property but also the communication skills to make the process smooth and even enjoyable. It’s a relationship built on trust, shared vision, and a clear understanding of your goals. While a stunning portfolio is a great start, it only tells part of the story. The true measure of a great designer is found in the details: how they communicate, how they solve problems, and how they make you feel about the project.

To find the perfect fit, you need to look beyond the surface. This means reading between the lines of reviews, knowing which warning signs to look out for, and recognizing the green flags that signal a great partnership ahead. When you find a designer who listens intently, offers creative solutions tailored to your life, and is transparent about every step, you can feel confident that your vision is in the right hands. This is how you move from simply hiring a contractor to collaborating with a true partner who will help you create an outdoor space you’ll love for years to come.

How to Read Between the Lines of Reviews

Online reviews and testimonials are a helpful first step, but the real value isn’t in the star rating. It’s in the story. Look for reviews that describe the entire experience, not just the final result. Did the homeowner mention clear communication, a designer who listened to their ideas, or a team that respected their property? These details paint a picture of the working relationship you can expect.

A portfolio shows you what a designer can build, but reviews tell you how they do it. Pay attention to comments about the process, problem-solving, and professionalism. A designer’s portfolio might showcase their approach to layout and material selection, but reviews reveal their commitment to client satisfaction. When you find reviews that consistently praise a designer’s communication and attention to detail, you’re on the right track to finding a great landscape design partner.

Common Red Flags to Avoid

Your intuition is a powerful tool, and if something feels off during your initial conversations, it probably is. Not everything you need to know will be in a glossy portfolio. A major red flag is a designer who is vague about their process, timeline, or costs. You want a partner who is upfront and transparent, not one who avoids direct questions.

Also, be cautious of designers who seem to push their own style instead of listening to your needs or who pressure you into making a quick decision. A lack of flexibility or an unwillingness to provide references from recent clients is another warning sign. Finally, consider if they are a full-service company. Juggling separate designers, builders, and installers can lead to miscommunication and delays. A fragmented approach can turn your dream project into a logistical headache, especially for complex elements like masonry and hardscaping.

Green Flags: Signs of a Great Partnership

On the flip side, there are clear signs that you’ve found a fantastic designer. A great partner will listen more than they talk during your first meeting. They’ll ask thoughtful questions about your lifestyle, family, and how you envision using the space. This shows they’re focused on creating a custom design that truly works for you, not just a one-size-fits-all solution.

Look for a portfolio that showcases a range of styles, proving their versatility and ability to adapt to different clients’ tastes. Transparency is another huge green flag. They should be open about their process, provide clear estimates, and explain how they handle changes or challenges. The best designers are proud of their work and will gladly encourage you to speak with past clients. When you see their completed projects and hear positive feedback directly from other homeowners, you can feel confident you’ve found a team that builds beautiful spaces and strong relationships. You can often see this firsthand on a company’s YouTube channel.

What Does Landscape Design Cost on Long Island?

Let’s talk about one of the biggest questions on every homeowner’s mind: what will this actually cost? While there isn’t a single price tag for a landscape project on Long Island, understanding the key cost drivers will help you set a realistic budget. Think of it less like buying a product off a shelf and more like creating a custom piece of art for your home. The final price depends on your vision, your property, and the materials you choose. A clear picture of these elements is the first step toward getting an accurate estimate and creating a plan that aligns with your financial goals.

A landscape project is a significant investment, not just in your property’s value, but in your quality of life. It’s about creating a space for morning coffee, family barbecues, or quiet evenings by a fire pit. The right design extends your living area into the outdoors, providing a beautiful and functional backdrop for years of memories. Because every project is tailored to a specific home and family, the costs are just as personalized. A simple refresh will have a very different budget from a full-scale backyard resort with a pool and outdoor kitchen. Our goal is to help you understand what goes into the final number so you can feel confident and excited about the process.

Factors That Influence Project Cost

The cost of a landscape project can vary widely because every design is unique. The most significant factors are the size of your property and the complexity of the design. A simple planting plan for your front yard will naturally cost less than a complete backyard transformation with multiple levels and features. The materials you select also play a huge role. For example, choosing high-end porcelain or natural stone for a patio will have a different price point than standard concrete pavers. Finally, the existing condition of your site, like steep slopes requiring retaining walls or poor soil needing replacement, can also influence the overall investment.

Softscaping vs. Hardscaping Costs

Your project budget will be divided between two main categories: softscaping and hardscaping. Softscaping includes all the living elements, like trees, shrubs, flowers, soil, and grass. Hardscaping refers to the non-living, structural components, such as patios, walkways, retaining walls, and fire pits. Generally, hardscaping is the more significant investment due to the cost of materials and the skilled labor required for installation. A project heavy on intricate masonry will have a higher budget than one focused primarily on lush garden beds. Finding the right balance between these two elements is key to achieving your desired look while staying within your budget.

Balancing Installation and Long-Term Maintenance Costs

A smart landscape plan considers costs beyond the initial installation. It’s important to think about long-term maintenance from the very beginning. Some choices may have a higher upfront cost but save you time and money down the road. For instance, installing high-quality synthetic turf eliminates the recurring expenses of watering, mowing, and fertilizing. Similarly, properly installed hardscapes made from durable materials will last for decades with minimal upkeep, especially with professional cleaning and sealing services. Factoring maintenance into your decision helps protect your investment and ensures your outdoor space looks beautiful for years to come.

Smart Budgeting Tips for Your Project

Feeling confident about your budget starts with a bit of preparation. Before you meet with a designer, create a list of your “must-haves” and “nice-to-haves.” This helps you and your designer prioritize where to allocate funds. If your complete vision feels out of reach right now, consider phasing the project. You could build the foundational patio and walkways this year and add the outdoor kitchen or swimming pool later. When you do get estimates, ask for an itemized breakdown so you can see exactly where your money is going. Most importantly, be open with your designer about your budget. A great partner will use that information to create a beautiful, functional design that respects your financial comfort zone.

When Is the Best Time to Start a Landscape Project on Long Island?

Timing is everything, especially when it comes to landscaping. The best time to start your project depends on what you’re building and what your priorities are. A project focused on new garden beds has a different ideal schedule than one centered on a new stone patio. Understanding the seasonal flow of landscape work on Long Island can help you plan better, save money, and enjoy a smoother process from start to finish.

Thinking about your project in terms of seasons allows you to work with the natural rhythm of the climate, not against it. It also puts you in a strategic position to hire the right designer and construction team before their schedules fill up. Let’s look at the ideal timelines for different types of projects and how you can make the most of off-season planning.

Ideal Seasons for Planting and Hardscaping

For softscaping, which includes planting trees, shrubs, and flowers, fall is often the perfect season on Long Island. The soil is still warm from the summer, but the cooler air temperatures reduce stress on new plants. This gives their roots a chance to get established before winter arrives. Spring is the second-best option, offering a gentle start before the summer heat sets in.

Hardscaping projects, on the other hand, are much more flexible. You can install masonry for patios, walkways, and retaining walls almost any time the ground isn’t frozen solid. In fact, late fall and winter can be an excellent time for this work, as it won’t interfere with your ability to enjoy your yard during the warmer months.

The Benefits of Off-Season Planning

The single best thing you can do for your landscape project is to plan it during the off-season. The design process takes time, and you don’t want to feel rushed. If you dream of a new pool for next summer, you should begin the landscape design process in the fall or winter. This gives you and your designer plenty of time for consultations, creating 3D renderings, making revisions, and selecting materials.

Starting early also means you can handle permits and approvals without a time crunch. Most importantly, it helps you secure a spot on your preferred contractor’s schedule. The best design-build firms are often booked months in advance, so planning ahead ensures you don’t have to settle for your second choice or delay your project for another year.

Finding Value with Seasonal Promotions

Because spring and summer are the busiest times for landscape construction, you may find more flexibility and even potential savings by scheduling work during the slower months. Some contractors offer promotions in the late fall and winter to keep their skilled crews working. While this isn’t a universal rule, it’s always worth asking if there’s any pricing advantage to an off-season installation.

This is especially true for projects that aren’t dependent on warm weather. For example, installing a covered pavilion or starting an indoor home remodel can often be done efficiently during the winter. Planning your project during this time also allows you to watch for sales on materials or outdoor furniture, helping you get the most value for your budget.

Related Articles

Frequently Asked Questions

How long does the landscape design process take before construction can start? The design phase itself can take anywhere from a few weeks to a couple of months, depending on the project’s complexity and how quickly decisions are made. This period includes our initial consultation, a thorough site analysis, the creation of your detailed 3D design, and any revisions you’d like to make. We also use this time to select materials and handle the necessary permits, so once the plan is perfect, our construction team is ready to get started without delay.

My dream backyard is a big project. Can I build it in stages? Absolutely. In fact, phasing a large project is a very smart approach. We can create a complete master plan for your entire property first, which ensures the final result will be cohesive. From there, we can help you prioritize and break the project into logical phases that fit your timeline and budget. For example, you might decide to install the patio and foundational plantings this year, and then add the swimming pool and outdoor kitchen in the next phase.

Do I need to have a complete vision for my yard before I contact a designer? Not at all. It’s our job to help you discover and refine your vision. You just need to start with a general idea of how you want to feel in your space or what activities you want to do there. During our first conversation, we’ll ask questions to understand your lifestyle and tastes. From there, we use tools like 3D renderings to show you what’s possible, allowing you to see and shape the design until it feels just right.

I want a beautiful yard, but I don’t have a lot of time for maintenance. What are my options? Creating a stunning, low-maintenance landscape is one of our specialties. We can design a space that works for your lifestyle by making smart choices from the start. This could involve selecting hardy, native plants that thrive in Long Island’s climate with minimal care. We can also incorporate durable hardscaping, like porcelain paver patios, that are easy to clean. For a perfect lawn without the constant upkeep, synthetic turf is a fantastic solution for play areas or even personal putting greens.

You mentioned Gappsi handles both indoor and outdoor projects. How does that actually work? It works by creating a single, seamless process for you. Instead of you having to hire and coordinate a separate architect, interior designer, and landscape contractor, our team manages it all. We start with a holistic design conversation about your entire home. This allows us to ensure the style, materials, and flow between your indoor and outdoor spaces are perfectly harmonized. You have one point of contact, which simplifies communication and creates a more unified and beautiful result for your whole property.

Share this page: