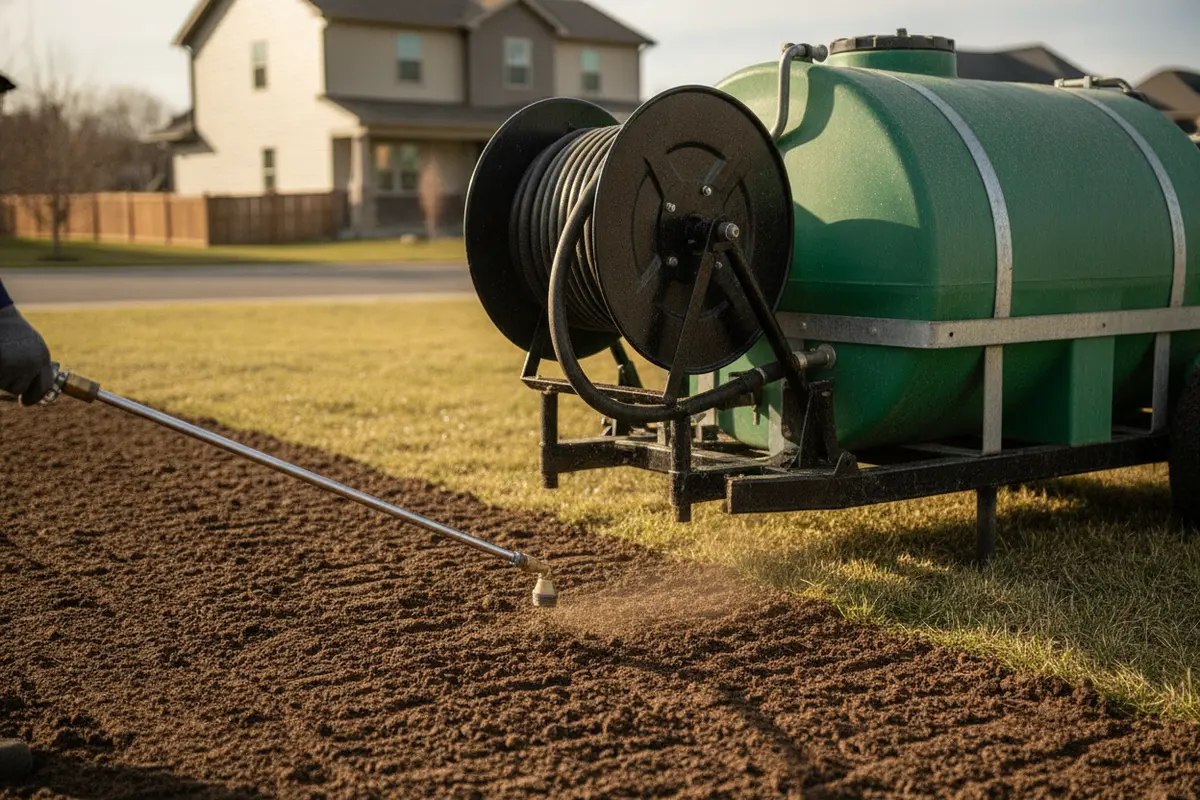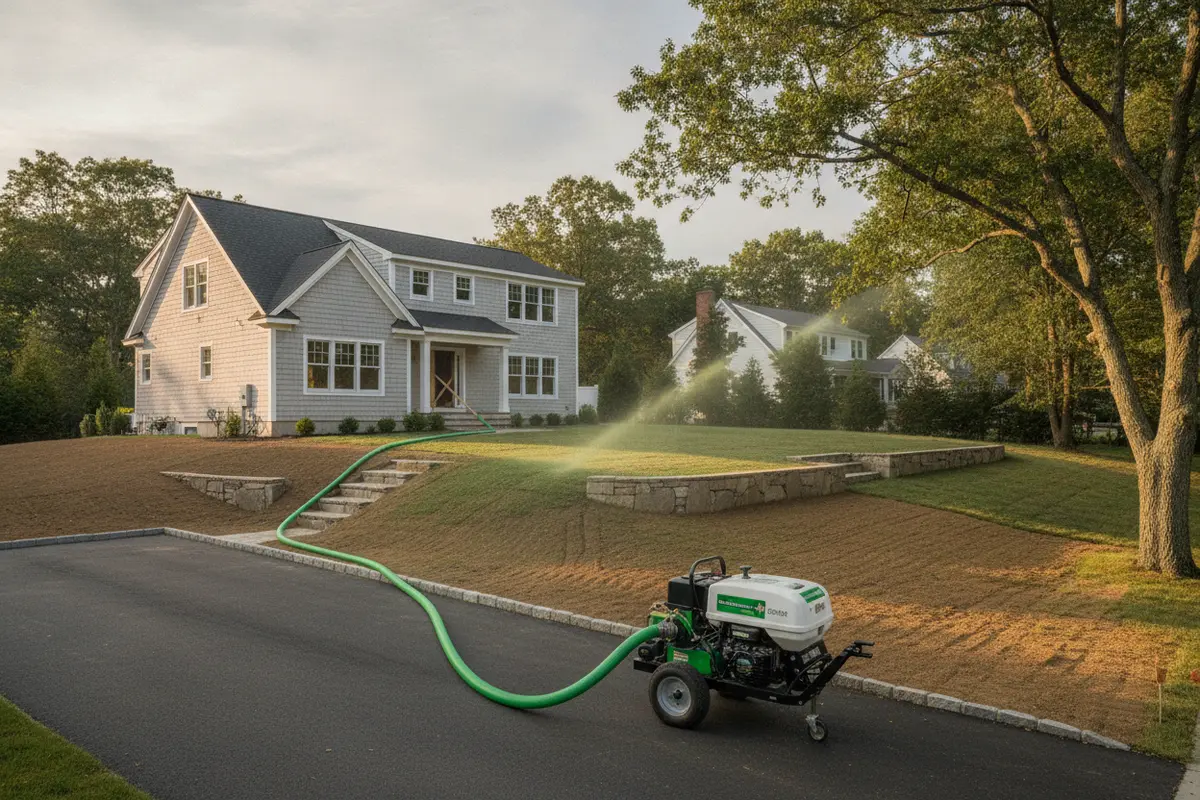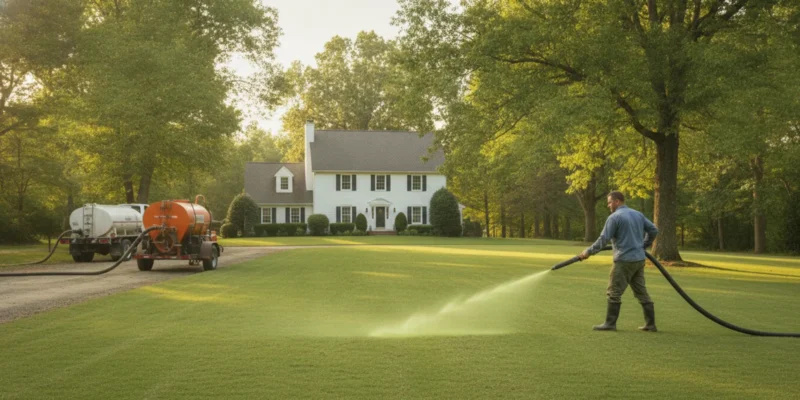
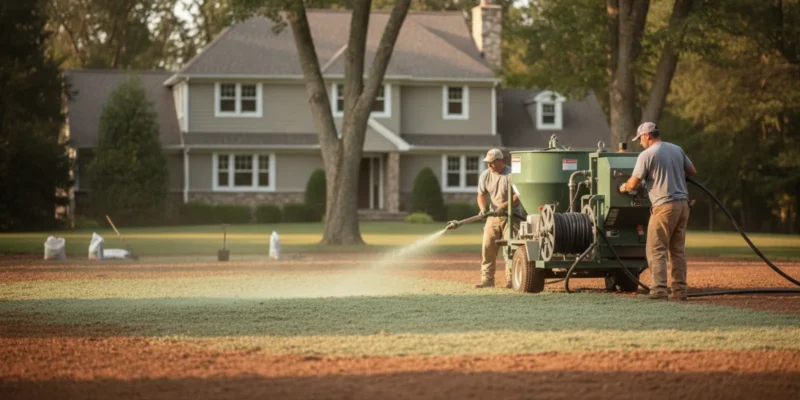
Hydroseeding equipment applying seed mixture to a prepared residential lawn

Hydroseeding Cost: What Long Island Property Owners Should Plan For

Hydroseeding cost depends on more than the size of the lawn. For Long Island property owners, the amount of ground to cover, soil condition, access, grading, seed blend, and follow-up care all affect the scope. This guide explains how to compare estimates and plan the work without relying on a one-size-fits-all price.

Contact Gappsi through our contact page to discuss your landscape project

Hydroseeding applies a water-based mixture of seed, mulch, and other specified materials to prepared ground. It can be considered for a new lawn or for selected bare areas, but it is not a universal fix for poor drainage, compacted soil, or an unstable slope. The estimate should explain what will happen before, during, and after application.

What does hydroseeding cost include?

A useful quote separates the application from the work required to make the site ready. A contractor may price the project as a complete scope or list individual tasks. Ask which approach is being used and whether the stated amount covers only spraying or the full lawn-establishment process.

  • Site assessment: Reviewing the area, existing vegetation, grade, drainage, access, and soil condition.
  • Preparation: Removing unwanted growth or debris, loosening or amending soil when specified, and shaping the surface.
  • Seed mixture: Selecting seed and mulch suited to the intended use and site conditions, with product details written into the proposal.
  • Application: Mobilizing equipment and applying the mixture at a stated coverage rate or over a clearly measured area.
  • Protection and follow-up: Instructions for watering, limiting traffic, addressing runoff, and evaluating establishment.

Each item can change the total. A small, clear, nearly level area may require less preparation than a larger site with construction debris, compacted ground, tight equipment access, or uneven grades. Two estimates that use the same word, “hydroseeding,” may therefore describe different jobs.

Ask for the scope to distinguish what is included, what is excluded, and what depends on site conditions. For example, “prepare the lawn” is too broad to compare unless the proposal says whether that means removing debris, loosening the soil, correcting grade, or adding topsoil. If a task is not described, ask whether the homeowner or another contractor must complete it before application. This simple clarification can prevent a low initial estimate from becoming a larger project once the crew arrives.

Which site conditions have the biggest effect on hydroseeding cost?

Area and shape matter, but measuring square footage is only a starting point. A broad, open rectangle can be easier to reach and treat than a narrow strip divided by planting beds, fences, trees, or other obstacles. Ask whether the quote reflects the actual seedable area rather than the entire property.

Existing ground conditions determine how much preparation is needed. Construction work can leave compacted soil, stones, leftover materials, or abrupt grade changes. Bare soil can also be too loose, too hard, or uneven for uniform coverage. The estimate should identify what the crew will remove, reshape, loosen, or leave as-is.

Before the estimate, walk the area and note visible differences instead of describing the entire yard as one uniform surface. A newly disturbed section, an older lawn with bare spots, and a shaded side yard may each need a different scope. Take clear photos of low areas, exposed roots, steep transitions, and debris, then discuss them during the site review. Photos do not replace a site assessment, but they help make sure the conversation covers conditions that may otherwise be overlooked.

Drainage and slope deserve a close look. Water that runs across a newly seeded area can move seed and mulch before the lawn establishes. A slope may need a different preparation or protection plan from a flat area. Hydroseeding alone should not be presented as a cure for a drainage problem. Ask how surface water moves now and what, if anything, the proposed scope does about it.
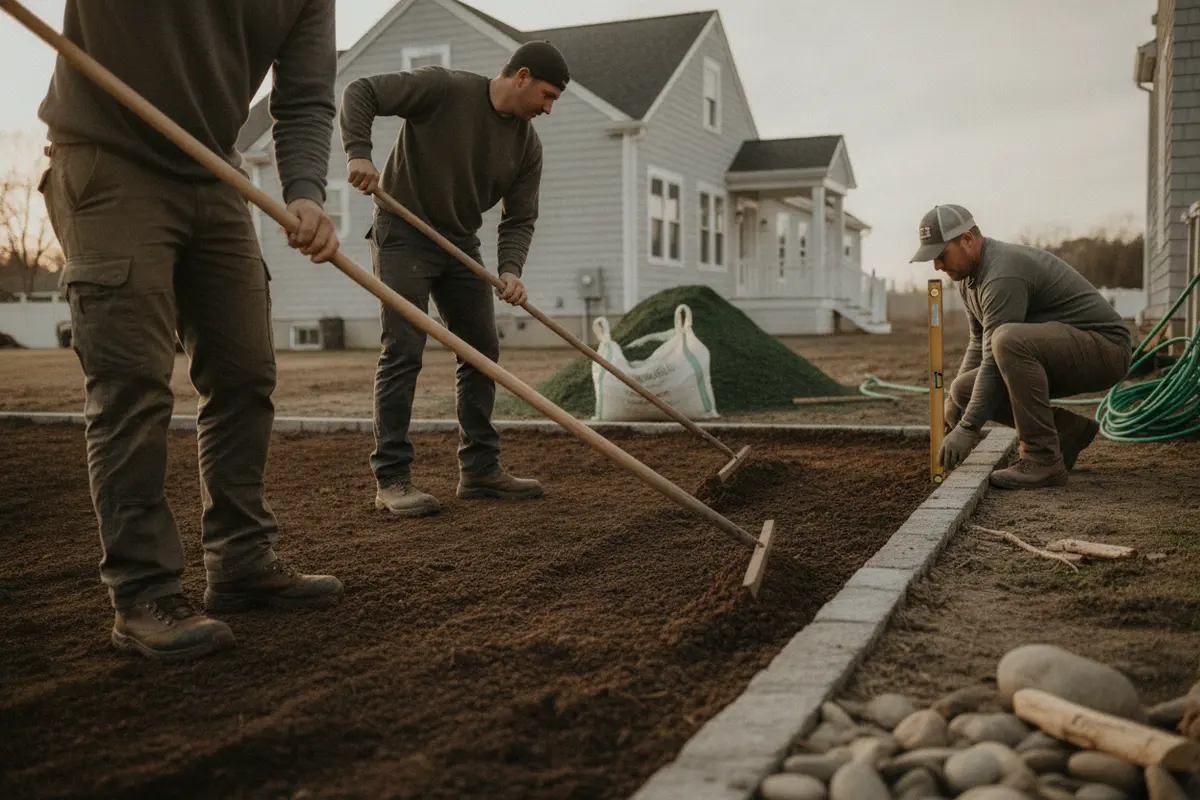
Ground preparation before hydroseeding a residential lawn

Access and distance from equipment can also affect labor and setup. A gate, long narrow passage, steep side yard, or limited staging area may change how a crew reaches the work area. Walk the route with the estimator and point out any obstacles that might not be obvious from a property photo.

Seed and mulch choices should reflect the site and the owner’s expectations. A sunny front lawn, shaded area, and frequently used backyard may call for different choices. Do not assume that every seed blend is interchangeable. Ask for the seed type or blend, mulch product, and any included soil additives in writing, along with the reason for those selections.

Use the intended use of each area to make that conversation specific. A lawn mainly viewed from a patio may have different priorities from a play area that receives regular foot traffic. Likewise, a patch beneath mature trees may have different light and moisture conditions from an open front yard. Share how you use the space, whether pets or routine access will cross it, and what nearby construction or planting is planned. The provider can then explain whether the proposed materials and preparation are suitable for those conditions or whether another approach should be discussed.

How can you compare hydroseeding cost estimates?

Compare scope before comparing totals. Use a simple table or checklist to see whether each proposal covers the same area, preparation, materials, application, and aftercare. The example below is a comparison framework, not a price list. Have each provider fill in the details for the actual property.

Estimate item What to confirm Why it matters
Measured area Square footage and boundaries included Clarifies what is being treated and what is excluded
Preparation Debris removal, grading, soil work, and who performs each task Preparation often explains why totals differ
Materials Seed blend, mulch, additives, and application amount Lets you compare material scope rather than a generic label
Access and setup Equipment route, staging, and any access limitations Identifies labor or setup needs before work begins
Watering and care Written watering guidance, traffic limits, and follow-up responsibilities Establishment depends on care after application
Exclusions and changes Unincluded tasks, disposal, site repairs, and change-order terms Reduces surprises if conditions differ from the initial review

For instance, one proposal might include rough grading and debris removal while another starts with finished, prepared soil. The lower total is not necessarily the lower-cost solution if you still need to arrange and pay for those omitted tasks. Ask each estimator to state the assumptions behind the scope and to flag items that may be added after work starts.

A practical way to compare offers is to make a side-by-side worksheet. Copy each contractor’s exact description for area, site preparation, material, application, and care into separate columns. Mark any blank cell as a question rather than treating it as included. Then ask for an updated written answer. If one estimate includes soil work and another excludes it, request a comparison based on the same starting condition. You can also separate essential work from optional work, such as additional shaping beyond the agreed lawn area, so each proposal remains understandable.

Consider a hypothetical new-build yard with rough soil and construction residue. A quote that covers only application may look simpler, but it does not tell you who will remove debris or make the surface ready. In contrast, for an already prepared, accessible patch, a broader site-preparation allowance might not be needed. The point is not to select the longest or shortest proposal. It is to confirm that the included tasks match the property and your desired finished area.

Gappsi’s landscaping project information can help you explore related outdoor work. If a lawn is one piece of a larger backyard plan, consider the relationship between the lawn area, planting beds, paths, and the rest of the layout. A backyard project overview offers another route for thinking about how these parts fit together.

Ask Gappsi about the right next step for your property

What should Long Island homeowners plan for before application?

Start by clarifying the goal. Are you establishing a lawn after construction, repairing a bare patch, or improving a larger landscape area? A clearly defined goal helps an estimator determine which parts of the site belong in the scope. It also helps you avoid paying for treatment in places that will later be excavated for a walkway, planting bed, utility work, or another project.

  1. Mark the work area. Identify the exact boundaries and note sections that should remain untouched.
  2. Discuss existing conditions. Point out low spots, recurring puddles, runoff, compacted soil, buried or exposed utilities, and areas where vegetation has struggled.
  3. Coordinate the sequence. Complete major grading, construction, and access work before establishing the lawn whenever practical. Confirm that other trades will not need to cross newly seeded ground.
  4. Plan for water. Ask what watering method and schedule the selected seed mixture requires. Confirm that the water source reaches the entire area and that you can maintain the schedule.
  5. Protect the new surface. Decide how foot traffic, pets, deliveries, and maintenance equipment will be kept off the area while it establishes.
  6. Get the scope in writing. Keep the measured area, materials, preparation, exclusions, and care responsibilities with the proposal.

Long Island sites vary from open, sunny yards to shaded lots with mature trees, compacted areas, and tight access. Local weather and the season also influence scheduling and watering. Ask the provider which conditions should be present on the installation date and what happens if rain, heat, or another site issue makes the planned date unsuitable. The point is to understand the decision process, not to assume one calendar date works for every property.

Sequencing matters when the lawn is part of a larger outdoor project. Before approving an application date, list the remaining work: delivery access, grading, patio or path construction, planting, irrigation adjustments, and any work that could disturb the treated ground. Put these tasks in order with the people responsible for them. For example, if a path still needs excavation, identify its route and finish that work before seeding wherever possible. If access must cross the proposed lawn, ask whether a temporary route or a different sequence is practical. A short coordination conversation can avoid having to repair a surface that was disturbed by a later trade.

Also prepare a straightforward site brief for the estimate visit. Include the approximate lawn boundaries, the reason the area needs seeding, known water-flow concerns, access restrictions, and your preferred timing. Note whether the project is a single defined area or several separated sections. When the estimator can see the same information you are using to compare quotes, it is easier to identify scope differences and ask focused questions. Keep a copy of the brief with proposals so your decisions are based on consistent information.

What happens after hydroseeding?

Application is only one step. The new surface needs the aftercare specified for its materials and site. Request written instructions instead of relying on a quick verbal summary. They should explain how to water, what to avoid, and whom to contact if runoff, bare areas, or other concerns appear.

Watering needs can change with weather, sun exposure, soil, and the selected seed. Do not assume that a fixed schedule is right for every lawn. Ask how to keep the surface appropriately moist without washing material away or creating standing water. If you cannot water consistently, raise that concern before selecting an approach.

Make the instructions useful for the people who will care for the lawn. Write down the watering guidance, any limits on traffic, and the point at which the provider recommends checking progress. If you will be away, arrange who will handle the routine. If a hose or sprinkler does not reach a corner, identify that before application rather than discovering it afterward. These practical details do not replace the contractor’s site-specific directions; they help you follow them consistently.

Limit foot and vehicle traffic while the area establishes. Plan a route for people, pets, and service access that avoids the treated ground. Ask when mowing can begin and what height or equipment practices are appropriate for the chosen seed. If the area includes a slope or a place that receives concentrated runoff, ask how to monitor it after rain.

Establishment is affected by factors beyond the application itself. If the result is uneven, document the locations and conditions, then compare them with the original scope and care instructions. Before work begins, ask whether follow-up visits or any corrective work are included, and what conditions could make them a separate charge. Avoid assuming that every quote includes a guarantee or a return visit.
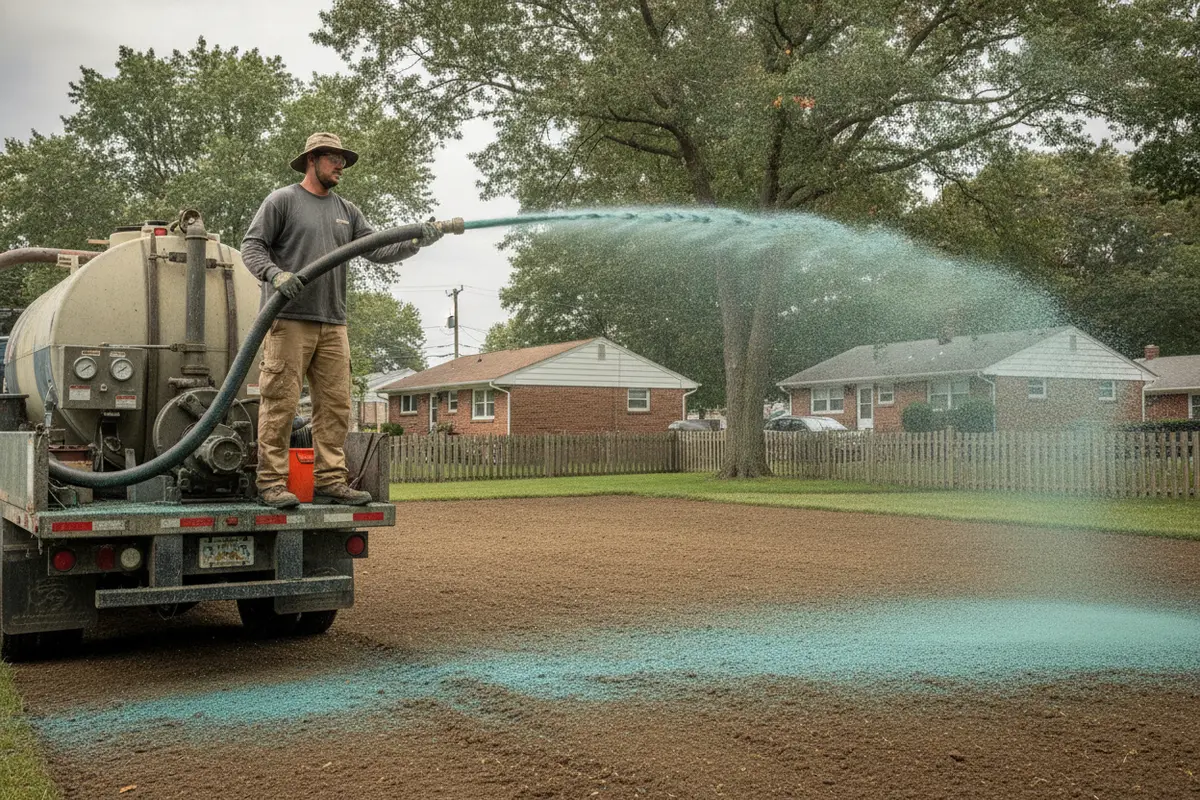
Hydroseeding mixture being applied to a prepared backyard lawn

Keep a simple record during the early care period. Note when watering was done, any unusual weather, and whether water pooled or ran across the surface. If you see a concern, take a dated photo from a consistent viewpoint and contact the provider with the relevant details. This gives both sides a clearer basis for discussing what happened than a general report that the lawn “did not take.” Follow the written care plan, and ask before making changes such as applying additional materials or driving equipment over the area.

When might another lawn approach be worth discussing?

Hydroseeding is one way to establish vegetation, but the right method depends on timing, site preparation, access, use, and the owner’s willingness to manage aftercare. Ask the estimator to explain why the recommended method fits the property and whether another approach should be considered. A comparison is most useful when it includes the same finished area and similar preparation requirements.

If you are planning a broader property update, think about the order of work. Drainage corrections, grading, walls, paving, planting, and lawn establishment may affect one another. Work that disturbs the soil after seeding can undo part of the effort, while treating the lawn too early can complicate access for later construction. The relevant landscaping service category and the wider Gappsi home improvement overview are useful starting points for exploring related project needs.

For general soil and conservation information, the USDA Natural Resources Conservation Service provides resources about land and soil stewardship. Use site-specific professional advice for decisions about grading, drainage, and materials on your property.

What questions should you ask before choosing a proposal?

  • What area will be treated, and how was it measured?
  • What preparation is included, and what condition must the site be in before application?
  • Which seed and mulch products are proposed, and why do they suit this location?
  • How will access, slope, drainage, and runoff be addressed in the work plan?
  • What watering and traffic instructions will I receive?
  • Which tasks, materials, disposal, or follow-up work are excluded from the total?
  • How are weather delays or unexpected ground conditions handled?
  • Who should I contact if I have a concern after application?

Clear answers make it easier to judge whether a quote is complete. They also set expectations for your role after the crew leaves. If an estimate is brief, ask for a written scope before comparing it with another provider’s proposal.

Before you decide, check that the proposal identifies the person responsible for each stage. One party may prepare the area while another applies the mixture, or the homeowner may be expected to finish preparation. Confirm how the work area will be measured, how any change in conditions will be communicated, and whether approval is needed before additional work begins. Save the proposal, care instructions, and any revised scope together. A clear record helps you compare what was offered with what was completed, and it gives you a useful reference if a question arises later.

Contact Gappsi through our contact page to discuss your project questions

Frequently Asked Questions

Is hydroseeding cost based only on lawn size?

No. Area is one factor, but preparation, access, slope, soil condition, seed and mulch choices, and aftercare requirements can also affect the scope and total. Compare the written work included rather than relying on an area figure alone.

Does hydroseeding include soil preparation?

Not automatically. Each proposal should state whether it includes debris removal, grading, soil loosening or amendments, and other preparation. Ask what site condition is assumed and which tasks are excluded.

Can hydroseeding solve a drainage problem?

Hydroseeding establishes vegetation; it should not be treated as a substitute for diagnosing and correcting a drainage issue. Discuss where water flows and ask whether the site needs separate grading or drainage work before lawn establishment.

What should I compare in two hydroseeding quotes?

Compare the measured area, preparation, seed and mulch, access assumptions, application, watering guidance, exclusions, and follow-up terms. A lower total may omit work that another proposal includes.

How do I get a project-specific estimate?

Share the area, current ground conditions, access limitations, project timing, and any drainage concerns with the provider. Ask for a written scope that lists included work, materials, exclusions, and aftercare responsibilities.

Ready to plan your landscape project?

Contact Gappsi through our contact page to discuss your landscape plans

A site-specific discussion can help clarify the work, materials, and preparation your property may need before you compare estimates.

Posted by Gappsi Group, sharing practical planning guidance for Long Island property owners.
Share this page:
Hydroseeding crew applying an even seed and mulch slurry to a prepared residential lawn

Hydroseeding Equipment: What Long Island Property Owners Should Know

Choosing hydroseeding equipment is not simply a matter of matching a tank size to a lawn. The right setup has to mix and apply seed slurry evenly, reach the whole work area, and suit the site’s access, slope, soil, and preparation. For Long Island property owners, asking how the equipment fits the actual site can make it easier to compare proposals and understand what the work includes.

Contact Gappsi through our contact page to discuss your outdoor project

Posted by Gappsi Group

What does hydroseeding equipment do?

A hydroseeder combines water, seed, and selected slurry materials in a tank, then uses a pump and hose or spray outlet to distribute the mixture over prepared ground. The mixture commonly includes mulch, and may include amendments selected for the project. The equipment is designed to keep the mix moving and apply it in a reasonably consistent layer. It does not replace sound grading, soil preparation, or follow-up watering.

Think of the machine as one part of a process. First, the site is assessed and prepared. Then the operator selects a mixture and application method, loads and mixes the slurry, applies it, and explains care after installation. If any of those steps are skipped, a large or powerful machine alone will not create a good seedbed.

Which hydroseeding equipment components matter most?

Equipment names and specifications vary, but a useful review starts with the parts that affect mixing, delivery, and control. Ask the contractor to explain the actual machine they plan to use and why it fits the property rather than relying on a capacity figure by itself.

  • Tank and agitation system: The tank holds the slurry. Agitation keeps seed and mulch distributed while the mixture is prepared and applied. Systems may use mechanical paddles, water movement, or a combination. Ask how the operator prevents settling and keeps the mix moving during application.
  • Pump: The pump moves slurry from the tank through the delivery system. Its compatibility with the planned mix and hose setup matters. The contractor should be able to describe how the pump supports the intended application, not just quote a model name.
  • Hose, reel, and connections: A hose lets the operator reach areas the machine cannot drive into. Length, diameter, bends, and elevation changes can affect practical reach and handling. Confirm that the planned hose route can cover the farthest areas without damaging existing surfaces or plantings.
  • Spray wand or discharge outlet: The application tool gives the operator control over where the slurry lands. A wand can help direct material around edges and obstacles, while the right outlet and application technique depend on the machine and site.
  • Loading and cleanout provisions: Safe loading, access to water, and a workable cleanout plan influence setup and completion. Ask where equipment will be parked, how water will be supplied, and how the crew will protect paving and drainage areas.

Hydroseeding equipment with tank, hose, and spray wand at a prepared lawn

Equipment should be considered alongside the slurry recipe. Seed type, mulch, tackifier, and any added material should be selected for the site and the contractor’s method. Ask for the product names and application plan if you want to understand what is being placed on your property. Avoid assuming that every hydroseeding mix is identical.

Ask Gappsi about the right next step for your outdoor project

How should you compare hydroseeding equipment types and capacity?

Hydroseeders range from compact units suited to smaller or access-limited jobs to larger machines designed for higher volume work. A larger tank may reduce the number of refills, but it may also require more room for parking and maneuvering. Capacity is only useful when it matches the site, the crew’s workflow, water access, and the volume of slurry required.

Equipment consideration What it affects Questions to ask
Tank capacity Batch size and how often the machine may need refilling How does the planned capacity fit the area and the crew’s application sequence?
Agitation design How the slurry stays mixed during loading and application How will the operator keep seed and mulch distributed throughout the job?
Pump and delivery setup Moving the selected mixture through the hose or outlet Is the pump and hose setup appropriate for the slurry and the farthest application point?
Machine footprint and access Where the unit can park and how it reaches the work zone Can it enter, turn, and remain on a suitable surface without crossing sensitive areas?
Hose reach and handling Coverage around buildings, slopes, and landscape features What route will the hose take, and can it reach every planned section?

For a small back or side yard, access and hose handling may matter more than tank volume. For a broad open area, capacity and refill logistics may deserve more attention. A steep or irregular property may require a different application plan from a level, unobstructed lawn. Ask the contractor to relate each equipment choice to a condition on your property.

Hydroseeding should also be compared fairly with other ways of establishing a lawn. Soil condition, project scale, timing, access, and how quickly the area needs to be usable can all affect the decision. For example, synthetic turf is a different surface approach, not a hydroseeding machine or seed method. Review the goals for the space before treating equipment specifications as the whole decision.

What site conditions shape equipment choice on Long Island?

Property layouts across Long Island vary. A tight side passage, a pool area, mature planting beds, a long driveway, or a sloped section can affect where a machine can go and how slurry is delivered. A site visit should identify the access route, work boundaries, water availability, drainage paths, and areas that need protection.

  • Access width and turning space: Measure gates and narrow passages, and note steps, retaining walls, and other obstructions. Confirm whether the machine stays on the driveway or needs another route.
  • Hose path: Trace how the hose will reach the work zone. Consider corners, elevation changes, and crossings over paving, planting, or pool-related surfaces.
  • Slope and runoff: Discuss how the crew will apply material on slopes and around low points. The plan should account for where water naturally moves and avoid directing slurry toward drains or neighboring areas.
  • Existing landscape features: Identify trees, garden edges, irrigation components, lighting, and recently finished surfaces that need to remain clear of equipment and overspray.
  • Water and staging: Confirm the source and availability of water, the location for loading, and a cleanout location that will not create an unwanted discharge.

For general soil and conservation information, property owners can consult the USDA Natural Resources Conservation Service. A contractor still needs to evaluate the specific site, soil, and project scope. The agency’s homepage is a starting point for general resources, not a substitute for a site assessment or local requirements.

Hydroseeding hose reaching a sloped lawn from a machine near the driveway

What should you confirm before hiring a hydroseeding contractor?

The equipment conversation is useful because it reveals how thoroughly a contractor has planned the work. You do not need to operate a hydroseeder or compare every machine model. You do need a clear description of the site preparation, planned application, materials, access, and aftercare.

  1. Ask what preparation is included. Clarify whether the proposal covers clearing, rough or final grading, topsoil work, and removal of debris. Do not assume that seeding equipment includes those tasks.
  2. Ask what the slurry contains. Request a plain-language explanation of seed selection, mulch, tackifier if used, and any other additions. The selection should be tied to the site and the intended use.
  3. Ask why the machine suits the property. Have the contractor explain capacity, access, hose reach, and any areas that may need a different sequence or method.
  4. Confirm boundaries and protection. Mark the areas to seed and identify surfaces, plantings, drains, and neighboring property that should not receive material.
  5. Get an aftercare plan. Ask how and when to water, what to avoid during establishment, and whom to contact if weather or site conditions change the plan. Follow the contractor’s directions for the selected seed and materials.
  6. Compare complete scopes. When reviewing proposals, compare preparation, materials, area covered, access assumptions, cleanup, and aftercare instructions. A machine size alone is not a meaningful comparison.

Keep a copy of the scope and any product details. If the property is part of a larger backyard project, coordinate the seeding sequence with other planned work. A landscape project may involve grading, planting, paving, or other elements that should be sequenced to avoid disturbing a newly seeded surface.

Should you rent hydroseeding equipment or hire a crew?

Renting can appear straightforward, but hydroseeding calls for more than operating a pump. The operator needs to prepare a suitable slurry, keep it mixed, manage hoses, apply a consistent layer, and understand the surface and site constraints. Equipment rental may also involve transport, water logistics, cleanup, and safe operation. Before renting, ask the supplier what training and support are included and whether the machine is intended for the materials you plan to use.

Hiring a contractor can make sense when the site is large, access is difficult, grading is involved, or you want the application and preparation managed as a coordinated scope. It is still important to understand what is included. A contractor’s proposal should state the work area, preparation responsibilities, material plan, equipment access assumptions, and aftercare guidance.

For a do-it-yourself decision, consider the full sequence rather than just the rental day. Can you prepare the soil to the needed condition? Can you source and load the materials? Is there a practical water supply? Can you reach each area without creating ruts or overspray? Do you have time to apply the mix and then maintain the site as directed? If several answers are uncertain, getting a professional assessment can help clarify the options before committing.

How do weather and timing affect an equipment plan?

Weather affects site access and what happens after application. Wet ground can be difficult to drive on and may be more vulnerable to disturbance. Heavy rain can move loose material or expose drainage problems. Hot, dry, or windy conditions can make follow-up care more demanding. Equipment does not remove these risks, so scheduling should account for the condition of the soil and a realistic care plan.

Ask the contractor how they decide whether conditions are suitable on the scheduled day. Find out what happens if the ground is too wet, the forecast changes, or the site cannot be prepared as expected. Also confirm whether water access is available for the care period and who is responsible for watering after the crew leaves.

Long Island homeowners planning several outdoor improvements can coordinate the lawn work with a broader backyard renovation. It may be practical to complete heavy equipment access, grading, and construction before establishing seeded areas. The correct order depends on the layout and scope, so identify all planned work before scheduling application.

What warning signs should you watch for?

Be cautious if a proposal focuses only on the size of the machine, promises a uniform outcome without inspecting the site, or leaves soil preparation and aftercare unclear. Other questions to resolve include:

  • Does the contractor explain how equipment will reach every section?
  • Are the work boundaries, included preparation, and materials written down?
  • Is there a plan for water, drainage, hose routing, and surface protection?
  • Are weather delays and changes in site conditions discussed?
  • Does the aftercare guidance match the selected materials and actual site?

A clear answer does not need to include technical jargon. It should connect the equipment and work plan to the property. If a contractor cannot explain the basics in terms you can follow, ask for clarification before approving the scope.

Explore backyard project ideas if hydroseeding is one piece of a larger plan, and use a site discussion to clarify which work is relevant to your property. For more on Gappsi’s outdoor project offerings, visit the Gappsi website or speak with the team about your goals.

Contact Gappsi to discuss your Long Island outdoor project

Frequently Asked Questions

What is the most important part of hydroseeding equipment?

No single component determines whether a project is suitable. The tank and agitation system, pump, hose, and application tool need to work as a coordinated setup for the slurry and the site. Site preparation and aftercare matter just as much as the machine.

Does a larger hydroseeder always work better?

No. A larger tank may reduce refill frequency, but it also needs enough space for access and staging. A compact machine with a practical hose route may suit an access-limited area better. Ask how the capacity and machine footprint fit your property.

Can a hydroseeder reach a sloped or hard-to-access lawn?

A hose can let an operator apply slurry in areas the machine cannot enter, but the actual reach and application plan depend on the equipment, slope, distance, and obstacles. Have the contractor inspect the route and explain how the crew will protect the surrounding landscape.

What should a hydroseeding quote include?

Look for the work area, site preparation, materials, equipment and access assumptions, cleanup, and aftercare instructions. Ask what is excluded and who handles grading, water, or other work that may be needed before application.

Is hydroseeding equipment enough to establish a lawn?

No. The machine distributes slurry, but it does not by itself prepare the soil or maintain the seed afterward. A successful plan addresses ground preparation, suitable materials, even application, weather, and the care instructions for the site.

Ready to plan your outdoor project?

Contact Gappsi through our contact page to discuss your project

Bring your site questions, access concerns, and project priorities to the conversation so you can identify the right next step for your property.

Share this page:
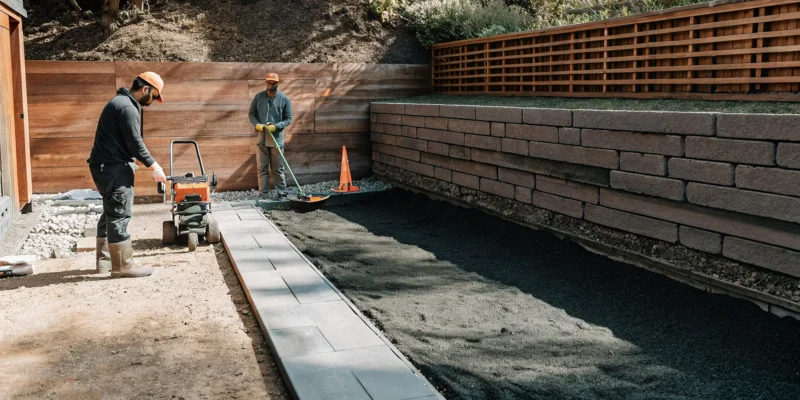
Workers installing a concrete block retaining wall in Long Island.

How Long to Install a Retaining Wall in Long Island?

Building on Long Island comes with its own set of rules and environmental factors. Our sandy soil, high water tables near the coast, and varied terrain all play a significant role in construction. These local conditions are precisely why a straightforward answer to “how long does retaining walls take to install in Long Island” can be misleading. A project in a coastal area of Suffolk County might require different foundation and drainage techniques than one in a more inland part of Nassau, directly affecting the schedule. We’ll explain how your property’s specific location, soil type, and slope influence the construction timeline, and why working with a local expert who understands these challenges is key to a successful project.

Key Takeaways

  • Multiple Factors Shape Your Schedule: The time it takes to build your wall depends on several things, including its size, your material choice, your property’s specific conditions like soil and slope, and the local permit process.
  • Finalize Decisions Early to Stay on Track: Making firm choices about your design and materials before construction begins is the best way to prevent delays. This allows your contractor to order supplies and create a solid schedule without waiting on last-minute changes.
  • A Local Pro Makes All the Difference: Partnering with an experienced Long Island contractor is crucial for an efficient build. They anticipate site-specific issues, handle the local permit process, and ensure critical steps like drainage are done correctly the first time.

What Determines Your Retaining Wall Timeline?

So, you’re wondering how long it will take to build your retaining wall. It’s a great question, and the honest answer is: it depends. The final timeline for your project isn’t a simple number; it’s a combination of your wall’s design, the materials you select, the unique conditions of your property, and even local paperwork. Think of it less like a fixed appointment and more like a recipe where each ingredient affects the total cooking time. Understanding these factors from the start helps you plan better and sets clear expectations for the entire process.

Our masonry design and construction team considers all these variables to give you a realistic schedule. From the initial design to the final cleanup, each step is influenced by the specific needs of your project. A simple, straightforward wall on a flat, accessible lot will naturally be completed faster than a complex, engineered wall on a steep, sandy slope. Let’s walk through the main things that will shape your project’s timeline so you know exactly what to expect.

Wall Height and Length

It might seem obvious, but the bigger the wall, the longer it takes to build. The size of your retaining wall is one of the most significant factors influencing the construction schedule. A small, decorative garden wall that’s under four feet high and around 50 feet long might only take our crew a few days of active work. However, if your project involves a taller, longer wall designed to support a major slope, the timeline extends. Walls over four feet often require an engineer’s stamp of approval and more extensive excavation and reinforcement, which can stretch the project from a few days into a couple of weeks or more.

Your Choice of Materials

The materials you choose for your wall do more than just define its look; they also impact how long it takes to install. Some materials, like interlocking concrete blocks, are manufactured for a uniform fit, which can make the installation process quicker. On the other hand, building a wall with natural stone requires a bit more artistry and time. Each stone is unique, so our masons carefully select and fit them together like a puzzle. While the result is stunning, this craftsmanship naturally takes longer than stacking uniform blocks. We can help you weigh the pros and cons of each material, balancing your aesthetic goals with your desired timeline.

Site and Soil Conditions on Your Property

Here on Long Island, we have our own unique environmental quirks that can affect construction. The specific conditions of your property, from soil type to water drainage, play a huge role in the installation timeline. Many areas in Nassau and Suffolk counties have sandy soil or high water tables, especially near the coast. These conditions require special attention to ensure your wall has a stable, long-lasting foundation. Our team might need to spend extra time on site preparation, like excavating deeper or adding robust drainage systems, to properly manage the local soil and water. Proper landscape design accounts for these factors from the very beginning.

Local Permit Requirements

Before a single shovel hits the ground, there’s often a bit of paperwork to handle. In most Long Island towns, you’ll need a permit to build a retaining wall, especially if it’s over four feet tall. The permit process itself adds to your overall project timeline, and the duration can vary depending on your municipality. Some towns, like Hempstead or Babylon, might process a straightforward application in three to five weeks. This waiting period happens before any construction can begin, so it’s an important part of the schedule to plan for. Working with an experienced local contractor who knows the permitting process can help make sure everything is submitted correctly the first time.

How Long Does It Take to Build a Retaining Wall in Long Island?

One of the first questions homeowners ask when planning a retaining wall project is, “How long will my yard be a construction zone?” It’s a fair question, and the answer depends on several factors. The timeline for building a retaining wall isn’t one-size-fits-all. The height, length, materials, and complexity of your design all play a significant role. Site conditions, like soil type and property access, also influence the schedule.

Understanding the general timeframe for different types of walls can help you set realistic expectations. Whether you’re adding a small garden border or terracing a steep slope, knowing what’s ahead makes the process much smoother. Here’s a breakdown of what to expect for small, standard, and large retaining wall projects in Long Island.

Small Walls (Under 3 Feet)

For a simple garden wall or a short decorative border under three feet tall, you can typically expect the active construction to take just one to two days. These smaller walls are perfect for creating raised flower beds or adding a clean edge to a patio. The process is relatively quick because it involves less excavation and fewer materials.

However, don’t let the short timeline fool you, proper installation is still crucial for a wall that lasts. Even for small projects, our team ensures a solid foundation to prevent shifting or leaning. It’s also important to know local rules. For example, some towns like Islip require a permit for any wall over 18 inches high, which can add some time to the planning phase before any work begins. Our experts in masonry can guide you through any local requirements.

Standard Walls (3 to 6 Feet)

If you’re looking to build a standard residential retaining wall, perhaps between three and six feet high, the project timeline extends a bit. For a wall of this size, you should plan for about three to five days of active work. These walls are common for managing moderate slopes, creating level areas for patios, or preventing soil erosion on your property.

The extra time is needed for more substantial excavation, placing more layers of materials, and installing proper drainage systems, which are critical for walls of this height. These projects almost always require permits, so the initial planning and approval phase will be longer than for a small garden wall. Integrating these structures into your overall property plan is key, which is where professional landscape design becomes invaluable.

Large or Complex Walls (Over 6 Feet)

When your project involves a retaining wall over six feet tall or includes complex features like curves, stairs, or multiple tiers, the timeline can stretch from two to four weeks or even longer. These large-scale structures are serious engineering projects designed to hold back immense amounts of soil pressure, so there’s no room for cutting corners.

The extended schedule accounts for several critical steps. First, a licensed engineer must design the wall to ensure it’s safe and structurally sound. The permitting process is also much more rigorous, often requiring detailed architectural plans and multiple inspections. The construction itself involves heavy machinery, deep excavation, and meticulous installation of drainage and reinforcement. For projects of this scale, working with an experienced masonry construction company is essential to ensure the job is done right.

How Do Materials Affect Installation Time?

Choosing the right material for your retaining wall is one of the most important decisions you’ll make. It influences the wall’s final look, its durability against Long Island’s weather, and your total budget. It also plays a huge role in the project’s timeline. Some materials, like uniform concrete blocks, allow for a faster, more predictable build. Others, like the unique and irregular pieces of natural stone, require more time and artistry to fit together perfectly. The difference comes down to the labor involved. A project that allows for repetitive, straightforward steps will move faster than one that requires custom fitting for every single piece.

The weight and size of the materials also matter. Heavier options may require heavy machinery for transport and placement, which can add time for delivery and careful maneuvering around your property. Lighter materials might be moved by hand, but they may not offer the same longevity. Understanding these trade-offs is key to setting a realistic schedule. Our team can walk you through the pros and cons of each option, helping you balance your aesthetic goals with your timeline. We have extensive experience with a wide range of masonry materials, ensuring we can find the perfect fit for your home and schedule.

Concrete Block and Poured Concrete

Concrete, in block or poured form, is a popular choice for a reason: it’s strong, durable, and relatively quick to install. Concrete Masonry Units (CMUs) are manufactured to be uniform in size and shape. This consistency allows our masons to work efficiently, stacking and securing the blocks in a predictable pattern, which speeds up the construction process considerably.

Poured concrete walls involve building forms, installing steel rebar for reinforcement, and then pouring the concrete. While setting up the forms takes precision, the pour itself can be completed quickly. The main time consideration here is the curing process. The concrete needs several days to a week or more to gain enough strength before the forms can be removed and backfilling can begin.

Natural Stone

If you’re dreaming of a wall with timeless character and one-of-a-kind beauty, natural stone is an unmatched choice. However, this beauty comes with a more intensive installation process. Unlike uniform blocks, each piece of natural stone is unique in shape, size, and thickness. Building with it is a true craft. Our skilled masons must carefully select, shape, and fit each stone to create a strong, interlocking structure. It’s like putting together a complex, heavy puzzle on a grand scale. This meticulous work takes more time than stacking uniform blocks, but the stunning, organic result is well worth the wait for many homeowners.

Timber

Timber retaining walls can be an attractive option, especially for a more rustic look or for smaller, decorative walls. Installation can be faster than masonry because it involves setting posts and attaching wooden planks. The materials are lighter and easier to handle than stone or concrete, which can reduce labor time. However, it’s important to think about the long-term timeline. While timber may have a lower upfront cost and faster build time, it has a shorter lifespan than stone or concrete. Wood is susceptible to rot and insect damage, meaning it may need replacement sooner, adding another project to your future to-do list.

Steel

Steel is a modern and powerful option for retaining walls, often used for its incredible strength and durability. It’s an excellent choice for taller walls or for properties with challenging conditions, like the sandy soils or high water tables we sometimes see on Long Island. Installation can be surprisingly fast depending on the design. The process often involves driving vertical steel beams deep into the ground and then sliding panels, made of steel or other materials, between them. This method can be more efficient than building a wall from the ground up, piece by piece. Steel is a specialized solution that provides robust structural support where it’s needed most.

Planning Steps That Impact Your Timeline

Before the first block is ever laid, a significant amount of work goes into planning your retaining wall. These upfront steps are essential for a successful project and have a major impact on your overall timeline. From creating a solid design to navigating local regulations and preparing the land, here’s what you need to account for before construction begins.

Design and Engineering

The design and engineering phase is your project’s blueprint. It’s about much more than just choosing a material you like; it’s about ensuring your wall is strong, safe, and built to last. A professional design will create a structure that properly supports soil, prevents erosion, and can even turn a sloped, unusable area into a functional part of your yard.

More complex projects, like tiered walls or walls with built-in stairs and lighting, require detailed engineering to get right. This stage involves creating precise plans and structural calculations, which can take time to finalize. Working with an experienced masonry designer ensures your vision is both beautiful and structurally sound, preventing costly issues down the road.

Securing Long Island Permits

In most Long Island towns, you will need a permit to build a retaining wall, especially if it’s over four feet tall. This is a critical step that happens before any construction can start. The time it takes to secure a permit varies by municipality. For example, the Town of Hempstead and the Town of Babylon can often process a straightforward application in three to five weeks.

This waiting period is a fixed part of your project timeline that you can’t skip. An experienced local contractor will be familiar with the specific requirements of your town, helping you prepare a clean application package to avoid unnecessary delays. Handling these home remodeling logistics correctly from the start is key to keeping your project on track.

Site Preparation and Excavation

Once your design is approved and permits are in hand, the physical work begins with site preparation. This involves clearing the area of any plants or obstacles, followed by excavating a trench for the wall’s footing. The soil must be properly graded to ensure stability and proper drainage. This step is especially important on Long Island, where sandy soil and coastal conditions present unique challenges.

The accessibility of your property also plays a role. If the construction area is hard to reach with machinery, excavation may take longer. Proper site preparation is a foundational part of any landscape construction project and sets the stage for a smooth and efficient build.

How Long Island’s Unique Site Conditions Affect Your Timeline

Your property isn’t a blank slate, especially here on Long Island. The unique geography of Nassau and Suffolk counties plays a big role in how a retaining wall project unfolds. From the sandy ground beneath our feet to our proximity to the coast, these local characteristics require a thoughtful approach. An experienced contractor will assess these factors from the very beginning, as they can add necessary steps to the installation process. Understanding how your specific lot fits into the bigger picture will help you set realistic expectations for your project’s schedule.

Sandy Soil and Drainage Needs

Much of Long Island is known for its sandy soil. While great for a day at the beach, it presents a specific challenge for construction. Sandy soil is less stable than denser, clay-based soils, meaning your retaining wall’s foundation needs to be stronger and deeper to prevent shifting. This often requires more extensive excavation and a thicker base of crushed stone. Proper drainage is also critical. We design our masonry projects to manage water flow effectively, preventing erosion that could undermine the wall. Addressing these soil conditions properly might add a day or more to the schedule, but it’s essential for a wall that lasts.

Coastal Properties and High Water Tables

If you live near the coast, your property faces a different set of considerations. A high water table, where groundwater is close to the surface, can complicate the excavation process. In some cases, water may need to be pumped from the site before the foundation can be properly laid, which can add time. Furthermore, coastal properties need walls built to withstand salt spray and harsh weather. While this primarily influences your choice of materials, the careful construction techniques required for these environments ensure your investment is protected from the elements. A well-built wall is your first line of defense against erosion on a coastal lot.

Your Property’s Slope and Accessibility

The natural slope, or grade, of your yard is one of the biggest factors influencing your timeline. A steeply sloped area may require a taller, more complex wall or a series of terraced walls, which naturally takes longer to build than a short, decorative wall on flat ground. Accessibility is another key point. If our team can’t get heavy equipment to the installation site easily, tasks like excavation and moving materials have to be done with smaller machinery or by hand. This manual labor can significantly extend the project timeline, so it’s a critical part of our initial landscape design assessment.

Why Proper Drainage Can Extend Your Project Timeline

A retaining wall’s biggest enemy is water pressure building up behind it. This force, called hydrostatic pressure, can push against the wall with incredible strength, especially after heavy rain or snowmelt. Without a way for that water to escape, your wall can bow, crack, or even fail completely over time. That’s why proper drainage isn’t just a good idea, it’s an essential part of building a wall that lasts for decades. While these steps are non-negotiable for a quality installation, they do require careful planning and execution, which adds time to the overall project. A professional team will never cut corners on drainage, because they know it’s the key to protecting your investment.

This focus on longevity is why our masonry construction process is so thorough. We build things to last, and that starts from below the ground up. Taking the time to install a robust drainage system means you won’t have to worry about costly repairs down the road. It’s about doing the job right the first time, even if it takes a little longer. It’s the unseen work that makes all the difference in the final product’s durability and appearance for years to come.

Weep Holes and Gravel Backfill

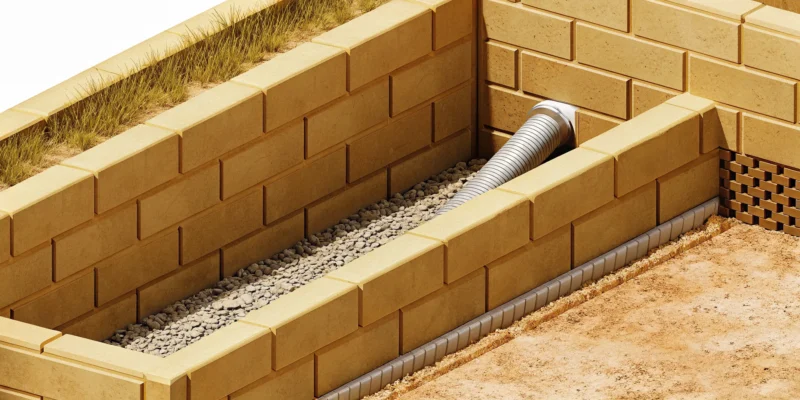
One of the most common drainage methods involves creating weep holes and using a gravel backfill. Weep holes are small openings at the base of the retaining wall that allow trapped water to seep out. To make sure water can get to these holes, the area directly behind the wall is filled with clean, crushed stone, not dirt. This gravel acts as a filter, letting water flow freely to the bottom of the wall while preventing soil from clogging the system. This step is meticulous, as it requires careful placement of at least a foot of gravel to ensure a clear path for water drainage.

French Drains and Perforated Pipes

For larger walls or properties with significant water runoff, a French drain system is often the best solution. This involves placing a perforated pipe in a trench filled with gravel behind the base of the wall. The pipe collects water and channels it safely away from the structure, preventing hydrostatic pressure from building up. Installing a French drain requires additional excavation and precise placement to ensure it functions correctly. This is one of the most important steps to prevent a wall from failing and is a standard part of any professional installation where water management is a concern.

What Can Delay Your Retaining Wall Project?

Even with a perfect plan, some factors can shift your project’s timeline. Building a retaining wall involves working with the land and navigating local processes, which means surprises can pop up. Being aware of these potential hurdles is the best way to manage them and keep your project moving forward as smoothly as possible. From unpredictable weather to hidden issues underground, several common culprits can cause delays. Understanding what they are ahead of time helps you set realistic expectations and work with your contractor to create effective contingency plans.

Weather and Seasonal Changes

Here on Long Island, we know the weather can be unpredictable. A week of heavy rain can saturate the ground, making it impossible to properly compact the base of your wall, a critical step for long term stability. Work might need to pause until the ground dries out. Similarly, a sudden cold snap can freeze the earth, bringing excavation to a halt. We always build the local weather patterns into our project schedules, but extended periods of bad weather can sometimes add days or even weeks to the timeline for your masonry project.

Unexpected Ground Conditions

You never truly know what’s hiding beneath the surface until you start digging. Your property could be sitting on large boulders, dense clay, or even old construction debris that needs to be removed. Discovering these obstacles requires extra labor and sometimes specialized equipment to address, which can extend the excavation phase of your project. An experienced team can often anticipate some of these issues based on the local geology, but surprises are always a possibility. This is a key reason why thorough site preparation is so important for a successful build.

Permit Revisions and Processing Times

Before any construction begins, your project needs the green light from your local town. While many Long Island municipalities are efficient, the permit process itself takes time. If the town requests revisions to your plans, it can create a significant delay as your engineer or architect makes updates and resubmits the application. The best way to minimize this risk is to work with a professional who understands local building codes and submits a complete, accurate application from the start. This helps ensure your home improvement project gets approved without unnecessary back and forth.

Material Lead Times and Contractor Schedules

Your project’s timeline is also tied to the availability of both materials and labor. If you have your heart set on a specific type of imported natural stone, its lead time could be several weeks or even months. This is why finalizing your material choices early in the planning process is so important. At the same time, reputable contractors are often booked well in advance, especially during the busy spring and summer seasons. Securing your spot on their schedule early is essential to keeping your project on track and avoiding a long wait.

When Should You Start Planning Your Project?

Timing is everything, especially when it comes to home improvement projects. Planning your retaining wall installation ahead of time is the secret to a stress-free experience. It gives you plenty of time to finalize your design, choose materials, and book the right team for the job without feeling rushed. Getting a head start is crucial for any major outdoor project, whether you’re dreaming of a new patio or a complete landscape design. By thinking about your project timeline early, you can ensure everything lines up perfectly, from the first consultation to the final finishing touches. This proactive approach helps you avoid potential delays and secures a spot with a trusted contractor.

The Best Seasons for Installation

For most outdoor construction on Long Island, spring and fall are the sweet spots for installation. The milder weather during these seasons is ideal for this kind of work. The ground isn’t frozen solid like in the winter, and your crew won’t be battling the intense heat and humidity of mid-summer. These more stable conditions allow materials like concrete and mortar to cure properly, which is essential for a strong, long-lasting wall. Planning your project for these windows helps ensure the installation process is efficient and the final result is top-quality. This same logic applies to other projects, like installing a new swimming pool or patio.

How Far in Advance to Book a Contractor

Once you have a season in mind, it’s smart to book your contractor well in advance. Even a smaller retaining wall can take several days to complete, while larger, more complex projects can take a few weeks. To be safe, I recommend reaching out to a contractor at least a few months before you want to start. This gives you a comfortable buffer for the entire pre-construction process, which includes the initial design consultation, material selection, and any necessary permits. Experienced masonry teams are often scheduled far out, especially during the peak spring and fall seasons, so booking early is the best way to get on their calendar.

How to Keep Your Retaining Wall Project on Schedule

Even with a clear timeline, construction projects can face unexpected hurdles. The best way to prevent delays is with careful, proactive planning. A few key decisions made before any dirt is moved can make all the difference in keeping your retaining wall installation on track and on budget. By thinking through the entire process from start to finish, you can avoid common pitfalls that stall progress. Here’s how you can keep things moving smoothly.

Work With an Experienced Local Pro

Partnering with a contractor who has deep experience in Long Island is the single most effective way to keep your project on schedule. A local professional understands the area’s unique soil conditions, weather patterns, and municipal permitting processes. They can anticipate potential challenges before they become costly delays. An experienced masonry designer will ensure your retaining wall is not only beautiful but also structurally sound, preventing erosion and improving your yard’s layout. They manage the project logistics, from scheduling inspections to coordinating material deliveries, so you don’t have to.

Finalize Your Design and Materials Early

Indecision can be a major source of delays. Before construction begins, it’s important to finalize your design and select all your materials. Whether you choose natural stone, concrete blocks, or another option, locking in your choices allows your contractor to order everything well in advance. This step helps you avoid waiting for backordered items to arrive. Gappsi offers a wide selection of high-quality porcelain and natural stone pavers to suit any aesthetic. Once your design is set, your team can create a precise schedule for excavation, construction, and finishing, ensuring a seamless workflow from one phase to the next.

Plan for Landscaping and Finishing Touches

A retaining wall is rarely a standalone feature. It’s usually part of a larger vision for your outdoor space. Thinking about the surrounding landscape from the very beginning is crucial for staying on schedule. Do you want to add built-in lighting, a garden bed on top, or a patio at its base? These elements often require work to be done during the wall’s construction, such as running electrical conduits or installing drainage. By incorporating these features into the initial plan with a landscape designer, you avoid having to do costly and time-consuming rework later.

Related Articles

Frequently Asked Questions

Why does a wall over four feet tall take so much longer to build? Once a retaining wall crosses the four-foot height threshold, it transforms from a simple landscape feature into a structural engineering project. The amount of soil pressure it must hold back increases dramatically, so the design requires a licensed engineer’s approval to ensure it is safe and stable. This adds an engineering phase to the plan. Construction also becomes more complex, demanding a deeper foundation, more reinforcement, and a more robust drainage system to handle the immense force, all of which adds to the on-site construction time.

Can I do anything to speed up the permit process? While you can’t control how quickly your local town office processes applications, you can prevent unnecessary delays. The best way to keep the permit phase as short as possible is to submit a perfect application package on the first try. This means having complete, accurate plans that meet all local codes. Working with an experienced local contractor is your best bet here, as they know exactly what each Long Island municipality requires and can prepare the paperwork correctly to avoid the back-and-forth of revisions.

What happens if I change my mind about the materials after construction starts? Changing your material choice mid-project can unfortunately cause significant delays and increase costs. Construction would likely need to pause while the new materials are ordered, and you would have to wait for them to be delivered, which could take weeks. Depending on the change, it might even require revisions to the engineering plans and permits. This is why we spend so much time with you during the planning phase, to make sure you are completely confident in your design and material selections before we break ground.

Is it faster to build a small retaining wall myself? While a DIY project might seem faster for a very small garden border, it often takes much longer than you’d expect. The real work isn’t just stacking the blocks; it’s in the preparation. A professional crew can excavate, build a perfectly level gravel foundation, and install proper drainage with speed and efficiency. For a homeowner, this prep work can take several weekends. A professional team can typically complete a small, properly built wall in a day or two, ensuring it won’t lean or fail after the first big rainstorm.

Can a retaining wall be built in the winter on Long Island? Generally, we advise against building retaining walls during the winter. Frozen ground is extremely difficult to excavate and makes it impossible to properly compact the foundation, which is critical for the wall’s stability. Additionally, the mortar and concrete used in construction need to cure at temperatures above freezing to reach their full strength. It’s much better to use the winter months for planning your design and securing permits so you’re ready to go as soon as the ground thaws in the spring.

Share this page:
Building a retaining wall on a slope with proper drainage to manage the overall project cost.

Building a Retaining Wall on a Slope Cost: A Breakdown

A sloped yard can feel like a wasted opportunity, a tricky space that’s hard to mow and even harder to enjoy. A retaining wall is the perfect solution, transforming that difficult grade into level, usable areas for patios, gardens, or play spaces. But before you can start planning your new outdoor oasis, you need to answer the big question: what is the actual building a retaining wall on a slope cost? The answer isn’t a simple number. It depends on your property’s unique challenges, the materials you choose, and the wall’s size. This guide breaks down all the factors, from permits to drainage, so you can create a realistic budget for your Long Island home improvement project.

Key Takeaways

  • Plan for engineering if your wall is over four feet tall: This height is a common threshold that requires building permits and a licensed engineer’s design. Factoring these professional services into your initial budget is essential for a safe, compliant, and structurally sound wall.
  • Prioritize drainage to prevent wall failure: The single most important factor for a long-lasting retaining wall is a proper drainage system. Investing in gravel backfill and pipes prevents water pressure from building up, which is the primary cause of cracks, bulges, and collapse.
  • Your property’s specific conditions determine the final cost: The steepness of the slope, soil type, and site accessibility all directly influence the project’s price. Because of these variables, an on-site consultation with a professional is the only way to get a truly accurate quote.

How Much Does a Retaining Wall on a Slope Cost?

Figuring out the budget for a retaining wall on a slope can feel tricky because there isn’t a single, flat-rate price. The final cost depends on your property’s unique layout, the materials you choose, and the wall’s size. Think of it less like buying a product off the shelf and more like commissioning a custom piece of functional art for your yard. To give you a clearer picture, let’s break down the main factors that influence the price tag, starting with how contractors typically measure and quote these projects.

Cost per Linear Foot

When you get a quote, you will likely see costs broken down by either the linear foot or the square foot. A linear foot measures the wall’s length, while a square foot measures its face (length times height). Generally, you can expect professional installation to range from $40 to $360 per linear foot. If pricing by the square foot, the cost is often between $20 and $50. This wide range accounts for different materials and the complexity of the job. A simple, straight wall will be on the lower end, while a curved wall made from premium stone will be higher. Our expert masonry services can provide a precise quote based on your specific design.

Cost by Wall Height

The height of your retaining wall is one of the biggest factors in its final cost. Walls under four feet tall are typically more straightforward and affordable. However, once a wall exceeds four feet, the project becomes much more involved. Taller walls must withstand significantly more soil pressure, requiring professional structural engineering, special permits, and extra reinforcement. While a standard retaining wall might cost between $3,500 and $10,000, a large, engineered wall can easily reach $15,000 to $25,000 or more. The necessary engineering and permits alone can add thousands to the initial budget before construction even begins. The porcelain and natural stone you choose will also influence this final number.

Cost by Slope Steepness

The steepness of your yard directly impacts the project’s complexity and expense. A steeper slope requires a more robust foundation and greater reinforcement to ensure the wall is stable and secure for years to come. This often means more excavation, more materials, and more labor. For very steep grades, building a single tall wall isn’t always the best solution. Instead, a series of shorter, stepped walls, known as terracing, is often recommended. This approach distributes the pressure more effectively and can create beautiful, usable garden beds or patios. This is a key part of a thoughtful landscape design that balances function with aesthetics.

What Factors Affect Your Retaining Wall Cost?

When you start budgeting for a retaining wall, you’ll quickly find that the final price depends on more than just the materials you choose. Several key factors related to your specific property will influence the total cost. Understanding these variables will help you get a clearer picture of your project’s scope and budget. From the wall’s dimensions to the ground it’s built on, each element plays a role in the design, labor, and materials required to build a structure that is both beautiful and built to last.

Wall Height and Length

The size of your retaining wall is one of the most significant cost drivers. As a wall gets taller, its price increases substantially, and not just because it requires more material. Taller walls must withstand greater pressure from the soil behind them, which means they need stronger, deeper foundations and more reinforcement to ensure stability. For many projects on Long Island, any wall over four feet tall also requires a building permit and a formal design from an engineer. Our expert masonry team accounts for these structural needs from the start, ensuring your wall is safe and compliant.

Slope Steepness

The grade of your yard is another critical factor. Building on a steep slope is more complex than working on a gentle incline. A steeper yard demands a more robust design to safely hold back the earth. This often involves more extensive excavation, stronger foundations, and additional reinforcement to prevent failure. In many cases, an engineer’s guidance is necessary to create a safe and effective plan. The increased complexity naturally leads to higher labor and material costs, but it’s a necessary investment to properly manage your landscape and prevent erosion.

Soil Conditions

The type of soil on your property can have a surprising impact on your retaining wall’s cost. Different soils behave in different ways, especially when wet. For example, the heavy clay soil common in many parts of Long Island tends to hold water and expand, putting immense pressure on a wall. If your site has challenging soil, your project will require a more thoughtful design. This may include deeper foundations and a more comprehensive drainage system to channel water away from the wall. Properly addressing your site’s specific soil conditions is key to preventing future issues like bulging or cracking.

Site Access and Excavation

How easily can workers and equipment get to the construction area? If the site is hard to reach, perhaps located in a tight backyard with no direct entry for machinery, it can increase labor costs. When materials have to be moved by hand and excavation requires more manual work, the project takes more time and effort. Easy access allows our team to use efficient equipment for digging, moving materials, and setting stones, which helps keep the project on schedule and within budget. We always assess site access during our initial consultation to give you an accurate and transparent estimate.

Local Labor Costs in Long Island

Labor is a major component of any construction project, and rates can vary based on your location. In areas like Long Island, skilled labor comes at a premium, reflecting the high level of expertise required for these projects. Factors like a steep, rocky, or hard-to-reach site will increase the amount of work needed for digging, leveling, and stabilizing the ground. This directly translates to higher labor costs. Investing in a professional home improvement company ensures the job is done right by experienced craftsmen who understand local building codes and environmental factors, giving you peace of mind.

Comparing Retaining Wall Material Costs

Choosing the right material for your retaining wall is one of the biggest decisions you’ll make. It influences not just the final price tag, but also the wall’s appearance, durability, and how long it will last. From the classic beauty of natural stone to the modern efficiency of concrete blocks, each option has its own set of benefits and costs. At Gappsi, our masonry experts help you find the perfect fit for your Long Island property, ensuring your new wall is both functional and beautiful for years to come. Let’s break down the most common materials and their associated costs.

Interlocking Concrete Blocks

Interlocking concrete blocks are a very popular and practical choice, typically costing between $20 and $55 per square foot. These blocks are engineered to fit together securely, creating a strong and stable wall without needing mortar. Their uniform shape makes installation relatively straightforward, and they come in various colors and textures to match your home’s style. This material strikes a great balance between structural integrity and aesthetic flexibility, making it a reliable option for many sloped landscapes on Long Island.

Natural Stone

If you’re aiming for a timeless, organic look, nothing compares to natural stone. With costs generally ranging from $30 to $50 per square foot, stone walls offer unmatched beauty and incredible longevity, often lasting more than 50 years. Each stone is unique, giving your wall a custom character that blends seamlessly with the natural environment. Because of the material’s weight and the skill required to fit irregular shapes together, it’s often best suited for shorter walls. The result is a stunning feature that adds significant curb appeal to your property.

Poured Concrete

For maximum strength and durability, a poured concrete wall is an excellent, though more expensive, option. With prices starting around $40 and reaching $100 or more per square foot, this material is one of the strongest available. The process involves building forms and pouring concrete to create a solid, seamless structure. While highly effective for tall walls or challenging slopes, the installation is labor-intensive and requires specialized expertise, which contributes to the higher cost. A professionally installed poured concrete wall provides unparalleled stability for the most demanding projects.

Timber and Wood

Timber is the most budget-friendly material for a retaining wall, with costs usually falling between $10 and $40 per square foot. It offers a rustic, natural look that can work well in certain garden settings. However, the lower upfront cost comes with a trade-off. Wood has a much shorter lifespan compared to stone or concrete and is vulnerable to rot and insect damage, especially in Long Island’s wet and humid seasons. For this reason, it’s generally not the best choice for supporting significant slopes or for homeowners seeking a long-term, low-maintenance solution.

Segmental Retaining Wall Blocks

Segmental retaining wall (SRW) blocks are a favorite for residential projects, and for good reason. Priced between $20 and $35 per square foot, they offer a fantastic combination of durability, affordability, and style. Like interlocking blocks, they are designed for easy, mortar-free installation, but they often come in a wider array of decorative faces and colors. These blocks are engineered to create a strong, flexible system that can last for 50 years or more, making them a smart and attractive investment for creating level, usable space on your property.

Does a Steeper Slope Always Mean a Higher Cost?

It’s a fair question, and the short answer is yes, a steeper slope almost always leads to a higher cost. The price increase isn’t just about needing more blocks or stones. Building on a significant grade introduces a host of complexities that demand more intensive labor, specialized equipment, and robust engineering to ensure your wall is safe and durable. While a retaining wall on a gentle slope might cost between $3,500 and $10,000, a project on a steep hill can easily climb to $20,000 or more. The final price depends on a few key decisions and site conditions that directly impact the design and construction process.

Terracing vs. a Single Tall Wall

For properties with a very steep grade, building one massive wall isn’t always the best or most affordable solution. Instead, your designer may recommend terracing. This approach involves creating a series of shorter, stepped walls that follow the contour of the slope. Terracing effectively distributes the immense pressure from the soil, making each individual wall more stable and simpler to construct. While it might sound like more work, this method can reduce the need for heavy-duty engineering. It also creates beautiful, usable garden beds or flat areas, turning a challenging slope into a stunning landscape feature. A professional landscape designer can help you determine if terracing is the right strategy for your yard.

Foundation and Reinforcement Needs

The height of your retaining wall, which is directly influenced by the slope’s steepness, plays a huge role in its structural requirements. As a general rule, any wall over four feet tall requires a building permit and plans from a licensed engineer. This is a crucial safety measure. Taller walls must withstand incredible force, so they need much stronger foundations and additional reinforcement to prevent bowing or collapse. This often involves digging deeper footings and incorporating steel rebar or geogrid mesh into the structure. These necessary steps add to the project’s complexity and overall cost, but they are absolutely essential for building a wall that is secure and built to last.

How Soil Type Impacts Design

The type of soil on your property is another critical factor that affects your wall’s design and cost. For example, Long Island’s clay-heavy soils tend to expand and contract as they absorb and release water. This movement exerts significant pressure on a retaining wall. To counteract this, your wall will need a deeper foundation and a robust drainage system. Trapped water is the number one enemy of a retaining wall, so proper drainage isn’t optional. Installing solutions like gravel backfill and weep holes adds to the initial cost but is vital for preventing catastrophic failure and far more expensive repairs in the future. Properly managing water is a key part of our masonry construction process.

Hidden Costs to Budget For

When you get a quote for a retaining wall, it usually covers the basics: materials and the labor to build it. But a few other expenses can pop up along the way. Thinking about these potential costs from the start helps you create a realistic budget with no surprises. Planning for these items ensures your project runs smoothly and that your final wall is not only beautiful but also safe and built to last.

Permits and Engineering Fees

Before any digging begins, you need to handle the paperwork. Most towns on Long Island require a building permit for retaining walls over a certain height, typically four feet. This process ensures the wall is built to code and is safe for your property. For taller or more complex walls, you will likely need a licensed engineer to create and approve the plans. This isn’t just red tape; an engineer’s stamp of approval confirms the design can handle the pressure from the soil and water, which is critical on a slope. These professional services are a key part of a successful masonry project and protect your investment.

Drainage and Backfill

Water is the number one enemy of a retaining wall. Without a proper way for water to escape, pressure builds up behind the wall and can cause it to bulge, crack, or even fail completely. That’s why planning for drainage is not an option, it’s a necessity. This involves installing systems like a French drain, weep holes, and using specific backfill material like gravel to allow water to flow away freely. While it adds to the initial cost, investing in a solid drainage solution is the single best thing you can do to ensure your retaining wall stands strong for decades.

Site Prep and Soil Testing

Getting your site ready for construction is a major step that can influence your budget. The process involves clearing vegetation, excavating soil to create a level base, and ensuring the crew has easy access to the area. If your property has a very steep slope or is difficult to reach with equipment, the labor costs for preparation can increase. For particularly tall walls or in areas with questionable soil, an engineer might recommend a soil test. This analysis determines the soil’s stability and load-bearing capacity, which helps inform the foundation design and ensures your wall is built on solid ground.

Landscape Restoration

A new retaining wall can transform your yard, but the construction process can be tough on the surrounding landscape. Once the wall is complete, you’ll want to budget for restoring the area. This might involve laying new sod, planting shrubs, or adding mulch to blend the new structure seamlessly into your yard. Think of it as the finishing touch that completes your outdoor vision. This is also the perfect time to integrate the wall with other features, like a new stone patio or walkway, as part of a larger landscape design that enhances your entire property.

Contingency for Delays

Even with the best planning, unexpected issues can arise. A week of heavy rain can halt progress, or the excavation crew might uncover a massive boulder that needs to be removed. These kinds of surprises can lead to delays and increase labor costs. That’s why it’s always a smart idea to build a contingency fund into your budget, typically around 10% to 15% of the total project cost. This buffer gives you peace of mind, ensuring that you can handle any unforeseen challenges without derailing your project or your finances.

Why Drainage Can Make or Break Your Retaining Wall

When you picture a retaining wall, you probably think about the visible blocks or stones. But the most critical part of a successful wall is something you’ll never see: the drainage system behind it. Water is the number one enemy of a retaining wall. Without a proper way to escape, rainwater and groundwater get trapped in the soil behind the wall. This creates something called hydrostatic pressure, which is just a technical term for the immense force of water-logged soil pushing against your wall. It’s this pressure that causes walls to bow, crack, and eventually fail. In fact, a staggering 80% of all retaining wall failures are caused by water problems. Water-soaked soil can become two to three times heavier than dry soil, creating a relentless force that your wall was not designed to handle.

Ignoring drainage is like building a boat with a hole in it; it might look fine at first, but it’s destined to sink. Over time, this constant pressure will find the weakest point. You might see the wall start to lean, bulge in the middle, or develop cracks. By the time these signs appear, the structural integrity is already compromised, and a simple fix is usually off the table. That’s why our approach to masonry always prioritizes a robust drainage plan from day one. Investing in proper drainage is not an upsell; it is the only way to protect your investment and ensure your wall stands strong for decades, preventing costly and dangerous collapses down the road.

The Risk of Poor Drainage

Think of the area behind your retaining wall as a giant, un-draining bucket. Every time it rains or the ground becomes saturated, that bucket fills up. With nowhere to go, the water soaks into the soil, making it incredibly heavy and turning it into a thick, muddy slurry. This immense weight exerts constant, powerful pressure on your wall. At first, you might not notice anything, but this force is always at work, pushing and testing the structure. Eventually, the wall will begin to show signs of stress, leading to a failure that can happen gradually or, in some cases, quite suddenly. This is why a well-built wall is more than just what you see on the surface.

Effective Drainage Solutions and Costs

The good news is that preventing water damage is straightforward with the right techniques. An effective drainage system gives water an easy path to escape. This typically involves a combination of a perforated pipe at the base of the wall, a layer of clean, crushed gravel for backfill, and sometimes weep holes that allow water to pass through the face of the wall. The gravel lets water flow freely down to the pipe, which then channels it safely away from the wall’s foundation. While adding a professional drainage system can add to the initial cost, it’s a small price to pay to avoid the much higher expense of a complete wall rebuild and potential landscape restoration.

Choosing the Right Backfill

The material you place directly behind your retaining wall is just as important as the drainage pipe. Using the excavated dirt or dense topsoil is a common and critical mistake. These materials hold water like a sponge, which defeats the purpose of a drainage system and increases hydrostatic pressure. The correct approach is to use a clean, crushed angular stone or gravel as backfill. The gaps between the stones create a clear path for water to travel down to the drainage pipe at the base. To keep soil from mixing with the gravel and clogging the system, we also install a special filter fabric between the gravel and the surrounding earth, ensuring your drainage works perfectly for years to come.

How Wall Height Affects Permits, Engineering, and Price

When you’re planning a retaining wall, its height is more than just a design choice. It’s a key factor that directly influences the project’s cost, timeline, and complexity. Taller walls need to withstand much more pressure from the soil behind them, so they fall under a different set of rules for safety and stability. Understanding how height affects the need for permits, professional engineering, and your overall budget is crucial before breaking ground. It helps you plan properly and avoid unexpected expenses and delays down the road. Let’s walk through what you need to know.

The “4-Foot Rule”

In the world of construction, there’s a well-known guideline called the “4-foot rule.” Simply put, any retaining wall you plan to build that is over four feet tall will likely require a building permit and a design from a licensed engineer. This isn’t just red tape; it’s a critical safety measure. A wall of this height holds back a massive amount of soil, and a failure could be catastrophic. The rule ensures your wall is properly designed to handle the pressure, has a solid foundation, and is built to last. Thinking about this rule from the very beginning helps set realistic expectations for your project’s scope and budget.

When You Need an Engineer and Permits

Crossing that four-foot threshold means your project moves into a new phase of planning. An engineer becomes a necessary part of your team. They will assess your property, especially for tricky slopes or questionable soil conditions, to make sure the ground can support the wall’s weight. They provide the official drawings and plans required for your permit application. This professional oversight does add to the cost. You should budget for permit fees, which can vary, and the cost of the engineering plans themselves. While it’s an added expense, working with an engineer ensures your wall is structurally sound and compliant with all safety codes, protecting your investment and your property.

Long Island’s Local Regulations

While the “4-foot rule” is a great starting point, it’s important to remember that your local town or village on Long Island has the final say. Municipalities in Nassau and Suffolk County have their own specific building codes that might be even more stringent. These local regulations will dictate the exact requirements for permits, engineer approvals, foundation depth, and the type of reinforcement needed for your wall. This is where local expertise becomes invaluable. A team that has extensive experience with masonry construction on Long Island will understand these nuances and can manage the entire permitting process for you, ensuring your project is built correctly and legally from the start.

Common Retaining Wall Mistakes That Cost You More

Building a retaining wall is a fantastic way to add usable space and beauty to your sloped Long Island property. But it’s also a project where small mistakes can lead to big, expensive problems down the road. A failing wall isn’t just an eyesore; it’s a safety hazard that can cost a fortune to repair or replace. Knowing the common pitfalls ahead of time is the best way to protect your investment and ensure your new wall stands strong for decades. Let’s walk through the most frequent missteps and how you can avoid them.

Ignoring Site Prep and Drainage

If there’s one mistake that guarantees a retaining wall will fail, it’s poor drainage. When water gets trapped in the soil behind a wall, it creates immense hydrostatic pressure that pushes outward. Without a way for that water to escape, it’s only a matter of time before the wall bulges, cracks, or completely collapses. Proper drainage, using features like perforated pipes and clean crushed gravel for backfill, is absolutely vital. Skipping this step to save a few dollars upfront will almost certainly lead to total wall failure later. A solid foundation is just as important, requiring careful excavation and compaction to create a stable base that won’t shift over time.

Using the Wrong Materials

It can be tempting to choose your wall material based on aesthetics or the initial price tag, but this is a critical error. You need to pick materials that are strong enough for your wall’s height and the pressure from the slope. A short, decorative garden wall has very different requirements than a tall wall holding back a steep hillside. While beautiful, some natural stones may not be suitable for significant structural loads without expert installation. A professional can help you select the right porcelain and natural stone or concrete blocks that provide the necessary strength for your specific project, ensuring your wall is both beautiful and structurally sound.

Misjudging the Slope

Not all slopes are created equal, and trying to hold back a very steep one with a single, tall wall is a recipe for disaster. For very steep grades, it’s often much safer and more effective to build several shorter, stepped walls. This technique, called terracing, distributes the pressure and creates stable, level areas for planting or patios. A single tall wall on a steep slope requires deep excavation and significant reinforcement, which drives up the cost and complexity. A professional landscape design can transform a challenging slope into a stunning, multi-level feature that is both safe and functional.

DIY vs. Professional Help

While a small, decorative garden wall can be a manageable DIY project, anything more significant requires a professional. You absolutely need an expert for any wall over three feet tall, if you have heavy clay soil, or if the wall is located near your home’s foundation. These situations involve complex engineering and serious safety risks. Professionals understand local building codes, can secure the necessary permits, and have the experience to handle challenges like poor soil or difficult site access. Hiring a qualified masonry company isn’t just an expense; it’s an investment in your property’s safety and value.

Is a Retaining Wall on a Slope a Good Investment?

When you look at a sloped yard, you might see a challenge. But with a retaining wall, that slope becomes an opportunity. A retaining wall is more than just a structural fix for your landscape; it’s a strategic investment in your property’s function, beauty, and overall value. By solving practical problems like erosion and creating new possibilities for your outdoor living space, a well-built wall can provide returns you’ll enjoy for years. It transforms a difficult piece of land into a stable, usable, and attractive asset. Before you start, it’s helpful to understand exactly how this investment pays off.

Preventing Erosion

One of the most critical jobs of a retaining wall is to hold back soil and prevent erosion. On Long Island, rain and runoff can slowly wash away your landscape, threatening your home’s foundation and creating an unstable yard. A professionally designed wall provides a powerful barrier against this force. Since water-related issues cause the vast majority of retaining wall failures, proper construction is key. Our expert masonry team ensures your wall has the correct drainage and reinforcement to handle the immense pressure of water-soaked soil, protecting your property from costly damage down the line.

Gaining Usable Outdoor Space

A sloped yard often means unusable space. A retaining wall completely changes that dynamic by creating flat, functional tiers. That tricky hillside can become the perfect spot for a beautiful stone patio, a lush garden, or a safe play area for your kids. By leveling out sections of your property, you can finally install the outdoor features you’ve been dreaming of, like a cozy fire pit area or even a stunning pavilion. This is one of the most exciting benefits, as it directly expands your living area and allows you to get so much more enjoyment from your home.

Improving Curb Appeal and Property Value

A retaining wall is a project that delivers on both form and function, which is a winning combination for property value. It solves a major landscaping problem while adding significant visual appeal. A thoughtfully designed wall built with high-quality natural stone can become a beautiful focal point in your yard, seamlessly integrated into your overall landscape design. This improvement in both usability and aesthetics makes your home more attractive to potential buyers, with some estimates suggesting a well-executed retaining wall can increase property value substantially. It’s an investment that enhances your daily life and pays you back in the long run.

Get an Accurate Quote for Your Long Island Retaining Wall

After exploring all the variables, you can see why a simple online calculator won’t cut it for a sloped retaining wall. The only way to get a truly accurate cost is to have a professional contractor visit your property. An expert can evaluate your specific slope, soil conditions, and project goals to give you a realistic number. For especially tall walls or difficult slopes, an engineer may need to perform a soil inspection to ensure the ground can safely support the structure. This is a critical step for long-term stability and safety.

When you’re ready to gather estimates, a good rule of thumb is to get multiple quotes. Reach out to at least three qualified hardscape contractors and ask for their ideas and a detailed, written price plan. This approach allows you to compare not just the final price but also their proposed solutions and level of expertise. It’s a great way to find a partner you trust for your project.

Remember to ask about permits. In many areas, including here on Long Island, walls over four feet tall typically require building permits and plans approved by a licensed engineer. A full-service company like Gappsi handles this entire process for you. Our team of masonry designers and construction experts provides a comprehensive quote that covers everything from initial design and engineering to final installation, ensuring there are no surprises along the way.

Related Articles

Frequently Asked Questions

Why is there such a wide price range for retaining walls? Think of a retaining wall as a custom-built structure, not an off-the-shelf product. The final cost depends entirely on your specific property and design choices. A short, straight wall on a gentle slope using basic blocks will be on the lower end of the price spectrum. However, a tall, curved wall on a steep hill using premium natural stone will cost significantly more due to the need for more materials, complex labor, and professional engineering.

Do I really need a permit and an engineer for my wall? In most cases, yes, if your wall is over four feet tall. This isn’t just about following rules; it’s about safety. A wall of that height holds back an incredible amount of soil, and a failure can be dangerous and destructive. An engineer ensures the design is structurally sound for your specific site, and the permit confirms it meets local safety codes. A professional contractor will handle this entire process for you.

What is the single most common mistake that leads to a failing wall? Ignoring proper drainage is, without a doubt, the biggest mistake you can make. When water gets trapped behind a wall, it makes the soil extremely heavy and creates immense pressure that can cause the wall to bulge, crack, or collapse. Investing in a drainage system with the right backfill and pipes isn’t an optional upgrade; it’s the most critical step to ensure your wall lasts for decades.

My yard is very steep. Is it better to build one tall wall or several shorter ones? For a very steep yard, building a series of shorter, stepped walls (a technique called terracing) is often the better solution. A single massive wall requires extensive engineering and reinforcement to handle the immense pressure. Terracing distributes that pressure more effectively across several smaller structures, which can be safer and more stable. Plus, it creates beautiful, usable flat areas for gardens or patios.

Can I save money by building the wall myself? While a very small, decorative garden wall under a couple of feet high can be a manageable DIY project, you should always hire a professional for anything structural. If your wall needs to hold back a significant slope, is over three feet tall, or is near your home’s foundation, professional expertise is essential. It’s an investment in your property’s safety and ensures the job is done right the first time, preventing far more expensive repairs later.

Share this page:
A detailed view of retaining wall construction showing the gravel base, block layers, and backfill.

Retaining Wall Construction Detail: A DIY Guide

Building something that lasts is a goal for any homeowner making a significant investment in their property. When it comes to retaining walls on Long Island, longevity is all about fighting two powerful forces: soil pressure and water. A poorly built wall might look good for a year or two, but without the right foundation and drainage, our freeze-thaw cycles will quickly expose its weaknesses. A truly durable wall is built with a deep respect for these forces. Every retaining wall construction detail, especially the unseen ones like the gravel base, the perforated drain pipe, and the geogrid reinforcement, is what guarantees a structure that won’t bulge, lean, or fail. Let’s explore how to build a wall that’s engineered to stand the test of time.

Key Takeaways

  • Control Water to Protect Your Wall: Water pressure is the main cause of retaining wall failure. You must install a complete drainage system, including gravel backfill and a perforated pipe, to channel water away and ensure your wall remains stable for years.
  • Build a Flawless Foundation: A retaining wall is only as strong as its base, so dig a proper trench, create a compacted gravel footing, and make sure the first row of blocks is perfectly level. Any mistake here will be magnified as you build up.
  • Recognize When to Hire a Professional: While short garden walls can be a DIY project, you should always call an expert for walls over three feet tall, on steep slopes, or near driveways. These situations require professional engineering and construction to handle immense soil pressure and ensure safety.

What’s a Retaining Wall and Why Might You Need One?

If you have a sloped or hilly yard, you know the challenges. Mowing is a workout, rainwater creates muddy rivers, and you have very little flat space for a patio or a garden. A retaining wall is the perfect solution to these problems. At its core, a retaining wall is a structure designed to hold back soil and create a level surface where one didn’t exist before. Think of it as a way to tame a tricky landscape and turn it into a functional, beautiful part of your home.

But these walls are more than just practical. They can completely transform your outdoor living space. A well-designed retaining wall can create stunning terraced gardens, define a cozy seating area around a fire pit, or build a level foundation for a new swimming pool. By using beautiful materials, our expert teams can build a wall that not only solves your erosion and grading issues but also becomes a gorgeous focal point. It’s a structural workhorse that doubles as a key element of your landscape design, adding value and character to your property.

The Main Jobs of a Retaining Wall

So, what exactly does a retaining wall do? Its primary role is to provide structural support to hold back earth, but this simple function accomplishes several important jobs for your yard. First, it prevents soil erosion by keeping dirt and landscaping in place, which is especially important on steep grades or during heavy Long Island rains. Second, it creates usable, flat land from a slope, giving you a perfect spot for a patio, a play area for the kids, or a garden. Finally, a properly installed wall helps manage water drainage, directing runoff away from your home’s foundation. With the right masonry design, it also adds immense visual appeal.

Which Retaining Wall Type Is Right for Your Yard?

Choosing the right retaining wall is a lot like picking the right tool for a job. Each type has its own strengths, and the best one for you depends on your yard’s slope, your style, and how much work you want the wall to do. Are you holding back a serious hillside or just creating a charming raised garden bed? Understanding the different options is the first step to building a wall that is both beautiful and built to last. Our team has years of experience with masonry design, so we can help you find the perfect fit for your Long Island home. Let’s walk through the most common types.

Gravity Walls

Think of a gravity wall as the strong, silent type. It uses its own sheer weight and mass to hold back the soil behind it. These walls are typically built from heavy materials like concrete, large stones, or bricks. To provide stability, they are designed to be much wider at the bottom than at the top, often leaning back into the hill they are supporting. Gravity walls are a fantastic, durable solution for walls up to about 10 feet high. For anything taller, they can become too massive and heavy for the ground beneath them, but for most residential needs, they offer a timeless and powerful solution.

Segmental Walls

If you love the clean, uniform look of interlocking blocks, a segmental wall is an excellent choice. These walls are built using high-quality concrete blocks that are engineered to fit together perfectly, often without needing mortar. This dry-stacking method makes them incredibly versatile and a popular option for both DIY projects and professional installations. Segmental walls are true workhorses, suitable for everything from simple garden edging to significant structural support on a sloped yard. Their design flexibility allows for straight or curved layouts, giving you plenty of creative freedom to shape your landscape.

Timber Walls

Timber walls bring a natural, rustic warmth to a landscape that many homeowners love. They can be quicker to install than stone or concrete walls and often have a lower upfront material cost. However, it’s important to go in with your eyes open. Wood is susceptible to rot and insect damage, especially in a damp climate, so these walls may not last as long as their masonry counterparts. To maximize their lifespan, you must ensure you have excellent drainage and use properly treated lumber. Regular maintenance is also key to keeping a timber wall strong and looking its best.

Decorative and Garden Walls

Sometimes, a retaining wall’s main job is simply to look good. Decorative and garden walls are designed to enhance your landscape’s visual appeal while providing light-duty functional support. You can use them to create terraced flower beds, build raised patios, or add definition to different areas of your yard. These walls can be built from a wide variety of beautiful materials, including natural stone, brick, or decorative concrete blocks that complement your home’s style. They are a perfect way to add structure and character to your outdoor space as part of a larger landscape design.

Your Retaining Wall Shopping List

Getting organized before you start building is one of the best things you can do for your project. A well-planned shopping list ensures you have every material and tool on hand, saving you from last-minute trips to the store. Think of this as your project recipe; gathering all the ingredients first makes the entire process run more smoothly. From the blocks themselves to the gravel that keeps your wall stable, here’s a complete list of what you’ll need.

Wall Blocks and Materials

The first and most obvious item on your list is the wall material itself. Concrete blocks are a fantastic, all-around choice because they are strong, versatile, and built to last. For a more straightforward DIY project, look for interlocking blocks that you can dry-stack without mortar. When making your choice, think about the final look you want to achieve. Gappsi offers a wide selection of high-quality porcelain and natural stone that can create a beautiful, durable wall. Your decision will come down to balancing your budget with the aesthetic you envision for your yard.

Base and Drainage Supplies

A retaining wall is only as strong as its foundation. To build a solid base, you will need plenty of gravel. This forms the leveling pad in the trench where your first row of blocks will sit. You will also need a perforated drainage pipe to place behind the wall, which channels water away safely. For the backfill, which is the material that fills the space directly behind the wall, use more crushed stone or gravel, not the soil you dug out. This entire system works together to relieve water pressure and prevent your wall from bowing or failing over time.

Geogrid Reinforcement

If your retaining wall will be taller than three or four feet, you absolutely need to add geogrid reinforcement to your shopping list. Geogrid is a strong, flexible mesh that gets layered within the wall and buried back into the hillside. It works by stabilizing the soil behind the wall, effectively holding it in place and distributing the pressure. Skipping this step on a taller wall is a serious mistake that can compromise its structural integrity. For complex projects requiring significant reinforcement, it’s often best to consult with our masonry construction experts to ensure everything is engineered correctly.

Caps, Adhesive, and Filter Fabric

With the structural components covered, it’s time for the finishing touches. Capstones are the flat, finished blocks that go on the very top of your wall, giving it a professional and polished look. You will need a strong landscape or block adhesive, applied with a caulking gun, to secure these caps in place. Another critical item is filter fabric. This special cloth is placed between your gravel backfill and the regular soil to prevent dirt from washing into your drainage system and clogging it. You can find many of these essential supplies at the Gappsi Store.

Essential Tools for the Job

Having the right tools makes any job easier, and building a retaining wall is no exception. Before you break ground, make sure you have a few key items ready. You will need a round point shovel for digging and a square blade shovel for moving gravel and creating a flat trench bottom. A heavy-duty rake helps spread materials evenly. To compact your gravel base, you’ll need a hand tamper. Finally, gather a level, a tape measure, a hammer or mallet for adjustments, and a caulking gun for the block adhesive. Having these tools ready will make your workflow much more efficient.

Do You Need a Permit to Build a Retaining Wall?

Before you start digging that trench, let’s talk about one of the most important parts of your project: the building permit. The answer to whether you need one isn’t always straightforward. It depends entirely on your local regulations, and here on Long Island, rules can vary from one town to the next. Generally, the two biggest factors that determine if you need a permit are the height of your wall and what it will be supporting.

Getting this right is crucial. Building without a required permit can lead to fines, orders to tear down your work, and major headaches when you eventually sell your home. While a small, decorative garden wall might not require any paperwork, a taller, structural wall almost certainly will. This process involves submitting plans and ensuring your design meets safety standards. It can feel a bit overwhelming, which is why many homeowners partner with an experienced team. A professional masonry contractor will handle the entire permitting process, giving you peace of mind that your project is compliant and built correctly from the start.

Understanding Height Limits and Local Codes

The most common rule of thumb is that a permit is required for retaining walls over four feet tall. However, you can’t take that as a guarantee. Some municipalities in Nassau and Suffolk counties have stricter rules, requiring permits for walls as short as three feet. It’s also important to know how that height is measured; it’s not just what you see above the ground. Height is calculated from the bottom of the first course of blocks or the footing to the top of the wall cap. The only way to know for sure is to contact your local town or village building department. A quick phone call before you begin can save you a lot of trouble later.

When to Get an Engineer Involved

For some retaining walls, you’ll need more than just a building permit; you’ll need plans stamped by a licensed structural engineer. This is almost always the case if your wall exceeds the standard height limit set by your town. You will also need an engineer if the wall will support extra weight, known as a “surcharge.” This includes things like a driveway, a patio, or even a steep slope behind the wall. An engineer will create a design that accounts for soil type, drainage, and the immense pressure the wall must withstand. This ensures your home remodeling project is not only beautiful but also structurally sound and safe for your family.

How to Build Your Retaining Wall, Step by Step

Building a retaining wall is a project you can absolutely tackle yourself with the right plan and a bit of patience. We’ve broken down the entire process into eight clear steps to guide you from the first shovel of dirt to the final capstone. Follow them carefully, and you’ll create a structure that’s not only beautiful but also built to last. Remember, precision at every stage is what separates a good wall from a great one. Taking your time with the foundation and ensuring everything is level will save you from headaches later on.

Of course, a retaining wall is often just one piece of a larger backyard puzzle. If you’re designing a complete outdoor living area and want the wall to integrate perfectly with a new patio or garden, our landscape design experts can help map everything out before you even break ground. For now, let’s focus on the build. Grab your gloves and safety glasses, and let’s get started.

Step 1: Plan and Mark Your Layout

Your first move is to map out exactly where the wall will go. Use wooden stakes and a string line to create a clear guide for your trench. This simple visual outline is your blueprint, so take your time to get it right. Double-check your measurements and make sure the planned wall is straight or follows the curve you envisioned. Making adjustments now with stakes and string is much easier than trying to correct a crooked row of heavy blocks later. This initial planning prevents common mistakes and ensures your project starts on a solid footing.

Step 2: Dig and Prepare the Trench

With your layout marked, it’s time to start digging. The trench is the foundation of your wall, and its dimensions are important. As a rule of thumb, the trench should be deep enough to bury about half of your first block, plus 4 to 6 inches for the gravel base. The width should be about twice the width of your block to give you working room. Use a square-headed shovel to get the bottom of the trench as flat and level as possible. Tamp the soil down firmly to create a solid, compacted surface for the next layer.

Step 3: Lay the Gravel Base

A stable retaining wall needs a solid gravel base. This layer provides a level surface for your first course of blocks and, more importantly, helps with drainage. Fill the trench with 4 to 6 inches of compactible gravel, like ¾-inch crushed stone. Spread it evenly and use a hand tamper to pack it down tightly until it’s firm and level. Check for levelness both front-to-back and side-to-side with a carpenter’s level. Our masonry construction team always emphasizes that a perfectly compacted and level base is non-negotiable for a long-lasting wall.

Step 4: Set and Level the First Row of Blocks

This is the most critical step in the entire process. The first row, or base course, must be perfectly level, as every other block will follow its lead. Place your first block on the prepared gravel base and press it down firmly. Use your level to check it from front to back and side to side. Use a rubber mallet to tap it into position. Place the next block right beside it, ensuring it’s snug against the first one and perfectly level with it. Continue this process for the entire first row, making constant adjustments until it’s flawless.

Step 5: Build Up the Wall, Staggering the Joints

Once the first row is set, building the rest of the wall is straightforward. As you add each new row, stagger the joints in a running bond pattern, just like a brick wall. This means the vertical seam between any two blocks should line up with the center of the block below it. This pattern locks the blocks together and distributes pressure evenly across the wall, making it significantly stronger. Before placing each new row, sweep the top of the previous one clean of any dirt or gravel to ensure a tight, stable fit.

Step 6: Add Drainage and Backfill

Proper drainage is what keeps a retaining wall standing for decades. As you build your wall course by course, you need to backfill the space behind it. Shovel a layer of ¾-inch crushed stone into the gap behind the blocks, about 12 inches deep. This creates a drainage zone that prevents water from building up and pushing against the wall. After adding a few rows and their corresponding backfill, lightly compact the gravel. Avoid using soil for backfill, as it holds moisture and creates the hydrostatic pressure you’re trying to prevent.

Step 7: Reinforce with Geogrid (for Taller Walls)

If your wall is going to be taller than three or four feet, you’ll need to add reinforcement. Geogrid is a strong, flexible mesh that stabilizes the soil behind the wall, essentially tying it into the hillside. To install it, lay a sheet of geogrid on top of a course of blocks, with one end on the block and the rest extending back into the soil. Place the next course of blocks on top to lock it in place. Then, pull the geogrid taut and cover it with backfill. Your block manufacturer will provide specific instructions on how many layers of geogrid you need.

Step 8: Add the Capstones to Finish the Wall

The final step is to install the capstones, which give your wall a professional and finished appearance. These flat, solid blocks sit on the top row of your wall. Lay them out first to ensure a good fit, cutting them with a masonry saw if needed. Then, remove the capstones, apply a few beads of strong concrete adhesive to the top of the wall blocks, and firmly press the capstones back into place. This adhesive secures them permanently, so they won’t shift over time. You can find a variety of beautiful capstone options in our collection of porcelain and natural stone.

How to Ensure Your Wall Has Proper Drainage

If there’s one step you absolutely cannot skip, it’s planning for drainage. Water is a retaining wall’s biggest enemy. Without a clear path to escape, rainwater and groundwater will collect behind your wall, creating immense hydrostatic pressure. This pressure can cause the wall to bulge, crack, or even collapse over time. On Long Island, this is even more critical because trapped water will freeze and expand in the winter, causing serious damage.

Proper drainage isn’t just one thing; it’s a system that works together to protect your investment. The goal is to give water an easy route away from the wall so it never has a chance to build up. This involves using the right backfill material, installing a drain pipe, and sometimes including weep holes. Getting this system right from the start is the key to building a wall that will stand strong for decades. For complex projects or challenging slopes, working with a masonry professional ensures every detail is handled correctly.

Use Gravel Backfill and Filter Fabric

After you lay your first course of blocks, you’ll need to start backfilling, which means filling the space between your wall and the soil behind it. It’s tempting to just shovel the excavated dirt back in, but that’s a huge mistake. Soil holds water, which is exactly what you want to avoid. Instead, you must use a free-draining material like clean, crushed gravel or stone. This creates a porous zone where water can flow down freely instead of sitting against your wall. As you build each course, add another layer of gravel behind it. You should have at least 12 inches of gravel directly behind the wall. To prevent soil from mixing with and clogging your gravel, line the excavated area with landscape filter fabric before you add the stone.

Install a Perforated Drain Pipe

A perforated drain pipe, also called a drain tile, is your wall’s main drainage channel. This flexible or rigid pipe has small holes or slits that allow water to enter. You’ll lay this pipe at the base of the wall, right behind the first course of blocks and nestled into the gravel backfill. Make sure the pipe is wrapped in a fabric “sock” or surrounded by filter fabric to keep debris out. The pipe should be sloped slightly, about a quarter-inch per foot, so gravity can carry the water away. You can run the pipe so it drains out to daylight at the end of the wall or direct it into a dry well. This simple component is crucial for preventing hydrostatic pressure and protecting your wall’s structural integrity.

Add Weep Holes to Manage Water

Weep holes are another tool for relieving water pressure. These are small openings at the base of the wall that allow trapped water to escape directly through the front. For segmental block walls, you can create a weep hole by simply leaving a small, vertical gap between two blocks in the first or second course. You can also insert a small-diameter pipe through the wall. A good rule of thumb is to place a weep hole every five to ten feet along the length of the wall. Just like with your drain pipe, you’ll want to place filter fabric over the back of the weep hole to stop soil from washing out and creating a mess on the face of your wall. If you have an existing wall with drainage problems, sometimes restoration work can be done to add them.

Common Retaining Wall Mistakes (and How to Avoid Them)

Building a retaining wall is a big project, and while it’s incredibly satisfying to see it come together, a few common slip-ups can cause major headaches down the road. A well-built wall will stand strong for decades, but one with hidden flaws can lean, bulge, or even collapse. Understanding the most frequent mistakes is the best way to avoid them. Let’s walk through what can go wrong and how you can ensure your wall is built to last.

Forgetting About Drainage

Water is the number one enemy of a retaining wall. When rainwater soaks the soil behind your wall, it creates immense hydrostatic pressure, which is just a technical term for the heavy force of water pushing outward. Many DIY builders overlook this, skipping drain pipes or using dense soil for backfill that traps water instead of letting it escape. This pressure can cause a wall to bow or completely fail during a heavy storm. Proper masonry design always accounts for water, making it the most critical element for long-term stability.

Creating a Weak or Uneven Base

Your retaining wall is only as strong as its foundation. A common mistake is failing to create a solid, level base for the first course of blocks. If the trench isn’t deep enough or the gravel base isn’t properly compacted, the wall can shift, settle unevenly, or lean over time. Soil pressure and water will find any weakness, and it all starts at the bottom. Taking the time to dig a proper trench and compact the base material is a non-negotiable step for a structure that needs to fight gravity and hold back tons of earth.

Rushing the First Row

That first row of blocks sets the stage for the entire wall. If it isn’t perfectly level and straight, every subsequent row will amplify the error. A tiny imperfection at the bottom becomes a very noticeable problem by the time you get a few feet high. Many people get impatient and rush this step, but it’s where you need to be the most meticulous. Use a level across the top and front-to-back of every single block in the first course. Taking your time here will save you from having to tear down and rebuild your wall later.

Using the Wrong Backfill

What you put behind your wall is just as important as the blocks themselves. A frequent error is backfilling with the same soil that was excavated from the trench. Soil, especially clay-heavy soil, holds water like a sponge, which leads directly to the hydrostatic pressure we talked about. The correct method is to use a free-draining material like crushed stone or gravel. This creates a path for water to flow down to the perforated drain pipe at the base of the wall, relieving pressure and keeping your wall safe and stable.

Ignoring Soil Pressure

It’s easy to underestimate the sheer force that soil exerts on a retaining wall. The load isn’t just the weight of the dirt directly behind it. You also have to consider the slope of the land above the wall and any additional weight, called a surcharge, from things like a driveway, patio, or even a shed. A wall that might be strong enough for a flat yard could easily fail if it’s holding back a steep hill. Underestimating these forces can lead to structural failure, so it’s important to assess the entire area before you even begin your design and construction.

Skipping Reinforcement on Taller Walls

Once a retaining wall gets over three or four feet tall, blocks and gravity alone may not be enough to hold it back. Taller walls require reinforcement, typically with a material called geogrid. This is a strong synthetic mesh that gets laid between courses of blocks and extends back into the soil. It essentially ties the wall to the earth behind it, creating a stronger, more cohesive structure that can handle the increased pressure. Skipping this step on a tall wall is a recipe for failure, as the wall won’t have the internal strength to resist bowing or collapse.

Choosing Materials Unsuited for Your Climate

The materials you choose need to be able to handle your local weather conditions. Here on Long Island, we experience freeze-thaw cycles, where water seeps into porous materials, freezes, expands, and causes cracks. Using blocks or stones that aren’t rated for this climate can lead to spalling, cracking, and a wall that deteriorates much faster than it should. It’s essential to select high-quality, durable porcelain or natural stone designed to withstand the temperature fluctuations in our region, ensuring your wall looks great and stays strong for years to come.

When to Call a Professional Instead of DIY

I love a good DIY project as much as anyone. There’s a real sense of accomplishment in building something with your own hands, whether it’s a garden bed or a piece of furniture. But when it comes to retaining walls, the line between a satisfying weekend project and a potential structural headache can be thin. Sometimes, the smartest and safest move is to call in a professional. Recognizing when a project is beyond your scope isn’t giving up; it’s making a wise investment in your home’s safety and value. A retaining wall is more than just a stack of blocks. It’s an engineered structure designed to hold back tons of soil and water.

Many DIY failures happen because it’s easy to underestimate the powerful forces at play. Hidden factors like soil pressure, water management, and the need for a perfectly level base can turn a well-intentioned project into a leaning, bulging, or completely failed wall. These mistakes often stay hidden for a while, only revealing themselves after a heavy rain or a winter freeze, when repairs become unavoidable and expensive. A professional brings the experience to foresee these issues. They understand the physics, the local building codes, and the specific challenges of Long Island’s soil and climate. Hiring an expert is about ensuring the job is done right the first time, giving you a structure that is not only beautiful but also safe and permanent.

If Your Wall Is Taller Than a Few Feet

As a retaining wall gets taller, the pressure from the soil behind it increases exponentially. A small, two-foot garden wall is one thing, but a wall standing four feet or higher is holding back an immense amount of earth. Most local building codes in Long Island require permits and an engineer’s stamp of approval for walls of this size for good reason. A professional team understands how to properly reinforce taller walls with geogrid and build a foundation that can handle the incredible load. This isn’t a corner you want to cut, as a structural failure could be catastrophic for your property and anything downhill from it.

When Your Property Has a Steep Slope

Building on a slope adds a whole new layer of complexity. The angle of the land, known as the “surcharge,” puts extra pressure on the wall that a flat-ground wall wouldn’t experience. You also have to manage water runoff from the higher ground, which can quickly saturate the soil and undermine a poorly constructed wall. Professionals conduct site evaluations to understand these forces and design a wall that works with your landscape, not against it. They have the right equipment to excavate and grade the area safely, ensuring your wall provides stable, long-term support for the hillside without risking a landslide.

If You’re Unsure About Soil and Drainage

Proper drainage is the single most important factor in a retaining wall’s longevity, and it’s directly tied to your soil type. Sandy soil drains differently than heavy clay, and a one-size-fits-all DIY approach might not account for these critical nuances. Professionals can identify your soil conditions and implement the right drainage solutions, like perforated pipes and the correct type of gravel backfill, to channel water away safely. Underestimating how much water will try to get through or around your wall is one of the most common reasons for DIY failures. A pro masonry team has seen it all and knows exactly how to keep water from becoming your wall’s worst enemy.

To Ensure It’s Built to Last

Hiring a professional is about more than just labor; it’s about expertise and peace of mind. A professional handles every detail, from securing permits and creating an engineered design to selecting the best materials for Long Island’s freeze-thaw cycles. While the upfront cost is higher than DIY, it protects you from the much larger expense of fixing a failed wall down the road. Remember, a smaller wall built correctly will always outperform a larger one built on a shoestring budget. When you work with an experienced landscape construction company, you get a durable, beautiful structure that adds lasting value to your property without the guesswork.

Related Articles

Frequently Asked Questions

How long can I expect a professionally built retaining wall to last? The lifespan of your wall really depends on the materials used and, most importantly, the quality of the installation. A properly built masonry wall made from concrete blocks or natural stone, with excellent drainage, can easily last for 50 years or even a lifetime. It’s a permanent feature of your landscape. A timber wall, on the other hand, has a shorter lifespan, typically 15 to 20 years, because even treated wood will eventually break down from moisture and soil contact.

My yard has a slight slope, but I’m not sure it’s “steep.” How do I know if I really need a retaining wall? That’s a great question. Retaining walls aren’t just for managing dramatic hillsides. Even a gentle slope can be transformed. Think about your goals for the space. Do you want a perfectly flat area for a patio set? Are you dreaming of terraced garden beds for flowers or vegetables? A shorter, decorative wall can create that definition and usability without needing to hold back a mountain of soil. It’s often less about “needing” one for erosion and more about “wanting” one to create a more functional and beautiful yard.

What is the single most critical part of building a retaining wall? If I had to pick just one thing, it would be everything that happens below ground before you even lay the first block. This means creating a solid, compacted gravel foundation that is perfectly level. A wall built on an uneven or weak base will inevitably shift and fail. Tied for first place is installing a proper drainage system, including gravel backfill and a perforated pipe. Without a way for water to escape, pressure will build up and destroy your wall from behind. Get the base and drainage right, and you’re set up for success.

Can I use a retaining wall to create a level area for something like a patio or a sports games court? Absolutely! That’s one of the best uses for a structural retaining wall. By cutting into a slope and holding back the earth, you can manufacture a flat, usable space where one didn’t exist before. This is the perfect way to create a solid foundation for a beautiful stone patio, a cozy fire pit area, a play space for your kids, or even a backyard sports games court. It’s a foundational step in turning a sloped, tricky yard into a functional outdoor living area.

I’m considering a DIY wall, but it might be over 3 feet tall. Is it really that important to get a permit? Yes, it is incredibly important. A permit isn’t just bureaucratic red tape; it’s a crucial safety check. Walls over a certain height (often three or four feet on Long Island) are holding back immense pressure and must be engineered to be safe. Building without a required permit can lead to fines, a tear-down order from your town, and major problems when you try to sell your house. More importantly, an unpermitted, improperly built wall can be a serious safety hazard. For taller walls, it’s always wisest to work with a professional who can handle the engineering and permitting process for you.

Share this page: