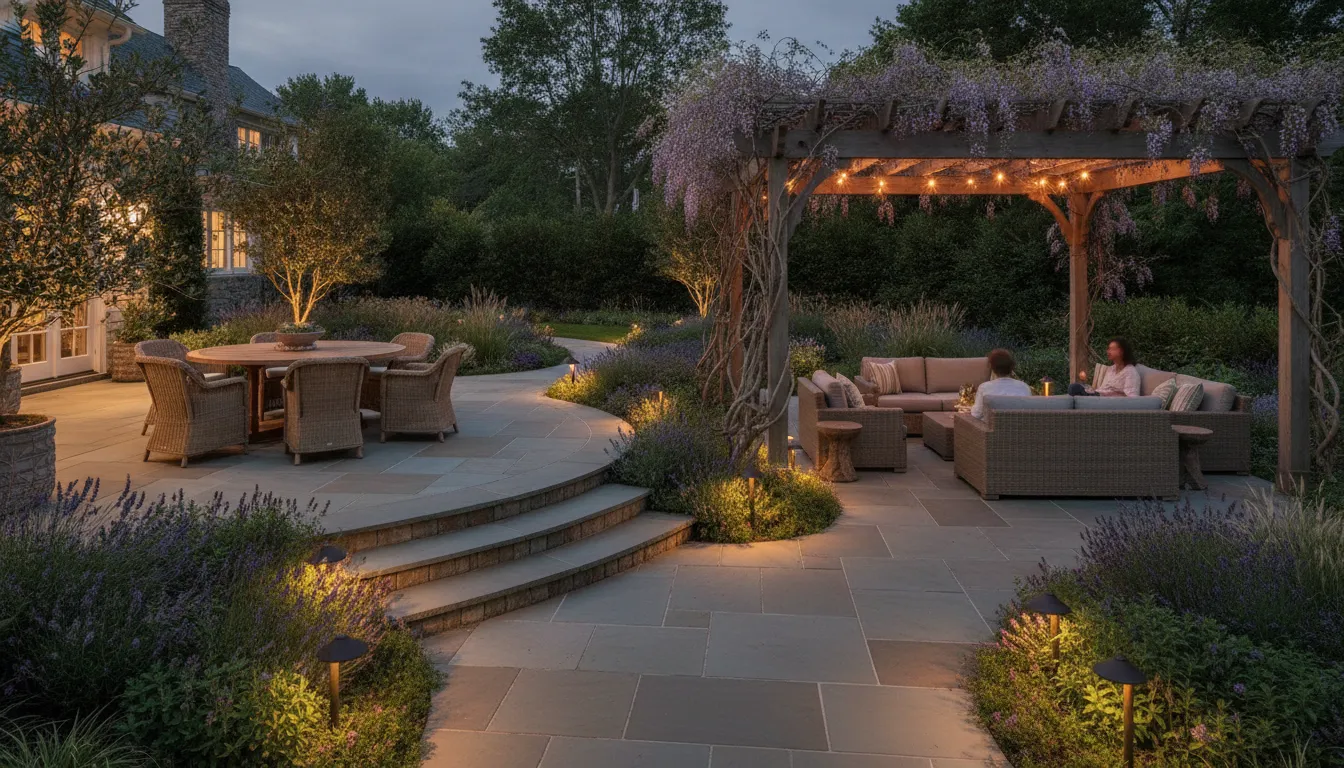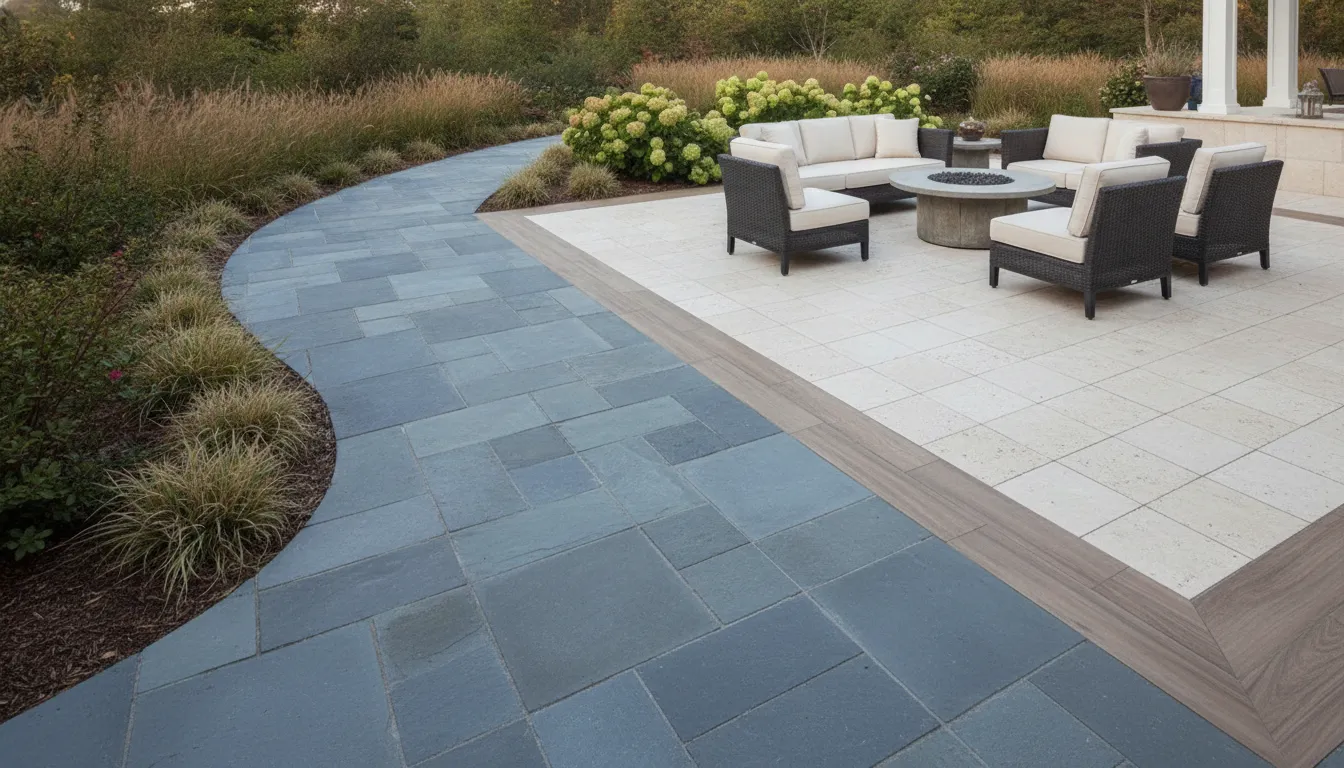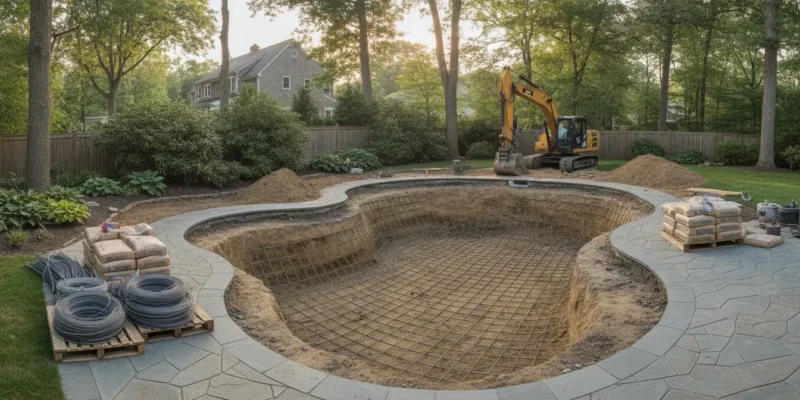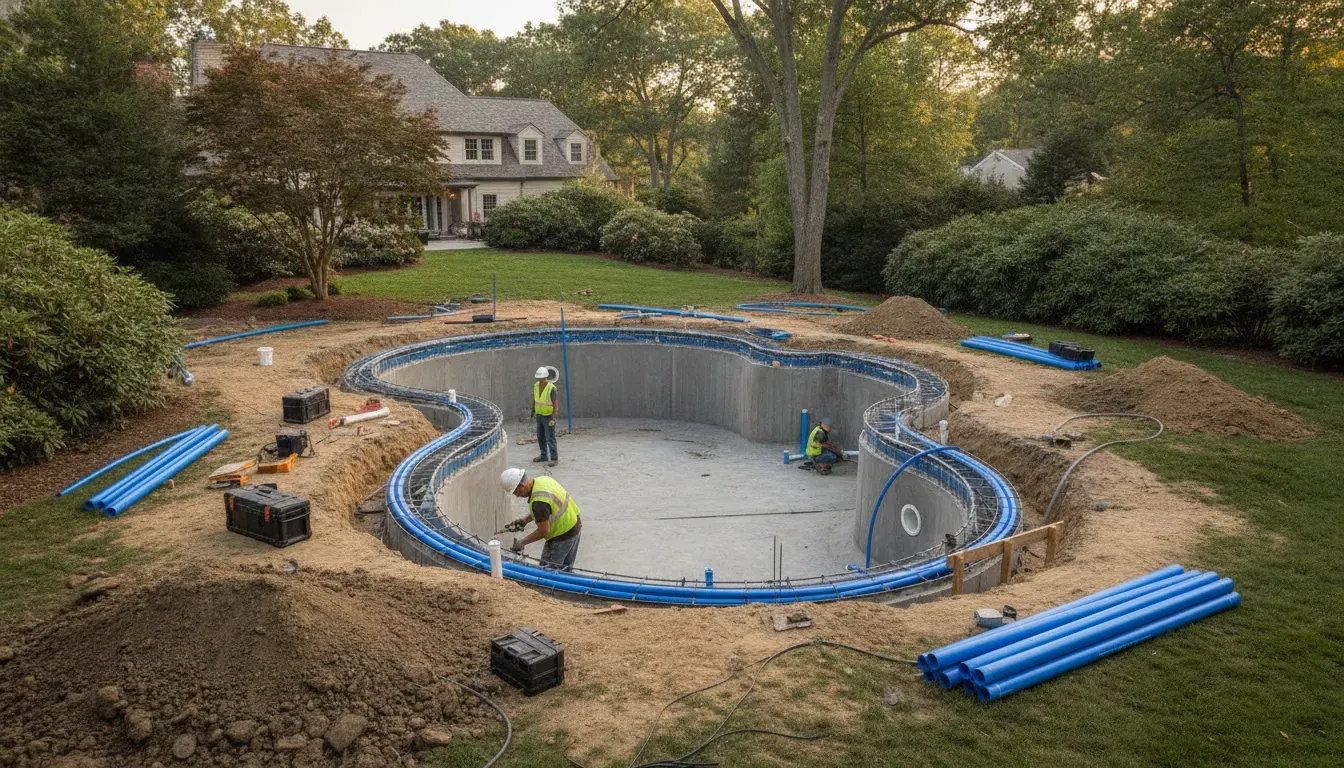
Modern home sauna with wood benches, professionally installed by a Long Island contractor.

How to Find a Home Sauna Contractor on Long Island

A home renovation project can feel overwhelming, especially one as specialized as a sauna installation. You have to consider the right type of sauna, the best location, and the specific electrical and ventilation needs for your space. Getting any of these details wrong can lead to costly problems down the road. This is why selecting a qualified and experienced home sauna contractor Long Island residents rely on is so critical. The right partner takes the complexity off your shoulders, managing the project with professionalism and ensuring every detail is handled correctly, so you can simply look forward to relaxing in your new oasis.

Key Takeaways

  • Choose the right sauna for your home: Understand the key differences between traditional, infrared, and steam saunas to select one that fits your space, budget, and desired wellness experience.
  • Prioritize a professional and safe installation: A sauna involves complex electrical and ventilation systems, so hiring a licensed professional is essential. This ensures your installation is safe, meets local codes, and protects your home.
  • Vet your contractor with care: A great project starts with a great partner. Look for a licensed and insured contractor with specific sauna experience who provides a detailed quote, a clear timeline, and strong warranties.

What Are the Different Types of Home Saunas?

Choosing the right sauna for your home is the first step toward creating your personal wellness retreat. The best option for you depends on the experience you want, the space you have, and your installation preferences. From the intense, steamy heat of a traditional Finnish sauna to the gentle warmth of an infrared model, each type offers a unique way to relax and recharge. Understanding the differences will help you decide which sauna will fit perfectly into your Long Island home and lifestyle.

Whether you envision a rustic outdoor cabin or a sleek indoor unit integrated into your master bathroom, there’s a sauna to match. Let’s walk through the most popular types so you can find the one that’s right for you.

Traditional Finnish Saunas

When you picture a classic sauna, you’re likely thinking of a traditional Finnish sauna. These rooms use an electric or wood-burning stove to heat rocks, bringing the air temperature to a toasty 195°F. The environment is typically dry, but you can create bursts of steam, known as “löyly,” by ladling water over the hot stones. This type of sauna provides an intense, purifying sweat. Because of the high heat and specific electrical or ventilation needs (especially for wood stoves), a traditional sauna requires careful planning and professional installation.

Infrared Saunas

If you prefer a less intense heat, an infrared sauna might be a better fit. Instead of heating the air, infrared saunas use special lamps to warm your body directly with gentle, radiant heat. The temperatures are much lower, usually between 120°F and 140°F, allowing for longer, comfortable sessions. Many people find this warmth deeply relaxing. Infrared saunas are also very energy-efficient, heat up quickly, and often come as pre-built kits that can plug into a standard household outlet, simplifying the installation process. Gappsi offers a variety of high-quality saunas to suit any preference.

Steam Saunas

Often called steam rooms, steam saunas are all about high humidity. A steam generator boils water and pumps the vapor into an airtight enclosure, creating a moist environment with nearly 100% humidity. While the temperature is lower than a traditional sauna, the wet heat feels very penetrating. This experience is excellent for respiratory health, helping to clear congestion and soothe sinuses. It’s also fantastic for your skin. A steam room requires waterproof construction with materials like tile or glass, making it a great addition to a home remodeling project.

Outdoor Saunas

An outdoor sauna transforms your backyard into a year-round escape. Imagine stepping out into the crisp Long Island air before warming up in your private retreat. These saunas are built to withstand the elements and can be designed as charming barrel saunas, modern cubes, or rustic cabins. You can choose between traditional or infrared heating systems to create your ideal experience. An outdoor sauna can stand alone or be integrated into a larger outdoor living space, perhaps next to a pool or under a custom-built pavilion or pergola for the ultimate backyard oasis.

How Much Does a Sauna Installation Cost on Long Island?

One of the first questions homeowners ask when considering a home sauna is, “How much will this cost?” It’s a great question, and the answer depends on several factors. Think of it not just as a purchase but as an investment in your home and your well-being. The final price tag for a sauna installation on Long Island can range from a few thousand dollars for a simple, prefabricated kit to tens of thousands for a large, custom-built outdoor oasis.

The total cost is influenced by the type of sauna you choose, its size and location, the quality of materials, and the complexity of the installation. Beyond the sauna unit itself, you also need to account for essential services like electrical work, ventilation, and any necessary permits. Understanding these components will help you create a realistic budget and ensure there are no surprises along the way. A trustworthy contractor will walk you through a detailed quote, breaking down every aspect of the project so you know exactly where your money is going. At Gappsi, we provide clear, comprehensive estimates for all our sauna installations, ensuring you feel confident and informed from start to finish.

How Costs Vary by Sauna Type

The type of sauna you select is the biggest factor in determining your starting price point. Infrared saunas, which use light to create radiant heat, are often the most budget-friendly option. On Long Island, you can expect an infrared sauna installation to range from about $3,200 to $6,500 or more, depending on the size and features.

Traditional Finnish saunas, which use a heater to warm rocks and create a deep, steamy heat, typically have a higher price tag. These installations generally start around $4,000 and can go up to $10,000 or more. The cost difference comes from the more powerful heater, the robust construction needed to handle high heat and humidity, and often more extensive labor for a proper build.

Factors That Affect Your Final Price

Beyond the basic type, several other choices will shape your final cost. A smaller, two-person indoor sauna might fall in the $6,000 to $8,000 range, while a larger custom sauna built for entertaining will naturally cost more. The location also plays a huge role. An outdoor sauna is a fantastic luxury, but it requires a foundation, weatherproofing, and running electrical lines outside, which can bring the total cost to between $10,000 and $20,000 or more.

The materials you choose and any custom features also add to the price. High-end woods, intricate layouts, large glass panels, and advanced lighting systems will increase the budget. These details are where a standard installation transforms into a personalized retreat, and our team can help you balance your vision with your budget during the home remodeling design process.

Budgeting for Electrical, Ventilation, and Permits

It’s easy to focus on the sauna itself, but the supporting work is just as important for a safe and functional installation. Most traditional electric saunas require a dedicated 240-volt hookup, which must be installed by a licensed electrician. While some smaller infrared saunas can use a standard 120-volt outlet, it’s crucial to confirm the electrical requirements beforehand.

Proper ventilation is another key consideration to ensure good air quality and prevent moisture from damaging your home. This may involve installing new vents, which adds to the labor and material costs. Finally, most permanent sauna installations on Long Island require building permits and an electrical inspection to ensure everything is up to code. Factoring these professional services and administrative fees into your initial budget will help you avoid unexpected expenses down the road.

Custom Build vs. Sauna Kit: Which Is Right for You?

Deciding between a custom-built sauna and a pre-made kit is one of the first big choices you’ll make. A custom sauna is designed from the ground up to fit your space and style, while a kit comes with pre-fabricated parts for a more straightforward assembly. Both paths can lead to a fantastic home wellness retreat, but they cater to different priorities, budgets, and design goals. Thinking about how you want the final product to look, feel, and function will help you determine the best route for your Long Island home.

Why Choose a Custom-Built Sauna?

A custom-built sauna is the perfect choice if you have a unique space or a specific vision in mind. Instead of a one-size-fits-all box, you get a sauna that is designed to fit your lifestyle and integrate perfectly with your home’s aesthetic. This personalized approach means you can select every detail, from the bench layout to the type of wood and heater. For homeowners on Long Island, a professionally installed, custom-built sauna can also be a smart investment, making your property more appealing and potentially increasing its resale value. It becomes more than just a wellness feature; it’s a permanent, valuable upgrade to your home.

Is a High-Quality Sauna Kit a Good Fit?

If you think sauna kits are a major step down in quality, it might be time to look again. Modern, premium sauna kits have improved dramatically, often using the same high-grade cedar or spruce and effective insulation you’d find in a custom project. A kit can be an excellent fit if your budget is a primary concern or if you find a design that already meets your needs without requiring modifications. While they offer less design flexibility, high-quality kits provide a more predictable and often faster path to owning a sauna. You can still achieve a luxurious and durable result without starting entirely from scratch.

Why Professional Installation Is Key for Both

Whether you choose a custom design or a top-tier kit, proper installation is not the place to cut corners. A sauna involves heat, moisture, and complex electrical components, making professional installation essential for safety and long-term performance. An expert ensures that your sauna has correct ventilation to prevent moisture issues and that all electrical work is up to code. You should always hire a licensed electrician for the wiring to prevent serious safety hazards. Relying on professional installation guarantees your sauna will be a safe, efficient, and lasting addition to your home for years to come.

What to Look for in a Long Island Sauna Contractor

Choosing the right contractor is just as important as picking the perfect sauna for your home. The right partner will make the entire process smooth, safe, and successful, ensuring your new wellness retreat is built to last. When you start meeting with potential installers, focusing on a few key areas will help you separate the true professionals from the rest. Think of it as a checklist to find a contractor who values quality and client satisfaction as much as you do.

Verify Licensing, Insurance, and Local Expertise

First things first, always confirm that any contractor you consider is fully licensed and insured to work in Long Island. This is non-negotiable. Proper licensing proves they meet local and state standards, while insurance protects you from any liability in case of accidents on your property. A professional installation is critical for safety, especially with the complex electrical and ventilation systems a sauna requires. A contractor with deep local expertise will also understand Nassau and Suffolk County building codes, ensuring your project is completed correctly from the start.

Review Their Specialization and Material Quality

Not all sauna contractors are the same. Some may specialize in infrared models, while others are experts in traditional Finnish saunas or custom steam rooms. Ask about their specific experience with the type of sauna you want. It’s also a great idea to inquire about the materials they use. The quality of the wood, heaters, and insulation will directly impact your sauna’s performance and durability. A reputable company will be transparent about their suppliers and proud to showcase the high-quality materials they use in their home remodeling projects.

Ask About Warranties and Ongoing Support

Your relationship with a contractor shouldn’t end the day the installation is complete. Ask detailed questions about the warranties they offer on both the sauna unit and their craftsmanship. A confident contractor will stand behind their work. Find out if they provide ongoing support or service plans to help you maintain your sauna over the years. This commitment to long-term customer care is a strong indicator of a trustworthy and reliable company that plans to be around for years to come, offering services like restoration and sealing to keep your investments pristine.

Look for Clear Pricing and Timelines

A professional contractor will provide a clear, detailed, and transparent quote. This estimate should break down the costs for the sauna itself, labor, materials, and any necessary electrical or ventilation work. Sauna prices can vary, so having a comprehensive proposal helps you understand exactly what you are paying for and avoids surprise fees later. You should also receive a realistic project timeline. Knowing the key milestones, from permit approval to final installation, helps you plan accordingly and ensures everyone is on the same page.

Avoid These Mistakes When Hiring a Sauna Contractor

Hiring the right contractor is the most important step in your sauna journey. To make sure your project goes smoothly and you end up with a relaxing retreat instead of a renovation headache, it helps to know what pitfalls to avoid. Let’s walk through some of the most common mistakes homeowners make so you can steer clear of them.

Skipping the Planning and Design Stage

It’s easy to get excited and want to jump straight into building, but skipping the planning phase is a recipe for disappointment. A great sauna is more than just a hot room; it’s a space designed for your specific needs and home. Take the time to work with your contractor on a detailed design. Think about where it will go, how it will blend with your home’s style, and what features are most important to you. A thorough home remodeling expert will help you map out every detail, from bench layout to lighting, ensuring the final result is a perfect fit.

Overlooking Electrical and Ventilation Requirements

This is a big one. Proper electrical work and ventilation are crucial for your sauna’s safety and performance. Inadequate ventilation can lead to poor air quality and moisture issues, while faulty wiring is a serious safety hazard. Your contractor must have a clear and compliant plan for both. Make sure they can explain how they will handle the electrical load and create proper airflow according to local building codes. A professional installation ensures your sauna runs efficiently and safely for years, giving you peace of mind every time you step inside to relax.

Choosing Size Over Functionality

Many people assume that a bigger sauna is automatically a better one, but that’s not always the case. The best sauna is one that’s sized for its intended use. An oversized sauna can feel empty, take longer to heat, and use more energy than necessary. Think about your real-world needs. Will it be a private escape for one or two people, or will you be hosting friends? A contractor can help you find the sweet spot between spaciousness and efficiency, creating a cozy and functional retreat. You can explore different saunas to get a feel for the options that might work for your space.

Not Asking the Right Questions Before Signing

Before you sign any contract, make sure you’ve done your homework on the contractor. Don’t be shy about asking detailed questions. Inquire about their specific experience with sauna installations, the types of materials they use, and what their warranty covers. Ask for a clear timeline and a detailed, itemized quote so you know exactly what you’re paying for. A reputable contractor will be happy to provide this information and answer all your questions. Visiting a showroom like the Gappsi Store can also give you a firsthand look at the quality of materials and craftsmanship you can expect.

What Is the Sauna Installation Process?

Understanding the installation process from start to finish helps you know what to expect when you hire a contractor. While every project is unique, a professional installation generally follows a clear, three-step path. This structured approach ensures your sauna is not only beautiful and functional but also safe and built to last. From the initial creative vision to the final flick of the switch, a seasoned team handles the complexities so you can focus on the excitement of your new home wellness retreat. Here’s a breakdown of what that journey looks like.

Step 1: Design, Planning, and Securing Permits

This is where your vision starts to take shape. A professional sauna contractor will work with you to design a sauna that fits your specific needs and the layout of your home. They will help you choose the right type, size, and materials, considering everything from your wellness goals to your home’s aesthetic. This initial phase also involves careful planning to account for the local climate and building styles common on Long Island. Your contractor will create detailed plans and handle the process of securing any necessary building permits, making sure your project gets started on the right foot and without any administrative headaches.

Step 2: Ensuring Code Compliance and Safety

Safety is the most important part of any home project, and sauna installation is no exception. It is crucial that your new sauna complies with all local building codes in Nassau and Suffolk Counties. A reputable contractor will manage all the technical details, especially the electrical requirements. They ensure the sauna is wired correctly by a licensed electrician and that all components adhere to strict safety regulations. This step protects your home and family and guarantees your sauna will operate reliably for years. This is where an experienced team’s value truly shows, as they handle the critical safety checks with precision.

Step 3: The Final Installation and Finishing Touches

Once the design is approved and all permits are in place, it’s time for the main event. Your contractor will coordinate the delivery and assembly of the sauna. The timeline can vary, but many modern infrared saunas can be fully installed in just a few hours. After the core unit is assembled, the team will add the finishing touches. This could include integrating the sauna with existing walls, adding custom lighting, or installing exterior trim. This final step transforms a simple kit or set of materials into a seamless part of your home, ready for you to enjoy.

How to Find the Best Sauna Contractor on Long Island

Finding the right contractor is the most critical step in turning your dream of a home sauna into a reality. You need a partner who not only understands the technical aspects of the installation but also shares your vision for a relaxing, beautiful space. The right professional will guide you through the process, ensuring every detail is handled correctly, from the initial design to the final flip of the switch. On Long Island, you have many options, so knowing how to identify a top-tier contractor will make all the difference in the quality and longevity of your investment.

Start with a Premier Full-Service Provider like Gappsi

When you’re ready to bring a sauna into your home, your first step can make all the difference. I always recommend starting your search with a premier, full-service provider. A company like Gappsi, for example, handles everything from start to finish. They specialize in creating complete wellness spaces, including saunas, swim spas, and hot tubs for homeowners across Long Island. The major benefit here is that they manage the entire installation, including all the tricky plumbing and electrical work. This integrated approach ensures every piece of the puzzle fits together perfectly, saving you the headache of coordinating multiple contractors and hoping for the best. It’s a much smoother path to your dream sauna.

Tips for Vetting Other Local Specialists

If you decide to explore other local specialists, it’s important to know what to look for. Don’t just go with the biggest name; instead, find a contractor who listens and offers solutions tailored to your specific space and needs. A detailed planning and design phase is non-negotiable. A great contractor will walk you through this process, not rush past it. Also, make sure to discuss ventilation thoroughly. It’s one of the most common mistakes in sauna construction and can seriously impact your experience. Asking the right questions upfront helps ensure you partner with a true professional who will build a safe, functional, and beautiful sauna.

Related Articles

Frequently Asked Questions

What’s the real difference in feel between a traditional sauna and an infrared one? Think of it as the difference between sitting in a hot, steamy room versus feeling the sun’s warmth on your skin. A traditional sauna uses a heater to raise the air temperature to a very high level, creating an intense, purifying sweat that you can enhance with bursts of steam. An infrared sauna uses special lamps to warm your body directly, providing a gentler heat at a lower temperature that many find deeply relaxing and comfortable for longer sessions.

Do I really need to hire an electrician for a sauna installation? For most saunas, yes, and it’s a step you should never skip. Traditional saunas and larger infrared models almost always require a dedicated 240-volt circuit to operate safely and efficiently. This is not a standard outlet and must be installed by a licensed electrician to meet safety codes. While some very small, plug-in infrared saunas exist, professional electrical work is the standard for a safe, permanent installation.

Is an outdoor sauna a practical choice for the Long Island climate? Absolutely. Outdoor saunas are specifically designed to withstand the elements, including our cold winters and humid summers. They are built with durable, weather-resistant materials and proper insulation. An outdoor model can turn your backyard into a year-round wellness destination. The key is ensuring it’s installed correctly on a solid foundation to handle seasonal shifts in the ground.

Why should I hire a professional for a sauna kit if it’s designed for assembly? While a kit provides the core components, a professional installation ensures everything comes together safely and performs correctly for the long haul. A contractor handles the critical details that go beyond basic assembly, like ensuring the electrical wiring is up to code, the ventilation is adequate to prevent moisture damage to your home, and the unit is perfectly level and sealed. This expertise protects your investment and gives you peace of mind.

How much disruption should I expect during a sauna installation? The level of disruption depends on the project’s scope. A straightforward installation of a prefabricated indoor sauna can often be completed in a day or two with minimal fuss. A custom-built sauna or an outdoor model is a more involved process that includes a design phase, potential permit applications, and construction, so it will naturally take longer. A good contractor will provide a clear timeline so you know exactly what to expect and when.

Modern outdoor cabin sauna with a glass door in a lush Long Island backyard.

Your Guide to an Outdoor Cabin Sauna on Long Island

Your backyard can be a wonderful place to connect with friends and family, and an outdoor sauna offers a unique setting to do just that. It creates an intimate, screen-free zone for sharing quiet conversations and making memories. Far from being just a solo retreat, a sauna can become the social heart of your outdoor space, complementing a pool or patio and offering a healthy, relaxing activity for guests. It’s a new way to host gatherings that leave everyone feeling refreshed. An outdoor cabin sauna Long Island is more than a wellness tool; it’s a lifestyle upgrade that fosters connection right in your own home.

Key Takeaways

  • A sauna is a powerful wellness tool: Beyond simple relaxation, regular sauna use can support your heart health, soothe sore muscles after a workout, reduce daily stress, and promote deeper, more restful sleep.
  • Match the sauna to your lifestyle: Find the right fit by considering your preferences for heat type (wood, electric, or infrared), choosing durable materials like cedar, and selecting a size that suits your personal or social needs.
  • Prioritize a professional installation: A safe and long-lasting sauna depends on careful planning, which includes preparing a solid foundation, securing the right permits, and relying on experts for all electrical and structural work.

Why Add an Outdoor Sauna to Your Backyard?

Imagine stepping out into your Long Island backyard and into your own private wellness retreat. An outdoor sauna is more than just a beautiful addition to your home; it’s a powerful tool for improving your health and creating a unique space to relax and connect. From easing sore muscles to providing a quiet escape, adding a sauna can completely transform how you use your outdoor space and how you feel every day. It’s an investment in your well being that offers benefits you can enjoy year round, turning a simple corner of your yard into a destination for relaxation and rejuvenation.

Support Cardiovascular Health

Stepping into a warm sauna does more than just relax you; it gives your heart a gentle workout. The heat raises your heart rate and gets your blood flowing, much like a brisk walk. This process helps improve circulation and, over time, can contribute to lower blood pressure30275-1/fulltext). Think of it as a passive form of cardio that supports your overall heart health. Regular sessions are a simple, enjoyable way to complement an active lifestyle and invest in your long term wellness. It’s a relaxing habit that your cardiovascular system will thank you for, making it a smart and soothing addition to your daily routine.

Soothe Muscles and Aid Recovery

Whether you’ve spent the day gardening, playing on your home Sports Games Courts, or just dealing with daily tension, an outdoor sauna is your personal recovery zone. The deep, penetrating heat works wonders on tired, sore muscles, helping to release tightness and ease aches. This warmth increases blood flow, which delivers more oxygen to your muscles and helps them repair faster. For anyone with an active lifestyle, a sauna can become an essential part of your routine, reducing stiffness and getting you ready for your next adventure. It’s a natural way to manage muscle soreness and keep your body feeling its best.

Reduce Stress and Improve Sleep

In our busy lives, finding a moment of true peace can be a challenge. An outdoor sauna provides a dedicated sanctuary for you to disconnect and unwind. The quiet warmth encourages mindfulness and helps your body release endorphins, the natural chemicals that make you feel good. This deep relaxation doesn’t just melt away the day’s stress; it also paves the way for a better night’s sleep. As your body cools down after a sauna session, it sends a powerful signal to your brain that it’s time to rest. This can lead to falling asleep faster and enjoying a deeper, more restorative sleep cycle.

Create a Unique Space for Socializing

A sauna isn’t just for solo relaxation; it can also be a wonderful and healthy way to connect with friends and family. Imagine sharing a warm, tranquil space for conversation, away from the distractions of phones and screens. It offers a unique and intimate setting for catching up that feels more special than sitting in the living room. An outdoor sauna can be the centerpiece of your backyard entertainment area, perfectly complementing a patio, pool, or garden. It’s a fantastic way to design a wellness-focused backyard where you can host gatherings that leave everyone feeling refreshed and rejuvenated.

Which Type of Outdoor Sauna Is Right for You?

Choosing an outdoor sauna is about matching your wellness goals and lifestyle with the right type of heat and experience. Each sauna offers a unique atmosphere, from rustic and traditional to modern and convenient. Do you envision a classic, wood-scented retreat or a sleek, high-tech space you can control with the push of a button? Understanding the differences is the first step to creating your perfect backyard escape.

The four main types of outdoor saunas are traditional wood-burning, electric, infrared, and steam. Each has its own heating method, installation needs, and overall feel. Thinking about how you plan to use your sauna, who will be using it, and what kind of maintenance you’re comfortable with will help you narrow down the options. Let’s look at what makes each type special so you can find the one that fits seamlessly into your Long Island home.

Traditional Wood-Burning Saunas

For the purist, nothing compares to a traditional wood-burning sauna. This is the most authentic experience, offering the gentle crackle of a fire and the rich, earthy aroma of burning wood. It’s a ritual that invites you to slow down and connect with the elements. These saunas create a soft, enveloping heat that many people love. Keep in mind that they require a steady supply of wood and proper ventilation for the stove. They also take a bit longer to heat up, but for many owners, the wait is a worthy part of the relaxing process.

Electric Saunas

If convenience and control are at the top of your list, an electric sauna is an excellent choice. With a simple turn of a dial or press of a button, you can set your desired temperature and let the sauna heat up quickly and efficiently. This ease of use makes it simple to fit a sauna session into a busy schedule. Electric saunas are reliable and provide a consistent dry heat. Installation typically requires a dedicated electrical circuit, a straightforward job for a professional team during a home remodeling project or backyard renovation.

Infrared Saunas

Infrared saunas represent a modern approach to heat therapy. Instead of heating the air around you, infrared technology uses light to warm your body directly. This results in a deep, penetrating heat at a much lower air temperature than traditional saunas. For this reason, they are a great option for people who find the high heat of other saunas uncomfortable or overwhelming. You can still work up a great sweat and get all the benefits of heat therapy in a gentler, more temperate environment.

Steam Saunas

Often called steam rooms, steam saunas create a completely different environment from their dry-heat counterparts. A steam generator pumps warm, moist air into the space, resulting in nearly 100% humidity. This wet heat is fantastic for hydrating skin and providing relief for sinuses and respiratory issues. The feeling is more like a tropical rainforest than a dry desert. Because of the high moisture content, steam saunas require meticulous waterproofing, proper drainage, and excellent ventilation, making professional design and construction absolutely essential.

How to Choose the Best Outdoor Cabin Sauna

Choosing an outdoor sauna is about more than just picking a model from a catalog. It’s about designing a personal wellness retreat that fits your lifestyle and your backyard perfectly. To find the right fit, you need to think about how you’ll use it, what it’s made of, and how it will hold up to our unique Long Island climate. Taking the time to consider these details ensures you get a sauna that you’ll love for years to come.

Think of it as a rewarding home upgrade. Before you get to the exciting moment when your sauna arrives, ready for assembly, a little planning goes a long way. Key factors like size, materials, heating method, and special features will shape your experience. You also need to consider how the structure will integrate with your existing landscape and withstand local weather patterns. By balancing your personal wish list with these practical considerations, you can confidently select an outdoor cabin sauna that becomes a cherished part of your home. At Gappsi, we guide homeowners through this entire process, helping you find the perfect sauna to create your backyard oasis.

Determine the Right Size and Capacity

First, think about who will be using your sauna. Are you dreaming of a quiet, personal escape for one or two people? Or do you envision it as a social hub for relaxing with family and friends after a swim? The answer will guide you to the right capacity. A cozy two-person sauna is perfect for intimate relaxation, while a larger six or eight-person model can accommodate gatherings. Consider your available backyard space as well. You want the sauna to feel like a natural part of your landscape, not a cramped addition. Planning the right size from the start ensures your new sanctuary meets all your expectations.

Inspect Materials and Build Quality

The materials used to build your sauna directly affect its longevity, performance, and maintenance needs. While some entry-level kits use spruce or pine, these woods can be prone to sticky resin seeping out over time. For a truly durable and beautiful outdoor sauna, look for premium woods like cedar. Western Red Cedar is a popular choice because it’s naturally resistant to decay and insects, and it releases a wonderful aroma when heated. Beyond the wood, inspect the overall build quality. Look for thick walls for better insulation, sturdy benches, and a well-constructed door that seals tightly to keep the heat in. A high-quality build ensures your investment will last through many seasons of use.

Compare Heating Methods and Energy Use

Your sauna’s heater is its heart, and you have a few great options to choose from. Traditional wood-burning stoves offer an authentic, rustic experience with a soft heat and gentle crackle. Electric heaters are incredibly convenient, allowing you to turn on your sauna with the flip of a switch or a tap on an app. It’s a common misconception that electric saunas always heat up faster; the heat-up time is often similar for both wood and electric models depending on the unit’s power. Infrared saunas use a different technology to heat your body directly, operating at lower temperatures. Each has its own energy use profile, so consider what works best for your home and budget when you compare heating options.

Select Your Must-Have Features and Amenities

This is where you can truly personalize your sauna. Think about what would make your experience special. Do you want a large window to enjoy a view of your garden? Or do you prefer a more enclosed, meditative space? Proper ventilation is essential for any sauna, but you can also add features like multi-level benches, ergonomic backrests, or even an attached changing room for convenience. Modern amenities like Bluetooth speakers for music or chromotherapy lighting for mood enhancement can turn a simple sauna session into a full sensory experience. Integrating your sauna into a complete landscape design can create a seamless flow in your outdoor living space.

Account for Long Island Weather

Installing an outdoor sauna is one of the most rewarding upgrades you can make, but it’s important to plan for our local climate. A sauna on Long Island needs to withstand hot, humid summers and cold, snowy winters. This starts with a solid foundation that allows for proper drainage. The structure itself should be built from weather-resistant materials and feature a durable, protective roof to shield it from rain and snow. Proper sealing and finishing are also critical to prevent moisture damage and ensure your sauna performs well for years. Choosing a sauna designed to handle these elements will protect your investment and guarantee it remains a beautiful, functional retreat no matter the season.

Installing a Sauna in Your Long Island Backyard

Bringing a sauna to your backyard is an exciting project. While it might seem complex, the installation process is quite straightforward when you break it down into clear steps. With careful planning and the right team, you can ensure your new wellness retreat is built safely, correctly, and exactly where you want it. From preparing the ground to flipping the switch for your first session, each step is a move toward creating your personal oasis. Let’s walk through the key considerations for installing an outdoor cabin sauna on Long Island.

Prepare the Site, Foundation, and Drainage

First things first, your sauna needs a solid, level base to sit on. Preparing the installation site is a critical first step for a stable and long-lasting structure. You should never install a sauna directly on grass or uneven soil. Instead, you’ll need a structurally sound surface to serve as its foundation. Excellent options include a concrete pad or a patio built with beautiful porcelain and natural stone pavers. A reinforced deck can also work, as long as it’s designed to handle the weight. Proper site preparation also includes planning for drainage to prevent water from pooling around the base, protecting your investment for years to come.

Check Local Permits and Zoning Rules

Before you get too far into planning, it’s time to handle the paperwork. Most municipalities on Long Island require building permits for permanent outdoor structures like a sauna, and you will definitely need an electrical permit for the heater. It’s essential to check your local zoning laws for specific rules, such as setback requirements that dictate how far the sauna must be from your property lines and any height restrictions. Navigating these regulations can feel tedious, but it’s a non-negotiable part of the process. Working with an experienced local company like Gappsi can make this step much smoother, as we are familiar with the home remodeling codes and permit processes across Nassau and Suffolk counties.

Plan for Electrical and Ventilation Needs

Proper electrical work is crucial for a safe and functional sauna. Whether you choose a traditional electric heater or an infrared model, the installation must be handled by a licensed electrician to ensure it meets all safety codes. Your sauna will require a dedicated circuit, so it’s important to plan the wiring route from your home’s electrical panel to the sauna’s location. Just as important is ventilation. An effective ventilation system allows fresh air to circulate, which ensures a comfortable breathing environment, helps the sauna heat efficiently, and prevents moisture from building up inside the cabin. Our team at Gappsi coordinates with certified electricians to guarantee your sauna is installed perfectly.

Position for Privacy and Landscaping

Now for the fun part: deciding exactly where your new sanctuary will live. Think about how you can create a private, tranquil experience. Many homeowners position their saunas in a spot that is shielded from neighbors’ views, perhaps tucked behind a row of lush trees or elegant fencing. This is a wonderful opportunity to integrate your sauna into your overall backyard design. You can use thoughtful landscape design to create a beautiful stone path leading to the door, add soft exterior lighting for evening sessions, and plant fragrant flowers nearby to enhance the relaxing atmosphere. Your sauna shouldn’t just be in your backyard; it should be part of it.

Follow a Simple Maintenance Routine

One of the best things about modern outdoor saunas is how easy they are to maintain. Keeping your sauna in top condition requires just a few simple habits. After each use, it’s a good idea to wipe down the benches and backrests with a clean, damp cloth. You can clean the floor as needed and periodically check the heater and stones to make sure everything is in working order. For the exterior, an occasional cleaning will keep the wood looking fresh. If your sauna is surrounded by a patio or walkway, our restoration and sealing services can help protect those surfaces from the elements, ensuring your entire sauna area remains pristine and inviting.

Where to Find Your Outdoor Sauna on Long Island

Finding the right outdoor sauna for your Long Island home is about more than just picking a model you like. It’s about partnering with a team that can guide you through the entire process, from design to installation. Adding a sauna is a wonderful upgrade to your property, creating a personal retreat for relaxation and wellness. To get it right, you need a provider who understands the local landscape, building codes, and what it takes to create a lasting outdoor feature. A great partner will help you think through all the details, like where the sauna will fit best in your yard, what kind of foundation it needs, and how to run the necessary electrical lines safely.

When you start your search, look for a company with a proven track record in creating beautiful and functional outdoor living spaces. You want someone who can answer your questions honestly and provide a clear plan for your project. This includes everything from selecting the right materials that can withstand Long Island’s weather to ensuring the final installation is flawless. The right team will make the process feel exciting, not overwhelming. They will handle the technical aspects so you can focus on anticipating your first relaxing session. With the right guidance, you can be confident that your new sauna will be a source of enjoyment for many years.

Partner with Gappsi for Expert Design and Installation

When you’re ready to add a sauna to your backyard, working with a local expert makes all the difference. At Gappsi, we specialize in the sale, delivery, and installation of high-quality saunas across Nassau and Suffolk County. Our team lives and works here on Long Island, so we understand how to design outdoor spaces that are both beautiful and durable. We’ll help you select the perfect sauna for your home and handle every detail of the installation. From initial design to the final walkthrough, our goal is to provide a seamless and enjoyable experience, leaving you with a stunning backyard retreat you can be proud of.

Key Questions to Ask a Sauna Provider

Before you commit to a sauna, it’s important to ask a few key questions to ensure a smooth process. First, confirm that you have a suitable spot. Is the ground level? Is there enough clearance around the unit? Next, discuss the electrical requirements. Most outdoor saunas need a dedicated circuit, so you’ll want to understand what’s involved in setting that up. You should also ask about the delivery and installation timeline. A reputable provider will give you a clear picture of the entire project from start to finish. Thinking through these details ahead of time is a crucial step in a successful Long Island sauna installation.

Explore Your Financing Options

An outdoor sauna is a valuable addition to your home, and it’s an investment in your well-being. We understand that budgeting for a large home improvement project is a top priority for many homeowners. That’s why it’s a good idea to ask potential providers about their financing options. Many companies, including Gappsi, offer flexible payment plans to help make your dream sauna more accessible. These options allow you to get the high-quality sauna you want without having to compromise. By exploring financing, you can manage the cost in a way that fits your budget, making it easier to move forward with your project.

Why Professional Installation Is a Must

While a DIY project can be tempting, professional installation is essential for an outdoor sauna. Proper setup is critical for both safety and performance. A professional installer ensures that all electrical components are connected correctly, which prevents potential hazards. They also handle the ventilation system, which is vital for maintaining air quality and protecting the structure from moisture damage. Beyond the technical aspects, a professional installation guarantees that every feature, from the lighting to the audio system, works perfectly. Investing in an expert installation protects your sauna and ensures it will provide years of reliable relaxation.

Related Articles

Frequently Asked Questions

What’s the real difference in feeling between an infrared and a traditional sauna? Think of it like the sun’s warmth on a cool day versus the heat of a summer afternoon. An infrared sauna uses light to warm your body directly, so you feel a deep, penetrating heat without the air around you getting intensely hot. A traditional sauna, whether electric or wood-burning, heats the air itself to create that classic, hot, and enveloping environment. If you love high heat and a steamy atmosphere (if you add water to the rocks), go traditional. If you prefer a gentler warmth that still makes you sweat, infrared is a fantastic choice.

How much space do I really need in my backyard for a sauna? You might be surprised by how little space you need. A cozy two-person sauna can fit comfortably in a corner of a patio or deck, often requiring a footprint of just five by five feet. For larger models that can host friends and family, you’ll want to plan for a bigger area. The most important factor is ensuring you have a solid, level foundation and enough clearance around the structure for access and proper ventilation.

Can I actually use an outdoor sauna during a cold Long Island winter? Absolutely, and it’s one of the best times to use it. A well-built sauna with thick, insulated walls and a quality heater is designed to perform beautifully in the cold. The contrast between the crisp winter air and the deep warmth inside is incredibly refreshing and invigorating. Just make sure your sauna is made from weather-resistant materials, like cedar, and has a durable roof to handle snow and rain.

Which type of sauna is the easiest to own and maintain? For pure convenience, electric and infrared saunas are the front-runners. They heat up with the press of a button and require very little upkeep beyond wiping down the interior after use. A traditional wood-burning sauna involves more of a ritual, as you need to manage the fire and clean out the stove, but many people find that process to be part of its charm. All types are fairly low-maintenance once installed correctly.

Do I need to hire my own electrician and handle the permits myself? You don’t have to go it alone, and you really shouldn’t. Navigating local permits and ensuring the electrical work is done to code are critical steps for safety and compliance. When you work with a full-service company like Gappsi, we coordinate all of that for you. We handle the permit process and work with licensed electricians to ensure your sauna is installed safely and correctly, so you can just focus on the excitement of your new backyard retreat.

Above ground swim spa landscaping idea with a modern stone paver patio and evergreen shrubs.

9 Inspiring Above Ground Swim Spa Landscaping Ideas

The height and bulk of an above ground swim spa can feel like a design challenge, but it’s actually a creative opportunity. Instead of trying to hide it, you can work with its structure to create a dynamic, multi-dimensional space. Building a deck up to its edge can give it a seamless, built-in look, while surrounding it with raised stone planters can make it feel like a natural part of the garden. The goal is to make the spa look intentional and beautifully integrated. We’ve gathered our favorite above ground swim spa landscaping ideas to help you solve this design puzzle and turn your spa into a stunning architectural feature in your yard.

Key Takeaways

  • Design around your spa, not just next to it: Make your swim spa look intentional by building a deck, patio, or garden beds that connect it to your yard. This approach helps manage the spa’s height and turns it into a beautiful, integrated feature instead of a standalone object.
  • Plan for low-maintenance enjoyment: Think about the practical details from the start to save yourself headaches later. This means ensuring a solid foundation, proper drainage for splashes, non-slip surfaces for safety, and choosing plants that will not make a mess in your water.
  • Layer privacy for a stylish retreat: Create a secluded oasis by layering different privacy solutions. Combine stylish fencing with vertical elements like a pergola or trellis, and use lush, year-round plants to build a natural screen that feels beautiful, not boxy.

What Makes Swim Spa Landscaping Unique?

Landscaping around a swim spa is a unique project that blends the best of pool design and garden planning. Unlike a traditional in-ground pool, a swim spa often sits above ground, creating a significant vertical element in your yard. Its compact size allows it to fit in spaces where a full pool might not, but its year-round usability means the surrounding area needs to be functional and beautiful in every season. The key is to create a design that feels intentional, making the spa a seamless and integrated feature of your outdoor living space rather than an afterthought.

Thinking about your swim spa landscaping requires a different approach. You have to consider how to manage its height, ensure the surrounding area is safe and accessible, and choose materials that complement the spa without causing damage. It’s a wonderful opportunity to create a personal retreat, whether that’s a lush garden oasis, a sleek modern patio, or a cozy, private corner. With the right planning, you can transform the area around your swim spa into your favorite spot to relax, exercise, and entertain.

Design Around the Height and Structure

An above-ground swim spa’s height is one of its most defining features, and your design should work with it, not against it. You can place a swim spa in several ways: completely above ground, partially recessed into the earth, or fully built into a multi-level deck. Each choice creates a different look and feel. A fully above-ground spa, for instance, requires stairs or a small deck for access, which can be designed to add architectural interest.

A partially recessed spa can soften the spa’s profile, making it feel more connected to the ground. This approach works beautifully with surrounding porcelain or natural stone pavers that create a smooth transition from the lawn or patio to the water’s edge. Building the spa into a larger deck structure is another popular option, creating a cohesive entertainment area with distinct zones for lounging, dining, and swimming. The goal is to make the spa look like it truly belongs in your yard.

Plan for Drainage, Safety, and Access

Practicality is just as important as aesthetics when it comes to swim spa landscaping. First, you need a solid, perfectly level foundation that can support the immense weight of the spa when filled with water, which can be around 20,000 pounds. This usually means a reinforced concrete slab or a specially engineered deck. Our expert masonry and construction teams can ensure your foundation is built to last.

Water will inevitably splash out, so proper drainage is critical. The surface around your spa should be slightly sloped to direct water away from the foundation and prevent pooling. It’s also vital to choose non-slip materials for decking and patios to keep the area safe. Finally, think about access. You’ll need easy entry and exit from the spa, but don’t forget about the equipment panel. Make sure your design leaves enough clear space for a technician to perform routine maintenance without having to tear up your beautiful landscaping.

Avoid These Common Landscaping Mistakes

A little foresight can help you avoid common mistakes that create extra work or even damage your investment. For example, never place sharp rocks, loose gravel, or stones directly against the acrylic shell of your swim spa. Over time, these materials can shift, potentially scratching the finish or putting pressure on the structure. It’s better to create a border a few inches away from the spa’s base.

You should also be mindful of what you plant nearby. Avoid trees and large shrubs with aggressive root systems that could disrupt the spa’s foundation over time. It’s also wise to steer clear of plants that drop a lot of leaves, flowers, or needles, as this debris will end up in your water and filter system. Working with a professional landscape designer can help you select the right plants and materials from the start, ensuring your swim spa area remains a low-maintenance sanctuary.

9 Landscaping Ideas for Your Above Ground Swim Spa

An above ground swim spa is a fantastic addition to any backyard, but it can look a bit stark sitting on its own. The right landscaping can transform it from a simple container of water into a stunning, integrated feature of your outdoor living space. This process is about creating a seamless transition between your home, your yard, and your new relaxation spot. With a thoughtful design, you can make your swim spa area beautiful, functional, and uniquely yours. Here are nine ideas to get you started on creating a beautiful and functional area around your swim spa.

1. Build a Wraparound Deck or Elevated Platform

One of the best ways to make an above ground swim spa feel like a permanent, luxurious part of your yard is to build a deck around it. A multi-level or wraparound deck can completely hide the sides of the spa, giving it the appearance of an in-ground installation. This approach also provides easy, safe access and creates usable space for lounge chairs, planters, or a small table. You can use materials like wood or low-maintenance composite decking to match your home’s style. A well-designed deck makes your swim spa the true centerpiece of your backyard oasis, perfect for both relaxing and entertaining.

2. Lay a Stone or Porcelain Paver Patio

Creating a solid, stylish foundation around your swim spa is essential for both looks and function. A patio made from porcelain or natural stone pavers provides a durable, slip-resistant surface that stands up to splashes and foot traffic. Unlike grass, a paver patio means no mud or grass clippings getting tracked into your spa. With a huge variety of colors, shapes, and textures available, you can design a patio that perfectly complements your home and landscape. This creates a clean, polished look and a stable area for furniture, turning your spa zone into a complete outdoor room.

3. Add a Pergola or Pavilion for Shade and Style

A structure like a pergola or pavilion does more than just look great; it adds function and a sense of enclosure to your swim spa area. These structures provide welcome shade on sunny days and offer protection from light rain, extending the time you can enjoy your spa. You can hang string lights for evening ambiance, grow climbing vines for a touch of green, or add outdoor curtains for extra privacy. A pavilion or pergola adds a vertical architectural element that defines the space and makes it feel like a true outdoor retreat.

4. Use Raised Garden Beds and Flower Borders

To soften the hard lines of a swim spa, surround it with life and color. Building raised garden beds around the base is a clever way to conceal the spa’s exterior while adding lush greenery. You can construct the beds from stone, wood, or composite materials to match your deck or patio. Fill them with a mix of flowering plants, textured foliage, and fragrant herbs to create a sensory experience. This approach helps your swim spa blend more naturally into your yard’s landscape design and turns it into a vibrant, beautiful focal point.

5. Plant Evergreen Shrubs and Ornamental Grasses

For year-round beauty and privacy, choose your plants wisely. Evergreen shrubs like boxwood or arborvitae provide a consistent green screen that hides the spa and blocks views from neighbors. They look great in all seasons and require minimal upkeep once established. To add texture and movement, mix in some ornamental grasses. Their feathery plumes catch the breeze and create a soft, natural look that contrasts nicely with the hardscape. Choosing the right plants for your landscape ensures your spa area looks beautiful and feels private throughout the year.

6. Create Pathways with Decorative Stone or Gravel

Well-defined pathways are key to a functional and polished landscape design. A path leading to your swim spa keeps feet clean and protects your lawn from wear and tear. You can create beautiful walkways using materials like flagstone, pavers, or decorative gravel. A winding gravel path can add a rustic, organic feel, while a straight paver walkway offers a more formal, modern look. Using Gravelfix stabilization grids ensures your gravel path stays neat and tidy. These pathways connect your swim spa to other areas of your yard, like the patio or back door, creating a cohesive flow.

7. Install Synthetic Turf for a Low-Maintenance Lawn

If you want the look of a lush lawn without the constant upkeep, synthetic turf is an excellent choice for the area around your swim spa. It provides a soft, comfortable surface for bare feet and stays perfectly green all year long with no mowing, watering, or fertilizing. Best of all, you won’t have to worry about mud or grass clippings getting into your spa water. Synthetic turf is incredibly durable and drains quickly, making it a practical and attractive solution for creating a clean, usable space for relaxation and play.

8. Add Lighting for Evening Ambiance

Don’t let the sunset end your swim spa enjoyment. Thoughtful outdoor lighting can transform your space into a magical retreat after dark while also improving safety. You can hang elegant string lights from a pergola, install subtle path lights along your walkway, or use uplighting to highlight beautiful trees and plants. In-deck lighting can define the spa’s perimeter and prevent trips. A well-planned landscape lighting scheme creates a warm, inviting atmosphere, making your evening soaks feel even more special and extending the usability of your entire backyard.

9. Incorporate a Soothing Water Feature

Why stop at just one water feature? Adding a small fountain or a cascading waterfall near your swim spa can greatly enhance the relaxing atmosphere. The gentle sound of moving water is incredibly soothing and can help mask unwanted background noise from neighbors or traffic. This feature can be a standalone piece or integrated into the surrounding patio or garden beds. It adds another layer of sensory enjoyment to your space, complementing the main attraction of your swim spa or pool and turning your backyard into a true sanctuary of tranquility.

What Are the Best Plants and Materials for a Swim Spa?

Choosing the right plants and materials to surround your swim spa is about more than just looks. It’s about creating a functional, safe, and low-maintenance environment so you can spend more time relaxing and less time on upkeep. The right combination of softscaping and hardscaping will frame your spa beautifully and make the entire space more enjoyable. From lush greenery to elegant stone, let’s explore the best options for your backyard oasis.

Choose Low-Maintenance Shrubs and Grasses

You want plants that look great without demanding all your free time. Evergreen shrubs are a fantastic choice because they provide year-round color and structure, effectively hiding the spa’s walls while adding a touch of green. Consider planting varieties like boxwood or dwarf arborvitae. Ornamental grasses, such as fountain grass or feather reed grass, are another excellent option. They add soft texture and movement to the landscape and are incredibly resilient. The goal is to create a beautiful backdrop that doesn’t shed leaves into your spa, which is why an expert landscape design often prioritizes these clean, hardy plants.

Add Color with Water-Tolerant Flowers

While shrubs provide the foundation, flowers bring your spa area to life with vibrant color. Layering colorful flowering plants in front of your evergreens creates depth and visual interest. Choose perennials that are known to be water-tolerant, like daylilies, hostas, or black-eyed Susans, as they can handle occasional splashes from the spa. Before planting, it’s a good idea to lay down a layer of mulch. Mulch helps the soil retain moisture, reduces weed growth, and gives the garden beds a clean, finished look. This simple step makes your flower borders much easier to maintain throughout the season.

Select the Right Base: Pavers, Gravel, and Stone

The material you choose for the area immediately surrounding your swim spa is critical for safety and style. A patio provides a stable, slip-resistant surface for getting in and out of the spa. Porcelain and natural stone pavers are top-tier choices because they offer endless design possibilities and incredible durability. They create a sophisticated, high-end look that stands up to the elements. For pathways leading to the spa or as a decorative accent, consider using gravel. Modern stabilized gravel systems keep the stones in place, creating a tidy and comfortable walking surface that adds a natural, rustic texture to your design.

Know What to Avoid Planting Nearby

Just as important as what you plant is what you don’t plant. Avoid trees or shrubs that drop a lot of flowers, fruit, or needles, as they will create constant cleanup work in and around your spa. Also, steer clear of plants with aggressive root systems that could damage the spa’s foundation or surrounding patio over time. When it comes to materials, never place loose rocks, stones, or gravel directly against the spa wall. These materials can trap moisture and may even chip or corrode the spa’s exterior. Instead, use proper masonry techniques to build a small, supportive retaining wall or raised border to keep these materials contained.

How Do You Add Privacy Without Losing Style?

Your swim spa should be a personal retreat, a place where you can relax without feeling like you’re on display. Creating privacy is essential, but it doesn’t mean you have to build a fortress around your yard. The key is to blend privacy solutions into your landscape design so they feel intentional and beautiful. Instead of just blocking views, think about creating a secluded sanctuary. With the right combination of structures, fencing, and plants, you can screen your swim spa from neighbors while adding depth, texture, and style to your entire outdoor living space. This approach turns a practical need into a design opportunity, making your backyard feel more like a cohesive and intimate escape. When privacy is part of the overall vision, it enhances the sense of luxury and tranquility. It allows you to fully immerse yourself in the experience, whether you’re exercising, unwinding after a long day, or spending time with family. The goal is to make your private space feel expansive and inviting on the inside, not closed off and restrictive from the outside.

Choose Fencing That Complements Your Design

Fencing is often the first solution that comes to mind for privacy, and for good reason. It’s effective and clearly defines your space. But a fence doesn’t have to be a plain, solid wall. Think of it as a backdrop for your swim spa oasis. You can choose materials and styles that match your home’s architecture and your garden’s aesthetic. For example, a horizontal wood fence can create a modern, spa-like feel, while a classic white vinyl fence offers a clean, traditional look. There are many modern fencing options available, from aluminum to composite materials, that provide privacy without sacrificing style. Consider a fence with integrated lattice at the top to add visual interest while still blocking sightlines.

Use Pergolas and Lattices for Vertical Privacy

Sometimes, privacy is needed from above, especially if your yard is overlooked by neighboring windows. This is where vertical structures shine. A custom pergola not only adds an elegant architectural element but also creates a sense of place around your swim spa. You can add retractable shades, outdoor curtains, or fixed slats to the roof for adjustable privacy and sun protection. Lattice panels can also be incorporated into the sides of a pergola or used as standalone screens. These are perfect for supporting climbing vines like clematis or jasmine, which will eventually form a beautiful, living wall that offers natural screening and a lovely fragrance while you relax.

Plant for Natural, Year-Round Screening

For a softer, more organic approach, nothing beats using plants to create a natural privacy screen. The goal is to build layers that look lush and intentional. Start with a backbone of evergreen shrubs or trees, like Arborvitae or Holly, which provide dense, year-round coverage even in winter. This is a key part of a strategic landscape design. Then, you can layer in ornamental grasses, flowering shrubs, and perennials to add texture, color, and seasonal interest. Planting in staggered rows rather than a single straight line creates a more natural and effective visual barrier. This method not only hides your swim spa from view but also integrates it beautifully into the surrounding garden.

How Do Budget and Yard Size Affect Your Design?

Your budget and the size of your yard are the two main factors that will shape your swim spa project. But don’t think of them as limitations. Instead, see them as creative starting points. A smaller budget encourages smart, high-impact choices, while a compact yard challenges you to be efficient and clever with your design. On the other hand, a larger budget or yard opens up a world of possibilities for creating a true backyard resort. No matter your circumstances, a thoughtful plan is the key to creating a space you’ll love.

Ideas for a Modest Budget

Creating a beautiful setting for your swim spa doesn’t have to break the bank. You can achieve a polished look by focusing on simple, elegant materials. For example, creating a clean, modern patio area with affordable and durable gravel solutions can define the space beautifully. Instead of complex garden beds, consider using large, attractive planters filled with low-maintenance greenery. This adds color and texture without the cost of extensive garden installation. Smart planning allows you to build a stylish and functional swim spa environment that feels luxurious, proving that a great design is more about creativity than cost.

High-End and Luxury Upgrades

If your budget allows, you can transform your swim spa into the centerpiece of a luxurious outdoor retreat. Imagine your spa surrounded by an expansive patio made from exquisite porcelain and natural stone pavers, seamlessly connecting to a custom outdoor kitchen. You can integrate high-end features like powerful swimming jets or self-cleaning systems into the spa itself. For ultimate comfort and style, adding a custom pavilion or pergola provides shade and a stunning architectural element. You could even create a complete wellness zone by installing a sauna nearby, offering a perfect escape right in your backyard.

Landscaping a Small Backyard

In a smaller yard, the goal is to make the space feel open and uncluttered while maximizing functionality. A great strategy is to build vertically. A privacy fence, a trellis with climbing vines, or tall, slender shrubs can draw the eye upward and create a sense of seclusion. A line of evergreen shrubs is an excellent choice because it can hide the walls of the swim spa and provides beautiful greenery all year. Using light-colored pavers for your patio can also make the area feel larger and brighter. For a green, no-fuss lawn area, synthetic turf is a perfect space-saving solution that always looks pristine.

Designing for a Large Backyard

A large backyard gives you the freedom to dream big and create distinct “zones” for different activities. Your swim spa can be the heart of a dedicated relaxation zone, perhaps built into a multi-level deck or surrounded by a sprawling stone patio. You can connect these areas with grand, winding pathways made from natural stone or decorative gravel. With more space, you can incorporate larger structures, like a complete outdoor kitchen or a dining area under a large pavilion. You could even add other recreational features, like a putting green or one of our Sports Games Courts, to create the ultimate entertainment hub for family and friends.

What Landscaping Style Is Right for You?

Your swim spa is the main attraction, but the right landscaping style sets the entire mood for your backyard. Think about the feeling you want to create. Do you dream of a tropical getaway, a serene Zen retreat, or a space that feels like a natural extension of your Long Island home? Choosing a theme helps guide your decisions on plants, materials, and decor, ensuring every element works together to create a cohesive and beautiful outdoor oasis. Let’s explore a few popular styles to find the perfect fit for you.

Create a Tropical or Mediterranean Escape

To make your backyard feel like a permanent vacation, a tropical or Mediterranean theme is a fantastic choice. For a lush, tropical vibe, surround your swim spa with large-leafed plants like elephant ears and canna lilies. Layering is key here. You can use evergreen shrubs to hide the spa’s structure and keep things green all year, then add pops of vibrant, colorful flowers in front. For a Mediterranean feel, think about materials like travertine or light-colored porcelain pavers. These options create a bright, sun-drenched look that pairs beautifully with lavender, rosemary, and ornamental grasses. It’s all about creating a rich, inviting atmosphere that feels worlds away.

Embrace a Modern or Zen Garden Approach

If you prefer clean lines and a sense of calm, a modern or Zen-inspired design is ideal. This style focuses on simplicity and the beauty of natural elements. Think minimalist. Decorate the area around your swim spa with carefully chosen plants, smooth stones, and sleek wood or tile accents. A limited color palette of greens, grays, and whites creates a tranquil feeling. A structured pavilion or pergola can add a strong architectural element that complements the modern aesthetic while providing shade. The goal is to design an uncluttered, peaceful space where you can truly unwind and escape from the everyday hustle.

Design a Naturalistic, Seamless Landscape

For a swim spa that looks like it has always been part of your yard, a naturalistic approach is perfect. This style aims to blend the spa seamlessly into its surroundings. Use local plants and materials that feel native to Long Island to create a cohesive look. You can place large, natural stones around the base of your above ground swim spa to give it a rustic, integrated feel. Our expert masonry services can help you build a custom stone surround that makes your spa look like a natural hot spring. This approach turns your backyard into a beautiful, functional space for family time and entertaining.

Frequently Asked Questions

How can I make my above-ground swim spa look more integrated and less like it was just dropped in my yard? The key is to build up the surrounding landscape to meet the height of the spa. Creating a multi-level deck or a raised stone patio around it can make the spa appear built-in, giving it a permanent and polished look. You can also use raised garden beds built against the spa’s base to soften the edges with lush greenery. These strategies help blend the spa into your yard, making it feel like a cohesive and intentional part of your outdoor living space.

What is the most critical first step before any landscaping begins? Before you think about plants or patios, you must ensure you have a proper foundation. A swim spa is incredibly heavy when filled with water, so it needs a perfectly level and reinforced concrete slab or a specially engineered deck to support it. Proper site preparation also includes planning for drainage to direct splash-out away from the spa and your home’s foundation. Getting this step right is essential for the safety and longevity of your entire project.

I have a small backyard. Will landscaping around a swim spa make it feel even more cramped? Not at all, if you design it thoughtfully. In a smaller space, the trick is to think vertically. Using tall, slender plants like arborvitae or installing a stylish privacy screen can draw the eye upward and create a sense of seclusion without taking up much ground space. Choosing light-colored pavers for a small patio can also make the area feel more open and bright. A smart design will make your small yard feel like a functional and intimate retreat.

How do I choose plants that won’t create a huge mess or damage the spa? You want to select plants that are clean and have non-aggressive root systems. Evergreen shrubs and ornamental grasses are excellent choices because they provide year-round color and texture without dropping a lot of leaves into your water. Avoid planting large trees nearby, as their roots can disrupt the foundation over time. Also, steer clear of plants that shed a lot of flowers or fruit to minimize your cleaning duties and keep your filter system happy.

Can I landscape my swim spa area myself, or should I hire a professional? While you can certainly handle smaller tasks like arranging container plants or adding decorative lights, the core elements of a swim spa installation often require professional expertise. Projects involving a concrete foundation, extensive masonry, multi-level decking, and proper drainage are best left to experienced contractors. A professional designer can also help you create a cohesive plan that pulls all the elements together, ensuring your investment is both beautiful and built to last.

Contractors renovating an existing in-ground swimming pool with new gunite finish, coping and travertine deck

Pool Renovation on Long Island: Remodel vs Repair

An aging Long Island pool does not automatically need to be demolished. Cracked finishes, outdated equipment, leaking plumbing, and a dated deck can point to different levels of work. The first decision is whether the pool needs structural repair, a cosmetic remodel, or a broader renovation plan.

Call Gappsi at (631) 831-3177 to discuss your pool renovation options.

A pool renovation restores an existing swimming pool while upgrading selected features such as the finish, tile, coping, equipment, deck, lighting, or layout, without automatically replacing the entire shell. The right scope begins with evaluating the shell, bond beam, plumbing, and surrounding surfaces.

That distinction matters on Long Island, where repeated repairs may justify a coordinated project, while a sound shell may make targeted improvements the more practical choice. Start by defining what renovation includes, then match the scope to the pool’s condition and your long-term plans.

What Counts as a Pool Renovation?

A full pool renovation is more than applying a new finish. It is a coordinated update to the surfaces, systems, and surrounding features that determine how the pool looks, performs, and fits the backyard. The work may remain largely cosmetic, or it may include structural repairs and infrastructure upgrades after an inspection identifies underlying problems.

For a gunite pool in Nassau or Suffolk County, the scope should be defined before demolition begins. A contractor should evaluate the shell, waterline, equipment pad, plumbing, coping, and deck as connected parts of one system. If cracks or other structural problems are present, they need to be addressed before resurfacing. Covering a shell issue with a new finish can leave the cause unresolved and lead to another repair cycle.

The main components of a full renovation

  • Interior finish: The existing surface may be replaced with plaster, a pebble-based finish, or quartz. The material affects the pool’s appearance, texture, maintenance needs, and the time between major refinishing projects.
  • Waterline tile: New ceramic, porcelain, glass, or stone tile can refresh the waterline and create a more deliberate connection between the pool, coping, and deck. Tile selection also affects long-term cleaning and maintenance.
  • Coping: Replacing the edge material updates the pool’s profile and provides a clean transition to the surrounding hardscape. Coping can be coordinated with natural stone, travertine, or concrete pavers used elsewhere in the yard.
  • Equipment and plumbing: A renovation may include pumps, filters, heaters, automated controls, lighting, skimmers, main drains, or aging plumbing lines. Replacing inefficient equipment can reduce operating demands, while updating old underground lines may help prevent future leaks and disruptive excavation.
  • Deck and surrounding hardscape: Worn or cracked decking can be removed and replaced as part of the project. Addressing the deck at the same time as the pool helps manage elevations, drainage, access, and the visual relationship between the pool and outdoor living areas.

Not every project needs every component. Replacing tile and coping can modernize an older pool without changing its structural shell, while a broader renovation may combine resurfacing, equipment updates, and deck replacement. Gappsi can also coordinate design decisions so the renovated pool works with the larger backyard rather than appearing like an isolated upgrade.

For a closer look at finish work, review Gappsi’s guide to gunite pool resurfacing and refinishing. The right scope depends on the pool’s condition, the homeowner’s goals, and whether the existing shell and supporting systems can continue serving the property.

Remodel vs Repair: How to Tell the Difference

The most important distinction in an aging pool is whether the problem is structural or primarily cosmetic. A cosmetic remodel can change the appearance and usability of a sound pool. Structural repair addresses the parts that hold, contain, and circulate the water. At Gappsi, that decision should begin with an assessment of the existing gunite shell, not with a finish sample.

What belongs in a structural repair?

Structural work comes first when the pool is showing signs of movement, water loss, or deterioration behind the visible finish. Cracks in the gunite shell can allow seepage and worsen over time. The bond beam, which supports the waterline tile and coping, also needs to be sound before resurfacing or replacing those finishes. If it is compromised, installing new tile over it only conceals the problem temporarily.

Older underground plumbing is another key consideration. Aging lines can develop leaks that are difficult to locate and expensive to reach after a new surface or deck has been installed. Replacing vulnerable plumbing during a planned project may prevent future excavation. Visible seepage, unexplained water loss, shifting around the pool, recurring leaks, or repeated repairs all warrant a professional shell and systems assessment before cosmetic decisions are made.

Some warning signs are easier to see at the waterline. Loose coping, cracked tile, rough plaster, flaking finishes, and worn decking may indicate that the pool is ready for renovation, but they do not prove that the shell needs rebuilding. The same visible symptom can have different causes. For example, a damaged tile line may reflect ordinary age, movement in the bond beam, or water intrusion behind the finish. A site inspection helps separate a surface replacement from a repair that must happen below it.

  • Structural repair tasks: repairing gunite shell cracks, evaluating seepage or shifting, verifying bond beam integrity, and addressing aging underground plumbing.
  • Systems-related repairs: investigating circulation problems, plumbing leaks, and equipment issues that affect how the pool operates.

What can a cosmetic remodel change?

When the shell and supporting structure are stable, a cosmetic remodel can produce a substantial change without rebuilding the pool. Resurfacing can replace a worn interior finish with plaster, pebble-based material, or quartz. New waterline tile and coping can update the edge, improve the transition around the pool, and change the overall character of the backyard. Tile material choices, including ceramic, porcelain, or stone, also affect long-term maintenance at the waterline.

  • Cosmetic remodel tasks: resurfacing the interior, replacing waterline tile, updating coping, and refreshing the pool’s visible finishes.
  • Broader upgrades: replacing outdated equipment, improving lighting, or changing surrounding elements when they can be completed without correcting a shell defect.

A major remodel can cross both categories. Adding a tanning ledge, waterfall, or different pool shape may require significant structural modification, even when the original shell is mostly sound. That is why Gappsi evaluates the structure, plumbing, intended design, and surrounding site as one project. The right pool renovation does not simply cover old surfaces. It resolves underlying defects first, then applies cosmetic finishes.

What Are the Biggest Cost Drivers in a Pool Renovation?

How much does a pool renovation cost on Long Island? There is no responsible one-size-fits-all answer. A limited cosmetic remodel may begin in the lower thousands, while a larger renovation involving structural work, new decking, plumbing, and equipment can reach $30,000 or more. The pool’s size, age, shell condition, finish selections, and access to the property all affect the estimate. For perspective, Gappsi’s published baseline for a new gunite swimming pool on Long Island is $90,000 to $140,000. A renovation that preserves a sound shell is therefore evaluated differently from a full replacement.

The first major cost driver is the interior finish. Standard plaster, pebble-based finishes, and quartz each have different material, installation, and service-life considerations. Waterline tile and coping also affect the budget. Ceramic, porcelain, and stone tile vary in both appearance and maintenance needs. You can review a detailed guide to inground pool remodel cost before comparing finish packages.

Shell condition comes before appearance. Cracks, seepage, shifting, or a compromised bond beam must be assessed before resurfacing or replacing coping. Aging underground plumbing can add excavation and repair work, but replacing problematic lines during the project may help prevent future leaks. The scope may also expand when an older pool has outdated electrical components, filtration, or circulation equipment.

Equipment upgrades are another important variable. Replacing an inefficient pump with a variable-speed model can reduce electricity use, particularly in New York’s high-energy-cost environment. A heat pump, updated filter, automation, LED lighting, or saltwater conversion adds an upfront cost while changing how the pool operates and is maintained. Deck and coping work can become a substantial portion of the project when concrete, pavers, travertine, or other surrounding materials must be removed and rebuilt.

Typical pool project scopes and planning ranges
Scope Typical work General cost range Typical timeline
Cosmetic remodel Resurfacing, selected tile, coping, or equipment updates on a sound shell. Often lower thousands to tens of thousands, depending on materials. Several weeks
Full renovation Finish, tile, coping, plumbing or structural repairs, equipment, and portions of the deck. Often $30,000 or more when multiple systems are involved. Several weeks to a few months
Full replacement Demolition, excavation, new shell, new systems, finishes, and surrounding work. New gunite construction commonly falls near the $90,000-$140,000 Long Island baseline. Multiple months, subject to permits and weather

For additional context, see Gappsi’s guide to gunite swimming pool cost on Long Island. An on-site assessment is the only reliable way to separate a manageable remodel from a project that approaches replacement scope.

When Should You Renovate Your Pool Instead of Replacing It?

For many Long Island homeowners, the choice between remodeling a pool and building a new one is clear: renovating is more affordable when the existing shell remains structurally sound. Keeping that foundation avoids demolition, excavation, and the cost of constructing an entirely new pool. The right choice, however, depends on more than the age or appearance of the pool.

A gunite pool often gives homeowners a strong starting point for a redesign. Its concrete shell can support changes to the layout, finishes, and features, allowing a renovation to solve functional problems while updating the backyard’s appearance. Gappsi can help homeowners evaluate the existing pool alongside the surrounding patio, landscaping, and outdoor living areas through Long Island swimming pool design and construction.

Renovation is often the better economic decision when:

  • The shell is stable, with no unresolved cracking, shifting, or persistent seepage.
  • The pool’s shape and location still work for the backyard and how your household uses it.
  • Recurring repairs, aging finishes, or outdated equipment are creating a pattern of expense.
  • You want meaningful improvements without paying to remove and rebuild the entire structure.

Frequent repairs deserve special attention. Fixing one leak, finish failure, or equipment problem at a time may appear less expensive initially. Repeated service costs can add up without improving the pool as a whole. When repairs become frequent, a coordinated pool renovation may be more economical over the long term. A single project can address the finish, coping, tile, circulation system, and other related issues according to one plan.

Renovation does not necessarily mean preserving every dimension. A major rehabilitation can incorporate a tanning ledge, water feature, or revised pool shape, although these changes require substantial structural work. That flexibility can make an existing gunite shell worth renovating, especially when its placement fits the property’s grading, access, and outdoor circulation better than a new excavation would.

The deciding input should be a professional shell assessment. Gappsi should inspect for visible seepage or shifting, confirm the condition of the bond beam that supports the tile and coping, and check whether old plumbing could lead to underground leaks. Cosmetic work should not cover an unresolved structural problem. Conversely, replacing a sound shell simply because the tile, coping, surface, or equipment is dated can create unnecessary construction costs.

Call (631) 831-3177 to discuss your pool renovation with Gappsi

Replacement becomes more reasonable when the shell has extensive structural failure. The pool’s location no longer suits the property, or the desired redesign would require rebuilding nearly every component. An on-site evaluation can compare those costs with a renovation plan and give you a practical basis for deciding rather than relying on appearance alone.

Pool Renovation Upgrades That Add the Most Value

The most useful upgrades do more than change the appearance of an older pool. They can simplify routine care, improve how the space is used, and connect the pool to the rest of the backyard. During a renovation, Gappsi evaluates the existing shell, equipment, deck, and surrounding landscape together so each improvement supports the overall design.

  • Saltwater conversion: A saltwater system can make pool care more convenient and provide a softer water feel. It is not maintenance-free, but it can reduce the need to handle and add certain chemicals manually. Gappsi can assess whether the existing equipment and plumbing are suitable for the conversion.
  • LED pool lighting: Replacing older lights with LED fixtures improves evening visibility while using an efficient lighting format. Homeowners can also choose adjustable color settings to create a more flexible atmosphere for swimming, entertaining, or quiet evenings outdoors. Older underwater lights and wiring should be inspected as part of the renovation.
  • Automation and control systems: A centralized control system can bring filtration, heating, and lighting into one interface. Remote controls make it easier to adjust settings before using the pool, monitor routine operation, and avoid unnecessary equipment run time. This is especially useful when several systems were installed at different times.
  • Tanning ledges and in-pool seating: A shallow ledge creates a place to sit, cool off, or supervise children without using the deeper swimming area. Built-in seating can make the pool more comfortable for conversation. These additions may require substantial structural modification, so they belong in the design phase rather than as an afterthought.
  • Pool deck and landscape integration: A renovated pool can look disconnected if the surrounding paving, planting, drainage, and outdoor living areas remain unchanged. Coordinating the pool edge with travertine, natural stone, or concrete pavers creates a clearer transition from water to patio. Homeowners planning new or restored pavers can also review Gappsi’s guide to sealing pool deck pavers.

Contractor installing natural travertine pavers around a renovated in-ground swimming pool

Landscape integration can include planting beds, shade, walkways, an outdoor kitchen, or a seating area that follows the pool’s geometry. Gappsi’s design-build approach helps coordinate those decisions with the pool renovation instead of forcing separate contractors to work around completed surfaces. The result is a backyard that functions as one outdoor living space, with materials and elevations selected for practical use as well as visual continuity.

Prioritize upgrades according to the condition of the pool and the way your household uses it. A failing system or unsafe light circuit deserves attention before decorative features. Once the essential work is planned, design additions such as a ledge, lighting, and coordinated paving can make the renovated pool more useful for years to come.

How Long Does a Pool Renovation Take on Long Island?

There is no single schedule for every pool renovation. A simple finish replacement may move faster than a project that includes shell repairs, new plumbing, a redesigned deck, and updated landscaping. On Long Island, the most reliable timeline comes from evaluating the pool first, confirming the scope, and planning around permits and seasonal conditions. Gappsi maps those dependencies before construction begins so homeowners know what happens next.

  1. Site assessment and design: Gappsi inspects the existing pool, surrounding deck, equipment, drainage, and visible finishes. The design phase establishes whether the project is a focused update or a broader remodel, including decisions about tile, coping, surface materials, lighting, and usable backyard space.
  2. Permitting and planning: Permit requirements and review times can affect the start date. Long Island weather also matters, because cold temperatures, rain, and seasonal work limitations can change the construction sequence. The schedule should allow time for approvals, material selections, deliveries, and coordination with any masonry or landscape work.
  3. Demolition and structural repair: Existing finishes, damaged tile, coping, or sections of deck are removed as needed. Before cosmetic work proceeds, the pool shell and bond beam should be assessed. Cracks, shifting, seepage, or other structural concerns need attention first, rather than being covered by a new finish.
  4. Resurfacing, tile, and coping: Once the base is ready, the crew installs the selected interior finish and replaces waterline tile or coping where included. Material choices such as plaster, pebble, quartz, ceramic, porcelain, or stone affect both the appearance and the installation sequence.
  5. Equipment upgrades: Pumps, filters, heaters, plumbing, lighting, and controls are updated according to the approved plan. Replacing aging equipment or underground lines may add work to the schedule, but it can reduce the risk of future leaks and avoid reopening finished areas later.
  6. Deck and landscaping: Deck removal, new pavers or stone, drainage adjustments, planting, and other outdoor improvements follow the pool work when the design includes them. Coordinating these elements with Gappsi helps create a connected backyard instead of treating the pool as an isolated feature.
  7. Fill, finish, and startup: The pool is filled, systems are started, water chemistry is balanced, and the completed work is inspected. Proper balancing protects new surfaces and equipment. For Long Island homeowners, winterization and freeze-thaw protection should also be part of the care plan, especially if the project is completed near the end of the season.

Freshly resurfaced in-ground swimming pool with new quartz finish and ceramic tile waterline

In practical terms, a limited update may take less time than a complete renovation, while structural repairs and full backyard changes extend the schedule. The right answer to how long a pool renovation takes comes after an on-site assessment, not from a fixed promise. Gappsi can separate permitting, construction, and finishing milestones so the plan reflects the actual condition of your Long Island pool.

Call (631) 831-3177 to schedule your pool renovation with Gappsi

Frequently Asked Questions

Can you remodel an existing pool without rebuilding it?

In many cases, yes. A renovation can preserve the existing shell while updating the finish, tile, coping, decking, plumbing, lighting, and equipment. A professional shell assessment should come first if you see seepage, shifting, or recurring leaks.

How do I know whether my pool needs repair or a full renovation?

Cracks in the gunite shell, bond beam concerns, underground plumbing leaks, or movement call for structural evaluation before cosmetic work. If the shell is sound but the surface, coping, tile, deck, or equipment is worn, a focused remodel may address the problem without replacing the structure.

What typically affects the cost of a pool renovation?

The main variables are pool size, age, shell condition, finish materials, deck work, plumbing access, equipment selection, and design changes. Replacing a variable-speed pump, heater, or controls adds a different cost than resurfacing alone, so an on-site assessment is more useful than a broad online estimate.

Is renovating usually less expensive than building a new pool?

Often, renovation costs less because the project can retain the existing shell and avoid full demolition, excavation, and new construction. Replacement may deserve consideration when structural problems are extensive or the existing layout cannot support the way your family wants to use the backyard.

How long does a pool renovation take on Long Island?

There is no single timeline. Resurfacing or an equipment swap is generally simpler than a project involving structural repairs, new decking, or a changed pool shape. Permitting and seasonal weather can also affect scheduling, so your contractor should provide a phase-by-phase timeline after inspecting the pool.

Ready to Plan Your Pool Renovation?

A clear evaluation can help you separate structural repairs from cosmetic improvements and choose a renovation scope that fits your existing pool. Gappsi can help you review the pool’s condition, discuss design options, and map the next practical steps for your Long Island backyard.

Schedule a free pool renovation consultation by calling Gappsi at (631) 831-3177

Luxury Long Island backyard swimming pool with a natural stone rock waterfall cascading into the water

Pool Waterfall Design and Installation Guide

A water feature can change how a pool looks, sounds, and feels without taking over the entire backyard. The right design connects moving water with the pool, surrounding stonework, planting, and the way your family uses the space.

Call Gappsi at (631) 831-3177 to start planning a pool waterfall for your backyard.

A pool waterfall can serve as a visual focal point, add the sound of moving water, and create a more intentional transition between the pool and landscape. The best result depends on scale, water flow, materials, placement, and proper coordination of pumps and plumbing.

For Long Island homeowners, that planning matters. A natural-rock spillway may suit a garden-inspired setting, while a clean sheet fall can complement contemporary paving and architectural lines. Gappsi uses design-build experience and 3D visualization to evaluate those choices before installation, including how the feature will work with gunite or vinyl construction. The first decision is not which feature looks most impressive, but how it will support the way you want to use your backyard.

Why Add a Pool Waterfall to Your Backyard

A well-designed waterfall changes how a backyard feels before anyone enters the water. The movement, sound, and texture create a stronger connection between the pool, patio, planting beds, and surrounding hardscape. Instead of treating the pool as a separate rectangle, Gappsi can use a pool waterfall as a focal point that helps the entire outdoor space feel more intentional.

Moving water can make the pool area more relaxing. The steady sound of a cascade may soften the noise of nearby streets, neighbors, or outdoor equipment. It also gives the space a natural rhythm that can make quiet afternoons, evening swims, and time spent beside the pool feel more private. Adjustable flow can let homeowners choose a gentle spill or a stronger cascade when they want more sound and movement.

The feature can also support an active, restorative backyard routine. A waterfall does not replace exercise or medical care, but a pool provides a low-impact setting for movement. Mayo Clinic notes that aquatic exercise is gentle on bones, joints, and muscles, while research indexed by PubMed describes aquatic exercise in fitness and rehabilitation settings. A review in the National Library of Medicine also discusses hydrotherapy for musculoskeletal rehabilitation. The waterfall adds atmosphere to that experience, helping the pool feel more like a therapeutic retreat than a basic recreational feature.

Visual interest is another practical benefit. Natural boulders, river stone, a gunite ledge, or a clean sheet of water can become functional art in the landscape. The feature remains visible when the pool is not in use, especially when its shape is coordinated with planting, retaining walls, pavers, and evening lighting. A thoughtfully integrated water feature can strengthen curb appeal and contribute to the perceived value of an outdoor living area. Although resale outcomes depend on the property and the quality of the overall installation.

Gappsi approaches the waterfall as part of the complete pool design, not as an attachment added at the end. Its design-build team can coordinate the feature with the pool structure, circulation equipment, deck materials, and landscape layout. Homeowners comparing options can review these swimming pool water feature ideas before deciding whether a rock cascade, sheer descent, or another water effect fits their yard.

A pool waterfall is worth considering when you want sound, movement, and a defined visual anchor in one feature. The right scale and placement matter more than adding the largest possible cascade.

Call Gappsi at (631) 831-3177 to discuss your pool waterfall design.

Types of Pool Waterfalls and Water Features

The right feature depends on the pool’s architecture, the surrounding hardscape, and the kind of movement you want to see and hear. A modern pool waterfall may use a narrow stainless-steel opening for a clean sheet of water, while a natural design can layer boulders and river stone to resemble a mountain stream. Other features create upward movement, illuminated arcs, or a quiet visual accent without a large cascade.

Luxury residential pool with a natural rock waterfall cascading into the water

Gappsi’s design-build team can coordinate the structure, plumbing, pump, lighting, and finish as one system. That matters because a feature is not only a visual element. Its flow rate, landing point, operating controls, and relationship to the pool deck all affect how it performs.

Type Look Best For Key Note
Sheer descent A smooth, narrow sheet of falling water Contemporary pools, raised walls, and spas Creates a defined edge and can be paired with LED lighting.
Rain curtain A uniform veil of water from a linear opening Minimalist designs and broad visual effects Its clean, sheer appearance suits a sleek pool environment.
Grotto or rock waterfall Layered stone, boulders, and irregular cascades Naturalistic yards and resort-inspired landscapes Boulders and river stone can mimic a mountain stream.
Deck jets Several smooth streams arcing from the deck Family pools and animated perimeter accents Typical arcs reach about 4 to 5 feet, depending on design and flow.
Bubblers Gentle upward plumes of water Tanning ledges and shallow areas Add movement without the volume of a larger cascade.
Fountains Vertical or rounded sprays Standalone focal points and formal layouts Can be sized to complement, rather than dominate, the pool.
Water bowls Water spilling from a raised vessel Geometric walls and structured patios Provides a strong architectural accent with a compact footprint.
Laminars A clear, glass-like arc of water Modern pools and nighttime displays They can reach about 6 to 8 feet and maintain a precise arc when properly designed.

The distinction between natural and modern features is not absolute. A stone spillway can use concealed LED lighting, and a sleek sheer descent can pour from a wall faced with natural stone. LED illumination highlights moving water after sunset, while adjustable flow lets homeowners change the sound and intensity for swimming, entertaining, or quieter evenings. Gappsi can also evaluate whether a feature should pour into the main pool, an attached spa. Or a tanning ledge, then design the surrounding surfaces to support safe use and limit splashout.

For more design direction, review these swimming pool water feature ideas or explore Gappsi’s examples of a sheer descent water feature.

How Much Does a Pool Waterfall Cost?

The cost of a pool waterfall depends less on a single feature label and more on the design decisions behind it. A short, simple spillway added to an existing pool is a different investment from a large natural-rock structure with multiple cascades, integrated lighting, and dedicated equipment. For that reason, a responsible estimate should be presented as a general investment range after the feature has been designed, rather than as an exact price that may not fit the property.

On Long Island, Gappsi’s published baseline for a complete gunite swimming pool build is $90,000 to $140,000. A waterfall is only one component of that larger project, so its feature-only cost should not be confused with the cost of building the pool itself. When a waterfall is being added to an existing pool, the scope may also include modifications that would not apply during new construction.

  • Feature size and shape: A narrow sheet fall or compact spillway generally requires less structure and water volume than a wide cascade, raised wall, grotto, or multi-tiered rock formation.
  • Material selection: Natural stone, boulders, and river rock involve different preparation and installation requirements than cast concrete. Stainless steel components can create a clean, contemporary edge, but fabrication and finish details affect the budget.
  • Pump and plumbing: The pump must deliver the intended flow without excessive noise, splash, or strain. Larger features may require dedicated plumbing, additional drains, structural support, and engineering review.
  • Lighting and controls: LED lighting adds an evening dimension, while automation can schedule operation and adjust when the feature runs. These upgrades add to the initial scope but can make the system easier to manage.

Operating cost matters as well. Energy-efficient waterfall pumps can reduce the cost of running the feature, especially when paired with timers or automation that prevents unnecessary operation. Proper sizing is important because an oversized system may use more energy than the design requires, while an undersized pump may fail to produce the intended flow.

A well-designed waterfall can also contribute to the property’s outdoor appeal by creating a strong focal point and improving the character of the poolscape. That potential property-value return is not guaranteed and should not be treated as a dollar-for-dollar payback. The better approach is to choose a feature whose scale, materials, sound, and maintenance requirements make sense for the home. Gappsi can evaluate the pool, surrounding hardscape, and equipment needs before preparing a project-specific scope.

Where to Place a Pool Waterfall for Best Effect

Placement determines whether a waterfall feels like an intentional part of the pool or an accessory added afterward. Start by considering how people use the space, where the feature will be visible from the house, and how its sound will carry across the yard. A well-planned feature can also improve water movement. As water returns to the pool, it helps distribute sanitizers and reduce stagnant zones, provided the pump, plumbing, and circulation plan are properly sized.

For many Long Island backyards, the most direct option is a spillway that pours into the main swimming area. This creates a clear focal point and lets swimmers enjoy the sound and movement from inside the pool. The waterfall can also be positioned along a raised bond beam, retaining wall, or elevated natural-stone formation so it connects visually with the surrounding patio and landscape. Gappsi’s waterfall builders on Long Island case study shows how a moss rock design can be integrated into a broader outdoor setting.

Should the Waterfall Pour Into the Pool, Spa, or Tanning Ledge?

The receiving area changes both the experience and the scale of the installation. A cascade into the main pool creates a prominent visual anchor. A spillway from a raised spa adds movement while reinforcing the spa’s separation from the swimming area. A smaller flow into an attached tanning ledge can provide a gentler effect for shallow-water lounging without the volume or drop of a large rock waterfall. These options can be combined, but each requires coordinated elevations and plumbing so water reaches the intended basin without excessive turbulence.

Keep the landing point close enough to the receiving water to control splashout and water loss. A high drop, strong flow, or narrow landing zone can send water onto the deck, increase evaporation, and create a wet path around the pool. Flow controls and correctly selected pump capacity allow the effect to be adjusted for quiet evenings or more active entertaining. The design should also include non-slip decking around areas likely to receive spray. Textured stone, concrete, or another slip-resistant surface is safer than a smooth finish where bare feet and water meet.

Finally, evaluate sightlines from the kitchen, seating areas, and interior rooms. A waterfall should contribute to the full landscape composition, not only look attractive from one end of the pool. Review additional Long Island poolscapes for examples of how pool edges, patios, planting, and water features can work together as one backyard plan.

How Do Water Features Integrate with Gunite and Vinyl Pools?

The pool shell and liner material influence how a water feature is designed, supported, and connected to circulation. A gunite pool gives the builder more freedom to mold a raised wall, grotto, custom spillway, or integrated bench into the structure. A vinyl-lined pool can also support an attractive feature, but the installation usually relies on carefully selected surface-mounted or bolt-on components, such as spillways, bubblers, or a compact sheer descent. In either case, the feature should be planned with the pool, deck, drainage, and landscape rather than added as an afterthought.

Water movement begins with the equipment plan. Pump sizing and flow rates must match the width, height, and style of the feature. A narrow sheet fall needs a different flow pattern from a broad rock waterfall. Larger features may require dedicated plumbing, structural preparation, and engineering so the system delivers a consistent effect without creating excess splashout or placing stress on the pool wall. Adjustable valves can give homeowners practical control over the sound and appearance. From a quiet sheet during conversation to a stronger flow when the pool is being used as a focal point.

Material selection also affects how the feature fits the property. Natural stone, river rock, and hardscaping can make a gunite grotto or rock waterfall feel connected to surrounding patios and planting beds. A clean stainless steel or stone-faced sheer descent can create a more architectural transition from the coping into the water. Gappsi’s sheer descent water feature work illustrates how the edge detail and spillway shape contribute to the overall design.

  1. Design the complete setting. A professional 3D design integrates the feature with the pool shape, sightlines, hardscape, planting, lighting, and available equipment space. This is where the team can compare a molded gunite grotto with a vinyl-pool spillway or bubbler.
  2. Prepare the structure. Gunite features can be formed as part of the pool construction, with proper support, waterproofing, coping, and access for service. Vinyl installations need liner-safe details and a mounting approach that protects the liner and wall assembly.
  3. Plan the plumbing. The installer determines pipe routes, return locations, valves, drains, and service access. A larger pool waterfall may need separate plumbing instead of sharing an undersized return line.
  4. Size the pump and setup. Flow requirements are matched to the feature’s dimensions. Adjustable controls allow the homeowner to customize the water volume and reduce unnecessary pump demand when full flow is not needed.
  5. Install the finish materials. Stone, tile, metal, coping, and surrounding deck surfaces are fitted to manage water contact and complement the existing hardscape. Non-slip surfaces are especially important where splash may reach the deck.
  6. Test and fine-tune the system. Before completion, the team checks the flow pattern, splashout, level transitions, drainage, valves, lighting, and equipment operation. Adjustments at this stage help the feature run evenly and look intentional from the main viewing areas.

Pool Waterfall Maintenance and Winterization

Sheer descent pool waterfall feature with clean water sheet arcing into a gunite pool

A waterfall stays attractive and dependable when its care is treated as part of the pool’s routine, not as a separate decoration. Start by removing leaves, twigs, and other debris from the basin, spillway, rocks, and catch points. Periodic brushing and surface cleaning also help limit algae growth, which can discolor stone and make the moving water look cloudy. The exact cleaning schedule depends on surrounding trees, weather, and how often the feature runs.

Because the feature typically shares water with the pool, maintenance also depends on the central filtration and disinfection system. Test the water according to your pool-care schedule and keep the chemistry balanced for the entire circulation system. Gappsi’s guidance notes that regular testing and chemical balancing are essential for both the pool and the feature. This approach supports clear water and helps distribute sanitizer through areas that might otherwise become stagnant. The CDC also emphasizes proper circulation and disinfection when operating aquatic facilities: review its pool operation and maintenance guidance.

Automated controls make daily operation easier. A timer can run the waterfall during the hours you use the backyard, then shut it off when the pool area is empty. Scheduling reduces unnecessary pump runtime while preserving the sound and visual movement you want. If the pump has adjustable flow, you can also select a quieter, lower-volume setting for ordinary circulation and increase the effect when entertaining.

Cold weather requires a separate plan in Long Island and other freezing climates. Before sustained freezing temperatures arrive, the feature should be shut down, drained, and prepared according to the equipment design. Associated plumbing and pump systems must be winterized so trapped water does not freeze, expand, and damage pipes, fittings, or equipment. Large rock features may also hold water in concealed channels, so winterization should cover the full assembly rather than only the visible spillway. Have the installer or pool professional identify drain points and confirm the correct restart procedure in spring.

Thoughtful maintenance protects the stonework, pump, plumbing, and water quality at the same time. Gappsi can account for access, drainage, controls, and seasonal protection when designing or servicing a feature.

Call Gappsi at (631) 831-3177 to plan a pool waterfall that is easier to maintain year-round.

Call Gappsi at (631) 831-3177 to learn which pool waterfall fits your pool and landscape.

Frequently Asked Questions

Can I add a waterfall to an existing pool?

Often, yes. The design depends on the pool structure, available space, equipment pad, plumbing access, and the intended location. A smaller sheet fall or bubbler may require less infrastructure than a large rock feature. Gappsi can evaluate the pool and surrounding hardscape, then use 3D planning to coordinate the feature with the deck, landscape, and existing circulation system.

How much do pool waterfalls cost?

There is no single price because the investment changes with the feature’s size, stone or finish, pump, plumbing, lighting, and installation conditions. A simple sheet fall and a boulder-and-river-stone waterfall represent different scopes. The most useful estimate comes from a design review that defines the desired water effect and the work required to integrate it.

Are pool waterfalls worth it?

For homeowners who want more than a swimming area, a waterfall can add movement, sound, and a clear focal point to the backyard. It can also support water circulation when properly designed. The feature is most worthwhile when its scale, flow, maintenance needs, and style fit the pool and landscape rather than being added as an isolated decoration.

What maintenance does a pool waterfall require?

Plan to clear debris, clean surfaces, monitor water chemistry, and check the pump and plumbing as part of regular pool care. Automatic controls can schedule operating times, while colder Long Island weather requires draining and winterizing the feature’s plumbing and equipment. Proper circulation and disinfection should be maintained whenever the feature is operating, consistent with CDC pool-operation guidance.

Ready to Plan Your Pool Waterfall?

A well-planned water feature can bring movement, sound, and a clear design focal point to your pool area. Gappsi can help you discuss the right waterfall style, placement, plumbing, and materials for your pool build. Call Gappsi at (631) 831-3177 to talk through your pool waterfall or water feature project.