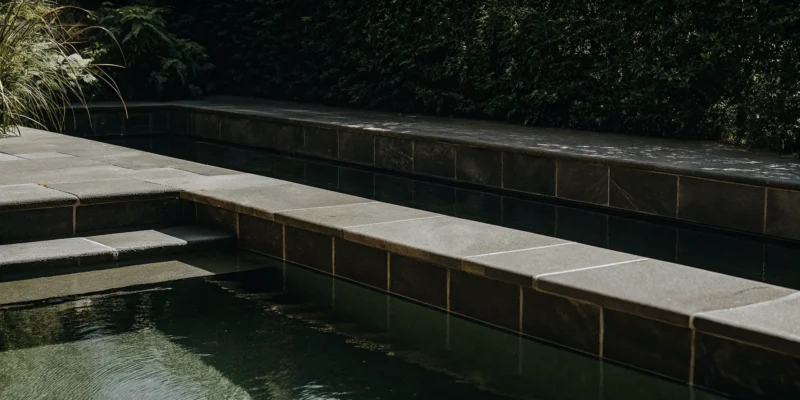
Light-colored natural stone coping surrounding a backyard pool on Long Island.

Your Guide to Natural Stone Pool Coping on Long Island

Your pool is the centerpiece of your backyard, and the coping is its frame. This single design choice ties your pool to the patio, deck, and your home’s overall style. Opting for natural stone is a way to create a truly unique and high-end finish. Unlike uniform pavers, each piece of stone has its own character, color, and texture, ensuring your pool area is one-of-a-kind. For those planning a project with natural stone pool coping Long Island, this guide covers the most popular and practical stone choices, what to expect for costs, and how to maintain your investment for lasting beauty.

Key Takeaways

  • Prioritize Function and Durability: Natural stone coping is a key safety feature, offering a slip-resistant edge while protecting your pool’s structure from water damage. It is also tough enough to withstand Long Island’s weather, making it a smart, long-term investment.
  • Balance Aesthetics with Practicality: Select a stone that complements your home’s style, but also consider its practical features. Lighter colors stay cooler for bare feet, and textured finishes like those on granite provide essential slip resistance for a safer pool area.
  • Budget for Quality and Upkeep: Your total cost includes the stone, expert installation, and potential structural repairs, so plan accordingly. To keep your coping beautiful, incorporate simple cleaning and periodic sealing (every one to three years) into your pool care routine to prevent stains and weather damage.

What Is Natural Stone Pool Coping?

If you’re planning a new pool or renovating an existing one, you’ve probably heard the term “pool coping.” Think of it as the finishing touch, the material that caps the top edge of your pool’s shell. Natural stone pool coping uses materials quarried from the earth to create this border, providing a beautiful and functional frame for your backyard oasis. It’s the surface you’ll grab onto when you pull yourself out of the water and the edge you’ll sit on to dip your feet on a warm summer day. This edge is a key design element that ties your pool to the surrounding patio or deck.

While many materials can be used for coping, natural stone offers a unique blend of elegance and durability that is hard to match. Popular choices for Long Island homes include granite, travertine, limestone, and bluestone. Each type of stone brings its own distinct color, texture, and character, allowing you to create a look that feels both timeless and personal. Unlike manufactured materials, no two pieces of natural stone are exactly alike, which means your pool will have a truly one-of-a-kind finish. This natural variation adds depth and sophistication, connecting your landscape to the environment in a way that precast concrete or brick simply can’t replicate.

Why Pool Coping Matters

Coping is much more than just a decorative border around your pool. It serves several critical functions that protect your investment and keep your family safe. First, it shields the top of your pool wall from the elements and prevents water from getting behind the pool shell, which could cause serious structural damage over time. It also helps direct splash-out water away from the pool and into deck drains, keeping your patio area drier and cleaner.

Most importantly, coping provides a safe, non-slip surface for walking and entering the pool. This is where material choice becomes essential. For example, granite has a naturally textured surface that offers excellent grip, even when it’s wet. Choosing the right coping is a key step in designing beautiful and secure swimming pools that you can enjoy with peace of mind for years to come.

How Natural Stone Compares to Other Coping Materials

Choosing the right coping is a big decision, and while natural stone is a stunning option, it’s smart to see how it compares to other popular materials. Every choice has its own look, feel, and set of benefits. Understanding the differences between natural stone and materials like concrete, porcelain, and brick will help you find the perfect match for your pool, your style, and your budget. Let’s walk through the key comparisons so you can feel confident in your final decision.

Natural Stone vs. Concrete

Concrete pavers are a common sight on Long Island, mostly because they are budget-friendly and come in many styles. If your primary concern is cost, concrete is an appealing choice. However, while stamped concrete can mimic the look of stone, it can’t replicate the authentic, one-of-a-kind character you get from the real thing. Each piece of natural stone has unique veining and texture that an engineered product simply can’t match.

When it comes to durability, high-quality natural stone often outperforms concrete in the long run, especially with our local freeze-thaw cycles. Gappsi’s expert masonry services ensure a perfect installation, whether you choose the natural beauty of stone or the versatility of concrete.

Natural Stone vs. Porcelain Pavers

Porcelain pavers are a modern favorite, known for being extremely dense, non-porous, and resistant to stains and fading. This makes them a very low-maintenance option for a busy pool area. While porcelain can convincingly imitate the appearance of natural stone, it sometimes lacks the organic texture and depth that makes stone feel so special underfoot. The beauty of natural stone is in its imperfections and natural variations.

Cost-wise, high-end porcelain can be in a similar price range to some natural stones. For example, premium travertine or bluestone coping can run from $40 to $60 per linear foot. You can explore both beautiful porcelain and natural stone options to see which material speaks to you.

Natural Stone vs. Brick

Brick coping offers a classic, traditional look that pairs beautifully with many architectural styles. It brings a sense of history and warmth to a poolside. However, when it comes to standing up to the elements, natural stone generally has the edge. Dense stones like granite are less porous than brick, making them more resistant to water absorption and the spalling (flaking) that can occur during freezing winters.

While brick provides a uniform color and texture, natural stone offers a much wider spectrum of colors, patterns, and finishes, from rustic and rugged to sleek and smooth. Proper care is key for both materials, and knowing how to restore and seal your coping will keep it looking great for years.

The Best Natural Stone Options for Your Pool

Choosing the right natural stone is one of the most exciting parts of designing your pool area. Each stone has a unique personality, offering a different look, feel, and set of benefits. From the rugged strength of granite to the classic elegance of limestone, the best choice for your Long Island home depends on your personal style and how you plan to use your space. Let’s look at some of the most popular and reliable porcelain and natural stone options.

Granite

Granite is a fantastic all-around choice for pool coping, especially here on Long Island. It’s incredibly strong and has a naturally textured surface that provides excellent slip resistance, which is a huge plus for safety around a wet pool deck. This durable stone holds up beautifully against our harsh freeze-thaw cycles and resists damage from pool chemicals and constant foot traffic. Available in a variety of colors, granite offers a timeless, sophisticated look that complements any backyard design, from modern to traditional. It’s a practical and beautiful investment that will keep your pool area looking great for years.

Travertine

If you’re dreaming of a pool area with a touch of Mediterranean elegance, travertine is an excellent option. This popular stone is known for its beautiful, earthy tones, ranging from soft creams to warm tans and rich browns. One of its best features is that it stays relatively cool to the touch, even in direct summer sun, making it comfortable for bare feet. Travertine’s porous nature allows it to absorb water quickly, which helps keep the surface from getting too slippery. Its classic, luxurious feel can transform your backyard into a true oasis, perfect for relaxing and entertaining around your swimming pool.

Limestone

Limestone offers a classic, refined look that brings a sense of understated luxury to any poolscape. Its fine grain and consistent, soft color palette, often in shades of beige, gray, or white, create a clean and elegant finish. Like other natural stones, limestone is a durable material that can handle the elements well, making it a reliable choice for pool coping. It provides a smooth yet non-slip surface when properly finished. If you want to create a timeless, sophisticated atmosphere for your masonry project that feels both high-end and inviting, limestone is a wonderful material to consider for your pool’s edge.

Bluestone

Bluestone is a classic choice that delivers a distinct and iconic look, especially popular in the Northeast. Its signature blue-gray color can also feature beautiful variations of rust, green, and lilac, adding unique character to your pool area. This dense, durable sandstone is built to last and can withstand heavy use. It’s important to know that bluestone can absorb heat and get warm in direct sunlight, so it’s often best used in areas with some shade or paired with other materials. Proper sealing is also recommended to protect its rich color and prevent staining, ensuring it remains a stunning feature for years to come.

What Are the Benefits of Natural Stone Coping?

Choosing the right coping is a big decision, but natural stone offers a combination of beauty, durability, and safety that’s hard to beat. When you invest in natural stone, you’re not just finishing your pool edge; you’re adding a feature that brings several key advantages to your backyard oasis. From its ability to withstand the local climate to its timeless look, natural stone provides benefits that make it a top choice for Long Island homeowners.

Stands Up to Long Island Weather

Here on Long Island, our outdoor materials have to be tough. Natural stone is up for the challenge. It can handle our freezing winters and hot, sunny summers without cracking or fading. Unlike some other materials, it also holds up well against pool chemicals and constant foot traffic from summer pool parties. When you choose a durable option like granite or travertine, you’re getting a material that’s built to last for years, giving you peace of mind and a beautiful pool surround season after season. This durability makes natural stone pavers a smart, long-term investment for any local homeowner.

Provides a Safe, Slip-Resistant Surface

Safety is always a top priority around a swimming pool, especially with kids and guests running around. Natural stone provides an excellent slip-resistant surface, which is a huge plus. Many stones, like granite and travertine, have a naturally textured finish that offers good grip, even when the surface is wet from splashes. This inherent texture helps prevent slips and falls, making your pool area safer for everyone. Choosing a material that looks great and protects your family is a win-win. It’s a key reason why so many homeowners prefer natural stone for their swimming pools and patios.

Offers Timeless Style

Natural stone brings an elegance and sophistication to your pool that never goes out of style. Each piece is unique, with its own variations in color, veining, and texture, creating a look that is both organic and luxurious. Whether you prefer the classic look of travertine, the rich tones of bluestone, or the uniform strength of granite, there’s a stone to match your home’s aesthetic. This timeless appeal ensures your pool will look just as stunning in ten years as it does today. Our masonry design team can help you select the perfect stone to create a cohesive and beautiful outdoor living space.

Adds Long-Term Value to Your Home

A pool is a significant investment, and the materials you choose can directly impact your home’s value. While natural stone coping might have a higher initial cost than some alternatives, it pays off in the long run. Its incredible durability means you’ll spend less time and money on repairs and replacements down the road. Plus, the high-end, beautiful finish of natural stone is a major selling point for potential buyers if you ever decide to sell. Think of it as a lasting upgrade that enhances your enjoyment now and adds to your property’s value for the future. It’s a key part of any successful home remodeling project.

How Much Does Natural Stone Coping Cost?

Figuring out the budget for your pool project is a big step, and the coping is a key part of that puzzle. The cost of natural stone coping on Long Island can vary quite a bit, typically ranging from $15 to $60 per linear foot installed. Think of it as an investment in your home’s safety, style, and long-term value. While it might be tempting to cut corners here, choosing the right material and professional installation prevents costly repairs down the road.

The final price tag depends on a few main things: the type of stone you choose, the complexity of the installation, and local labor rates. High-end stones like travertine and granite will naturally be at the upper end of the price spectrum, but their durability and stunning appearance often justify the cost. We can help you explore a wide range of porcelain and natural stone options to find the perfect fit for your design vision and budget. Understanding these factors will help you plan more effectively and ensure there are no surprises along the way.

Cost Differences Between Stone Types

The type of stone you select is the biggest factor in your coping cost. On Long Island, premium natural stones like travertine or granite usually fall in the $40 to $60 per linear foot range. More common options might be closer to the lower end of the scale. This price difference comes down to the stone’s rarity, durability, and origin. A stone that is harder to quarry or has to be shipped from far away will cost more than a locally sourced one. Each stone has a unique character, so the price reflects not just its physical properties but also its aesthetic appeal. Your choice will ultimately balance the look you want with the budget you have.

What Factors Influence the Final Price?

Beyond the stone itself, several other elements affect the total cost. Materials typically make up about 40% to 50% of the final price, with the rest going toward labor. Here on Long Island, labor rates are higher than in many other areas, generally between $45 and $75 per hour. This is because skilled masons are in high demand. Other local factors, like needing deeper foundations to handle our winter frosts and higher shipping and insurance costs, also play a part. When you’re planning your swimming pool installation, it’s important to account for these regional variables to get a realistic estimate for your project.

Hidden Costs to Keep in Mind

When budgeting for natural stone coping, it’s smart to be aware of a few potential hidden costs. If you’re replacing old coping, it’s crucial to have a professional inspect the concrete beam underneath. If this beam is damaged, it must be repaired before the new coping is installed to prevent future problems. It might seem like a good idea to save money with a cheaper material, but lower-quality options often don’t withstand Long Island’s weather cycles. Investing in a durable stone like bluestone from the start can save you money in the long run. Proper restoration and sealing are also key to protecting your investment for years to come.

How to Choose the Right Natural Stone for Your Pool

Picking the perfect natural stone for your pool coping feels like a big decision, because it is. This is the finishing touch that frames your beautiful pool, and it needs to be both stunning and safe. It’s about finding that sweet spot where your design vision meets practical needs like durability and comfort. Don’t worry, it’s easier than it sounds when you break it down. By focusing on your pool’s overall design, the stone’s specific characteristics, and a few common pitfalls to sidestep, you can confidently select a material you’ll love for years. Let’s walk through the key things to consider.

Match the Stone to Your Pool’s Design

Your pool coping should feel like a natural extension of your backyard oasis, not an afterthought. Start by looking at the big picture: your home’s architecture, your patio materials, and your landscaping style. The goal is harmony. For a natural and elegant look, materials like travertine, limestone, granite, or bluestone are consistently popular choices. A sleek, modern home might call for the clean lines of granite, while a rustic farmhouse could be beautifully complemented by the earthy texture of bluestone. Take a look at different swimming pools to see how different coping stones create a distinct feel and tie the whole space together.

Select the Right Color, Finish, and Texture

Beyond the type of stone, its color and finish play a huge role in both looks and function. Lighter colors are a smart choice because they stay cooler under the hot summer sun, making them much more comfortable for bare feet. Texture is your best friend when it comes to safety. For instance, granite often has a naturally rough surface that provides excellent slip resistance, even when it’s wet from splashes. You’ll also see options like “honed,” “flamed,” or “tumbled” finishes. Each offers a different level of texture and visual appeal, so it’s important to see and feel the natural stone options in person to understand what works best for your family.

Avoid These Common Selection Mistakes

Making a confident choice also means knowing what to avoid. One of the most common mistakes homeowners make is choosing a stone based only on the lowest price. While budget is important, the cheapest option may not be durable enough for Long Island weather, leading to costly repairs down the road. Another pitfall is selecting a material that clashes with your existing patio or deck, creating a disjointed look. Finally, if you’re replacing old coping, don’t ignore the structure underneath. Overlooking necessary beam repairs during a replacement can cause serious problems later. Working with an expert in masonry ensures these foundational issues are addressed correctly from the start.

How to Maintain Your Natural Stone Coping

Your natural stone coping is a durable, long-lasting choice, but a little routine care will keep it looking brand new for years. Thankfully, maintenance is straightforward and doesn’t require a lot of time. By staying on top of cleaning, sealing, and minor repairs, you protect your investment and ensure your pool area remains a stunning, safe centerpiece for your Long Island home.

Think of it as part of your regular pool care routine. A few simple steps each season will prevent buildup, protect the stone from the elements, and stop small issues from becoming big problems. This proactive approach keeps your coping beautiful and functional, so you can spend more time enjoying your pool and less time worrying about its upkeep. With the right care, your natural stone will continue to add value and style to your backyard oasis.

Simple Tips for Routine Cleaning

Keeping your natural stone coping clean is easier than you might think. The best strategy is to prevent dirt and grime from settling in the first place. Make it a habit to sweep away leaves, twigs, and other debris regularly, especially after a storm. This simple step prevents organic matter from staining the stone. A quick rinse with a garden hose can also wash away loose dirt and pollen.

For a deeper clean, use a pH-neutral cleaner designed for natural stone or a simple mixture of mild dish soap and warm water. Gently scrub the surface with a soft-bristle brush, then rinse thoroughly to remove any soap residue. Avoid using acidic or abrasive cleaners, like vinegar or bleach, as they can etch and damage the stone’s surface. If you encounter stubborn stains, our team offers professional restoration and sealing services to bring your stone back to life.

Know When and How to Seal Your Stone

Sealing is your stone’s best defense against the elements. A quality sealant creates an invisible barrier that repels water, pool chemicals, and oils, preventing them from soaking into the porous stone and causing stains or damage. For Long Island homeowners, sealing is especially important to protect against the freeze-thaw cycles of winter, which can cause moisture inside the stone to expand and create cracks.

Most natural stone coping should be sealed upon installation and then resealed every one to three years, depending on the type of stone and the amount of traffic it gets. A good way to test if it’s time to reseal is to sprinkle some water on the surface. If it beads up, your sealant is still working. If it soaks in and darkens the stone, it’s time for a fresh coat. While DIY kits are available, professional swimming pool services ensure the job is done right for maximum protection.

How to Spot and Fix Damage Early

Regularly inspecting your pool coping is the key to catching minor issues before they become costly repairs. A few times a season, take a slow walk around your pool and look closely at the stone and the mortar joints between them. Pay attention to small cracks, chips, or any areas that look discolored or worn. Also, check for any loose or shifting stones, as this could indicate a problem with the underlying structure.

If you spot a small crack or a crumbling mortar joint, it’s best to address it quickly. Maintaining the proper chemical balance in your pool is also crucial, as imbalanced water can slowly degrade both the stone and the mortar. For any damage that seems beyond a simple fix, it’s wise to call in an expert. Our masonry team can assess the damage and perform seamless repairs, ensuring the integrity and beauty of your pool coping for years to come.

Find the Best Natural Stone Supplier on Long Island

Choosing the right supplier is just as important as selecting the perfect stone. A great partner will not only provide high-quality materials but also offer the expertise to ensure your project is a success from start to finish. When you’re investing in your home, you want to work with someone who understands your vision and has the resources to bring it to life. Here on Long Island, that means finding a supplier who knows the local environment and can guide you to the best choices for a lasting, beautiful pool deck.

What to Look For in a Local Supplier

Your search should start with quality and selection. A reputable supplier will have a diverse inventory, giving you plenty of options to match your home’s aesthetic. Look for a company that offers a wide selection of materials, from classic travertine to durable granite and even sleek porcelain alternatives. Don’t just rely on small samples; ask to see full-size slabs or view a portfolio of completed projects. This gives you a much better sense of how the stone’s color and texture will look on a larger scale. A supplier with a physical showroom, like the Gappsi Store, is a huge plus because you can see and feel the materials for yourself before making a final decision.

Questions to Ask Before You Buy

Once you’ve found a potential supplier, it’s time to get specific. Being prepared with the right questions helps you compare options accurately and avoid surprises down the road. Start by asking for a detailed, itemized quote that lists the pool coping as a separate line item. This transparency is key. You should also ask your masonry contractor about the specific grade and style of the stone they plan to use. Inquire about what the installation price includes, such as demolition of old materials, delivery fees, and any necessary repairs to the pool’s structure. Finally, don’t forget to ask about the warranty for both the material and the installation work.

Why Partnering With a Local Expert Matters

Working with a Long Island-based expert offers advantages that you just can’t get from a national chain or online-only retailer. A local supplier understands the unique challenges of our climate, from humid summers to freezing winters. They can recommend stones like granite that are proven to withstand freeze-thaw cycles, salt air, and pool chemicals without losing their integrity. Beyond material expertise, a local partner provides personalized service and quicker delivery times, keeping your project on schedule. When you’re building a beautiful pool, having a team you can trust and easily communicate with makes the entire process smoother and more enjoyable. They are invested in the local community and their reputation depends on your satisfaction.

Related Articles

Frequently Asked Questions

Will natural stone coping get too hot for bare feet? This is a great question, and the answer really depends on the color and type of stone you choose. Lighter-colored stones, like travertine, are fantastic because they reflect sunlight and stay comfortably cool even on the hottest summer days. Darker stones, such as bluestone, will absorb more heat and can get quite warm in direct sun. If you love the look of a darker stone, consider if your pool area gets any afternoon shade, as that can make a big difference.

Is natural stone a safe, non-slip option for a pool area? Absolutely. Safety is a huge reason why so many people choose natural stone. Many types, like granite, have a natural texture that provides excellent grip for wet feet. Beyond the stone itself, the finish you select also plays a key role. Finishes like “flamed” or “tumbled” are specifically created to enhance texture and improve slip resistance, giving you extra peace of mind when kids and guests are enjoying the pool.

How often do I really need to seal my stone coping? As a general rule, you should plan on resealing your stone every one to three years. The exact timing depends on the porosity of your stone and how much use your pool area gets. A simple way to check is to sprinkle a few drops of water on the surface. If the water beads up, your sealant is still working fine. If it soaks in and darkens the stone, it’s time to reseal. Proper sealing is your best defense against stains and weather damage.

Which type of natural stone is the most durable for Long Island’s climate? For our specific weather, with its freezing winters and humid summers, you want a dense, strong stone. Granite is an outstanding choice because it has very low porosity, which means it doesn’t absorb much water. This makes it highly resistant to the cracking that can happen during freeze-thaw cycles. That said, proper installation is just as important as the material itself for ensuring your coping lasts for decades.

Can I put new stone coping over my old, existing coping? I would strongly advise against this. It might seem like a way to save time or money, but it often leads to bigger problems. The old coping must be completely removed so a professional can inspect the concrete beam underneath. If that beam is cracked or damaged, it needs to be repaired before any new stone is installed. Covering up a problem will only cause the new coping to fail prematurely, so it’s always best to start with a solid, sound foundation.
A concrete block retaining wall built on a slope using the stepped-base method.

How to Build a Retaining Wall on a Slope That Lasts

The biggest threat to any retaining wall isn’t a storm; it’s the slow, silent force of water building up behind it. This pressure can cause even the most robust-looking walls to lean, crack, and eventually fail. That’s why learning how to build a retaining wall on a slope is really about learning how to manage water. A successful wall is a complete system, combining a strong foundation, interlocking blocks, and, most importantly, a bulletproof drainage plan. In this guide, we’ll show you the warning signs of a failing wall and explain the professional techniques used to prevent these issues from ever happening, ensuring your structure stands strong against the elements for years to come.

Key Takeaways

  • Prioritize drainage above all else: Think of your retaining wall as a water management system. To prevent failure, you must have a solid plan that uses gravel, filter fabric, and pipes to channel water away from the wall and relieve pressure.
  • Build on level steps, not the slope: A strong retaining wall on a hill requires a stepped foundation. Instead of digging a sloped trench, you create a series of flat, level footings that step up the incline, providing a stable base for the entire structure.
  • Know when to call a professional: A small garden wall can be a great DIY, but you should hire an expert for any wall over three feet tall or on a steep slope. Professionals handle the engineering, permits, and complex site issues to guarantee your wall is safe and built correctly.

What Is a Retaining Wall and Why Your Slope Needs One

If you have a sloped yard, you know the challenges it can present. From soil washing away during heavy rains to having limited flat space for a patio or garden, a hilly landscape can feel more like a problem than a feature. A retaining wall is a structure engineered to hold back soil and create level tiers in your yard. Think of it as a way to tame your slope, turning unusable inclines into beautiful, functional areas. A properly built retaining wall provides long-term value by creating usable space on stubborn slopes while also solving critical issues with erosion and water flow. It’s one of the most effective ways to add structure, stability, and style to your property.

Stop erosion and manage drainage

On a slope, gravity and rainwater are constantly working to pull your soil downhill. This erosion can expose tree roots, wash away your lawn, and even threaten your home’s foundation over time. A retaining wall acts as a barrier, holding the soil firmly in place. But a successful wall does more than just stop dirt from moving. It must also manage water. Without a proper drainage system, water can get trapped behind the wall, saturating the soil and creating immense hydrostatic pressure. This force is powerful enough to make a wall bulge, crack, or fail completely. That’s why professional masonry construction includes drainage stone and pipes to safely channel water away.

Signs your sloped yard needs a retaining wall

How do you know if a retaining wall is the right solution for your yard? The signs are often easy to spot once you know what to look for. If you see soil washing out onto your driveway or patio after a storm, that’s a clear indicator of erosion. You might also notice soggy patches of ground or pooling water at the bottom of a hill, which points to drainage problems. Another sign is simply having a yard that’s too steep to enjoy. If you can’t find a level spot for a chair or your kids have nowhere flat to play, a retaining wall can help you reclaim that space. Getting a professional landscape design assessment can help you understand what’s possible.

Choose the Right Materials for Your Retaining Wall

Picking the right material for your retaining wall is a big decision. It affects not just how your wall looks, but also how long it lasts and how much it costs. Your choice will depend on your home’s style, your budget, and the specific demands of your sloped yard. From the classic beauty of natural stone to the modern versatility of concrete blocks, each option has its own set of pros and cons. Let’s walk through the most common materials so you can feel confident in your choice.

Concrete blocks: durable, modular, and versatile

Concrete blocks are a popular and practical choice for retaining walls, and for good reason. Their modular shape makes them relatively easy to stack, and they are quite durable. We can source them in a wide range of colors and textures, allowing you to find a look that complements your home and landscape. When installed with proper drainage, a concrete block wall holds up well against Long Island’s freeze-thaw cycles. While some basic blocks can look a bit utilitarian, you can always enhance them with a beautiful masonry veneer for a more polished and custom appearance. A solid, compacted base is key to preventing any shifting over time.

Natural stone: long-lasting with a premium finish

If you’re looking for a retaining wall with timeless beauty and incredible longevity, natural stone is the premier choice. While it represents a larger initial investment, a natural stone wall is built to last for decades, becoming a permanent and beautiful feature of your landscape. Each stone is unique, creating a rich, textured look that manufactured products can’t quite replicate. A well-built stone wall adds significant value and curb appeal to your property. We love working with porcelain and natural stone because it allows us to create truly one-of-a-kind structures that blend perfectly with the natural environment of your Long Island home.

Gabion baskets: excellent drainage with a natural look

Gabion walls offer a unique, rustic look that is both functional and stylish. These are essentially wire baskets filled with rocks or stones, and they are fantastic for managing drainage. The gaps between the stones allow water to pass through freely, which prevents the buildup of hydrostatic pressure that can cause other walls to fail. This makes them an excellent solution for steep slopes or areas prone to erosion. Gabion walls are highly durable and blend seamlessly into natural surroundings, providing an earthy aesthetic. They are a great way to incorporate natural stone elements into your yard in a structurally sound and visually interesting way.

Timber: budget-friendly but has a shorter lifespan

Timber can be an attractive option for retaining walls, especially if you’re working with a tighter budget. It offers a warm, natural look that can work well in many garden settings. However, the main trade-off with timber is its lifespan. Even when properly treated, wood is susceptible to rot and insect damage, and most timber walls need to be replaced within about 10 to 15 years. While the upfront cost is lower, you may find yourself spending more in the long run on replacements compared to a stone or concrete wall that can last for 50 years or more. It’s an important factor to consider when planning for the future of your landscape.

Key factors: soil type, wall height, and load requirements

Ultimately, choosing a material isn’t just about aesthetics or budget. Several technical factors will determine the best option for your specific project. The type of soil in your yard, the final height of the wall, and the amount of load it needs to hold back are all critical considerations. For example, a tall wall on a steep slope with clay soil will require a much stronger material and more reinforcement than a short, decorative wall in a garden bed. This is where a professional landscape design plan becomes invaluable, ensuring your wall is not only beautiful but also engineered to stand the test of time.

How to Build a Retaining Wall on a Slope: The Stepped-Base Method

Building a retaining wall on a slope requires a specific approach to guarantee it will stand strong against the forces of gravity and water. You can’t just start digging a trench that follows the slope; that’s a recipe for a leaning, failing wall. Instead, the best practice is the stepped-base method. This technique involves creating a series of level foundations that step up the hill, providing a solid, stable footing for each section of your wall. Think of it like building a wide, sturdy staircase for your landscape.

Each step provides a new, perfectly level starting point for the wall blocks. This ensures the entire structure is interlocked and supported from the ground up. While the process is straightforward, it demands precision at every stage, from digging the trench to leveling the base. For smaller, decorative garden walls, this can be a rewarding DIY project. However, for walls over three feet high or those supporting significant loads, professional expertise is essential to ensure safety and longevity. A professional can handle the engineering, material selection, and construction needed for a wall that truly lasts.

Step 1: Check local codes and mark your layout

Before you pick up a shovel, your first move should be to check with your local municipality about building codes. Regulations for retaining walls, especially in areas like Suffolk and Nassau County, can dictate how high you can build without a permit and what materials are acceptable. A quick call or visit to your town’s website can save you from a major headache later. It’s crucial to understand these rules, as they are in place to ensure safety.

Once you’ve confirmed the local requirements, it’s time to mark the wall’s layout in your yard. Use wooden stakes and a string line to create a clear guide for your excavation. This simple step helps you visualize the final placement and ensures your lines are straight or your curves are smooth. Taking the time to plan and mark your layout accurately is the first step toward a professional-looking result.

Step 2: Excavate a deep, stable footing

With your layout marked, you can begin excavating the trench for the wall’s foundation. Always start digging at the lowest point of the slope. The trench needs to be deep enough to bury at least half of your first block, plus an additional six inches for the gravel base. For example, if you’re using 8-inch-tall blocks, you’ll want a trench that’s at least 10 inches deep (4 inches for the block + 6 inches for the base).

The trench should also be wide enough to accommodate the depth of the block and give you some working room behind it. A stable footing is the most critical part of your retaining wall, so don’t cut corners here. Digging a deep, wide trench ensures your wall has a solid anchor deep within the ground, which is essential for resisting pressure from the soil behind it. This is the foundation of your entire masonry project.

Step 3: Compact and level the base for each step

After digging your trench, the next step is to create a solid base. Fill the bottom of the trench with about six inches of ¾-inch crushed stone or a similar gravel aggregate. This layer is vital for both drainage and stability. Once the gravel is in the trench, you need to compact it thoroughly. For small projects, a hand tamper will work, but for longer walls, renting a plate compactor is well worth the cost.

This compacted base must be perfectly level. Use a carpenter’s level to check it from front to back and side to side. An unlevel base will cause your entire wall to be crooked and unstable. Take your time with this step, adding or removing small amounts of gravel until the entire footing is perfectly flat. This solid, level foundation is what your entire wall will rely on for support.

Step 4: Lay your first course and step up the slope

Now you can start laying the first course of blocks on your perfectly leveled gravel base. Place each block firmly on the base, making sure it’s level and snug against the next one. Use a rubber mallet to make minor adjustments. This first course sets the direction for the rest of the wall, so double-check that every block is aligned and level.

Once you reach the end of your first level section, it’s time to create the “step.” Excavate the next section of the trench so that its base is one block-height higher than the previous one. Then, add and compact your gravel base just as you did before. This creates a new, level starting point for the next section of your first course, allowing the wall to climb the slope securely.

Step 5: Stack, reinforce, and backfill as you build

As you begin stacking the second course of blocks, offset the joints from the course below, just like a brick pattern. This interlocking adds significant strength. Most modern retaining wall blocks have a locking lip on the back or a pin system that helps create a slight setback with each course, which improves stability. For extra security, apply a bead of concrete adhesive between each layer.

As you build, you must backfill the space behind the wall. After each course is laid, fill the area behind the blocks with at least 12 inches of gravel. This promotes drainage and relieves pressure on the wall. For walls taller than three or four feet, you’ll also need to install geogrid reinforcement. This flexible mesh is laid between courses and extends back into the slope, anchoring the wall to the earth behind it.

Step 6: Cap the wall and finish the landscape

The final touch for your retaining wall is the cap, which gives it a professional, finished appearance. Capstones are flat, solid blocks that are glued onto the top course using concrete adhesive. They not only look great but also protect the wall’s core from rain and prevent water from seeping into the backfill from above. This is a simple but important step to ensure the longevity of your wall.

With the wall capped, you can complete the project by finishing the landscape around it. Grade the soil behind the wall to slope away from it, directing surface water runoff elsewhere. You can then add topsoil and plant grass, groundcover, or other plants to integrate the wall into your yard. Proper landscape design will make your new retaining wall a beautiful and functional feature.

How to Ensure Proper Drainage Behind Your Wall

A retaining wall is only as strong as its drainage system. This might sound dramatic, but it’s the absolute truth. The biggest threat to your wall isn’t a storm or shifting ground; it’s the slow, relentless force of water building up behind it. This is called hydrostatic pressure, and it can push a wall over from the inside out. Without a proper escape route, rainwater and groundwater saturate the soil, turning it into a heavy, unstable mass that exerts incredible force. A single cubic foot of water weighs over 62 pounds, and when that weight is multiplied across the entire length of your wall, the pressure is immense.

That’s why building a drainage system isn’t just a final step, it’s an integral part of the entire construction process. A well-designed system proactively manages water from the moment it approaches the wall. It involves a combination of the right materials and smart installation techniques to collect water, filter it, and guide it safely away. Think of it as giving water a clear, easy path to follow, so it never has a chance to become a problem. This is why our approach to masonry construction always starts with a solid drainage plan, ensuring your wall stands strong for decades.

Use gravel backfill and geo-filter fabric

The space directly behind your retaining wall needs to be filled with a material that lets water pass through easily. Instead of backfilling with dense soil, which holds moisture, you should use clean, crushed gravel. The gaps between the stones create a clear vertical path for water to travel down to the base of the wall. This prevents the soil from becoming saturated and heavy.

To make this system last, you need to protect the gravel from getting clogged with dirt and silt. This is where geo-filter fabric, also called geotextile fabric, comes in. This special material acts like a filter, allowing water to pass through while holding back soil particles. Before adding the gravel, you’ll line the excavated area with this fabric, creating a barrier between the gravel and the surrounding earth. It’s a simple addition that keeps your drainage system clean and functional for years.

Install perforated drain pipes and weep holes

Once water filters down through the gravel, it needs a place to go. At the base of the wall, right on top of the compacted footing, you’ll install a perforated drain pipe. This is a pipe with small holes or slits that collects the water and carries it away. The pipe should be laid with a slight slope, so gravity does the work of moving the water to an outlet away from the wall, like a storm drain or a dry well. Wrapping the pipe in geo-filter fabric is also a good idea to prevent sediment from clogging the perforations.

Another simple but effective drainage feature is weep holes. These are small openings intentionally left in the face of the wall, usually just above ground level. They act as a last line of defense, allowing any water that might get trapped behind the wall to escape before it can build up pressure.

Slope the grade to manage surface water runoff

An effective drainage plan starts before water even reaches the wall. The ground on the upper side of your retaining wall should be carefully graded to slope away from it. This simple step encourages surface water from rain or sprinklers to flow away naturally instead of pooling against the wall and seeping into the backfill. Even a slight grade can make a huge difference in the amount of water your drainage system has to handle.

For properties with significant runoff, you might also consider adding a swale, which is a shallow channel, a few feet behind the wall. This intercepts water further up the slope and diverts it to the sides, keeping the area immediately behind your wall much drier. It’s a proactive approach that is a key part of professional landscape design.

Drainage mistakes that cause wall failure

When drainage is overlooked, it’s not a matter of if a retaining wall will fail, but when. The most common mistake is using soil or the wrong type of aggregate for backfill. This traps water instead of letting it flow, leading to that dreaded hydrostatic pressure. Without a clear path to escape, the saturated soil becomes incredibly heavy and pushes relentlessly against the wall.

This immense pressure is the number one cause of wall failure. You’ll see the signs over time: the wall may start to lean, develop cracks, or bulge outwards. Individual blocks might shift or separate. Eventually, the force can become so great that it causes a complete structural collapse. This is why professionals consider a retaining wall to be a water management system first and a landscape feature second.

Is Your Retaining Wall Failing? Warning Signs to Look For

A well-built retaining wall is a workhorse, but even the strongest structures need a check-up now and then. Catching problems early is the key to preventing a small issue from becoming a major, costly headache. A failing wall doesn’t just look bad; it can pose a serious risk to your property, your driveway, or even your home’s foundation. Paying attention to the subtle clues your wall gives you can save you from expensive emergency repairs down the line. Think of it as preventative care for your landscape’s most important structural feature.

Regularly walking the length of your wall, especially after heavy rain or a winter freeze, is a simple habit that can make all the difference. Look closely at the face of the wall, the ground at its base, and the soil directly above it. If you notice any of the warning signs we’re about to cover, it’s a clear signal that the pressure behind the wall is becoming too much for it to handle. These issues rarely fix themselves and almost always get worse over time, as the forces of gravity and water are relentless. When you see them, it’s time to call for a professional masonry assessment to understand the severity of the problem and your options for fixing it.

Visible cracks, leaning, or bulging

These are the classic, can’t-miss signs that your retaining wall is under serious stress. What might start as a tiny crack in the spring can quickly become a dangerously bowed wall after a season of heavy rain. A forward tilt, even a slight one, means the wall is losing its battle against the weight of the soil behind it. A bulge or curve in a formerly flat wall is another red flag, indicating a specific point of intense pressure. These are not just cosmetic flaws; they are direct evidence that the structural integrity of your wall is compromised and needs immediate attention.

Soil erosion and water pooling at the base

Water is the primary force that causes retaining walls to fail, so signs of poor drainage are a major concern. If you see soil washing out from the joints of the wall or from underneath its base, it means water is carrying it away and weakening the wall’s foundation. Likewise, persistent puddles or damp areas at the foot of the wall indicate that water isn’t being diverted correctly. This trapped moisture builds immense hydrostatic pressure. These symptoms suggest the wall’s drainage system has failed or was improperly installed, putting the entire structure at risk of collapse.

Separated blocks and shifting sections

When the individual components of your wall start to move, you have a serious problem. Look for gaps opening between stones or concrete blocks, or notice if entire sections are shifting out of alignment with the rest of the wall. This is a clear sign that the interlocking strength of the structure is gone. The wall is literally coming apart. Ignoring these clues can lead to a sudden and catastrophic failure, which could damage your landscape, patio, or other nearby structures. If you see blocks separating or sections moving, don’t wait. It’s time to get a professional restoration expert to evaluate the situation.

When to Call a Professional for Your Retaining Wall

While a small, decorative garden wall can be a satisfying DIY project, building a structural retaining wall on a slope is a different story. The forces of gravity and water are powerful, and a poorly built wall can fail, leading to property damage or safety hazards. Knowing when to step back and call in an expert is the most important part of the project. Certain situations absolutely require a professional touch to ensure your wall is safe, compliant, and built to last for decades.

For high walls and steep slopes

The height of your wall is a major factor. As a general rule, any wall over three or four feet tall holds back an immense amount of soil pressure and requires an engineered design. The same goes for walls built on very steep slopes, where even a shorter wall has to manage significant gravitational forces. A professional team understands the physics involved and can design a wall with the proper footing, reinforcement, and batter (the backward lean) to remain stable. They ensure your wall isn’t just a temporary fix but a permanent, safe addition to your landscape design. Trying to guess on a project of this scale is a risk not worth taking.

For complex soil conditions and geotechnical issues

The ground beneath your wall is just as important as the wall itself. Long Island’s soil can vary from sandy to clay-heavy, and each type behaves differently under pressure, especially when wet. Before you even start digging, it’s wise to have an expert assess the site. For particularly challenging slopes, a geotechnical engineer might be needed to determine if the ground is stable enough to support a wall. This step is vital for preventing long-term problems like slow-motion landslides or foundation failure. A professional masonry contractor will account for your specific soil conditions, ensuring the wall has a solid base to stand on for years to come.

To handle permits, compliance, and engineering

Building a structural retaining wall often requires permits from your local town or village here on Long Island. Getting through these regulations can be a headache, and building without the proper approvals can lead to fines or orders to tear down your work. Professionals are familiar with local building codes and will make sure your project is fully compliant from the start. They work with engineers to create stamped plans that meet all safety requirements, especially if there’s a slope, driveway, or structure near the wall. This gives you peace of mind knowing your home improvement project is built correctly and legally.

How Gappsi builds lasting retaining walls for Long Island homeowners

At Gappsi, we see retaining walls as more than just functional structures; they are key elements that protect and beautify your property. A properly constructed wall provides incredible long-term value by preventing erosion, improving drainage, and creating more usable outdoor space. We focus on every detail, from excavating a solid foundation to installing robust drainage systems behind the wall. Our team uses high-quality porcelain and natural stone to build walls that are not only strong but also seamlessly integrated with your home’s aesthetic. We handle the entire process, ensuring your investment enhances your property for many years.

Related Articles

Frequently Asked Questions

Why is a wall over four feet tall considered a job for a professional? The pressure from soil doesn’t just add up, it multiplies as a wall gets taller. A five-foot wall has to manage exponentially more force than a two-foot wall. This requires a deeper foundation, specific reinforcements like geogrid mesh, and an engineered design to ensure it won’t fail under the immense weight. It stops being a simple stacking project and becomes a true structural engineering task where safety is the top priority.

I’m focused on how my wall will look. Is the drainage system really that important? I completely get it, the final look is what you’ll see every day. But think of it this way: the drainage system is what protects that beautiful look for the long haul. Without a proper way for water to escape, it builds up behind the wall and creates a force strong enough to crack, bulge, and eventually push the whole structure over. A great drainage plan is the invisible hero that ensures your beautiful wall doesn’t become a leaning, broken mess in a few years.

What kind of lifespan can I expect from a new retaining wall? A wall’s lifespan really comes down to two things: the materials you choose and the quality of the installation. A professionally built wall using high-quality natural stone or concrete blocks, with a robust drainage system, can easily last 50 years or more. On the other hand, a timber wall might only last about 10 to 15 years before needing replacement. The key takeaway is that proper construction is just as important as the material itself.

My existing wall is leaning a little. Can it be repaired, or does it need to be replaced? A leaning wall is a serious red flag that points to a fundamental problem, usually with its foundation or drainage system. Unfortunately, this isn’t something that can be patched up. The lean means the wall has already lost its fight against the pressure behind it. In almost every case, the only safe and permanent solution is to have the wall completely dismantled and rebuilt correctly from the foundation up.

I think I need a retaining wall, but I’m not sure where to start. What’s the first step? It can feel like a huge project, but the first step is simple. Before you get lost in material options or construction details, have a professional come out to assess your property. An expert can analyze your slope, your soil type, and your drainage needs to give you a clear understanding of what the project actually requires. This initial consultation is the best way to get a solid plan and avoid costly mistakes down the road.

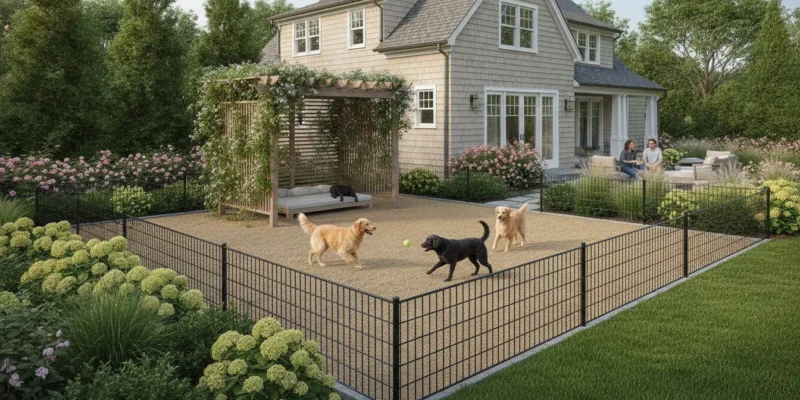
Landscaped Long Island backyard with a fenced dog run and shaded rest area

Dog Run Design: Safe Backyard Options for Long Island Homes

A backyard pet area works best when it is planned as part of the landscape, not added as an isolated pen. Existing grades, wet spots, fence lines, sunlight, and the route from the house all shape how comfortable and manageable the finished space will be. Contact Gappsi through our contact page

A well-planned dog run combines a suitable location, controlled drainage, secure fencing, a practical surface, shade, a reliable gate, and a maintenance routine. On Long Island, the right balance depends on the property, including its soil, slopes, seasonal weather, and available space.

The first decision is where to place it. A careful look at access, water movement, sun exposure, and nearby planting can prevent avoidable problems before excavation or material selection begins.

Where should a dog run go in a Long Island backyard?

Start with the route your dog will use every day. A dog run works best when it connects conveniently to a door, mudroom, or other outdoor access point. So letting the dog out does not require crossing a patio, garden bed, or busy entertaining area. The location should also be easy for people to reach for feeding, cleaning, waste removal, and gate checks.

Look at the existing grade before choosing a straight line along the property edge. A yard that appears flat may still direct stormwater toward the house, a neighboring property, or a low area where the surface stays wet. Note where water collects after rain, where downspouts discharge, and whether the proposed run would cross a slope. Grading means shaping the ground so water moves in a planned direction. Ground preparation and drainage should be resolved before selecting the finished surface.

Long Island properties vary across Nassau and Suffolk Counties, so there is no universal placement. A site evaluation can account for soil, existing grades, drainage, utilities, fences, and the relationship between the run and the rest of the landscape. Gappsi’s Long Island landscape design and construction services include topsoil grading, ground preparation, drainage, irrigation, planting, and synthetic turf integration.

Track the sun at different times of day and through the seasons. A location with some shade can give a dog relief during hot weather, while a fully shaded, poorly drained corner may stay damp after rain. Consider whether a tree, house, pergola, or planned shade feature can provide relief without placing roots, falling debris, or maintenance work inside the active area.

Protect existing planting by separating the run from delicate beds and keeping irrigation access in mind. Plants near the boundary may be exposed to running, digging, and repeated watering. Leave a practical route for trimming, repairs, and surface cleaning rather than forcing maintenance through the dog area.

Contact Gappsi through our contact page

Before finalizing the location, review access, grade, drainage, sun, shade, planting, and seasonal maintenance together. That connected view helps the dog run function as part of the backyard instead of becoming an isolated enclosure that creates new drainage or upkeep problems.

How should drainage and surfacing work together?

A dog run is a complete ground system, not just a surface product. Grading, the shaping of the ground to guide water, should be planned before the finished material is selected. On a Long Island property, the right approach depends on existing soil, low areas, nearby structures. Rainfall patterns, the number of dogs using the space, and how water currently moves through the yard.

Start with the drainage path. The site should be evaluated for standing water, downspout discharge, compacted soil, and areas where runoff could collect near a foundation, fence, planting bed, or walkway. The finished grade should direct water toward an appropriate dispersal or drainage feature rather than leaving it to find its own route. Gappsi’s landscape division supports grading, drainage, irrigation, planting, and synthetic turf integration as connected parts of a landscape plan. You can review its broader Long Island landscape design and construction services for more context.

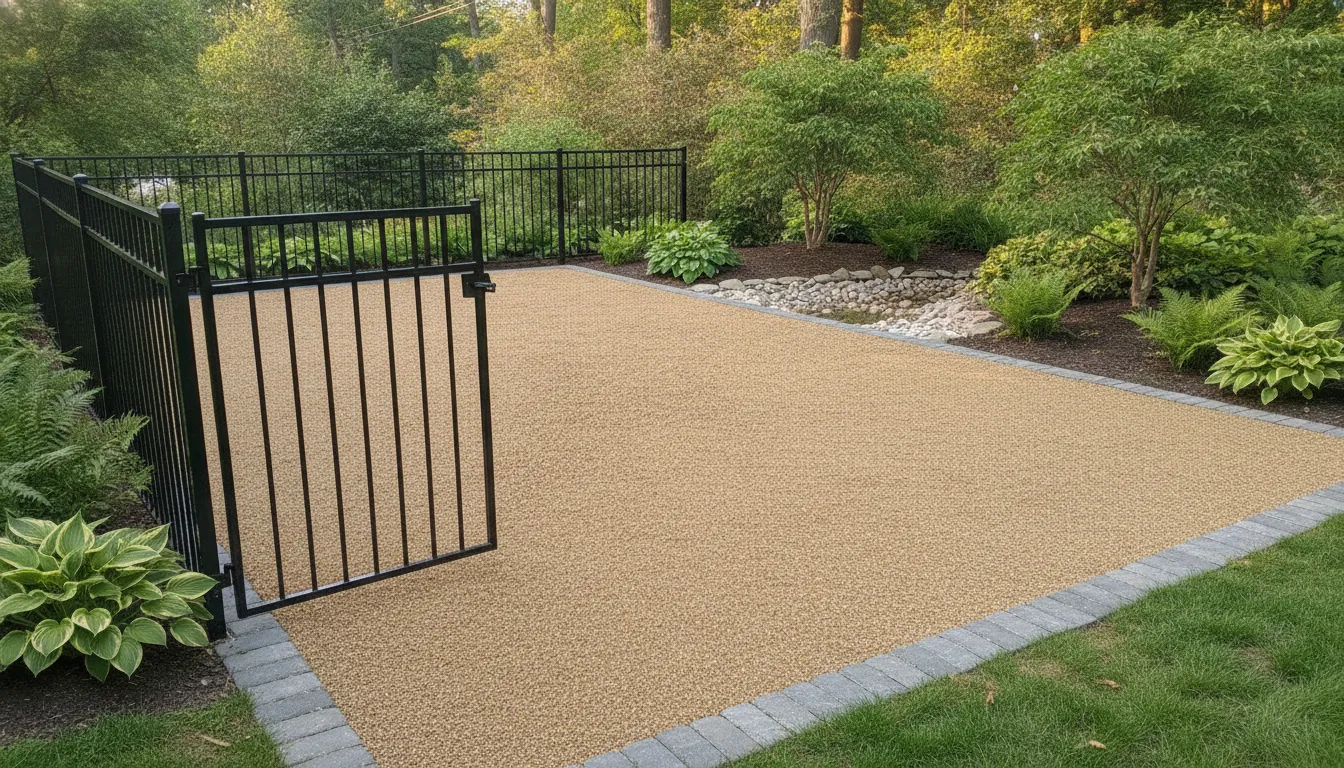
Backyard dog run with a permeable surface, secure fence, and planned drainage edge

Prepare the base before installing the surface. A suitable base creates a stable foundation and helps manage water moving through the system. Ground preparation may involve removing unsuitable organic material, shaping the subgrade, placing appropriate aggregate, and compacting the base. The exact construction depends on site conditions and the selected surface. A surface installed over a soft or poorly graded area may not address settling or water collection below it.

Surface choices should be evaluated by how they handle regular use, cleanup, weather, and transitions to the rest of the property. Natural grass, synthetic turf, compacted aggregate, and other landscape materials each involve different maintenance and drainage considerations. No single surface is automatically right for every dog, household, or backyard. Synthetic turf can be part of a practical design, but its backing, base, edging, seams, and drainage route need to work together. The existing artificial grass for dogs drainage and care guide covers those turf-specific decisions in greater detail.

Plan transitions as carefully as the main surface. A dog run may meet pavers, a patio, natural lawn, planting beds, or a gate threshold. These junctions should be easy to cross, stable underfoot, and accessible for sweeping, scooping, rinsing, and repairs. Edging can define the boundary, while careful seam placement can reduce maintenance concerns in turning or high-traffic areas. Keep irrigation heads, planting, fencing, and gate swings from creating obstacles or directing water into the run.

Sanitation access belongs in the design from the beginning. Solid waste still needs prompt removal, and the area may require rinsing or system-specific cleaning. Provide a practical route for a hose and cleaning tools, while ensuring wash water does not flow toward a foundation, neighboring property, or sensitive planting. Outdoor pet areas create distinct water and waste-disposal challenges, so drainage should support the cleaning routine rather than depend on it to correct poor grading. Avoid promises that a surface will be odor-free, cool, or pet-safe in every condition. The complete system, including its maintenance plan, determines how the space functions over time.

What fencing and gate details make a dog run safer?

A dog run needs a perimeter that fits the dog’s behavior, the property’s layout, and the way people use the yard. Start by tracing the boundary from the house, not just outlining an open patch of lawn. A convenient connection to a rear or side door can make daily access easier. While a route that crosses a planting bed, pool area, or service zone may create avoidable conflicts.

Fence transitions deserve particular attention. Where the dog run meets an existing fence, wall, hedge, deck, or gate. Look for changes in surface, gaps, corners, and places where a dog could push, squeeze, or dig. The transition should feel continuous from the dog’s point of view. A new section that stops short of an older boundary can leave an opening even when the main run appears enclosed. It is also worth considering how the perimeter will meet the ground, especially on a sloped Long Island property where grading can change the gap beneath a fence.

Place gates for routine access

Gate placement affects more than entry. Locate the gate where a person can approach, open, and close it without stepping into a tight corner or blocking a walkway. If the run connects directly to the house, consider whether the gate should serve everyday pet access, maintenance access, or both. A wider service opening may help with tools and surface upkeep, while a separate pedestrian gate can reduce unnecessary movement through the space.

Choose a latch that adults can operate consistently and that remains out of the dog’s reach. The exact hardware depends on the gate design, nearby structures, and the dog’s habits. Check the swing path as well. A gate should not open into a location where it can strike a wall, interfere with a path, or create a momentary escape route.

Balance visibility with separation

Fencing can provide containment without making the run feel disconnected from the yard. Open sections may help people see the dog and monitor activity from the house. Privacy screening can be useful where the run faces a neighboring property or a busy area. But solid panels can change airflow, sightlines, and the way the space relates to the rest of the landscape. Use the boundary style to support both supervision and the desired level of separation.

Gappsi can coordinate boundary materials, gates, and the surrounding landscape as part of a broader plan. Review Long Island fencing options alongside grading, planting, paths, and access so the dog run functions as part of the yard rather than as an isolated enclosure.

How can shade, planting, and comfort improve the space?

A dog run should support more than movement. It also needs places where a dog can pause, drink, and settle away from direct sun. Long Island’s summer heat, changing sun angles, wind, rain, and winter conditions all affect how comfortable the area feels through the year. Plan shade and rest areas as part of the layout instead of adding them after the fencing and surface are complete.

Use a combination of natural and built shade where the site allows. Existing trees may provide useful relief, while a canopy, covered rest area, or other structure can create more predictable shelter. Keep the water station in a convenient location that people can reach without stepping through the entire run. A hose connection or nearby cleaning access can also make routine rinsing easier. But drainage should be considered so water does not collect at the resting area or run toward the home.

Planting can define the edges of the dog run and soften views from the house. Low-maintenance beds, screening plants, or a planted buffer may help separate the activity area from patios, walkways, and neighboring properties. Plant selection should be reviewed for the specific site and for how the dog uses the yard. Do not assume that every attractive plant is appropriate for every pet. Leave enough space between planting beds and the active route for pruning, inspection, and cleanup.

Visibility matters for both comfort and maintenance. Position the run so it can be seen from a frequently used room or outdoor seating area, while preserving privacy where needed. Avoid placing dense planting where it hides a gate, water station, or corner that needs regular inspection. A clear path to the enclosure also helps with waste removal, seasonal cleanup, and bringing supplies into the area.

Gappsi’s Long Island landscape design and construction services include planting, irrigation, grading, drainage, and seasonal maintenance. Coordinating those elements during planning helps the shade, comfort, and upkeep decisions work with the rest of the dog-run system.

Dog run ideas: temporary setup or installed landscape feature?

Comparison of a temporary dog area and a planned installed dog run
Planning factor Temporary portable pen or cable setup Planned installed dog run
Best use case Useful for short-term needs, trial layouts, travel, rentals, or a property where permanent work is not yet practical. Better suited to a household that expects regular, long-term use and wants the area coordinated with the backyard.
Site preparation Usually relies on the existing lawn or ground surface, so uneven areas, mud, and worn paths remain site concerns. Can include topsoil grading and ground preparation based on the property’s soil, grades, access, and surrounding features.
Drainage Does not correct low spots or create a deliberate route for rainwater and cleanup water. Water management remains a property-level issue. Allows grading, drainage, and surfacing to be planned as one system. The area’s size, number of dogs, surface, and weather all affect drainage and durability.
Fencing A portable pen creates a defined boundary, while a cable setup depends on its attachment points and the dog’s movement. Supervision and configuration remain important. Can coordinate the perimeter, gates, privacy screening, and connections to the house, patio, planting beds, or existing fence.
Comfort Offers limited control over shade, surface condition, transitions, and access to water unless those features are added separately. Can incorporate a shaded resting area, practical water access, planting, and a surface selected for the intended use. No single surface is right for every property.
Maintenance Requires frequent inspection of the pen, cable, attachment points, ground condition, and waste or mud buildup. Still requires waste removal, cleaning, drainage observation, vegetation care, and fence or gate inspections, but those tasks can be considered during design.
Flexibility Easy to move or remove as household needs change, but the usable area and layout are constrained by the temporary equipment. Less movable, but it can be designed around circulation, maintenance access, future landscape work, and the way the family uses the yard.

A temporary arrangement makes sense when you are testing where your dog prefers to move, need a short-term containment option, or cannot alter the property yet. Treat it as a use solution, not as a substitute for correcting standing water, worn soil, poor access, or a boundary that does not fit the yard. For cable systems in particular, follow the equipment instructions and check local requirements rather than assuming a general setup is appropriate.

An installed dog run is worth considering when the area will receive daily use or must work with existing grading, drainage, fencing, planting, irrigation, and hardscape. Gappsi’s landscape scope includes these connected site decisions across Nassau and Suffolk Counties. Review the options for dog run installation on Long Island alongside the broader landscape plan before choosing a surface or boundary.

The practical choice depends on the property, the dog’s habits, and how long you expect the space to serve the household. Start by observing the current route, low spots, shade, cleanup access, and fence connections. Those observations will show whether a portable setup is enough or whether a coordinated landscape feature would solve more of the daily problems.

What should a dog run maintenance plan include?

A dog run stays easier to use when maintenance is planned alongside the layout. The routine should cover waste removal, rinsing, surface transitions, fencing, gates, planting, and drainage. On Long Island, seasonal weather can change how often each task is needed, so inspect the area after heavy rain, winter freeze-thaw cycles, spring growth, and summer heat.

Remove waste and rinse the surface regularly

Remove solid waste promptly with a scoop that will not drag across the surface or disturb seams. Check corners, gate areas, fence lines, and the places your dog uses most often. After removal, rinse the area when the surface and drainage system are designed for it. Direct the rinse water through the planned drainage path, not toward a foundation, neighboring property, or a low spot that already holds water.

Clear leaves, soil, and other debris with a soft rake or another method suited to the installed surface. Organic material can collect along edges and transitions, where it may hold moisture or interfere with cleaning. Use only cleaning products approved for the specific turf, edging, or other surface materials. If odor remains after routine removal and rinsing, investigate the drainage path and sanitation routine instead of simply applying stronger chemicals.

Inspect the enclosure and surface transitions

Walk the perimeter regularly to check fence sections, posts, gate alignment, hinges, and latches. Confirm that the gate closes securely and that its swing does not scrape the surface or create a difficult corner. Look for gaps, loose hardware, damaged screening, or vegetation pushing against the fence. A small issue is easier to address before repeated use or a storm makes it worse.

Inspect transitions where the dog run meets pavers, planting beds, natural lawn, or a patio. Watch for lifted edges, open seams, exposed fasteners, erosion, or abrupt changes that collect dirt. Keep planting controlled around the enclosure, while preserving practical access for cleanup and repairs. Seasonal pruning may be necessary where roots, branches, or fallen leaves enter the run.

Check drainage after rain and reassess the design when conditions change

After a significant rain, look for standing water, muddy edges, washed soil, clogged inlets, or new runoff paths. Note how long wet areas remain and whether water is moving toward the house or gate. Do not assume additional rinsing will solve a drainage problem. A landscape professional can review grading, drainage, planting, and surface integration as one connected system.

Reassess the design if the number of dogs changes, access becomes difficult, the surface repeatedly fails, or the maintenance routine no longer fits the household. The goal is not to preserve a fixed layout at all costs. It is to keep the dog run clean, accessible, enclosed, and compatible with the rest of the Long Island property.

How much planning does a dog run project need?

A well-planned dog run starts with the property, not a product. On Long Island, an evaluation should review the available space, existing grades, soil and drainage conditions, access from the house, and how the area will be used. The number and size of dogs, daily activity, waste cleanup, shade, and maintenance access all affect the layout.

Start with the site and the daily routine

The first step is to identify practical goals. Should the run connect directly to a back door? Does it need room for play, a resting area, or a convenient route for cleaning? A site review can also identify low areas, water flow, tree roots, planting zones, and nearby utilities or property features. Gappsi’s landscape services include Long Island landscape design and construction, including topsoil grading, ground preparation, drainage, irrigation, and planting.

Coordinate the layout, surface, and enclosure

Grading and drainage should be reviewed before choosing a surface. The enclosure, gates, and walking approach should then be laid out together so the gate opens safely. The dog has usable space, and people can enter for cleaning or maintenance. Material decisions may include surfacing, edging, fencing, privacy screening, and any shade or water features. These elements work as one system rather than as separate purchases.

Move from design to a clear proposal

After the site evaluation, the design-build process can move through design concepts or 3D planning, material selection, construction details, a written proposal, and scheduling. The proposal should clarify the planned work, selected materials, site preparation, drainage approach, fencing and gate scope, and maintenance responsibilities. Gappsi can combine site evaluation, design, construction, and maintenance through one provider, while the exact scope remains specific to the property.

Ask local building-department questions early

Before construction, ask the building department serving the property whether any local requirements apply to the proposed work. New York’s Department of State explains the role of local jurisdictions in administering questions related to the Uniform Code and Energy Code: New York building-code FAQs. This is a reason to confirm details with the appropriate city, town, village, or county office. Not an assumption that every dog run needs a permit or that approvals are guaranteed.

Contact Gappsi through our contact page

Frequently Asked Questions

What is a dog run?

A dog run is a defined outdoor area where a dog can move, explore, and spend time safely within a controlled boundary. A well-planned run combines fencing and a gate with suitable surfacing, drainage, shade, access to water, and a maintenance plan. It can be attached to a home or placed elsewhere in the yard, depending on the property layout.

Are dog runs good for dogs?

They can be useful for fresh air, movement, and supervised outdoor time, especially when the space matches the dog’s size, behavior, and activity level. A run does not replace walks, training, social interaction, or veterinary care. Shade, secure containment, clean water, a comfortable surface, and regular waste removal are important parts of responsible use.

What is the 7-7-7 rule for dogs?

The 7-7-7 rule is a popular training and socialization guideline, not a universal veterinary standard. Different versions describe introducing a puppy to several new experiences during early development. Treat it as a flexible idea rather than a rigid schedule, and adjust activities for the dog’s age, health, temperament, and guidance from a veterinarian or qualified trainer.

How much does a dog run cost?

There is no reliable one-size-fits-all price. Cost drivers include the run’s size, excavation and grading, drainage, fencing, gates, surfacing, access conditions, and the amount of site preparation required. A site evaluation can clarify which elements your Long Island property needs before a project is priced.

What should I consider before building a dog run?

Review the yard’s grades, drainage patterns, sunlight, relationship to the house, fence connections, gate access, surface maintenance, and seasonal conditions. In Nassau or Suffolk County, also ask the applicable local building department whether any project-specific requirements apply. Planning these decisions together helps avoid treating a fence, turf product, or portable pen as the entire solution.

Ready to Plan Your Dog Run?

A site evaluation can help connect the dog run to your property’s grading, drainage, fencing, and everyday access needs. Gappsi Group can discuss practical design options for your Long Island home and help you decide which details belong in the plan.

Contact Gappsi through our contact page

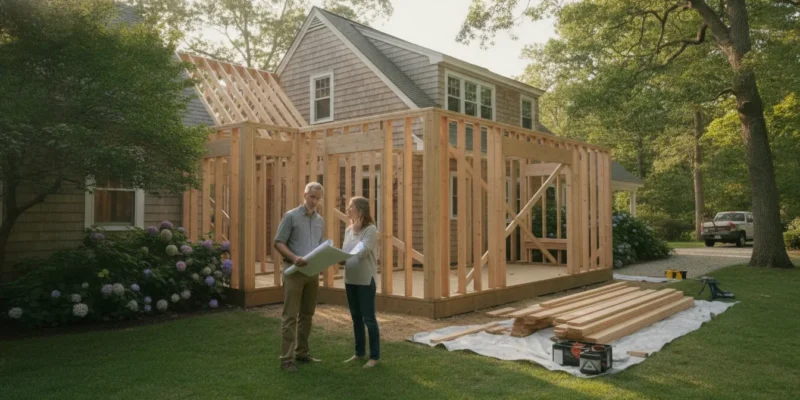
Long Island home addition under design and construction beside a landscaped yard

Home Additions: A Long Island Planning Guide

Adding usable space to a Long Island home is not only a matter of choosing where to build. The right plan connects your household goals with the existing structure, property layout, local requirements, materials, and the people responsible for design and construction.

Successful home additions begin with a clear decision about how the space should function. Next, evaluate the existing home, site conditions, drawings, permits, and construction logistics.

On properties in Nassau and Suffolk Counties, the best approach depends on whether you are expanding outward. Building upward, converting existing space, or coordinating the addition with drainage, access, and the rest of the property.

Before comparing addition types, define what the new space must accomplish and how it should connect to the rooms, routines, and exterior areas you already use. Those decisions create a practical foundation for the design, permit, and construction choices that follow.

Contact Gappsi through our contact page

What Should You Decide Before Planning Home Additions?

Start with the problem the project needs to solve, not with a preferred floor plan. Home additions can increase finished living space for a larger kitchen, extra bedroom, bathroom, or shared family area. Write down what is missing now, who will use the space, and how that use may change over time. A growing household, work-from-home needs, aging-in-place concerns, or a desire for better connection to the yard can each lead to a different design response.

Next, separate essential functions from optional features. A conventional addition is a multi-room structure attached to the side of a house and permanently open to the main home. It may include a great room, dining room, family room, bathroom, guest bedroom, or primary bedroom. Defining the must-have rooms early helps determine whether you need a larger footprint or a more focused expansion. See the broader options for Long Island home remodeling when an addition may need to coordinate with updates elsewhere in the house.

Could an Existing Space Solve the Problem?

Compare new construction with conversion before committing to an expanded footprint. Unfinished basement or attic space can add practical living area without expanding the home’s footprint, but the existing conditions must support the intended use. A basement conversion requires a completely dry basement. An attic conversion must accommodate insulation and ventilation requirements under the applicable local building code. If the space will include a sleeping area, plan for a compliant egress exit, which may require a specially sized window. These checks should happen before design decisions make an unsuitable space seem like the obvious answer.

Also inspect the parts of the property that a drawing may not reveal at first glance. Note the location of utilities, the relationship between rooms, natural light, ceiling height, access routes, foundation conditions, drainage, and how construction could affect daily routines. A new footprint may provide the needed rooms, but it can also change outdoor circulation and the way the house sits on the lot.

How Does Long Island Context Affect the Plan?

Homes in Nassau and Suffolk Counties vary widely in lot size, existing construction, neighborhood pattern, and site conditions. Treat the property as a specific site rather than applying a universal addition formula. Your early plan should identify the intended use, available footprint, conversion opportunities, and existing constraints. It should also leave room for project-specific review of local requirements, drawings, and site conditions before construction decisions are finalized.

Contact Gappsi through our contact page

Which Type of Home Addition Fits Your Long Island Property?

The right addition depends on how much space you need, where your property can accommodate construction. And whether you want to expand the footprint or reuse space you already have. A careful comparison helps you avoid designing a solution that conflicts with the home’s structure, circulation, or daily routines.

Small expansions and enclosed outdoor rooms

A bump-out expands an existing room or adds a compact room to the current layout. It can be useful when a kitchen needs more workspace, a dining area needs better circulation, or a bedroom needs additional floor area. A sunroom takes a different approach, creating a light-filled space that brings the outdoors in while shielding occupants from the elements. These options can add function without committing to a large multi-room project.

Ground-floor and vertical additions

A conventional addition creates a permanent connection to the main house and can accommodate several rooms, such as a family room, bathroom, guest bedroom, or primary suite. It also creates a larger change to the home’s footprint, so the design must account for how the new structure meets the existing exterior and interior layout.

When lot space is limited, a second-story addition can add substantial living area above the existing structure. This approach may suit a homeowner who needs multiple rooms but has little room to build outward. An over-garage addition can similarly add a room without increasing the home’s overall footprint, depending on the home’s layout and the garage structure. Review the planning considerations in this guide to garage addition contractors before treating the space above a garage as an automatic solution.

Contact Gappsi through our contact page

Conversions and separate living spaces

Addition path Planning question
Bump-out or sunroom Can a focused expansion solve the space problem?
Ground-floor or second-story addition How will the new structure connect to the existing home?
Basement, attic, or garage conversion Can existing conditions support the intended use?
ADU or detached space Does the property support a separate living program?

A basement or attic conversion adds usable living space without expanding the home’s footprint. A basement should be completely dry before it is planned as finished space. An attic must be suitable for required insulation and ventilation, and its framing needs careful review. If the converted area includes sleeping space, egress may require specially sized or placed windows. These conditions make an early assessment important.

A garage conversion can repurpose an infrequently used garage for a room that better matches household needs. An accessory dwelling unit, or ADU, is a self-contained living space distinct from the primary house on the lot. It may be considered when separate living space is part of the long-term goal. But its design should be evaluated as a distinct building program rather than simply a larger room addition. For Long Island homeowners, a site evaluation can compare these paths against the existing structure, access, and property layout before drawings are developed.

How Do Permits and Architectural Drawings Affect the Plan?

  1. Define the rooms, uses, and connection to the existing home.
  2. Evaluate the site, structure, utilities, access, and drainage.
  3. Develop architectural, site, and structural drawings.
  4. Confirm local submission requirements with the building department.
  5. Finalize the scope, finishes, proposal, and construction coordination plan.

Permits are not a formality to handle after the design is finished. They help establish whether the proposed work can be built as planned, what documents the municipality needs, and which parts of the existing house will be affected. In New York, each city, town, village, and county generally administers and enforces the Uniform Code and Energy Code within its jurisdiction. That means the correct starting point for a Long Island project is the building department serving the property, not a generic checklist found online.

New York’s Energy Code applies statewide. But a municipality may adopt a more restrictive local energy conservation construction code when the State Fire Prevention and Building Code Council approves it. Requirements can therefore vary by project and location. The New York Department of State advises homeowners with specific code questions to contact their local building department for the applicable forms and compliance requirements: New York’s building code and energy code FAQ.

Call Gappsi at Contact Gappsi through our contact page to discuss your home additions plan.

What goes into the permit package?

The exact package depends on the scope. A small expansion may affect the exterior wall, foundation, roof connection, windows, insulation, and nearby utilities. A larger addition may involve new rooms, plumbing, electrical work, heating or cooling, and changes to the way people move through the house. The design team should identify these impacts before the drawings are finalized, then confirm the local submission requirements with the building department.

Architectural drawings show the homeowner-facing layout and appearance. They can indicate room dimensions, doors, windows, ceiling heights, exterior elevations, finishes, and how the addition connects to the existing floor plan. In practical terms, they let you review whether the new kitchen, bedroom, bathroom, or living area will function as intended before construction begins.

A site plan places the addition on the property. It can show the house, lot boundaries, setbacks, walkways, driveway, grading, drainage features, and other site conditions that may affect the proposed footprint. This matters on Long Island because two homes with similar floor plans can have very different lots and existing conditions.

Structural drawings and calculations address how the work will stand. They may explain the foundation, framing, beams, headers, roof connection, and other load-bearing elements. Homeowners do not need to read every calculation, but they should understand that these documents connect the design concept to the physical requirements of the house.

Good drawings clearly distinguish existing construction from proposed work and show the location and extent of the changes. That clarity helps the homeowner, designer, contractor, and reviewing officials discuss the same plan. It also makes it easier to spot decisions that need attention, such as a window location. A new stair, or the transition between old and new flooring, before those choices become field changes.

How Can You Build a Realistic Design and Scope?

A workable design starts with decisions that can be tested against the existing house and property. Clarify how the new space should function, how people will move between rooms, and which elements must be included from the beginning. A site evaluation helps identify conditions that affect the plan, such as available footprint, existing structure. Utilities, drainage, access for crews, and the relationship between the addition and the rest of the home.

Visual tools can make those decisions easier to review. Three-dimensional visualization gives homeowners a way to understand proportions, sightlines, windows, roof relationships, and how the addition may feel before construction begins. Architectural drawings then translate the selected concept into a more precise plan for the work. Together, these documents help expose conflicts early instead of leaving major decisions to the construction phase.

Finished family room addition opening toward a landscaped Long Island backyard

Choose finishes before the proposal is finalized

Finish selection is part of scope, not a last-minute decorating exercise. Flooring, cabinets, countertops, plumbing fixtures, windows, doors, lighting, siding, roofing, and trim can all affect installation requirements and the final proposal. Reviewing material samples and product options in advance also makes the allowance for each item clearer. Gappsi’s design-build process can combine 3D visualization, architectural planning, material selection, and construction through its Long Island home remodeling services.

Make the proposal specific

A useful proposal should describe the work rather than offer a vague allowance for a generic addition. It should identify the rooms and square footage being considered, demolition, foundation or structural work. Windows and doors, mechanical systems, insulation, finishes, cleanup, and the responsibilities of each party. Gappsi describes its remodeling process as including a detailed proposal, permit assistance, and a project timeline. That level of definition gives homeowners a better basis for comparing options and identifying exclusions.

There is no responsible one-size-fits-all price for home additions. Excavation, structural conditions, utility changes, finish selections, site access, local requirements. And the amount of work needed to connect the new space to the existing house can vary substantially. A site-specific evaluation and defined scope are more useful than a generic addition price promised before those factors are known.

Schedule coordination should account for design development, drawings, material lead times, permit-related steps, inspections, deliveries, and trade sequencing. The site plan should also address where materials arrive, how workers access the property, and what remains occupied. Discuss how dust, weather, and temporary utility interruptions will be managed. These logistics help align the design with the realities of living through construction.

Contact Gappsi through our contact page

What Should You Ask a Home Addition Contractor?

The right questions reveal whether a contractor can guide the full project, not simply perform the building work. Start by asking who is responsible for the design. Will the contractor develop the layout and exterior concept, or will you need to hire a separate designer? If an architect or engineer is involved, ask who coordinates that relationship and how revisions are handled.

How will the plans and permits be handled?

Ask whether the proposal includes architectural drawings, structural engineering, site measurements, and the documents needed for permit applications. The contractor should explain which parts are handled in-house and which are completed by licensed design professionals. Also ask who communicates with the local building department and whether you will be informed if the municipality requests changes. Requirements can vary by property and location, so avoid accepting a vague promise that permits will be taken care of.

Who manages the work after construction begins?

Find out who your day-to-day contact will be and who coordinates carpenters, electricians, plumbers, roofers, and other trades. Ask how schedule updates are delivered, how site questions are documented, and how delays or sequencing conflicts are communicated. A clear project-management process matters because an addition connects new work to the existing structure. Ask how the team will evaluate the property, protect occupied areas, manage deliveries, and address conditions discovered after demolition or excavation.

What exactly is included in the proposal?

Request a written scope that identifies the drawings, materials, finishes, fixtures, insulation, windows, doors, exterior cladding, cleanup, and final connections included in the work. Ask which items remain your responsibility and which selections must be made before construction starts. You should also understand the change-order process: what triggers one, how the impact is documented, and who must approve it before the work proceeds. This is especially important when site evaluation reveals existing conditions that were not visible during the initial consultation.

For a broader checklist focused on the selection process, review this guide on how to hire a room addition builder. Then compare each contractor’s answers against your actual goals, property, and communication needs rather than choosing from a short proposal alone.

Contact Gappsi through our contact page

How Does a Home Addition Connect to the Rest of Your Property?

An addition should feel connected to the property, not like an isolated box attached to the house. Review the path from the new rooms to the driveway, walkways, patio, garden, and other outdoor areas. A new kitchen or family room may need a practical door to the yard. A bedroom wing may need a private approach. A second-story project may still affect the roofline, exterior materials, drainage, and the way water moves across the site.

Exterior transitions deserve the same attention as interior finishes. The siding, masonry, roofing, windows, doors, steps, and landing should relate to the existing house while meeting the requirements of the new design. If the project changes a stoop, walkway, patio, retaining wall, or driveway, include that work in the scope instead of treating it as an afterthought. Gappsi’s Long Island masonry design and construction services can be relevant when an addition requires coordinated exterior work.

What site work should you review early?

Discuss grading, drainage, utility locations, construction access, material storage, and protection for existing landscaping before work begins. A new footprint can change how runoff leaves the roof and how people move around the property. Landscape planning may also include planting, screening, irrigation, or repairs after construction. Review Long Island landscape design and construction when the addition needs to connect with grading, planting, drainage, or a broader outdoor plan.

Gappsi serves Nassau and Suffolk Counties from its Smithtown showroom and design center. A site-specific discussion can bring the home’s interior goals, exterior transitions, and property conditions into one plan rather than leaving those decisions to separate contractors.

Contact Gappsi through our contact page

Frequently Asked Questions

What is the cheapest addition to a house?

There is no single cheapest option for every Long Island property. Converting an existing basement, attic, or garage may avoid some footprint expansion, but the space still needs to meet structural, moisture, insulation, ventilation, access, and code requirements. A small bump-out may be more practical for one home, while another may need a larger addition to solve the actual space problem. Compare the existing conditions and the intended use before comparing construction approaches.

How much would a 20 by 20 addition cost?

A responsible proposal cannot be based on dimensions alone. The cost depends on foundation and structural work, excavation, utilities, heating and cooling, windows and doors. Finishes, site access, permits, and how the new space connects to the existing house. A site evaluation and defined scope are needed before a contractor can prepare a project-specific proposal. Avoid treating an online square-foot estimate as a quote for your property.

What is the 30 percent rule for renovations?

The phrase can refer to informal budgeting advice, but it is not a universal rule that determines whether a Long Island addition is feasible. A homeowner should rely on a project-specific scope, drawings, site review, and advice from qualified design and construction professionals. Ask the local building department about applicable requirements instead of using a general rule as a substitute for review.

Is it cheaper to build a house or add an addition?

The answer depends on the existing house, the amount of space required, the property, and the extent of work needed to connect new construction to the old structure. An addition may preserve a location and features the homeowner values, while a larger project may involve more extensive structural and site work. Compare the actual scope, design requirements, permits, finishes, and disruption involved in each option before making a decision.

Do I need a permit for a home addition in New York?

Project-specific requirements should be confirmed with the building department serving the property. New York’s Department of State explains that local jurisdictions generally administer and enforce the Uniform Code and Energy Code. And homeowners with specific questions should contact the local building department for applicable forms and compliance requirements. A qualified design-build team can help organize drawings and permit assistance, but local review remains part of the process.

Plan Your Long Island Home Addition

A well-planned addition starts with a clear purpose, a review of the existing home and property, and a scope that connects design, drawings, permitting, materials, and construction coordination. Gappsi’s home remodeling team serves homeowners across Nassau and Suffolk Counties and can discuss the next planning step for your property.

Bring your goals, the rooms you need, and any concerns about access, finishes, or construction logistics to the conversation. A site-specific review is more useful than a generic estimate because every home’s structure and property conditions are different.

Contact Gappsi through our contact page

Porcelain paver showroom on Long Island with a modern display of large format tiles.

Porcelain Paver Showroom Long Island: A Buyer’s Guide

If the word “porcelain” makes you think of delicate teacups, it’s time for a new perspective. The porcelain used for outdoor pavers is a completely different material, engineered for incredible strength and resilience. Made from fine clay fired at extreme temperatures, these pavers are dense, non-porous, and built to withstand heavy foot traffic and harsh weather without cracking or chipping. They combine the elegance of high-end materials with an unmatched toughness that makes them perfect for any outdoor project. The best way to understand their durability is to see and feel them for yourself at a porcelain paver showroom on Long Island, where you can compare their quality directly.

Key Takeaways

What Are Porcelain Pavers?

If you’re picturing the delicate porcelain of a teacup, it’s time to think bigger and stronger. Porcelain pavers are a type of ceramic tile made from a very fine, dense clay that is fired at extremely high temperatures. This intense manufacturing process makes them incredibly strong, dense, and long-lasting. Unlike other materials, they are non-porous, meaning they don’t absorb water. This key quality makes them a superior choice for a wide range of projects.

Whether you’re designing a stunning new patio or looking for a sleek, modern material for your kitchen, porcelain and natural stone pavers offer a versatile solution. They combine the beauty of natural materials like stone and wood with unmatched performance, giving you a surface that looks fantastic and holds up beautifully over time. It’s a smart investment that provides both elegance and peace of mind for any home improvement project.

Why They’re a Long Island Favorite for Outdoor Living

Long Island weather can be tough on outdoor materials, with hot, sunny summers and cold, icy winters. This is where porcelain truly shines. Because the material is so dense and doesn’t soak up water, it naturally resists stains, mold, and the cracking that often happens during our seasonal freeze-thaw cycles. This makes it an ideal choice for everything from walkways to driveways.

Porcelain pavers are also one of the lowest-maintenance options on the market. They resist fading from UV rays and stand up to heavy foot traffic without showing wear. A simple cleaning is usually all it takes to keep your beautiful swimming pool deck or patio looking brand new, giving you more time to relax and enjoy your outdoor space.

Thinking Beyond the Patio: Indoor Uses

Porcelain’s durability and sophisticated style aren’t just for the outdoors. Many homeowners are bringing this versatile material inside to create seamless, flowing designs from their patio to their living room. Large porcelain slabs can be used for stunning kitchen countertops, elegant bathroom walls, or even as a durable and stylish flooring option for high-traffic areas.

This ability to bridge indoor and outdoor living is perfect for creating a cohesive and modern feel throughout your property. Imagine a continuous floor that runs from your kitchen out to your poolside lounge area. By working with a team that specializes in home remodeling, you can use porcelain to create a unified aesthetic that is both practical and beautiful.

How Porcelain Compares to Other Pavers

Choosing the right paver is a big decision, and it’s about more than just looks. You’re weighing cost, durability, and how much time you want to spend on upkeep. While traditional materials have their charm, porcelain pavers bring some serious advantages to the table. Let’s look at how they stack up against other popular choices like natural stone, concrete, and brick, so you can feel confident you’re picking the perfect material for your Long Island home.

Porcelain vs. Natural Stone

There’s no denying the appeal of natural stone. Each piece is completely unique, and materials like bluestone are a Long Island favorite because they’re strong, not slippery, and age beautifully. It’s a classic choice that connects your patio or walkway to the natural landscape. However, that natural beauty can come with a bit more maintenance.

Porcelain offers a modern alternative that is incredibly strong, dense, and long-lasting. It’s even more scratch-resistant than many types of natural stone. This means that patio furniture, high foot traffic, and everyday life won’t cause the same wear and tear you might see on softer stone. You get a pristine look that lasts for years, combining the aesthetic of stone with superior durability. Gappsi offers a wide selection of both porcelain and natural stone, so you can compare them side-by-side.

Porcelain vs. Concrete

Concrete pavers are a common sight, often chosen for their initial affordability. They get the job done and come in a variety of shapes and colors. The main drawback, however, is the long-term commitment to maintenance. Concrete is porous, so it easily absorbs stains from oil, wine, or fallen leaves. To keep it looking its best, it typically requires regular cleaning and sealing.

In contrast, porcelain pavers are one of the lowest-maintenance options available. They don’t need to be sealed every year, and because they are non-porous, spills just sit on the surface, making them easy to wipe clean with soap and water. While the upfront material cost for porcelain may be higher, its minimal upkeep can make it a more cost-effective choice over time. This is a key factor when planning your masonry project.

Porcelain vs. Brick

Brick pavers offer a timeless, traditional look that many homeowners love. They can create a warm and inviting atmosphere for patios and walkways. However, brick can be prone to chipping, and the color can fade over time with exposure to the sun and elements. The porous nature of brick also means it can absorb moisture, making it susceptible to moss growth and freeze-thaw cycles in the winter.

When you choose pavers, it’s smart to look at both the installation cost and the long-term upkeep. Porcelain pavers are designed with slip resistance in mind, making them a safe choice for high-traffic areas around pools and patios. Their incredible durability and low maintenance needs add up to a cost-effective solution over the life of your project. You won’t have to worry about the kind of annual restoration and sealing that older materials often require.

The Advantages of Porcelain Pavers for Your Home

When you invest in your home’s outdoor space, you want materials that look beautiful and perform exceptionally for years. Porcelain pavers deliver on both fronts, offering a powerful combination of style, strength, and practicality. They have quickly become a go-to choice for Long Island homeowners for several key reasons, making them a smart addition to any patio, walkway, or pool deck project. Unlike some traditional materials that require a lot of upkeep, porcelain provides a foundation for outdoor living that you can enjoy without constant worry or work. Let’s look at the specific advantages that make them such a compelling option.

Built to Last Through Long Island Weather

Long Island’s weather can be tough on outdoor materials, with freezing winters and humid summers. Porcelain pavers are engineered to handle these extremes. Because they are incredibly dense and non-porous, they absorb very little water. This quality makes them highly resistant to cracking during freeze-thaw cycles, a common problem with other materials. Their durability also means they resist fading from sun exposure and won’t develop mold or mildew. Choosing porcelain and natural stone means you are installing a surface that is built to maintain its integrity and appearance for decades with minimal upkeep.

Stain-Proof and Easy to Clean

Imagine hosting a backyard barbecue without worrying about spilled wine or grease staining your beautiful patio. With porcelain pavers, that’s the reality. They are one of the lowest-maintenance paving options available because their non-porous surface prevents spills from soaking in. Oil, wine, and dirt simply sit on top, making cleanup as easy as wiping with soap and water. Unlike many types of natural stone that require regular sealing to protect them, porcelain pavers do not need to be sealed. This saves you time and money on long-term maintenance, which you can learn more about by exploring typical restoration and sealing services.

A Style for Every Aesthetic

Your patio or walkway should feel like a natural extension of your home’s design, and porcelain offers the versatility to achieve just that. These pavers are available in a huge range of styles, colors, and sizes, from standard squares to large, modern slabs. Advanced manufacturing technology allows porcelain to convincingly mimic the look of other materials, including the warm grain of wood, the sleek finish of concrete, or the rich texture of natural stone like slate or travertine. This design flexibility ensures you can find the perfect look to complement your home, whether your style is classic, contemporary, or rustic. You can explore options at the Gappsi Store.

Safe and Slip-Resistant

Safety is always a top priority, especially in high-traffic areas or around a pool where surfaces can get wet. Many porcelain pavers are manufactured with a textured, anti-slip finish specifically for this reason. This surface provides excellent traction underfoot, reducing the risk of slips and falls even when the pavers are wet. It’s an ideal choice for families with children or for anyone wanting extra peace of mind around their outdoor living spaces. This makes porcelain a top material for surrounding swimming pools, creating a secure and stylish deck area for everyone to enjoy.

What’s the Cost of Porcelain Pavers on Long Island?

When you’re planning a new patio, walkway, or pool surround, the budget is always a top consideration. Understanding the cost of porcelain pavers helps you plan your project with confidence. The final price tag is a combination of two main things: the pavers themselves and the professional installation. Think of it as an investment in your home’s beauty and functionality, one that pays off for years with minimal upkeep. Let’s walk through what you can expect to budget for a porcelain paver project here on Long Island.

The total investment depends on the specific materials you choose and the complexity of your project. A simple, straightforward patio will have a different cost than a multi-level design with intricate patterns. At Gappsi, we provide clear, detailed estimates so you know exactly what to expect before any work begins. Our goal is to help you create a stunning outdoor space that fits your vision and your budget.

Breaking Down Material Costs

First, let’s talk about the pavers. The material cost for high-quality porcelain pavers on Long Island typically falls between $7 and $9 per square foot. This range accounts for the wide variety of styles, colors, and finishes available. For example, a paver that mimics the look of rare Italian marble might be at the higher end of the scale, while a more standard, solid-color paver could be more budget-friendly. The price reflects the quality, durability, and design of the product you select. Visiting a showroom is a great way to see these differences firsthand and find a style that you love.

Budgeting for Professional Installation

Next is the installation, which is just as important as the pavers themselves. Professional installation costs generally range from $5 to $10 per square foot. This fee covers more than just laying down the tiles; it includes essential site preparation like grading the land for proper drainage and building a stable base to prevent shifting or cracking. The complexity of the job, such as creating curved pathways or intricate patterns, can also influence the price. Investing in expert masonry services ensures your beautiful new surface will last for decades.

What Influences the Final Price?

Several factors come together to determine the final price of your project. The total square footage is the biggest driver, but the condition of the installation site also plays a role. If your yard requires significant excavation or grading, the labor costs may be higher. The specific installation method and the complexity of your chosen design will also affect the final number. While it’s important to consider the upfront cost, remember that porcelain’s incredible durability and low maintenance needs offer significant long-term savings. Unlike other materials that may require regular sealing and restoration, porcelain holds its beauty with very little effort.

How to Choose the Right Porcelain Paver Showroom

Choosing your porcelain pavers is an exciting step, but it’s also a big decision. While browsing online galleries is a great way to gather inspiration, nothing replaces the experience of visiting a showroom in person. This is where your project starts to feel real. A great showroom isn’t just a store; it’s a resource center where you can see, touch, and compare materials to find the perfect match for your home. It’s the difference between simply buying a product and finding a true partner for your project.

When you start looking for a showroom on Long Island, you’ll want to find one that offers more than just a catalog of options. The right place will provide a wide selection with plenty of samples you can take home, offer expert design guidance to help you visualize the final look, and have a team of skilled professionals to handle the installation. Knowing what to look for and which questions to ask will help you feel confident in your choice and ensure your new patio, walkway, or pool deck looks incredible for years to come. This is about creating a space you love, and it all begins with finding the right team and the right materials.

A Great Selection and Plenty of Samples

The first thing you’ll notice in a quality showroom is the sheer variety of options. You want a place that offers a wide selection of porcelain and natural stone pavers so you can explore different colors, textures, and styles. Pictures online can be a helpful starting point, but they rarely capture the true character of a paver. Visiting a showroom, like the Gappsi showroom in Smithtown, NY, lets you see and feel the materials firsthand. This hands-on experience is essential. Ask if you can take a few samples home. Seeing how the pavers look next to your house in the morning sun versus the evening shade can make all the difference in finding the perfect fit for your space.

Expert Design Guidance

A great showroom provides more than just materials; it offers expertise. Look for a team that can give you professional design guidance to help bring your vision to life. The best suppliers have designers on staff who can help you plan your space, select complementary colors, and create a cohesive look that ties into your home’s existing architecture and landscape. This support is invaluable, especially if you’re feeling a little overwhelmed by all the choices. Instead of just selling you pavers, a design-focused team acts as a creative partner, helping you map out a beautiful and functional outdoor living area, from the patio to the surrounding landscape.

Professional Installation and Support

Finding the perfect pavers is only half the battle. The quality of the installation is just as important as the quality of the material itself. That’s why it’s a huge advantage to choose a showroom that also offers professional installation. A full-service company like Gappsi not only sells the pavers but also has an experienced masonry team to install them correctly. This creates a seamless process from start to finish. You have one point of contact, which simplifies communication and ensures accountability. It gives you peace of mind knowing that the team laying your pavers is an expert in working with that specific product, guaranteeing a beautiful and durable result.

Key Questions to Ask Your Supplier

Walking into a showroom prepared with the right questions will make your decision process much smoother. Beyond just looking at samples, you’ll want to dig a little deeper. Start by asking about the paver’s durability rating and slip resistance, especially if you’re planning to use them around a pool. Inquire about the recommended installation method and what kind of base is required for our Long Island climate. Don’t forget to ask about the warranty for both the materials and the labor. Finally, it never hurts to ask about any current promotions, discounts on older styles, or bundled deals that include both the paver materials and installation. Being informed helps you make the best investment for your home.

Finding the Best Porcelain Paver Showroom on Long Island

Finding the right porcelain pavers for your home is a big decision, and pictures online can only tell you so much. To truly get a feel for the texture, color variation, and quality of a paver, you need to see it in person. This is where a great showroom makes all the difference. The best showrooms on Long Island are not just warehouses with stacks of stone; they are design destinations created to inspire you. You should be able to walk through thoughtfully arranged displays, see how different pavers look in various lighting conditions, and feel the material for yourself.

A top-quality showroom experience is about more than just the products. It’s about the people who guide you. You want to work with a team that understands design principles and the technical aspects of installation. They should be able to answer your questions about everything from slip resistance to which base is best for your soil type. When you find a supplier that combines an extensive selection of porcelain and natural stone with genuine expertise, you can feel confident moving forward with your project. It turns a potentially overwhelming process into an exciting and creative part of your home improvement journey.

Gappsi: Your Long Island Porcelain Destination

For a showroom experience that checks all these boxes, Gappsi is the premier destination on Long Island. Located in Smithtown, their showroom is designed to give you a hands-on feel for their extensive collection of Italian-made porcelain pavers. You can explore a huge variety of styles, from pavers that mimic the warm look of natural wood to modern, large-format tiles perfect for a sleek patio. Gappsi even offers options strong enough for driveways, ensuring a beautiful and durable entrance to your home. Their team is not just there to sell; they are design and construction experts who can help you bring your vision to life, ensuring your outdoor space is both beautiful and built to last.

Popular Porcelain Paver Brands to Know

When you start exploring porcelain pavers, you’ll quickly see a few brand names appear consistently. These manufacturers are leaders in the industry, known for their commitment to quality, design innovation, and durability. Getting familiar with what makes each brand unique can help you find the perfect material for your project, whether you’re planning a new patio, walkway, or pool surround. At the Gappsi showroom, we carry a wide selection from top-tier brands, giving you the chance to see and feel the difference for yourself.

Marazzi

If you love the warm, inviting look of wood but worry about its upkeep outdoors, Marazzi is a brand you need to see. They are masters at creating porcelain tiles with a stunningly realistic wood-like appearance, giving you that natural aesthetic without the risk of rot or fading. Their tiles are non-porous and incredibly durable, making them a fantastic choice for Long Island patios and pool decks. Because they are so easy to sanitize and resistant to stains and scratches, Marazzi’s fade-resistant tiles offer a beautiful finish that stands up to busy family life and changing seasons with ease.

Daltile

Daltile is all about providing options. This brand is recognized for its incredibly extensive range of porcelain tiles, ensuring there’s a style to match nearly any design vision. Whether your home is classic and traditional or sleek and modern, Daltile offers a huge variety of colors, finishes, and sizes to bring your ideas to life. They focus on combining beautiful aesthetics with practical functionality, so you can trust their products are not only stylish but also durable and simple to maintain. This makes them a go-to choice for both residential and commercial projects across Long Island.

Emser Tile

For homeowners looking for something with a bit of artistic flair, Emser Tile delivers. This brand is celebrated for its innovative designs and high-quality materials that truly enhance the beauty of any space. Emser Tile is a great choice if you want your patio or outdoor living area to feel distinctive and thoughtfully designed. Their products are engineered for excellent performance and durability, especially in outdoor applications where they need to withstand the elements. We often recommend Emser to clients who want their porcelain pavers to be a standout feature of their landscape.

Porcelanosa

Porcelanosa is a leading name in the industry, known for its luxurious porcelain tiles that feel both sophisticated and timeless. This brand is a favorite for high-end residential projects, offering exceptional aesthetic appeal without sacrificing functionality. Porcelanosa places a strong emphasis on innovation and sustainability in its manufacturing process, which resonates with many homeowners today. Their collections often reflect modern design trends, providing a clean, elegant look perfect for creating a chic outdoor oasis or a seamless indoor-outdoor transition. Their reputation for quality makes them a trusted choice for any home remodeling project.

Florida Tile

Florida Tile is recognized for its strong commitment to producing high-quality, sustainable porcelain tiles right here in the United States. The brand offers a diverse selection of products that are as stylish as they are durable, making them a versatile choice for many different applications. Whether you’re designing a rustic patio or a contemporary pool deck, Florida Tile provides beautiful options designed to meet the demands of everyday life. Their focus on quality and responsible manufacturing gives homeowners peace of mind, knowing they are investing in a product that is built to last and created with care.

Exploring Popular Porcelain Paver Styles

One of the best parts about choosing porcelain pavers is the sheer variety of styles available. Modern porcelain can convincingly replicate almost any material, giving you complete creative control over your project’s final look. Whether your home has a rustic, traditional, or ultra-modern vibe, there’s a porcelain paver that will fit right in. This design flexibility is a major reason why porcelain and natural stone have become so popular for outdoor living projects across Long Island. Let’s look at a few of the most sought-after styles you can explore for your own backyard transformation.

The Natural Look of Wood

If you love the warm, inviting look of a wood deck but dread the thought of staining, sealing, and dealing with splinters, wood-look porcelain is your answer. These pavers capture the beautiful grain and rich tones of natural wood with stunning realism. You get all the aesthetic benefits without any of the constant upkeep. They are perfect for creating a cozy patio, a rustic walkway through a garden, or a seamless transition from your indoor hardwood floors to your outdoor space. Plus, unlike real wood, they won’t rot, warp, or fade, even after a harsh Long Island winter.

The Classic Look of Stone

There’s a reason natural stone has been used for centuries: it’s timeless, elegant, and substantial. Porcelain pavers masterfully replicate the appearance of classic materials like slate, bluestone, and travertine. You can find pavers with subtle color variations and authentic-looking textures that give your project a high-end, custom feel. This allows you to achieve the luxurious look of exotic stone without the associated cost or sourcing challenges. It’s an ideal choice for creating grand entryways, sophisticated patios, and walkways that complement traditional masonry work, giving your home a cohesive and stately appearance.

Sleek, Contemporary Designs

For a clean, modern aesthetic, sleek porcelain pavers are an excellent choice. These styles often come in large format tiles and monochromatic colors like cool grays, deep charcoals, and crisp whites. They create an uncluttered, sophisticated foundation for contemporary homes and minimalist landscapes. This look is perfect for designing a resort-style pool deck, a chic rooftop terrace, or a streamlined patio for outdoor entertaining. The clean lines and uniform appearance of these pavers pair beautifully with modern architectural elements, creating a polished and intentional outdoor living area that feels both spacious and refined.

Are Financing and Promotions Available?

A beautiful new porcelain paver patio or walkway is a wonderful investment in your home, but it’s also a significant one. The good news is you don’t have to pay for the entire project all at once. Many homeowners use financing and seasonal promotions to make their dream outdoor space a reality without straining their budget. Thinking ahead about the financial side of your project can make the whole process smoother and more enjoyable. Let’s look at a couple of ways you can make your paver project more affordable.

Understanding Your Financing Options

Bringing your vision to life is the exciting part, and figuring out how to pay for it shouldn’t be a roadblock. Many home improvement companies understand this and offer plans to help. It’s quite common for them to provide a variety of affordable financing solutions designed to fit different budgets, so you can find a payment schedule that works for you. This approach allows you to get your project started sooner and pay for it over time in manageable installments. Don’t hesitate to ask your design consultant about the financing options available; they are there to help you find the right fit.

Finding Seasonal Deals and Discounts

Beyond financing, a little savvy shopping can go a long way. Keep an eye out for seasonal sales and special promotions, which can significantly lower your total project cost. With material costs for quality porcelain pavers often falling between $7 and $9 per square foot, even a small discount can add up to substantial savings. When you visit a porcelain paver showroom on Long Island, always ask about any ongoing sales, clearance items, or package deals. Planning your project around these promotions is a smart way to get the high-end look you want for less.

Planning Your Long Island Porcelain Paver Project

Once you have a style in mind, it’s time to get into the details of your project. Proper planning is the key to a smooth installation and a beautiful, long-lasting result. From the ground up, every step matters. Thinking through the base, your budget, and your professional partners ahead of time will save you from headaches later on. A successful project isn’t just about picking the right paver; it’s about ensuring it’s installed correctly and fits within your financial plans. Let’s walk through the essential steps to get your porcelain paver project started on the right foot.

Selecting the Right Base and Installation Method

The foundation of your paver project is just as important as the pavers themselves. Porcelain pavers need a properly prepared base to ensure they last. Simply laying them over an old concrete slab isn’t enough, as this can lead to poor drainage, shifting, and cracking over time. A solid foundation, typically made of compacted aggregate, allows for proper water drainage and creates a stable surface that can handle Long Island’s changing seasons. This expert site preparation is a core part of professional masonry services and is critical for the longevity of your patio, walkway, or pool surround.

How to Measure and Estimate for Your Project

Creating a realistic budget starts with understanding all the costs involved. The total price includes the pavers themselves, which can range from a few dollars to over $35 per square foot, and the cost of professional installation. Don’t underestimate the installation budget; it’s a significant part of the investment because it involves extensive ground preparation to do the job right. To get a clear estimate, measure the square footage of your project area. Then, you can explore different porcelain and natural stone options to see how material choices affect your total cost. Always factor in a small cushion for any unexpected needs that might arise.

Partnering with a Design and Installation Expert

Working with the right team can make all the difference. A great showroom does more than just sell pavers; it provides comprehensive support to bring your vision to life. Look for experts who offer help with design, space planning, and complete project management. A full-service partner can guide you through every phase, from initial concept to final installation. They can also provide valuable tips on how to care for your new pavers and offer creative solutions for unique projects, like a rooftop deck or an intricate patio design. This level of landscape design expertise ensures your new space is both beautiful and functional.

Related Articles

Frequently Asked Questions

Are porcelain pavers slippery, especially around a pool? This is a great question and a top concern for anyone with a pool. Many porcelain pavers are specifically made with a textured, anti-slip finish. This provides excellent grip, even when the surface is wet, making them a very safe choice for pool decks, patios, and walkways. When you’re choosing your pavers, just be sure to ask about the slip-resistance rating to find the perfect option for your space.

How do porcelain pavers hold up during a Long Island winter? They perform exceptionally well. The secret is in how they are made. Porcelain is fired at very high temperatures, which makes the material incredibly dense and non-porous. This means it doesn’t absorb water, so when temperatures drop below freezing, there is no trapped moisture to expand and cause cracks. This resistance to the freeze-thaw cycle is why porcelain is such a durable, long-lasting choice for our climate.

Do porcelain pavers get too hot to walk on in the summer sun? Like any paving material, porcelain will absorb some heat from direct sunlight. However, the color you choose makes a big difference. Lighter-colored pavers in shades of white, beige, or light gray will reflect more sunlight and stay significantly cooler underfoot than darker colors like charcoal or black. If your patio gets a lot of direct sun, opting for a lighter-colored paver is a smart way to keep the surface comfortable for bare feet.

Can I just lay porcelain pavers over my old concrete patio? While it might seem like a convenient shortcut, we strongly advise against it. Laying pavers directly over an existing concrete slab can lead to major problems with drainage and stability. An old slab can shift or crack, and that movement will transfer directly to your new pavers. A proper installation requires a stable, well-draining base made of compacted aggregate to ensure your beautiful new surface lasts for decades without issues.

What’s the real difference in cost between porcelain and concrete pavers over time? While concrete pavers might have a lower initial price, porcelain often proves to be more cost-effective in the long run. The main reason is maintenance. Porous materials like concrete require regular, costly sealing to protect them from stains and water damage. Porcelain, being non-porous, never needs to be sealed. You save money and time every year on upkeep, making it a smart investment that holds its value and beauty with minimal effort.