Two people reviewing designs on a tablet to get a quote for a backyard pavilion.

How to Get a Quote for a Backyard Pavilion

You have a vision for your backyard: a beautiful, shaded space for family dinners, a comfortable retreat by the pool, or an elegant focal point for your garden. A pavilion can be all of those things, but turning that vision into a reality requires a solid plan, and that plan starts with a budget. Understanding the costs involved is the first step toward building the outdoor living area you’ve been dreaming of. This article will serve as your roadmap, guiding you through the main types of pavilions, the custom features available, and the other expenses like electrical work and foundations. By the end, you’ll have a clear understanding of the entire process, making it much easier to get a quote for backyard pavilion and start your project.

Key Takeaways

  • Look Beyond the Sticker Price: Your total cost includes more than just the structure. Remember to factor in expenses like site preparation, permits, electrical work for lighting, and a solid foundation to avoid budget surprises.
  • Match Your Pavilion to Your Home and Habits: The right pavilion is a blend of form and function. Consider how materials like wood or metal, and roof styles like hip or open gable, will complement your home’s architecture and support how you plan to use your new outdoor room.
  • Vet Your Builder Thoroughly: The success of your project depends on your contractor. Choose a licensed and insured professional who provides detailed, itemized quotes, offers a strong warranty, and has a portfolio of high-quality work you can review.

What Affects the Cost of a Backyard Pavilion?

Thinking about adding a pavilion to your backyard is exciting, but it’s natural to wonder about the cost. The final price tag isn’t just one number; it’s a combination of several key factors. From the size of the structure to the materials you choose, every decision plays a role in your total investment. Understanding these elements will help you set a realistic budget and plan a project that perfectly fits your space and your wallet. Let’s walk through the main components that will shape the cost of your new outdoor retreat.

How Size and Layout Impact Your Budget

First, the size of your pavilion is one of the biggest factors in its cost. A larger structure requires more materials and labor, which naturally increases the price. But it’s not just about square footage. The complexity of the layout also matters. A simple rectangular design will be more budget-friendly than a custom L-shaped or multi-level structure. It’s also smart to think about the installation footprint. You’ll need extra space around the pavilion for the construction crew and their equipment, a detail that’s easy to overlook during the planning phase. Exploring different pavilion and pergola designs can give you a better sense of how size and shape influence the final look.

Choosing Your Pavilion Materials

The materials you select will define your pavilion’s style, durability, and maintenance needs, all of which affect the cost. Classic wood offers a warm, traditional look, while vinyl and metal provide a more modern, low-maintenance alternative. Here on Long Island, it’s especially important to choose materials that can handle our coastal climate. You’ll want something that resists humidity, salt air, and seasonal weather changes. For example, certain woods have a high resistance to rot, while powder-coated aluminum stands up well to moisture. We often integrate beautiful and resilient materials like porcelain and natural stone for flooring and support columns, ensuring your pavilion is built to last.

The Role of Design and Custom Features

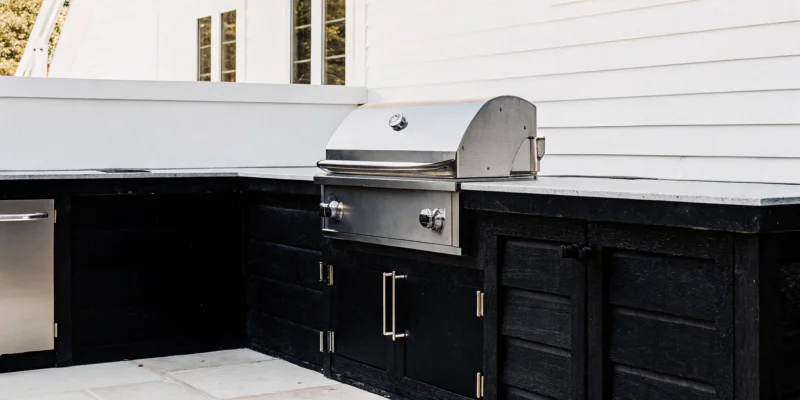
A basic pavilion provides shade and style, but custom features are what truly make the space your own. These additions will influence your budget, so it’s good to decide what’s most important to you. Popular upgrades include integrated lighting for evening gatherings, ceiling fans for hot summer days, and electrical outlets for charging devices or plugging in speakers. You could even add a full outdoor kitchen or a cozy fireplace. The overall design style also plays a part. The roofing style you choose, whether it’s a classic hip roof or a more open gable design, can dramatically change the look and cost. These custom touches are where a skilled design and build team can really bring your vision to life.

Preparing Your Site and Foundation

Before your pavilion can go up, the ground beneath it needs to be ready. Site preparation is a critical step that should never be overlooked. This process can involve clearing and leveling the land, removing trees or other obstructions, and grading the area for proper drainage. The foundation itself is another major cost component. A simple concrete slab is a common choice, but you might opt for a more decorative foundation using pavers or natural stone. Proper planning and design from the start prevents costly mistakes down the road. A full-service team can handle all the necessary masonry and site work, ensuring your pavilion has a solid and stable base.

What Are the Main Types of Backyard Pavilions?

Choosing a pavilion is an exciting step in creating your dream outdoor space. But with so many options, it’s easy to feel a little overwhelmed. The right pavilion not only provides shade and shelter but also defines the style of your backyard. Think of your pavilion as the anchor for your outdoor living area, whether it’s a quiet spot for morning coffee or a central hub for family gatherings next to the pool. It’s a structure that invites you to spend more time outside, extending your living space and adding significant value to your property.

The style you select can transform your yard from a simple lawn into a destination. From the materials you choose to the shape of the roof, every detail contributes to the final look and feel. Understanding the main types of pavilions and pergolas will help you narrow down what works best for your home, your lifestyle, and your budget. Are you drawn to the warmth of natural wood that complements a traditional garden, or the clean lines of modern metal for a sleek poolside lounge? Do you need a fully custom structure to fit a unique corner of your yard? Let’s walk through the most popular styles to help you find the perfect match for your Long Island home.

Classic Wood Pavilions

There’s a reason wood pavilions are a timeless favorite. They bring a natural warmth and classic charm that blends beautifully with almost any landscape design. Materials like cedar and pine are not only beautiful but also durable, creating a sturdy structure that feels both elegant and inviting. A wood pavilion is incredibly versatile; you can leave the wood in its natural state, stain it to highlight the grain, or paint it to perfectly match your home’s exterior trim. Imagine a cozy wood pavilion with a stone fireplace for cool evenings or a simple, rustic structure overlooking your garden. This flexibility allows a wood pavilion to serve as a beautiful and functional extension of your home’s masonry and stonework.

Sleek Metal and Steel Designs

If your taste leans more contemporary, a metal or steel pavilion might be the perfect fit. These structures are known for their sleek, sophisticated look, using strong materials like powder-coated aluminum or steel to create a minimalist profile. With their clean lines and simple forms, metal pavilions add a touch of modern elegance to any backyard without obstructing views. They are a fantastic choice for framing a chic outdoor lounge area or a poolside retreat. One of the biggest advantages of metal is its durability and low maintenance. Unlike wood, it won’t warp or rot, and it stands up exceptionally well to the coastal weather we get on Long Island. These pavilions look stunning when paired with other modern elements, like a geometric swimming pool or minimalist patio furniture.

Hip Roof vs. Open Gable Styles

The style of the roof has a major impact on your pavilion’s overall appearance and function. The two most common styles are the hip roof and the open gable. A hip roof features four sides that slope gently downwards from a central point or ridge. This design offers excellent protection from sun and rain from all angles and has a classic, elegant look that complements traditional home architecture. It creates a cozy, enclosed feeling underneath. An open gable roof, on the other hand, has two sloping sides that form a triangle, leaving the ends open. This style creates a more vaulted, airy ceiling, making the space feel larger and more open. It’s a great choice if you want to preserve a sense of openness in your yard while still having overhead cover.

Custom-Built vs. Prefabricated Kits

When it comes to construction, you can generally choose between a prefabricated kit or a fully custom-built pavilion. Kits come with pre-cut materials and a set design, which can simplify the installation process. They are a good option if you have a standard-sized space and find a design that you love as is. However, they offer limited flexibility if your yard has unique dimensions or if you want specific features. A custom-built pavilion gives you complete creative control. Working with a designer and builder, you can create a structure that is perfectly tailored to your space, needs, and aesthetic vision. This is the best route if you want to integrate the pavilion seamlessly with an existing patio, add custom electrical for lighting and fans, or match architectural details of your home. A custom build ensures your pavilion is truly one-of-a-kind.

How to Get an Accurate Pavilion Quote

Getting a clear and accurate quote for your backyard pavilion starts with a little preparation. When you know what you want and what to ask, you can confidently compare your options and find the right builder for your project. Here’s how to get started.

Gather Your Project Details

Before you pick up the phone, take some time to brainstorm your vision. Having a clear idea of your project helps a contractor give you a much more accurate price. Think about the basics first: What size do you envision, and where will it go in your yard? Consider its main purpose. Will it be a cozy spot for family dinners, a shady lounge by the swimming pool, or the hub for an outdoor kitchen? Your answer will shape the design. It’s also helpful to gather inspiration photos that capture the style you’re hoping for, whether it’s rustic wood or modern metal. This initial planning sets a solid foundation for your conversation with a builder.

What to Share with Your Contractor

Once you have your vision, it’s time to share it. The more details you can provide, the better. Start with the size, location, and style you decided on. Then, talk about materials. Are you leaning toward a classic wood pavilion or a low-maintenance vinyl or metal structure? Let your contractor know about any custom features you want, like built-in lighting, ceiling fans, or electrical outlets for charging devices. It’s also a good idea to have a general budget in mind. Sharing this helps your builder recommend designs and materials that fit your financial comfort zone, ensuring the final proposal is both beautiful and practical for your home.

Key Questions to Ask for Your Quote

A quote is more than just a number; it’s the start of a conversation. To make sure you’re hiring a reliable professional, come prepared with a few key questions. Ask for a detailed, itemized estimate so you can see exactly what you’re paying for. Inquire about their license and insurance, which are non-negotiables for any project on your property. It’s also smart to ask about their experience with similar projects and to see a portfolio or watch videos of their work. Finally, clarify who is responsible for securing building permits. A trustworthy contractor will be happy to answer these questions and guide you through the process.

What Other Costs Should You Expect?

When you receive a quote for your backyard pavilion, it’s important to understand what it includes. The price of the structure itself is just one piece of the puzzle. To create a realistic budget and avoid any surprises down the road, you need to account for several other potential expenses. From navigating local rules to planning for long-term care, thinking about these costs upfront ensures your project goes smoothly from start to finish. Here are the key areas to factor into your total investment.

Permits and Local Regulations

Before any construction begins, you’ll need to consider local building codes. Depending on your pavilion’s size and your specific location in Long Island, a permit may be required. Each town and village has its own set of rules, so it’s a good idea to check with your local building department early on. This step can feel a bit overwhelming, but working with an experienced builder makes it much easier. A team that regularly builds pavilions and pergolas will be familiar with local requirements and can often handle the permit application process for you, ensuring everything is compliant from day one.

Electrical and Site Work

A pavilion is more than just a roof; it’s a functional outdoor room. If you envision having lights for evening gatherings, a ceiling fan for warm days, or outlets for music and charging devices, you’ll need to budget for electrical work. Beyond that, your site itself must be ready for construction. This might involve clearing the area, leveling uneven ground, or even doing some foundational landscaping to prepare the space. Proper site preparation is essential for a stable and secure structure, so be sure to discuss these needs with your contractor to get a clear idea of the associated costs.

Installation and Labor

The cost of labor and installation is a significant part of your pavilion project. This isn’t just about assembling the structure; it also includes building a solid foundation to support it. Whether you opt for a simple concrete slab or an elegant patio made from porcelain and natural stone, the foundation is critical to your pavilion’s longevity. The complexity of your design, the materials you choose, and the accessibility of your property will all influence the final installation cost. A detailed quote should clearly break down these labor expenses, so you know exactly what you’re paying for.

Future Maintenance and Care

Your beautiful new pavilion is an investment in your home, and like any investment, it requires some upkeep to stay in top shape. Depending on the materials you choose, you should plan for future maintenance. For example, a wood pavilion may need to be re-stained or sealed every few years to protect it from the elements. All pavilions will benefit from routine cleaning to keep them looking their best. Factoring in a small budget for long-term care will protect your structure for years to come. For paver or stone bases, professional cleaning and sealing services can also extend their life and beauty.

How to Compare Pavilion Quotes

Once you have a few quotes in hand, the real work begins. It’s tempting to just scan for the lowest price, but a smart comparison goes much deeper than that. The goal is to understand the true value behind each number, ensuring you’re comparing apples to apples. A lower price might seem attractive initially, but it could signal cheaper materials, less experienced labor, or surprise costs down the road. A thorough, professional quote tells a story about the contractor’s process, their attention to detail, and the quality of the final product you can expect for your Long Island home.

To make the best decision for your home and budget, you need to look at three key areas. First, you have to know how to read the quote itself and what a detailed estimate should include. A vague, one-line price is a red flag. Second, it’s important to recognize common budgeting mistakes so you can avoid them from the start, ensuring your project stays on track financially. Finally, you’ll want to examine the less obvious, but equally important, details like project timelines and warranties. Breaking down each quote this way helps you see beyond the bottom line and choose a builder who will deliver a beautiful, lasting pavilion without any hidden surprises.

How to Read a Quote

A good quote is more than just a final number; it’s a transparent breakdown of your entire project. Don’t accept a single lump-sum figure. Instead, look for an itemized list that details the costs for materials, labor, foundation work, and any custom features you requested. The price of a pavilion can vary widely based on its size, the materials used, and the complexity of the design. A detailed quote allows you to see exactly where your money is going and ensures there are no misunderstandings. This level of detail also shows that the contractor has thoroughly considered your project and isn’t just giving you a rough guess. At Gappsi, we provide comprehensive quotes for our custom pavilions and pergolas so you can feel confident in your investment.

Common Budgeting Mistakes to Avoid

One of the most common mistakes homeowners make is rushing through the planning phase and only budgeting for the structure itself. A beautiful pavilion often requires more than just assembly. Think about the entire scope of the project. Will you need a new patio or foundation? Our masonry experts can create the perfect base for your structure. Do you want lighting, ceiling fans, or outdoor outlets? That means you’ll need to budget for electrical work. Also, consider the space required for the construction crew and their equipment. Neglecting these associated costs or the long-term maintenance needs can lead to unexpected expenses that strain your budget later on. A great contractor will help you think through these details from the beginning.

What to Look for in Timelines and Warranties

The details beyond the price are often what separate a great contractor from a good one. Your quote should include a clear and realistic project timeline with estimated start and end dates. This shows the builder respects your time and has a solid plan for execution. Equally important is the warranty. A reputable builder will stand behind their work with a strong warranty covering both materials and labor. Be cautious of quotes that seem significantly lower than others. An unusually low price can sometimes be a red flag for lower quality work, subpar materials, or a non-existent warranty, leaving you unprotected if issues arise. A company that offers comprehensive home remodeling services understands the importance of quality and client satisfaction, which is always reflected in their timelines and warranties.

How to Choose the Right Pavilion Builder

Selecting the right builder for your pavilion is just as important as choosing the perfect design. The right partner will guide you through the process, deliver exceptional quality, and ensure your new outdoor structure stands the test of time. A great contractor turns your vision into a reality, while a poor one can lead to headaches and disappointment. To make sure you have a smooth and successful project, focus on finding a builder with a strong reputation, a commitment to quality, and a portfolio that inspires you.

Explore Gappsi’s Custom Pavilions and Pergolas

Your backyard is unique, so your pavilion should be too. Instead of settling for a one-size-fits-all kit, look for a builder who specializes in custom designs. At Gappsi, we create bespoke pavilions and pergolas tailored to your home’s style and your family’s needs. Whether you envision a rustic timber frame structure for cozy evenings or a modern pergola for poolside lounging, a custom approach ensures every detail is perfect. We work with you to design an outdoor structure that not only provides shade and comfort but also becomes a stunning focal point in your landscape, seamlessly integrating with your existing patio and garden.

Qualities of a Great Contractor

A great contractor brings more than just tools to the job; they bring a commitment to excellence. When you’re vetting potential builders, look for three key qualities: superior materials, skilled craftsmanship, and outstanding customer service. A reputable company will be transparent about the materials they use, from the wood for the frame to the porcelain and natural stone for the foundation. Their team should consist of experienced artisans who take pride in their work. Just as importantly, they should prioritize clear communication, listen to your ideas, and keep you informed every step of the way.

Why Experience and References Matter

Experience is not just a number; it’s a track record of success, problem-solving, and satisfied clients. A builder with decades of experience has likely encountered every possible challenge and knows how to handle them efficiently. Before hiring anyone, ask for proof of their license and insurance to protect yourself. Don’t just rely on online reviews. Ask for a portfolio of their completed projects and a list of references you can contact. Seeing their work firsthand on their YouTube channel or speaking with past customers will give you genuine insight into their craftsmanship and professionalism, helping you make your decision with confidence.

What to Know Before You Sign the Contract

You’ve compared quotes, chosen a builder, and finalized your design. The last step before breaking ground is signing the contract. This document is more than just a formality; it’s the official blueprint for your project, outlining every detail from payment terms to the final walkthrough. Taking the time to review it carefully ensures that you and your contractor are completely aligned on the expectations for your new pavilion. A thorough contract protects both parties and sets the stage for a smooth, successful build. Before you add your signature, let’s walk through the key details you’ll want to confirm.

Understanding Payment Schedules and Timelines

Your contract should clearly detail the payment schedule and the project timeline. Typically, payments are tied to specific project milestones, like the completion of the foundation, framing, or roofing. This structure ensures you are paying for work as it’s finished. The contract should also provide a realistic timeline, including a start date and an estimated completion date. At Gappsi, we provide a comprehensive proposal that breaks down these elements so you know exactly what to expect. A clear plan prevents misunderstandings and helps you manage your budget effectively from start to finish.

How Seasons Can Affect Pricing

While the cost of materials and labor is a major factor, the time of year you build can also play a role. Spring and summer are peak construction seasons on Long Island, which can mean longer wait times for scheduling. Building during the off-season, like in the late fall or winter, might offer more flexibility. Your contract should lock in pricing, protecting you from seasonal fluctuations once signed. Regardless of the season, it’s vital to use materials suited for the regional climate. We often recommend durable options like porcelain and natural stone that can handle Long Island’s weather year-round, ensuring your investment lasts.

Planning for Post-Installation Support

A great builder’s commitment doesn’t end when the construction is complete. Your contract should include information about warranties for both materials and workmanship. It’s also a good idea to discuss what post-installation support looks like. Will the company provide guidance on how to care for your new pavilion? Knowing who to call if you have questions or need future work provides valuable peace of mind. We believe in building lasting relationships with our clients, offering services like restoration and sealing to keep your outdoor spaces beautiful for years to come.

Related Articles

Frequently Asked Questions

How long does it actually take to build a pavilion? The timeline for a pavilion project varies quite a bit because the physical construction is only one part of the process. You also have to account for the design phase, securing any necessary permits, and preparing the site. A straightforward, prefabricated pavilion on a ready site might be complete in a few weeks. However, a large, custom-built pavilion that includes a new stone foundation and electrical work could take a couple of months from the initial design meeting to the final walkthrough. A professional builder will always provide a detailed project timeline in your contract.

Do I really need a permit for a pavilion on Long Island? It really depends on the size of your pavilion and the specific regulations in your town or village. Many smaller structures might not require a permit, but larger ones almost always do. It’s a step you definitely don’t want to skip, as it ensures your pavilion is safe and compliant with local codes. The best approach is to work with an experienced local builder who understands the requirements in your area. They can confirm what’s needed and often handle the entire permit application process for you.

What’s the biggest mistake people make when budgeting for a pavilion? The most common mistake is budgeting only for the pavilion structure itself and forgetting about the other essential costs. A successful project includes a solid foundation, which could be a concrete slab or a beautiful paver patio. You may also need to level the ground or run electrical lines for lighting and ceiling fans. Thinking about the project holistically from the start, including site work and custom features, helps you create a realistic budget with no surprises.

Is a wood or metal pavilion better for Long Island weather? Both materials can be excellent choices, so it comes down to your personal style and how much maintenance you prefer. Wood offers a timeless, natural look but will require periodic staining or sealing to protect it from our coastal humidity and weather. On the other hand, powder-coated aluminum or steel pavilions provide a sleek, modern aesthetic and are extremely durable and low-maintenance. The right choice is the one that best fits your home’s look and your lifestyle.

Can I add a pavilion to my existing patio? Yes, absolutely. Adding a pavilion is a fantastic way to get more use out of an existing patio by providing shade and a defined space for relaxing or dining. A custom builder can design a structure that fits your patio’s dimensions perfectly. They will also assess your current patio to ensure it can properly support the weight of the new pavilion, making any necessary reinforcements to create a safe and seamless addition to your backyard.

Homeowners review plans to hire a contractor for their new outdoor kitchen.

5. How to Hire a Contractor for an Outdoor Kitchen

An outdoor kitchen is a serious construction project. It’s not just about placing a grill on a patio; it involves building a durable foundation, running gas and electrical lines, and selecting materials that can withstand Long Island’s weather. Juggling plumbers, electricians, and masons can quickly become a full-time job filled with stress and potential mistakes. This is why you hire a contractor for an outdoor kitchen. A qualified professional serves as your project’s single point of contact, coordinating all the moving parts and ensuring every aspect of the job is done correctly, on time, and up to code, leaving you free to plan the menu for your first cookout.

Key Takeaways

  • A Contractor Manages the Entire Project: Your contractor should be more than just a builder; they are your project manager. They will guide you from the initial design and material choices to securing permits and coordinating all the skilled labor, ensuring a smooth process from start to finish.
  • Vet Your Contractor Thoroughly: Protect your home and budget by confirming three key things: a valid license, full insurance coverage, and a strong portfolio of past projects. Don’t hesitate to ask for proof and speak with their former clients.
  • Get Everything in Writing: A trustworthy contractor provides a detailed, itemized contract that outlines the full project scope, materials, timeline, and payment schedule. This document is your best tool for avoiding surprise costs and ensuring everyone is on the same page.

What Does an Outdoor Kitchen Contractor Do?

So, you’re dreaming of an outdoor kitchen. You can almost smell the burgers sizzling and hear the clink of glasses with friends. But how do you get from that dream to a fully functional, beautiful reality? That’s where an outdoor kitchen contractor comes in. Think of them as your project’s captain. They don’t just build the structure; they guide the entire process from the first sketch to the final cleanup. A great contractor combines the skills of a designer, a project manager, and a construction expert, ensuring your new space is built to last and perfectly suits your lifestyle. They handle the complexities so you can focus on planning your first backyard party.

Design and Planning

The first step is always the most exciting: bringing your ideas to life. A skilled contractor will sit down with you to talk about how you plan to use your space. Are you an aspiring grill master, a pizza enthusiast, or a host who needs a full-service bar? They translate your vision into a functional layout. Many professionals, including our team at Gappsi, use 3D mockups to give you a virtual tour of your kitchen before any ground is broken. This personalized design and construction process ensures every cabinet, countertop, and appliance is exactly where you want it, creating a space that is uniquely yours.

Construction and Installation

Once you’ve approved the design, your contractor takes over the heavy lifting. They manage the entire construction phase, which is a huge relief. This includes everything from preparing the foundation and running utility lines for water, gas, and electricity to the final installation of your grill and cabinets. They coordinate all the different specialists, like plumbers and electricians, so you don’t have to juggle multiple contacts. A professional contractor also handles all the necessary permits and ensures the project adheres to local building codes. This gives you peace of mind that your beautiful new kitchen is also safe and compliant, creating a seamless transition from concept to reality.

Material Selection and Sourcing

An outdoor kitchen needs to be tough enough to handle everything from summer sun to winter snow. This is where a contractor’s expertise in materials really shines. They know which products are not only beautiful but also durable and weather-resistant. Your contractor will guide you through selecting the best options, from stunning porcelain and natural stone for your countertops to high-performance stainless steel for your appliances. By sourcing reliable, long-lasting materials, they help protect your investment and ensure your outdoor kitchen remains a beautiful, functional centerpiece of your backyard for many years to come.

How to Choose the Right Outdoor Kitchen Contractor

Choosing a contractor is the most important decision you’ll make for your outdoor kitchen project. You’re not just hiring someone to build something; you’re trusting them with your home and your vision. The right partner will bring expertise and peace of mind, while the wrong one can lead to headaches and disappointment. To make sure you find a great match, focus on three key areas: their credentials, their past work, and their insurance coverage. Taking the time to vet these details will help you hire with confidence.

Verify Their Licenses and Certifications

Before you get into the exciting design details, start with the basics. Your contractor must have the proper licenses and certifications to work in Long Island. This isn’t just red tape; it’s your assurance that they understand local building codes and safety standards. A licensed professional is accountable for their work, which protects your investment and ensures the project is completed correctly and safely. Don’t be shy about asking for their license number. A reputable company will have this information ready and will be happy to provide it. This simple step confirms their legitimacy and commitment to professional standards for all their home remodeling projects.

Evaluate Their Experience and Portfolio

Experience is what separates a good contractor from a great one. You want a team that specializes in outdoor kitchens, not someone who is building one for the first time. Ask to see a portfolio of their completed projects. Look for high-quality photos and a variety of designs that show their range and attention to detail. If a contractor can’t show you examples of their work, consider it a major red flag. A strong portfolio demonstrates their skill and gives you a feel for their style. You can also check their YouTube channel to see video tours of past projects, which can give you an even better sense of their craftsmanship.

Confirm They Are Insured and Bonded

This is a non-negotiable. Your contractor must carry both general liability insurance and workers’ compensation. General liability protects your property from accidental damage during construction, while workers’ compensation covers any injuries that might happen to the crew on your property. Without this coverage, you could be held financially responsible for accidents. Any legitimate contractor will have comprehensive insurance and should be able to provide you with a certificate of insurance upon request. This protects everyone involved and is a clear sign that you’re working with a true professional who takes their masonry and construction work seriously.

Key Questions to Ask Your Contractor

Once you have a shortlist, it’s time to interview your potential contractors. Asking the right questions now can save you from headaches, unexpected costs, and disappointment later. A reputable contractor will welcome your questions and provide clear answers. Here are the key areas to cover to ensure you’re hiring the best team for your outdoor kitchen.

Inquire About Project Management and Timelines

A great design needs great execution. Ask about their project management process and who your main point of contact will be. Inquire about their experience with projects similar to yours, as this gives you a realistic idea of their capabilities and how they handle timelines. A contractor who has completed many outdoor living projects can walk you through their process with ease, giving you confidence that they can deliver on schedule and keep things moving smoothly.

Ask About the Design Process and Customization

Your outdoor kitchen should reflect your style, so understanding the design process is vital. Ask if they create custom designs and provide 3D renderings to help you visualize the space before construction begins. This step is crucial for making adjustments and ensuring the final result is what you envisioned. A great design process is collaborative, so make sure you feel heard and that they can bring your specific vision to life.

Clarify Budget Estimates and Costs

A trustworthy contractor provides a detailed, itemized estimate. Be cautious of vague quotes and ask specifically what is included, such as permits or utility hookups. Getting clear budget estimates upfront prevents surprise expenses. The quality of materials, like the porcelain and natural stone you choose, will also impact the final cost, so discuss these options early on. A transparent conversation about money from the beginning builds trust.

Request References and Discuss Communication

A contractor’s past work predicts your future experience. Ask for references from recent clients, ideally from projects completed in the last year. Speaking to former customers gives you unfiltered insight into their workmanship. Also, pay attention to their communication style. Are they responsive to your calls and emails? A contractor who is difficult to reach before you’ve signed a contract is a major red flag. You want a partner who is communicative and transparent throughout the project.

Contractor Red Flags to Watch For

Choosing a contractor is a big decision, and you want to feel confident you’re bringing the right team into your home. While most professionals are honest and hardworking, it’s smart to know the warning signs of a less-than-reputable operator. Trusting your gut is important, but knowing these specific red flags will help you protect your investment and ensure your project goes smoothly from start to finish. Think of this as your checklist for vetting potential partners, so you can move forward with total peace of mind.

Warning Signs with Licensing and Insurance

This is a non-negotiable. Any contractor you hire must have a valid license for your area and carry both liability insurance and worker’s compensation. If a contractor is hesitant to provide proof of either, consider it a major red flag. A proper license shows they meet local standards, while insurance protects you from liability if a worker is injured on your property or if accidental damage occurs. A professional company understands this is a standard part of doing business and will have their documentation ready. Don’t feel awkward asking for it; a legitimate home remodeling company will expect you to.

Issues with Pricing and Contracts

A price that seems drastically lower than all other bids can be tempting, but it’s often a sign of trouble. This could mean the contractor is using subpar materials, cutting corners on safety, or plans to add unexpected fees later. Always insist on a detailed, itemized contract before any work begins or money changes hands. The contract should clearly outline the full scope of work, specific materials to be used, a payment schedule, and an estimated timeline. Be wary of anyone who asks for a large cash deposit upfront or operates without a formal agreement. A clear contract is the foundation of a successful project and protects both you and the contractor.

Problems with Communication and Credibility

A construction project is a partnership, and clear communication is essential. If a contractor is difficult to reach, vague with their answers, or dismissive of your questions during the bidding process, imagine how they’ll be once they have your deposit. A professional will be happy to explain their process and keep you informed. Furthermore, a contractor should be proud of their past work. Ask to see a portfolio and speak with recent references. If they can’t provide examples or have a trail of negative online reviews, it’s best to walk away. A company with a strong reputation will have a gallery of completed projects they are eager to share.

Budgeting and Timeline: What to Expect

Once you start seriously planning your outdoor kitchen, two big questions usually come to mind: “How much will this cost?” and “How long will it take?” Getting clear, honest answers is crucial, and it’s a hallmark of a great contractor. A professional partner will walk you through a detailed budget and a realistic schedule, ensuring there are no major surprises along the way. This transparency is key to a stress-free project. Understanding the financial and time commitments from the start helps you plan accordingly and feel confident in your investment. At Gappsi, we pride ourselves on a comprehensive approach to home remodeling that keeps you informed every step of the way. Let’s break down what you can typically expect when it comes to budgeting and project timelines for your new outdoor kitchen.

Breaking Down the Costs

A trustworthy contractor will provide a detailed and transparent cost breakdown. Many professionals charge an initial consultation fee to cover the time spent creating a thorough design and proposal. This fee is often credited toward your total project cost if you decide to move forward. This approach ensures you receive an exact price upfront, preventing unexpected expenses later. Your estimate should clearly outline costs for labor, materials, appliances, and any other project-specific expenses. This level of detail helps you understand exactly where your money is going and allows you to make informed decisions about your investment.

Understanding the Project Timeline

The timeline for an outdoor kitchen can vary depending on its complexity, but a reliable contractor will manage the entire process to keep things moving efficiently. From the initial design and securing permits to construction and the final walkthrough, having one team handle everything is the smoothest path to completion. A good project manager will provide a clear schedule and communicate regularly about progress. While unforeseen events like weather can cause delays, a professional team will anticipate potential hurdles and have contingency plans in place. You can see examples of our streamlined process on the Gappsi YouTube channel, where we showcase projects from start to finish.

How Materials and Permits Impact Your Project

The materials you choose have a significant impact on both your budget and the project timeline. High-quality, durable materials like natural stone or porcelain may have a higher upfront cost but offer incredible longevity and require less maintenance. For example, using non-combustible materials for the kitchen’s structure ensures it won’t rot, warp, or rust over time. Your contractor should also be an expert in local building codes and permits. A professional who is knowledgeable about Long Island’s regulations will handle the entire permitting process, preventing costly delays and ensuring your outdoor kitchen is built safely and legally. This expertise in both masonry and local requirements is non-negotiable.

Related Articles

Frequently Asked Questions

Do I really need a specialized outdoor kitchen contractor, or can a general contractor do the job? While a talented general contractor can build many things, an outdoor kitchen specialist brings a unique set of skills to the table. They have deep knowledge of weather-resistant materials, proper ventilation for grills, and the specific utility requirements for outdoor spaces. This expertise is crucial for building a kitchen that not only looks great but also functions safely and withstands the elements for years to come.

What are the biggest factors that influence the final cost of an outdoor kitchen? The final price is mainly shaped by three things: the size and complexity of the layout, the quality of your appliances, and the materials you choose for countertops and finishes. A simple grill island will naturally cost less than a full U-shaped kitchen with a sink, refrigerator, and bar seating. Likewise, premium appliances and high-end natural stone will affect the budget more than standard, builder-grade options.

How involved will I need to be in the project once construction starts? Your most important work happens during the design phase. Once you approve the final plans and materials, a great contractor takes over the day-to-day management. They will handle scheduling, oversee the construction crew, and solve any problems that arise. You should expect to receive regular progress updates, but you won’t need to be on-site directing the work. Your main job is to get excited for the final reveal.

What is the most common mistake homeowners make when planning an outdoor kitchen? A frequent oversight is underestimating the importance of a functional layout. It’s easy to focus on the grill and forget to plan for adequate counter space for food prep, a landing zone for hot dishes, and easy access to a sink or trash bin. Thinking through how you will actually cook and entertain in the space is key to creating a kitchen that is a joy to use, not a source of frustration.

Besides the kitchen itself, what other elements should I consider for the surrounding space? A great outdoor kitchen is the heart of a larger outdoor living environment. Think about how it connects to the rest of your yard to create a cohesive experience. You might consider adding a shaded structure like a pavilion for comfort, installing proper lighting for evening gatherings, or creating comfortable seating areas nearby. Integrating your kitchen with landscaping or a patio helps transform your entire backyard into an inviting retreat.

Homeowners review plans to hire a contractor for their new outdoor kitchen.

5. How to Hire a Contractor for an Outdoor Kitchen

An outdoor kitchen is a serious construction project. It’s not just about placing a grill on a patio; it involves building a durable foundation, running gas and electrical lines, and selecting materials that can withstand Long Island’s weather. Juggling plumbers, electricians, and masons can quickly become a full-time job filled with stress and potential mistakes. This is why you hire a contractor for an outdoor kitchen. A qualified professional serves as your project’s single point of contact, coordinating all the moving parts and ensuring every aspect of the job is done correctly, on time, and up to code, leaving you free to plan the menu for your first cookout.

Key Takeaways

  • A Contractor Manages the Entire Project: Your contractor should be more than just a builder; they are your project manager. They will guide you from the initial design and material choices to securing permits and coordinating all the skilled labor, ensuring a smooth process from start to finish.
  • Vet Your Contractor Thoroughly: Protect your home and budget by confirming three key things: a valid license, full insurance coverage, and a strong portfolio of past projects. Don’t hesitate to ask for proof and speak with their former clients.
  • Get Everything in Writing: A trustworthy contractor provides a detailed, itemized contract that outlines the full project scope, materials, timeline, and payment schedule. This document is your best tool for avoiding surprise costs and ensuring everyone is on the same page.

What Does an Outdoor Kitchen Contractor Do?

So, you’re dreaming of an outdoor kitchen. You can almost smell the burgers sizzling and hear the clink of glasses with friends. But how do you get from that dream to a fully functional, beautiful reality? That’s where an outdoor kitchen contractor comes in. Think of them as your project’s captain. They don’t just build the structure; they guide the entire process from the first sketch to the final cleanup. A great contractor combines the skills of a designer, a project manager, and a construction expert, ensuring your new space is built to last and perfectly suits your lifestyle. They handle the complexities so you can focus on planning your first backyard party.

Design and Planning

The first step is always the most exciting: bringing your ideas to life. A skilled contractor will sit down with you to talk about how you plan to use your space. Are you an aspiring grill master, a pizza enthusiast, or a host who needs a full-service bar? They translate your vision into a functional layout. Many professionals, including our team at Gappsi, use 3D mockups to give you a virtual tour of your kitchen before any ground is broken. This personalized design and construction process ensures every cabinet, countertop, and appliance is exactly where you want it, creating a space that is uniquely yours.

Construction and Installation

Once you’ve approved the design, your contractor takes over the heavy lifting. They manage the entire construction phase, which is a huge relief. This includes everything from preparing the foundation and running utility lines for water, gas, and electricity to the final installation of your grill and cabinets. They coordinate all the different specialists, like plumbers and electricians, so you don’t have to juggle multiple contacts. A professional contractor also handles all the necessary permits and ensures the project adheres to local building codes. This gives you peace of mind that your beautiful new kitchen is also safe and compliant, creating a seamless transition from concept to reality.

Material Selection and Sourcing

An outdoor kitchen needs to be tough enough to handle everything from summer sun to winter snow. This is where a contractor’s expertise in materials really shines. They know which products are not only beautiful but also durable and weather-resistant. Your contractor will guide you through selecting the best options, from stunning porcelain and natural stone for your countertops to high-performance stainless steel for your appliances. By sourcing reliable, long-lasting materials, they help protect your investment and ensure your outdoor kitchen remains a beautiful, functional centerpiece of your backyard for many years to come.

How to Choose the Right Outdoor Kitchen Contractor

Choosing a contractor is the most important decision you’ll make for your outdoor kitchen project. You’re not just hiring someone to build something; you’re trusting them with your home and your vision. The right partner will bring expertise and peace of mind, while the wrong one can lead to headaches and disappointment. To make sure you find a great match, focus on three key areas: their credentials, their past work, and their insurance coverage. Taking the time to vet these details will help you hire with confidence.

Verify Their Licenses and Certifications

Before you get into the exciting design details, start with the basics. Your contractor must have the proper licenses and certifications to work in Long Island. This isn’t just red tape; it’s your assurance that they understand local building codes and safety standards. A licensed professional is accountable for their work, which protects your investment and ensures the project is completed correctly and safely. Don’t be shy about asking for their license number. A reputable company will have this information ready and will be happy to provide it. This simple step confirms their legitimacy and commitment to professional standards for all their home remodeling projects.

Evaluate Their Experience and Portfolio

Experience is what separates a good contractor from a great one. You want a team that specializes in outdoor kitchens, not someone who is building one for the first time. Ask to see a portfolio of their completed projects. Look for high-quality photos and a variety of designs that show their range and attention to detail. If a contractor can’t show you examples of their work, consider it a major red flag. A strong portfolio demonstrates their skill and gives you a feel for their style. You can also check their YouTube channel to see video tours of past projects, which can give you an even better sense of their craftsmanship.

Confirm They Are Insured and Bonded

This is a non-negotiable. Your contractor must carry both general liability insurance and workers’ compensation. General liability protects your property from accidental damage during construction, while workers’ compensation covers any injuries that might happen to the crew on your property. Without this coverage, you could be held financially responsible for accidents. Any legitimate contractor will have comprehensive insurance and should be able to provide you with a certificate of insurance upon request. This protects everyone involved and is a clear sign that you’re working with a true professional who takes their masonry and construction work seriously.

Key Questions to Ask Your Contractor

Once you have a shortlist, it’s time to interview your potential contractors. Asking the right questions now can save you from headaches, unexpected costs, and disappointment later. A reputable contractor will welcome your questions and provide clear answers. Here are the key areas to cover to ensure you’re hiring the best team for your outdoor kitchen.

Inquire About Project Management and Timelines

A great design needs great execution. Ask about their project management process and who your main point of contact will be. Inquire about their experience with projects similar to yours, as this gives you a realistic idea of their capabilities and how they handle timelines. A contractor who has completed many outdoor living projects can walk you through their process with ease, giving you confidence that they can deliver on schedule and keep things moving smoothly.

Ask About the Design Process and Customization

Your outdoor kitchen should reflect your style, so understanding the design process is vital. Ask if they create custom designs and provide 3D renderings to help you visualize the space before construction begins. This step is crucial for making adjustments and ensuring the final result is what you envisioned. A great design process is collaborative, so make sure you feel heard and that they can bring your specific vision to life.

Clarify Budget Estimates and Costs

A trustworthy contractor provides a detailed, itemized estimate. Be cautious of vague quotes and ask specifically what is included, such as permits or utility hookups. Getting clear budget estimates upfront prevents surprise expenses. The quality of materials, like the porcelain and natural stone you choose, will also impact the final cost, so discuss these options early on. A transparent conversation about money from the beginning builds trust.

Request References and Discuss Communication

A contractor’s past work predicts your future experience. Ask for references from recent clients, ideally from projects completed in the last year. Speaking to former customers gives you unfiltered insight into their workmanship. Also, pay attention to their communication style. Are they responsive to your calls and emails? A contractor who is difficult to reach before you’ve signed a contract is a major red flag. You want a partner who is communicative and transparent throughout the project.

Contractor Red Flags to Watch For

Choosing a contractor is a big decision, and you want to feel confident you’re bringing the right team into your home. While most professionals are honest and hardworking, it’s smart to know the warning signs of a less-than-reputable operator. Trusting your gut is important, but knowing these specific red flags will help you protect your investment and ensure your project goes smoothly from start to finish. Think of this as your checklist for vetting potential partners, so you can move forward with total peace of mind.

Warning Signs with Licensing and Insurance

This is a non-negotiable. Any contractor you hire must have a valid license for your area and carry both liability insurance and worker’s compensation. If a contractor is hesitant to provide proof of either, consider it a major red flag. A proper license shows they meet local standards, while insurance protects you from liability if a worker is injured on your property or if accidental damage occurs. A professional company understands this is a standard part of doing business and will have their documentation ready. Don’t feel awkward asking for it; a legitimate home remodeling company will expect you to.

Issues with Pricing and Contracts

A price that seems drastically lower than all other bids can be tempting, but it’s often a sign of trouble. This could mean the contractor is using subpar materials, cutting corners on safety, or plans to add unexpected fees later. Always insist on a detailed, itemized contract before any work begins or money changes hands. The contract should clearly outline the full scope of work, specific materials to be used, a payment schedule, and an estimated timeline. Be wary of anyone who asks for a large cash deposit upfront or operates without a formal agreement. A clear contract is the foundation of a successful project and protects both you and the contractor.

Problems with Communication and Credibility

A construction project is a partnership, and clear communication is essential. If a contractor is difficult to reach, vague with their answers, or dismissive of your questions during the bidding process, imagine how they’ll be once they have your deposit. A professional will be happy to explain their process and keep you informed. Furthermore, a contractor should be proud of their past work. Ask to see a portfolio and speak with recent references. If they can’t provide examples or have a trail of negative online reviews, it’s best to walk away. A company with a strong reputation will have a gallery of completed projects they are eager to share.

Budgeting and Timeline: What to Expect

Once you start seriously planning your outdoor kitchen, two big questions usually come to mind: “How much will this cost?” and “How long will it take?” Getting clear, honest answers is crucial, and it’s a hallmark of a great contractor. A professional partner will walk you through a detailed budget and a realistic schedule, ensuring there are no major surprises along the way. This transparency is key to a stress-free project. Understanding the financial and time commitments from the start helps you plan accordingly and feel confident in your investment. At Gappsi, we pride ourselves on a comprehensive approach to home remodeling that keeps you informed every step of the way. Let’s break down what you can typically expect when it comes to budgeting and project timelines for your new outdoor kitchen.

Breaking Down the Costs

A trustworthy contractor will provide a detailed and transparent cost breakdown. Many professionals charge an initial consultation fee to cover the time spent creating a thorough design and proposal. This fee is often credited toward your total project cost if you decide to move forward. This approach ensures you receive an exact price upfront, preventing unexpected expenses later. Your estimate should clearly outline costs for labor, materials, appliances, and any other project-specific expenses. This level of detail helps you understand exactly where your money is going and allows you to make informed decisions about your investment.

Understanding the Project Timeline

The timeline for an outdoor kitchen can vary depending on its complexity, but a reliable contractor will manage the entire process to keep things moving efficiently. From the initial design and securing permits to construction and the final walkthrough, having one team handle everything is the smoothest path to completion. A good project manager will provide a clear schedule and communicate regularly about progress. While unforeseen events like weather can cause delays, a professional team will anticipate potential hurdles and have contingency plans in place. You can see examples of our streamlined process on the Gappsi YouTube channel, where we showcase projects from start to finish.

How Materials and Permits Impact Your Project

The materials you choose have a significant impact on both your budget and the project timeline. High-quality, durable materials like natural stone or porcelain may have a higher upfront cost but offer incredible longevity and require less maintenance. For example, using non-combustible materials for the kitchen’s structure ensures it won’t rot, warp, or rust over time. Your contractor should also be an expert in local building codes and permits. A professional who is knowledgeable about Long Island’s regulations will handle the entire permitting process, preventing costly delays and ensuring your outdoor kitchen is built safely and legally. This expertise in both masonry and local requirements is non-negotiable.

Related Articles

Frequently Asked Questions

Do I really need a specialized outdoor kitchen contractor, or can a general contractor do the job? While a talented general contractor can build many things, an outdoor kitchen specialist brings a unique set of skills to the table. They have deep knowledge of weather-resistant materials, proper ventilation for grills, and the specific utility requirements for outdoor spaces. This expertise is crucial for building a kitchen that not only looks great but also functions safely and withstands the elements for years to come.

What are the biggest factors that influence the final cost of an outdoor kitchen? The final price is mainly shaped by three things: the size and complexity of the layout, the quality of your appliances, and the materials you choose for countertops and finishes. A simple grill island will naturally cost less than a full U-shaped kitchen with a sink, refrigerator, and bar seating. Likewise, premium appliances and high-end natural stone will affect the budget more than standard, builder-grade options.

How involved will I need to be in the project once construction starts? Your most important work happens during the design phase. Once you approve the final plans and materials, a great contractor takes over the day-to-day management. They will handle scheduling, oversee the construction crew, and solve any problems that arise. You should expect to receive regular progress updates, but you won’t need to be on-site directing the work. Your main job is to get excited for the final reveal.

What is the most common mistake homeowners make when planning an outdoor kitchen? A frequent oversight is underestimating the importance of a functional layout. It’s easy to focus on the grill and forget to plan for adequate counter space for food prep, a landing zone for hot dishes, and easy access to a sink or trash bin. Thinking through how you will actually cook and entertain in the space is key to creating a kitchen that is a joy to use, not a source of frustration.

Besides the kitchen itself, what other elements should I consider for the surrounding space? A great outdoor kitchen is the heart of a larger outdoor living environment. Think about how it connects to the rest of your yard to create a cohesive experience. You might consider adding a shaded structure like a pavilion for comfort, installing proper lighting for evening gatherings, or creating comfortable seating areas nearby. Integrating your kitchen with landscaping or a patio helps transform your entire backyard into an inviting retreat.

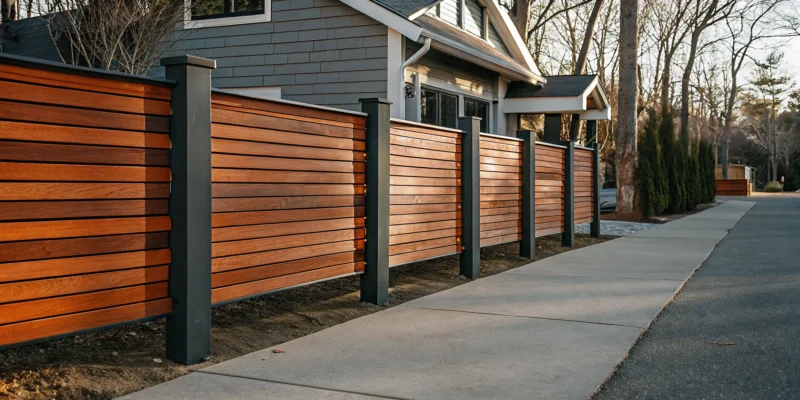
Modern Frame It All composite privacy fence with horizontal wood-look panels and metal posts.

The Guide to Frame It All Composite Privacy Fences

When planning a home improvement project, many of us are looking for ways to make more sustainable choices. It feels good to invest in products that are not only beautiful and durable but also better for the environment. Composite fencing is a perfect example of this forward-thinking approach. Instead of relying on new lumber, these fences are crafted from a smart blend of recycled plastics and reclaimed wood fibers. This process transforms materials that might have ended up in a landfill into something strong and useful. Frame It All, Composite Privacy Fences offer an eco-friendly option that doesn’t sacrifice quality, giving you a high-performance product you can feel great about installing on your property.

Key Takeaways

  • Get the classic look of wood without the constant work: Composite fencing is engineered from recycled materials to resist common problems like rot, pests, and weather damage, so you can skip the yearly staining and sealing.
  • Invest in a fence that lasts for decades: While the upfront cost is higher than wood, a composite fence saves you money in the long run by eliminating maintenance expenses and lasting over 30 years, all while offering a variety of modern styles and colors.
  • Protect your investment with proper installation: The long-term performance of your composite fence depends on a correct installation. Hiring a professional ensures details like post setting and panel spacing are handled correctly, which protects your warranty and prevents future issues.

What Is a Frame It All Composite Privacy Fence?

If you’re looking for a fence that combines modern style with serious strength, a Frame It All composite privacy fence is an excellent choice. Think of it as the best of both worlds. It’s not wood and it’s not plastic, but a smart combination of materials engineered to give you a beautiful, long-lasting barrier for your yard. This type of fencing is specifically designed to handle the demands of outdoor life without asking for much in return.

Unlike traditional wood fences that require regular staining and sealing, composite fencing is built for low-maintenance living. It’s a practical solution for busy homeowners who want a beautiful property line without the constant upkeep. You get the classic look of a privacy fence with the resilience of modern technology, creating a secure and stylish backdrop for your outdoor space. It’s a choice that looks great from day one and continues to perform for years to come.

Built with Eco-Friendly Materials

One of the best things about a composite fence is its construction. It’s a great option for anyone who wants to make a more environmentally conscious choice for their home. These fences are crafted from a thoughtful blend of recycled plastics and reclaimed wood fibers. This process takes materials that might otherwise end up in a landfill and transforms them into something durable and beautiful for your property. By choosing composite, you’re investing in a product that not only looks good but also supports a more sustainable approach to manufacturing.

Designed for Durability and Style

Composite fences are incredibly strong. They are engineered to resist common issues that plague wood fences, like rot, insects, warping, and splintering. Here on Long Island, we know how harsh the weather can be, and these fences are built to handle it, standing strong against heavy winds and seasonal changes. Plus, a special cap coating protects the surface from the sun’s rays, so the color won’t fade easily over time. This means the beautiful fence you install today will maintain its vibrant look for years, giving you both security and lasting curb appeal. We offer a variety of composite fences and netting to fit your home’s unique style.

Why Choose Composite Fencing Over Wood?

When you’re planning a new fence, one of the biggest decisions is choosing the right material. For years, wood was the go-to option for its classic, natural look, but it comes with a demanding maintenance schedule that many homeowners find overwhelming. Composite fencing offers a modern solution, giving you the beautiful appearance of wood without the constant upkeep. It’s an engineered product made from a blend of recycled wood fibers and durable plastic, creating a material that is incredibly strong, attractive, and easy to care for. This unique composition gives it an edge over traditional wood in almost every category, from weather resistance to longevity.

Choosing composite means you’re investing in a long-term solution for your property’s privacy and security. Unlike wood, it won’t fall victim to the common issues like rotting, warping, or insect damage that can make a fence look old before its time. This makes it a smart choice for any homeowner who values both aesthetics and practicality. At Gappsi, we help homeowners select from a variety of fencing options to find the perfect fit for their landscape and lifestyle. A composite fence not only defines your property line but also adds to your home’s curb appeal for decades. Let’s look at a few key reasons why so many people are making the switch from traditional wood to innovative composite materials.

Stands Up to Any Weather

Long Island weather can be tough on outdoor structures. From humid summers and heavy rain to freezing winters and strong coastal winds, your fence needs to be resilient. This is where composite fencing truly shines. It’s engineered to be incredibly strong, resisting common wood-related problems like rot, warping, cracking, and splintering. Many composite fence systems can even handle winds up to 100 miles per hour, giving you peace of mind during storms. While a wood fence might start to show wear after a few seasons, a composite fence maintains its integrity and appearance, ensuring your yard looks great year after year, no matter what the weather brings.

Enjoy a Low-Maintenance Design

One of the biggest advantages of composite fencing is how little work it requires. With a wood fence, you have a recurring list of chores: sanding, staining, painting, and sealing every few years to protect it from the elements. Composite fencing eliminates all of that. You never need to sand, stain, or paint it. To keep it looking its best, all you need is an occasional cleaning with soap and water. This saves you a significant amount of time, effort, and money over the life of the fence. Choosing low-maintenance materials is a key part of any smart home remodeling project, and a composite fence lets you spend your weekends relaxing, not working on your fence.

Resists Pests and Rot

Wood fences are vulnerable to two major threats: moisture and insects. Over time, exposure to rain and humidity can lead to rot, which weakens the structure and ruins its appearance. Wood is also a target for termites and other pests that can cause serious damage. Composite fencing provides a perfect solution. Because it’s made from a blend of wood fibers and plastic, it doesn’t absorb moisture like traditional wood, making it highly resistant to rot and decay. It’s also unappealing to termites and other wood-boring insects. This superior durability makes composite a significant upgrade, giving you the beautiful look of wood without the constant worry about pests and rot compromising your investment.

What Styles and Options Are Available?

One of the best parts about choosing a composite fence is the sheer variety available. You aren’t locked into one specific look. Instead, you can find a style that perfectly complements your home’s architecture and your personal taste, whether it’s sleek and modern or warm and traditional. Frame It All offers a range of designs, colors, and heights, giving you the creative freedom to design a fence that feels like a natural extension of your home.

This flexibility ensures your new fence will not only provide privacy and security but also enhance your property’s overall curb appeal. Let’s look at the specific options you can choose from to create the perfect backdrop for your yard.

Modern Designs for Complete Privacy

If you’re looking for a clean, contemporary boundary for your property, composite fencing is an excellent choice. These fences are made from a mix of recycled wood fibers and durable plastics, offering the beautiful look of wood without the constant upkeep. You can select from several styles to get the exact level of privacy you want. A full privacy fence uses interlocking panels to create a solid barrier, which is perfect for backyards and pool areas.

For a slightly different look, a shadowbox style alternates pickets on either side of the central rail. This design offers substantial privacy while still allowing for some airflow. Gappsi offers a wide selection of fencing solutions to match any home design, ensuring your fence is both functional and beautiful.

A Look at Colors and Textures

Frame It All composite fences do a fantastic job of mimicking the appearance of real wood. They come in a variety of colors and textures, from rich, warm tones that resemble cedar and redwood to cool, modern grays and blacks. The surface often features a subtle wood grain texture, making it hard to tell it’s not natural wood from a distance. This allows you to match your fence to your home’s siding, your deck, or other elements in your yard.

A major benefit is that the color and finish are consistent on both sides of the fence. This creates a polished look for you and your neighbors, avoiding the common “bad side” of a traditional wood fence. Choosing the right materials is key to a cohesive design, whether it’s for pavers or fences.

Customizable Heights and Panels

Your fence should fit your property’s specific needs, and that includes its height. Frame It All fencing is available in various heights, so you can create a tall, secure boundary for your backyard or a shorter, more decorative fence for your front yard. You can also choose between pre-assembled panels for a quick installation or individual pickets for a more customized project.

This level of customization allows you to design a fence that perfectly integrates with your property’s layout and existing features. By working with a professional, you can ensure your fence is incorporated seamlessly into your overall landscape design, creating a beautiful and functional outdoor space you’ll love for years to come.

How Much Does a Composite Fence Cost?

When you’re planning a new fence, the budget is always a top consideration. Composite fencing is a fantastic investment in your home’s beauty and security, but it’s helpful to understand the costs involved. The price tag isn’t just about the initial purchase; it’s also about the long-term value you get from a durable, low-maintenance product. Let’s break down what you can expect to pay for a composite fence and the factors that shape the final cost.

Understanding the Long-Term Value

It’s true that composite fences often have a higher upfront cost compared to traditional wood fences. But think of it as a one-and-done investment. Over the years, a composite fence saves you money because it doesn’t require the constant upkeep that wood demands. You won’t be spending your weekends (or your budget) on staining, painting, or replacing warped and rotting boards. Those maintenance costs for wood can add up quickly. With a composite fence from our Gappsi Store, you get a beautiful boundary for your yard that holds its value without demanding extra time and money.

Comparing Costs: Composite vs. Wood

So, what are the actual numbers? Materials for composite fencing generally run between $25 and $45 per linear foot. When you factor in professional installation, the total cost typically lands somewhere between $30 and $55 per linear foot. While a wood fence might seem cheaper at first, remember to account for the future costs of sealing and repairs. A professionally installed composite fence is built to last, giving you peace of mind and a predictable, long-term cost. Our team at Gappsi provides expert fencing installation to ensure your investment is secure and looks great for decades.

What Influences the Final Price?

Several factors can influence the total cost of your composite fence project. The height and total length of the fence are the biggest variables, as they determine the amount of material needed. The specific style, color, and texture you choose can also affect the price. Beyond the materials, preparing the site is another consideration. If your yard has a significant slope or needs old fencing removed, that can add to the labor costs. Finally, it’s always a good idea to check local building codes and property lines before starting. Careful planning ensures a smooth installation and helps you avoid any unexpected expenses down the road.

How Long Will a Composite Fence Last?

When you invest in a new fence for your Long Island home, you want peace of mind knowing it will stand strong for years to come. Unlike traditional materials that require constant upkeep and eventual replacement, composite fencing offers a truly long-term solution. When considering your fencing options, one of the biggest questions is always about durability. Frame It All composite fences are engineered specifically for longevity, giving you a beautiful and secure property line that you won’t have to worry about season after season. This makes it a practical and cost-effective choice for homeowners who value both quality and their time.

A Fence Built to Last for Decades

One of the most compelling reasons to choose composite is its incredible lifespan. A Frame It All Cap Composite Fence is designed to last for more than 30 years. To put that in perspective, that’s about five times longer than the average wood fence, which often needs to be replaced after just a handful of years due to rot or damage. This impressive durability means you can install your fence and enjoy it for decades without the recurring cost and hassle of a full replacement. It’s a smart, one-time investment that adds lasting value and security to your home, freeing you up to focus on enjoying your outdoor space instead of maintaining it.

Proven Weather Resistance and Strength

Long Island weather can be tough on outdoor structures, from humid summers to coastal storms. That’s where the resilience of composite materials really shines. These strong composite fences are built to handle just about anything nature throws their way. They resist common issues like rot, insect damage, warping, and splintering that often plague wood fences. Plus, they are engineered to withstand winds up to 100 miles per hour, giving you confidence that your fence will remain standing and secure even during severe weather. This level of strength ensures your fence will maintain its structural integrity and beautiful appearance for years, regardless of the season.

What to Know Before You Install

A successful fence installation starts long before the first post goes in the ground. Taking the time to plan ahead is the best way to ensure your project goes smoothly and your new fence looks great for years to come. A little preparation can save you from major headaches down the road, from neighborly disputes to issues with the fence material itself. Before you even think about digging, it’s important to consider a few key things: local regulations, the condition of your property, and whether to tackle the job yourself or bring in the experts. Thinking through these details will help you protect your investment and get the most out of your beautiful new composite fence. This planning phase is just as critical as the construction itself. It sets the foundation for a fence that not only provides privacy and security but also adds real value to your home. At Gappsi, our team handles every aspect of fences and netting installation, from initial planning to the final walkthrough. We make sure every detail is covered, so you can relax while we take care of the hard work and create a finished product you’ll love.

Check Local Codes and Property Lines

Before you do anything else, it’s essential to understand your local rules. Towns across Long Island have different regulations regarding fence height, style, and how far it needs to be from the street or your property line. A quick call to your local building department can clarify what’s allowed in your area and if you need a permit. It’s also a great idea to get a property survey to confirm your exact property lines. This simple step can prevent any future disagreements with your neighbors. Planning carefully from the start ensures your fence is installed correctly and legally, giving you peace of mind.

Prepare Your Site and Foundation

Proper site preparation is key to a sturdy, long-lasting fence. Start by clearing the planned fence line of any obstacles like bushes, rocks, or debris. The ground should be as level as possible to ensure the panels fit together correctly. When installing a composite fence, it’s crucial to follow the manufacturer’s instructions precisely. This includes leaving small expansion gaps between the panels. These gaps allow the material to expand and contract with temperature changes, which prevents the fence from buckling or warping over time. A solid foundation and careful assembly will keep your fence looking its best and maintain its warranty.

Deciding Between DIY and Professional Installation

While a DIY installation might seem like a way to save money, it’s important to consider the long-term value of your fence. Composite fencing is a significant investment, and a professional installation protects that investment. The Gappsi team has the right tools and experience to handle any challenges, like uneven terrain or tricky corners, ensuring a perfect result. Hiring a professional saves you time and guarantees the job is done right, preserving your warranty and giving you a fence that performs beautifully for decades. When you’re ready to add a fence to your property, our expert installers are here to help.

How to Install a Composite Fence

Installing a composite fence is a rewarding project that adds both privacy and style to your yard. While it requires careful planning and attention to detail, breaking the process down into manageable steps makes it much more approachable. Whether you’re a seasoned DIYer or considering professional help, understanding the key stages of installation is essential for a successful outcome. From gathering the right supplies to setting the final panel, following a clear plan will help you build a beautiful, sturdy fence that lasts for years.

Gather Your Tools and Materials

A smooth installation starts with having everything you need on hand. Before you begin, take the time to organize all your tools and materials. You’ll need the core components for each fence section, including composite pickets, rail sleeves, fence brackets, and the correct screws. You will also need treated lumber for the posts, which provide the structural backbone of your fence. Making a complete checklist and laying everything out will save you from making extra trips to the store and keep your project on track. Gappsi offers a wide selection of high-quality fences and netting materials to get you started.

Follow a Step-by-Step Guide

With your materials ready, you can begin the installation. Start by carefully measuring your yard and marking the fence layout to ensure straight lines. Next, dig the post holes and secure the posts with concrete mix. This is a critical step, so give the concrete plenty of time to set according to the manufacturer’s instructions before moving on. Once the posts are solid, you can attach the brackets and begin assembling the fence panels between them. Working methodically and checking your measurements as you go will help you achieve a professional-looking finish. For visual guides on similar projects, you can explore the Gappsi YouTube channel.

Avoid Common Installation Mistakes

A few common mistakes can compromise the stability and appearance of your new fence. The most frequent error is not allowing the concrete around the posts to cure completely. Rushing this step can lead to leaning posts and an unstable fence down the line. Another pitfall is incorrect post spacing or failing to ensure each post is perfectly level. Even a small error in alignment can become very noticeable once the panels are installed. Taking your time and double-checking your work at each stage is key. If you want to guarantee a flawless result, our team has the expertise to handle your entire fence installation from start to finish.

How to Maintain Your Composite Fence

One of the best things about choosing a composite fence is how little work it requires. Unlike wood, you can forget about the yearly cycle of sanding, staining, or painting. A composite fence is designed to hold its color and integrity for years with just a bit of simple care. Keeping your fence looking brand new is straightforward and doesn’t require any special skills or expensive equipment.

Think of it as a quick seasonal refresh rather than a demanding chore. A little attention once or twice a year is usually all it takes to wash away dirt and grime, ensuring your fence remains a beautiful backdrop for your yard. Proper care also protects your investment and keeps your property looking sharp. With the right approach, you can easily handle the upkeep yourself and enjoy a stunning, hassle-free fence for decades. We’ll walk you through the simple steps for cleaning and what to look for throughout the year.

Simple Cleaning and Care Tips

The best way to clean your composite fence is with a simple solution of mild soap and water. Just grab a soft-bristled brush and a garden hose to gently scrub away any dirt or mildew that has built up. This gentle method is effective and completely safe for the fence material. It’s a good idea to install fences that are easy to care for, and composite fits that description perfectly.

It’s important to avoid using a pressure washer, as the high-powered stream of water can damage the surface of the composite boards and might even void your warranty. You should also steer clear of harsh chemicals or bleach, which can cause discoloration. Stick with basic soap and water for a reliable clean that protects your fence’s finish.

A Seasonal Maintenance Checklist

To keep your composite fence in top shape, a quick seasonal check-up is all you need. Once or twice a year, give it a good cleaning with soap and water to remove any accumulated grime. While you’re cleaning, take a moment to inspect the base of the fence line and clear away any leaves, dirt, or debris that could trap moisture.

Also, take a look at the fence posts and panels to make sure everything is secure. While proper installation should prevent most issues, it’s always good to check. This is why having a professional team handle the initial setup is so important, as they ensure details like expansion gaps are correctly implemented for long-term stability. A little routine property care helps maintain your home’s entire exterior.

What Makes Frame It All a Great Choice?

When you’re investing in your home, you want to be sure you’re choosing products that are well-made and backed by a solid company. Frame It All checks both of these boxes, offering a combination of superior materials and reliable support that makes them a top choice for homeowners. Their focus on quality ensures you get a fence that not only looks fantastic but also provides lasting value for your property.

High-Quality Materials and Manufacturing

Frame It All stands out because of its commitment to quality and sustainability. Their composite fencing is an eco-friendly choice, crafted from a blend of recycled plastic and wood fibers. This isn’t just about being green; this combination creates a fence that is incredibly durable and stylish. The manufacturing process is quite clever: recycled materials are processed and mixed, then shaped into strong fence boards that are finished with a protective cap. This final layer is key to the fence’s resilience against the elements, ensuring it looks great for years. Choosing high-quality fences and netting means you’re investing in a product designed for both beauty and long-term performance.

Understanding the Warranty and Support

A great product is backed by a great warranty, and that’s exactly what you get with high-quality composite fencing. Many Frame It All fences come with warranties that last 20 to 30 years, often covering issues like fading and staining. This gives you incredible peace of mind, knowing your investment is protected for decades. However, a warranty is only as good as the installation. It’s crucial that the fence is installed correctly, with proper spacing for expansion and contraction, to keep the warranty valid. This is why professional installation is so important. An expert team ensures every detail is handled correctly, so you can fully enjoy the benefits and protection of your warranty.

Related Articles

Frequently Asked Questions

Will the color of my composite fence fade from the sun? This is a great question, as nobody wants a fence that looks washed out after a few years. High-quality composite fencing, like the kind from Frame It All, is made with UV inhibitors and a protective cap coating. This special layer acts like a permanent sunscreen for your fence, designed to resist fading and keep the color looking rich and consistent for decades. While any outdoor product will have some minimal change over a very long time, it’s engineered to be far more color-stable than wood or older types of plastic.

Can I paint my composite fence if I want a new color down the road? It’s generally not recommended to paint a composite fence. The beauty of this material is its low-maintenance finish that never needs staining or painting. Applying paint would create a new surface that you would have to maintain, and it likely wouldn’t adhere well to the composite material over the long term. Plus, painting your fence could void the manufacturer’s warranty. It’s best to choose a color you love from the start, as there are many beautiful options available to match your home’s style.

How does composite fencing hold up to Long Island’s salt air and heavy snow? Composite fencing is an excellent choice for our coastal climate. Unlike wood, which can be damaged by moisture and salt, the composite material doesn’t absorb water, so it resists rot and corrosion from the salty air. It’s also incredibly strong and won’t become brittle in the cold. Heavy, wet snow won’t cause it to warp or sag, ensuring your fence line remains straight and secure through even the toughest winters.

Does installing a composite fence actually increase my home’s value? Yes, it absolutely can. A beautiful, durable fence significantly boosts your home’s curb appeal and provides privacy and security, which are all highly desirable features for potential buyers. Because composite fencing is a long-lasting, low-maintenance product, it signals to a new owner that this is one part of the property they won’t have to worry about replacing or constantly maintaining. It’s a smart upgrade that adds both functional and financial value to your home.

What happens if a single board on my composite fence gets damaged? Accidents happen, but one of the practical benefits of a composite fence is that repairs are often straightforward. In many cases, a single damaged picket or panel can be removed and replaced without having to take down an entire section of the fence. A professional installer can easily swap out the damaged piece, making the repair process much simpler and more cost-effective than dealing with a rotting or broken wood fence.

A pavilion under construction with blueprints and tools used for calculating the building cost.

What Is the Average Cost to Build a Pavilion?

One of the biggest concerns with any home improvement project is the fear of hidden costs and budget surprises. Planning for a new pavilion should be an exciting process, not a stressful one filled with financial uncertainty. The key to a smooth project is creating a realistic and comprehensive budget from the very beginning. That’s why we’re breaking down exactly what is the average cost to build a pavilion here on Long Island. We will cover everything from the price of materials and labor to the often-overlooked expenses like site preparation and permits, ensuring you can plan your new outdoor oasis with confidence and avoid any unexpected expenses along the way.

Key Takeaways

  • Understand the core cost drivers: Your pavilion’s final price is primarily determined by its size, your choice of materials, and the complexity of the design. Planning for these key factors first will help you set a realistic budget from the start.
  • Budget for the entire project: A successful budget accounts for more than just the structure; be sure to include costs for site preparation, permits, electrical work, and furnishings to avoid any financial surprises.
  • Prioritize long-term value: Choosing higher quality materials and professional installation may cost more initially, but it’s a smart investment that saves you money over time by minimizing future repairs and maintenance.

What’s the Average Cost to Build a Pavilion?

Thinking about adding a pavilion to your backyard is exciting. It’s a fantastic way to create a dedicated space for relaxing, dining, or entertaining guests, shielded from the sun or a light rain. But before you get too far into picking out furniture, it’s smart to understand the potential costs. The final price tag for a pavilion can vary quite a bit, depending on the size, materials, and complexity of the design you have in mind. As a general guideline, you can expect the cost to fall somewhere between $35 and $60 per square foot.

This range gives you a starting point, but the two biggest factors that will shape your budget are the materials you choose and the cost of labor for installation. A simple, pre-fabricated kit will naturally cost less than a large, custom-built structure with electrical wiring and a stone fireplace. For example, a common 20×30 foot pavilion can range anywhere from $21,000 to $36,000, which shows just how much these details matter. By breaking down these expenses, you can get a clearer picture of what to expect and build a realistic budget for the beautiful outdoor living space you’ve been dreaming of. Let’s look at how these costs add up so you can plan your project with confidence.

Breaking Down Material Costs

The materials you select are the foundation of your pavilion’s cost and its final look. A basic residential pavilion might start around $4,000, but more elaborate, custom designs with premium materials can easily exceed $20,000. For example, pressure-treated pine is often a budget-friendly option, while cedar offers a beautiful, natural look at a higher price point. Vinyl and metal are other popular choices, each with their own unique benefits and costs. Your material choice is the main reason a standard 20×30 foot pavilion can range so widely, from $21,000 to $36,000. It’s all about balancing your aesthetic goals with your budget.

Factoring in Labor Costs

Unless you’re an experienced builder tackling a DIY kit, labor will be a significant part of your total investment, typically making up 10% to 35% of the final cost. Hiring a professional team ensures your pavilion is built safely, securely, and up to local code, which is especially important here on Long Island. A custom-designed pavilion will require more skilled labor for a longer period than assembling a pre-made kit. The complexity of the job, from preparing the foundation to installing intricate design details, will also influence the overall labor expense. Getting a detailed quote from a trusted contractor is the best way to understand these costs for your specific project.

What Influences Your Pavilion’s Final Cost?

When you start planning for a new pavilion, it’s helpful to understand what goes into the final price. The total cost isn’t just about the structure itself; it’s a combination of size, materials, site conditions, and a few other key factors. Thinking through these elements ahead of time will help you create a realistic budget and ensure your project runs smoothly from start to finish. Let’s break down the main components that will shape your pavilion’s cost.

Size and Design Complexity

It’s simple: the larger and more intricate your pavilion, the more it will cost. A standard 10×12 foot pavilion will naturally be more budget-friendly than a sprawling 20×40 foot structure designed for large gatherings. Bigger pavilions require more materials, a more substantial foundation, and more labor to build. Similarly, a simple, open-sided design will cost less than a custom one with features like built-in kitchens, fireplaces, or complex rooflines. The cost per square foot typically ranges from $35 to $60, so a larger footprint directly impacts the final price. Our team can help you design beautiful pavilions and pergolas that fit both your space and your budget.

Your Choice of Materials

The materials you choose play a huge role in your pavilion’s cost and its long-term durability. Pressure-treated pine is often the most affordable option, but it requires regular maintenance. For a more premium and lasting structure, you might consider materials like cedar, vinyl, or a timber frame made from Douglas Fir or Oak. Each material has a different price point and aesthetic. Vinyl, for example, is low-maintenance, while a timber frame offers a grand, rustic look. The materials for the base are also important, whether you opt for classic pavers or elegant porcelain and natural stone. We can walk you through the pros and cons of each to find the perfect fit.

Location and Site Conditions

Where you plan to build your pavilion matters. A perfectly flat, clear patch of lawn is the ideal scenario, but most yards need some preparation first. Site prep can include clearing trees, grading uneven ground, or running utility lines, all of which add to the project cost. Your pavilion will also need a solid foundation to ensure it’s stable and secure for years to come. This usually involves pouring concrete footings, which can cost between $125 and $300 per footing. A professional site assessment is the best way to understand what your specific property needs before construction begins.

Local Permit and Inspection Fees

Don’t forget about the administrative side of things. Depending on where you live in Long Island and the size of your planned pavilion, you will likely need a building permit. Permit fees typically cost between $60 and $150, but this can vary. While some very small structures might be exempt, it’s always best to check your local municipal codes. Navigating the permit process can be tricky, but working with an experienced contractor like Gappsi means we handle all the paperwork and ensure your project is fully compliant with local regulations, so you don’t have to worry about it.

How Do Size and Style Affect Pavilion Costs?

When you’re budgeting for a new pavilion, its size and style are the two biggest factors that will shape the final price. It makes sense: a larger footprint requires more materials and labor, while a more complex design adds to the craftsmanship needed. Understanding how these elements work together helps you find the perfect balance between your vision and your budget. Let’s break down the typical costs you can expect based on different pavilion sizes and popular design choices, so you can plan your project with confidence.

Small Pavilions (10×12 to 12×16)

A small pavilion is a fantastic choice for creating a cozy, defined nook in your backyard. These sizes, typically ranging from 10×12 to 12×16 feet, are perfect for a small dining set or a comfortable seating area. On average, you can expect the cost to fall between $4,000 and $9,000. Their compact footprint requires fewer materials and a simpler foundation, which helps keep the price manageable. They offer a simple yet elegant way to add structure to your outdoor space for relaxation or quiet conversation without a massive investment.

Medium Pavilions (14×20 to 16×24)

If you envision hosting family dinners or larger get-togethers, a medium-sized pavilion is often the perfect fit. Ranging from 14×20 to 16×24 feet, these structures strike a great balance between having ample space and maintaining a reasonable budget, typically costing between $9,000 and $18,000. This size gives you enough room to create a full outdoor living room or a dedicated dining area that feels both spacious and inviting. Gappsi offers a variety of beautiful pavilions and pergolas that can be tailored to fit this popular size range and your specific needs.

Large and Custom Pavilions (20×30+)

For those who want to create a true outdoor destination, a large or custom pavilion is the ultimate choice. Structures that are 20×30 feet or larger can cost anywhere from $18,000 to over $50,000. The higher price reflects the greater amount of materials, the need for a more robust foundation, and the potential for highly customized designs. These expansive pavilions can easily accommodate multiple zones for different activities, like a full outdoor kitchen, a formal dining area, and a comfortable lounge with a fireplace.

How Popular Designs Impact the Price

Beyond sheer size, the architectural style of your pavilion plays a huge role in the final cost. A simple, traditional wood design will naturally be more affordable than one with intricate details or a mix of premium materials. Incorporating custom elements like stone columns or detailed masonry work will also increase the price. As one design expert notes, “If you’re looking for an outdoor structure that exudes timeless elegance and grandeur, stone and masonry designs are the ultimate choice.” These high-end materials require specialized labor and craftsmanship, which is factored into the overall cost.

What Other Costs Should You Plan For?

When you’re planning your new pavilion, it’s easy to focus on the structure itself. But the final price tag often includes more than just the posts and the roof. To create a realistic budget and avoid any surprises, it’s important to think about the entire project from the ground up. These additional costs are what transform a simple structure into a fully functional and beautiful outdoor living space. From preparing the site to furnishing the finished area, each step has its own associated costs. Planning for these elements ahead of time ensures a smoother process and a result you’ll love for years to come.

Site Prep and Foundation

Before any construction begins, your yard needs to be ready. This often involves site preparation, which can include clearing the area, leveling uneven ground, and pouring a solid foundation. A proper foundation, typically concrete, is essential for the stability and longevity of your pavilion. Depending on the condition of your property, this step can range from a simple task to a more complex one. For a stable and secure structure, a professionally prepared site is non-negotiable. At Gappsi, our masonry experts ensure your pavilion is built on a foundation that’s made to last, giving you peace of mind from the very start.

Electrical and Utility Hookups

Think about how you want to use your pavilion. Do you envision evening gatherings under soft lighting, a ceiling fan for warm summer days, or a TV for watching the big game outdoors? All of these features require electrical work. Running electricity to your pavilion for outlets, switches, and lighting is a common additional cost. You might also consider plumbing for an outdoor sink or a gas line for a built-in grill or fire pit. Planning for these utility hookups early in the design process is the most efficient way to integrate them seamlessly into your new outdoor space.

Furniture and Accessories

An empty pavilion is a blank canvas. The final step in bringing your vision to life is adding furniture and accessories that reflect your style and meet your needs. This could include a comfortable outdoor sofa and chairs for lounging, a dining set for alfresco meals, or decorative items like outdoor rugs and planters. If you’re dreaming of an outdoor kitchen or a cozy fireplace, those elements will also be part of this finishing stage. Budgeting for these items from the beginning helps you create a complete and inviting retreat. The right furnishings are what truly make your pavilion an extension of your home.

Long-Term Upkeep

To keep your pavilion looking its best for years to come, you should plan for long-term maintenance. The amount of upkeep required will depend on the materials you choose. For example, a wood pavilion may need to be stained or sealed every few years to protect it from the elements. While choosing high-quality, durable materials can reduce maintenance needs, every outdoor structure benefits from regular care. Gappsi offers professional restoration and sealing services to help protect your investment. Factoring in a small budget for future upkeep ensures your beautiful pavilion remains a centerpiece of your yard for a lifetime.

Should You DIY or Hire a Professional?

Once you have a vision for your pavilion, the next big question is who will build it. This decision often comes down to a trade-off between your budget, your timeline, and your own handyman skills. While tackling the project yourself can seem like a great way to save money, hiring a professional ensures the job is done right, giving you peace of mind and a structure built to last. Let’s walk through the pros and cons of each path to help you figure out which one is the right fit for your backyard project.

The DIY Route: Kit Costs and Considerations

If you’re comfortable with construction projects, building a pavilion from a kit can be a rewarding experience. You can find kits with all the materials included, typically costing between $3,000 and $5,000. For more elaborate designs or premium materials, high-end kits can run from $6,000 to $8,000 or more. These kits come with instructions and are designed for homeowners to assemble themselves. However, it’s important to be realistic about your abilities. For larger or more intricate structures, especially those with complex timber frames, a DIY approach can compromise structural integrity and safety. A poorly built pavilion won’t just look off, it could be a hazard.

Hiring a Pro: Benefits and Pricing

Hiring a professional team to build your pavilion does come with a higher upfront cost, but it’s an investment in quality and durability. When you work with an experienced company, you’re paying for expertise, efficiency, and a guarantee that your structure is safe and built to code. Professionals handle every detail, from securing permits to preparing the site and ensuring the final build is perfect. This expertise is especially crucial for custom pavilions and pergolas, which require precise craftsmanship. In the long run, a professionally installed pavilion often provides better value, saving you from potential repair costs and giving you a beautiful, long-lasting addition to your home.

How to Decide Which Is Right for You

So, how do you choose? Start by considering the scale of your project. A simple 10×12 pavilion is much more manageable for a DIYer than a large, custom 20×30 structure that requires a team. Be honest about your skill level and the amount of time you can dedicate to the project. If the thought of pouring a concrete foundation or lifting heavy beams sounds overwhelming, it’s best to call in the pros. If your dream backyard includes integrated features like an outdoor kitchen, custom masonry, or complex electrical work, a professional contractor is essential to ensure everything works together seamlessly and safely.

What Are Common Budgeting Mistakes to Avoid?

Creating a realistic budget is one of the most important steps in planning your new pavilion. It helps you set clear expectations and ensures your project moves forward without stressful financial surprises. While it’s exciting to think about the final design, overlooking a few key details in the budgeting stage can cause problems later on. Budget overruns often happen because of small, seemingly minor oversights that add up over time.

To help you stay on track, let’s walk through some of the most common budgeting mistakes homeowners make. By knowing what to look out for, you can create a more accurate and comprehensive financial plan for your project. We’ll cover the sneaky hidden expenses that can pop up, the essential permits and fees you can’t forget, and why choosing materials shouldn’t just be about finding the lowest price. A little foresight here goes a long way in making the entire process smoother and more enjoyable.

Underestimating Hidden Expenses

It’s rarely one big expense that throws a budget off course; it’s usually a series of small, unexpected costs. Things like extensive site clearing, soil testing if the ground is unstable, or extra drainage solutions can add up. You should also account for material delivery fees, waste removal, and the final landscaping needed to blend the new structure into your yard. A great way to prepare for these unknowns is to build a contingency fund into your budget, typically around 10% to 20% of the total project cost. This buffer gives you peace of mind and ensures a small surprise doesn’t derail your entire plan.

Forgetting About Permits and Fees

In Long Island, most construction projects, including building a pavilion, require permits from your local town or village. Forgetting to factor these into your budget is a common oversight. Permit fees can vary depending on your location in Nassau or Suffolk County and the scale of your project, but they are a necessary expense. Building without the proper permits can lead to fines and costly delays, so it’s a step you can’t afford to skip. Working with an experienced contractor like Gappsi is a huge help, as we handle the entire permitting process for you, ensuring everything is filed correctly and all local codes are met.

Choosing Materials Based on Price Alone

While it’s tempting to opt for the least expensive materials to lower upfront costs, this can often lead to more spending in the long run. Cheaper options may not hold up well against Long Island’s weather, resulting in frequent repairs, refinishing, or even a full replacement sooner than you’d like. Instead, focus on overall value. High-quality materials, like beautiful and durable natural stone pavers for the flooring, may have a higher initial cost but provide significant long-term benefits through durability and low maintenance. Investing in quality from the start ensures your pavilion remains a beautiful, lasting addition to your home for years to come.

How Can You Plan Your Pavilion Budget?

Creating a realistic budget is the first step toward bringing your dream pavilion to life without any financial surprises. A well-planned budget acts as your roadmap, guiding your decisions on everything from materials to final touches. By thinking through the costs ahead of time, you can confidently invest in a beautiful outdoor structure that fits your wallet and your backyard. Let’s walk through how you can get clear on the numbers, make smart choices, and find payment solutions that work for you.

Getting Accurate Quotes from Contractors

The best way to understand your potential costs is to gather detailed quotes from experienced professionals. I recommend reaching out to at least three reputable companies with a solid history of building pavilions and pergolas. Make sure any contractor you consider is licensed and insured. Don’t just look at the final number; ask for a written estimate that breaks down the costs for materials, labor, and any other fees. This transparency helps you compare offers accurately and ensures there are no hidden expenses down the line. Reading online reviews can also give you a great sense of a company’s reliability and craftsmanship.

Making Smart Material Choices for Value

The materials you choose will have the biggest impact on your pavilion’s final price tag. Pressure-treated pine is often the most budget-friendly option, while cedar offers a great mid-range balance of beauty and natural rot resistance. For a more premium, long-lasting structure, you might consider high-end timbers like Douglas Fir or even a durable vinyl or metal build. Think about the long-term value, not just the upfront cost. A slightly more expensive, low-maintenance material could save you money on upkeep over the years. Discussing these material options with your builder can help you find the perfect fit for your budget and style.

Exploring Financing and Payment Options

Building a pavilion is a significant home improvement project, and you don’t always have to pay for it all at once. Many builders offer financing or flexible payment plans to make the investment more manageable. When you’re getting quotes, be sure to ask about the payment options available. A good partner will be happy to walk you through the process and help you find a solution that works for your family’s budget. This conversation is also a great time to confirm who handles the building permits, as your contractor can often help you with the local requirements, ensuring your project starts smoothly.

Related Articles

Frequently Asked Questions

What’s the most realistic first step I should take to start planning my pavilion? Your best first step is to think about how you want to use the space. Before you get into materials or exact dimensions, picture your ideal afternoon in the pavilion. Are you hosting large family dinners, or do you want a quiet spot to read? Your answer will guide the size, location, and features you need, which makes it much easier to set a realistic budget and have a productive conversation with a contractor.

How long does it typically take to build a pavilion? The timeline really depends on the project’s complexity. A straightforward pavilion kit might be assembled in a few days, but a large, custom-built structure with a full foundation, electrical work, and masonry can take several weeks from start to finish. The permitting process can also add time before any construction begins, so it’s wise to plan ahead.

Do I really need a permit for a small pavilion on Long Island? It’s very likely that you will. Most towns and villages in Nassau and Suffolk counties have regulations for outdoor structures, even smaller ones. It’s always better to check your local building codes to be certain. Working with an experienced contractor is a great advantage here, as they will handle the entire permitting process to ensure your project is fully compliant from day one.

Can I save money by preparing the site myself before the builders arrive? While it might seem like a good way to cut costs, site preparation is a critical step that’s usually best left to professionals. A pavilion needs a perfectly level and stable foundation to be safe and durable. Improper grading or foundation work can lead to serious structural problems later. A professional team has the right equipment and expertise to ensure the site is prepared correctly, which protects your investment.

Is it possible to add features like an outdoor kitchen or fireplace later on? Yes, you can absolutely phase your project, but it’s much more efficient to plan for future additions from the start. If you think you might want an outdoor kitchen or a fireplace down the road, tell your builder during the initial design phase. They can run the necessary utility lines, like gas, water, and electricity, and pour a foundation that can support the extra weight, making it much simpler and more affordable to add those features later.