The best backyard turf is not simply the greenest sample on a shelf. The right choice has to match muddy paws, bare feet, pool water, golf balls, or everyday entertaining without becoming a maintenance headache. This guide compares the main types of artificial turf and explains which details matter for a residential yard on Long Island.
Explore Gappsi synthetic turf options and request a consultation.
Quick answer: Most residential lawns use soft polyethylene turf, while pet areas need fast drainage. Play areas benefit from an appropriate shock-absorbing system, and putting greens require a short, dense surface designed for consistent ball roll. The best system depends on use, drainage, sun exposure, surrounding materials, and installation quality.
Types of artificial turf at a glance
In short: Residential turf is best compared by its intended use, not by color alone. Lawn, pet, play, poolside, putting green, and rooftop products solve different problems.
Manufacturers can adjust fiber material, blade profile, pile height, density, backing, and drainage to create very different surfaces. A lush lawn product may feel comfortable underfoot but roll too slowly for a putting green. A dense, short pet product may be easy to clean but look less meadow-like in a front yard. Start with what the area must do every day.
| Turf type | Most important trait | Best fit |
|---|---|---|
| Landscape lawn turf | Natural appearance and soft feel | Front and back yards |
| Pet-friendly turf | Drainage and easy cleanup | Dog runs and pet yards |
| Play-area turf | Complete surface system designed for play | Family activity zones |
| Poolside turf | Drainage and stable edges | Pool surrounds and transition areas |
| Putting green turf | Predictable ball roll | Backyard golf practice |
| Balcony or rooftop turf | Low-profile, suitable drainage system | Finished outdoor living areas |
What are the main artificial turf fiber materials?
In short: Polyethylene is common in residential landscapes because it balances softness, resilience, and appearance. Nylon and polypropylene can be useful in specialized applications, but the complete product specification matters more than a material name by itself.
Polyethylene for everyday residential lawns
Polyethylene fibers are widely used for landscape lawns. They can be manufactured in varied blade shapes and green tones, often with a contrasting thatch layer near the backing. That combination helps a finished lawn avoid the flat, uniformly bright appearance associated with older artificial grass.
For a family yard, compare how samples recover after being pressed, how they feel against skin, and how they look in direct sun and shade. A sample that appears perfect under showroom lighting can look different beside existing shrubs, masonry, or a swimming pool.
Nylon for specialized durability
Nylon fibers are known for strength and can be used where durability or shape retention is a priority. The tradeoff is that nylon can feel firmer and may not be the first choice for a soft, casual lawn. It can be useful in specialized products, including some golf applications.
Polypropylene for select low-profile uses
Polypropylene can appear in economical or specialized turf products. Because product construction varies, homeowners should not choose based on price or fiber label alone. Review the intended application, backing, drainage, warranty terms, and installer guidance together.
Which turf is best for a family lawn?
In short: Choose landscape turf that feels comfortable, springs back after foot traffic, complements the property, and works with a properly prepared base.
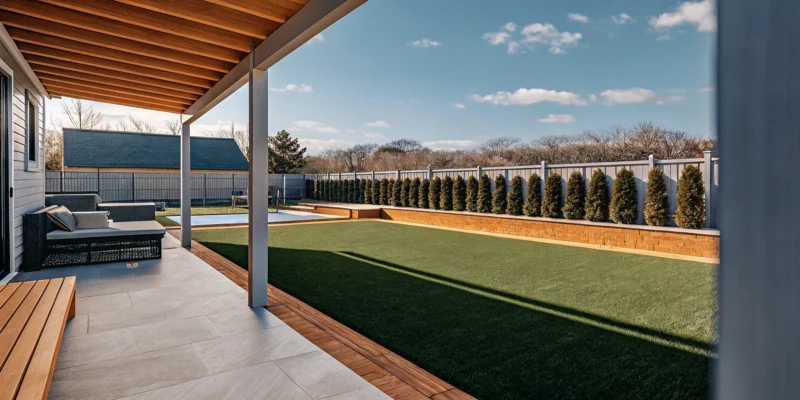
A residential lawn is a visual surface and a living area. It may need to support outdoor dining, children’s activities, and routes between the house, patio, and pool. For that reason, the best product is rarely the tallest or densest sample. Very long blades can look plush but may show traffic patterns or require more brushing. A balanced pile height and supportive thatch can provide a realistic appearance with practical upkeep.
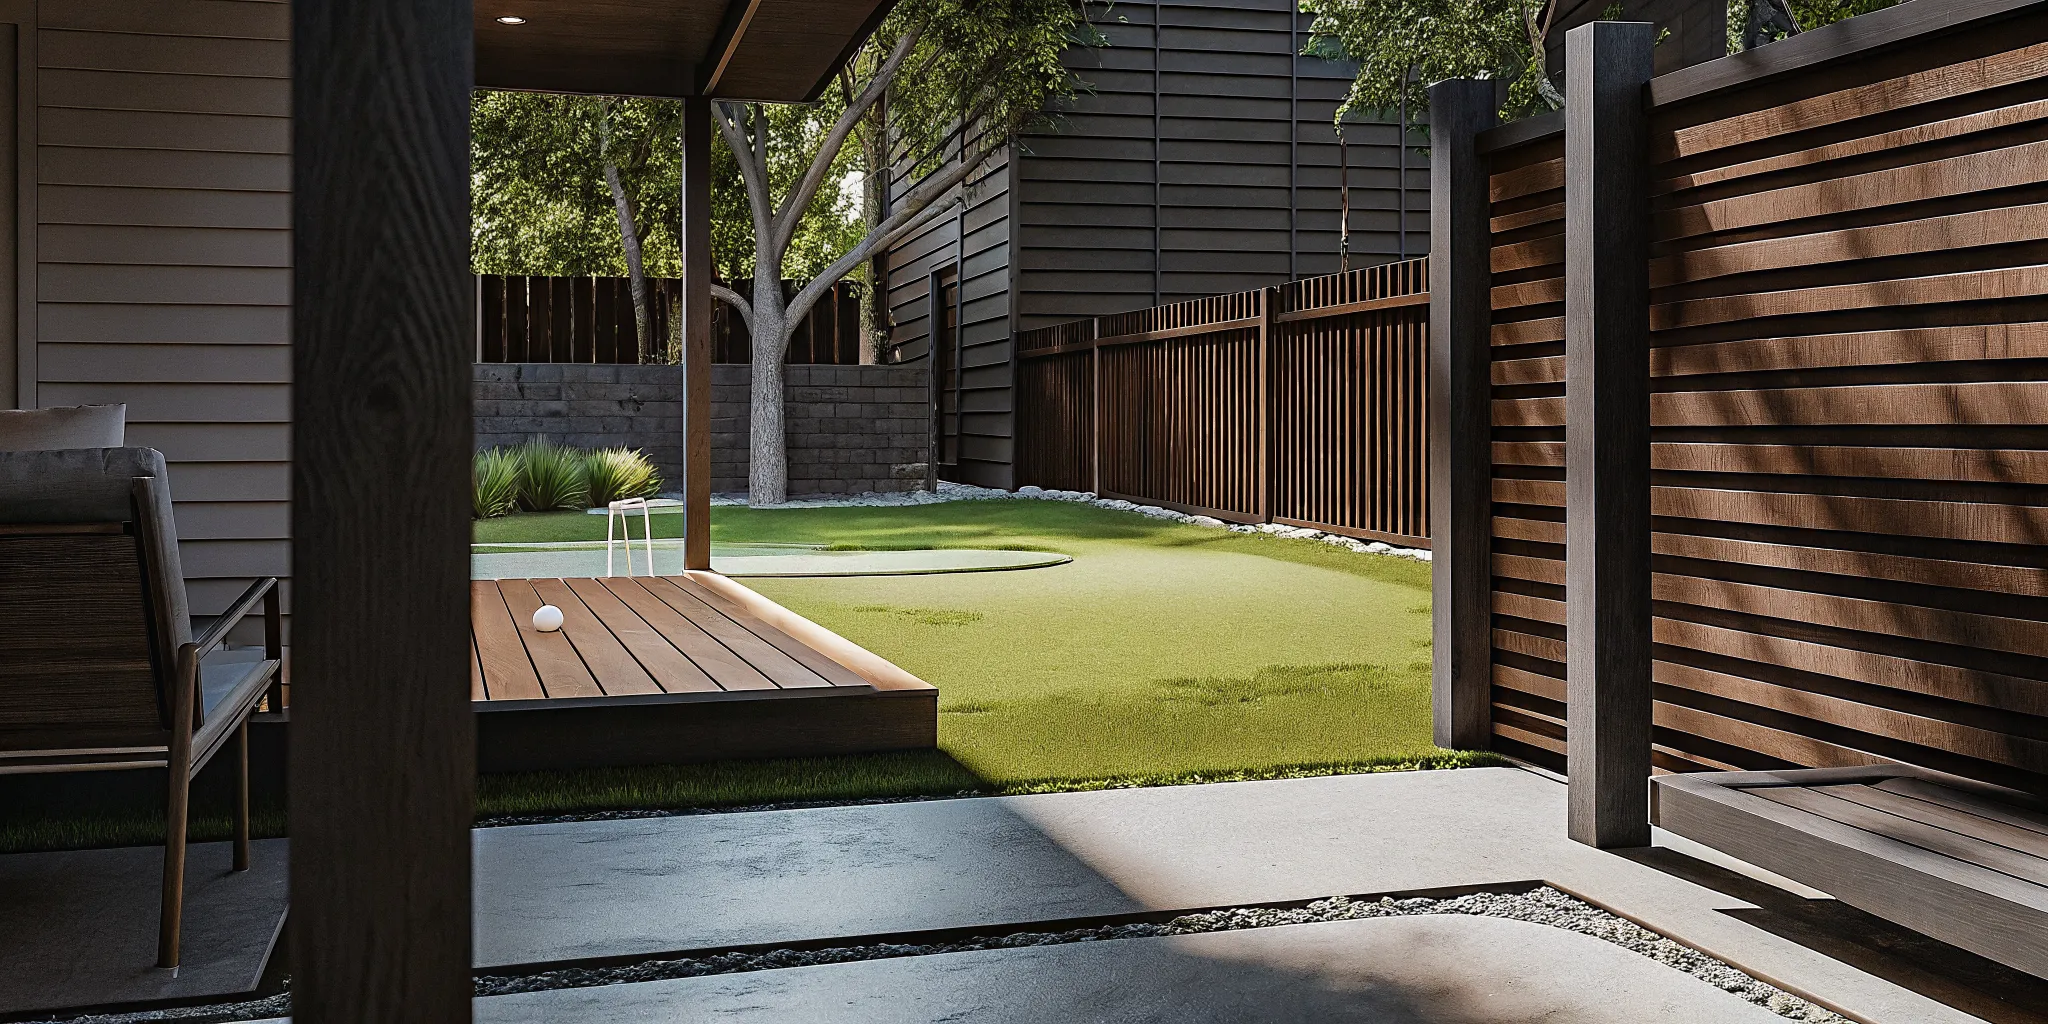
Color should also fit the setting. Long Island yards often combine mature plantings with natural stone, porcelain, or concrete pavers. A nuanced blend of greens and tan thatch generally integrates more naturally than a single bright-green tone. Gappsi’s broader landscape design and construction services can help coordinate the lawn with planting beds, grading, and outdoor living zones.
How do pet, play, and poolside turf differ?
In short: Pet areas prioritize drainage and cleaning access, play zones need a surface system suited to the intended activity, and poolside turf requires careful transitions and water management.
Pet-friendly turf
Pet turf should be selected as a complete system. Permeable backing, a drainage-ready base, accessible edges, and a practical cleaning plan all matter. A shorter, resilient pile can make solid-waste pickup and brushing easier than an extra-plush lawn. The layout should also prevent trapped runoff near fences, walls, or low spots.
For homeowners planning a dedicated dog area, see Gappsi’s guide to choosing artificial grass for pets. Discuss the number and size of pets with the installer because those details influence the surface and base recommendation.
Play-area turf
A play area is more than grass fibers. Its design should reflect the age group, equipment, expected activity, and surrounding edges. Ask the project team what complete system is appropriate for the planned use rather than assuming any soft-looking lawn product is suitable.
Poolside turf
Poolside turf can create a green visual break between hard surfaces and planting areas. Good drainage, secure perimeter details, and clean transitions are essential because the area will regularly receive splash water and foot traffic. The turf plan should be coordinated with the pool deck rather than added after every edge is fixed. Homeowners considering a larger renovation can review Gappsi’s swimming pool design and construction work for integrated ideas.
Visit the Gappsi showroom in Smithtown to compare outdoor materials in person.
What makes putting green turf different?
In short: Putting green turf is designed around ball behavior, not the plush appearance of a lawn. Surface selection and contouring should support the speed, breaks, and practice experience the homeowner wants.
Backyard putting greens generally use a shorter, denser surface than landscape lawns. The design team must consider the green’s shape, cups, fringe, slopes, drainage, and approach areas as one system. A visually attractive green that does not roll consistently will quickly become frustrating.
Before selecting a product, explain how you plan to practice. A casual family green has different goals from a challenging practice area with multiple breaks and fringe shots. Gappsi’s synthetic turf design-build team can connect material selection with the finished layout.
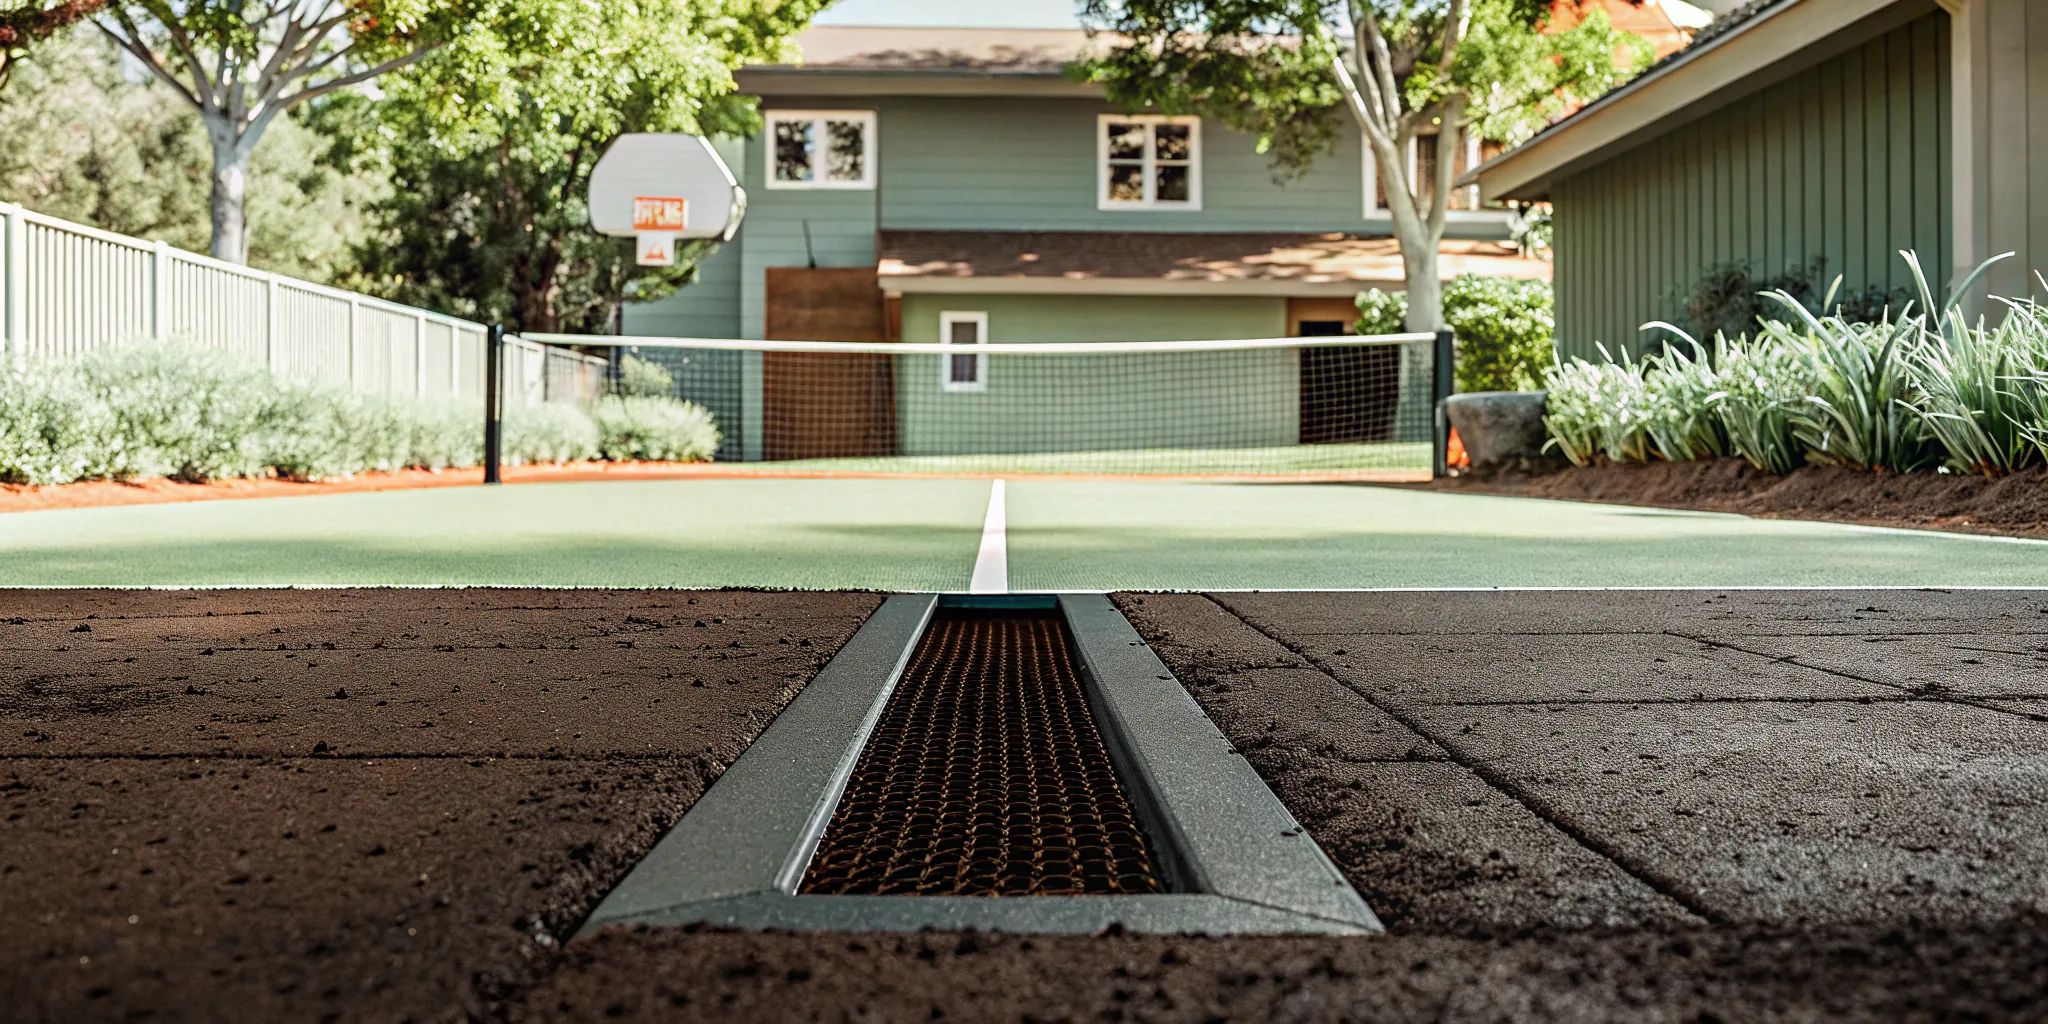
Why does the installation system matter?
In short: Even premium turf can fail to perform if grading, base preparation, drainage, seams, edges, or infill are poorly planned.
Turf is the visible finish, but much of its performance comes from the layers and workmanship below it. The project team should inspect existing grades and runoff patterns before choosing a construction approach. Water needs a reliable path away from structures and should not collect under the surface or at perimeter edges.
Long Island conditions make that site review especially useful. Sandy areas can drain quickly, while compacted soil, low spots, and hardscape borders may restrict runoff. A design-build team can coordinate excavation depth, base preparation, and finished elevations with nearby patios, pools, planting beds, and structures. That planning helps each surface meet cleanly and keeps the turf from becoming an isolated finish selected without regard to the rest of the yard.
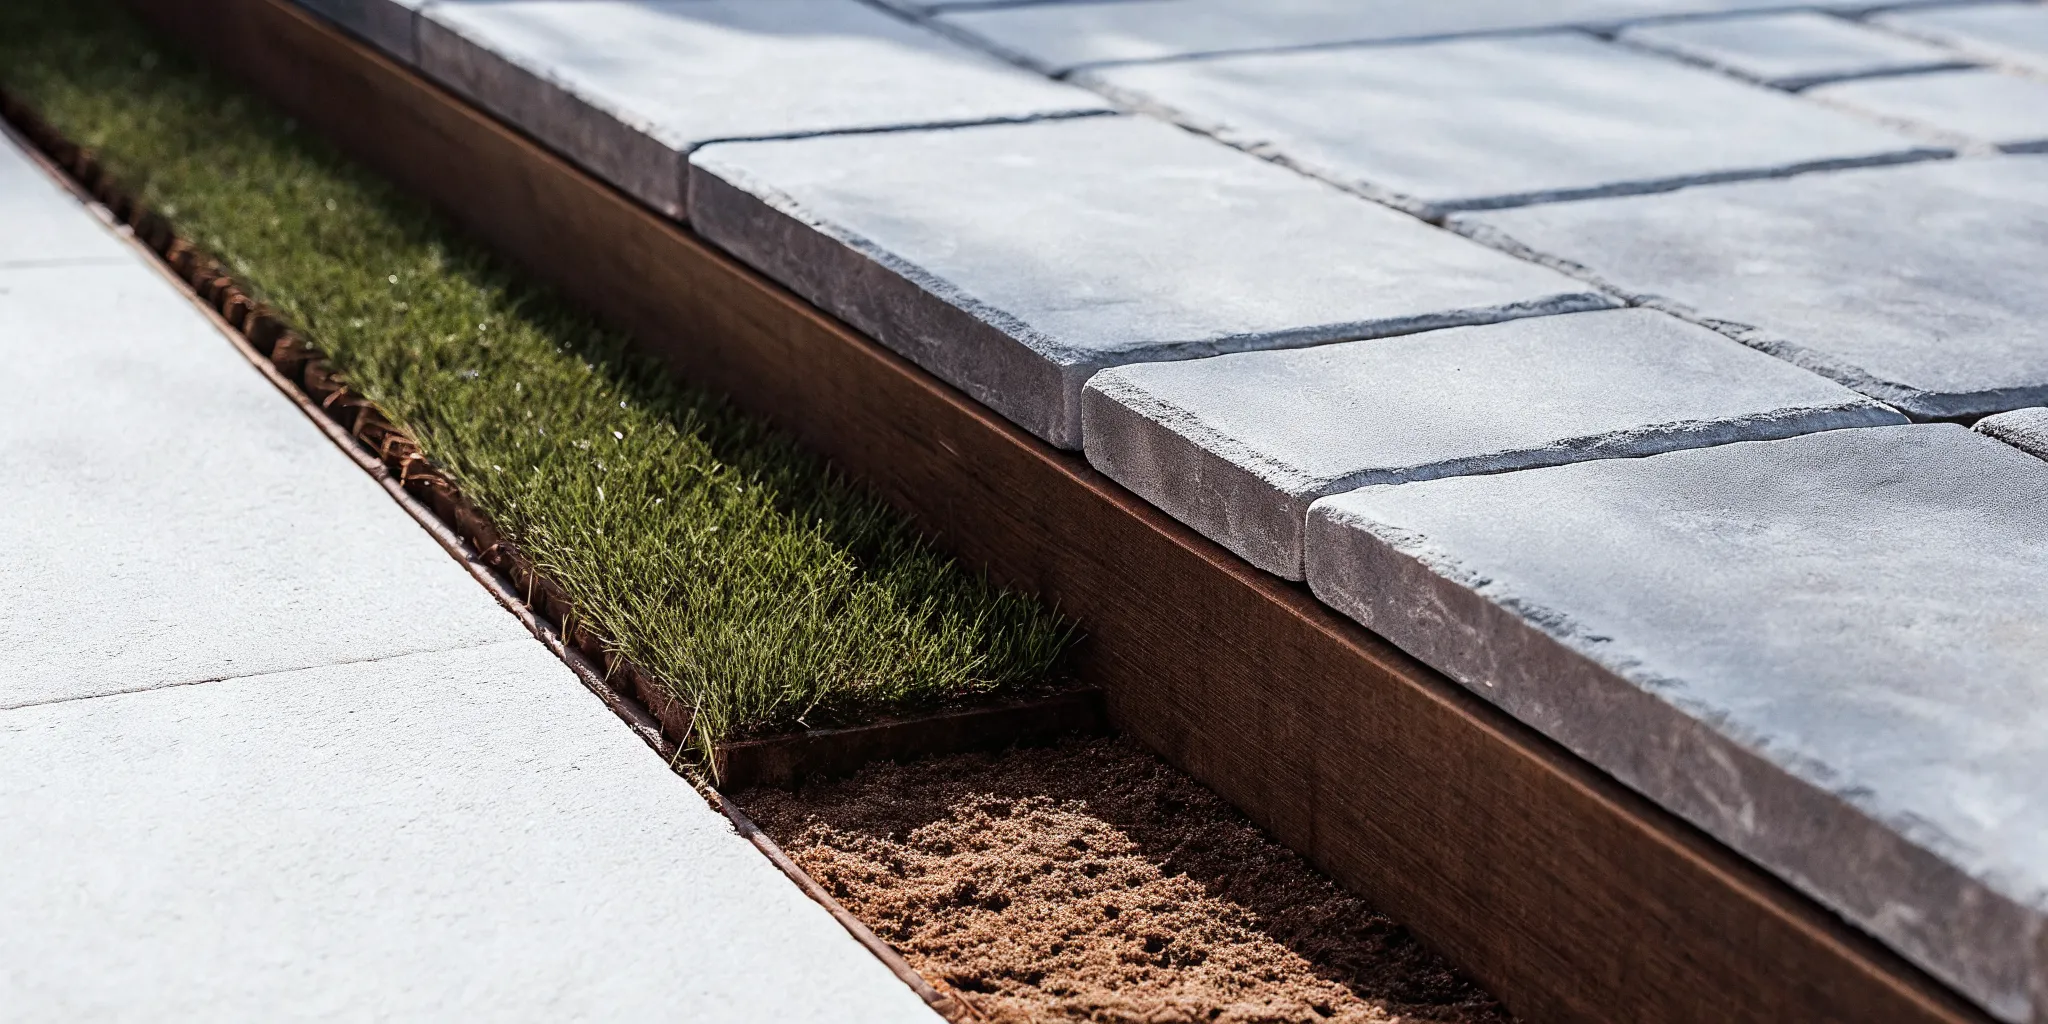
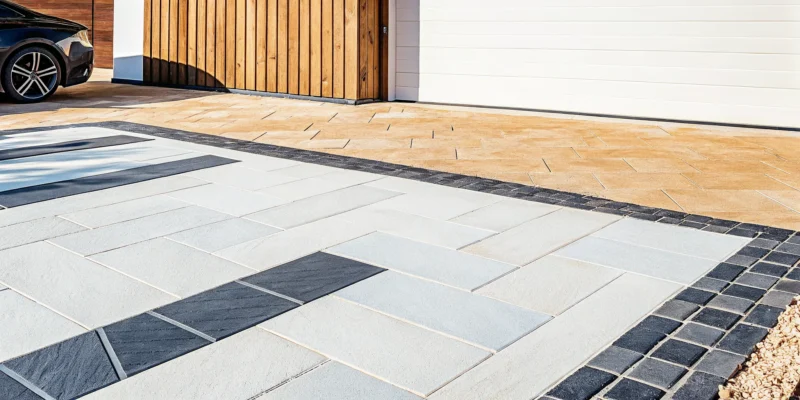
Seams and transitions deserve equal attention. They should be positioned and secured to minimize visibility and suit the direction of the blades. Edges beside pavers, planting beds, steps, fences, and pool decks need durable restraint and a neat finish. When several materials meet, an integrated design-build plan can reduce awkward gaps and afterthoughts.
Installation questions to ask
- Drainage: How will water move through and away from this specific area?
- Base: What preparation is recommended for the site’s soil and intended use?
- Edges: How will turf meet pavers, planting beds, walls, and other surfaces?
- Seams: Where will seams be located, and how will blade direction be managed?
- Care: What brushing, rinsing, or debris removal will the finished surface require?
How to choose the right turf for your yard
In short: Define the purpose of each zone, compare complete systems, evaluate samples in realistic light, and plan turf together with drainage and surrounding materials.
- Map daily use. Note where pets run, children play, guests gather, and people travel between outdoor spaces.
- Identify site conditions. Review shade, drainage, slopes, trees, access, and the surfaces that border the future turf.
- Compare relevant samples. Judge feel, recovery, blade variation, and appearance in both sun and shade.
- Review the whole system. Discuss backing, base, drainage, edge restraint, seams, and maintenance rather than focusing only on fibers.
- Coordinate the design. Make sure turf, masonry, planting, pool areas, and recreation features form a coherent outdoor plan.
A consultation-led process is especially valuable for yards with several uses. One property may benefit from soft landscape turf near the patio, a drainage-focused pet zone along the side yard, and a purpose-built putting green farther from the house. The materials can look unified while performing differently.
Frequently asked questions about artificial turf
In short: The best turf choice depends on how the yard will be used and how the complete surface system is designed, installed, and maintained. Homeowners should compare samples, ask about the layers below the surface, and select the product only after drainage and surrounding materials are considered.
What type of artificial turf looks most like real grass?
Residential polyethylene landscape turf often provides a natural-looking balance of soft blades, varied green tones, and contrasting thatch. The most convincing option is the one that complements the property’s plants, light, and surrounding hardscape.
Is taller artificial grass always better?
No. Taller fibers can appear lush, but they may show traffic patterns and need more brushing. Pile height should suit the area’s use, desired appearance, density, and maintenance expectations.
Can the same turf be used for pets and a putting green?
Usually, these applications call for different surfaces. Pet areas prioritize drainage and cleanup, while putting greens prioritize consistent ball roll. Separate products can still be designed to look cohesive.
Does artificial turf need drainage?
Yes. The backing and prepared base must work with the site’s grades and runoff conditions. Drainage planning is especially important near pools, structures, fences, and pet areas.
Should I choose turf before planning the rest of the yard?
It is better to coordinate turf with the full outdoor design. Grades, planting beds, pavers, pool decks, steps, and recreation areas all affect turf edges, drainage, and appearance.
Plan a turf system built around your home
In short: The right turf is the product and installation system that fits the way your household actually uses the yard.
Gappsi has served Long Island homeowners since 1987 and brings design, material selection, and construction planning together. Visit the Smithtown showroom to compare materials, or speak with the team about a lawn. Pet area, poolside transition, or backyard putting green for a Nassau or Suffolk County property.