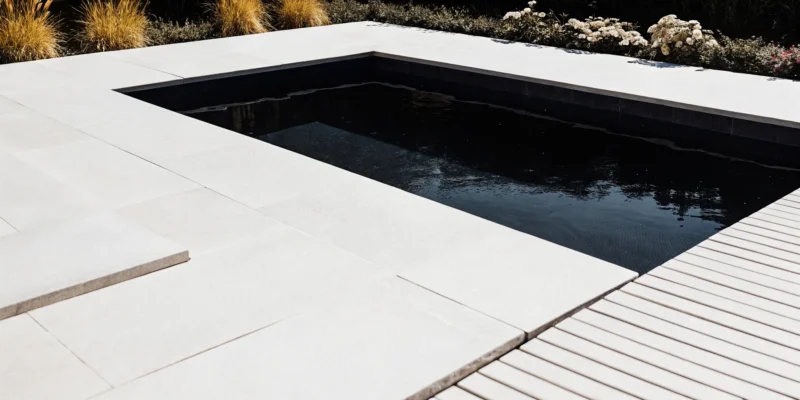
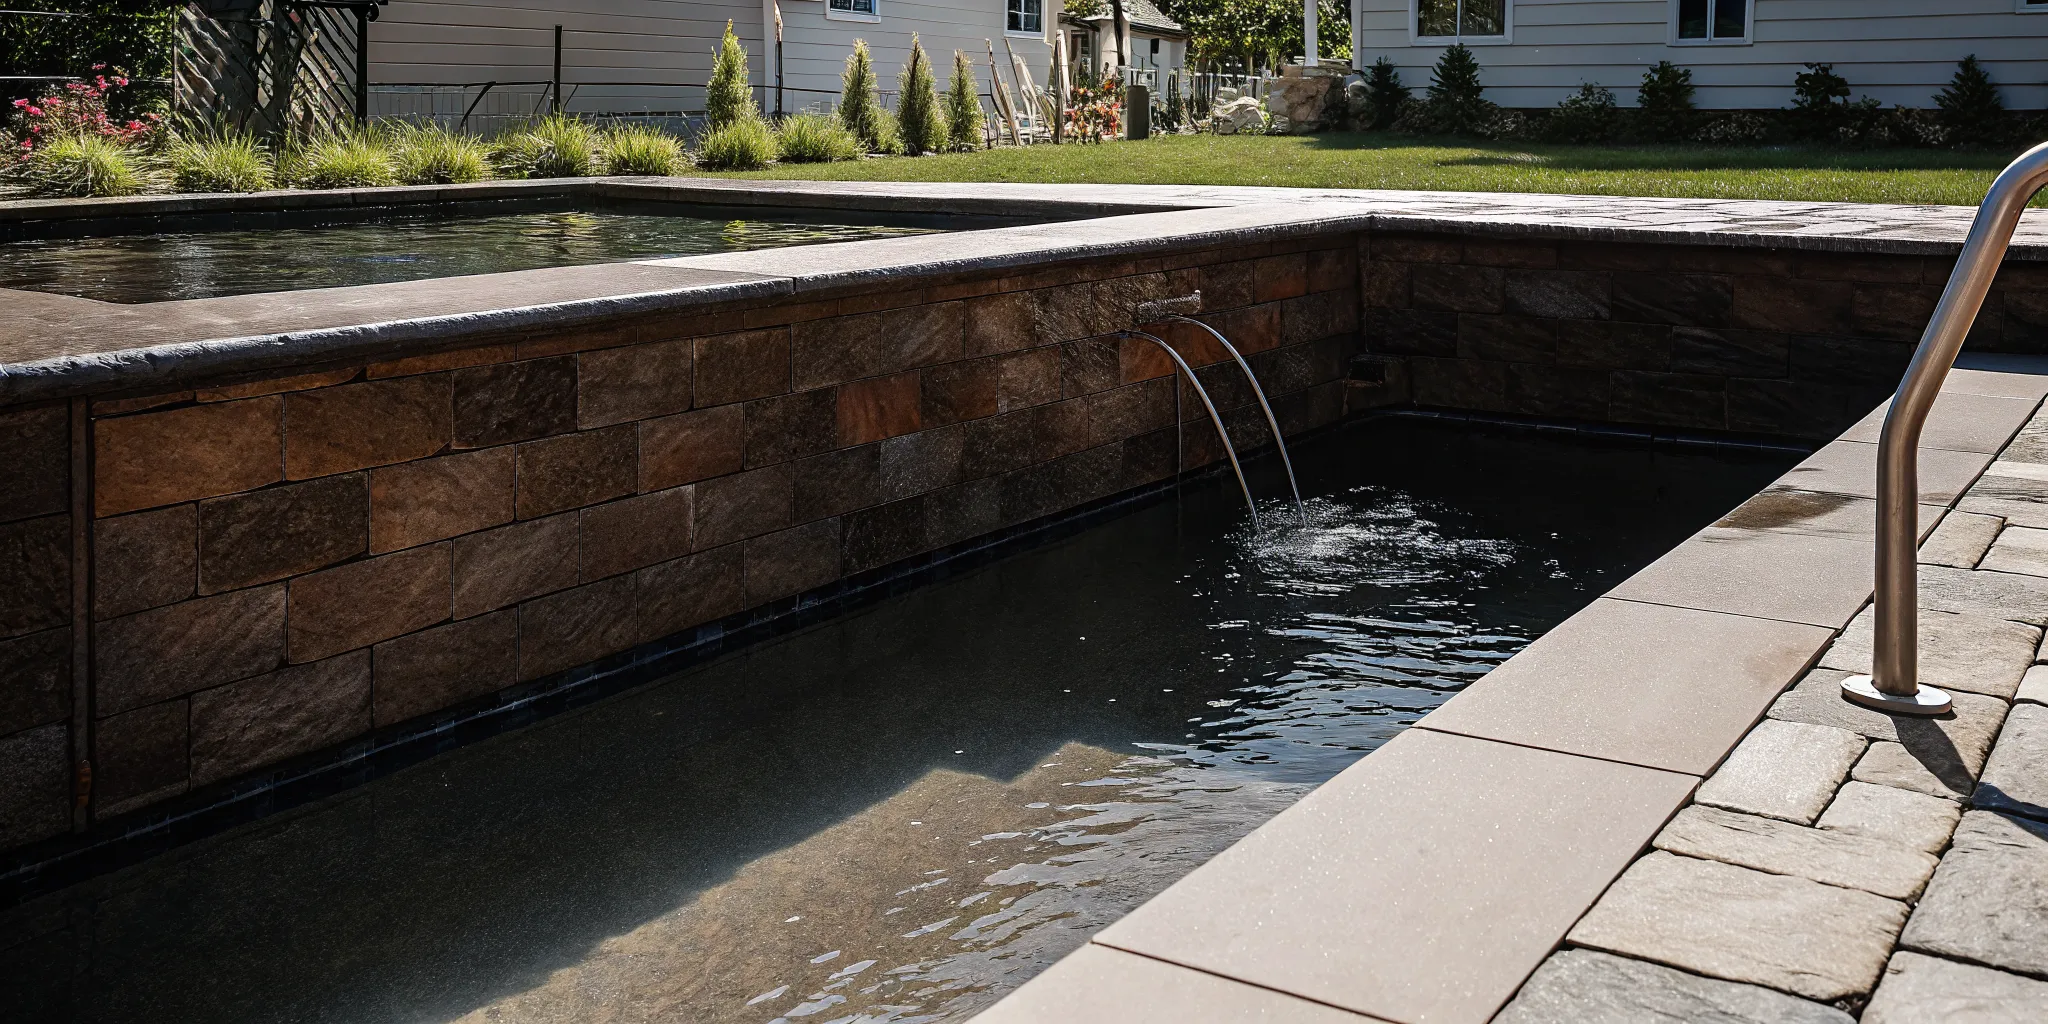
Custom gunite swimming pool with natural stone coping and blue water in a Long Island backyard

Gunite Swimming Pool Cost Long Island 2026: Full Pricing Breakdown

Building a backyard swimming pool is a major investment that changes how you use your outdoor space. On Nassau and Suffolk Counties, pricing depends heavily on local permitting, labor rates, and the materials you choose for your backyard. Understanding these regional variables helps you set a realistic budget for your property.

Schedule a free consultation today to get an accurate gunite swimming pool cost long island quote for your specific property.

A typical gunite swimming pool cost on Long Island ranges from $90,000 to $140,000 for standard installations. Custom projects often reach $100,000 to $400,000 or more. This covers excavation, steel reinforcement, the concrete shell, filtration equipment, coping, and decking. Gunite offers permanent durability, custom design flexibility, and superior long-term resale value versus other pool types.

Before you begin digging, you must evaluate how local site conditions, materials, and accessories shape your final construction budget. Real pricing depends on specific site layouts, soil conditions, and your design choices. Understanding Current Gunite Pool Pricing on Long Island for 2026 is the first step toward planning your new backyard escape.

Gunite Swimming Pool Cost Long Island: Current Gunite Pool Pricing on Long Island for 2026

Homeowners on Long Island can expect a wide range of costs when planning a pool project. A typical swimming pool cost long island installation ranges from $90,000 to $140,000 for most standard residential properties. Custom designs or larger water features often push this price higher. This initial price includes basic excavation, steel framing, the shot concrete shell, standard plaster, and basic plumbing or filtration equipment.
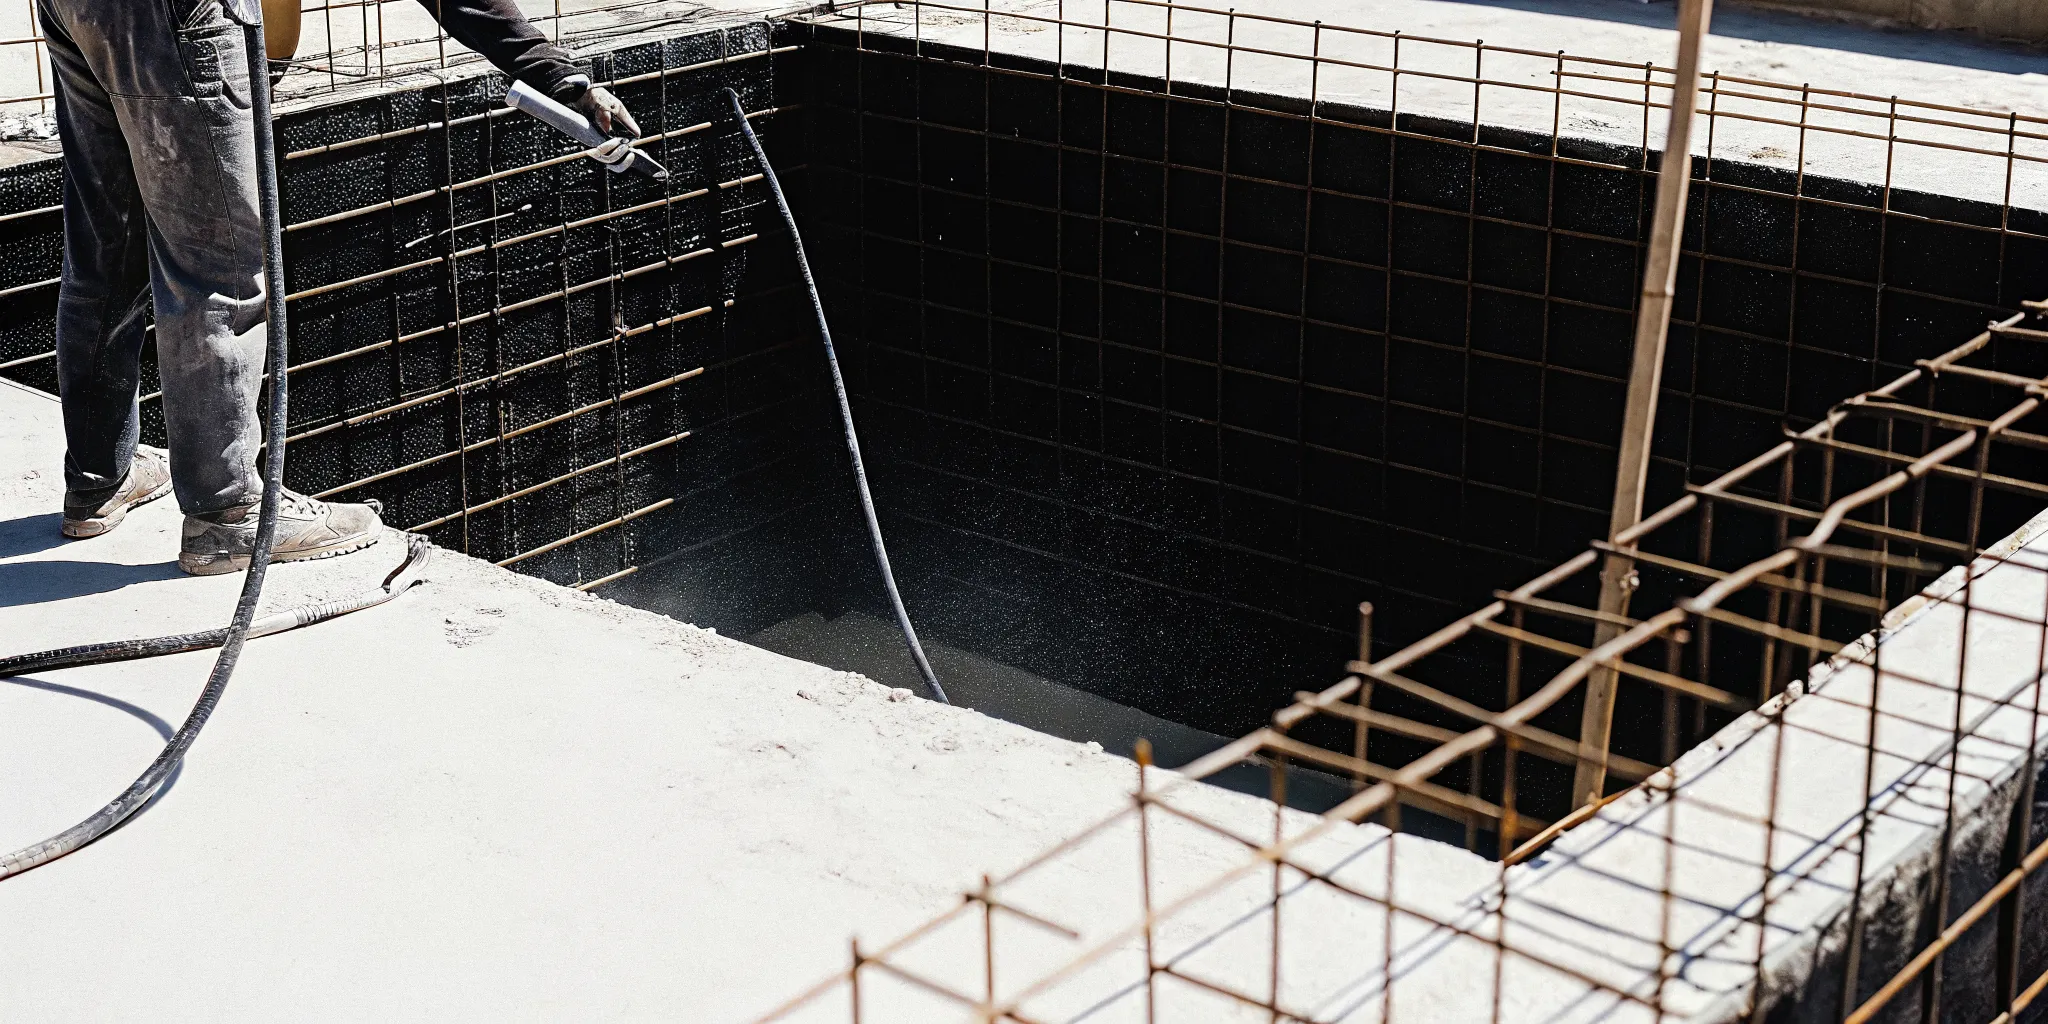
Gunite pool construction with steel rebar cage being sprayed with gunite concrete on a residential Long Island job site

Typical Pricing Per Square Foot

Most pool builders calculate the starting price of a pool by its total size. On Long Island, a standard gunite swimming pool cost averages between $100 and $280 per square foot. This rate covers the basic build but does not include extra patio work, water heating, or landscaping. For example, a standard 14 by 28 foot pool will cost less than a large 20 by 40 foot pool because it needs fewer materials and less labor.

Common Pool Sizes and Estimated Costs

  • Small (14×28 ft): Starting at $90,000 for the base installation
  • Mid-size (16×32 ft): Typically $105,000 to $130,000 including standard features
  • Large (20×40 ft): Often exceeds $140,000 before any custom additions
  • Custom designs: Can reach $200,000 to $400,000 with spas, waterfalls, and premium finishes

These figures represent the base installation before you add features like spas, slides, or stone coping.

Why Long Island Costs Are Higher

Local factors make building a pool on Long Island more expensive than the national average. Homeowners here pay a premium of 25% to 45% compared to national construction rates. High labor rates, strict local building codes, and complex permit fees drive these costs up. High water tables in Nassau and Suffolk counties also require extra drainage steps, which adds to the final price.

What Is Included in a Gunite Pool Installation Cost

Building a concrete pool requires many steps. Each step has its own fees. When you plan for a gunite swimming pool cost long island homeowners should know what is in the contract. A full build has six main steps from excavation to the final pool finish.

  1. Excavation and Permits: Town permits cost $800 to $2,000. Excavation sets the depth and shape of your pool using heavy machinery.
  2. Steel Framing and Plumbing: A grid of steel rebar forms the skeleton. Rough plumbing for drains, skimmers, returns, and spa jets is laid before any concrete is sprayed.
  3. Spraying the Gunite Shell: The shell makes up 35% to 45% of the total price. For a 16×32 pool, expect $55,000 to $80,000 for the pneumatic concrete application.
  4. Tile and Coping Installation: Natural travertine coping costs $28 to $55 per linear foot. A band of waterline tile protects the plaster from staining.
  5. Surrounding Pool Decking: Standard concrete or stone paver decking costs $6,500 to $12,000 for a safe walk area around the pool.
  6. Finishing and Equipment Setup: Interior plaster ($4/sq ft basic), filtration equipment ($4,000 to $8,000), and automation systems finalize the build.
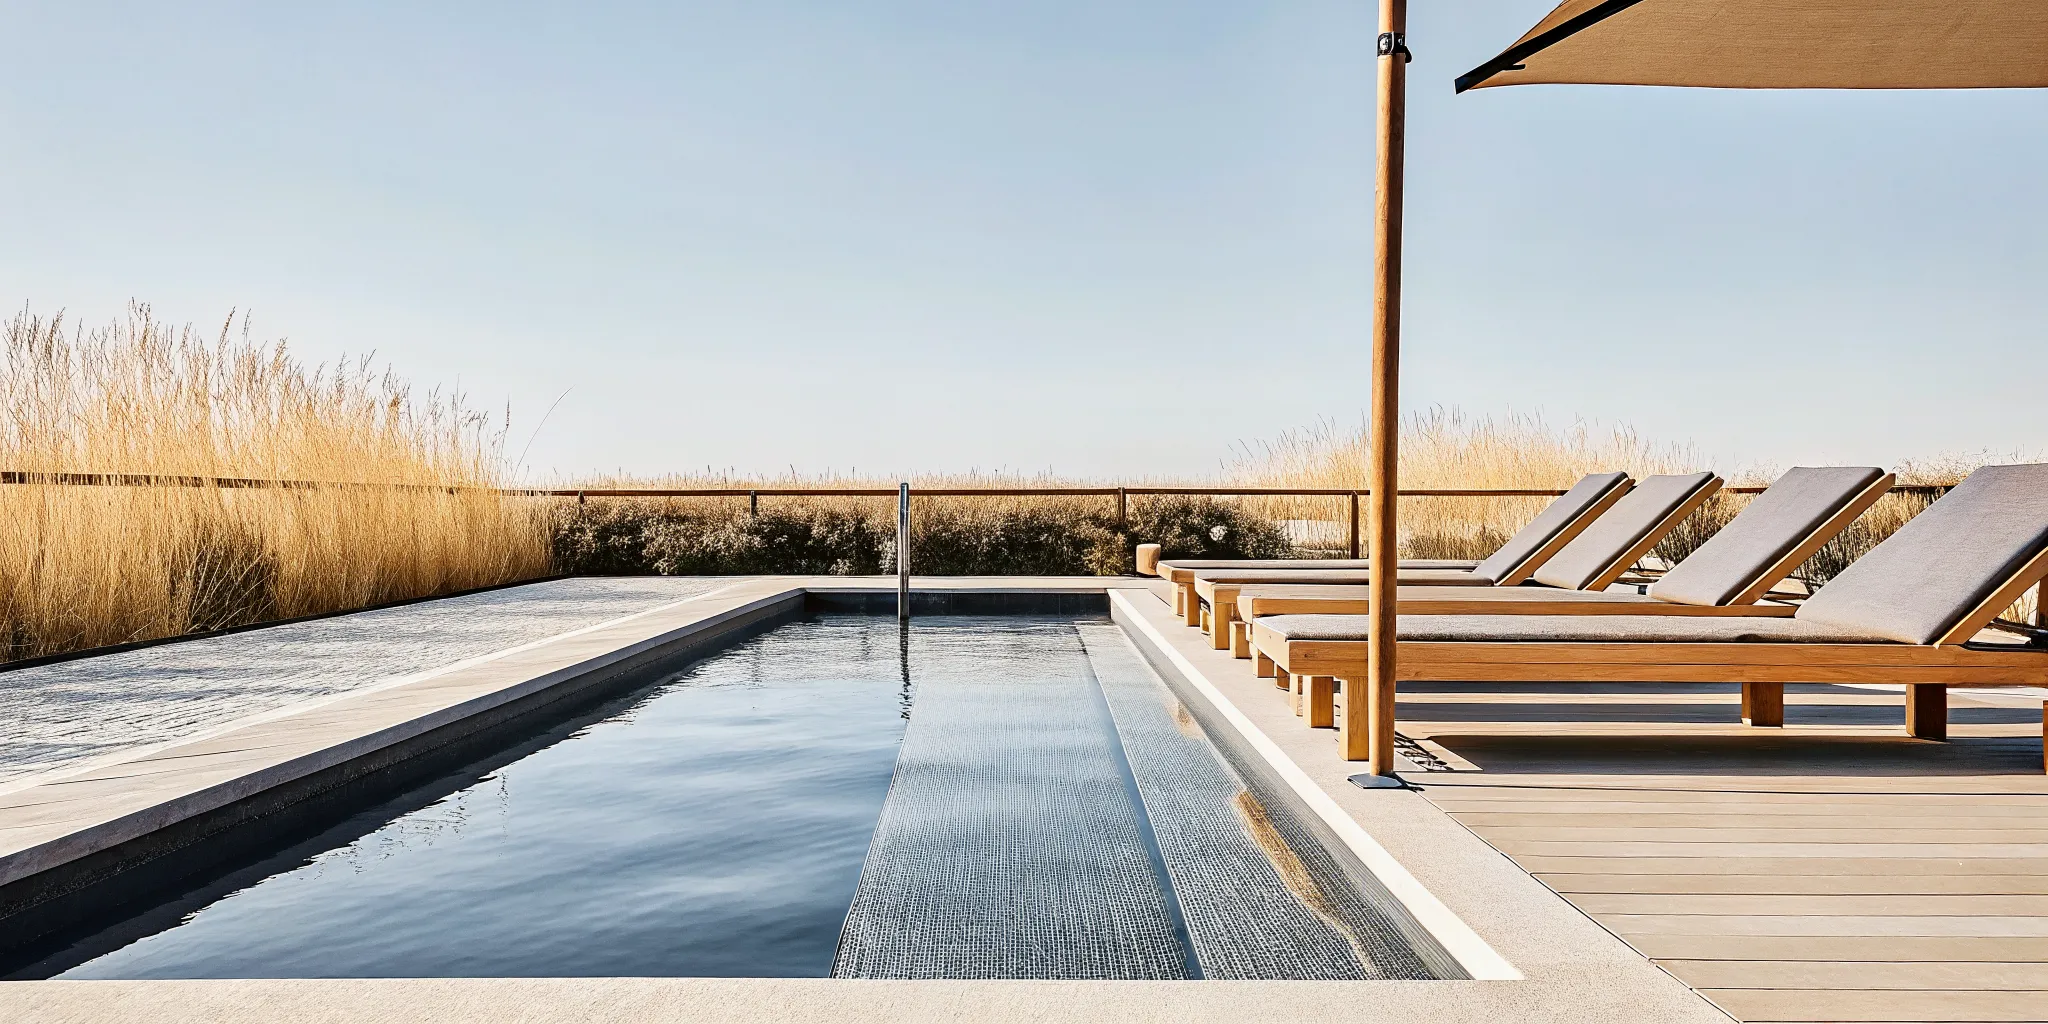
Completed gunite swimming pool with natural stone coping and travertine deck in a landscaped Long Island backyard

You can learn more about pool design options from custom gunite swimming pool builders who specialize in these custom concrete builds.

Key Factors That Affect Gunite Pool Pricing on Long Island

The total gunite swimming pool cost on Long Island depends on several major variables. From the shape of your pool to the physical layout of your yard, specific factors will shape your final estimate. Understanding these details helps you plan your backyard project with confidence.

Pool Size and Shape Options

The size of your pool is a clear cost driver, but its shape also plays a large role. A standard rectangle is the most straightforward design to excavate and build. Choosing a freeform design with custom curves typically adds 20% to 30% to your construction costs. These custom curves require more detailed steel rebar structures and precision gunite application.

Yard Site Conditions and Soil Challenges

Ground conditions in Nassau and Suffolk Counties can vary greatly and impact your budget. In northern hilly areas, hitting large rocks or boulders can require special equipment, which adds $3,000 to $15,000 in excavation fees. Homes on the South Shore of Long Island often deal with a high water table. To build a stable custom gunite swimming pool in these areas, builders must use dedicated dewatering pumps and active drainage systems during excavation.

Property Access and Tight Spaces

Before construction starts, builders must get heavy machinery like excavators and dump trucks into your yard. If your property has tight property lines, mature trees, or low utility lines, work becomes more complex. Tight access can add 15% to 30% to your labor fees. Crew members may need smaller machines, which takes more time to dig and move soil.

  • Standard access: No additional fees for machinery entry
  • Limited access: 15% to 20% surcharge for narrow pathways or gates
  • Tight access: 20% to 30% surcharge requiring smaller equipment and hand-digging in some areas

Water Features and Custom Finishes

Water additions and custom finishes can customize your backyard but will increase the overall price. Adding an attached spa or a waterfall can add $8,000 to $35,000 to your total project. The interior finish you choose also affects the budget. Basic white plaster is the standard option, while a durable pebble finish adds $4,000 to $8,000. Automated control systems to manage pumps and heaters from a phone add $3,000 to $8,000 to your equipment budget.

Gunite vs. Other Pool Types: A Cost Comparison

Choosing the right backyard pool style is a major choice for Long Island homeowners. Before you buy, you must look at how gunite swimming pools compare to other systems in build cost and life. Each build type has distinct upfront fees, upkeep needs, and total lifespans that affect your long-term budget.

Pool Type Upfront Cost Lifespan Liner Change Cost Design Freedom
Vinyl Liner $25k – $65k 10 – 15 Years $3k – $7.5k Limited
Fiberglass $60k – $120k 25 – 30 Years None Set Shapes
Gunite $65k – $175k+ 50+ Years None Unlimited

A gunite pool costs more upfront than vinyl or fiberglass options. However, the shell lasts over 50 years with proper care. Vinyl liner pools need new liners every 10 to 15 years, costing $3,000 to $7,500 each time. Fiberglass shells last 25 to 30 years but cannot be customized to your yard shape. When you plan your gunite swimming pool cost long island budget, factor in the 50-year lifespan that eliminates replacement costs.

Budgeting for Your Gunite Pool: Hidden Costs and Financing

A custom gunite swimming pool is a major home improvement project. Many homeowners focus only on the base quote from their pool builder. But a full backyard transformation involves extra work. Planning for these hidden costs early helps you avoid surprises. It ensures you have enough funds to finish your entire outdoor project on budget.

Extra Site and Yard Work Costs

The base pool quote usually covers the pool shell, plaster finish, and basic equipment. But you must also budget for site work that happens outside the pool walls.

  • Safety fencing: Required by most Nassau and Suffolk town codes, typically $1,500 to $4,000
  • Electrical work: Subpanel, pump wiring, and bonding runs from $2,000 to $6,000
  • Plumbing hookups: Gas line for heater, water fill line, and drainage, from $1,500 to $4,000
  • Landscaping restoration: Lawn repair, grading, and planting after construction, $3,000 to $10,000
  • Permits and inspections: Local town fees from $800 to $2,000

These extras can add $25,000 to $50,000 to your total gunite swimming pool cost long island project.

Long Term Upkeep and Maintenance

Owning a concrete pool requires ongoing care to protect your investment. You should budget about $1,500 to $3,000 each year for routine pool maintenance and service. This cost covers water testing chemicals, pool opening and closing services, and electricity for the pump. Setting aside these funds keeps your pool water clean and prevents early wear on your plaster shell.

Pool Financing Options on Long Island

Many homeowners use financing to build their backyard pools. Common paths include home equity loans, home equity lines of credit, and personal loans. Some pool builders also partner with specialized lenders to offer custom financing programs. To stay safe, we recommend budgeting 20% to 30% above your base pool quote. This extra buffer covers any site surprises, design upgrades, or unexpected landscaping costs that arise during construction.

Frequently Asked Questions

How much does a gunite pool cost on Long Island?

A custom gunite swimming pool cost on Long Island typically ranges from $100,000 to over $400,000 for high-end designs. Basic custom installations usually start around $90,000. These prices depend on the size of the pool, complex excavation needs, water features, and your choice of patio materials. The total price reflects Nassau and Suffolk County permit codes and local labor rates.

Is a gunite swimming pool worth the extra cost?

Yes, a gunite pool is highly durable and lasts for over 50 years with proper care. Unlike vinyl liner pools that need new liners every ten years, gunite concrete shells resist tears and severe weather. Gunite also allows you to choose any custom size or shape for your backyard. This long-term strength and custom look can help increase the resale value of your Long Island home.

How long does it take to install a gunite pool?

Installing a gunite swimming pool on Long Island usually takes between 8 and 12 weeks of active construction. This timeline does not include the local town permit approval process, which can add several weeks or months. The main construction phases include excavation, steel cage installation, gunite spraying, curing, plumbing, tiling, and patio building. Wet weather or complex rock soil conditions can also add time to the project schedule.

What are the annual maintenance costs for a gunite pool?

You can expect to spend between $1,500 and $3,000 each year to maintain a gunite swimming pool on Long Island. This budget covers chemicals, water testing, opening and closing services, and electricity for the pump. It is also wise to budget for long-term care, such as resurfacing the plaster shell every 10 to 15 years.

Ready to build your custom gunite pool?

Delaying your pool project means missing out on another swim season and facing higher build costs down the road. Starting your design-build process now ensures your backyard is ready for warm weather without any rush. Work with our team to create a beautiful, long-lasting pool that fits your property and family perfectly.

Call 631-543-1177 today to schedule a free consultation for your custom gunite pool on Long Island.
Share this page:
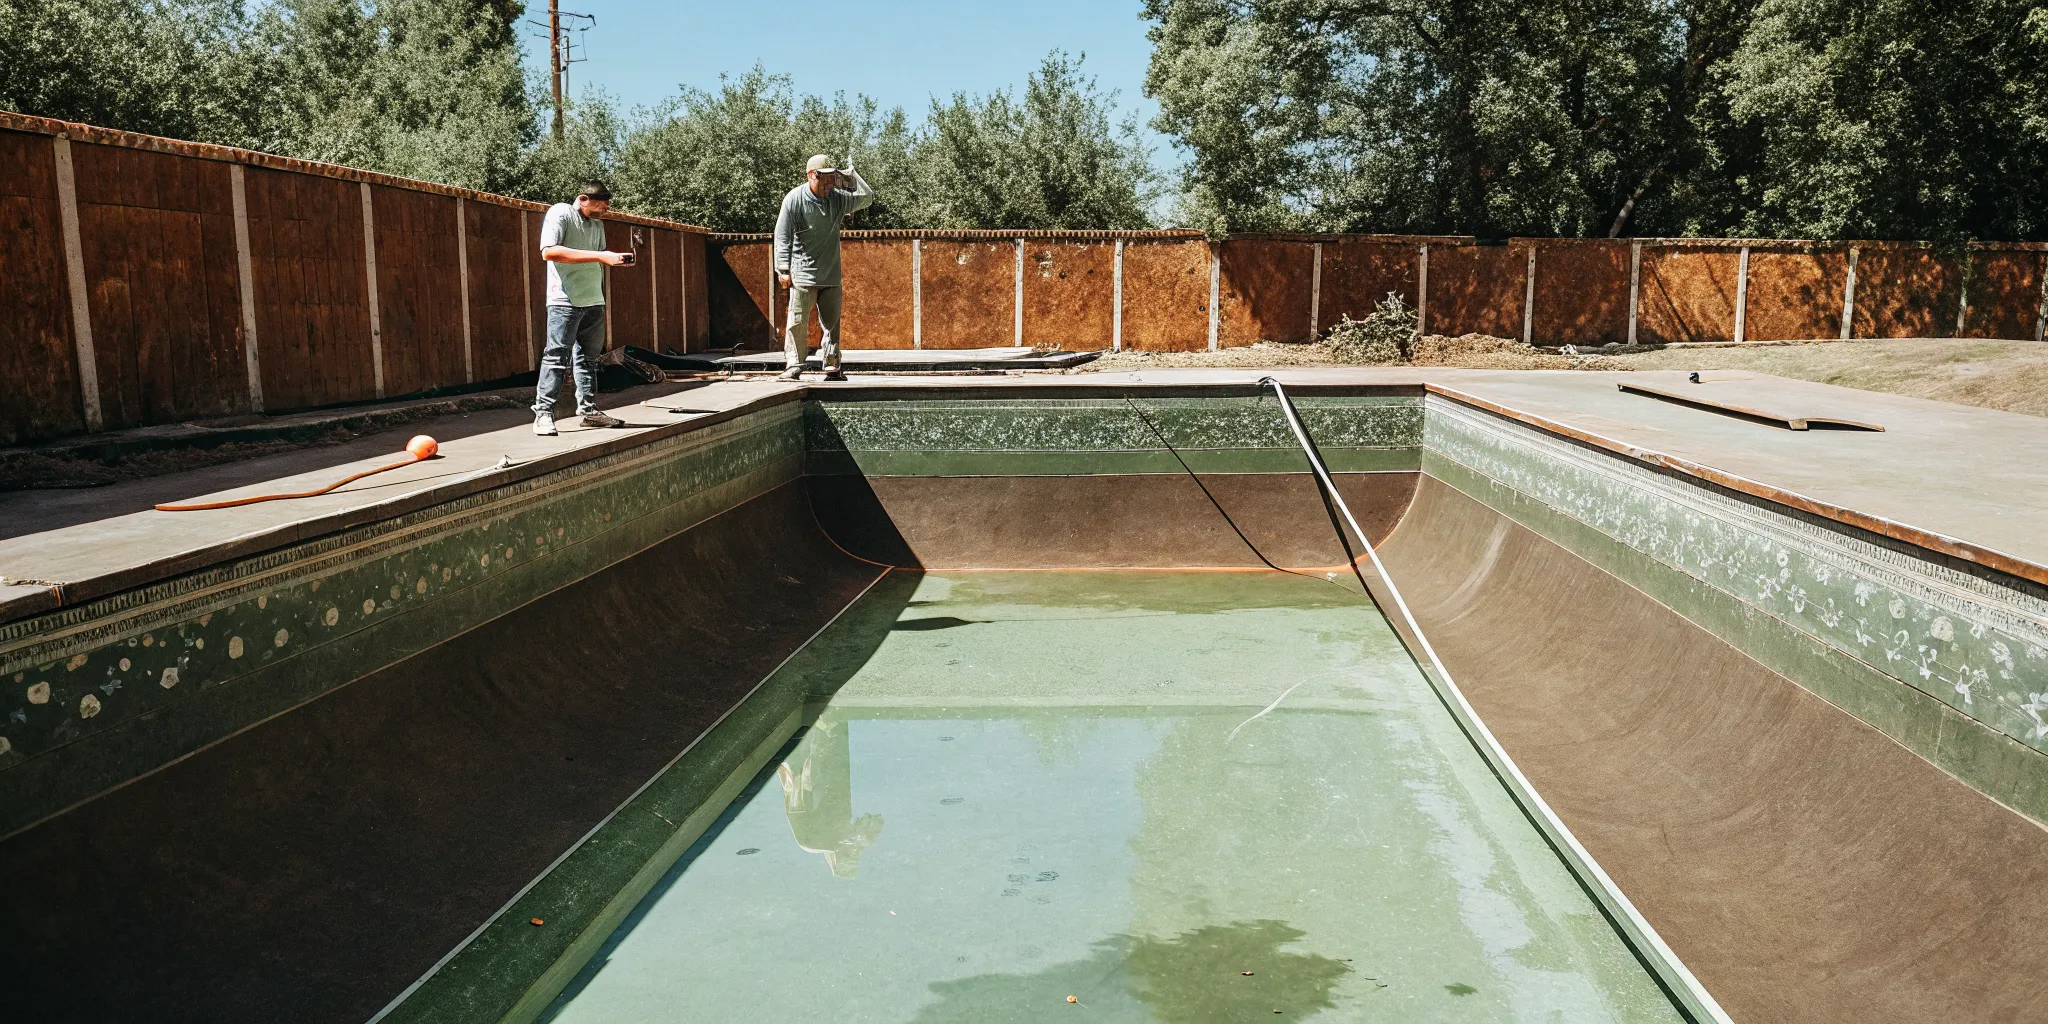
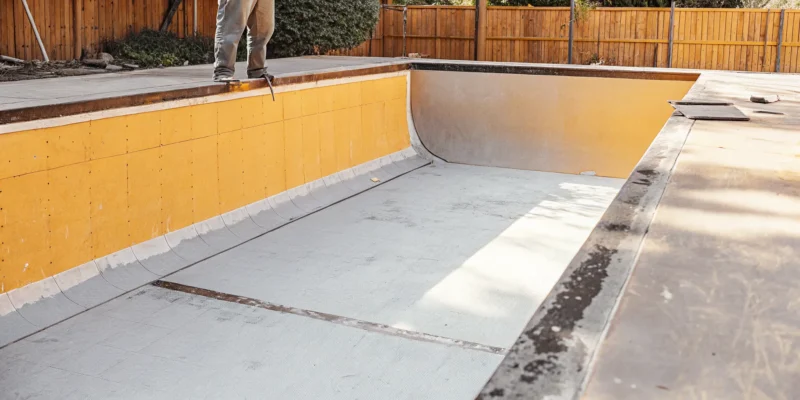
Empty inground swimming pool with concrete walls being prepared for a new vinyl liner installation

Key Considerations for Inground Vinyl Liner Pool Replacements

Old vinyl liners in time lose their stretch and start to pull away from the pool walls. Homeowners on Long Island must track these changes to avoid costly repairs to the pool floor or walls.

Vinyl liner pool replacement is a needed update for Long Island pools. It happens every ten years to protect the concrete or steel base from ground water pressure. The process involves draining the pool and installing a new twenty-eight mil liner. This thickness stands up to the freeze and thaw cycles in Nassau and Suffolk counties. Experts check the pipes and walls for rust or cracks before fitting the new liner. This makes sure the pool stays water-tight for at least another decade. Patterns that look like natural bluestone or travertine update your backyard while stopping leaks that could hurt the pool base and walls.

Knowing exactly when to start this project is the first step toward a beautiful and safe swimming area. Spotting the specific signs that your liner needs replacement before a small tear becomes a major flood is key to protecting your pool investment.

How Do You Know When Your Vinyl Liner Needs Replacement?

A vinyl pool liner is a key part of your swimming pool. It keeps the water in and protects the walls and floor. Like any part of your home, a liner will age over time. Most vinyl liners last between 7 and 12 years. This depends on how well you care for your pool water. On Long Island, the weather can also change how long your liner lasts. It is vital to know the signs of wear. This helps you plan for a vinyl liner pool replacement before a big leak starts. Seeing leaks early keeps your pool safe for your family. A new liner can change the look of your whole yard.

Visible Cracks and Water Loss

One of the first signs of an old liner is plain harm. You may see small cracks or tears near the water line or steps. These happen because the vinyl becomes brittle. Sun rays and pool tools dry out the liner over time. Even a small rip can cause your pool to lose water.

If you see the water level drop more than an inch a week, you may have a leak. Constant water loss can harm the base of your pool. It can also lead to high water bills and more work for your pump. Check your pool water level every week to spot these leaks early.

Fading and Surface Stains

The look of your liner can tell you a lot about its health. Fading from the sun is a common sign of age. While a faded liner might still hold water, it is often weak. Sun rays break down the vinyl and make it less flexed. You might also see stains from algae or grit.

If you cannot clean these spots with normal pool tools, they may be fixed for good. Stains can make your pool look old and dirty. Changing the liner is the best way to get a clean and fresh look for your yard. A new liner adds value to your home and makes the pool more fun to use. It is a great way to make your backyard look bright and new again.

Wrinkling and Floor Heaving

A good liner should be smooth and tight. If you see wrinkles or loose spots, the liner may be failing. Wrinkles can happen if the bead snaps out of its track. They can also occur if ground water gets under the pool. This is common in Nassau and Suffolk counties during the spring when the ground stays wet.

In some cases, the pool floor can even rise or feel bumpy. This is called a raised floor or heaving. It often means there is too much water pressure under the pool. These issues mean your liner is no longer doing its job well. If your pool floor feels uneven, you should call a pro for a checkup.

Watch for these telltale signs to know when it is time to call Gappsi’s swimming pool services:

  • Frequent water loss that needs adding more water.
  • Cracks and tears near the steps or water line.
  • Large stains or severe fading from the sun.
  • Wrinkles that do not go away.
  • A pool floor that feels bumpy or has shifted.
  • A liner that is older than 12 years.

If your vinyl liner shows cracking, fading, wrinkling, or water loss of more than one inch per week, it is likely time for a replacement. These issues worsen over time and can cause structural damage to the pool walls and floor. Replacing the liner when these signs first appear saves you from more costly repairs and keeps your pool safe for swimming.

What Is the Vinyl Liner Replacement Process?

The process for a vinyl liner pool replacement is hard. It needs the right tools and years of skill. Gappsi has helped owners in Nassau and Suffolk counties for over 38 years. We start the job by draining every drop of water from the pool. Our team uses strong pumps to clear the pool in a few hours.

Next, we take out the old, worn-out vinyl and the metal or plastic faceplates. We strip the pool down to its core to see the state of the walls. It is vital to check for rust, cracks, or floor sinking. Long Island’s freeze-thaw cycles stress your pool over time.

Fixing the Base and Fitting the Liner

A clean and flat base is the goal for this stage. We patch any cracks in the floor and sand the walls if they are rough. Gappsi’s experts then line up the new vinyl. We use a strong vacuum to suck out the air behind the liner. This vacuum holds the vinyl in place while the water starts to fill.

You can choose from many new patterns and colors. We offer thick 27 mil and 28 mil options for better strength. Modern beadlock systems give a tight fit that lasts for years. These systems are much more secure than the old J-hook styles used in the past.

  1. Drain the pool water all the way using high-speed pumps.
  2. Cut out the old vinyl liner and remove the gaskets and faceplates.
  3. Clean and repair the pool walls and floor to create a smooth base.
  4. Replace the gaskets and seal the tracks for the new liner.
  5. Fit the new vinyl liner into the track using an expert vacuum system.
  6. Fill the pool with fresh water and adjust the liner to remove any wrinkles.
  7. Install the final faceplates and restart the pool filter and heater.

Filling and Final Setup

Filling the pool is a slow and careful step. As the water rises, we walk the pool floor to smooth out any small folds. We do not cut the openings for the skimmers or returns until the water is deep enough. This keeps the liner from stretching too much after it is cut.

Once the pool is full, we install new gaskets and faceplates for a watertight seal. Finally, we hook up the pump, filter, and heater. This is a great time to upgrade to a variable-speed pump. These pumps can save you 30 to 80 percent on your energy bill each year.

The vinyl liner replacement process typically takes 2 to 5 days and involves draining the pool. Removing the old liner, repairing the walls and floor, fitting a new liner with a vacuum system, and refilling the pool. Each step must be done carefully to ensure the liner sits flat and seals tight around all fittings and plumbing.

What Modern Vinyl Liner Patterns and Designs Are Available?

Choosing a new pattern is the best part of a vinyl liner pool replacement. New print methods allow for complex looks that mimic natural stone. These choices help your pool match your deck and home style. They also boost the look of your yard.

Finished inground swimming pool with new stone-pattern vinyl liner, filled with clear water, surrounded by a concrete deck in a landscaped Long Island backyard

Current design trends for pool liners

You no longer have to settle for a plain blue pool floor. Now you can pick patterns that look like pebble, marble, or travertine. Many people on Long Island choose tile looks for the waterline. This gives the pool the look of a custom gunite build. Geometric shapes and lagoon themes are also top choices for a unique look.

The color you pick will change how your water looks in the sun. Dark liners can help hold heat and create a deep feel. Light colors make the water look bright and clear. Gappsi can show you many samples at our Smithtown shop to help you find the best fit for your yard.

Liner thickness and life

Liner thickness is measured in mils. Most pool owners choose 20 mil, 27 mil, or 28 mil. A 20 mil liner is the standard pick and costs less. But a 27 mil or 28 mil liner is more tough against tears and sun damage. This extra thickness helps if you have pets or use the pool a lot. It can help the liner last longer than the usual seven to twelve years.

While a thick liner costs more now, it may save you money by lasting for many years. We suggest the thicker mil picks for those who want a strong pool.

Secure fit and retention

How your liner stays in place is key. Two main ways are the J-hook and the beadlock system. A J-hook hangs over the pool wall. A beadlock system uses a track to snap the liner into place. These systems are more secure. They help stop the liner from slipping or pulling away from the wall.

A tight fit is the best way to avoid wrinkles. This is why we take exact measures during a pool liner swap. Pros use vacuums to pull air out from behind the vinyl. This helps the liner sit flat against the floor as the pool fills with water.

Modern vinyl liners come in patterns that mimic bluestone, travertine, marble, pebble, and tile. Thickness options range from 20 mil to 28 mil, with thicker liners offering better resistance to punctures and UV damage. Beadlock retention systems provide a more secure fit than traditional J-hook methods and help prevent wrinkling over time.

Energy-Efficient Pool Pump Upgrades During Replacement

Changing a vinyl pool liner is the best time to check your pool tools. When the pool is empty for a vinyl liner pool replacement, you can simply swap out old pumps. New systems help you save money and reduce the time you spend on pool care. Gappsi works with brands like Pentair and Hayward to bring the latest tools to your backyard on Long Island. Adding these upgrades now is smart because the pool is already open for service. You can save on labor by doing all the work at once.

Variable-Speed Pump Energy Savings

A standard single-speed pump runs at one high speed all day. This uses a lot of power and adds to high power bills in Nassau and Suffolk counties. A variable-speed pump is other than a standard one because it can run at lower speeds. These pumps use 30% to 80% less energy than older models. Over time, the energy savings can pay for the cost of the new pump.

Salt Chlorine Generator Systems

Many people choose to add salt chlorine systems during a liner change. These tools turn salt into chlorine right in your pool water. This means you do not have to buy or handle heavy buckets of chlorine. Saltwater pools feel softer on your skin and eyes than standard pools. They also keep chlorine levels steady, which helps your new liner last longer. Because salt is less harsh than liquid chlorine, it can prevent the fading often seen on older vinyl liners. This keeps your new liner looking great for many years to come.

Modern LED Lighting and Filter Upgrades

Old pool lights often use a lot of power and need new bulbs often. New LED lights are much better and last for many years. You can even choose lights that change colors to create a new mood for your pool area.

Along with lights, consider a new high-flow filter. Gappsi uses strong filters from Pentair and Hayward that catch more dirt. These filters keep your water clear with less work from you. Adding new gear while the pool is down for service saves on labor costs. It gets your pool ready for the next decade of use without extra trips from a repair team.

Scheduling equipment upgrades during a liner replacement is cost-effective because the pool is already drained and the equipment pad is accessible. Variable-speed pumps reduce energy use by 30 to 80 percent. Salt chlorine generators soften pool water and reduce chemical handling, and LED lighting lasts years longer than older incandescent models.

Structural Integrity: What to Inspect While the Pool Is Empty

When you drain your pool for a vinyl liner pool replacement, you get a rare look at the structure. This is the best time to find hidden problems that you cannot see when the pool is full of water. Catching these issues now is much cheaper than fixing them after you install the new liner.

Examining the Pool Walls and Floor

We start by checking the pool walls for any signs of damage. For pools with concrete walls, we look for cracks that could let water seep through. If your pool has steel walls, we check for rust or corrosion that could weaken the shell. On Long Island, the ground moves as it freezes and thaws each year. This ground movement can cause the pool floor to settle or heave, making bumps or low spots. We can smooth out these areas to ensure your new liner fits well.

Empty inground swimming pool walls and floor being prepared for a new vinyl liner installation, showing the concrete shell and liner track system

Checking the Plumbing and Skimmers

Next, we inspect the plumbing and the areas where the liner meets the pool parts. We check the skimmer integrity and the state of the return line fittings to make sure they are still sealed. Leaks in these spots can cause water to build up behind the vinyl. This often leads to wrinkles or soft spots on the pool floor. By checking these parts now, you avoid the need for costly repairs later. Proper pool care, including keeping the water chemistry in balance, helps your new liner last for many years.

Why Repairs Matter Now

Fixing structural issues during a liner swap saves you both time and money. Once the new liner is in place and the pool is full, it is hard to reach the walls or plumbing. A solid shell also helps your liner reach its full lifespan, which is often 7 to 12 years. Our team at Gappsi has given swimming pool services on Long Island since 1987. We have the skills to handle full-service repairs to keep your pool in top shape for your family.

An empty pool reveals hidden structural problems that are invisible when the pool is full. Common issues include concrete wall cracks, steel wall rust, floor settling or heaving, and leaking skimmer or return line seals. Fixing these during a liner replacement is far less expensive than addressing them later.

Vinyl Liner Replacement vs. New Pool Construction

Choosing between a vinyl liner pool replacement and a full new build depends on your budget and the state of your yard. For most Long Island owners, a liner change is the fastest way to fix up a backyard. It costs much less than starting from scratch but still gives the pool a fresh, clean look.

The Cost and Budget Difference

Swapping a liner is a budget-friendly move for pool owners. Most liner jobs cost between 1/3 and 1/5 of the price of a new pool. Gappsi’s pricing for a standard vinyl liner pool usually ranges from $21,000 to $23,000 for a 16×34 Roman end model. This price includes the filter, pump, and permits. A full build of a new pool would cost much more and take weeks of heavy work.

Pool owners often choose to swap the liner when they want a new look without the high cost of a new build. Modern liners come in many stone and tile patterns that mimic the look of more expensive pools. This gives you a high-end feel while keeping your costs low.

Construction and Yard Impact

A vinyl liner pool replacement usually takes just a few days to finish. Our team drains the water, removes the old vinyl, and checks the walls for damage. We also look at the floor for signs of settling or heaving. If the concrete walls are solid, we can install the new liner quickly. This limits the mess in your yard more than a full build.

Long Island’s freeze-thaw cycle can cause ground shifts over time. During a swap, we check the walls for any shifts or leaks. This helps ensure the pool stays safe and level for years to come. A full new build requires deep digging and heavy gear that can damage your lawn and plants.

When a New Build Makes Sense

Sometimes a simple liner swap is not enough to fix the pool. If your pool has big cracks or major leaks in the walls, you may need a new build. A full project also makes sense if you want to change the size, shape, or depth of your pool. In these cases, Gappsi’s swimming pool services can help you design a brand-new space from the ground up.

Project Detail Vinyl Liner Replacement New Pool Construction
Average Cost $3,000 to $8,000 $21,000 to $50,000+
Time to Finish 2 to 5 days 4 to 8 weeks
Mess in Yard Low; pool area only High; heavy gear used
Frame Repair Minor wall and floor fixes Full digging and new walls
Style Choice Limited to color and pattern Total change of shape or size
Added Value Keeps current value Adds big home value

Better Gear and Energy Savings

Changing your gear during a liner swap can also save you money. Setting up a new pump can cut your power use by up to 80%. ENERGY STAR says these new pumps pay for themselves quickly through lower bills. This is a good time to check for leaks and ensure your system runs well for the next decade.

Why Hire an Expert for Your Vinyl Liner Replacement

Replacing a vinyl liner is more than just swapping out a sheet of plastic. It starts with exact sizes of your pool’s walls, floors, and corners. If the liner is off by even an inch, it can stretch too much or create large folds. Experts use tools to map the pool shape with care. This ensures the liner fits tight against the walls. A good fit prevents the vinyl from pulling away from the track, which helps the liner last longer.

Special Tools and Seam Welding

Vinyl liners have seams that must stay tight for many years. Experts use high-tech tools to bond the vinyl pieces together. This creates a strong seal that can handle the weight of many gallons of water. They also use strong vacuums to pull the air from behind the liner. This removes air pockets that could cause the vinyl to shift or tear. Proper seating into the tracks also keeps the liner from slipping as the pool fills.

Balancing Water and Preventing Wrinkles

Filling a pool with water needs careful timing and pressure. If the water enters too fast or too slow, the liner might bunch up. Experts watch the fill process to smooth out any small wrinkles before the water pressure becomes too high. They also check the chemical balance of the water as they fill. This protects the new vinyl from fading or staining early on. Gappsi has 38 years of history with pool services on Long Island. Our team knows how to handle the local climate and ground water issues.

Wall Checks and Warranty Safety

When you drain a pool, you can see the walls and floor for the first time in years. An expert will look for rust on steel walls or cracks in concrete. They can find plumbing leaks that you might have missed. Fixing these issues now saves you from a bigger repair later. Most makers also need an expert to set up the liner to keep the warranty active. If you try to do it yourself and make a mistake, you could lose that protection. Hiring an expert is the best way to keep your pool value safe.

The Risks of DIY Setup

Many homeowners ask if they can replace a vinyl pool liner themselves to save money. While it is possible, the risks are often higher than the savings. A small error in measuring or hanging the liner can lead to lasting damage. You might end up with leaks that ruin the pool base or the surrounding deck. Experts have the tools and training to avoid these costly mistakes. Explore Gappsi’s full service offerings to find the best plan for your pool and yard.

Professional vinyl liner installation starts with precise measurements, uses industrial vacuums for wrinkle-free fitting, and includes inspection of pool walls, plumbing, and floor. Professional installation also preserves the manufacturer’s warranty, which DIY installation may void. The cost of hiring an expert is offset by fewer errors, better material handling, and longer liner life.

Frequently Asked Questions

How much does it cost to replace a vinyl inground pool liner?

Most pool liner replacements on Long Island cost between $3,000 and $8,000. The final price depends on the pool size, liner thickness, and the complexity of the install. A thicker 28 mil liner costs more upfront but lasts longer and resists punctures better. Labor and any structural repairs also affect the total cost. Gappsi provides free estimates to give you a firm price for your specific pool.

How long does a vinyl liner replacement take?

A complete vinyl liner pool replacement takes 2 to 5 days from drain to full refill. The actual installation of the liner happens in one day. The remaining time covers draining, repairs to walls or floor, and filling the pool slowly to prevent wrinkles. Weather can also affect the timeline if rain delays the drain and installation steps.

Can you replace a vinyl liner without draining the pool?

No. The pool must be fully drained to remove the old liner, inspect the walls and floor, and install the new liner correctly. Draining also lets the crew check for structural issues that are hidden when the pool is full. The drain water can be redirected to the yard or sewer depending on local codes in Nassau and Suffolk counties.

What is the best time of year for a vinyl liner replacement?

Spring and early summer are the most popular times for liner replacements on Long Island. The weather is mild enough to drain and work on the pool without freezing pipes. Scheduling early in the season also ensures your pool is ready for the hottest months. Gappsi starts taking bookings in February for spring installations.

Do saltwater pools damage vinyl liners?

Saltwater pools do not damage vinyl liners when the salt and chlorine levels are balanced properly. In fact, salt chlorine generators produce a steady, low level of chlorine that can be gentler on vinyl than manually adding high doses of liquid chlorine. The key is maintaining balanced water chemistry regardless of the sanitizer type used.

Can you install a new liner over an old one?

No. Installing a new liner over an old one traps moisture and bacteria between the layers. This leads to mold growth and accelerates liner deterioration. It also hides cracks and rust in the pool walls that need repair. The old liner must always be removed completely before installing a new one.

Ready to schedule your free liner consultation?

Your pool’s liner is the single most important barrier between your family’s swimming water and the structure of your pool. When it starts to show cracks, fading, or wrinkles, acting quickly prevents damage that costs far more than the liner itself. Gappsi has served Long Island homeowners for over 38 years with expert vinyl liner installation, pump upgrades, and pool structural repairs. Our team handles every detail from the initial drain to the final water chemistry check. Contact Gappsi’s pool services team to schedule a free consultation and get a firm quote for your vinyl liner pool replacement.

Share this page:
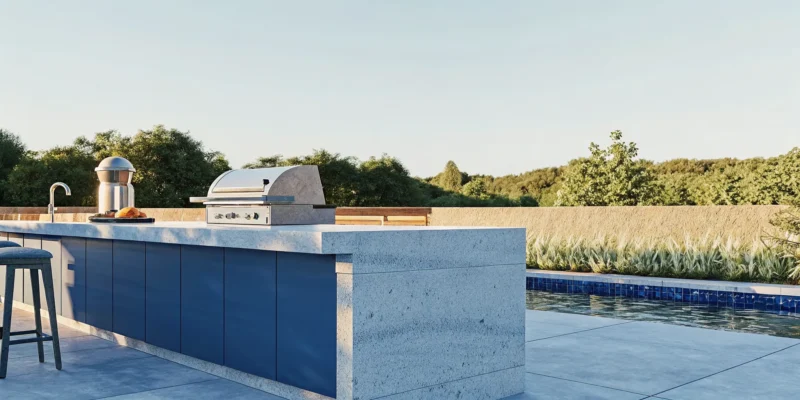
Elegant outdoor kitchen with natural stone island and built-in grill in a lush Long Island backyard

The Ultimate Outdoor Kitchen Planning Guide for Long Island

Long Island homeowners often find that a custom outdoor kitchen becomes the most used room in their home. This functional space extends your living area while providing a dedicated zone for social flow.

Our outdoor kitchen planning guide helps you build a useful and strong backyard cooking space. Success starts with a 3D plan that shows your layout and seating areas so you can move around easily. You should pick materials like natural granite, bluestone, or travertine that can handle the cold winter weather on Long Island. According to This Old House, these kitchens can return up to 80% of their cost in home value. Gappsi brings 38 years of Italian craftsmanship to every project. We fit appliances like gas grills and brick pizza ovens into a stone veneer base. Working with one team helps you avoid the stress of hiring many workers and ensures your permits are filed correctly.

Planning a great project requires you to look at how you will use the space each day. Think about your cooking style before you pick your stones. We will walk you through Step 1: Define Your Outdoor Kitchen Goals and Lifestyle Needs to make sure your new space fits your family. This journey starts with a clear vision of how you want to cook and entertain in your Long Island backyard.

Outdoor Kitchen Planning Guide: Step 1: Define Your Outdoor Kitchen Goals and Lifestyle Needs

Planning an outdoor kitchen starts with a clear vision. You must think about how you will use the space before you buy any parts. A solid Long Island outdoor kitchen layout guide helps you focus on your daily life and needs. Think about your current cooking habits. Do you want a small spot for family meals or a big space to host guests? Knowing your goals now will save you time and money later.

Check your cooking style

First, look at how you like to cook. Think about the meals you make most often. Do you want to do the same things outside, or do you want to try new styles? Some people want a simple grill for burgers. Others want a full space with a pizza oven, a smoker, and side burners. You should also think about prep space. You will need room to cut food and set down trays. A good plan includes enough counter space near your grill to make cooking easy.

Think about how many people you will host. Do you have small family dinners or large backyard parties? This will change the size of your grill and the amount of seating you need. If you often have more than ten people over, you might want a bar area. This gives guests a place to sit and talk while you cook. It keeps the social flow moving and keeps people out of the cooking zone for safety.

  1. Assess your cooking needs. List the meals you want to make and the tools you will need for them.
  2. Measure your yard space. Note the room you have for counters, seats, and walk ways.
  3. Watch the sun and wind. See how the light and air move through your yard during the day.
  4. Set your budget range. Decide what you can spend on parts, stone veneer, and labor.
  5. Think about the seasons. Plan for Long Island weather to make sure your space lasts for many years.

Plan your yard and space

Measure your open yard space well. You need to know how much room you have for a kitchen island. It is also wise to think about the path from your house to the yard. Most pros say to keep a space of 15 to 20 feet from your indoor kitchen. This is a short walk for moving food and tools. It is far enough to keep smoke away from your doors. It also helps keep the cost of gas and water lines low.

Watch the sun and wind ways in your yard. You do not want to cook in direct hot sun all day. You also do not want the wind to blow smoke from the grill into your dining area or home. Notice where the shade falls at many times. This can help you decide if you need a pavilion or a pergola for shade. Long Island weather can change fast. Having a plan for both sun and rain is a smart move.

Budget and home value

Your budget will guide your choices for parts and stone. A basic built-in grill setup on Long Island may start at about $5,000. Full custom kitchens with granite counters and stone veneer can cost $40,000 or more. While this is a big cost, it is also a great way to add value to your home. Most homeowners find that an outdoor kitchen can return 50 to 80 percent of the cost in home value.

When you plan your budget, think about the long term. Using strong stone like natural bluestone or travertine will save you money on fixes. These parts can handle the cold winters and salt air in Nassau and Suffolk counties. A well-built kitchen is a smart gain for your home and your life. It gives you a place to relax and have fun with your friends and family for a long time.

Step 2: Choose the Right Layout for Cooking and Social Flow

The layout you pick for your outdoor kitchen defines how you use the space. A good design keeps the person cooking close to the guests but out of the way of foot traffic. You should aim to keep the main cooking area about 15 to 20 feet from your indoor back door. This gap makes it easy to grab supplies without spending too much on utility lines. If you plan to add a cover, check local rules for outdoor grill exhaust needs to keep the space safe and clear of smoke.

Match Your Layout to Your Yard Size

Large yards on Long Island can support a full U-shape or a large island. These layouts offer the most counter space for prep work and serving. For smaller patios, a straight-line setup works best because it fits against an existing wall. If you want to maximize a corner, an L-shape design provides a natural workflow. Gappsi uses 3D design tools to help you see these Long Island outdoor kitchen layouts before any work starts in your yard.

Separate Your Work and Social Zones

Safety is the top goal when planning where to put your grill and sink. You want to keep hot surfaces away from where children play or where guests sit to talk. An island layout is great for this because it creates a clear line between the chef and the guests. This setup lets you stay part of the party while you work. Using a 3D plan helps ensure your outdoor kitchen pavilion or patio has enough room for everyone to move safely.

Layout Type Best Use Case Main Benefit
Straight-Line Small patios or tight decks. Saves space and keeps costs low.
L-Shape Corner spots with medium space. Offers separate prep and cook zones.
U-Shape Large yards for frequent hosts. Provides the most counter space.
Island Social cooking and open yards. Allows guests to sit near the chef.

When you choose a layout, think about the wind and sun. You do not want smoke blowing back into your house or the sun hitting you while you grill. Gappsi can help you find the best spot on your property to avoid these issues. Our team looks at your yard’s shape and your home’s style to build a kitchen that fits perfectly.

Step 3: Select Materials That Withstand Long Island Weather

Long Island weather changes a lot through the year. We have hot summers and very cold winters. The air near the water often has salt in it. These things can hurt your outdoor kitchen if you pick the wrong items. You need stones and tools that can take the heat and the ice.

Picking the right stones and pavers keeps your space looking new for a long time. It also helps your home stay in good shape. Choosing tough items now saves you money on fixes later.

Strong Bases With Stone Veneer

The base of your kitchen must be solid to hold heavy grills. Most people use a frame made of steel or stone blocks. Then, they cover it with stone veneer. This looks like a real stone wall but is faster to build. It stays strong in wet air and deep snow.

Gappsi uses many types of veneer to match your house. You can learn more in our stone veneer guide for outdoor rooms. These thin stone pieces stay on the base even when the ground moves in the cold months. Using veneer also lets you pick from many colors and textures.

Tough Stone Counters

Your counters are where you prep food and eat with friends. They must be easy to wash and hard to chip or break. Natural stone is a smart pick for our area because it lasts. Granite is a top choice because it does not stain from grease. It also does not fade when the sun is bright.

Colors like Blue Pearl, Uba Tuba, and Absolute Black look great in the yard. Some stones can break when they get wet and then freeze. Facts on freeze-thaw cycles in granite show that dense stones last long in cold spots. Other good picks are bluestone and travertine. These stones stay cool to the touch even on very hot days.

Safe Flooring and Pavers

The floor of your outdoor kitchen must be safe and very hard. Concrete pavers work well on Long Island. They are made to handle the ice that grows in the dirt during winter. This stops the floor from breaking or shifting out of place. Gappsi works with the best names in the field.

We use pavers from Cambridge, Nicolock, and Techo-bloc. We also have many options from Belgard and Unilock. These pavers come in many looks and tones to match your grill. They give you a flat spot for your stove and chairs. They also stand up to salt if you live by the sea.

See the Gappsi Showroom in Smithtown

Choosing the right stone is easy when you can feel it in your hands. We invite you to see the Gappsi showroom in Smithtown. It is at 1015 West Jericho Tpke and is easy to find. You can see all the stones, pavers, and counters in person.

We have a large space with over 10,000 square feet for you to walk through. Our team can help you pick the best match for your style and cost needs. Seeing the colors in the sun helps you find a look you will like. We can show you how stones look when they are side by side.

Step 4: Plan Your Must-Have Appliances and Cooking Features

The core of your outdoor kitchen planning guide is the list of tools you choose to install. These items decide how often you will use your new space for cooking and hosting. A built-in gas grill usually serves as the main piece for most Long Island homes. These grills offer a quick start and steady heat for burgers or steaks. Brands like Delta Heat and Twin Eagles are top picks for their strength. You should place the grill in a spot where the wind can carry smoke away from your guests.

Choosing Your Primary Grill and Cooking Surfaces

When you choose a grill, look for thick stainless steel parts that can resist rust. The salt air and wet weather on Long Island can wear down cheap metals fast. Adding a side burner is a smart move for your kitchen layout. It lets you simmer sauces or boil water without walking back to the indoor house. You can also add a flat-top griddle for cooking eggs or stir-fry dishes. These features help you do all your cooking in one spot.

For those who enjoy slow-cooked meals, a smoker is a great add to the yard. Gappsi carries brands like Fire Gear to give you good results for every meal. You must also plan for enough counter space next to your cooking tools. Leave at least 24 inches of workspace on one side of the grill to handle plates and trays. This keeps the cooking flow smooth and safe for the cook.

Adding Specialty Pizza Ovens and Power Burners

A brick pizza oven is a favorite for people who host many outdoor parties. These ovens reach very high heat and can cook a pizza in just a few minutes. Fontana Forni makes gas and wood-fired ovens that sit well on a stone base. These ovens are not just for pizza. You can use them to roast meats or bake bread with a rich wood-fired taste. They add a unique look and feel to your outdoor living space.

You may also want to look at outdoor kitchen appliances such as power burners. These big burners can hold heavy pots for boiling corn or lobsters for a summer feast. They are a must-have for large groups who spend a lot of time outdoors. Planning for these features early helps you set up the right gas and power lines during the build.

Selecting Durable Fridges and Sinks

An outdoor fridge is a key part of any well-planned kitchen. You need a unit that is outdoor-rated to handle the heat of a New York summer. Brands like SUMMIT build units with strong seals and tough motors to keep food safe. These units stay cold even on the hottest days of the year. You should also think about adding an ice maker to your plan. It saves you from making trips to the store for heavy bags of ice.

A sink is the final piece of a full outdoor setup. Having a sink with hot and cold water makes cleaning up after a meal very fast. It also lets you wash your hands or rinse fresh food right where you are working. Sinks should be made of thick stainless steel to avoid damage from the weather. You can see many of these outdoor rated appliances at the Gappsi showroom in Smithtown. Adding these features ensures your outdoor kitchen is both useful and fun for years to come. Building an outdoor kitchen can also add value to your home. Some experts say it can return up to 80 percent of its cost when you sell.

Step 5: Coordinate Utilities, Permits, and Professional Installation

A good outdoor kitchen planning guide covers more than just picking a grill or granite counters. You must plan gas, water, and power lines to create a safe and useful cooking space. Gappsi brings 38 years of local skill to this phase. We manage every utility link and permit rule to keep your project on track. Our design-build model is a big plus. You work with one team that handles everything from 3D design to the final stone build.

Safe and Expert Utility Links

Running gas lines is a job for a licensed plumber who knows local safety codes. This step ensures your built-in grill and brick pizza oven have a steady fuel source. Proper set up prevents leaks and ensures your gear works at its best. Power work is just as vital. You will need power for lights, fridges, and outlets. We use GFCI outlets to protect against shocks on wet days. Our team places pipes under your masonry design and construction made of natural bluestone or travertine to hide wires and protect them from weather.

Plumbing needs careful planning too. A useful sink needs hot and cold water lines and a solid drain system. We focus on proper slopes to ensure water moves away from your home and patio. This prevents puddles and keeps your outdoor kitchen clean and dry. We also plan for winter prep. Long Island freeze-thaw cycles can damage pipes if they are not drained before winter. Our team builds in easy access points. This lets you shut off and drain lines when the cold hits.

Navigating Permits in Nassau and Suffolk

Most towns in Nassau and Suffolk Counties require building permits for outdoor kitchens. This process often includes site plans and checks on how far the kitchen is from the yard edge. The Nassau County government and local Suffolk towns use these rules to keep people safe. We handle the permit work for our clients. This saves you from spending hours at town hall. It also keeps your build moving without delays.

Airflow is another key factor for covered kitchens. If you build an outdoor kitchen pavilion, you must have enough fresh air. Trapped smoke and heat can be dangerous. They can also damage your frame. We design custom vent systems and choose hoods that match the power of your grill. This ensures your cooking area stays safe for you and your guests. Using a design-build firm means these hard details are part of the main plan.

  1. Map out all utility lines during the 3D design phase to prevent costly changes later.
  2. Hire a licensed plumber to install gas lines and test for leaks before you finish the stone work.
  3. Set up a dedicated power panel with GFCI protection for all your cooking and cooling gear.
  4. Set up hot and cold water lines with frost-proof valves to make winter prep fast and simple.
  5. Submit clear site plans to your local building office to get the needed permits and signs.
  6. Plan for proper airflow if your kitchen will be under a roof or inside a pavilion frame.

Bringing It All Together: Why Gappsi Is Your Single-Source Partner

Planning an outdoor kitchen is a big job. You have to think about the layout, the parts you need, and the cooking tools. It can be hard to work with many other workers at the same time. This is why many people on Long Island look for a partner who can do it all. Gappsi is here to help you turn your yard into a great place for food and fun.

The Benefits of Design-Build Services

Our team uses a design-build model for every project. This means you only have to work with one firm from the start to the end. We handle the 3D design and the masonry work ourselves. We also set up your gas lines and power outlets.

Using one team helps keep your project on a clear timeline. You will have one contract and one point of contact for the whole build. This makes the outdoor kitchen planning guide process simple and stress free.

We also take care of the hard parts like getting permits. Most towns in Nassau and Suffolk Counties need a permit for gas, water, and power lines. Our team knows how to talk to local building offices to get your project done fast.

You can check the permit rules for your area on sites like the Smithtown Building Department page. Having an expert handle these steps saves you a lot of time and worry.

A History of Italian Skill

Gappsi has been serving Long Island homes since 1987. Our founder, Giuseppe Abbrancati, has more than 50 years of work in the trade. He started learning about building in Italy when he was only seven years old. He brings that old world care and skill to every project we do today.

This past helps us build spaces that look great and last for many years. We use the best ways to make sure your stone and pavers stay in place. We are proud of the work we have done over the last 38 years.

Our team has earned over 50 ICPI awards for our stone work and masonry. We also hold a patent for the Gappsi Edge Restraint System. This tool helps keep your patio and kitchen floors from moving over time.

We have 12 expert groups that work under one roof. This allows us to handle every part of your build without calling other firms. Our team works together to make sure every stone and pipe is set correctly.

Experience Our Smithtown Showroom

It is helpful to see and feel the items for your new space. We have a 10,000 square foot showroom in Smithtown where you can look at many choices. You can pick out natural stone veneer for your island or granite for your counters.

Seeing these items in person helps you make the best choice for your home. We can show you how different stones look next to each other in real light. This hands-on way is the best way to start your project.

Our work can be seen in many homes across the island. We have finished projects like this Dix Hills outdoor kitchen project for our happy customers.

You can also view our Merrick outdoor kitchen project to see a custom Wolf appliance setup. These projects show how we combine beauty and use in every build. We treat every yard like it is our own to give you the best results possible.

Frequently Asked Questions

How much does an outdoor kitchen cost on Long Island?

The price of an outdoor kitchen depends on the size and the materials you choose. A simple build with a grill and counter space often costs between $5,000 and $8,000. For a custom space with stone veneer, granite counters, and many appliances, costs can range from $15,000 to over $40,000. Your choice of natural bluestone or travertine and the cost of new gas lines will set the final price.

Do I need a permit for an outdoor kitchen in Nassau or Suffolk?

Most towns in Nassau and Suffolk Counties need building permits for outdoor kitchen projects. You will likely need a permit if you plan to install new gas lines, wires, or pipes. Each town has its own rules for where you can build on your land. Gappsi handles the permit process for our clients to make sure every project meets local laws. This saves you time and stops legal problems with your home building.

How long does it take to design and build an outdoor kitchen?

The time to build an outdoor kitchen depends on the design and permit wait times. A typical project starts with a 3D design and picking materials at our Smithtown showroom. Once the town approves the permits, the building work often takes two to four weeks. This time covers the stone work for the kitchen island, counter setup, and appliance tests. Bad weather and the size of the yard work can also change the final schedule.

Can I install standard indoor appliances in an outdoor kitchen?

You should not use indoor appliances in an outdoor kitchen. Indoor units cannot handle the rain, sun, or the deep cold of Long Island. Proper outdoor kitchen appliances use tough stone or stainless steel to stop rust. They also have strong cooling parts and tight seals to keep food and drinks safe in hot weather. Using indoor models outside is a safety risk and will end your repair coverage.

Ready to plan your custom outdoor kitchen on Long Island?

Waiting to start means more time in a yard that does not fit your needs and missing out on the layout you want. Each month you wait is more time you lose with friends and family. By starting now, you can beat the rush and make sure your new space is ready for the first warm days of spring. Our team handles the permits and utility plans for Nassau or Suffolk to make the stone veneer and appliance install easy. We use strong stones like natural bluestone and granite to build a space that lasts through the Long Island winters.

Ready to build? Schedule a free design consultation to walk through our Smithtown showroom and start your plan.

Share this page:
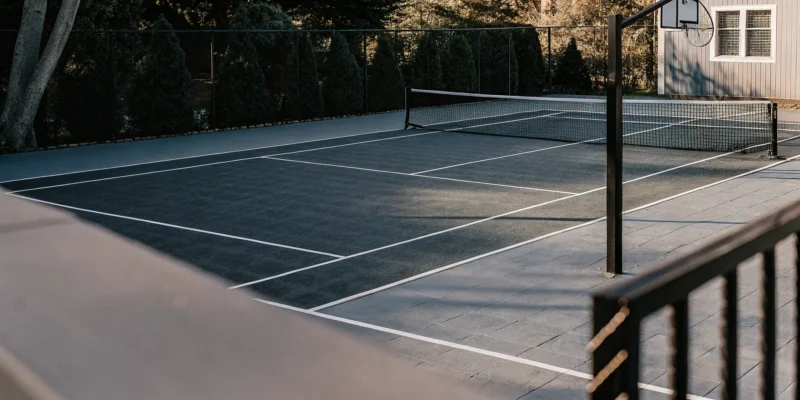
Backyard multi-sport games court with synthetic turf, basketball hoop, and pickleball lines on a sunny day

Sports Games Courts: Essential Space Requirements and Material Guide

Homeowners on Long Island often struggle to fit multiple sports into a single backyard layout. Standard dimensions for basketball and pickleball require specific clearance zones to ensure safe play for the whole family.

Sports Games Courts provide a special area for basketball, pickleball, and volleyball. These multi-sport areas let you combine several games into one spot by using crossed lines and movable nets. Experts at EVstudio note that a half-court for basketball needs about 2,350 square feet. A pickleball court fits in a much smaller 880 square foot area. Choosing the right size depends on your open lawn space and the sports you play most.

A flat base of concrete or asphalt serves as the floor for the project. We finish this base with Matflex tiles or synthetic turf to create a smooth surface. Proper planning ensures you have enough buffer space for safe play during fast games on your new backyard court.

Determining how much room you have is the first step. You must factor in the dimensions of the court plus the clearance zones for player safety. Space Requirements for Your Backyard Sports Games Courts will vary based on your property size and the games you choose.

Space Requirements for Your Backyard Sports Games Courts

Fitting a court into your yard starts with your goals. Most yards in Nassau and Suffolk County can fit a multi-use area if you plan the layout well. You must think about the size of the play zone and the space around it. These game court designers help you map out these zones to match your property lines and local rules.

Small to medium property layouts

A court size of 30×60 feet works well for most small to medium yards. This footprint gives enough room for a standard pickleball court while leaving space to move safely. Gappsi built a court of this size for an East Islip project using Snap Sports tiles on a concrete base. As shown by USA Pickleball, the standard court is 20×44 feet, so a 30×60 layout adds a helpful buffer for safe play.

Medium to large yard options

If you have more room, a 36×60 foot layout is a great choice. This size adds extra buffer space which is helpful for tennis or half-court basketball. For homes with very large lots, a 50×100 foot area can fit a full tennis court. These large setups often include paths made of Nicolock Stone Ridge pavers around the edge to keep the area clean and easy to reach.

Safety and clearance buffers

Every court needs a safety zone beyond the play lines. These buffer zones keep players from hitting walls, fences, or plants during a fast game. Most plans need at least 5 to 10 feet of clear space around the main court lines. Experts at EVstudio note that total space needs must include these safe zones to prevent injury. Gappsi checks these zones during the design phase to make sure your court is both fun and safe for all ages.

Standard Court Dimensions for Popular Sports

To plan for backyard sports games courts, you need a clear map of your space. Each sport has its own size. Knowing these sizes helps you pick the right plan for your yard on Long Island. Gappsi has built many multi-sport setups in Nassau and Suffolk County. We recently finished a 30 by 60 foot court in East Islip. This size is a great choice for mid-sized yards.

Basketball and tennis needs

Basketball is a top choice for multi-sport plans. A full pro court is 94 feet by 50 feet. Most people pick a half-court to save space. A standard half-court is 47 feet long and 50 feet wide. If your yard is small, you can still play with a 30 by 30 foot area. This size fits a three-point line and gives you room to shoot. It is a smart way to add value to your home.

Tennis needs the most room of any home sport. The play area for doubles is 78 feet by 36 feet. But you must add extra space to move around. A full tennis court usually needs a total space of 120 feet by 60 feet. Game court experts can help you fit these large courts into your yard. They use smart grading and stone walls to make the land flat and ready for play.

Pickleball and net games

Pickleball is a fast-growing sport for home sports games courts. The court size is 44 feet by 20 feet. This is much smaller than a tennis court. It makes the game a great fit for yards in towns like Smithtown. The 44 by 20 foot size also works for badminton. Using one area for both games is a smart way to get more use from your yard. You can swap nets in just a few minutes.

Volleyball needs a bit more room than pickleball. A standard court is 60 feet by 30 feet. When you plan for volleyball, remember to leave extra room to serve. Playing these sports keeps your family active and fit. The CDC says that adults need at least 150 minutes of exercise each week. Having a court at home makes it easy to hit that goal without leaving your house.

Comparing popular game plans

Sport Court Size (Feet) Total Space Needed (Feet)
Full Basketball 94 x 50 100 x 56
Half Basketball 47 x 50 52 x 56
Pickleball 44 x 20 60 x 30
Tennis (Doubles) 78 x 36 120 x 60
Volleyball 60 x 30 80 x 50

When you mix sports, you can save space with lines that overlap. A combined basketball and tennis court often needs about 94 feet by 60 feet. This plan uses a net you can take down. You can switch from hoops to a tennis game quickly. Gappsi uses tough tiles like Matflex to make sure the surface works well for every game you play. This modular surface is easy to keep clean and looks great for years.

Expert setup makes sure your court is flat and drains well. Good base prep is the most vital part of any sports games courts job. Gappsi brings years of local skill to every build on Long Island. We handle the 3D design and the permits so you can just enjoy the play. Our team works with you to pick the best spot and size for your needs.

Choosing the Right Surface Material for Your Sports Games Courts

The base and top layers you pick for your backyard define how the game feels and how well water drains. For homeowners on Long Island, the local weather makes drainage a top priority. Most Sports Games Courts services start with a solid base like concrete or asphalt before they add the final play surface. Concrete provides a flat and permanent floor that lasts for decades but has a higher upfront cost. Asphalt is a common choice for a budget-friendly base, but it may need more care over time to prevent cracks from winter freezes.

Synthetic Turf and Grass Options

Synthetic turf is a top choice for a soft feel and easy upkeep. Gappsi uses the Italgreen line to give you a pro-level experience at home. Homeowners interested in making the switch can read about the 10 key benefits of synthetic turf on Long Island. You can choose from types like the Soccer 52 Double X for active games or the Green HD 17 for tennis. These surfaces allow for fast play while being easy on your joints.

Many homeowners also add a Golf or Putting Green section to their sports games courts for more variety. Synthetic turf helps with outdoor water use because it does not need a hose to stay green. It also drains well after a heavy storm in Nassau County.

Interlocking Tiles and Modular Systems

Modular tiles offer a versatile and fast way to finish your court. Products like Matflex tiles or Snap Sports polypropylene tiles are popular because they snap together over a hard base.

In a recent project in East Islip, NY, Gappsi Inc used Snap Sports tiles on a recycled concrete base to build a 30×60 foot court. These tiles are made to grip well even when they get wet. They come in many colors, which helps you mark lines for different sports. You can also mix in Nicolock Stone Ridge pavers around the court edge to create a clean look that matches your patio.

Performance and Maintenance Needs

Each material has a different trade-off between how it plays and how you care for it. Hard surfaces like concrete or asphalt provide a fast ball bounce that is great for basketball. Tiles add a bit of cushion which helps protect your knees during a long game of pickleball.

If you want a court that works for many sports, a mix of tiles and turf is often the best path. No matter which you pick, a professional setup ensures the ground is level. This stops water from pooling and keeps your game court designers happy with the final result. Proper care keeps the court safe for your family for many years.

Designing a Multi-Sport Layout for Maximum Versatility

A smart layout lets you play many games in a small space. By using one area for basketball, volleyball, and tennis, you get the most out of your yard. The key is to plan how each game fits on the same floor. You can use different colors for the lines so players know where to look. This makes your multisport court guide easy for everyone to use.

Marking multiple sports

You can fit a lot of fun on one surface with the right lines. Most people use a solid color for the main sport, like basketball. Then, you can add dashed lines for other games. Use one color for pickleball and another for badminton. This helps players stay in bounds without getting mixed up. Different colors make each game clear even when they overlap on the court floor.

It is helpful to follow rules from groups like USA Pickleball when you plan. They list the right sizes for courts and zones. When you know the exact space you need, you can fit more games into your plan. This helps you avoid mistakes and keep the play fair for all who use the area. Precise measurements from a map or survey help you fit everything in.

Adjustable gear and nets

Good gear makes it easy to switch between sports. Use hoops that you can raise or lower for different ages. Removable nets are also a must for a multi-use area. You can take them down for soccer or basketball and put them up for tennis in minutes. This keeps the space open and safe when you do not need the net for a specific game.

For an East Islip project, we used top gear to give the owners full use of their space. Strong posts can hold nets for many games. Some posts have holes at different heights for volleyball or tennis. This setup means you do not need many extra parts in your yard. One set of posts does the work of three.

How to plan your layout

Setting up your sports games courts takes a few clear steps. You must think about space and gear before you start to build. Here is a simple path to follow:

  1. Measure your yard to see how much room you have for the court.
  2. Pick which sports you want to play most to set the main size.
  3. Plan a striping scheme using colors that stand out from each other.
  4. Select gear like adjustable hoops and net posts that fit many games.
  5. Mark the lines on the surface once the base and floor are ready.

Planning the right way ensures you do not waste space or funds. A good design keeps the court fun for years as your family grows. If you need help, professional game court designers can find the best fit for your home.

Planning Your Sports Games Courts Installation on Long Island

Building Gappsi Inc sports games courts in your backyard takes careful work and a clear plan. We have helped people on Long Island for over 38 years to create play spaces. Gappsi’s complete sports games courts services cover every part of the job from start to finish. We work across both Nassau and Suffolk Counties from our main office in Smithtown.

Initial site review and 3D design

The first step is a full check of your yard to see what will work best. We look at the space you have and the slope of the land. We use 3D tools to show you how the court will look in your yard before we start. This helps you find the best spot for play and see how it fits with your home. You can also visit our showroom in Smithtown to see the court parts in person. Our 12 divisions work as one team to handle the court, walls, and lights all at once.

During the design phase, you can choose the sports you want to play most. Some owners want a space for basketball and tennis. Others may want a smaller spot for a pickleball court or volleyball games. We help you pick the right size for your yard and your needs. A good plan at the start saves time and helps you get the most out of your new space.

Permits and base prep

Most towns on Long Island need a permit before you build sports games courts. Rules vary between Nassau and Suffolk, but Gappsi and our team help with the papers. We provide the drawings and data needed for town sign off. This ensures everything follows local laws. Once we have the permit, our team starts the site work. This is a key part of the build that ensures the court lasts for many years.

Site prep starts with clearing the land and grading the soil. We level the ground so water drains away from the court area. Good drainage is vital on Long Island to prevent pools of water after a storm. Then, we put down a firm base made of asphalt or concrete. This solid floor acts as the spine of the court. It keeps the surface flat and stops it from sinking over time. A strong base is the best way to keep your court safe and fun for decades.

Surface installation and line markings

When the base is set, we add the top play surface. You can pick from Matflex tiles or synthetic turf for your court. These materials help stop slips and protect your joints during play. Our team fits the pieces together with care to ensure a smooth finish. After the surface is down, we paint the lines for your chosen sports. We use bright, long-lasting paint that stays clear through many seasons.

We can make a half-court for basketball or a space for three or four other games. Our East Islip project is a great case of a 30×60 ft court that fits a yard well. Once the lines are dry, we set up the hoops and nets so you can start playing.

How to Budget for Your Sports Games Courts Project

Building a custom area for play involves several cost factors that homeowners should consider early. The total price for sports games courts depends mostly on the size of the court and the materials you choose for the base and surface. Proper planning helps you avoid hidden costs while ensuring your new court lasts for decades.

Primary cost factors for construction

The size of your project is the biggest driver of the final price. Larger courts need more raw materials and more labor for grading. For example, a half-court basketball setup may range from $8,600 to $38,000 depending on the size and site needs. You also need to budget for professional site prep. This includes grading and drainage to keep the court level and dry. According to the EPA, managing runoff with proper drainage is vital for any large paved surface to prevent local water issues.

Choosing your base and surface materials

Your choice of base material impacts your budget. Concrete is a permanent and tough option but usually costs more than asphalt. A synthetic turf surface over a gravel base is another path to consider. For the top layer, many homeowners choose modular Matflex tiles or Snap Sports polypropylene tiles. These materials handle the local climate in Nassau County and Suffolk County while they help protect players from hard falls.

Permits and professional design value

Working with a full-service firm like Gappsi helps simplify the process. We manage the drawings and plans needed to get permits in your local town. Our team has served Long Island since 1987. We provide clear 3D designs so you see the value before work starts. You can reach our Smithtown showroom at 631-543-1177 to discuss a plan that fits your backyard and your budget.

Frequently Asked Questions About Sports Games Courts

How much does a backyard sports games court cost?

Cost depends on court size, base material, and surface type. A half-court basketball layout (30×30 ft) on an asphalt base costs less than a full-size multi-sport surface (50×100 ft) with synthetic turf and multiple striping. Your site conditions, grading needs, and permitting also affect the final price. A professional consultation provides an accurate estimate based on your specific property.

What is the best surface for a multi-sport court?

The best surface depends on the sports you play most. Synthetic turf from Italgreen offers excellent drainage and low maintenance while supporting basketball, pickleball, and volleyball. Matflex polypropylene tiles provide a modular, cushioned surface that handles multiple sports well. Concrete and asphalt offer the most durability for basketball-heavy use but lack the shock absorption of turf or tiles.

How much space do I need for a backyard sports games court?

A versatile court starts at 30×60 ft, which fits a regulation pickleball court with room for half-court basketball and volleyball. For tennis or full-court basketball plus other sports, plan for at least 50×100 ft. You also need buffer space around the court for safe movement. Gappsi offers free site evaluations to measure your available space and recommend the best layout.

Can you put a sports games court on a sloped yard?

Yes. Professional grading and drainage solutions can transform sloped properties into level court foundations. Gappsi’s design-build team includes excavation and grading expertise as part of every project. And the company’s landscape division handles any retaining walls or drainage systems needed to prepare your site.

How long does it take to install a sports games court?

Most residential installations take 1 to 3 days depending on complexity. For a detailed walkthrough of the installation process, check out our detailed installation and maintenance guide for synthetic turf courts. A simple synthetic turf court on prepared ground may be installed in one day. Courts requiring concrete or asphalt base work, extensive fencing, or custom striping and equipment may take longer. Gappsi provides a clear timeline during the design phase.

What sports can I play on a single multi-sport court?

A well-designed multi-sport court can accommodate basketball (full or half court), pickleball, volleyball, badminton, tennis, bocce, shuffleboard, and soccer practice. Color-coded line markings and removable nets and hoops let you switch between sports in minutes.

Ready to Build Your Sports Games Courts?

Turn your backyard into a year-round destination for fun and fitness. Gappsi Group has been designing and building Sports Games Courts for Long Island homeowners since 1987. From the first site evaluation to the final line markings, our team handles every detail.

Call (631) 543-1177 or stop by our showroom at 1015 West Jericho Turnpike, Smithtown, NY 11787 to see material samples and discuss your project. Let us build a court your family will enjoy for decades.

Share this page:
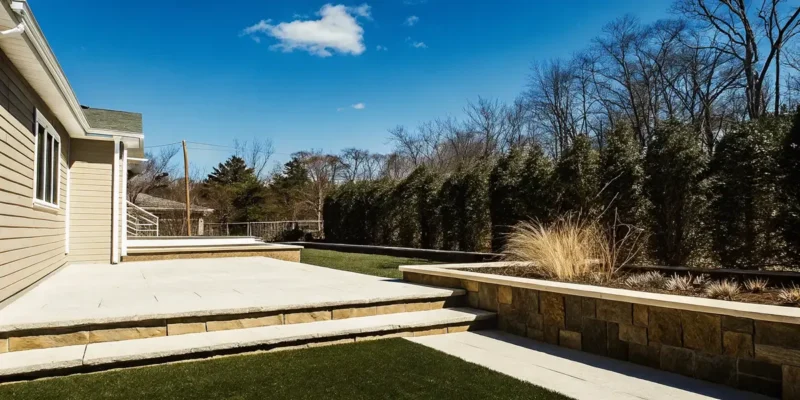
Low-maintenance luxury Long Island landscape with porcelain paver patio, synthetic turf, and evergreen privacy screens

Low-Maintenance Luxury Landscape Long Island: A Design Guide

A low-maintenance luxury landscape on Long Island pairs natural stone with materials that resist the harsh coastal elements. Many property owners want a beautiful yard but do not want to spend every weekend tending to it. Meeting these goals requires a shift in how we think about outdoor design.

A low-maintenance luxury landscape on Long Island is an expertly designed outdoor space that pairs an elegant style with specific features that minimize recurring labor. This approach starts with smart site planning to ensure proper drainage and sun exposure, as noted by researchers at Clemson University. By replacing high-effort elements like large lawns with durable options, homeowners can enjoy a resort-like feel without the burden of constant upkeep. Key components include stain-resistant porcelain pavers, natural stone like travertine, and synthetic turf solutions that eliminate the need for mowing or fertilizers. Native plantings further reduce water needs and pest control costs. A vertically integrated design model ensures the property stays beautiful with only minimal seasonal care from the homeowner.

Many people think that a fine backyard needs a full-time crew to stay tidy, but modern masonry design and construction and hardy plant choices offer a different way. To build a space that lasts, you must first understand what defines a low-maintenance luxury landscape.

Low-maintenance Luxury Landscape Long Island: What Defines a Low-Maintenance Luxury Landscape?

A low-maintenance luxury landscape is not the same as a no-care landscape. As experts at Clemson University note, there is no such thing as a maintenance-free landscape. The goal is to reduce the amount of care while keeping the property looking its best. This is achieved through intelligent design, durable materials, and strategic plant selection rather than through neglect.

Luxury in this context means investing in materials and systems that endure. Instead of standard concrete that cracks and stains, a luxury landscape uses porcelain pavers that resist frost and salt. Instead of a high-maintenance lawn that demands weekly mowing, it uses synthetic turf or groundcovers that require minimal attention. Instead of flimsy fencing, it uses permanent stone walls or mature evergreen hedges that provide privacy without constant trimming.

For Long Island homeowners, the coastal climate adds urgency to these choices. Salt air accelerates corrosion of metal fixtures. Frost heaves shift improperly installed pavers. Sandy soil drains quickly and dries out plants. A properly designed low-maintenance luxury landscape addresses each of these conditions with the right material choice at the start. This is why Gappsi Group, serving Nassau and Suffolk Counties since 1987, emphasizes planning and design as the foundation of every project. With 38 years of experience and 50-plus industry awards. The company understands that the upfront investment in quality materials and professional installation pays for itself many times over in reduced maintenance costs.

Think of it this way. Every weekend you spend repairing, weeding, mowing, or resealing is a weekend you could spend enjoying your yard. A low-maintenance luxury landscape shifts the balance away from work and toward relaxation.

Start with Strategic Site Planning and Design

Planning is essential to the development of a low-maintenance landscape. Extra time spent in planning will be repaid many times over in later leisure time, says Clemson University Extension. Before any material is ordered or any ground is broken, a thorough site analysis sets the stage for success.

Step 1: Analyze Your Site Conditions

Walk your property at different times of the day and in different seasons. Note where the sun hits in the morning versus the afternoon. An area that gets full morning sun but harsh afternoon heat requires different plant and material choices than a deeply shaded corner. Check for drainage issues, low spots where water pools, and runoff paths after heavy rain. These conditions, as noted by University of Missouri Extension, dictate whether you need grading work, drainage solutions, or raised beds to keep your landscape healthy.

Step 2: Document Your Family’s Needs

Consider both your present needs and future desires. Do you entertain frequently and need a large patio? Do children or pets need a safe play area? Would you like a space for gardening, a fire pit for cool evenings, or a quiet reading nook? Creating a clear priority list now prevents costly rework later. A luxury landscape that reflects how you actually live will serve you better than one designed around generic assumptions.

Step 3: Evaluate Existing Plants and Features

Identify trees and shrubs on the property and assess their health and future growth. A tree that will outgrow its current location may be less expensive to remove now than to manage as problems arise later. As Clemson specialists advise, preserving healthy mature trees adds immediate character and value, but struggling specimens should be replaced rather than maintained at high cost. Avoid tilling near established trees, since damaging their roots can lead to decline.

Step 4: Plan for Energy Efficiency

Shade trees placed on the east and west exposures of the home provide morning and late afternoon cooling during summer months. Keep the area south of the house open to allow winter sunlight to warm the structure. This passive approach reduces your energy bills while contributing to a comfortable outdoor environment. The same trees, if they are deciduous, allow sunlight through in winter when their leaves drop.

Step 5: Create a Phased Implementation Plan

A full property transformation does not have to happen all at once. Establish a phased plan that tackles the hardest elements first, such as grading, drainage, and hardscape installation, then follows with plantings and finishing touches. This approach spreads the investment over time and allows you to enjoy each phase as it is completed.

Select Hardscape Materials That Last

Your choice of hardscape materials determines how much maintenance your landscape will require for decades to come. On Long Island, salt air, frost, and heavy rain mean you need surfaces that stand up to the weather without constant attention.

Porcelain Pavers

Porcelain pavers are fired at extremely high temperatures, creating a dense, non-porous surface that resists stains, frost, and salt. They require no sealing, keep their color for decades, and clean easily with a rinse. For pool decks, patios, and walkways, porcelain paver installation by an experienced team ensures the base preparation matches the material’s long lifespan. Porcelain is also slip-resistant and stays cooler under direct sun than natural stone, making it a practical choice for sun-exposed areas.

Natural Stone

Travertine, bluestone, and granite offer a classic aesthetic that ages beautifully through Italian masonry craftsmanship. These materials require periodic sealing every three to five years with a water-based urethane sealer, a service Gappsi offers through its restoration program. Natural stone provides texture and character that cannot be replicated by manufactured products. It works well for pathways, patio borders, and retaining walls where a timeless look is desired.

Resin Stone Surfaces

Resin-bound aggregate systems combine small stones with a clear binder to create a permeable, smooth surface that drains water naturally. A durable resin stone patio prevents puddles and weed growth while offering a clean, modern appearance. These surfaces are ideal for driveways and high-traffic areas where you want excellent drainage with minimal upkeep.

Comparison of Hardscape Options

Material Care Level Typical Lifespan Best Use
Porcelain Pavers Very Low 50+ Years Patios, pool decks, walkways
Natural Stone Medium 30-50 Years Pathways, walls, borders
Resin Stone Low 25+ Years Driveways, high-traffic paths
Gravelfix Stabilized Gravel Low 20+ Years Driveways, natural paths
Standard Concrete Pavers High 15-20 Years Budget installations

Gappsi’s showroom at 1015 West Jericho Turnpike in Smithtown lets you see and feel these materials before making a decision. Touching the stone, walking on the pavers, and seeing the color in person ensures your selection matches your expectations.

Incorporate Synthetic Turf for Year-Round Greenery

Synthetic turf has evolved dramatically in recent years. Modern products from American manufacturers use advanced materials that look and feel like natural grass while requiring a fraction of the upkeep. There is no mowing, no fertilizing, no watering, and no re-seeding. For Long Island homeowners who want a green lawn without the weekly chore cycle, low-maintenance synthetic turf solutions offer a compelling alternative.

Applications extend beyond simple lawns. Synthetic turf works well for pet runs, putting greens, play areas, and the fields surrounding sports game courts. The ZeroFill infill system used by Gappsi reduces heat retention and provides a soft, natural feel underfoot. Because synthetic turf does not require pesticides or fertilizers, it eliminates chemical runoff that can affect local waterways. This is an increasingly important consideration for environmentally conscious homeowners on Long Island.

Synthetic turf pairs naturally with hardscape materials. A porcelain paver patio bordered by a strip of synthetic turf creates a clean, modern transition between living and leisure areas. The contrast between the structured geometry of pavers and the organic softness of the turf defines the luxury aesthetic while keeping maintenance minimal.

Gappsi’s 38 years in the landscape industry mean its team understands proper base preparation for synthetic turf. A correct base layer ensures drainage, prevents wrinkling, and maintains a level surface for the life of the installation.

Add Privacy Screens and Thoughtful Plantings

Privacy is one of the most requested features in a luxury landscape. The ability to enjoy your outdoor space without feeling exposed to neighbors or street traffic transforms the experience from merely functional to genuinely relaxing.

Evergreen plantings provide year-round screening. Arborvitae, leyland cypress, and other tall evergreens grow densely and require only occasional shaping. For faster results, a combination of fencing with climbing vines or espaliered trees creates layered privacy that matures quickly. Gappsi’s landscape design and construction services include custom planting plans that balance immediate screening needs with long-term growth patterns.

When selecting plants for a low-maintenance landscape, prioritize native species. Research from Cornell University shows that native plants do a better job of sustaining local insect communities than non-native alternatives. Plants like eastern red cedar, inkberry holly, and summersweet clethra thrive in Long Island’s climate without requiring excessive water or chemical inputs. They support local pollinators, resist pests naturally, and reduce the need for intervention.

Identify existing trees and shrubs during the planning phase. A healthy mature tree that screens an unsightly view is worth preserving. A struggling or poorly placed specimen may be easier and less expensive to replace now than to maintain over time. Make note of microclimates on your property areas that are particularly dry, wet, shaded, or exposed and select plants that match those conditions. This reduces the need for supplemental watering, soil amendments, and ongoing care.

Decorative containers with seasonal plantings add color and interest without requiring extensive garden beds. Planters can be moved, swapped, and refreshed with minimal effort, keeping the landscape feeling dynamic without demanding constant weeding and mulching.

Partner with a Full-Service Design-Build Contractor

A low-maintenance luxury landscape is only as good as the team that builds it. When multiple trades are involved, coordination matters. A masonry crew, a planting crew, an irrigation specialist, and a lighting installer need to work from the same plan with the same timeline. If one tradesperson finishes their work in a way that complicates the next step, the result suffers.

This is why a vertically integrated design-build contractor offers a clear advantage over hiring separate subcontractors. Gappsi’s 12 specialized divisions cover everything from initial 3D design through final installation, with in-house teams for masonry, landscape, synthetic turf, fencing, and restoration. There is no finger-pointing between subcontractors because the entire project is managed under one roof.

The company’s patented Gappsi Edge Restraint System is a specific example of how attention to detail reduces long-term maintenance. The system holds paver edges securely in place, preventing the shifting and settling that creates uneven surfaces and tripping hazards over time. Innovations like this, developed through decades of hands-on experience, distinguish a professional installation from a DIY or basic contractor approach.

The 3D design process used by Gappsi allows you to see your completed landscape before construction begins. This eliminates guesswork and ensures the final result matches your expectations. You can evaluate material combinations, test layout options, and refine the design until every element works together. For more information about how luxury outdoor contractors approach comprehensive landscape transformations, see Gappsi’s guide to selecting the right partner for your project.

Frequently Asked Questions

How do I design a low-maintenance landscape on Long Island?

Start with a thorough site analysis that evaluates sun exposure, drainage patterns, and existing vegetation. Choose durable materials like porcelain pavers and synthetic turf that require minimal ongoing care. Select native plants adapted to Long Island’s coastal climate. Work with a full-service contractor who can integrate all elements into a single cohesive plan.

What are the best low-maintenance materials for a luxury landscape?

Porcelain pavers offer the lowest maintenance with a 50-plus year lifespan and no sealing required. Resin stone surfaces provide excellent drainage and weed resistance for driveways and paths. Synthetic turf eliminates mowing and watering while maintaining a green appearance year-round. Natural stone like bluestone and travertine offer classic aesthetics with periodic sealing every three to five years.

How much does a luxury landscape cost on Long Island?

Costs vary based on property size, material choices, and scope of work. A comprehensive luxury landscape with hardscape, synthetic turf, plantings, and lighting typically ranges from moderate to significant investment per square foot. The best approach is to schedule a consultation where the design team can assess your property and provide a detailed estimate based on your specific goals.

Can I have a luxury landscape without hiring a full-service contractor?

While it is possible to coordinate separate contractors for different aspects of the project. The complexity of integrating multiple systems, materials, and timelines makes a single-provider approach more reliable. A full-service contractor ensures that the grading, drainage, hardscape, planting, and lighting work together as a unified system. This reduces coordination headaches and produces a more cohesive result.

How long does it take to install a luxury landscape on Long Island?

Timelines depend on project complexity, permitting requirements, and seasonal weather. A typical full-property transformation takes several weeks to a few months. Phased projects allow you to break the work into manageable stages, completing the most impactful elements first while planning future phases. A detailed timeline is established during the design phase before construction begins.

Ready to Design Your Low-Maintenance Luxury Landscape on Long Island?

Building a landscape that balances elegance with practicality requires expertise that only comes from experience. Gappsi Group has been designing and building luxury outdoor spaces on Long Island since 1987. From the first consultation to the final walkthrough. Every project receives the same attention to detail that has earned the company 50-plus industry awards and a patented paver restraint system.

Do not settle for a landscape that keeps you working instead of relaxing. Call Gappsi at 631-543-1177 or visit the showroom at 1015 West Jericho Turnpike in Smithtown to start the conversation. Your low-maintenance luxury landscape on Long Island is closer than you think.

Share this page: