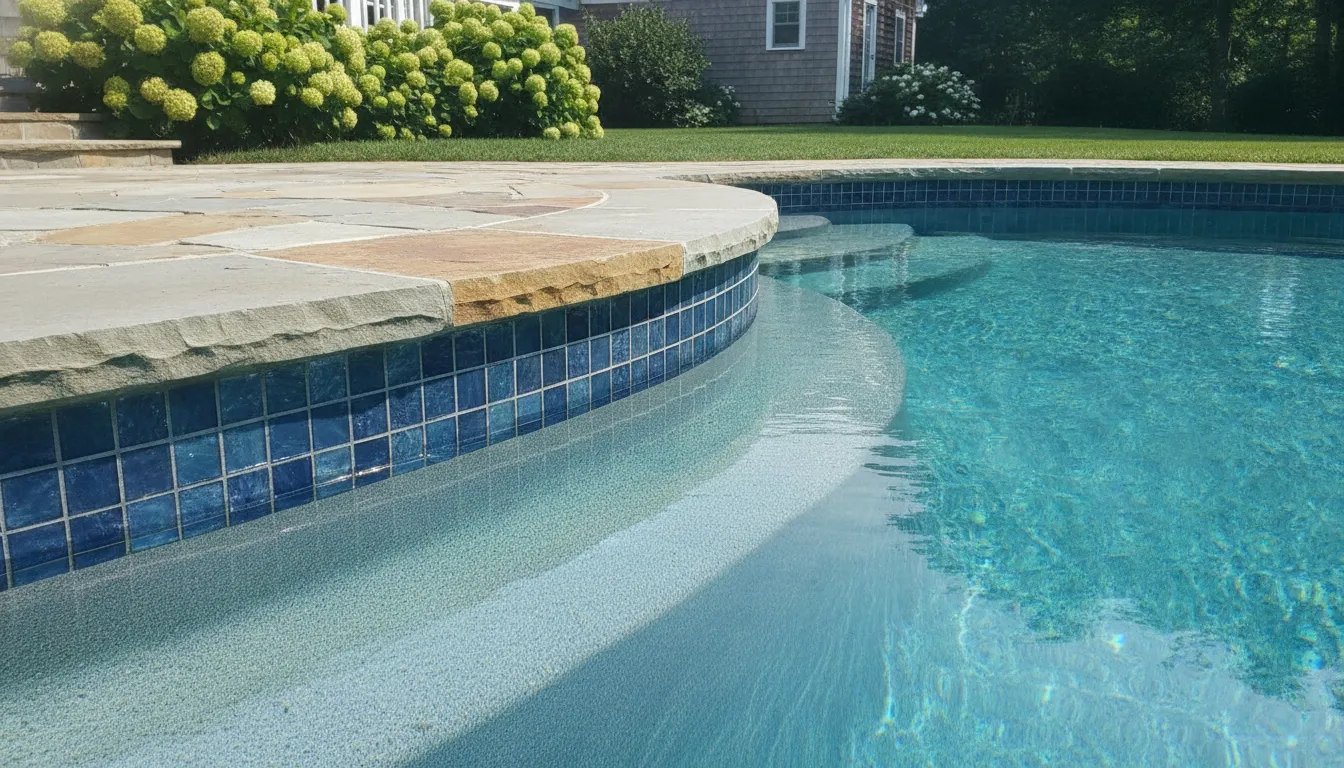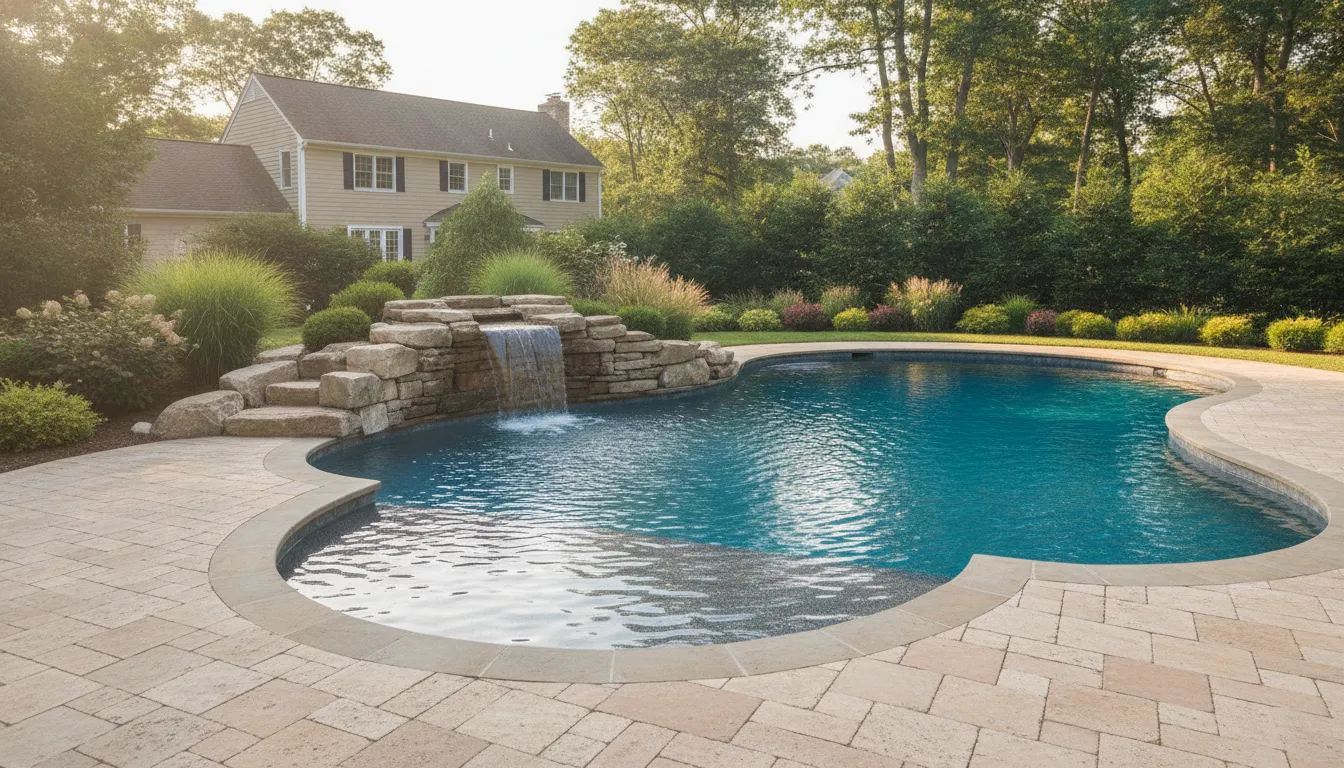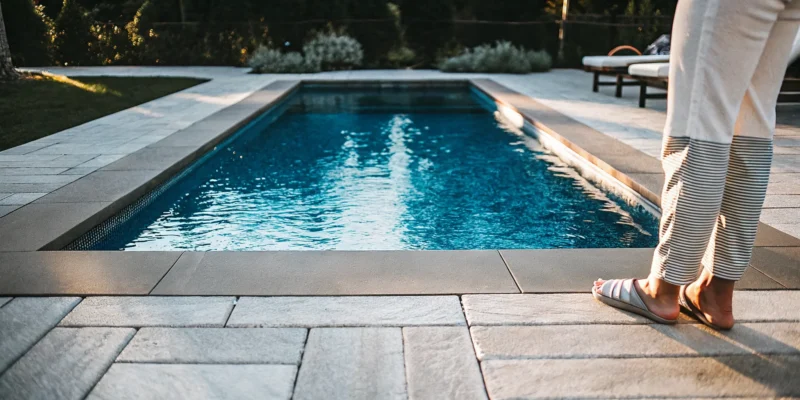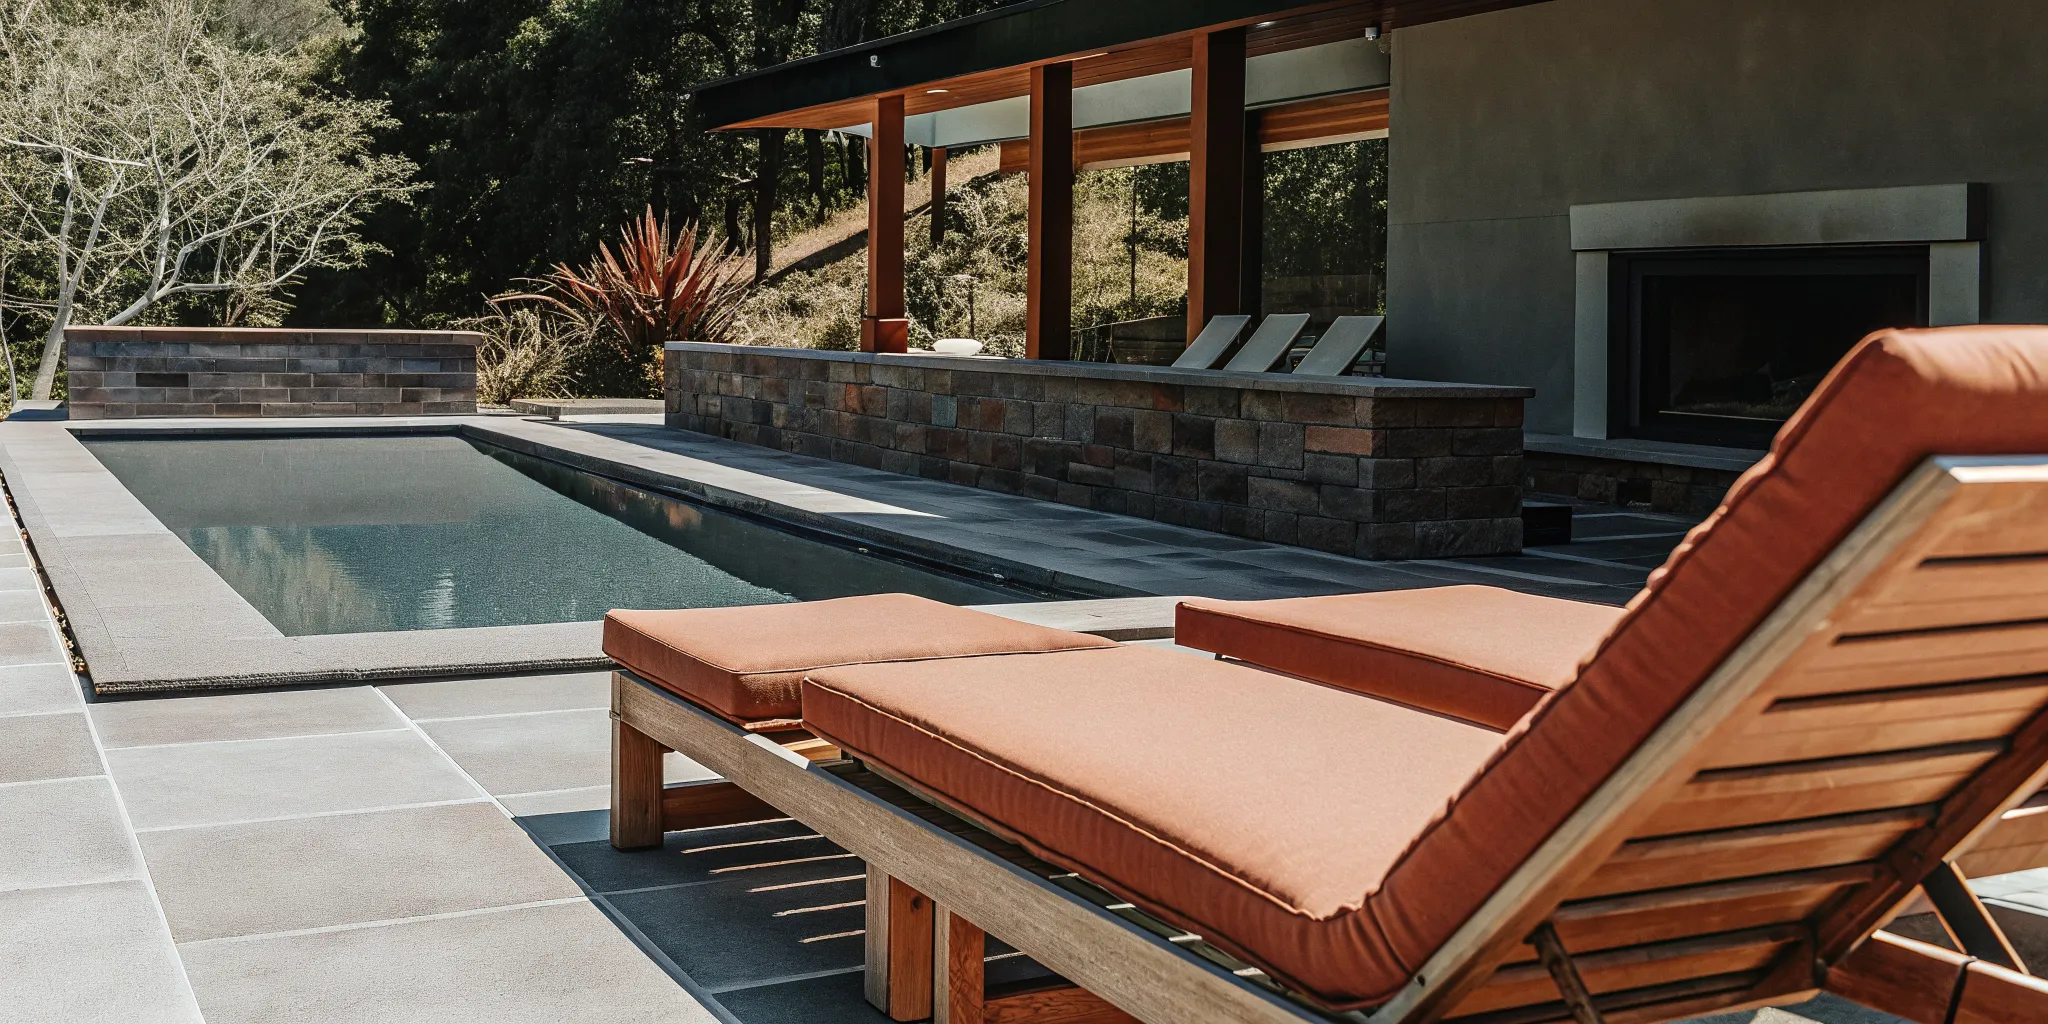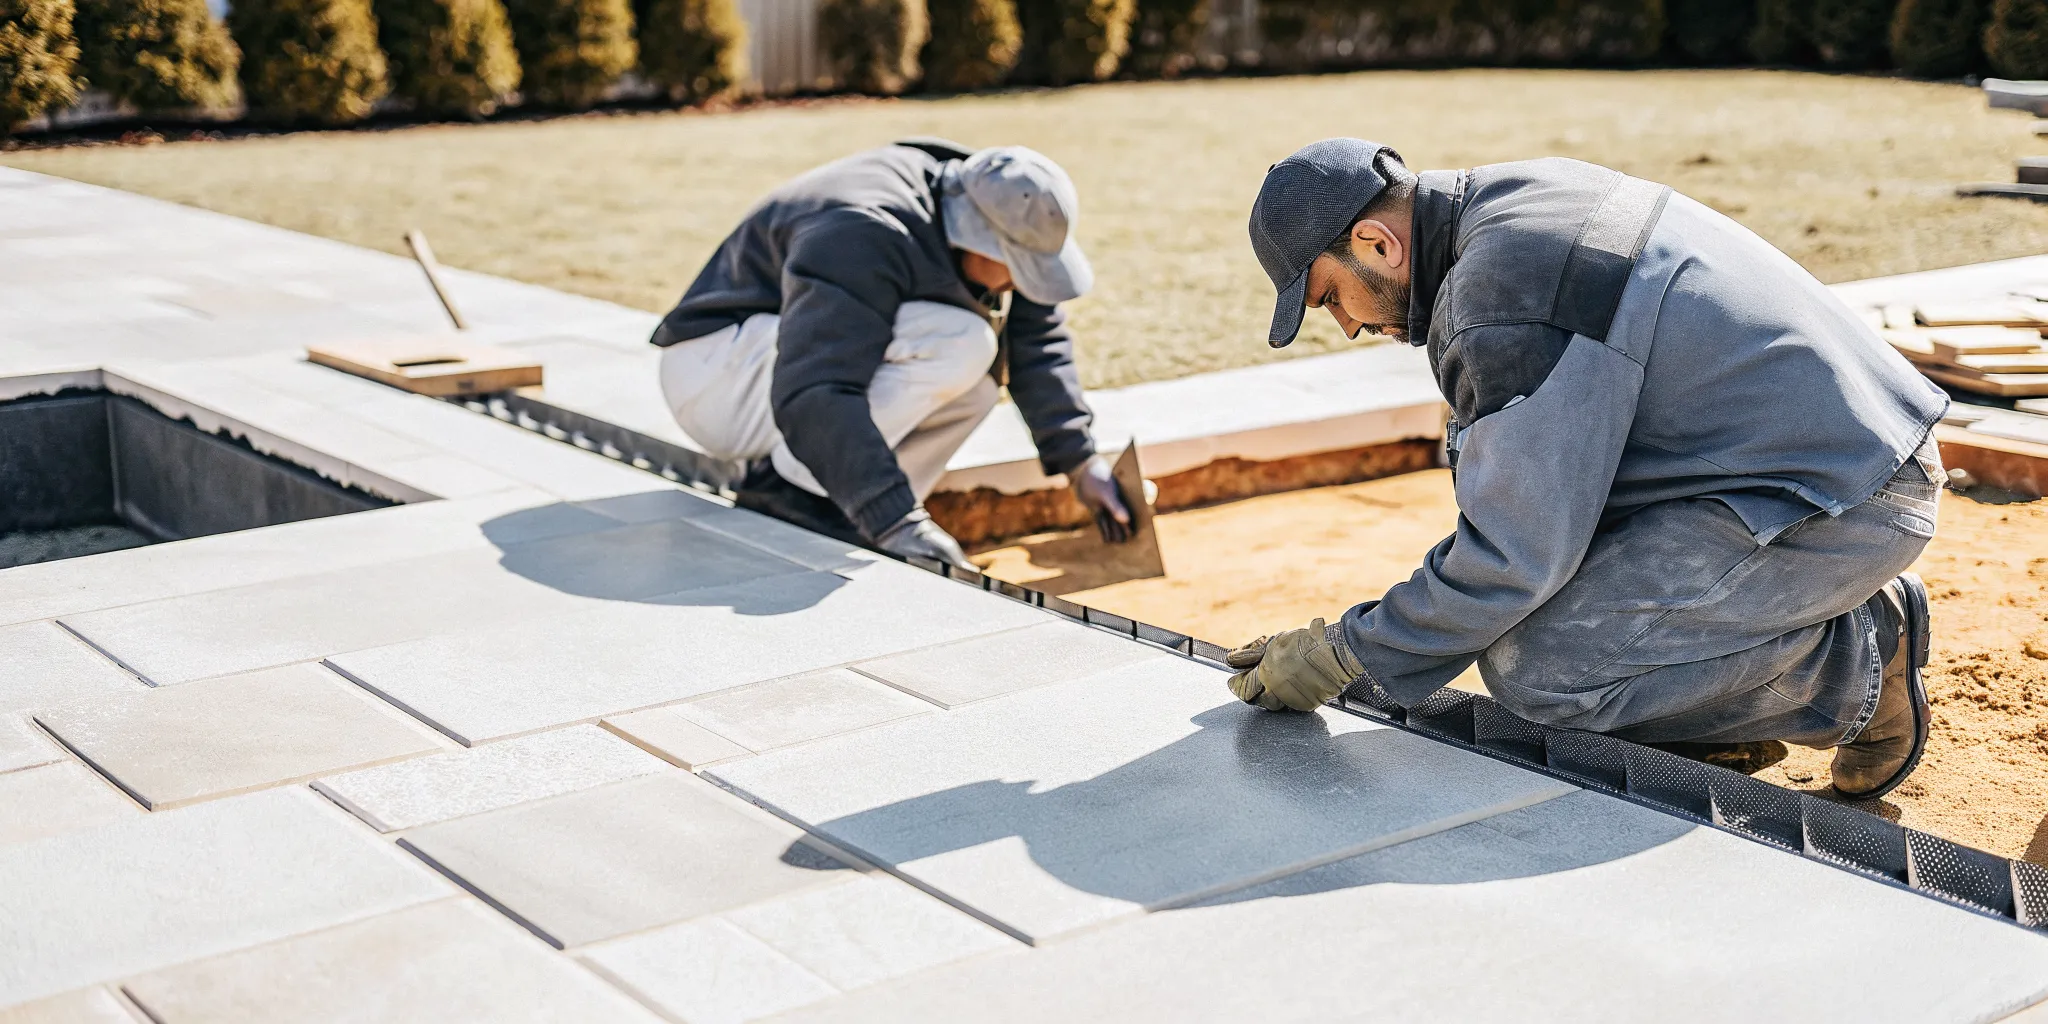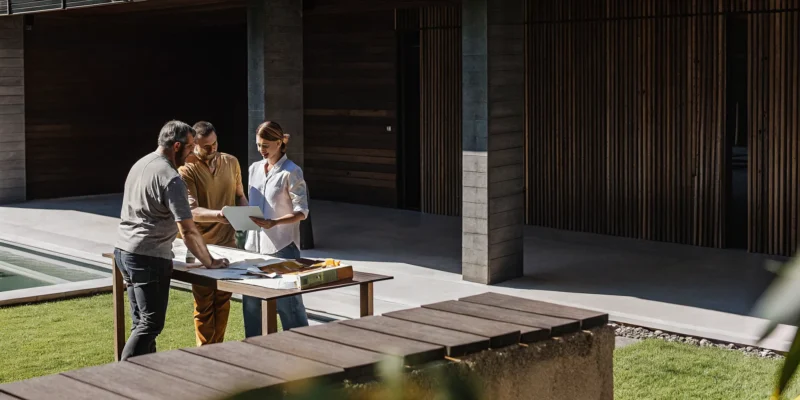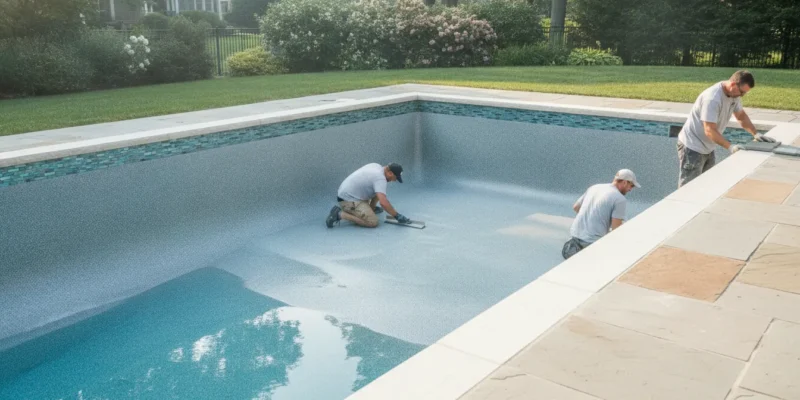
Modern inground pool remodel with a waterfall and patio, a project that impacts the total estimate.

Pool Remodel vs. Install: A Price Comparison

You see the potential for a true outdoor oasis in your backyard, but that outdated pool is standing in the way. Turning your vision into reality starts with one thing: understanding the budget. Whether you’re considering a simple resurfacing or a complete overhaul, every decision impacts the final price. To move forward with confidence, you need a clear estimate. We’ll break down the numbers for every option and help you compare the prices of custom pool installation and backyard transformation, giving you the clarity to build a plan you can feel good about.

Key Takeaways

  • Understand What Drives the Cost: Your final estimate depends on more than just pool size. Key factors include your choice of surface finish, decking materials like porcelain or stone, and whether you’re adding major features like a spa or changing the pool’s shape.
  • Set a Realistic Budget with Detailed Quotes: Don’t settle for a single number. Request itemized estimates from at least three contractors to compare costs for labor, materials, and permits. This transparency is the best way to avoid surprise expenses and choose the right partner.
  • A Remodel Pays for Itself Over Time: The benefits go beyond a beautiful new look. Upgrading your pool can increase your home’s value, improve safety with modern features, and significantly lower your monthly energy and maintenance costs with efficient equipment.

What Goes Into a Pool Remodel Estimate?

Thinking about remodeling your pool is exciting, but the big question is always about cost. A pool remodel isn’t a one-size-fits-all project, and the final price tag depends on several key factors. While a typical inground pool remodel can range from $6,000 to over $50,000, your specific choices will determine where your project falls on that spectrum. Understanding these variables will help you set a realistic budget and have a more productive conversation with your contractor. Let’s break down the main components that shape your estimate.

Factoring in Pool Size and Project Scope

It makes sense that the bigger your pool, the more your remodel will cost. A larger surface area requires more materials for resurfacing and more labor to get the job done. The scope of your project is just as important. Are you looking for a simple refresh, like replastering the surface and replacing the waterline tile? Or are you planning a complete overhaul with new decking and features? A basic resurfacing job is on the lower end of the cost scale, while a comprehensive renovation that touches every part of your swimming pool will naturally command a higher budget.

The Impact of Your Material Choices

The materials you select have a huge impact on both the look and the cost of your remodel. For resurfacing, standard plaster is one of the most affordable and popular options. However, if you want to create a more luxurious feel, you might consider an aggregate finish, tile, or premium fiberglass, which all come at a higher price point. The same goes for your pool deck and coping. You can choose from a wide variety of beautiful and durable materials, from classic concrete pavers to high-end porcelain and natural stone. Each choice affects your total investment.

Vinyl Liner Pools: Pros, Cons, and Lifespan

If you’re looking for the most budget-friendly way to get a pool, a vinyl liner is often the answer. These pools typically cost between $35,000 and $80,000, making them an accessible entry point for many homeowners. The lower upfront cost is their biggest advantage. However, the trade-off is in their longevity. The vinyl liner itself isn’t a permanent fixture and will need to be replaced roughly every 10 years to keep the pool in good condition. While the initial investment is smaller, it’s important to factor in this recurring replacement cost when you plan your pool project for the long term.

Fiberglass Pools: Pros, Cons, and Lifespan

Fiberglass pools represent a fantastic middle ground, balancing cost, durability, and maintenance. With a price range of $45,000 to $100,000, they are a step up from vinyl but offer significant long-term benefits. The non-porous surface is smooth to the touch, resists algae growth, and makes cleaning much easier. These pools are incredibly durable and can last for over 25 years with minimal upkeep. The main consideration is that they are built from pre-designed molds, which means your shape and size options are more limited than with a custom-built pool. Still, for many, the ease of installation and low maintenance make them an ideal choice.

Concrete and Gunite Pools: Pros, Cons, and Lifespan

For ultimate design flexibility, nothing beats a concrete or gunite pool. These are the most premium option, with costs ranging from $50,000 to over $120,000, but they allow for complete customization. You can design any shape, size, or depth you can imagine, seamlessly integrating features like built-in spas, tanning ledges, or unique water features. This level of custom masonry results in a pool that is incredibly strong and can last for 50 years or more. The downside is a longer construction timeline, typically three to six months, and they require more intensive maintenance over their lifespan, including periodic acid washes and eventual resurfacing to keep them looking their best.

When Structural Changes Are on the Table

If your vision includes more than just cosmetic updates, be prepared for a significant budget increase. Altering the fundamental shape, depth, or size of your pool is a major construction project that involves excavation, new plumbing, and extensive masonry work. These types of structural changes can easily push a project’s cost from $50,000 to over $100,000. While transforming a simple rectangular pool into a custom freeform oasis is absolutely possible, it’s one of the most expensive updates you can make. This is where having an experienced masonry design team is essential.

Budgeting for New Features and Upgrades

This is the fun part where you can truly customize your pool. Adding new features can make your outdoor space more enjoyable and functional, but each addition will affect your final estimate. Popular upgrades include building a tanning ledge, installing a spillover spa, or adding a slide for the kids. You might also consider modern LED lighting, automated cleaning systems, or elegant water features like waterfalls and fountains. These additions can range from a few hundred dollars for simple lights to over $25,000 for an attached hot tub or spa, so it’s important to prioritize what matters most to you.

Understanding Labor and Contractor Fees

Don’t underestimate the cost of labor—it can account for nearly half of your total project budget. The price reflects the skill, experience, and time required to execute your remodel flawlessly. While it might be tempting to go with the lowest bidder, a pool remodel is not the place to cut corners. Hiring a reputable and experienced contractor ensures that the job is done correctly, meets all local codes, and will last for years to come. An established home remodeling company with a proven track record provides peace of mind that is well worth the investment.

Breaking Down Labor vs. Material Costs

When you look at a pool remodel estimate, the numbers essentially boil down to two key areas: labor and materials. Labor often makes up nearly half of your total project budget, and for good reason. This cost covers the expertise, time, and precision required to execute your remodel flawlessly, from demolition and plumbing to the final finishing touches. While it can be tempting to choose the lowest bidder to save money upfront, a pool remodel is not the place to cut corners. Investing in an experienced home remodeling company ensures the job is done right, meets all safety codes, and is built to last, giving you valuable peace of mind for years to come.

On the other side of the equation are your material choices, which is where you have the most flexibility to influence the final cost. This is your chance to define the style of your new oasis. For resurfacing, a classic plaster finish is a popular and budget-friendly option, while premium aggregate or all-tile surfaces create a more luxurious look at a higher price point. The same principle applies to your pool deck and coping. You can select from a wide range of beautiful and durable materials, from classic concrete pavers to high-end porcelain and natural stone. Understanding this balance between expert labor and your material selections is the key to setting a realistic budget and making informed decisions.

What’s the Real Cost of an Inground Pool Remodel?

Let’s talk numbers. The final cost of your inground pool remodel depends entirely on your vision. Are you looking for a simple cosmetic update or a complete backyard transformation? While every project is unique, understanding the typical cost ranges can help you set a realistic budget. We’ve broken down the estimates into three common tiers to give you a clearer picture of what to expect for your Long Island home.

The Basic Refresh: What to Expect for $6k–$15k

Think of this tier as the perfect way to give your pool a new lease on life without a complete overhaul. A basic refresh, typically falling between $6,000 and $15,000, focuses on cosmetic updates and minor repairs. This could include replacing a few cracked tiles, patching the plaster, or upgrading an older piece of equipment like the pump. It’s an excellent option if your pool’s structure is sound but it’s starting to show its age. These smaller updates can make a significant visual impact and improve your pool’s functionality, ensuring it’s ready for another season of fun.

The Mid-Range Makeover: Your $15k–$30k Options

If your pool needs more than just a touch-up, you’re likely looking at a mid-range makeover. With a budget of $15,000 to $30,000, you can tackle more substantial projects. This is the typical range for completely resurfacing your pool with a new finish, replacing the waterline tile, or renovating the surrounding deck and coping. Because inground pools require specialized labor and high-quality materials, costs are higher than for above-ground pools. This is where you can make a big impact by upgrading to beautiful and durable porcelain or natural stone pavers for your pool deck.

The High-End Transformation: Budgeting for $30k and Up

For a truly dramatic change, you’ll be entering the high-end transformation tier, which starts at $30,000 and can easily exceed $100,000. This budget allows for major structural changes and luxury additions. You could change the shape or depth of your pool, add an integrated spa, or install custom water features like waterfalls or fountains. These large-scale projects require extensive design and construction work, but the result is a completely customized backyard oasis. A full swimming pool renovation of this scale turns your backyard into the ultimate destination for relaxation and entertainment.

Cost Breakdown for Common Remodeling Projects

To give you a better handle on your budget, let’s look at the numbers for some of the most common pool remodeling projects. These figures can help you see where your investment will go and what kind of results you can expect at different price points. Remember, these are typical ranges, and a detailed quote from a trusted contractor is the best way to get an exact price for your specific project.

Pool Resurfacing Costs

Resurfacing is one of the most impactful updates you can make, and the cost typically falls between $6,000 and $50,000. The biggest factor driving this price is the material you choose. A classic white plaster finish is the most budget-friendly option and gives your pool a clean, timeless look. If you want to add more texture and color, an aggregate finish is a popular mid-range choice. For a truly luxurious and durable surface, a full tile finish sits at the high end of the spectrum but offers a stunning, long-lasting result for your swimming pool.

Tile and Coping Replacement Costs

Replacing the waterline tile and the coping around your pool’s edge is a fantastic way to refresh its entire look. This project generally costs between $2,500 and $25,000 or more. The final price tag depends heavily on your material selections. Standard ceramic or porcelain tiles are cost-effective and come in a huge variety of styles. However, if you opt for custom mosaic designs or high-end materials like glass or natural stone coping, you can expect the cost to be on the higher end of that range, reflecting the premium quality and expert installation required.

Deck and Patio Renovation Costs

Your pool deck is the foundation of your outdoor living space, and renovating it can cost anywhere from $5,000 to over $20,000. The scope of the project is the main variable here. Simply resurfacing your existing concrete deck will be more affordable than a complete tear-out and replacement. Installing new pavers offers the biggest transformation, and your choice of material matters. While concrete pavers are a solid option, upgrading to elegant and durable porcelain or natural stone pavers will create a truly high-end finish that transforms your entire backyard.

Don’t Get Surprised: Planning for Hidden Costs

No matter the size of your project, it’s smart to plan for the unexpected. One of the most common remodeling mistakes is underestimating the total cost and not accounting for potential surprises. During demolition, your contractor might uncover issues that need to be addressed, like old plumbing or electrical problems. That’s why it’s so important to properly vet your contractors to ensure they are transparent and thorough. We always recommend setting aside a contingency fund of 10% to 20% of your total budget. This buffer ensures that unforeseen expenses won’t derail your project or force you to make compromises on your vision.

Site Preparation and Excavation Fees

If your remodel involves more than just a surface-level update, you’ll need to account for site preparation. The most expensive parts of a major pool renovation often happen before the beautiful new features are even installed. Changing your pool’s shape, making it deeper, or adding an integrated spa requires excavation—and that means heavy machinery, labor, and hauling away debris. These costs can add up quickly and are a significant part of the budget for any project that alters the pool’s structure. This is why getting a detailed, transparent quote is so important, so you can see exactly where your money is going and avoid surprises down the line.

Permits and Fencing Requirements

Before any work begins, there’s a bit of administrative groundwork to cover. Most towns and villages on Long Island require permits for significant pool renovations, especially those involving structural or electrical changes. These permits come with fees and ensure your project meets local safety and building codes. Speaking of safety, fencing is another crucial consideration. Most areas have strict regulations about pool barriers to prevent accidents. If your current fence doesn’t meet code, you’ll need to budget for an upgrade. Working with an experienced local contractor can make this process much smoother, as they’ll be familiar with the specific requirements in your area and can manage the fencing and permit process for you.

Ongoing Costs: Maintenance, Water, and Insurance

The final price of your remodel isn’t the last expense you’ll have. It’s important to remember the ongoing costs of pool ownership. Regular maintenance, including chemicals and professional servicing, can run between $80 and $150 per month. If you’ve increased your pool’s size, expect your water and utility bills to rise as well. Finally, give your insurance agent a call. A newly renovated pool, especially one with new features like a slide or diving board, can impact your homeowner’s policy. This might increase your premium by around $50 to $75 per month, but it’s a necessary step to ensure you’re properly covered. Factoring these long-term costs into your budget from the start helps you enjoy your new oasis without financial stress.

What’s Included in a Standard Pool Remodel?

A pool remodel is a collection of projects that can reinvent your backyard. Depending on your goals, your project can range from a simple cosmetic refresh to a full overhaul. Here are the most common components of a pool renovation.

Giving Your Pool a New Surface

Over time, your pool’s surface can stain, develop cracks, or simply feel rough to the touch. Resurfacing is the process of applying a brand-new finish to the interior, which not only makes it look pristine but also helps prevent leaks. While plaster is a common and affordable option, many homeowners are choosing more durable and visually striking finishes like polished aggregate or elegant tile. A fresh surface is one of the most impactful changes you can make, instantly brightening your pool and making the water look more inviting. It’s a foundational step in most major remodels that restores both beauty and integrity to your pool.

Modernizing Your Pool Equipment

Your remodel is the perfect time to improve how you use and enjoy your pool. This is your chance to add features you’ve always wanted, like a tanning ledge for lounging, a soothing waterfall, or an attached spa for year-round relaxation. Beyond the fun additions, it’s also a great opportunity to upgrade core systems for better performance. This could mean switching to a saltwater generator for softer water or installing energy-efficient pumps and heaters. These modern swimming pool upgrades can significantly lower long-term maintenance costs and make your pool much easier to manage, giving you more time to simply enjoy it.

Updating the Plumbing and Electrical

What’s happening behind the scenes is just as important as what you see on the surface. Older pools often have outdated plumbing and wiring that can be inefficient or even unsafe. During a remodel, your contractor can inspect these critical systems, replace old pipes, and ensure all electrical components are up to current safety codes. This is definitely not a DIY job—it requires a licensed professional to ensure everything is installed correctly for safety and longevity. Taking care of these essential updates during your renovation protects your investment, prevents future problems, and gives you complete peace of mind.

Revamping Your Deck and Coping

The area around your pool sets the stage for your entire outdoor space. Cracked concrete or faded pavers can make even a beautifully resurfaced pool look dated. Renovating the deck and the coping—the stone or concrete edge around the pool—provides a major visual impact and ties the whole area together. You can choose from a wide variety of materials, including beautiful and durable natural stone pavers, classic concrete, or sleek, modern porcelain. A new deck doesn’t just look great; it expands your usable living space, creating a safer, more attractive area for lounging, dining, and entertaining.

Dream Upgrades: What Popular Features Really Cost

A pool remodel is the perfect opportunity to add features that make your backyard more beautiful, functional, and fun. While you’re already investing in the project, incorporating a few upgrades can completely transform your experience. From creating a resort-like feel with a new spa to simplifying your routine with smart automation, these additions can make your pool the true centerpiece of your home.

The cost of these popular upgrades can vary quite a bit depending on the size of your pool, the materials you choose, and the complexity of the installation. Think of these price ranges as a starting point to help you budget. For a precise figure, you’ll need a detailed quote that reflects your specific design goals. A professional consultation can help you understand which upgrades will provide the most value for your swimming pool and your lifestyle.

Adding a Tanning Ledge or Spa

A tanning ledge, also known as a Baja shelf, is a shallow, flat area in your pool perfect for placing lounge chairs or for kids to splash around in safely. It adds a touch of luxury and creates a designated space for relaxation. Similarly, integrating a spa or hot tub directly into your pool design provides a seamless way to enjoy hydrotherapy. Because these features require significant structural work and custom masonry, they are a considerable investment. Expect the cost to add a tanning ledge or spa to start around $5,000 and go up from there based on size and finishes.

Installing Modern Lighting and Automation

Upgrading your pool’s lighting can dramatically change its ambiance after sunset. Modern LED lights are energy-efficient and can be programmed to change colors, setting the perfect mood for a quiet evening or a lively party. Paired with an automation system, you can control your lights, heater, pump, and water features right from your smartphone. This convenience simplifies pool ownership and ensures your equipment runs efficiently. Installing new LED lighting can cost between $700 and $1,700, while full automation systems typically range from $1,200 to $3,500.

Creating Ambiance with Water Features

The sound and sight of moving water can turn your pool area into a tranquil oasis. Water features range from simple deck jets that create elegant arcs of water to elaborate rock waterfalls that provide a naturalistic feel. These additions enhance the sensory experience of your backyard, masking neighborhood noise and creating a peaceful atmosphere. The cost varies widely with the design’s complexity. A simple fountain might cost under $1,000, while a custom waterfall built with natural stone can easily exceed $10,000.

Switching to Energy-Efficient Heaters and Filters

While they aren’t the most glamorous upgrades, investing in your pool’s core equipment is one of the smartest moves you can make during a remodel. A new, high-efficiency heater can extend your swimming season into the cooler months without causing a huge spike in your utility bills. Likewise, upgrading to a variable-speed pump can significantly reduce energy consumption compared to older single-speed models. These practical upgrades pay for themselves over time through lower operating costs. A new pool heater typically costs between $1,800 and $4,100 installed.

Investing in Safety and Motorized Covers

For many homeowners, especially those with children or pets, safety is the top priority. An automatic or motorized pool cover is one of the most effective safety barriers you can install. With the push of a button, a sturdy cover slides over your pool, preventing accidental access. These covers also offer other benefits: they keep debris out, reduce water evaporation, and retain heat, which lowers your cleaning and heating costs. While they are a significant investment, often ranging from $5,000 to $15,000, the peace of mind and convenience are invaluable.

How Long Will Your Pool Remodel Take?

One of the most common questions we get from homeowners is about the project timeline. Knowing how long your backyard will be a construction zone helps you plan your summer and manage expectations. The truth is, the timeline for a pool remodel can vary significantly, from a couple of weeks for minor touch-ups to a few months for a complete transformation. The duration depends entirely on the scope of your project.

To give you a clearer picture, we’ve broken down typical timelines based on the scale of the work involved. Think of these as general guidelines—your specific project could be shorter or longer depending on the details. A simple resurfacing job is much quicker than changing the shape of your pool and adding a brand-new patio. We’ll walk you through what to expect for minor, standard, and major renovations so you can head into your project with confidence.

Timeline for Minor Updates: 1–3 Weeks

If your pool is in good shape but needs a little refresh, you’re likely looking at a minor update. These projects typically take about one to three weeks to complete. This category includes cosmetic fixes and simple equipment swaps that don’t require major demolition or construction. Think of it as a facelift for your pool. Examples include replacing the waterline tile, patching a small crack in the plaster, or upgrading to a more efficient pump or filter. These quick projects can make a big impact on your pool’s look and feel without a long-term commitment.

Timeline for Standard Projects: 4–8 Weeks

Most pool remodels fall into this category, with a timeline of about four to eight weeks. A standard project involves more significant work, like completely resurfacing the interior with new plaster or aggregate, or replacing the entire deck and coping. This is the timeframe you can expect if you’re looking to give your pool a substantial makeover without altering its fundamental structure. These are the kinds of swimming pool projects that can dramatically update your backyard’s aesthetic, turning a dated space into a modern retreat. Planning for this timeline allows for proper demolition, installation, and curing time for new materials.

Timeline for Major Renovations: 8–12+ Weeks

For a full-blown transformation, you should plan for a timeline of eight to twelve weeks, and sometimes longer. A major renovation involves structural changes to the pool itself. This could mean altering the depth or shape, adding a tanning ledge or integrated spa, or installing dramatic water features. Often, these projects are part of a larger backyard overhaul that includes new landscaping and masonry work. Because these renovations are complex and require extensive planning, permitting, and construction, the timeline is naturally longer. The result, however, is a completely customized outdoor space built just for you.

How Pool Type Affects the Project Timeline

The material your pool is made from—whether it’s concrete, vinyl liner, or fiberglass—plays a big role in how long your remodel will take. Concrete and gunite pools offer the most design flexibility, but they also have the longest renovation timelines. Major structural changes or a complete resurfacing involves significant masonry work and requires time for materials to properly cure. According to industry experts, a standard inground pool project can take 8 to 12 weeks, but highly customized work on a concrete pool can stretch that timeline even further.

Renovations for vinyl liner and fiberglass pools are often quicker. Replacing a vinyl liner can sometimes be done in just a few days, though the project will take longer if the underlying wall structure needs repairs. Fiberglass pool remodels are typically the fastest because the work is usually cosmetic, like refinishing the gelcoat, rather than structural. Since you can’t easily change the shape of a pre-molded fiberglass shell, the scope of the project is naturally more contained. Ultimately, the complexity of the job is the biggest factor, regardless of the pool type.

What Can Delay Your Pool Remodel?

Several factors can stretch your project timeline, and it’s smart to be aware of them from the start. Unpredictable weather, especially on Long Island, can cause delays. The municipal permitting process can also take longer than expected, so it’s important to get that started early. Beyond that, making changes to the plan mid-project is one of the biggest reasons for delays. Having a clear vision and a detailed plan before any work begins is the best way to keep your project on track and ensure your pool remodel finishes on time and within budget.

Should You Remodel or Replace Your Pool?

Deciding whether to give your existing pool a facelift or start over from scratch is a major decision. An outdated pool can feel like a missed opportunity, but the path forward isn’t always clear. The right choice depends on your pool’s current condition, your long-term vision for your backyard, and your budget. Think of it this way: Is your pool’s foundation solid but just in need of a style update, or are there deeper issues that a simple makeover can’t fix? Breaking down the signs for each option will help you figure out the best investment for your home.

Is It Time for a Remodel? Watch for These Signs

If your pool’s main structure—the shell—is still in great shape, a remodel is often the perfect solution. This is your best bet if your goals are primarily cosmetic or functional. Maybe the tile looks dated, the plaster is stained, or you’re simply dreaming of a more modern aesthetic. A remodel allows you to update the look and feel without the cost and time of a full replacement. It’s also the ideal route for adding new features that make your pool more enjoyable and efficient. You can introduce a tanning ledge for lounging, upgrade to energy-saving equipment, or install a beautiful new waterfall. Essentially, if you want to improve your current swimming pool without changing its fundamental size and shape, a remodel is the way to go.

When to Consider a Full Pool Replacement

Sometimes, a pool has issues that go more than skin-deep. If you’re dealing with major structural problems like large cracks in the shell, persistent leaks that are difficult to locate, or completely outdated plumbing and electrical systems, a replacement might be the smarter long-term choice. Patching up serious damage can become a costly, recurring headache. It’s also time to consider a new build if your renovation plans are so extensive that the cost starts to creep close to the price of a new pool. A full replacement gives you a clean slate to design the exact pool you want, from shape and depth to materials and features, ensuring everything is built to modern standards.

The Cost of Converting Your Pool Type

If a full replacement is on the table, you might also be thinking about changing your pool type altogether. This is a major step, but it can be a fantastic long-term investment if your current pool doesn’t fit your lifestyle. For instance, converting a vinyl liner pool to a low-maintenance fiberglass model typically costs between $50,000 and $70,000. If you’re dreaming of a fully custom shape and high-end finish, upgrading to a concrete or gunite pool is the ultimate choice, though it’s a bigger investment, usually ranging from $50,000 to $100,000. While the upfront remodeling costs are significant, the decision often comes down to long-term benefits like durability and reduced maintenance, which can make the switch worthwhile.

Remodel vs. Replace: Comparing the Prices and Process

Financially, there’s a significant difference between remodeling and replacing. A pool remodel is typically the more budget-friendly option upfront. Costs can range from around $6,000 for basic resurfacing to $50,000 or more for a comprehensive overhaul that includes new tile, coping, and equipment. This approach leverages the existing structure, which saves on demolition and excavation costs. A full replacement is a much larger investment, generally starting around $50,000 and going well into six figures depending on the size, materials, and complexity. While the initial cost is higher, it guarantees a brand-new, structurally sound pool with a full warranty, which can provide peace of mind and prevent future repair bills.

For Context: How Much Does a New Pool Installation Cost?

To make a smart decision between remodeling and replacing, it helps to know what a brand-new pool costs. The price of a new inground pool can vary widely based on your location, the materials you choose, and the complexity of the design. Nationally, the average cost for a new inground pool installation typically falls between $45,000 and $85,000. Understanding these baseline costs gives you a crucial point of comparison. If your remodel estimate is approaching this range, it might be worth exploring what a completely new build could offer you in terms of modern design, efficiency, and a full warranty. This context is key to ensuring you’re making the best long-term investment for your home.

New Pool Costs by Material

The material you choose for your pool’s shell is one of the biggest factors in the final price. Vinyl liner pools are generally the most budget-friendly option, often costing between $40,000 and $75,000. Fiberglass pools, which are pre-molded shells dropped into an excavated hole, sit in the middle, typically ranging from $55,000 to $100,000. At the higher end are concrete or gunite pools, which offer the most design flexibility and durability, with costs usually starting at $65,000 and going well over $120,000. Each material has its own benefits, and the right choice depends on your budget and vision for your swimming pool.

How Pool Size Impacts Price

It’s a simple rule: the larger the pool, the higher the cost. A bigger surface area requires more materials, more labor for excavation and installation, and more water to fill it. A small “cocktail” pool (around 10’x20′) might cost between $65,000 and $75,000. A medium-sized pool (about 15’x30′), perfect for most families, typically runs from $75,000 to $100,000. For a large pool (20’x40′ or bigger) designed for laps or entertaining big crowds, you can expect the price to start at $100,000 and climb from there. The size directly influences every aspect of the build, from the initial masonry work to the final decking.

Pool Remodel Budgeting: 4 Mistakes to Avoid

A pool remodel is an exciting investment, but a few common budgeting missteps can add unnecessary stress to the process. Thinking through your finances and planning for the unexpected will help you stay on track and ensure your project is a success from start to finish. Let’s walk through some of the most frequent mistakes homeowners make so you can sidestep them completely.

Mistake #1: Underestimating the Total Cost

It’s easy to focus on the exciting cosmetic upgrades, but one of the biggest mistakes is overlooking the long-term costs of pool ownership. Your initial remodel estimate is just the beginning. You also need to account for future maintenance, including chemicals, cleaning, and potential repairs to keep your new oasis in pristine condition. Factoring these ongoing expenses into your overall budget from day one prevents financial surprises later. Planning for services like professional restoration and sealing can also extend the life of your investment.

Mistake #2: Choosing Materials Based on Looks Alone

While aesthetics are important, selecting materials based only on their appearance can be a costly error. That beautiful but porous stone might look great initially, but it could stain easily or become slippery when wet. It’s crucial to balance style with durability and maintenance requirements. Consider how materials will stand up to Long Island’s weather, chlorine, and constant use. Our team can guide you through a wide selection of durable porcelain and natural stone options that are both stunning and built to last, saving you money on future repairs and upkeep.

Considering Long-Term Value Over Upfront Cost

Focusing only on the initial price tag is a common mistake, but a successful remodel is an investment that pays for itself over time. Choosing the cheapest option now can lead to higher costs down the road. Instead, think about the long-term benefits. Upgrading to modern, energy-efficient equipment is one of the smartest moves you can make. A new variable-speed pump or a high-efficiency heater might cost more upfront, but they can dramatically lower your monthly utility bills. These upgrades not only save you money but also enhance your enjoyment, allowing you to extend your swimming season without worrying about a huge energy spike. A quality pool renovation is about creating lasting value for both your home and your lifestyle.

Mistake #3: Skipping Essential Planning and Permits

In the rush to get started, some homeowners are tempted to bypass proper planning and permitting. This is a mistake that can lead to significant delays, failed inspections, and even fines. A detailed plan and a clear timeline are your best tools for keeping the project on schedule and within budget. Working with an experienced contractor is key, as they will manage the entire permitting process for you. This ensures your remodel meets all local building codes and safety regulations, giving you peace of mind and a smooth, hassle-free renovation.

Mistake #4: Forgetting to Set Aside a Contingency Fund

Even with the most meticulous planning, unexpected issues can arise during a remodel. You never know what you might find once demolition begins—hidden plumbing problems or structural issues can pop up. That’s why a contingency fund is essential. Most experts recommend setting aside an extra 10% to 20% of your total project cost for these unforeseen expenses. This financial cushion ensures that a surprise won’t derail your budget or force you to compromise on your vision. It’s the best way to prepare for the unknown and keep your project moving forward.

Smart Ways to Save on Your Pool Remodel

A pool remodel is a significant investment, but that doesn’t mean it has to break the bank. With some smart planning, you can achieve a stunning transformation while keeping your budget in check. Saving money isn’t about cutting corners or sacrificing quality; it’s about making strategic decisions that maximize the impact of every dollar you spend. From timing your projects to finalizing your design choices, a few key strategies can make a world of difference in the final cost. Let’s explore some practical ways to get the beautiful, updated pool you’ve been dreaming of without any financial surprises along the way.

Bundle Your Services

One of the most effective ways to save is to tackle multiple projects at once. If you’re already planning to resurface your pool, consider if you also want to replace the tile or upgrade the lighting. Since the pool will already be drained and a construction crew will be on-site, bundling these tasks is far more efficient than doing them separately over time. This approach saves on labor costs and mobilization fees. At Gappsi, we often see clients combine a pool remodel with a new patio or updated landscaping, creating a cohesive backyard transformation in a single, streamlined project.

Opt for a Simpler Design

The complexity of your design directly impacts the cost. While it can be tempting to completely change the shape or depth of your pool, these structural alterations are among the most expensive parts of a renovation. You can achieve a dramatic new look without major excavation by focusing on high-impact cosmetic updates. Sticking with your pool’s existing footprint and choosing a classic geometric shape saves a significant amount on labor and materials. Instead, you can allocate that budget toward premium finishes, a stunning new waterfall, or an energy-efficient heater to extend your swim season.

Finalize Your Plan Before Work Begins

Indecision can be expensive. One of the fastest ways to drive up costs is by making changes after the project has already started. Each modification, no matter how small it seems, can lead to change order fees, wasted materials, and project delays. To avoid this, invest ample time in the planning phase. Finalize every detail—from the exact tile you want to the specific model of your new pump—before you sign a contract. A detailed, locked-in plan ensures your initial quote is accurate and helps the entire remodeling process run smoothly, on time, and on budget.

How to Get an Accurate Remodel Estimate

Getting a clear and reliable estimate is the first step toward a successful pool remodel. A detailed quote sets expectations, prevents surprise costs, and ensures you and your contractor are on the same page from day one. Starting a project without a realistic budget can lead to frustration and delays, so it’s worth the effort to get this part right. Let’s walk through how to get a number you can trust for your Long Island pool renovation.

How to Prepare for Your Contractor Consultation

Before you pick up the phone, do a little homework. The more clarity you have, the more accurate your estimate will be. Start by gathering inspiration. What do you want your new pool area to look like? Think about materials for the decking, like beautiful porcelain pavers, new tile for the waterline, or modern lighting features. Create a list of “must-haves” and “nice-to-haves.” Finally, establish a realistic budget range. Knowing what you’re comfortable spending helps a contractor suggest solutions that fit your financial and aesthetic goals, making the initial conversation much more productive.

Smart Questions to Ask Every Pool Contractor

Your consultation is a two-way street. It’s your chance to interview potential contractors and see if they’re the right fit. Finding the right team ensures your project is completed on time and to your satisfaction. Come prepared with a list of questions to understand their process and expertise. Ask about their license and insurance, and don’t be shy about requesting to see a portfolio of similar pool projects. Inquire about their projected timeline, who will be on-site managing the work, and what their payment schedule looks like. A professional contractor will also provide a written contract and warranty before any work begins, giving you peace of mind.

Decoding and Comparing Your Remodel Quotes

Not all estimates are created equal. A trustworthy quote should be more than just a single number at the bottom of a page; it should be a detailed, itemized document. Look for a clear breakdown of costs for materials, labor, permits, and any special equipment. Understanding what drives the cost helps you make informed decisions. If one quote seems vague, ask for more detail. This transparency is a sign of a professional company and allows you to compare apples to apples when looking at different bids for your home remodeling project.

The Power of Getting Multiple Estimates

It’s always a good idea to speak with a few different companies. Getting at least three estimates gives you a solid understanding of the market rate for your project in the Long Island area. This process isn’t just about finding the lowest price. In fact, be careful of bids that seem too cheap, as they might signal lower-quality work or materials. Comparing quotes helps you see how different contractors approach the project, what materials they recommend, and what their timelines are. This information empowers you to choose a partner who offers the best value, not just the lowest cost.

Is a Pool Remodel Worth It? The Real Payoff

Thinking about a pool remodel is exciting, but it’s also a big decision. Beyond just fixing cracks or updating tile, a renovation is an investment in your home and your lifestyle. It’s about transforming an underused or outdated part of your yard into a stunning centerpiece that adds value, improves safety, and cuts down on your weekend chores. Many homeowners put off a remodel because they’re focused on the initial cost, but it’s crucial to look at the bigger picture. A modern, efficient, and beautiful pool doesn’t just look better—it functions better and can save you money and headaches down the line. When you weigh the costs, it’s just as important to consider the significant returns. From higher property values to lower energy bills and enhanced safety for your family, a well-planned

Add Real Value to Your Property

A sparkling, modern swimming pool is a huge draw for potential buyers, especially here on Long Island. It’s not just a feature; it’s a lifestyle upgrade. A professional remodel can significantly increase your home’s market value—by as much as 8%, according to some estimates. Think of it this way: an old, cracked, or inefficient pool can be a liability that turns buyers away. But a beautifully renovated pool, complete with modern finishes and energy-efficient equipment, becomes a major asset. It signals that your home is well-maintained and ready for enjoyment, making it a smart investment for your future.

Improve Your Pool’s Safety and Function

An older pool might not meet today’s safety standards. A remodel is the perfect opportunity to address potential hazards and give you peace of mind. This could mean replacing a slippery deck with beautiful, non-slip porcelain pavers, adding a safety fence, or installing a reliable automated cover. Beyond safety, you can also rethink how you use your pool. Want a shallow area for the kids to splash around? A tanning ledge is a perfect addition. Dream of relaxing after a long day? We can integrate a heated spa. A remodel lets you customize your swimming pool to fit your family’s current lifestyle.

Save Money on Energy and Maintenance

Let’s be honest: pool ownership comes with recurring costs. But a remodel can drastically reduce your monthly bills and the time you spend on upkeep. Swapping out an old, single-speed pump for a modern variable-speed model can save you a surprising amount on electricity. The same goes for upgrading to energy-efficient LED lights. According to HomeGuide, these updates, along with a good pool cover to reduce water evaporation, are key for long-term savings. This means you can spend less time worrying about utility bills and more time actually enjoying your pool.

Design Your Dream Backyard Oasis

Your backyard should be your personal retreat. A pool remodel is your chance to create a true outdoor oasis that reflects your style. You can replace dated tile with sleek glass, add the soothing sound of a waterfall, or build a gorgeous new patio for lounging and entertaining. It’s about more than just updating the pool itself; it’s about creating a cohesive, beautiful environment where you, your family, and your friends can make lasting memories. Remodeling an existing pool is often more affordable than building a new one from scratch, giving you the backyard of your dreams for a fraction of the cost.

Related Articles

Frequently Asked Questions

Is it cheaper to remodel my pool during the off-season? While the cost of materials generally stays consistent year-round, scheduling your remodel for the fall or winter can have its advantages. Contractors are often less booked during these cooler months, which can lead to more flexibility in scheduling and a potentially faster project timeline. Planning ahead ensures your pool will be completely ready to go the moment the warm weather arrives, without you having to sacrifice any precious swim time.

How do I decide between a simple repair and a full remodel? Think about the scale of the issues you’re facing. If you have a single cracked tile or a minor leak, a targeted repair is likely all you need. However, if you’re dealing with widespread problems like a rough, stained surface, outdated equipment that constantly breaks down, or a deck that’s cracking all over, it’s time to consider a remodel. A remodel addresses the root causes and allows you to update the entire space at once, which is often more cost-effective in the long run than a series of small fixes.

Will I need a permit for my pool remodel? This really depends on the scope of your project. Simple cosmetic updates, like replacing tile or resurfacing the interior, typically don’t require a permit. However, if your renovation involves structural changes, such as altering the pool’s depth, or includes significant electrical or plumbing work, you will almost certainly need one. A reputable contractor will be familiar with local Long Island regulations and will handle the entire permitting process for you.

What upgrade offers the most impact for a limited budget? If you want the biggest visual transformation without a complete overhaul, focus on resurfacing the pool’s interior and replacing the waterline tile. A fresh, new surface can make the water look brighter and more inviting, instantly making the entire pool feel brand new. This combination provides a dramatic aesthetic refresh and addresses common wear-and-tear issues, giving you a lot of bang for your buck.

Can I use my pool at all while it’s being remodeled? For safety reasons and to ensure the quality of the work, your pool will be completely out of commission during the remodel. The process requires the pool to be drained, and the area will be an active construction zone with equipment and materials. It’s best to plan your project for a time when you know you won’t need to use it, which is another great reason to consider an off-season renovation.

Share this page:

A Guide to Outdoor Kitchen Installation in East Setauket

We’ve all been there. You’re hosting a backyard barbecue, the weather is perfect, and everyone is having a great time outside. But you, the host, are constantly running back into the house for plates, drinks, or utensils, missing out on the conversation. An outdoor kitchen solves this problem by creating a single, cohesive space for cooking and entertaining. It brings the full functionality of your indoor kitchen to the center of the party. This common frustration is why so many homeowners are opting for a complete outdoor kitchen installation; our recent project in East Setauket shows how it creates a true hub for backyard life.

https://youtu.be/iuxTeeLETOs

View Gappsi’s YouTube Channel to view Backyard Design with Porcelain Patio and Pool in East Setauket, NY | Gappsi

Transforming a backyard into a luxury retreat takes vision, creativity, and expert craftsmanship.  This latest Gappsi project in East Setauket, NY, is a perfect example. The homeowners wanted a space that was beautiful, functional, and comfortable year-round. Gappsi designed and installed an entire backyard environment that blends modern features, elegant materials, and thoughtful outdoor living spaces. The result is a seamless combination of leisure, entertainment, and architectural sophistication.

A Custom Vinyl Pool as the Centerpiece

The project began with the installation of a custom vinyl pool featuring concrete walls for exceptional durability and longevity. Measuring 16 feet by 36 feet, the pool offers ample space for swimming, relaxing, and entertaining. Its shape complements the backyard layout, providing space for the surrounding patio, sundeck, and additional landscape features.

A full-width sundeck at the shallow end provides a resort-style element. Gappsi installed two bubblers on the sundeck, creating a soothing, spa-like water feature that enhances the pool’s visual appeal and comfort.

Custom Vinyl Pool as the CenterpieceTo create a clean, elevated look around the perimeter, Gappsi used sandstone coping with rounded edges on the top and bottom. The coping was then sealed to match the porcelain patio, ensuring a cohesive, elegant finish throughout the space. This color-matching technique allowed the natural stone to blend beautifully with the rest of the design.

Porcelain Patio Pavers Throughout the Yard

The entire patio surrounding the pool was installed using high-quality porcelain pavers selected from the Gappsi showroom. The homeowners chose a beige porcelain with white veins, adding a modern yet timeless aesthetic to the outdoor environment. Porcelain is one of the most durable and low-maintenance materials available for outdoor patios.  The porcelain paver is resistant to fading, staining, weathering, and heat.

Porcelain Patio Pavers Throughout the YardThe pavers were installed with precision to create a smooth, flawless surface ideal for lounging, walkways, and outdoor entertaining. Their neutral tones allow all surrounding structures and landscaping features to blend harmoniously.

Synthetic Turf Accents for Clean, Modern Lines

To further elevate the visual design, Gappsi installed a 12- to 14-inch synthetic turf border around the patio. This strip of turf creates a clean line in front of the retaining walls and alongside the home, enhancing contrast while keeping the overall layout neat and contemporary. Synthetic turf is not only visually appealing but also eliminates the need for trimming, watering, or maintenance along those tight boundary lines.

Retaining Wall and Pool Auto Cover Housing

Synthetic Turf Accents for Clean, Modern LinesA custom-designed retaining wall was built behind the pool’s deep end. This wall also serves as the housing area for the pool’s automatic cover system, keeping it concealed and protected. The retaining wall blends seamlessly with the overall design, offering both structural support and visual appeal.

A Custom Pavilion Designed to Match the Home

One of the standout features of this backyard is the custom-built pavilion, thoughtfully designed to mirror the home’s architectural style. Trimmed entirely in Azek moldings, the pavilion features a detailed front peak that ties into the residence’s aesthetic.

The pavilion floor is uniquely delineated with synthetic turf, creating a soft, visually distinct boundary between the shaded structure and the porcelain patio. Under the pavilion, Gappsi created a cozy outdoor living room complete with a gas fireplace, a mounted TV, and comfortable lounge space. The cathedral ceiling enhances openness while providing excellent airflow, and a built-in heater allows the homeowners to enjoy the area even during cooler seasons.

backyard-design-with-porcelain-patio-and-pool-in-east-setauket-ny-gappsiA Premium Outdoor Kitchen Built for Entertaining

No luxury backyard is complete without a well-designed outdoor kitchen. Gappsi installed an L-shaped outdoor kitchen featuring top-tier Twin Eagle appliances, including:

  • A 36-inch grill
  • A 30-inch griddle
  • Summit refrigerator
  • Summit ice maker
  • Stainless steel cabinetry
  • A built-in sink

The kitchen is topped with a leather-finished granite countertop, explicitly chosen to complement the color of the stone walls and porcelain patio. This outdoor kitchen allows for complete meal preparation, making the backyard an ideal space for gatherings, celebrations, and summer cookouts.

Custom Pavilion Designed to Match the HomeA Cohesive and Luxurious Backyard Design

This project reflects Gappsi’s commitment to quality design, precision installation, and personalized outdoor living solutions. Every part of this East Setauket backyard, from the pool and patio to the pavilion and kitchen, was thoughtfully planned and executed to deliver a cohesive, luxurious, and functional environment.

The combination of porcelain pavers, synthetic turf, custom masonry, architectural woodwork, and premium outdoor appliances creates a space that is both modern and timeless. Whether relaxing on the sundeck, enjoying the pavilion in the evening, or hosting a backyard barbecue, the homeowners now have a private retreat that enhances their lifestyle year-round.

This backyard transformation stands as one of Gappsi’s latest and most impressive designs, showcasing their craftsmanship and dedication to delivering beautiful outdoor spaces across Long Island.

Planning Your Dream Outdoor Kitchen

An outdoor kitchen is more than just a place to grill; it’s the heart of your backyard, a space where you can cook, dine, and entertain without missing a moment of the fun. It keeps everything you need for preparing and serving meals right where you are, so you no longer have to run back and forth to your indoor kitchen. This means more time spent with family and friends, enjoying the beautiful Long Island weather. Planning is the first step to creating a space that is both beautiful and perfectly suited to your needs. From the layout and appliances to the materials and finishes, every detail contributes to a kitchen that you will love for years to come.

Defining Your Entertainment Style

Before you start picking out grills, think about how you plan to use your outdoor kitchen. Are you picturing large, lively parties with friends, or quiet, intimate dinners with your family? Your personal entertainment style will guide the entire design. For big gatherings, you might want a long countertop with bar seating, a large grill, and maybe even a pizza oven. If you prefer smaller get-togethers, a more compact, efficient layout with essential appliances might be all you need. Thinking about your lifestyle first ensures your new outdoor kitchen will be a functional and natural extension of how you already love to live and entertain.

The Gappsi Design and Build Process

Creating a fully functional outdoor kitchen involves more than just placing a grill on a patio. It requires careful planning, design expertise, and skilled construction. A comprehensive design and build process ensures that every element works together harmoniously. The Gappsi team handles everything from the initial design concepts to installing appliances and connecting all the necessary utilities like gas, water, and electricity. Working with a single, experienced team simplifies the entire project, eliminating the stress of coordinating multiple contractors and ensuring a seamless, high-quality result that perfectly matches your vision for the perfect outdoor living space.

Initial Consultation and Site Assessment

The journey to your dream outdoor kitchen begins with an initial consultation. This is where we get to know you and your vision. During this first meeting, our design team will walk through your property to assess the available space and discuss your specific needs, wants, and budget. We’ll talk about how you envision using the kitchen, what features are most important to you, and the overall aesthetic you want to achieve. This collaborative conversation is essential for gathering the information needed to create a design that is tailored specifically to your home and lifestyle, laying a strong foundation for the entire project.

Custom Design Phase

After the initial consultation, the creative work begins. Our team takes all the ideas and information gathered and translates them into a custom design plan. This phase is all about ensuring your new outdoor kitchen fits perfectly into your existing landscape and meets all your functional requirements. We create detailed layouts that optimize workflow and space, help you select materials that match your home’s style, and present you with a visual representation of the final project. This custom design ensures your outdoor kitchen is not just an addition, but an integrated part of your home’s overall character.

Construction and Installation

Once the design is finalized, our skilled construction team takes over to bring it to life. This phase is where your vision becomes a physical reality. We use durable, high-quality materials that are specifically chosen to withstand the elements, ensuring your outdoor kitchen will have longevity with minimal maintenance. Our expert masons and builders handle every aspect of the installation with precision, from building the foundation and structure to installing countertops, cabinets, and appliances. We manage the entire construction process to ensure it runs smoothly and efficiently.

Final Walkthrough

The project isn’t finished until you are completely satisfied. After the construction and installation are complete, we conduct a final walkthrough with you. This is our opportunity to ensure that every detail meets your expectations and that every component functions exactly as intended. We’ll inspect the quality of the workmanship, test all the appliances, and answer any questions you may have about using and caring for your new outdoor kitchen. This final step guarantees that the finished space is everything you dreamed it would be, ready for you to start making memories.

Choosing Materials Built for Long Island Weather

Building an outdoor kitchen on Long Island means selecting materials that can handle everything our coastal climate throws at them, from humid summer air and salty breezes to freezing winter temperatures. The right materials will not only look great but also stand the test of time, resisting wear and requiring less maintenance. Durability is key to protecting your investment and ensuring your outdoor kitchen remains a beautiful and functional space for entertaining season after season. From countertops to cabinetry, every choice should be made with weather resistance and longevity in mind, creating a structure that is as tough as it is beautiful.

Durable Countertop Options

Your countertops are one of the most used surfaces in your outdoor kitchen, so they need to be incredibly durable. Unlike indoor kitchens, outdoor countertops are exposed to sun, rain, and temperature fluctuations. For this reason, materials like natural stone or engineered surfaces are excellent choices because they are strong and can resist stains and weather damage. These materials provide a sturdy and reliable surface for food prep, serving, and dining, all while maintaining their beauty despite the demanding outdoor conditions. Choosing the right countertop is a critical decision for both the functionality and the long-term appearance of your kitchen.

Natural Stone and Quartz

When it comes to combining beauty and strength, natural stone and quartz are top contenders for outdoor countertops. Materials like granite and bluestone offer a timeless, organic look that blends seamlessly with outdoor surroundings. They are incredibly durable and can handle the rigors of an outdoor environment. Similarly, engineered quartz provides a non-porous, highly resilient surface that is resistant to stains and easy to clean. As seen in our East Setauket project, a leather-finished granite countertop can perfectly complement the surrounding stone and porcelain, creating a cohesive and elegant look that is built to last.

Weather-Resistant Cabinetry and Structure

The foundation and cabinetry of your outdoor kitchen form its structural core, and they must be built to endure Long Island’s challenging coastal conditions. Salt air, high humidity, and the annual freeze-thaw cycle can quickly degrade inferior materials. That’s why it’s essential to use strong, weather-resistant products for the kitchen’s structure. At Gappsi, we often use high-quality masonry products from trusted brands like Cambridge, Techo-Bloc, and Unilock. These materials are specifically engineered to withstand the elements, providing a solid and durable base that ensures your outdoor kitchen remains stable and beautiful for decades.

Cambridge, Techo-Bloc, and Unilock Pavers

Building a resilient outdoor kitchen starts from the ground up. We rely on pavers and wall systems from industry leaders like Cambridge, Techo-Bloc, and Unilock because they are designed to handle the specific weather challenges of Long Island. These products are manufactured to resist fading from UV rays, damage from salt, and cracking from freeze-thaw cycles. Using these high-performance materials for the base and veneer of your outdoor kitchen ensures it will not only look stunning upon completion but will also maintain its structural integrity and appearance for many years, making them a wise investment for any outdoor project.

High-Performance Stainless Steel Appliances

The appliances are what turn your outdoor kitchen from a simple prep area into a fully functional cooking space. To withstand the outdoors, it’s crucial to select appliances made from high-performance, corrosion-resistant stainless steel. As showcased in our East Setauket project, we installed an L-shaped outdoor kitchen with top-tier Twin Eagle appliances, including a 36-inch grill, a 30-inch griddle, and stainless steel cabinetry. These premium appliances are designed for outdoor use, ensuring they can handle moisture and temperature changes without rusting or failing, allowing you to cook with confidence and precision in your backyard oasis.

Understanding the Cost and Return on Investment

Thinking about a new outdoor kitchen is exciting, but it’s natural to wonder about the budget. It’s helpful to view this project not just as a cost, but as a true investment in your home’s value and your family’s lifestyle. An outdoor kitchen extends your living area, creating a central hub for making memories, entertaining friends, and enjoying beautiful Long Island days. The final cost will depend on your vision, but the return comes in both financial value and priceless moments spent enjoying your new space. With a clear plan, you can create a stunning kitchen that aligns with your budget and enhances your home for years to come.

What to Expect for an Outdoor Kitchen Installation

The cost of an outdoor kitchen in the East Setauket area can range from around $15,000 for a more basic setup to $50,000 or more for a luxurious design with high-end appliances. The primary factors influencing the price are the size of the kitchen, the complexity of the design, and the materials you choose. Appliances are a significant part of the budget; a quality grill might cost between $2,000 and $4,000, while a premium model could be over $8,000. At Gappsi, our design process focuses on helping you select the right combination of features, from durable masonry to premium appliances, to bring your vision to life within your desired budget.

How an Outdoor Kitchen Increases Property Value

Adding an outdoor kitchen is widely considered one of the best home improvements for a strong return on investment. For potential buyers, especially on Long Island, a functional and beautiful outdoor entertaining space is a major draw. It effectively increases the usable square footage of your home and signals a property that is well-cared-for and designed for enjoyment. Beyond the financial upside, think of the return on lifestyle. It creates a perfect setting for everything from casual weeknight dinners to large family celebrations, making your backyard the go-to destination for fun and relaxation.

The Installation Process: What to Expect

The idea of a construction project can feel a bit daunting, but understanding the process can make it feel much more manageable. A professional installation is a well-orchestrated series of steps, from initial design to the final finishing touches. When you work with an experienced team, you can expect clear communication, a respect for your property, and a streamlined workflow. The goal is to handle all the complexities behind the scenes, including permits and coordinating different trades, so you can simply look forward to the exciting final reveal of your brand new outdoor kitchen.

Permits and Local Regulations in East Setauket

If your outdoor kitchen design includes features like gas lines for a grill, plumbing for a sink, or new electrical wiring for lighting and refrigerators, you will almost certainly need permits. Navigating local building codes and the permitting process can be complicated, but it’s a critical step to ensure your project is safe, compliant, and built to last. A full-service contractor like Gappsi takes care of this for you. We manage all the necessary paperwork and inspections, ensuring every part of your installation meets East Setauket’s local regulations, giving you complete peace of mind.

A Typical Project Timeline

A well-planned outdoor kitchen installation is surprisingly efficient. Most projects take between one to three weeks from start to finish. A simpler, more straightforward build might be completed in just five to seven days, while a more complex design with extensive masonry and utility hookups could take two to three weeks. It’s also important to remember that outdoor work is subject to weather, which can sometimes cause minor delays. During our planning phase, we provide a clear and realistic project timeline so you know exactly what to expect and when you can start firing up the grill.

Why a Licensed Local Contractor Matters

Hiring a licensed and local contractor is the single most important decision you’ll make for your project. A licensed professional is essential for coordinating the specialized work required for gas, water, and electrical connections, ensuring everything is done safely and to code. Furthermore, a local contractor possesses invaluable knowledge of Long Island’s specific building requirements and environmental conditions. This expertise is what allows Gappsi to manage projects seamlessly, avoiding common pitfalls and ensuring the finished kitchen is not only beautiful but also durable and structurally sound.

Maintaining Your Outdoor Kitchen Year-Round

Your new outdoor kitchen is built with durable materials designed to withstand the elements, but a little routine care will keep it looking and functioning its best for decades. Proper maintenance ensures your investment remains a beautiful and reliable centerpiece of your backyard. From preparing it for the winter to simple cleaning tasks throughout the year, these small efforts protect your appliances, countertops, and cabinetry. This allows you to spend less time on upkeep and more time enjoying your outdoor living space with family and friends, season after season.

Seasonal Use on Long Island

Don’t limit your outdoor kitchen to just the summer months. With thoughtful design, you can enjoy the space for much of the year. Integrating features like LED lighting creates a warm ambiance for evening dinners, while a nearby fire pit or a pavilion with built-in heaters can make cool spring and autumn nights comfortable. When planning your kitchen, consider how it connects with other outdoor elements like seating walls and patios. Creating a cohesive outdoor living area makes the kitchen more functional and invites you to use it more often, extending your enjoyment well beyond the peak of summer.

Winterization and Long-Term Care Tips

Preparing your outdoor kitchen for a Long Island winter is key to its longevity. Before the first freeze, it’s important to winterize any water lines and appliances according to the manufacturer’s instructions to prevent damage. Throughout the year, regularly clean stainless steel surfaces to maintain their shine and prevent corrosion. For countertops, it’s a good idea to seal natural stone surfaces periodically to protect them from stains and weathering. These simple maintenance steps will ensure your outdoor kitchen remains in pristine condition and is always ready for your next cookout.

Contact Gappsi Today

📍 Serving all of Long Island, NY — Nassau & Suffolk Counties 🌐 www.gappsi.com 📞 Call now for a free consultation and estimate!

SCHEDULE A MEETING TODAY WITH GAPPSI

Synthetic Turf Accents for Clean, Modern Lines

Frequently Asked Questions

Why are porcelain pavers so popular for patios? Porcelain pavers are a fantastic choice because they combine good looks with incredible toughness. Unlike some other materials, they are highly resistant to stains from things like spilled wine or food, and they won’t fade from sun exposure. They are also very dense, which means they don’t absorb much heat, making them more comfortable for bare feet on a hot summer day. It’s a low-maintenance option that keeps your backyard looking polished for years.

How long does a complete backyard renovation like the one featured take? A multi-part project that includes a pool, a large patio, and custom structures is a significant undertaking, so the timeline can range from several weeks to a few months. The exact duration depends on the complexity of the design, permitting, and weather. A professional design and build team manages the entire schedule, coordinating all the moving parts so the process feels streamlined and efficient for you as the homeowner.

Can I really use an outdoor kitchen all year on Long Island? You absolutely can, especially with a thoughtful design. While summer is peak season, adding a pavilion or covered structure provides protection from the elements. Integrating features like built-in heaters or a nearby fireplace, as seen in the East Setauket project, creates a warm and inviting space that you can comfortably enjoy on cool spring evenings and crisp autumn afternoons, extending your outdoor living well beyond just a few months.

Do I need a huge backyard to have a functional outdoor kitchen? Not at all. While large backyards offer more layout possibilities, a beautiful and highly functional outdoor kitchen can be designed for almost any size space. The key is a smart, custom design that makes the most of your available area. A compact L-shaped kitchen or a simple linear island can provide all the essentials, like a grill, prep space, and storage, without overwhelming a smaller patio.

I love these ideas, but I’m not sure where to begin. What’s the first step? The first step is simply starting a conversation. It begins with an initial consultation where you can share your ideas, talk about how you want to use the space, and discuss your budget. This meeting is all about exploring the possibilities for your home and getting a clear understanding of the design and build process. It’s the best way to turn your inspiration into a workable plan.

Key Takeaways

  • Design Beyond the Grill: Think of your outdoor kitchen as the central hub of your entire backyard. Plan its layout to connect seamlessly with your patio, pool, and lounge areas, creating one cohesive space for cooking, dining, and relaxing.
  • Build for Long Island Weather: Your material choices are key to a long-lasting outdoor kitchen. Select durable options like natural stone, porcelain, and premium stainless steel to resist local climate challenges, ensuring your space stays beautiful with less maintenance.
  • Rely on a Single, Expert Team: An outdoor kitchen involves permits, plumbing, and electrical work. Working with a professional design-build contractor simplifies the entire process, as they handle all coordination to ensure your project is completed safely, correctly, and without the stress of managing multiple vendors.

Related Articles

Share this page:
A beautiful in-ground pool and patio, weighing the installation cost of fiberglass vs. vinyl liner pools.

Spray-On Fiberglass Pool Liner Cost: A Full Breakdown

When you picture your backyard in 10 years, is your pool a source of fun or a constant expense? That’s the real question when choosing between fiberglass and vinyl. A low upfront price for a vinyl liner pool looks tempting, but it hides a mandatory—and expensive—replacement down the road. We’ll compare the total 15-year cost of both options, looking at everything from liner replacements to the potential spray-on fiberglass pool liner cost for a future resurfacing project. This way, you get the full story, not just the initial quote.

Key Takeaways

  • Initial Cost vs. Lifetime Value: A vinyl liner pool’s lower upfront price is offset by a mandatory liner replacement every 10-12 years. A fiberglass pool’s higher initial cost is a one-time payment for a permanent structure that doesn’t require major future replacements.
  • Calculate Your True Maintenance Commitment: The smooth, non-porous surface of a fiberglass pool means less money spent on chemicals and less time spent cleaning. This low-maintenance benefit is a major factor in the total cost of ownership compared to a vinyl liner pool.
  • Fiberglass Pays for Itself in Under a Decade: The money saved on a vinyl liner installation is typically spent on higher maintenance and liner replacement within 7 to 10 years. After that point, the fiberglass pool becomes the more economical choice for every season you own it.

Fiberglass vs. Vinyl Liner: What’s the Initial Price Tag?

When you’re planning your dream backyard, the first question is usually about the budget. The initial installation cost is a major factor, and it varies quite a bit between fiberglass and vinyl liner pools. Understanding these upfront expenses helps you make a choice that feels right for your family and your finances from day one. Let’s break down what you can expect to invest in each type of pool.

What’s the Price for a Fiberglass Pool Installation?

A fiberglass pool installation typically costs between $25,000 and $50,000. This price gets you the pre-molded shell and standard installation. Think of it as the foundation of your project. Fiberglass pools are manufactured off-site and delivered to your home in one piece, which makes the installation process much faster than other pool types. While the initial price tag might be higher than some vinyl liner quotes, you’re paying for a durable, low-maintenance surface that won’t need a major overhaul in a decade. Gappsi offers a wide selection of high-quality swimming pools to fit different backyard styles and budgets.

What’s the Price for a Vinyl Liner Pool Installation?

Vinyl liner pools are known for being a more affordable option upfront, with complete installation packages often ranging from $55,000 to $75,000. The final price depends heavily on the size, shape, and features you choose. The lower initial investment is appealing, but it’s important to remember the long-term picture. The vinyl liner itself will need to be replaced every 10 to 12 years, which is a significant future expense. So, while you might save money at the start, you’re essentially signing up for a recurring maintenance project down the road.

How Pool Size Affects Your Initial Cost

It’s no surprise that the bigger the pool, the higher the price tag. A larger pool requires more excavation, more materials for the shell or liner, and more labor to install. For example, replacing an average-sized vinyl liner pool with a new fiberglass one can cost around $60,000. This gives you a good idea of what a mid-range project looks like. A small fiberglass plunge pool will be on the lower end of the cost spectrum, while a large, custom-shaped vinyl pool with extensive masonry work and decking will be at the higher end.

Beyond the Pool: What Drives Up Installation Costs?

The initial quote for your pool is a great starting point, but it’s rarely the final number. Several factors can influence the total cost of your installation, and it’s smart to know what they are before you begin. Think of it like building a house—the foundation and frame are just the beginning. The real character (and cost) comes from the layout, finishes, and features you choose. From the size and shape of your pool to the specific challenges of your backyard, every decision plays a role in the final price tag. Let’s walk through the main variables so you can create a realistic budget for your dream pool.

How Custom Sizes and Shapes Impact the Price

It’s no surprise that the bigger the pool, the higher the cost. A larger pool requires more materials, more excavation, and more labor. But size isn’t the only design choice that affects your budget. The shape of your pool is also a key factor. While standard rectangular or oval shapes are often more cost-effective, a custom freeform design will add to the price. Vinyl liner pools offer incredible flexibility here, allowing for unique shapes and a wide variety of liner patterns to match your style. When you’re planning your swimming pool installation, consider how a custom shape fits into your overall vision and budget.

How Your Yard Can Add to the Bill

Before any work on the pool itself can begin, your yard needs to be ready. Site preparation is a critical step that can sometimes bring unexpected costs. If your yard has a significant slope, it will need to be leveled. We may also need to clear trees or reroute utility and sprinkler lines. Another major consideration is access. Can we easily get heavy machinery into your backyard? If access is tight, it might require more manual labor or specialized equipment, which can increase the installation cost. A thorough site assessment is the best way to identify these potential expenses early in the landscape design process.

The Price of Pool Features and Upgrades

This is where you can truly personalize your pool and turn it into a backyard resort. While a basic pool is fantastic, many homeowners choose to add features that enhance both its beauty and function. Popular upgrades include tanning ledges (also called Baja shelves), built-in benches, dramatic water features like waterfalls or deck jets, and ambient LED lighting for night swimming. You might also consider an automatic pool cover for safety and convenience or an integrated spa. Each of these additions will increase the initial price, but they also add long-term value and enjoyment to your outdoor living space.

How Local Labor and Permits Affect Your Budget

The cost of professional labor is a significant part of your pool installation budget. According to Angi, hiring a professional crew can range from $10,000 to $20,000, depending on the project’s complexity. This investment ensures your pool is installed correctly, safely, and to code. You’ll also need to account for local permit fees. These can vary depending on your town in Long Island, but they are a necessary step in the process. Working with an experienced company like Gappsi means we handle the entire permitting process for you, making sure all paperwork is filed correctly and your project proceeds without any administrative headaches.

Long-Term Costs: Which Pool Saves You Money?

The sticker price is just the beginning of your pool’s story. While it’s easy to focus on the initial installation cost, the real expenses show up over the years in maintenance, chemicals, and repairs. This is where fiberglass and vinyl liner pools really start to differ. Think of it like buying a car—one model might be cheaper upfront, but if it constantly needs repairs and gets poor gas mileage, is it really the better deal? The same logic applies to your backyard oasis. Understanding the long-term financial commitment for each pool type is key to making a choice you’ll be happy with for years to come. We’ll break down what you can expect to spend on upkeep for both fiberglass and vinyl liner swimming pools so you can see the full picture.

What Does Yearly Fiberglass Pool Maintenance Cost?

If you’re looking for a low-maintenance lifestyle, a fiberglass pool is your best friend. Their secret is the smooth, non-porous gelcoat surface. This finish makes it incredibly difficult for algae to take hold, which means you’ll spend less time scrubbing and more time swimming. It also means you’ll use significantly fewer chemicals to keep the water balanced—often requiring up to 30% less chlorine than other pools. Over the life of the pool, you won’t have to worry about costly acid washing or complete resurfacing projects. A little regular cleaning and water testing is usually all it takes to keep a fiberglass pool looking pristine, saving you both time and money season after season.

The Hidden Cost of Fiberglass: Resurfacing

While fiberglass pools are champions of low daily maintenance, they aren’t completely immune to the effects of time. Far down the road, typically after 15 to 25 years, you may need to consider resurfacing. Think of it less like a constant repair and more like a major renovation project that restores your pool to its original glory. It’s a significant expense that vinyl liner owners deal with more frequently through liner replacements. For fiberglass pool owners, it’s a one-time, long-term investment in the pool’s longevity. Understanding this future cost helps you get a complete picture of what it means to own a fiberglass pool for decades to come.

Why Fiberglass Pools Need Resurfacing

The smooth, durable surface of a fiberglass pool is called the gelcoat. It acts as a protective skin, shielding the underlying fiberglass structure from UV rays and pool chemicals. Over many years of sun exposure and use, this gelcoat can begin to wear down. You might notice the color fading, a chalky residue forming, or even small spider cracks appearing on the surface. Resurfacing addresses these issues by applying a fresh top layer, essentially giving your pool a brand-new finish. It’s a necessary step to maintain the pool’s structural integrity and keep it looking beautiful for another couple of decades.

The Resurfacing Process Explained

Resurfacing a fiberglass pool is a job best left to the pros. The process begins with completely draining the pool. From there, the crew will meticulously sand and prep the entire surface to ensure the new coating will adhere properly. This step is crucial for a smooth, long-lasting finish. Once the surface is ready, a new layer of gelcoat or another specialized coating is applied. After allowing it to cure completely, which can take several days, the pool is refilled, and the water is rebalanced. The entire project typically takes about a week to complete, transforming a worn-out pool back into a stunning backyard centerpiece.

Fiberglass Resurfacing Costs and Material Options

The cost to resurface a fiberglass pool generally ranges from $5,000 to $15,000, depending on the size of your pool and the material you choose. A basic gelcoat application is the most common and cost-effective option, usually falling between $5,000 and $8,000. For a more durable finish, you might opt for an epoxy or polymer coating, which can cost between $7,000 and $12,000. In rare cases where the surface has significant damage, a full fiberglass layer replacement might be necessary, pushing the cost upwards of $12,000. While it’s a significant investment, it’s a key part of the long-term care that keeps your swimming pool in top condition.

What Does Yearly Vinyl Liner Pool Maintenance Cost?

Vinyl liner pools are known for their attractive initial price point, but their long-term maintenance costs are higher. The primary expense to plan for is the eventual liner replacement. While a well-cared-for liner can last for several years, it will eventually need to be replaced, which is a significant investment. The vinyl material is also softer and more susceptible to punctures or tears from sharp objects, pets, or even harsh chemicals. This means you might find yourself budgeting for patch kits or professional repairs to fix leaks. These ongoing maintenance needs are an important part of the total cost of ownership for a vinyl liner pool.

Who Wins on Chemical and Energy Costs?

When you look at your monthly bills, the differences between fiberglass and vinyl really add up. Over a decade, the initial savings from a vinyl liner pool can easily be eaten up by higher chemical and electricity costs. Because a fiberglass pool’s surface is inert and non-porous, it doesn’t absorb chemicals or affect the water’s pH balance the way other surfaces can. This stability means you’ll buy fewer chemicals over the year. This cleaner environment also means your pump and filter don’t have to work as hard to keep the water clear, which can lead to modest savings on your energy bill. These seemingly small monthly savings accumulate into a substantial amount over the life of your pool.

Replacing a Vinyl Liner: How Often and How Much?

One of the most significant long-term costs of a vinyl liner pool is the eventual replacement of the liner itself. Unlike a fiberglass shell, a vinyl liner is not a permanent fixture. It’s a reality every vinyl pool owner will face, so it’s important to understand the timeline and the budget required when that day comes. This planned expense is a major factor when comparing the lifetime cost of vinyl versus fiberglass pools. Knowing what to expect can help you make a more informed decision and avoid financial surprises down the road.

How Long Does a Vinyl Liner Last?

On average, you can expect a vinyl pool liner to last about 10 to 15 years. This lifespan isn’t set in stone, though. Several factors can influence how long your liner holds up. Consistent exposure to harsh sunlight can cause it to fade and become brittle over time. Similarly, improper chemical balancing can wear down the material prematurely. Careful use is also key—sharp objects, like pet claws or broken glass, can easily cause tears or punctures that require patching or even a full replacement. Proper maintenance is the best way to get the most life out of your liner before it needs to be replaced as part of your swimming pool upkeep.

Repairing vs. Replacing: When to Patch a Vinyl Liner

So, what happens when you find a tear in your liner? The big question is whether a simple patch will do the trick or if it’s time for a full replacement. Generally, a repair is a great option if your liner is still relatively new—say, under seven years old—and the damage is small, like a tear that’s less than a few inches long and not near a seam. For minor issues, a patch is a quick and affordable fix. However, if your liner is getting older, closer to that 10-year mark, or showing signs of widespread wear like brittleness, cracking, or pulling away from the walls, a replacement is the wiser choice. Patching an old, brittle liner is often just a temporary solution, and you’re better off investing in a new one to avoid future headaches and potential water damage to your pool’s structure. Understanding the costs of each option can help you make the right call.

What Does It Cost to Replace a Vinyl Liner?

When it’s time for a new liner, the replacement process involves draining the pool, removing the old liner, smoothing the pool floor, and installing the new one. Including the liner and professional installation, you can expect to pay between $7,500 and $8,500 for a standard-sized pool. Some homeowners use this opportunity to upgrade their entire pool structure. If you’re considering a more permanent solution, replacing a vinyl liner pool with a fiberglass unit is a major home remodeling project that typically costs between $50,000 and $65,000. This converts your pool into a lower-maintenance, more durable option for the long term.

Breaking Down the Cost of a New Liner

So, what does a new liner actually cost? According to Angi, homeowners can expect to pay around $2,504 for a full replacement, with most projects falling somewhere between $1,242 and $3,871. This price typically includes the new liner material and the professional labor required for the installation. Another way to estimate is by square footage, which often comes out to about $5 per square foot. While this is a significant investment, it’s a predictable part of owning a vinyl liner pool. Thinking about this recurring expense is crucial when you’re comparing the long-term financial commitment of different pool types from the very beginning.

Additional Factors Affecting Replacement Price

The final bill for your liner replacement can be influenced by several factors beyond the basic installation. The size and shape of your pool are the biggest variables; a larger pool requires more material, and custom shapes like kidney or L-shapes need a specially made liner, which costs more than a standard rectangular one. The type and thickness of the vinyl you choose also play a role. Beyond the liner itself, you’ll need to budget for draining the pool, which can cost several hundred dollars, and then refilling it. Other potential costs include permit fees, if your town requires them, and a disposal fee for the old liner. Factoring these items into your budget ensures you have a complete picture of what’s involved in replacing the liner for your swimming pool.

How Do You Know It’s Time for a New Liner?

Your pool will give you some clear signals when the liner is nearing the end of its life. The most obvious signs are visible cracks, tears, or holes that can lead to water loss. You might also notice the liner is fading significantly or has stains that you can’t remove. Another common issue is wrinkling or stretching, where the liner pulls away from the walls or floor, creating a loose fit. If you find yourself constantly adding water to the pool, you likely have a leak that needs to be addressed. Catching these signs early can help you plan for a replacement before a minor issue becomes a major, costly problem requiring extensive restoration services.

What Are the Most Common Hidden Pool Costs?

The price of the pool itself is just one piece of the puzzle. To create a complete and realistic budget, you need to account for the extra costs that turn a simple pool installation into a beautiful backyard retreat. A transparent contractor will walk you through these, but it’s always best to go into the conversation with your eyes wide open. From preparing the ground to finishing the landscape, several factors can add to your final bill. Thinking about these items ahead of time helps prevent sticker shock and ensures your project stays on track without cutting corners. Let’s break down the most common hidden costs so you can plan with confidence.

What if They Find Rocks or Utility Lines?

Before your pool can go in, the ground has to be prepared. This is where the first variables pop up. Your property’s soil condition, slope, and accessibility for heavy machinery all play a role. If the crew discovers large rocks, a high water table, or poor soil that needs to be replaced, the cost of excavation will increase. The same goes for rerouting unexpected utility lines. While a straightforward dig is priced into your initial quote, complex site challenges require more labor and equipment. This is why the total cost can vary so widely depending on the complexity of the site preparation.

Don’t Forget to Budget for Decking and Landscaping

A pool sitting in a patch of dirt isn’t anyone’s dream. The area around your pool, known as the poolscape, is what truly creates an oasis. This includes the patio or deck, fencing, and surrounding greenery. Decking alone can add anywhere from $3,000 to $12,000 to your project. You’ll need to budget for materials and installation for your pool surround, whether you choose beautiful porcelain and natural stone pavers or another material. You should also factor in the cost of safety fencing, which is often required by local regulations, as well as professional landscape design to bring the whole space together.

What About Future Repairs and Service Calls?

Your financial commitment doesn’t end once the pool is filled. Pool ownership comes with annual operating costs for chemicals, electricity, and water, which can easily add up to around $1,000 per year. You should also set aside funds for eventual repairs, like fixing a pump or replacing a vinyl liner down the road. Many homeowners also opt for professional pool opening and closing services each season. While not a “hidden” cost, it’s an ongoing expense to remember. Proper maintenance, like having your patio professionally cleaned and sealed, also helps protect your investment and prevent more costly restoration work later on.

Why Fiberglass Pools Cost More Upfront (and Less Later)

When you first look at the numbers, it’s true that a fiberglass pool has a higher initial price tag than a vinyl liner pool. It’s easy to see that bigger number and immediately think it’s the more expensive option, but that’s only part of the story. The upfront cost of a fiberglass pool is an investment in long-term savings and a lower-maintenance lifestyle. Think of it less as a purchase and more as a one-time payment for decades of enjoyment without the recurring costs that come with other pool types.

The higher initial price comes from a more complex manufacturing process and the quality of the materials used. However, this upfront investment pays you back over the years. You’ll spend less time and money on chemicals, repairs, and major replacements like new liners. Over the life of your pool, a fiberglass model often ends up being the more economical choice. Let’s break down exactly why that initial cost is higher and how it leads to savings down the road.

How Manufacturing and Shipping Affect the Price

Unlike vinyl liner pools, which are assembled in your backyard, fiberglass pools are built as a single, solid shell in a factory. This controlled environment allows for a precise manufacturing process that results in a durable, high-quality product with a smooth, non-porous finish. The cost of these premium materials and the specialized labor in the factory contribute to the initial price.

Once the pool shell is complete, it has to be carefully transported from the factory to your home on Long Island. This process requires special equipment and logistics to move such a large item, and the shipping costs are factored into the final price you pay. While this adds to the upfront expense, it also means you’re getting a pre-fabricated, structurally sound pool that’s ready for installation the moment it arrives.

How a Faster Install Reduces Labor Costs

One of the biggest advantages of a fiberglass pool is how quickly it can be installed. Because the shell arrives as one complete piece, the installation process is streamlined and efficient. After the excavation is done, the shell is lowered into place, leveled, and backfilled. The plumbing and electrical work can be completed quickly, and your pool can be ready for water in as little as a few days.

This speed is a huge contrast to vinyl liner pools, which can take weeks to build on-site. A shorter installation timeline means significantly lower labor costs, which helps offset the higher material price of the fiberglass shell. Plus, a faster installation means you and your family can start enjoying your new swimming pool much sooner.

How Durability and Warranties Pay Off

The real savings with a fiberglass pool become clear when you look at its lifespan. These pools are incredibly durable and built to last for decades—many are still in perfect condition after 50 years. The gelcoat surface is tough, non-porous, and resistant to algae growth, which means you’ll use fewer chemicals and spend less time on weekly maintenance.

This durability is why fiberglass pools often come with long-term warranties from the manufacturer, giving you peace of mind. With a vinyl liner pool, you have to plan for the major expense of replacing the liner every 5 to 10 years. With a fiberglass pool, that recurring cost simply doesn’t exist. You’re investing once in a pool that will stand the test of time.

Smart Ways to Save on Pool Costs

A new swimming pool is a significant investment in your home and lifestyle, but that doesn’t mean you can’t be strategic about the costs. Beyond choosing between fiberglass and vinyl, there are several practical ways to manage your budget without compromising on the quality of your backyard oasis. A little bit of planning and some savvy decision-making can make a big difference in the final price tag. Whether you’re installing a brand new pool or maintaining an existing one, thinking like a project manager can help you get the most value for your money. Here are a few expert tips to help you save on your pool project.

Time Your Projects for Off-Season Savings

One of the simplest ways to save money is to think about timing. Pool contractors are busiest during the spring and early summer when everyone is rushing to get their backyards ready for the warm weather. If you can plan your project for the off-season, you might find more competitive pricing. Scheduling major work like a new installation or resurfacing during the fall or winter can often lead to better prices from contractors who are looking to keep their crews busy. This requires some forward-thinking, but the potential savings can be well worth the wait. It’s a great strategy to discuss with your pool builder when you’re in the initial planning stages.

Choose Standard Designs Over Custom Patterns

Customization is one of the most exciting parts of designing a pool, but it’s also where costs can quickly add up. This is especially true for vinyl liner pools. While intricate, colorful patterns are beautiful, they come at a premium. According to experts at Angi, opting for a plain, standard liner can save you between $300 to $700 compared to a more decorative option. This same principle applies to other design elements. Sticking with a standard pool shape instead of a complex freeform design can also keep your initial installation costs down. Prioritizing where you want to spend your budget allows you to splurge on features that matter most to you while saving on others.

Opt for Repairs When Possible

For current pool owners, especially those with vinyl liners, it’s important to know when a repair is a smarter financial choice than a full replacement. If your liner is still relatively new—less than seven years old—and has a minor tear or cosmetic issue, a simple patch can often solve the problem for a fraction of the cost of a new liner. It’s always a good idea to consider repair before jumping to a complete overhaul. An experienced professional can assess the damage and give you an honest recommendation. This approach not only saves you money in the short term but also extends the life of your current liner, pushing that big replacement expense further down the road.

Common Pool Cost Myths, Busted

When you start researching pool costs, you’ll run into a lot of opinions that can make it hard to see the full financial picture. It’s easy to get stuck on the initial price tag, but the true cost of a pool unfolds over years of ownership. Let’s clear up some of the most common misconceptions about pool expenses so you can make a decision based on facts, not fiction. Understanding the long-term investment from the start helps you choose a pool that fits your budget and lifestyle for decades to come.

Myth: “Vinyl Is Always Cheaper”

One of the most persistent myths is that vinyl liner pools are the undisputed budget-friendly choice. While it’s true they have a lower upfront cost, often starting around $50,000, that initial price is just the beginning of the story. Think of it as a down payment. The vinyl liner itself is a temporary component that you’ll need to replace every 10 to 12 years, and that’s a significant future expense. A fiberglass swimming pool, on the other hand, is a one-time installation. The sticker price is higher, but you aren’t signing up for a mandatory, costly replacement down the road.

The Truth About Pool Maintenance Time and Cost

The conversation about cost often overlooks what day-to-day and year-to-year maintenance actually entails. After just seven to ten years, the initial savings from a vinyl liner pool are frequently spent on repairs, liner patches, extra chemicals, and higher electricity bills. Because vinyl liners are more susceptible to tears, their upkeep is more intensive. A fiberglass pool’s non-porous shell resists algae growth, which means you’ll spend less time and money on chemicals and cleaning. This is a key part of the total cost of ownership that Gappsi helps clients plan for.

Which Pool Lasts Longer and Adds More Value?

A swimming pool should be an asset, not a liability. A well-maintained inground pool can increase your home’s value by about 7 percent, but the type of pool matters. A fiberglass pool is a permanent structural addition to your home, much like a finished basement or a kitchen remodel. A vinyl liner, however, has a limited lifespan. In fact, many homeowners eventually face the decision to replace their entire vinyl pool with a fiberglass unit, a project that can cost around $60,000. Investing in a durable, low-maintenance fiberglass pool from the start adds lasting value that future buyers will appreciate.

The True Cost of Your Pool Over 15 Years

Thinking about your pool’s cost shouldn’t stop once the installation is complete. The real price of ownership unfolds over years of maintenance, repairs, and replacements. When you look at the total investment over a decade or more, the most affordable option upfront isn’t always the most economical in the long run. Let’s break down what you can expect to spend on both fiberglass and vinyl liner pools over a 15-year period to see how the numbers really stack up.

The 15-Year Cost of a Fiberglass Pool

A fiberglass pool is a fantastic example of a “buy it for life” investment. While the initial installation cost is higher, your expenses drop off significantly after that. With a lifespan of 30 to 50 years, the pool shell itself will require very little from you financially over the first 15 years. The non-porous gelcoat surface is incredibly durable and algae-resistant, which means you’ll spend less time and money on chemicals and cleaning. Over 15 years, your primary costs will be routine water care, electricity, and opening/closing services. You won’t have to budget for a major liner replacement, making the long-term financial forecast for a fiberglass pool refreshingly predictable.

The 15-Year Cost of a Vinyl Liner Pool

Vinyl liner pools attract many homeowners with their lower initial price tag. For the first several years, you’ll enjoy your pool with standard maintenance costs for chemicals and electricity. However, the major planned expense is the liner itself. Most vinyl liners need to be replaced every 10 to 12 years. This means that within your 15-year ownership window, you are almost guaranteed to face one full liner replacement, which can be a significant expense. On top of that, vinyl liners are more susceptible to punctures and tears, which could lead to unexpected repair costs. You’ll also likely use more chemicals over time to keep the water balanced compared to a fiberglass pool.

When Does a Fiberglass Pool Pay for Itself?

This is where the long-term value of fiberglass really shines. While you might pay more to get started, the financial break-even point often arrives sooner than you’d think. In fact, many pool experts find that after about 7 to 10 years, the initial savings from choosing a vinyl liner have been completely spent on higher maintenance costs and at least one liner replacement. From that point forward, the fiberglass pool becomes the more cost-effective option. By year 15, you’re well past the break-even point and are actively saving money every season. This makes the higher upfront cost a strategic investment in a lower-maintenance, worry-free future for your backyard.

Which Pool Is the Best Value for You?

Choosing between a fiberglass and a vinyl liner pool comes down to what you value most: upfront flexibility or long-term, hands-off enjoyment. Both are fantastic options that create a beautiful backyard oasis, but they deliver value in different ways. One offers endless customization for a potentially lower initial price, while the other provides decades of durability with minimal fuss. To figure out which pool is the right investment for your Long Island home, it’s helpful to compare them on the factors that matter most: durability, design freedom, and your own long-term plans.

Durability and Performance Head-to-Head

When it comes to longevity, fiberglass pools have a clear advantage. A well-made fiberglass shell is incredibly durable and can easily last the lifetime of your home. Its smooth, non-porous surface is also a major performance perk, as it naturally resists algae growth. This means you’ll spend less time scrubbing walls and more time actually swimming. Vinyl liner pools, on the other hand, depend on a liner that needs to be replaced every 10 to 12 years. Each replacement can cost around $5,000, adding a significant, recurring expense to your long-term budget. While the pool structure itself is sound, the liner is the component that requires consistent care and eventual replacement.

How to Balance Customization and Your Budget

If you have a very specific vision for your pool’s shape and size, a vinyl liner might be the perfect fit. This option offers nearly unlimited design freedom, allowing you to create a custom shape that fits your yard perfectly. You can also choose from a wide variety of liner patterns to achieve the exact look you want. Fiberglass swimming pools are created from pre-fabricated molds, which means you’ll be choosing from a selection of proven shapes and sizes. While the designs are beautiful and modern, you won’t be able to create a one-of-a-kind shape. Both pool types start around the $50,000 mark for installation, so the choice becomes less about the initial price and more about whether you prefer total design control or the simplicity of a pre-designed, durable shell.

Making the Final Decision for Your Family

The best way to decide is to look beyond the initial quote and consider the total cost of ownership. While a fiberglass pool might cost $10,000 to $15,000 more upfront, it often proves to be the better long-term investment. The money you save on a vinyl liner installation can quickly be eaten up by liner replacements, extra chemicals, and more intensive maintenance over the years. Many homeowners who wait until they can afford a fiberglass pool are ultimately happier with their decision because they avoid these recurring costs. Think about how long you plan to be in your home and how you want to spend your time—maintaining your pool or enjoying it. Considering your 15-year plan will help you see the true value and make a choice you’ll be happy with for decades.

Related Articles

Frequently Asked Questions

So, which pool is actually cheaper in the long run? While a vinyl liner pool often has a lower initial price, a fiberglass pool almost always costs less over its lifetime. After about seven to ten years, the money you saved on a vinyl installation is typically spent on higher chemical use, potential repairs, and at least one expensive liner replacement. A fiberglass pool is a one-time investment that saves you money and hassle for decades.

How much work is it to maintain each type of pool? A fiberglass pool is the clear winner for low-maintenance living. Its smooth, non-porous surface makes it very difficult for algae to grow, meaning you’ll spend far less time scrubbing and balancing chemicals. A vinyl liner is more susceptible to algae and requires more careful chemical management. You also have to be mindful of potential punctures or tears, which adds another layer of upkeep.

How often will I really need to replace a vinyl liner? You should plan on replacing a vinyl liner every 10 to 15 years. This timeline can be shorter if the pool gets a lot of direct sun or if the water chemistry isn’t perfectly maintained. When it’s time for a replacement, it’s a significant project that involves draining the pool and a considerable expense.

If I want a custom shape, do I have to choose a vinyl liner pool? Vinyl liners offer the most design freedom, allowing for virtually any shape you can imagine. Fiberglass pools are made from pre-designed molds, so you’ll choose from a wide selection of popular and modern shapes. While you can’t create a completely unique shape, the variety available today fits beautifully into most backyard designs.

Besides the pool itself, what’s the biggest extra cost I should plan for? The area surrounding your pool, often called the poolscape, is the biggest additional expense. This includes your patio or decking, safety fencing required by law, and professional landscaping to complete the look. These elements are what transform your yard into a true outdoor living space, so it’s important to budget for them from the start.

Share this page:
Inground vinyl pool kit installed in a backyard with a stone patio and lounge chairs.

Inground Vinyl Pool Kit Price: A Full Breakdown

It’s easy to get lost in conflicting information when researching pool costs. You might hear that vinyl pools have lots of “hidden” fees or that the advertised inground vinyl pool kit price is misleading. Let’s clear the air. The truth is, the kit is just one component of your total investment. Essential steps like site preparation, professional installation, and electrical work all have their own costs. This guide is designed to give you a transparent, no-surprises breakdown of every expense. We’ll cover what’s in the kit, what’s not, and how to plan for a smooth, predictable, and stress-free project.

Key Takeaways

  • Look Beyond the Kit Price: The initial cost of a vinyl pool kit is only part of the story. Your total budget should also account for necessary expenses like excavation, professional installation, permits, and electrical work to get an accurate financial picture.
  • Customization Shapes Your Cost: The final price tag is directly influenced by your choices. Key factors include the pool’s size and shape, liner thickness, and any upgrades you add, such as heaters, lighting, or custom stone decking.
  • Budget for Future Liner Replacement: A key long-term cost of a vinyl pool is replacing the liner, which typically needs to be done every 5 to 9 years. Factoring this predictable expense into your budget from the start helps you plan for future maintenance.

What’s in an Inground Vinyl Pool Kit?

When you hear “pool kit,” you might picture a simple box, but it’s much more than that. An inground vinyl pool kit is a comprehensive package that includes nearly all the essential components you need to build a pool in your backyard. Think of it as the foundation of your future oasis. These kits are designed to streamline the building process, whether you’re a seasoned DIYer or planning to hire a professional team.

The main idea is to bundle the core structural and functional parts together. This way, you aren’t left scrambling to find a compatible pump for your filter or the right ladder for your deep end. While every kit can vary slightly, a quality package provides the bones of your pool, ready for assembly and installation. At Gappsi, we ensure our swimming pool systems are complete, taking the guesswork out of the equation so you can focus on the fun parts, like planning your first pool party.

What the Kit Includes

So, what’s actually inside the box? A standard inground vinyl pool kit typically comes with the pool’s structure, which is often a set of steel or polymer wall panels that form the perimeter. You’ll also get a durable vinyl liner—many suppliers even let you choose from various colors and patterns. Essential hardware like fiberglass steps, a handrail for safety, and a deep-end ladder are also included. Functionally, the kit provides the heart of your pool’s circulation system: a pump and filter. To round it out, you can expect to find a basic maintenance kit, skimmer, and return jets to keep the water clean and moving.

A Quick Look at the Installation Process

Getting your kit from the driveway into the ground involves a few key stages. First, the wall panels are assembled to create the pool’s shape. Next, a concrete collar is poured around the base of the walls to lock them securely in place. After that, the pool floor is carefully prepared and smoothed before the vinyl liner is hung and fitted. While it’s a more involved process than dropping in a pre-made fiberglass shell, it allows for incredible design flexibility. A significant portion of a vinyl pool’s cost comes from labor, so handling the installation yourself can lead to big savings if you’re up for the challenge.

How Much Does an Inground Vinyl Pool Kit Cost?

Figuring out the cost of an inground vinyl pool kit can feel a bit like a puzzle, but it’s simpler than you think once you break it down. The price of the kit itself is just your starting point. It covers the essential structure of your pool, but not the labor or finishing touches that bring it to life. The total cost depends on the kit’s quality, what’s included, and where you live. Think of it in three main tiers: basic kits for the budget-conscious, premium kits with all the bells and whistles, and the all-in cost that reflects local installation expenses. Understanding these different price points will help you set a realistic budget for your dream backyard oasis.

The Price Tag on Basic Kits

If you’re looking for the most straightforward entry point into pool ownership, a basic inground vinyl pool kit is where you’ll start. These kits typically run around $6,000 and provide the bare essentials to get your project underway. This usually includes the steel or polymer wall panels, the vinyl liner, a skimmer, and the coping that lines the pool’s edge. What it generally doesn’t include is a pump, filter, steps, or any of the plumbing. A basic kit is a great foundation, but remember to budget for the necessary equipment and installation costs on top of this initial price. It’s a solid choice for a DIY-savvy homeowner or someone looking to manage costs by sourcing other components separately.

What to Expect for Premium Kits

For those wanting more durability and features right out of the box, premium kits are the way to go. Prices for these more comprehensive inground swimming pool kits can range from about $12,500 to over $21,000. The higher price tag gets you significant upgrades, such as thicker, more resilient vinyl liners, stronger wall panels, and often includes built-in steps, which are a huge convenience. Many premium packages also come bundled with a high-quality pump and filter system, saving you the trouble of sourcing them separately. This is a solid choice if you want a longer-lasting pool with fewer initial hassles and a more all-inclusive starting package.

How Location Affects Your Price

The price of the kit is one thing, but the total cost to build your pool is another story, and your location plays a huge role. On average, the complete installation of a vinyl-lined pool can land around $45,000 for a standard 12’ x 24’ pool. This figure accounts for the kit, labor, excavation, electrical work, plumbing, and a basic concrete deck. Here on Long Island, factors like local labor rates and permit requirements can influence the final number. That’s why getting a detailed quote from a local expert who understands the whole process, from design to the first swim, is the best way to get an accurate picture of your total investment in a new swimming pool.

What Factors Influence the Price of a Kit?

When you start shopping for an inground vinyl pool, you’ll notice that the kit price is just a starting point. Think of it as the base model of a car—the final cost depends on the choices you make and the unique conditions of your property. Understanding these variables ahead of time helps you create a realistic budget and ensures there are no surprises down the road. The main factors that will shape your final quote are the pool’s size and shape, the quality of the liner you choose, your backyard’s specific conditions, and any extra features you decide to add. Each of these elements plays a significant role in the overall investment, so let’s break them down one by one. This way, you can feel confident about where your money is going and make informed decisions to build the perfect pool for your home.

Pool Size and Shape

It’s no surprise that the bigger the pool, the higher the price. A larger pool requires more materials for the walls, a larger liner, and more labor to assemble. The shape also plays a key role. A classic rectangle is generally the most cost-effective option, while custom freeform shapes with curves and unique angles will add to the cost due to the complexity of manufacturing and installation. One of the great advantages of vinyl is its design flexibility. Unlike fiberglass pools, which have depth limitations, vinyl swimming pools can be built to almost any depth you want, giving you complete control over your design.

Liner Quality and Thickness

The vinyl liner is the most visible part of your pool, and its quality directly impacts both the look and longevity of your investment. Liners come in various thicknesses, measured in mils. While a standard liner is perfectly suitable for many families, upgrading to a thicker one offers better resistance to tears and punctures from pool toys, pets, or debris. A thicker liner costs more upfront and can be a bit more challenging to install, but the added durability often translates to a longer lifespan, saving you money on replacements in the long run. It’s a trade-off between initial cost and long-term peace of mind.

Your Backyard’s Condition

What’s happening underground in your backyard can have a major effect on your budget. The ideal site is flat, clear, and has soft, easy-to-dig soil. However, many Long Island properties have challenges like rocky soil, clay, a high water table, or a significant slope. These conditions can make the excavation process much more difficult and expensive. Easy digging might cost as little as $2.50 per cubic yard, but tough, rocky terrain can push that figure to over $200 per cubic yard. A professional site assessment is crucial to understanding what your specific landscape will require for a smooth installation.

Optional Equipment and Features

Beyond the basic pool structure, your equipment and feature choices will round out your final cost. Some items, like a pump and filter, are mandatory for keeping your pool clean and functional. But even with these essentials, you have options that vary in price and performance. From there, you can add a range of upgrades to enhance your swimming experience. A pool heater can extend your swim season, underwater lighting creates a beautiful nighttime ambiance, and an automatic pool cover adds a layer of safety and convenience. These features, along with additions like slides or diving boards, allow you to customize your pool to fit your lifestyle.

What Costs Come After Buying the Kit?

Buying an inground vinyl pool kit is an exciting first step toward creating your backyard oasis. But it’s important to remember that the price on the kit is just that—a starting point. Several other essential costs come into play before you can start swimming. Thinking about these expenses ahead of time helps you create a realistic budget and ensures a smooth process from start to finish. Let’s break down the major costs you can expect after you have your kit in hand.

Excavation and Site Prep

Before your pool can be assembled, you need a place to put it. This means excavation—a big hole in your backyard. The cost for this can vary widely depending on what’s under your grass. Long Island soil can be sandy and easy to dig, but hitting a patch of dense clay or large rocks can make the job much more difficult and expensive. Easy digging might cost just a few dollars per cubic yard, but tough conditions can run into the hundreds. Proper site prep also involves clearing the area and ensuring the ground is perfectly level, which is critical for the pool’s structure. This foundational work is something our landscaping design teams handle every day.

Professional vs. DIY Installation

One of the biggest decisions you’ll make is whether to install the pool yourself or hire a professional. While a DIY approach can certainly save you money on labor—potentially $3,500 to $5,000—it’s a massive undertaking. The installation involves assembling the wall panels, fitting the liner perfectly, and connecting all the components. It requires precision and specialized knowledge. Hiring an experienced team ensures the job is done correctly and efficiently, preventing costly mistakes that could damage your pool down the line. A professional swimming pool installation also typically comes with a warranty, giving you peace of mind that your investment is protected.

Permits and Electrical Work

Installing a pool isn’t a simple backyard project; it’s a major construction job that requires official approval. You’ll need to secure building permits from your local town or village before any work begins, which can cost a few hundred dollars. This step is non-negotiable and ensures your pool meets all safety and building codes. Additionally, your pool’s pump, filter, and any lighting or heating systems need power. This requires a licensed electrician to run dedicated circuits from your home’s electrical panel to the pool equipment. For safety reasons, this is absolutely not a DIY task. Always hire a professional to handle the electrical work to keep your family safe and your pool up to code.

Plumbing and Equipment Setup

Your pool’s circulation system is its lifeline, and it all comes down to the plumbing. This involves connecting the skimmers, drains, pump, and filter to keep your water clean and clear. Getting this network of pipes right is crucial for your pool to function properly. The labor for plumbing and equipment setup is a significant part of the overall installation cost because it requires skill and precision. This is also when the vinyl liner is carefully set into place. The liner is durable, but it can be punctured, so it needs to be handled by someone who knows what they’re doing. Proper setup from the start prevents leaks and ensures all your equipment works together seamlessly for years to come.

Which Upgrades Add to the Final Cost?

A basic vinyl pool kit gives you the essentials, but the real transformation happens with the upgrades. Think of the kit as your blank canvas. The features you add are what turn a simple swimming hole into a stunning backyard retreat that becomes the heart of your home. These add-ons are where you can truly customize your pool to fit your lifestyle, whether you’re looking for energy efficiency, enhanced safety, or a beautiful space for entertaining friends and family. While these upgrades will increase your initial investment, many pay for themselves over time through lower maintenance needs, higher energy savings, and a more enjoyable pool experience day in and day out.

Planning for these features from the start helps you create a comprehensive budget and ensures your finished swimming pool is exactly what you dreamed of, without any surprise costs down the line. It’s about looking beyond the initial price and considering the total value and enjoyment you’ll get from your investment. From the equipment that keeps your water sparkling to the lighting that sets the mood for an evening swim, every choice contributes to the final product. Let’s look at some of the most common upgrades that will influence your final price tag and how they can improve your pool.

Better Pumps, Filters, and Heaters

The equipment that runs your pool is its heart and lungs, and this is one area where an upgrade can make a huge difference. Opting for a high-efficiency variable-speed pump, for instance, can significantly cut down on your energy bills over the life of the pool. Similarly, a better filter means cleaner, clearer water with less manual work for you. And if you want to extend your swim season into the cooler months, a reliable heater is a must. Investing in top-tier equipment from the beginning means a more functional, cost-effective, and enjoyable pool for years to come.

Pool Covers and Safety Features

A pool cover is one of the most practical upgrades you can make. Automatic covers not only provide a critical layer of safety for families with children and pets but also save you money and time. They reduce water evaporation, keep debris out (which means less cleaning), and help the water retain heat, lowering your heating costs. Beyond covers, you might also consider adding perimeter fences and netting to secure the pool area. These features are an essential part of responsible pool ownership and add peace of mind.

Lighting and Smart Systems

Want to create that perfect ambiance for an evening swim? Upgraded lighting is the way to do it. Modern LED lights come in a variety of colors and can be programmed to create different moods, turning your pool into a beautiful nighttime feature. You can also integrate smart systems that let you control everything—from the lights and temperature to the pump and water features—right from your phone. This technology adds a layer of convenience that makes managing your pool incredibly simple and is a key part of any modern home remodeling project.

Decking and Pool Edging

The area surrounding your pool is just as important as the pool itself. The right decking and edging, also known as coping, define the look and feel of your entire outdoor space. Upgrading from basic concrete to beautiful porcelain and natural stone pavers can completely change the aesthetic. A well-designed deck provides a safe, non-slip surface for walking and lounging, while high-quality coping creates a seamless and polished transition from the deck to the water. This is where you can really tie the pool into your home’s overall design.

How Do Vinyl Pools Stack Up Against Other Types?

Choosing the right type of inground pool often comes down to comparing vinyl, fiberglass, and concrete. Each has its own benefits and long-term considerations. A vinyl liner pool is a popular starting point for many homeowners due to its lower initial cost and design flexibility. To help you decide, let’s break down how these pool types differ in cost, maintenance, and overall lifespan.

Upfront Costs: Vinyl vs. Fiberglass vs. Concrete

When you’re planning your new swimming pool, the initial price is often the first thing you look at. This is where vinyl liner pools really shine. Generally, a vinyl pool is the most affordable option to install, with average costs running from $25,000 to $65,000. In comparison, fiberglass pools have a higher starting price because the shell is manufactured off-site and delivered in one piece. Concrete pools are typically the most expensive upfront due to the labor-intensive custom construction process. If your main goal is to get a beautiful pool for the lowest initial investment, a vinyl liner pool is the clear winner.

Long-Term Maintenance Differences

The lower upfront cost of a vinyl pool is balanced by its specific maintenance needs. The vinyl liner is durable but softer than fiberglass or concrete, so you’ll want to regularly check for potential tears or punctures. In contrast, concrete pools require regular brushing to prevent algae growth on their porous surface and may need acid washing every few years. Fiberglass pools are known for being low-maintenance, as their smooth, non-porous surface is algae-resistant and gentle on your feet. While vinyl requires careful attention to the liner, its day-to-day chemical maintenance is usually less intensive than a concrete pool’s.

Lifespan and Replacement Needs

This is where the long-term budget comes into play. While the structure of a vinyl pool lasts for decades, the liner itself will eventually need to be replaced. A typical vinyl liner has a lifespan of about 5 to 9 years, though some premium liners can last longer with proper care. The average replacement cost is between $3,000 and $6,000. Fiberglass and concrete shells can last for 50 years or more, but they have their own major future expenses. Concrete pools need to be completely resurfaced every 10 to 15 years, a project that can be quite costly. Our restoration and sealing services can handle these jobs, but it’s a significant undertaking.

What Are the Yearly Costs of a Vinyl Pool?

Once your beautiful new pool is installed, the fun begins. But it’s also smart to plan for the ongoing expenses that come with ownership. While vinyl pools are celebrated for their lower upfront cost compared to other types, they do have yearly maintenance needs. Thinking about these costs ahead of time means you can budget accordingly and avoid any surprises down the road. This way, you can focus less on your wallet and more on enjoying your backyard retreat.

Keeping your pool in top shape involves a few key areas of spending. You’ll have the predictable, long-term cost of replacing the liner, the routine annual upkeep for chemicals and cleaning, and a small budget set aside for any unexpected equipment repairs. Let’s break down what you can expect to spend each year to maintain your vinyl pool, ensuring it stays sparkling and swim-ready for years to come. With the right plan, these costs are completely manageable parts of enjoying your investment.

Replacing the Liner

One of the most significant long-term expenses for a vinyl pool is replacing the liner. Think of it as a predictable refresh for your pool every several years. A quality vinyl liner typically lasts between 5 and 9 years, depending on factors like sun exposure, chemical balance, and usage. When it’s time for a replacement, it’s a great opportunity to update the look of your pool with a new color or pattern. Budgeting for this expense from the start ensures you’re prepared when the time comes, making the process smooth and stress-free. Proper care can help you get the most life out of your liner before it needs to be replaced by a professional swimming pool service.

Annual Upkeep Expenses

Beyond the liner, you’ll have regular maintenance costs to keep your pool water clean, safe, and balanced. These annual upkeep expenses cover everything from chemicals like chlorine and algaecide to cleaning supplies and the costs of opening and closing your pool for the season. For many homeowners in Long Island, this can range from a few hundred to over a thousand dollars per year, depending on the pool’s size and whether you handle the maintenance yourself or hire a service. Consistent upkeep not only keeps your pool looking great but also helps protect the liner and equipment from premature wear. It’s a necessary investment for a healthy and enjoyable swimming environment.

Equipment Maintenance and Repairs

Just like any other part of your home, your pool’s equipment will need occasional attention. Your pump, filter, and heater are the workhorses that keep your pool running smoothly, and over time, they may need repairs or replacement parts. It’s also possible to get a small tear or hole in the liner that needs patching. Setting aside a small budget for these potential repairs is a wise move. Addressing minor issues quickly can prevent them from turning into bigger, more expensive problems. Quality installation helps minimize these issues, but it’s always good to be prepared for the occasional fix to keep your pool equipment in perfect working order.

Where Can You Find a Quality Pool Kit?

Once you’ve decided on a vinyl liner pool, the next big step is finding a kit that delivers on quality without creating a ton of headaches. The right kit is the foundation of your entire project, so this isn’t the place to cut corners. You’ll find plenty of options online, from basic packages to all-inclusive systems. The key is to look beyond the price tag and consider what you’re truly getting. Are you just buying a pallet of parts, or are you investing in a system from a company that will stand by its product?

For homeowners here on Long Island, it’s also important to choose a system built to handle our specific climate and soil conditions. A quality kit should come with durable components, a strong warranty, and clear instructions. Better yet, it should come with access to expert support. While the idea of a DIY pool project is appealing to many, having a team of professionals to guide you—or handle the entire installation—can be the difference between a summer of fun and a season of stress. At Gappsi, we provide complete swimming pools and installation services, ensuring every detail is handled correctly from the start.

Why We Trust Our Gappsi Pool Systems

We’ve been building backyard retreats on Long Island since 1987, so we know exactly what it takes to construct a pool that lasts. That’s why we’ve developed our own Gappsi Pool Systems. We don’t just sell you a kit; we provide a complete, high-quality solution that we stand behind. Our systems feature durable, non-corrosive polymer walls that are perfect for Long Island’s coastal environment. We pair them with top-tier liners and energy-efficient equipment to give you a beautiful, low-maintenance pool. When you choose a Gappsi pool, you’re getting more than just materials—you’re getting decades of local expertise and a dedicated team committed to bringing your vision to life.

Other Brands on the Market

As you research your options, you’ll likely come across several national brands that sell kits directly to consumers. Companies like Pool Warehouse are known for offering a wide variety of shapes and sizes, including custom designs for a unique look. You might also see EnduraPool, which markets full inground kits that include nearly everything you need to get set up. For those focused on a hands-on project, Royal Swimming Pools is another popular name that specializes in do-it-yourself packages. These brands can be a good fit for experienced DIYers who are comfortable managing a large-scale construction project on their own.

What to Look for in a Brand

Regardless of which brand you choose, there are a few key things to look for. First, examine the wall materials. Most kits come with either polymer or steel walls. While both are strong, polymer walls are often a better choice because they’re lighter, easier to work with, and completely rust-proof—a huge plus in our salty air. Next, check the liner’s thickness and warranty. A high-quality liner will last longer and resist punctures better. Finally, consider the support offered. Does the company have a responsive customer service team? A great brand doesn’t just sell you a product; it provides the resources you need for a successful installation.

Are There Common Myths About Vinyl Pool Costs?

When you start planning for a new pool, it’s easy to get tangled up in conflicting information, especially when it comes to the costs. The price of an inground vinyl pool kit can seem straightforward, but it’s just one piece of a much larger puzzle. A few common myths can lead to some unwelcome surprises in your budget, turning an exciting project into a stressful one. Many homeowners assume the kit price is the final price, that a DIY installation will automatically cut the cost in half, or that a vinyl pool won’t add any real value to their home down the line.

Let’s clear the air on these points. Getting a handle on the full financial picture from the very beginning is the key to making a confident decision. It ensures your new backyard oasis is a source of joy, not a financial headache. We’ll walk through the so-called “hidden” costs that often get overlooked, the reality of DIY savings, and what a vinyl pool truly means for your home’s long-term value. By looking past the myths, you can plan your project with a clear, realistic budget and get excited about the summers ahead.

The “Hidden” Costs to Watch For

One of the biggest myths is that the price on the pool kit is your total cost. In reality, the kit is just the starting point. Several other expenses are essential for a proper installation. For instance, every vinyl pool needs a concrete footer poured around its walls to provide stability, which is an added material and labor cost. You also need to think about the future. A vinyl liner is durable, but it doesn’t last forever. You can expect to replace the liner every 7 to 15 years, which is a significant future expense to plan for. On top of that, you have annual maintenance costs for chemicals, cleaning, and opening/closing the pool, which keep it sparkling and safe.

The Truth About DIY Savings

The idea of building your own pool to save money is tempting, and it’s true that you can cut down on labor costs by going the DIY route. However, it’s crucial to be realistic about what this project involves. Installing an inground pool is a major construction job that requires specialized skills, heavy machinery, and a deep understanding of plumbing, electrical work, and local building codes. A small mistake during excavation or installation can lead to costly repairs that quickly erase any initial savings. When you work with professionals, you’re not just paying for labor; you’re investing in expertise, efficiency, and the peace of mind that comes with knowing the job is done right the first time.

Understanding Long-Term Value

You might hear that vinyl pools don’t add as much resale value to a home as other pool types. While they may have a different ROI compared to concrete pools, they absolutely add value in other important ways. A beautiful, well-maintained pool transforms your backyard into a private resort, creating a hub for family fun, relaxation, and entertaining. This lifestyle upgrade is a huge selling point for many potential buyers. A complete and inviting outdoor living space makes your home more desirable and can help it stand out on the market. The true value isn’t just in the numbers—it’s in the countless memories you’ll make.

How Can You Finance Your New Pool?

A new swimming pool is a significant investment in your home and lifestyle, but that doesn’t mean you have to pay for it all at once. Thinking through your budget and payment options ahead of time can make the entire process smoother. Fortunately, there are several ways to manage the cost, from dedicated financing programs to smart purchasing strategies that can save you money from the start. Let’s walk through some of the most common approaches to financing your dream pool.

Financing Programs and Payment Plans

Many homeowners are surprised to learn how accessible financing can be. Most reputable pool companies understand this is a major purchase and offer financing programs to help spread out the cost. These plans can turn a large, one-time expense into manageable monthly payments. When you meet with a contractor, always ask about their financing partners and what kinds of plans are available. Beyond company-specific options, you can also look into a home equity line of credit (HELOC) or a personal loan from your bank. Exploring these avenues can help you find a payment structure that fits comfortably within your family’s budget, making it easier to invest in one of Gappsi’s swimming pools without financial strain.

Finding Promotions and Discounts

Who doesn’t love a good deal? Keep an eye out for seasonal promotions or special discounts, especially during the off-season when pool companies are less busy. Some businesses offer discounts for paying with a check instead of a credit card to avoid processing fees, passing those savings on to you. The best way to stay in the loop is to ask your pool provider directly about any current offers. You can also check company websites for promotions on products and materials. Visiting the Gappsi Store online or in person is a great way to see what’s available and find high-quality materials that might be on sale, helping you reduce the overall project cost.

Smart Ways to Save on Your Purchase

You can make strategic choices during the planning phase that have a big impact on your final bill. Opting for a vinyl liner pool is already a great start, as they are typically more affordable than concrete or fiberglass. You can also save by choosing a smaller pool or a simpler shape, which reduces material and labor costs. Another effective strategy is to schedule your installation during the fall or early spring. Demand is lower during these times, and contractors may offer more competitive pricing. Simplifying the surrounding masonry work or phasing your landscaping project can also help you manage upfront expenses while still achieving a beautiful result.

Related Articles

Frequently Asked Questions

What’s the real total cost I should budget for a vinyl pool? The kit price is your starting line, not the finish line. To get a realistic budget, you need to account for the essential work that brings the pool to life. This includes the cost of excavation, professional installation labor, plumbing, and the electrical work needed to power the pump and any lighting. You should also plan for the patio or decking that will surround your pool, as this is a key part of the final look. A comprehensive quote from a local professional is the best way to understand the full investment for your specific property.

How long does a vinyl pool actually last? The structure of a vinyl pool, meaning the steel or polymer wall panels, is incredibly durable and built to last for decades. The component with a shorter lifespan is the vinyl liner itself. With proper care and balanced water chemistry, you can expect a liner to last between 5 and 9 years. Think of replacing it as a predictable maintenance task that also gives you a great opportunity to refresh your pool’s appearance with a new color or pattern.

Is installing the pool kit myself a realistic way to save money? While you can certainly save on labor costs with a DIY installation, it’s a major construction project that requires a high level of skill. You’ll be managing excavation, assembling the structure with precision, and handling crucial plumbing connections. A small error can lead to costly repairs that could easily wipe out your initial savings. For most homeowners, hiring an experienced team provides peace of mind, ensures the job is done right, and protects your investment.

Can I get a custom-shaped pool with a vinyl kit? Absolutely! This is one of the biggest advantages of choosing a vinyl liner pool. Unlike fiberglass pools that are made from pre-set molds, vinyl offers incredible design flexibility. You can go with a classic rectangle, a curvy lagoon shape, or a completely unique freeform design that fits your backyard’s layout. You also have full control over the depth, so you can create a pool with a deep end for diving or a large shallow area for relaxing.

What’s the biggest thing people forget to budget for? The most commonly overlooked expense is the “poolscape,” which is everything that surrounds the water. This includes the patio material, the safety fencing required by local codes, and the landscaping that makes the space feel complete and beautiful. These finishing touches are what transform a simple pool into a true backyard oasis. It’s always a good idea to plan for these elements from the very beginning so your budget reflects the full scope of the project.

Share this page:

Negative Edge Gunite Pool Design & Installation in Riverhead, Long Island | Gappsi

View Gappsi’s YouTube Channel to view Negative Edge Gunite Pool Design & Installation in Riverhead, Long Island

Luxury Meets the Waterfront: A Vision Realized

Set along the breathtaking shoreline of the Long Island Sound.  This recent Gappsi project on the North Shore of Riverhead, NY, showcases the perfect blend of artistry, engineering, and luxury design. It is a custom-built negative-edge Gunite swimming pool.  The built-in spa is designed to complement the property’s spectacular waterfront views and create an outdoor oasis of serenity and sophistication.

From the elegant Cumaro wood deck to the shimmering glass tile finishes, every element was meticulously chosen and expertly crafted. The result is a masterpiece that elevates the property’s natural beauty while providing an exceptional space for relaxation and entertainment.

Designing for the Horizon: The Power of the Negative Edge

When your backyard overlooks the Long Island Sound, the view becomes your most valuable design element. Gappsi’s vision for this project was to blend the pool’s surface with the water beyond seamlessly.  Creating a signature effect through a negative-edge (infinity-edge) design.

negative-edge-pool-long-island6The pool’s location along the property’s edge allows the water to flow into the Sound visually.  Creating a mesmerizing illusion of endless space. This architectural approach transforms a typical backyard into a resort-style destination.  It emphasizes tranquility and the natural connection between land, water, and sky.

Crafting the Perfect Deck: Cumaro Wood and Cable Rail Elegance

The journey to the pool begins on a Cumaro wood deck, custom-built by Gappsi’s skilled craftsmen. Cumaro, a rich Brazilian hardwood, is prized for its natural durability, weather resistance, and luxurious appearance. Its warm, earthy tones complement the surrounding coastal landscape, adding both elegance and endurance.

Encircling the deck is a steel cable railing system.  A sleek, modern choice that ensures uninterrupted views of Long Island Sound. This see-through railing design enhances the space’s openness. It allows homeowners and guests to take in the full beauty of the waterfront without obstruction.

Custom-built stairs lead gracefully down to the pool area.  Maintaining a fluid transition between the upper deck and lower patio is an example of Gappsi’s commitment to both aesthetic and functional harmony.

Luxury Meets the Waterfront: A Vision RealizedThe Pool and Spa: A Fusion of Beauty and Innovation

At the heart of the design lies the Gunite swimming pools built with precision and advanced engineering. The negative edge runs along the property’s waterfront side.  Creating that iconic infinity look where the pool and the Sound merge into one breathtaking scene.

In the center of the pool sits a raised spa, overflowing on three sides into the main body of water. This feature not only enhances visual appeal but also introduces soothing movement and sound, adding to the tranquil ambiance of the outdoor space.

Both the pool and spa interiors were finished with Tao Blue Diamond Brite, a high-end quartz aggregate that delivers a radiant blue hue and superior durability. The finish reflects sunlight beautifully, mirroring the shimmering tones of the Sound and sky for a visually captivating effect.

The Pool and Spa: A Fusion of Beauty and InnovationFiorito Travertine & Italian Porcelain: A Sophisticated Surface

Surrounding the pool, Gappsi installed a custom patio featuring Fiorito travertine and Italian porcelain pavers, two materials chosen for their elegance, performance, and timeless style.

The travertine coping and pavers offer a natural texture and subtle color variation that pair beautifully with the Cumaro deck and glass tile details. Travertine’s ability to stay cool underfoot makes it an ideal choice for pool areas, while its luxurious aesthetic adds sophistication to the design.

For the main patio surface, Italian porcelain pavers were installed using an open-drain pedestal system, a grout-free, raised installation technique that allows water to drain naturally between tiles. This innovative system ensures superior drainage and minimal maintenance while maintaining a clean, modern look.

Glass Tile Accents: The Jewel of the Design

The use of glass tile veneer throughout this project brings a touch of artistry and brilliance to the space.

The spa walls above the waterline were covered in vibrant glass tiles, which glisten in sunlight.  It enhances the spa’s visual prominence. The same tiles were used as markers on steps and benches inside the pool, blending safety with beauty.

The entire negative edge wall was also veneered with glass tiles, turning the cascading water into a dynamic, sparkling display. Below, a custom-built trough catches and recirculates the overflow water and is finished with matching Fiorito travertine for a cohesive aesthetic. Two symmetrical steps on either side of the pool provide access and balance to the design, also veneered for a seamless finish.

negative edge wall was also veneered with glass tilesEngineering Precision: The Gappsi Standard

Building a negative-edge Gunite pool requires expert-level precision in both structure and hydraulics. Every detail from the slope of the edge to the alignment of the tile was executed with Gappsi’s renowned attention to quality and detail.

This project stands as an example of Gappsi’s commitment to excellence, combining advanced pool engineering with artistic design. The result is a flawless flow of water, sound, and light that complements the property’s natural beauty.

Gappsi: Where Vision Becomes Reality

For over 30 years, Gappsi has been transforming Long Island properties with award-winning designs and exceptional craftsmanship. This Riverhead project is a testament to the company’s dedication to building outdoor environments that reflect elegance, functionality, and the client’s personal lifestyle.

From concept to completion, Gappsi handles every phase of construction design, masonry, pool construction, landscaping, and more, ensuring cohesive quality throughout the project.

With this Long Island Sound waterfront pool, Gappsi has once again demonstrated why they are the premier custom pool builder and outdoor living specialist on Long Island.

negative-edge Gunite swimming pool in RiverheadExperience the Art of Outdoor Living

This negative-edge Gunite swimming pool in Riverhead, NY, represents the pinnacle of coastal luxury. The combination of Cumaro wood, Fiorito travertine, glass tile, and precision engineering has created an outdoor space that feels both timeless and contemporary. A personal sanctuary designed to inspire relaxation and admiration.

Suppose you’re dreaming of transforming your property with a custom infinity pool, travertine patio, or complete backyard renovation. In that case, the Gappsi team is ready to bring your vision to life.

Contact Gappsi Today
📍 Serving Long Island, Suffolk County, Nassau County, and the North Shore
🌐 www.gappsi.com
📞 Call to schedule a free consultation with our design experts.

custom infinity pool, travertine patio, or complete backyard renovation,

SCHEDULE A MEETING TODAY WITH GAPPSI

Share this page: