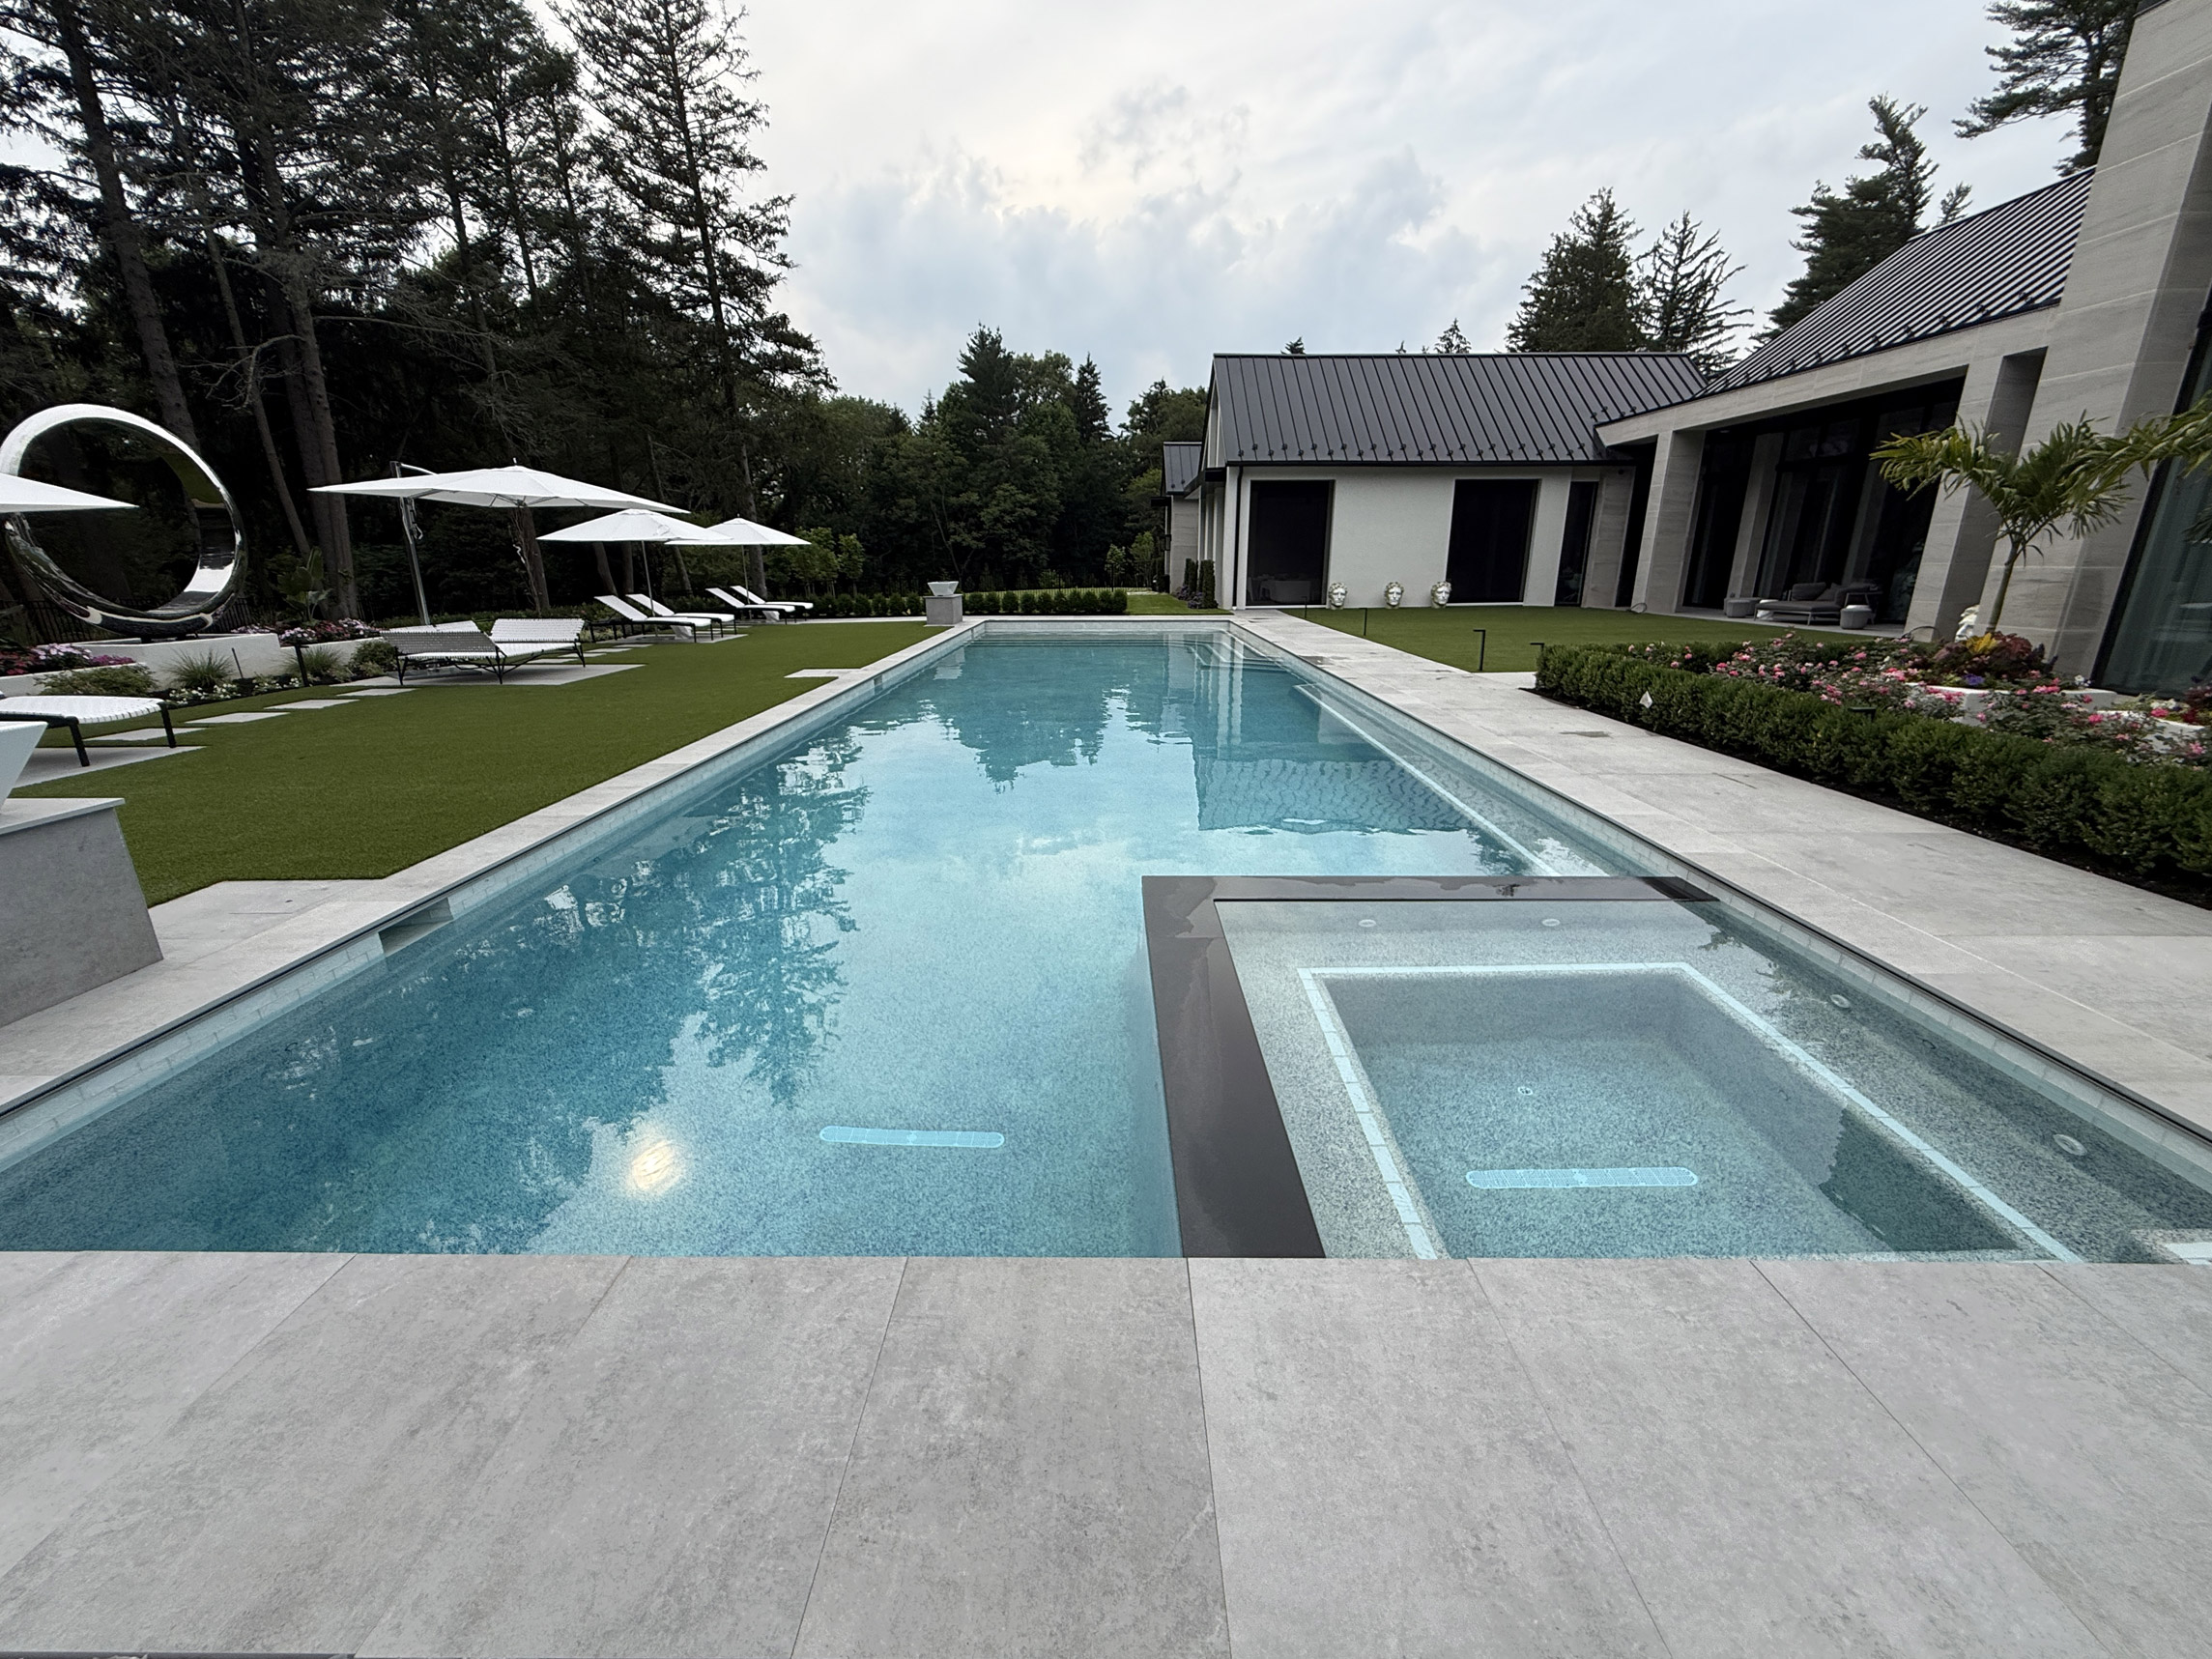
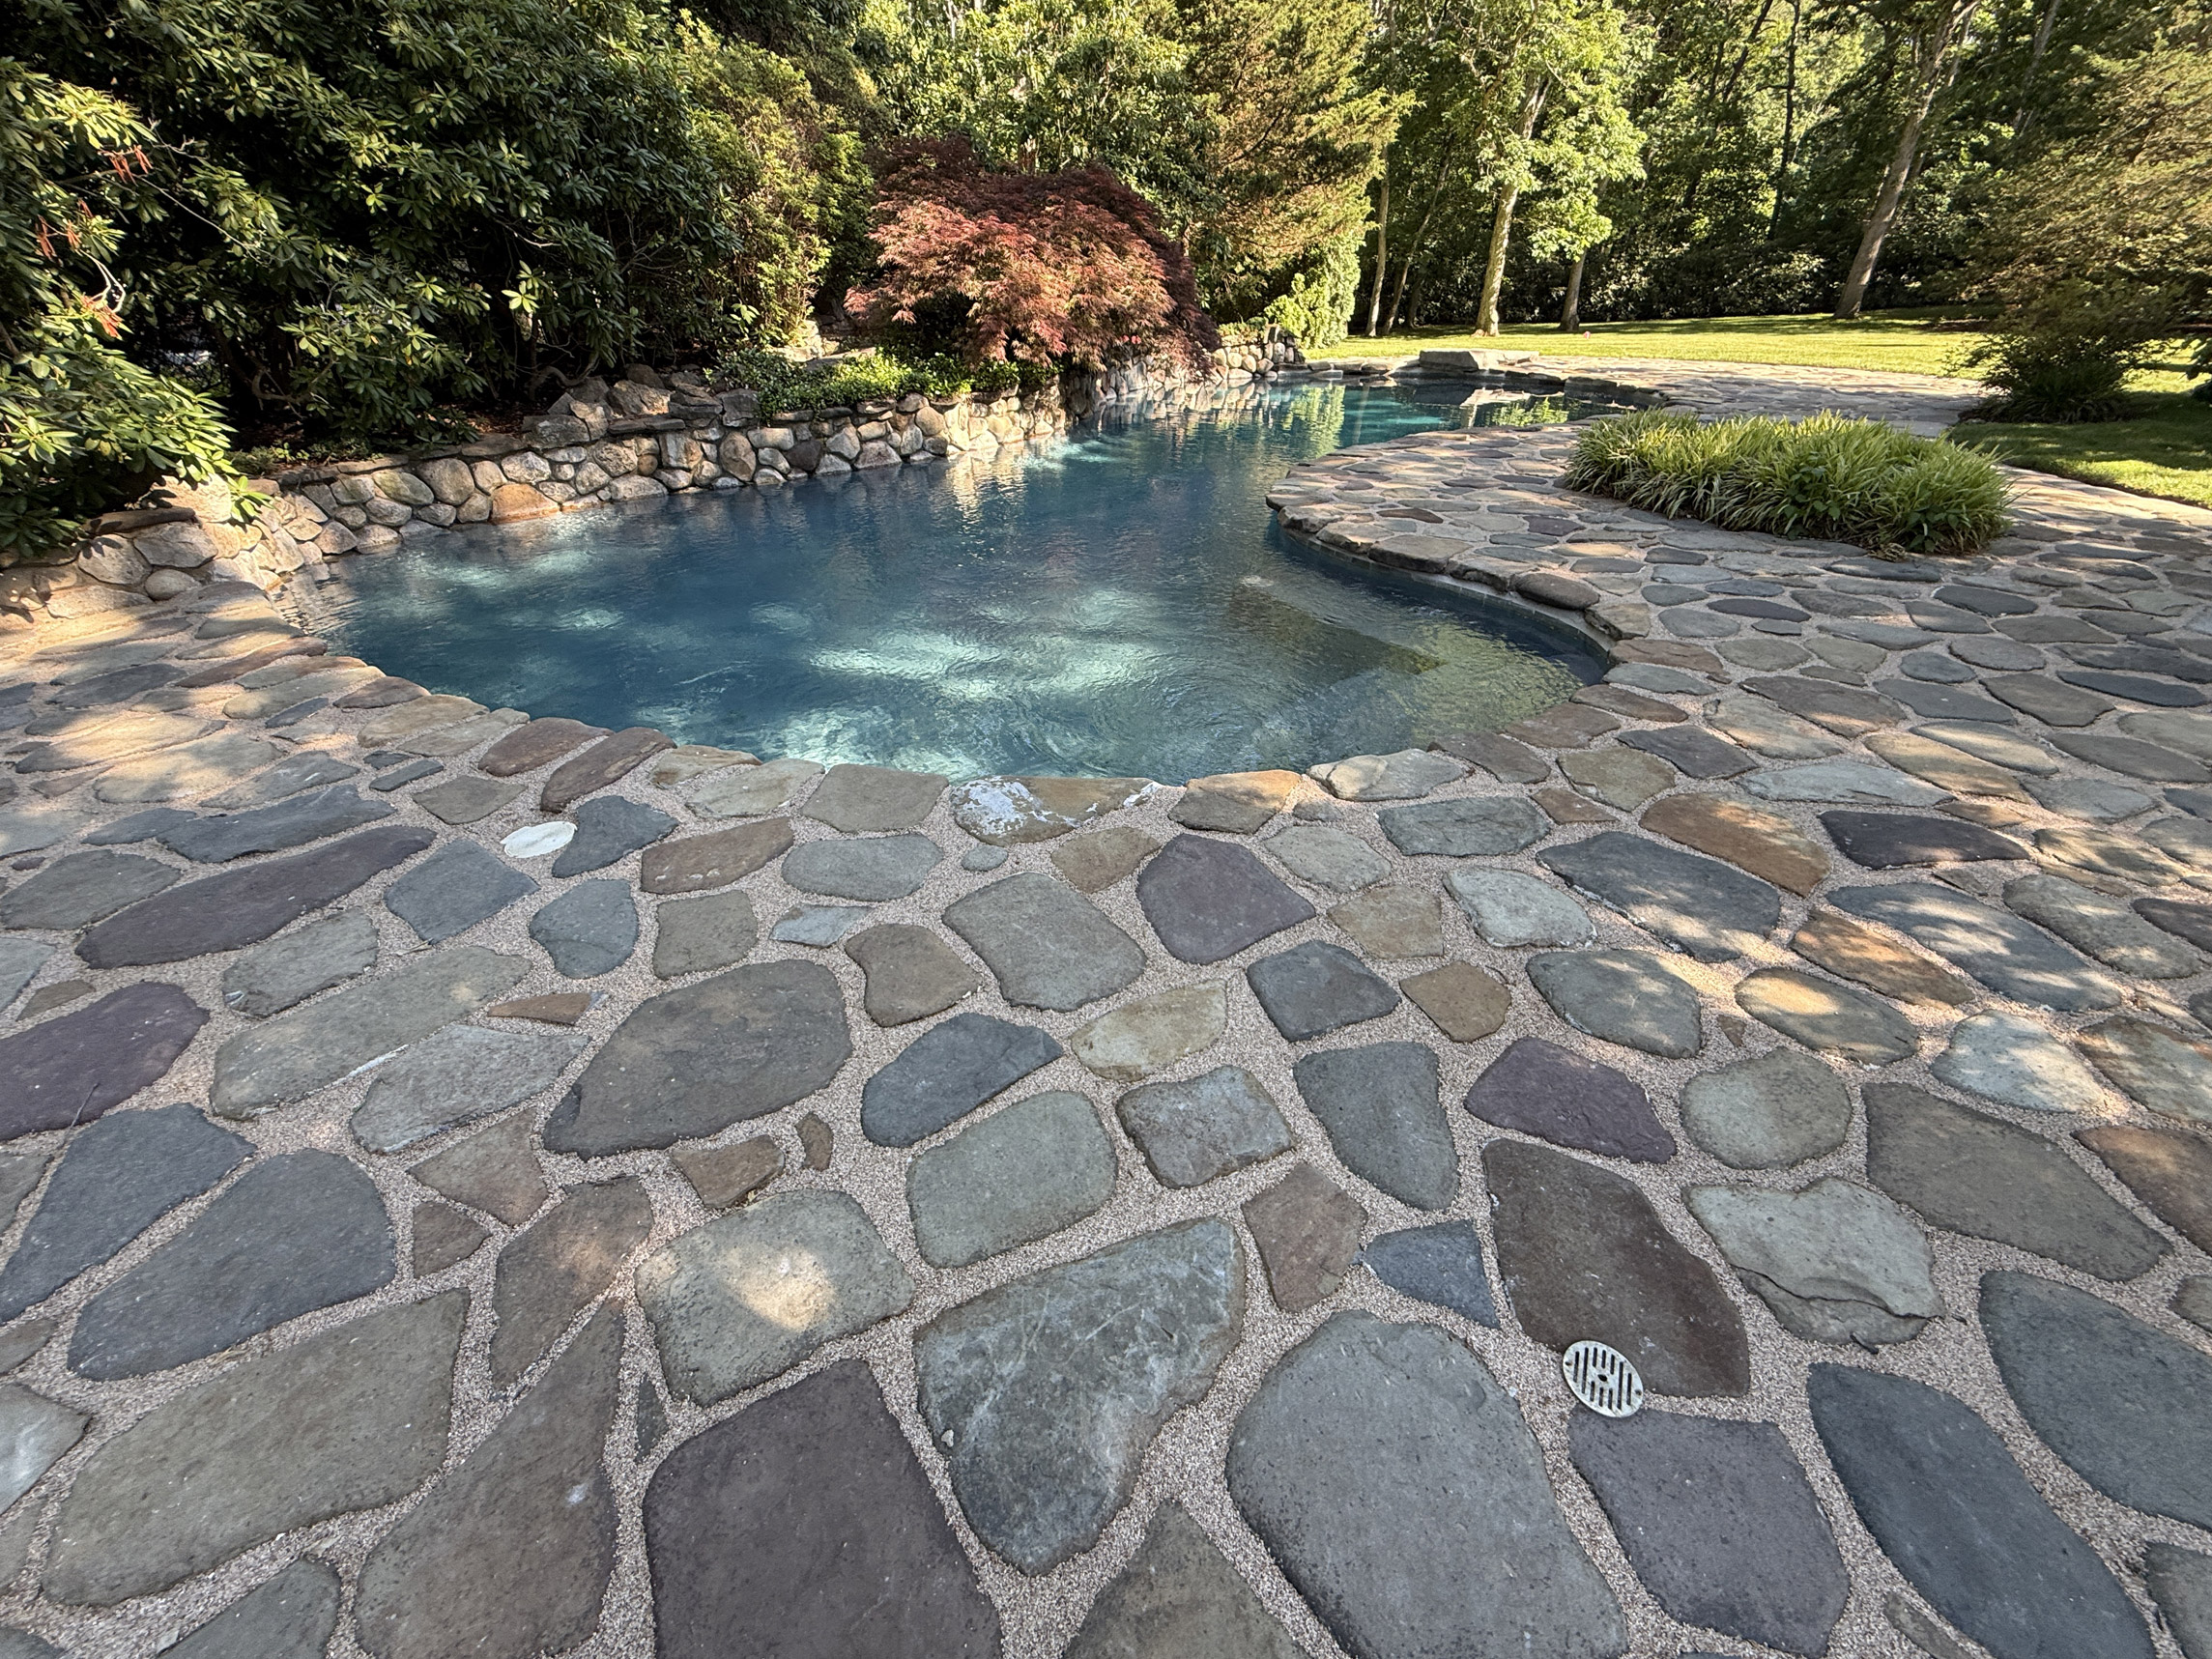
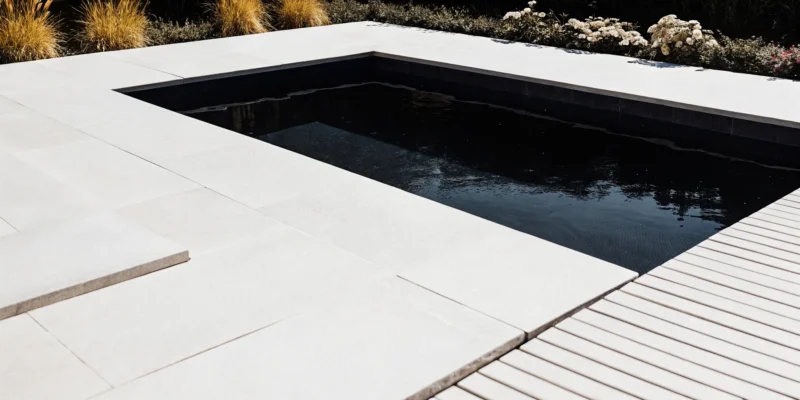
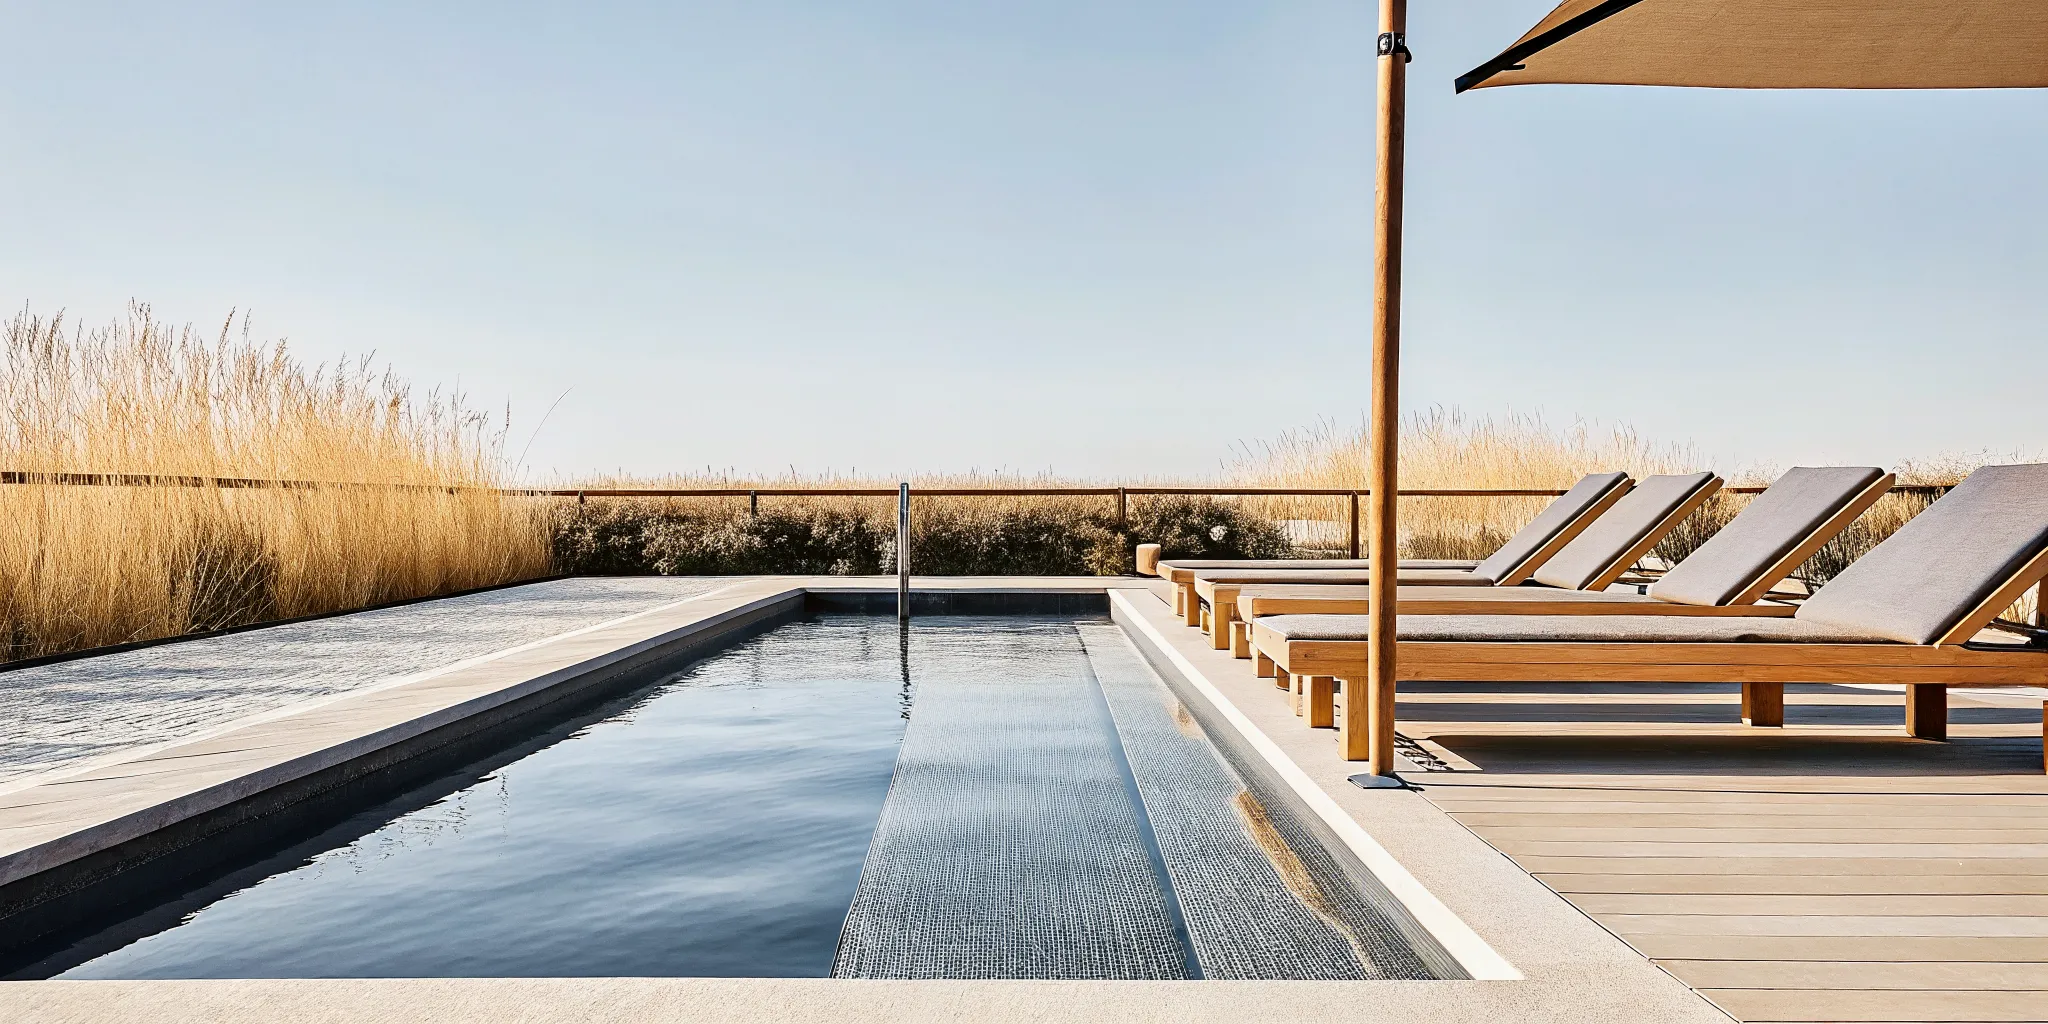
Gunite swimming pool with a smooth marble dust finish

Marble Dust Pool Finish Guide for Gunite Pools

Many Long Island homeowners struggle with rough pool plaster that scrapes skin and traps green algae growth. A new marble dust pool finish solves this problem by providing a fresh and smooth surface. This blend is both cost effective and beautiful for any gunite pool project.

Ready to upgrade your Long Island pool? Visit our Smithtown showroom to compare finishes and plan your project.

A marble dust pool finish is a smooth interior coating made from white cement and crushed marble. Also called marcite or pool plaster, it protects a gunite shell and gives the water a bright, classic appearance. Careful installation and balanced water help preserve its feel and appearance.

What is a marble dust pool finish?

A marble dust pool finish is a smooth plaster coating made from white cement and crushed marble. Also called marcite, it seals and protects a gunite shell while giving the water a bright, clean look. It is a classic option for Long Island pool building work.

Parts of pool plaster

The main parts of this finish are white cement and crushed marble. When you mix these with water, they form a thick paste. Pro teams spread this paste over the concrete shell of the pool. The marble bits are small, which helps the surface stay smooth.

This smooth feel is nice for swimmers and makes it easy to keep the pool clean. You can see this mix at our Smithtown showroom to feel how it looks and feels.

While the standard color is bright white, you can change the tint of the mix. These tints can turn the water a light blue or a soft gray. This can help the pool match your deck or yard. Many people pick a light tint to give their water a deep glow, and a pool marble dusting pro can help you pick the best color for your home.

Visual style for gunite pools

The look of a marble dust pool finish is hard to beat. It reflects the sun to make the water look crisp and clear. This finish is a top choice for a gunite pool update because of its old-school style. It gives an even surface that looks great with any pool shape without feeling as rough as some pebble or stone finishes.

The bright white color also makes it easy to see the bottom of the pool. This is a good safety feature for families with young kids. It creates a high contrast with the pool lights at night, giving your yard a grand look. On Long Island, we use this finish for both luxury and simple pools.

Its bright appearance works with many pool designs and surrounding materials.

How it works with concrete

This type of finish is a great fit for gunite pools because it sticks well to the shell. The plaster acts as a final layer that keeps the water in the pool. It is thick enough to hide small bumps in the shell but thin enough to stay strong. This bond is vital for the health of your pool over time.

A strong bond between the plaster and the concrete prevents leaks. This saves you money on water bills and repairs in the long run.

Since the mix is porous, it does need some care. You must keep your pool water in a healthy range to protect the surface. If you let the water get out of balance, the finish could get rough or stained. Good care will keep the marble dust looking new and feeling smooth for a long time.

It is one of the most cost-effective ways to finish a gunite pool. Many owners find that the classic look and feel are worth the small amount of work needed to keep the water right.

Marble dust vs. other gunite pool finishes

A marble dust pool finish offers a smooth, classic surface, while quartz and exposed stone generally offer greater wear resistance and more texture. Marble dust can stay bright white or accept a tint. The right choice for a Long Island pool building project depends on preferred feel, appearance, care, and budget.

Smooth feel of marble dust

Classic plaster feels smooth, reflects light, and is often a cost-friendly choice. Balanced water helps prevent stains and rough spots. Research also shows that marble dust helps strength in cement mixes.

Strength of quartz and stone

Some owners want a finish that lasts longer and resists wear. Quartz finishes mix small bits of quartz with cement. This makes the surface harder than plain marble dust. It stands up better to pool chemicals and heavy use.

Many choose this for a gunite pool update when they want more color choices. The quartz bits can be dyed to give the water a deep blue or green hue. It is a smart way to get a custom look that stays strong for a long time.

Exposed stone is another tough choice. It uses small pebbles or glass beads to create a bumpy texture. This look hides dirt well and adds a natural feel to your yard. It is very strong and resists stains better than smooth plaster.

But it can be rougher on the skin. You should check a sample at a showroom to see if you like the feel. This type of finish is great for pools with a natural or rustic style and works well with rock features.

How to pick the best finish

Choosing the best finish depends on your style and budget. Think about how the pool will look with your house and deck. A smooth white finish looks great with modern homes. A stone finish might look better with a wood deck or a garden.

You also need to think about care. If you have a busy life, a harder surface might save you time on repairs. But if you want the softest feel, marble is still the king.

Cost is also a factor in your choice. Marble dust is usually the least costly to install. Quartz and stone cost more because they take more work and better mixes. But they may last longer, which can save money over time.

Talk to a pro to find the best match for your home and lifestyle. They can show you how each choice looks in the sun and under the water.

Material Strength Feel Look
Marble Dust Good Very Smooth Bright White
Quartz Better Mostly Smooth Deep Colors
Exposed Stone Best Textured Natural Stone
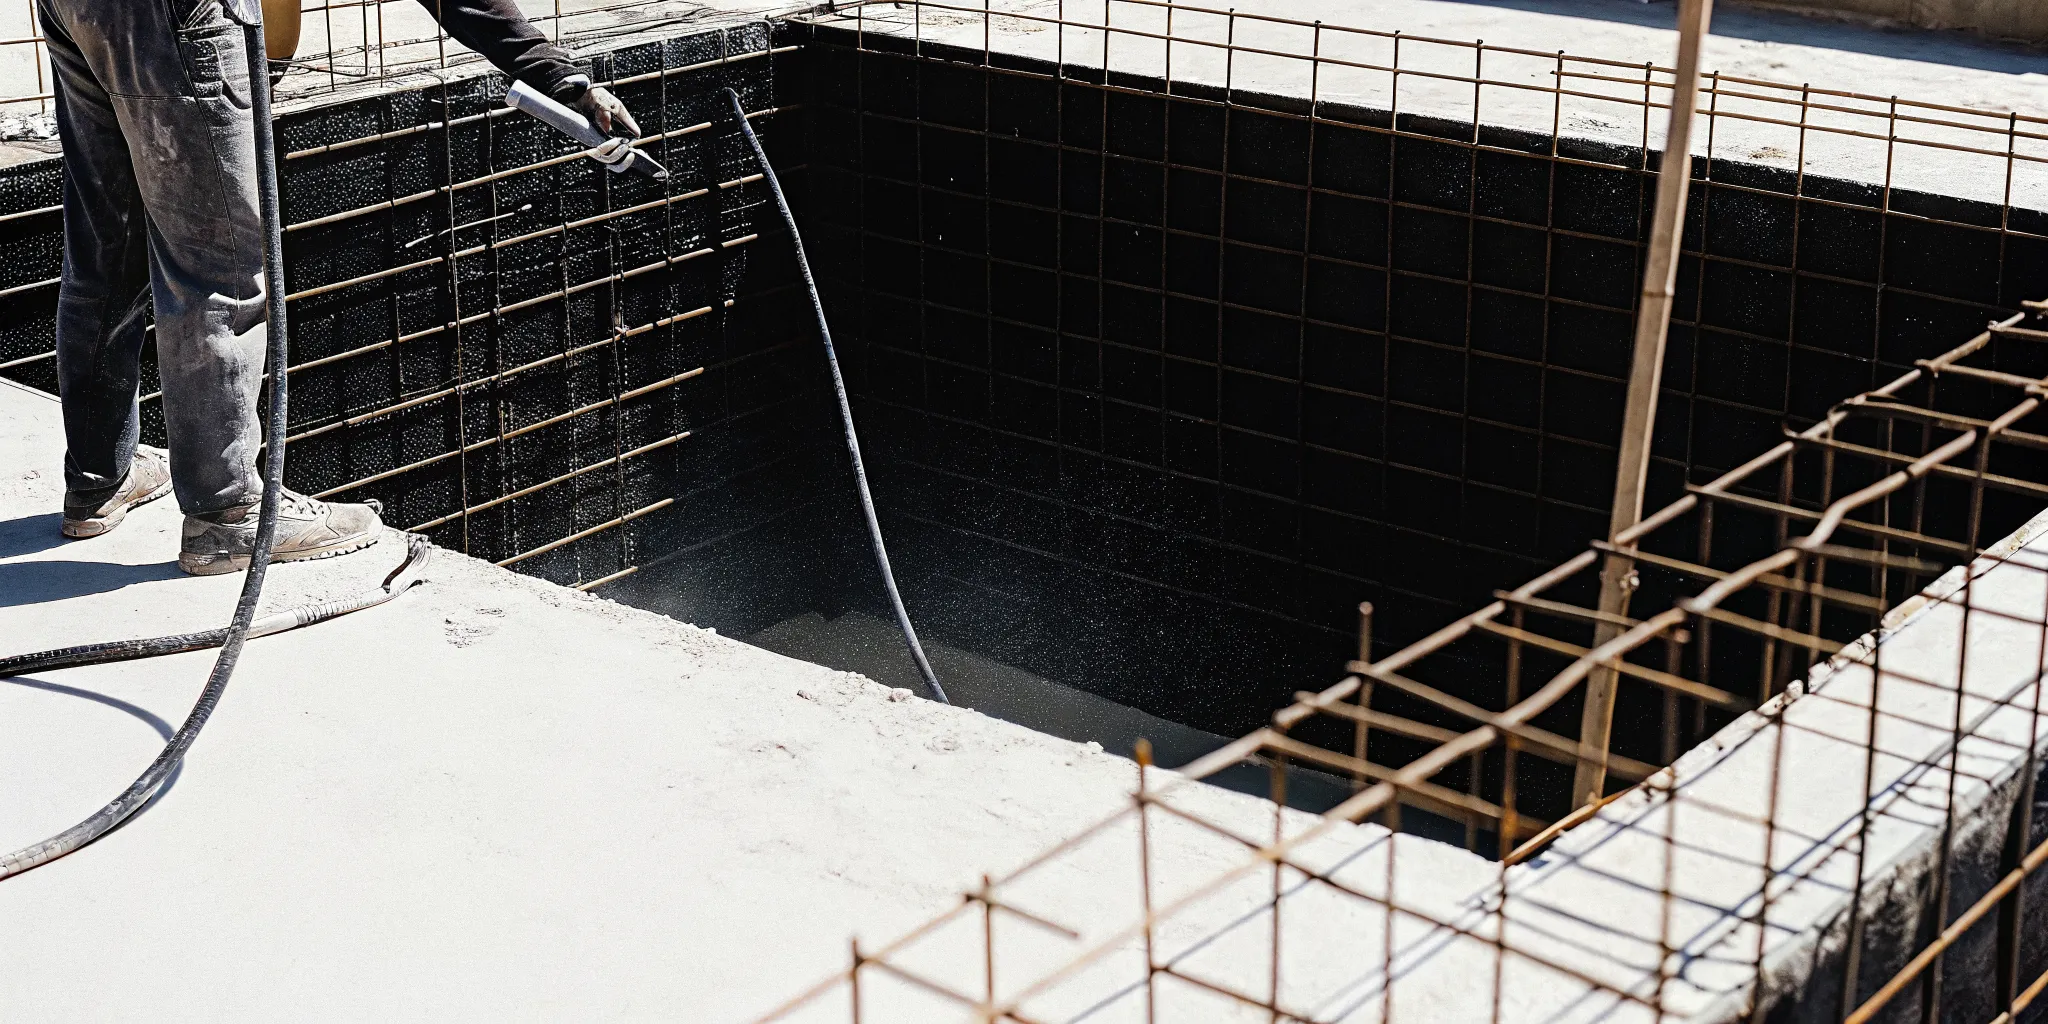
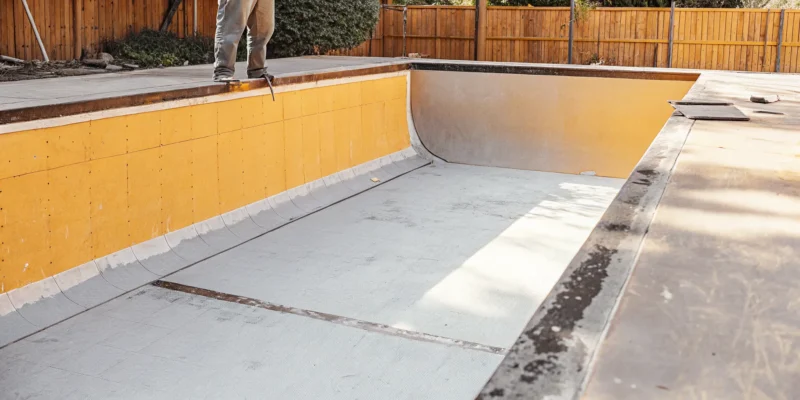
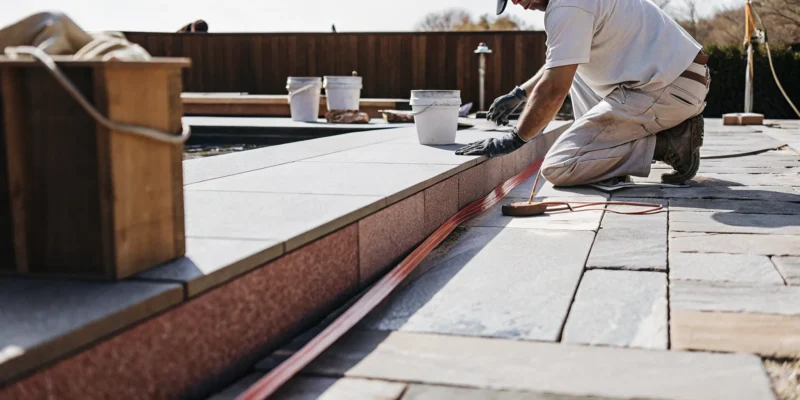
Professional applying a smooth marble dust pool finish to a gunite pool
Careful hand application helps create a smooth, even marble dust surface.

How is marble dust applied to a gunite pool?

A skilled crew applies marble dust after inspecting, repairing, and cleaning the gunite shell. The team adds a bond coat, mixes white cement with fine marble, and trowels the plaster into a smooth layer. Prompt filling and careful startup water care then help the new surface cure.

Surface prep and check

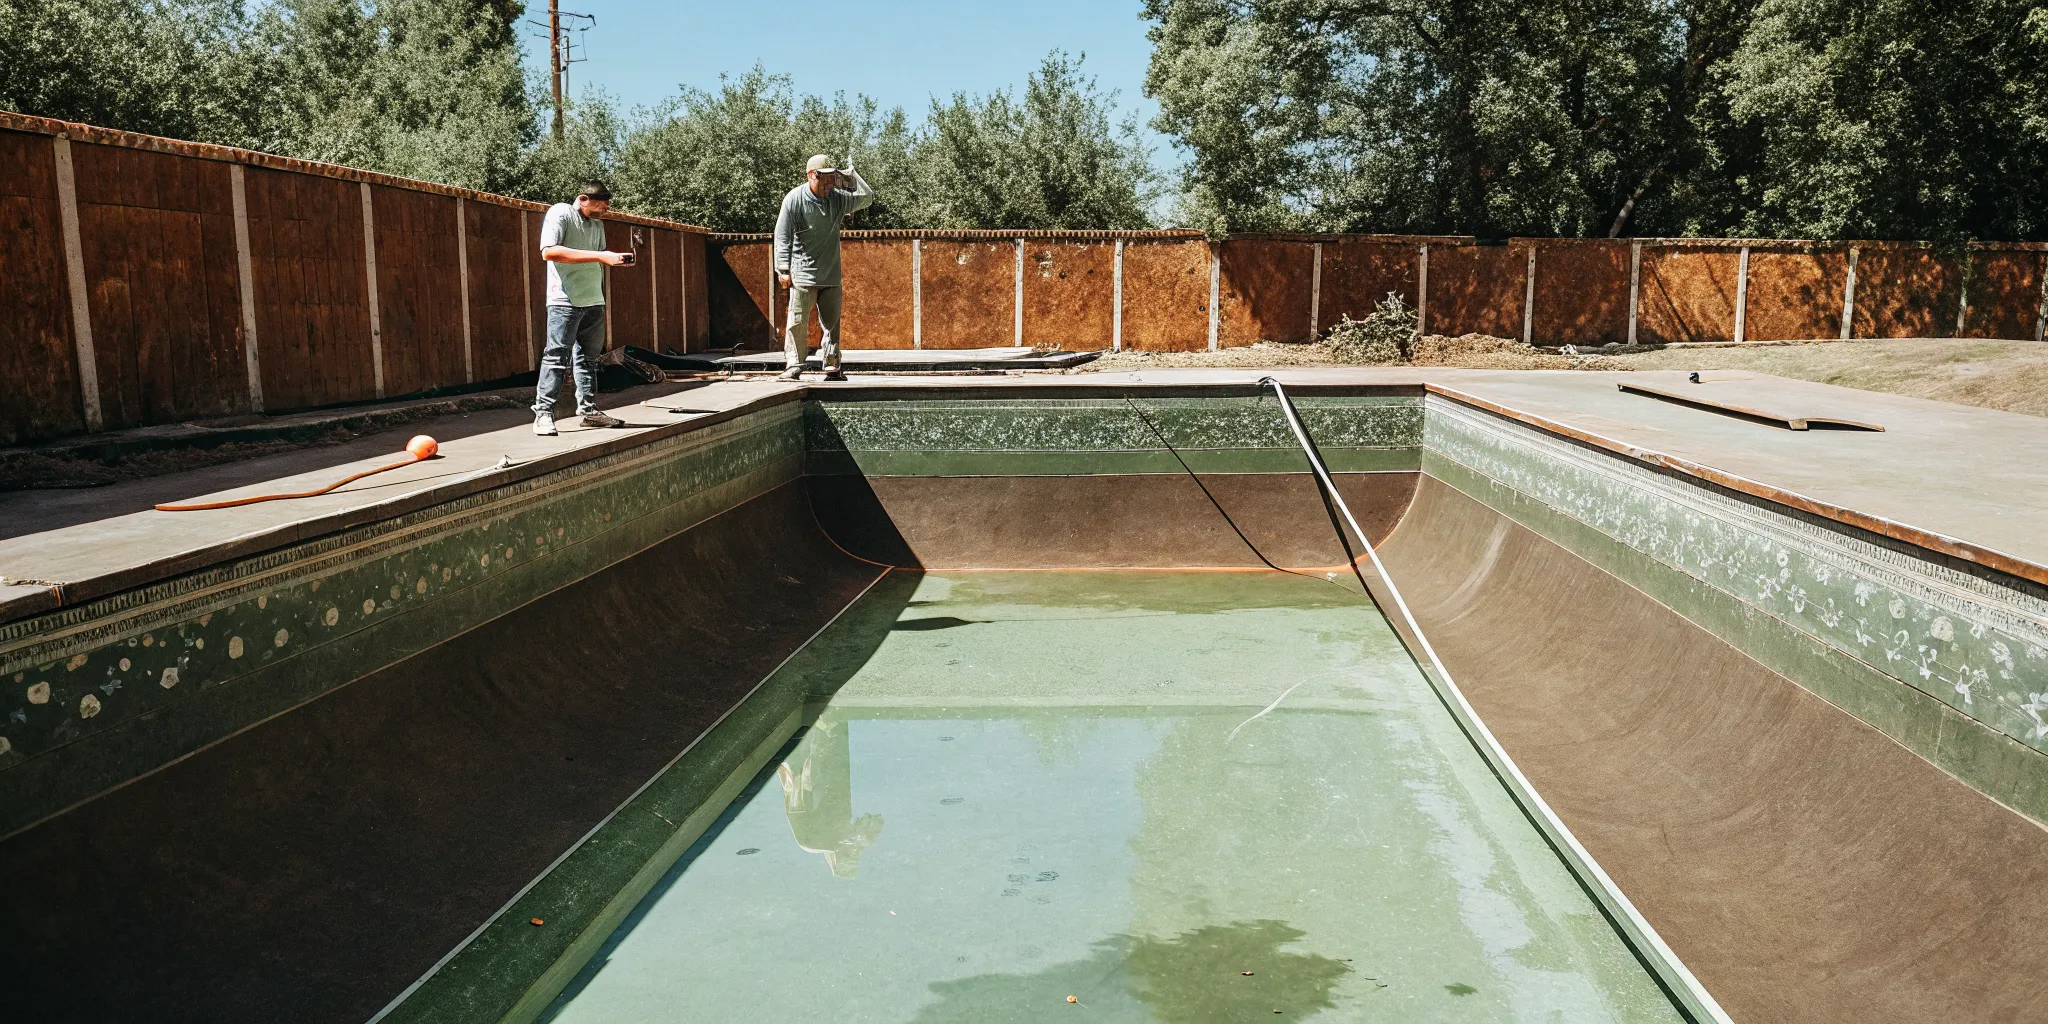
The work begins with a full check of the pool shell. First, the crew must drain the pool and let it dry. They look for any loose bits or old plaster that might fall off. If the gunite has cracks, they must fix them with a strong cement mix.

This creates a flat and firm base for the new marble dust pool finish. A clean surface is the only way to get a bond that lasts. If the shell is dirty, the new plaster might peel or flake away in just a few years.

After the shell is clean, the team apply a bond coat. This is a special type of glue made for pools. It acts as a bridge between the old gunite and the new plaster layer. Without this coat, the two layers might not stick well.

The team must be sure to cover every inch of the pool floor and walls. This step is what makes a pro job stand out from a quick fix. It makes sure that the final result stays smooth and looks great under the sun.

Mixing and applying the finish

The crew mixes the plaster right at your home. They use large bins to blend the white cement and crushed marble. They must get the ratio just right so the mix is easy to spread. If the mix is too dry, it will be hard to smooth out.

If it is too wet, it might run down the walls. This is why a pro crew is so vital. They know how to adjust the mix based on the heat and sun of the day. They can also add tints to the mix if you want a cool gray or deep black pool look.

Once the mix is ready, the team works fast. They use hand trowels to press the plaster onto the walls. It takes a lot of arm strength to get an even coat across the whole pool. The crew starts at the deep end and moves up the walls.

They must work in the shade or use a tent to keep the sun off the wet plaster. If it dries too fast, it might crack. This is a tough part of the job that needs many hands on deck at once.

  1. Draining and scrubbing: The team pumps out all the pool water and uses tools to scrub away old scale and dirt from the shell.
  2. Gunite repairs: Any holes or cracks in the concrete shell are filled with a patch mix to make sure the base is flat.
  3. The bond coat: A sticky layer is rolled onto the shell to help the new marble dust pool finish grip the old concrete.
  4. The first pass: The crew uses trowels to spread a thin layer of plaster over the walls and floor of the pool.
  5. Final smoothing: As the plaster starts to set, the team rubs it down many times to get a glass-smooth feel.
  6. Filling with water: Clean water must go back into the pool as soon as the floor is done to help the plaster cure.
  7. Startup care: You must brush the pool walls and check the water mix every day for at least two weeks.

Startup care and water balance

Filling the pool is not the last step. The first month is a vital time for a new gunite swimming pool renovation. You must keep the water mix in a safe range. High or low pH can etch the new surface and make it feel rough.

The CDC says that proper water balance is key for the health of both the pool and the people who use it. Brushing the walls twice a day helps remove any loose dust from the plaster.

At Gappsi, we take pride in our work. We offer a full range of outdoor services beyond just pools. Our team can also build Sports Game Courts and patios to match your new pool. If you want to see our work, visit our Smithtown showroom.

We can show you samples of the different colors and styles we offer. Our goal is to help you create a backyard space that you love to use every day.

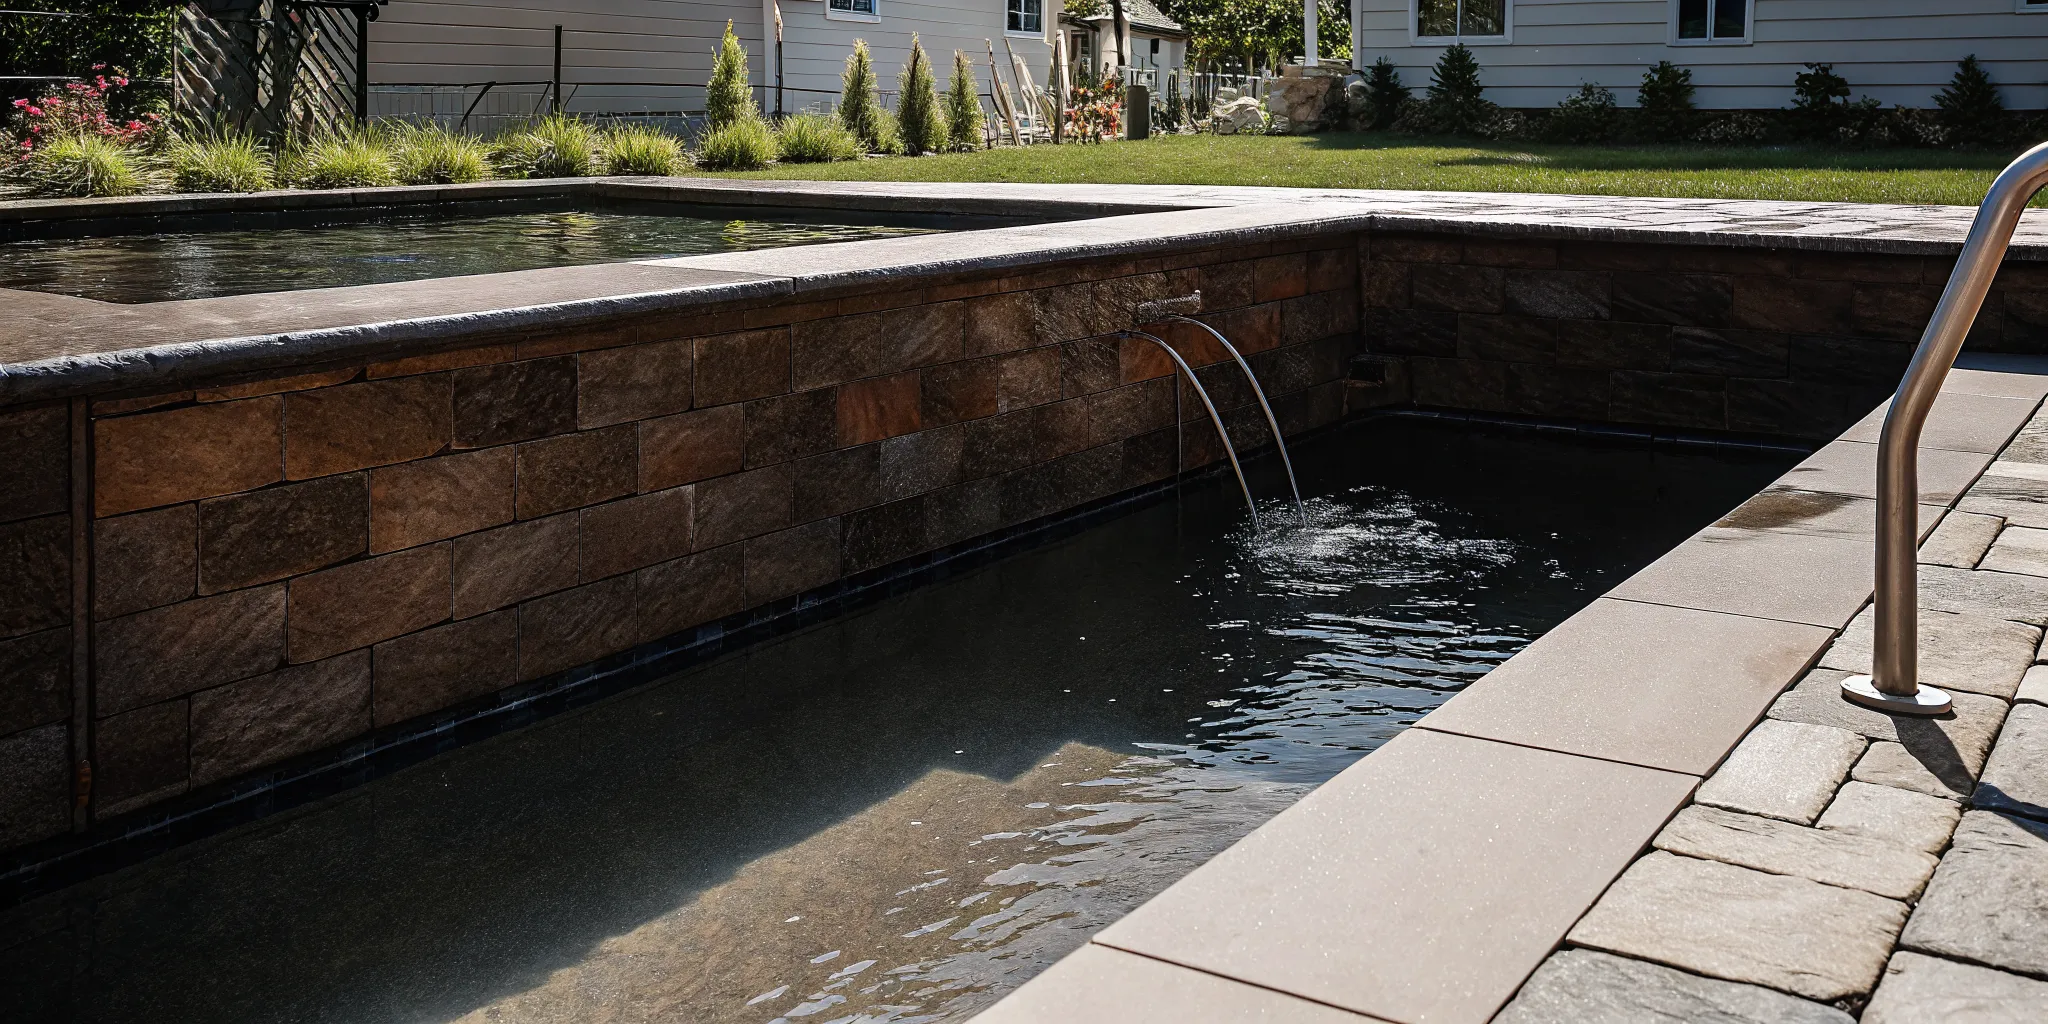
Finished Long Island gunite pool with a white marble dust pool finish
A finished marble dust surface gives clear water a bright, classic appearance.

Comparing pool finish options for your property? Talk with Gappsi about marble dusting before choosing a color and finish.

How long does a marble dust pool finish last?

A marble dust pool finish can remain attractive for many years, but there is no single service-life guarantee. Longevity depends on shell preparation, installation quality, water chemistry, climate, and use. Careful startup and routine maintenance help preserve the smooth plaster surface.

You can learn more about how to build a pool with us. We help people on Long Island get the best results for their homes.

Factors that impact service life

Preparation, climate, and pool use all affect service life. The crew should repair cracks, clean the shell, and apply the mix evenly. Proper filling and startup care help a marble dust pool finish set correctly.

Signs your pool needs a new finish

You should look for signs that your pool needs a new finish. Stains are a common sign that the surface is wearing out. Some stains are just on the top, but others go deep into the plaster.

You might also see rough spots on the floor or walls. This can happen when the water balance is off. The water can eat away at the finish. This is called etching and it makes the walls feel like grit.

Scaling is another sign to watch for in your pool. This is when hard white spots form on the surface. It can make the finish feel like sand or even sharp in some areas.

If you see cracks or if the plaster starts to fall off in chunks, you should call a pro. You can see work we have done in our showrooms to see how a fresh finish should look. A smooth surface is safer for your feet and looks much better.

Why water balance matters

The best way to make your marble dust pool finish last is to watch the water. You must keep the pH and other levels in the right range. If the water is too harsh, it will be bad for the white cement.

This will lead to a rough surface that can trap dirt and algae. It is also hard on your skin and eyes when you swim. Good water balance keeps the surface smooth and clear.

You should test your pool water often to keep it safe. Keeping the water in check protects the finish and makes it feel better for those who swim. Many groups give tips on how to keep your pool safe and clean.

As one guide, the CDC has rules on pool health. Using these rules will help you get the most out of your pool finish and keep it bright for a long time.

How to care for a marble dust pool finish

Protect a new marble dust pool finish by following the installer’s startup plan, brushing away plaster dust, circulating and filtering the water, and monitoring chemistry. After startup, regular testing, cleaning, and prompt stain removal help keep the surface smooth and bright.

The first few weeks of startup

Wait for three weeks before you use an auto pool cleaner. The wheels can leave tracks on the soft finish. It is also best to wait a few weeks before you use a pool heater. High heat can change how the finish cures.

Good startup care helps the surface stay smooth and bright for many years. Gappsi Group has seen many pools in Nassau and Suffolk Counties stay in great shape with these steps. Our team in Smithtown knows that these early days set the stage for how long your pool will last.

Keep the water chemistry balanced

Keeping your water chemistry balanced is the best way to protect your marble dust pool finish. If the water is not balanced, it can damage the smooth inside. Check your pool water at least once a week. You want to look at the pH level first.

If the pH stays too high for a long time, calcium can build up. This creates a white crust on the walls. If the pH is too low, the water becomes acid. Acid can etch the marble dust and make the walls feel rough.

Total alkalinity and calcium hardness are also key. Alkalinity acts as a shield for the pH level. It keeps the pH from jumping up and down. Calcium hardness is a measure of how much lime is in the water.

If the level is too low, the water will try to pull calcium out of your pool walls. This leads to pits and small holes in the finish. If you see white flakes in the water, your calcium may be too high. Keeping these levels in a safe range will help your pool finish last for a long time.

Handling stains and yearly changes

Stains can form on a marble dust pool finish from leaves, dirt, or metal bits. If you see a dark spot, try to brush it right away. Many stains are just on the surface and will come off with a stiff brush. For tough marks, you can use a stain remover made for pool plaster.

Do not use harsh tools like wire brushes. They can tear the finish. If you have trees near your pool, skim the water often. Natural things like acorns can leave brown marks if they sit on the bottom for too long.

On Long Island, we must deal with cold winters and big shifts in the weather. When you close your pool for the year, make sure the water is clean. Add winter chemicals to keep the water clear while the pool is off. A tight cover is a good tool to keep out dirt and trash.

If you use a mesh cover, check the water level and chemistry in the late winter. Snow and rain can change the balance of the water. Taking care of your pool in the cold months prevents a big mess in the spring. If you need help with a new pool build or a fix, we are here for you.

Is marble dust right for your Long Island pool?

Marble dust may be right for a Long Island gunite pool when a smooth feel and bright, classic appearance are priorities. Also called marcite, the finish combines Portland cement and crushed marble sand. Compare its texture, maintenance needs, and color options with alternatives before deciding.

When you plan your pool construction, the finish is one of the last steps. It sets the color of the water and the feel of the floor, while marble dust feels soft to the touch during long days of swimming.

The classic look and feel

A marble dust finish gives your pool a crisp and white glow. When the sun hits the water, the white surface makes the pool look light blue and clear. This look fits well with many home styles on the island. Its smooth feel makes it a practical pick for steps and shallow areas where people sit or play.

The texture is tight and fine. This helps to keep the water clear and the surface easy to brush. Most people like how the pool stays bright even on cloudy days. The result is a classic style that does not quickly go out of fashion.

Strong and lasting results

Long Island weather can be tough on a pool. Our cold winters and hot summers mean you need a finish that lasts. Research shows that adding marble dust to cement mixes can make them stronger. One study found that marble dust helps durability and helps the mix resist damage from the weather.

A good install is also vital for your pool. Our experts at Gappsi Group make sure the mix is applied well. This stops thin spots or cracks that could lead to leaks later. When done right, a marcite finish can last for ten to fifteen years.

You just need to keep your water balance in check to keep it looking new. Proper care keeps the surface white and stops stains from forming over time.

Making your final choice

It is helpful to see these samples in person before you decide. You can visit the Gappsi showroom in Smithtown to see real samples of pool finishes. We can show you how marble dust looks next to other options like pebble or glass bead. Seeing the colors and feeling the textures helps you make a choice you will love for years.

We can also help you plan other parts of your yard, including the patio and landscape. We work with you from the first design to the final splash in your new pool.

Frequently Asked Questions

These answers cover the most common questions about marble dust terminology, colors, staining, and comparative cost. Because every pool and site differs, a professional inspection is the best way to evaluate the right finish and care plan for a specific property.

What is the difference between marcite and marble dust?

There is no real difference between these two terms. In the pool industry, marcite is just another name for a marble dust finish. Both refer to a mix of white Portland cement and crushed marble sand. This mix is the standard way to coat gunite pools on Long Island.

According to Gappsi, this classic choice remains common. It gives the pool a bright white look and a very smooth surface for swimmers.

Can you add color to a marble dust pool finish?

Yes, you can add liquid or powder tints to the mix to change the color. While white is the most common choice, many pool owners choose light blues or grays to give the water a deeper look. Keep in mind that dark colors may show streaks or fade over time due to the sun and pool salts. If you want a custom look, you can visit the Gappsi showroom to see different color options in person.

Does a marble dust pool finish stain easily?

Since it is a porous finish, marble dust can stain if you do not keep the water in check. Metals like iron or copper in the water can leave dark spots on the white walls. Debris like leaves can also leave marks if they sit on the floor for too long. According to Gappsi, frequent water testing and weekly brushing help prevent most stains.

Is marble dust the most affordable pool finish?

Yes, marble dust is often the most budget-friendly choice for finishing a gunite pool. It costs less than modern options like quartz or pebble because the parts are simpler. While it saves you money upfront, it has a shorter life than tougher finishes. Research shows that adding marble powder helps the cement resist water better, but the actual service life depends on installation and care.

Ready for your Long Island pool consultation?

A professional consultation can help you compare marble dust colors, assess the current gunite shell, and understand the application and startup process. Ask about a marble dust pool renovation and the appropriate next step for your Long Island property.

Ready to visit the Smithtown showroom or request a pool consultation? Visit our local Smithtown showroom to talk to a pool expert and start your pool project with our helpful crew today. We are here to help you get the best results for your home.

Share this page:
Luxury pool with a polished blue Hydrazzo finish

Hydrazzo Pool Finish Colors for Luxury Pools

Hydrazzo pool finish colors decide whether a luxury pool feels quietly refined or visually disconnected. On Long Island, the right blend should complement the home, surrounding stone, sunlight, and desired water color.

Schedule a pool design consultation with Gappsi

Hydrazzo pool finish colors shape both the visible pool floor and the water’s overall tone. Light white and pale blue blends tend to create bright, clear-looking water, while gray, deeper blue, and darker blends produce a richer, more dramatic appearance. The final effect also depends on pool depth, sun exposure, nearby landscaping, and the tile and coping selected around the edge. For a luxury pool on Long Island, the strongest choice connects the pool to the home’s architecture and outdoor materials. It does not simply favor the boldest sample. Review full-size samples in daylight and compare them beside the planned stone and tile. Then judge how each option will look across shallow steps and deeper swimming areas before making the final selection.

Choosing among polished whites, cool blues, and deeper tones becomes easier once each option is tied to a clear design goal. Hydrazzo pool finish colors at a glance is the natural starting point for comparing those visual differences, so begin there.

Hydrazzo pool finish colors at a glance

Hydrazzo pool finish colors help set the visual tone of a pool before water enters it. Light finishes tend to support a bright, open look. Blue and gray choices can add more depth or create a stronger contrast with pale stone.

The table below offers a practical starting point, not a promise of an exact result. Water depth, sun, shade, nearby plants, sky color, and deck materials can all change what you see.

Popular color comparisons

Hydrazzo color Expected water appearance Design style it supports
Arctic White Clear, pale blue in bright sun Clean, classic, or resort-inspired spaces.
Catalina Blue Fresh medium blue Relaxed coastal or family pool designs.
Pacific Blue Rich blue with added visual depth Bold, modern, or tropical settings.
Maui Blue-green or aqua cast Lagoon-inspired and natural designs.
French Gray Soft blue-gray Modern, understated, or stone-led spaces.
Gulfstream Blue Deep, saturated blue Dramatic pools and strong landscape contrast.

The comparison above shows the broad visual direction of each option.

Arctic White is often the safest choice when the goal is a crisp, bright pool. French Gray gives the water a quieter cast and pairs well with cool-toned paving, including modern porcelain paver options. Maui brings more green into the view, which can suit lush planting and natural stone.

For a stronger blue effect, Catalina Blue, Pacific Blue, and Gulfstream Blue move from fresh to deep. The final look still shifts across the pool because deeper areas often appear darker than steps and tanning ledges.

Why the same finish can look different

A finish sample shows its base color and aggregate, but it cannot copy the full setting. Direct sun may make water look brighter. Shade, clouds, trees, and darker coping can make the same finish seem deeper or more muted.

Water care also shapes how clearly the finish reads. The EPA’s pool water efficiency guidance notes that covers can limit evaporation and help maintain water levels. Steady care makes it easier to judge the finish rather than changes at the surface.

A better way to choose

Start with the water color you want, then compare finishes beside the actual coping, tile, and deck material. View each sample in sun and shade. If possible, inspect completed pools with similar depth and surroundings before making the final choice.

Also decide whether the pool should blend with the landscape or stand apart from it. Pale finishes often feel open and calm. Deep blues create a stronger focal point, while gray and aqua tones can bridge modern materials with planted areas.

What makes Hydrazzo a luxury pool finish?

Hydrazzo is a polished marble pool finish chosen for its refined look and smooth feel. Unlike a finish that puts texture first, it creates a calm surface with depth and soft visual movement. The available hydrazzo pool finish colors also help designers connect the pool water with the surrounding stone, tile, and landscape.

Polished marble character

The luxury impression starts with marble aggregate that is polished after application. Polishing reveals the stone while creating a surface that feels smooth underfoot. It also gives the finish a gentle sheen rather than a flat, uniform appearance.

Each installation has natural variation. Small shifts in marble tone and placement create variegation across the pool floor and walls. That movement can make the water look layered as light changes through the day. It also means the finished pool has its own character, rather than the repeated look of a printed pattern.

Color with depth

A finish color does more than coat the pool shell. Its base tone, exposed marble, water depth, sunlight, and nearby materials all shape the final view. For that reason, a color sample should guide the design, not serve as an exact promise.

Lighter selections can support a bright, clear look. Deeper shades often create a richer and more reflective appearance. In both cases, the marble adds fine variation that keeps broad areas from looking plain. This depth works well in formal pools, modern yards, and resort-style settings.

Durability depends on care

Hydrazzo is often selected when the design calls for both polish and a durable marble-based surface. Still, no pool finish performs on material choice alone. Skilled application, proper startup, balanced water, and steady care all help protect its look and feel.

Water chemistry deserves close attention because the pool surface stays in contact with treated water. The CDC guidance on pool water treatment and testing explains why owners should test water. It also advises owners to maintain proper disinfectant and pH levels. A consistent care plan can reduce avoidable stress on the finish.

For luxury pool design, the strongest choice is usually the one that fits the whole setting. Review color samples beside coping, tile, decking, and nearby walls. Then consider how sun, shade, and water depth may change the view. Hydrazzo stands out when its polished marble character supports the architecture instead of competing with it.

Light blue Hydrazzo pool finish color beside natural stone coping
A light Hydrazzo finish can support a bright, clear-looking pool.

Popular Hydrazzo colors and the looks they create

Hydrazzo pool finish colors range from bright white to deep black, with several blues, grays, and blue-green blends between them. Each choice can shape the water’s apparent tone, yet the finished view is never based on the surface color alone. Pool depth, sunlight, shade, nearby plants, and deck materials all affect what the eye sees.

Use color names as a useful starting point, not a promise of one exact result. The same finish may look pale on a sunny step and much richer in the deep end. Reviewing a full pool, a large sample, and nearby materials can give a clearer sense of the likely effect.

Bright and classic blue tones

Arctic White is the cleanest and brightest option in this group. It tends to support a clear, light blue water look in strong daylight. The pale base can also make shadows, leaves, and reflected clouds more visible. It suits settings built around crisp stone, white accents, or a simple resort-style palette.

Gulfstream Blue brings more blue into the finish while keeping the overall look lively. It can read as fresh and inviting rather than dark. Catalina Blue moves toward a fuller mid-blue character. It often feels balanced in pools where the owner wants distinct blue water without choosing the deepest finish.

Mediterranean Blue and Pacific Blue create increasingly rich blue impressions. Mediterranean Blue can support a deep, classic blue mood that pairs well with warm stone and green planting. Pacific Blue is a bold option that may make deep areas appear more intense. Both can shift from bright blue to darker blue as light changes.

Soft gray and blue-green choices

Hatteras Gray has a cool gray base that can give the water a calm, muted blue cast. Its restrained look works well beside concrete, bluestone, and other cool-toned materials. French Gray is often the softer choice. It can create a gentle blue-gray appearance that feels less stark than white and less strong than a true blue finish.

Bimini Teal introduces a clear blue-green direction. It can suit tropical planting, tan decking, or a yard designed around warm natural colors. Jamaican Mist has a softer, mixed character. Its visual appeal comes from subtle variation, which can make the water feel relaxed and less uniform than a solid-looking blue.

Blue-green finishes can respond strongly to their surroundings. Green plants may strengthen the green cast, while open sky may pull the view back toward blue. Compare samples beside the planned coping and deck, since those nearby colors remain in view whenever someone looks at the pool.

Deep and dramatic finishes

Black Maui sits at the darkest end of the palette. It can create a deep lagoon or reflecting-pool effect, especially in shaded areas or pools with broad, still views. In direct sun, the water may show more blue and reveal greater variation across steps, benches, and changing depths.

A dark finish can make the pool a strong visual anchor, but it also changes how the whole setting feels. It may suit modern landscapes, natural stone, or dense planting. Before choosing it, compare the finish in sun and shade. Also view it at several depths, because shallow ledges will not look like the pool floor.

The most useful comparison is not simply light versus dark. Consider whether the pool should feel crisp, classic, muted, tropical, or dramatic. Then narrow the Hydrazzo pool finish colors to the options that support that goal and work with the fixed materials around the water.

Why does the same Hydrazzo color look different in every pool?

A Hydrazzo sample shows the finish itself, but it cannot show the exact water color your completed pool will have. Water, light, depth, and the setting all change what your eye sees. That is why hydrazzo pool finish colors can look different across two pools, even when both use the same blend.

Finish color and water depth

The finish base sets the starting point. White and light bases often create a bright, clear look, while blue, gray, or darker bases add more depth. The aggregate and polished surface can also shift the tone as sunlight moves across the pool.

Water depth makes that starting color appear lighter or darker. Shallow steps and sun shelves often look close to the dry finish sample. Deeper areas tend to look richer because light travels through more water before it returns to your eye. The National Ocean Service explanation of blue water shows how water absorbs colors from the light spectrum.

Sun, shade, and the Long Island sky

Direct midday sun can make the water look bright and clear. Morning light, late-day light, clouds, and shade can bring out gray or green notes. A color viewed on a sunny afternoon may look much deeper after sunset or during a cloudy Long Island morning.

Seasonal changes matter too. Summer sun sits higher and reaches more of the pool surface. In spring and fall, lower sun angles can create longer shadows from the house, fence, and trees. A shaded pool may never match a photo taken in full sun, even with the same finish.

Reflections from the surrounding yard

Pool water acts like a moving mirror. It reflects blue sky, green plants, pale stone, dark masonry, and nearby buildings. A light limestone patio may make the scene feel brighter. Dense trees, dark pavers, or a shaded retaining wall can make the same water look cooler or deeper.

Underwater lights add another layer after dark. Warm white lights can soften blue and gray tones, while cooler lights may make them appear sharper. Light placement also affects how evenly the finish reads across steps, benches, walls, and the deep end.

Choose the finish as part of the whole yard, not as a stand-alone swatch. Compare wet samples outdoors at different times of day. Then review the pool depth, shade pattern, masonry, plants, and planned lights with Gappsi’s custom swimming pool design team. This gives you a more useful view of the color changes to expect.

Deep blue Hydrazzo pool finish color in a luxury backyard
Deeper Hydrazzo colors create a stronger visual focal point.

How to choose a Hydrazzo finish color

Choosing among Hydrazzo pool finish colors starts with the water, not a small color chip. The same finish can look different once water, sun, shade, and pool depth shape the view. A clear process helps keep the finish tied to the full backyard design.

Your water-color goal

First, decide how you want the filled pool to look from the patio and the house. Pale finishes tend to support a bright, clean look. Deeper blues and darker blends can create a richer tone. Your choice should also fit the mood of the surrounding space.

  1. Define the water-color goal. Choose a broad direction, such as pale aqua, clear blue, deep blue, or a darker lagoon look. Use that goal to narrow the finish options before comparing small details.

  2. Coordinate the full material palette. Compare each finish with coping, patio stone, house colors, and nearby plants. A finish should support those fixed features rather than compete with them.

  3. Review physical samples. Look at full samples outdoors instead of choosing from a screen or printed card. View them beside the planned coping and patio materials at more than one time of day.

  4. Assess depth and sun. Compare the sample in direct light, shade, shallow areas, and deeper water when possible. The EPA UV Index guidance explains how sun strength changes during the day and with local conditions.

  5. Confirm installation details. Ask the design-build team how the selected blend, application, exposure, and startup plan will affect the final look. Record the exact product name and approved sample before work begins.

Materials around the pool

Coping and patio colors form the frame around the water. Warm limestone, cool gray porcelain, and mixed natural stone can each shift how a blue finish reads. Place the options together, then step back far enough to judge the palette as one scene.

Landscape colors matter too. Green planting, wood structures, and shaded seating areas can soften or deepen the water’s apparent tone. Review these parts with the pool finish so the surface does not become an isolated choice.

Samples and installation details

A small dry sample is useful for narrowing choices, but it cannot show the complete result. Ask to see completed pools with a similar depth, sun exposure, and material palette. Visit them in daylight when possible, since phone images may alter both color and contrast.

Before approving the finish, confirm what the sample represents and how the crew will apply it. Ask about aggregate exposure, expected shade variation, and the pool startup process. An experienced design-build team can explain which differences are part of the finish and which details need correction.

Keep the approved sample, finish name, and related material choices together in the project record. This gives the owner, designer, and installer one clear reference. It also makes final review more direct once the pool is filled and the surface has settled into its finished appearance.

Compare Hydrazzo colors with Gappsi at the Smithtown showroom

Coordinating your pool finish with the complete backyard

A pool finish should not be chosen as an isolated color sample. Water, sunlight, pool depth, and nearby materials all affect how it looks. Compare Hydrazzo pool finish colors beside the coping, pavers, masonry, and home exterior before making a final choice.

For a Long Island backyard, the full setting also includes seasonal changes. Summer sun can make water look brighter, while shade from trees or the house can deepen its tone. Reviewing every surface together helps create a yard that feels planned rather than pieced together.

Pool shape, coping, and paving

Start with the pool shape and the lines around it. Gappsi’s swimming pool design and construction services connect the finish decision to the complete pool plan. A formal rectangular pool often works well with crisp coping and a simple finish tone. Freeform pools can pair well with softer colors and paving that follows the curves.

Coping creates the visual border between water and patio. Light coping can sharpen the edge and brighten the water. Darker coping adds contrast, but it may also draw more attention than the finish itself. Gappsi can coordinate coping and paving through its masonry design and construction services as part of an integrated plan for the full backyard.

Masonry and outdoor living areas

The pool should connect naturally to patios, retaining walls, fire features, and outdoor kitchens. Review Gappsi’s natural stone options when selecting a finish beside stonework. Repeat one or two material tones across these areas instead of matching every surface. This approach creates unity while letting the pool remain the main visual feature.

Warm beige or cream finishes often sit well beside tan stone and warm masonry. Gray or blue-gray finishes can support a cooler palette with bluestone, concrete, or dark accents. View samples near the outdoor kitchen and patio because those spaces frame many common views of the pool.

Planting, light, and drainage

Landscaping changes both the color and mood around the water. Deep green planting can make pale finishes feel fresh and bright. Flowers, ornamental grasses, and evergreen beds also bring texture without competing with the pool surface.

Plan planting beds, lighting, and drainage before the finish is installed. The EPA WaterSense outdoor guidance explains practical ways to use water wisely in a landscape. That planning can help keep soil, mulch, and runoff away from paved areas and the pool edge.

At night, test how warm and cool lighting affects the chosen finish. Also check views from the house, patio, and outdoor kitchen. Coordinating the full site early gives each material a clear role. It also helps the finished Long Island backyard read as one complete space from every main seating area.

What should you know before selecting Hydrazzo?

Installer skill and pool condition

A polished Hydrazzo surface depends on careful prep, application, and polishing. Ask each installer about direct experience with this finish, not just general plaster work. Review completed pools in person when possible, since photos can hide texture, mottling, and changes caused by light.

The pool shell also needs a close review before renovation begins. Cracks, hollow areas, leaks, old repairs, and worn fittings may call for added work. A sound plan should explain what will be removed, repaired, replaced, and tested before the new finish goes on.

Discuss the whole renovation scope, including tile, coping, drains, returns, lights, and equipment. This helps prevent a new interior from being paired with worn parts that soon need service. It also gives the installer a chance to plan clean transitions around every fitting.

Startup and balanced water

Startup is part of the finish process, not an optional final step. Before work starts, confirm who will fill the pool, test the water, brush the surface, and adjust chemistry. Get those duties and the startup schedule in writing so no step is left unclear.

Balanced water helps protect swimmers, pool equipment, and interior surfaces. The CDC guidance for healthy swimming explains why disinfectant and pH need regular checks. Follow the finish maker’s care guidance and ask the installer which test results should be tracked during startup.

Source water can affect the startup plan. Well water, hard water, metals, or an unusual fill source may need added testing before filling. Share any known water issues early, then confirm how the team plans to handle them.

Color expectations and routine care

Compare hydrazzo pool finish colors under conditions that match your yard. Sun, shade, pool depth, nearby plants, and the sky can all affect how the water appears. View a full-size finished pool instead of choosing from a small sample alone.

Ask how normal variation may appear across steps, benches, walls, and the deep end. The installer should explain what a polished surface can look and feel like after startup. Clear expectations make it easier to judge the completed work fairly.

Routine care still matters after startup ends. Keep a simple log for test results, chemical changes, brushing, cleaning, and service visits. Avoid harsh tools or unapproved treatments, and ask for written care steps before anyone performs stain or scale work.

Before selecting the finish, compare bids by scope rather than price alone. Confirm surface prep, repairs, startup duties, water testing, care instructions, and final inspection. A detailed proposal gives you a clearer view of both the finished look and the work required to maintain it.

Request a complete pool design and finish consultation

Frequently Asked Questions

Is Hydrazzo suitable for refinishing an existing pool?

Hydrazzo can be suitable for refinishing an existing pool when the shell is sound and properly prepared. Before installation, a qualified contractor should inspect cracks, hollow areas, leaks, fittings, and previous repairs. The proposal should clearly state which old material will be removed and how defects will be corrected. Gappsi’s swimming pool service team can help assess existing tile, coping, drains, returns, and lights before a new finish is applied.

How soon can you swim after a Hydrazzo pool finish is installed?

The swimming date depends on the installer’s startup plan, fill timing, and confirmed water chemistry. Do not enter the pool until the contractor or service professional approves it for use. The CDC’s healthy swimming guidance explains that disinfectant and pH require regular checks. Ask who will test, brush, and adjust the water during startup, then follow the written schedule.

Does a darker Hydrazzo finish make pool water warmer?

A darker Hydrazzo finish may absorb more sunlight than a pale finish, but it does not guarantee noticeably warmer water. Pool temperature also depends on sun exposure, air temperature, wind, pool depth, circulation, and cover use. Choose a dark finish for its visual effect rather than as a heating method. If temperature control matters, compare suitable covers and heating options during pool planning.

How do you clean a polished Hydrazzo pool finish?

Clean polished Hydrazzo with tools, chemicals, and methods approved by the finish maker and installer. Maintain balanced water, brush as directed, remove debris, and keep a record of test results and treatments. Avoid harsh tools or unapproved stain and scale treatments because they may affect the polished surface. Ask for written routine-care instructions before startup ends, and consult a qualified pool professional when discoloration appears.

Ready to Choose Your Hydrazzo Pool Finish Color?

Delaying your finish selection can slow the design process and leave less time to compare colors beside your stonework, landscape, and home style. Starting now gives you time to review each option under changing light and decide how you want the water to look throughout the day. An early choice also keeps the finish connected to the wider pool plan, reducing rushed decisions when construction details and schedules begin coming together.

Ready to move from color ideas to a clear direction for your Long Island pool? Request a pool design consultation or schedule a visit to the Smithtown showroom. You can discuss your preferred look, compare practical design options, and take the next step with a plan shaped around your property.

Share this page:
Swimming pool contractors in Long Island, NY discussing plans for a new pool project.

A Guide to Swimming Pool Contractors in Long Island, NY

The journey to a new swimming pool begins long before the first shovel hits the ground. It starts with a vision of your ideal backyard retreat. The challenge lies in finding a professional who can translate that vision into a functional, beautiful, and well-built reality. This process involves much more than just construction; it’s a partnership. You need a team that listens to your ideas, offers expert guidance on materials and design, and manages the entire project with transparency and skill. Among the swimming pool contractors Long Island NY has available, the premier choice is one who acts as your dedicated partner, ensuring a smooth and stress-free experience from the initial design consultation to your first swim.

Key Takeaways

  • Envision the Entire Space, Not Just the Pool: A successful project treats the swimming pool as the centerpiece of a larger outdoor living area. The right contractor provides comprehensive services, from masonry patios to landscaping, to create a cohesive and beautiful backyard retreat.
  • Do Your Homework to Hire with Confidence: Choosing the right partner is critical, so look beyond the price tag. Protect your project by verifying the contractor’s license and insurance, reviewing their past work, and insisting on a detailed written contract before any work begins.
  • Understand What Drives Cost and Value: The price of a new pool is a reflection of its size, materials, and custom features. Factors like choosing a gunite build, adding a waterfall, or installing a premium stone patio all contribute to the final investment and the long-term value of your backyard oasis.

What Services Do Long Island Pool Contractors Offer?

When you start planning for a new swimming pool, it’s easy to picture the finished product: sunny afternoons, family fun, and a beautiful backyard centerpiece. But getting there involves more than just digging a hole and adding water. A professional Long Island pool contractor offers a comprehensive range of services designed to manage your project from the first sketch to the first swim. They act as your partner, guiding you through design choices, material selections, and the construction process to ensure the final result matches your vision perfectly.

This partnership often extends beyond the pool itself. Many top contractors understand that a pool is just one part of a larger outdoor living ecosystem. Their services can include creating the surrounding patio, integrating landscaping, and even adding structures like pergolas or outdoor kitchens. They handle the complexities of permits, coordinate different construction teams, and ensure everything is built to last. Understanding the full scope of what a contractor can offer is the first step in finding the right team to build not just a pool, but your own private backyard resort. From brand new installations to breathing new life into an old favorite, their expertise covers every possibility.

New Pool Installation

The most exciting service, of course, is building a brand new pool from the ground up. This process begins with a detailed design phase where you work with experts to create a custom pool that fits your property and lifestyle. Contractors on Long Island specialize in various types of swimming pools, with gunite pools being a popular choice for their incredible durability and design flexibility. Because gunite is sprayed onto a rebar framework, it can be shaped into nearly any form you can imagine. This allows for a truly bespoke design, from a classic rectangle to a freeform lagoon, that integrates seamlessly with your backyard’s layout and your personal style.

Pool Renovations and Repairs

If you already have a pool, you know it’s a major asset to your home. Over time, however, it may need more than just routine cleaning. Pool contractors offer extensive renovation and repair services to update, modernize, and restore existing pools. This could be as simple as repairing a crack or replacing old tile, or as complex as a complete resurfacing and equipment upgrade. A renovation is a fantastic opportunity to add modern features you’ve been wanting or to improve energy efficiency. Quality restoration services can extend the life of your pool for years, protecting your investment and making it feel brand new again.

Custom Features and Add-Ons

To make your pool a true showpiece, contractors offer a wide array of custom features and add-ons. These elements transform a standard pool into a luxurious oasis and enhance your entire outdoor experience. Imagine the sound of a cascading waterfall, the drama of fire bowls flanking the water, or the beauty of color-changing LED lights for nighttime swims. Beyond the pool itself, contractors can build out the surrounding area with beautiful masonry patios, install integrated hot tubs, or build shaded lounge areas with custom pavilions and pergolas. These additions create a cohesive and functional outdoor living space perfect for relaxing and entertaining.

Finding the Best Swimming Pool Contractor in Long Island

Choosing to build a swimming pool is a major investment in your home and your lifestyle. The single most important decision you’ll make in this process is selecting the right contractor. On Long Island, you have plenty of options, but finding a partner who can bring your complete vision to life requires looking beyond basic installation. A great contractor doesn’t just dig a hole and fill it with water; they create an experience. They listen to your ideas, understand how you want to use the space, and have the expertise to manage the entire project from the first sketch to the final tile.

The ideal company offers a seamless process, integrating the pool with its surroundings. Think about it: your pool is the centerpiece of your backyard, but it’s the patio, landscaping, and lighting that complete the picture. You want a team with deep local knowledge of Long Island’s specific building codes and environmental conditions. A contractor who provides comprehensive swimming pool services will ensure your project runs smoothly and results in a beautiful, cohesive outdoor oasis. Instead of juggling multiple vendors for masonry, fencing, and planting, you can rely on one expert team to execute every detail perfectly. This integrated approach not only saves you from logistical headaches but also guarantees a harmonious design where every element works together.

Why Gappsi Is the Premier Choice

For over 30 years, Gappsi has been the trusted name for creating exceptional outdoor spaces across Long Island. Our reputation is built on a foundation of expert craftsmanship and a holistic approach to design. We don’t just build pools; we design and construct entire backyard environments. This means your new gunite or vinyl pool will perfectly complement the surrounding masonry patios, walkways, and landscaping because our in-house teams handle it all. Our extensive portfolio showcases our commitment to innovative, custom designs that reflect each homeowner’s unique style. By managing every phase of the project, we deliver a stress-free experience and a stunning, unified result you’ll enjoy for years to come.

How to Choose the Right Pool Contractor

Selecting the right team to build your swimming pool is one of the most important decisions you’ll make for your home. This isn’t just about construction; it’s about finding a partner who understands your vision and can bring it to life with skill and integrity. A great contractor ensures the process is smooth and the final result is a beautiful, safe, and lasting addition to your property. To help you make a confident choice, focus on a few key areas that separate the professionals from the rest.

Check for Licensing, Insurance, and Credentials

Before you even talk about design, make sure your potential contractor is fully licensed and insured to work in Long Island. This is a critical first step that protects you from liability and ensures the company adheres to local building codes and safety standards. A reputable contractor will have this information readily available and will be happy to provide proof. Think of it as the foundation of a trustworthy relationship. A company that handles its legal and financial responsibilities properly is one you can depend on to build your swimming pool with the same level of professionalism and care.

Review Their Experience and Portfolio

Experience speaks volumes in the pool construction industry. A contractor with a long history and a diverse portfolio has likely encountered and solved a wide range of challenges. Ask to see examples of their previous work, paying close attention to projects similar to what you have in mind. A robust gallery of photos and videos, like the projects featured on our Gappsi YouTube channel, can give you a clear sense of their craftsmanship and design capabilities. A company that has been transforming backyards for decades brings a level of expertise that provides peace of mind and ensures a high-quality outcome for your investment.

Ask About Warranties and Aftercare

Your relationship with a pool contractor shouldn’t end the day the water is filled. A swimming pool is a long-term investment that requires ongoing care. Be sure to ask detailed questions about the warranties they offer on both the pool structure and the equipment, such as pumps and filters. A strong warranty shows that the contractor stands behind their work. Additionally, inquire about their aftercare services. Do they offer maintenance packages, repairs, or seasonal support? Companies that provide services like restoration and sealing demonstrate a commitment to the longevity of your project, ensuring your pool remains in perfect condition for years to come.

Evaluate Communication and Customer Service

A major construction project requires clear and consistent communication. From the very first phone call or email, pay attention to how the contractor interacts with you. Are they responsive, respectful, and willing to answer all your questions thoroughly? A great contractor acts as a collaborative partner, listening to your ideas and providing expert guidance to achieve your goals. The entire process, from initial design to final walkthrough, should feel supportive and transparent. When you schedule a consultation, it should feel like the beginning of a positive and productive partnership dedicated to creating the backyard of your dreams.

How Much Does a New Pool Cost in Long Island?

One of the first questions on every homeowner’s mind is, “What will this actually cost?” When it comes to installing a new swimming pool in Long Island, the answer isn’t a single number. Instead, it’s a range that reflects the size, materials, and complexity of your vision. Think of it less as a purchase and more as an investment in your home’s value and your family’s lifestyle. A pool is the centerpiece of your backyard, and its cost is tied to the quality of the entire outdoor living space you create around it.

At Gappsi, we specialize in luxury-level, hand-crafted construction that transforms your whole backyard. The final price tag depends on many variables, from the type of pool you choose to the custom features you add. We’ll walk you through the key factors that influence the cost so you can build a realistic budget for your dream oasis.

Key Factors That Influence Price

Several key elements will shape the total cost of your pool project. The size, depth, and shape of the pool are the most significant factors, as they dictate the amount of labor and materials required. The materials you choose also play a huge role. For example, a custom gunite pool allows for endless design possibilities but comes at a higher price point than a standard vinyl liner pool.

Beyond the pool itself, consider the surrounding environment. The cost includes site preparation, excavation, and any necessary grading. The patio material is another major consideration. Using high-quality porcelain and natural stone pavers creates a stunning, durable deck that complements your home. Finally, don’t forget custom features like waterfalls, integrated spas, lighting, and the required safety fencing, all of which contribute to the final investment.

Cost Estimates by Pool Type

While every project is unique, it helps to have a general idea of what to expect. For a complete, professionally installed pool project in Long Island, prices can range from $100,000 to over $400,000. The lower end of this range typically covers simpler vinyl liner pools with basic patio designs. These are a great option, but they offer less design flexibility.

For a truly custom backyard retreat, most homeowners opt for gunite swimming pools. These projects often start in the mid-to-high six figures, especially when they include premium masonry, extensive landscaping, and custom water features. This investment gives you complete control over the shape, size, and finish, resulting in a one-of-a-kind pool that is built to last. The best way to get an accurate figure is to schedule a consultation to discuss your specific goals.

Exploring Innovative Pool Features

A modern swimming pool is so much more than a place to cool off. It’s the centerpiece of your backyard, and today’s innovative features can turn it into a personalized oasis. When you start planning your project, think about how you want to use the space and what features will make it truly yours. From smart technology to stunning waterfalls, the possibilities for customizing your swimming pool are nearly endless. Here are a few popular trends to consider for your Long Island home.

Smart Automation and Energy-Efficient Systems

Imagine adjusting your pool’s temperature, lighting, and cleaning schedule right from your phone. That’s the convenience of smart automation. These systems make pool maintenance simpler and more efficient, giving you more time to actually enjoy the water. According to industry experts, smart pool technology not only provides convenience but also leads to significant energy savings by optimizing filtration cycles and heating. It’s a practical upgrade that streamlines your life and can lower your utility bills, making it a win-win for any pool owner.

Saltwater Systems and Natural Pools

If you’re looking for an alternative to traditional chlorine, a saltwater system is a fantastic option. These systems use a generator to convert salt into chlorine, resulting in softer, silkier water that’s gentler on your skin and eyes. The National Association of Realtors notes that saltwater pools are a desirable feature for their lower maintenance and more natural feel. For those wanting an even more organic approach, natural pools use plants and biological filters to keep the water clean, creating a beautiful, self-sustaining ecosystem right in your backyard.

Water Features, Infinity Edges, and Lighting

The right design elements can transform your pool from a simple rectangle into a breathtaking water feature. The gentle sound of a cascading waterfall or the sleek drama of an infinity edge adds a layer of sophistication and tranquility to your outdoor space. As noted by Pool & Spa Marketing, these additions create a soothing ambiance that makes your pool area a true retreat. Paired with modern LED lights, you can create any mood you desire, from a vibrant party atmosphere to a calm, glowing backdrop for a quiet evening swim.

Integrated Outdoor Living Spaces

The most inspiring backyards are those where the pool feels seamlessly connected to the rest of the living area. Think beyond the pool itself and envision a complete outdoor environment. Integrating your pool with a custom patio, an outdoor kitchen, a cozy fire pit, or a shaded pavilion creates a cohesive and multifunctional space for relaxing and entertaining. This approach to outdoor living turns your entire backyard into a destination, extending your home’s usable square footage and adding significant value to your property.

Mistakes to Avoid When Hiring a Pool Contractor

Building a new pool is an exciting process, but choosing the wrong contractor can quickly turn your dream into a stressful ordeal. A swimming pool is a significant investment in your home and lifestyle, so it’s important to get it right from the start. By being aware of common pitfalls, you can make a confident and informed decision. Here are some of the most critical mistakes to avoid when you begin your search for a pool contractor in Long Island.

Choosing Price Over Value

It’s always tempting to go with the lowest bid, but when it comes to pool construction, a cheap price often signals trouble. A suspiciously low estimate may mean the contractor is cutting corners on materials, using inexperienced labor, or hasn’t fully accounted for the project’s scope. These shortcuts can lead to structural problems, equipment failures, and costly repairs down the road. The American Society of Home Inspectors notes that the lowest price may not be the best deal. Instead of focusing only on the initial cost, consider the overall value. A quality contractor provides durable materials, expert craftsmanship, and a solid warranty, ensuring your swimming pool is a source of enjoyment for years to come.

Skipping Background and Reference Checks

Hiring a contractor without doing your homework is a significant risk. Before you sign anything, take the time to verify their credentials. A reputable contractor will be fully licensed and insured and happy to provide proof. Don’t just take their word for it; ask for a list of recent references and actually call them. The National Association of Home Builders emphasizes the importance of checking references to gauge reliability and quality. Ask past clients about their experience with the contractor’s communication, timeliness, and how they handled any issues that arose. Looking at their portfolio of completed projects can also give you a clear idea of their work quality.

Ignoring Local Permits and Regulations

In Long Island, pool construction is subject to strict local building codes and zoning laws. A contractor who suggests you can bypass the permitting process is a major red flag. Building without the proper permits can result in hefty fines, legal trouble, and even an order to tear down the unpermitted structure. The New York State Department of Health requires that all swimming pools comply with local codes. An experienced, professional contractor will be an expert in local regulations and will manage the entire permitting process for you. This ensures your pool is built safely and legally, giving you peace of mind.

Not Demanding a Detailed Contract

A verbal agreement or a vague, one-page estimate is not enough to protect you. A professional project requires a professional contract. This document is your most important tool for ensuring the project goes as planned. According to the Better Business Bureau, you should always get a written contract that clearly details every aspect of the job. It should include a complete description of the work, a list of all materials and equipment, a clear payment schedule, and a projected timeline with start and completion dates. The contract should also outline the warranty for both workmanship and materials. A detailed contract prevents misunderstandings and provides legal protection for both you and the contractor.

Related Articles

Frequently Asked Questions

What’s the first step I should take if I’m considering a new pool? The best first step is to schedule a design consultation. This isn’t a high-pressure sales meeting; it’s a creative conversation where you can share your ideas and learn what’s possible for your specific property. A good designer will listen to how you plan to use the space, walk you through material options, and help you understand the entire process from start to finish. It’s the most effective way to move from a vague idea to a concrete plan.

Do pool contractors also build the patio and surrounding landscape? While some companies only focus on the pool itself, a premier contractor offers a complete, integrated solution. This means they have in-house teams or trusted partners who handle everything from the masonry patio and walkways to the landscaping, lighting, and fencing. Choosing a company that manages the entire project ensures a cohesive design where all the elements work together beautifully and saves you the headache of coordinating multiple different vendors.

How can I get an accurate cost estimate for my pool project? The only way to get a truly accurate price is through a detailed, on-site consultation. The total investment depends on many factors, including the size and shape of the pool, the materials you choose (like gunite versus vinyl), site accessibility, and any custom features you want to add, such as a waterfall or integrated spa. A professional will assess your property, discuss your vision in detail, and then provide a comprehensive proposal that outlines all the costs involved.

I already have a pool, but it looks old and tired. Can it be updated? Absolutely. A renovation can completely transform an existing pool and make it feel brand new. This can involve anything from simple cosmetic updates, like replacing the tile and coping, to major overhauls like resurfacing the interior, adding modern water features, or upgrading to more energy-efficient equipment. It’s a fantastic way to improve your pool’s appearance and functionality without starting from scratch.

How much maintenance does a new swimming pool require? Modern pools are much easier to care for than you might think. Features like saltwater systems and automated cleaning and chemical-monitoring systems can significantly reduce the time you spend on maintenance. The quality of the initial construction also plays a big role. A well-built pool with high-quality equipment will run more efficiently and require fewer repairs. Many contractors also offer seasonal opening, closing, and maintenance packages to make ownership even more effortless.

Share this page:
Blueprint and calculator for determining vinyl pool installation cost per square foot.

Vinyl Pool Installation Cost Per Square Foot: A Guide

A new pool is more than just a place to swim; it’s the centerpiece of your entire outdoor living space. While understanding the vinyl pool installation cost per square foot is a critical first step, a truly stunning backyard involves thinking about the complete picture. Picture a beautiful stone patio for lounging, a custom pavilion for shade, and professional landscaping that ties it all together. This article will help you budget for the entire project, not just the pool itself. We will explore how integrating these elements from the start creates a cohesive, resort-like atmosphere that adds significant value and enjoyment to your Long Island home.

Key Takeaways

  • Budget for the Complete Project: A realistic budget includes more than just the pool itself; remember to factor in essential costs like site preparation, decking, safety fencing, and local permits.
  • Your Pool’s Design Dictates the Cost: The biggest factors affecting your initial cost are the pool’s dimensions and complexity. A classic rectangular pool is the most budget-friendly choice, while custom shapes and added depth will increase the total price.
  • Understand the Main Long-Term Expense: Vinyl pools have a lower upfront cost, but their primary long-term expense is liner replacement every five to nine years. Planning for this predictable cost is key to managing your investment.

How Much Does a Vinyl Pool Cost Per Square Foot?

Figuring out the budget for a new pool can feel like a huge task, but breaking it down makes it much more manageable. While a simple per-square-foot price can be misleading because of all the variables involved, we can look at average costs to get a solid starting point. From there, you can begin to picture how different sizes and features will shape your final investment.

The great news is that vinyl liner pools are one of the most affordable inground options available. This allows you to create a beautiful backyard oasis without the higher price tag of other pool types. Let’s look at the typical cost ranges and how you can start estimating the price for your own dream pool.

Understanding the Average Cost Range

When you start planning for new swimming pools, it helps to have a general budget in mind. For a professionally installed inground vinyl liner pool, the total project cost typically lands somewhere between $35,000 and $65,000. Many homeowners find their final cost sits around the $45,000 mark for a complete installation. This average price often includes the essential components you need to get started, like the pool pump, filter, basic steps, and a simple concrete patio surround. Of course, this range can shift based on the complexity of the job, the materials you choose, and any fun extras you decide to add.

How to Calculate Your Pool’s Square Footage

While a simple square footage calculation (length times width) is a start, it’s more practical to look at how common pool sizes affect the overall budget. The size of your pool is one of the biggest factors influencing the final price. For example, a smaller pool around 10 by 20 feet might have an estimated cost between $20,000 and $50,000. If you have a bit more space, a mid-size 12-by-24-foot pool could range from $25,000 to $50,000. For a larger family pool, something like a 14-by-28-foot design often falls between $35,000 and $55,000. These numbers give you a clearer picture of how your project’s scale connects directly to your budget.

What Factors Influence the Per-Square-Foot Cost?

Thinking about cost in terms of square footage is a great starting point, but it’s only one piece of the puzzle. The final price of a vinyl liner pool is a blend of several key factors, each playing a role in your total investment. From the size and shape you envision to the specific liner you choose and even the unique characteristics of your backyard, every decision influences the budget. Understanding these variables will help you see where your money is going and allow you to make informed choices that align with your vision and financial plan. Let’s walk through the main elements that shape the cost of bringing your dream pool to life.

Pool Size and Depth

It might seem obvious, but the bigger and deeper your pool, the more it will cost. A larger pool requires more excavation, more materials for the walls and floor, and a larger vinyl liner to fit. Think of it this way: every extra foot of length, width, or depth adds to the labor and material totals. While a sprawling pool is a beautiful centerpiece, a more modest size can still provide a perfect backyard oasis without stretching your budget. When you begin planning your swimming pool installation, considering how you’ll use the space can help you find the perfect dimensions that balance your desires with your budget. A simple, classic rectangle will almost always be more cost-effective than a sprawling, complex design.

Design Shape and Complexity

Beyond simple size, the shape and complexity of your pool design are major cost drivers. A standard rectangular pool is the most straightforward and affordable to build. Once you venture into custom shapes, like freeform lagoons, L-shapes, or designs with intricate curves, the cost begins to climb. These complex designs require more specialized labor, custom-cut materials, and a more involved installation process. Features like built-in benches, tanning ledges, or custom stairs also add to the price tag. While these elements create a truly unique and luxurious experience, it’s important to account for them in your budget from the start. Our team specializes in creating custom masonry features that can turn a simple pool into a stunning backyard resort.

Liner Quality and Thickness

The vinyl liner is the heart of your pool, and not all liners are created equal. The thickness of a liner is measured in mils, and a thicker liner, while more expensive, offers greater durability. It’s more resistant to punctures and tears from pool toys, pets, or debris, which can save you from future repairs. Thicker liners often come with longer warranties, giving you extra peace of mind. Beyond thickness, you’ll find a wide array of patterns and textures that can mimic the look of tile or stone. While premium patterns can add to the cost, they also offer a chance to customize the look of your pool’s interior and create a high-end finish.

Your Location and Local Labor Rates

Where you live plays a significant role in the overall cost of your pool installation. Here on Long Island, factors like local labor rates, the cost of materials, and transportation all get factored into the final price. Permitting processes and building codes in towns across Nassau and Suffolk counties can also influence the project timeline and associated costs. Working with a local contractor who has deep experience in the area is invaluable. A team that understands the regional landscape, literally and figuratively, can anticipate challenges and ensure your project runs smoothly from start to finish. This local expertise is something we pride ourselves on at Gappsi.

Site Conditions and Property Access

Every backyard is different, and the specific conditions of your property can have a big impact on installation costs. A perfectly flat, open yard is the ideal scenario, but that’s not always the reality. If your yard has a significant slope, you may need retaining walls to create a level area for the pool, which adds to the budget. The presence of large rocks, poor soil conditions, or the need to remove trees can also increase excavation costs. Furthermore, if your backyard is difficult to access with heavy machinery, more work may need to be done by hand, which is more labor-intensive and expensive. A thorough site evaluation is essential to uncover these potential costs before work begins and is a key part of our landscape design process.

How Pool Size and Shape Impact Your Budget

When you start planning your new vinyl pool, two of the most significant decisions you’ll make are its size and shape. These choices are the primary drivers of your project’s total cost because they directly influence the amount of materials needed and the labor required for excavation and construction. A larger, more complex pool will naturally require a bigger budget than a smaller, standard one. Understanding how these elements work together will help you design a pool that fits both your backyard and your finances perfectly. From a simple rectangle for swimming laps to a custom freeform oasis, every choice has an impact on the bottom line.

Comparing Costs: Small vs. Large Pools

It’s no surprise that bigger pools come with a bigger price tag. The larger the pool’s footprint, the more you’ll spend on excavation, materials, and labor. A larger surface area requires more vinyl liner, more wall paneling, and more water to fill it. The surrounding pool deck will also be larger, adding to the cost of materials like stone or pavers. For perspective, industry data shows that a standard 12-foot by 24-foot inground vinyl pool often has a starting cost of around $45,000. This price typically includes the basic necessities like a filter, heater, and a simple concrete deck. Think of this as a baseline, as every extra square foot you add will increase the overall cost. We can help you explore different swimming pools to find the perfect size for your space and budget.

Standard Rectangles vs. Custom Freeform Shapes

If you want to get the most value from your budget, a classic rectangular shape is the most cost-effective design. The straight lines and 90-degree angles make construction straightforward, allowing for the use of standard-sized materials and simpler labor processes. This efficiency translates directly into cost savings for you. On the other hand, custom freeform shapes like kidney, lagoon, or L-shapes create a more organic and unique look. While visually stunning, these designs require more intricate work. The liner must be custom-made, the excavation is more complex, and the construction process demands more time and skill. These factors increase both material and labor costs. A beautiful freeform pool often becomes the centerpiece of a backyard, especially when paired with custom masonry and patio work.

The Role of Depth in Material and Labor Costs

The depth of your pool plays a quiet but important role in your budget. A deeper pool requires significantly more excavation, which increases labor hours and may require specialized equipment, especially if we encounter rocky soil. The pool’s structure also needs to be stronger to withstand the added water pressure, which can mean more robust wall supports. A typical backyard pool might have a shallow end and a deep end around 6.5 feet. However, if you’re dreaming of a diving board, safety standards require a depth of at least nine feet. This extra depth not only adds to excavation and material costs but also increases the volume of water needed to fill the pool. When planning your home remodeling project, considering how you’ll use the pool will help determine the right depth for your family and your budget.

What Other Costs Should You Budget For?

When you’re planning for a new vinyl liner pool, the price of the pool itself is just the starting point. To create a complete and accurate budget, you need to account for all the other elements that turn a simple pool into a finished backyard oasis. These additional costs, from preparing the ground to adding the final safety features, are essential for a successful project. Thinking about these expenses upfront helps you avoid surprises and ensures your vision can come to life without a hitch. Let’s walk through the other major costs you should factor into your total investment.

Excavation and Site Prep

Before your pool can be installed, your yard needs to be prepared. The construction process, which includes digging the hole for the pool, is often the most labor-intensive part of the project. This phase covers the heavy machinery, the skilled labor to operate it, and the initial framing of your pool structure. The cost for excavation can vary depending on your property. If your yard has rocky soil, a steep grade, or limited access for equipment, the site preparation may require more time and resources. A professional swimming pool company will assess your site early on to give you a clear idea of these costs.

Pool Decking, Coping, and Patios

The area immediately surrounding your pool, known as the pool deck or patio, is where you’ll do most of your lounging and entertaining. The cost for this part of the project depends heavily on the materials you choose and the total square footage. Coping, the material used to cap the pool shell wall, creates a finished edge and is another key design choice. You might opt for classic concrete, elegant natural stone, or modern porcelain pavers. Each material comes with a different price point and maintenance level, giving you the flexibility to match your budget and style.

Long Island Permits and Inspections

Building a pool on Long Island involves securing permits from your local town or village, and this process comes with its own set of fees. Each municipality in Nassau and Suffolk County has specific regulations for residential pools, which often include requirements for safety features like alarms, gates, and covers. Navigating these local codes can be complex, which is why working with an experienced contractor is so valuable. A builder who is familiar with your town’s requirements can manage the entire permitting process for you, ensuring everything is filed correctly and your project complies with all safety standards from the start.

Essential Add-Ons: Lighting, Heaters, and Water Features

This is where you can truly personalize your pool. While not strictly necessary, features like lighting and heaters can dramatically improve your swimming experience. LED lighting allows you to enjoy your pool after dark, while a heater can extend your swim season into the cooler days of spring and fall. You might also consider adding water features like a gentle waterfall, deck jets, or even an attached hot tub. These elements add movement, sound, and a touch of luxury to your backyard. It’s a good idea to decide which add-ons are most important to you and include them in your initial budget.

Landscaping and Safety Fencing

The final touches around your pool are what tie the whole space together. Professional landscaping can create a seamless transition from your new pool to the rest of your yard, adding privacy and beauty. Just as important is the installation of a safety fence. Most Long Island towns legally require a fence of a certain height with a self-latching gate to enclose the pool area. You have many options for fencing materials, from classic aluminum to low-maintenance vinyl, allowing you to choose a style that complements your home while meeting all safety codes.

Potential Changes to Homeowners Insurance

Adding a pool to your property will almost certainly affect your homeowners insurance. Because a pool is considered an “attractive nuisance,” it increases your liability, so your provider will likely require you to increase your coverage. It’s a smart move to call your insurance agent before you begin construction to understand how your premium will change. You should also discuss your pool’s construction with your builder. For instance, if you’re considering a saltwater system, it’s important to use polymer walls instead of metal ones, as salt can cause corrosion if the vinyl liner is ever punctured. Discussing these details ensures your pool is built for long-term enjoyment.

Popular Upgrades to Consider for Your Budget

Once you have the basic structure of your vinyl pool planned, it’s time for the fun part: choosing the features that will make it uniquely yours. While these upgrades will add to your initial investment, they can dramatically improve your pool’s functionality, beauty, and overall enjoyment. Think of them as investments in your backyard lifestyle. From creating a resort-like atmosphere to simplifying maintenance, here are some of the most popular upgrades Long Island homeowners add to their vinyl pools.

Waterfalls, Built-In Steps, and Tanning Ledges

If you’re dreaming of a backyard that feels like a private resort, custom water features are the way to go. A gentle waterfall adds soothing sounds and a beautiful focal point, transforming your pool area into a tranquil escape. For easier access and a more integrated look, consider built-in steps instead of a standard ladder. They provide a graceful entry point and double as in-pool seating. Another popular choice is a tanning ledge, also known as a sun shelf. This is a wide, shallow area perfect for placing a lounge chair in the water or giving toddlers a safe place to splash. These custom swimming pool features are best incorporated during the initial build to ensure a seamless design.

LED Lighting and Smart Automation

Adding LED lighting is one of the best ways to extend your pool time into the evening hours. Modern LED systems can create a stunning ambiance with a full spectrum of colors, all controlled with the touch of a button. It’s not just about looks; lighting also improves safety for night swimming. To make pool ownership even easier, you can integrate smart automation. Imagine adjusting your pool’s lights, heater, and water features directly from your smartphone. This technology gives you complete control over your pool environment without having to fiddle with equipment. It’s a modern convenience that many homeowners find is well worth the investment for the ease and flexibility it provides.

High-Efficiency Heaters

A pool heater is practically a necessity on Long Island if you want to maximize your swimming season. A high-efficiency heater allows you to comfortably open your pool earlier in the spring and keep it open well into the fall. While adding a heater will increase the upfront cost, think of all the extra weeks or even months of enjoyment you’ll get each year. Modern heaters are more energy-efficient than ever, helping you manage long-term operating costs while ensuring your pool is always the perfect temperature. It’s an upgrade that pays for itself in priceless family memories and extended relaxation time.

Upgraded Pumps and Filtration Systems

While not as glamorous as a waterfall, the pump and filter are the heart of your pool, and upgrading them can make a huge difference. A variable-speed pump is a smart investment that can save you a significant amount on your energy bills. Unlike single-speed pumps that run at full power all the time, a variable-speed model can operate at lower, more efficient speeds to circulate water. Pairing it with an upgraded filtration system, like a cartridge or diatomaceous earth (DE) filter, will keep your water clearer and healthier. These systems trap finer particles than standard sand filters, meaning you’ll enjoy sparkling water with less maintenance and fewer chemicals.

Comparing Pool Types: Vinyl, Fiberglass, and Concrete

While this guide focuses on vinyl pools, it’s helpful to see how they stack up against the other main players: fiberglass and concrete. Each type has its own set of benefits and considerations, and the right choice for your Long Island backyard depends on your budget, aesthetic goals, and how much maintenance you’re willing to handle. Understanding these differences will help you feel confident in your final decision. Gappsi has extensive experience installing all types of swimming pools, so we can help you find the perfect fit for your home. Let’s break down how they compare.

Vinyl vs. Fiberglass Cost and Maintenance

Think of vinyl and fiberglass pools as two different paths to the same destination. A vinyl liner pool typically has a lower initial installation cost, which is a major draw for many homeowners. It also offers great flexibility in size and shape. However, fiberglass pools often have a lower long-term cost of ownership.

While the upfront price for fiberglass is higher, you won’t have to replace a liner every five to nine years. Over a decade or two, this can make the total cost very similar, or even less than vinyl. Fiberglass pools are also known for their durability and low-maintenance, non-porous surface, which resists algae growth and requires fewer chemicals. The trade-off is that fiberglass shells come in predetermined shapes and sizes, offering less design freedom than a custom-built vinyl pool.

Vinyl vs. Concrete Cost and Maintenance

When you want complete design freedom, a concrete (or gunite) pool is the top choice. You can create any shape, size, or depth you can imagine, and integrate unique features like built-in tanning ledges or intricate tile work. This level of customization comes with the highest upfront cost and the longest installation time. A concrete pool is a significant masonry project that is built to last for decades.

In contrast, vinyl pools are much more budget-friendly and can be installed relatively quickly. The smooth vinyl surface is also gentle on your feet and less prone to algae than a porous concrete finish. The main downside is durability. A vinyl liner can be punctured and will need to be replaced eventually, whereas a concrete shell is incredibly strong and permanent.

A Look at Long-Term Ownership Costs

When you budget for a new pool, it’s important to think beyond the initial price tag. For vinyl pools, the biggest long-term expense is liner replacement. A new liner can cost several thousand dollars every five to nine years, depending on its quality and your pool’s size. This is a predictable cost you should factor into your annual home maintenance budget.

Fiberglass pools avoid this expense entirely, and their primary long-term cost is just routine chemical and electricity use. Concrete pools fall somewhere in the middle. While their structure is permanent, they do need to be resurfaced every 10 to 15 years, which is a significant expense. Proper care, including professional cleaning and sealing of the surrounding patio, also contributes to the overall upkeep of any pool area.

How to Finance Your New Vinyl Pool

A new vinyl pool is an exciting investment in your home and lifestyle, but it’s natural to think about how to pay for it all. The good news is you have several options for financing your project, making it easier to create the backyard oasis you’ve been dreaming of. Here’s a look at a few common paths homeowners take to fund their new pool.

Home Equity Loans and HELOCs

If you have equity built up in your home, a home equity loan or a Home Equity Line of Credit (HELOC) can be a smart way to fund your pool project. These options often come with lower interest rates than other types of loans because your home serves as collateral. Some lenders even offer renovation-specific loans that let you borrow against your home’s estimated value after the pool is installed, giving you more borrowing power. This approach is great for larger projects where you might be bundling your pool installation with other home remodeling updates, like a new patio or outdoor kitchen.

Personal Loans and Pool Financing Options

A personal loan is another popular route that doesn’t require you to use your home as collateral. While interest rates can sometimes be higher, these loans provide a straightforward way to get the funds you need and spread the cost over a set period. This makes the dream of owning a pool much more achievable without a huge upfront expense. Many homeowners find this to be a simple and effective solution. At Gappsi, we can help you understand all the possibilities for bringing your dream swimming pool to life, so you can choose the path that feels right for your family and your budget.

Paying with Cash and Seasonal Timing

If you have the funds available, paying with cash is the most direct way to finance your pool. You’ll avoid interest payments entirely, which keeps your total cost down and simplifies the whole process. Another smart strategy is to think about timing. You might find some savings by scheduling your pool installation during the off-season, like in the fall or early spring, when demand is typically lower. Planning ahead not only helps your budget but also ensures your backyard is ready for the first warm day of summer. We can work with you to find the ideal timeline for your new pool project.

Is a Vinyl Pool Right for Your Long Island Home?

Deciding on the right type of pool is a big step, and for many Long Island homeowners, a vinyl liner pool is an excellent choice. It’s about finding the perfect balance between your budget, your vision for your backyard, and the amount of maintenance you’re comfortable with. Vinyl pools offer a fantastic, customizable, and affordable way to create the backyard of your dreams. But before you take the plunge, it’s smart to weigh the specific considerations for our region, from the seasonal weather to the long-term costs. Let’s break down what owning a vinyl pool on Long Island really looks like.

Weather and Seasonal Use in Long Island

Here on Long Island, we love our summers, but we know they don’t last forever. This seasonal reality is exactly why vinyl liner pools are such a popular choice. They are generally more affordable to install than concrete or fiberglass options, which makes them a practical investment for an amenity you’ll use intensely for a few months each year. You get all the fun and relaxation of a private backyard oasis without the higher initial expense. Plus, modern vinyl swimming pools are known for their smooth, non-porous surfaces, which makes them easier to care for during the swimming season and simpler to winterize when the cool weather returns.

Understanding Liner Replacement and Maintenance

Let’s be direct about the most significant long-term cost of a vinyl pool: the liner. A high-quality vinyl liner typically lasts between five and nine years. When it’s time for a replacement, you can expect the cost to be around $4,500, which includes the new liner, labor, and fresh water. While this is a notable expense, it’s a predictable one you can plan for. Think of it as a periodic refresh that keeps your pool looking brand new. This process also gives you the chance to update the look of your pool with a new liner pattern or color, which is a unique benefit of vinyl pools.

Breaking Down Annual Upkeep Costs

Beyond the eventual liner replacement, your annual upkeep costs for a vinyl pool are quite manageable. On average, you can expect to spend between $350 and $800 per year on the chemicals and supplies needed to keep your pool water clean, safe, and sparkling. Over a decade, this regular maintenance adds up to about $7,000. This covers everything from chlorine and pH balancers to algaecide. When you consider the countless hours of enjoyment, family time, and relaxation your pool provides, this annual cost is a small price to pay for a beautiful addition to your home and backyard.

How to Maximize Your Pool Investment

A new pool is more than just a place to swim; it’s an investment in your home, your family’s happiness, and your lifestyle. To get the most out of this exciting addition, it helps to think strategically from the very beginning. Maximizing your investment isn’t just about finding the lowest price. It’s about making smart choices that ensure quality, longevity, and enjoyment for years to come. This means looking at the bigger picture, from who you hire to when you build and what you build around your pool.

Thinking ahead can save you from future headaches and unexpected costs. A well-planned project results in a beautiful, functional space that truly fits your needs and adds significant value to your property. By focusing on a few key areas, you can turn a simple pool installation into a complete backyard transformation. We’ll walk through how to select the right team for the job, the best time to schedule your installation for potential savings, and how to create a complete outdoor living environment that will be the envy of the neighborhood. These steps will help you feel confident in your decisions and thrilled with the final result.

Select the Right Pool Contractor

Choosing your pool contractor is the single most important decision you’ll make in this process. An experienced builder does more than just dig a hole; they guide you through every step, from initial design to final inspection. It’s best to work with a seasoned professional who can manage site preparation and understands all the local safety rules and permitting requirements here on Long Island. A reputable swimming pools company will have a proven track record, a portfolio of completed projects, and the expertise to handle any challenges that arise. This ensures your pool is built correctly, safely, and to the highest standards, protecting your investment for the long haul.

Time Your Installation for Potential Savings

While you might dream of a new pool during the summer heat, planning your installation for the off-season can be a smart financial move. You might save money by installing your pool during the fall, winter, or early spring when demand is lower. Contractors are often less busy during these months, which can lead to more scheduling flexibility and sometimes better pricing on labor and materials. Building in the off-season also gives you a head start, ensuring your pool is ready for the very first warm day of summer instead of being a construction zone during peak season.

Enhance Your Space with Outdoor Living Features

A pool is a fantastic centerpiece, but the features you build around it are what create a true backyard oasis. Don’t forget to budget for extra elements like waterfalls, special lighting, and beautiful patios, as these can complete the vision for your space. Think about how you want to use the area. A stunning masonry patio provides the perfect spot for lounge chairs, while a custom pavilion offers shade and a place for outdoor dining. Integrating these features from the start creates a cohesive, resort-like feel that extends your living space and makes your backyard the ultimate destination for relaxation and entertainment.

Related Articles

Frequently Asked Questions

What’s a realistic all-in budget I should plan for, beyond just the pool itself? While the pool itself might range from $35,000 to $65,000, it’s smart to plan for the total finished project. A good rule of thumb is to add 25 to 50 percent to your pool’s base cost to cover essentials like the patio, safety fencing, landscaping, and any electrical work. This means if your pool is quoted at $45,000, your complete backyard transformation could land somewhere between $56,000 and $67,000 once all the necessary and desired elements are included.

How often will I really need to replace the vinyl liner, and what does that involve? You can expect a quality vinyl liner to last between five and nine years with proper care. The replacement process is fairly straightforward for a professional team. It involves draining the pool, removing the old liner, making any minor surface repairs, and installing the new one. It’s a predictable maintenance item, and many homeowners see it as a great opportunity to give their pool a fresh look with a new color or pattern.

Why is a simple rectangular pool so much more affordable than a custom shape? A classic rectangular design is cost-effective because it relies on standard materials and a straightforward construction process. The straight lines and right angles are simpler to excavate and build, which reduces labor time. Custom, freeform shapes require more specialized work, including a custom-made liner and more complex framing and excavation, all of which add to the final cost.

What is the most common “surprise” cost I should be prepared for? The most frequent unexpected cost comes from site preparation. Every backyard is unique, and issues like a steep slope requiring a retaining wall, rocky soil that’s difficult to dig, or poor access for machinery can add to the budget. This is why a thorough site evaluation by an experienced contractor before any work begins is so important, as it helps identify these potential challenges upfront.

How long does the actual pool installation process take from start to finish? Once the permits are secured, the physical construction of a vinyl liner pool is relatively quick. For a standard project without major site complications, the installation process typically takes between two and five weeks. This timeline covers everything from the initial excavation to filling the pool with water, getting you ready to swim much faster than with other pool types.

Share this page:
Gunite pool and patio contractors planning a new backyard installation.

Gunite Pool and Patio Contractors: What to Expect

Your backyard has incredible potential, and a gunite pool and patio can turn that potential into your family’s favorite destination. This isn’t just an upgrade; it’s a lifestyle investment that provides a beautiful setting for relaxation, entertainment, and making lasting memories. Because a gunite pool is a permanent structural addition to your home, the quality of the craftsmanship is paramount. The entire success of the project rests on the team you hire. You need more than just builders; you need dedicated partners who understand landscape integration, masonry, and high-end finishes. Choosing the right gunite pool and patio contractors is the first and most important step, ensuring your new outdoor space is built to last and exceeds all your expectations.

Key Takeaways

  • Gunite means custom and durable: Unlike other pool types, gunite is built to last for decades and can be designed in any shape or size you can imagine, making it a true extension of your home and personal style.
  • Plan your budget for today and tomorrow: Your total investment includes the initial construction, which is based on size and design, plus long-term care like annual maintenance and eventual resurfacing. Factoring in both from the start prevents future financial surprises.
  • Vet your contractor thoroughly: The right partner is essential for a smooth project, so protect your investment by verifying their license and insurance, calling their references, and insisting on a detailed contract that outlines the timeline, payment schedule, and warranties.

Is a Gunite Pool and Patio a Good Investment?

Deciding to add a pool and patio to your home is a big step, and it’s smart to ask if it’s a worthwhile investment. The answer is a resounding yes, especially when you choose a gunite pool. This isn’t just about adding a feature to your backyard; it’s about creating a lifestyle. A gunite pool and patio combination transforms your property into a personal resort, a place for making memories with family, entertaining friends, and enjoying quiet moments of relaxation. While the initial cost is a factor, the long-term value is undeniable, both in terms of enjoyment and property value.

Unlike other pool types, a gunite installation is built to last for decades, making it a permanent and valuable addition to your home. The design flexibility means you can create a space that is perfectly tailored to your landscape and personal style. When you combine a custom swimming pool with a beautifully designed patio, you’re not just improving your property, you’re expanding your living space. This cohesive outdoor environment becomes an extension of your home, offering a seamless transition from indoors to outdoors. It can significantly increase your home’s appeal and market value, making it a solid investment in both your property and your quality of life.

Unmatched Durability

When we talk about durability, gunite pools are in a class of their own. A gunite pool is a robust concrete structure created by spraying a specialized concrete mixture over a steel rebar frame. This process builds a solid, monolithic shell that is incredibly strong and built to withstand the test of time. Because they are constructed on-site, they become an integral part of your property. With proper maintenance, a gunite pool can easily last for more than 50 years, far outliving other pool types. This longevity means you won’t have to worry about costly liner replacements or structural issues down the road. Investing in gunite is an investment in permanence, giving you peace of mind and a beautiful backyard feature that your family can enjoy for generations.

Limitless Design and Customization

One of the most exciting aspects of a gunite pool is the complete creative freedom it offers. Since gunite is sprayed onto a custom-built frame, you are not limited to pre-fabricated shapes or sizes. Your imagination is truly the only boundary. Whether you envision a sleek, modern geometric pool, a free-flowing lagoon with natural rock features, or a classic Roman-style design, gunite can make it happen. This flexibility extends to custom features that can be integrated directly into the pool’s structure. Think about adding built-in benches for socializing, a shallow tanning ledge for lounging, or a cascading waterfall. Our expert masonry services allow us to craft these unique elements, ensuring your pool is a one-of-a-kind masterpiece.

The Perfect Patio Pairing

A stunning gunite pool deserves an equally beautiful patio to complete the scene. The patio is the bridge between your home and your pool, creating a cohesive and functional outdoor living area. It’s where you’ll place your lounge chairs, set up a dining table for alfresco meals, and gather with loved ones. A well-designed patio expands your home’s usable square footage and provides a comfortable, stylish space for entertainment and relaxation. We can help you select the perfect materials, like elegant porcelain or natural stone pavers, that complement both your pool and your home’s exterior. By integrating features like an outdoor kitchen or a shaded pergola, your patio becomes a true outdoor room, elevating your backyard into a luxurious retreat.

Breaking Down the Cost of a Gunite Pool and Patio

Let’s talk about one of the biggest questions on every homeowner’s mind: what will it cost? A gunite pool and patio is a major home improvement project, and understanding the budget is the first step to bringing your vision to life. The final price can vary quite a bit because every project is unique. Your dream design, the size of your yard, and the features you choose all play a role in the total investment.

Think of it less as a fixed price and more as a custom quote tailored to you. The beauty of a gunite pool is its flexibility, which also applies to the budget. You can create a simple, elegant retreat or a feature-rich entertainment hub. Our goal is to give you a clear picture of where your money goes so you can make informed decisions. From the initial design to the final tile, we’ll break down the expenses, helping you create a realistic budget that aligns with your goals for a stunning backyard transformation.

Key Factors That Influence Price

Several key elements will shape the final cost of your gunite pool. The most significant factors are size and depth; a larger, deeper pool requires more materials and labor. The shape also matters. A classic rectangular pool is typically more straightforward to build than a custom freeform design with curves and unique angles.

Beyond the basic structure, any special features will add to the price. Think about additions like a tanning ledge, a built-in spa, waterfalls, or custom lighting. The condition of your property is another consideration. A sloped yard or rocky soil may require extra excavation and site preparation, which can affect the cost. We can help you explore different swimming pool designs to find a perfect fit for your vision and budget.

Where Your Budget Goes

When you receive a quote for a gunite pool, the total is a sum of several distinct parts. On average, a complete installation can range from $65,000 to over $120,000, depending on the complexity. The bulk of your budget, often $60,000 or more, will go toward materials. This includes the steel rebar, the gunite itself, plumbing, electrical components, and your chosen interior finish.

Labor costs can range from $5,000 to $30,000, covering the skilled teams who handle excavation, construction, and finishing. Excavation itself can be a separate line item, along with necessary permits. The surrounding patio is also a key part of the budget, with costs depending on the size and the porcelain or natural stone you select.

How to Plan for Unexpected Costs

A smart budget accounts for more than just the initial construction. It’s wise to plan for the long-term care of your investment. Annually, you can expect to spend between $2,700 and $4,000 on routine maintenance, which includes chemicals, cleaning, and opening or closing the pool for the season. This ensures your pool water stays clean, safe, and sparkling.

Additionally, gunite pools require resurfacing every 7 to 15 years to maintain their integrity and appearance. This is a more significant expense, typically costing between $6,000 and $15,000. Planning for these future costs from the beginning helps prevent surprises down the road. Our restoration and sealing services can help keep both your pool and patio in top condition for years to come.

Your Gunite Pool and Patio Project: A Step-by-Step Guide

Seeing your dream backyard take shape is an exciting process. Building a custom gunite pool and patio is a major construction project, but it doesn’t have to be overwhelming. When you partner with an experienced team, you can feel confident and informed every step of the way. We believe in transparency, so we’ve broken down the entire construction journey from the first design sketch to the final walkthrough. This guide will give you a clear picture of what to expect as we transform your property.

The beauty of a gunite pool is its complete customization, which means the process is tailored to your unique vision. At Gappsi, we manage every detail in-house, from securing permits to installing the final paver. Our integrated approach ensures your new swimming pool and patio are built to the highest standards, creating a seamless and stunning outdoor oasis you’ll enjoy for decades. Let’s walk through the process together.

Step 1: Design, Planning, and Permits

This is where your vision starts coming to life. Our design process is a collaborative effort where we sit down with you to map out every detail. We’ll discuss the ideal shape, size, and depth of your pool, along with features like steps, benches, or sun shelves. At the same time, we’ll design the surrounding patio, ensuring it complements the pool and your home’s architecture. We consider how you plan to use the space, whether for quiet relaxation or large family gatherings. Once the design is finalized, our team handles the essential but tedious task of securing all necessary town and village permits on Long Island, making sure your project complies with local building codes from the very beginning.

Step 2: Excavation and Steel Framework

Once the permits are approved, the physical work begins. The first major step is excavation, where our crew carefully digs out the area for your new pool according to the design specifications. You’ll see your backyard transform as the shape of your pool emerges from the ground. Immediately following excavation, we install a complex web of steel rebar. This steel grid acts as the skeleton of your pool, creating a strong framework that will reinforce the gunite shell. This step is critical for the structural integrity and long-term durability of your pool, forming the backbone for the entire project.

Step 3: Gunite Application and Curing

This is the step that gives a gunite pool its name and its strength. Using a high-pressure hose, our team sprays a specialized, dry concrete mix called gunite over the entire steel framework. This technique allows us to create the fluid curves and custom shapes that make gunite pools so desirable. After the gunite is applied and expertly shaped, it needs to cure. This hardening process is crucial for achieving maximum strength. During this period, the pool shell is often lightly watered to ensure it cures evenly, preventing cracks and creating a monolithic, watertight structure that will last a lifetime.

Step 4: Plumbing, Electrical, and Finishes

With the gunite shell fully cured, we move on to installing the pool’s circulatory and electrical systems. Our technicians will strategically place all the necessary plumbing for skimmers, drains, and jets to ensure proper water filtration and flow. We also run the electrical lines for underwater lighting, pumps, and any automated features. Next comes the beautiful finishing touches. We’ll install your chosen waterline tile and the coping, which is the stone or paver edge around the pool’s perimeter. Finally, we apply the interior finish, such as plaster or a durable pebble aggregate, which gives the pool its smooth surface and beautiful water color.

Step 5: Patio Integration and Final Walkthrough

Now it’s time to connect your stunning new pool to your home by building the patio. Whether you’ve chosen elegant porcelain pavers or natural stone, our masonry experts will meticulously lay the foundation for your new outdoor living area. This is also when we install other features like outdoor kitchens, fire pits, or even a beautiful pergola to provide shade. Once the construction is complete, we’ll conduct a final walkthrough with you. We’ll inspect every detail, answer all your questions, and make sure you’re completely satisfied with your new backyard retreat before we consider the project finished.

How Long Will It Take?

Patience is key when building a high-quality custom pool and patio. On average, you can expect a gunite pool project to take between 8 and 12 weeks from excavation to completion. However, this timeline can vary. Larger, more intricate designs with complex features will naturally require more time. Other factors, like weather delays or unforeseen site conditions, can also extend the schedule. At Gappsi, we provide a realistic timeline from the start and maintain open communication throughout the project, so you always know what’s happening. Remember, the goal is to build a backyard oasis that lasts, and quality craftsmanship is always worth the wait.

Common Construction Challenges to Anticipate

Even with a perfect plan, any major construction project can face a few bumps in the road. Knowing what to expect ahead of time helps you prepare and keeps stress to a minimum. Think of these potential hurdles not as problems, but as part of the process that a great contractor will help you handle. From unpredictable Long Island weather to the specifics of your property, being aware of common challenges is the first step to a smooth and successful project. A transparent partnership with your build team is key to addressing these issues as they arise, ensuring your vision comes to life just as you imagined.

Weather and Permit Delays

Two things no one can control are the weather and administrative timelines. Here on Long Island, a sudden string of rainy days can pause excavation or gunite application, slightly shifting your project schedule. Similarly, securing building permits is a necessary step that involves local municipal offices, and their processing times can vary. A seasoned contractor anticipates these possibilities and builds buffer time into the project plan. They will handle the permit submissions for you and keep you updated, so while you can’t speed up the rain or the paperwork, you’ll always know what’s happening and feel confident in the timeline.

Managing Soil and Site Conditions

Every property is unique, and the ground beneath your yard plays a big role in the construction process. Things like rocky soil, a steep slope, or limited access for equipment can add time and cost to the excavation phase. This is why a thorough site assessment before any work begins is so important. An experienced team will evaluate your property’s specific conditions and discuss any potential complexities with you upfront. This initial landscape design and planning phase ensures that factors like drainage and grading are properly addressed, preventing surprises down the line and setting your project up for success.

How to Stay on Budget

Sticking to a budget is a top priority for most homeowners. The final price of your gunite pool and patio depends on many variables, including size, depth, design complexity, and your chosen materials. For example, the type of porcelain and natural stone you select for the patio will influence the overall cost. Beyond the initial build, it’s also wise to plan for the future. Remember to factor in the ongoing costs of ownership, such as monthly cleaning and chemicals. A detailed estimate from your contractor should break down all these costs clearly, helping you make informed decisions and ensuring your new backyard remains a source of joy, not financial stress.

How to Find the Right Gunite Pool Contractor

Choosing the right contractor is the most important decision you’ll make for your gunite pool and patio project. The right partner will bring your vision to life with skill and professionalism, while the wrong one can turn your dream project into a stressful ordeal. This isn’t just about finding someone who can build a pool; it’s about finding a team you can trust to manage a complex construction project in your backyard. A great contractor communicates clearly, respects your budget, and has a proven track record of creating beautiful, durable outdoor spaces. To ensure you find a reliable expert for the job, it’s essential to do your homework. Taking the time to properly vet potential builders will give you peace of mind and help you feel confident as you move forward with your investment. Think of it as building a partnership. You want someone who is as committed to the final result as you are.

Verify Credentials, Licensing, and Insurance

Before you even look at a portfolio, your first step is to confirm the contractor’s credentials. Any professional you consider should be fully licensed and insured in New York. This is a step you just can’t skip. Proper licensing ensures they meet state and local standards, while insurance protects you from liability in case of accidents on your property. A reputable company will have no problem providing you with proof of their general liability insurance and workers’ compensation. Don’t be shy about asking for these documents. A contractor who is hesitant to share this information is a major red flag. This simple verification step is your first line of defense in protecting your home and your investment in a new swimming pool.

Review Portfolios and Check References

Once you’ve confirmed a contractor is properly licensed and insured, it’s time for the fun part: seeing their work. Ask to see a portfolio of their completed gunite pool projects. Pay close attention to the details, the quality of the finishes, and the overall design. Do their projects align with the style you envision for your own backyard? A strong portfolio is a great sign, but don’t stop there. Ask for a list of recent references and actually call them. Ask previous clients about their experience with the contractor’s communication, timeliness, and professionalism. You can also watch videos of their work to get a better sense of their craftsmanship and the scope of their projects.

Contractor Red Flags to Avoid

As you meet with potential contractors, keep an eye out for warning signs. Be wary of anyone who pressures you to sign a contract immediately or offers a deal that seems too good to be true. Another major red flag is a request for a large upfront payment. Payments should be made in installments tied to specific project milestones. You should also be cautious of contractors who provide vague estimates or are unwilling to put all the details in writing. A trustworthy partner will provide a clear, itemized quote and a transparent payment schedule. Your contractor should be a partner in your home remodeling project, not a source of stress.

Key Questions to Ask Before You Sign

You’ve reviewed portfolios, checked references, and found a contractor you trust. Now comes the most important part: the contract. Before you put pen to paper, it’s essential to get crystal clear on the details. Asking the right questions now protects your investment and ensures a smooth process from start to finish. A professional contractor will welcome these questions and provide clear, confident answers. This final check helps you confirm you’re partnering with a team that values transparency and is committed to bringing your vision for a new swimming pool to life without any unwelcome surprises down the road.

Timelines, Milestones, and Payments

A well-defined project plan is your roadmap to completion. Ask for a detailed timeline with specific milestones, like excavation, gunite application, and patio installation. Your payment schedule should align directly with these milestones. It’s standard practice to avoid paying a large sum upfront. Instead, payments should be made as work is completed and approved by you. This structure keeps everyone accountable and ensures you only pay for work that meets your standards. Before agreeing to anything, confirm the contractor is fully licensed and insured for your protection.

What a Detailed Estimate Should Include

A professional estimate is more than just a final number. It should be a comprehensive document that breaks down every cost associated with your project. Make sure your estimate clearly itemizes expenses for materials, labor, permits, and equipment. It should also outline any allowances for finishes like tile or coping, so you know exactly what’s included. A transparent estimate prevents misunderstandings about unexpected costs later on. If an estimate seems vague or too good to be true, it’s a sign to ask for more detail before moving forward.

Understanding Warranties and Aftercare

Your relationship with your contractor shouldn’t end when the construction is finished. A quality gunite pool is a long-term investment, so it’s important to understand the warranties provided. Ask for specific details on the warranty for the pool structure itself, as well as for the individual components like pumps, filters, and heaters. You should also inquire about aftercare support. Does the company offer maintenance packages or restoration and sealing services to keep your pool and patio looking pristine for years to come? Knowing who to call for future upkeep provides valuable peace of mind.

Maintain Your New Gunite Pool and Patio

Your beautiful new gunite pool and patio are finished, and it’s time to enjoy them. To keep your backyard oasis looking and functioning its best for decades, a consistent maintenance routine is key. Think of it not as a chore, but as protecting your investment. Proper care prevents small issues from becoming costly problems and ensures your pool is always ready for a spontaneous swim. With a simple plan, you can easily manage the upkeep and spend more time relaxing.

Cleaning and Water Chemistry Basics

Keeping your gunite pool’s water clean and chemically balanced is the most important part of your maintenance routine. You’ll want to test the water weekly and adjust the chemicals as needed to keep it safe and sparkling. Regular skimming and vacuuming will also prevent debris from staining the surface. While you can do this yourself, many homeowners opt for professional service, which often costs between $80 and $150 per month. To maintain the plaster finish, your swimming pool will need an acid wash every three to five years and a complete resurfacing every 10 to 15 years.

Inspect for Cracks and Wear

A quick visual inspection of your pool and patio each week can save you a lot of trouble down the road. Take a few minutes to walk around and look for any small cracks in the gunite surface or the surrounding masonry. Because gunite can be more prone to algae if not cleaned often, it’s also a good time to check for any stubborn spots. Addressing a small crack is a relatively simple fix, but letting it go can lead to bigger structural issues. Prompt restoration and sealing is the best way to protect the integrity of your pool shell and keep it looking flawless.

Seasonal Sealing and Winterization

Here on Long Island, preparing your pool and patio for the winter is an essential step. Properly winterizing your gunite pool protects the plumbing from freezing and cracking, and it prevents damage to the pool shell and tile line. This process involves lowering the water level, clearing the lines, and adding winterizing chemicals before covering it securely. It’s also a great time to inspect your patio and apply a sealant if needed, protecting your masonry from the harsh freeze-thaw cycles. A proper seasonal shutdown ensures that when spring arrives, your pool is in great shape and ready for another season of fun.

Partner with Gappsi for Your Dream Backyard

Choosing a contractor for your gunite pool is one of the most important decisions you’ll make for your home. You’re not just hiring someone to dig a hole; you’re trusting a team to build the centerpiece of your family’s summer memories. At Gappsi, we’ve spent decades turning Long Island backyards into personal resorts, and we understand that this project is a significant investment in your home and lifestyle. Our goal is to make the entire process, from design to the first swim, a seamless and exciting experience.

Gunite offers incredible design freedom, which is why it’s such a popular choice. These swimming pools are built to last a lifetime and can be molded into any shape or size you can imagine. Whether you envision a sleek, modern rectangle with sharp lines or a freeform lagoon with natural rock features, we can create it. The construction process is meticulous, typically taking 8 to 12 weeks, because quality and durability are our top priorities. We build pools that stand the test of time, giving you a beautiful and functional space for decades.

A gunite pool is a long-term asset, often lasting more than 50 years with the right care. While they are incredibly durable, they do require periodic maintenance to stay in pristine condition. As your long-term partner, we can help you with everything from routine upkeep to future restoration and sealing to protect your investment.

Your dream backyard doesn’t stop at the water’s edge. We specialize in creating cohesive outdoor environments where the pool is perfectly integrated with its surroundings. Imagine a stunning patio made from elegant porcelain pavers, a custom outdoor kitchen for entertaining, or a cozy fire pit for cool evenings. Our expertise in masonry and landscape design ensures every element works together beautifully. When you partner with Gappsi, you get a single, dedicated team to manage your entire project, ensuring a smooth process and a spectacular result.

Related Articles

Frequently Asked Questions

How is a gunite pool different from a vinyl liner or fiberglass pool? Think of a gunite pool as a custom-built, permanent structure, while vinyl and fiberglass pools are more like pre-packaged options. Gunite is built on-site with a steel frame and sprayed concrete, so you can design any shape or size you want. Fiberglass pools are pre-molded shells that are dropped into place, limiting your design choices. Vinyl liner pools are built into a frame, but the liner needs to be replaced every several years. Gunite is built to last for decades, making it a true, long-term part of your property.

How much disruption should I expect in my backyard during construction? Building a pool is a major construction project, so you should expect your backyard to be a work zone for several weeks. There will be excavation equipment, building materials, and a team of professionals on-site. A great contractor, however, will work hard to minimize the impact on your daily life. They will establish a clear path for equipment, keep the site as tidy as possible, and communicate with you regularly about the schedule so you always know what to expect.

Why is it better to have one company handle both the pool and the patio? Using one company for your entire backyard project ensures a seamless and cohesive result. When the same team designs and builds both the pool and the surrounding patio, they can guarantee the styles, materials, and elevations all work together perfectly. This integrated approach also simplifies project management, as you have a single point of contact responsible for the entire timeline and budget. It eliminates the risk of miscommunication between different contractors, leading to a smoother process and a more unified final look.

Can I add features like a spa or waterfall to my gunite pool later on? While it is technically possible to add features to an existing gunite pool, it is a much more complex and expensive process than including them in the initial build. Adding a spa or integrated waterfall later would require significant work, including breaking into the original pool shell and redoing plumbing and finishes. For this reason, it’s always best to plan for all the features you want from the very beginning. This ensures they are structurally integrated and function perfectly from day one.

How soon after the pool is finished can I actually start swimming? This is the question everyone is excited to ask. Once the final interior finish is applied to your pool, it will be filled with water. After that, the water needs to be chemically balanced and the equipment needs to run for a bit to ensure everything is circulating properly. This process, often called the “start-up,” usually takes a few days. Your contractor will let you know exactly when the water is perfectly balanced and safe, giving you the green light to take your first official swim.

Share this page: