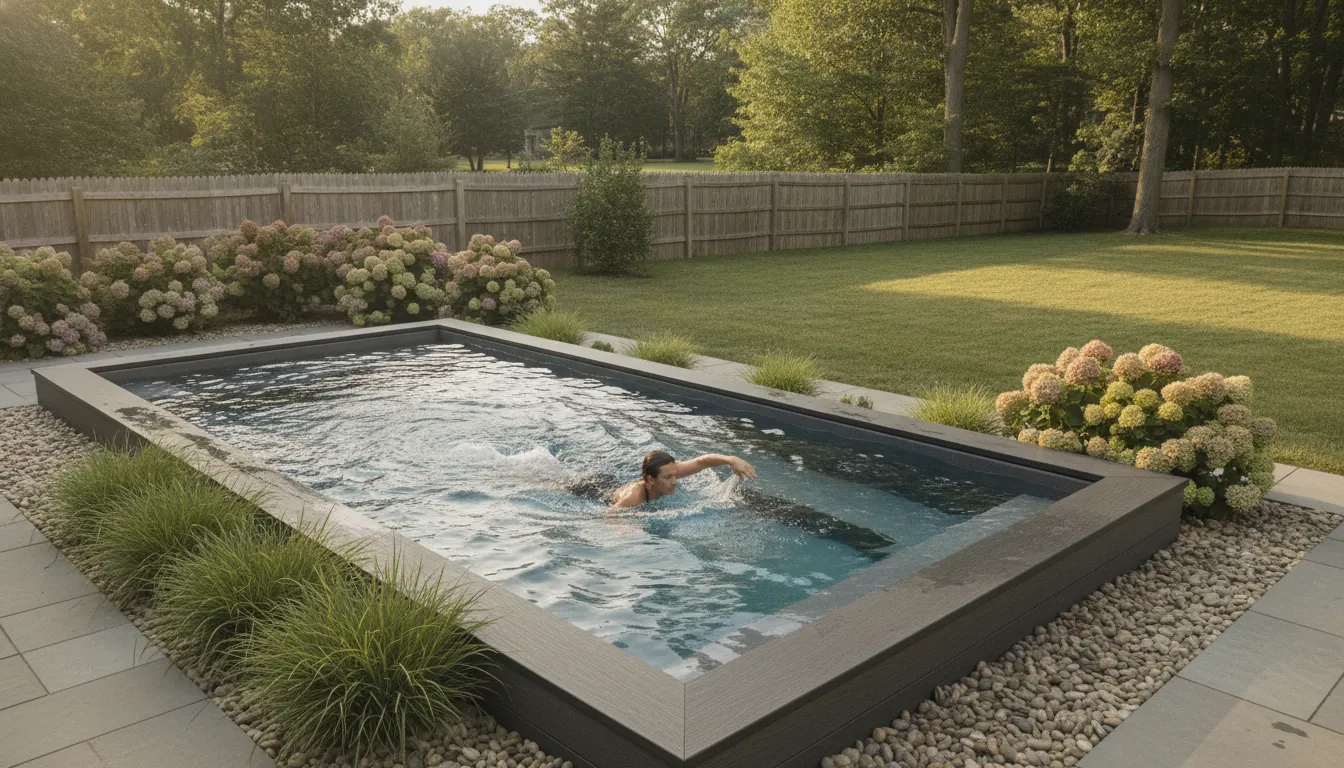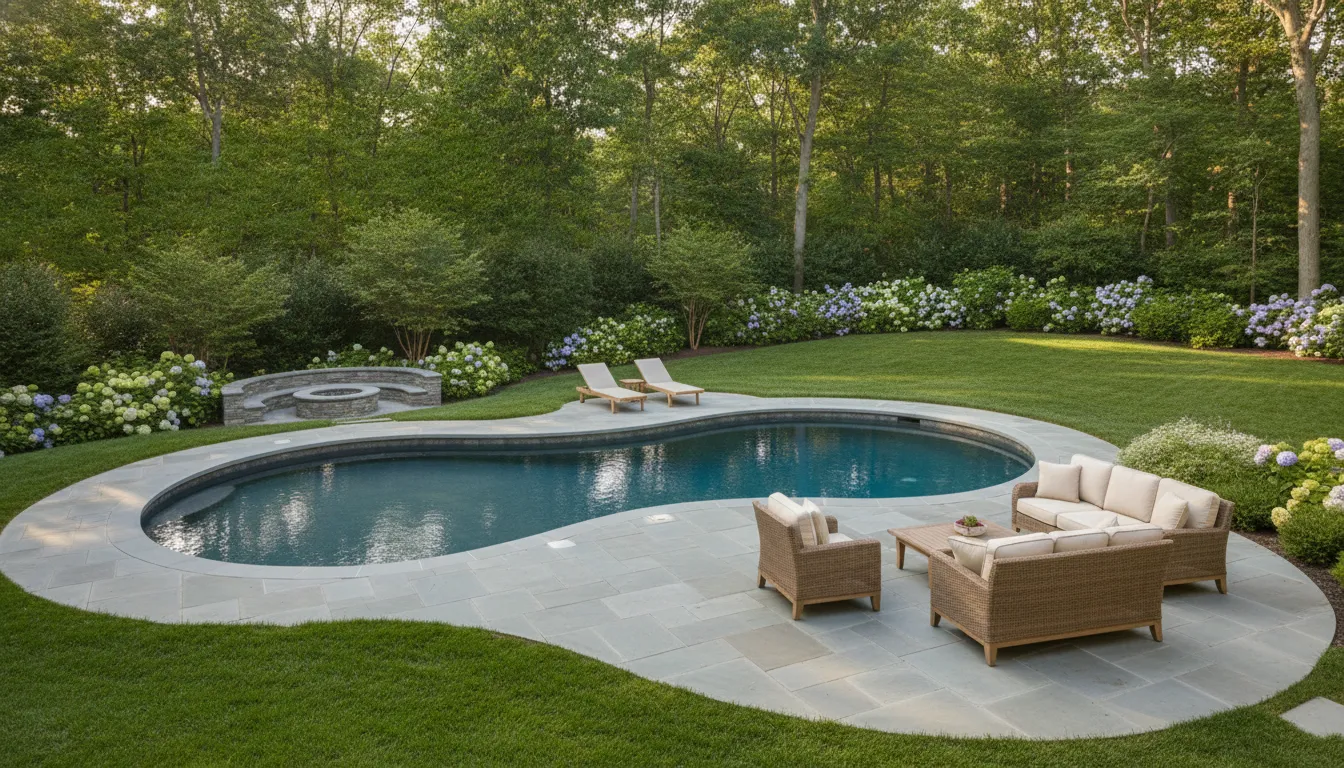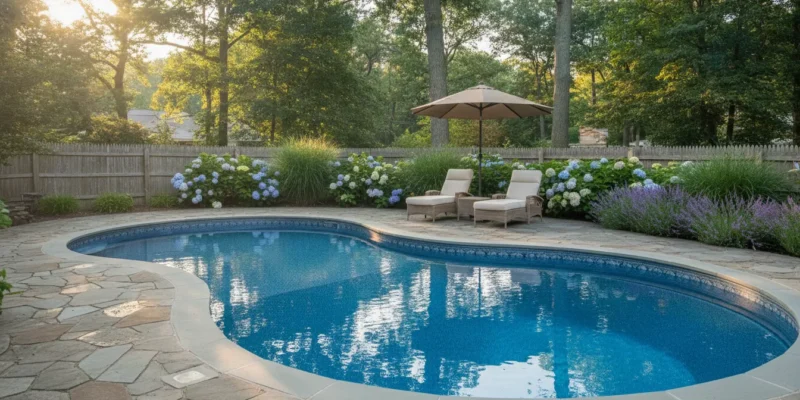
Modern Luxury in Brookville, NY: Inside Gappsi’s Latest Gunite Pool & Custom Porcelain Hardscape Transformation

View Gappsi’s YouTube Channel to view Modern Luxury in Brookville, NY: Inside Gappsi’s Latest Gunite Pool & Custom Porcelain Hardscape Transformation

There is something truly captivating about a well-executed backyard transformation. When high-end materials, thoughtful spatial planning, and master craftsmanship converge, the result isn’t just an outdoor space; it is a private resort right outside your backdoor.

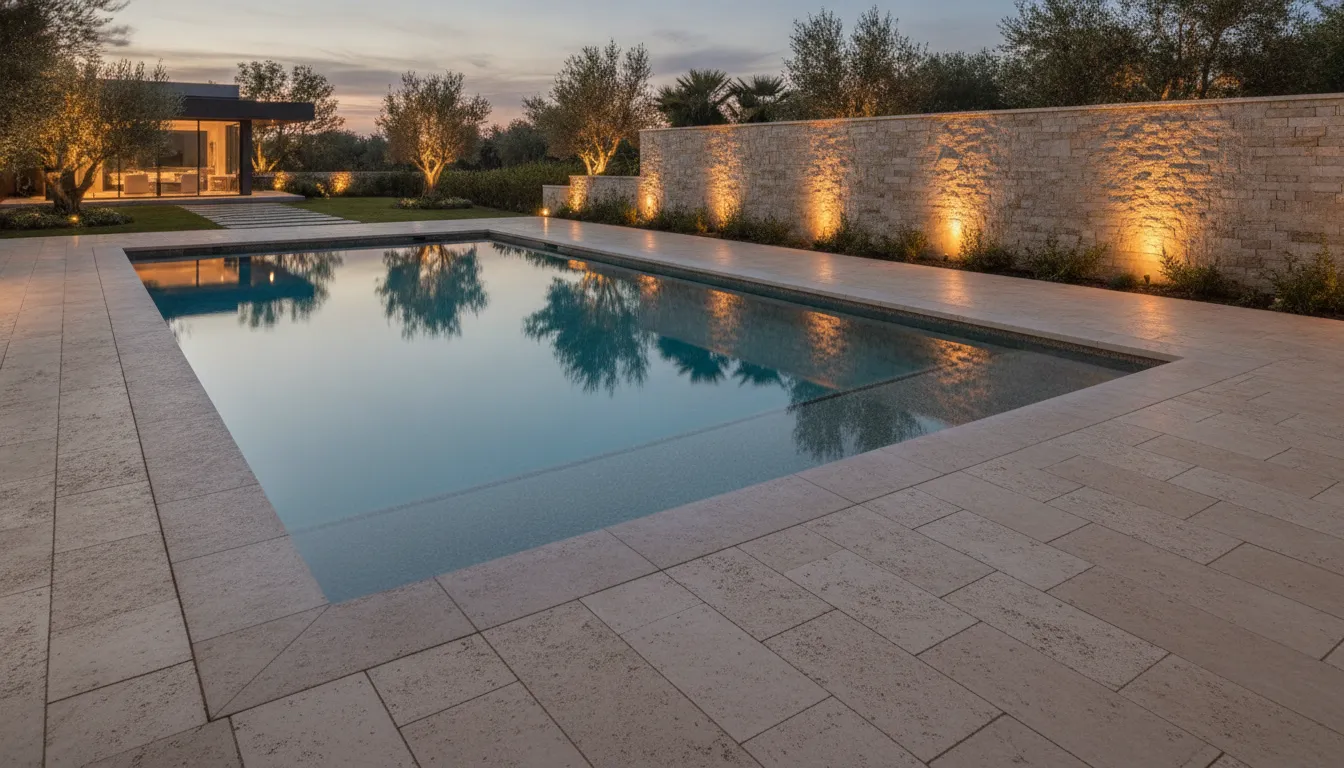
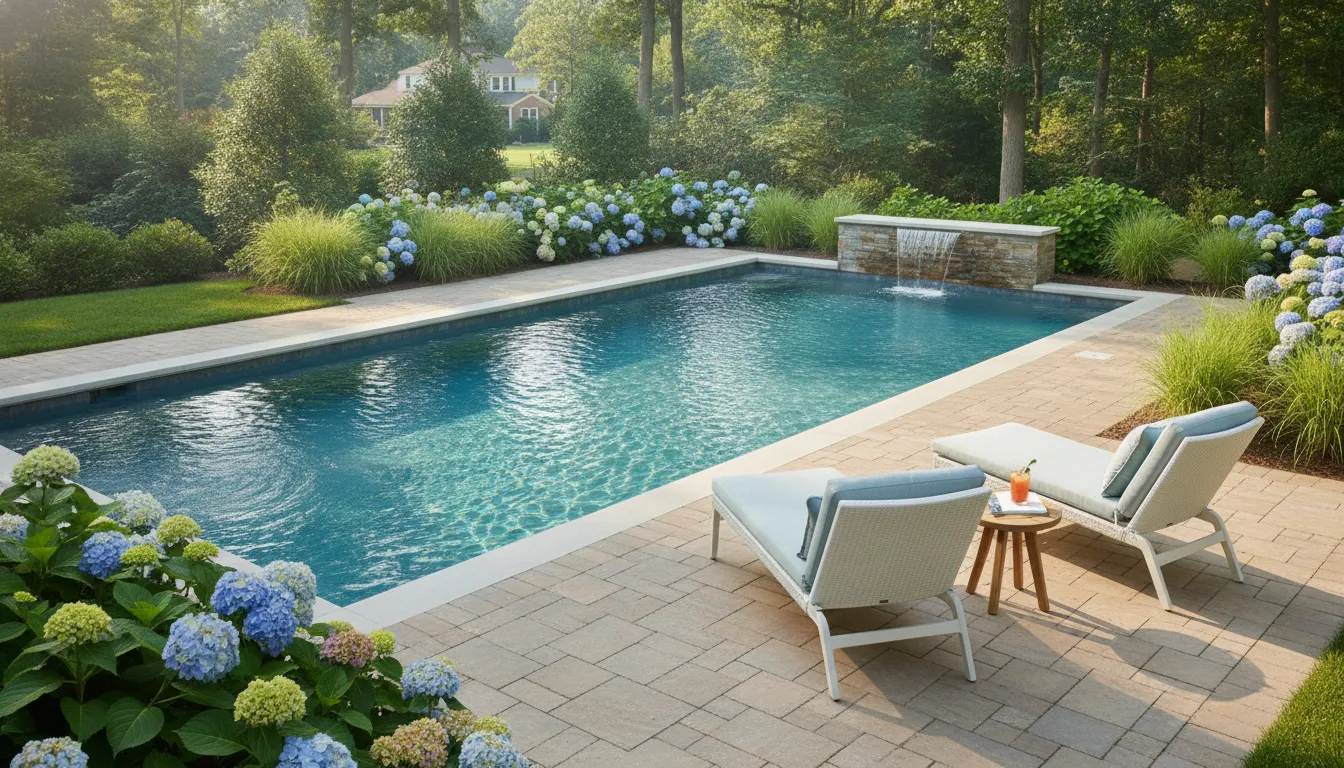
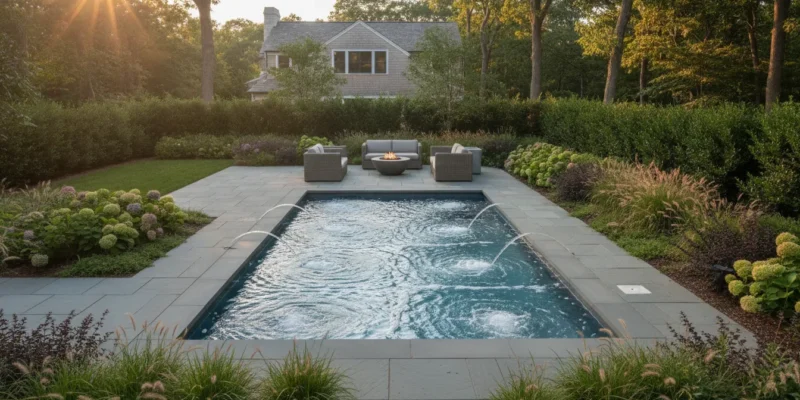
At Gappsi, we recently wrapped up a complete backyard estate installation in the prestigious community of Brookville, NY. This project showcases what is possible when modern architectural design meets world-class pool construction. From a massive 20’ x 70’ custom gunite pool finished in radiant Pebble Brilliant to intricate porcelain paver patterns woven with synthetic turf, every square inch of this property was engineered for elegance, durability, and effortless outdoor living.

Here is a closer look inside this spectacular Long Island backyard build.

1. Grand Scale Meets Smart Engineering: The 20’ x 70’ Gunite Pool

When designing a pool for a sprawling estate in Brookville, proportions are everything. A standard-sized pool can easily get lost in a large property. For this project, our design team specified an expansive 20-foot-wide by 70-foot-long gunite pool.

Gunite (pneumatically applied concrete) is the gold standard for custom swimming pools. It gives us total structural freedom to sculpt precise lines, custom benches, and built-in steps while offering unmatched structural longevity in the variable Long Island climate.

Contemporary 5-Foot Resort Depth

While traditional pools often featured deep ends reaching 8 to 10 feet, modern homeowners are shifting toward more functional, social-friendly water depths. This entire 70-foot pool was designed with a maximum depth of 5 feet.

  • Enhanced Usability: A continuous shallow-to-mid depth makes the entire footprint usable for water sports, casual floating, and active socializing.

  • Lap Swimming: At 70 feet long, the pool offers a true lap-swimming experience, allowing fitness enthusiasts to swim long strides without hitting deep drop-offs.

  • Safety & Comfort: Swimmers of varying heights can comfortably touch the bottom across broad sections of the pool, creating an inviting environment for guests of all ages.

2. Water Finish & Accents: Pebble Brilliant & Custom Glass Tile Work

The interior finish defines how a pool interacts with natural sunlight. To create a luminous, rich water color that glimmers throughout the day, we applied Pebble Brilliant across the entire interior surface.

What is Pebble Brilliant?

Pebble Brilliant is a premium aggregate pool finish that combines smooth, natural pebbles with vibrant interior pigmentation. The result is a silky-smooth tactile feel underfoot, superior resistance to chemical wear, and an incredible oceanic hue that reflects the sky.

Intricate Glass Tile Framing

To elevate the water line and accentuate the pool’s interior geometry, our masons installed custom glass tiles across key architectural focal points:

  • 6-Inch Waterline Band: A pristine 6-inch band of iridescent glass tiles lines the top of the pool perimeter, catching light above and below the surface.

  • Step & Bench Trimmers: Glass tile safety trimmers line the leading edges of every step and interior seating bench. This not only creates striking visual contrast against the blue water, but it also provides a clear visual guide for swimmer safety.

3. Year-Round Convenience: Integrated Spa & Automatic Cover

A true luxury outdoor space must be as functional as it is beautiful. This Brookville project incorporates two high-performance elements that make pool ownership seamless and enjoyable.

                      +------------------------------------------+
                      |         20' x 70' GUNITE POOL            |
                      |  - Pebble Brilliant Interior Finish      |
                      |  - Glass Tile Waterline & Step Trimmers  |
                      |  - Max Depth: 5 Feet                     |
                      +------------------------------------------+
                                           |
                                           v
    +--------------------------------------+--------------------------------------+
    |                                                                             |
    v                                                                             v
+------------------------------------+                         +------------------------------------+
|           INTEGRATED SPA           |                         |       AUTOMATIC POOL COVER         |
| - Custom single-step corner entry  |                         | - Hidden track system              |
| - Year-round hydrotherapy heating  |                         | - Thermal heat retention & safety  |
+------------------------------------+                         +------------------------------------+

Custom Integrated Spa

Seamlessly built into the pool structure, the custom spa offers a dedicated hydrotherapy retreat. To maintain clean visual lines while ensuring comfortable access, we crafted a custom single-step entry in the corner of the spa. This subtle design detail allows for safe, graceful entry into the spa without disrupting the seating area or taking up valuable interior foot room.

Concealed Autocover System

Safety, heat retention, and cleanliness are paramount for large-format pools. We equipped this installation with an automatic pool cover (autocover) concealed within a flush-mounted mechanism.

At the press of a button, the durable mechanical cover glides over the 70-foot span. The benefits are significant:

  1. Safety: Creates a reliable physical barrier to protect children and pets.

  2. Energy Efficiency: Retains water heat overnight, dramatically cutting utility costs during cooler spring and autumn evenings.

  3. Debris Control: Prevents leaves and surrounding yard debris from entering the pool, minimizing filtration cycles and chemical usage.

4. Modern Hardscaping: Porcelain Pavers & Synthetic Turf Inlays

While the pool is the centerpiece, the surrounding hardscape sets the tone for the entire outdoor living space. For the patio, pool coping, and sun decks, we selected high-grade porcelain pavers—the ultimate material for modern pool surrounds.

Why Porcelain Pavers Outperform Traditional Stone

  • Cool Touch Technology: Porcelain reflects solar heat far better than natural bluestone or dark concrete, staying comfortable under bare feet during hot Long Island summers.

  • Slip-Resistant & Non-Porous: Engineered outdoor porcelain features a textured surface for wet-foot safety and resists staining from saltwater, chlorine, spills, or fallen leaves.

  • Color Uniformity: Offers crisp, clean architectural lines that do not fade over time.

The 4×4 Paver & Synthetic Turf Grid

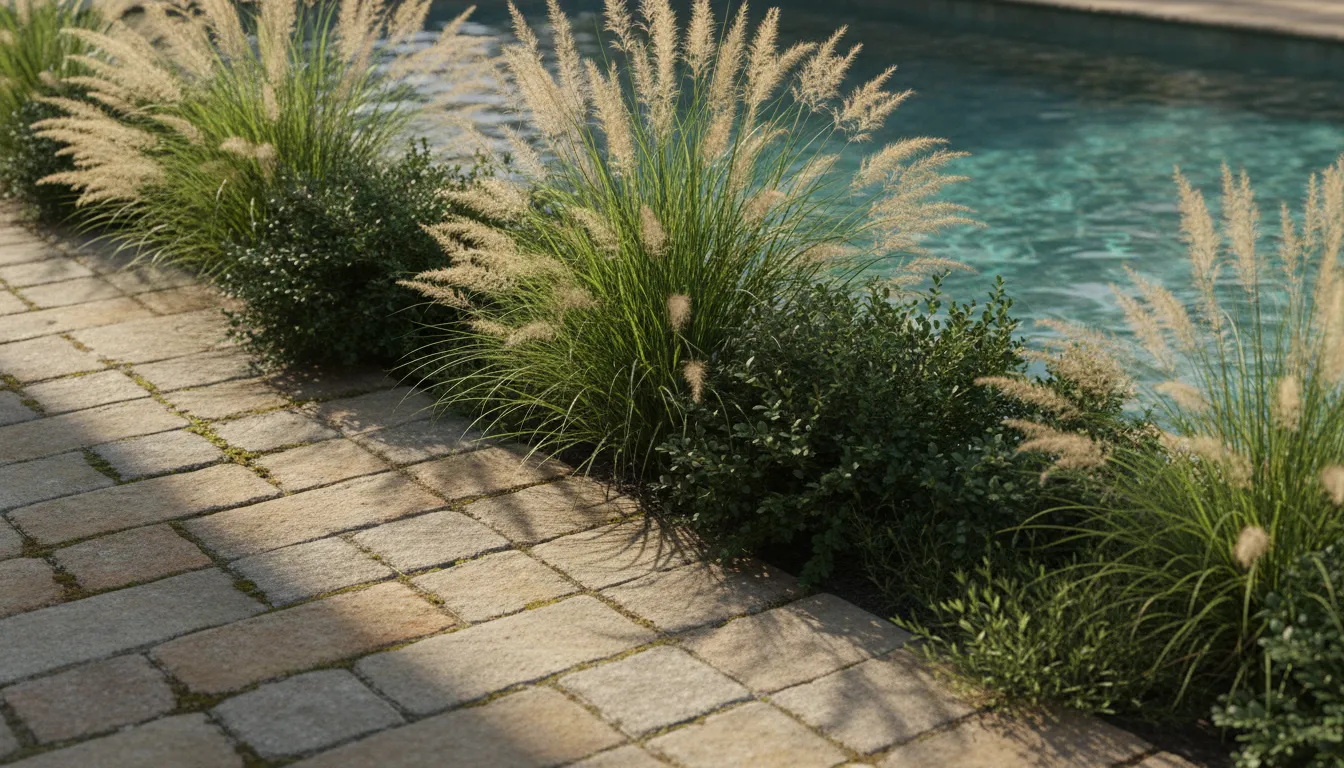
To soften the expansive stone surface and introduce vibrant green accents, we installed 4×4 porcelain pavers intertwined with synthetic turf. This modern grid pattern breaks up large patio spans, providing an eye-catching geometric look that stays perfectly lush 365 days a year without mowing, watering, or fertilizer.

The Lounge Chair Sun Deck

Dedicated to relaxation, the sunbathing area features extra-large 32×80 porcelain slabs specifically layout-planned for chaise lounges. Framing these large-format tiles with high-density synthetic turf creates a resort-style lounge pad that drains instantly after rain and keeps the poolside environment clean and mud-free.

Project Highlights at a Glance

Feature Specification Material / Detail
Pool Construction 20′ W x 70′ L Gunite Structure Max 5′ depth, custom benches & steps
Interior Finish Pebble Brilliant Smooth aggregate finish with high clarity
Tile Accents Iridescent Glass Tile 6″ waterline band + step & bench trimmers
Spa Integration Custom Gunite Spa Single-step corner entry
Cover System Concealed Autocover Motorized, energy-efficient safety cover
Main Patio 4×4 Porcelain Pavers Integrated with synthetic turf grid pattern
Lounge Deck 32×80 Porcelain Slabs Surrounded by lush synthetic turf framing
Location Brookville, NY Built entirely by Gappsi Design-Build

The Gappsi Difference: Turnkey Outdoor Living on Long Island

A complex project like this requires seamless coordination across multiple trades, from excavation and gunite plumbing to precision masonry and synthetic turf installation. As a single-source design-build firm, Gappsi handles every phase under one roof:

  1. Custom 3D Landscape Design: Visualizing every tile layout, stone edge, and elevation change before ground is broken.

  2. In-House Construction Teams: Our skilled masons, pool builders, and turf specialists execute every detail to exacting standards.

  3. Premium Material Sourcing: From porcelain pavers to Pebble Brilliant pool finishes, we use only top-tier products designed for Northeastern weather conditions.

Transform Your Long Island Backyard with Gappsi

Whether you are looking to build a large-scale lap pool in Brookville, upgrade your patio with low-maintenance porcelain and synthetic turf, or design a complete outdoor entertainment center, Gappsi is ready to bring your vision to life.

Ready to start your pool or hardscape project?

Visit Gappsi.com or call us at (631) 543-1177 to schedule a private design consultation at our Smithtown showroom.

Contact Gappsi Today

📍 Serving all of Long Island, NY — Nassau & Suffolk Counties
🌐 https://www.gappsi.com/
📞 Call now for a free consultation and estimate

SCHEDULE A MEETING TODAY WITH GAPPSI

Share this page:

Resin Bond Stone Joint Restoration for a Natural Pool Patio in Setauket, NY

View Gappsi’s YouTube Channel to view Resin Bond Stone Joint Restoration for a Natural Pool Patio in Setauket, NY

When an older natural stone pool patio begins to show signs of wear, homeowners often assume the only solution is a complete replacement. Fortunately, that isn’t always the case. At Gappsi, we specialize in restoring and preserving beautiful outdoor living spaces while enhancing their durability and appearance. One of our latest projects in Setauket, NY, demonstrates how innovative materials and expert craftsmanship can breathe new life into an aging patio without sacrificing its original character.

For this project, Gappsi restored the deteriorating joints of a natural stone pool patio using Italian-imported resin-bond stones. At the same time, we remodeled the swimming pool with a fresh gray marble dust finish that complements the landscape and maintains the property’s natural, pond-like aesthetic.

Restoring an Aging Natural Stone Pool Patio

Natural stone patios have a timeless beauty that blends seamlessly with outdoor landscapes. Unlike manufactured pavers, irregular stone patios create an organic appearance that is difficult to replicate. However, over time, the cement joints between the stones can deteriorate due to exposure to weather, water infiltration, freeze-thaw cycles, and years of foot traffic.

The homeowner’s patio had reached this point. The original cement joints had become loose and were beginning to crumble, creating several problems:

  • Loose stones throughout the patio
  • Unsightly cracks and missing joint material
  • Increased weed and moss growth
  • Water penetration beneath the patio surface
  • Safety concerns from uneven stones

Although the stones themselves remained in excellent condition, the failing joints threatened the structural integrity of the entire patio.

Instead of replacing the beautiful natural stone, Gappsi recommended restoring the joints with a modern resin-bond stone system to preserve the patio while significantly improving its performance.

resin-bond-stone-joint-restoration-for-a-natural-pool-patio-in-setauket

Removing the Failed Cement Joints

Every successful restoration begins with proper preparation.

Our first step was to carefully remove all the deteriorated cement between the stones. This process requires precision to avoid damaging the surrounding stone while completely eliminating loose material that could weaken the new installation.

By thoroughly cleaning every joint, we created a solid foundation for the new resin bond to adhere properly and perform for years to come.

This preparation stage is one of the most important parts of any patio restoration project because the longevity of the finished installation depends on the quality of the base beneath it.

Why Resin Bond Stones Are a Superior Solution

Traditional cement joints have been used for decades, but today’s resin technologies offer significant advantages for outdoor stone patios.

For this project, Gappsi installed resin-bond stones imported from Italy, combining decorative stone aggregate with a premium one-component urethane binder.

Once mixed, the materials create an attractive, durable joint that locks the stones in place while remaining more flexible than conventional cement.

Some of the benefits include:

Increased Flexibility

Unlike rigid cement joints, resin-bond materials can better accommodate slight movement caused by seasonal temperature changes. This flexibility helps minimize cracking over time.

Excellent Drainage

The resin-bound stone system allows water to drain naturally while maintaining the patio’s stability. Proper drainage helps reduce standing water and minimizes freeze-thaw damage during Long Island winters.

Long-Lasting Performance

Premium urethane binders create strong adhesion between the decorative stone aggregate, producing joints that resist erosion, cracking, and weathering far better than traditional mortar.

Natural Appearance

Because the joints are made of decorative stone rather than gray cement, they blend seamlessly with natural stone patios. This was especially important for maintaining the landscape’s organic design.

Imported Italian Materials Deliver Premium Results

At Gappsi, we believe exceptional outdoor spaces deserve exceptional materials.

For this Setauket project, we selected a premium resin-bond stone product imported directly from Italy. Italian manufacturers have long been recognized for producing some of the highest-quality hardscape materials available, combining durability with elegant design.

The one-component urethane binder creates a strong bond while allowing the decorative stones to retain their natural texture and appearance.

The finished joints look as though they have always been part of the original patio while offering dramatically improved performance.

Preserving the Natural Landscape Design

One of the homeowner’s primary goals was to preserve the property’s unique character.

This swimming pool was originally designed to resemble a natural pond, with irregular stonework blending into the surrounding landscape. Rather than replacing the patio with modern pavers, Gappsi carefully maintained the existing stone layout that gives the backyard its distinctive appearance.

By restoring instead of replacing, we preserved:

  • The original natural stone patio
  • The organic shape of the landscape
  • The rustic charm of the outdoor living space
  • The established character of the property

The new resin-bond joints provide a fresh, clean appearance while remaining true to the original design vision.

Pool Remodeling Completes the Transformation

In addition to restoring the patio, Gappsi remodeled the swimming pool.

The pool received a brand-new gray marble dust finish, replacing the aging interior surface.

Gray marble dust has become increasingly popular because it creates a sophisticated appearance while enhancing the water’s natural color. Instead of the bright blue look associated with traditional plaster finishes, gray marble dust produces subtle tones that resemble a tranquil pond or natural lagoon.

The result perfectly complements the surrounding stone patio and creates a cohesive outdoor environment.

The refreshed pool finish also improves:

  • Surface durability
  • Water appearance
  • Swimming comfort
  • Overall property value
  • Long-term performance

Why Restoration Can Be Better Than Replacement

Many homeowners believe that older patios must be demolished once the joints begin failing. In reality, restoration is often the smarter investment.

When the existing natural stones remain structurally sound, restoring the joints provides numerous advantages:

  • Lower overall project cost
  • Faster installation
  • Less disruption to the property
  • Preservation of mature landscaping
  • Retention of original craftsmanship
  • Improved durability using modern materials

For homeowners who appreciate the beauty of natural stone, restoration allows them to enjoy the same timeless appearance with significantly improved performance.

Expert Hardscape Restoration by Gappsi

Every restoration project requires careful planning, quality materials, and experienced craftsmanship.

At Gappsi, we specialize in restoring patios, walkways, pool decks, driveways, retaining walls, and outdoor living spaces throughout Long Island. Whether your project involves natural stone, travertine, porcelain pavers, concrete pavers, or custom masonry, our experienced team evaluates every detail to recommend the best long-term solution.

We combine traditional masonry expertise with innovative products, such as imported resin-bond systems, to deliver beautiful, durable results that stand the test of time.

A Beautiful Backyard Revitalized in Setauket, NY

This latest Gappsi project in Setauket, NY, showcases how thoughtful restoration can completely transform an aging outdoor space. By removing deteriorated cement joints, installing premium Italian resin-bond stones, and refinishing the pool with elegant gray marble dust, we preserved the backyard’s natural beauty while dramatically improving its durability and functionality.

The homeowner now enjoys a refreshed pool patio that maintains its original pond-inspired design while benefiting from today’s advanced restoration materials.

If your natural stone patio has loose joints, cracked mortar, or signs of aging, Gappsi can help restore its beauty without unnecessary replacement. Our experienced team provides custom hardscape restoration and pool remodeling solutions that enhance both the appearance and longevity of your outdoor living space throughout Long Island.

Contact Gappsi Today

📍 Serving all of Long Island, NY — Nassau & Suffolk Counties
🌐 https://www.gappsi.com/
📞 Call now for a free consultation and estimate

SCHEDULE A MEETING TODAY WITH GAPPSI

Share this page:
Custom gunite swimming pool with natural stone coping and blue water in a Long Island backyard

Gunite Swimming Pool Cost Long Island 2026: Full Pricing Breakdown

Building a backyard swimming pool is a major investment that changes how you use your outdoor space. On Nassau and Suffolk Counties, pricing depends heavily on local permitting, labor rates, and the materials you choose for your backyard. Understanding these regional variables helps you set a realistic budget for your property.

Schedule a free consultation today to get an accurate gunite swimming pool cost long island quote for your specific property.

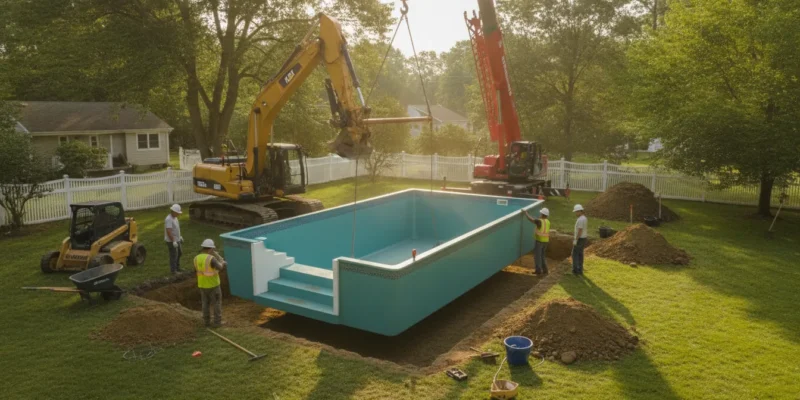
A typical gunite swimming pool cost on Long Island ranges from $90,000 to $140,000 for standard installations. Custom projects often reach $100,000 to $400,000 or more. This covers excavation, steel reinforcement, the concrete shell, filtration equipment, coping, and decking. Gunite offers permanent durability, custom design flexibility, and superior long-term resale value versus other pool types.

Before you begin digging, you must evaluate how local site conditions, materials, and accessories shape your final construction budget. Real pricing depends on specific site layouts, soil conditions, and your design choices. Understanding Current Gunite Pool Pricing on Long Island for 2026 is the first step toward planning your new backyard escape.

Gunite Swimming Pool Cost Long Island: Current Gunite Pool Pricing on Long Island for 2026

Homeowners on Long Island can expect a wide range of costs when planning a pool project. A typical swimming pool cost long island installation ranges from $90,000 to $140,000 for most standard residential properties. Custom designs or larger water features often push this price higher. This initial price includes basic excavation, steel framing, the shot concrete shell, standard plaster, and basic plumbing or filtration equipment.

Gunite pool construction with steel rebar cage being sprayed with gunite concrete on a residential Long Island job site

Typical Pricing Per Square Foot

Most pool builders calculate the starting price of a pool by its total size. On Long Island, a standard gunite swimming pool cost averages between $100 and $280 per square foot. This rate covers the basic build but does not include extra patio work, water heating, or landscaping. For example, a standard 14 by 28 foot pool will cost less than a large 20 by 40 foot pool because it needs fewer materials and less labor.

Common Pool Sizes and Estimated Costs

  • Small (14×28 ft): Starting at $90,000 for the base installation
  • Mid-size (16×32 ft): Typically $105,000 to $130,000 including standard features
  • Large (20×40 ft): Often exceeds $140,000 before any custom additions
  • Custom designs: Can reach $200,000 to $400,000 with spas, waterfalls, and premium finishes

These figures represent the base installation before you add features like spas, slides, or stone coping.

Why Long Island Costs Are Higher

Local factors make building a pool on Long Island more expensive than the national average. Homeowners here pay a premium of 25% to 45% compared to national construction rates. High labor rates, strict local building codes, and complex permit fees drive these costs up. High water tables in Nassau and Suffolk counties also require extra drainage steps, which adds to the final price.

What Is Included in a Gunite Pool Installation Cost

Building a concrete pool requires many steps. Each step has its own fees. When you plan for a gunite swimming pool cost long island homeowners should know what is in the contract. A full build has six main steps from excavation to the final pool finish.

  1. Excavation and Permits: Town permits cost $800 to $2,000. Excavation sets the depth and shape of your pool using heavy machinery.
  2. Steel Framing and Plumbing: A grid of steel rebar forms the skeleton. Rough plumbing for drains, skimmers, returns, and spa jets is laid before any concrete is sprayed.
  3. Spraying the Gunite Shell: The shell makes up 35% to 45% of the total price. For a 16×32 pool, expect $55,000 to $80,000 for the pneumatic concrete application.
  4. Tile and Coping Installation: Natural travertine coping costs $28 to $55 per linear foot. A band of waterline tile protects the plaster from staining.
  5. Surrounding Pool Decking: Standard concrete or stone paver decking costs $6,500 to $12,000 for a safe walk area around the pool.
  6. Finishing and Equipment Setup: Interior plaster ($4/sq ft basic), filtration equipment ($4,000 to $8,000), and automation systems finalize the build.
Completed gunite swimming pool with natural stone coping and travertine deck in a landscaped Long Island backyard

You can learn more about pool design options from custom gunite swimming pool builders who specialize in these custom concrete builds.

Key Factors That Affect Gunite Pool Pricing on Long Island

The total gunite swimming pool cost on Long Island depends on several major variables. From the shape of your pool to the physical layout of your yard, specific factors will shape your final estimate. Understanding these details helps you plan your backyard project with confidence.

Pool Size and Shape Options

The size of your pool is a clear cost driver, but its shape also plays a large role. A standard rectangle is the most straightforward design to excavate and build. Choosing a freeform design with custom curves typically adds 20% to 30% to your construction costs. These custom curves require more detailed steel rebar structures and precision gunite application.

Yard Site Conditions and Soil Challenges

Ground conditions in Nassau and Suffolk Counties can vary greatly and impact your budget. In northern hilly areas, hitting large rocks or boulders can require special equipment, which adds $3,000 to $15,000 in excavation fees. Homes on the South Shore of Long Island often deal with a high water table. To build a stable custom gunite swimming pool in these areas, builders must use dedicated dewatering pumps and active drainage systems during excavation.

Property Access and Tight Spaces

Before construction starts, builders must get heavy machinery like excavators and dump trucks into your yard. If your property has tight property lines, mature trees, or low utility lines, work becomes more complex. Tight access can add 15% to 30% to your labor fees. Crew members may need smaller machines, which takes more time to dig and move soil.

  • Standard access: No additional fees for machinery entry
  • Limited access: 15% to 20% surcharge for narrow pathways or gates
  • Tight access: 20% to 30% surcharge requiring smaller equipment and hand-digging in some areas

Water Features and Custom Finishes

Water additions and custom finishes can customize your backyard but will increase the overall price. Adding an attached spa or a waterfall can add $8,000 to $35,000 to your total project. The interior finish you choose also affects the budget. Basic white plaster is the standard option, while a durable pebble finish adds $4,000 to $8,000. Automated control systems to manage pumps and heaters from a phone add $3,000 to $8,000 to your equipment budget.

Gunite vs. Other Pool Types: A Cost Comparison

Choosing the right backyard pool style is a major choice for Long Island homeowners. Before you buy, you must look at how gunite swimming pools compare to other systems in build cost and life. Each build type has distinct upfront fees, upkeep needs, and total lifespans that affect your long-term budget.

Pool Type Upfront Cost Lifespan Liner Change Cost Design Freedom
Vinyl Liner $25k – $65k 10 – 15 Years $3k – $7.5k Limited
Fiberglass $60k – $120k 25 – 30 Years None Set Shapes
Gunite $65k – $175k+ 50+ Years None Unlimited

A gunite pool costs more upfront than vinyl or fiberglass options. However, the shell lasts over 50 years with proper care. Vinyl liner pools need new liners every 10 to 15 years, costing $3,000 to $7,500 each time. Fiberglass shells last 25 to 30 years but cannot be customized to your yard shape. When you plan your gunite swimming pool cost long island budget, factor in the 50-year lifespan that eliminates replacement costs.

Budgeting for Your Gunite Pool: Hidden Costs and Financing

A custom gunite swimming pool is a major home improvement project. Many homeowners focus only on the base quote from their pool builder. But a full backyard transformation involves extra work. Planning for these hidden costs early helps you avoid surprises. It ensures you have enough funds to finish your entire outdoor project on budget.

Extra Site and Yard Work Costs

The base pool quote usually covers the pool shell, plaster finish, and basic equipment. But you must also budget for site work that happens outside the pool walls.

  • Safety fencing: Required by most Nassau and Suffolk town codes, typically $1,500 to $4,000
  • Electrical work: Subpanel, pump wiring, and bonding runs from $2,000 to $6,000
  • Plumbing hookups: Gas line for heater, water fill line, and drainage, from $1,500 to $4,000
  • Landscaping restoration: Lawn repair, grading, and planting after construction, $3,000 to $10,000
  • Permits and inspections: Local town fees from $800 to $2,000

These extras can add $25,000 to $50,000 to your total gunite swimming pool cost long island project.

Long Term Upkeep and Maintenance

Owning a concrete pool requires ongoing care to protect your investment. You should budget about $1,500 to $3,000 each year for routine pool maintenance and service. This cost covers water testing chemicals, pool opening and closing services, and electricity for the pump. Setting aside these funds keeps your pool water clean and prevents early wear on your plaster shell.

Pool Financing Options on Long Island

Many homeowners use financing to build their backyard pools. Common paths include home equity loans, home equity lines of credit, and personal loans. Some pool builders also partner with specialized lenders to offer custom financing programs. To stay safe, we recommend budgeting 20% to 30% above your base pool quote. This extra buffer covers any site surprises, design upgrades, or unexpected landscaping costs that arise during construction.

Frequently Asked Questions

How much does a gunite pool cost on Long Island?

A custom gunite swimming pool cost on Long Island typically ranges from $100,000 to over $400,000 for high-end designs. Basic custom installations usually start around $90,000. These prices depend on the size of the pool, complex excavation needs, water features, and your choice of patio materials. The total price reflects Nassau and Suffolk County permit codes and local labor rates.

Is a gunite swimming pool worth the extra cost?

Yes, a gunite pool is highly durable and lasts for over 50 years with proper care. Unlike vinyl liner pools that need new liners every ten years, gunite concrete shells resist tears and severe weather. Gunite also allows you to choose any custom size or shape for your backyard. This long-term strength and custom look can help increase the resale value of your Long Island home.

How long does it take to install a gunite pool?

Installing a gunite swimming pool on Long Island usually takes between 8 and 12 weeks of active construction. This timeline does not include the local town permit approval process, which can add several weeks or months. The main construction phases include excavation, steel cage installation, gunite spraying, curing, plumbing, tiling, and patio building. Wet weather or complex rock soil conditions can also add time to the project schedule.

What are the annual maintenance costs for a gunite pool?

You can expect to spend between $1,500 and $3,000 each year to maintain a gunite swimming pool on Long Island. This budget covers chemicals, water testing, opening and closing services, and electricity for the pump. It is also wise to budget for long-term care, such as resurfacing the plaster shell every 10 to 15 years.

Ready to build your custom gunite pool?

Delaying your pool project means missing out on another swim season and facing higher build costs down the road. Starting your design-build process now ensures your backyard is ready for warm weather without any rush. Work with our team to create a beautiful, long-lasting pool that fits your property and family perfectly.

Call 631-543-1177 today to schedule a free consultation for your custom gunite pool on Long Island.

Share this page:
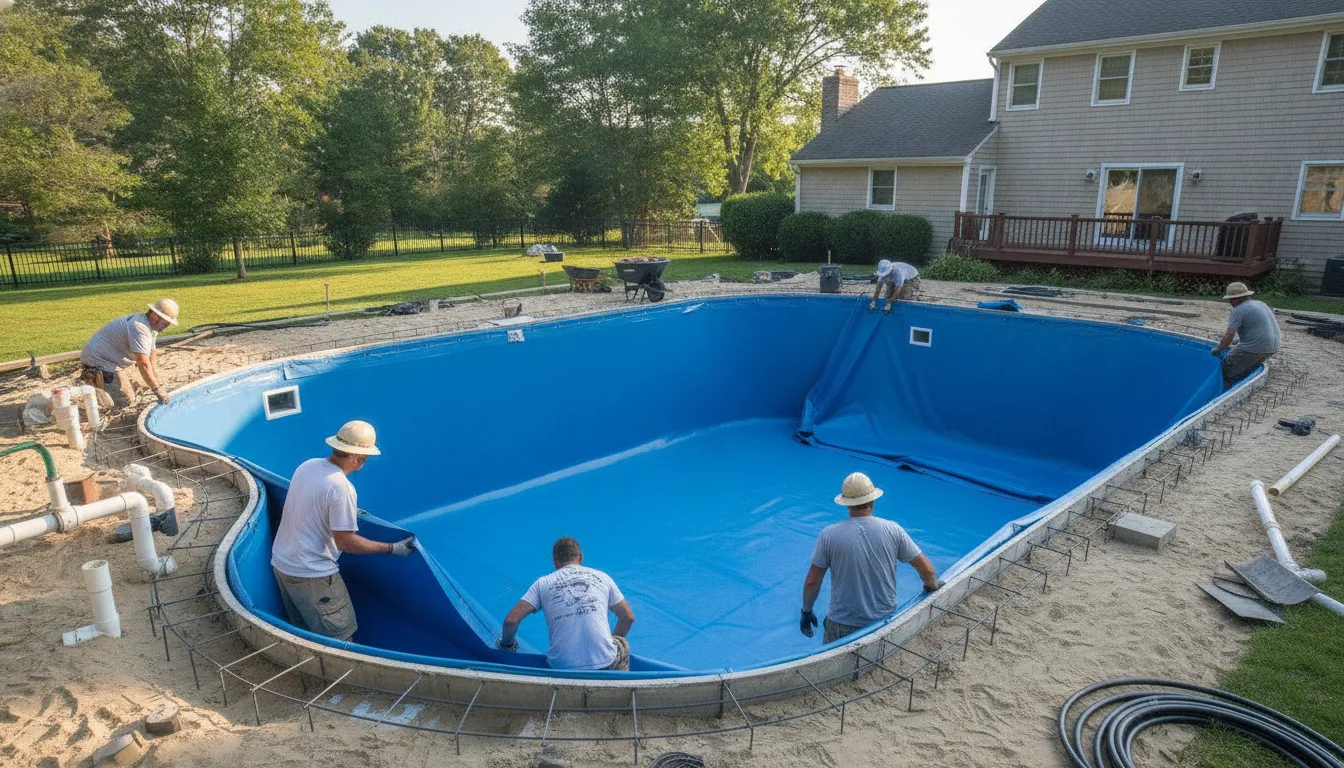
Empty inground swimming pool with concrete walls being prepared for a new vinyl liner installation

Key Considerations for Inground Vinyl Liner Pool Replacements

Old vinyl liners in time lose their stretch and start to pull away from the pool walls. Homeowners on Long Island must track these changes to avoid costly repairs to the pool floor or walls.

Vinyl liner pool replacement is a needed update for Long Island pools. It happens every ten years to protect the concrete or steel base from ground water pressure. The process involves draining the pool and installing a new twenty-eight mil liner. This thickness stands up to the freeze and thaw cycles in Nassau and Suffolk counties. Experts check the pipes and walls for rust or cracks before fitting the new liner. This makes sure the pool stays water-tight for at least another decade. Patterns that look like natural bluestone or travertine update your backyard while stopping leaks that could hurt the pool base and walls.

Knowing exactly when to start this project is the first step toward a beautiful and safe swimming area. Spotting the specific signs that your liner needs replacement before a small tear becomes a major flood is key to protecting your pool investment.

How Do You Know When Your Vinyl Liner Needs Replacement?

A vinyl pool liner is a key part of your swimming pool. It keeps the water in and protects the walls and floor. Like any part of your home, a liner will age over time. Most vinyl liners last between 7 and 12 years. This depends on how well you care for your pool water. On Long Island, the weather can also change how long your liner lasts. It is vital to know the signs of wear. This helps you plan for a vinyl liner pool replacement before a big leak starts. Seeing leaks early keeps your pool safe for your family. A new liner can change the look of your whole yard.

Visible Cracks and Water Loss

One of the first signs of an old liner is plain harm. You may see small cracks or tears near the water line or steps. These happen because the vinyl becomes brittle. Sun rays and pool tools dry out the liner over time. Even a small rip can cause your pool to lose water.

If you see the water level drop more than an inch a week, you may have a leak. Constant water loss can harm the base of your pool. It can also lead to high water bills and more work for your pump. Check your pool water level every week to spot these leaks early.

Fading and Surface Stains

The look of your liner can tell you a lot about its health. Fading from the sun is a common sign of age. While a faded liner might still hold water, it is often weak. Sun rays break down the vinyl and make it less flexed. You might also see stains from algae or grit.

If you cannot clean these spots with normal pool tools, they may be fixed for good. Stains can make your pool look old and dirty. Changing the liner is the best way to get a clean and fresh look for your yard. A new liner adds value to your home and makes the pool more fun to use. It is a great way to make your backyard look bright and new again.

Wrinkling and Floor Heaving

A good liner should be smooth and tight. If you see wrinkles or loose spots, the liner may be failing. Wrinkles can happen if the bead snaps out of its track. They can also occur if ground water gets under the pool. This is common in Nassau and Suffolk counties during the spring when the ground stays wet.

In some cases, the pool floor can even rise or feel bumpy. This is called a raised floor or heaving. It often means there is too much water pressure under the pool. These issues mean your liner is no longer doing its job well. If your pool floor feels uneven, you should call a pro for a checkup.

Watch for these telltale signs to know when it is time to call Gappsi’s swimming pool services:

  • Frequent water loss that needs adding more water.
  • Cracks and tears near the steps or water line.
  • Large stains or severe fading from the sun.
  • Wrinkles that do not go away.
  • A pool floor that feels bumpy or has shifted.
  • A liner that is older than 12 years.

If your vinyl liner shows cracking, fading, wrinkling, or water loss of more than one inch per week, it is likely time for a replacement. These issues worsen over time and can cause structural damage to the pool walls and floor. Replacing the liner when these signs first appear saves you from more costly repairs and keeps your pool safe for swimming.

What Is the Vinyl Liner Replacement Process?

The process for a vinyl liner pool replacement is hard. It needs the right tools and years of skill. Gappsi has helped owners in Nassau and Suffolk counties for over 38 years. We start the job by draining every drop of water from the pool. Our team uses strong pumps to clear the pool in a few hours.

Next, we take out the old, worn-out vinyl and the metal or plastic faceplates. We strip the pool down to its core to see the state of the walls. It is vital to check for rust, cracks, or floor sinking. Long Island’s freeze-thaw cycles stress your pool over time.

Fixing the Base and Fitting the Liner

A clean and flat base is the goal for this stage. We patch any cracks in the floor and sand the walls if they are rough. Gappsi’s experts then line up the new vinyl. We use a strong vacuum to suck out the air behind the liner. This vacuum holds the vinyl in place while the water starts to fill.

You can choose from many new patterns and colors. We offer thick 27 mil and 28 mil options for better strength. Modern beadlock systems give a tight fit that lasts for years. These systems are much more secure than the old J-hook styles used in the past.

  1. Drain the pool water all the way using high-speed pumps.
  2. Cut out the old vinyl liner and remove the gaskets and faceplates.
  3. Clean and repair the pool walls and floor to create a smooth base.
  4. Replace the gaskets and seal the tracks for the new liner.
  5. Fit the new vinyl liner into the track using an expert vacuum system.
  6. Fill the pool with fresh water and adjust the liner to remove any wrinkles.
  7. Install the final faceplates and restart the pool filter and heater.

Filling and Final Setup

Filling the pool is a slow and careful step. As the water rises, we walk the pool floor to smooth out any small folds. We do not cut the openings for the skimmers or returns until the water is deep enough. This keeps the liner from stretching too much after it is cut.

Once the pool is full, we install new gaskets and faceplates for a watertight seal. Finally, we hook up the pump, filter, and heater. This is a great time to upgrade to a variable-speed pump. These pumps can save you 30 to 80 percent on your energy bill each year.

The vinyl liner replacement process typically takes 2 to 5 days and involves draining the pool. Removing the old liner, repairing the walls and floor, fitting a new liner with a vacuum system, and refilling the pool. Each step must be done carefully to ensure the liner sits flat and seals tight around all fittings and plumbing.

What Modern Vinyl Liner Patterns and Designs Are Available?

Choosing a new pattern is the best part of a vinyl liner pool replacement. New print methods allow for complex looks that mimic natural stone. These choices help your pool match your deck and home style. They also boost the look of your yard.

Finished inground swimming pool with new stone-pattern vinyl liner, filled with clear water, surrounded by a concrete deck in a landscaped Long Island backyard

Current design trends for pool liners

You no longer have to settle for a plain blue pool floor. Now you can pick patterns that look like pebble, marble, or travertine. Many people on Long Island choose tile looks for the waterline. This gives the pool the look of a custom gunite build. Geometric shapes and lagoon themes are also top choices for a unique look.

The color you pick will change how your water looks in the sun. Dark liners can help hold heat and create a deep feel. Light colors make the water look bright and clear. Gappsi can show you many samples at our Smithtown shop to help you find the best fit for your yard.

Liner thickness and life

Liner thickness is measured in mils. Most pool owners choose 20 mil, 27 mil, or 28 mil. A 20 mil liner is the standard pick and costs less. But a 27 mil or 28 mil liner is more tough against tears and sun damage. This extra thickness helps if you have pets or use the pool a lot. It can help the liner last longer than the usual seven to twelve years.

While a thick liner costs more now, it may save you money by lasting for many years. We suggest the thicker mil picks for those who want a strong pool.

Secure fit and retention

How your liner stays in place is key. Two main ways are the J-hook and the beadlock system. A J-hook hangs over the pool wall. A beadlock system uses a track to snap the liner into place. These systems are more secure. They help stop the liner from slipping or pulling away from the wall.

A tight fit is the best way to avoid wrinkles. This is why we take exact measures during a pool liner swap. Pros use vacuums to pull air out from behind the vinyl. This helps the liner sit flat against the floor as the pool fills with water.

Modern vinyl liners come in patterns that mimic bluestone, travertine, marble, pebble, and tile. Thickness options range from 20 mil to 28 mil, with thicker liners offering better resistance to punctures and UV damage. Beadlock retention systems provide a more secure fit than traditional J-hook methods and help prevent wrinkling over time.

Energy-Efficient Pool Pump Upgrades During Replacement

Changing a vinyl pool liner is the best time to check your pool tools. When the pool is empty for a vinyl liner pool replacement, you can simply swap out old pumps. New systems help you save money and reduce the time you spend on pool care. Gappsi works with brands like Pentair and Hayward to bring the latest tools to your backyard on Long Island. Adding these upgrades now is smart because the pool is already open for service. You can save on labor by doing all the work at once.

Variable-Speed Pump Energy Savings

A standard single-speed pump runs at one high speed all day. This uses a lot of power and adds to high power bills in Nassau and Suffolk counties. A variable-speed pump is other than a standard one because it can run at lower speeds. These pumps use 30% to 80% less energy than older models. Over time, the energy savings can pay for the cost of the new pump.

Salt Chlorine Generator Systems

Many people choose to add salt chlorine systems during a liner change. These tools turn salt into chlorine right in your pool water. This means you do not have to buy or handle heavy buckets of chlorine. Saltwater pools feel softer on your skin and eyes than standard pools. They also keep chlorine levels steady, which helps your new liner last longer. Because salt is less harsh than liquid chlorine, it can prevent the fading often seen on older vinyl liners. This keeps your new liner looking great for many years to come.

Modern LED Lighting and Filter Upgrades

Old pool lights often use a lot of power and need new bulbs often. New LED lights are much better and last for many years. You can even choose lights that change colors to create a new mood for your pool area.

Along with lights, consider a new high-flow filter. Gappsi uses strong filters from Pentair and Hayward that catch more dirt. These filters keep your water clear with less work from you. Adding new gear while the pool is down for service saves on labor costs. It gets your pool ready for the next decade of use without extra trips from a repair team.

Scheduling equipment upgrades during a liner replacement is cost-effective because the pool is already drained and the equipment pad is accessible. Variable-speed pumps reduce energy use by 30 to 80 percent. Salt chlorine generators soften pool water and reduce chemical handling, and LED lighting lasts years longer than older incandescent models.

Structural Integrity: What to Inspect While the Pool Is Empty

When you drain your pool for a vinyl liner pool replacement, you get a rare look at the structure. This is the best time to find hidden problems that you cannot see when the pool is full of water. Catching these issues now is much cheaper than fixing them after you install the new liner.

Examining the Pool Walls and Floor

We start by checking the pool walls for any signs of damage. For pools with concrete walls, we look for cracks that could let water seep through. If your pool has steel walls, we check for rust or corrosion that could weaken the shell. On Long Island, the ground moves as it freezes and thaws each year. This ground movement can cause the pool floor to settle or heave, making bumps or low spots. We can smooth out these areas to ensure your new liner fits well.

Empty inground swimming pool walls and floor being prepared for a new vinyl liner installation, showing the concrete shell and liner track system

Checking the Plumbing and Skimmers

Next, we inspect the plumbing and the areas where the liner meets the pool parts. We check the skimmer integrity and the state of the return line fittings to make sure they are still sealed. Leaks in these spots can cause water to build up behind the vinyl. This often leads to wrinkles or soft spots on the pool floor. By checking these parts now, you avoid the need for costly repairs later. Proper pool care, including keeping the water chemistry in balance, helps your new liner last for many years.

Why Repairs Matter Now

Fixing structural issues during a liner swap saves you both time and money. Once the new liner is in place and the pool is full, it is hard to reach the walls or plumbing. A solid shell also helps your liner reach its full lifespan, which is often 7 to 12 years. Our team at Gappsi has given swimming pool services on Long Island since 1987. We have the skills to handle full-service repairs to keep your pool in top shape for your family.

An empty pool reveals hidden structural problems that are invisible when the pool is full. Common issues include concrete wall cracks, steel wall rust, floor settling or heaving, and leaking skimmer or return line seals. Fixing these during a liner replacement is far less expensive than addressing them later.

Vinyl Liner Replacement vs. New Pool Construction

Choosing between a vinyl liner pool replacement and a full new build depends on your budget and the state of your yard. For most Long Island owners, a liner change is the fastest way to fix up a backyard. It costs much less than starting from scratch but still gives the pool a fresh, clean look.

The Cost and Budget Difference

Swapping a liner is a budget-friendly move for pool owners. Most liner jobs cost between 1/3 and 1/5 of the price of a new pool. Gappsi’s pricing for a standard vinyl liner pool usually ranges from $21,000 to $23,000 for a 16×34 Roman end model. This price includes the filter, pump, and permits. A full build of a new pool would cost much more and take weeks of heavy work.

Pool owners often choose to swap the liner when they want a new look without the high cost of a new build. Modern liners come in many stone and tile patterns that mimic the look of more expensive pools. This gives you a high-end feel while keeping your costs low.

Construction and Yard Impact

A vinyl liner pool replacement usually takes just a few days to finish. Our team drains the water, removes the old vinyl, and checks the walls for damage. We also look at the floor for signs of settling or heaving. If the concrete walls are solid, we can install the new liner quickly. This limits the mess in your yard more than a full build.

Long Island’s freeze-thaw cycle can cause ground shifts over time. During a swap, we check the walls for any shifts or leaks. This helps ensure the pool stays safe and level for years to come. A full new build requires deep digging and heavy gear that can damage your lawn and plants.

When a New Build Makes Sense

Sometimes a simple liner swap is not enough to fix the pool. If your pool has big cracks or major leaks in the walls, you may need a new build. A full project also makes sense if you want to change the size, shape, or depth of your pool. In these cases, Gappsi’s swimming pool services can help you design a brand-new space from the ground up.

Project Detail Vinyl Liner Replacement New Pool Construction
Average Cost $3,000 to $8,000 $21,000 to $50,000+
Time to Finish 2 to 5 days 4 to 8 weeks
Mess in Yard Low; pool area only High; heavy gear used
Frame Repair Minor wall and floor fixes Full digging and new walls
Style Choice Limited to color and pattern Total change of shape or size
Added Value Keeps current value Adds big home value

Better Gear and Energy Savings

Changing your gear during a liner swap can also save you money. Setting up a new pump can cut your power use by up to 80%. ENERGY STAR says these new pumps pay for themselves quickly through lower bills. This is a good time to check for leaks and ensure your system runs well for the next decade.

Why Hire an Expert for Your Vinyl Liner Replacement

Replacing a vinyl liner is more than just swapping out a sheet of plastic. It starts with exact sizes of your pool’s walls, floors, and corners. If the liner is off by even an inch, it can stretch too much or create large folds. Experts use tools to map the pool shape with care. This ensures the liner fits tight against the walls. A good fit prevents the vinyl from pulling away from the track, which helps the liner last longer.

Special Tools and Seam Welding

Vinyl liners have seams that must stay tight for many years. Experts use high-tech tools to bond the vinyl pieces together. This creates a strong seal that can handle the weight of many gallons of water. They also use strong vacuums to pull the air from behind the liner. This removes air pockets that could cause the vinyl to shift or tear. Proper seating into the tracks also keeps the liner from slipping as the pool fills.

Balancing Water and Preventing Wrinkles

Filling a pool with water needs careful timing and pressure. If the water enters too fast or too slow, the liner might bunch up. Experts watch the fill process to smooth out any small wrinkles before the water pressure becomes too high. They also check the chemical balance of the water as they fill. This protects the new vinyl from fading or staining early on. Gappsi has 38 years of history with pool services on Long Island. Our team knows how to handle the local climate and ground water issues.

Wall Checks and Warranty Safety

When you drain a pool, you can see the walls and floor for the first time in years. An expert will look for rust on steel walls or cracks in concrete. They can find plumbing leaks that you might have missed. Fixing these issues now saves you from a bigger repair later. Most makers also need an expert to set up the liner to keep the warranty active. If you try to do it yourself and make a mistake, you could lose that protection. Hiring an expert is the best way to keep your pool value safe.

The Risks of DIY Setup

Many homeowners ask if they can replace a vinyl pool liner themselves to save money. While it is possible, the risks are often higher than the savings. A small error in measuring or hanging the liner can lead to lasting damage. You might end up with leaks that ruin the pool base or the surrounding deck. Experts have the tools and training to avoid these costly mistakes. Explore Gappsi’s full service offerings to find the best plan for your pool and yard.

Professional vinyl liner installation starts with precise measurements, uses industrial vacuums for wrinkle-free fitting, and includes inspection of pool walls, plumbing, and floor. Professional installation also preserves the manufacturer’s warranty, which DIY installation may void. The cost of hiring an expert is offset by fewer errors, better material handling, and longer liner life.

Frequently Asked Questions

How much does it cost to replace a vinyl inground pool liner?

Most pool liner replacements on Long Island cost between $3,000 and $8,000. The final price depends on the pool size, liner thickness, and the complexity of the install. A thicker 28 mil liner costs more upfront but lasts longer and resists punctures better. Labor and any structural repairs also affect the total cost. Gappsi provides free estimates to give you a firm price for your specific pool.

How long does a vinyl liner replacement take?

A complete vinyl liner pool replacement takes 2 to 5 days from drain to full refill. The actual installation of the liner happens in one day. The remaining time covers draining, repairs to walls or floor, and filling the pool slowly to prevent wrinkles. Weather can also affect the timeline if rain delays the drain and installation steps.

Can you replace a vinyl liner without draining the pool?

No. The pool must be fully drained to remove the old liner, inspect the walls and floor, and install the new liner correctly. Draining also lets the crew check for structural issues that are hidden when the pool is full. The drain water can be redirected to the yard or sewer depending on local codes in Nassau and Suffolk counties.

What is the best time of year for a vinyl liner replacement?

Spring and early summer are the most popular times for liner replacements on Long Island. The weather is mild enough to drain and work on the pool without freezing pipes. Scheduling early in the season also ensures your pool is ready for the hottest months. Gappsi starts taking bookings in February for spring installations.

Do saltwater pools damage vinyl liners?

Saltwater pools do not damage vinyl liners when the salt and chlorine levels are balanced properly. In fact, salt chlorine generators produce a steady, low level of chlorine that can be gentler on vinyl than manually adding high doses of liquid chlorine. The key is maintaining balanced water chemistry regardless of the sanitizer type used.

Can you install a new liner over an old one?

No. Installing a new liner over an old one traps moisture and bacteria between the layers. This leads to mold growth and accelerates liner deterioration. It also hides cracks and rust in the pool walls that need repair. The old liner must always be removed completely before installing a new one.

Ready to schedule your free liner consultation?

Your pool’s liner is the single most important barrier between your family’s swimming water and the structure of your pool. When it starts to show cracks, fading, or wrinkles, acting quickly prevents damage that costs far more than the liner itself. Gappsi has served Long Island homeowners for over 38 years with expert vinyl liner installation, pump upgrades, and pool structural repairs. Our team handles every detail from the initial drain to the final water chemistry check. Contact Gappsi’s pool services team to schedule a free consultation and get a firm quote for your vinyl liner pool replacement.

Share this page:
Pool coping installer laying stone pavers around a pool on Long Island.

How to Hire a Pool Coping Installer on Long Island

Your pool coping is the unsung hero of your backyard, quietly protecting your investment from the elements. But it’s not invincible. Over time, you might notice small cracks, crumbling mortar, or stones that feel loose underfoot. These aren’t just cosmetic issues; they are warning signs that water might be seeping into your pool’s structure. On Long Island, this is especially dangerous, as trapped water can freeze and expand, causing serious damage. Knowing how to spot these telltale signs early can save you from costly repairs. This article will help you identify when your coping needs attention and why calling a professional pool coping installer Long Island trusts is the best next step.

Key Takeaways

  • Coping serves two key roles: It acts as a crucial safety feature by providing a non-slip grip and protecting your pool’s structure, while also being a primary design element that frames your pool’s look.
  • Select materials that withstand Long Island weather: Your coping choice must endure our freeze-thaw cycles. Durable options like granite, cool-to-the-touch travertine, and low-maintenance porcelain are excellent for both performance and style.
  • Always hire a professional for installation: This is not a DIY project. An expert installer guarantees correct drainage, a secure fit, and a safe edge, which prevents costly structural damage and protects your investment in the long run.

What Is Pool Coping and Why Is It Important?

When you picture a beautiful swimming pool, you probably think of the sparkling water and the stylish patio. But there’s a key element that ties it all together: the pool coping. It’s the finishing touch that sits on the edge of your pool, and it does a lot more than just look good. Understanding what coping is and why it’s so important is the first step in creating a safe, durable, and stunning backyard oasis.

What Does Pool Coping Do?

Simply put, pool coping is the material used to cap the top edge of your pool shell. Think of it as the border where the pool wall meets the surrounding deck or patio. Its primary job is to create a seamless transition, but its role is twofold: function and style. Functionally, it protects the pool structure and gives swimmers a place to grab onto. Aesthetically, it frames the water and provides a polished, finished look. Choosing the right coping is a crucial decision in your swimming pool design, as it impacts both the safety and the overall vibe of your space.

How Coping Keeps Your Pool Safe

Safety is the most critical function of pool coping. A well-installed coping provides a smooth, rounded edge that prevents cuts and scrapes as people get in and out of the water. It also offers a sturdy, non-slip surface for swimmers to grip. Beyond personal safety, coping protects the pool itself. It directs water from splashes and rain away from the pool shell and into the deck drains. This prevents water from getting behind the pool wall, which could cause serious structural damage over time. Proper coping is a key part of protecting your investment and ensuring your patio and pool structure remain in great shape, avoiding the need for premature restoration and sealing.

How Coping Defines Your Pool’s Style

While safety and function are essential, let’s be honest, looks matter too. Pool coping is a major design feature that defines your pool’s personality. It’s the frame that completes the picture. The material you choose can steer your backyard’s style in any direction you want, from modern and sleek to rustic and natural. A crisp, white porcelain coping might create a chic, resort-like feel, while a rugged bluestone could give you a more organic, earthy look. By carefully selecting your porcelain and natural stone coping, you can create a cohesive design that ties your pool to the rest of your outdoor living space, making it feel truly custom.

Choosing a Pool Coping Material for Your Long Island Home

The material you choose for your pool coping does more than just frame the water. It’s the surface where you’ll dangle your feet, where kids will launch their cannonballs, and it’s a critical design choice that ties your entire backyard together. For Long Island homeowners, this decision is especially important. Our weather, from hot, sunny summers to freezing winters, requires a material that is both beautiful and incredibly resilient. The right choice will feel comfortable underfoot, provide a safe, non-slip edge, and complement your home’s style for years to come.

Your coping material is a key part of your overall swimming pool design. It needs to stand up to constant water splashes, direct sun, and changing temperatures. Luckily, there are several fantastic options that are perfectly suited for our climate. Whether you prefer the timeless look of natural stone or the sleek finish of modern pavers, there’s a material that will fit your vision and your lifestyle. Let’s explore some of the best choices for Long Island homes.

Travertine

If you dream of a pool deck that feels soft and luxurious, travertine is an excellent choice. One of its best features is that it stays remarkably cool to the touch, even on the hottest summer days. That means no more hopping around on scorching hot surfaces. Travertine is also naturally porous, which gives it a slip-resistant texture that’s perfect for families with children. It provides a sophisticated, elegant look that can transform your pool area into a resort-like retreat. You can find a variety of beautiful natural stone options that will give your pool a high-end finish.

Bluestone

For that quintessential Long Island look, nothing beats bluestone. It has been the go-to coping material across the Northeast for decades, and for good reason. Its rich, natural color variations create a timeless and classic feel that complements both traditional and contemporary homes. Beyond its good looks, bluestone is exceptionally strong and durable, making it a reliable choice that will last for years. Choosing bluestone is a nod to local tradition, creating a beautiful and enduring frame for your pool that feels right at home. Its installation is a specialty of expert masonry contractors.

Granite

When you need a material that is practically indestructible, look no further than granite. This natural stone is a true powerhouse, capable of handling anything Long Island’s climate throws at it. Granite easily withstands our harsh freeze-thaw cycles, resists damage from pool chemicals, and won’t fade in the sun. Its naturally textured surface also provides excellent grip, making it one of the safest choices for a wet pool edge. Investing in granite coping means choosing a worry-free, high-performance material that offers both rugged durability and natural beauty for your pool area.

Porcelain

If you love a clean, modern aesthetic and minimal maintenance, porcelain pavers are a fantastic option. Because porcelain is non-porous, it’s highly resistant to stains, water damage, and fading, so it will look brand new for years with very little effort. It’s also incredibly durable and can handle temperature swings without cracking. Porcelain comes in a huge variety of styles, allowing you to achieve the look of natural stone, wood, or concrete with added performance benefits. This versatility makes it easy to find a porcelain paver that perfectly matches your backyard design.

Limestone and Concrete Pavers

Both limestone and concrete pavers offer a wonderful balance of style, durability, and value. Limestone provides a beautiful, natural look with subtle textures and colors that can create a soft, organic feel around your pool. It’s a durable stone that holds up well in our climate. Concrete pavers, on the other hand, offer incredible design flexibility. They come in a vast range of colors, shapes, and styles, allowing you to create a truly custom look at an accessible price point. Both are excellent materials that can be installed by a skilled masonry designer to create a stunning and functional pool edge.

What Does Pool Coping Cost on Long Island?

Budgeting for your pool project is a big step, and understanding the cost of coping is a key piece of the puzzle. While the final price tag can vary, knowing the components that go into it will help you plan effectively. The cost is typically measured per linear foot and depends heavily on the materials you choose and the specifics of your pool. A good plan starts with understanding these variables, so you can feel confident in your investment and create a beautiful, lasting finish for your backyard oasis.

Understanding the Price Per Linear Foot

When you get a quote for pool coping, you’ll almost always see the price broken down by the linear foot. This is simply the measurement of your pool’s perimeter, or its edge. On Long Island, the cost for professional coping installation can range from $15 to over $60 per linear foot. This range accounts for different materials, from affordable concrete pavers to premium natural stone. Think of this price as a starting point. A simple rectangular swimming pool will be straightforward to measure, while a freeform design with lots of curves will require more detailed calculations. This per-foot cost generally includes both the materials and the labor for installation.

Factors That Affect Your Final Cost

Several key factors will influence your total investment. The most significant is your choice of material. Premium options like granite or travertine will cost more than standard concrete pavers. The size and shape of your pool also play a big role; a larger pool or one with intricate curves requires more material and labor. Don’t forget about the condition of your pool’s existing edge. If old coping needs to be removed and disposed of, or if the underlying bond beam needs repairs, this will add to the final cost. At Gappsi, we source high-quality porcelain and natural stone to ensure your coping is both beautiful and durable.

Breaking Down Material vs. Labor Costs

Your total project cost is a blend of material and labor expenses, and it’s wise not to cut corners on either. Choosing a high-quality material is your first line of defense against issues like cracking or slippery surfaces. Sourcing from a trusted supplier ensures you get a product that can withstand Long Island’s weather. Equally important is the installation itself. Expert masonry work guarantees that each stone is properly set, sealed, and graded for drainage. Paying for professional labor prevents costly mistakes down the road, ensuring your pool coping remains secure and beautiful for years to come.

Common Pool Coping Challenges for Long Island Homeowners

Living on Long Island means enjoying beautiful summers by the pool, but our unique coastal climate also presents specific challenges for keeping that pool in top shape. The dramatic temperature swings, salty air, and heavy precipitation can be tough on your pool’s structure, especially the coping. When coping isn’t installed correctly, it can fail, leading to costly repairs and even safety hazards around your pool area. It’s a common headache for homeowners who invest in a beautiful backyard only to see it degrade prematurely.

From the North Shore to the South Shore, every pool owner faces similar hurdles. Your coping needs to withstand harsh winters, manage water effectively, and perfectly fit the unique shape of your pool. These aren’t just minor details; they are essential for the longevity and safety of your investment. Overcoming these challenges requires a combination of the right materials and expert installation. A professional installer understands how to work with our local conditions to ensure your pool coping is beautiful, safe, and built to last for years to come. They can anticipate problems before they start, saving you stress and money down the road.

Surviving Freeze-Thaw Cycles

One of the biggest enemies of any outdoor masonry on Long Island is the freeze-thaw cycle. During late fall and winter, water seeps into the pores of stone and concrete. When the temperature drops below freezing, that water turns to ice and expands, creating immense pressure from within. This expansion can cause materials to crack, chip, and break apart over time. For pool coping, this process can be especially destructive, leading to loose stones and a compromised pool edge.

Choosing a durable, low-porosity material is your first line of defense. Materials like high-quality porcelain and natural stone are less susceptible to water absorption, making them ideal for our climate. Equally important is professional installation. An expert ensures the coping is set on a solid base with proper mortar and joints, minimizing opportunities for water to get trapped and cause damage.

Ensuring Proper Drainage and Protection

Pool coping does more than just frame your pool; it’s a critical part of your pool’s water management system. Its primary job is to direct water from splashing and rain away from the pool shell and foundation. When coping is installed with the correct slight slope away from the water, it prevents water from getting behind the pool wall. This is essential for preventing erosion and protecting the structural integrity of your pool over the long term.

Proper drainage also contributes to a safer and cleaner pool deck. By channeling water away, the coping helps prevent slippery puddles from forming where people walk. It also reduces the moisture that can lead to mold, mildew, and algae growth on your patio. Expert masonry work is key to creating this functional and protective barrier, ensuring your entire pool area remains safe and beautiful.

Fitting Custom Pool Shapes

Rectangular pools are no longer the only option. Today’s homeowners are opting for stunning freeform designs with elegant curves, integrated spas, and tanning ledges. While these custom shapes create a beautiful backyard focal point, they also make coping installation much more complex. Each piece of coping must be precisely cut and meticulously fitted to follow the pool’s unique contours without leaving wide gaps or sharp, uneven edges.

This is where the skill of a seasoned installer truly shines. A DIY attempt or a job by an inexperienced contractor on a custom swimming pool often results in a sloppy, unprofessional finish that detracts from the pool’s design. Professionals have the specialized tools and expertise to make flawless cuts, ensuring a smooth, uniform, and safe edge that perfectly complements the beauty of your custom pool.

What to Expect During a Pool Coping Installation

A professional pool coping installation is a meticulous process, not just a matter of laying down new stones. It’s a craft that ensures your pool edge is beautiful, safe, and built to withstand Long Island’s weather for years to come. When you hire an experienced team, you can expect a systematic approach that covers everything from structural checks to the final finishing touches. Knowing what to expect can make the process feel smooth and transparent, giving you confidence that the job is being done right. From preparing the foundation to sealing the final joint, every step is crucial for a lasting result. Let’s walk through the key phases of a typical installation so you can see exactly how a professional transforms your swimming pool.

Preparing the Site and Removing Old Coping

First, your installation team will focus on preparation. Before any new material is placed, a skilled contractor will inspect the pool’s structural edge, known as the bond beam, to confirm it’s solid and sound. This step is essential because the bond beam provides the foundation for the entire coping structure; without a stable base, the new coping could fail prematurely. If you’re replacing old, damaged coping, this is also when the crew will carefully remove and haul away the existing material. This initial phase ensures a clean and stable slate, which is critical for the longevity of your new masonry work and the overall success of the project.

Setting and Securing the New Coping

Once the site is fully prepped, the exciting part begins: setting the new coping. Your installer will mix a strong mortar and carefully set each stone, ensuring a secure and permanent bond. This is where true craftsmanship shines. They will pay close attention to creating a consistent overhang, which is the part of the coping that extends slightly over the pool’s edge. This detail isn’t just for looks; it also helps direct splashes away from the pool deck. For pools with curves, corners, or integrated spas, each piece of porcelain or natural stone is custom-cut to fit perfectly, creating a seamless and polished line around your entire pool.

Sealing and Applying Finishing Touches

The final stage of installation is all about protection and polish. After the coping stones are securely in place, your installer will apply a flexible, waterproof sealant in the joint between the coping and the patio. This is a critical step that prevents water from seeping into the gap, which could cause shifting or damage from freeze-thaw cycles. Once everything is sealed, the team will finish the joints and give the entire area a thorough cleaning. A professional crew leaves your poolside looking pristine and ready for you to enjoy, with no mess left behind. Proper restoration and sealing is the key to a long-lasting, beautiful finish.

Telltale Signs You Need New Pool Coping

Your pool coping is the protective cap for your pool’s edge, but it’s not meant to last forever. Over time, exposure to the elements, pool chemicals, and regular use will take a toll. Spotting the warning signs early can save you from more extensive and costly repairs down the road. Think of it as a regular health checkup for your pool. A quick walk around your pool every few weeks is all it takes to catch problems before they become serious.

Ignoring a small crack or a slightly loose stone might seem harmless, but these minor issues can allow water to seep into the pool’s structure. On Long Island, where we experience freeze-thaw cycles, that trapped water can freeze and expand, causing significant damage to your pool shell and deck. Keeping an eye out for these signs is key to protecting your investment and ensuring your pool area remains a safe and beautiful retreat for your family. If you notice any of these issues, it’s a good idea to consider professional restoration and sealing services to assess the damage and recommend a solution. Catching problems early is the best way to keep your backyard oasis in top shape for years of enjoyment.

Visible Cracks, Chips, or Wear

One of the most straightforward signs that your coping needs attention is visible damage. Look for fine hairline cracks, noticeable chips, or areas where the surface is flaking or crumbling. These aren’t just cosmetic flaws; they are entry points for water. Even a tiny crack can widen over time, compromising the bond between the coping and the pool beam. You might also notice that the color has faded unevenly or that the texture feels rough and worn down. This kind of deterioration not only looks bad but can also make the pool edge uncomfortable or unsafe for swimmers to hold onto. Different porcelain and natural stone materials show wear in different ways, so pay close attention to any changes in their appearance.

Loose or Shifting Stones

If you can feel a coping stone move or wiggle under your hands or feet, you have a problem that needs immediate attention. Loose coping is a serious trip hazard, and the last thing you want is an accident around the pool. This instability usually happens when the mortar or adhesive holding the stones in place has failed. Often, this is because water has penetrated the joints and broken down the bond. You might see crumbling grout or widening gaps between the stones. Don’t ignore this. A single loose stone can lead to a domino effect, causing neighboring stones to shift as well. A professional masonry expert can determine the cause and secure your coping properly.

Water Damage and Drainage Problems

Your pool coping has a critical job: to direct splash-out and rainwater away from the pool shell and into your deck drains. When it fails, you’ll see signs of water damage. Look for a white, chalky residue on the coping or the wall below it, a sign of mineral deposits left by evaporating water. You might also notice persistent damp spots, mold, or algae growing on or behind the coping. These symptoms indicate that water is pooling instead of draining correctly. This trapped moisture can cause immense pressure on your pool wall, especially when it freezes in the winter. Proper drainage is essential for the longevity of your entire swimming pool structure, so any sign of a drainage problem is a clear signal to call a professional.

Professional vs. DIY Installation: Why an Expert Matters

While tackling a home project yourself can be rewarding, pool coping installation is one area where expertise is non-negotiable. The process involves much more than just placing stones around the pool’s edge. It requires precision, knowledge of materials, and an understanding of how your pool structure works. A small mistake can lead to costly repairs and safety hazards down the road. Hiring a professional ensures the job is done right the first time, protecting your investment and giving you a beautiful, durable finish that lasts for years.

The Risks of a DIY Project

It’s easy to see the appeal of a DIY project, but with pool coping, the risks often outweigh the potential savings. Many homeowners choose a material based only on its appearance, which can lead to cracked edges, slippery surfaces, or stone that becomes uncomfortably hot in the sun. The installation itself is also deceptive. While it may seem straightforward, you need to know exactly what you are doing. For example, if you notice multiple cracks in your existing coping, it could indicate that the pool walls have shifted. This is a major structural problem that a DIY repair won’t fix and could lead to a complete pool deck remodel.

How a Pro Guarantees a Lasting Result

A professional installer brings years of experience to your project, guaranteeing a result that is both beautiful and built to last. Experts help you avoid common but costly mistakes related to sourcing materials, applying the right sealants, and achieving a flawless finish. They understand how different stones react to Long Island’s weather and will ensure your coping can withstand freeze-thaw cycles without cracking or shifting. Most importantly, a professional masonry contractor ensures the coping has a smooth, rounded edge. This detail is critical for the safety of everyone using the pool, preventing scrapes and providing a comfortable grip for getting in and out.

The Value of a Professional Warranty

Hiring a professional provides peace of mind that a DIY project simply can’t offer. Reputable installers are licensed and insured, protecting you from any liability during the project. At Gappsi, we handle every aspect of the installation with our in-house team, so you never have to worry about unknown subcontractors on your property. A professional company also provides clear, upfront pricing and detailed estimates, so you know exactly what to expect. Ultimately, the warranty and support you receive from an established Long Island installer are invaluable. It’s a promise that your new pool coping is a secure, long-term investment in your home.

How to Choose the Right Installer on Long Island

Choosing a contractor for your pool coping is one of the most important decisions you’ll make for your backyard project. This isn’t just about finding someone to lay down stones; it’s about finding a partner who will protect your investment and bring your vision to life with skill and care. The right installer ensures your pool’s edge is not only beautiful but also safe and durable enough to withstand Long Island’s distinct seasons.

A great contractor provides a seamless experience from the first consultation to the final cleanup. They communicate clearly, respect your property, and have a deep understanding of local building codes and environmental factors. With decades of experience transforming Long Island homes, we know that exceptional craftsmanship is built on a foundation of trust and expertise. Before you commit, it’s essential to do your homework. Taking the time to properly vet an installer will give you peace of mind and a finished product you can enjoy for years to come. Use these steps to guide your search and find a professional you can count on.

Verify Their License, Insurance, and Experience

Before you fall in love with a design, make sure you’re talking to a legitimate professional. The first step is to confirm they are fully licensed to work in Nassau or Suffolk County and carry comprehensive liability insurance. This is a non-negotiable that protects you from any potential accidents or property damage during the project. Don’t just take their word for it; ask to see the documents. Experience is just as critical. An installer with years of experience on Long Island will have a deep understanding of how to build structures that last through our freeze-thaw cycles and coastal weather, ensuring your pool coping doesn’t crack or shift prematurely.

Review Their Portfolio and Material Expertise

A portfolio is your window into an installer’s craftsmanship and style. Ask to see a gallery of their completed pool coping projects. As you look through the photos, pay close attention to the details. Are the lines clean and straight? Are the grout joints consistent? Does the overall finish look polished and professional? This is also the time to gauge their familiarity with different materials. A true expert should be able to confidently discuss the benefits of travertine versus porcelain and show you examples of their work with each. Their portfolio should prove they have the skill to execute your specific design flawlessly.

Ask About Warranties and Ongoing Support

A professional installer stands behind their work long after the project is finished. Be sure to ask detailed questions about the warranties they offer. A strong warranty should cover both the materials used and the labor performed, giving you a clear path to resolution if any issues arise. It’s also wise to inquire about ongoing support and maintenance. For instance, you can ask if they provide services like deep cleaning or sealing to keep your coping looking its best. Companies that offer restoration and sealing services are often invested in the long-term durability of their installations, which is a great sign of a quality partner.

Key Questions to Ask Before Hiring

Once you’ve narrowed down your options, it’s time for a final round of questions to ensure you’re making the right choice. Having a list ready helps you compare installers and clarifies expectations for everyone involved.

Here are a few key questions to ask:

  • Can I see your license and certificate of insurance?
  • How many years have you been installing pool coping on Long Island?
  • Do you have a portfolio of recent projects I can review?
  • Who will be my main point of contact during the installation?
  • What does your warranty cover and for how long?
  • How do you handle unexpected issues or project delays?

Their answers should give you the confidence you need to move forward with your swimming pool project.

Mistakes to Avoid When Hiring a Coping Installer

Choosing an installer for your pool coping is a big decision. The right partner will ensure your pool edge is beautiful, safe, and built to last, while the wrong one can lead to costly repairs and headaches. To help you make a confident choice, let’s walk through some common mistakes homeowners make and how you can steer clear of them. A little preparation goes a long way in guaranteeing your project is a success from start to finish.

Don’t Choose Based on Price Alone

It’s tempting to go with the lowest quote, but this can be a costly mistake in the long run. A surprisingly low price often signals subpar materials or inexperienced labor. Many homeowners focus on the initial look of the coping without considering its durability. This can lead to problems like cracked edges after a tough winter, dangerously slippery surfaces, or stone that gets uncomfortably hot in the summer sun. When you select a material, think about quality and performance first. Investing in a durable, high-quality material and a skilled installer protects your investment and ensures your pool area remains a safe, enjoyable space for years.

Don’t Skip the Vetting Process

Hiring the first installer you speak with without doing your homework is a major risk. A true professional will have a proven track record, proper credentials, and a deep understanding of local requirements. Take the time to verify their license and insurance, and ask for references from recent projects here on Long Island. A crucial part of the vetting process is confirming their familiarity with local building codes and permit requirements. An experienced masonry contractor will handle these details for you, preventing legal complications and ensuring your project is completed to standard.

Always Review Contracts and Permits

A verbal agreement isn’t enough to protect you or your investment. Before any work begins, make sure you have a detailed written contract that outlines the entire scope of the project. This document should include a clear timeline, a payment schedule, and a specific list of all materials to be used. Don’t be afraid to ask for clarification on any points you don’t understand. It’s also a great idea to take photos throughout the installation process. This documentation creates a clear record of the work and helps ensure the final result is exactly what you agreed upon. You can see examples of our finished work on our YouTube channel.

Remember to Plan for Maintenance

Your pool coping material choice has a direct impact on the longevity of your pool’s edge and the amount of upkeep it will need. Here on Long Island, it’s especially important to consider factors like freeze-thaw durability to prevent cracking during our cold winters. You should also think about slip resistance for safety and how much heat the material absorbs. Talk to your installer about the long-term maintenance requirements for the materials you are considering. A good contractor will not only install your coping correctly but also provide guidance on how to care for it, including services like professional restoration and sealing.

Tying It All Together: Coping and Your Outdoor Design

Your pool coping is much more than just the edge of your pool. Think of it as the frame for your masterpiece. It’s the critical design element that connects your sparkling swimming pool to the rest of your outdoor living space. When chosen thoughtfully, your coping can create a seamless flow between the water, your patio, and the surrounding landscape. It’s the detail that pulls your entire backyard vision together, turning a collection of separate areas into one cohesive, beautifully designed oasis. This is how you get that magazine-worthy look where everything just works together perfectly.

Making the right choice means looking beyond the pool itself. Consider the colors and textures of your home’s exterior, your patio furniture, and even the plants in your garden. The goal is to create a harmonious environment where every element feels like it belongs. This is where a holistic design approach makes all the difference. By planning how your coping will interact with other hardscape features, you ensure a polished and intentional look that feels both luxurious and inviting. It’s this attention to detail that transforms a backyard into a personal retreat, a place you’ll love spending time in for years to come.

Match Your Coping to Your Deck and Patio

The best coping choices don’t just look good on their own, they harmonize with your deck and patio. When selecting a material, think about how its color and texture will pair with your existing surfaces. For example, the warm, earthy tones of travertine coping can beautifully complement a rich wood deck, creating a soft and natural transition. If you have a modern patio made of sleek concrete or dark stone, a crisp, light-colored porcelain coping can provide a stunning contrast. On Long Island, it’s also vital to consider practical factors like slip resistance and durability through our freeze-thaw cycles to ensure your design is as safe as it is stylish.

Complement Your Look with Pavers

Using pavers that match or complement your coping is a fantastic way to create a unified and expansive feel in your backyard. Imagine a seamless flow of beautiful granite from your pool’s edge across your entire patio. This approach gives your space a high-end, custom look that can significantly increase your property’s value. Alternatively, you can create visual interest by choosing a complementary paver. A skilled masonry designer can help you pair different materials, like a smooth bluestone coping with textured concrete pavers, to add depth and character to your outdoor design while maintaining a cohesive color palette.

Create a Cohesive Backyard Oasis

Coping is the finishing touch that ties everything together. Its smooth, rounded edge provides a safe and comfortable border for your pool, but its design impact goes much further. You can use the same coping material on other features throughout your yard, like on the tops of retaining walls, garden steps, or around a fire pit. This repetition of material creates a powerful sense of unity and intention. It’s a professional landscape design secret that makes your entire backyard feel like a single, thoughtfully planned oasis. This consistency is what elevates a space from simply functional to truly extraordinary.

Related Articles

Frequently Asked Questions

How long should my pool coping last? The lifespan of your pool coping really depends on three things: the material you choose, the quality of the installation, and how well you maintain it. A high-quality, dense material like granite or porcelain that is installed by an expert can easily last for decades, even with our tough Long Island winters. On the other hand, a lower-grade material or a DIY installation might show signs of failure in just a few years. Proper installation that accounts for freeze-thaw cycles is the most important factor for a long-lasting result.

What’s the best coping material for a family with kids? When safety is your top priority, you want to focus on materials that are non-slip and don’t get too hot. Travertine is a fantastic choice because it stays remarkably cool under the summer sun, so you don’t have to worry about little feet getting burned. It also has a naturally porous texture that provides good grip. Porcelain is another excellent option; it’s incredibly durable, non-porous, and comes in many textured, non-slip finishes that are perfect for a busy and splash-heavy pool area.

Can my cracked coping be repaired, or does it all need to be replaced? This is a great question, and the answer depends on the extent of the damage. A single, small chip or a hairline crack in one stone might be repairable. However, if you have multiple cracked stones, crumbling mortar, or any loose sections, it usually points to a larger problem, like water getting behind the coping. In those cases, a full replacement is often the best solution to fix the underlying issue and prevent more serious structural damage to your pool.

How long does a typical pool coping installation take? For a standard-sized pool, a professional coping installation usually takes a few days. The total time can vary based on the size and shape of your pool, the type of material being installed, and whether we need to remove old coping first. A complex, freeform pool will naturally take longer than a simple rectangle because of the custom cuts required. A good contractor will give you a clear timeline before the project begins.

Does my coping have to match my patio pavers? Not at all. While using the same material for both your coping and patio creates a very seamless, high-end look, it’s not your only option. You can create a beautiful, intentional design by choosing a complementary material. For instance, a dark bluestone coping can create a stunning frame around a lighter-colored paver patio. The key is to select materials that share a similar style or color palette to ensure your entire outdoor space feels cohesive and thoughtfully designed.

Share this page: