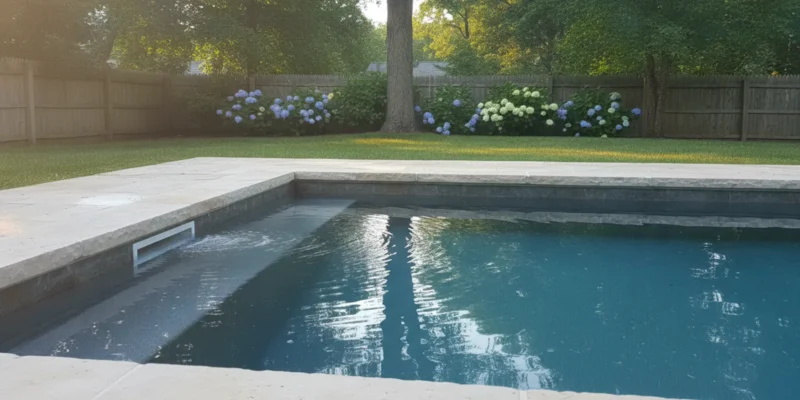
Swimming pool skimmer opening set into stone coping beside clear pool water

When does a Long Island swimming pool need a skimmer replacement? Pool skimmer replacement Long Island

A pool skimmer draws surface water and floating debris toward the circulation system. For Long Island homeowners, pool skimmer replacement may be appropriate when the body, throat, or connected plumbing has failed and a durable repair is not practical. A crack by itself does not prove that the skimmer is causing water loss, so diagnosis should come before demolition or replacement.

Contact Gappsi through our contact page to discuss your pool concern

When should you consider replacing a pool skimmer?

Replacement is worth discussing when an inspection finds a broken skimmer body or throat, extensive cracking, failed connections, or separation that cannot be corrected with a compatible repair. A skimmer can also merit closer evaluation if water loss appears to stop near the opening, if the unit has shifted, or if the surrounding pool structure shows movement. Those are reasons to investigate, not proof of a particular failure.

Look for a pattern rather than one isolated symptom. Note the water level and when it changes, whether the pump is running, whether the water level stabilizes at a particular point, and whether the skimmer draw or equipment behavior changes. A professional can use that history alongside a physical inspection to decide what to test next. Gappsi’s pool remodeling information is a relevant starting point for discussing related pool work.

What signs can you check before arranging an assessment?

Start with what is visible and accessible. Look at the opening, lid, basket, throat, nearby coping, and the joint between the skimmer and pool surface. Do not reach into equipment or remove parts that are difficult to access. A loose lid or clogged basket is not the same as a damaged skimmer body, and each points to a different next step.

  • Cracks or broken edges: Note their location, length, and whether they appear to extend through the throat or visible body.
  • Gaps or displacement: Record any separation at the pool edge, movement of the skimmer, or nearby coping that appears raised or shifted.
  • Water-level pattern: Write down the level at the start and end of observations, along with the time interval and pump status.
  • Changes in circulation: Describe weak surface draw, air in the system, or a change in pump sound. Such symptoms can have causes elsewhere.
  • Recent changes: Mention nearby construction, freeze-thaw damage, impact, or other work if you know it occurred.
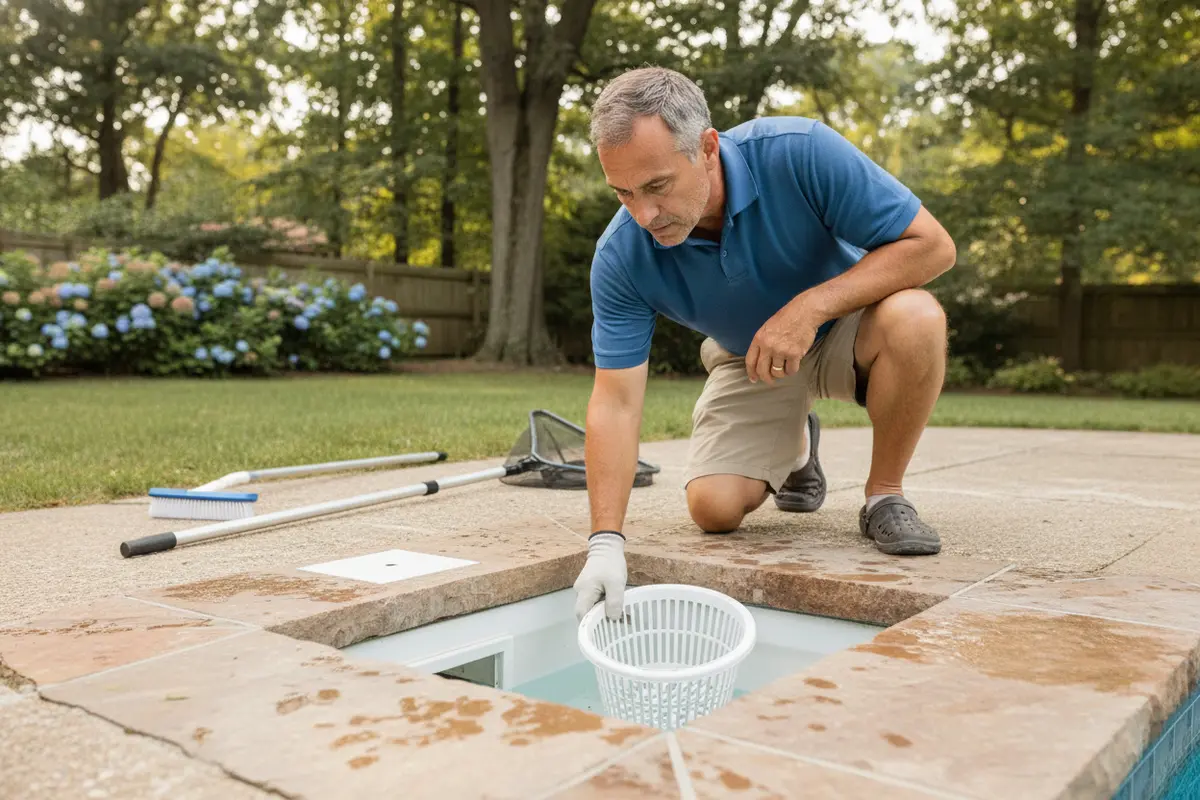
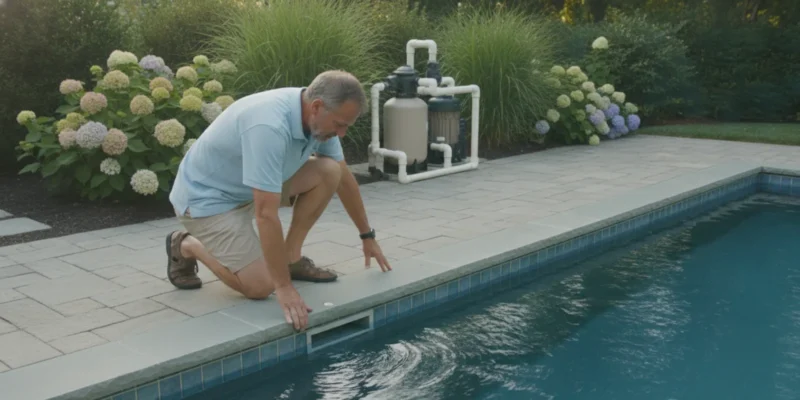
Pool professional inspecting a skimmer throat and surrounding coping

Take clear photographs in daylight, including one close view and one wider view showing the adjacent surface. If the pool is next to a pool patio, document any movement or cracking there as well. A surface defect may be related to access or surrounding conditions, but it does not identify a leak source on its own. If a pool includes a waterfall, a change in sheer descent flow can be useful background for the inspection, though it is not a skimmer test.

Could something other than the skimmer cause the same symptoms?

Yes. Pool water can be lost at another fitting, a return line, a light niche, a shell surface, or another connection. Poor surface draw may reflect a low water level, a blocked basket, a valve setting, or a circulation issue elsewhere. Water also leaves a pool through normal use, splash-out, and evaporation, so a falling level alone does not identify the source.

Tell the evaluator whether a symptom occurs only while the pump runs, after it stops, or under either condition. Also note whether the water level appears to settle near the bottom of the skimmer opening. That observation may help guide testing, but it is not a stand-alone diagnosis. If the level drops quickly, equipment loses prime, or there is a safety concern, avoid operating affected equipment and seek qualified guidance rather than repeatedly restarting it.

A simple observation log can make a site visit more useful. Record the date and time, water level relative to a fixed point such as the tile line, whether the pump was on, recent weather or heavy pool use, and any visible change near the skimmer. Take pictures from the same position when possible. Do not deliberately run equipment that is losing prime or let the water fall below a safe operating level just to collect more data. If the pool has a marked fill line, use it as a visual reference rather than relying on memory.

For example, a homeowner might notice that the level falls over several days but cannot tell whether the skimmer is responsible. Notes showing that the pump schedule changed, the pool was used heavily, or water loss continued while equipment was off can help narrow the conversation. They do not establish the source by themselves, but they give the evaluator a clearer timeline. Include the location of any crack in each photo, and avoid applying sealant before the inspection unless a qualified professional directs you to do so.

When the source is unclear, ask what observations or tests support the diagnosis and what alternatives have been considered. A careful evaluation can prevent work on the skimmer when a different component is responsible. This is especially useful before coping or deck material is disturbed.

Can a skimmer be repaired instead of replaced?

Sometimes. A limited defect in an accessible area may be suitable for repair if the surrounding body and connections remain sound and the repair material is compatible with the pool construction. Replacement becomes a stronger possibility when damage is extensive, the throat or body is broken, the connection has failed, or a repair would not provide a dependable result. The location of the defect, construction type, plumbing condition, and access all affect the decision.

What inspection finds Possible direction What to ask
Loose lid or basket problem, body intact Correct or replace the affected component Can the issue be resolved without opening the surrounding surface?
Small, accessible defect in otherwise sound material Evaluate a compatible localized repair What makes this repair suitable, and how will it be checked?
Broken throat, extensive body damage, or failed connection Assess replacement scope What coping, deck, and plumbing access will be needed?
Water loss but no confirmed skimmer defect Identify the source before selecting work What evidence connects the loss to this location?

This table is a discussion aid, not a remote diagnosis. Ask the contractor to show the defect and explain why the proposed option addresses it. If repair is not recommended, ask whether the reason is the extent of damage, the location, access, or the condition of the connection. If replacement is proposed, clarify the expected limits of work before approval.

What does pool skimmer replacement involve?

The process depends on pool construction and the way the skimmer was installed. The work generally starts by confirming the failed component and planning access. Nearby coping or deck material may have to be removed carefully to reach the skimmer and its plumbing. The damaged unit is then addressed, compatible connections are made, and the work is checked before the surface is closed and restored. The exact sequence and amount of surface work can vary by site.

  1. Confirm the diagnosis and scope. Identify what has failed, what testing supports that finding, and what parts of the pool system are included.
  2. Plan access and protect the area. Review the likely removal area, protection for nearby finishes, and how people and pets will be kept away from an open work zone.
  3. Expose and address the skimmer. Carefully open the necessary area, remove or repair the affected components, and make connections suitable for the existing system.
  4. Check the work before restoration. Ask how operation and connections will be examined before the opening is covered.
  5. Restore the surrounding finish. Review the coping or deck repair, joints, transitions, and any material match that can reasonably be achieved.

Testing before restoration matters. Once the area is closed, access to the connection may be more difficult. Ask what check will be performed and what the result will show. Clarify who handles each part of the work, including surface removal, plumbing, replacement components, testing, and finish restoration. For homeowners considering a larger pool remodeling project, discussing the sequence can help avoid disturbing newly completed work.
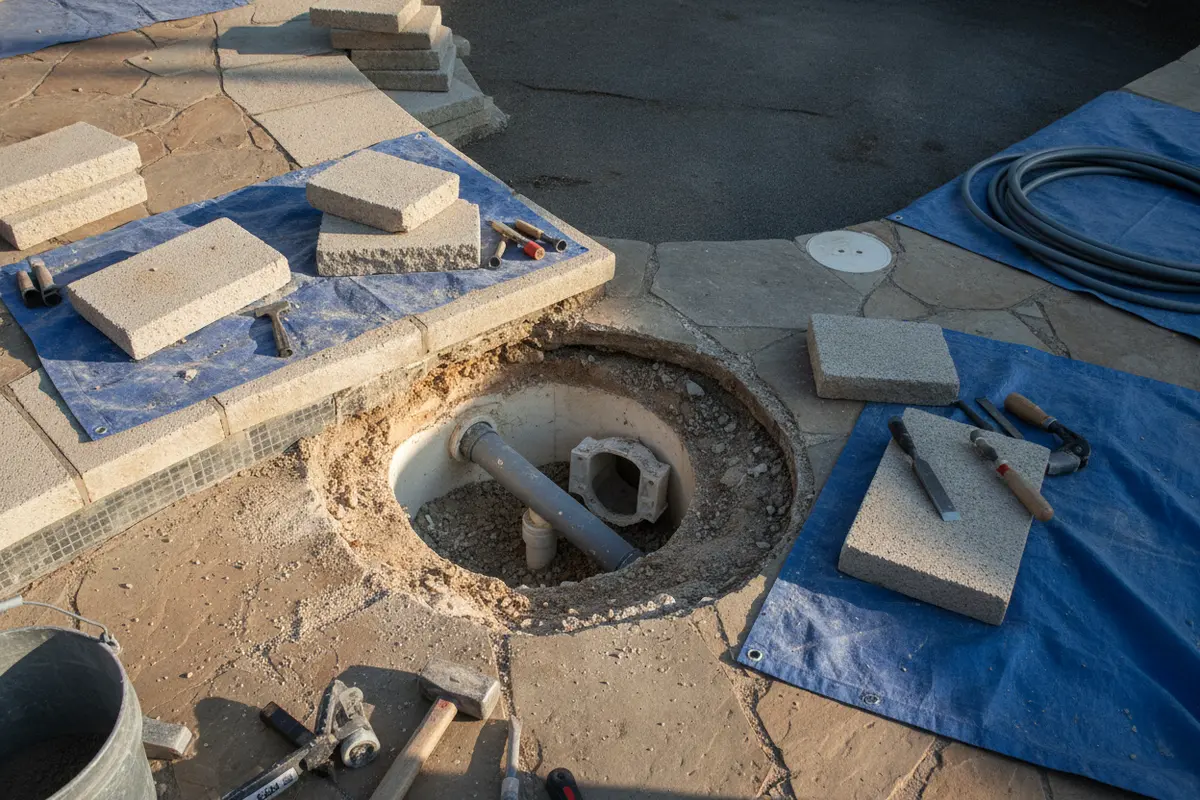
Pool skimmer and plumbing exposed during replacement work

How can you compare a repair proposal with a replacement proposal?

Compare the explanation and scope, not just the name of the proposed work. A clear proposal should connect the observed condition to the recommended work. It should distinguish what is known from what may be discovered after access is opened. If an estimate includes surface restoration, ask what material and area are included and how the finished edge will meet the existing surface.

For example, imagine a pool that loses water and has a visible crack near the throat. One proposal may recommend replacement immediately; another may recommend checking whether the crack extends into the body and whether a connection is leaking. The useful comparison is whether each recommendation explains its evidence, how it will address the suspected failure, and what happens if opening the area reveals additional damage. Neither the visible crack nor the estimate title answers those questions by itself.

  • Request a plain-language explanation of the confirmed defect and any remaining uncertainty.
  • Ask whether a repair is feasible and, if not, why it is not considered suitable.
  • Separate access, skimmer components, plumbing, testing, and finish restoration in the scope.
  • Clarify what is excluded and how changes will be discussed if concealed conditions appear.
  • Ask what the site will look like at the end of each work stage and when the pool can be assessed for return to use.

Photograph the existing coping and keep any information you have about its material. When the skimmer is surrounded by a broader patio area or other hardscaping, discuss sequencing and finish coordination before work begins. If a pool project includes a pool house, note access routes and any shared work area when coordinating the schedule.

How should Long Island homeowners plan the work?

Plan around access, the condition found, weather, materials, and other scheduled pool work. There is no single schedule that fits every installation. Ask when the pool may need to be lowered or equipment isolated, what areas must remain clear, and what conditions would change the sequence. Do not lower pool water or alter equipment settings unless the person responsible for the work advises it.

Before a site visit, clear loose items from the pool edge and keep children and pets away from visible damage. Share the pool construction type if known, a short timeline of symptoms, the water-level notes, and the photographs. If the pool is being prepared for a seasonal closure, coordinate the assessment with any pool safety cover planning; a cover does not diagnose or fix a skimmer. For broader yard coordination, the backyard project category may help frame related improvements, but the skimmer defect should be evaluated on its own merits.

For general pool and water safety information, homeowners can consult the New York State Department of Health. This general resource does not diagnose a skimmer or replace site-specific direction about operating a particular pool.

What should you ask before approving replacement?

Use the conversation to establish what is included and how the result will be evaluated. These questions can make a recommendation easier to understand:

  • What observation or test confirms that the skimmer is the source of the issue?
  • Which part has failed: lid, throat, body, fitting, or connected plumbing?
  • Could a repair address the condition, and what is the reason for choosing replacement instead?
  • What coping or deck material may be removed, and what restoration is included?
  • How will the connections be checked before the work area is closed?
  • What concealed conditions could change the scope, and how will those changes be explained?
  • What should remain off or inaccessible during work, and who will confirm the pool is ready for normal operation?

Clear answers help you distinguish a confirmed repair need from a provisional plan. They also set expectations for the transition between the skimmer, coping, and surrounding surface. Contact Gappsi through its contact page when you are ready to discuss the concern, and review pool patio considerations if nearby surfaces are part of the project.

Contact Gappsi through our contact page to discuss an evaluation

Frequently Asked Questions

How can I tell whether a pool skimmer is leaking?

Visible cracks or separation can raise concern, but water loss can come from several parts of a pool. Record the level, timing, and pump status, then have the suspected source assessed rather than treating one symptom as confirmation.

Does every cracked skimmer need replacement?

No. The location and extent of the crack, the condition of the body and connections, and the feasibility of a compatible repair all matter. Ask for an explanation of why repair or replacement fits the observed damage.

Will replacing a skimmer disturb the patio?

It may. Access can require removal of nearby coping or deck material, depending on the installation and connection. Before work starts, clarify what may be removed and how the area will be restored.

Can I keep using the pool while waiting for an assessment?

That depends on the damage, water level, and equipment behavior. If there is substantial water loss, exposed damage, equipment trouble, or an electrical concern, stop using affected equipment and seek qualified guidance.

Posted by Gappsi Group

Contact Gappsi through our contact page to discuss your pool skimmer

A careful diagnosis helps Long Island homeowners choose a suitable repair or replacement scope and understand what the surrounding pool area may require.
Share this page:
Residential swimming pool with stone coping and patio inspected for repair needs

Swimming Pool Repair: How to Plan the Right Next Step

When you need to repair a swimming pool, begin by identifying what changed, when it started, and whether it affects the pool shell, water circulation, equipment, or surrounding deck. A clear record helps separate a visible symptom from its likely cause. It also helps you discuss a focused next step without assuming every crack, wet spot, or change in water level calls for the same repair.

Contact Gappsi through our contact page to discuss your pool repair

Pool problems can overlap. A damp area may relate to plumbing, drainage, or splash-out. A loose coping stone may be a localized setting issue or a sign that its base needs closer inspection. Document what you can observe first, then ask a qualified pool professional to assess the condition in context.

What should you check before planning swimming pool repair?

Start with a walk-around when the area is safe and the pool is in its usual operating condition. Do not dismantle equipment or enter a pool if there is an electrical concern. Note whether the issue is new, recurring, or getting worse, and use the same observations each time you check.

  • Water level: Record it at the same time each day for several days. Note rain, backwashing, and heavy use. Evaporation and splash-out can resemble a leak, so a falling level alone does not identify the cause.
  • Surface: Photograph cracks, discoloration, roughness, flaking, or detached material. Include a familiar object nearby for scale, but do not scrape or chip the surface.
  • Edges and deck: Look for loose coping, uneven transitions, open joints, standing water, and areas where paving has shifted.
  • Circulation: Note unusual pump sounds, weak returns, air bubbles, cloudy water, or filter pressure that differs from its normal range.
  • Timing: Write down whether symptoms appear after the pump starts, after rain, or after the pool is used.
  • Location: Mark whether the sign is inside the pool, at a fitting, around the equipment pad, or in the surrounding patio. A simple sketch can make a photo easier to interpret.

Keep notes factual. “Water is down about an inch since yesterday” is more useful than “the pool is leaking” before a leak has been confirmed. If water is near electrical equipment, the ground is settling quickly, or a structural crack appears to be changing, keep people away from the affected area and seek prompt professional guidance.

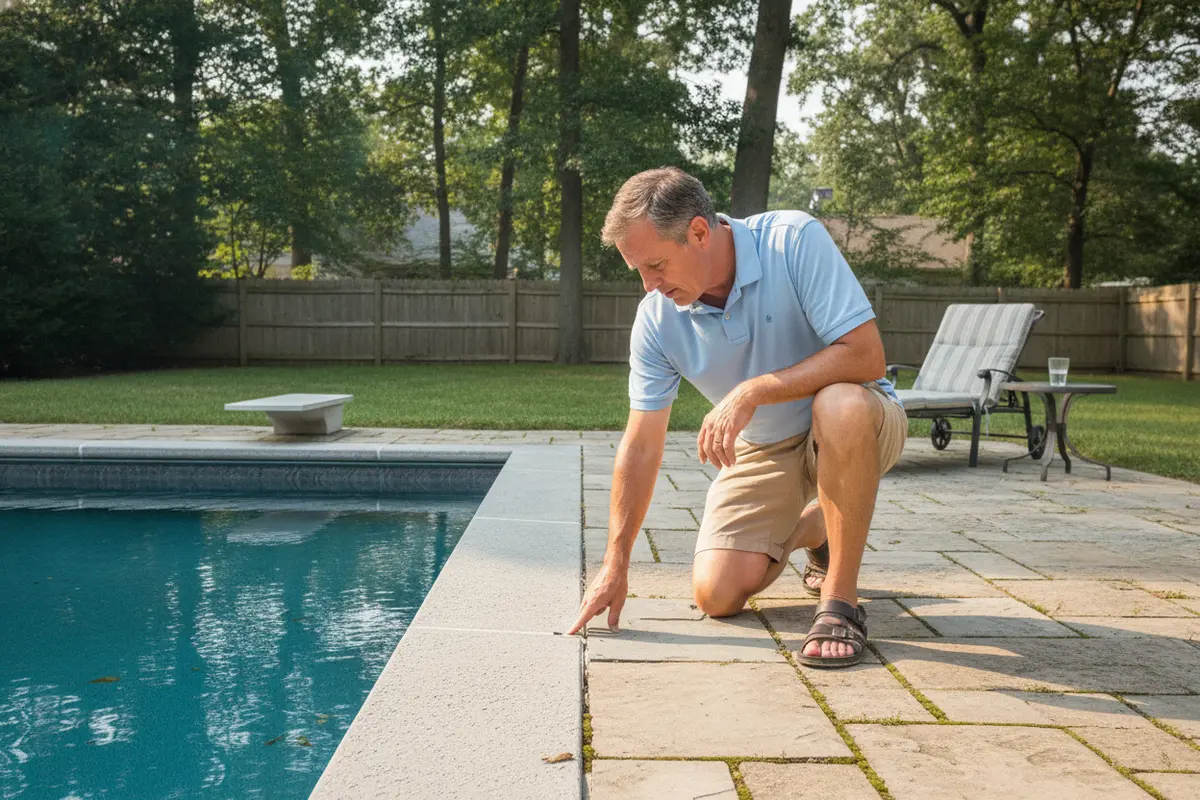
Pool coping joint and patio being examined for repair concerns

How do you distinguish surface, plumbing, and equipment concerns?

Group the concern by location and function before arranging an inspection. These categories are not a diagnosis. They help describe what you see, explain the history, and ask useful questions. Pool systems connect, so a symptom in one place may need to be checked alongside another area.

Observed concern Possible area to inspect Useful information to collect Question to ask
Surface crack or flaking Finish, substrate, movement, or water-chemistry history Photos, location, approximate length, change over time Is this limited to the finish, or does the underlying condition need review?
Water loss Evaporation, plumbing, fittings, shell, or circulation system Consistent level notes, pump status, recent use What inspection can narrow down where water is going?
Weak return or noisy pump Basket, filter, valves, pump, or plumbing Equipment labels, pressure readings, when flow changes Can the equipment be serviced, or does a component need replacement?
Loose coping or uneven deck Setting bed, joints, base, drainage, or adjacent paving Wide and close photos, drainage observations, affected area Will the scope address the base and water management as well as the visible stone?

A symptom comparison can guide a conversation, but it cannot establish the source. For example, a water-level change may have several explanations. Ask what inspection method is appropriate before authorizing work. Depending on the evidence, a professional may recommend separate evaluations of the pool vessel, plumbing, equipment, and patio.

Which swimming pool repair approach fits the condition?

The suitable approach depends on inspection findings and whether the problem is isolated or connected to a larger system. A localized repair may fit when the surrounding material is sound and the cause is understood. Broader work may be appropriate when damage repeats, affects multiple areas, or follows a system failure.

Localized repair

Examples include addressing a specific fitting, replacing a failed equipment component, or resetting a limited section of coping. Ask how the work area will be prepared, how adjacent materials will be matched, and how the contractor will check that the cause has been addressed. Confirm whether testing or a follow-up observation is included.

Surface restoration

Widespread wear or finish damage may call for a larger surface scope. The proposal should state what preparation is included, what material or finish is proposed, and how existing conditions may affect the result. A new surface should not be assumed to resolve plumbing or structural concerns. Ask whether those areas were evaluated separately.

System or area renovation

If the pool, coping, deck, or circulation equipment has several related issues, compare a repair plan with a more comprehensive renovation plan. Ask the contractor to separate necessary work from optional improvements and explain dependencies. If a patio is involved, Gappsi’s pool patio projects can help you consider how adjacent surfaces fit into a broader plan.

Do not choose by the visible patch alone. A useful scope explains both the repair and why it is expected to address the observed condition. Ask whether an adjacent surface must be opened or reset to reach the affected component, and whether restoring it is included.

Explore pool remodeling resources to consider when a larger project may fit better than several disconnected repairs.

What should a pool repair estimate explain?

Ask for a written scope that describes the problem being addressed, work sequence, materials, exclusions, and conditions that could change the plan. A useful estimate lets you compare approaches, not just totals. When a diagnosis is uncertain, the proposal should say what is known, what remains unknown, and what additional testing may be proposed.

  1. Inspection findings: What was observed, and what remains uncertain?
  2. Work area: Which pool, equipment, coping, or deck sections are included?
  3. Preparation: Does the work require draining, access, removal, or protection of nearby surfaces?
  4. Materials: What replacement material or component is proposed, and how will it relate to existing finishes?
  5. Sequence: What happens first, and what must be complete before the pool returns to service?
  6. Assumptions: What concealed conditions could affect the scope, and how will changes be reviewed?
  7. Care: What operating or maintenance instructions apply after the repair?
  8. Completion: What checks or observations will confirm the agreed work is complete?

Compare proposals on scope and assumptions. If one includes equipment testing and another addresses only a visible surface, they are not equivalent. Request clarification in writing before deciding. Gappsi provides information about financing options; review the details directly and ask whether they apply to your project. For a project conversation, use the Gappsi contact page.

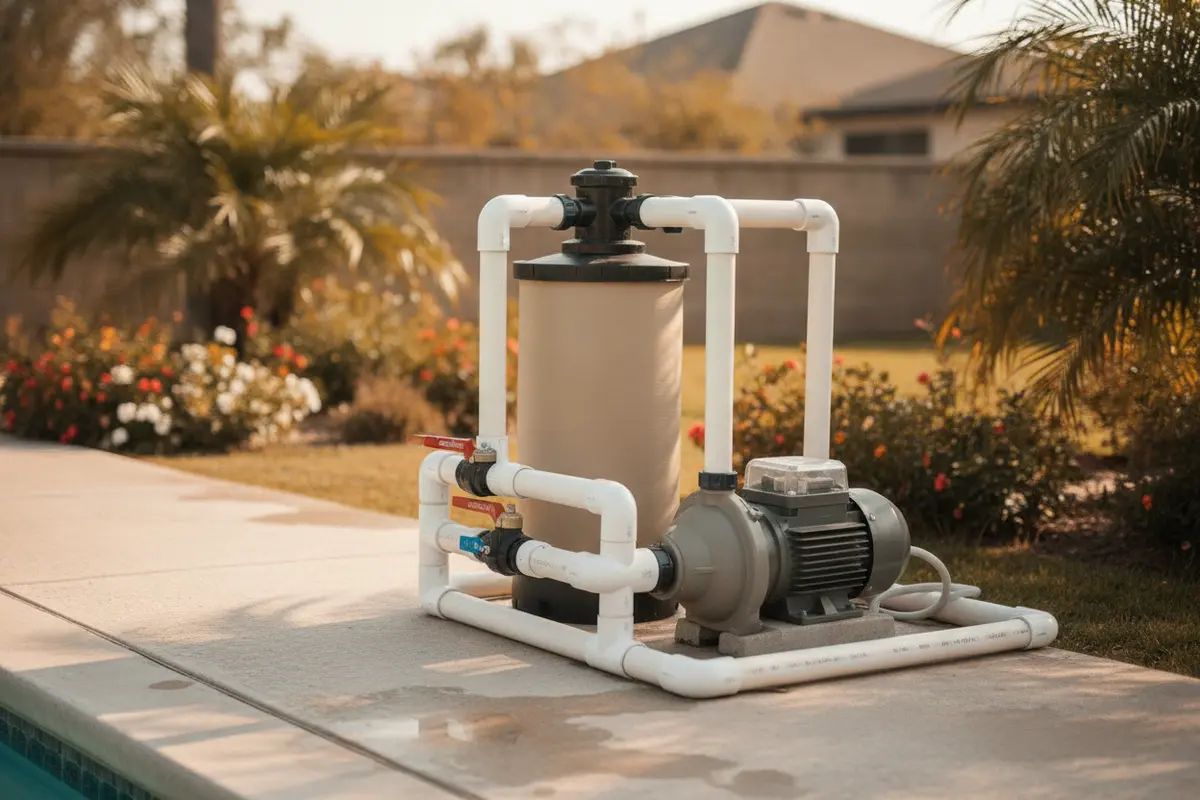
Pool pump and filter equipment checked during repair planning

How can you prepare the site and reduce avoidable delays?

Before work is scheduled, gather the pool’s age if known, previous repair records, equipment model information, and photographs from before symptoms appeared. Keep access routes clear and identify gates, pets, or landscaping that may affect entry. Tell the contractor about recent chemical treatments, unusual water-level changes, and prior work near the pool.

Ask who is responsible for draining or refilling if needed. Do not drain a pool on your own without professional advice; site and groundwater conditions may matter. Confirm how the work area will be protected, where removed materials will go, and whether the pool can be used during each phase. If work involves water and electrical systems, ask how safe shutdown and restart will be handled by the appropriate professional.

When the repair touches adjoining paving, review examples of hardscaping and porcelain patio work to help describe surrounding materials and layout. If the area has an existing finish or surface-care concern, see Gappsi’s sealing topics and restoration resources. These pages are background, not a substitute for an assessment of your pool.

How should Long Island homeowners plan timing?

Plan around the repair scope, material availability, weather exposure, and time needed for any required curing or equipment checks. Ask for a sequence and approximate schedule rather than assuming the project will take a fixed number of days. If you use the pool seasonally, raising the issue early may give you more time to compare options and coordinate related patio work.

Build the schedule around decision points, not just a start and finish date. For example, ask when inspection findings will be shared, when you must approve any material choice, and how concealed conditions will be communicated. Confirm who will tell you when the pool is ready to use, and what operating instructions apply after work is complete.

Keep a copy of the written scope and care instructions. When work is complete, compare the finished area with the agreed scope and report unresolved symptoms promptly. If the original issue was intermittent, continue the same simple observations for a period recommended by the professional, rather than relying only on how the area looks on completion day.

How can you compare repair plans in practical situations?

Consider a homeowner who notices a damp patch near one side of the patio and a water level that seems lower than usual. The first step is not to assume that the patio is the leak source. Record the water level consistently, note pump operation and pool use, and photograph the damp area in relation to fittings, equipment, and drainage. Then ask the inspector what evidence supports each possible cause and whether more than one area needs evaluation.

In a different case, a coping stone may move while the pool level appears stable. Photograph the stone and nearby joints, note whether several stones are affected, and check whether water collects nearby after rain. Ask whether the setting material, adjacent base, drainage, or a broader patio condition is part of the review. Replacing only the visible stone may not be the right scope if the supporting area also needs attention.

A third example is a pump that becomes noisy while return flow weakens. Record when the sound starts, whether it changes with the system cycle, and any pressure reading you can safely see without opening equipment. Do not take apart electrical or pressurized components. Share equipment labels and observations with a qualified professional, then compare estimates that clearly state which component is being inspected, serviced, or replaced.

Across all three situations, the useful comparison is between evidence, diagnosis, and scope. A repair plan should connect the observed symptom to the proposed work, state what remains uncertain, and make clear how completion will be checked. If two proposals recommend different work, ask each provider to explain the difference in findings rather than trying to resolve it from price alone.

What information should you bring to a project conversation?

A concise packet can make an initial discussion more productive. Include dated photos from wide and close viewpoints, your symptom log, approximate pool age if known, prior repair records, and equipment information. List what has changed and what has not. For example, note whether the water level changes while the pump is off or whether a sound occurs only during operation, but avoid presenting an unconfirmed cause as fact.

Gather practical questions in advance. Ask what the professional will inspect, what access is needed, whether testing is separate from repair, which surfaces may be disturbed, and how any unexpected findings will be approved. If the project could touch the deck or coping, note the material and areas you want preserved. Gappsi’s patio project examples and project resources may help you describe the setting.

When ready, provide the observations and questions through the contact page. A focused inquiry can explain the location of the issue, how long it has been present, whether it is changing, and which parts of the pool or patio appear involved.

Contact Gappsi through our contact page to discuss a pool repair scope

Frequently Asked Questions

How can I tell whether a pool is leaking?

A changing water level may justify further investigation, but evaporation, splash-out, and routine maintenance can also lower it. Record conditions consistently and ask a pool professional whether testing is appropriate before assuming the cause.

Should I repair a crack as soon as I see it?

Photograph it and note whether it changes. A qualified professional can assess its location, size, and surrounding conditions. Seek prompt guidance if it appears to be growing or is associated with shifting, water loss, or other changes.

Can a pool deck problem be separate from a pool problem?

Yes. The deck, coping, drainage, pool shell, and plumbing are distinct elements, although one condition can affect another. Ask the inspector to identify which parts were reviewed and which repairs are included.

What should I send before discussing a repair?

Share clear wide and close-up photographs, dates and notes about symptoms, equipment details if available, and previous repair records. Do not make destructive tests or alter equipment to investigate the issue yourself.

What should I ask before swimming after a repair?

Ask the professional responsible for the work what must be checked before the pool returns to service, including any operating instructions or waiting period that applies to the materials or equipment involved.

For safety guidance around residential pools, the U.S. Consumer Product Safety Commission offers Swimming Pool Safety information. Its guidance supports keeping access and safety considerations in view while planning work; follow the instructions specific to your pool and the professionals completing the repair.

Plan your next step

A practical repair plan starts with a careful record, a focused inspection, and a written scope that explains what will be repaired and why. Bring dated photos, a symptom log, and specific questions to your conversation with Gappsi, then confirm which conditions need attention before work begins.

Contact Gappsi through our contact page to discuss your pool repair.

Posted by Gappsi Group. A careful record and a clear scope are practical foundations for the next repair decision.

Share this page:
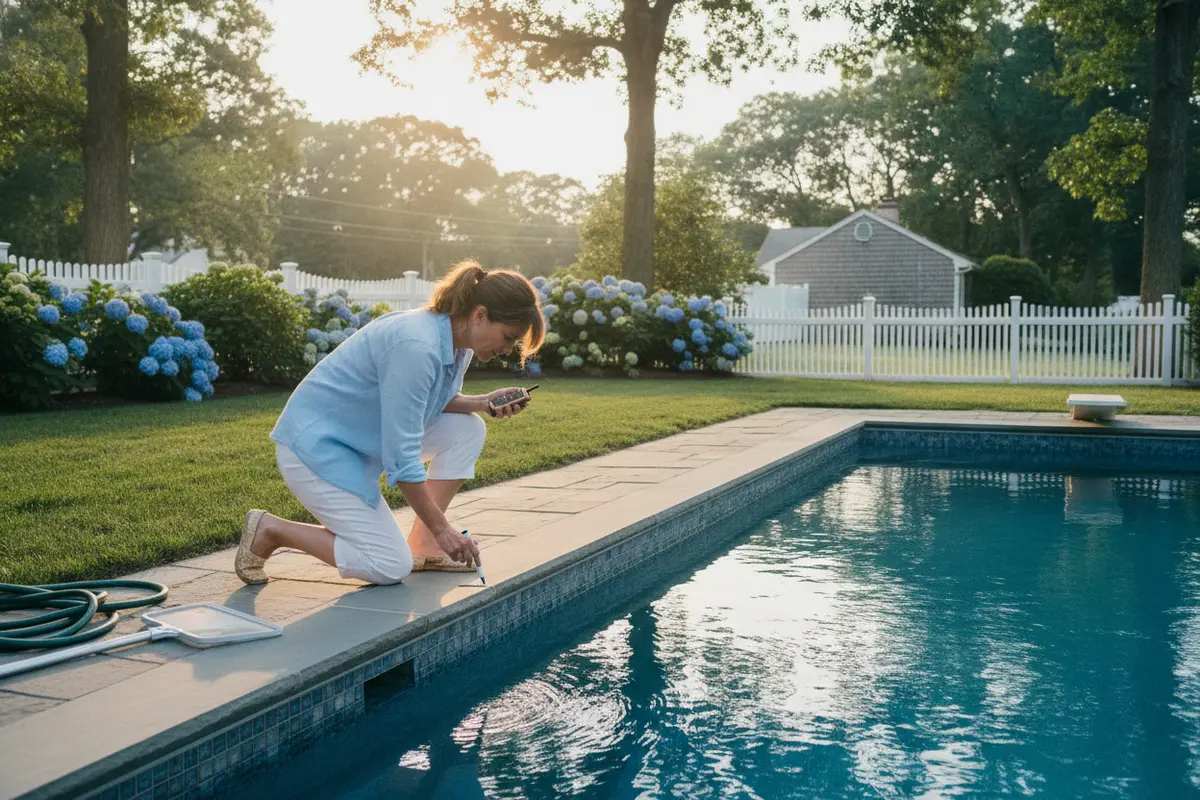
Homeowner checking a swimming pool waterline beside residential pool equipment

Pool Leak Repair: What Long Island Homeowners Should Know

A pool that keeps losing water raises a practical question: is the change normal evaporation, water use, or a leak? This guide to pool leak repair shows Long Island homeowners how to observe the pattern, separate clues from conclusions, and prepare for an informed inspection.

Contact Gappsi through our contact page

Water loss alone does not identify a source. Evaporation, splash-out, filter backwashing, water features, and leaks can all lower the level. Begin by documenting what happens rather than applying a patch or assuming that a visible crack is the cause. A short, consistent record can help a professional focus the assessment.

How can you tell when pool leak repair may be needed?

Choose a repeatable observation routine. Mark the water level with a removable marker or take a photograph from the same position at roughly the same time each day. Record water added and note weather, swimming, cleaning, and feature use. A single measurement can be affected by a recent swim or maintenance cycle; several comparable observations provide better context.

  • Note the water level and date, and photograph the waterline.
  • Record whether the circulation pump was running and its schedule.
  • Write down rain, strong wind, heat, swimming, and water-feature operation.
  • Note filter cleaning or backwashing, if applicable, and any water discharged during maintenance.
  • Look for persistent damp soil, puddles, or moisture near equipment, but do not treat those signs as proof.
  • Record air at returns, a pump that struggles to stay primed, or changes in equipment performance.

Consider ordinary sources of loss before drawing a conclusion. Wind and sun affect evaporation, while play and splashing move water out of the pool. A waterfall or other feature can also change water exposure and circulation. If the loss is persistent and repeatable after these factors are recorded, a professional assessment is a reasonable next step.

Keep the observations comparable. If you take one reading after several hours of swimming and another after a quiet day, the difference may not tell you much. Use a consistent measuring point, note unusual conditions, and avoid adding water without recording when and approximately how much. This is not a substitute for a leak test. It is a way to give an inspector a clearer account than “the pool seems low.”

Contact Gappsi through our contact page to discuss your pool project and share the pattern you have recorded.

What does a bucket comparison show before pool leak repair?

A bucket comparison can help distinguish likely evaporation from additional pool water loss. Set a stable bucket on a pool step where it will not float or tip. Fill it with pool water to a marked level and mark the pool water level on the outside of the bucket. Keep the pool and bucket exposed to similar conditions. After a day or two, compare the amount each level changed.

  1. Pick a period without rain or unusual pool use.
  2. Keep circulation and water features in the same condition throughout the comparison, if safe and practical.
  3. Mark both levels clearly and record the start time.
  4. At the end, compare the drop in the pool with the drop in the bucket.

If the pool level drops more than the bucket level, leakage becomes more plausible. The comparison cannot locate a leak, prove a specific cause, or account perfectly for differences in exposure and circulation. Treat it as a screening observation, not a repair diagnosis. Stop and seek advice if setup or pool conditions make the test unsafe.

Homeowner recording a residential swimming pool waterline

Do not drain the pool to investigate. Draining may create structural or groundwater-related risks that depend on construction and site conditions. Ask a qualified pool professional what inspection is appropriate for the particular pool.

Does water loss change when the circulation system runs?

Whether the level changes differently with the pump operating can help organize the next questions. Only compare operating and non-operating periods if the pool system can be used safely and the comparison will not put equipment at risk. Keep other conditions as consistent as possible and record the duration of each period.

Loss that seems greater while the pump runs can make pressure-side plumbing or equipment connections worth checking. Loss that continues with the system off may point attention toward the shell, fittings, or another source. These are patterns to report, not proof of a leak location. A professional may need to inspect fittings, equipment, and plumbing and use appropriate tests to confirm a source.

Do not open electrical equipment or take apart pressurized plumbing to perform a homeowner test. Pool pumps combine water and electricity, and pressure can release unexpectedly. If the pump loses prime, water is escaping heavily, or electrical concerns appear, avoid unsafe operation and get professional guidance. The U.S. Consumer Product Safety Commission provides general safety information at its official website; that resource is not a pool leak diagnosis.

Which areas should a pool leak repair inspection consider?

A pool includes several possible leak locations. The useful inspection depends on pool construction, visible symptoms, equipment layout, and when the water loss occurs. A visible crack may deserve attention, but it does not automatically explain all water loss. Likewise, water near a pump may come from an equipment connection, a discharge route, or an unrelated source.

Possible area Clues to document Questions for the assessment
Shell or finish Visible cracking, damaged finish, or loss that continues when circulation is off What inspection or testing can determine whether the surface is the source?
Skimmer, light, or return fitting Moisture around a fitting or level change that appears to slow near a particular height Will the fitting, seal, and nearby surface be evaluated together?
Circulation plumbing Loss that seems greater with the pump on, air at returns, or damp ground near a line Which line or operating condition is suspected, and what test can verify it?
Filter and equipment connections Water around a pump, filter, valve, union, or waste route during operation Can the system be observed in operation and the discharge route checked?

Use this comparison to describe what you have noticed, not to diagnose the problem yourself. For instance, a damp patch near equipment is more useful when paired with a photograph, the pump schedule, and a note about whether the area is wet only during operation. That context helps avoid confusing irrigation or rainwater with a pool-related issue.

How should you prepare for an inspection?

Prepare a concise timeline rather than trying to investigate every component. Include the first date you noticed the change, how often you add water, and whether the pattern changes when the pump runs. Share any recent repair, work near plumbing, filter maintenance, or change in use of a spa or water feature.

  • Water-level notes, photographs, and dates.
  • Pump schedule and notes about operating or non-operating periods.
  • Photos of equipment, visible damage, fittings, and damp areas.
  • Pool type and approximate age, if known.
  • Recent maintenance, repairs, backwashing, or nearby excavation.
  • Weather, irrigation, and water-feature details that could explain wet ground or water loss.

Before the visit, ask what access is needed and what the proposed inspection can establish. Ask whether findings will be documented and whether any test requires changing how the pool operates. A clear explanation of limits matters: an observation may narrow possibilities without proving the source. Keep people away from open equipment and do not remove covers or expose electrical components.

A useful handoff can be brief. For example: “The waterline dropped on three days without rain. I added water on Tuesday. The pump ran its usual schedule, and the soil beside the equipment was damp after operation.” Include dates and photographs when available. Avoid presenting a guess as fact. The person assessing the pool can use the details to decide what to inspect first.

How can you compare a proposed pool leak repair plan?

Repair scope should follow the evidence. A fitting seal, a plumbing repair, and work to a pool surface are different tasks. Before authorizing work, ask the provider to identify the suspected location, describe the evidence, explain the proposed method, and state how the result will be checked. If the source has not been confirmed, ask what remains uncertain and what additional inspection is recommended.

Request a written scope that identifies included work and exclusions. Clarify any access needs, including whether decking, landscaping, or equipment may have to be moved. If the proposed work affects adjacent surfaces, ask who handles that work and how the area will be left. A written record makes it easier to compare proposals on scope rather than on a broad label such as “leak repair.”

There is no universal price for every leak. Cost depends on the source, pool construction, access, and extent of the work. A repair to an exposed fitting differs from locating and reaching a buried line. Ask what conditions could change the scope, whether additional work needs separate approval, and what follow-up observation is recommended after completion.

It is also useful to agree on a simple post-repair check. Ask what water-level behavior to monitor, under what operating conditions, and for how long before reporting that the symptom continues. Do not assume that one quiet day confirms a repair; weather, use, and circulation can change the observed level. Follow the instructions supplied for the specific work.

What site conditions around a Long Island pool should you mention?

Outdoor conditions can complicate the record. Rain may alter the level, while sun and wind affect evaporation. Irrigation, drainage, and changing soil moisture can make a wet area hard to interpret. Note recent rainfall, sprinkler schedules, and whether water collects in the same location after other outdoor water use.

Also describe the hardscape and planting around the pool. If access to a suspected line could affect a patio, steps, or planting bed, mention that before work is planned. Gappsi’s pool patio examples and pool remodeling information offer context for adjacent project settings, but they do not diagnose a leak or establish a repair method.

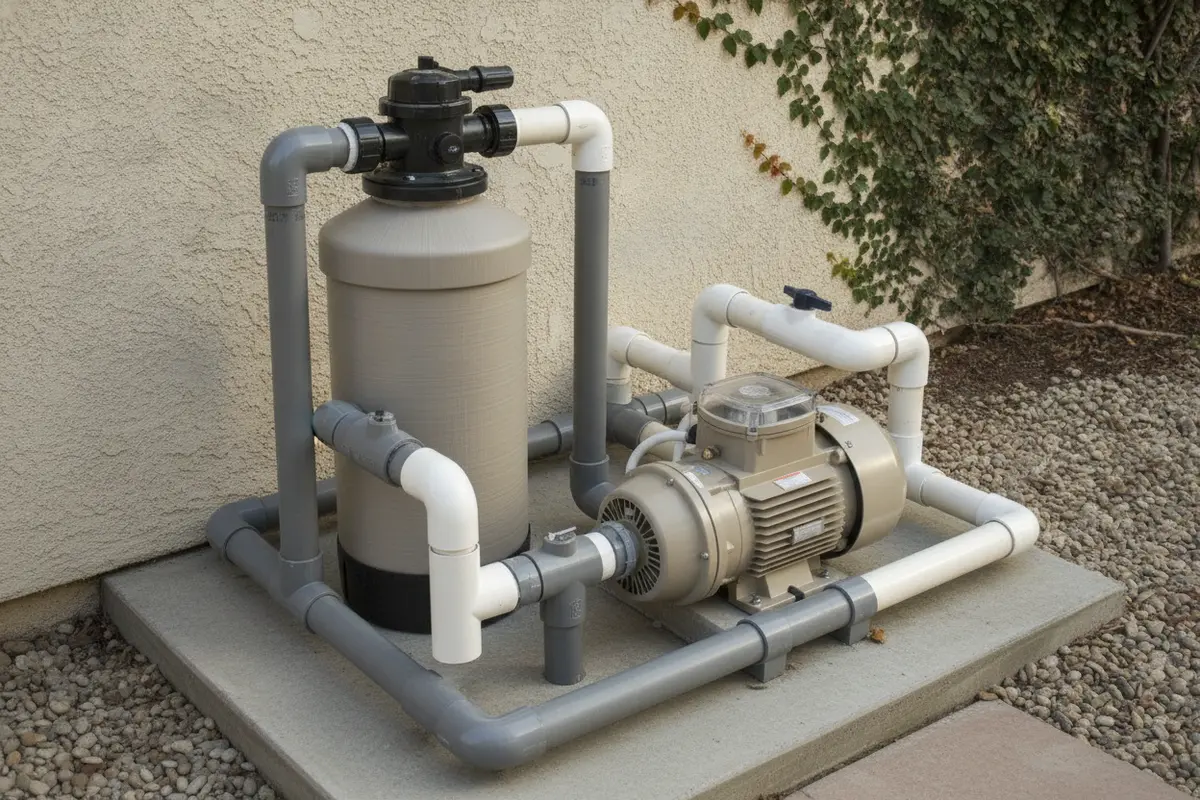
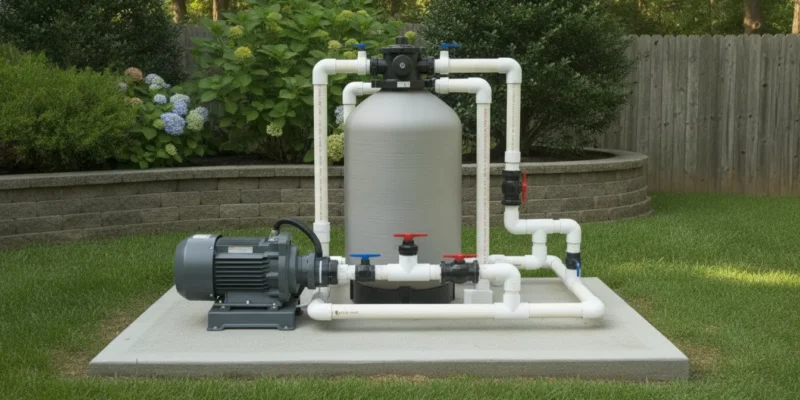
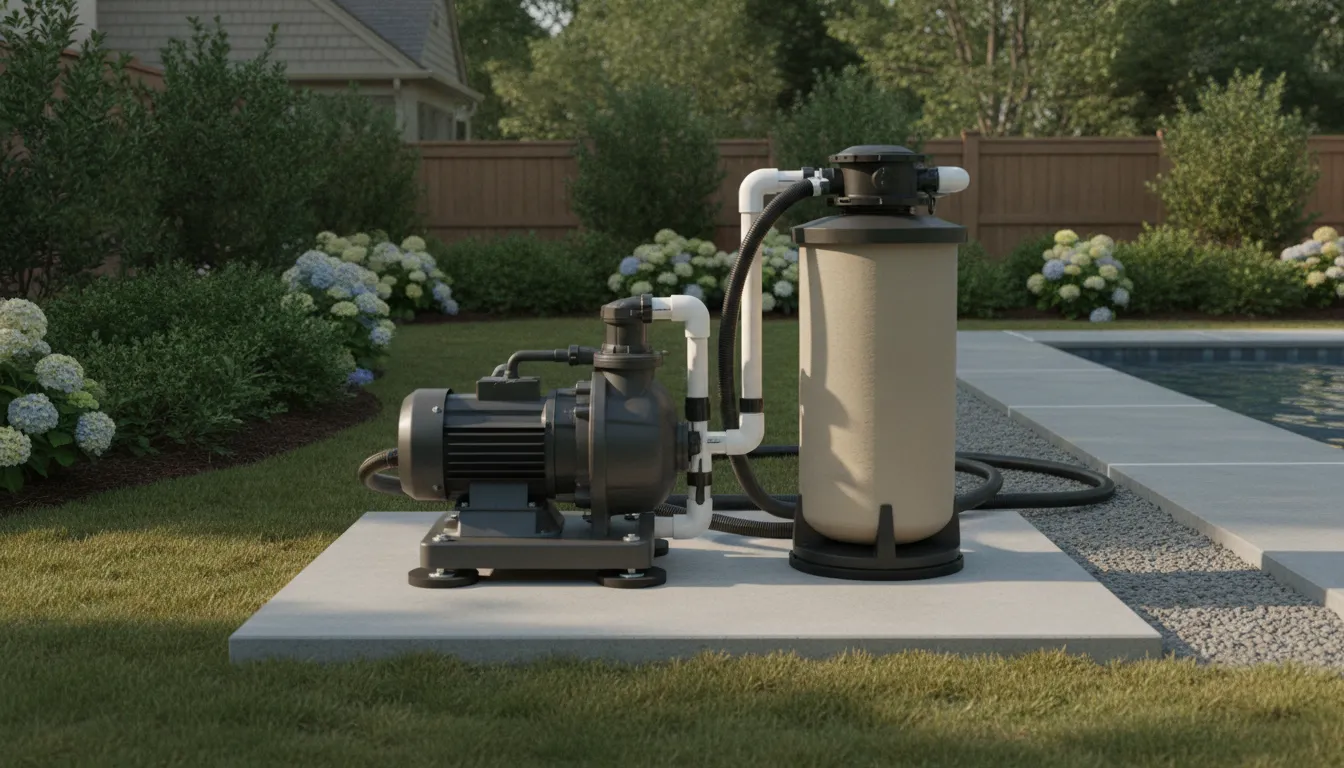
Pool pump and filter beside a residential swimming pool

If you are considering broader work at the same time, review relevant examples such as pool house projects, shallow pool areas, or pool safety cover resources. A leak repair may need no additional improvements, so keep separate decisions separate unless the site plan gives a clear reason to coordinate them.

For related outdoor project context, Gappsi has examples of backyard projects and porcelain patio work. These pages concern adjacent settings and materials, not a promise that a particular repair is available or suitable. Keep the conversation focused on the documented water loss and the inspection needed to assess it.

Which mistakes can make a suspected leak harder to assess?

  • Calling every level change a leak. Record weather, use, maintenance, and feature operation before concluding that water is escaping.
  • Patching before locating the source. A surface product will not correct a plumbing or equipment problem, and may obscure useful evidence.
  • Draining without advice. Pool construction and groundwater conditions matter; do not use draining as a diagnostic shortcut.
  • Ignoring equipment-area moisture. Photograph it and note whether it appears during pump operation, while remembering that other water sources are possible.
  • Changing several conditions at once. If pump schedule, water features, and pool use all change, it becomes harder to connect a symptom to a cause.
  • Accepting an unclear scope. Ask what was tested, what is believed to be leaking, what work is included, and how the outcome will be reviewed.

Which next step makes sense for your pool?

If observations are consistent with ordinary water loss and the level stabilizes, continue monitoring under comparable conditions. If loss is repeatable, seems linked to pump operation, or appears with persistent wet ground or equipment trouble, share the record and arrange an assessment. The goal is to identify the source before choosing among shell, fitting, plumbing, or equipment work.

Keep decisions in sequence: document the symptom, ask what inspection is appropriate, understand the evidence, and then review a written scope. A single clue such as a damp patch, a crack, or a changing waterline does not establish the repair. If more than one issue is present, ask that each be described separately so the proposed work addresses a clear problem.

Contact Gappsi through our contact page to discuss your pool project

Frequently Asked Questions

How much water loss means a pool has a leak?

No single amount proves a leak for every pool. Compare pool and bucket levels under similar conditions, track water added, and note weather, use, and pump operation. A professional assessment is needed to confirm the source.

Can I use pool putty or sealant to stop a leak?

Only if the leak location and material are suitable for that product and method. Applying a patch before identifying the source may leave plumbing or equipment problems unchanged. Ask a qualified professional to assess the area first.

Should I keep running the pump if I suspect a leak?

That depends on the symptoms and equipment. If the pump loses prime, water escapes heavily, or electrical concerns appear, avoid unsafe operation and seek professional guidance. Do not open electrical or pressurized equipment yourself.

Can a leak affect the pool patio?

Escaping water may affect nearby soil or surfaces, but a damp patio alone does not prove the source. Record where and when moisture appears and have the pool, equipment, and nearby drainage considered together.

Plan your next step with Gappsi

Posted by Gappsi Group

Contact Gappsi through our contact page

Clear notes and a focused conversation can help you decide what assessment to request next.

Share this page:
A modern gunite pool in Long Island, with a person on a tablet getting a quote.

How to Get a Gunite Pool Quote in Long Island

Your new pool isn’t just a standalone feature; it’s the centerpiece of a complete outdoor living space. The perfect backyard includes a beautiful poolside patio, thoughtful landscaping, and maybe even a pergola for shade. A truly comprehensive quote will reflect this entire vision, showing how all the elements work together. When you start searching for “where can I get a quote for gunite pools in Long Island,” you should be looking for a partner who can design and build your whole backyard oasis. We’ll explain how to get a quote that covers not just the pool, but the entire dream you have for your property.

Key Takeaways

  • Gunite offers lasting value and flexibility: Unlike pre-formed pools, gunite construction provides complete design freedom and a durable structure built to withstand Long Island’s climate. This means you can create a custom shape with unique features that becomes a long-term investment in your home.
  • A detailed quote is a sign of a good partner: Don’t just look at the final price; a professional builder will provide an itemized breakdown of costs, a clear project timeline, and full warranty details. This transparency is key to making a confident and informed decision.
  • Your preparation makes the process better: Before contacting builders, define your vision by gathering inspiration and setting a budget. This initial homework helps you communicate your goals clearly and allows potential partners to create a more accurate and personalized plan for your backyard.

What Is a Gunite Pool?

A gunite pool is a type of concrete pool built with a rebar framework and a sprayed-on mixture of cement, sand, and water. If you’re looking for maximum customization and long-term durability, a gunite pool is often the perfect choice. Because it’s built and shaped right in your backyard, this construction method can accommodate tricky yard layouts, slopes, and the unique design elements you’ve been dreaming of. Unlike pre-formed pools, gunite gives you a blank canvas to create a truly one-of-a-kind oasis. This flexibility makes it one of the most popular choices for custom swimming pools on Long Island. From freeform shapes to integrated spas and waterfalls, if you can imagine it, you can likely build it with gunite.

The Gunite Construction Process

Every new pool project begins with a detailed plan. This is where you’ll work with your builder to choose the size, shape, depth, and special features for your pool. The construction itself is a multi-step process that starts with excavation and laying the plumbing. Next, a steel rebar grid is installed to create the pool’s skeleton. Then, the gunite mixture is pneumatically sprayed onto the rebar to form the dense, durable shell. After the gunite cures for several weeks, a waterproof finish is applied. The entire installation typically takes 8 to 12 weeks, though this timeline can vary based on your design’s complexity, weather, and local permitting.

Gunite vs. Other Pool Types

Gunite pools are prized for their design flexibility and strength, but it’s helpful to know how they compare to other options like vinyl and fiberglass. While a gunite pool can be designed in any shape, a fiberglass pool is a pre-molded shell with limited size and shape options. Gunite pools do require more hands-on maintenance, like regular brushing, to keep the surface pristine. In contrast, the smooth surface of a fiberglass pool is less prone to algae. However, the plaster finish of a gunite pool can be updated with beautiful materials like tile or porcelain and natural stone, giving you the chance to refresh its look down the road, an option not available with other pool types.

Debunking Common Gunite Pool Myths

Two common myths about gunite pools often come up: that they are too expensive and that they crack easily. While gunite pools are a significant home investment, their cost reflects their longevity and limitless customization. Many homeowners find the long-term value and ability to create a perfect fit for their lifestyle justifies the initial budget. The second myth, about durability, is also worth clearing up. A well-built gunite pool is incredibly strong and can last for decades. When constructed by an expert team using proper techniques, the steel-reinforced concrete shell is engineered to withstand ground movement and the elements, making it a lasting addition to your home.

Why Choose a Gunite Pool in Long Island?

When you decide to add a pool to your Long Island home, you’re not just buying a place to swim. You’re creating a centerpiece for your backyard, a hub for family fun, and a significant addition to your property. While there are several types of pools to consider, gunite pools stand out for their unmatched durability, design flexibility, and long-term value. For homeowners in Suffolk and Nassau counties, a gunite pool is a smart choice that is built to last, can be tailored to your exact vision, and becomes a true extension of your home. It’s an investment in a lifestyle, offering a beautiful and resilient retreat right in your own backyard.

Built for Long Island Weather

Long Island weather can be tough on outdoor structures. From hot, humid summers to freezing winters, your pool needs to withstand the elements year after year. This is where gunite truly shines. The construction process, which involves spraying a concrete and sand mixture over a steel-reinforced frame, creates a dense, solid shell. This monolithic structure is incredibly strong and can handle the dramatic temperature shifts of our climate without the risk of damage that can affect other pool types. A well-built gunite pool resists the ground movement caused by freeze-thaw cycles, giving you peace of mind that your investment is protected. This inherent durability makes it one of the most reliable swimming pools for the region.

Endless Design Possibilities

If you can dream it, you can probably build it with gunite. Unlike fiberglass pools that come in preset shapes, gunite pools offer complete creative freedom. Because the material is applied on-site, your pool’s design is limited only by your imagination and your backyard’s layout. You can opt for a classic rectangle, a freeform lagoon, or a complex geometric shape with sharp angles and gentle curves. This flexibility allows you to integrate custom features seamlessly, like built-in benches, tanning ledges, or an attached spa. A gunite pool can be perfectly tailored to fit into a unique space or complement your home’s specific architectural style, ensuring the final result is a one-of-a-kind masterpiece.

A Lasting Investment in Your Home

A gunite pool is more than just an amenity; it’s a long-term investment in your property. With proper maintenance, the sturdy gunite shell can last for 50 years or more, making it a permanent feature that adds significant value to your home. Beyond its longevity, a gunite pool can be equipped with modern, energy-efficient technologies like LED lighting, automated cleaning systems, and high-efficiency heaters. These features not only make pool ownership more convenient and enjoyable but also appeal to future homebuyers. When you combine a beautiful pool with expert masonry and landscaping, you create a cohesive outdoor living space that enhances your lifestyle and your home’s marketability for decades to come.

Customize Your Pool: Popular Features and Upgrades

This is where the real fun begins. A gunite pool is a blank canvas, and the features you add are what will make it uniquely yours. Beyond the basic structure, these upgrades transform your pool from a simple place to swim into a complete backyard destination. Think about how you want to use your space, whether it’s for quiet relaxation, lively entertaining, or family fun. The right combination of features will bring your vision to life and create an outdoor oasis you’ll love for years.

Custom Shapes and Integrated Spas

One of the biggest advantages of a gunite pool is the design freedom it offers. You aren’t confined to a catalog of standard shapes. Instead, you can create a pool that perfectly complements your property’s layout and your personal style. Whether you envision a sleek, geometric design with sharp angles or a freeform, lagoon-style pool with gentle curves, it’s all possible. This flexibility also allows for seamless integration of features like a custom spa. An attached spa provides a perfect spot to unwind, creating a cohesive and luxurious look that feels like a private resort right in your own backyard.

Stunning Water Features and Infinity Edges

Adding moving water introduces sound, texture, and a touch of magic to your pool area. Water features can range from serene, trickling waterfalls built into rock formations to modern, sheer descent fountains that create a smooth sheet of water. For a truly dramatic statement, especially if your property has a view, an infinity or vanishing edge is an incredible option. This design makes the water appear to flow over the edge of the pool, merging with the horizon. These custom elements can transform the entire atmosphere of your backyard, turning your swimming pool into a stunning work of art.

Luxury Finishes, Lighting, and Tanning Ledges

The details you choose will define your pool’s character. High-end finishes like pebble, quartz, or all-tile surfaces not only add durability but also influence the color and feel of the water, creating a rich, inviting look. At night, modern LED lighting can completely change the mood, with options for changing colors to suit any occasion. Another feature that has become a must-have is a tanning ledge, also known as a Baja shelf. This large, shallow area is perfect for placing a lounge chair, letting you dip your toes in the water while you sunbathe, or providing a safe space for small children to splash and play.

Poolside Patios, Decks, and Landscaping

A beautiful pool deserves an equally beautiful setting. Creating a cohesive outdoor living area is key to making your pool the true centerpiece of your backyard. This means carefully planning the surrounding patios, decks, and landscaping. You can use beautiful porcelain and natural stone pavers to create a durable and stylish deck that connects the pool to your home. Thoughtful landscaping softens the hardscape, adds privacy, and integrates the entire space into its natural surroundings. Adding structures like a pergola for shade or an outdoor kitchen for entertaining can complete your backyard transformation, creating a functional and inviting environment for family and friends.

Breaking Down the Cost of a Gunite Pool

When you start dreaming of a gunite pool, one of the first questions that comes to mind is, “How much will it cost?” The truth is, there’s no simple price tag. The final cost of a gunite pool is a sum of its parts, and since these pools are completely custom, the price can vary quite a bit. Think of it like building a custom home; the final number depends on the blueprint, the materials, and all the finishes you choose. The flexibility of gunite means your project is unique to your property and your vision, which is exciting but also makes a one-size-fits-all price impossible.

Understanding the key cost factors from the beginning helps you set a realistic budget and make informed decisions. A transparent builder will walk you through each line item, so you know exactly where your investment is going. From the initial dig to the final tile, several major components influence the overall price. These include the pool’s size and complexity, the specific conditions of your backyard, necessary local permits, and all the special features you want to include. Let’s break down what those are so you can feel confident when you start gathering quotes for your Long Island backyard oasis.

Pool Size and Design Complexity

The most significant factor influencing your pool’s cost is its size and shape. A larger, deeper pool naturally requires more materials, like steel rebar and gunite, and more labor to construct. But it’s not just about square footage. The complexity of your design also plays a huge role. A simple rectangular pool will generally be more budget-friendly than a freeform lagoon with intricate curves or a multi-level design. Because gunite offers complete design freedom, you can create anything you can imagine. This flexibility allows you to build stunning swimming pools that perfectly match your home’s aesthetic, whether that’s a modern geometric shape or a resort-style oasis.

Site Preparation and Excavation

Before the beautiful parts of your pool take shape, your yard needs to be prepared. This phase involves more than just digging a hole. It includes clearing the area, marking utility lines, and creating an access path for heavy machinery. The cost of excavation can change based on the conditions of your property. If the crew encounters challenges like large rocks, a high water table, or unstable soil, additional labor and equipment will be needed, which can increase the price. A professional site assessment is key to anticipating these potential hurdles and creating an accurate estimate for preparing your backyard for its new centerpiece.

Local Permits and Inspections

Building a swimming pool in Long Island requires official approval from your local town or village. Securing building permits is a non-negotiable step in the process, and it comes with its own set of fees. The cost and timeline for obtaining permits can vary depending on your municipality in Nassau or Suffolk County. This process also involves several inspections at different stages of construction to ensure everything is built to code. An experienced local builder like Gappsi is familiar with these requirements and can handle the entire permitting process for you, ensuring your project starts off on the right foot without any bureaucratic headaches.

Added Features and Amenities

This is where you get to infuse your personality into the pool. The features you add are what transform a simple swimming hole into a luxurious retreat, but they also contribute to the final cost. Popular upgrades include integrated hot tubs, dramatic waterfalls, and elegant tanning ledges. You can also incorporate advanced technology like colorful LED lighting and automated cleaning systems. Don’t forget the area around the pool, as your choice of decking, like beautiful porcelain and natural stone pavers, will also be a major part of your budget. Each feature adds value and enjoyment, so it’s all about balancing your wish list with your overall investment.

Finding the Best Gunite Pool Builders in Long Island

Choosing the right builder for your gunite pool is one of the most important decisions you’ll make in this process. This is the team you’ll be trusting to turn a patch of your backyard into a stunning oasis, so it’s not a choice to take lightly. The right partner will make the journey from design to first swim feel seamless and exciting. They will listen to your ideas, offer expert guidance, and manage all the complex details so you don’t have to. On the other hand, the wrong builder can lead to frustrating delays, unexpected costs, and a final product that doesn’t quite match your vision.

On Long Island, you have many options, but the best builders stand out for their craftsmanship, transparency, and dedication to their clients. They don’t just build pools; they build relationships and create outdoor living spaces that families will enjoy for decades. As you begin your search, it’s helpful to know what to look for and to have a benchmark for what true excellence looks like. By focusing on experience, communication, and a proven track record, you can confidently find a builder who will bring your dream pool to life.

Gappsi: A Legacy of Long Island Excellence

When you’re looking for the best, it helps to know what a top-tier builder’s reputation looks like. For years, Gappsi has been a trusted name in the Long Island pool industry, known for a deep commitment to quality and customer satisfaction. That extensive experience in building gunite swimming pools makes them a reliable choice for homeowners looking to invest in a durable and completely customizable backyard feature. A long history in the local community isn’t just about being around for a while; it’s about consistently delivering on promises and building a portfolio of beautiful projects and happy clients. This is the kind of legacy you should look for in a partner for such a significant home improvement project.

What to Look for in a Top Pool Builder

As you evaluate potential builders, keep a few key qualifications in mind. First, you should ensure they have deep experience with gunite construction, are fully licensed and insured, and can provide references from previous clients. Beyond that, a great builder will prioritize your vision from the very beginning. Look for a team that offers a comprehensive design consultation, allowing you to explore all the possibilities and get a detailed estimate. A reputable builder will also guide you through the entire process, from initial design to construction, ensuring that your vision is realized while adhering to local regulations. This hands-on support is what makes the difference between a stressful construction project and an enjoyable creative partnership.

Your Step-by-Step Guide to Getting a Pool Quote

Getting a quote for your dream pool should be an exciting process, not an overwhelming one. Think of it as the first concrete step toward countless summer days spent relaxing in your own backyard. By breaking it down into a few manageable steps, you can approach builders with confidence and clarity. Being prepared not only helps you get a more accurate quote but also ensures you find a partner who truly understands your vision. This guide will walk you through everything you need to do, from initial brainstorming to comparing final proposals, so you can make the best choice for your Long Island home and family. Let’s get started on turning your backyard vision into a reality.

Step 1: Define Your Vision and Budget

Before you even think about calling a builder, take some time to dream. What does your perfect pool look like? Start by thinking about the basics: size, shape, and depth. Then, move on to the details that make it uniquely yours. Do you envision an integrated spa for relaxing evenings, a fun water slide for the kids, or a specific interior finish that makes the water sparkle? Also, consider the surrounding poolside patio and landscaping. Having a clear idea of your wants, needs, and overall budget will help you communicate effectively and set a solid foundation for your project.

Step 2: Gather Inspiration and Assess Your Property

This is where your vision starts to take shape. Create a mood board on Pinterest or clip images from magazines that capture the style you love. Gunite gives you incredible design freedom, so don’t be afraid to think outside the box with freeform shapes or unique features. Once you have your inspiration, take a walk around your property. Consider the size of your yard, any slopes, sun exposure, and access for construction equipment. Seeing how other homeowners have transformed their spaces on Gappsi’s YouTube channel can provide fantastic, real-world ideas for your own Long Island backyard.

Step 3: Research Local Pool Builders

Finding the right builder is the most important decision you’ll make. You want a partner, not just a contractor. Look for local Long Island companies with a proven track record of building beautiful, high-quality gunite pools. A great builder will have a strong portfolio, glowing reviews, and proper licensing and insurance. Don’t just look at their pool projects; check out their expertise in related areas like masonry and landscaping, as these are key components of a complete backyard transformation. A company that can handle the entire project seamlessly is often the best choice.

Step 4: Prepare for Your Consultation

When you meet with a potential builder, you want to make the most of that time. Arrive at your consultation with your inspiration folder, a copy of your property survey if you have one, and your list of must-have features. A great pool designer will listen to your ideas and then offer their own expert advice, helping you refine your vision. They can suggest materials, like beautiful porcelain and natural stone pavers for the patio, and help you understand how your ideas fit within your budget and the constraints of your property. This collaborative conversation is where the design truly comes to life.

Step 5: Schedule On-Site Visits

After your initial consultations, the best builders will want to visit your home. This on-site assessment is critical. It allows the designer to take precise measurements, evaluate the terrain, identify potential challenges like utility lines or access issues, and visualize the project in the actual space. This is your chance to walk them through your yard and explain exactly where you imagine your new oasis. It’s also an opportunity to discuss the entire scope, from the pool itself to the surrounding landscape design, ensuring every element works together harmoniously.

Step 6: Compare Your Quotes

Once you have a few quotes in hand, it’s time to compare them. It’s tempting to just look at the bottom line, but the cheapest option is rarely the best value. A good quote is detailed and transparent. It should itemize costs for each part of the project, provide a clear timeline, and outline warranty information. Compare the quality of the proposed materials and equipment. Does one builder include higher-end features or a more comprehensive service? Choosing a builder is about trusting their expertise and feeling confident in the long-term value and quality of their work.

How to Read a Gunite Pool Quote

Receiving a quote for your dream pool is an exciting step, but it can also feel a bit overwhelming. A professional quote is much more than just a final price; it’s a detailed blueprint of your entire project. Think of it as the first real look into how a builder plans to bring your vision to life. A thorough, transparent document is a great sign that you’re working with a reputable company that values clear communication. It helps you understand exactly what you’re paying for, what the construction process will look like, and what kind of support you can expect after your pool is complete.

Before you sign on the dotted line, it’s important to carefully review every detail. A well-structured quote should clearly outline three key areas: an itemized breakdown of all costs, a realistic project timeline, and comprehensive warranty information. Understanding these components will help you compare different offers fairly and choose a builder who provides not just a beautiful pool, but also peace of mind. Let’s walk through what to look for in each of these sections so you can feel confident in your decision.

Itemized Cost Breakdown

A detailed, itemized cost breakdown is non-negotiable. This is where your builder lists every single component of the project and its associated cost, ensuring there are no surprises down the road. Your quote should clearly outline expenses for excavation, steel reinforcement, gunite application, plumbing, electrical work, and interior finishes. It should also specify costs for standard equipment like pumps and filters.

Look for line items for any custom features you’ve requested, such as integrated spas, waterfalls, or special lighting. This level of detail allows you to see exactly how each choice impacts the total price and helps you make informed decisions. It also ensures the swimming pool design is fully integrated with your property for a cohesive look.

Clear Project Timeline

Understanding the project timeline is essential for managing your expectations. A reliable quote will include a clear, realistic schedule from start to finish. While a typical gunite pool installation can take between 8 to 16 weeks once major work begins, this can vary based on the project’s complexity and the permitting process.

Your timeline should cover more than just the big construction milestones. Look for details on the necessary phases that ensure a strong, safe, and beautiful pool, including the time needed for the gunite to cure properly, finish work, equipment setup, and final inspections. A builder who provides a detailed schedule shows they have a solid plan and respect your time, helping you prepare for each stage of the construction process.

Warranty and Service Details

A gunite pool is a significant, long-term investment in your home, so your quote must include comprehensive warranty information. Pay close attention to what is covered and for how long. A strong warranty typically includes separate terms for the pool structure itself, the interior finish, and the equipment. Knowing you have a solid warranty provides peace of mind that your builder stands behind their work.

The quote should also be upfront about the long-term care your pool will need. Gunite pools are incredibly durable, but they do require consistent maintenance to stay in pristine condition. A trustworthy builder will be transparent about these needs and may even offer restoration and sealing services to help you protect your investment for years to come.

Choosing the Right Long Island Pool Builder

Selecting a pool builder is one of the most important decisions you’ll make in this process. You’re not just hiring a contractor; you’re choosing a partner who will be in your backyard for months and whose work you will live with for years. The right builder makes the entire experience feel collaborative and exciting, while the wrong one can turn your dream project into a source of stress. A great company will guide you through every step, from initial design to the first time you dive in, making sure you feel heard and respected along the way.

Think of it as building a team for your home. You want someone with proven expertise, a great reputation, and a process that makes you feel confident and informed. The best builders are transparent, communicative, and just as invested in the final result as you are. They bring not only construction skills but also design vision, helping you create a cohesive outdoor living space that flows beautifully with the rest of your property. This partnership is the foundation of a successful project, ensuring your new swimming pool is everything you imagined and more.

Licensing, Insurance, and Local Knowledge

Before you fall in love with a design, take a moment to check the builder’s credentials. This is a simple but critical step for your protection. Your builder must be fully licensed and insured in New York. This isn’t just a formality; it safeguards you from liability in case of accidents on your property during construction. Don’t be shy about asking for proof of their license and insurance certificates.

Equally important is their local knowledge. A builder who has been working on Long Island for years understands the specific town codes, permitting processes, and soil conditions across Nassau and Suffolk counties. This expertise is invaluable for keeping your project on schedule and avoiding costly surprises. A local pro knows how to build a pool that will withstand our specific climate, from hot summers to freezing winters.

A Strong Portfolio and Positive Reviews

A picture is worth a thousand words, and a portfolio is a builder’s visual resume. Look for a company that proudly showcases its work. A robust portfolio should display a wide range of projects, not just one or two stunning examples. This demonstrates their experience with different styles, property sizes, and custom features. As you review their past projects, ask yourself if their design aesthetic aligns with your own vision.

Beyond the pretty pictures, find out what past clients have to say. Read online reviews and testimonials, paying close attention to how the builder responded to any issues or challenges that arose. A perfect record is rare, but a company that handles problems with professionalism and grace is a keeper. You can also ask the builder for a list of references you can speak with directly about their experience.

A Thorough On-Site Assessment Process

A serious pool builder will not give you a firm quote without first visiting your property. The initial consultation is your chance to see how they operate. A true professional will walk your yard with you, listen to your ideas, and offer expert suggestions. They should take measurements, assess the accessibility for equipment, and discuss how the pool will integrate with your home and existing landscape design.

This on-site assessment is the foundation for a detailed and accurate quote. During this meeting, the builder should discuss everything from pool shape and depth to custom features like waterfalls or tanning ledges. Many top-tier builders use 3D design software to help you visualize the final product before breaking ground. This thorough process shows that a builder is committed to creating a personalized plan that fits your space, style, and budget perfectly.

The Gunite Pool Construction Timeline

Building a gunite pool is an exciting process, but it’s definitely a marathon, not a sprint. Understanding the construction timeline from start to finish helps you set realistic expectations and appreciate each step of the journey. While every project is unique, the path from a patch of grass to your personal oasis follows a few key phases. A quality build takes time, and patience during construction pays off with a pool that will last for decades. Here’s a breakdown of what you can expect after you’ve signed your contract.

The Permitting Phase

Before any dirt can be moved, your project needs the green light from your local municipality. Getting the necessary permits is the first official step, and honestly, it can be one of the most unpredictable. Depending on your specific town or village in Long Island, this process can take anywhere from a few weeks to several months. An experienced local builder is your best asset here. They understand the specific requirements and processes for different areas, handling the paperwork and follow-ups for you. This administrative phase is crucial for ensuring your pool is built to code and passes all future inspections.

Construction and Curing

Once the permits are in hand, the real transformation begins. The construction phase for most gunite swimming pools takes about 8 to 16 weeks. This timeline covers everything from excavation and plumbing to installing the steel framework and spraying the gunite shell. After the gunite is applied, we enter the critical curing stage. This is where you get to play a small but vital role. You’ll need to hose down the new pool shell several times a day for about a week. This simple step helps the concrete cure slowly and evenly, giving it incredible strength and durability for the long haul. It’s a team effort that ensures a top-quality result.

Understanding Potential Delays

Even with the best planning, some things are just out of our control. Weather is the most common cause of delays on Long Island, as rain can halt excavation and other outdoor work. Scheduling inspections with the town can also add time, as can waiting on material deliveries. While frustrating, it’s important that your builder doesn’t rush through crucial steps like soil preparation or plumbing to make up for lost time. A reputable contractor will communicate openly about any setbacks and will always prioritize the quality and integrity of your pool over a rushed deadline. This commitment to craftsmanship is what separates a good project from a great one.

Related Articles

Frequently Asked Questions

How long does a gunite pool actually last? A professionally built gunite pool is a permanent addition to your home. The steel-reinforced concrete shell is engineered for incredible longevity and can easily last for 50 years or even longer with proper care. While the interior finish may need to be updated every 10 to 15 years to keep it looking fresh, the fundamental structure is built to endure, making it a true generational investment in your property.

Are gunite pools difficult to maintain? Gunite pools do require consistent care, but “difficult” is not the right word, especially with modern technology. The plaster surface needs regular brushing to keep it pristine, and you will need to manage the water chemistry, just like with any pool. However, you can make life much easier by incorporating automated cleaning systems, covers, and efficient filtration. Think of it as routine upkeep that protects a significant investment.

Why is gunite a better choice than fiberglass for Long Island? The biggest reasons are durability and design freedom, which are especially important here on Long Island. Our freeze-thaw cycles can be tough on the ground, and a gunite pool’s monolithic, steel-reinforced structure is built to withstand that movement. Additionally, since fiberglass pools are pre-molded, your design options are limited. Gunite is built on-site, so it can be tailored to fit your specific yard and creative vision perfectly.

How long does the whole process take, from design to swimming? This is a great question, and the timeline has two main parts. First is the design and permitting phase, which can take a few months depending on your town’s specific requirements. Once the permits are approved and construction begins, you can generally expect the build itself to take about 8 to 16 weeks. This includes excavation, construction, curing, and finishing touches. A good builder will give you a more precise timeline based on your project’s complexity.

I have a sloped or unusually shaped yard. Can I still get a pool? Absolutely, and this is exactly where gunite pools excel. Because a gunite pool is built from scratch right in your backyard, it can be designed to fit almost any space. A skilled designer can work with slopes by incorporating retaining walls or multi-level features. The flexibility of gunite means we can create a custom shape that complements your property’s unique layout, turning a challenging space into a stunning focal point.

Share this page:
Inground pool pump and filter on a concrete equipment pad beside a Long Island backyard pool

Pool Pump Noise Troubleshooting for Homeowners

A swimming pool pump is supposed to hum while it circulates water through the filter. Pool pump noise troubleshooting starts by asking whether that sound is new, and whether it is a rattle, a gurgle, or a grind. On a Long Island inground pool, the useful first step is a short, power-off look at the strainer housing and the equipment pad, not a guess about the motor windings.

Contact Gappsi through our contact page to talk through a noisy pool pump

This guide sorts the sounds a homeowner can describe, then lists checks that stay outside the motor housing. It does not size a replacement pump or walk through electrical repair. If the pump will not start, smells hot, or trips the breaker, stop and call a pool professional before another restart.

What does normal pool pump noise sound like?

A healthy circulation pump makes a steady, low hum while it runs. The pitch can change a little when the pump starts, or when a variable-speed pump steps from a low speed to a higher one. Hayward, a major pump maker, notes that the motor has an internal cooling fan you can hear. A pump under a bedroom window will be more noticeable than one set farther from the house.

Write down what changed before you open anything on the equipment pad. A sound that has always been there is different from a sound that started this week after a storm or a long swim day. Use the same listening spot each time, a few feet from the pad, with the same pump speed selected.

  • Steady hum: Usually the motor and its cooling fan doing normal work.
  • New rattle: Often something loose on the pad, or debris caught in the water path.
  • Gurgle or gravel sound: Often air in the suction line, or cavitation from restricted flow.
  • Squeal or grind: Often a bearing or shaft-seal problem. Stop the pump and get help.

Compare the sound with the water returning to the pool, not only with the motor housing. Weak return flow, bubbles at the wall fittings, or a cloudy pool can point to the same restriction that makes the pump loud. A louder hum with normal flow and clear water is less urgent than a new grind that was not there last week.

How should pool pump noise troubleshooting start?

Turn the pump off at the breaker before you touch the strainer lid, the basket, or any fitting. Pentair’s service guidance says to identify the pool-pump breaker, confirm power is off, and make sure the system is not running before you open a pump or check pipes. Confirm the equipment pad is quiet and that a timer or automation system will not start the pump while the lid is open. Keep hands, tools, and children away from the motor while it could restart. The Pentair variable-speed pump servicing tips are written for technicians, and the power-off step applies at a home pad too.

Then work from the outside of the equipment inward. Look before you loosen a fitting. A cracked strainer lid, a wet motor housing, or a burning smell is a stop sign, not a homeowner repair.

  1. Power off. Shut the circulation pump off at the breaker and confirm the equipment pad is silent.
  2. Look at the lid and basket. Note cracks, a loose lid, or a strainer basket packed with leaves and seed pods.
  3. Check the pad. See whether the pump rocks on the concrete, or whether the mounting bolts are loose.
  4. Restart and listen once. If the noise is a grind or the breaker trips, shut the pump off again.
  5. Write the result. Note the sound, the flow at the return fittings, and any bubbles in the pool.

Do not open the motor housing, pull electrical wires, or drain the pool to chase a sound. Those steps belong with a technician who can test the equipment safely. The goal of this first pass is a clear description, plus any obvious debris or loose hardware you can see with the power off.

Why does a pool pump rattle or sound like gravel?

A rattle that comes and goes often tracks with debris. Leaves, seed pods, and small stones can reach the strainer basket, and some can pass toward the impeller. Hayward ties many noisy-pump complaints to cavitation, which is a water-flow problem rather than a mystery inside the motor.

Pool pump strainer basket and filter equipment on a concrete pad

Hayward describes two hydraulic causes. The suction pipe can be too small for the water the pump is trying to move, so the pump starves and gets loud. Or the pressure side can have little backpressure, which Hayward notes is common on some water-feature pumps. A valve or other restriction on the return side is the kind of change a technician would plan, not a knob to turn at random.

Air in the suction line is the other common clue a homeowner can see from the pool. Bubbles at the returns, a gurgling strainer lid, or a water level that sits at the skimmer mouth can pull air into the line. Check that the pool water covers the skimmer opening the way your system expects, and that the strainer lid and its O-ring look intact. Do not add sealant or force the lid if the threads look damaged.

If the strainer basket is full, clearing it with the power off is a fair homeowner check. If the basket is clean and the gravel sound continues, stop there. Impeller debris and undersized suction lines are service calls, not a reason to run the same pump longer.

When is the noise coming from the pad, not the motor?

Some pumps are loud because the pad amplifies them. Hayward says vibration from the pump feet and the base can make a pump noisy. A piece of rubber between the feet and the pad can reduce that transfer. The pump also needs to sit level. Suction lines should not sit higher than the pump.

Pool pump sitting level on a concrete equipment pad next to the filter

With the power off, look at the feet and the bolts. A pump that rocks on a cracked pad, or that sits on loose pavers, will buzz even when the motor is fine. Tightening a clearly loose mounting bolt is reasonable. Rebuilding the pad, moving plumbing, or changing pipe size is not a same-day homeowner task.

Listen for a buzz that changes when someone leans lightly on the filter or a pipe. That kind of change points to vibration in the plumbing, not to a failing bearing. Note which pipe moves, then leave the alignment to a technician so a joint is not stressed.

Location still matters after the hardware is tight. A pump beside a bedroom or a covered patio will sound louder than the same pump across the yard. Moving it is an installation project. The pool equipment guide for Long Island inground pools covers how pumps, filters, and heaters are planned on the pad. This page stays with the noise you already have.

Which pool pump sounds mean stop and call?

A squeal, a grind, or a screech that gets worse as the pump runs is a different problem from a leaf-filled basket. Hayward says bearings can get noisy with age or with heat and high chemical concentrations, and that a leaking pump seal can damage the front motor bearing. The maker’s advice is to repair leaks quickly and to have bearings or the motor replaced by an authorized dealer, not to keep running the pump.

Use the table as a sorting tool. It is not a diagnosis. If two rows seem true at once, use the more cautious one.

What you notice What it often suggests What to do next
Steady hum, normal return flow, no new leak Ordinary motor and fan noise Note it. Recheck only if the sound changes.
Rattle with a full strainer basket Debris limiting flow Power off, empty the basket, restart once.
Gravel sound plus bubbles at the returns Air leak or cavitation Check water level and the lid. Call if it continues.
Buzz that changes when the pump is touched at the feet Pad or plumbing vibration Look for loose bolts. Leave pipe work to a pro.
Squeal, grind, wet motor, or a hot smell Seal, bearing, or electrical trouble Shut the pump off and call a pool professional.

Water that will not clear is a separate clue. A noisy pump with weak flow can leave debris circulating, but adding more chlorine will not quiet the motor. The Long Island pool maintenance guide covers weekly water care. Use it after the pump is running normally again.

Shut the pump off and leave it off if the breaker trips. Do the same if the motor housing is wet, or if water sprays from the seal area. Running it to see if the sound stops can turn a seal leak into a damaged bearing. That is the point where a phone call costs less than another restart.

How do Long Island seasons change what you hear?

A pump that sat all winter can sound different on the first spring start. Air in the lines, a dry lid gasket, or debris left in the skimmer can gurgle until the system primes. Follow the start-up steps in your pool opening guide, and treat a grind on that first start as a stop, not as air that will work itself out.

Summer use is the other spike. Heavy swimmer loads and more debris mean fuller baskets and longer run times. A variable-speed pump may be quiet on a low overnight speed and louder on a high daytime speed. That change is expected. A new grind at the low speed is not.

Heat and covered equipment areas also raise the stakes. Hayward links noisy bearings to heat and to high chemical concentrations. Store chemicals away from the motor, and do not mix products on the pad. If sanitizer levels or pH have been far outside the range your product label allows, mention that history when you call. Out-of-range water can irritate swimmers and damage equipment, which is a reason to fix the water after the pump is safe to run. Heater noise and heater sizing belong in a separate conversation, not in this pump check.

Fall leaf drop fills skimmers fast. Pentair notes that sticks, leaves, and acorns can pack a skimmer basket, and that a blockage adds friction to the system. A basket you emptied in June may be packed solid by October. The pump will sound harsher as flow drops. Empty the basket with the power off. If the noise stays after a clean basket and a normal water level, call a technician. A higher pump speed is not the next step.

Winter cover season changes the sound again. A pump on a short circulation cycle can seem louder because the yard is quiet. Judge it against flow and leaks, not against summer background noise. If you close the pool, follow the equipment steps from installation. Do not invent a shutdown on the pad. A winter cover is a different job from diagnosing the pump.

What should you tell a pool professional?

A useful call is specific. Say when the sound started, what it resembles, and what you already checked with the power off. A technician can move faster with that record than with “the pump is loud.”

  • The sound: Hum, rattle, gurgle, squeal, or grind, and whether it is new.
  • The timing: At startup only, after an hour, or the whole run cycle.
  • The flow: Strong returns, weak returns, or bubbles in the pool.
  • The basket and lid: Clean or packed, and whether the lid or O-ring looks damaged.
  • The pad: Level, rocking, loose bolts, or a wet motor housing.
  • The power: Whether the breaker tripped or the pump shut itself off.

Gappsi designs and builds gunite, vinyl-liner, and fiberglass pools, and pool equipment is part of that work, including filters, heaters, and salt chlorine generators. A noise visit is not a cue to replace the whole pad. Ask what failed, what will be repaired, and what will be left as is. If the larger issue is an aging pool rather than one noisy pump, that is a renovation question, not a same-day noise check. Planting tight around the pad can also block service access, so leave that work until the equipment is quiet.

If the technician recommends a different pump or a plumbing change, that is an installation decision. Keep this troubleshooting record, and use the equipment guide when you compare options. Automation can also change when the pump runs, which changes when you hear it. The pool automation guide covers schedules and controls, not motor repair.

Bring photos of the pad, the lid, and any wet seal area. Photos keep the conversation on the equipment you have. They also stop a phone description from turning into a guess about a different pump model.

Contact Gappsi through our contact page before the noise gets worse

Frequently Asked Questions

Why is my pool pump suddenly loud?

A new sound usually means something changed in the water path or inside the motor. Start with the power off and look at the strainer basket, the lid, and whether the pump sits firmly on the equipment pad. A new grind, a hot smell, or a wet motor housing means stop and call a pool professional.

Can leaves in the basket make a pool pump noisy?

Yes. A packed strainer basket limits flow, so the pump works harder and sounds rougher than it did on a clean day. With the breaker off, empty the basket, reseat the lid, and restart once. If the harsh sound remains, leave the impeller and the plumbing to a professional.

Is a humming pool pump always a problem?

No. A steady hum from the motor and its cooling fan is a normal operating sound on most residential pumps. The problem is a new rattle, gurgle, squeal, or grind, especially when it shows up with weak return flow, bubbles, or a leak at the pump.

Should I keep running a pump that squeals?

No. A squeal or grind can mean a worn bearing or a leaking shaft seal, and Hayward advises a dealer repair rather than continued use. Turn the pump off at the breaker and schedule service before you try another cycle.

Does a noisy pump mean I need a new one?

Not by itself. Debris in the basket, air in the suction line, or a loose equipment pad can be loud without a failed motor. Ask a technician to separate a simple restriction from a seal or bearing failure before you replace the pump.

Ready to sort out a noisy pump?

Start with the sound, a power-off look at the basket and pad, and a note about flow and bubbles. Stop when the motor grinds, leaks, or trips the breaker. Gappsi was founded in 1987 and builds pools for homeowners in Nassau and Suffolk Counties. You can review Gappsi swimming pool services or contact Gappsi through our contact page to talk through the pump you have. Posted by Gappsi Group.

Share this page: