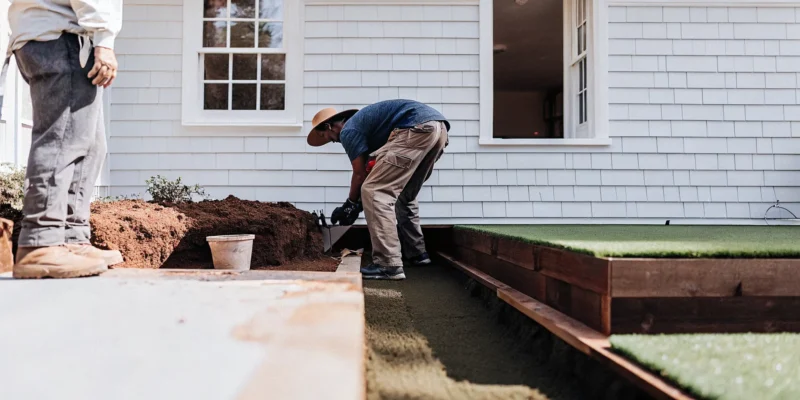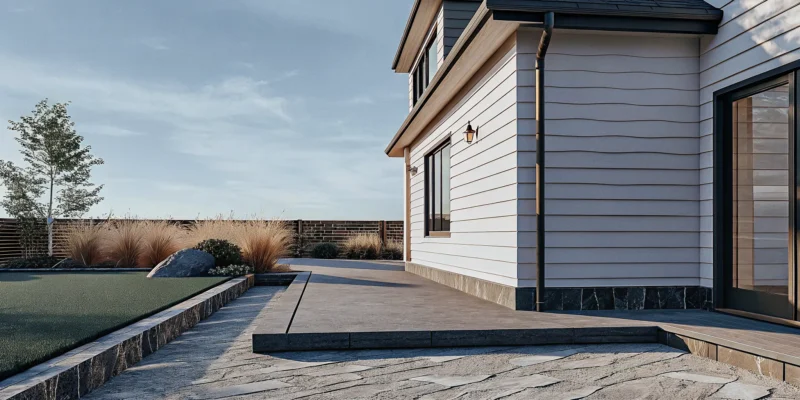
Natural stone waterfall and koi pond surrounded by bluestone patio and landscape in a Long Island backyard

Long Island Water Features: Fountains, Ponds, and Waterfalls

A Long Island backyard can feel entirely different when moving water becomes part of the landscape. The sound of a bubbling fountain near a patio, a pondless waterfall beside natural stone. Or a pool spillway framed by plantings can add movement and a stronger connection between the home and its outdoor spaces.

Long Island water features can include masonry fountains, ponds, waterfalls, reflecting pools, and pool-integrated elements such as bubblers or deck jets. The right choice depends on the property’s layout, the desired sound and visual effect, available maintenance time, and how the feature connects with patios, masonry, pools, and plantings.

Gappsi Group approaches these projects through an integrated design-build process, considering the structure, circulation, materials, plumbing, and surrounding landscape together. That planning helps each feature feel intentional rather than added as an afterthought. Start by comparing the forms, scale, and atmosphere created by the most popular water feature options.

Ready to explore water feature options for your property? Call Gappsi Group at 631-831-3177 for a consultation.

What Types of Water Features Enhance Long Island Landscapes?

The right water feature should fit the property’s architecture, available space, and the way the family uses the backyard. Gappsi Group designs and installs several options across Nassau and Suffolk Counties, from compact masonry fountains to natural-looking waterfalls and pool details. Together, fountains, ponds, and waterfalls can become an integral part of a custom outdoor living plan rather than an isolated decoration.

Custom masonry fountains for patios and entertaining areas

A fountain works well when a homeowner wants sound and movement without dedicating a large portion of the yard to a pond. Wall fountains can anchor a patio or frame an outdoor kitchen, while urn fountains suit an entry garden, courtyard, or smaller terrace. Tiered fountains create a stronger vertical focal point for a broad patio or formal landscape. Gappsi’s masonry work can coordinate the fountain with bluestone, travertine, or other natural stone already used around the home. Fountains are also practical masonry elements for outdoor kitchens and patios, and bubbling fountains can provide a calm focal point near a seating area.

Custom masonry bluestone fountain on a Long Island patio

Natural stone waterfalls and ponds

For a property with a slope, garden transition, or larger natural area, a waterfall can make changes in elevation feel intentional. A pondless waterfall recirculates water through a concealed basin, making it a useful choice for a suburban yard where homeowners want the sound of moving water without an open pond. See Gappsi’s work with pond-less waterfall designers for a related Long Island project. A pond-based waterfall is better suited to a larger landscape where the pond itself can support aquatic planting and become a destination. Natural Long Island boulders can help the installation transition into surrounding plantings.

Natural stone waterfall and koi pond surrounded by a bluestone patio in a Long Island backyard

Koi ponds and reflecting pools

A koi pond gives a dedicated garden space a living focal point and can be paired with bridges, stepping stones, or a quiet seating area. It requires thoughtful placement for access and long-term care. A reflecting pool takes a more formal approach, using a clean water surface to mirror trees, masonry, or the lines of the house. It can suit an estate-style property, a straight architectural garden, or a courtyard where visual simplicity matters more than a natural pond edge.

Pool-integrated water features

Homeowners planning a pool can incorporate water into the structure itself. Deck jets arc into the pool from the surrounding deck, bubblers add movement to a shallow tanning ledge, and sheer descents create a smooth sheet from a raised wall. These features add visual and auditory interest to poolscapes, particularly when coordinated with coping, steps, and nearby planting beds. Browse the Landscape Design & Water Features Gallery to compare approaches for different Long Island properties.

Comparison of Water Feature Types for Long Island Properties
Type Best Location Space Needed Maintenance Materials Used
Masonry Fountain Patios, outdoor kitchens, entry gardens Small to medium Low Bluestone, travertine, concrete pavers
Pondless Waterfall Suburban yards, garden transitions Small to medium Low to medium Natural boulders, bluestone
Koi Pond Dedicated garden spaces Medium to large Medium to high Natural stone, liner, gravel
Reflecting Pool Formal landscapes, courtyards Medium to large Medium Concrete, stone coping
Pool Waterfall Gunite pool raised walls Integrated with pool Low Bluestone, natural stone
Deck Jets Pool deck perimeters Integrated with pool Low Stainless steel

How Does Gappsi Integrate Water Features with Pool and Patio Designs?

A water feature works best when it is planned with the spaces around it, not added after the pool, patio, or planting plan is complete. Gappsi Group approaches each project as a connected outdoor living design, coordinating structure, circulation, plumbing, lighting, and planting from the beginning. This design-build approach helps ensure that a waterfall, fountain, or bubbling element feels intentional and supports how your family uses the yard.

Pool features designed into the structure

Gappsi installs custom Gunite, Vinyl Liner, and Fiberglass pools, with Gunite offering particular flexibility for built-in water features. A Gunite pool can incorporate an integrated waterfall along a raised wall, bubblers on a shallow sun shelf. Deck jets that arc into the basin, or a sheer descent set into masonry. These details can become both a visual focal point and a source of movement and sound within the poolscape. Waterfalls, in particular, add an auditory and visual element to the pool area.

Feature placement also affects daily operation. The design should account for splash, circulation, access to pumps and controls, and the relationship between the water feature and surrounding paving. Where appropriate, a gutter or grate system can capture splashed water and return it to the pool or feature, supporting more efficient water use. Explore Gappsi’s custom swimming pool installation services to see how the pool and its surrounding elements can be planned together.

Patios, outdoor kitchens, and fire-water balance

Water features can extend the experience beyond the pool. Within a masonry patio or outdoor kitchen, a wall fountain, basin fountain. Or compact bubbling feature can establish a focal point without taking over the dining and cooking areas. Gappsi’s masonry scope includes outdoor kitchens, fireplaces, fire pits, and fountains, making it possible to coordinate materials, proportions, and sightlines across the entire entertaining space.

A fireplace or fire pit next to a fountain creates a deliberate fire-and-water combination. The contrast can define separate zones while keeping the patio visually connected. Stone selection, coping details, drainage, and specialized water plumbing should be resolved as one plan. Learn more about Gappsi’s masonry design and construction services.

Plantings that frame the feature

Landscape planting completes the transition between hardscape and water. Gappsi can position plants to frame a view, soften a raised wall, or create separation from a seating area while preserving access for maintenance. On Long Island, regionally appropriate plant choices, healthy soil, and careful grading help the surrounding landscape thrive with less intervention. Plants that shed excessive leaves or debris directly into the water should be avoided, since thoughtful selection can reduce cleaning demands.

With one team guiding the project from concept through completion, Gappsi Group can coordinate the pool, masonry, plumbing, and landscape details. That is how Long Island water features feel like part of the property rather than an isolated installation.

What Materials Work Best for Long Island Water Features?

Material selection affects how a water feature looks, drains, and holds up through Long Island’s changing seasons. Gappsi plans the visible finish together with the masonry base and water plumbing, since professional fountain installation requires both structural masonry and specialized plumbing for reliable operation.

Bluestone for Spillways and Waterfall Coping

Bluestone creates a clean, substantial edge for a spillway or waterfall coping. Its blue-gray color works with pool coping, patios, and planting beds. A properly installed, sloped piece directs water where it belongs instead of allowing it to collect behind the feature. The joints, substrate, and drainage details matter as much as the stone itself. Those details help limit damage when wet surfaces freeze and thaw.

Natural Boulders for Rock Waterfalls

For a more natural composition, Gappsi can use Long Island fieldstone boulders to build a rock waterfall. Large stones establish the structure, while smaller stones and planting soften the transitions into the surrounding landscape. Natural stone is well suited to Long Island weather when it is selected, set, and drained correctly. This approach also gives each waterfall an irregular profile, so the water moves over ledges rather than appearing as a manufactured sheet.

Travertine, Concrete Pavers, and Stainless Steel

Travertine veneers are useful around fountain surrounds because their warm color and textured surface connect the water feature to nearby masonry. For adjoining patios and walkways, concrete pavers provide a coordinated, serviceable surface with replaceable units if access to plumbing is ever needed. Homeowners comparing patio finishes can review Gappsi’s natural stone pavers options as part of the planning process.

For contemporary designs, stainless steel works well for sheer descents, narrow spillways, and modern fountain elements. It provides a crisp visual line against stone or concrete and can be detailed to keep water flowing evenly. Across all material choices, freeze-thaw performance depends on proper bases, positive drainage, durable joints, and plumbing that can be winterized. Gappsi’s design-build process coordinates those elements so the finish supports the feature rather than becoming an isolated decorative layer.

How to Maintain Water Features Through Long Island’s Seasons

A seasonal checklist keeps fountains and ponds reliable without turning them into a constant chore. Properly designed water features can remain manageable when planting, circulation, access points, and drainage are considered from the beginning. EPA guidance also supports water-efficient design choices that reduce maintenance demands over time.

  1. Restart the system in spring. Once freezing weather has passed, remove winter covers, clear leaves and sediment, and inspect the basin for cracks or shifting. Check pump housings, intake screens, plumbing connections, and electrical components before restarting circulation. For a fountain, confirm that the pump delivers an even flow and that splash stays within the basin. A professional installation must coordinate the masonry foundation with specialized water plumbing, so any leak or movement deserves prompt attention. See this luxury custom outdoor water fountain for an example of how the feature can be integrated into an outdoor design.
  2. Keep summer operation balanced. Monitor water levels during hot, windy periods and add water when necessary to protect the pump from running dry. Choose plants around the feature carefully. EPA guidance recommends selecting vegetation that does not contribute excess debris, which helps reduce cleaning and filtration work. Strategic planting and physical barriers can also reduce wind exposure and evaporation. If splashing is a concern, a gutter or grate system can catch water and return it to the pool or feature. These details support efficient operation while helping prevent algae-promoting buildup from excessive debris and stagnant water.
  3. Prepare for fall debris. Skim leaves regularly before they sink and decompose. Install netting or a fitted cover over pond-based systems when leaf drop increases, and remove accumulated debris from basins, skimmers, filters, and pump intakes. Pondless waterfalls generally require less seasonal work because they do not have an open pond surface, but their reservoirs and pump vaults still need inspection and cleaning.
  4. Winterize before sustained freezing. Follow the equipment manufacturer’s instructions for draining and protecting fountain pumps. Disconnect, clean, and store removable pumps where appropriate. For pond systems, remove vulnerable equipment, clear plumbing where required, and protect exposed components from ice damage. Do not assume a pondless system is maintenance-free. Its pump, reservoir, and circulation lines still need winter protection suited to the installation.

With the right plant selection, splash control, and seasonal inspections, Long Island water features can stay attractive and functional through changing weather. The goal is not to eliminate maintenance, but to design a system where each task is predictable and proportionate to the feature.

Designing a Water-Efficient Landscape with Fountains and Ponds

Water efficiency should be part of the landscape plan before excavation begins. For Long Island water features, the goal is not simply to use less water. It is to direct water where it can do the most work, limit avoidable loss, and select plantings that can thrive in Nassau and Suffolk County conditions.

Group plants by water needs

Hydrozoning groups plants with similar water requirements, so irrigation is not applied uniformly to a landscape with different needs. Place moisture-tolerant plants closer to a pond or recirculating basin. Drier areas can use plants such as inkberry holly, switchgrass, eastern red cedar, or beach grass where the site allows. Flowering perennials such as black-eyed Susan and bee balm can add seasonal color without turning every planting bed into a high-demand zone. Regionally appropriate plant choices and properly sized turf areas are recognized components of a water-efficient landscape by the U.S. Environmental Protection Agency.

EPA landscape guidance also emphasizes healthy soil, appropriate grading, mulch, and hydrozones. Healthy soil supports infiltration and root development. Grading should direct runoff away from structures while keeping useful water in planted areas. Rather than allowing it to collect against masonry or wash out soil around the feature.

Reduce evaporation and recapture splash

A properly selected layer of organic mulch helps retain soil moisture and reduces how often surrounding beds need irrigation. Low, carefully placed planting and masonry barriers can also reduce wind exposure and evaporation. Around fountains and pond edges, a gutter or grate system can capture splash and drag-out, returning that water to the feature instead of sending it into adjacent paving or turf. This is especially important where a fountain has a strong jet or a waterfall crosses a busy patio edge.

Gappsi Group’s design-build approach coordinates grading, drainage, masonry, plumbing, irrigation, soil preparation, and planting from the beginning. That integration makes efficiency part of the construction plan, not a retrofit after runoff, splash, or excessive irrigation has already become a problem. The result is a water feature that works with the landscape around it and remains practical to maintain.

Frequently Asked Questions

What types of water features are best for Long Island landscapes?

The best choice depends on the yard, architecture, and maintenance goals. Custom masonry fountains suit patios and outdoor kitchens, while pondless waterfalls provide movement and sound without a large open basin. Ponds, reflecting pools, pool waterfalls, bubblers, and sheer descents can also be planned as part of a cohesive landscape design.

Can I install solar-powered water features on Long Island?

Solar operation can be considered for a small or remote feature when the location receives enough direct sunlight. A designer should evaluate the feature’s pump requirements, daily operating schedule, and placement before selecting the system. Wired recirculating equipment may be more practical for larger fountains, ponds, or pool-integrated elements.

What maintenance is required for ponds in Long Island’s climate?

Ponds generally need seasonal attention, including debris removal, pump inspection, water-level checks, and winter preparation. Thoughtful plant selection can reduce leaves and other debris entering the water. Pondless waterfalls typically have less open water to manage, but their basin, pump, and filtration components still require regular inspection.

Do I need a permit for a pond or fountain on Long Island?

Permit requirements can vary by municipality and by the feature’s size, depth, plumbing, electrical work, and relationship to a pool or property improvements. Before construction, confirm requirements with the local building department and have the design-build team coordinate any necessary applications. This review helps identify site and utility requirements early.

Ready to Plan Your Long Island Water Feature?

A thoughtful water feature can give your landscape a defined focal point and connect patios, planting areas, and outdoor living spaces. Gappsi Group can help you evaluate the right direction for your property, whether you are considering a fountain, pond, or waterfall.

Contact Gappsi Group for a water feature consultation: Call 631-831-3177.

A professional backyard basketball court installation with a custom modular tile surface.

Backyard Basketball Court Installation: A Guide

Your home should be a reflection of your family’s personality, and your outdoor space is no exception. A basketball court doesn’t have to be a generic slab of concrete. It can be a fully customized feature that showcases your style. You can choose the colors of your favorite sports team, add a family logo to the center circle, and even include lines for other sports like pickleball. The creative possibilities are what make a backyard basketball court installation so exciting. This guide will explore all the ways you can personalize your court, transforming it from a simple playing surface into a one-of-a-kind family destination.

Key Takeaways

  • Get the Groundwork Right First: Before you think about colors, focus on the essentials: finding a level spot, planning for proper drainage, and checking local regulations. A professional site assessment is the best way to avoid future problems and ensure your court is built on a solid foundation.
  • Match the Surface to Your Style of Play: Your court’s surface affects everything from safety to performance. Concrete is durable and fast, great for competitive play, while modular tiles offer better shock absorption and customization, making them ideal for families and multi-sport use.
  • Know When to Call a Professional: While you can handle finishing touches like assembling the hoop, the most critical stages (excavation, grading, and base preparation) require expert precision. Hiring a professional ensures your court is built to last, preventing costly mistakes and guaranteeing a high-quality playing surface.

What Are the Best Surfaces for a Backyard Basketball Court?

Choosing the right surface for your backyard basketball court is one of the most important decisions you’ll make. It affects everything from the ball’s bounce and player safety to your budget and long-term maintenance. Think of it as the foundation for years of fun and friendly competition. The surface you pick will determine how the court plays, how it feels underfoot, and how well it stands up to Long Island’s changing seasons. There isn’t a single “best” option for everyone; the ideal choice really depends on your family’s needs, your aesthetic preferences, and how you plan to use the space. It’s a decision that directly impacts the quality of play and the overall enjoyment you’ll get from your investment.

The most common materials include traditional asphalt and concrete, modern modular tiles, and cushioned synthetic surfaces. Each comes with its own set of benefits and considerations. Are you building a court for a serious player who needs a consistent, fast bounce for training? Or is your goal to create a fun, multi-purpose play area for casual family games where safety is the top priority? Answering these questions will help you narrow down the options and find a surface that aligns with your vision. At Gappsi, we specialize in designing and installing custom sports game courts and can walk you through the pros and cons of each material to find the perfect fit for your home and lifestyle.

Asphalt

Asphalt is a classic choice for basketball courts, and for good reason. It’s generally one of the more budget-friendly options, and it provides a consistent, high ball bounce that many players are familiar with from playing at local parks. The installation is relatively quick, giving you a playable surface sooner. However, it does have its downsides. Asphalt is prone to cracking over time, especially with the freeze-thaw cycles we experience in New York. It also requires periodic sealing every few years to protect it from the elements and prevent it from fading. On hot summer days, the dark surface can absorb a lot of heat, making it uncomfortable to play on without a lighter-colored acrylic topcoat.

Concrete

A concrete court is a durable, long-term investment for any backyard. When installed correctly with a proper base, reinforcement, and control joints, a concrete slab can last for decades with very little upkeep. It provides a hard, fast surface that delivers an excellent and predictable ball response, making it great for competitive play. Unlike asphalt, concrete stays much cooler in the sun. The main drawback is its unforgiving nature; the hard surface offers no shock absorption, which can be tough on players’ joints. The initial installation is also a significant project that requires professional expertise from a masonry team to prevent future cracking and ensure a perfectly level playing field.

Modular Tiles

Modular tiles are a fantastic modern solution for backyard sports game courts. These interlocking plastic tiles are designed to be installed over a concrete or asphalt base, providing an instant upgrade. They offer superior shock absorption, which is much easier on the knees and ankles, making them a safer option for players of all ages. Another huge plus is their excellent drainage; rainwater flows right through the open-grid design, so the court dries quickly after a storm. Modular tiles also come in a wide variety of colors, allowing you to fully customize your court with team colors, logos, and unique line markings for a truly professional look.

Synthetic Turf

While not traditional for basketball, a high-quality synthetic surface offers incredible versatility and safety. These cushioned, rubberized surfaces provide the highest level of shock absorption, significantly reducing the risk of injury from falls. This makes them an ideal choice for families with young children or for creating a multi-sport game area where you might play pickleball, volleyball, and more. The ball bounce is softer than on a hard court, but the trade-off is a skid-resistant surface that performs well in all weather. Gappsi offers premium synthetic turf options that can transform your backyard into a safe and fun athletic zone that blends beautifully with your landscape.

Comparing Surfaces: Cost, Durability, and Upkeep

So, how do you choose? Start by thinking about your priorities. If budget is your primary concern, asphalt is often the most economical starting point. For maximum durability and minimal maintenance, concrete is a strong contender, though it provides the hardest playing surface. If player safety and customization are at the top of your list, modular tiles are an excellent all-around choice, offering a great balance of performance and joint-friendly play. For the ultimate multi-sport court with a focus on safety, a synthetic surface is unmatched. Each material has a different long-term maintenance requirement, so be sure to factor that into your decision to ensure your court looks and plays great for years.

How Much Will a Backyard Basketball Court Cost?

Figuring out the budget for your dream basketball court is one of the first and most important steps. The final cost can vary quite a bit because it depends on your specific vision and property. Think of it less as a single price tag and more as a collection of choices you get to make. The total investment covers everything from the court’s size and surface material to the site preparation and any custom features you add.

While a full-court installation can range from $10,000 to over $24,000, a half-court is often more budget-friendly, typically falling between $2,700 and $8,300. These numbers are a great starting point, but factors like your yard’s current condition and the specific materials you choose will shape your final quote. At Gappsi, we specialize in creating custom sports game courts that fit your family’s needs and your home’s unique landscape. Let’s break down the main components that influence the cost.

Breaking Down Costs: Half-Court vs. Full-Court

The most significant factor in your budget is the size of the court. A half-court is a fantastic and popular option for most Long Island backyards. It provides more than enough room for practicing free throws, playing one-on-one, or enjoying a game of H.O.R.S.E. with the family. Because it requires less material and labor, a half-court is a more accessible entry point for adding a basketball court to your home.

A full-court, on the other hand, is a much larger project and a bigger investment. It’s the perfect choice if you have a large property and want a space that can accommodate full-team games. The decision really comes down to how you plan to use the court and the space you have available.

How Surface Materials Affect Your Budget

Your choice of playing surface has a major impact on both the cost and the performance of your court. The most economical option is typically an asphalt base with an acrylic topcoat. This combination provides good traction and holds up well against the weather without the higher price of other systems. Concrete is another popular base material known for its durability, though it generally costs more than asphalt.

For a premium experience, many homeowners opt for modular tiles. These interlocking tiles offer superior shock absorption, excellent drainage, and vibrant color customization. While they represent a higher initial investment, their longevity and low maintenance can make them a worthwhile choice. Our expertise in masonry ensures that whatever surface you choose, it will be built on a solid, professionally prepared foundation.

What Drives the Cost Up?

Beyond the court’s size and surface, several other factors can influence the final price. The most critical is site preparation. A basketball court requires a perfectly flat, stable base, and the work needed to create it depends on your yard’s current state. If your property has a significant slope, poor soil, or drainage problems, more extensive excavation and grading will be necessary.

Site accessibility also plays a role. If heavy equipment can’t easily reach the construction area, the labor costs may increase. Other elements that add to the budget include retaining walls to create a level playing area, advanced drainage systems, and custom additions. Features like professional lighting for night games, high-end adjustable hoops, and custom-painted logos will also drive the cost up. Proper landscape design is key to addressing these site-specific challenges from the start.

What Size Should Your Backyard Basketball Court Be?

Deciding on the right size for your backyard basketball court is one of the most important first steps. The ideal dimensions depend on three main things: how much space you have, how you plan to use the court, and your overall budget. You don’t need a massive yard to create a fun and functional playing area. The key is to find the perfect balance between having enough room to play and preserving the rest of your outdoor living space for gardening, relaxing, or entertaining.

Whether you envision a full-court setup for serious competition or a smaller practice area for the kids to enjoy, there’s a solution that will fit your Long Island property. We can help you assess your yard and determine the best layout. Our team specializes in designing and building custom sports game courts that maximize your space and match your family’s lifestyle. From professional-style courts to more compact, family-friendly designs, let’s explore the most common sizes to help you find the perfect fit.

Standard Full-Court Dimensions

If you want the ultimate basketball experience right in your backyard, a full-court setup is the gold standard. This is what you see in professional games, with official NBA dimensions measuring 94 feet long by 50 feet wide. A court this size gives you enough room for full 5-on-5 games, allowing you to run plays and practice just like the pros. Of course, this option requires a significant amount of flat, open space, making it a major investment in both your property and your budget. For serious athletes or families who live and breathe basketball, having a regulation court at home is an incredible feature that provides an authentic playing experience for training and competition.

Common Half-Court Dimensions

For most homeowners, a half-court is the perfect solution. It offers an excellent balance of playability and space efficiency, making it the most popular choice for residential backyards. A typical half-court is around 47 feet by 50 feet, but we often design them in sizes like 30 by 50 feet to fit different properties. This setup gives you more than enough room for 3-on-3 games, shooting drills, and practicing your moves. You get the feel of a real court with a three-point line and a full key, all while preserving a good portion of your yard for other activities. It’s a practical and highly functional option that brings the fun of basketball home without taking over your entire yard.

How to Fit a Court in Your Yard

The first step to planning your court is to measure your available space. Remember to think beyond the court’s exact dimensions, as you’ll want at least a few feet of clearance on all sides for safety and out-of-bounds play. If a standard half-court won’t quite fit, don’t worry. We can design custom-sized sports game courts that work with your yard’s unique shape and size. Even a smaller area, like a 20-by-25-foot space, can become a great “key court” with a hoop and a free-throw line. This gives you a dedicated spot for shooting practice and one-on-one games. The goal is to create a functional playing surface that you and your family will love to use.

Where Should You Put Your Basketball Court?

Choosing the right spot for your backyard basketball court is just as important as picking the right surface. The location affects everything from your playing experience to your relationship with your neighbors. Before you break ground, it’s essential to think through a few key factors. Proper planning at this stage saves you from major headaches and extra costs down the road. A well-placed court will become a family-favorite spot for years, so let’s make sure we get it right from the start.

Finding Enough Space and Level Ground

First things first, you need to find a suitable spot in your yard. Before you start digging, it’s a great idea to have a professional evaluate whether your chosen site is right for a court. The ground must be as level as possible to ensure a safe and fair playing surface. Significant slopes or uneven terrain will require extensive excavation and grading, which can add to your project’s timeline and budget. A professional assessment will identify any potential issues and help you create a solid plan for your sports games courts installation.

Thinking About Drainage and Grading

Proper drainage is critical for the longevity and usability of your court. If the ground isn’t graded correctly, you’ll end up with puddles after every rainstorm, which can damage the surface and make it slippery. An uneven surface is also a safety hazard. A professional team will handle the necessary landscape design and grading to ensure water flows away from the court. You should also plan for enough space around the court itself. A buffer of at least three feet around the perimeter gives players room to move safely and provides space for spectators to watch the game.

Checking Long Island Zoning Laws and HOA Rules

This is the homework step you absolutely cannot skip, especially here on Long Island. Before any construction begins, you need to check your local town’s zoning regulations for things like setbacks, size limits, and permits. If you live in a community with a Homeowners’ Association (HOA), you’ll likely need their approval too. HOAs often have specific rules about structures like basketball courts and hoops. Getting all your permissions in order beforehand prevents potential fines or the heartbreaking possibility of having to remove a court that wasn’t approved.

Considering Noise and Your Neighbors

The sound of a bouncing basketball is the soundtrack to fun, but it might not be your neighbor’s favorite tune. Think about the acoustics of your yard and how the noise will travel. Placing the court further away from your neighbors’ property lines or homes is a considerate move. You can also use landscaping or fencing and netting to help absorb some of the sound and keep stray balls from ending up in their yard. A little thoughtful planning can go a long way in keeping the peace and ensuring your court is a source of joy for everyone.

How Can You Customize Your Basketball Court?

Building a backyard basketball court is exciting, but the real fun begins when you start making it your own. Customization is what transforms a simple playing surface into a signature feature of your home, one that reflects your family’s personality and style. This is your chance to go beyond the basics and design a space that’s not only functional for play but also a beautiful, integrated part of your landscape. From choosing team colors and adding a family logo to installing lights for nighttime games, the possibilities are truly endless. A custom court becomes more than just a place to play; it becomes a central hub for family fun, fitness, and making memories.

When you work with a professional team, you can design your court to your exact specifications. Think about how you’ll use the space. Will it be just for basketball, or do you want the flexibility for other activities? Do you have young kids who will be learning to play? Answering these questions will help you choose the right features. A well-designed court considers everything from aesthetics to practicality, ensuring you get a high-quality space you’ll love for years. Gappsi offers a wide range of options for sports games courts to help you create the perfect backyard setup.

Court Colors, Logos, and Line Markings

Your court’s appearance is one of the easiest and most impactful ways to customize it. You can choose colors that match your home’s exterior for a cohesive look or go bold with the colors of your favorite sports team. Many homeowners choose to add a personal logo, family initial, or custom graphic to the center circle, making the court truly one-of-a-kind.

Beyond aesthetics, the line markings are also customizable. While you’ll want standard basketball lines, you can also add lines for other sports like pickleball, volleyball, or tennis. This versatility turns your basketball court into a multi-sport hub for the whole family. A professional can ensure all lines are painted to regulation standards, giving your court a clean and polished finish.

Adding Lights for Night Play

Why let the fun stop when the sun goes down? Installing proper lighting is one of the best ways to get more use out of your backyard court. With well-placed lights, you can enjoy games with family and friends long into the evening, which is perfect for busy schedules and warm summer nights. LED lighting is a popular choice because it’s energy-efficient and provides bright, even illumination across the entire playing surface.

Proper installation is key to avoiding dark spots or uncomfortable glare. A professional can help you design a lighting plan that fits your court’s size and your property’s layout. Integrating lighting into your overall landscape design ensures the fixtures look great during the day and provide safe, effective light at night.

Installing Fencing, Netting, and Rebounders

Containment and convenience are just as important as the court itself. Installing fencing or netting around the perimeter is a smart move to keep the ball in play. This simple addition prevents you from constantly chasing stray balls down a hill, into your garden, or into a neighbor’s yard. It also adds a layer of safety, especially if your court is near a street or other potential hazards.

For those who love to practice solo, a rebounder system is a fantastic accessory. These nets attach to the hoop and automatically return the ball to the shooter, allowing for more efficient and focused training sessions. Gappsi can help you select and install high-quality fences and netting that blend seamlessly with your court and landscape.

Choosing Hoops, Backboards, and Multi-Sport Options

The basketball hoop is the centerpiece of your court, so it’s important to choose one that fits your needs. For serious players, a tempered glass backboard offers the best performance, similar to what you’d find in a gym. Acrylic is a more budget-friendly option that still provides a great playing experience. If you have kids, an adjustable hoop is a must, as you can easily change the height as they grow.

You can also find hoops with breakaway rims that can handle dunks without getting damaged. If you want to maximize your court’s utility, consider adding equipment for other sports. A multi-sport net system can be easily set up for games like volleyball or badminton, making your backyard the ultimate destination for active fun.

Planning Mistakes to Avoid Before You Build

Building a backyard basketball court is an exciting project, but the success of the final result hinges on careful planning. A few missteps in the early stages can lead to costly fixes and a court that doesn’t live up to your dreams. Taking the time to think through the details before breaking ground ensures your investment is sound and your court will be a source of enjoyment for years.

From the ground beneath the surface to the space around the perimeter, every choice matters. Homeowners sometimes get so focused on the final look, like colors and logos, that they overlook the foundational elements that are far more critical. Let’s walk through some of the most common planning mistakes we see and how you can sidestep them. By getting these details right from the start, you set yourself up for a smooth installation and a professional-quality court you can be proud of.

Skipping Soil Tests and Base Preparation

It’s easy to get excited about picking out your court colors, but the most important work happens before any surface is laid. One of the biggest mistakes you can make is skipping a soil test. The ground in your Long Island backyard might look stable, but a proper test reveals its true composition. This step is crucial because it determines the right way to build a foundation that won’t shift or settle over time.

Without a solid base, your court can develop cracks, low spots, or an uneven playing surface. Proper base preparation ensures your court has a stable foundation, preventing these issues and protecting your investment. A professional team will handle this, making sure the groundwork is perfect for a durable, long-lasting court.

Underestimating Your Drainage Needs

Water is a court’s worst enemy. If you don’t plan for drainage, you’ll end up with puddles that make the court unusable after it rains and can lead to surface damage, mold, or staining over time. Simply leveling the ground isn’t enough. A professionally installed court needs a slight, almost unnoticeable, slope to guide water away from the playing area.

Given Long Island’s weather, from summer thunderstorms to melting snow, having a solid drainage plan is essential. Depending on your yard’s specific layout, this might also involve installing French drains or other systems to keep the court and the surrounding area dry. Integrating this into your initial landscape design is the most effective way to manage water runoff from the start.

Ignoring Sun, Shade, and Weather

Think about where the sun falls in your yard throughout the day and across the seasons. Placing your court in an area with relentless, direct sun can make the surface uncomfortably hot and create a harsh glare during play. On the other hand, a spot that’s always in the shade might stay damp and be more prone to mildew. The goal is to find a balance.

Consider how you can use your landscape to your advantage. A few well-placed trees can offer afternoon shade for players and spectators. You could also incorporate a nearby pavilion or pergola to create a comfortable, shaded viewing area. Thinking about these elements ahead of time will make your court a much more pleasant place to spend time.

Not Leaving Enough Room Around the Court

When you’re measuring your yard, it’s tempting to maximize the size of the court itself. However, you need to plan for the space around it, too. A court without enough of a buffer zone can feel cramped and even be unsafe. Players need room to run out of bounds without crashing into a fence, a wall, or landscaping.

A good rule of thumb is to leave at least three feet of open space around the entire perimeter. This gives players a safe runoff area and provides room for spectators to place chairs or for you to add a bench. This extra space is also perfect for installing fencing and netting to keep the ball in play, creating a more functional and polished look for your entire sports game courts area.

Should You DIY Your Basketball Court Installation?

Taking on a home improvement project yourself can be incredibly satisfying. The idea of building your own backyard basketball court, from clearing the ground to sinking the first shot, has a definite appeal. It feels like a project that could save you money while giving you a great sense of accomplishment. However, installing a basketball court is a far more complex task than a typical weekend project. It involves landscaping, grading, and often concrete work, all of which require a high degree of precision to get right. A small mistake in the foundation can lead to major problems down the road, like cracks, poor drainage, or an uneven playing surface that’s both frustrating and unsafe.

Before you start digging, it’s important to honestly assess your skills, the tools you have available, and your tolerance for a project that could take weeks or even months. Do you have experience with excavation and ensuring a perfectly level surface? Are you prepared to operate heavy machinery or mix and pour tons of concrete? While the final steps, like painting lines or assembling a hoop, might seem manageable, the foundational work is what determines the court’s quality and longevity. For a project of this scale, weighing the pride of a DIY job against the guaranteed quality of a professional installation is a critical first step.

What You Can Realistically Do Yourself

If you’re set on getting your hands dirty, there are parts of a basketball court installation you can realistically handle. A DIY approach can be a rewarding project if you have the right skills and an existing, suitable surface. For instance, if you already have a level concrete patio or driveway, you could install modular tiles and assemble the hoop system yourself. Painting the lines for the key and three-point arc can also be a fun finishing touch. However, it’s crucial to be aware of the common pitfalls. Even a slight misalignment can create drainage issues, and an inconsistent surface can affect the ball’s bounce. Plan to play during the day, or make sure you have a plan for installing proper lighting.

When to Call a Professional

For most homeowners, calling a professional is the best path to a flawless and lasting basketball court. Key stages like site evaluation, ground leveling, and base preparation are not forgiving of mistakes. A professional team will assess your property to find the ideal location, ensuring it’s suitable for a court and won’t cause drainage problems for the rest of your yard. They have the expertise and equipment to properly prepare the base, which is the most critical factor for a durable surface. Underestimating the importance of this step can lead to cracks and an uneven court. By hiring experts, you can avoid costly errors and get high-quality sports games courts built to last for years of family fun.

How Do You Maintain a Backyard Basketball Court?

Your new backyard basketball court is a fantastic addition to your home, and with a little routine care, you can keep it looking and playing great for years. Proper maintenance protects your investment, ensures safety, and preserves the court’s performance. Think of it less as a chore and more as a way to keep the fun going season after season. The upkeep your court needs will depend on its surface, but most tasks are simple and straightforward. For bigger jobs like significant repairs or resurfacing, Gappsi’s restoration and sealing services can bring your court back to pristine condition.

Different surfaces have unique needs, from simple sweeping to periodic sealing. Whether you have a classic concrete court or modern modular tiles, a consistent maintenance plan is key. We’ll walk through the essential steps to care for your court, its lines, and all the hardware that makes the game possible. By staying on top of these tasks, you ensure your court remains the go-to spot for family fun and friendly competition. Let’s get into what it takes to maintain your beautiful new backyard sports games court.

Simple Cleaning and Crack Repair

Keeping your court surface clean is the first and most important step in maintenance. Regularly sweep away leaves, dirt, and other debris to prevent them from grinding into the surface and causing premature wear. For a deeper clean, you can gently power wash the court to remove any built-up grime. This simple step keeps your court looking fresh and ensures a safe, non-slip playing surface.

For concrete or asphalt courts, it’s also important to keep an eye out for small cracks. Addressing them early prevents water from seeping in, freezing, and expanding the damage, a common issue during Long Island winters. While you can handle basic cleaning yourself, professional masonry and repair experts can ensure cracks are filled correctly for a lasting fix.

Sealing the Surface and Repainting Lines

Over time, exposure to the elements can take a toll on your court’s surface and line markings. For asphalt and concrete courts, applying a protective sealant every few years is a great way to defend against UV damage, water penetration, and general wear and tear. This single step can significantly extend the life of your court and keep its color vibrant.

Faded lines can make even a well-maintained court look old. Repainting the lines every two to three years will restore that crisp, professional look and make gameplay clearer. If your court is starting to show its age, Gappsi offers professional cleaning and sealing services to revitalize the surface and repaint lines, making it look brand new again.

Caring for Modular Tiles

If you chose modular tiles for your backyard sports games court, you’re in luck, because their maintenance is incredibly simple. These durable surfaces are designed to withstand heavy use and all kinds of weather. Cleaning is usually as easy as hosing down the court to wash away dirt and dust that may have settled. The perforated design of the tiles allows water to drain right through, preventing puddles from forming.

One of the biggest advantages of a modular tile court is how easy it is to repair. Unlike a concrete slab, if a single tile gets damaged, you can simply pop it out and replace it with a new one. This makes long-term care for your sports games court both cost-effective and hassle-free.

Inspecting Hoops, Nets, and Hardware

Your court’s maintenance doesn’t stop at the surface. It’s a good idea to periodically inspect the hoop, backboard, and net to ensure everything is in safe, working order. Check any metal poles or hardware for signs of rust and tighten any bolts that may have loosened over time. A quick touch-up with rust-resistant paint can stop corrosion in its tracks.

Don’t forget the net. A torn or weathered net can bring down the whole look of your court. Luckily, replacing a basketball net is an easy and inexpensive update that instantly makes your hoop look fresh. You can see examples of high-quality, durable court components in action by viewing some of the projects on the Gappsi YouTube channel.

Is a Backyard Basketball Court a Good Investment?

Adding a basketball court to your backyard is a big decision, and it’s smart to think about it as an investment. Beyond the initial cost, you want to know what kind of return you’ll get, not just in dollars, but in enjoyment and lifestyle improvements. A well-designed court is more than just a slab of concrete; it’s a feature that can enhance your property and your family’s daily life. When you weigh the benefits, from potential property value to priceless family memories, you can see how a backyard court becomes a valuable addition to your Long Island home. It’s about creating a space that serves your family’s needs for fun, fitness, and connection, right in your own backyard.

Increasing Your Long Island Property Value

Any major home improvement project should be considered for its impact on your property’s value, and a basketball court is no exception. In a competitive market like Long Island, unique features can make your home stand out. A professionally installed basketball court is an attractive amenity that can set your property apart from others in the neighborhood. It signals a home that’s built for family life and recreation. With proper maintenance, a backyard court can last for many years, making it a worthwhile feature for homeowners who want to improve their property’s appeal. It’s a unique selling point that potential buyers, especially those with active families, will notice.

The Benefits for Health, Fitness, and Family

The value of a backyard basketball court goes far beyond finances. It’s an investment in your family’s health and happiness. Having a court just steps from your door provides an incredibly convenient way to stay active. Playing basketball offers an excellent cardiovascular workout and helps improve physical fitness for all ages. It encourages kids to put down their screens and get outside, and it gives adults an easy way to de-stress with a quick game. A backyard court becomes a natural gathering spot for family and friends, creating lasting memories of friendly competition and fun. Gappsi can help you design and install custom synthetic turf and sports game courts that become the heart of your home’s outdoor life.

Enjoying Year-Round Use and Versatility

A backyard basketball court isn’t just for basketball. With smart planning, it can be a versatile space for year-round activity. Choosing the right surface is one of the most important decisions to get right, as it determines the court’s durability and multi-sport potential. Many homeowners use their courts for other activities like pickleball, volleyball, or even as a safe, flat area for kids to ride scooters. By adding features like lighting for night games or a nearby seating area, you extend its usability even further. You can even create a complete outdoor entertainment zone by adding pavilions and pergolas for shade and relaxation, turning a simple court into a multi-functional hub for your family.

Build Your Dream Game Court with Gappsi

Creating the perfect backyard game court is an exciting project, and with the right partner, you can turn that vision into a reality. At Gappsi, we specialize in designing and building custom sports game courts that fit the unique landscape of your Long Island home and the way your family loves to play. We believe a game court is more than just a slab of concrete; it’s a place for fun, fitness, and making memories.

When you work with our team, you’re in control of the design. We collaborate with you on every detail, from choosing the ideal surface material and court dimensions to picking out custom colors, logos, and line markings. Whether you envision a classic half-court for basketball practice or a versatile multi-sport layout for the whole family, we have the expertise to build a durable, high-performance court that looks incredible and stands up to years of play. Our comprehensive approach covers everything from proper site grading and drainage to professional installation, so you can avoid common pitfalls and feel confident in your investment.

We handle the entire process with the care and precision your home deserves. Our experience building beautiful and functional outdoor spaces across Nassau and Suffolk Counties means we understand how to integrate your new game court seamlessly into your existing landscape. Let us help you create a stunning and personal sports destination right in your own backyard.

Related Articles

Frequently Asked Questions

How long does it take to build a backyard basketball court? The timeline for building a court can vary quite a bit, as it depends on the complexity of your project. The most time-consuming part is the site preparation, which includes excavation, grading, and pouring a concrete base. The concrete alone needs several weeks to cure properly before any surface can be applied. Once the base is ready, installing modular tiles or painting the surface is relatively quick. Weather is also a big factor, so we always build in a buffer for potential rain delays.

What’s the best court surface for a family with kids? For families, I almost always recommend modular tiles. They provide excellent shock absorption, which is much gentler on joints and helps reduce injuries from falls. The open-grid design also means the court dries very quickly after it rains, so your kids can get back to playing sooner. While concrete is durable, it’s an unforgiving surface for younger players. Modular tiles offer a great balance of safety, performance, and fun customization with different colors.

My yard isn’t perfectly flat. Can I still get a court? Yes, you absolutely can. Most yards have some degree of slope, and this is a very common challenge we solve. The solution involves professional site work, including grading the land to create a perfectly level area for the court. In some cases, we may need to build a retaining wall to support the level surface. This is why a professional site evaluation is one of the first and most important steps; it allows us to create a solid plan for building a stable, long-lasting court on your property.

Do I really need a permit for a basketball court on Long Island? In most cases, yes. Nearly every town on Long Island has its own zoning regulations regarding structures like sports games courts. These rules can dictate the court’s size, its distance from your property lines, and whether you need a permit before construction begins. If you live in a community with an HOA, you will also need to get their approval. Checking these local rules is a critical first step that saves you from potential fines or other headaches later on.

How can I make my court useful for more than just basketball? Making your court a multi-sport hub is a fantastic way to maximize your investment. During the design phase, we can add painted lines for other sports like pickleball or four-square. Installing an adjustable-height hoop is another great feature, as it allows younger kids to play and can be lowered for other games. You can also add removable net posts for volleyball or badminton, instantly transforming the space for different activities.

Wall panel options showing ways to cover an internal brick wall.

7 Chic Ways to Cover an Internal Brick Wall

Your home’s style evolves, and a feature that once felt perfect can start to feel out of place. An exposed brick wall, with its distinct color and texture, often dictates the entire design of a room. If you’re ready for a brighter, more modern, or completely different aesthetic, that brick might feel like a roadblock. The good news is, you have options. Covering it up is a powerful design move that can completely refresh your space, giving you a blank canvas to work with. Let’s explore the most popular ways to cover an internal brick wall, from simple cosmetic updates to full transformations that will redefine your room.

Key Takeaways

  • Decide if covering is right for you: Covering a brick wall can brighten a room and improve insulation, but keeping it exposed offers unique texture and character. Weigh the pros and cons based on your brick’s condition and your personal style.
  • Proper prep prevents future problems: Before starting, always clean the surface, repair cracks with the correct mortar, and use a breathable primer. These steps are crucial for preventing moisture damage and ensuring your new finish lasts.
  • Know when to DIY versus hiring a pro: Simple cosmetic updates like painting are great DIY projects. For more complex jobs like plastering, stone application, or structural repairs, hiring a professional ensures a flawless finish and protects your home’s integrity.

Should You Cover Your Interior Brick Wall?

That exposed brick wall you’ve been staring at can feel like both a blessing and a curse. On one hand, it’s a feature packed with character, texture, and a sense of history. On the other, it might not fit your design vision, or it could be showing its age with cracks and drafts. Deciding whether to cover it is a big step, but it’s a common dilemma for homeowners looking to refresh their space. The right choice depends entirely on your home’s condition, your personal style, and your long-term goals.

Exposed brick can be a stunning focal point, lending a rustic or industrial vibe that’s hard to replicate. It tells a story and adds a layer of authenticity to a room. However, it’s not always practical. Brick can be porous, making it prone to moisture, and it isn’t the best insulator, which can affect your home’s energy efficiency. If the brick is damaged or simply doesn’t align with the bright, clean aesthetic you’re dreaming of, covering it can be a transformative part of your home remodeling project. Let’s walk through the pros and cons to help you make a confident decision.

Reasons to Cover Your Brick Wall

While exposed brick has its charm, there are plenty of valid reasons to cover it up. You might simply be ready for a new look. Covering a dark or dated brick wall can instantly brighten a room and give you a clean canvas for a different style. It’s also a practical choice if the brick is in poor condition. The interior brick in many homes was never intended to be seen, so it may be lower quality, mismatched, or damaged. Covering it is often easier and more cost-effective than extensive repairs. Finally, covering brick can improve your home’s energy efficiency by adding a layer of insulation and sealing drafts, making your space more comfortable year-round.

Reasons to Keep Your Brick Exposed

If your brick is in good shape, keeping it exposed can be a fantastic design choice. It offers a unique texture and warmth that you just can’t get from drywall. An exposed brick wall can serve as a stunning accent, adding a sense of history and timeless character to any room, from the living room to the kitchen. It works beautifully with various styles, including industrial, rustic, modern, and eclectic. The rich colors and natural variations in the brick can become the centerpiece of your decor, creating an inviting and stylish atmosphere that feels both authentic and chic. It’s a feature that makes a statement all on its own.

Busting Common Myths About Covering Brick

There are a few misconceptions about covering interior brick that might be holding you back. One common myth is that covering brick will always cause moisture problems. The truth is, problems only arise when the wall is covered improperly with the wrong materials. A professional masonry expert will know how to prepare the surface and use breathable materials to prevent trapped moisture. Another myth is that you’ll lose that authentic brick look forever. If you love the texture but not the color or condition of your current wall, you can always install a new surface like thin brick tiles or stone cladding for a fresh, flawless finish.

How to Prepare Your Brick Wall for Covering

Before you jump into the fun part of transforming your brick wall, a little prep work is essential. Think of it as setting the stage for a flawless performance. Properly preparing the surface ensures your new covering will look beautiful and last for years. Skipping these steps can lead to issues down the road, so taking the time to do it right is a smart investment in your home. These four steps will get your wall ready for its makeover.

Step 1: Clean the Brick Surface

First things first, you need a clean slate. Over time, brick collects dust, dirt, and even a bit of grime. You’ll want to get all of that off so your new finish can adhere properly. For most walls, a stiff-bristled brush and a simple cleaning solution will do the trick. Be gentle, especially if your brick is older or showing signs of wear. If you’re dealing with stubborn stains or are worried about damaging the brick, calling in a pro is a great idea. Expert restoration and sealing services can ensure the job is done safely and effectively.

Step 2: Repair Any Cracks or Damage

Next, give your wall a thorough inspection. Look for any cracks, crumbling mortar, or loose bricks. It’s important to fix these spots before you cover them up. Using the wrong type of mortar for repairs can cause more harm than good, leading to more cracking later on. You need a mix that’s compatible with your existing brick and mortar. This is where professional masonry expertise can be a lifesaver, ensuring the structural integrity of your wall is sound before you proceed with any cosmetic changes. A solid, stable surface is key to a lasting finish.

Step 3: Add a Vapor Barrier to Control Moisture

Moisture is the enemy of any successful home project. Brick is a porous material that needs to breathe, meaning it allows moisture to pass through it and evaporate. When you cover it with a non-breathable material, you can trap that moisture inside the wall. This can lead to serious problems like mold, mildew, and deterioration of the brick itself. Installing a vapor barrier is a crucial step to manage moisture and protect your home. This is especially important for exterior-facing interior walls or basement walls where moisture levels can be higher.

Step 4: Apply Primer or a Sealant

The final prep step is to apply a quality primer or sealant. This creates a uniform surface for your chosen covering and helps it adhere better. Most importantly, you need to choose a breathable, or vapor-permeable, product specifically designed for masonry. A non-breathable sealant will trap water vapor just like an improper covering would, which can cause paint to peel and the brick face to flake off. A good primer will also prevent the porous brick from soaking up too much paint or plaster, saving you time and material in the long run.

7 Creative Ways to Cover an Interior Brick Wall

Once you’ve prepped your wall, the fun part begins. Covering an interior brick wall isn’t just about hiding something you don’t like; it’s an opportunity to introduce a new style, texture, and personality into your space. From simple cosmetic updates to more structural changes, there’s a solution for every design goal and budget. Let’s walk through seven creative ways you can transform your brick wall from a feature you’re unsure about into a stunning focal point you’ll love.

1. Paint or Limewash

Painting is one of the most straightforward ways to update an interior brick wall. A few coats of paint can instantly brighten a room and give it a clean, modern look. For a more nuanced and classic finish, consider limewash. This special paint, made from lime and water, soaks into the brick instead of sitting on top of it. The result is a soft, matte texture that gives the brick a beautiful, slightly weathered appearance. You can apply multiple coats to achieve a whiter, more opaque finish while still maintaining the brick’s natural character. This is a fantastic weekend project for a quick room refresh.

2. Whitewashing

If you like the idea of lightening up your brick but find solid paint a bit too flat, whitewashing is an excellent middle ground. More opaque than limewash, this technique involves applying a watered-down paint solution to the brick. It tones down the original color, usually red or brown, while allowing the natural texture and some color variation to peek through. This method is perfect for achieving a rustic, shabby-chic, or coastal aesthetic. Whitewashing can dramatically change the mood of a room, making it feel brighter and more open without completely erasing the charm of the exposed brick.

3. Plaster, Render, or Stucco

For a complete transformation that adds texture and depth, consider covering your brick wall with plaster, render, or stucco. This method involves applying a plaster-like material directly over the brick to create a new, seamless surface. The finish can be anything from a smooth, polished look to a more rustic, textured effect. This is a durable, long-lasting solution that completely hides the brick and provides a fresh canvas for your interior design. Because it requires skill to get a professional finish, this is often a job for an experienced masonry designer, but the results are truly transformative and can suit any style from Mediterranean to minimalist.

4. Drywall (Stud Wall or Direct Bond)

If you want a perfectly smooth, traditional wall, installing drywall is the best solution. This method completely conceals the brick, giving you a standard wall surface that you can paint or wallpaper. You have two main options: building a new stud wall in front of the brick or attaching furring strips directly to the brick to anchor the drywall sheets. While it’s a more involved project, it’s the most effective way to deal with uneven brick or moisture issues, since you can add insulation and a vapor barrier behind the drywall. This is a core part of many home remodeling projects and offers a truly blank slate.

5. Wood Paneling

Adding wood paneling is a fantastic way to introduce warmth, texture, and character to a room. You can cover the brick with anything from classic beadboard for a traditional look to sleek wood slats for a modern feel or rustic shiplap for a farmhouse vibe. The paneling can be installed over furring strips attached to the brick wall, which also creates a small air gap that helps with insulation and moisture control. Wood paneling not only covers the brick but also becomes a stunning architectural feature in its own right, adding a cozy and inviting atmosphere to your space.

6. Tile or Stone Cladding

To make a bold statement, consider covering your brick wall with tile or a thin stone veneer. This method adds incredible texture, color, and a high-end feel to any room. You can choose from a wide variety of materials, including sleek porcelain tiles for a contemporary look or rugged, earthy natural stone pavers for a rustic, organic feel. This is an especially popular choice for fireplace surrounds or feature walls in living rooms and kitchens. While it requires careful preparation and installation, the result is a durable, artful surface that adds significant visual interest and value to your home.

7. Wallpaper or Fabric Wall Coverings

For a decorative touch that offers endless possibilities in pattern and color, wallpaper or fabric is a great choice. Before you can apply them, the brick wall needs to be smoothed over, typically by installing drywall or applying a skim coat of plaster. Once you have a smooth surface, you can choose from thousands of designs to match your decor. Wallpaper can create a dramatic accent wall, while upholstered fabric panels can add softness and improve acoustics. This method allows you to easily change the look of your room down the line without a major renovation.

Your Shopping List: Materials and Tools for Each Method

A successful project starts long before you pick up a tool. It begins with a clear plan and a well-stocked toolkit. To make things easier, I’ve put together a shopping list for each of the most popular methods for covering brick. Think of these as your pre-project checklists. Gathering everything you need ahead of time means you can focus on the creative part without making extra trips to the hardware store. Before you begin any of these projects, remember that proper wall preparation, including cleaning and repairs, is the key to a lasting finish. If you find any significant damage, our experts in restoration and sealing can ensure your wall is in perfect condition before you start.

Paint, Limewash, and Whitewash

This is one of the most approachable DIY methods, and your shopping list is pretty straightforward. For a classic painted look, you’ll want a good quality masonry primer and paint. For limewash or whitewash, you can buy a pre-mixed product or create your own.

Your list will include:

  • Materials: Masonry primer, latex or masonry paint, limewash, or a 1:1 mixture of white latex paint and water for a whitewash effect. Don’t forget painter’s tape and drop cloths.
  • Tools: A wire brush for cleaning, natural bristle brushes for limewash, rollers for paint, a paint tray, rags, and a spray bottle with water to dampen the brick before applying limewash.

Plaster, Render, and Stucco

Applying a plaster or stucco finish is a skill that takes practice, but it creates a beautiful, seamless surface. This method completely hides the brick for a modern and clean aesthetic. The key is mixing the material to the right consistency and applying it in thin, even layers.

Here’s what you’ll need:

  • Materials: A bonding agent to help the plaster stick, your chosen plaster or stucco mix, and clean water for mixing.
  • Tools: A powerful drill with a paddle mixer attachment will save your arms. You’ll also need buckets, a hawk to hold the plaster, and a trowel to apply it. Safety glasses and gloves are a must. For a project this involved, many homeowners trust our masonry design team to get a flawless result.

Drywall and Furring Strips

Putting up drywall is the best way to get a perfectly smooth, traditional wall. The process involves building a thin frame over the brick using furring strips, which gives you a flat surface to attach the drywall.

Your shopping list should contain:

  • Materials: Wood or metal furring strips, concrete screws to attach them to the brick, drywall sheets, drywall screws, joint compound (mud), and drywall tape.
  • Tools: A drill with a masonry bit is essential. You’ll also need a level to get the frame straight, a tape measure, a utility knife for scoring the drywall, and taping knives for the joint compound. This is a foundational step in many home remodeling projects.

Wood Paneling

Wood paneling adds warmth, texture, and character to a room. From rustic shiplap to classic beadboard, the options are nearly endless. Like drywall, this method typically requires attaching wood battens (similar to furring strips) to the brick first.

Here’s what to grab at the store:

  • Materials: Your choice of wood paneling, wood battens for the frame, construction adhesive, and finishing nails. You may also need wood filler and your preferred paint or stain.
  • Tools: A saw (miter or circular) for cutting panels to size, a nail gun or hammer, a level, a tape measure, and a drill. Seeing how wood can transform a space is part of what makes our custom pavilions and pergolas so special.

Tile and Stone Cladding

For a truly high-end and durable finish, consider cladding your brick wall with tile or a thin stone veneer. This method adds incredible texture and a sense of permanence, turning your wall into a stunning focal point. It’s perfect for fireplace surrounds or creating a dramatic accent wall.

Here is your list of supplies:

  • Materials: Your selected tile or stone veneer, a high-quality mortar or thin-set adhesive, and grout if your material requires it.
  • Tools: A notched trowel for applying adhesive, a wet saw or tile cutter for precise cuts, a level, a rubber mallet to set the pieces, a grout float, and sponges. You can explore a wide variety of beautiful options at the Gappsi Store, which features an extensive collection of porcelain and natural stone.

Should You DIY or Hire a Pro?

Deciding whether to cover your brick wall yourself or bring in a professional comes down to the complexity of the project, your budget, and your comfort level with home improvement tasks. While some methods are straightforward enough for a weekend warrior, others require a skilled hand to get right. Weighing the pros and cons can help you make a choice that protects your home’s value and gives you a result you’ll love for years to come.

Projects You Can Tackle Yourself

If you’re comfortable with basic carpentry, you can likely handle covering a brick wall with drywall. The most common method involves attaching wood furring strips directly to the brick, creating a frame for the drywall panels. This approach is a great way to get a smooth, modern finish without needing specialized masonry skills. Another manageable project is installing timber battens on the wall, which gives you a solid base to anchor your new wall covering. These projects are great if you’re looking for a significant change and aren’t afraid to get your hands dirty.

When It’s Time to Call in the Experts

If your project involves plastering, rendering, or any structural changes, it’s best to call for professional help. A professional masonry expert can test and match existing mortar, ensuring any repairs support the wall’s integrity instead of accidentally damaging it. Achieving a flawless, high-end finish with materials like plaster or limewash also requires specific knowledge. For example, a pro will know to use mineral-based masonry paint designed for brick, not standard house paint, for a clean look that lasts. For a truly seamless transformation, our home remodeling team can handle the project from start to finish.

Mistakes to Avoid No Matter What

Whether you DIY or hire a pro, there are a few critical mistakes to avoid. Never cover your brick wall with impermeable materials like dense stucco, vinyl siding, or certain faux stone panels. These materials can trap moisture inside the brick, preventing it from breathing and leading to serious long-term damage. Using the wrong mortar mix for repairs is another common error that can cause the surrounding bricks to crack or crumble over time. If you suspect a previous owner made these mistakes, our restoration and sealing services can help assess and correct the damage.

Design Ideas for Your New Wall

Once your brick wall is covered, you have a beautiful blank canvas to work with. This is your chance to turn a once-problematic wall into a stunning focal point that complements your home’s style. Instead of just letting it blend into the background, think about how you can use design elements to make your new wall a feature you truly love. With the right approach to color, lighting, and decor, you can completely transform the feel of the room and create a space that feels intentional and thoughtfully designed.

Experiment with Texture and Color

Just as exposed brick can lend a feeling of rustic charm or city style to a room, your new wall covering offers a fresh opportunity to define your space. The material you choose sets the stage. A smooth, plastered wall painted in a soft, neutral hue creates a calm and modern backdrop, while wood paneling can introduce warmth and organic texture. If you opted for stone or porcelain cladding, you can play with a rich variety of tones and patterns to create a chic and inviting interior. Don’t be afraid to go bold with color or choose a material with a unique finish. This wall is your chance to add character and depth to your home.

Highlight Your Wall with Smart Lighting

The right lighting can make all the difference. Instead of relying solely on overhead fixtures, consider how you can use light to accentuate your new wall. Installing track lighting or wall sconces can cast a warm glow, creating shadows and highlighting any texture in the material, whether it’s the subtle lines of shiplap or the unique surface of stone veneer. This technique draws the eye and adds a layer of sophistication to the room. Smart lighting, as part of a larger home remodeling project, can help you create different moods, turning your wall into a dynamic feature that adapts to any occasion.

Add Shelves, Art, and Other Decor

Your new wall is the perfect backdrop for showcasing your personality. Adding shelves or art can enhance its visual appeal, creating a focal point that anchors the room. Consider installing a set of minimalist floating shelves to display curated objects, books, or small plants. Alternatively, a single, large-scale piece of art can make a dramatic statement and tie the room’s color palette together. The clean surface of your new wall, whether it’s drywall or plaster, ensures that your chosen decor will stand out. This is your opportunity to tell a story and make the space uniquely yours.

Related Articles

Frequently Asked Questions

Can I ever go back to exposed brick if I cover it? This really depends on the method you choose. If you install drywall or wood paneling over the brick, the process is generally reversible, although it will require some work to dismantle the frame and patch any screw holes. However, methods like painting, plastering, or applying a stucco finish are much more permanent. Removing these coatings is an intensive process that can damage the brick surface, so it’s best to consider those options a long-term commitment.

My brick wall feels damp. Is it still okay to cover it? You should never cover a damp brick wall. Doing so will trap the moisture, which can lead to serious problems like mold, mildew, and the eventual breakdown of the brick and mortar. Your first step should be to identify and fix the source of the dampness. This might involve exterior repairs or improving ventilation. It’s wise to consult a professional to diagnose the issue correctly before you proceed with any cosmetic project.

What’s the easiest and most affordable way to update my brick wall? Painting, whitewashing, or applying a limewash finish are by far the most approachable and budget-friendly options. These projects require relatively few materials and can completely change the look and feel of a room in just a weekend. They offer a significant visual impact by brightening the space, all without the cost and complexity of more structural solutions like installing drywall or plaster.

Why can’t I just use regular house paint on my brick wall? Brick is a porous material that needs to breathe, which means it allows small amounts of water vapor to pass through it. Standard interior latex or acrylic paints create a non-breathable film that traps this moisture inside the brick. Over time, this trapped moisture can cause the paint to bubble and peel, and it can even damage the face of the brick itself. Using a breathable masonry paint or limewash ensures the wall stays healthy and your finish lasts.

How do I decide between keeping the brick and covering it? The decision comes down to the brick’s condition and your personal style. If the brick is in good shape and you enjoy its texture and character, keeping it exposed is a great choice. You can always clean it or apply a clear sealant to protect it. However, if the brick is damaged, of poor quality, or simply doesn’t fit the bright, clean aesthetic you want for your home, then covering it is a fantastic way to transform your space and achieve your design goals.

Outdoor kitchen builders reviewing design plans and material samples for a custom build.

How to Find the Right Outdoor Kitchen Builders

Building an outdoor kitchen on Long Island comes with its own unique set of challenges. Our four-season climate, with its humid summers, freezing winters, and salty coastal air, demands specific materials and construction techniques. A project that looks great on day one can quickly deteriorate if it’s not built correctly for our environment. This is why finding local experts is so important. You need outdoor kitchen builders who understand these conditions and can recommend durable materials like high-grade stainless steel and resilient porcelain. This guide will help you ask the right questions to find a builder with the local knowledge to create a beautiful, long-lasting outdoor space.

Key Takeaways

  • Choose a full-service partner, not just a contractor: Your project’s success hinges on finding a builder who manages everything from design and permits to final installation. Look for a team with a strong local portfolio and verified reviews to ensure a smooth process and a high-quality result.
  • Design for your lifestyle, not just for looks: Before picking appliances, think about how you will actually use the space. A functional layout with plenty of counter space, smart storage, and a logical workflow is the true foundation of an outdoor kitchen you will love for years.
  • Select materials built for Long Island weather: Our coastal climate requires durable materials to prevent rust, cracking, and fading. Ask your builder about high-grade stainless steel, porcelain, and natural stone to ensure your outdoor kitchen remains beautiful through every season.

What Services Do Outdoor Kitchen Builders Provide?

Finding the right outdoor kitchen builder means looking for a partner who can guide you through every step of the process. A great builder doesn’t just lay pavers and install a grill. They provide a complete service that transforms your backyard into a functional, beautiful extension of your home. From the initial sketch to the final cleanup, they manage all the moving parts so you can focus on planning your first cookout. A professional team handles the design, construction, and finishing touches, ensuring your new space is built to last and perfectly suits your lifestyle.

Custom Design and Planning

This is where the fun begins. A skilled builder starts by listening to you. They want to know how you plan to use your space. Will it be for intimate family dinners or large neighborhood parties? Do you see yourself flipping burgers or experimenting with a pizza oven? They take your vision and translate it into a detailed plan that considers workflow, seating, and how the kitchen integrates with your existing landscape design. This pre-design phase is critical for a successful project, ensuring the final layout is both practical and beautiful, not just a collection of appliances that looked good in a catalog.

Full Installation and Construction

Once the design is approved, the builder brings it to life. This is much more than just assembly. Professional outdoor kitchen contractors manage every phase of the build, from creating the structural frame to installing utilities like gas, water, and electricity. They handle all the complex tasks that require specialized knowledge, ensuring everything is safe and up to code. Working with an experienced, full-service construction company makes a huge difference in the quality of the final product. They coordinate every detail, from pouring the foundation to signing off on permits, for a smooth and stress-free process.

Material and Appliance Selection

The sheer number of options for countertops, cabinets, and appliances can be overwhelming. A good builder acts as your expert guide, helping you choose materials that fit your style and can withstand Long Island’s weather. They’ll explain the difference between various grades of stainless steel and recommend durable surfaces like porcelain and natural stone pavers. Their expertise helps you avoid common mistakes, like choosing materials that will fade, warp, or rust over time. This guidance ensures your investment is not only beautiful on day one but remains that way for years to come.

How Much Does an Outdoor Kitchen Cost?

Figuring out the budget for your outdoor kitchen is one of the first and most important steps. The final price tag can vary quite a bit, depending on everything from the appliances you choose to the materials you love. Think of it as an investment in your home and your lifestyle. A well-designed outdoor kitchen not only adds significant value to your property but also creates a wonderful new space for making memories with family and friends. To give you a clearer picture, let’s break down the typical cost ranges and what you can expect within each budget.

Entry-Level Kitchens ($3,000–$5,000)

If you’re looking for a simple, functional space to start your outdoor cooking adventures, an entry-level kitchen is a fantastic option. In this price range, you can expect a setup that focuses on the essentials. This typically includes a quality grill, either freestanding or built into a modest structure, along with a small amount of counter space for prep work. The construction might involve a prefabricated frame with a simple stone or stucco finish. This approach is perfect for smaller backyards or for homeowners who want to enjoy the benefits of an outdoor kitchen without a massive initial investment. Even a basic design requires a solid foundation, which is where professional masonry ensures your new kitchen is built to last.

Mid-Range Kitchens ($5,000–$15,000)

This is the most popular range for many homeowners on Long Island, as it offers a great balance of features, style, and value. A mid-range budget allows for more customization and a more integrated look. You can expect a larger built-in grill, more expansive countertops, and additional appliances like an outdoor refrigerator, a sink, or dedicated storage cabinets. This is also where you can start exploring higher-quality materials. You might choose beautiful porcelain or natural stone for your countertops and select a more detailed veneer for the kitchen’s base. An L-shaped or U-shaped layout becomes possible, creating a more social and functional cooking environment for entertaining guests.

High-End Custom Kitchens ($15,000–$50,000+)

For those who envision a true outdoor culinary destination, a high-end custom kitchen is the way to go. In this tier, the possibilities are nearly endless. You can incorporate premium, professional-grade appliances, including specialty items like a pizza oven, a smoker, or a power burner for large pots. Features like a full bar with a sink, ice maker, and beverage center are common. These kitchens often include sophisticated lighting, extensive seating, and integration with pavilions or pergolas for a complete outdoor room. The materials are top-of-the-line, from exotic granite countertops to custom stonework, creating a luxurious and fully personalized entertainment hub.

Factors That Influence the Final Cost

Regardless of the budget tier you fall into, several key factors will always influence the final cost of your project. The size and complexity of your kitchen’s layout play a huge role; a simple island is less expensive than a multi-level, U-shaped design. The appliances you select are another major variable, as brands and features can cause prices to differ by thousands. Your choice of materials for countertops, veneers, and flooring will also impact the budget. Finally, don’t forget about utilities. The cost to run gas, electrical, and plumbing lines to your kitchen site is a critical part of the overall expense. A full-service home remodeling expert can manage these details for you.

Which Features Should You Prioritize in Your Design?

Deciding what to include in your outdoor kitchen is the most exciting part of the process. A successful design starts with a clear vision of how you plan to use your backyard, not just a list of appliances that look good in a catalog. Think about your cooking style, how many people you typically host, and what would make the space truly feel like an extension of your home. Prioritizing features from the start ensures your final outdoor kitchen is both beautiful and perfectly functional for your family’s lifestyle.

Cooking Stations: Grills, Pizza Ovens, and More

The cooking station is the heart of your outdoor kitchen. While a high-quality built-in grill is a classic starting point, think about how you love to cook. Do you dream of hosting pizza nights? A custom-built brick or stone pizza oven can become a stunning focal point and a source of delicious meals. For the barbecue enthusiast, adding a smoker or a ceramic kamado-style grill offers incredible versatility. Don’t forget practical additions like side burners for heating sauces or boiling water. Your choice of custom masonry can integrate these elements seamlessly, creating a cohesive and professional-grade cooking hub that brings everyone together for memorable experiences outside.

Surfaces and Storage: Countertops and Cabinetry

Ample counter space and smart storage are what separate a simple grill setup from a true outdoor kitchen. You need durable surfaces for food prep, serving, and staging. Materials like granite or porcelain are excellent choices for countertops because they can withstand Long Island’s weather and are easy to clean. When it comes to cabinetry, select weatherproof options like stainless steel or marine-grade polymers to protect your tools and supplies from moisture and pests. Having well-designed storage means less running back and forth to your indoor kitchen, letting you stay present with your guests. Our selection of porcelain and natural stone offers beautiful, resilient options for creating the perfect look.

Comfort and Flow: Pergolas and Shade Structures

To make your outdoor kitchen a place you want to be, you need to plan for comfort. A pergola or pavilion provides essential shade on hot summer days and offers protection from a passing shower, extending the time you can spend outside. These structures also help define the kitchen area, creating the feel of an outdoor room and adding architectural interest to your backyard. Thoughtful placement can improve the flow from your house to the patio and create a sense of privacy from neighbors. Integrating a pavilion or pergola is a key step in transforming a simple patio into a true outdoor living destination.

Essential Utilities: Lighting, Plumbing, and Electrical

Proper utility planning is the invisible foundation of a great outdoor kitchen. Integrating a sink with running water makes food prep and cleanup incredibly convenient. You’ll also want plenty of GFCI-protected electrical outlets to power small appliances like blenders, rotisseries, or a mini-fridge. Don’t underestimate the importance of lighting. A good lighting plan includes task lighting directly over the grill and prep areas for safety, as well as ambient lighting to create a warm, inviting atmosphere for evening gatherings. Planning these landscape and utility details early in the design process is critical for a functional and safe space.

Modern Touches: Smart Tech and Integrated Appliances

Take your outdoor entertaining to the next level by incorporating modern technology. An integrated sound system can set the mood with your favorite playlist, while an outdoor-rated television is perfect for watching the big game with friends. Smart appliances, from wine coolers to advanced grills, can be controlled from your phone for ultimate convenience. Even simple additions like a Wi-Fi extender ensure you and your guests stay connected. These features transform your outdoor kitchen from just a place to cook into a complete entertainment hub, making your custom home remodeling project a true investment in your lifestyle.

Popular Outdoor Kitchen Design Trends

Your outdoor kitchen should be a reflection of your style and how you love to spend time outside. While classic designs are always in fashion, it’s fun to see what new ideas are shaping modern backyard living. From flexible layouts to integrated entertainment features, today’s trends are all about creating a space that is as functional as it is beautiful. Thinking about these popular concepts can help you brainstorm features for your own outdoor oasis and create a space you’ll enjoy for years to come.

Flexible Layouts: Modular vs. Custom

One of the first decisions you’ll make is the kitchen’s layout. Modular kitchens offer a sleek, modern look with pre-made sections that can be arranged in various configurations. They come in a wide range of colors and styles, making them a highly customizable option if you want a streamlined installation process. For those who want a truly one-of-a-kind space, a custom-built kitchen provides complete creative freedom. A custom design allows you to build around existing landscape features, match your home’s unique architecture, and create a layout perfectly tailored to your cooking and entertaining style.

Modern Surfaces: Stainless Steel and Porcelain

The right surfaces can define the look and feel of your outdoor kitchen. Stainless steel remains a top choice for appliances and countertops, giving your space a professional, chef-grade appearance that is also incredibly durable. Another fantastic option gaining popularity is porcelain. Porcelain pavers and countertops are non-porous, which means they resist stains from spills like wine or oil. They are also exceptionally resistant to heat, frost, and fading, making them a smart and long-lasting choice for weathering Long Island’s seasons while maintaining a clean, sophisticated look.

Sustainable Choices: Eco-Friendly Materials

Homeowners are increasingly looking for ways to make environmentally conscious choices, and outdoor kitchens are no exception. This trend focuses on using sustainable materials that are both beautiful and have a smaller environmental footprint. Materials like stainless steel are not only durable but also recyclable. You can also incorporate locally sourced natural stone for countertops or flooring, which reduces transportation emissions and supports a more organic aesthetic. Choosing long-lasting, high-quality materials from the Gappsi Store also contributes to sustainability by minimizing the need for replacements down the road.

Entertainment Hubs: Bars and Seating Areas

Modern outdoor kitchens are much more than just a place to grill. They have become true entertainment hubs designed for socializing with family and friends. This trend involves creating multifunctional zones within your kitchen area. Think about adding a bar-height counter with comfortable stools for guests to chat while you cook, or a dedicated lounge area nearby. Integrating features like built-in refrigerators for drinks and ample counter space for serving food makes hosting effortless. Placing your kitchen under a pavilion or pergola provides shade and defines the space, turning it into the social heart of your backyard.

How to Choose the Right Outdoor Kitchen Builder

Choosing your builder is the single most important decision you will make for your outdoor kitchen project. The right partner will bring your vision to life seamlessly, while the wrong one can lead to budget overruns, poor craftsmanship, and endless frustration. Hiring an unqualified contractor is the biggest reason outdoor kitchen projects fail, whether it is due to using the wrong materials for Long Island weather or failing to coordinate permits and utilities. To make sure your investment is in good hands, take the time to vet potential builders thoroughly. A little research upfront saves you from major headaches down the road and ensures the final result is a space you will love for years. By focusing on experience, reputation, and a comprehensive approach, you can find a team that will deliver a beautiful and functional outdoor kitchen that perfectly suits your home and lifestyle.

Review Their Portfolio and Past Projects

Before you even pick up the phone, spend time with a builder’s portfolio. Look for a gallery of completed projects that showcases their range and quality of work. Do their designs resonate with your personal style? Pay close attention to the details, like the precision of the stonework and the seamless integration of appliances. Working with experienced outdoor kitchen contractors makes a huge difference in the final outcome. Their expertise informs everything from the layout to the material selection, ensuring your kitchen is not only beautiful but also practical. A strong portfolio, like the projects on our YouTube channel, demonstrates a history of successful builds and happy clients.

Check Online Reviews and Ask for References

Online reviews and client testimonials are your best friend during the hiring process. See what past customers are saying on Google, Houzz, and other third-party sites. While a perfect record is rare, look for a consistent pattern of positive feedback regarding communication, professionalism, and quality. One of the biggest mistakes homeowners make is rushing to hire the first builder they find without doing proper research. Don’t be afraid to ask a potential builder for a list of references you can contact directly. Speaking with a past client gives you unfiltered insight into what it is like to work with the company from start to finish.

Verify Licenses and Local Experience

Never hire a builder who is not licensed and insured in New York. This is non-negotiable, as it protects you from liability in case of accidents or property damage. Beyond the basics, look for a builder with extensive experience working specifically on Long Island. A local expert will be familiar with Suffolk and Nassau County’s unique building codes, permitting processes, and environmental considerations. This local knowledge is invaluable for keeping your project on schedule and compliant with all regulations. A builder who understands the local landscape can also provide better recommendations for materials that will withstand our coastal climate.

Find a Full-Service Builder to Handle Permits and Utilities

An outdoor kitchen involves more than just a grill and some countertops. It requires careful coordination of plumbing, electrical, and gas lines, not to mention securing the right permits. A full-service builder simplifies this complex process by managing every detail for you. These teams handle everything from the initial custom design to the final installation, acting as a single point of contact. This integrated approach prevents miscommunication between different trades and ensures a cohesive workflow. A successful project starts with a detailed plan that considers how you will actually use the space, and a full-service firm excels at turning that vision into a well-executed reality.

Common Mistakes to Avoid When Hiring a Builder

Building your dream outdoor kitchen is an exciting project, but a few common missteps can turn that dream into a headache. Knowing what to watch out for helps you select the right partner and ensures your investment is built to last. When you take the time to plan thoughtfully and hire a builder who understands your vision, you set your project up for success from day one. By avoiding these frequent mistakes, you can feel confident that your new outdoor space will be as functional as it is beautiful for years to come.

Rushing Your Decision

One of the biggest mistakes homeowners make is rushing to hire the first builder they speak with. It’s tempting to jump in once you’ve decided to move forward, but this is a decision that requires careful thought. Take your time to research and interview several candidates. A reputable builder will have an extensive portfolio of past projects, clear testimonials, and the proper licenses and insurance. You’re not just hiring a contractor; you’re choosing a partner for a significant home improvement project. Make sure their communication style and design sensibility align with your own before you sign any contracts.

Ignoring Workflow and Utility Planning

A beautiful outdoor kitchen that’s impractical to cook in is a design failure. One of the most common mistakes homeowners make is overlooking the importance of layout and workflow. Think about how you move in your indoor kitchen, from the fridge to the sink to the stove. The same logic applies outside. A professional designer will help you plan a functional layout that includes adequate counter space, smart storage, and a natural flow between cooking, cleaning, and serving areas. This also includes planning for essential utilities like plumbing, gas, and electrical lines early in the design process to avoid costly changes later.

Choosing Materials Unsuited for Long Island Weather

Long Island’s climate, with its humid summers, freezing winters, and salty air, is tough on outdoor structures. Choosing the wrong materials can lead to rust, cracks, and rapid deterioration. For example, it is incredibly common for people to purchase outdoor grills and cabinet doors made of a lower grade of stainless steel that isn’t suited for coastal environments. You need materials that can withstand the elements. High-grade 304 stainless steel, durable porcelain pavers, and resilient natural stone are excellent choices that offer both beauty and longevity. An experienced local builder will guide you toward the best options for our specific weather patterns.

Focusing on Appliances Over Layout

It’s easy to get excited about a top-of-the-line grill or a wood-fired pizza oven, but people often design outdoor kitchens around appliances instead of behavior. Before you pick out the hardware, think about how you plan to use the space. Will you be hosting large parties or intimate family dinners? Do you need a bar area for mingling or a long countertop for buffet-style serving? A great design starts with your lifestyle. By planning the layout around how you’ll actually live and entertain in the space, you create a kitchen that truly works for you, complete with comfortable seating and shade structures like pergolas.

Key Questions to Ask Before You Hire

Once you have a shortlist of potential builders, it’s time to start the interview process. Asking smart, specific questions will help you find a true partner who not only understands your vision but has the expertise to bring it to life. Think of this as your final check to ensure you’re hiring the right team for the job. Here are four essential questions to ask before you sign any contracts.

What materials are best for Long Island’s climate?

Long Island’s coastal air and four-season weather demand materials that are built to last. A builder’s recommendations here will tell you a lot about their local experience. For example, choosing the wrong grade of stainless steel for appliances and cabinets is a common mistake, as some grades will rust in our salty air. Your builder should guide you toward 316-grade stainless steel and other durable options like marine-grade polymers.

For surfaces, you want something that can handle hot summers and freezing winters without cracking or fading. High-quality porcelain and natural stone are excellent choices for countertops and patios because they are dense, non-porous, and incredibly resilient. Ask any potential builder why they recommend certain materials and listen for answers rooted in longevity and local climate knowledge.

How long will the project take?

Every homeowner wants to know when they can fire up the grill. While every project is different, a professional builder should be able to give you a realistic timeline. Generally, the construction part of an outdoor kitchen project takes one to four months, but this can vary based on the project’s complexity, permit approvals, and weather delays.

Ask for a detailed schedule that outlines each phase, from excavation and utility installation to final appliance hookups. A builder who provides a clear, phase-by-phase timeline shows they have a solid project management process. Working with a full-service company that handles all aspects of home remodeling can also help keep the project on track, as they manage all the moving parts in-house.

What do your warranties cover?

A warranty is a builder’s promise to stand behind their work, and it’s a critical part of your contract. Before you commit, make sure your agreement clearly outlines all project timelines, costs, materials, and warranties. You need to know exactly what is protected and for how long.

Ask about two types of warranties: one for the materials, which usually comes from the manufacturer, and one for the workmanship, which comes from the builder. A reputable contractor will be transparent about their warranty policies and what they cover. This protects your investment and gives you peace of mind. A company that also offers restoration and sealing services shows a long-term commitment to the durability of their work.

What are the benefits of professional installation?

You might be tempted to save money with a general handyman, but this is a question that allows a true expert to shine. Working with experienced outdoor kitchen contractors can make a significant difference in how well your project turns out. A professional installer understands the unique challenges of outdoor construction, from proper drainage and ventilation to the specific requirements for running gas and electrical lines safely.

An experienced team ensures the job is done right the first time, preventing costly mistakes and future headaches. Their expertise in masonry and outdoor construction means your kitchen will not only look beautiful but will also be safe, functional, and built to withstand the elements for years to come.

Related Articles

Frequently Asked Questions

How do I even begin planning an outdoor kitchen? The best way to start is by thinking about how you want to live in the space, not just what appliances you want. Ask yourself who you’ll be cooking for. Is it mostly for your family, or do you plan on hosting big neighborhood parties? Considering your entertaining style first will help you and your designer create a layout that truly works for you, ensuring you have the right balance of cooking space, prep counters, and seating.

What makes a material “weatherproof” for Long Island? A weatherproof material is one that can handle our specific climate challenges, from humid, salty air in the summer to freezing temperatures in the winter. For surfaces, this means choosing non-porous options like porcelain or dense natural stone that won’t absorb water, stain easily, or crack when the temperature drops. For appliances and cabinets, it means selecting high-grade stainless steel that is specifically formulated to resist rust and corrosion in a coastal environment.

Why is hiring a full-service builder better than managing contractors myself? A full-service builder acts as your single point of contact for the entire project, which saves you from the stress of coordinating different tradespeople. They manage the plumbers, electricians, and masons to ensure everyone is working from the same plan and schedule. This integrated approach prevents miscommunication, avoids costly mistakes, and ensures your project is handled smoothly from the initial design and permitting all the way to the final cleanup.

My backyard is small. Can I still have a functional outdoor kitchen? Absolutely. A great outdoor kitchen is about smart design, not sheer size. A smaller backyard just means you need to be more intentional with your layout. A simple, straight-run kitchen with a high-quality built-in grill, a bit of counter space for prep work, and some well-placed storage can be incredibly functional. The key is to prioritize the features that are most important to your cooking style to create a space you love to use.

Do I really need a sink in my outdoor kitchen? While you can certainly have an outdoor kitchen without one, adding a sink is what truly makes it a self-sufficient space. Having running water outside is a game-changer for everything from washing vegetables and your hands during food prep to making cleanup after a meal much simpler. It saves you countless trips back into the house, allowing you to stay present and enjoy the party with your guests.

Professional workers installing interlocking pavers on a prepared crushed stone base for a paver patio on Long Island

How to Plan Your Paver Patio Installation Long Island

A paver patio is easier to enjoy when the decisions are made before excavation begins. Start by defining how your household will use the space, then account for drainage, property lines, access, materials, and the base needed for Long Island’s freeze-thaw conditions. A clear plan helps prevent costly changes after installation begins.

Contact Gappsi for a free consultation.

A complete paver patio installation Long Island plan covers design, material selection, site preparation, an 8- to 10-inch excavation, a compacted crushed-stone base, laying patterns, edge restraints, joint sand, and sealing. Depending on the patio’s size and complexity, installation commonly takes about 3 to 14 days.

From concrete pavers and Italian porcelain to natural bluestone, granite, travertine, limestone, or sandstone, each material affects the patio’s appearance, maintenance, and construction details. The first step is matching those choices to your space, daily use, and overall property design.

Step 1: Designing Your Paver Patio and Selecting Materials

Begin by measuring the proposed patio area, noting property lines, existing trees, doors, steps, drainage paths, and the transition from the house to the yard. Then define how your household will use the space. A dining patio needs room for chairs and circulation, while a lounge area may be organized around seating, a pool view, or a fire pit. Sketching these uses before selecting a pattern helps create a layout that works in daily life, not just on paper.

Call Gappsi at 631-543-1177 to discuss your patio plans and schedule a design consultation.

Allow for the actual footprint of furniture, grills, planting beds, and walkways. When estimating material quantities, add about 5% to the measured square footage for cuts around curves and irregular spaces, as recommended by Oregon State University Extension (paver planning guidance). Your plan should also account for a gradual slope that directs water away from the home and prevents pooling.

Gappsi can develop a 3D design so you can review proportions, circulation, colors, borders, and material combinations before construction begins. The design-build-supply model keeps planning, product selection, and installation coordinated through one provider. Homeowners can also visit the Gappsi showroom at 1015 W Jericho Turnpike in Smithtown to compare samples in person and see how surface texture and color change under different lighting. For broader guidance, review these best patio materials for Long Island.

Material selection should reflect the patio’s use, exposure, maintenance expectations, and architectural style. Natural bluestone provides a distinctive blue-gray surface and works well for formal entertaining areas. Travertine offers a textured natural-stone appearance that is often used around pools and outdoor living spaces. For flexible color, shape, and pattern choices, consider concrete pavers from manufacturers such as Cambridge, Nicolock, Techo-bloc, or Belgard. Italian porcelain pavers provide another option for homeowners seeking a crisp, contemporary surface with large-format design possibilities.

Gappsi also supplies other natural stone choices, including granite, limestone, and sandstone. Its masonry design and construction services on Long Island can coordinate the patio with retaining walls, outdoor kitchens, steps, or other masonry features. Confirm the selected material, pattern, edge detail, drainage plan, and any town permit requirements before moving to excavation.

Step 2: Preparing the Site and Building a Solid Paver Base

A paver patio performs only as well as the surface beneath it. On Long Island, the base must support the patio while managing water and seasonal movement. Careful layout, excavation, and compaction help reduce the risk of settling, pooling, and uneven pavers after repeated freeze-thaw cycles.

  1. Mark the patio area. Use stakes, string lines, or marking paint to define the finished footprint, including curves, steps, seating areas, and transitions to existing walkways. Check the measurements before excavation and confirm that the planned patio will direct water away from the house. The layout should include a deliberate slope because standing water can damage a paver surface over time. Oregon State University Extension explains why paver areas need a gradient for runoff.
  2. Excavate to the required depth. Remove topsoil, roots, organic material, and unstable soil from the marked area. For a typical patio, excavation should reach approximately 8 to 10 inches, allowing room for the compacted stone base, bedding layer, and pavers. The exact depth can vary with soil conditions, drainage needs, and the selected paver thickness. A shallow excavation may leave the patio vulnerable to movement when wet soil freezes and expands.
  3. Build the crushed-stone foundation. Install approximately 6 inches of 3/4-inch crushed stone across the excavated area. Spread the material evenly rather than placing the full depth in one loose layer. The stone should be compacted in lifts, with each lift thoroughly consolidated before the next is added. A plate compactor helps lock the angular stone together and creates a stable foundation for the bedding material.
  4. Verify drainage and grade. Check the slope with a level and string line as the base is shaped and compacted. Direct runoff away from the foundation and avoid creating low spots that can hold water. Proper drainage is especially important for Long Island’s freeze-thaw cycles because trapped moisture can contribute to heaving, shifting, and joint deterioration. For a deeper material overview, review Gappsi’s guide on how to install a paver base.
  5. Inspect the finished base before moving on. The surface should be firm, evenly graded, and free of soft areas. Correct weak spots before installing bedding sand and pavers. Gappsi’s patented Edge Restraint System is also planned as part of the installation, helping define and secure the patio perimeter once the pavers are laid.

How Do You Choose the Right Paver Pattern for Your Patio?

The pattern you select should fit the patio’s shape, intended use, and the material you want to see underfoot. Start by measuring the space and marking key features, such as a dining area, walkway, steps, or fire pit. A simple layout helps reveal where full pavers will work and where cuts will be necessary. For curves and unusual corners, plan for about 5% extra material to cover required cuts.

Match the pattern to the patio’s style

Running bond uses rows with each joint offset from the next. Its straightforward lines can make a narrow patio feel longer and work well with rectangular concrete pavers or brick-shaped units. Herringbone places pavers at a repeating angle, usually 45 or 90 degrees. The interlocking layout gives the surface a more directional appearance and is a practical choice for concrete pavers, especially where the patio connects to a frequently used walkway.

Basket weave groups pairs of rectangular pavers into repeating blocks. It creates a traditional look that suits older homes and smaller sitting areas without adding a complicated visual grid. Ashlar, sometimes called a random rectangular pattern, combines several rectangular sizes for a more varied layout. It is especially well suited to natural bluestone, where variations in color and texture can complement the changing sizes.

Consider material size before finalizing the layout

Material choice limits or expands the patterns available. Concrete pavers are manufactured in coordinated sizes that support running bond, herringbone, and basket weave. Bluestone can be cut into an ashlar arrangement or installed in more uniform courses. Travertine and porcelain may also be available in coordinated modular sizes, but the supplier should confirm the exact dimensions before the design is finalized.

For a cleaner contemporary patio, consider large-format 24×24 pavers. Fewer joints create a calmer visual field, while careful base preparation and precise installation remain essential because larger units make unevenness more noticeable. Review these large-format paver options before choosing a layout.

During a paver patio installation on Long Island, the pattern should also account for drainage, property lines, and transitions to the home. A design-build team can test several layouts in a plan, then confirm the pattern works with the selected stone or paver before ordering materials.

Step 3: Installing Edge Restraints and Laying the Pavers

Once the base is compacted and the layout is confirmed, the installation moves from preparation to precision. This stage determines whether the patio keeps its lines, joint spacing, and level surface over time. Gappsi’s patented Edge Restraint System, developed in 2000, provides a defined perimeter that helps hold the pavers in position.

  1. Install the perimeter restraint

    Set the Edge Restraint System along the planned patio boundary, including curves, corners, and transitions to walkways or steps. Secure the restraint according to the site conditions and confirm that its top edge matches the planned paver elevation. A stable perimeter limits lateral movement when the patio is exposed to foot traffic, water, and seasonal freeze-thaw cycles. For homeowners comparing installation approaches, Gappsi’s masonry design and construction services on Long Island include the planning and construction details that support this step.

  2. Establish reference lines and elevations

    Run string lines across the work area to establish the intended direction, slope, and finished height. Use a level or laser level to check the lines against fixed points such as the house, drainage structures, and adjoining paving. The surface should shed water appropriately without creating abrupt changes in elevation. Check the lines throughout installation rather than waiting until the final pavers are in place.

  3. Lay the field pavers

    Place each paver on the compacted bedding layer, following the approved pattern. Set pavers carefully instead of dragging them across the base, which can disturb the prepared surface. Maintain consistent joint spacing as you work, and use a rubber mallet for minor adjustments. Periodically check several rows with a straightedge and level. Small corrections made early prevent uneven joints or a visible alignment problem across the finished patio.

  4. Cut the perimeter pieces

    Measure and mark pavers for edges, curves, posts, steps, drains, and other obstacles only after the surrounding field pattern is established. A wet saw produces controlled cuts through many paver materials, while a paver splitter may suit certain concrete units. Keep cut edges oriented toward the restraint or another less visible boundary when the layout allows. Order approximately 5% extra material to account for these cuts and normal installation breakage.

Step 4: Applying Joint Sand and Sealing the Patio

Once the pavers are set and the edge restraints are secure, the joints need to be filled and stabilized. This finishing stage helps keep the surface connected, limits movement, and prepares the patio for routine maintenance.

How is polymeric sand applied?

Polymeric sand is swept across the dry patio so it settles into every joint between the pavers. The installer works in multiple directions and uses a broom to remove excess material from the surface. Any remaining sand on top of the pavers should be cleared before water is added, because residue can harden and leave a visible film.

After the joints are filled, a plate compactor passes over the patio to settle the sand deeper into the joint spaces. A protective pad may be used to reduce the risk of scratching the paver surface. The joints are then topped up where needed and lightly activated with water according to the sand manufacturer’s instructions. Controlled watering allows the binding agents to set without washing sand out of the joints.

Regular sand can shift, wash away, and leave open spaces where weeds can take hold. In contrast, polymeric sand helps stabilize the joints after activation and reduces weed growth when it is installed correctly. For a closer look at the material and its use, see this guide to polymeric sand for pavers.

What type of sealer should you choose?

Sealing is a finish decision as well as a maintenance consideration. A wet-look sealer deepens color and creates a more pronounced appearance, while a natural-look sealer preserves a subtler, closer-to-original finish. The right choice depends on the paver material, exposure, desired appearance, and whether the patio needs added resistance to staining.

Sealer should be applied only after the joint sand has fully set and the surface is clean and dry. On Long Island, many homeowners plan for a resealing cycle of approximately two to three years, although weather exposure, foot traffic, drainage, and the product used can change that timing. Review the process for sealing concrete pavers before selecting a product or scheduling maintenance.

What Permits Do You Need for a Paver Patio on Long Island?

Permit requirements for a paver patio can change from one Long Island municipality to another. A project in a Nassau County village may follow different procedures than one in a Suffolk County town. So homeowners should confirm requirements with the local building department before excavation begins.

Which patio projects may require approval?

Local officials commonly evaluate the patio’s total square footage, its distance from property lines, and whether the work changes existing drainage patterns. A larger patio, a patio close to a side or rear property line, or a design that redirects water may require a permit, site plan, or additional review. Rules can also depend on whether the project includes related features such as retaining walls, steps, covered structures, lighting, or changes to grading.

Do not assume that a patio is automatically exempt because it sits at ground level. The applicable building code, zoning rules, setbacks, drainage requirements, and village or town procedures all matter. The building department may also ask for a property survey or drawing showing the proposed layout and distances from lot lines.

How can a contractor help with the permit process?

An experienced local contractor can identify the approvals that may apply, prepare the project information, and coordinate questions with the appropriate municipality. This local knowledge helps prevent avoidable delays, especially when the design includes grading changes or sits near a setback. Gappsi includes permit expediting within its design-build service, helping homeowners move from the initial patio plan to a properly reviewed installation.

Before choosing materials or finalizing the layout, ask who will verify approvals and coordinate submissions. Gappsi’s masonry design and construction services on Long Island bring design, construction, and permit coordination into one process. That approach gives the project team a clearer view of site conditions and local requirements before work starts.

How Much Does a Paver Patio Installation Cost on Long Island?

For homeowners comparing paver patio installation on Long Island, a practical installed range is about $20 to $35 per square foot. The final estimate depends on the material, layout, access, and condition of the site. These planning ranges can help you compare options before scheduling a detailed design consultation.

Estimated installed paver patio costs by material tier
Tier Typical materials Estimated installed cost
Basic or classic Standard concrete pavers with a straightforward layout $20 to $24 per square foot
Mid-range Natural stone or travertine with added color and texture options $24 to $29 per square foot
Large-format Large-format pavers, multi-pattern fields, or more detailed layouts $29 to $35 per square foot

What changes the cost of a patio?

Patio size affects the total investment, but square footage is only one part of the estimate. A compact patio with several curves, steps, or borders can require more labor per square foot than a larger, simple rectangle. Material choice also matters. Concrete pavers, travertine, natural bluestone, and large-format products each have different material and installation requirements.

Site preparation is another major variable. The crew may need to remove an existing concrete slab or patio, excavate unsuitable soil, address drainage, or correct grading before installing the base. Poor access for equipment, steep changes in elevation, retaining elements, fire features, and outdoor kitchen pads can also increase labor and preparation costs. A proper slope helps move water away from the patio and reduces the risk of long-term pooling.

How does Gappsi’s design-build-supply model help?

Gappsi manages design, material supply, and installation through one design-build-supply model. That means homeowners work with one provider instead of coordinating separate designers, suppliers, and installers, which helps reduce handoff problems and middleman markup. Gappsi also provides free consultations so the team can review measurements, access, grading, material preferences, and demolition needs before preparing an accurate quote.

How Do You Maintain Your Paver Patio After Installation?

Consistent care keeps a paver patio attractive and helps protect the joints, surface, and drainage system through Long Island’s changing seasons. A simple maintenance routine is usually enough when it is performed before small problems become larger repairs.

Start with regular sweeping using a stiff outdoor broom. Removing leaves, soil, and food debris prevents buildup in the joints and reduces the conditions that encourage weeds or staining. Sweep more often during fall and after storms, especially beneath trees. For stuck-on dirt, use occasional power washing on a gentle setting. Keep the spray at a reasonable distance and avoid directing high pressure straight into the joints, because it can wash out the sand that supports the pavers.

Inspect the joints periodically. If heavy rain, cleaning, or normal wear has removed sand, reapply polymeric sand according to the product instructions. The joints should be clean and dry before new sand is installed and activated. Polymeric sand helps lock the pavers together while limiting weed growth, but it is not a substitute for correcting drainage or movement beneath the patio.

Sealing every two to three years can help protect the patio from moisture, staining, and repeated freeze-thaw exposure during Long Island winters. The right schedule depends on the paver material, traffic, shade, and condition of the existing sealer. Review the process for sealing concrete pavers before choosing a product or application method.

How Should You Protect Pavers in Winter?

Use a plastic shovel or a broom to clear snow without scraping the surface. Avoid deicing salt when possible, since it can damage some pavers and affect nearby landscaping. For traction, use clean sand instead. After the season, sweep away the remaining sand and inspect for loose joints, cracked pieces, or areas where water collects. Addressing those issues in spring helps keep the patio stable before the next cycle of heavy use and weather.

Frequently Asked Questions

How much does a paver patio cost on Long Island?

The total cost depends on the patio’s size, layout, material, access to the site, drainage needs, excavation, and base preparation. Concrete pavers, natural stone, and porcelain pavers each have different material and installation considerations. A site review and itemized design-build estimate provide a more useful figure than a broad online average.

What is the best base material for a paver patio?

A properly compacted base of 3/4-inch crushed stone is a practical choice for patio construction. The stone should be installed in compacted lifts over the prepared subgrade, with drainage planned before the surface materials are placed. Base depth depends on site conditions, soil, drainage, and the intended use of the patio.

Do I need a permit for a paver patio installation?

Permit requirements vary by town in Nassau and Suffolk Counties. Setbacks, patio size, grading, drainage, and proximity to property lines can affect the review. Check with the local building department before construction, or work with a contractor who can confirm the requirements and coordinate permit expediting.

How long does a paver patio installation take?

The schedule depends on the patio’s size, design complexity, excavation, material availability, weather, and any permit requirements. The work typically includes layout, excavation, base preparation, paver installation, joint sand, and finishing. Your contractor should provide a project schedule after reviewing the property and design.

Is polymeric sand better than regular sand for paver joints?

Polymeric sand is generally better suited to finished paver joints because it helps stabilize the joints when properly installed and activated. The joints must be clean and dry, and the product must be compacted and watered according to its instructions. Routine maintenance still helps protect the joint system over time.

Ready to start planning your paver patio installation on Long Island? Call Gappsi at 631-543-1177 to schedule a free consultation and discuss your project.