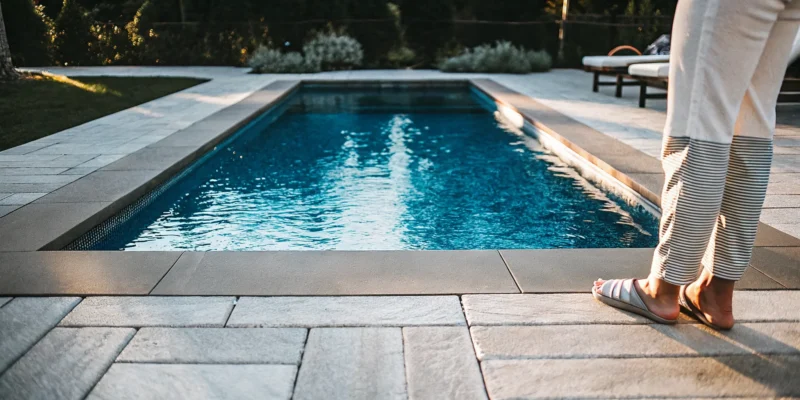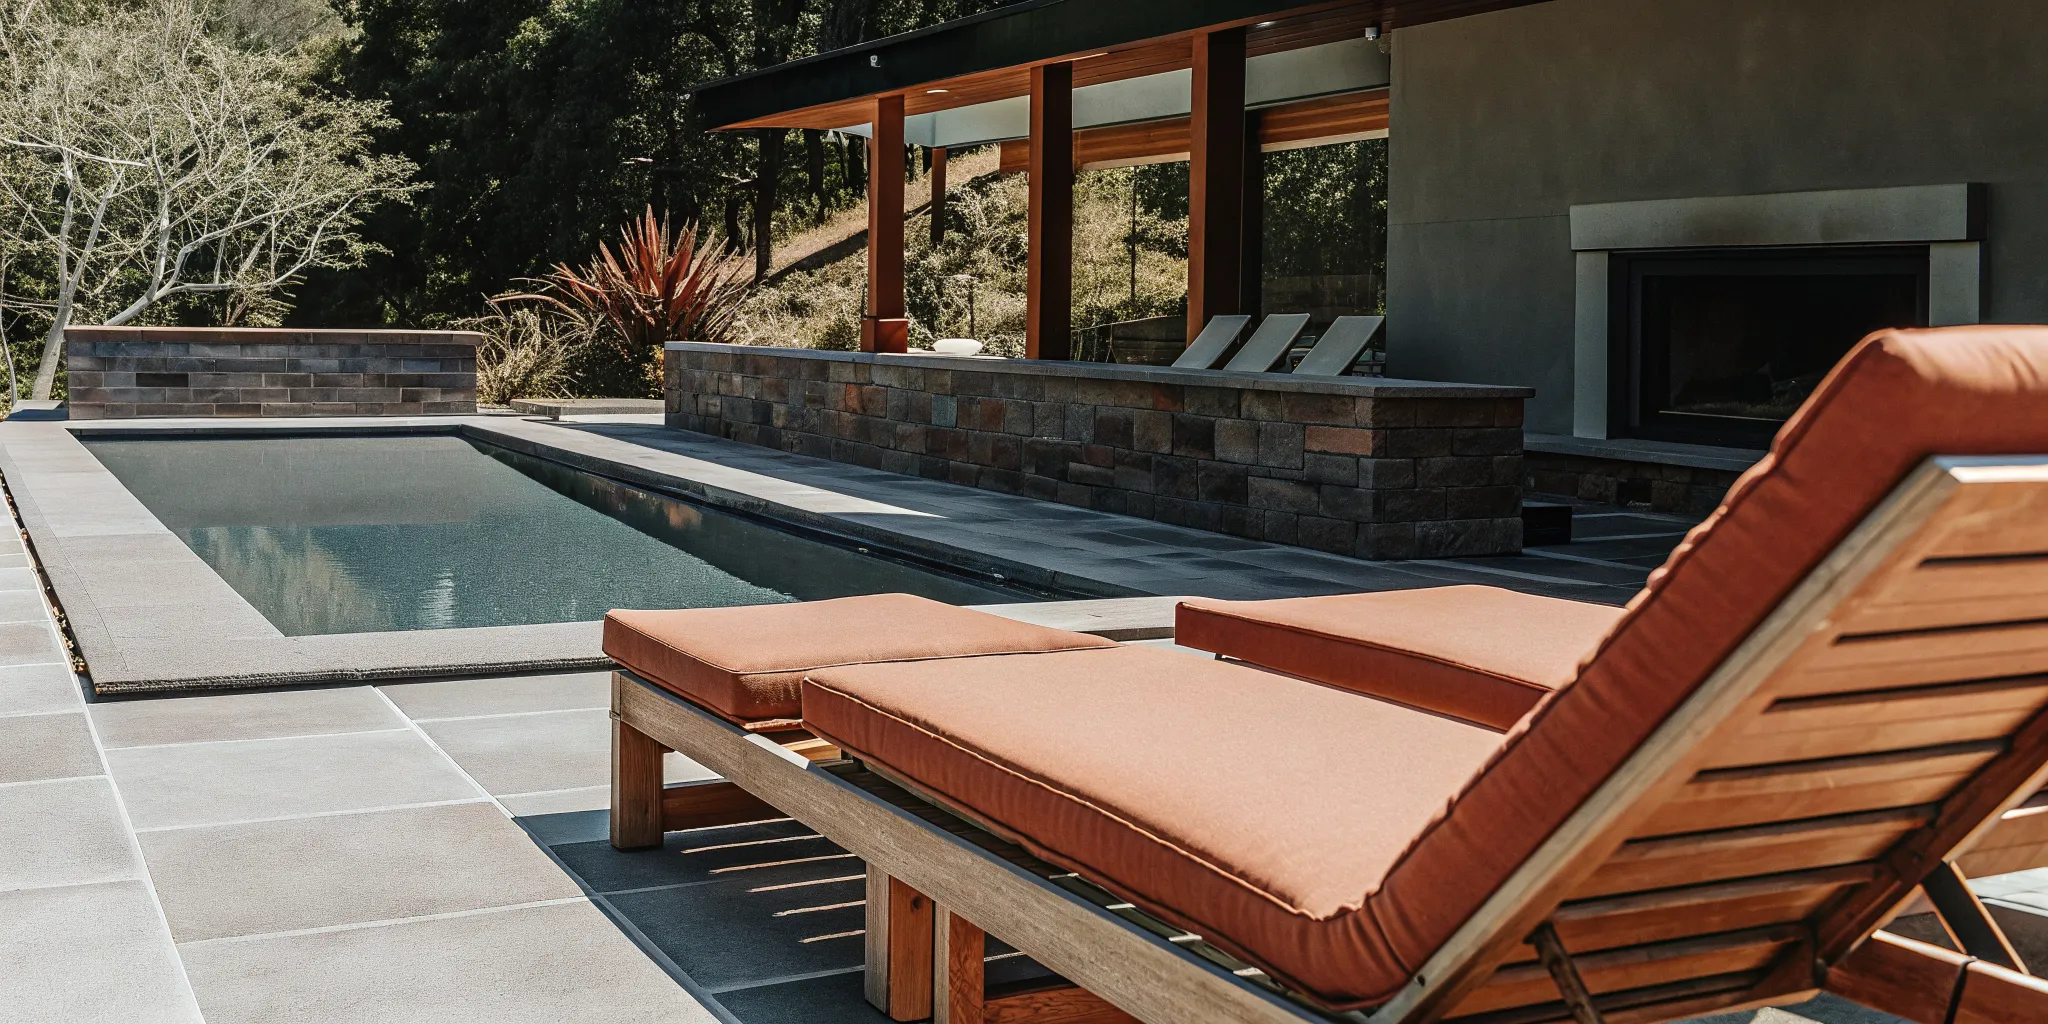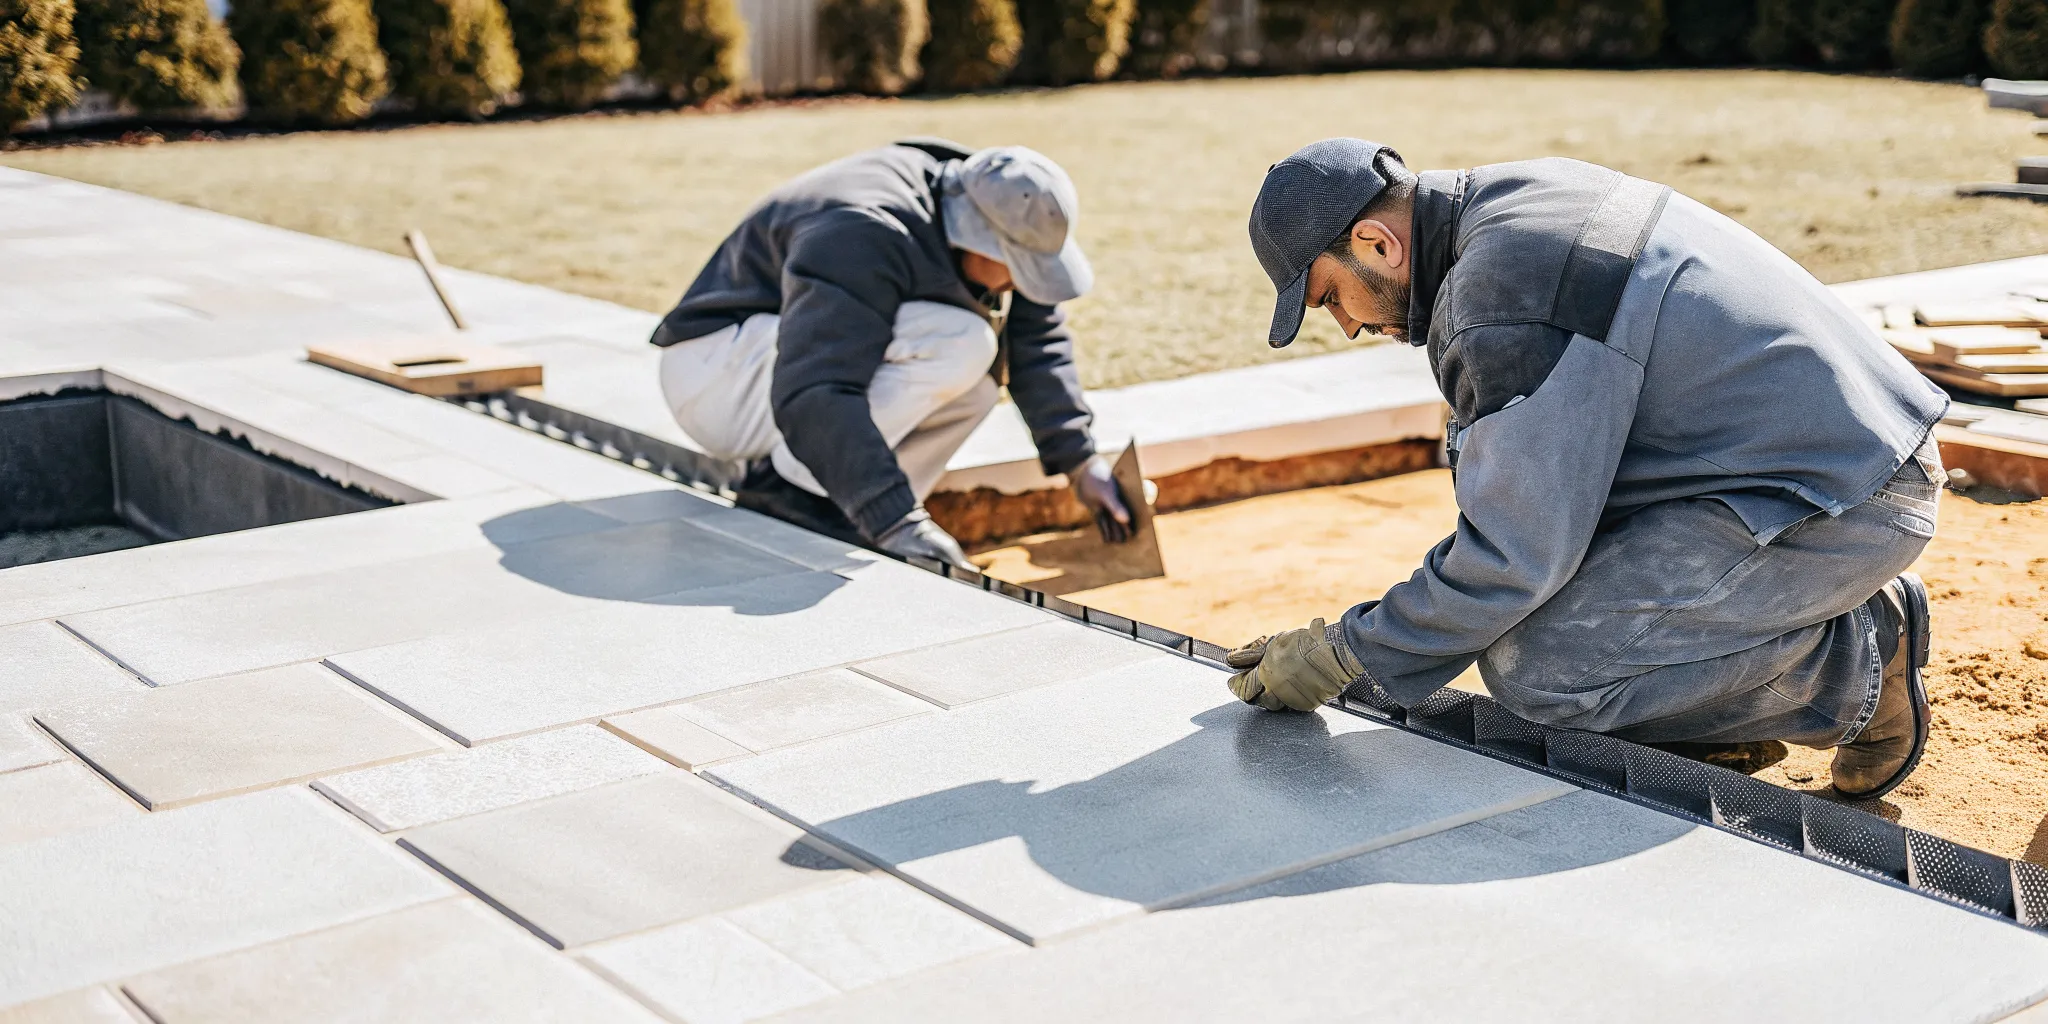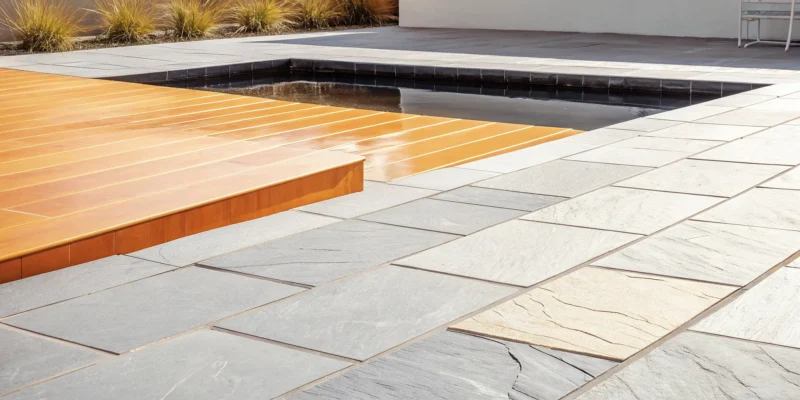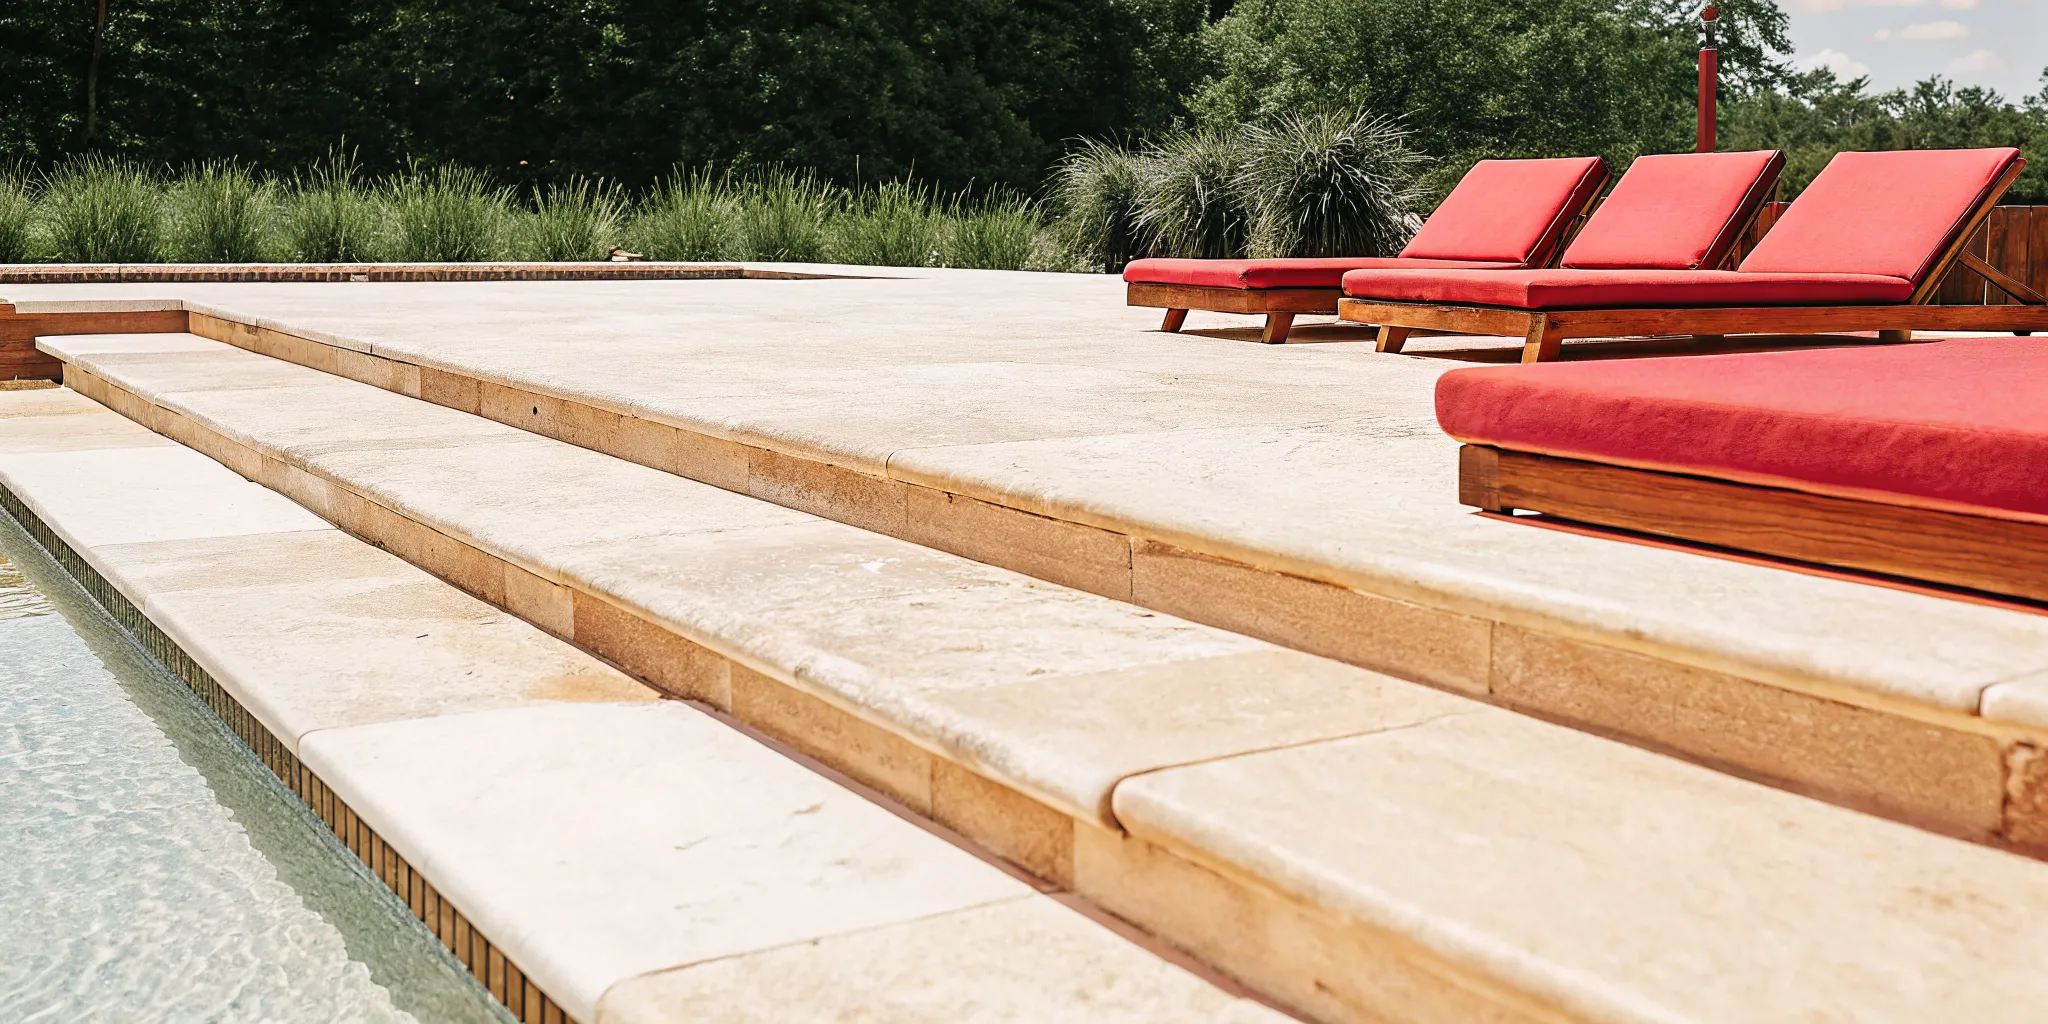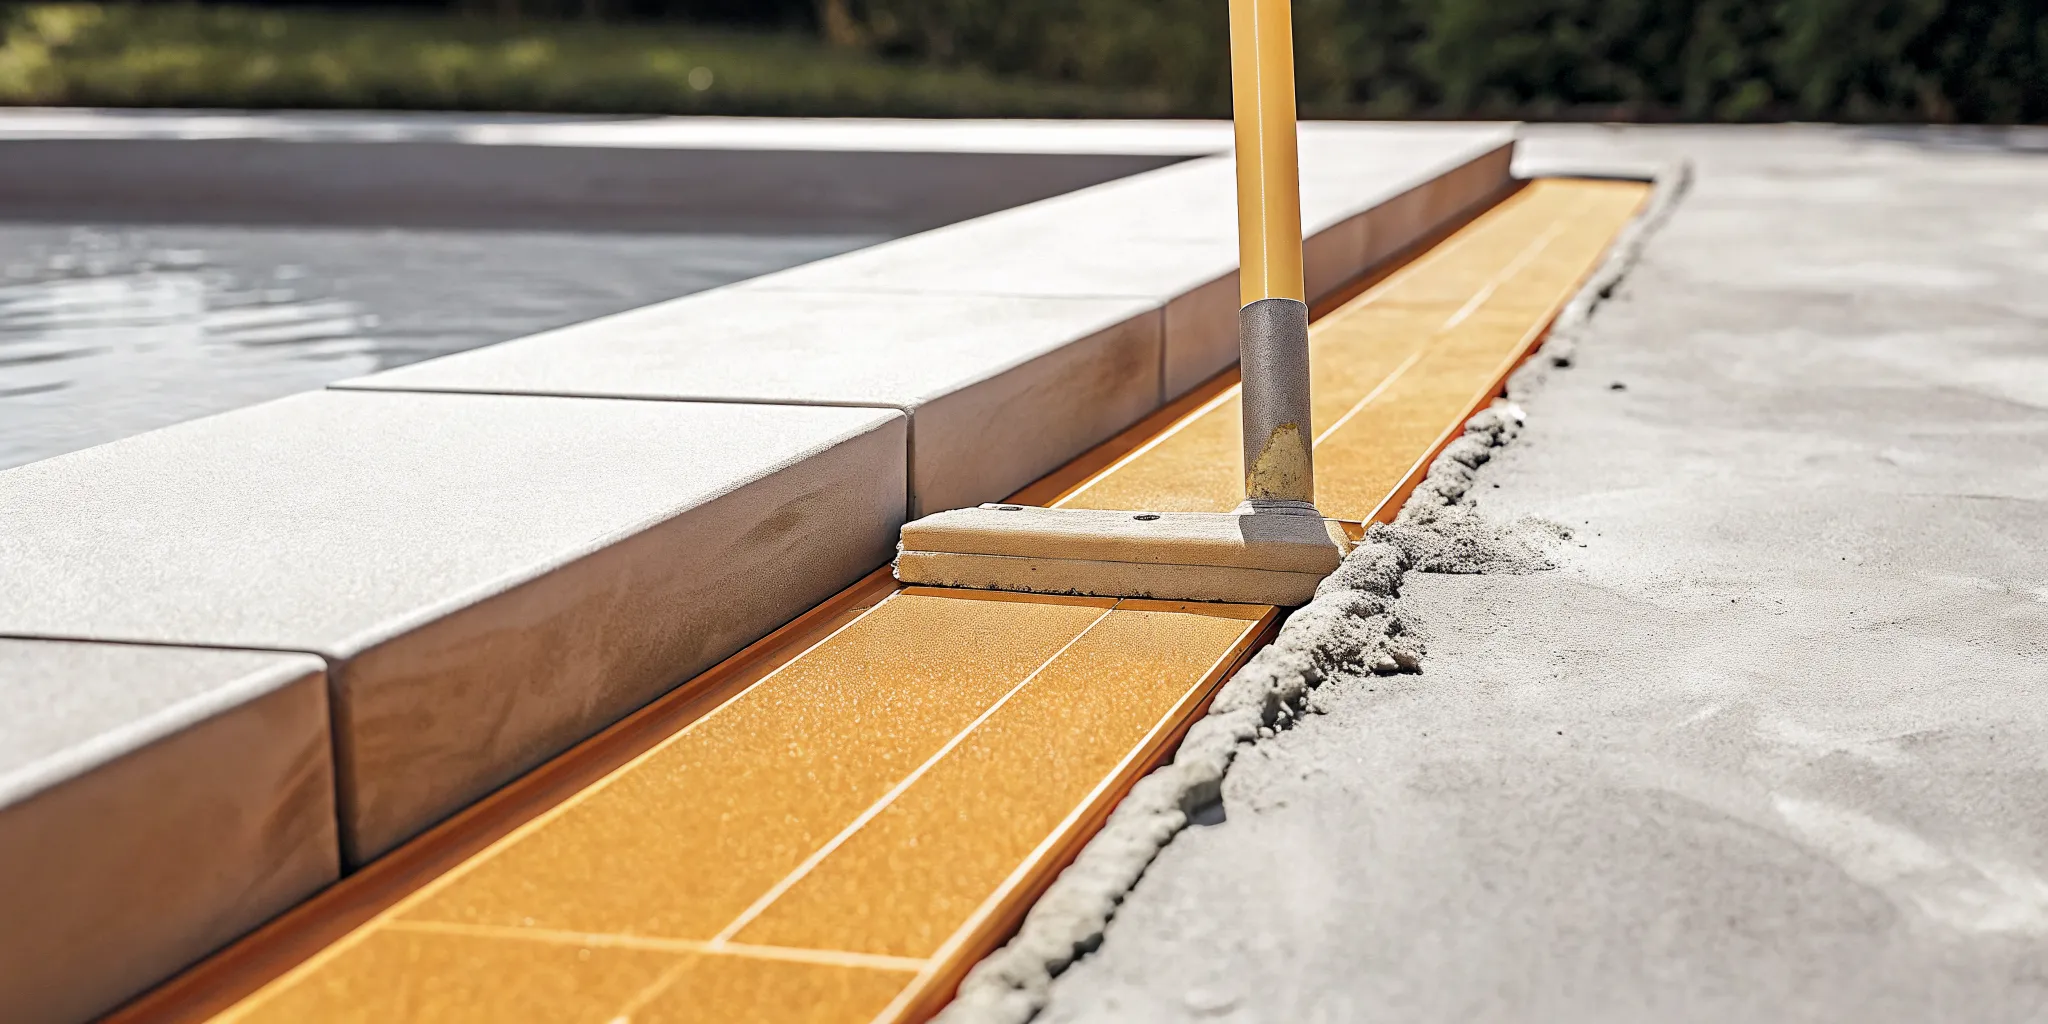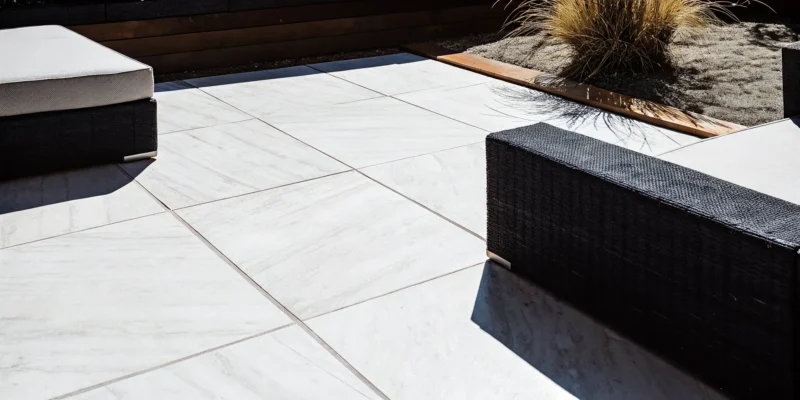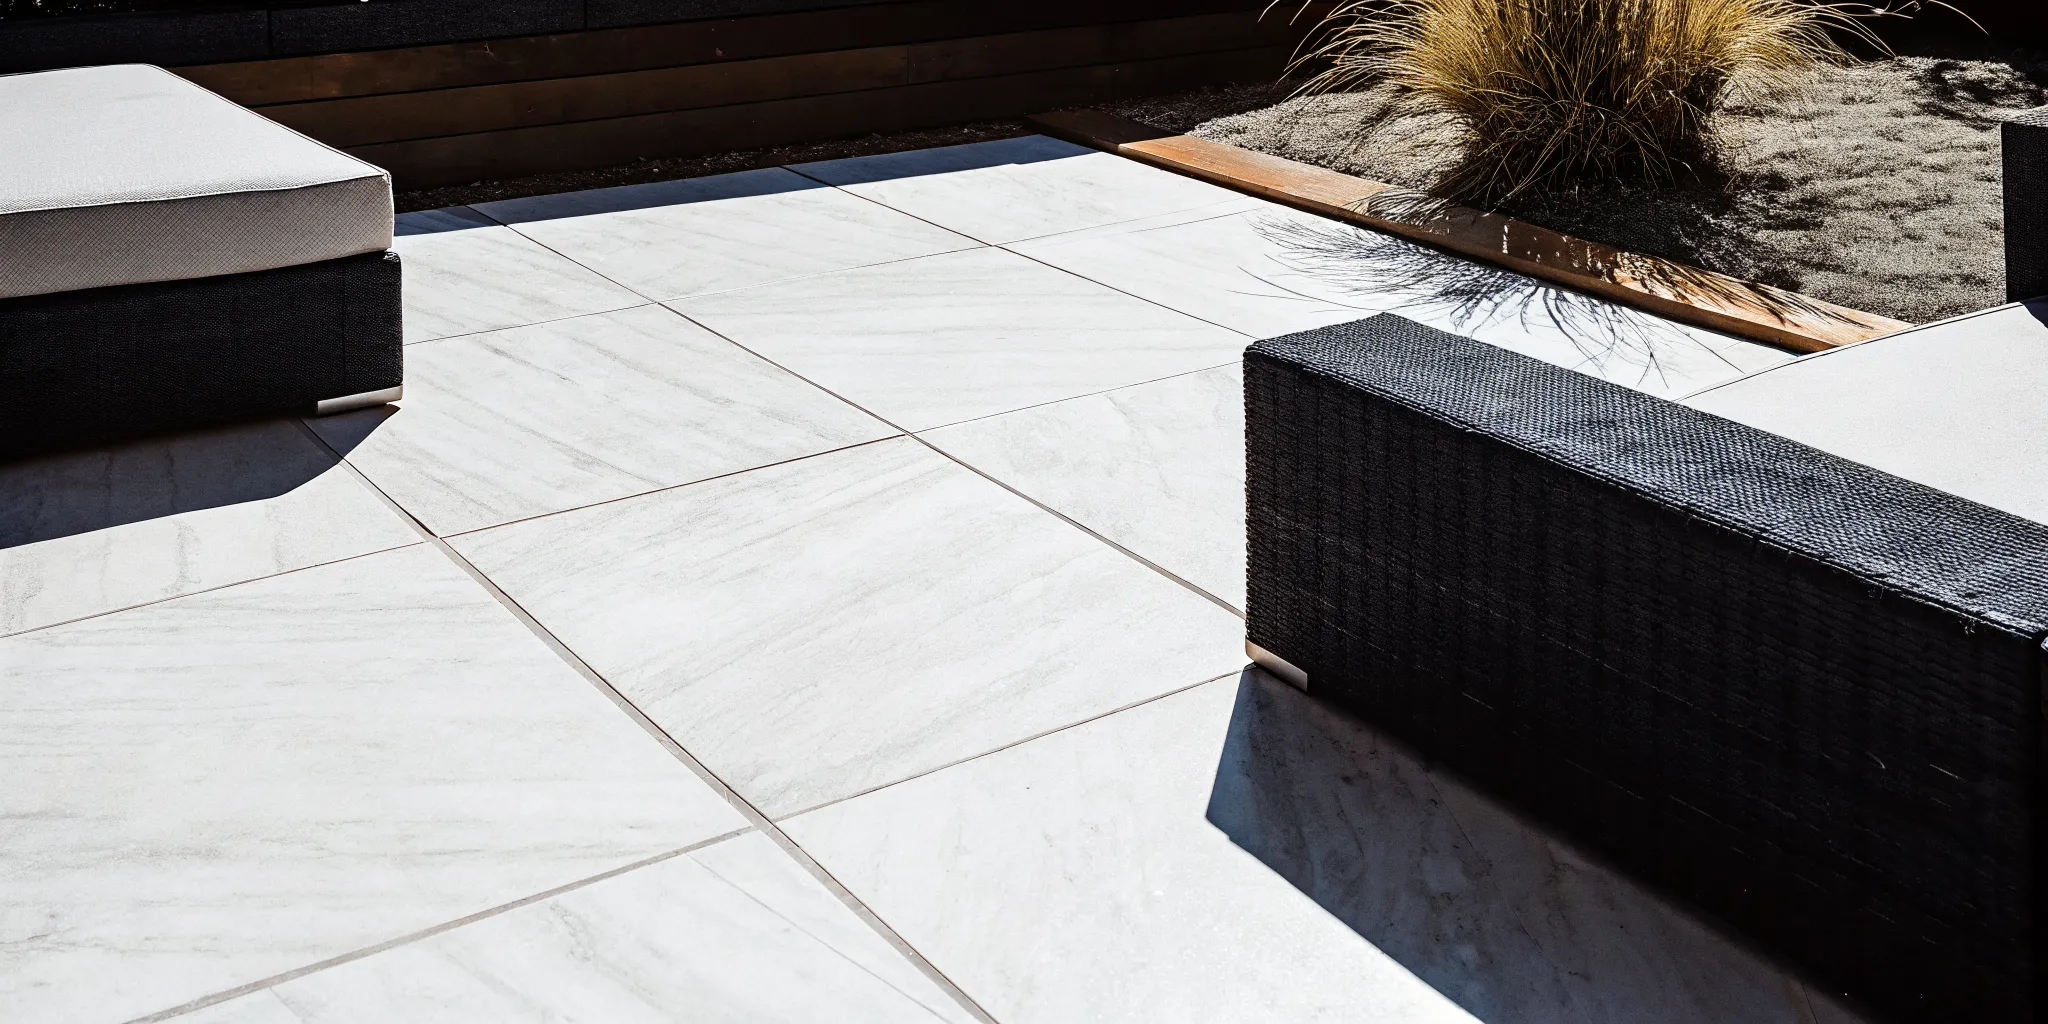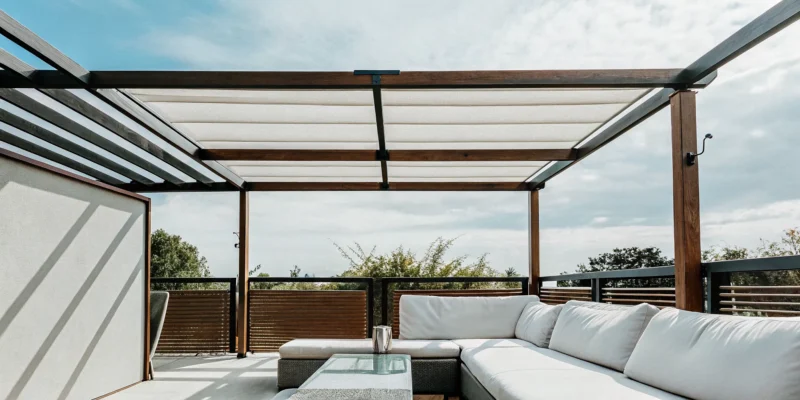
A pool patio showcasing the best paving materials, with natural stone pavers and a clean coping edge.

3 Best Paving Materials for Your Pool Patio & Coping

When you picture your perfect pool day, you probably see friends and family laughing, relaxing, and having fun. The foundation for all those great moments is a safe and comfortable patio. The right surface prevents slips and falls, feels good underfoot, and creates a welcoming environment for everyone. This is why selecting the best paving material for a pool patio and coping is about much more than just aesthetics. It’s about creating a secure space where you can relax without worry. Let’s explore the top materials that deliver on safety, comfort, and style, so you can build the perfect poolside retreat.

Key Takeaways

  • Focus on safety and comfort first: Your best material choice will have a non-slip texture to prevent accidents and a lighter color to keep bare feet comfortable on hot days.
  • Match your material to your home and climate: Select a paver that complements your home’s architecture and is durable enough to withstand pool chemicals and New York’s freeze-thaw cycles for a beautiful, long-lasting patio.
  • Remember that professional installation is key: The right material can fail without proper installation. Critical details like drainage, secure coping, and expansion joints are what make a patio safe, durable, and worth the investment.

What Are the Best Materials for Your Pool Patio?

Choosing the right material for your pool patio is one of the most important decisions you’ll make for your backyard oasis. The surface you select sets the tone for the entire space and plays a huge role in safety and comfort. You want something that looks beautiful, feels good under bare feet, and can stand up to splashes and sunshine. Let’s walk through the top three materials that homeowners love, so you can find the perfect match for your new swimming pool.

Natural Stone

If you’re dreaming of a rich, textured look with timeless appeal, natural stone is a wonderful option. Materials like travertine, bluestone, and flagstone offer unique patterns and colors that create a one-of-a-kind patio. Travertine is especially popular for pool areas because its porous nature helps with drainage and it stays surprisingly cool in the summer sun. While natural stone is a premium choice and can be more of an investment, its organic beauty is unmatched. A tumbled or brushed finish can also add extra grip, making it a safer surface for wet feet.

Porcelain Pavers

For a combination of modern style and incredible durability, porcelain pavers are hard to beat. They are specifically engineered for outdoor use, making them resistant to water, chlorine, salt, and fading from UV rays. This means your patio will look great for years with very little fuss. Porcelain is also a top choice for safety, as it offers excellent slip resistance. Plus, it doesn’t require sealing and is simple to clean. Choosing lighter-colored porcelain and natural stone pavers will also help keep the surface cooler for a more comfortable poolside experience.

Concrete Pavers

Concrete pavers are a fantastic all-around choice, giving you a great balance of style, durability, and value. They offer the strength of solid concrete but come in a huge variety of colors, shapes, and sizes, often designed to mimic the elegant look of natural stone. This versatility makes it easy to find a style that complements your home and landscape design. A key benefit for pool areas is their non-slip surface, which provides a safe and secure footing for family and guests. Concrete pavers are a practical and attractive solution that can bring your vision to life without stretching your budget.

What Makes a Great Pool Paving Material?

Choosing the right material for your pool patio goes far beyond aesthetics. While you definitely want a surface that looks beautiful, the best choices also deliver on safety, comfort, and long-term durability. Think about it: this is where your family and friends will spend countless summer days walking, playing, and relaxing. The right paving material creates a secure and enjoyable environment that can handle everything from cannonballs to cookouts.

When you start exploring your options, you’ll find that the best materials share a few key characteristics. They provide excellent grip, stay comfortable under bare feet, stand up to harsh pool chemicals, and manage water effectively. Let’s look at what makes a paving material truly great for a Long Island pool patio.

Prioritize Slip Resistance for Safety

Safety should always be your top priority around a swimming pool. Wet surfaces can be incredibly slippery, so choosing a non-slip material is essential for preventing accidents. The texture of the paver plays a huge role here. Materials with a slightly rough or matte finish, like tumbled travertine or brushed porcelain, offer much better traction than smooth, polished surfaces. When we design a pool patio, we select materials that meet or exceed industry safety standards for wet walking surfaces. This ensures your pool area is a safe space for everyone, from toddlers taking their first steps to grandparents enjoying the sun.

Ensure Comfort with Heat-Resistant Surfaces

We’ve all done the hot-pavement-dance on a scorching summer day. The material you choose for your pool deck can make the difference between a comfortable stroll and a mad dash for the shade. Dark, dense materials tend to absorb and hold onto heat, becoming uncomfortably hot for bare feet. Lighter-colored pavers are a great choice because they reflect more sunlight. Certain materials, like travertine, are naturally cooler to the touch, making them a popular and comfortable option. A heat-resistant surface ensures your patio remains a pleasant and usable space even during the peak of a Long Island summer.

Find Materials That Withstand Weather and Chemicals

Your pool patio has a tough job. It’s constantly exposed to direct sunlight, chlorinated or saltwater splashes, and the full range of New York’s four-season climate, including freeze-thaw cycles in the winter. You need a material that won’t fade, stain, or crack under pressure. High-quality porcelain and natural stone pavers are specifically designed for this environment. Materials like granite and certain types of concrete are incredibly dense and non-porous, which means they resist damage from both chemicals and weather, ensuring your investment looks great for years to come.

Understand Water Absorption and Drainage

Proper water management is critical for the safety and longevity of your pool patio. You want a surface that discourages water from pooling, which can create slipping hazards and lead to mildew growth. Textured pavers help water drain away more effectively than perfectly flat ones. However, the material itself is only part of the equation. A professional installation with a proper drainage system is just as important. Our masonry and construction teams ensure your patio is graded correctly, so water flows away from the pool and your home’s foundation, protecting your entire outdoor living space.

Comparing Your Top Material Choices

Now that you know what to look for in a pool paving material, let’s weigh the pros and cons of the top three contenders. Each one offers a unique blend of style, durability, and maintenance requirements, so thinking through your priorities will help you land on the perfect fit for your home.

The Pros and Cons of Natural Stone

Natural stone is a classic choice for a reason. Materials like travertine, bluestone, and flagstone bring an unmatched richness and texture to a pool patio. Because each stone is unique, you get a one-of-a-kind look with endless variations in pattern, shape, and color. This makes it easy to find natural stone options that feel like a true extension of your home. The biggest consideration with natural stone is the investment. It’s a premium material, and the cost reflects the intensive process of quarrying, finishing, and transporting it. While some stones like travertine are famous for staying cool on hot summer days, others can absorb more heat, so it’s important to choose wisely for a comfortable poolside experience.

The Pros and Cons of Porcelain Pavers

Porcelain pavers have become a go-to for modern pool patios, and it’s easy to see why. They offer incredible durability and a clean, sophisticated look. We especially recommend textured porcelain pavers because they provide a comfortable, slip-resistant surface that’s perfect for bare feet. One of the best things about porcelain is its resilience. It stands up to water, chlorine, salt, and harsh UV rays without fading or degrading. This means your patio will look great for years with very little effort. In fact, porcelain typically doesn’t require sealing, which is a huge plus for anyone who prefers low-maintenance outdoor living. It’s a practical and beautiful choice for any poolside design.

The Pros and Cons of Concrete Pavers

If you’re looking for a material that balances cost, style, and performance, concrete pavers are an excellent option. They give you the high-end look of natural stone without the premium price tag, making them a very popular choice for pool decks. You can find them in a huge variety of colors, sizes, and shapes, which gives you the creative freedom to design a patio that perfectly matches your vision. Textured concrete pavers also offer a reliable non-slip surface, keeping your pool area safe for family and friends. To get the most out of them, proper sealing and expert installation are key. When done right, they create a durable and stunning poolside retreat that will last for years.

Everything to Know About Pool Coping

Pool coping is one of those details that makes a huge difference in the final look and feel of your backyard oasis. It’s the finishing touch that frames your pool, but it does more than just look pretty. Think of it as the bridge between your pool and your patio. It provides a safe edge, a comfortable seat, and a protective cap for your pool’s structure. Choosing the right coping is a key step in designing a pool area that is both beautiful and functional.

What Is Pool Coping and What Does It Do?

So, what exactly is pool coping? It’s the material used to cap the edge of your pool shell. This cap serves a few important jobs. It protects the pool structure from the elements and prevents water from getting behind the shell, which could cause damage over time. It also creates a smooth, rounded edge that’s safe for swimmers to hold onto. Finally, it helps direct water that splashes out of the pool toward deck drains. Properly installed coping is essential for the longevity and safety of your swimming pool.

Popular Coping Edge Styles to Consider

Coping comes in several edge styles, and your choice influences both the safety and aesthetic of your pool. One of the most popular options is the bullnose edge, which is rounded and smooth. This style is comfortable to sit on and easy to grip, making it great for families. Another option is a rough-cut or chiseled edge, which offers a more rustic, natural look. You could also opt for a cantilevered edge, where the patio material extends slightly over the pool’s edge for a clean, modern finish. The style you select should complement your porcelain or natural stone patio.

How to Match Coping with Your Patio

Your pool coping should feel like a natural extension of your patio, not an afterthought. The key is creating a cohesive design that ties your outdoor space together. You can achieve a seamless look by using the same material for both your coping and your patio. Alternatively, you can create a beautiful visual contrast by choosing a coping material that complements your pavers in a different color or texture. For example, a dark gray coping can create a stunning frame around a light-colored patio. Our masonry design experts can help you find the perfect combination.

Breaking Down the Cost and Maintenance

Creating your dream pool patio is an exciting project, but it’s also a significant investment. To make the best choice for your home and budget, it’s helpful to look beyond the initial price tag and consider the full picture. This includes the upfront cost of materials and installation, the long-term upkeep required to keep your patio looking beautiful, and the importance of avoiding common installation errors that can lead to expensive repairs down the road. Thinking about these factors now will ensure you can relax and enjoy your poolside oasis for many years to come.

Your Initial Investment

The material you choose for your pool patio is the biggest factor in your initial cost. Natural stone, like travertine or bluestone, sits at the higher end of the price spectrum. This is because it’s expensive to quarry, finish, and transport these beautiful, one-of-a-kind materials. On the other hand, concrete pavers offer a more budget-friendly alternative. They give you the sophisticated look of natural stone without the premium price, making them a popular choice for achieving a high-end aesthetic. Exploring a wide selection of porcelain and natural stone options can help you find the perfect balance between your vision and your budget.

Planning for Long-Term Upkeep

To keep your pool patio looking its best season after season, a little maintenance goes a long way. Sealing your pavers is one of the most important steps, especially for natural stone. A quality sealant protects the stone from pool chemicals, stains, and the effects of Long Island’s weather. While most natural stone requires this protective layer, porcelain pavers are a fantastic low-maintenance option that usually doesn’t need sealing. Factoring in periodic cleaning and resealing will protect your investment and preserve its beauty. Gappsi offers professional restoration and sealing services to keep your patio in top condition.

Common Installation Mistakes to Avoid

Proper installation is just as important as choosing the right material. A professional installation prevents future headaches and ensures your patio lasts. One common mistake is mixing different paver sizes and shapes without a cohesive design, which can create a chaotic look. Another critical error is failing to install expansion joints where the pavers meet the pool coping. These joints allow the materials to expand and contract with temperature changes, preventing cracks and damage. Working with an experienced masonry and construction company ensures these crucial details are handled correctly from the start.

Design Tips for a Beautiful and Safe Pool Patio

Once you’ve narrowed down your material choices, it’s time for the fun part: designing a space that’s both stunning and secure. The right design choices go beyond just picking a pretty paver. They create a cohesive look that complements your home and a safe environment for your family and friends to enjoy all summer long. From the color palette to the surface texture, every detail plays a role in building your perfect poolside retreat.

A well-thought-out design ensures your patio is not only beautiful on day one but also functional and durable for years to come. Think about how you plan to use the space. Will it be a quiet spot for sunbathing, a lively area for kids to play, or an elegant setting for outdoor dining? Your answers will influence the layout, the type of pavers you choose, and even the patterns you incorporate. For example, a large, open pattern can make a small space feel bigger, while intricate designs can define different zones for lounging and dining. We help homeowners explore a wide range of porcelain and natural stone options to find the perfect fit for their vision and lifestyle. Getting these details right from the start is the key to creating an outdoor oasis you’ll love.

Choose Colors and Patterns You’ll Love

Your pool patio is an extension of your home, so its color scheme should feel personal and inviting. Pavers come in a huge range of colors, from warm, earthy tones that create a natural, rustic vibe to cool grays and blues for a more modern look. White pavers are a classic choice because they reflect sunlight, helping to keep the surface cooler on hot days. Beyond color, the pattern you choose can add a lot of personality. A simple running bond is timeless, while a herringbone or basketweave pattern can add a touch of custom detail. Think about what style best matches your home’s architecture and your personal taste.

Select the Right Texture for Safety and Style

When it comes to pool patios, safety is just as important as style. A wet surface can be a major slipping hazard, which is why texture is a critical consideration. Pavers with a naturally rough, tumbled, or brushed finish provide much better grip underfoot. Materials like travertine and textured concrete are excellent choices for this reason. They also help water drain away instead of pooling on the surface. This doesn’t mean you have to sacrifice looks for safety. The right texture can add visual depth and character to your patio, creating a rich, layered look that feels both elegant and secure. Our masonry design team can help you find the perfect balance.

Learn How to Seal and Protect Your Pavers

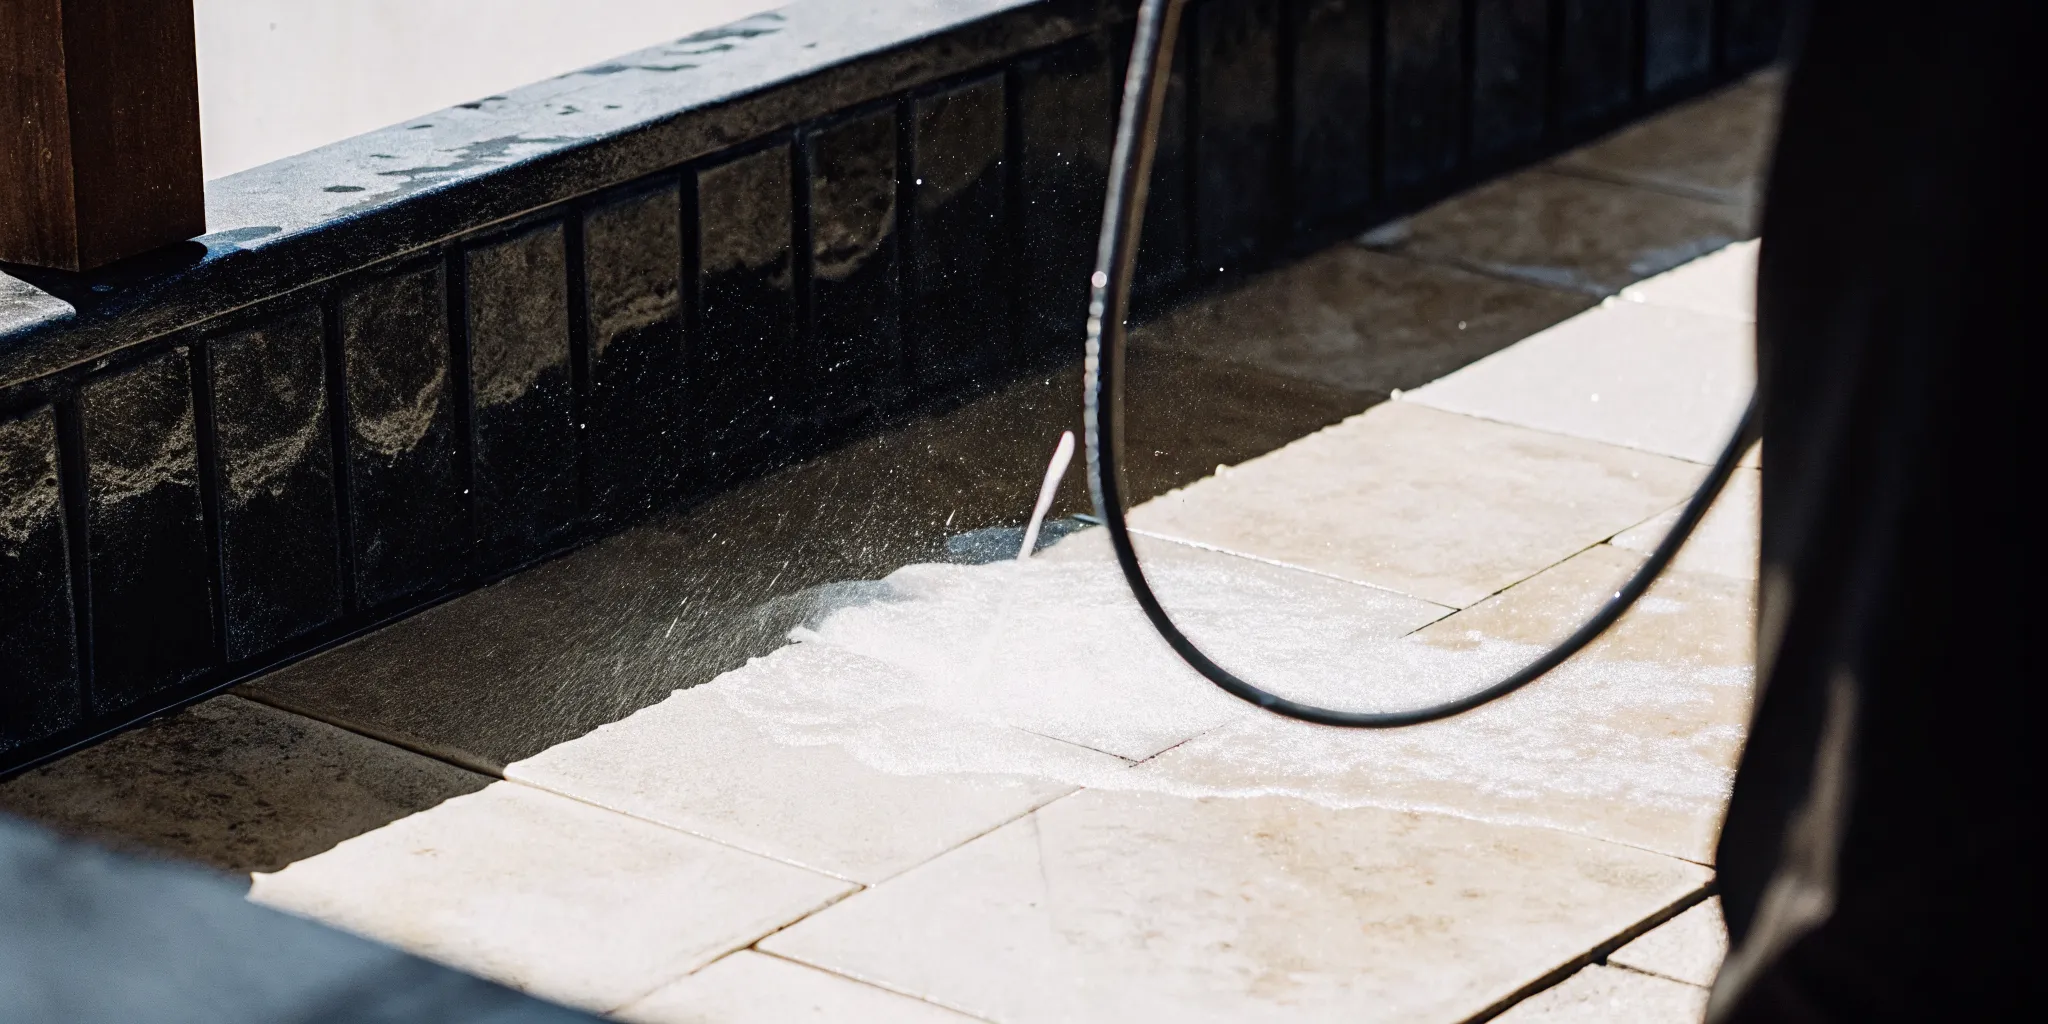
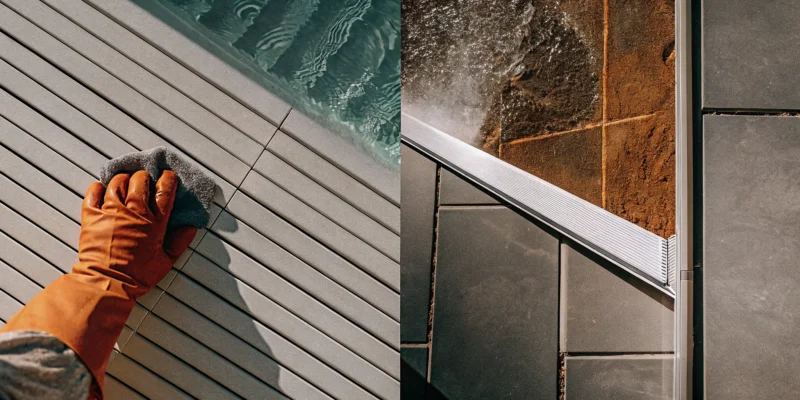
To keep your new pool patio looking its best, a little protection goes a long way. Sealing your pavers is a crucial step, especially for natural stone. A quality sealant protects the stone from stains, harsh pool chemicals, and fading caused by the sun. It also makes cleaning up spills much easier. While most natural stone benefits from sealing, high-density materials like porcelain pavers usually don’t need it, which is a great low-maintenance perk. Applying a sealant is a key part of long-term care that preserves the beauty and integrity of your investment. If you need help, our restoration and sealing services can ensure your patio stays in top condition.
How to Choose the Right Material for Your Long Island Home

Now that you know the top material options, let’s narrow down the perfect choice for your Long Island property. Your home’s location, style, and your family’s safety are all key factors in making a decision you’ll love for years to come. Thinking through these elements will help you select a material that is not only beautiful but also practical for our unique environment.

Consider New York’s Four-Season Climate

Living on Long Island means your outdoor patio has to endure everything from humid summer days to freezing winter nights. The constant freeze-thaw cycle can cause some materials to crack and degrade over time. That’s why it’s so important to choose durable options like dense natural stone or porcelain pavers, which are built to withstand these temperature swings. Beyond durability, think about safety. Materials with a bit of texture, like travertine or brushed concrete, provide better grip around the pool, reducing the risk of slips and falls during a summer splash or after a rainstorm.

Match Your Patio to Your Home’s Architecture

Your new pool patio should feel like a natural extension of your home, not an afterthought. Take a look at your home’s architectural style. Is it a classic colonial, a coastal cottage, or a modern build? The materials you choose should complement that aesthetic. For example, the profile of your pool coping can make a big impact. A rounded bullnose edge creates a soft, traditional look, while a sharp, drop-face edge offers a clean, contemporary feel. Our masonry design experts can help you select colors, patterns, and textures that harmonize with your home’s existing character.

Make Your Final Decision with Confidence

With your ideal material and style in mind, the final step is ensuring a safe and professional installation. Safety around a pool is non-negotiable. Industry standards require a minimum coefficient of friction for wet walking surfaces, a technical detail a professional installer will handle for you. It’s also critical that all pavers, especially the coping around the pool’s edge, are installed securely and perfectly level to prevent tripping hazards. Working with an experienced team on your swimming pool project guarantees that every detail is managed correctly, giving you a stunning and secure patio built to last.

Frequently Asked Questions

Which material is the safest for a family with young children? Safety is all about texture. For a pool area with lots of activity, you want a paver with a non-slip surface that provides excellent grip for wet feet. Textured materials like tumbled travertine, brushed porcelain, and certain concrete pavers are all fantastic choices. They offer much better traction than smooth or polished surfaces, which helps prevent slips and falls and gives you peace of mind.

My backyard gets a lot of direct sun. Which pavers will stay the coolest? To avoid a hot-pavement-dance, your best bet is to choose lighter-colored pavers, as they reflect more sunlight and absorb less heat. White, beige, or light gray options will feel much more comfortable underfoot on a hot day. If you love the look of natural stone, travertine is famous for staying naturally cooler to the touch, making it a premium and very comfortable choice for sunny pool decks.

How much maintenance does a new pool patio really need? The level of upkeep depends on the material you choose. Porcelain pavers are the easiest to care for since they are non-porous and don’t require sealing. Natural stone and concrete pavers, however, benefit greatly from being sealed. A quality sealant protects them from chlorine, salt, stains, and weather damage. Beyond that, regular sweeping and occasional washing will keep any patio looking its best.

Is it better to use the same material for the coping and the patio? There is no right or wrong answer here; it really comes down to the look you want to achieve. Using the same material for both the coping and the patio creates a seamless, uniform design that feels very cohesive. On the other hand, choosing a contrasting coping material, perhaps in a darker or complementary color, can create a beautiful frame around your pool and add a custom design element.

What’s the biggest mistake people make when choosing patio materials? A common mistake is focusing only on appearance while overlooking function. It’s easy to fall in love with a beautiful, sleek paver, but if it gets dangerously slippery when wet or scorching hot in the sun, you won’t be happy with it long-term. The best approach is to find a material that balances the style you want with the safety, comfort, and durability your family needs for a poolside space.

Elevating the Game: A Custom Racquetball Court Installation in Long Beach, NY

View Gappsi’s YouTube Channel to view Elevating the Game: A Custom Racquetball Court Installation in Long Beach, NY

When it comes to home improvement and outdoor recreation, few things add as much value and excitement as a professional-grade sports game court. At Gappsi, we take pride in transforming underutilized spaces into world-class athletic environments. Our latest project takes us to the beautiful coastal community of Long Beach, NY, where we recently completed a stunning custom racquetball court that blends high-performance engineering with sleek, modern aesthetics.

This project is a testament to how Gappsi can take an existing, aging footprint and revitalize it into something spectacular. If you’ve been dreaming of a backyard arena but aren’t sure how to handle existing concrete or irregular yard shapes, this Long Beach installation serves as the perfect blueprint.

The Foundation: Breathing New Life into Existing Concrete

One of the most common questions we receive from homeowners in Long Beach and across Long Island is: “Do I need to rip out my old concrete patio or basketball pad to build a new court?” The answer, as demonstrated by this project, is a resounding no.

For this specific installation, the client had an existing concrete slab. While the concrete was structurally sound, it was aesthetically dated and lacked the shock absorption required for high-impact sports like racquetball. Instead of the costly and invasive demolition process, Gappsi used the existing slab as a sub-base.

By working with the existing foundation, we saved the client time and minimized the project’s environmental impact. However, installing over old concrete requires a keen eye for precision, especially when that concrete isn’t perfectly square.

The Surface: Mateflex Tiles and “Top Court” Style

To achieve a professional feel, we utilized Mateflex modular tiles for this custom racquetball court. Mateflex is the industry standard for outdoor sports surfacing for several reasons:

  1. Drainage: The open-grid design allows water to flow through the tiles and off the concrete, ensuring the court dries quickly after a Long Beach rain shower.

  2. Safety: These tiles offer excellent lateral forgiveness, reducing the strain on players’ knees, ankles, and lower backs compared to playing directly on concrete.

  3. Durability: They are UV-stabilized, meaning the vibrant colors we chose will stay bright despite the constant exposure to salt air and sun.

For this project, we opted for the “Top Court” style. This specific tile configuration is designed for multi-sport versatility and provides the consistent ball bounce and traction necessary for the fast-paced nature of racquetball.

Aesthetic Excellence: The Blue Gradient

Visual appeal is a hallmark of a Gappsi court. For this Long Beach residence, we moved away from the traditional green or red surfaces and leaned into a sophisticated, aquatic-inspired color palette that fits perfectly with the South Shore vibe.

  • The Center: We used a deep Navy Blue for the primary playing area in the custom racquetball court. This dark hue provides a high-contrast background, making it easier for players to track the fast-moving racquetball.

  • The Perimeter: To create a sense of depth and boundary, we used a vibrant Royal Blue for the out-of-bounds areas.

  • The Markings: To tie it all together, the court was professionally striped with crisp White Lines. The result is a sharp, “pro-league” look that stands out as a focal point of the backyard.

Elevating the Game A Custom Racquetball Court Installation in Long Beach NY

Seamless Integration: Keeping the Hoops

At Gappsi, we believe in functional design. The client had an existing basketball hoop already anchored into the site. Rather than removing it, we meticulously installed the Mateflex tiles and the synthetic turf border around the existing pole. This allows the space to remain a multi-functional “Sport Game Court,” where the family can transition from a high-intensity racquetball match to a casual game of HORSE without needing separate facilities.

A Mirror Image: The Gappsi Legacy

One of the most distinctive aspects of this job is its history. Just on the other side of the property wall sits another sports game court that Gappsi installed several years ago.

Standing between the two, it feels like looking at a mirror image of excellence. Seeing the older court still in fantastic condition is a testament to the longevity of our materials and the quality of our craftsmanship. The new racquetball court complements its “older brother” perfectly, creating a massive, contiguous sports complex within the property that is truly a rare find in Long Beach.

The Finishing Touch: Synthetic Turf Framing

Perhaps the most important detail for “curb appeal” was the decision to frame the court with high-quality synthetic turf.

As mentioned earlier, the original concrete slab was not perfectly square. This is a common issue with older construction. If we had simply laid the tiles and left them, the “crooked” edges of the concrete would have been an eyesore.

Our solution was to use synthetic turf to “square up” the visual field. We framed the entire court with a lush green border, which serves several purposes:

  • Separation: It creates a clean, distinct border between the athletic court and the perimeter fence.

  • Problem Solving: In areas where the concrete was narrow, we used a thin strip of turf; in areas where the concrete fell short of the fence line, we used more turf to fill the gap.

  • Maintenance: The turf provides a “buffer zone” that prevents grass clippings or dirt from blowing onto the court surface, keeping the Mateflex tiles cleaner for longer.

The contrast between the Royal Blue tiles and the vibrant green turf gives the entire backyard a manicured, resort-like feel.

Why Choose Gappsi for Your Long Beach Sports Game Court?

This Long Beach racquetball court is the latest example of why Gappsi remains the leader in outdoor sports environments on Long Island. We don’t just “lay down tiles”, we engineer solutions. Whether it’s dealing with non-square foundations, integrating existing equipment, or matching the aesthetic of a previous installation, our team handles every detail from concept to completion.

Long Beach residents know that the salt air and coastal weather can be tough on outdoor structures. By choosing Gappsi and materials like Mateflex and premium synthetic turf, you are investing in a court that is built to withstand the elements while providing endless hours of fitness and fun.

Ready to Build Your Dream Court?

From racquetball and basketball to pickleball and tennis, Gappsi is ready to transform your backyard. This latest project in Long Beach shows that no matter the shape of your existing space, we can create a professional, beautiful, and durable court tailored to your style.

Contact Gappsi Today

📍 Serving all of Long Island, NY — Nassau & Suffolk Counties
🌐 https://www.gappsi.com/
📞 Call now for a free consultation and estimate

SCHEDULE A MEETING TODAY WITH GAPPSI

Thermo-Spruce SaunaLife GL4 outdoor sauna kit with a full-glass front and modern Scandinavian design.

The Ultimate SaunaLife GL4 Outdoor Sauna Kit Guide

Your backyard should be more than just open space; it should be a true extension of your home, filled with features that bring you joy and relaxation. When considering a new addition, you want something that is both functional and beautiful. This is where the SaunaLife GL4 Outdoor Sauna Kit truly shines. It’s not just a place to get warm; it’s a sophisticated piece of backyard architecture. With its clean Scandinavian lines, full-glass front, and high-quality Thermo-Spruce construction, it adds a touch of modern luxury to any outdoor setting. In this article, we’ll explore how this sauna can transform your property, blending seamlessly with patios, pools, and gardens to create the ultimate personal retreat.

Key Takeaways

  • Premium Materials Meet Modern Design: The GL4 is crafted from durable, weather-resistant Thermo-Spruce and features a stunning full-glass front, creating a sophisticated wellness retreat that is built to last.
  • Personalize Your Sauna Session: With app-controlled lighting and a two-level bench system for different heat intensities, you can easily create the perfect atmosphere for relaxation or socializing.
  • Ensure a Solid Foundation: A successful installation starts with a perfectly level site and requires a licensed electrician for the wiring; proper preparation is key to ensuring your sauna is safe and stable for years of use.

What is the SaunaLife GL4?

If you’ve ever dreamed of having a personal wellness retreat right in your backyard, the SaunaLife GL4 is designed to make that a reality. This isn’t just any outdoor sauna; it’s a thoughtfully crafted kit that brings an authentic Scandinavian sauna experience to your home. It’s designed for those who appreciate both modern aesthetics and genuine relaxation. The GL4 combines high-quality materials with a sleek, contemporary look, making it a stunning focal point for any outdoor living space.

Think of it as more than just a place to get warm. It’s a dedicated space for you and your family to unwind, de-stress, and focus on your well-being. Whether you’re looking to soothe sore muscles after a workout or simply escape for a few quiet moments, this sauna provides the perfect setting. At Gappsi, we see it as a beautiful extension of your home, blending seamlessly with other outdoor features like patios and pools. It’s an investment in your home and your health, all wrapped up in one elegant package.

Specs and Sizing

The SaunaLife GL4 is designed to be a shared experience, comfortably fitting up to four people. This makes it ideal for enjoying a session with family or hosting a few friends for a relaxing evening. It’s a substantial unit, weighing in at 1650 pounds, which speaks to its solid and durable construction. You can feel confident that it’s built to last. The size is generous enough for a small group but still compact enough to fit into most backyard designs without overwhelming the space. It strikes the perfect balance between being a personal retreat and a social wellness hub.

Built with Thermo-Spruce Wood

One of the standout features of the GL4 is the material it’s made from: thermally treated Nordic spruce, or “Thermo-Spruce.” The walls and roof are constructed from thick, 1.57-inch wood that has undergone a special heat treatment process. This process makes the wood incredibly resistant to moisture, rot, and fungi, which is essential for an outdoor structure, especially with Long Island’s varied weather. This treatment also enhances the wood’s insulation properties, helping the sauna heat up efficiently and maintain its temperature. It’s a smart, durable choice that ensures your sauna will stand strong for years to come.

Its Scandinavian Design

The SaunaLife GL4 is all about clean lines and modern simplicity, true to its Scandinavian roots. It features a sleek, linear style that feels both timeless and contemporary. This isn’t a rustic, cabin-style sauna; it’s a sophisticated architectural piece that adds a touch of luxury to your property. The design is meant to complement your home and landscape, much like a well-designed pavilion or pergola. It’s crafted to be a beautiful addition that you’ll be proud to show off, creating a high-end resort feel right in your own backyard.

Key Features and Design

The SaunaLife GL4 is more than just a place to get warm; it’s a thoughtfully crafted piece of backyard architecture. Every element, from the materials to the technology, is chosen to create a seamless and luxurious wellness experience. The design focuses on blending the comfort of the indoors with the beauty of your outdoor space, making it a true retreat. It’s these specific features that really set the GL4 apart and make it a standout choice for homeowners looking to add a high-end sauna to their property. Let’s look at the key design elements that make this sauna so special.

Full-Glass Front

One of the most striking features of the GL4 is its beautiful full-glass front. This isn’t just for looks; it completely transforms the sauna experience. Instead of feeling enclosed, you feel connected to your backyard, allowing natural light to pour in and create a bright, open atmosphere. The bronze-tinted tempered glass provides a sense of privacy while still offering clear views of your garden or patio. This design choice makes the sauna feel spacious and inviting, turning it into a stunning focal point for your outdoor living space. It’s a modern touch that perfectly complements the natural wood construction.

Smart Wi-Fi Lighting

The GL4 comes equipped with a sophisticated, waterproof LED lighting system that you can control right from your phone. Using a simple app or remote, you can adjust the color and brightness to create the perfect ambiance for your session. Whether you want a soft, warm glow for a quiet evening of relaxation or a more colorful light for a social sauna session, you can set the mood with just a tap. This smart lighting feature adds a layer of modern convenience and personalization, making each visit to your sauna a unique and tailored experience. It’s a small detail that makes a big difference in your overall enjoyment.

Two-Level Benches

Inside the GL4, you’ll find two levels of wide, comfortable benches made from smooth, knot-free wood. This tiered design is a classic feature of authentic Scandinavian saunas and serves a very practical purpose. Heat rises, so the upper bench is always the hottest spot, perfect for those who love intense heat. The lower bench offers a milder temperature, which is great for longer sessions or for those who are new to saunas. This flexibility allows everyone to find their perfect comfort zone. The benches are spacious enough to stretch out and relax, ensuring your time in the sauna is as comfortable as it is restorative.

Designed for Natural Light

Beyond the glass front, the entire structure is designed to maximize natural light and your connection to the outdoors. The large glass panel and door work together to create an open, airy feeling that helps you relax and unwind without feeling confined. You can watch the seasons change in your backyard, enjoy a view of the stars at night, or simply appreciate the daylight while you de-stress. This thoughtful design ensures the sauna doesn’t just sit in your yard; it becomes a part of it. It’s an immersive experience that lets you enjoy the wellness benefits of a sauna while staying connected to the beauty of your own personal sanctuary.

How Does the SaunaLife GL4 Compare?

When you’re looking to add a sauna to your backyard, you’ll find a lot of options out there. The SaunaLife GL4 really stands out from the crowd, not just for its beautiful design, but for the thoughtful details that go into its construction. It’s more than just a hot room; it’s a complete wellness experience designed to last a lifetime. Let’s look at what makes this particular model a top choice for homeowners who value quality, technology, and authentic craftsmanship. We’ll explore the materials, the smart features, the design heritage, and whether it truly offers good value for your investment.

Quality of Materials and Build

The GL4 is built like a fortress, but a beautiful one. It uses thick, 1.57-inch thermally treated Nordic Spruce for the walls and roof. This special treatment makes the wood incredibly durable and provides excellent insulation, which is perfect for keeping the heat in during a cool Long Island evening. Inside, the benches and backrests are made from smooth, knot-free Aspen wood, so you can relax in total comfort. This focus on premium materials ensures your sauna will stand the test of time, much like the high-quality porcelain and natural stone we use for patios and walkways. It’s a structure built for a lifetime of use.

The Benefit of Smart Tech

What I love about the GL4 is how it blends traditional sauna culture with modern convenience. It comes with a waterproof LED lighting system that you can control right from your phone or with a simple remote. This means you can set the perfect mood before you even step inside, whether you want a bright, energizing light or a soft, calming glow. The exterior lights under the eaves also add a welcoming touch to the porch area. It’s a smart feature that makes your sauna experience completely personal, similar to how custom lighting can transform pavilions and pergolas into the perfect evening retreat.

Craftsmanship and Design

There’s an authenticity to the SaunaLife GL4 that you can feel. Each kit is handcrafted in Northern Europe, the heart of sauna culture, where this practice has been perfected over generations. This isn’t a mass-produced item; it’s a piece of genuine Scandinavian design with impeccable attention to detail. From the precise fit of the wood panels to the clean lines of the full-glass front, the craftsmanship is evident. This commitment to quality construction mirrors our own approach to projects like custom masonry, where expert skill and artistry make all the difference in the final result.

Is It Worth the Investment?

Let’s talk about value. The SaunaLife GL4 is a premium product, and its price reflects that. But it’s best to think of it as a long-term investment in your home and your well-being. This sauna is built to last, backed by a lifetime warranty that gives you complete peace of mind. When you consider the health benefits and the countless hours of relaxation it provides, the value becomes clear. Adding a feature like this can transform your backyard into a personal wellness retreat, much like installing a swimming pool does. It’s an asset that enhances your lifestyle and your property for years to come.

What to Expect During Installation

Bringing a sauna to your backyard is an exciting project, and the SaunaLife GL4 kit is designed to make the process as smooth as possible. While it’s created with the confident DIYer in mind, a successful installation always starts with a good plan. Think of it in three main phases: preparing the site, assembling the structure, and handling the electrical hookups. Each step is crucial for ensuring your sauna is safe, stable, and ready for years of enjoyment. Proper preparation prevents future headaches and protects your investment.

Before you even open the box, you’ll want to have a clear vision for where the sauna will live and how it will integrate with your existing outdoor space. This is where professional planning can make a huge difference. Our team at Gappsi specializes in creating cohesive backyard designs, ensuring your new sauna feels like a natural extension of your home. We can help you think through everything from the foundation to the surrounding landscaping, making sure every detail is perfect. Whether you decide to build it yourself or prefer a full-service installation, knowing what to expect will help you get the most out of your new wellness retreat.

Assembling the Pre-Cut Kit

The SaunaLife GL4 Outdoor Sauna Kit is engineered for a straightforward DIY installation. It arrives as a complete package with everything you need to build the structure. Inside, you’ll find interlocking wall panels, benches, the roof, porch components, floorboards, and metal flashing. This pre-cut and fitted design takes the guesswork out of the process, allowing the pieces to fit together logically. It’s a bit like a life-sized puzzle, but with a much more rewarding result. The interlocking wall beams simplify the main assembly, making it a manageable project for two people over a weekend.

Common Challenges and How to Solve Them

While the kit is designed for easy assembly, it’s helpful to know about a few potential challenges. The beautiful full-glass front and door are signature features, but they are quite heavy. It’s essential to take your time and have a second person on hand to help lift and set them in place safely. Rushing this step can lead to accidents or damage. The interlocking wall beams make the build much easier, but an extra set of hands is still recommended to hold things steady as you work. Patience and teamwork are your best tools here.

Preparing Your Foundation and Site

A solid foundation is the most critical part of your sauna installation. Before you begin assembly, you must prepare a perfectly solid and level site. This ensures the sauna is stable, the door hangs correctly, and water drains away properly. A poorly prepared base can cause structural issues over time. You have a few options for the foundation, including a concrete slab or a compacted gravel pad. Our masonry design and construction team can create a custom concrete base that provides the ultimate stability for your new sauna.

Electrical and Professional Help

Unless you are a licensed electrician, the electrical work is one part of the installation you should not attempt yourself. It’s strongly recommended to hire a professional for this step to ensure everything is safe and up to code. Most sauna heaters require a dedicated 240V circuit, which is different from a standard household outlet. The lighting and controls also need a 120V connection. A licensed electrician will run the correct wiring from your home’s electrical panel to the sauna, ensuring a secure and reliable power source for your heater and accessories.

Understanding the Price and Warranty

Investing in a luxury item like an outdoor sauna involves understanding the full scope of the cost, delivery, and the protection that comes with your purchase. Getting clear on these details upfront helps you plan your project and gives you confidence in your decision. From the initial kit price to custom add-ons and warranty coverage, here’s what you need to know about bringing a SaunaLife GL4 to your Long Island home.

Breaking Down the Kit Price

The SaunaLife GL4 kit, designed to comfortably fit up to four people, is a significant investment in your home’s wellness and entertainment value. The kit is competitively priced at $9,490.00, which is a notable savings from its original list price. This cost reflects the high-quality Thermo-Spruce materials, thoughtful Scandinavian design, and advanced features like full-glass fronts and smart lighting. When you purchase one of Gappsi’s premium saunas, you are not just buying a product; you are adding a permanent, high-value feature to your property that offers relaxation and health benefits for years to come.

Custom Options and Costs

One important detail to remember is that the sauna heater is purchased separately from the GL4 kit. While this might seem like an extra step, it’s actually a great opportunity for customization. You can choose a heater that perfectly fits your preferences and budget, whether you want a traditional model or one with modern Wi-Fi capabilities for remote control. This flexibility allows you to tailor your sauna experience. At Gappsi, we specialize in creating personalized spaces, and helping you select the right components is part of our complete home remodeling service.

Shipping and Delivery

Planning for your sauna’s arrival is straightforward. The SaunaLife GL4 kit is shipped on a large wooden pallet via a freight carrier. The delivery is “curbside,” meaning it will be delivered to the street level. Customers will receive tracking updates and a call to schedule the delivery, ensuring a smooth and organized process. This allows you to prepare the space and coordinate with our installation team to have everything ready for a smooth and efficient assembly. This organized process ensures you can prepare the space and coordinate with our installation team to have everything ready for a smooth and efficient assembly.

What the Warranty Covers

Your investment in a SaunaLife sauna is protected by a manufacturer’s warranty, which provides peace of mind regarding the quality and durability of the product. The warranty details cover the structural integrity and components of the sauna, ensuring it stands up to the elements and regular use. You can typically find specific warranty information in the product details section on the Gappsi store. Having professionals handle the installation also ensures that your sauna is assembled correctly, which is often essential for keeping the warranty valid. We make sure every part of the process is handled with care.

What Do Owners Say?

Reading through product specs is one thing, but hearing from people who actually own and use the SaunaLife GL4 every day gives you the real story. We looked at reviews and owner feedback to get a clear picture of what it’s like to bring this sauna into your backyard. It’s important to know what you’re getting into, from the moment the kit arrives to your first relaxing session. Owners consistently talk about a few key areas: the impressive build quality, the hands-on assembly process, its fantastic performance, and the customer support that backs it all up. This kind of firsthand insight is invaluable when you’re deciding on a major addition to your home, like one of our custom saunas. Let’s break down what people are saying.

Reviews on Build Quality

One of the most common points of praise for the SaunaLife GL4 is its exceptional build quality. Owners often mention that the materials feel substantial and high-end. One review noted, “the thermo-spruce walls and roof are thick and feel premium. Benches are heavy, smooth, and comfortable.” This isn’t just about aesthetics; it’s about durability and creating an authentic, luxurious experience. The choice of Thermo-Spruce for the walls and smooth Aspen for the benches shows a commitment to quality that you can feel. It’s this focus on using the right high-quality materials that ensures your sauna will not only look great but will also stand the test of time.

The Assembly Experience

For those who enjoy a good DIY project, the assembly process is often described as straightforward. The interlocking wall beams are designed to fit together smoothly, which simplifies the construction. However, owners do offer some practical advice. One mentioned that “the glass front and door look great but are heavy, so take your time installing them.” This is a key takeaway: while the kit is designed for user assembly, having a second person to help is a smart move, especially for lifting the heavy glass panels. Of course, if you prefer a hands-off approach, our team has extensive experience with home construction projects and can handle the installation for you.

How It Performs

When it comes to performance, the feedback is overwhelmingly positive. Users feel the sauna is “built to last a lifetime,” a testament to its strong Nordic Spruce exterior and smooth, knot-free Aspen interior. This thoughtful combination of woods does more than just look good. It ensures the sauna heats efficiently, retains warmth, and provides a comfortable place to relax without worrying about knots or rough surfaces. This level of performance is what turns a simple hot room into a true wellness retreat. It’s the kind of lasting quality we build into all of our outdoor structures, from pavilions to pergolas.

Customer Service Feedback

Great products are backed by great support, and owners have good things to say about their customer service experiences. Reviews often highlight that the sales and service teams are helpful and responsive, making the entire process from purchase to setup much smoother. One owner pointed out that the company “prides itself on having one of the best return policies in the industry.” This provides valuable peace of mind. When you purchase through the Gappsi Store, you get the benefit of our local expertise combined with the assurance that the manufacturer stands firmly behind its product.

Health and Wellness Benefits

Adding a sauna to your backyard is more than just a luxury upgrade; it’s an investment in your well-being. The SaunaLife GL4 is designed to be a personal retreat where you can unwind, recharge, and focus on your health. From easing sore muscles after a workout to providing a quiet space for meditation, the benefits of regular sauna use are extensive. It creates a dedicated space for you and your family to disconnect from daily stress and reconnect with each other. This beautiful structure quickly becomes a central part of a healthier, more relaxed lifestyle, right in the comfort of your own home.

The Authentic Sauna Experience

The SaunaLife GL4 delivers a true Scandinavian sauna experience, which is essential for reaping its full wellness benefits. This isn’t just about getting hot; it’s about the specific, enveloping heat that a well-crafted sauna provides. Built with premium Nordic Spruce, the GL4 is designed for optimal heat circulation and retention, creating a deeply therapeutic environment. This authentic experience helps improve circulation, soothe muscles, and cleanse the skin. Gappsi offers a range of high-quality saunas that bring this time-honored tradition to your Long Island backyard, ensuring you get a genuine and effective wellness tool that will last for years.

How It Helps You Relax

Every detail of the SaunaLife GL4 is crafted to create a tranquil sanctuary. The interior features smooth, knot-free Aspen wood for the benches and backrests, which stays comfortable to the touch even at high temperatures. This thoughtful choice of materials contributes to a serene atmosphere where you can truly let go of stress. The solid construction and beautiful design make you feel secure and peaceful the moment you step inside. Think of it as your personal escape, a dedicated space for quiet reflection or unwinding after a long day. Creating these pockets of peace is a key part of any successful home remodeling project.

Enjoy Wellness All Year

One of the best things about the GL4 is that it’s a year-round wellness destination. Imagine warming up in the sauna on a chilly fall evening or relaxing your muscles after a summer day spent in the pool. With space for up to five people, it’s perfect for sharing with family and friends. The full-glass front and large side window let in beautiful natural light, making the space feel open and connected to your garden. Plus, the waterproof LED lighting system, controlled by an app, lets you set the perfect mood for any occasion. It’s a versatile addition that complements other backyard features like swimming pools, making your outdoor space a hub for health and happiness throughout the year.

How to Maintain Your SaunaLife GL4

One of the best things about the SaunaLife GL4 is that it’s designed for relaxation, not for adding more chores to your list. Its high-quality materials and smart construction mean maintenance is straightforward. With just a little bit of regular care, your sauna will remain a stunning and functional centerpiece in your backyard for years to come. Think of it as protecting your investment in wellness. A few simple steps each season will ensure it’s always ready for you to unwind and recharge, no matter what the Long Island weather brings.

Caring for the Thermo-Spruce Wood

The beautiful exterior of the GL4 is made from Thermo-Spruce, a type of wood that’s been heat-treated to resist moisture and decay. This process makes it incredibly durable and perfect for our local climate. To keep the wood looking its best, simply clean it occasionally with a soft brush and a mild, soapy water solution to remove any dirt or pollen. To protect it from the sun and maintain its rich color, you can apply a UV-inhibiting sealant every couple of years. If you prefer a hands-off approach, our professional restoration and sealing services can keep your sauna’s exterior in pristine condition.

Maintaining the Tech and Lighting

The GL4’s modern features, like its Wi-Fi-controlled LED lighting, are built to last but benefit from simple check-ins. Keep the remote control in a dry, convenient spot and occasionally wipe down the interior and exterior light fixtures with a soft cloth to keep them shining brightly. It’s also a good idea to periodically check that the Wi-Fi connection is stable so you can always set the mood with a tap on your phone. These small steps ensure the smart technology that makes your sauna experience so seamless continues to work perfectly every time you step inside.

Seasonal Care for Long Island Weather

The SaunaLife GL4 is built to handle everything from summer humidity to winter snow. Its thick walls and smart roof design are made for four-season enjoyment. In the fall, make sure to clear any leaves or debris from the roof to allow for proper water drainage. After a winter storm, gently brush any heavy snow off the top to prevent excess weight. In the spring, it’s a great time to give the sauna a quick inspection and cleaning to wash away the winter grime. This simple seasonal routine ensures your sauna is always prepared to offer a warm escape, whatever the season.

Is the SaunaLife GL4 Right for You?

Deciding on a major addition to your home, like an outdoor sauna, involves more than just picking a model you like. You need to know it will fit your space, stand up to the elements, and match your home’s style. The SaunaLife GL4 is a fantastic choice for many, but let’s walk through the key considerations to see if it’s the perfect fit for your Long Island backyard. Thinking about where it will go, how it will handle our coastal weather, and how it complements your existing outdoor living area will help you make a confident decision.

Finding the Perfect Spot

The SaunaLife GL4 is designed to be a lasting feature in your yard, so choosing the right location is key. You’ll need a solid, level foundation, which could be a concrete slab or a reinforced deck. The sauna is built to last a lifetime, using strong Nordic Spruce wood for the outside and smooth, knot-free Aspen wood for the inside benches and backrests. This quality construction means it deserves a well-prepared spot. Our masonry experts can create the perfect patio or base to ensure your sauna is stable and secure, setting the stage for years of relaxation.

Will It Withstand Long Island Weather?

Living on Long Island, we know our weather can be unpredictable. From humid summers to snowy winters, any outdoor structure needs to be tough. The SaunaLife GL4 is built to handle all kinds of weather. Its thick, thermally treated spruce walls and insulated glass keep the heat in, while the smart roof design helps water drain away effectively. This thoughtful engineering protects your investment from the elements, so you can enjoy your sauna year-round without worry. It’s a durable addition that’s truly designed for four-season use, giving you a reliable wellness retreat right in your backyard.

Fitting It Into Your Backyard Design

Your backyard is an extension of your home, and any new feature should feel like it belongs. The SaunaLife GL4 shines here because its design looks both modern and rustic, so it should fit well in any backyard. It features a full-glass front and a large side window, letting in plenty of natural light and creating a connection with the outdoors. This aesthetic versatility means it can blend seamlessly with a lush garden, a sleek modern patio, or a cozy space next to one of our custom pavilions or pergolas. It doesn’t just add function; it enhances the overall beauty of your space.

Related Articles

Frequently Asked Questions

Why isn’t the heater included with the sauna kit? The heater is sold separately to give you more control over your sauna experience. This allows you to choose a model that fits your specific preferences, whether you want a traditional electric heater or a modern one with Wi-Fi controls. It ensures you get the exact performance and features you want, rather than being locked into a standard package.

Can Gappsi install the sauna for me, or is it only a DIY project? While the SaunaLife GL4 is designed as a kit for those who enjoy a hands-on project, you absolutely do not have to build it yourself. Our team at Gappsi offers complete, professional installation services. We can handle everything from preparing the foundation and assembling the structure to coordinating with a licensed electrician to ensure it’s all done perfectly.

How long does the sauna typically take to heat up? The time it takes to reach your desired temperature can vary, but you can generally expect it to be ready in about 45 to 60 minutes. This depends on the power of the heater you choose and the outdoor temperature. The GL4’s excellent insulation from the thick Thermo-Spruce wood helps it heat efficiently and hold its temperature well once it’s warm.

What is the main difference between Thermo-Spruce and regular wood? Thermo-Spruce is Nordic spruce that has been treated with a special heat and steam process. This treatment makes the wood much more resistant to moisture, rot, and insects, which is essential for an outdoor structure on Long Island. It also improves the wood’s stability and insulation, so your sauna is built to last and performs beautifully through every season.

What kind of foundation does the SaunaLife GL4 require? A solid and perfectly level foundation is crucial for the sauna’s stability and longevity. The best options are a concrete slab or a compacted gravel pad. An uneven base can cause issues with the structure and the door alignment over time. Our masonry team can design and build the ideal foundation to ensure your sauna has the secure base it needs.

Finnmark FD-7 combination barrel sauna with Thermo-Aspen wood benches and glass door.

Finnmark FD-7 Sauna Review: Is It Right For You?

When you decide to add a sauna to your home, one of the first questions you face is: traditional steam or modern infrared? Each offers unique benefits, from the intense, purifying heat of a Finnish sauna to the deep, muscle-soothing warmth of infrared therapy. It can feel like you have to choose one over the other. The Finnmark Thermo-Aspen Combination Barrel Sauna FD-7 completely changes the conversation by giving you both. This hybrid model is designed for those who refuse to compromise, blending a powerful traditional heater with advanced infrared panels. It’s the perfect solution for your backyard wellness retreat.

Key Takeaways

  • Get the best of both worlds with dual heating: The FD-7 combines a traditional steam heater and modern infrared panels, so you can choose between a classic, steamy sweat session or a deep, muscle-soothing warmth.
  • Built with durable, high-quality materials: The sauna is constructed from thick, thermally treated Aspen wood, which resists warping and moisture, ensuring it remains a beautiful and functional part of your backyard for years.
  • Control your sauna from anywhere: With Wi-Fi connectivity and a user-friendly app, you can preheat your sauna on your way home, making it easy to fit a relaxing session into your schedule without the wait.

What Is the Finnmark FD-7 Combination Sauna?

If you’re exploring ways to create a personal wellness retreat in your backyard, the Finnmark FD-7 Combination Sauna is a compelling option. It’s a premium 4-person hybrid barrel sauna, which means it blends the timeless tradition of steam heat with the targeted benefits of modern infrared technology. This dual-function design is its standout feature, giving you complete control over your relaxation experience. Some days you might crave the intense, moist heat of a classic Finnish sauna, while on others, the deep, gentle warmth of infrared might be what your body needs. With the FD-7, you don’t have to choose. This flexibility makes it an incredible addition to any home, easily accommodating the different preferences of family members and guests. It transforms a corner of your property into a year-round sanctuary for health and relaxation. Integrating one of these high-quality saunas into your landscape design is a fantastic way to invest in your home and your well-being, creating a dedicated space to unwind and recharge without ever having to leave. The beautiful barrel shape is not just for aesthetics; it promotes efficient air circulation, ensuring even heat distribution for a more comfortable and effective session. It’s a statement piece that signals a commitment to a healthier, more relaxed lifestyle.

How Its Dual Heating Technology Works

The magic of the FD-7 lies in its dual heating system. You can enjoy a traditional Finnish experience by pouring water over heated stones to create a wave of relaxing steam. At the same time, the sauna is equipped with Finnmark Spectrum Plus™ Infrared Heaters. These advanced heaters produce both mid and far-infrared waves that warm your body directly, penetrating deep into muscles and joints. This process can trigger significantly more sweat than standard heaters, which helps with detoxification. This combination allows you to customize your session, using one method or blending both for a truly unique and therapeutic experience.

A Look at Its Construction and Materials

Built to last, the FD-7 is constructed from thick, 1.5-inch Thermo-Aspen wood staves. This thermally treated wood is incredibly durable and provides excellent insulation, keeping the heat right where you want it. Inside, you’ll find smooth Canadian Cedar benches that are comfortable and add a clean, classic look to the interior. The design also features an 8mm thick tempered glass door and windows, which give it an open, upscale feel while letting in natural light. To top it off, it includes a shingle roof kit to protect the structure from the elements, ensuring your sauna remains a beautiful backyard feature for years.

Sizing It Up: Dimensions and Capacity

The Finnmark FD-7 is designed to comfortably seat up to four people, making it a great choice for small families or for enjoying a wellness session with friends. The exterior measures 75 inches wide, 79 inches deep, and 75 inches high. Inside, the space is 66 inches wide, 72 inches deep, and 71 inches high. This generous layout provides plenty of room to relax without feeling cramped. Before you decide, it’s always a good idea to measure your intended space to ensure a perfect fit for your new backyard escape.

Explore the FD-7’s Standout Features

The Finnmark FD-7 isn’t just another barrel sauna; it’s a thoughtfully designed wellness retreat packed with features that cater to both traditional sauna lovers and modern tech enthusiasts. What really makes it stand out is how it blends high-quality, natural materials with powerful and versatile heating technology. From the moment you step inside, you can feel the difference that premium wood and advanced engineering make. This sauna is built for performance and convenience, giving you the best of both worlds.

You get the choice between a classic, steamy heat session or a deep, penetrating infrared warmth, all within the same beautiful structure. This means you don’t have to choose one type of sauna experience over the other. Plus, with smart controls, you can have your sauna ready and waiting for you, perfectly heated to your liking. It’s this combination of durability, dual-heating functionality, and user-friendly tech that makes the FD-7 a top contender for anyone looking to add a personal sauna to their home. Let’s look at the specific features that bring this experience to life and see what sets it apart from other options on the market.

Durable Thermo-Aspen Wood and Cedar Benches

The foundation of any great sauna is the wood, and the FD-7 is built with some of the best. It uses thick, 1.5-inch staves of Thermo-Aspen, a type of wood that has been heat-treated to remove moisture and resin. This process makes it incredibly durable and resistant to warping or decay, which is exactly what you want for an outdoor structure. Inside, the benches are crafted from smooth Canadian Cedar. This wood is naturally antimicrobial and gives off a subtle, clean aroma when heated, adding a classic sensory element to your sauna session. This careful selection of materials ensures your sauna not only looks beautiful but is also built to last for years.

Low-EMF Infrared Heaters

For those who prefer a gentler, deeper heat, the FD-7 includes low-EMF infrared heaters. These heaters are UL-listed for safety and designed to produce very low levels of electromagnetic fields, giving you peace of mind while you relax. Unlike traditional heaters that warm the air around you, infrared technology heats your body directly. This allows for a more intense sweat at a lower temperature, which many people find more comfortable. The heat penetrates deep into your muscles, making it an excellent choice for soothing aches and pains after a long day or a tough workout.

Powerful 4.5kW Traditional Heater

If you’re a fan of the classic Finnish sauna experience, the FD-7 has you covered with its powerful 4.5kW traditional heater. This robust unit can heat the sauna up to 185°F, creating the intense, enveloping heat that traditionalists love. It also comes with sauna stones, so you can ladle water over them to produce a satisfying burst of steam, or “löyly.” This feature lets you control the humidity inside the sauna, customizing each session to your preference. Having this powerful traditional heater makes the FD-7 a truly versatile, two-in-one unit that doesn’t compromise on performance.

Smart Controls: Wi-Fi and Touchscreen

The FD-7 seamlessly blends traditional relaxation with modern convenience through its smart control system. It features a built-in LCD touchscreen panel that is intuitive and easy to use. Even better, it has Wi-Fi capability, allowing you to connect to the sauna through an app on your phone. This means you can turn the sauna on and set your preferred temperature from anywhere, whether you’re on your way home from work or just finishing up in another part of the house. It’s a simple feature that makes it so much easier to fit a sauna session into your busy schedule.

How Does the FD-7 Compare to Other Barrel Saunas?

When you start looking at barrel saunas, you’ll quickly notice they aren’t all the same. The Finnmark FD-7 really stands apart from the crowd, and it comes down to a few key differences in its design, materials, and technology. While many saunas offer either a traditional steam experience or an infrared one, the FD-7 combines both. This hybrid approach gives you incredible flexibility, letting you choose the type of heat you’re in the mood for on any given day.

Beyond its heating system, the FD-7 is built with premium materials that are chosen for longevity and performance, especially in an outdoor setting. Think of it like choosing high-quality natural stone for your patio versus a standard concrete slab; the right materials make all the difference in durability and aesthetics. From its thermally treated wood to its advanced control panel, every element is designed to provide a superior and more convenient experience. Let’s break down exactly how the FD-7 stacks up against other options on the market.

Dual Heating vs. Single-Method Saunas

The most significant feature of the FD-7 is its dual-heating system. Most barrel saunas force you to choose between a traditional electric heater that creates steam when you pour water on the rocks, or modern infrared panels that heat your body directly. The FD-7 gives you both. This means you can enjoy the intense, steamy heat of a classic Finnish sauna one day and the deep, gentle warmth of an infrared session the next. This versatility is a game-changer, as it allows you to tailor your sauna experience to your specific wellness goals, whether that’s a deep sweat session or gentle muscle relaxation.

Comparing Material Quality and Durability

The FD-7 is crafted from 1.5-inch thick Thermo-Aspen wood, which is a huge step up from the pine or spruce used in many standard barrel saunas. This thermal treatment process makes the wood incredibly durable, resistant to rot and moisture, and stable in changing weather conditions, which is essential for any outdoor structure on Long Island. Inside, the benches are made from smooth, antimicrobial Canadian Cedar, adding a beautiful contrast and a pleasant, natural aroma. This focus on premium, long-lasting materials ensures your sauna will not only look great but will also stand the test of time.

A Look at Tech and Control Features

This is where the FD-7 really shines. It’s equipped with Finnmark’s Spectrum Plus infrared heaters, which deliver both mid- and far-infrared waves. This technology allows the heat to penetrate more deeply into your muscles for more effective relief. Many basic infrared saunas use standard carbon heaters that don’t offer this full-spectrum benefit. Plus, the FD-7 comes with a modern touchscreen control panel that is Wi-Fi enabled. This lets you preheat your sauna from your phone, so it’s ready to go the moment you are, a level of convenience you won’t find in models with simple analog dials.

How It Stacks Up on Heat-Up Time and Efficiency

No one wants to wait around forever for their sauna to get hot. Thanks to its powerful 4.5kW traditional heater and excellent insulation from the thick Thermo-Aspen staves, the FD-7 heats up noticeably faster than many competitors. Customer reviews frequently mention how impressed they are with the speed and quality of the heat. This efficiency isn’t just about convenience; better heat retention means the sauna doesn’t have to work as hard to maintain its temperature, which can be more energy-efficient in the long run. It delivers a powerful, consistent heat that makes every session feel perfect.

What Health Benefits Can You Expect From Dual Heating?

One of the most significant advantages of the Finnmark FD-7 is its hybrid heating system. Instead of forcing you to pick between a traditional steam sauna and a modern infrared one, it gives you both. This combination means you can customize each session to fit your exact needs, whether you’re looking for intense, sweat-inducing heat or a gentle, deep-penetrating warmth. By blending these two technologies, the FD-7 offers a wider range of health benefits than a single-method sauna ever could. You get the classic, purifying experience of a steam sauna paired with the targeted, therapeutic relief of infrared heat, creating a truly comprehensive wellness tool for your home.

The Wellness Benefits of a Traditional Steam Sauna

Most saunas make you choose between traditional steam or infrared therapy, but the FD-7 gives you both inside one beautiful Thermo-Aspen barrel. This allows you to enjoy the timeless ritual of a steam sauna, where you can ladle water over hot stones to create a wave of enveloping steam known as “löyly.” This humid heat is incredible for deep relaxation, opening up your pores for clearer skin, and supporting respiratory health. Having one of these saunas at home means you can access these wellness benefits whenever you need to unwind and reset.

How Infrared Therapy Soothes Deep Tissue

While traditional saunas heat the air around you, infrared technology works differently. Infrared heat feels ‘softer’ than traditional steam but can be deeper and more muscle-penetrating. It warms your body directly, providing a gentle heat that works its way deep into your muscles and joints. This makes it especially effective for easing muscle tension after a workout or a long day spent landscaping your yard. The infrared heaters in the FD-7 offer a therapeutic warmth that helps you recover faster and feel more relaxed from the inside out.

Find Relief for Muscle and Back Pain

If you deal with everyday aches and pains, the targeted heat of the FD-7 can make a real difference. The placement of the infrared heaters is designed for maximum therapeutic benefit. In fact, many users have shared that, “The back heaters really help reduce my back pain.” This focused heat helps soothe soreness and stiffness in specific areas, making it a valuable tool for managing discomfort. Imagine having a personal retreat in your backyard that not only helps you relax but also provides tangible relief for your most persistent aches.

Support Detox and Improve Circulation

The FD-7’s powerful heating system allows you to create an environment perfect for detoxification and improved circulation. You can reach up to 190°F with the traditional heater while still enjoying the muscle-soothing benefits of infrared heat. This intense temperature encourages a deep sweat, which helps your body flush out toxins. At the same time, the heat causes your blood vessels to expand, which can improve circulation. This process delivers more oxygen to your cells and leaves you feeling refreshed and energized after every session.

What Do Customers Say About the FD-7?

When you’re considering a significant addition to your home, hearing from people who already own it can be incredibly helpful. It gives you a real-world perspective on performance, quality, and the overall experience. We looked through reviews and feedback from Finnmark FD-7 owners to see what they’re saying about this popular combination sauna. From its sturdy build to its unique heating system, here’s a summary of what customers are sharing about their investment in home wellness.

Feedback on Build Quality

One of the most consistent points of praise for the FD-7 is its solid construction. Customers frequently mention the high-quality materials, noting that it’s built with thick, 1.5-inch full-length Thermo-Aspen staves. This thermally treated wood isn’t just beautiful; it’s also exceptionally durable and resistant to warping and moisture, which is essential for an outdoor structure. Owners appreciate that this robust build promises longevity, ensuring their wellness investment will last for years. The pleasant, natural aroma of the wood also adds to the premium experience, making the sauna a beautiful feature in any backyard. This focus on superior materials is something we value in all our custom home projects.

Reviews on Heating and Comfort

The dual-heating system is a standout feature, and customers love the flexibility it offers. Many users describe the infrared heat as a “softer” warmth that penetrates deep into the muscles, perfect for recovery after a workout. At the same time, they have the option for a classic, intense steam session with the powerful traditional heater. One owner mentioned that “this Finnmark heat is noticeably better and heats up faster,” a huge plus when you want to unwind without a long wait. This versatility means different family members can enjoy their preferred sauna experience, or you can choose your session based on your wellness goals for the day.

What People Say About Customer Service

Beyond the product itself, customers often highlight their positive interactions with the company. Good customer service provides peace of mind, especially with a purchase that requires assembly and electrical setup. One reviewer simply stated, “Customer service was excellent,” a sentiment echoed in other feedback. Knowing that a responsive and helpful team is available to answer questions about ordering, installation, or operation makes the entire process smoother. This level of support ensures you feel confident in your purchase from start to finish, which is a standard we uphold in every one of our sauna installations.

Gauging Overall Satisfaction

Overall satisfaction with the FD-7 is very high, with customers often expressing that the sauna meets or exceeds their expectations. One happy owner said, “I am very happy with my purchase. The max temperature was the biggest selling point for me.” Others point to a seamless experience, with one review noting, “The order process was quick and easy, the sauna arrived on-time, installation was simple, and the sauna is extremely high quality.” This powerful combination of a great product, a straightforward process, and reliable performance is what ultimately leads to so many positive recommendations from users who feel their investment was well worth it.

Installing Your FD-7: What to Expect

Bringing a new sauna into your home is an exciting step toward creating your personal wellness retreat. The good news is that the Finnmark FD-7 is designed for a relatively straightforward installation. Whether you’re a hands-on type or prefer to leave it to the experts, understanding the process will help make everything go smoothly.

At Gappsi, we handle every detail of your home and backyard projects, including the complete installation of beautiful saunas like the FD-7. Our goal is to make the process seamless, so you can start relaxing as soon as possible.

Planning Your Space and Location

First things first, you’ll need to decide where your new sauna will live. The FD-7’s barrel shape and durable, thermally modified Aspen wood construction make it a perfect fit for outdoor spaces. You’ll need a solid, level surface to serve as its foundation, like an existing deck or a new patio area. A well-prepared base is key to ensuring your sauna is stable and lasts for years.

When planning, think about both aesthetics and convenience. Do you want it close to the house for easy access or nestled in a private corner of your garden? Our team can help you design the perfect setting, whether it involves creating a new stone patio with our masonry services or integrating it into your existing landscape.

Understanding the Electrical Needs

Getting the electrical setup right is the most important technical step for your sauna installation. The FD-7 has dual heating systems, and each has its own requirements. The infrared heaters need a 120v 15a connection, while the powerful 4.5kW traditional heater requires a dedicated 240v circuit. This is not a simple plug-in appliance, so a licensed electrician must perform the hookup to ensure everything is safe and up to code.

This is a critical part of the process where professional help is essential. When you work with a full-service team like Gappsi, we coordinate all the electrical work for you. We ensure that the power supply is correctly installed, so you can enjoy your sauna with complete peace of mind.

What to Expect During Assembly

Once your site is prepped and the electrical is ready, it’s time for assembly. The Finnmark FD-7 arrives neatly packed in a crate, with all the components ready to be put together. The sauna is designed for an efficient build, and the process is surprisingly quick. The interlocking staves and pre-assembled elements make the structure come together logically.

While it’s designed to be user-friendly, having a professional team handle the assembly ensures a perfect, secure fit and finish. Our installers are experienced with these kits and can have your sauna built and ready for use in just a few hours, leaving you with a beautifully assembled sauna ready for your first session.

The Details: Pricing, Warranty, and Financing

Making a significant addition to your home involves understanding the complete financial picture. Beyond the initial excitement, it’s smart to look at the cost, the protection you get for your investment, and how you can make the purchase work for your budget. Let’s walk through the pricing, warranty, and financing options for the Finnmark FD-7 sauna so you have all the information you need.

Breaking Down the Cost

Investing in a high-quality sauna like the Finnmark FD-7 is an investment in your home and well-being. The current price for this model is $9,495, which is a significant savings from its original price of $10,999. While this is a considerable purchase, the cost reflects its premium Thermo-Aspen construction, dual-heating technology, and durable design built for years of use. When you consider the long-term health benefits and the value it adds to your property, the price becomes a clear investment in your lifestyle. At Gappsi, we offer a curated selection of high-quality saunas to ensure you find the perfect fit for your home and budget.

What the 5-Year Warranty Covers

Your peace of mind is important, and a solid warranty is a big part of that. The Finnmark FD-7 comes with a 5-year limited warranty that covers the core structure and materials of the sauna itself. This means the wood, benches, and overall construction are protected against manufacturing defects. This coverage shows that the manufacturer stands confidently behind their craftsmanship. For an outdoor structure that will become a permanent part of your home, knowing it’s built to last and backed by a strong warranty provides essential security for your investment.

Understanding the Lifetime Heater Warranty

The heating system is the heart of any sauna, and the FD-7’s warranty is truly exceptional here. The Spectrum Plus infrared heaters are covered by an unlimited lifetime warranty. This is a powerful statement about their quality and durability. It means you can relax and enjoy the therapeutic benefits without worrying about the cost of replacing the most critical technological components down the road. This level of protection is rare and highlights the manufacturer’s commitment to long-term performance, ensuring your sauna remains a reliable retreat for years to come.

Exploring Your Financing Options

Bringing a luxury sauna home shouldn’t feel out of reach. To make the process more accessible, flexible payment options, including financing, are available for the Finnmark FD-7. This allows you to spread the cost over time, making it easier to manage the investment while you start enjoying the benefits right away. Breaking down the total into manageable monthly payments can make it a practical addition to your home improvement plans. You can explore all purchasing options and find the right products for your dream backyard at the Gappsi Store.

What Maintenance Does the FD-7 Require?

One of the best things about the Finnmark FD-7 is how simple it is to care for. You get all the benefits of a luxury sauna without a demanding upkeep schedule. Keeping your sauna in top condition comes down to a few straightforward habits that protect the beautiful wood and ensure the heaters run perfectly for years. Think of it as a simple routine, not a list of chores.

Regular cleaning prevents the buildup of sweat and oils, preserving that fresh, clean feeling every time you step inside. The Thermo-Aspen wood has its own simple care needs to maintain its rich color and durability. Finally, a quick check of the heater system is all it takes to keep it performing efficiently. By following these easy steps, you can make sure your sauna remains a pristine and inviting retreat in your home. At Gappsi, we can help you with any questions about maintaining your new sauna and other home wellness features.

Simple Steps for Regular Cleaning

To keep your sauna feeling fresh, a consistent cleaning routine is key. If you’re using it frequently, about four or five times a week, a weekly deep clean is a great habit to form. Start by vacuuming the interior to remove any loose dirt or debris. Then, gently wipe down the benches, walls, and backrests with a damp cloth after your sessions to manage sweat and keep the wood pristine. For a more thorough cleaning, you can use a mild soap and water solution to scrub the surfaces. This simple process helps maintain a hygienic environment so you can fully relax and enjoy your sauna experience.

How to Care for the Thermo-Aspen Wood

The FD-7 is built with beautiful Thermo-Aspen wood, and caring for it is surprisingly easy. The most important rule is to avoid harsh chemicals or abrasive cleaners, as they can damage the wood’s surface. A simple solution of mild soap and water is all you need for cleaning. It’s also a good idea to periodically inspect the wood for any signs of wear. To keep it looking its best and protect it from moisture, you can treat it with a suitable wood conditioner designed for saunas. This small step preserves the wood’s natural beauty and ensures its longevity.

Maintaining the Heater System

The advanced Spectrum Plus™ infrared heaters in the FD-7 require very little maintenance. Your main task is to keep the heater panels clean and free of dust. A quick wipe with a dry cloth is usually enough to maintain their efficiency and ensure they heat up properly. It’s also wise to visually inspect the system now and then to make sure everything looks right. Following the manufacturer’s guidelines for operation will help your heaters function perfectly for a long, long time, giving you a reliable and relaxing experience with every use.

Is the Finnmark FD-7 the Right Sauna for You?

Deciding on the perfect sauna for your home is a big step. It’s about finding a match for your wellness goals, your space, and your lifestyle. The Finnmark FD-7 is a fantastic option, but it’s designed with a specific user in mind. Let’s walk through a few key points to help you figure out if this combination sauna is the ideal addition to your Long Island home. By looking at who it’s for, what it costs, and how long it will last, you can make a choice you’ll be happy with for years to come.

Who Is the FD-7 Sauna For?

The Finnmark FD-7 is for the person who wants it all. If you’re torn between the classic, steamy heat of a traditional sauna and the deep, therapeutic warmth of infrared therapy, this model was made for you. It’s a perfect solution for households where one person loves a traditional sweat session while another prefers the gentle, penetrating heat of infrared. The advanced Spectrum Plus™ heaters are designed to target muscles and joints with mid- and far-infrared waves, giving you a more intense sweat and deeper relief. If you’re serious about your wellness routine and want the flexibility to switch between two powerful sauna experiences, the FD-7 is an excellent fit.

Considering Your Space and Budget

Let’s talk practicalities. The Finnmark FD-7 is a premium sauna, and its price reflects its high-quality construction and dual-heating technology. At around $9,495, it’s a significant investment in your home and well-being. You’re paying for durability, including thick 1.5-inch Thermo-Aspen wood that not only lasts but also fills your space with a pleasant, natural aroma. Before you commit, you’ll want to measure your intended location carefully to ensure a perfect fit. Thinking about how a sauna fits into a larger vision for your home? Integrating a wellness space can be a wonderful part of a home remodeling project, creating a dedicated retreat for relaxation and health.

A Look at Long-Term Value and Durability

When you invest in a piece of wellness equipment, you want to know it’s built to last. The Finnmark FD-7 delivers on that front. The manufacturer stands behind its quality with strong warranties for both the sauna structure and its advanced infrared heaters, which is always a great sign of confidence. The construction uses thick, full-length Thermo-Aspen staves, a material known for its exceptional durability and resistance to the elements. This isn’t just a purchase for today; it’s a long-term addition to your home. At Gappsi, we believe in using high-quality materials that stand the test of time, whether it’s for masonry or a personal sauna, and the FD-7 meets that standard.

Related Articles

Frequently Asked Questions

Why should I choose a combination sauna instead of just a traditional or infrared one? A combination sauna like the FD-7 gives you the best of both worlds, so you never have to choose. Some days you might want the intense, steamy heat of a classic Finnish sauna to get a deep sweat. Other days, your muscles might be sore, and the gentle, penetrating warmth of infrared heat is what you need. This flexibility is perfect for families with different preferences or for tailoring each session to your specific wellness goals.

What are the most important things to know before installing the FD-7? There are two key things to plan for. First, you need a solid and perfectly level surface for the sauna to sit on, like a concrete pad or a reinforced deck. Second, this isn’t a plug-and-play appliance. The powerful traditional heater requires a dedicated 240v circuit, which must be installed by a licensed electrician to ensure safety and proper function. Getting these two elements right from the start makes for a smooth installation.

Is the FD-7 worth the investment? When you look at the FD-7, you’re investing in quality that’s built to last. It’s constructed from thick, thermally treated Aspen wood, which is far more durable and weather-resistant than the materials used in many standard saunas. Plus, the infrared heaters come with a lifetime warranty. This focus on premium materials and long-term performance means you’re getting a reliable wellness retreat that adds lasting value to your home.

How much maintenance does this sauna actually require? The upkeep is surprisingly minimal. The main tasks are to wipe down the benches with a damp cloth after use to keep the wood clean and to occasionally vacuum the floor. The Thermo-Aspen wood is very durable, so you just need to avoid harsh chemical cleaners. It’s designed to be a low-stress addition to your home, allowing you to focus on relaxing, not on a long list of chores.

Can I use both the traditional and infrared heaters at the same time? Yes, you absolutely can, and that’s one of the best features of this hybrid sauna. You can run both heating systems simultaneously to create a uniquely powerful experience. This allows you to enjoy the deep, muscle-soothing warmth from the infrared panels while also getting the intense, enveloping heat from the traditional heater. It gives you complete control to customize your session.

Calculating the average cost of a natural stone patio installation with various stone samples.

What’s the Average Cost of Natural Stone Patio Installation?

One of the biggest concerns for any homeowner starting a major project is the fear of hidden costs. A budget is only useful if it’s comprehensive. When it comes to building a natural stone patio, the price of the stone itself is just one part of the equation. You also have to consider site excavation, base preparation, delivery fees, and the skilled labor required for a flawless finish. Understanding the average cost of natural stone patio installation is essential, but it’s just as important to know what’s included in that number. We’ll break down every potential expense so you can plan your project without any unwelcome financial surprises along the way.

Key Takeaways

  • Your Total Cost Hinges on Four Main Factors: The final price for your patio is determined by the type of stone you choose, the size and complexity of your design, the amount of site preparation required, and the cost of skilled labor.
  • Look Beyond the Price of the Stone Itself: A complete and realistic budget accounts for the entire project, so remember to include necessary costs like local permits, excavation, delivery fees, and the final protective sealant.
  • Prioritize Professional Installation for a Lasting Investment: While getting multiple quotes is wise, hiring an experienced mason is the best way to ensure your patio is built correctly, looks beautiful, and avoids costly repairs down the road.

How Much Does a Natural Stone Patio Cost?

Planning your budget is one of the first, and most important, steps in any home improvement project. When it comes to creating a beautiful natural stone patio, the final price tag can vary quite a bit. The cost depends on the materials you select, the size of your space, and the complexity of the design you have in mind. Understanding these variables will help you set a realistic budget and make informed decisions. Let’s break down what you can expect to invest in your new outdoor oasis, from the price per square foot to the total project estimate. This will give you a clear picture of the costs involved in bringing your vision to life.

What to Expect Per Square Foot

When you start pricing out your project, you’ll find that costs are often discussed per square foot. Generally, you can expect to pay between $16 and $35 per square foot for a natural stone patio, a price that includes both the stone and professional installation. The specific type of natural stone you choose plays a huge role in this range. For example, popular options like bluestone or flagstone can cost anywhere from $5 to $35 per square foot for just the material. This wide range reflects differences in quality, color, and availability, so it’s worth exploring your options to find the perfect fit for your style and budget.

Estimating the Total Project Cost

For an average-sized patio of about 200 to 400 square feet, the total project cost typically falls between $3,200 and $14,000. It’s helpful to know that labor makes up a significant portion of this price, usually around 60% to 70% of the total. This highlights the value of expert masonry work, which ensures your patio is built to last. Think of it as an investment in your home’s future. A well-designed stone patio not only enhances your lifestyle but can also increase your property value by 8% to 12%, often returning a large portion of the installation cost when you decide to sell.

What Factors Drive Up Patio Installation Costs?

Budgeting for a new natural stone patio can feel like a puzzle, but it becomes much clearer when you understand the key pieces that make up the final price. While every project is unique, four main factors consistently influence the overall cost: the type of stone you select, the patio’s size and design complexity, the condition of the installation site, and the labor required to bring it all together. Getting a handle on these variables from the start helps you avoid surprises and ensures your project stays on track.

For example, falling in love with a premium stone is wonderful, but it’s important to know how that choice will ripple through the rest of your budget. Similarly, a simple, elegant design might allow you to allocate more funds toward high-end materials, while a complex, multi-level patio will require a larger portion of the budget for skilled labor. Thinking through each of these elements will help you create a realistic budget and make informed decisions that align with your vision for the perfect outdoor space. Let’s break down what you can expect from each of these cost drivers.

The Type of Stone You Choose

When you start dreaming up your perfect patio, the stone you pick is one of the biggest decisions you’ll make, both for the look and the budget. The world of porcelain and natural stone is vast, with options ranging from classic bluestone to elegant flagstone. Generally, more common stones are easier on the wallet, while rarer or more difficult-to-quarry options will have a higher price per square foot. It’s not just about the initial cost, though. Think about durability and maintenance, too. A slightly more expensive, harder stone might save you money on upkeep in the long run. We can walk you through the pros and cons of each to find the perfect fit for your style and budget.

Your Patio’s Size and Complexity

It makes sense that a larger patio will cost more than a smaller one, but the design’s complexity also plays a huge role. A simple square or rectangular patio is the most straightforward to install. Once you add curves, intricate patterns like herringbone, or multiple levels, the labor involved increases significantly. These custom designs require more precise cuts and careful placement, which adds to the installation time and overall cost. Our expert masonry team loves bringing creative visions to life, but it’s important to remember that these beautiful, detailed features will be reflected in the final project price. A more complex design simply requires more skill and time to execute perfectly.

Preparing the Installation Site

A beautiful patio needs a solid foundation, and preparing the ground is a critical step that can impact your budget. If your yard has a significant slope, is uneven, or has poor drainage, we’ll need to address that before any stones are laid. This can involve excavation, grading the land, and installing a proper base of gravel and sand. The installation method also matters. A ‘dry-laid’ patio set on a gravel and sand base is typically less expensive than a ‘wet-laid’ one set in mortar on a concrete slab. Proper site preparation is non-negotiable for a patio that will last for decades without shifting or cracking.

Labor and Location

Labor is one of the most significant parts of a patio installation budget, often making up more than half of the total cost. This is where expertise truly counts. Skilled masons ensure every stone is perfectly placed, the base is stable, and the final result is both beautiful and durable. Labor rates can also vary depending on your location. Here on Long Island, costs reflect the high level of craftsmanship homeowners expect. While it might be tempting to cut corners on labor, investing in an experienced team prevents costly repairs down the road. A professionally installed patio is an investment in your home’s value and your family’s enjoyment for years to come.

A Closer Look at Natural Stone Prices

Choosing the right material is one of the most exciting parts of planning your patio. The stone you select sets the tone for your entire outdoor space, but it also plays a big role in your budget. Let’s break down some of the most popular natural stone options so you can find the perfect fit for your home and wallet.

Bluestone and Limestone

Bluestone is a timeless choice for patios, known for its beautiful blue-gray hues and durable, non-slip surface. It’s a fantastic option for pool surrounds and walkways. You can expect bluestone to cost between $15 and $31 per square foot. With proper care, it can easily last for more than 35 years, though it does need a sealant to maintain its rich color. Limestone offers a softer, more earthen look, with costs ranging from $16 to $32 per square foot. It’s another long-lasting material, but like bluestone, it requires regular sealing every couple of years to protect it from weathering and stains.

Slate and Sandstone

If you want a patio with a lot of character, slate is an excellent material to consider. It comes in a wide range of colors, from dark grays to greens and purples, and has a naturally textured surface. Slate is incredibly durable, often lasting over 50 years, and it’s naturally resistant to stains. The price for slate typically falls between $18 and $42 per square foot. Sandstone provides a warm, rustic feel with its red, tan, and brown tones. It costs between $18 and $30 per square foot and offers a naturally non-slip finish, but it is more porous than other stones and needs a high-quality sealant for protection.

Granite and Flagstone

For a high-end, incredibly resilient patio, granite is tough to beat. It’s one of the hardest natural stones available, making it highly resistant to scratches and heat. Granite costs between $19 and $32 per square foot and can last for decades with minimal maintenance, making it a great long-term investment. Flagstone is a more general term for flat stones laid on a sand or mortar base, often including varieties like bluestone or slate. It’s known for its irregular shapes that create a charming, naturalistic look. The cost for a flagstone patio generally ranges from $15 to $32 per square foot, depending on the specific type of stone used by your masonry team.

Travertine and Cobblestone

Travertine brings a touch of old-world elegance to any outdoor space. It’s a type of limestone formed near hot springs, giving it a distinctive fibrous and porous appearance. Travertine stays cool to the touch, making it a popular choice for pool decks in sunny climates. It costs between $15 and $30 per square foot. Cobblestone offers a classic, historic look and is exceptionally strong, with a potential lifespan of over 100 years. Because the rounded stones require a skilled hand to set properly, installation can be more intensive. You can expect cobblestone to range from $20 to $50 per square foot.

Are There Hidden Costs to Installing a Stone Patio?

When you get a quote for a new stone patio, it’s easy to focus on the big numbers: the cost of the stone and the labor to install it. But a smart homeowner knows to ask, “What else?” Several additional costs can pop up during a project, and being aware of them from the start helps you create a realistic budget with no unwelcome surprises. Think of it less like “hidden” costs and more like a complete checklist for your project.

From local permits to the final protective sealant, these extra expenses are a normal part of the construction process. A great contractor will be transparent about these potential costs, but it’s always best to be informed. Understanding the full scope of the project, including site preparation, delivery logistics, and long-term care, ensures you’re not just budgeting for a patio, but for a beautiful and lasting outdoor space. At Gappsi, we manage every detail, from initial masonry design to the final cleanup, so you always know what to expect. Let’s walk through some of the common costs that might not be on that initial estimate.

Permits and Inspections

Depending on where you live in Long Island and the scale of your project, you may need a permit from your local town or village. This is especially true if your new patio involves changes to existing structures, grading, or electrical and plumbing lines. Permit fees are determined by your local municipality and are almost never included in a contractor’s initial installation quote. While your contractor will handle the process of filing for the permit, the fee itself is a separate cost you’ll need to cover. It’s a crucial step to ensure your project is up to code and avoids any legal headaches down the road.

Excavation and Site Prep

The condition of your backyard is one of the biggest variables in your total project cost. A perfectly flat, clear, and accessible area is the ideal scenario, but most yards need some work first. Site preparation can involve removing old concrete, leveling a sloped lawn, or digging down to create a stable base for the stones. If your yard has drainage issues or is difficult to access with equipment, the labor and time required for this prep work will increase. This is a critical part of any quality landscape construction project, as a poorly prepared base can lead to a patio that shifts and cracks over time.

Delivery and Equipment Fees

Getting several tons of natural stone from the supplier to your home has its own set of costs. Delivery fees are often a separate line item, so be sure to ask if they are included in your materials quote. Beyond delivery, the installation itself requires specialized tools. While basic supplies like mortar are usually part of the estimate, your project may require renting heavy equipment like a plate compactor to create a solid base or a wet saw for precise stone cutting. A professional team will have all the necessary equipment, but the cost of using and transporting it is factored into the overall project price.

Sealing and Protective Treatments

Once your beautiful new patio is installed, the final step is to protect it. Applying a quality sealant is essential for preserving the color and integrity of the natural stone, protecting it from stains, water damage, and the effects of weather. This is typically considered a finishing step and may be quoted separately from the installation. The cost can range from $2 to $10 per square foot, depending on the type of sealant used. Think of it as an investment in your patio’s future. Proper sealing and restoration will keep it looking its best for years to come and reduce long-term maintenance.

How Does Labor Affect Your Patio Budget?

When you’re planning your new natural stone patio, it’s easy to focus on the beautiful materials you’ll choose. But the cost of labor is just as important and can make up a huge portion of your final bill. The hands-on work of preparing the ground, laying the stones, and finishing the details is a skilled job, and the cost reflects that expertise. Several factors influence the price of labor, from the complexity of the installation to the type of professional you hire for the job.

Understanding these labor costs is key to creating a realistic budget. It’s not just about paying for someone’s time; it’s about investing in the craftsmanship that will make your patio last for decades. A well-built patio requires precision and experience, and the right team will ensure your project is built to withstand Long Island’s weather and years of family gatherings. At Gappsi, our masonry experts have the experience to bring your vision to life efficiently and beautifully.

Different Installation Methods

The way your stone patio is installed has a direct impact on labor costs. For example, setting natural stone pavers like flagstone or slate requires a meticulous process to create a stable, level surface, which naturally takes more time and skill. A dry-laid patio, set on a base of gravel and sand, is typically less labor-intensive than a wet-laid patio, which involves setting the stones in mortar on a concrete slab. The wet-laid method provides incredible durability but requires more materials, preparation, and expertise, increasing the overall project cost. The complexity of this work is why professional installation is so crucial for a lasting result.

Local Labor Rates

Where you live plays a big role in what you’ll pay for labor. Rates for skilled trades can vary significantly from one region to another, and Long Island is no exception. The cost of living, demand for contractors, and local regulations all influence pricing. For natural stone patios, installation costs can range from $15 to $35 per square foot, and a portion of that is determined by local market rates. Working with a local company like Gappsi means you’re getting an estimate that accurately reflects the costs in our area, with no surprises. Our team has a deep understanding of Long Island landscape construction and can provide a clear, comprehensive quote.

Hiring a Contractor vs. a Mason

For a natural stone patio, you’ll want to hire a professional with specific experience in stonework. While a general contractor can oversee a project, a specialized mason brings a level of artistry and technical skill that is essential for working with natural stone pavers. Masons are experts in cutting, fitting, and setting stones to create durable, beautiful patterns. Their specialized labor might come at a higher hourly rate, but their efficiency and expertise often mean the job is done right the first time. Investing in a skilled mason is an investment in the quality and longevity of your patio, preventing costly repairs down the road.

How Do Design Choices Impact the Final Price?

Beyond the stone itself, your design choices play one of the biggest roles in determining the final cost of your patio. The layout, features, and overall size all influence the amount of material needed and the hours of labor required for installation. A simple, straightforward design will naturally be more budget-friendly than a sprawling, multi-level oasis with custom features. This is where working with an experienced team makes a difference. Our masonry design experts can help you find the perfect balance between your dream patio and your budget, ensuring every dollar is well spent. We’ll walk you through how different elements affect the price so you can make informed decisions without sacrificing style. From the initial sketch to the final stone, we focus on creating a space that is both beautiful and practical for your home.

Simple vs. Complex Layouts

The shape of your patio has a direct impact on installation costs. A simple square or rectangular patio is the most cost-effective option because it requires fewer cuts and less intricate labor. When you introduce curves, circular patterns, or multiple levels, the complexity of the project increases significantly. Each curve means a stone must be custom-cut to fit perfectly, which takes more time and skill. This extra labor and the potential for more material waste from the cuts will be reflected in the final price. Think of it this way: a straightforward layout minimizes labor time, while a complex one is a custom art piece that demands more craftsmanship.

The Price of Popular Design Trends

Modern outdoor living is all about creating functional and beautiful extensions of your home. Popular trends often involve more than just a simple stone surface. Features like built-in seating walls, outdoor kitchens, fire pits, and intricate inlay patterns can transform a patio into a true backyard destination. While these additions create incredible spaces for entertaining and relaxing, they also add to the project’s cost. Each feature requires additional materials, specialized labor (like plumbing or gas lines for a kitchen), and more detailed construction. Incorporating these stylish outdoor elements is a fantastic investment in your home’s value and your lifestyle, but it’s important to account for them in your initial budget.

How Patio Size Affects Your Budget

It seems obvious that a larger patio will cost more than a smaller one, and that’s generally true. More square footage means more materials and more hours of labor. However, the relationship isn’t always linear. Sometimes, you can get a slightly better price per square foot on materials when buying in bulk for a very large project. On the other hand, a larger patio can introduce new challenges. A bigger footprint might require more extensive site preparation, such as significant grading or the installation of complex drainage systems to manage water runoff. Your landscape’s existing conditions play a huge role here, as a large patio on a sloped yard is a much bigger undertaking than one on a flat, clear surface.

Common Budgeting Mistakes to Avoid

Creating a budget for your new stone patio can feel like a big task, but getting it right from the start saves you from surprises down the road. It’s easy to focus only on the price of the stone itself, but a successful project budget accounts for every step of the process. Thinking through the entire scope of work, from the ground up, helps ensure your vision comes to life without unexpected costs. Let’s walk through a few common pitfalls homeowners encounter so you can plan with confidence. By understanding where costs can hide, you can create a realistic budget that covers everything your project needs for a beautiful, long-lasting result.

Underestimating Site Prep

One of the biggest budgeting oversights is underestimating the cost of site preparation. A beautiful patio is only as good as the foundation it’s built on. Proper site prep is essential for a durable, level surface that won’t shift or sink over time. This process involves more than just clearing the area; it includes excavating the ground, often digging down six to eight inches, and installing a solid base of compacted aggregate. This foundational work is labor-intensive and critical for drainage and stability. Factoring these masonry services into your initial budget is key to avoiding costly repairs later.

Ignoring Installation Complexity

The type of stone you choose and the intricacy of your design directly influence your total cost. While you might have a price per square foot for the material, the complexity of the installation can significantly affect labor expenses. A simple, rectangular patio will cost less to install than a curved one with an intricate pattern or multiple levels. Certain stones are also more challenging to cut and lay, requiring more time and skill from your installation team. When you’re exploring different porcelain and natural stone options, remember to discuss how your design choices will impact the overall labor budget with your contractor.

Forgetting About Long-Term Costs

Your budgeting shouldn’t stop once the last stone is laid. While natural stone is incredibly durable, it requires some maintenance to keep it looking its best for years to come. Think of it as protecting your investment. Depending on the type of stone and its exposure to the elements, you may need to factor in periodic cleaning and sealing. Sealing helps protect the stone from stains, water damage, and fading. These long-term restoration and sealing services are a minor expense compared to the initial installation cost, but including them in your long-term financial plan ensures your patio remains a stunning feature of your home.

How to Get an Accurate Project Estimate

Getting a clear and accurate project estimate is the key to a smooth process without financial surprises. A trustworthy estimate acts as a roadmap for your project, but to get a reliable quote, you need to know what to ask and how to compare offers. This isn’t just about finding the lowest price; it’s about finding the best value and building a relationship with a company you trust to bring your outdoor living space to life. Let’s walk through how to get an estimate you can feel confident about.

Key Questions to Ask Your Contractor

Before you commit, have a conversation with any potential contractor. Think of it as an interview. Start by asking about their experience: “How many natural stone patios have you installed, and can I see examples of your work?” You should also clarify logistics, like who is responsible for securing permits. A crucial question is, “Does your price include all materials, labor, site preparation, and cleanup?” This helps you avoid hidden fees. Finally, ask about their warranty and payment schedule to ensure you’re protected long after the project is complete.

The Importance of Multiple Quotes

It’s always a good idea to get at least three quotes from different installers. This isn’t just about finding the cheapest option; comparing estimates helps you get a realistic sense of the market rate for the quality you expect. Be cautious of a bid that is significantly lower than the others. An unusually low price can indicate lower-quality materials or less experienced labor. Your goal is to find a fair price from a reputable company that offers excellent value and craftsmanship, like the masonry design and construction Gappsi provides.

How to Read Your Estimate

An estimate should be more than a single number. A professional contractor provides a detailed, itemized document that breaks down all costs. Make sure you know exactly what is and isn’t included. Look for line items covering materials, labor, delivery fees, excavation, and any necessary permits. Don’t move forward without a written estimate, a formal contract, and a warranty in hand. This documentation protects both you and the contractor, creating clear expectations before the first stone is laid. This level of detail is a hallmark of a transparent process.

Smart Ways to Budget for Your Natural Stone Patio

A natural stone patio is a fantastic investment in your home, creating a beautiful space for relaxing and entertaining. While it’s a project that adds significant value, it’s also one you want to plan for financially. With a bit of smart planning, you can create the patio of your dreams without derailing your budget. The key is to understand where your money is going and identify areas where you can make strategic choices to save. From the materials you select to the timing of your project, a few key decisions can make a big difference in the final cost. Thinking through these elements ahead of time helps you set a realistic budget and approach your project with confidence, ensuring the process is as smooth as the beautiful stone you’ll soon be enjoying.

Choosing Cost-Saving Materials

The type of stone you choose is one of the biggest factors in your patio’s total cost. Natural stones like bluestone and flagstone can range from $5 to over $35 per square foot, so your material selection really matters. While premium stones offer a distinct look, you don’t have to pick the most expensive option to get a stunning result. There are many beautiful and durable stones at lower price points. The best approach is to explore a variety of porcelain and natural stone pavers to see what you like. Seeing and feeling the materials in person can help you find a stone that fits both your aesthetic and your budget.

Planning Your Project Timing

While timing doesn’t always guarantee a discount, planning your patio installation during a contractor’s off-season, like late fall or early spring, can sometimes offer more scheduling flexibility. A typical patio installation takes professionals about three to five days, but this timeline can be affected by weather and a contractor’s workload. The biggest benefit of planning ahead is that it gives you more time to save and finalize your design choices without pressure. Rushing the process can lead to last-minute changes or oversights that add unexpected costs. By planning your project well in advance, you give yourself the breathing room to make thoughtful, budget-friendly decisions.

DIY vs. Hiring a Pro: What to Consider

It can be tempting to tackle a patio project yourself to save on labor costs. However, installing a natural stone patio is physically demanding and requires a specific skill set. While a DIY approach saves money upfront, mistakes in excavation, base preparation, or stone laying can lead to costly repairs down the road. Natural stone patios are known for their durability, but their longevity depends on a skilled installation. Hiring a professional ensures the job is done correctly and efficiently, giving you a beautiful, long-lasting patio without the stress and potential pitfalls of doing it yourself.

Related Articles

Frequently Asked Questions

What is the most budget-friendly natural stone for a patio? While prices can fluctuate, options like bluestone, flagstone, and some types of limestone often fall on the more affordable end of the spectrum. The key is to remember that the final cost depends on the specific grade and thickness of the stone you choose. The best way to find a great value is to discuss your budget with our team; we can show you beautiful, durable options that won’t require you to compromise on quality or style.

Will a new stone patio really increase my home’s value? Yes, it’s a solid investment. A professionally installed natural stone patio enhances your home’s curb appeal and creates functional outdoor living space, which is a huge draw for potential buyers. It’s not just about adding a feature; it’s about expanding the usable square footage of your home. This kind of upgrade makes your property more attractive and can lead to a significant return on your investment when it’s time to sell.

How long does the installation process actually take from start to finish? For a standard-sized patio on a relatively flat surface, a professional crew can typically complete the installation in about three to five days. This timeline can extend if your project is larger, has a complex design, or if the site requires significant preparation like grading or excavation. Weather can also play a role, so it’s always good to build a little flexibility into your schedule.

Is a natural stone patio difficult to take care of? Natural stone is surprisingly low-maintenance, which is part of its appeal. The most important step is having it professionally sealed after installation and then resealed every few years. This protects the stone from stains and weathering. Beyond that, regular sweeping and occasional washing with a gentle cleaner are all it takes to keep your patio looking beautiful for decades.

Why is it so important to hire a specialized mason for this job? Working with natural stone is both a science and an art. A specialized mason understands the unique properties of each type of stone and has the skill to cut and fit them perfectly, ensuring a stable and beautiful result. They also have the expertise to prepare the ground correctly, which is critical for preventing shifting, cracking, and drainage problems. It’s an investment in craftsmanship that ensures your patio will last a lifetime.