View Gappsi’s YouTube Channel to view Basketball Court Construction in Watermill, NY by Gappsi
Creating a custom basketball court at home is one of the best ways to combine luxury outdoor living with recreation and fitness. At Gappsi, we specialize in designing and building premium sports game courts that enhance residential properties while providing years of enjoyment for families and athletes alike. One of our latest completed projects is a beautifully designed 32×32 basketball court installation in Watermill, NY.
This custom court was designed to complement the surrounding landscape while delivering professional-level performance and durability. From the foundation preparation to the finishing details, every aspect of the basketball court construction was carefully planned and professionally executed by the Gappsi team.
Custom Basketball Court Design in Watermill, NY
The homeowners in Watermill wanted a basketball court that looked elegant, performed like a professional court, and blended naturally into the property. The final design achieved all of these goals while creating an exciting recreational feature for the residents.
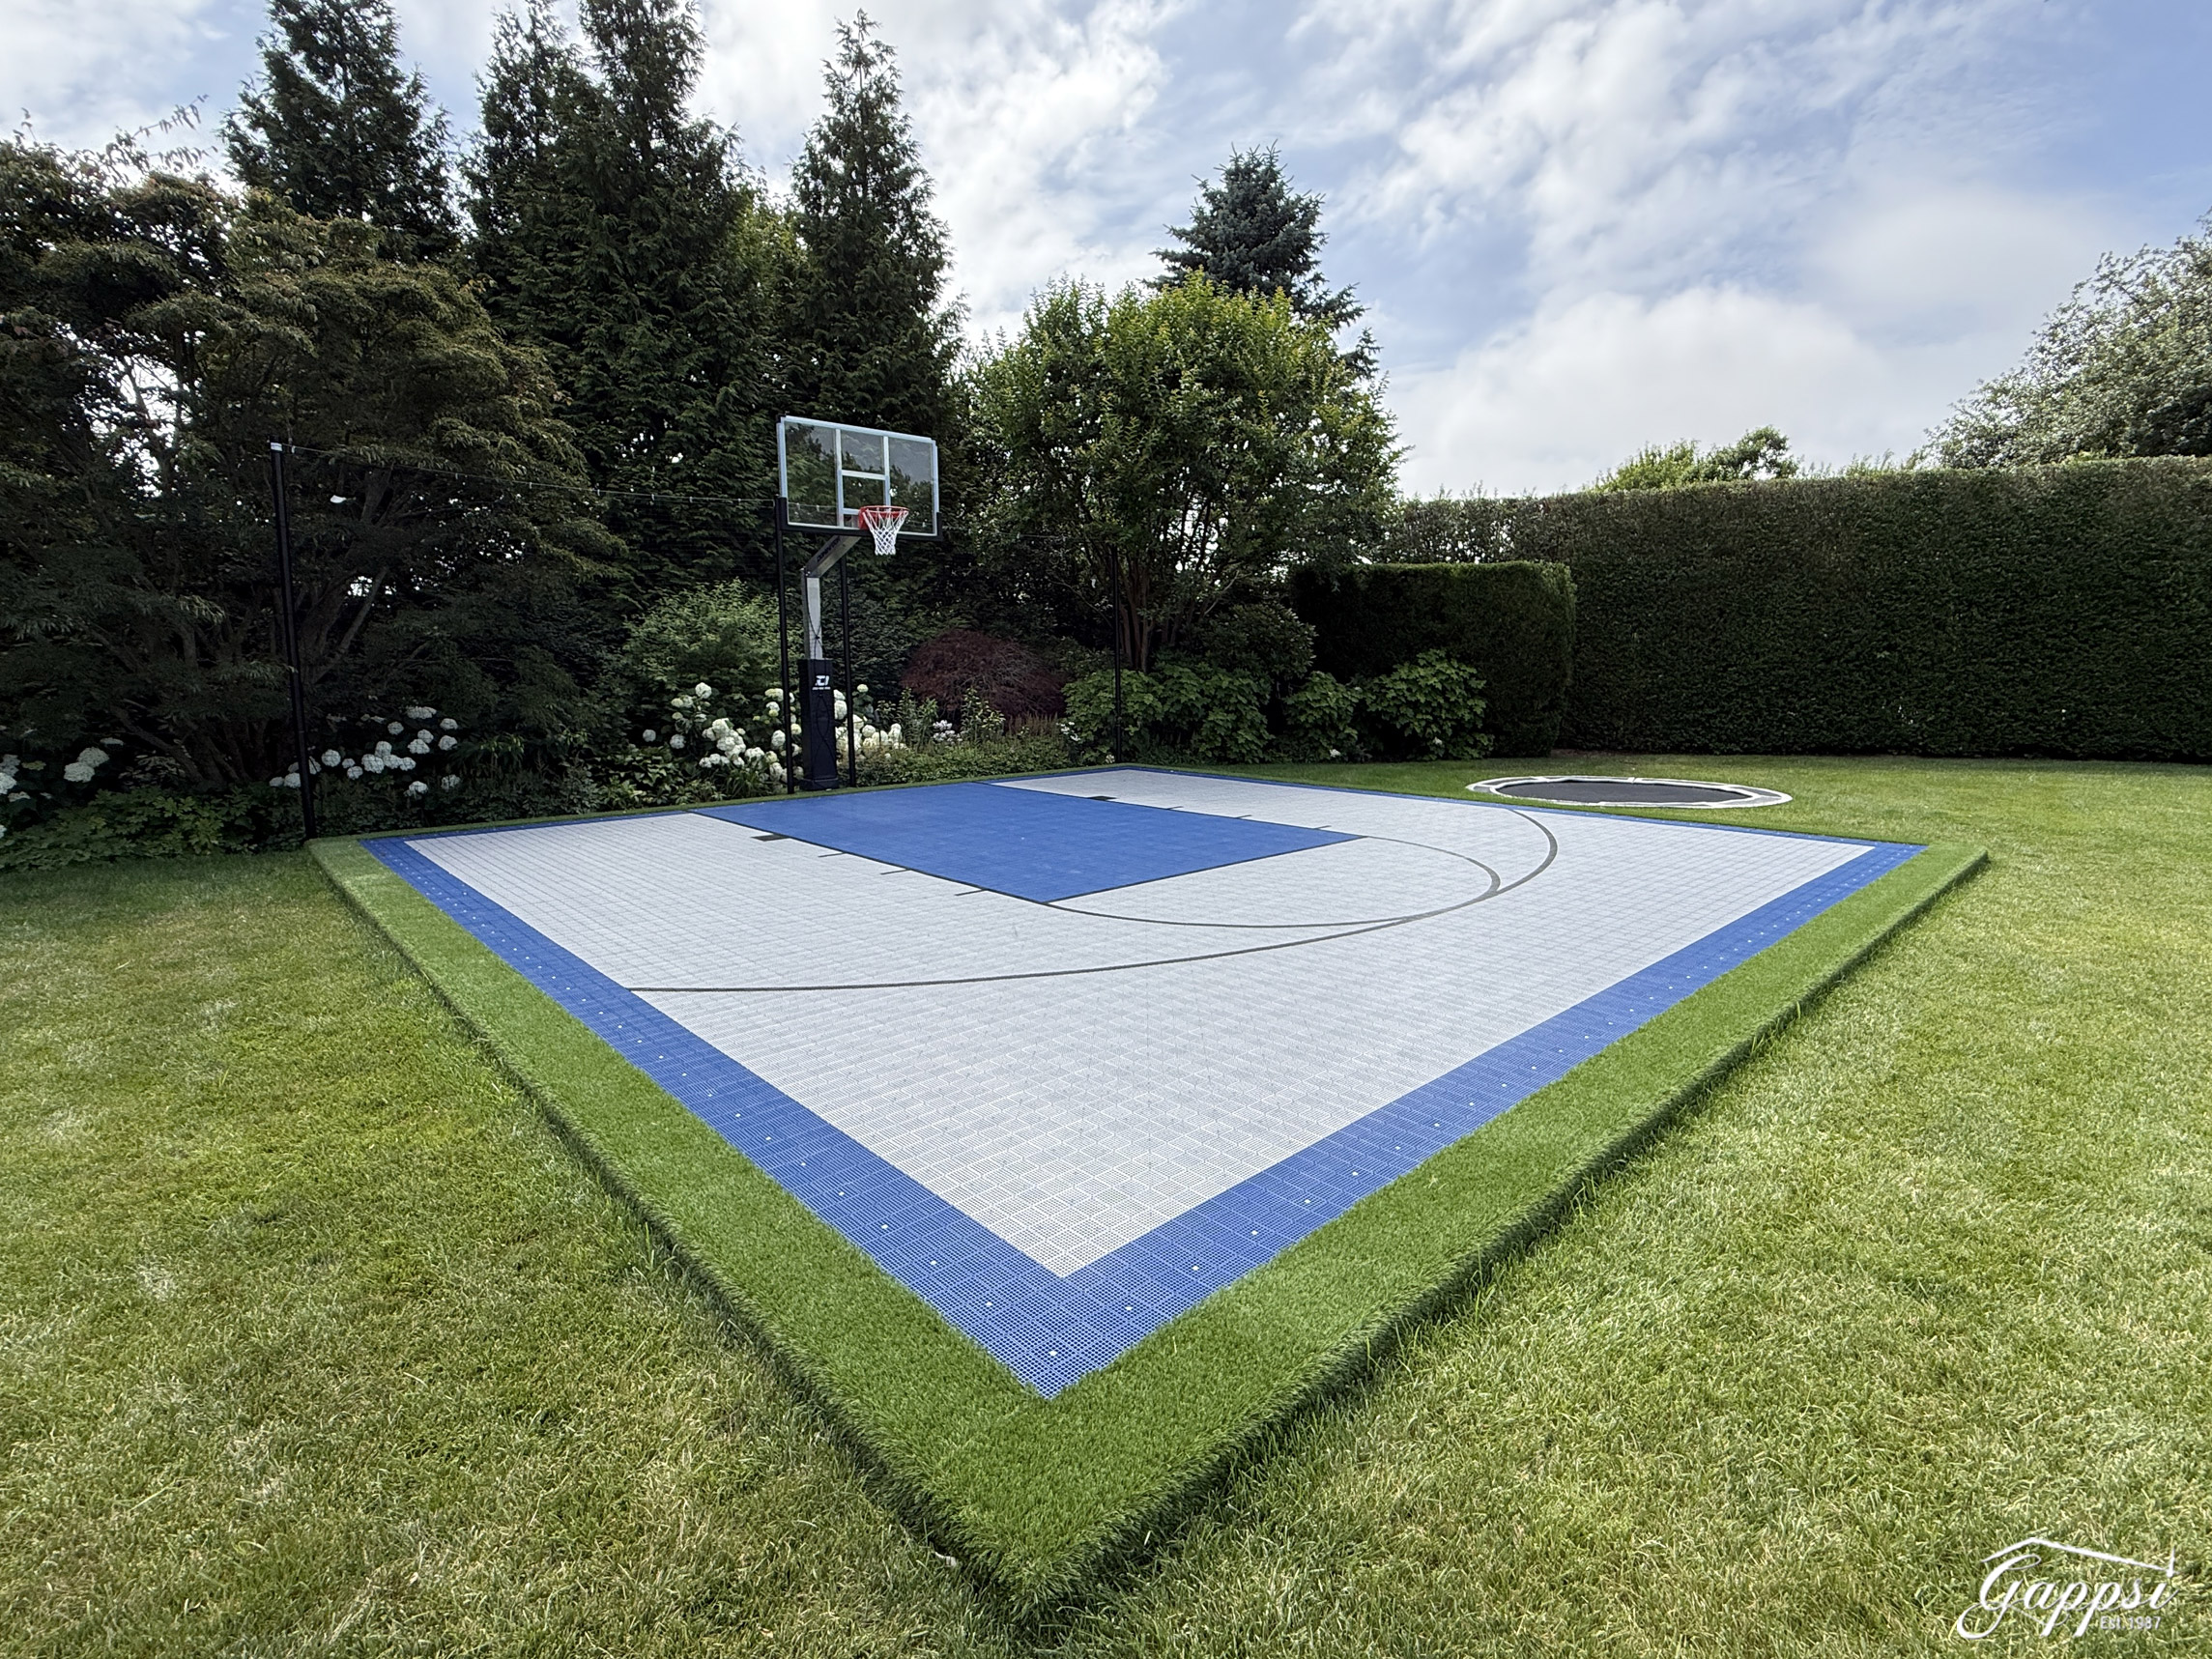
The court measures 32 feet by 32 feet, offering ample space for shooting, practicing drills, and recreational gameplay. The layout was designed to maximize functionality while maintaining a clean and modern appearance that enhances the outdoor living area.
At Gappsi, every basketball court project begins with proper site preparation. A strong and stable base is critical to ensuring the court remains level, durable, and structurally sound for years to come. For this project, we installed a recycled concrete base combined with bluestone chips. This base material provides excellent drainage and long-term stability while also being an environmentally responsible construction solution.
Mateflex Basketball Court Tiles Installation
For the playing surface, we installed high-quality Mateflex Top Court tiles. Mateflex tiles are among the most popular modular sports flooring systems available today because of their durability, shock absorption, traction, and low maintenance requirements.
The homeowners selected a custom color combination that gives the court a sleek and professional appearance. We used navy blue 12-inch tiles for the perimeter and key areas of the basketball court, creating a strong visual contrast and beautifully defining the playing zones. The remainder of the court was finished in a silver-gray color, providing a modern, stylish look that complements the residence and surrounding landscape.
The modular tile system also offers excellent drainage, making it ideal for outdoor sports courts in New York’s changing weather conditions. Unlike traditional asphalt-only surfaces, Mateflex tiles help reduce joint stress and provide improved comfort during play.
Elevated Court Construction with Synthetic Turf Border
One of the standout design elements of this Watermill basketball court is the elevated installation. The court was built slightly above the natural grass elevation, creating a clean transition between the playing area and the surrounding landscape.
To soften the visual appearance and create a polished finish, we installed synthetic turf as a fringe border around the entire basketball court. The synthetic turf adds a vibrant green accent while helping separate the court from the lawn area. It also contributes to better drainage and easier maintenance.
This combination of premium sports flooring and artificial turf creates a luxurious outdoor sports environment that blends perfectly into high-end residential properties throughout the Hamptons and Long Island.
Professional Basketball Court Striping
No professional-style basketball court is complete without proper striping. For this installation, Gappsi striped the basketball court using black court lines. The black striping provides excellent visibility against the navy blue and silver gray flooring while maintaining the sleek, modern aesthetic of the design.
Precision striping is essential for both appearance and gameplay. Our team carefully measured and installed every line to ensure accurate court dimensions and professional-quality results.
The contrasting colors between the court surface and striping make the court visually striking while maintaining excellent functionality for recreational basketball games and practice sessions.
Adjustable Dominator Basketball Hoop Installation
An important feature of this basketball court project was the installation of a professional adjustable Dominator aluminum basketball hoop system. Dominator hoops are known for their superior durability, stability, and performance.
The adjustable hoop allows players of different ages and skill levels to enjoy the court. Whether practicing layups with younger children or playing competitive games with adults, the adjustable system provides flexibility and convenience for the homeowners.
The aluminum construction also ensures long-lasting resistance to outdoor weather conditions, making it ideal for luxury outdoor basketball court installations in New York.
Protective Out-of-Bounds Netting System
To protect the surrounding landscaping and flower beds behind the basketball hoop, Gappsi installed a custom out-of-bounds netting system. The netting was supported by four 12-foot posts strategically positioned behind the hoop area.
This feature helps prevent basketballs from entering nearby planting beds and landscaping areas, reducing maintenance and improving safety. It also keeps the playing experience uninterrupted by minimizing the need to retrieve balls during games or practice.
The addition of protective netting is especially valuable for residential basketball courts located near gardens, pools, patios, or neighboring properties.
Why Homeowners Choose Gappsi for Basketball Court Construction
Gappsi has become a leading name in custom basketball court construction across Long Island and the Hamptons thanks to our attention to detail, premium materials, and personalized designs. Every court we build is customized to fit the homeowner’s property, lifestyle, and goals.
Our team handles every phase of the project, including:
- Site preparation and excavation
- Base installation
- Sports flooring systems
- Basketball hoop installation
- Court striping
- Synthetic turf integration
- Netting and fencing systems
- Landscape coordination
We understand that luxury homeowners want more than just functionality. They want a court that enhances their property’s beauty and value while providing a premium recreational experience.
Custom Outdoor Sports Game Courts for Long Island Homes
Outdoor basketball courts continue to grow in popularity across Long Island, especially in luxury communities like Watermill, Southampton, East Hampton, and the surrounding Hamptons areas. Homeowners are investing in custom sports courts that help families stay active while enjoying their outdoor living spaces.
At Gappsi, we design basketball courts that combine athletic performance with elegant outdoor design. From modern modular flooring systems to integrated landscaping and lighting options, our courts are built to deliver long-lasting value and enjoyment.
This latest basketball court construction project in Watermill, NY, is another example of Gappsi’s commitment to quality craftsmanship and innovative outdoor sports design. The combination of Mateflex tiles, synthetic turf, professional hoop systems, and custom netting created a stunning finished product that the homeowners can enjoy for years to come.
If you are considering a custom basketball court for your home, contact Gappsi today to learn more about our basketball court construction services throughout Long Island and the Hamptons.
Contact Gappsi Today
📍 Serving all of Long Island, NY — Nassau & Suffolk Counties
🌐 https://www.gappsi.com/
📞 Call now for a free consultation and estimate