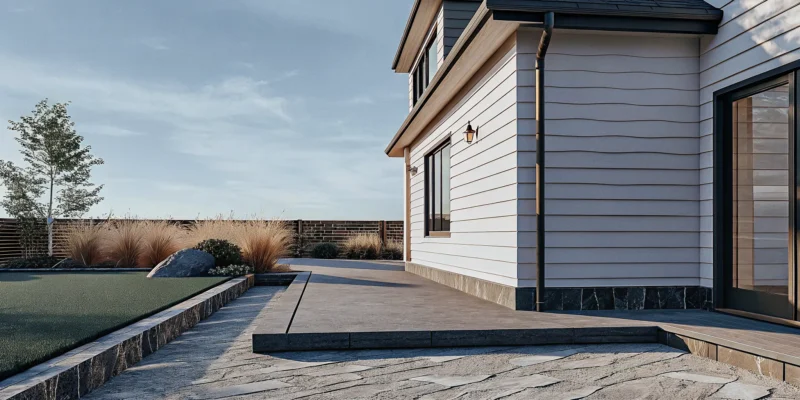
Barrel sauna installation on a patio in a Long Island backyard.

Your Guide to Barrel Sauna Installation on Long Island

The idea of stepping into your own private sauna after a long day is the ultimate home luxury. Barrel saunas, with their efficient heating and durable construction, have made this dream more accessible than ever for homeowners. While choosing the perfect model is a fun first step, ensuring it’s installed correctly is what truly guarantees years of safe and reliable use. Many people wonder about the practical details, like whether they need a permit in their town or how to find a qualified electrician. A proper barrel sauna installation Long Island requires knowledge of local codes and best practices. In this article, we’ll answer all these common questions and outline the process from start to finish, helping you create your perfect backyard escape.

Key Takeaways

  • The Barrel Shape is Smart Design: A barrel sauna’s round shape is more than just for looks; it helps the unit heat up faster and circulate warmth more evenly, making it an energy-efficient choice for your backyard.
  • Budget for the Complete Project: Your total cost will include more than just the sauna itself, so be sure to factor in expenses for professional installation, required electrical work, and creating a solid, level foundation.
  • A Professional Installer is Key: The process involves local permits, zoning laws, and critical electrical work. Hiring a full-service installer ensures your sauna is set up safely, complies with all Long Island regulations, and is ready for you to enjoy.

Barrel vs. Traditional Saunas: What’s the Difference?

When you picture a sauna, you might think of a standard square room. But barrel saunas have become incredibly popular for home installations, and for good reason. While both traditional and barrel saunas offer a fantastic way to relax and unwind, their fundamental design differences affect everything from heating efficiency to the overall experience. A traditional sauna is typically built into a home or as a square cabin, while a barrel sauna stands out with its unique cylindrical shape. Understanding these distinctions is the first step in deciding which type of personal oasis is the perfect fit for your Long Island backyard. Let’s look at what makes a barrel sauna special.

The Advantage of the Barrel Shape

The round design of a barrel sauna is more than just a unique aesthetic choice; it’s a clever piece of engineering. The circular shape means there is less empty air space to heat compared to a rectangular sauna of a similar size. This allows for more efficient heat circulation. The gentle curve of the walls encourages a natural and continuous flow of warm air, creating a consistent and enveloping warmth. Beyond efficiency, the barrel construction is incredibly sturdy and weather-resistant. The tight-fitting staves and stainless steel bands create a strong structure, and the rounded top naturally sheds rain and snow, making it a durable choice for our Long Island climate. It’s a design that’s both beautiful and practical for your backyard wellness space.

Faster Heating and Better Efficiency

One of the most practical benefits of a barrel sauna is how quickly it heats up. With less wasted space, especially near the ceiling where hot air gathers, a barrel sauna can get to your desired temperature up to 25% faster than a square model. This means you spend less time waiting and more time enjoying your session. This efficiency also translates to lower energy costs over time, which is a welcome bonus for any homeowner. The natural convection current created by the rounded walls ensures the heat is distributed evenly, so you won’t find hot and cold spots. It’s a smart design that makes your home wellness routine more spontaneous and sustainable, a key part of any modern home improvement project.

Key Health and Wellness Benefits

Adding a sauna to your home is an investment in your well-being. Whether you choose a barrel or traditional style, the health benefits are significant. Regular sauna use can help you relax, reduce stress, and soothe sore muscles after a workout or a long day. The heat improves circulation and can even promote better sleep and mental clarity. Think of it as your personal retreat, a place to disconnect and recharge right in your own backyard. Creating a dedicated space for relaxation, like a sauna paired with a beautiful patio or pergola, can transform your property into a true sanctuary for health and happiness. It’s a wonderful way to support a healthy lifestyle for you and your family.

Top Barrel Sauna Brands to Consider

Choosing the right barrel sauna comes down to your personal preferences for style, heating methods, and features. The market is full of excellent options, and knowing the top players can help you narrow down your search. Whether you prioritize quick heating times, traditional wood-burning experiences, or modern hybrid technology, there’s a brand that fits your needs. We’ve gathered a few of the most popular brands to give you a starting point as you explore adding a beautiful and functional sauna to your Long Island home. Each offers a unique set of features designed to enhance your wellness routine.

Almost Heaven Pinnacle

If efficiency is at the top of your list, the Almost Heaven Pinnacle is a fantastic choice. This 4-person barrel sauna is known for its ability to heat up about 20% faster than a typical cabin-style sauna of a similar size. This means less waiting and more time relaxing. Its compact 6×6 foot design makes it a great fit for many backyards without demanding too much space. The Pinnacle offers a straightforward, high-quality sauna experience, making it a popular option for those who want to enjoy the classic benefits of a sauna without unnecessary complexity. It’s a reliable workhorse that delivers consistent performance.

Dundalk LeisureCraft Tranquility MP

For those who appreciate classic craftsmanship and material quality, the Dundalk LeisureCraft Tranquility MP stands out. Made from 100% Canadian red cedar, this sauna not only looks beautiful but is also naturally durable and resistant to the elements. It offers flexibility by giving you the choice between a powerful electric heater or a traditional wood-burning stove for a more rustic experience. This 2 to 6 person model also includes a charming front porch, providing a small, covered space to cool down between sessions or store towels. It’s an ideal choice for anyone seeking an authentic and timeless sauna design.

Finnmark FD-6

Can’t decide between a traditional sauna and an infrared one? With the Finnmark FD-6, you don’t have to. This 4-person outdoor model is a hybrid, combining the deep, penetrating warmth of infrared heaters with the high-temperature environment of a traditional electric heater. This gives you the flexibility to choose your experience each day. You can enjoy a gentle, therapeutic infrared session or crank up the heat for a classic, sweat-inducing Finnish-style sauna. Constructed from aromatic and decay-resistant cedar, the Finnmark FD-6 offers the best of both worlds for the modern sauna enthusiast.

SaunaLife E8G Ergo Series

If you’re looking for a sauna that combines performance with a sleek, modern aesthetic, the SaunaLife E8G Ergo Series is worth a look. This spacious 6-person sauna is designed for comfort and style. Its most striking feature is a panoramic glass front, which creates an open, airy feel and offers beautiful views of your backyard. The interior features ergonomic benches for maximum comfort during longer sessions. Built from durable Thermo-Spruce and topped with a full shingle roof for extra weather protection, this sauna is as practical as it is beautiful. It’s a premium option for those who want their sauna to be a true backyard showpiece.

Gappsi’s Barrel Sauna Collection

Finding the perfect sauna can feel overwhelming, which is why we’ve curated a selection of high-quality options to simplify the process. At Gappsi, we offer a diverse range of saunas to fit any Long Island home, including traditional Finnish wood-burning models, convenient electric dry saunas, and therapeutic infrared units. Our team works with you to understand your wellness goals, aesthetic preferences, and backyard layout. We then help you select the ideal barrel sauna from our collection and handle the entire installation, ensuring a seamless and professional experience from start to finish. Our goal is to match you with a sauna that you and your family will enjoy for years to come.

Breaking Down Barrel Sauna Costs on Long Island

Investing in a barrel sauna is an exciting step toward creating your personal wellness retreat, but it’s helpful to have a clear picture of the total cost before you begin. The final price tag is more than just the sauna unit itself. It includes professional installation, essential electrical work, and any necessary site preparation to create a stable foundation. Understanding these components from the start helps you budget effectively and ensures there are no surprises along the way, allowing you to focus on the relaxation and health benefits ahead.

A well-planned project is a successful one, and knowing the full scope of the investment is the first step. From the initial purchase to the long-term care, each element plays a role in the overall value and enjoyment you’ll get from your sauna. Let’s walk through the main expenses you can expect when bringing a beautiful and functional barrel sauna to your Long Island home. This breakdown will help you plan with confidence and make an informed decision that fits your vision and your budget.

Cost of the Sauna Unit

The first and most significant expense is the sauna itself. Barrel saunas are prized for their unique, circular design, which allows them to heat up about 15 to 25 percent faster than a similar-sized square sauna. This efficiency can save you money on energy bills over time. The price of the unit depends on its size, the type of wood used, and the features it includes, like the heater type or window options. For example, a quality four-person barrel sauna can start around $4,500 and go up from there for larger models. You can explore a variety of high-quality saunas and spas to find the perfect fit for your space and budget.

Professional Installation and Electrical Fees

Once you’ve chosen your sauna, you’ll need to account for installation and electrical costs. While some saunas are sold as DIY kits, professional installation guarantees that everything is assembled correctly and safely. The most critical part of the setup is the electrical work. A licensed electrician must run a dedicated circuit for the sauna heater, a process that almost always requires an electrical permit. This is not a corner you want to cut, as it ensures your sauna operates safely and meets local codes. At Gappsi, our team coordinates the entire process, from assembly to final electrical hookup, giving you complete peace of mind.

Other Expenses to Plan For

Beyond the sauna and its installation, you may have a few other costs. First, you’ll need a solid, level foundation. This could be an existing patio or a new base made of concrete, pavers, or compacted gravel. If your yard needs leveling or a new pad, this will be an additional expense. Gappsi’s expertise in masonry and stonework means we can create the perfect foundation for you. You should also check with your local municipality about building permits. While not always required for smaller structures, it’s essential to confirm the rules in your specific area of Nassau or Suffolk County to ensure your installation is fully compliant.

Budgeting for Ongoing Maintenance

The good news is that barrel saunas are fairly low-maintenance. However, you should plan for some minor ongoing care to keep your sauna in top condition. This includes simple tasks like wiping down the interior benches after each use to manage moisture and keeping the exterior wood clean. On a monthly basis, it’s a good idea to check that all components are secure and functioning properly. The most significant long-term maintenance cost might be replacing the heating element, which typically has a lifespan of five to seven years depending on usage. Regular care is a small price to pay to protect your investment and ensure years of relaxing sauna sessions.

Do You Need a Permit for a Barrel Sauna on Long Island?

The short answer is, yes, you probably do. While it might seem like an extra step, getting the right permits is all about ensuring your new backyard oasis is safe, secure, and built to last. Think of it as the foundation for years of relaxation. Handling local rules can feel a little overwhelming, but breaking it down makes the process much more manageable. Here’s what you need to know about getting a permit for your barrel sauna on Long Island.

Understanding Nassau and Suffolk County Rules

In most towns across Nassau and Suffolk counties, adding a structure like a barrel sauna requires a building permit. This isn’t just red tape; it’s a process to confirm your sauna meets all local safety and construction standards. To get your permit, you’ll typically need to provide a plan that shows the sauna’s dimensions, where it will be located on your property, and the materials used. These general home sauna regulations are in place to protect you and your investment. Working with an experienced installer can make this process much smoother, as they will be familiar with what your local building department requires.

Electrical Permits and Zoning

Beyond the main building permit, you will also need a separate electrical permit for your sauna’s heater. This is a critical step, as it ensures all wiring is handled by a licensed professional and meets strict safety codes to prevent any hazards. It’s always a good idea to check with your local building department for their specific electrical requirements. You’ll also want to be mindful of zoning regulations, which are rules that dictate how far structures must be from property lines. An experienced team can help you create a site plan for your sauna that complies with all local zoning ordinances, ensuring your installation goes off without a hitch.

Checking with Your HOA

If your home is part of a Homeowners Association (HOA), you have one more checkpoint. Many HOAs have their own guidelines for outdoor structures to maintain the community’s aesthetic, so you’ll need to review your agreement and likely submit your plans for their approval. It’s always best to get this approval in writing before any work begins to avoid any potential issues down the road. This is just one part of the planning that goes into a successful home remodeling project. A professional installer who is used to working with HOAs can help you prepare the necessary documents for a smooth approval process.

The Barrel Sauna Installation Process, Step by Step

Once you’ve chosen your perfect barrel sauna, the next step is bringing it to life in your backyard. The installation process is straightforward when you break it down into a few key stages. From preparing the ground to connecting the heater, each step ensures your sauna is safe, functional, and ready for years of enjoyment. Let’s walk through what you can expect.

Preparing Your Site and Foundation

A solid foundation is the key to a long-lasting sauna. You’ll need to find a level spot in your yard with good natural drainage to prevent water from pooling. It’s also wise to consider local setback rules, which dictate how far the structure must be from property lines. For convenience, choose a location that is a reasonable distance from your home’s electrical panel. Your sauna can rest on several types of foundations, including a concrete pad, a sturdy deck, or a base of porcelain pavers. A professional can help you determine the best and most stable option for your specific landscape.

Connecting Electrical and Heating Systems

This is one area where you should always call a professional. Sauna heaters are powerful and require a dedicated 240-volt circuit with a GFCI breaker for safety, which is a standard code requirement in most areas. A licensed electrician will ensure the wiring is handled correctly, protecting both your home and your new sauna. Proper electrical work is not just about safety; it also guarantees your heater performs efficiently, giving you that perfect, enveloping heat every time. Gappsi coordinates with certified electricians to ensure every sauna installation meets all safety standards and local codes.

DIY vs. Professional Installation

While many barrel saunas are sold as kits, the assembly can be tricky depending on the model and your own experience with construction projects. A DIY approach can be rewarding, but it often comes with a steep learning curve and the potential for mistakes. Opting for a professional installation removes all the guesswork and stress. An experienced team arrives with the right tools and knowledge to assemble your sauna correctly and efficiently. This ensures every plank is perfectly aligned, the bands are properly tightened, and all components are secure, giving you complete peace of mind.

A Typical Installation Timeline

With a professional team, the timeline is quite efficient. After an initial consultation to assess your space, the first step is site preparation and electrical work, which can take a day or two. Once the foundation is ready and the electrical is in place, the actual sauna assembly is surprisingly fast. Most barrel saunas can be fully constructed in just a few hours. A full-service installer like Gappsi manages this entire process, coordinating the site prep, electrical, and assembly for a seamless experience. You can see examples of how our teams transform backyards from start to finish.

Common Questions About Barrel Saunas on Long Island

Deciding to add a barrel sauna to your home is exciting, but it naturally comes with a few questions. From practical concerns about cost and placement to making sure it can handle our local weather, you want to feel confident in your investment. Let’s walk through some of the most common questions we hear from homeowners on Long Island.

How to Manage Electricity Costs

Will a home sauna cause my electricity bill to skyrocket? This is a common concern, but the impact is usually less than you might think. Modern sauna heaters are designed for efficiency, and the barrel shape heats up much faster than a square room, reducing overall energy use. To keep costs low, use your sauna’s timer to have it ready right when you are, and avoid letting it run idly. Choosing a high-quality, well-insulated model also makes a big difference. The best saunas are built to retain heat, so the heater works less to maintain your desired temperature.

Indoor vs. Outdoor: Where Should It Go?

While barrel saunas are designed with the outdoors in mind, you can absolutely install one indoors. The signature curved shape is excellent at shedding rain and snow, making it a perfect backyard feature. If you’re considering an indoor setup, you’ll need a room with proper ventilation and a waterproof floor. For many Long Island homeowners, an outdoor sauna is the ideal choice. It creates a beautiful focal point in your yard and transforms your property into a personal wellness retreat. Placing it near your patio or swimming pool can create a seamless indoor-outdoor living experience for year-round enjoyment.

Important Safety Features

Safety should always be the top priority with any sauna installation. A critical feature is the use of heat shields on the walls and ceiling behind the heater. These shields prevent the wood from getting too hot and are a standard safety measure. Another essential component is a proper guardrail around the heater to prevent accidental burns. The sauna door should also be designed to open outward easily without a complex latch. Most importantly, all electrical work must be completed by a licensed electrician to ensure it meets code and operates safely. Proper installation is a key part of any home remodeling project, and a sauna is no exception.

Weatherproofing for the Long Island Climate

A quality barrel sauna is built to withstand Long Island’s varied climate, from humid summers to icy winters. The barrel shape naturally sheds water and snow, preventing moisture from pooling on the roof. These saunas are typically constructed from woods like cedar or thermowood, which are naturally resistant to rot, decay, and insects. For added protection against the elements, you can add a roof cover or apply a protective stain. Gappsi’s restoration and sealing services can also help you maintain your sauna’s exterior, ensuring it stays beautiful and functional for years to come.

Choosing Your Barrel Sauna Installer on Long Island

Selecting the perfect barrel sauna is exciting, but your work isn’t done just yet. Choosing the right installer is just as critical to ensuring your new backyard escape is safe, functional, and built to last. A great installation experience means you can start relaxing sooner, without any lingering worries about the setup. On Long Island, you need a team that understands the local landscape, from soil conditions to specific town codes.

What to Look For in a Professional Installer

When you start your search, you’ll want to find a company that offers more than just a point of sale. The ideal partner provides comprehensive installation services, managing the project from delivery to the final electrical hookup. This all-in-one approach prevents the logistical headaches and potential miscommunications that can happen when you’re juggling a separate dealer, delivery team, and electrician. A company that handles everything ensures a single point of contact and a clear line of responsibility. Look for a team with a proven track record of installing saunas and similar outdoor structures, as their experience is your best guarantee of a smooth process.

Questions to Ask Before You Hire

Before you commit to an installer, it’s important to ask a few key questions to make sure they’re the right fit. A prepared professional will have clear answers for you.

Start by asking:

  • Do you handle the entire installation, including the foundation and electrical work?
  • Are you familiar with the specific permit requirements in my Nassau or Suffolk County town?
  • Can you provide a detailed, itemized quote so I understand all the costs involved?
  • Do you have a portfolio of previous sauna installations I can review?

Understanding their experience with local building codes is especially important, as it can prevent major delays and legal issues down the road.

How Gappsi Ensures a Seamless Installation

At Gappsi, we’ve built our process around providing a completely seamless installation for homeowners across Long Island. We don’t just sell you a sauna; we deliver a full-service experience. Our team manages every detail, from preparing the site foundation to handling all the necessary electrical work required for your sauna’s heater. Because we have decades of construction experience in both Nassau and Suffolk counties, we know exactly what it takes to comply with local regulations, ensuring your installation is done right the first time. Our goal is to manage all the technical details so you can simply look forward to enjoying your new barrel sauna without any of the stress.

Related Articles

Frequently Asked Questions

What is a realistic total budget for a barrel sauna project? The final cost involves more than just the price of the sauna unit. You should also budget for professional installation, the foundation, and the necessary electrical work, which requires a licensed electrician. A quality installer will provide a detailed, itemized quote that includes all these components, so you have a clear understanding of the total investment from the start. This approach helps you plan effectively and ensures there are no hidden costs.

How complicated is the permit process on Long Island? The permit process can feel intimidating, but it is a standard part of ensuring your sauna is installed safely and to code. Most projects will require both a building permit for the structure and a separate electrical permit for the heater. The best way to simplify this is to work with an experienced installer who is familiar with the specific requirements in Nassau and Suffolk County towns. A full-service company can manage the paperwork and submissions for you, making the process much more straightforward.

How well do barrel saunas hold up to Long Island weather? Barrel saunas are very well suited for our local climate. Their rounded design is excellent at shedding snow and rain, preventing moisture from collecting. They are built from durable, weather-resistant woods like cedar or thermowood that naturally resist rot and insects. For extra protection against coastal air and winter storms, you can also add a roof cover or apply a protective sealant, ensuring your sauna remains a beautiful backyard feature for many years.

How much space do I need, and what kind of surface is required? You will need a solid, level area for your sauna. The exact footprint depends on the model you choose, but even a small yard can often accommodate one. The foundation can be as simple as a compacted gravel pad or as finished as a concrete slab or a paver patio. The most important factor is that the base is perfectly level to ensure the sauna is stable and the door functions correctly. A professional can assess your property and recommend the best location and foundation type for your space.

Why should I choose a barrel sauna over a traditional cabin style? The main advantages of a barrel sauna come from its unique circular design. This shape allows it to heat up faster and circulate warmth more evenly, which means you spend less time waiting and use less energy. Many people also prefer the distinct, rustic aesthetic of a barrel sauna, which can become a beautiful focal point in a backyard. While both styles offer great health benefits, a barrel sauna provides a smart combination of efficiency, performance, and visual appeal.

Share this page:
Pool fence beside a paver deck in a Long Island backyard

Pool Fence Options for Long Island: A Local Guide

A pool fence should make the swimming area safer without making the backyard feel closed in. On Long Island, the design also needs to account for New York State requirements. Town or village review, gate hardware, paver edges, drainage, landscaping, and the way your household moves through the property. Choosing the material before mapping those conditions can create avoidable work later.

Call Gappsi at (631) 831-3177 to discuss your Long Island pool fence plan.

The best pool fence for a Long Island home is a code-conscious, four-sided barrier with a self-closing, positive self-latching gate. New York State sets a four-foot baseline, while local rules may add requirements. Material choice should reflect visibility, privacy, maintenance, site grading, gate use, and coordination with the paver deck.

This guide compares mesh, glass, aluminum, vinyl, and ornamental metal. It also explains the local code questions, cost drivers, and design checks that Gappsi reviews with homeowners in Nassau and Suffolk Counties.

What should a Long Island pool fence accomplish?

A Long Island pool fence should separate the pool from the house, yard, and normal routes through the property. The barrier needs a continuous layout, a properly operating gate, and enough clearance for inspection and maintenance. New York State rules provide a starting point, but the responsible town or village building department confirms the complete requirement.

The first goal is access control. The Centers for Disease Control and Prevention recommends four-sided pool fencing that separates the water from the house and uses a self-closing, self-latching gate. A fence that uses the home as one side may not provide the same separation as a complete enclosure. The final layout must account for every route a child, visitor, or pet could take toward the pool.

New York State requires a fence or other barrier at least four feet high around a swimming pool. The state rule also addresses gate closure, positive latching, and latch-handle height. These details matter at the same time as the fence material. An attractive barrier does not meet the practical goal if a gate drags on the deck, fails to close, or leaves the latch difficult to operate.

How should the gate fit daily use?

Place the gate where adults can reach the pool area comfortably while avoiding a direct, uncontrolled route from a back door. Check the swing direction, landing surface, latch clearance, furniture placement, and distance from pool equipment. A paver edge, planter, retaining wall, or landscape growth should not obstruct the gate. The route should remain usable when the deck is wet and when the yard is being maintained.

Review side gates, basement walkouts, patio stairs, and doors from the home before finalizing the fence line. A gate alarm, door alarm, or pool alarm may provide an additional safeguard where required or appropriate. Those devices do not replace a properly planned barrier or active adult supervision. Gappsi can coordinate the fence conversation with a larger swimming pool design and installation plan when the projects are connected.

Why do local rules matter beyond the state baseline?

Nassau and Suffolk properties are reviewed by local building departments as well as New York State. A town or village can apply more restrictive rules for height, openings, setbacks, alarms, permits, materials, or inspections. Confirm the rule for your parcel before purchasing a system or drilling into a completed deck. The New York State fencing regulation is a useful starting point, not a substitute for local approval.

Gappsi can help organize the fence around the pool, hardscape, and landscape plan. The local authority remains responsible for interpreting and approving the code requirements for the property.

Call Gappsi at (631) 831-3177 for a site-specific pool fence and gate review.

Which pool fence materials work with a paver deck?

Mesh, glass, aluminum, vinyl, and ornamental metal can all serve as pool fence materials, but each supports a different combination of visibility, privacy, maintenance, and design character. Aluminum keeps open sightlines, mesh provides removable flexibility, glass preserves views, vinyl adds privacy, and ornamental metal creates a defined architectural edge.

Start with the view from the kitchen, living room, patio, and lawn. Then consider how often the fence will be cleaned, whether seasonal removal is realistic, where the gate will open, and how posts will meet the paver pattern. A small sample can look different when it is repeated around an irregular pool or installed beside a contrasting natural stone border.

Pool fence material comparison for Long Island paver decks
Material Useful characteristics Planning questions
Mesh Light visual presence and removable options for households that need seasonal flexibility. Who will remove, store, and reinstall it? Are sleeves, posts, and the approved use plan consistent?
Aluminum Open sightlines, defined boundaries, and limited painting compared with some metal systems. How will the finish, rail spacing, gate hardware, posts, and paver joints align?
Glass Clear views across the pool area and a visually open deck edge. Can the household keep panels clean? Are splash zones, drainage, and hardware access planned?
Vinyl Privacy-oriented profiles and a surface that does not require frequent painting. Will its larger visual footprint fit corners, transitions, gate clearance, and the yard?
Ornamental metal Architectural character that can relate to railings, lights, and other metal details. Is the exterior finish suitable, and will walls, steps, beds, and paver borders leave a continuous barrier?

Aluminum often suits homeowners who want a defined boundary without blocking the view of the pool. Glass can keep a carefully detailed deck visually open, although it requires regular cleaning. Mesh may suit a household that can manage removal and storage. Vinyl may support privacy, while ornamental metal can reinforce a traditional or formal landscape. Every option still requires code and gate review.

Gappsi’s guide to fencing materials for Long Island properties offers additional context. Compare the pool-specific route, hardware, and maintenance plan rather than selecting from appearance alone.

Black aluminum pool fence beside a bluestone paver deck

How do New York State and village codes shape the plan?

Use New York State requirements as the baseline, then confirm the full rule with the applicable town or village building department. The review should cover the four-foot barrier, gate closure, positive latch, latch-handle height, openings, alarms, setbacks, permits, and inspection steps for the specific property.

Code review belongs at the beginning of the project. A fence route that works on a level deck may require different detailing on a sloped yard. When pavers meet lawn, or when a retaining wall changes the grade, the barrier must remain continuous without creating an unintended opening. The fence route should also leave enough space to service pool equipment and inspect the gate.

  1. Map the property. Mark the pool, house doors, patios, stairs, equipment pads, property lines, retaining walls, planting beds, and possible gate locations.
  2. Confirm the state baseline. Review the four-foot barrier, self-closing gate, positive latch, and latch-handle requirements in the New York fencing regulation.
  3. Ask the local building department. Confirm stricter rules for height, openings, materials, alarms, setbacks, permits, and inspections.
  4. Test the daily route. Check gate swing, latch access, walking clearance, furniture placement, equipment access, and adult sightlines.
  5. Coordinate the installation. Resolve post locations, deck drilling, grading, drainage, and transitions before ordering materials or disturbing pavers.

The New York pool safety information also discusses barriers and additional safeguards. This article provides general information, not legal advice. The local building department determines what is approved for your property. Gappsi can coordinate design and construction questions, while the authority having jurisdiction makes the final code decision.

What affects pool fence cost on Long Island?

Pool fence cost on Long Island depends on linear footage, material, gates, hardware, deck access, grading, drainage, obstacles, site preparation, and permit requirements. A measured site review is more useful than a universal price because two pools with similar dimensions can require very different installation work.

Linear footage is the first major factor. A four-sided barrier around a large or irregular pool uses more material than a compact layout. Curves, angles, tight corners, elevation changes, and multiple gates can increase fabrication and labor. An existing wall or structure may affect the route, but it should only count as part of the barrier when the local authority confirms that it qualifies.

Material and installation methods also change the scope. Mesh may involve sleeves, seasonal handling, storage, and reinstallation. Aluminum and ornamental metal require posts, rails, gates, finishes, and suitable attachment points. Glass uses panels and specialized hardware, with cleaning and drainage access to consider. Vinyl can have a larger physical footprint that affects corners, transitions, and gate clearance.

Deck conditions deserve a separate review. Drilling through pavers or concrete, protecting finished surfaces, moving planting, working around pool equipment, and preserving drainage can add preparation steps. Narrow side yards, stairs, retaining walls, buried utilities, and limited staging space can change the installation sequence. Include permits and inspections in the budget conversation instead of relying on a generic online estimate.

For related hardscape planning, review Gappsi’s porcelain and natural stone paver services. A coordinated fence and deck plan can reduce conflicts between post locations, paver joints, drainage paths, and future repairs. Homeowners considering an existing stone surface can also review paver sealing guidance as part of the maintenance discussion.

How can a pool fence complement pavers and landscaping?

A pool fence complements pavers when the posts, gate, finish, transitions, drainage, planting, and circulation are designed as one system. The goal is a continuous barrier that looks intentional, leaves the gate usable, protects finished surfaces, and preserves access for maintenance and future hardscape work.

Begin with the primary views into the pool. Glass can preserve sightlines from the home and patio. Aluminum can define the pool edge while keeping the deck visually open. Vinyl can create more privacy, and ornamental metal can relate to railings, lighting, or other architectural details. Gappsi considers the wider outdoor plan so the fence does not look like an isolated addition.

Post placement is particularly important around pavers. Align posts with the deck geometry where possible, and avoid placing them at visually awkward points in contrasting pavers. When a fence meets a stair, retaining wall, lawn, planting bed, or house wall, design that transition before installation. Keep the barrier continuous while allowing enough room to inspect hardware and complete future repairs.

Drainage and planting need the same attention. The fence line should not create a low spot where rainwater, mulch, or soil collects around posts. Plants should not grow into the gate swing or hide the latch. Low-growing shrubs and grasses can soften the perimeter, but they need room for pruning and inspection. Avoid thorny plants beside a frequently used gate.

Plan for maintenance beyond the first season. Glass needs regular cleaning to stay clear. Pavers may be reset or extended, so record post locations and preserve access for hardscape work. If removable mesh is considered, decide who will remove, store, and reinstall it. Confirm that the system’s use fits the approved safety plan.

Gappsi’s travertine paver information can help homeowners compare color, texture, and surface transitions. The objective is not a perfect material match. It is a fence, deck, landscape, and gate system that remains safe and coherent as the property changes.

Glass pool fence meeting a light paver deck and landscaped border

How do you choose the right pool fence for your property?

Choose a pool fence by matching the approved barrier design to the household, pool location, visibility goals, maintenance tolerance, privacy needs, and paver layout. Make the final selection after local code review and a site check, not from material appearance alone.

Start with the household and pool layout

A pool close to the home needs a route that separates water from doors, patios, and normal paths through the yard. A freeform pool, raised spa, narrow side yard, or pool beside a retaining wall may need more careful gate and post planning. If children regularly visit, discuss the difference between a permanent four-sided enclosure and a removable barrier used during selected periods.

The CDC pool safety guidance supports separating the pool from the house with a four-sided fence. New York State also sets a four-foot minimum and a 40-inch latch-handle height. Confirm current local requirements before selecting a system, particularly when the property has unusual access points or existing structures.

Match visibility, privacy, and maintenance

Choose glass when preserving an open view is important and regular cleaning is acceptable. Choose aluminum when you want defined boundaries, open sightlines, and limited painting. Consider vinyl when privacy and a more substantial profile matter. Choose ornamental metal when the fence should reinforce the architecture of the landscape. Consider mesh after discussing installation, removal, storage, and the approved safety plan.

Gappsi can compare these options alongside the pool, pavers, landscape, and access conditions. Homeowners planning several parts of the property can review Gappsi’s masonry design and construction services and the contact page for the next planning step.

Call Gappsi at (631) 831-3177 before you finalize your pool fence material or layout.

Frequently Asked Questions

How high does a pool fence need to be in New York?

New York State requires a pool fence or other barrier at least four feet, or 48 inches, high. The gate must close automatically and latch positively, and the latch handle must be at least 40 inches above grade under the state requirement. Ask the applicable town or village building department to confirm stricter local rules. Read the New York fencing regulation.

Is a removable mesh pool fence appropriate for a Long Island home?

Removable mesh can provide flexibility when a household needs a barrier during visits or selected periods, but it must be installed, maintained, and used consistently. The CDC recommends a four-sided fence that separates the pool from the house. A permanent enclosure may provide a more consistent baseline for an active pool, subject to local approval and site conditions. See Gappsi’s swimming pool safety fence information.

Which pool fence material works best with pavers?

Aluminum often coordinates well with concrete pavers and natural stone because it provides open sightlines and a defined edge without frequent painting. Glass can preserve views but needs regular cleaning. Vinyl can add privacy, while ornamental metal can support a traditional architectural style. The best selection depends on code, deck geometry, visibility, maintenance, and the home’s landscape design.

Do pool fences require alarms in addition to gates?

In some situations, New York safety guidance may call for pool, door, or gate alarms in addition to a fence or barrier. Requirements depend on the property and local jurisdiction. Ask the applicable building department which safeguards, permits, and inspections apply before construction. Alarms can add another layer of protection, but they do not replace a complete barrier or supervision. Review New York pool safety information.

Plan your Long Island pool fence with Gappsi

A well-planned pool fence should support safety, local approval, daily circulation, and the look of the paver deck. Gappsi can help Long Island homeowners compare mesh, glass, aluminum, vinyl, and ornamental metal, then coordinate the selected system with the pool, hardscape, grading, drainage, and landscape.

Bring your pool dimensions, existing deck details, access points, and local code questions to the first conversation. A site-specific review can identify the practical scope before materials are ordered or finished surfaces are disturbed.

Call Gappsi at (631) 831-3177 to plan a code-conscious pool fence for your Long Island property.

Share this page:
Finished epoxy floor in a Long Island garage

Epoxy Garage Floor Cost on Long Island: 2026 Guide.

.Planning an epoxy floor starts with more than the price printed on a coating kit. Concrete condition, square footage, preparation, coating layers, access, and intended use all affect the installed total. A garage exposed to road salt and vehicle traffic also differs from a covered patio used for outdoor seating. On Long Island, reviewing those conditions helps turn a broad national range into a useful project budget.

Call Gappsi at (631) 831-3177 to discuss your epoxy flooring project.

Epoxy garage floor cost commonly falls between $3 and $12 per square foot for professional installation as a national planning benchmark, according to Bob Vila’s published cost research. That is not a Long Island quote. The actual scope depends on the slab, repairs, coating system, access, finish, and whether the project is indoors or outside.

This guide explains how to use that benchmark without treating it as a promise. It also covers preparation, epoxy versus polyaspartic, patios, DIY tradeoffs, and the questions to ask before comparing proposals.

What Does Epoxy Garage Floor Cost on Long Island?

As an early planning figure, a professionally installed epoxy garage floor may be evaluated against a national range of roughly $3 to $12 per square foot. Long Island pricing can move above or below that benchmark because labor, access, concrete repairs, moisture conditions, coating layers, and finish details vary from one property to another.

National cost research is useful because it gives a homeowner a starting point. It should not replace an assessment of the actual slab. Bob Vila reports a typical overall project range of $1,595 to $3,337, with a national average of $2,441. Those figures help establish a planning conversation, but they do not include every condition found in a Long Island garage or patio.

For example, a clean, open garage with sound concrete may need less corrective work than a floor covered with old paint, oil residue, failed patching, or deep cracks. A narrow garage with stairs, columns, floor drains, and tight edges can also require more labor than a larger open rectangle. The selected finish matters too. A solid color, decorative flake broadcast, protective topcoat, or traction additive changes the materials and application sequence.

A practical cost list for early planning

  • DIY materials: A retail kit may appear to have a lower starting price. But the complete budget can include grinding equipment, cleaning supplies, repairs, safety gear, mixing tools, disposal, and your time.
  • Professional installation: The $3 to $12 national benchmark is a planning reference. A contractor should explain which preparation steps, coating layers, repairs, and cleanup services are included.
  • One-car garage: A 240-square-foot floor may require less coating material, but edges, cracks, oil contamination, and difficult access can still affect the installed scope.
  • Two-car garage: A 400 to 500-square-foot floor uses more material and may require more labor. The concrete condition remains just as important as the measurement.
  • Patio or outdoor slab: Sunlight, rain, drainage, temperature changes, traction, and transitions into landscaping or masonry can add planning requirements that do not apply to an enclosed garage.

The best estimate separates preparation, coating layers, repairs, access, and cure timing instead of presenting one unexplained price. Gappsi’s epoxy garage flooring installation service provides context for the type of project being evaluated.

Call Gappsi at (631) 831-3177 to compare your garage flooring options.

Which Factors Change Epoxy Garage Floor Cost?

The largest cost differences usually come from the condition of the concrete and the scope of preparation. Square footage, repairs, grinding, moisture management, coating chemistry, decorative finishes, edges, access, and cure requirements can all change the labor and materials needed for a durable installation.

Two garages with the same dimensions can need different proposals. Gappsi reviews the full surface and intended use rather than applying a flat number to every floor.

  • Concrete condition: Oil saturation, spalling, deep cracks, loose material, old paint, and failed repairs need attention before a coating is applied. Coating over a weak or contaminated surface can hide a problem temporarily without solving it.
  • Mechanical preparation: Diamond grinding removes weak surface material and creates a profile that helps the primer and coating bond. The time required depends on the existing finish, contamination, concrete density, and previous coatings.
  • Moisture: Moisture moving through a slab can interfere with adhesion. Testing or additional evaluation may be needed before the final system is selected.
  • Coating build: Primer, base coat, decorative flakes, broadcast material, and protective topcoat each affect material use and application time. The right system depends on traffic, exposure, appearance, and maintenance expectations.
  • Edges and obstacles: Steps, walls, drains, stem walls, door thresholds, columns, and narrow corners require additional masking and cutting-in work.
  • Access and scheduling: Equipment movement, garage access, ventilation, temperature, humidity, and time without vehicle traffic can affect the schedule and labor plan.
  • Related renovation work: Flooring may be coordinated with storage, lighting, wall finishes, or other garage improvements. Gappsi’s garage renovation services can help define that broader scope separately from the floor coating.

A clear proposal should state whether cleaning, grinding, crack repair, moisture review, materials, labor, topcoat, and cleanup are included. It should also explain what is excluded. That detail makes it easier to compare two estimates without choosing the lower number simply because important preparation work was left out.

Is Epoxy or Polyaspartic Better for a Garage or Patio?

Epoxy and polyaspartic can both be useful coating technologies, but neither is automatically best for every project. Epoxy often offers a longer working window, while polyaspartic may be selected for faster cure characteristics and greater outdoor UV consideration. The concrete, exposure, traffic, and complete system should guide the choice.

The coating label is only one part of the specification. A system can perform poorly when the slab is oily, dusty, damp, weak, or improperly profiled. The installer should evaluate the primer, base coat, flakes, topcoat, texture, and expected use together.

Epoxy and polyaspartic considerations
Consideration Epoxy Polyaspartic
Working time Often provides more time for organized placement and decorative flake distribution. Often sets faster, requiring efficient staging and experienced application timing.
Garage use Can suit an enclosed garage when the system matches vehicle traffic and the slab is properly prepared. Can suit a garage when a faster return-to-use schedule or different system characteristics are important.
Outdoor exposure Direct sunlight can affect some epoxy systems, so the finish and exposure should be reviewed carefully. Often considered where UV exposure is a major part of the specification, subject to the selected product.
Cure timing May require a longer wait before foot or vehicle traffic. Follow the product and installer schedule. May allow faster use in some systems, but temperature and site conditions still control the schedule.
Preparation Needs clean, sound, profiled concrete. Faster or slower chemistry does not remove the need for preparation. Also needs clean, sound, profiled concrete. Speed does not compensate for oil, moisture, dust, or weak concrete.

For a garage, road salt, tire heat, oil, dropped tools, and vehicle traffic may matter more than a short cure claim. For a patio, UV exposure, rain, wet-foot traction, drainage, frost, and transitions into the rest of the yard become more important. A coating should be specified for the conditions it will face.

Homeowners considering a broader outdoor project can compare a coated concrete area with Gappsi’s outdoor living services. If the design calls for a different surface, travertine paver options may be evaluated alongside the drainage, steps, borders, and surrounding masonry.

How Does Surface Preparation Affect the Final Cost?

Surface preparation affects both price and performance because the coating bonds to the prepared concrete, not to an abstract square-foot measurement. Inspection, cleaning, repairs, grinding, profiling, moisture review, and dust removal may add labor, but they help the selected system address the actual condition of the slab.

Preparation is where many coating estimates become difficult to compare. One proposal may include mechanical grinding and repairs, while another may assume that the floor is ready for application. Ask for the preparation method and the condition it is designed to address.

Technician preparing a concrete garage floor for an epoxy coating

The typical preparation sequence

  1. Inspect the slab: Review cracks, spalling, old coatings, oil contamination, uneven areas, drains, edges, and access points.
  2. Clean the surface: Remove dirt, grease, dust, and other contaminants before mechanical preparation.
  3. Repair defects: Address cracks, pits, loose concrete, and deteriorated areas according to the selected system.
  4. Grind and profile: Use mechanical preparation to remove weak material and create the surface profile needed for bonding.
  5. Review moisture: Consider whether moisture conditions require further testing, a compatible product, or a change in scope.
  6. Apply the system: Install primer, coating, flakes, and protective layers according to the project specification.
  7. Plan access: Keep vehicles, furniture, and foot traffic off the floor for the time required by the system and conditions.

Skipping a preparation step may reduce the initial estimate while increasing the chance of peeling, visible repairs, weak adhesion, or premature wear. Gappsi can explain which steps are necessary for the proposed floor and which conditions would change the scope.

For a related hardscape plan, the masonry design and construction team can coordinate steps, transitions, drainage, and surrounding surfaces when the coating is part of a larger project.

Can Epoxy Garage Floor Cost Planning Include a Patio?

Epoxy garage floor cost planning can include a patio, but an outdoor slab needs a separate evaluation. Drainage, sunlight, rain, seasonal temperature changes, cracks, traction, adjacent landscaping, and door or step transitions can affect whether a coating is suitable and what preparation the project requires.

A patio should not be treated as an uncovered garage. Outdoor concrete experiences water and temperature changes that can expose weaknesses in the slab. Moving cracks, settlement, crumbling areas, recurring dampness, and poor drainage should be addressed before a coating is considered.

Start with drainage and transitions

Water should move away from the home, door thresholds, walls, and foundation rather than collecting at the patio edge. The installer should review transitions at steps, pool areas, planting beds, masonry, and exterior doors. Expansion and control joints also need a defined treatment instead of being filled without considering movement.

Plan for UV exposure and wet traction

Direct sun can affect the appearance and long-term suitability of some epoxy systems. Rain and wet footwear can also make a smooth coating difficult to walk on. A compatible finish or texture may improve traction, but the surface should still remain practical to clean and comfortable for the intended use.

Coated concrete patio beside Long Island landscaping and masonry

Gappsi can review a coated patio as part of a broader outdoor plan. A homeowner may also compare the coating with natural stone, porcelain, or pavers. Gappsi’s paver sealing guide offers related maintenance context when the selected surface is pavers rather than coated concrete. The decision should account for the complete outdoor design, not only the lowest surface price.

Is DIY Epoxy Worth the Lower Epoxy Garage Floor Cost?

A DIY kit can lower the initial product line item, but it does not eliminate preparation. Equipment, safety, repairs, application timing, or the risk of correcting a failed finish. DIY may be reasonable for a sound, simple slab and an experienced homeowner. A difficult floor needs a more complete cost comparison.

Materials are only one part of the calculation. A homeowner may need a grinder or grinding accessories, industrial cleaning products, mixing buckets, rollers, squeegees, protective equipment, crack-repair materials, and disposal supplies. Tool rental can narrow the gap between a kit and professional installation.

Where DIY applications commonly go wrong

  • Insufficient preparation: Dust, oil, paint residue, and weak concrete can interfere with bonding.
  • Unresolved moisture: Moisture moving through the slab can create adhesion problems after the floor appears finished.
  • Missed working time: Fast-setting systems require organized staging and consistent application speed.
  • Thin or uneven coverage: Inconsistent material distribution can create visible variation and weaker areas.
  • Inadequate cure planning: Walking or driving on the floor too soon can damage the finish.

A fair DIY comparison adds equipment, time, cleanup, material waste, and the possible cost of removing or repairing a failed coating. It should also account for the value of a documented preparation and installation plan.

What Should You Ask Before Comparing Epoxy Flooring Estimates?

Before comparing epoxy estimates, ask each contractor to identify the preparation method, repairs, coating layers, finish, moisture considerations, access requirements, cure schedule, exclusions, and warranty terms. A written scope lets you compare complete systems instead of comparing one contractor’s full installation with another contractor’s materials-only number.

  • What preparation method will be used, and what conditions does it address?
  • Are oil stains, old coatings, cracks, spalling, and patching included in the scope?
  • Which primer, base coat, flakes, and protective topcoat are specified?
  • How will moisture, temperature, humidity, drainage, and outdoor exposure be evaluated?
  • How long will the garage or patio remain unavailable to vehicles, furniture, and foot traffic?
  • What work is excluded, such as major slab repair, drainage correction, storage removal, or unrelated renovation?
  • How will edges, stairs, drains, thresholds, and transitions be finished?
  • What maintenance and cleaning practices does the selected system require?

Gappsi takes a project-specific approach to flooring and related home improvement work. If your garage is part of a larger property plan, review the swimming pool service page. Surface, drainage, access, and surrounding outdoor work may need to be coordinated across a Long Island property.

Call Gappsi at (631) 831-3177 to review your epoxy flooring estimate questions.

Frequently Asked Questions

How much does it cost to epoxy a 20×20 garage floor?

A 20×20 garage covers 400 square feet. Applying the national planning benchmark of $3 to $12 per square foot produces a broad starting range, but it is not a Long Island quote. Concrete repairs, grinding, access, coating layers, finish, and cure requirements can move the final scope.

What is the cost of epoxy garage floor installation per square foot?

Published national guidance commonly places professional installation around $3 to $12 per square foot. Use that figure for early planning only. A contractor should inspect the slab and explain preparation, repairs, materials, labor, finish, and exclusions before giving a project-specific estimate.

Is it worth epoxying a garage floor?

It can be worthwhile when the concrete is suitable, the system matches the garage conditions, and the preparation is complete. A coating can create a more consistent, cleanable surface, but it should not be used to conceal moving cracks, moisture, weak concrete, or unresolved drainage problems.

What are the disadvantages of epoxy flooring?

Potential disadvantages include preparation requirements, cure downtime, sensitivity to moisture or contaminated concrete, and appearance changes under unsuitable outdoor exposure. A smooth finish can also become slippery when wet. The system should be selected for the space, traffic, weather, and maintenance plan.

How much does it cost to DIY epoxy a garage floor?

A DIY kit can have a lower starting product price, but the complete budget includes equipment, cleaning, repairs, safety gear, waste, time, and possible correction work. Compare the full process, including surface preparation and cure planning, rather than comparing the kit price alone.

Call Gappsi at (631) 831-3177 to plan your epoxy floor project on Long Island.

Share this page:
Low-voltage landscape lighting along a Long Island stone patio and walkway

Landscape Lighting Design on Long Island

Outdoor spaces on Long Island change character after sunset. A front walk, patio, planting bed, retaining wall, or pool approach can lose the structure that makes it useful during the day. A thoughtful plan restores visibility while preserving comfortable darkness and the character of the property.

Call Gappsi at (631) 831-3177 to discuss your landscape lighting plan.

Landscape lighting uses carefully positioned, low-voltage LED fixtures to guide movement, highlight architecture and planting, and extend the practical use of outdoor living areas. Gappsi plans these systems around light distribution, fixture placement, hardscape details, controls, and maintenance rather than treating lighting as a collection of isolated fixtures.

This guide explains how low-voltage systems work, which fixture types serve common outdoor spaces, how to plan a layout, what affects installation cost, and how lighting can be coordinated with patios, walls, pools, and planting.

What Is Low-Voltage Landscape Lighting and Why Use It?

A low-voltage landscape lighting system uses a transformer to supply outdoor fixtures with reduced electrical voltage. It commonly powers efficient LED lamps along paths, planting beds, walls, patios, steps, and other exterior features. The system should be designed around how people use the property, not placed wherever an outlet happens to be available.

The result depends on matching the light source, fixture position, beam direction, and control schedule to each task. A walkway may need soft, even guidance. A mature tree may need a narrower accent. A retaining wall may benefit from a controlled wash that shows texture without shining into nearby windows. The National Park Service explains that choosing the task area, fixture height, and light distribution helps limit glare and unwanted spill through its outdoor lighting principles.

How can landscape lighting improve safety and security?

Thoughtful lighting can make steps, changes in grade, walkways, and entry transitions easier to read during evening use. It can define the route from a driveway to a front door and make a patio or pool approach easier to navigate. It can also make the exterior of a home more visible from the approach. These effects can support a safer-feeling arrival, but lighting alone does not guarantee security.

Gappsi’s existing landscape lighting design guidance describes the relationship between safety, security, and appearance. The practical goal is balanced visibility, not maximum brightness.

Why choose LED and an integrated design?

LED fixtures use energy efficiently and can provide focused output for paths, trees, walls, and gathering areas. Responsible placement also reduces unnecessary light trespass. A professional plan considers the home’s facade, mature planting, masonry, circulation routes, and evening routines together. Lighting can be coordinated with Gappsi hardscaping and masonry services so steps, seat walls, patios, and retaining walls support the same nighttime composition.

Call Gappsi at (631) 831-3177 for a Long Island landscape lighting consultation.

Which Fixtures and Techniques Work Best?

The best fixture is the one that serves a clear purpose in the layout. Path lights should orient people without creating a bright runway. Uplights can give a tree or column more height. Downlights can illuminate a walking surface from above. Accent fixtures can draw attention to a specimen plant or textured masonry, while wall washes spread softer light across broader surfaces.

  • Path lights: Guide walkways, steps, and planting-bed edges with controlled illumination.
  • Uplights: Aim a managed beam into a tree canopy, column, or architectural feature to add depth.
  • Downlights: Cast light toward steps, paving, seating, or paths from an elevated position.
  • Accent lights: Focus attention on a specimen tree, planting group, or stone detail.
  • Wall wash fixtures: Spread light across a facade or retaining wall instead of creating a hot spot.
  • Well lights: Sit flush with the ground where an in-ground fixture can illuminate a tree or wall discreetly.
  • Hardscape lights: Fit beneath caps, benches, ledges, or steps to add concealed illumination.
  • Shielded fixtures: Limit direct views of the lamp and help keep light out of windows, seating areas, neighboring properties, and the sky.

Technique matters as much as hardware. Uplighting should reveal the branching structure of a tree without aiming glare toward guests. Downlighting is useful for a walking surface because the beam follows the task area. Wall washing works best when the fixture distributes light evenly. A narrower accent can create contrast on textured stone or a focal plant.

Glare control should guide every decision. Hide fixtures behind planting where practical, shield the light source, and use the lowest output that serves the area. This lets the eye move between lit features and darker areas. Gappsi can coordinate fixture placement with Long Island landscape design, patios, masonry, planting, and circulation routes.

How Should You Plan a Landscape Lighting Layout?

A successful layout begins before fixtures are selected. Walk the property after sunset and identify where light supports a real activity, guides movement, or reveals a feature worth seeing. The task-first approach described by the National Park Service is useful on Long Island properties where paths, planting beds, patios, and masonry share a limited footprint.

  1. Map task areas. Mark the front walk, driveway edge, steps, patio, outdoor kitchen, seating area, pool approach, and routes between the house and backyard. Make changes in elevation easy to read without shining fixtures toward a person’s eyes.
  2. Choose focal points. Identify the tree, specimen planting, retaining wall, entry, architectural detail, or masonry feature that should anchor the nighttime view. Add softer nearby illumination so the composition does not become one bright spot surrounded by darkness.
  3. Connect architecture and planting. Consider the facade, columns, rooflines, trees, shrubs, and beds as one composition. Account for future plant growth, views from interior rooms, and sightlines from outdoor seating.
  4. Find dark zones and control glare. Look for abrupt gaps near gates, steps, paths, and transitions between hardscape and lawn. Fill only the areas that need visual continuity. Keep light away from bedrooms, roads, neighboring properties, and the sky.
  5. Plan the transformer and load. Count fixtures by type and group them by zone. Paths, architectural accents, entertaining areas, and security-oriented locations may need separate controls or schedules.
  6. Test the design at night. Inspect the property from the sidewalk, driveway, patio, and primary interior viewpoints. Move or shield anything that causes glare, hot spots, or unwanted spill before final positions are fixed.

For a Long Island project, Gappsi can coordinate the layout with existing or planned outdoor construction. Homeowners can also review the landscape design and construction guide when planning a larger outdoor environment.

How Much Does Landscape Lighting Installation Cost?

There is no responsible one-size-fits-all price for landscape lighting installation. A professional estimate is site-specific because the scope depends on the property, desired nighttime use, access, and how the system must work with existing or planned construction. Gappsi evaluates the layout before recommending equipment, wiring, and controls rather than presenting an unsupported generic range.

The number of fixtures is one cost driver, but it is not the only one. A small group of path lights may require less labor than a broader design with uplighting. Wall washing, stair illumination, concealed hardscape fixtures, multiple zones, and restoration around established planting or paving can also change the scope. See Gappsi’s professional low-voltage LED landscape lighting service.

Landscape lighting cost drivers and planning questions
Cost driver Planning question
Fixture count and type Which paths, trees, walls, steps, beds, or gathering areas need light, and what effect should each fixture create?
Transformer and wiring Will the transformer support the planned load, and can wiring be routed efficiently while keeping connections protected?
Trenching and access Will installation cross established planting, lawn, paving, masonry, or areas requiring careful restoration?
Hardscape coordination Should lighting be planned with a patio, retaining wall, outdoor kitchen, pool edge, or steps before construction?
Controls and maintenance Do you need timers or zones, and who will clean lenses, check connections, and adjust fixtures?

Scope matters more than a fixture count alone. Planning lighting with masonry and planting can reduce disruptive rework and produce a more consistent result. Shielded fixtures and appropriate distribution direct light toward the task area while limiting glare and spill. A consultation can connect lighting priorities with existing conditions and future outdoor plans.

How Can Lighting Be Integrated Into Patios, Walls, and Pools?

Lighting works best when planned with the hardscape rather than added after construction. A patio, retaining wall, outdoor kitchen, pergola, or pool edge already has lines, steps, material changes, and gathering points that can guide fixture placement. Gappsi’s hardscaping and masonry work can be coordinated with low-voltage lighting so the finished backyard remains useful after sunset.

Patios and outdoor kitchens need layers that match each activity. Low-profile fixtures can provide subtle illumination beneath a seat wall, counter edge, or step. A covered patio may need a separate source for a dining table or food-preparation surface. Wall-mounted fixtures can define entries, while accent lights can reveal stone, brick, or stucco texture without flooding the area.

Warm low-voltage landscape lighting along a Long Island patio walkway

Walkways, steps, and retaining walls require attention to transitions. Small indicator or path fixtures can mark an edge without creating a bright line of evenly spaced lamps. Concealed hardscape fixtures under caps and steps can show changes in elevation while preserving the material’s daytime appearance. A wall wash can reveal texture, but the fixture must not shine directly into nearby windows or seating.

Pool edges and planting beds should be designed as one visual composition. Lighting can support movement around the deck, identify a change in grade, and highlight selected planting without creating reflections across the water. The plan should account for views from the house, seating areas, and paths. See the Gappsi swimming pool service for broader pool-project context.

Call Gappsi at (631) 831-3177 to coordinate landscape lighting with your outdoor construction plan.

What Maintenance Does Landscape Lighting Need?

Outdoor lighting needs periodic attention because fixtures live among soil, pollen, leaves, salt residue, irrigation, and changing plants. Maintenance should be part of the original plan. Clean lenses and housings, check connections, and confirm that fixtures still point toward their intended task area.

  • Clean lenses and housings: Remove dirt, pollen, leaves, and residue that reduce useful output.
  • Check alignment: Re-aim fixtures after planting grows, soil shifts, or seasonal work changes the view.
  • Inspect wiring: Look for damage, loose connections, or areas exposed by erosion or digging.
  • Review controls: Adjust timers and zones as sunset times change or outdoor routines evolve.
  • Manage planting: Trim growth that blocks a beam or causes unwanted shadows.

Long Island properties may need attention after storms, heavy rain, landscaping work, and winter conditions. A maintenance check is also a useful time to reassess glare, light trespass, and whether the original layout still matches how the property is used.

Frequently Asked Questions

What is the cost of professional landscape lighting installation?

Professional landscape lighting installation is priced by site and scope. Fixture types, fixture count, transformer capacity, wiring routes, access, trenching, controls, hardscape coordination, and restoration all affect the estimate. Gappsi reviews the property and intended nighttime use before recommending a project-specific system.

What are the benefits of low-voltage landscape lighting?

Low-voltage landscape lighting can improve visibility on paths and steps, highlight architecture and planting, and extend the use of patios and other outdoor areas after dark. LED fixtures can provide focused output, while shielding and careful placement help limit glare and unwanted spill.

How do you choose the right outdoor lighting fixtures?

Choose fixtures by task, not by appearance alone. Path lights guide movement, uplights add height, downlights illuminate surfaces from above, accent lights focus attention. Wall washes spread light across broad surfaces, and hardscape fixtures add concealed illumination to steps or caps.

Can landscape lighting be integrated into existing hardscapes?

Yes. Existing patios, walls, steps, outdoor kitchens, pergolas, and pool edges can be assessed for discreet fixture placement and safe wiring routes. The installer should account for material protection, access, sightlines, and glare before cutting, trenching, or attaching fixtures.

What is the typical maintenance requirement for outdoor lighting?

Maintenance usually includes cleaning lenses, checking connections, re-aiming fixtures, adjusting timers, inspecting wiring, and managing plants that block the light. Frequency depends on the landscape, weather, irrigation, salt exposure, and how much the planting changes.

Call Gappsi at (631) 831-3177 to plan landscape lighting for your Long Island property.

Share this page:
Contractors renovating an existing in-ground swimming pool with new gunite finish, coping and travertine deck

Pool Renovation on Long Island: Remodel vs Repair

An aging Long Island pool does not automatically need to be demolished. Cracked finishes, outdated equipment, leaking plumbing, and a dated deck can point to different levels of work. The first decision is whether the pool needs structural repair, a cosmetic remodel, or a broader renovation plan.

Call Gappsi at (631) 831-3177 to discuss your pool renovation options.

A pool renovation restores an existing swimming pool while upgrading selected features such as the finish, tile, coping, equipment, deck, lighting, or layout, without automatically replacing the entire shell. The right scope begins with evaluating the shell, bond beam, plumbing, and surrounding surfaces.

That distinction matters on Long Island, where repeated repairs may justify a coordinated project, while a sound shell may make targeted improvements the more practical choice. Start by defining what renovation includes, then match the scope to the pool’s condition and your long-term plans.

What Counts as a Pool Renovation?

A full pool renovation is more than applying a new finish. It is a coordinated update to the surfaces, systems, and surrounding features that determine how the pool looks, performs, and fits the backyard. The work may remain largely cosmetic, or it may include structural repairs and infrastructure upgrades after an inspection identifies underlying problems.

For a gunite pool in Nassau or Suffolk County, the scope should be defined before demolition begins. A contractor should evaluate the shell, waterline, equipment pad, plumbing, coping, and deck as connected parts of one system. If cracks or other structural problems are present, they need to be addressed before resurfacing. Covering a shell issue with a new finish can leave the cause unresolved and lead to another repair cycle.

The main components of a full renovation

  • Interior finish: The existing surface may be replaced with plaster, a pebble-based finish, or quartz. The material affects the pool’s appearance, texture, maintenance needs, and the time between major refinishing projects.
  • Waterline tile: New ceramic, porcelain, glass, or stone tile can refresh the waterline and create a more deliberate connection between the pool, coping, and deck. Tile selection also affects long-term cleaning and maintenance.
  • Coping: Replacing the edge material updates the pool’s profile and provides a clean transition to the surrounding hardscape. Coping can be coordinated with natural stone, travertine, or concrete pavers used elsewhere in the yard.
  • Equipment and plumbing: A renovation may include pumps, filters, heaters, automated controls, lighting, skimmers, main drains, or aging plumbing lines. Replacing inefficient equipment can reduce operating demands, while updating old underground lines may help prevent future leaks and disruptive excavation.
  • Deck and surrounding hardscape: Worn or cracked decking can be removed and replaced as part of the project. Addressing the deck at the same time as the pool helps manage elevations, drainage, access, and the visual relationship between the pool and outdoor living areas.

Not every project needs every component. Replacing tile and coping can modernize an older pool without changing its structural shell, while a broader renovation may combine resurfacing, equipment updates, and deck replacement. Gappsi can also coordinate design decisions so the renovated pool works with the larger backyard rather than appearing like an isolated upgrade.

For a closer look at finish work, review Gappsi’s guide to gunite pool resurfacing and refinishing. The right scope depends on the pool’s condition, the homeowner’s goals, and whether the existing shell and supporting systems can continue serving the property.

Remodel vs Repair: How to Tell the Difference

The most important distinction in an aging pool is whether the problem is structural or primarily cosmetic. A cosmetic remodel can change the appearance and usability of a sound pool. Structural repair addresses the parts that hold, contain, and circulate the water. At Gappsi, that decision should begin with an assessment of the existing gunite shell, not with a finish sample.

What belongs in a structural repair?

Structural work comes first when the pool is showing signs of movement, water loss, or deterioration behind the visible finish. Cracks in the gunite shell can allow seepage and worsen over time. The bond beam, which supports the waterline tile and coping, also needs to be sound before resurfacing or replacing those finishes. If it is compromised, installing new tile over it only conceals the problem temporarily.

Older underground plumbing is another key consideration. Aging lines can develop leaks that are difficult to locate and expensive to reach after a new surface or deck has been installed. Replacing vulnerable plumbing during a planned project may prevent future excavation. Visible seepage, unexplained water loss, shifting around the pool, recurring leaks, or repeated repairs all warrant a professional shell and systems assessment before cosmetic decisions are made.

Some warning signs are easier to see at the waterline. Loose coping, cracked tile, rough plaster, flaking finishes, and worn decking may indicate that the pool is ready for renovation, but they do not prove that the shell needs rebuilding. The same visible symptom can have different causes. For example, a damaged tile line may reflect ordinary age, movement in the bond beam, or water intrusion behind the finish. A site inspection helps separate a surface replacement from a repair that must happen below it.

  • Structural repair tasks: repairing gunite shell cracks, evaluating seepage or shifting, verifying bond beam integrity, and addressing aging underground plumbing.
  • Systems-related repairs: investigating circulation problems, plumbing leaks, and equipment issues that affect how the pool operates.

What can a cosmetic remodel change?

When the shell and supporting structure are stable, a cosmetic remodel can produce a substantial change without rebuilding the pool. Resurfacing can replace a worn interior finish with plaster, pebble-based material, or quartz. New waterline tile and coping can update the edge, improve the transition around the pool, and change the overall character of the backyard. Tile material choices, including ceramic, porcelain, or stone, also affect long-term maintenance at the waterline.

  • Cosmetic remodel tasks: resurfacing the interior, replacing waterline tile, updating coping, and refreshing the pool’s visible finishes.
  • Broader upgrades: replacing outdated equipment, improving lighting, or changing surrounding elements when they can be completed without correcting a shell defect.

A major remodel can cross both categories. Adding a tanning ledge, waterfall, or different pool shape may require significant structural modification, even when the original shell is mostly sound. That is why Gappsi evaluates the structure, plumbing, intended design, and surrounding site as one project. The right pool renovation does not simply cover old surfaces. It resolves underlying defects first, then applies cosmetic finishes.

What Are the Biggest Cost Drivers in a Pool Renovation?

How much does a pool renovation cost on Long Island? There is no responsible one-size-fits-all answer. A limited cosmetic remodel may begin in the lower thousands, while a larger renovation involving structural work, new decking, plumbing, and equipment can reach $30,000 or more. The pool’s size, age, shell condition, finish selections, and access to the property all affect the estimate. For perspective, Gappsi’s published baseline for a new gunite swimming pool on Long Island is $90,000 to $140,000. A renovation that preserves a sound shell is therefore evaluated differently from a full replacement.

The first major cost driver is the interior finish. Standard plaster, pebble-based finishes, and quartz each have different material, installation, and service-life considerations. Waterline tile and coping also affect the budget. Ceramic, porcelain, and stone tile vary in both appearance and maintenance needs. You can review a detailed guide to inground pool remodel cost before comparing finish packages.

Shell condition comes before appearance. Cracks, seepage, shifting, or a compromised bond beam must be assessed before resurfacing or replacing coping. Aging underground plumbing can add excavation and repair work, but replacing problematic lines during the project may help prevent future leaks. The scope may also expand when an older pool has outdated electrical components, filtration, or circulation equipment.

Equipment upgrades are another important variable. Replacing an inefficient pump with a variable-speed model can reduce electricity use, particularly in New York’s high-energy-cost environment. A heat pump, updated filter, automation, LED lighting, or saltwater conversion adds an upfront cost while changing how the pool operates and is maintained. Deck and coping work can become a substantial portion of the project when concrete, pavers, travertine, or other surrounding materials must be removed and rebuilt.

Typical pool project scopes and planning ranges
Scope Typical work General cost range Typical timeline
Cosmetic remodel Resurfacing, selected tile, coping, or equipment updates on a sound shell. Often lower thousands to tens of thousands, depending on materials. Several weeks
Full renovation Finish, tile, coping, plumbing or structural repairs, equipment, and portions of the deck. Often $30,000 or more when multiple systems are involved. Several weeks to a few months
Full replacement Demolition, excavation, new shell, new systems, finishes, and surrounding work. New gunite construction commonly falls near the $90,000-$140,000 Long Island baseline. Multiple months, subject to permits and weather

For additional context, see Gappsi’s guide to gunite swimming pool cost on Long Island. An on-site assessment is the only reliable way to separate a manageable remodel from a project that approaches replacement scope.

When Should You Renovate Your Pool Instead of Replacing It?

For many Long Island homeowners, the choice between remodeling a pool and building a new one is clear: renovating is more affordable when the existing shell remains structurally sound. Keeping that foundation avoids demolition, excavation, and the cost of constructing an entirely new pool. The right choice, however, depends on more than the age or appearance of the pool.

A gunite pool often gives homeowners a strong starting point for a redesign. Its concrete shell can support changes to the layout, finishes, and features, allowing a renovation to solve functional problems while updating the backyard’s appearance. Gappsi can help homeowners evaluate the existing pool alongside the surrounding patio, landscaping, and outdoor living areas through Long Island swimming pool design and construction.

Renovation is often the better economic decision when:

  • The shell is stable, with no unresolved cracking, shifting, or persistent seepage.
  • The pool’s shape and location still work for the backyard and how your household uses it.
  • Recurring repairs, aging finishes, or outdated equipment are creating a pattern of expense.
  • You want meaningful improvements without paying to remove and rebuild the entire structure.

Frequent repairs deserve special attention. Fixing one leak, finish failure, or equipment problem at a time may appear less expensive initially. Repeated service costs can add up without improving the pool as a whole. When repairs become frequent, a coordinated pool renovation may be more economical over the long term. A single project can address the finish, coping, tile, circulation system, and other related issues according to one plan.

Renovation does not necessarily mean preserving every dimension. A major rehabilitation can incorporate a tanning ledge, water feature, or revised pool shape, although these changes require substantial structural work. That flexibility can make an existing gunite shell worth renovating, especially when its placement fits the property’s grading, access, and outdoor circulation better than a new excavation would.

The deciding input should be a professional shell assessment. Gappsi should inspect for visible seepage or shifting, confirm the condition of the bond beam that supports the tile and coping, and check whether old plumbing could lead to underground leaks. Cosmetic work should not cover an unresolved structural problem. Conversely, replacing a sound shell simply because the tile, coping, surface, or equipment is dated can create unnecessary construction costs.

Call (631) 831-3177 to discuss your pool renovation with Gappsi

Replacement becomes more reasonable when the shell has extensive structural failure. The pool’s location no longer suits the property, or the desired redesign would require rebuilding nearly every component. An on-site evaluation can compare those costs with a renovation plan and give you a practical basis for deciding rather than relying on appearance alone.

Pool Renovation Upgrades That Add the Most Value

The most useful upgrades do more than change the appearance of an older pool. They can simplify routine care, improve how the space is used, and connect the pool to the rest of the backyard. During a renovation, Gappsi evaluates the existing shell, equipment, deck, and surrounding landscape together so each improvement supports the overall design.

  • Saltwater conversion: A saltwater system can make pool care more convenient and provide a softer water feel. It is not maintenance-free, but it can reduce the need to handle and add certain chemicals manually. Gappsi can assess whether the existing equipment and plumbing are suitable for the conversion.
  • LED pool lighting: Replacing older lights with LED fixtures improves evening visibility while using an efficient lighting format. Homeowners can also choose adjustable color settings to create a more flexible atmosphere for swimming, entertaining, or quiet evenings outdoors. Older underwater lights and wiring should be inspected as part of the renovation.
  • Automation and control systems: A centralized control system can bring filtration, heating, and lighting into one interface. Remote controls make it easier to adjust settings before using the pool, monitor routine operation, and avoid unnecessary equipment run time. This is especially useful when several systems were installed at different times.
  • Tanning ledges and in-pool seating: A shallow ledge creates a place to sit, cool off, or supervise children without using the deeper swimming area. Built-in seating can make the pool more comfortable for conversation. These additions may require substantial structural modification, so they belong in the design phase rather than as an afterthought.
  • Pool deck and landscape integration: A renovated pool can look disconnected if the surrounding paving, planting, drainage, and outdoor living areas remain unchanged. Coordinating the pool edge with travertine, natural stone, or concrete pavers creates a clearer transition from water to patio. Homeowners planning new or restored pavers can also review Gappsi’s guide to sealing pool deck pavers.

Contractor installing natural travertine pavers around a renovated in-ground swimming pool

Landscape integration can include planting beds, shade, walkways, an outdoor kitchen, or a seating area that follows the pool’s geometry. Gappsi’s design-build approach helps coordinate those decisions with the pool renovation instead of forcing separate contractors to work around completed surfaces. The result is a backyard that functions as one outdoor living space, with materials and elevations selected for practical use as well as visual continuity.

Prioritize upgrades according to the condition of the pool and the way your household uses it. A failing system or unsafe light circuit deserves attention before decorative features. Once the essential work is planned, design additions such as a ledge, lighting, and coordinated paving can make the renovated pool more useful for years to come.

How Long Does a Pool Renovation Take on Long Island?

There is no single schedule for every pool renovation. A simple finish replacement may move faster than a project that includes shell repairs, new plumbing, a redesigned deck, and updated landscaping. On Long Island, the most reliable timeline comes from evaluating the pool first, confirming the scope, and planning around permits and seasonal conditions. Gappsi maps those dependencies before construction begins so homeowners know what happens next.

  1. Site assessment and design: Gappsi inspects the existing pool, surrounding deck, equipment, drainage, and visible finishes. The design phase establishes whether the project is a focused update or a broader remodel, including decisions about tile, coping, surface materials, lighting, and usable backyard space.
  2. Permitting and planning: Permit requirements and review times can affect the start date. Long Island weather also matters, because cold temperatures, rain, and seasonal work limitations can change the construction sequence. The schedule should allow time for approvals, material selections, deliveries, and coordination with any masonry or landscape work.
  3. Demolition and structural repair: Existing finishes, damaged tile, coping, or sections of deck are removed as needed. Before cosmetic work proceeds, the pool shell and bond beam should be assessed. Cracks, shifting, seepage, or other structural concerns need attention first, rather than being covered by a new finish.
  4. Resurfacing, tile, and coping: Once the base is ready, the crew installs the selected interior finish and replaces waterline tile or coping where included. Material choices such as plaster, pebble, quartz, ceramic, porcelain, or stone affect both the appearance and the installation sequence.
  5. Equipment upgrades: Pumps, filters, heaters, plumbing, lighting, and controls are updated according to the approved plan. Replacing aging equipment or underground lines may add work to the schedule, but it can reduce the risk of future leaks and avoid reopening finished areas later.
  6. Deck and landscaping: Deck removal, new pavers or stone, drainage adjustments, planting, and other outdoor improvements follow the pool work when the design includes them. Coordinating these elements with Gappsi helps create a connected backyard instead of treating the pool as an isolated feature.
  7. Fill, finish, and startup: The pool is filled, systems are started, water chemistry is balanced, and the completed work is inspected. Proper balancing protects new surfaces and equipment. For Long Island homeowners, winterization and freeze-thaw protection should also be part of the care plan, especially if the project is completed near the end of the season.

Freshly resurfaced in-ground swimming pool with new quartz finish and ceramic tile waterline

In practical terms, a limited update may take less time than a complete renovation, while structural repairs and full backyard changes extend the schedule. The right answer to how long a pool renovation takes comes after an on-site assessment, not from a fixed promise. Gappsi can separate permitting, construction, and finishing milestones so the plan reflects the actual condition of your Long Island pool.

Call (631) 831-3177 to schedule your pool renovation with Gappsi

Frequently Asked Questions

Can you remodel an existing pool without rebuilding it?

In many cases, yes. A renovation can preserve the existing shell while updating the finish, tile, coping, decking, plumbing, lighting, and equipment. A professional shell assessment should come first if you see seepage, shifting, or recurring leaks.

How do I know whether my pool needs repair or a full renovation?

Cracks in the gunite shell, bond beam concerns, underground plumbing leaks, or movement call for structural evaluation before cosmetic work. If the shell is sound but the surface, coping, tile, deck, or equipment is worn, a focused remodel may address the problem without replacing the structure.

What typically affects the cost of a pool renovation?

The main variables are pool size, age, shell condition, finish materials, deck work, plumbing access, equipment selection, and design changes. Replacing a variable-speed pump, heater, or controls adds a different cost than resurfacing alone, so an on-site assessment is more useful than a broad online estimate.

Is renovating usually less expensive than building a new pool?

Often, renovation costs less because the project can retain the existing shell and avoid full demolition, excavation, and new construction. Replacement may deserve consideration when structural problems are extensive or the existing layout cannot support the way your family wants to use the backyard.

How long does a pool renovation take on Long Island?

There is no single timeline. Resurfacing or an equipment swap is generally simpler than a project involving structural repairs, new decking, or a changed pool shape. Permitting and seasonal weather can also affect scheduling, so your contractor should provide a phase-by-phase timeline after inspecting the pool.

Ready to Plan Your Pool Renovation?

A clear evaluation can help you separate structural repairs from cosmetic improvements and choose a renovation scope that fits your existing pool. Gappsi can help you review the pool’s condition, discuss design options, and map the next practical steps for your Long Island backyard.

Schedule a free pool renovation consultation by calling Gappsi at (631) 831-3177

Share this page: