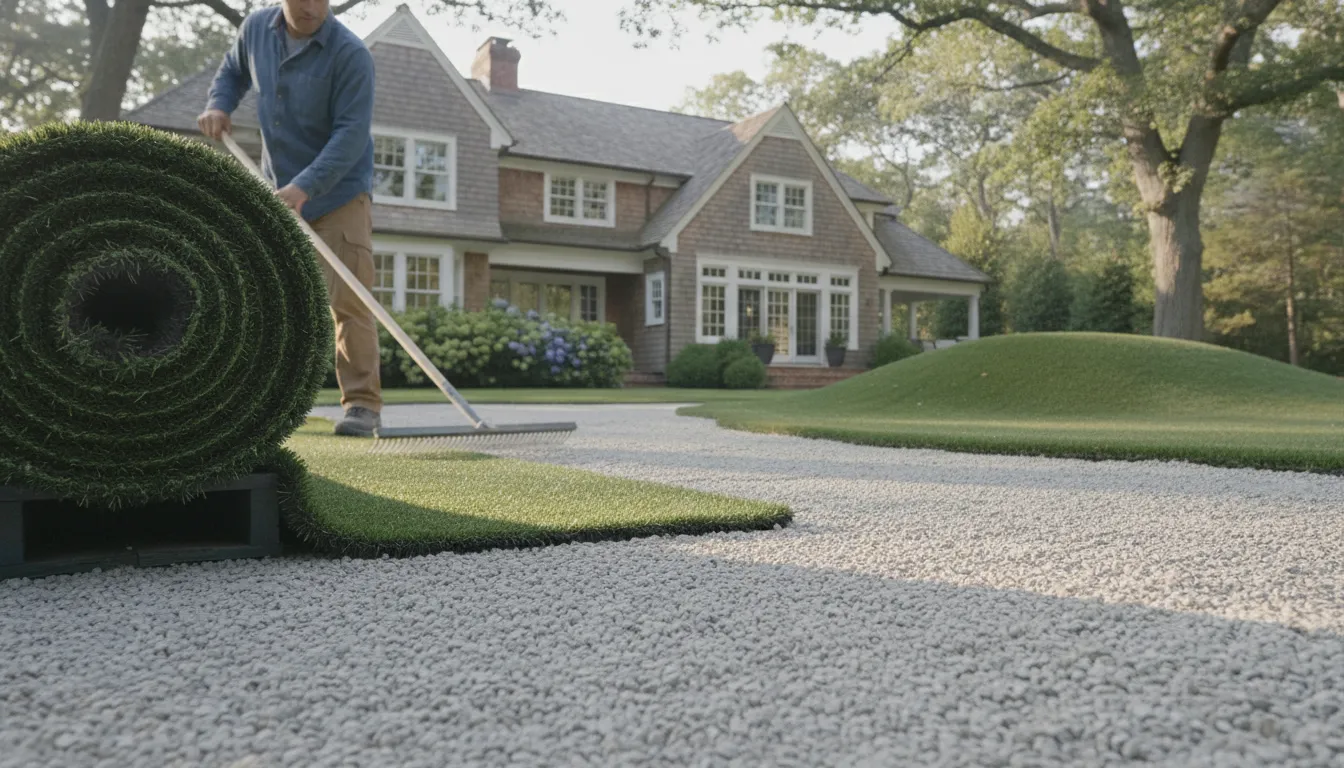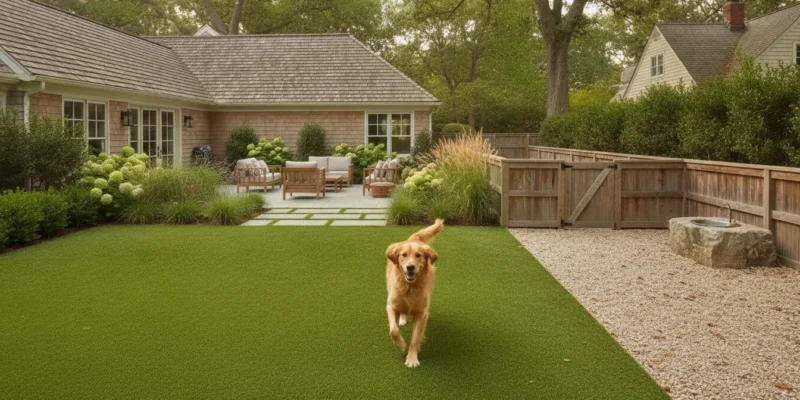
Dog enjoying a landscaped artificial turf run in a Long Island backyard

Artificial Grass for Dogs: Drainage and Care Guide

.

A dog-friendly backyard is easier to maintain when the surface, base, drainage path, and cleanup routine are planned together. Artificial turf is not simply a layer of green blades placed over an existing lawn. On Long Island, the right design must account for soil conditions, rain, urine flow, solid-waste removal, summer sun, and how the area connects to fencing, patios, and planting.

Contact Gappsi through our contact page

The best artificial grass for dogs is part of a complete system. It includes a properly prepared base, permeable backing, planned drainage, durable seams and edging, access for rinsing, and a realistic maintenance routine. Performance depends on site design, installation, product selection, sanitation, and heat management, so an odor-free or cool surface should never be assumed.

Whether you are planning a small dog run in Nassau County or a larger pet area in Suffolk County. Start by defining what the installation must handle every day. That begins with the turf surface and the layers beneath it.

What should artificial grass for dogs include?

A residential pet area should be planned as a complete surface and drainage system, not selected by blade appearance alone. The turf surface is only one part of the installation. A practical setup also accounts for the backing, compacted base, grading, drainage path, seams, edging, and access for routine cleaning. These details matter whether you are converting a small side yard in Smithtown or planning a larger dog run elsewhere in Nassau or Suffolk County.

The turf surface and backing should be appropriate for regular pet use and matched to the intended area. Pet-specific turf is available, but the right selection depends on how the space will be used. How much direct sun it receives, and how it connects to the rest of the backyard. Under the blades, a suitable backing needs to support water movement through the system. A permeable backing can allow urine to pass through, but it does not remove the need for proper grading, a suitable base, and an outlet or dispersal plan.

The base and drainage path are just as important as the finished turf. Ground preparation and topsoil grading help establish a stable surface and direct water where it belongs. The installation plan should consider existing soil, low spots, nearby structures, and whether water can disperse without collecting beneath the turf. Gappsi’s landscape division handles grading, drainage, irrigation, planting, and turf integration, which is useful when the pet area must work with the entire property. Homeowners can review the broader Long Island landscape design and construction scope when planning these connections.

Edges, seams, and transitions also deserve attention. Secure edging helps define the area, while properly planned seams reduce visible breaks and potential catch points. A dog run may transition to pavers, planting beds, a patio, or natural lawn. Those transitions should be comfortable to cross and positioned so they do not interfere with gates, mowing, irrigation, or cleanup.

Finally, include sanitation access in the design. Solid waste still requires prompt removal, and the surface may need rinsing or system-specific cleaning. Leave enough room to reach the area with a hose and cleaning tools. A full yard or constructed dog run can be designed around these needs. A portable potty mat may be convenient for a temporary use, but it does not solve property-wide grading, drainage, fencing, or access concerns. For a long-term residential project, those site decisions should be made before the turf is ordered.

How does drainage prevent dog-urine odor?

Odor control starts below the visible blades. In a properly designed system, permeable backing allows liquid to move through the turf rather than remain on the surface. A compacted, properly graded base then provides a path for that liquid to disperse or reach a planned drainage outlet. This can reduce the concentration of urine at the blade level, but it does not make artificial grass odor-free by itself.

Call Gappsi Group at Contact Gappsi through our contact page to discuss drainage, grading, and a dog-friendly turf layout for your Long Island property.

Why grading and the base matter

Water needs somewhere to go after it passes through the turf. If the area is flat where it should be sloped, or if the underlying base holds water, urine can remain in the system longer than intended. Poor drainage may also leave wet areas near edging, seams, fences, foundations, or other low points. During planning, the installation team should evaluate existing soil, surface grades, nearby structures, and the most practical route for dispersal.

The base is more than a layer that supports the turf. It helps create a stable, even surface while contributing to the drainage path. Excavation, aggregate selection, compaction, and grading all affect how the finished area handles liquid. A dog run beside a house may require a different drainage approach than a larger turf section in an open backyard. The design should account for both ordinary rainfall and the concentrated use of a pet bathroom area.

What drainage cannot solve alone

Drainage handles liquid, not solid waste. Remove feces promptly so residue does not remain on the blades or wash into the system. Regular rinsing can help move residue through the backing when the system and site drainage are designed for it. Focus additional attention on the places your dog uses most often. Spot cleaning and system-appropriate sanitation may also be needed, especially during warm weather or periods of frequent use.

Persistent odor is a reason to investigate, not a reason to apply stronger products at random. Possible causes include a blocked or undersized drainage path, a low area that stays damp. Contaminated infill, inadequate rinsing, or sanitation practices that do not match the turf system. Cleaning agents should be selected for the installed materials and used according to their directions. Harsh or unsuitable chemicals may affect turf components, nearby planting, or runoff.

For homeowners comparing artificial grass for dogs, ask how the complete system will manage urine, rainwater, solid waste, cleaning access, and future maintenance. A coordinated plan for the turf, base, grading, edging, and surrounding landscape gives odor control a stronger foundation than the turf surface alone.

How do you prepare the site for a dog-friendly turf area?

A dependable installation starts below the turf surface. For Long Island homeowners, the site plan should account for existing soil, runoff, access. Nearby foundations, and how the dog area will connect to the rest of the yard. Artificial grass for dogs performs as part of a complete system, including a prepared base, planned drainage, secure edges, and seams that can withstand regular use. Use this sequence to clarify the work before selecting a surface.

  1. Review the existing site. Identify low areas, compacted soil, standing-water patterns, tree roots, irrigation lines, downspouts, utilities, fences, gates, patios, and the route from the house. Note where the dog naturally enters, rests, plays, and relieves itself. This review helps determine whether the turf should occupy the full yard or a defined run. It also identifies conditions that could affect cleaning access and future landscape maintenance.
  2. Plan excavation and removal. Remove the existing lawn, unsuitable topsoil, roots, debris, and organic material to create a stable construction area. The required depth depends on the existing conditions and the planned turf system. So it should be established during the site assessment rather than guessed from a generic guide. Proper ground preparation limits settlement and gives the base room to perform as designed.
  3. Establish positive grading. Shape the subgrade so water moves away from the house, retaining walls, and other vulnerable structures. Grading should also respect adjoining planting beds, walkways, and paved areas. On Long Island, a drainage plan needs to respond to the specific property instead of assuming every Nassau or Suffolk site has the same soil or runoff behavior.
  4. Install and compact the aggregate base. Place the specified aggregate in controlled lifts, then compact it to form a firm, even foundation. The base supports the turf and helps manage water moving through the system. Check the finished surface for soft spots, abrupt changes, and areas that could hold water before the turf is installed.
  5. Confirm the drainage destination. Water needs a deliberate outlet or dispersal path. Review whether runoff can connect to an approved existing drainage feature, disperse appropriately on the property, or require another site-specific solution. Gappsi identifies synthetic turf backyard installation considerations for Long Island homeowners, while its landscape team coordinates grading and drainage with broader yard improvements.
  6. Protect equipment access and service routes. Decide how materials and installation equipment will reach the work area without damaging gates, planting, masonry, or neighboring property. Preserve practical access for rinsing, waste removal, repairs, and seasonal landscape work. A narrow side yard may influence the turf layout, staging plan, or gate design.
  7. Detail seams and edging. Lay turf so seams are planned away from high-turn areas when possible, then secure and finish them carefully. Use suitable edging where turf meets soil, fencing, planting, or hardscape. Loose edges and visible seams can become maintenance concerns, especially where dogs run, dig, or repeatedly turn.
  8. Design clean transitions. Connect the turf to pavers, patios, planting beds, gates, and other backyard features with transitions that are easy to cross and clean. A coordinated Long Island dog-run installation can address fencing, privacy screening, circulation, and the relationship between the pet area and the rest of the property. Confirm the final drainage, edges, and access before the surface is opened for use.

What maintenance does artificial grass for dogs require?

Artificial grass for dogs reduces some lawn chores, but it is not maintenance-free. A clean pet area depends on a simple routine that keeps solid waste off the surface. Moves residue through the drainage path, and catches small problems before they affect the whole installation. The exact cleaning schedule will vary with the number of dogs, the size of the area, weather, and the turf system selected.

Start with daily waste removal. Scoop solid waste as soon as practical, allowing softer material to firm up before lifting it if needed. Use a suitable scoop rather than dragging waste across the blades. Prompt removal keeps residue from being walked into the turf and gives rain or rinsing water a clearer path through the surface. Check the entire dog area, including corners near fencing, gates, edging, and places where a dog tends to return.
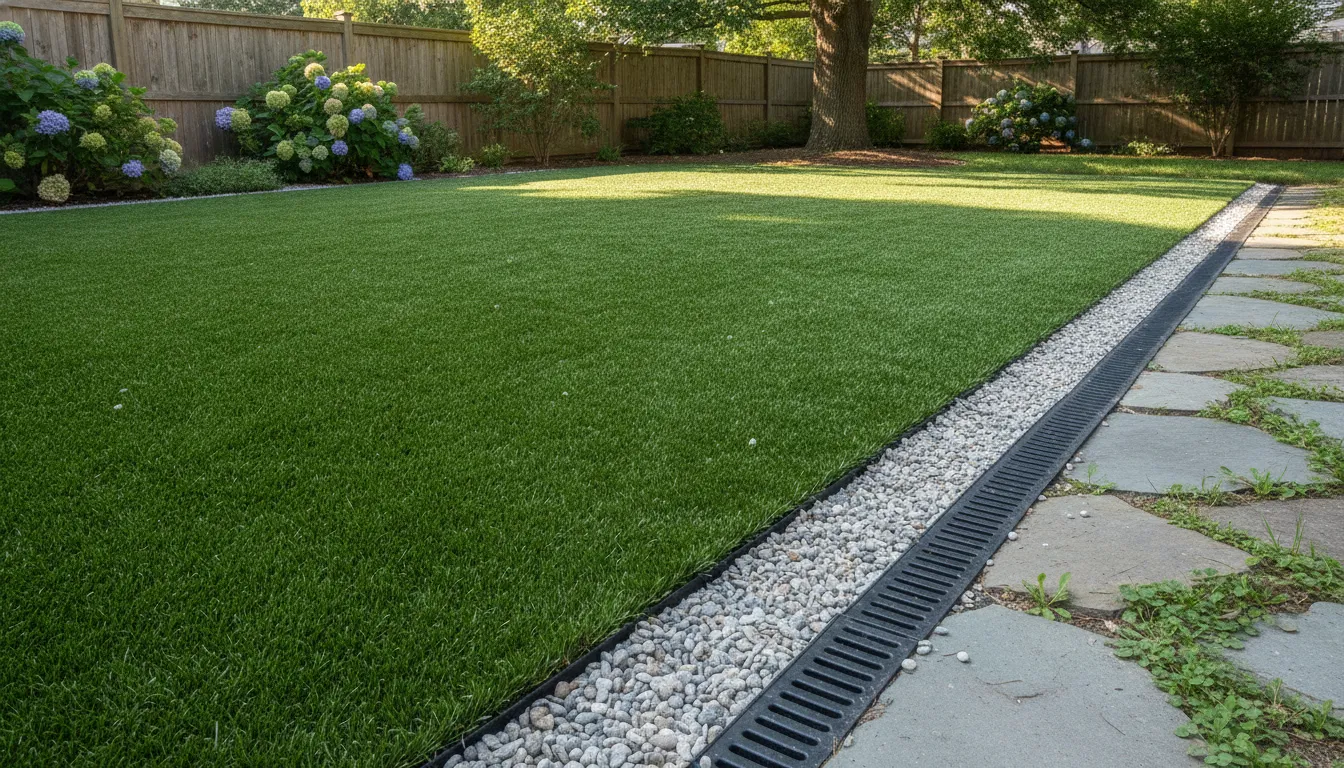
Water moving through a properly planned pet turf drainage area

Rinse the area regularly. A clean-water rinse can help move urine residue and loose debris through a permeable turf backing and into the planned base or drainage route. Rinse more often during periods of heavy use or limited rainfall, but avoid creating runoff toward a foundation, neighboring property, or area where water collects. The rinse should support the drainage design, not compensate for poor grading or a blocked outlet.

Remove leaves, soil, and other debris with a soft rake, leaf blower, or similar method that will not pull at seams or disturb the infill. Organic debris left in place can hold moisture and make spot cleaning more difficult. Inspect after storms, landscape work, and seasonal leaf drop, especially if the dog run sits below trees or beside planting beds.

For isolated spots, use the cleaning approach approved for the specific turf and infill system. Blot or lift residue first, then spot clean rather than applying an unverified chemical treatment to the entire area. Gappsi’s guide explains how homeowners can clean and maintain pet turf as part of a consistent sanitation routine. Follow product instructions and avoid mixing cleaning products.

Inspect the installation as you clean. Look for lifted edges, open seams, damaged sections, compacted areas, or places where water no longer drains as expected. Check around transitions to pavers, planting beds, and fencing, where soil and debris can accumulate. If rinsing leaves standing water, pause and identify whether the issue is surface grading, a blocked drainage route, or another site condition before adding more water.

When odor persists after scooping and rinsing, do not simply mask it. Persistent odor can indicate a sanitation issue, restricted drainage, airflow limitations, or a turf and infill combination that needs review. Note when the odor appears, where it is strongest, and whether water drains normally. A professional assessment can then focus on the actual cause and the appropriate system-specific response.

How can you manage heat and choose pet-turf features?

Direct summer sun can make artificial turf hot, including a surface selected for a dog area. Treat heat as a site-planning issue rather than assuming that any product will stay cool. A tree, pergola, shade sail, or other correctly positioned feature can give your dog a place to move out of the sun. Shade also needs to be balanced with drainage, visibility, planting, and access for cleaning.

Temporary water cooling can make the surface more comfortable before use, but it is not a permanent solution and does not replace a heat plan. On a sunny day, place your hand on the turf and check the surface before allowing your dog onto it. Your dog should also have access to drinking water and a shaded resting area. If the turf remains uncomfortable, limit use during the hottest part of the day and reassess the layout.

What should you ask about the turf surface?

Product selection should begin with how the area will be used. Pile height and density affect the look, feel, cleaning access, and way the blades respond to regular foot and paw traffic. A shorter pile may make waste removal and rinsing more straightforward, while a different profile may better match the surrounding lawn or landscape design. The right choice depends on the dog, the size of the area, whether people will use it too, and how it connects to the rest of the backyard.

Ask how the backing is constructed and whether it supports the drainage plan for the site. A pet-turf system should be evaluated as a complete assembly, including the prepared base. Permeable layers, seams, edging, and the path water will take after it passes through the surface. A product label alone cannot confirm that a poorly graded area will drain well.

How do infill and drainage choices affect daily use?

Infill can influence blade support, feel underfoot, and maintenance requirements. Do not select it solely because of a broad claim about odor, cooling, or sanitation. Ask what material is proposed, how it will be maintained, and whether it fits the needs of your dog and household. If a product discussion raises questions about recycled rubber or other infill materials, ask for clear product documentation instead of relying on an unsupported safety promise. The EPA notes that its federal research on tire crumb characterized constituents and potential exposure routes, while also stating that the reports were not themselves a risk assessment: read the EPA research context.

Gappsi identifies pet-specific turf products and specialized drainage systems for year-round use. Homeowners who want to review that option can see the Gappsi pet turf option. For a Nassau or Suffolk property, the practical evaluation should include shade, surface checks, cleaning access, grading, drainage, and the way the dog area fits the whole yard. That review is more useful than choosing based on a single feature or an unverified product promise.

How should a dog run connect to the rest of the backyard?

A dog run works better when it is planned as part of the backyard rather than placed as an isolated strip along a fence. The connection affects how dogs move, how owners clean the area, and how the rest of the landscape is used. A coordinated layout can place artificial grass for dogs near a convenient door while keeping gates, planting beds, patios, and drainage paths practical.

The goal is not to make every surface identical. It is to create clear transitions between pet turf, paving, lawn, and planting. The right arrangement depends on the property’s grade, existing drainage, fence lines, and the routines of the household.
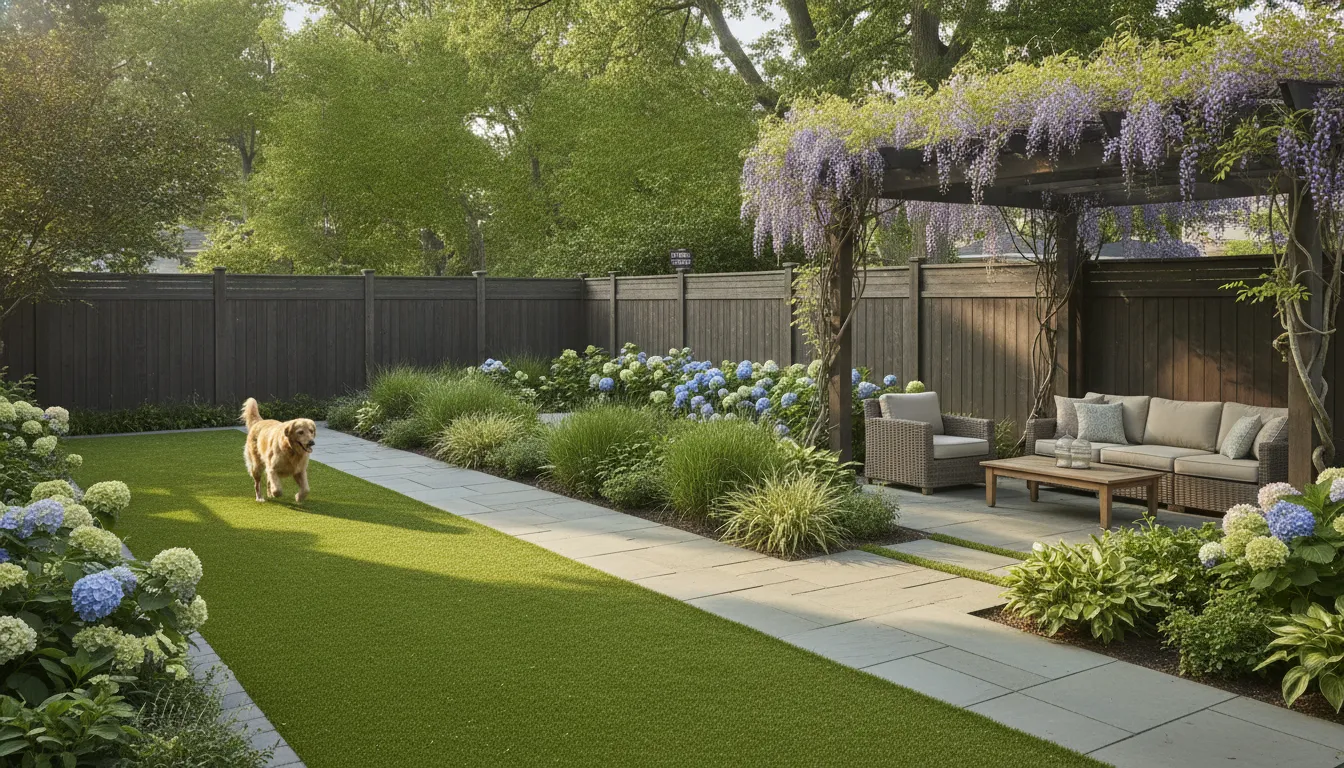
Dog run connected to a landscaped backyard with paving and planting

Use the comparison below as a planning framework. An isolated pet area may be appropriate for a simple, dedicated run, but an integrated design leaves more options for daily use and future landscape changes.

Isolated pet area compared with coordinated dog-run design
Planning element Isolated pet area Coordinated dog-run design
Fencing Uses a defined enclosure with limited relationship to other outdoor spaces. Aligns fence runs with the yard, sightlines, planting, and service access.
Gates May have one basic entry point that serves both people and pets. Places gates where they support safe circulation, deliveries, cleaning, and access from the home.
Drainage Can be treated as a small surface area without resolving nearby runoff. Coordinates grading, the turf system, and drainage destinations so water does not collect at transitions or near foundations.
Transitions Often ends abruptly at soil, concrete, or an existing lawn edge. Uses considered edging and level changes between turf, pavers, lawn, and planting areas.
Planting May leave little room for screening, shade, or separation from dogs. Places planting where it can define the run without creating blocked sightlines, toxic-plant concerns, or hard-to-clean debris zones.
Patios Requires owners to cross the yard to reach seating or entertaining areas. Connects the run to patios with durable, cleanable walking surfaces and a deliberate route.
Maintenance access May be difficult to reach with a hose, cleaning tools, or replacement materials. Preserves practical access for rinsing, solid-waste removal, inspections, and future repairs.
Future use Serves one purpose and may limit later backyard changes. Leaves flexibility for play, seating, landscape improvements, and other household needs.

Transitions deserve particular attention. A hard edge can help contain turf and simplify sweeping, while a paver path can keep muddy or wet feet away from the house. Planting should provide structure without dropping excessive debris into the run or narrowing the cleaning route. Shade trees, structures, or other site features can also be considered when planning summer comfort.

For a full residential layout, review Long Island dog-run installation as a construction and design project, not only a turf purchase. A site-specific plan can coordinate fencing, grading, drainage, paving, planting, and the selected pet-turf system around how the family actually uses the backyard.

What should a Long Island pet-turf plan specify?

A useful pet-turf plan should describe the conditions below the grass as clearly as the visible surface. Before choosing artificial grass for dogs, ask the installer to document how water, waste, foot traffic, fencing, and future yard improvements will be handled. This checklist can help Nassau and Suffolk County homeowners compare complete installation plans rather than isolated turf products.

  1. Site conditions: Record existing soil, slopes, low areas, tree roots, irrigation lines, utilities, and the proposed dog-run dimensions. The plan should identify how the area relates to the house, foundation, planting beds, patios, and neighboring properties.
  2. Drainage destination: Show where rainwater and liquid waste will go. The design may include grading, a permeable backing, a prepared base, an outlet, or an appropriate dispersal area. It should not simply assume that water will disappear. Confirm that the finished grade directs water away from foundations and does not create a nuisance for adjacent areas.
  3. Base preparation: Specify excavation depth as determined by the site, aggregate or other base materials, compaction, and the finished slope. Ground preparation and topsoil grading are important parts of performance, especially where Long Island soils hold water or the existing yard is uneven.
  4. Turf system: Identify the pet-specific turf product, pile characteristics, backing, infill if used, and intended application. Ask how the selected system supports drainage and routine cleaning. Avoid treating a portable potty mat and a constructed dog run as the same scope of work.
  5. Seams and edging: Show seam locations, fastening methods, perimeter restraint, and transitions to pavers, concrete, planting, or existing lawn. Clean edges reduce trip points and help keep the turf system in place during everyday use.
  6. Cleaning access: Include enough room to remove solid waste, rinse the surface, clear leaves, and inspect drains or outlets. The plan should state what routine sanitation the homeowner will perform and which cleaning products are appropriate for the selected system.
  7. Heat plan: Note the direction of direct summer sun and identify possible shade from structures, trees, or planned features. Water can provide temporary cooling, but homeowners should check the surface before allowing pets onto it.
  8. Fence and gate: Specify fence location, gate swing, latch position, privacy screening, access from the house, and clearance for maintenance. These details affect safety, convenience, and how naturally the dog run fits the backyard.
  9. Coordination and exclusions: Clarify responsibility for permits, utility locating, demolition, irrigation changes, fence work, drainage connections, planting, hardscape, and disposal. A coordinated plan prevents assumptions between separate trades.
  10. Maintenance: List expected scooping, rinsing, spot cleaning, debris removal, seam inspection, and drainage checks. Explain how persistent odor or standing water will be assessed instead of promising an odor-free result.

Gappsi Group can coordinate grading, drainage, synthetic turf integration, fencing, planting, hardscape, and 3D design as part of a broader design-build plan for homeowners across Nassau and Suffolk Counties. That approach helps the pet area work with the rest of the property, rather than becoming an isolated patch in the yard.

Contact Gappsi through our contact page

Frequently Asked Questions

Is artificial grass safe for dogs?

It can be a practical surface for a dog area when the turf, infill, base, drainage, edges, and cleaning plan are selected for the site. Safety is not determined by the blades alone. Ask what materials are included, how waste and rinse water will move, and how the surface will be managed in direct sun. The EPA notes that research on recycled tire crumb explored possible exposure routes, but its reports were not themselves a risk assessment: EPA research on recycled tire crumb.

Can dogs pee and poop on artificial grass?

Yes, but each type of waste needs a different response. In an appropriate system, urine can pass through a porous backing and into the drainage path. Solid waste remains on the surface, so it must be removed promptly and the area rinsed as appropriate for the installed system. Grading and the underlying base are part of the sanitation plan, not optional details.

How do you control dog-urine odor?

Start with a permeable system and a drainage design that does not trap moisture below the turf. Then remove solid waste, rinse routinely, and follow the system-specific cleaning guidance. Drainage, sanitation, airflow, infill choice, and routine cleaning all affect odor control. Persistent odor can indicate a drainage or sanitation problem, so it should be assessed rather than covered with a deodorizer.

What maintenance does artificial grass for dogs require?

Plan for regular waste removal, rinsing, debris clearing, and spot cleaning. Inspect seams, edging, and low areas periodically, especially after heavy rain or frequent use. Cleaning frequency depends on the number of dogs, the size of the area, weather, and the turf system. Artificial grass reduces some lawn tasks, but it is not maintenance-free.

Can fleas and ticks live in artificial grass?

Artificial grass does not provide the same soil and plant environment as a natural lawn, but it cannot guarantee complete elimination of fleas or ticks. Leaves, organic debris, shaded edges, and nearby planting can still create pest concerns. Keep the area clear, maintain the surrounding landscape, and follow your veterinarian’s guidance for pet parasite prevention. This cautious distinction is consistent with published pet-turf guidance: pet-turf pest guidance.

Ready to plan a dog-friendly backyard?

A well-planned pet-turf area can bring drainage, cleaning access, shade, and the rest of your backyard design into one practical plan. Gappsi Group can discuss the site conditions and layout for a residential pet-turf or dog-run project in Long Island.

Contact Gappsi through our contact page to discuss your project.
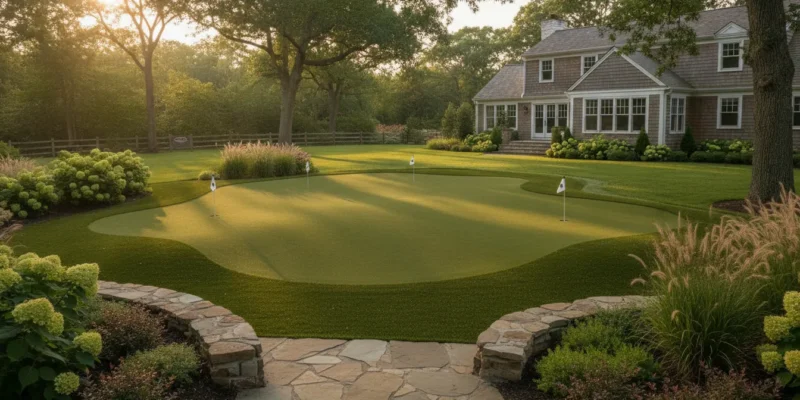
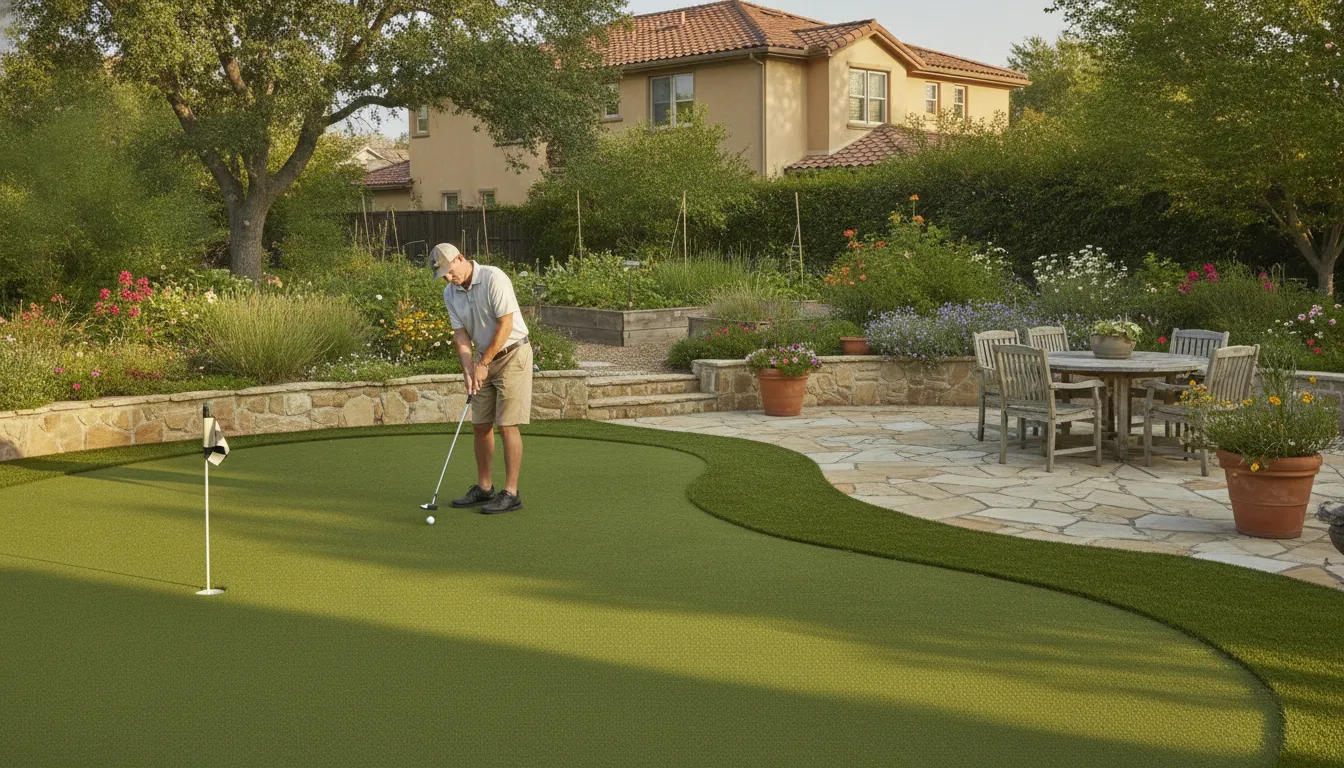
Contoured backyard practice putting green in a Long Island landscape

Putting Green Cost: Backyard Practice Green Guide

. .

A backyard practice green is more than a rectangle of artificial turf. The final scope can change with the green’s size, contours, cup locations, fringe, base preparation, drainage, infill, and the equipment needed to reach the work area. On Long Island, those site details often matter as much as the surface material.

Contact Gappsi through our contact page

Putting green cost depends on the complete installation, not turf alone. A simple material purchase may cover a basic surface. A professionally designed green can include grading, a stable aggregate base, shaped breaks, multiple cups, drainage, fringe transitions, and site restoration. Comparing proposals by total scope helps you distinguish a playable practice area from a basic turf installation.

Understanding what each part contributes makes it easier to evaluate a proposal and decide which design features fit your yard. Start by separating the visible turf from the construction and planning work beneath it.

What does putting green cost actually include?

Putting green cost is a scope question, not simply a turf price. Two projects with similar square footage can require very different work. A material-only purchase may cover rolls of low-pile synthetic turf, while a basic installation may add labor and straightforward ground preparation. A designed practice green can include grading, engineered contours, cups, fringe, drainage, base materials, infill, edging, and restoration around the work area.

Understanding these levels helps you compare proposals accurately and see when important construction items are listed separately.

Material-only turf

A material-only option generally starts with the playing surface product. Putting-green turf is different from standard lawn turf because its low pile is selected to support a truer golf-ball roll. Product selection may involve fiber type, pile height, density, and whether a separate fringe or transition material is needed. The homeowner or installer still needs to determine how the turf will be laid, secured, drained, and finished.

This approach can make sense for a small, simple area with suitable existing conditions. It does not automatically include excavation, disposal, aggregate base, grading, drainage corrections, cups, or the surrounding landscape work. Those omissions matter when comparing a turf product with an installed practice green.

Simple installation

A simple installation typically adds labor and a defined preparation scope. That may include removing existing grass, shaping the area, installing a compacted base, placing turf, securing edges, and completing basic finishing. The final scope depends on site access, existing grade, soil conditions, and the amount of preparation required. Published industry guidance identifies access, grading, site preparation, and landscaping demands as variables that can change installation requirements, rather than fixed components of every project.

It is important to ask whether drainage and disposal are included or treated as allowances. Limited access can also require more manual labor when equipment cannot reach the work area easily. These are site-specific questions, especially in established Long Island backyards.

Designed practice green

A designed practice green treats the area as part of the landscape, not just a patch of artificial grass. The scope can include multiple putting locations, intentional breaks, contours, fringe or fairway cuts, drainage integration, and transitions to patios or planting beds. Design and construction coordination can also affect how grading, irrigation, lighting, retaining elements, and adjacent hardscape are handled.

For more on backyard project decisions, review Gappsi Group’s backyard putting green guide. A complete proposal should identify each included layer, allowance, and exclusion so the quoted putting green cost reflects the finished scope. Gappsi Group evaluates these details through its Long Island design and construction process instead of assigning a universal price without reviewing the property.

How do size, contours, and cup count change the scope?

Square footage is only the starting point for planning a backyard practice green. A compact area may be enough for meaningful short-game practice. A larger layout can create room for several shot types and longer putts. Published industry guidance notes that a practice green can support a complete short game at a fraction of the area associated with PGA Tour greens. Those greens are roughly 5,000 to 6,000 square feet. The right size depends on how you plan to practice, the usable part of the yard, and the relationship between the green and surrounding landscape.

Size also affects more than the amount of turf. It influences excavation, base preparation, edging, fringe, drainage, and the amount of material that must be moved through the property. A small green with a straightforward outline may be efficient to build. A smaller green with several breaks, elevated edges, tight access, and multiple finish materials can require more detailed layout. It may also require more hand work than a larger, open rectangle. This is why a simple per-square-foot comparison can give homeowners an incomplete view of putting green cost.

Shape and contours determine how the green plays. A rounded or irregular outline can fit existing planting beds and patios, but it takes more precise layout than a basic rectangle. Gentle slopes and breaks can create realistic practice opportunities, yet each transition must be shaped, compacted, and finished so the ball responds predictably. Steeper changes in elevation may also affect drainage and the way the green meets adjacent lawn, pavers, walls, or planting areas.

Cup count is another scope decision. One cup creates a focused practice target. Two or more cups can support different distances and angles, but they require deliberate spacing and enough usable surface around each hole. The design should avoid placing cups where contours make one target impractical or where nearby fringe limits a normal stance. Multiple cups may also add layout, cutting, finishing, and coordination work.

Fringe and fairway cuts expand the playing surface beyond the putting area. They create visual separation and let you practice shots that are not made from the short putting surface. But they also introduce additional turf types, transitions, edging, and maintenance considerations. A proposal should identify which areas are putting turf, fringe, fairway, or surrounding landscape rather than grouping them into one vague square-foot figure.

Third-party cost guides consistently identify size, access, design complexity, and required craftsmanship as variables, but their published ranges are market context rather than a Gappsi quote. For a Long Island property, a site-specific review is the reliable way to connect the desired contours and cup layout with actual preparation and installation requirements.

Contact Gappsi through our contact page

Which site preparation factors affect putting green cost?

The playing surface is only one part of the installation. Before turf, cups, or fringe can be added, the crew must understand how the proposed green will fit the property and how the site needs to be prepared. That is why a Long Island putting green requires a site-specific scope rather than a simple calculation based on square footage.

  1. Confirm equipment and material access. A backyard with a wide driveway or side entrance may allow equipment and materials to move efficiently. A narrow gate, steps, fencing, mature planting, or other obstacles can require more manual labor and additional handling. Access conditions can significantly affect installation scope, so they should be reviewed before the design is finalized.
  2. Measure excavation and disposal. Existing lawn, soil, roots, old hardscape, or unsuitable material may need to be removed before the base is installed. The amount of excavation depends on the proposed shape, elevation, and existing conditions. Disposal of grass or soil may also be required, and that work should appear clearly in the proposal rather than being treated as an assumed detail.
  3. Plan grading and contours. A practice green needs intentional slopes and breaks, but those contours must connect sensibly to the surrounding yard. Unexpected grading or site preparation can change the overall scope. A landscape design and construction provider can coordinate the green with adjacent planting beds, patios, walkways, and lawn areas. See Gappsi’s Long Island landscape design and construction services for the broader site-planning context.
  4. Build the aggregate base correctly. After excavation and grading, the installation needs a stable, well-prepared base beneath the putting-green turf. The required preparation depends on the soil, drainage behavior, final elevations, and intended contours. A material-only turf purchase does not account for this construction scope.
  5. Resolve drainage and retaining needs. Water must move away from the playing surface without creating problems for the home, foundation, neighboring areas, or existing landscape. Drainage improvements, swales, collection points, or retaining work may be needed when the property has elevation changes or persistent water issues. Gappsi’s yard drainage solutions for Long Island provide useful context for why drainage belongs in the site review.
  6. Coordinate utilities and existing landscape. Irrigation, lighting, electrical lines, planting, trees, walls, and nearby structures can affect excavation and the final layout. The designer should identify what remains, what must be protected or relocated, and how the new green will transition into the yard. Nassau and Suffolk properties vary widely, so these conditions cannot be assumed from an aerial measurement alone.

When comparing putting green cost, ask whether the proposal includes access, excavation, disposal, grading, base preparation, drainage, retaining work, utility coordination, and landscape restoration. A complete scope makes the construction decisions visible before work begins.

How do turf, fringe, infill, and drainage affect value?

A practice green is not made from the same artificial grass used across a lawn. Putting-green turf has a low pile and tight surface so a golf ball can roll with more predictable speed and direction. Lawn turf is typically taller and fuller, which creates a softer visual transition but is not designed for putting performance. Selecting the correct turf therefore affects the use of the space, not just its appearance.

Density and pile height also influence how the surface feels underfoot and how consistently the ball travels. A dense, short-pile product can support a smoother roll, while the specific fiber and backing are part of the material decision. The right selection depends on whether the green is intended mainly for putting, includes chipping practice, or blends into a larger backyard recreation area. A proposal should identify the turf type rather than describe the surface only as synthetic grass.

Backyard putting green turf integrated with surrounding landscape

Fringe turf creates the visual and functional border around the putting surface. It can make the green look more natural within a Long Island landscape and gives homeowners a different surface for approach shots or short-game practice. Fringe width, shape, edging, and the transition to lawn, planting beds, patio materials, or other landscape features all add design and installation scope. The fringe should be planned with the green’s contours, drainage path, and surrounding grade, not added as an afterthought.

What does infill change?

Infill is placed between turf fibers to help support the blades and influence how the ball interacts with the surface. The amount and type selected can affect ball speed, friction, and the way the turf responds during use. That makes infill part of playability and maintenance planning, rather than a minor finishing detail. A homeowner should ask what infill is specified, where it will be installed, and what routine care is expected to keep the surface even.

Why does drainage belong in the scope?

Water management protects the usability of the area after rain and helps coordinate the green with the existing landscape. Grading, drainage layers, outlets, and nearby irrigation or planting areas may need to be considered together. Gappsi’s documented landscape services include grading, ground preparation, drainage, irrigation, and synthetic turf integration. For properties in Nassau or Suffolk County, a site review can identify whether access, existing grades, or surrounding construction changes the installation scope. The most useful measure of putting green cost is therefore a complete specification covering turf, fringe, infill, drainage, base preparation, and ongoing maintenance expectations.

What is the difference between professional design and simple turf installation?

A roll of artificial grass can cover a space, but a practice green must do more than look green. It needs a predictable ball roll, intentional breaks, usable cup locations, and a base that stays stable through Long Island weather. That is why a material-only purchase or basic turf installation should not be compared with a complete design-build project as though they were the same scope. When evaluating putting green cost, ask what is included in the finished playing surface, not only what the turf material costs.

Professional planning also connects the green to the surrounding landscape. Gappsi documents capabilities that include 3D landscape design, grading, ground preparation, drainage-related landscape coordination, and irrigation systems. Those services can matter when the green must fit a patio, planting bed, lawn area, or an existing grade. See this guide to artificial putting green design for additional design context.

Professionally contoured backyard putting green integrated with a Long Island landscape

Basic turf installation compared with a professionally designed practice green
Project element Material-only or basic installation Professionally designed practice green
Planning Uses a standard shape and limited site planning. Maps the playing goals, yard, access, transitions, and surrounding landscape.
Base May include only the minimum surface preparation. Builds and compacts a suitable aggregate base for a stable, consistent roll.
Contours Often follows the existing grade with few intentional breaks. Plans slopes, contours, and breaks to create varied practice shots.
Cups May provide a single location or leave cup work to the owner. Coordinates multiple cup locations with the design and intended practice.
Drainage Addresses drainage only if included in the limited installation scope. Reviews runoff and coordinates drainage with grading and adjacent landscape work.
Turf and fringe May use a general turf product or a simple cut pattern. Selects low-pile putting turf and plans fringe or fairway transitions for playability.
Finish Provides a functional covered area with fewer integrated details. Coordinates edging, transitions, restoration, and a finished appearance.
Coordination The homeowner may manage separate site, turf, and landscape needs. One coordinated scope can connect design, preparation, installation, and landscape elements.

The difference is not simply a question of choosing more expensive turf. Putting-green turf is low-pile artificial grass designed to let golf balls roll true, unlike thicker lawn turf. A professional scope accounts for how that surface interacts with base preparation, contours, cups, drainage, fringe, and access. It also identifies exclusions before work begins. A site-specific review is the reliable way to compare proposals and understand what your project includes.

What should a Long Island putting green proposal list?

A useful proposal should let you compare the complete construction scope, not just a turf product or a single square-foot figure. On Long Island, a backyard in Nassau County may require different preparation from a property in Suffolk County, depending on access, existing grades, drainage, and surrounding hardscape. Ask for each major assumption to be documented before you compare putting green cost.

  1. Measured area and layout: Confirm the proposed square footage, shape, perimeter, fringe or fairway-cut areas, and the location of every playing feature. The plan should show how the green fits the backyard rather than relying on a rough estimate.
  2. Access and existing conditions: The proposal should explain how crews and equipment will reach the work area. It should note narrow gates, steps, slopes, utilities, trees, or structures that affect the approach. Confirm whether the site review includes existing landscape and hardscape conditions.
  3. Demolition and disposal: Identify what will be removed, such as lawn, soil, roots, old edging, or existing paving, and state whether loading and disposal are included. Unlisted removal work can change the scope after construction begins.
  4. Excavation, base, and grading: Look for the planned excavation depth, aggregate or stone base, compaction method, finished elevations, and surface contours. The proposal should describe the breaks and slopes designed into the green, not simply say that the area will be leveled.
  5. Drainage and water management: Ask where runoff will go and whether the scope includes drainage systems, connections, swales, or adjustments around nearby planting beds. Gappsi’s landscape division coordinates grading, drainage, irrigation, and synthetic turf integration as part of broader outdoor construction planning.
  6. Cups and playing details: Confirm the number and placement of cups, the intended practice layout, and any changes in cut or elevation around them. These details affect both the design and the installation work.
  7. Turf, fringe, and infill: The specification should name the putting-surface turf, fringe material, color or cut transitions, seam approach, and infill type. Putting turf is not interchangeable with ordinary lawn turf, so the product description matters.
  8. Edging and restoration: Check the perimeter edging, transitions to patios or lawn, protection of adjacent areas, cleanup, soil replacement, planting restoration, and any irrigation or landscape repairs.
  9. Exclusions and maintenance: Require a clear list of items not included, such as permits, retaining work, electrical changes, tree removal, or repairs outside the green. The proposal should also explain recommended cleaning, brushing, infill care, and owner maintenance responsibilities without promising an unsourced lifespan or warranty.

A design-build provider should be able to connect the site plan, construction details, and finish selections in one document. Review this putting green contractor guide for additional questions to ask when comparing proposals.

Contact Gappsi through our contact page

Frequently Asked Questions

How much does it cost to install a backyard putting green?

There is no reliable single price for every property. Putting green cost depends on several choices. These include area, shape, contours, cup placement, turf, infill, excavation, base preparation, drainage, edging, disposal, and equipment access. A simple turf application and a constructed practice green are different scopes, so a site-specific proposal is the best way to compare the actual work included.

How much space does a 700-square-foot putting green provide?

A 700-square-foot green can provide meaningful room for putting practice, but the usable layout depends on its shape and the surrounding yard. The same area can accommodate different combinations of breaks, slopes, cup locations, fringe, and approach space. Measure the intended footprint rather than relying on square footage alone, because layout and play features determine how the area functions.

What type of turf is used for a practice putting green?

Putting-green turf is a low-pile synthetic surface selected to support a consistent ball roll. It differs from lawn turf in pile, density, and intended use. A proposal should identify the putting surface, any fringe or fairway-cut turf, seam locations, infill, edging, and drainage approach. These details help you understand what you are receiving instead of comparing material labels alone.

Does infill affect the putting surface?

Yes. Infill is part of the system that supports the synthetic fibers and affects how the finished surface is maintained and played. The appropriate selection depends on the turf system, drainage design, intended use, and site conditions. Ask the installer to explain the selected infill and how it fits the complete construction scope, rather than treating it as an interchangeable add-on.

Why is a site-specific proposal needed before deciding?

A site review reveals conditions that cannot be priced accurately from a satellite image or square-foot estimate. Access, existing grass or soil, grading, drainage, utilities, slopes, retaining needs, and disposal can change the work. On Long Island, a detailed proposal should list the measured area, preparation, base, contours, cups. Turf, infill, restoration, exclusions, and maintenance expectations so the scope is clear before construction begins.

Plan your backyard putting green with a complete scope

Putting green cost becomes easier to evaluate when the proposal reflects your property, intended layout, and full installation scope. Gappsi Group can discuss site conditions, preparation, drainage, turf selection, contours, and installation details for a backyard project in Nassau or Suffolk County.

Contact Gappsi through our contact page

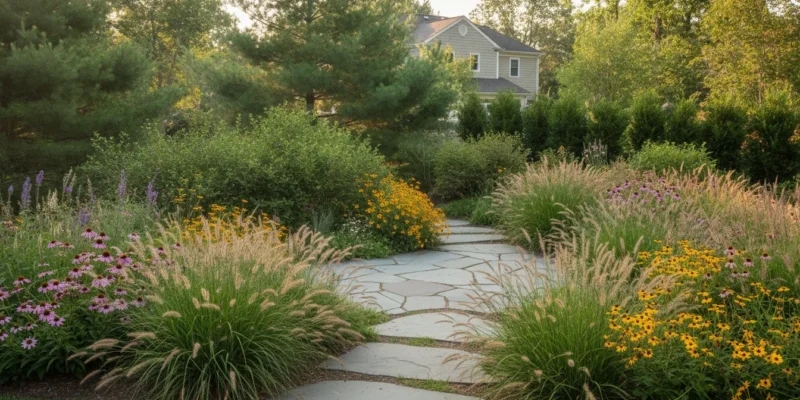
Layered native planting design in a Long Island backyard

Native Plants Long Island: A Practical Design Guide

A successful Long Island planting plan starts with the property, not a preset list of attractive plants. A coastal yard in Suffolk may face salt and wind, while an inland lot in Nassau may have different sun, soil, drainage, and available space. Those conditions shape which trees, shrubs, grasses, and perennials can establish and contribute useful structure through the seasons.

Contact Gappsi through our contact page to discuss landscape design and planting installation for your property.

Choosing native plants Long Island homeowners can rely on begins with matching each plant to its growing conditions, mature size, seasonal role, and maintenance needs. Regional references group choices into trees and shrubs, grasses, rushes and sedges, perennials, and ferns, while emphasizing that Long Island includes both coastal and inland ecosystems.

Before choosing species, clarify what native means in this regional context and how that definition supports practical landscape decisions. That foundation makes the rest of the planting plan more intentional, from the first site assessment through installation.

What does native mean for a Long Island landscape?

In practical terms, a native plant is a species that was growing locally before the arrival of Europeans, according to New York Sea Grant. That definition is more useful than treating every plant sold as “native” in the same way. For a homeowner, the key question is whether a plant’s natural range and growing conditions align with the specific property in Nassau or Suffolk County. A plant can be native to the broader region yet still be a poor fit for a shaded, compact, salt-exposed, or poorly drained yard.

Long Island includes both coastal and inland ecosystems, so conditions can change substantially between a waterfront property, a North Shore slope, and an inland suburban lot. Regional sources describe native plants as adapted to Long Island’s soils and climate, but adaptation does not mean every species will thrive everywhere. Sun exposure, soil moisture, wind, salt, drainage, and available root space still determine whether a selection is practical. This is why choosing native plants Long Island homeowners can maintain successfully starts with a site assessment rather than a universal list.

Native status is about place and relationship

Native plants also have an ecological context. Long Island’s native butterflies, bees, and birds evolved alongside local plant communities over thousands of years. Those plants can provide habitat where native animals hide, eat, and reproduce. In a residential landscape, that may translate into a planting plan with more than one seasonal purpose: flowers for visual interest. Seed heads or foliage that remain useful later in the year, and layered cover that gives wildlife places to move through the yard.

These benefits should be described carefully. A native label does not guarantee a particular number of pollinators, eliminate maintenance, or solve a drainage problem. It indicates a stronger regional relationship that can support habitat when the plant is matched to the site and managed appropriately.

Seasonal interest still requires planning

Native planting does not have to look informal or unfinished. A coordinated mix of trees, shrubs, grasses, perennials, and ferns can create structure at different heights and provide seasonal interest from spring blooms through fall foliage. The right combination depends on the landscape’s intended use, sightlines, mature space, and maintenance expectations.

It is also worth distinguishing a true native species from a cultivar. Cultivars are plants selected or bred for traits such as flower color, shape, or size. Those changes may affect how useful the plant is to wildlife, especially when flower structure or leaf color changes. When habitat value matters, ask how the plant was selected and whether its wildlife function remains appropriate, not only whether the label includes the word native.

For a broader look at site-specific planning, review Gappsi Group’s Long Island landscape design process alongside a property assessment.

How should you assess sun, soil, and drainage before choosing plants?

A short site assessment helps match native plants Long Island homeowners choose to the conditions where they will actually grow. Long Island includes both coastal and inland ecosystems, so a planting bed near the Sound may present different wind. Salt, and moisture concerns than a sheltered yard farther inland. Walk the property before selecting a species, and record observations rather than relying on a general plant list.

  1. Track sunlight throughout the day. Note which areas receive direct light in the morning, midday, and afternoon, including seasonal changes from trees and buildings. As a practical guide, full sun is at least six hours of direct sunlight. Partial shade is about three to six hours, and full shade is less than three hours. These ranges are useful starting points, not absolute rules for every plant. Review these regional sunlight definitions alongside the plant’s specific growing requirements.
  2. Examine soil texture and moisture. A sandy bed, compacted fill, and loamy topsoil can hold water and nutrients differently. Check whether soil feels loose, gritty, dense, or consistently damp, and observe whether water remains after rain. Native plants are described as adapted to Long Island soils and climate, but adaptation does not mean every native species suits every soil condition.
  3. Identify drainage problems before planting. Mark low spots, standing water, runoff paths, and areas where downspouts discharge. A wet planting area may require grading, improved soil conditions, or a drainage solution before plants are installed. Use these Long Island yard drainage solutions as a planning companion, rather than trying to conceal a persistent drainage issue with plant selection alone.
  4. Record wind and salt exposure. Properties near the coast, open lots, and yards with limited windbreaks may expose plants to stronger drying winds or salt spray. Note the direction of prevailing exposure and whether fences, homes, or existing trees provide protection. Treat coastal tolerance as a site-specific consideration and confirm it for each proposed plant.
  5. Plan for mature space and utilities. Measure the available width and height, then locate overhead lines, underground utilities, foundations, walkways, patios, pools, and property boundaries. Leave room for mature growth, root zones, maintenance access, and clear views. A plant that fits its container size may not fit the landscape several years later.
  6. Match the planting plan to maintenance capacity. Consider irrigation access, watering during establishment, pruning, leaf cleanup, mowing, and seasonal inspections. A cited regional guide recommends one to two inches of water weekly for newly planted plants, while established plants should be watered as needed according to weather. Actual needs vary by plant and site, so build a realistic care plan before installation.

Contact Gappsi through our contact page

Which native trees and shrubs fit different Long Island settings?

Plant selection should follow the conditions on your property, not a generic list of plants labeled native. Long Island includes both coastal and inland ecosystems. So a tree or shrub that handles an exposed shoreline may not be the right choice for a sheltered suburban yard. Start with the role you need the plant to perform, then match that role to sunlight, soil moisture, wind, available space, and expected maintenance.

How to match woody plants to common Long Island site conditions
Setting or goal Selection considerations Example direction
Sunny, exposed coastal area Evaluate salt spray, wind, sandy soil, and drying conditions before choosing a tree or shrub. Avoid placing a plant where its mature canopy will conflict with a view or structure. Beach plum can be considered for an appropriate sunny coastal setting, but it is not a universal prescription.
Sheltered shade or woodland edge Look for filtered light, consistent moisture, and enough room for branching. Confirm that nearby trees will not create dense competition as the planting matures. Spicebush may suit a compatible shady setting. Verify soil and moisture first.
Privacy screening Plan for mature height and width, spacing, seasonal density, and access for pruning. A screen should not be planted directly over utilities or against a foundation. Choose a locally appropriate mix rather than a single row of one species. See these ideas for native privacy plants for Long Island.
Small yard, patio, or utility corridor Prioritize a tree’s mature canopy, trunk placement, root zone, and clearance from overhead and underground utilities. A smaller plant at installation can still become a long-term conflict. Use the available footprint and service-line locations to narrow the choices before purchasing.

Mature size matters more than nursery-container size. Review the expected height and spread of every tree and shrub, then map that footprint against walkways, fences, pools, septic components, foundations, and utility lines. Roots need adequate soil volume, and branches need clearance from buildings and wires. These checks can prevent routine pruning from becoming a permanent maintenance burden.

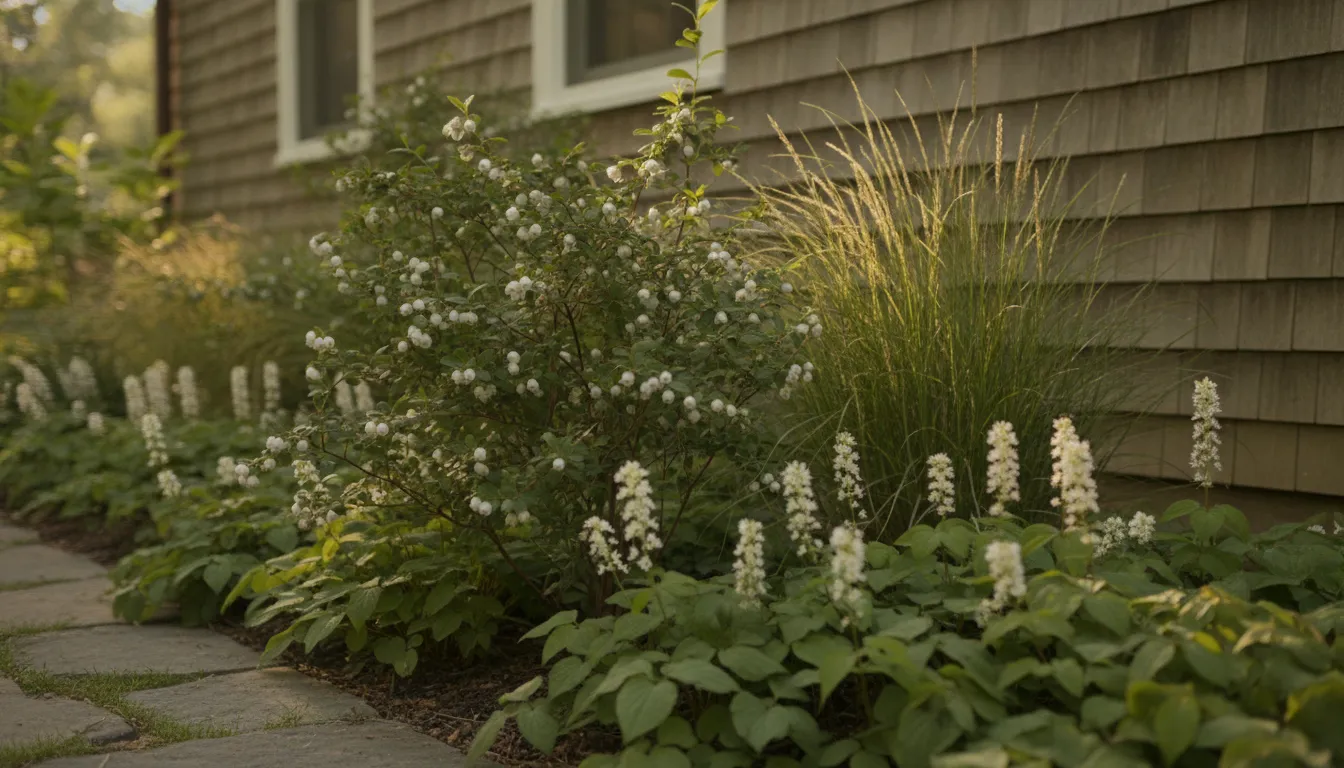
Planned native tree and shrub planting along a Long Island landscape border

For screening, combine function with the way the property is used. A planting near a deck may need filtered privacy without blocking all light, while a boundary planting may need greater seasonal density. For a sunny site, the cited Long Island guide lists beach plum among options for sunny areas. For shade, it lists spicebush among examples for shady areas. Treat both as starting points for site review, not automatic recommendations.

Native plants are described as adapted to Long Island’s soils and climate, but adaptation does not remove the need for proper placement or establishment care. A landscape plan should account for drainage, wind exposure, irrigation access, and the maintenance you can consistently provide. Gappsi’s landscape design and planting installation service can help coordinate those decisions across Nassau and Suffolk County properties.

How can grasses and perennials add seasonal structure?

Grasses and perennials give a planting plan a changing visual rhythm rather than a single burst of color. Use them to build layers of height, texture, and movement: taller grasses or flowering stems can define the back of a bed. Medium plants can carry the central seasonal display, and lower perennials can soften the edge near a walkway or patio. Regional plant catalogs group grasses, rushes, sedges, and perennials as distinct planting categories. Which makes it easier to combine different forms instead of repeating one type throughout the property.

Native grasses and perennials arranged on a Long Island landscape slope

Seasonal structure also means planning for more than peak summer. Some perennials contribute spring flowers, while grasses can hold their shape into fall and winter. Native plants on Long Island can provide interest from spring blooms through colorful fall foliage, although the timing and appearance will vary by species and site conditions. A balanced palette might combine flowering periods with seed heads, fine foliage, or upright stems so the garden remains legible after individual flowers fade. This approach is especially useful around outdoor living areas, where texture and form matter even when a bed is not in bloom.

Wildlife value can be part of the design objective. Native plants and local butterflies, bees, and birds evolved together, and native vegetation can provide places for animals to hide, eat, and reproduce. That does not mean every native planting must look informal. Repeated groups, defined edges, and deliberate spacing can support a clean landscape while still offering seasonal resources. The benefit depends on the selected plants, their arrangement, and how the property is maintained.

Be thoughtful when choosing cultivars. A cultivar is a plant bred or selected for traits such as a different flower color, leaf color, shape, or size. Those changes may affect how useful the plant is to wildlife, particularly when flower structure or foliage has been substantially altered. Ask the nursery or designer what trait was changed and whether the selection remains appropriate for the intended habitat goal. Also confirm that any non-native alternatives are not invasive.

Grasses and perennials can contribute to difficult areas, too. Native plants are identified as useful for shoreline and hillside erosion control, and regional listings include American beach grass and Spartina species for coastal erosion applications. These examples are not universal prescriptions. Salt exposure, flooding, soil, slope, and local regulations should be reviewed before selecting a plant for erosion control. A site-specific plan is more dependable than choosing a species from a list simply because it is labeled native.

What should a practical native planting plan include?

A useful plan turns a plant wish list into a layout that can be installed and maintained. Start with a site assessment, then document the plant palette, quantities, mature dimensions, soil work, grading, irrigation, and establishment care. Native plants are becoming more available at local garden centers, but sourcing still deserves attention. Research nurseries that specialize in local flora and ask about each plant’s provenance, growing conditions, and expected mature size. New York Sea Grant notes that native plants are increasingly available at local garden centers.

  1. Source plants that fit the project. Choose trees, shrubs, grasses, rushes, sedges, perennials, and ferns from a reputable local source. Confirm that selections are appropriate for the property’s sun, moisture, exposure, and intended function. Avoid treating the word native as a substitute for site review.
  2. Group plants by shared needs. Place plants with similar light and water requirements together. Grouping simplifies irrigation and maintenance, while repeating a few compatible forms creates a more legible design than scattering individual specimens throughout the yard.
  3. Plan for mature space. Record the expected mature height and width of every tree and shrub. Allow clearance from foundations, paving, utilities, property lines, sightlines, and overhead branches. A planting plan should show spacing at maturity, not only the gaps visible in a nursery container layout.
  4. Prepare soil before planting. Test or observe soil texture, compaction, and moisture. Correct unsuitable topsoil and compacted areas before roots go in. Gappsi’s documented landscape work includes ground preparation and topsoil work, which can be coordinated with the broader Long Island landscape design process.
  5. Resolve grading and drainage first. Confirm where water should move and whether a low area needs a drainage solution before selecting plants. Grading and topsoil work can be addressed as part of the landscape plan. For wet or poorly drained locations, review these Long Island yard drainage solutions before finalizing the planting palette.
  6. Coordinate irrigation and establishment watering. Show irrigation zones on the plan and protect new roots from inconsistent watering. One cited Long Island guide recommends 1 to 2 inches per week for newly planted plants, although actual needs vary by plant, soil, weather, and exposure. Established plants should be watered as needed while local weather is observed.
  7. Write the maintenance plan. Identify mulch, pruning, weeding, monitoring, and seasonal inspections. Native plants typically require less fertilizer than non-natives. But that does not eliminate establishment care or the need to watch for stress, weeds, and conflicts with paths or structures.

Contact Gappsi through our contact page

For a Nassau or Suffolk County property, the finished plan should connect plant selection with preparation, irrigation, grading, and installation. That coordinated approach gives each planting area a clear purpose while leaving room to adjust choices after the site is measured and reviewed.

How do you balance native planting with privacy, patios, and pools?

Native plants Long Island homeowners choose should support the way the property is used, not compete with it. A successful plan places planting where it can frame a view, soften a hardscape edge. Or screen a neighbor while preserving clear access to the patio, pool equipment, and doors. The right choice depends on mature size, root behavior, moisture, salt exposure, maintenance needs, and the distance from structures.

For privacy, think in layers rather than a single solid hedge. A staggered combination of appropriately sized trees, shrubs, and lower plants can screen sightlines while leaving room for air movement and circulation. Evergreen screening may be useful in some locations, but a native designation alone does not guarantee year-round foliage or a suitable mature height. Review the guidance on native privacy plants for Long Island alongside the property’s specific views and boundaries.

Pool and patio areas require additional restraint. Keep plants that drop heavy fruit, shed persistent debris, attract frequent insect activity, or develop invasive roots at an appropriate distance from seating, coping, drains, and mechanical equipment. That does not mean native plants cannot belong near a pool. It means each plant should be evaluated for its mature form, seasonal behavior, and maintenance impact before installation. The Long Island pool privacy planting approach should coordinate screening with safe circulation and clean sightlines, rather than placing vegetation wherever there is an open bed.

Drainage is part of the design, too. Planting beds should not conceal a grading problem or direct runoff toward a foundation, patio, or pool structure. On a wet or poorly drained property, coordinate soil preparation, grading, and plant selection. Long Island yard drainage solutions can help frame that site review. Some native plants may tolerate wetter conditions, but tolerance is not a reason to ignore standing water or place roots against a structure.

Gappsi can coordinate planting with irrigation and privacy-screening requirements, while addressing grading and topsoil work before installation. A measured plan protects the functions of the patio and pool, preserves circulation, and uses native planting where it genuinely fits the Nassau or Suffolk County site.

Frequently Asked Questions

What are the best native plants for Long Island landscapes?

There is no single best list for every property. Start with the site: sunlight, soil moisture, drainage, wind exposure, available space, and the amount of maintenance you can provide. Long Island includes both coastal and inland ecosystems, so a plant that works near the shore may not be the right choice for an inland yard. Build a layered plan using trees and shrubs, grasses or sedges, and perennials that match those conditions. A regional guide lists options such as beach plum for sunny areas and spicebush for shady areas, but those examples still require site review. Source

Which native trees are suitable for a Long Island yard?

Choose a tree by its mature size, root zone, light exposure, soil moisture, and distance from structures, utilities, patios, and pool equipment. Coastal wind and salt exposure also matter. Rather than selecting a tree from a generic online list. Have the planting location assessed and confirm the species and source with a knowledgeable local nursery or landscape professional. Native plants are adapted to Long Island soils and climate, but that does not mean every native tree fits every microclimate. Source

Are there evergreen native plants for Long Island privacy screening?

Evergreen screening can be appropriate, but the right choice depends on the width and height available, sun, drainage, wind, and the desired view obstruction. Confirm that a proposed plant is native to the region and suitable for the exact exposure before purchasing several. If the area is wet, address drainage and grading as part of the plan instead of assuming an evergreen will solve the problem.

Where can I buy native plants on Long Island?

Check local garden centers and nurseries that specialize in local flora, and ask how the plants are identified as native to Long Island. Native plants are becoming more available at local garden centers, while regional growers organize choices across trees and shrubs, grasses, sedges, perennials, and ferns. Availability changes by season, so verify current stock and plant provenance before making a design commitment. Source

When should I plant native plants on Long Island?

Plan planting around the plant’s availability and the property’s current conditions rather than relying on one calendar date. Review soil moisture, drainage, access, and the forecast with the nursery or installer, then schedule work when the site can be prepared and maintained properly. Newly planted plants need consistent establishment watering, with one regional guide recommending 1 to 2 inches per week as a starting reference, adjusted for the plant and weather. Source

Plan native plants for your Long Island property

A site-specific plan can help you match native trees, shrubs, grasses, and perennials to your property’s light, soil, drainage, space, and maintenance needs. Gappsi Group can help connect planting choices with the broader landscape design, grading, irrigation, and outdoor living plan. Contact Gappsi through our contact page

Square red patio stone ideas for a stunning backyard design.

9 Stunning Square Red Patio Stone Ideas

A great patio doesn’t exist in isolation. It should feel like a natural and intentional part of your entire backyard. The key is to think about how your red stones will connect with the other elements of your property, like the lush green of your lawn, the cool blue of your swimming pool, or the structure of a pergola. By coordinating colors and textures, you can create a unified and harmonious outdoor retreat. This guide offers inspiring square red patio stone ideas that will help you integrate your new patio seamlessly into your landscape for a polished, professionally designed look.

Key Takeaways

  • Choose Your Stone Wisely and Protect It: Your choice between concrete, clay, or natural stone sets the stage, but consistent maintenance is what ensures lasting beauty. Sealing your patio is a key step to preserve the vibrant red color and protect it from sun, stains, and weather damage.
  • Think Beyond a Simple Grid: The square shape is a starting point, not a limitation. Create a modern look with a clean stack bond, add energy with diagonal patterns, or use red stones as a bold border to frame your patio and garden beds for a custom, professional finish.
  • Make Your Patio Part of the Landscape: A red stone patio shines when it connects with its surroundings. Use it to create a stunning contrast with green lawns, frame a pool or pergola, and combine it with other materials like gravel to build a cohesive and visually interesting outdoor space.

What Are Square Red Patio Stones?

When you picture a classic, inviting patio, there’s a good chance square red stones come to mind. They have a timeless appeal that works with so many home styles, from charming colonials to sleek, modern designs. But “red patio stone” is more of a category than a single product. The material you choose will impact everything from the final look to the long-term maintenance. Let’s break down what you need to know to pick the perfect red stones for your outdoor space.

Concrete vs. Clay vs. Natural Stone: A Quick Comparison

Your first big decision is choosing the material. Red patios are most commonly made from concrete pavers or clay bricks, but you can also find beautiful red-hued natural stone. Concrete pavers offer the most versatility, as they can be manufactured in a huge range of shades, shapes, and textures. Clay bricks provide that classic, rich red color and are incredibly durable. For a more luxurious and unique look, certain types of natural stone like red sandstone or granite can create a stunning, one-of-a-kind surface. Each material has its own character, and the right choice often comes down to your home’s style and your project’s budget.

Why Red Is a Go-To Color for Outdoor Design

There’s a reason red is such a popular choice for outdoor spaces. It brings an incredible amount of warmth and energy to a landscape, making patios and walkways feel instantly more welcoming. Red pavers can ground a design, providing a beautiful contrast to lush green lawns and colorful garden beds. Whether you’re aiming for a traditional brick look or a more modern, streamlined feel, red stones are versatile enough to do it all. They work beautifully for creating inviting patios, defining garden paths, or even as an accent in a larger masonry project. The color is bold yet classic, ensuring your outdoor space never goes out of style.

Practical Details: Heat, Fading, and Upkeep

Beyond aesthetics, there are a few practical things to consider with red stones. Because red is a darker color, it will absorb more heat from the sun compared to lighter pavers. This can make the surface quite warm on bare feet during hot summer days, something to keep in mind for areas around a swimming pool. For Long Island homeowners, winter care is also crucial. Using rock salt for deicing can cause some paver materials to degrade over time. Instead, opt for sand or a calcium-based deicer. To protect your investment from the elements and keep the color vibrant, it’s a great idea to clean and seal your patio periodically.

Why Choose Square Red Patio Stones?

Beyond their classic good looks, square red patio stones offer a fantastic combination of durability, versatility, and design potential. They provide a strong foundation for your outdoor living space, giving you a reliable and attractive area for everything from quiet morning coffees to lively family barbecues. When you invest in a stone patio, you want something that not only looks great on day one but also holds its beauty and function for years to come. Let’s look at why this particular choice is so popular with homeowners.

Enjoy Durability Through Every Season

Your patio needs to handle everything Long Island weather throws at it, from hot summer sun to freezing winter nights. High-quality patio stones are engineered for exactly that. While some natural stones are porous and can absorb water, leading to stains or mold if not properly sealed, many modern pavers are built to be incredibly dense and resilient. This means less worry about cracking, chipping, or fading over time. Choosing the right material, whether it’s a durable concrete paver or a premium porcelain and natural stone, ensures your patio remains a beautiful and safe surface for your family through every season.

Get a Versatile Look for Modern and Traditional Styles

Red is a wonderfully warm and inviting color that complements any landscape, making greenery pop and adding a touch of classic charm. The square shape is a timeless choice that can be adapted to fit your personal style. You can lay the stones in a simple, clean grid for a modern feel or arrange them in more intricate patterns for a traditional, cobblestone-like effect. This versatility allows you to create a space that feels like a true extension of your home. A professional masonry design can help you explore patterns and layouts that perfectly match your home’s architecture and your vision for the space.

How Sealing Protects Color and Prevents Stains

To keep your red patio looking vibrant and fresh, proper maintenance is key. Applying a quality sealant is one of the most important steps you can take. Sealing does more than just protect against stains from cookout spills or fallen leaves; it also helps lock in the stone’s rich color and prevents it from fading due to sun exposure. It creates a protective barrier that makes cleaning easier and prevents moisture from seeping in, which can cause damage over time. Professional restoration and sealing services ensure the job is done right, protecting your investment and keeping your patio looking its best for years.

What Design Patterns Can You Create?

Once you’ve settled on square red stones, the fun part begins: choosing a design. The pattern you select sets the entire mood for your patio, walkway, or outdoor living area. You can go for something clean and modern or create a more intricate, classic look. Your choice of pattern can make a small space feel larger or add dynamic energy to a sprawling backyard. Think of your stones as building blocks for your outdoor masterpiece. With a little planning, you can arrange them in a way that perfectly reflects your personal style and complements your home’s architecture.

Create a Clean, Polished Look with a Simple Grid

Sometimes, the simplest design makes the biggest impact. Arranging your square red stones in a straightforward grid, also known as a stack bond, creates a clean, contemporary look that feels orderly and polished. This pattern emphasizes the shape of the stones and produces crisp, linear lines that work beautifully for modern and minimalist homes. It’s a timeless choice that allows the rich red color to be the star of the show. A simple grid is perfect for patios, walkways, and pool surrounds where you want an uncluttered, sophisticated foundation for your outdoor furniture and decor. Our expert masonry team can ensure every line is perfectly straight for a flawless finish.

Try Herringbone, Basketweave, and Other Eye-Catching Patterns

If you want to add more visual texture and movement, consider a more dynamic pattern. While classic herringbone and basketweave designs are traditionally done with rectangular pavers, you can achieve a similar effect by combining square stones with other shapes or by laying them on a diagonal. These intricate layouts turn your patio floor into a true focal point. A diagonal or offset pattern can make the space feel wider and more interesting. These eye-catching designs are a fantastic way to bring a sense of custom craftsmanship to your backyard, creating a look that feels both classic and unique. The variety of porcelain and natural stone pavers available gives you endless possibilities for creating these patterns.

Use Red Stones for Borders and Accents

Red stones don’t have to cover the entire surface to make a statement. Using them as a border or accent is a brilliant way to introduce a pop of color and define different zones in your yard. Imagine a beautiful gray or beige patio with a bold red stone border framing it. You can also use red stones to create a decorative edge around garden beds, a pool, or a winding pathway. This technique adds a professional, finished touch to your landscape design. Mixing red pavers with other colors, like charcoal or sand, can break up the space and add another layer of visual interest, guiding the eye through your outdoor environment.

How to Coordinate Colors with Furniture, Plants, and Edging

Creating a cohesive outdoor space is all about coordination. When choosing your red stone, look at your home’s existing colors, including the roof, siding, and trim. The key is to match the feeling of these colors, whether they are warm or cool, rather than trying to find an exact match. Once your patio is installed, you can tie everything together with your decor. Choose outdoor furniture, cushions, and umbrellas that complement the warm red tones. This color also looks stunning next to the vibrant greens of your garden. Consider adding a pergola or pavilion in a complementary wood or white finish to complete your beautifully coordinated outdoor room.

How to Integrate Red Stones with Your Landscape

Square red patio stones are a statement piece, so thinking about how they fit into your overall landscape is key to creating a cohesive and beautiful outdoor space. Instead of just dropping a red patio in your backyard, you can use the stones to connect different elements of your yard, from the garden beds to the pool deck. A thoughtful landscape design ensures the bold color feels intentional and harmonious rather than out of place.

The goal is to make your red stone patio feel like a natural extension of your home and garden. You can achieve this by repeating colors, textures, and materials throughout the space. For example, if you have red flowers in your garden, they will beautifully complement the patio. By integrating the stones with other features like pergolas, pools, and even gravel pathways, you create a unified design that guides the eye and makes your entire backyard feel like a single, well-planned retreat. It’s all about making the different parts of your yard work together. This approach prevents the patio from looking like an afterthought and instead makes it the centerpiece that ties everything together.

Pair Red Stones with Greenery and Garden Beds

One of the most classic and effective ways to style red stones is by surrounding them with plenty of greenery. The deep, warm tone of the red stone creates a stunning contrast with the vibrant greens of leaves and grass, making both colors appear richer. You can use square red stones to build a clean, defined border around your flower beds or to create a charming pathway that winds through your garden. This not only adds structure but also protects your plants during mowing. The combination of hardscape and softscape brings a balanced and timeless look to any yard, making your masonry work feel like part of the natural environment.

Frame Your Pool, Pergola, or Outdoor Living Area

Use red stones to define and anchor the different “rooms” in your outdoor living space. A square red stone patio can serve as the perfect foundation for a cozy seating area beneath a pergola or pavilion, creating a distinct zone for relaxation and entertainment. The warm color of the stones adds an inviting feel that’s ideal for gathering with friends and family. Red stones also make a striking frame around a swimming pool, where the rich color contrasts beautifully with the cool blue of the water. Using them to outline your main outdoor features helps organize your space and gives it a polished, professionally designed look.

Add Gravel for Texture and Visual Interest

Combining different materials is a great way to add depth and character to your patio design. Pairing smooth red stones with the rougher texture of gravel creates a compelling visual and sensory contrast. You can use gravel to fill the gaps between larger square stones for a modern, permeable design, or you can create a decorative border around your patio. This technique breaks up the solid block of color and introduces a new texture that catches the eye. Using a product like GravelFix can keep the gravel contained and stable, making it a practical and stylish addition to your red stone patio.

Use Lighting to Make Your Patio Pop at Night

Your red stone patio can be just as impressive after the sun goes down. With the right lighting, you can transform the space into an inviting oasis for evening get-togethers. Low-voltage landscape lighting can be installed along the edges of a pathway or patio to provide safe navigation and a soft, ambient glow. Uplighting nearby trees or architectural features can create dramatic shadows and highlight the rich color of the stones. Even simple string lights hung over the patio can make the area feel magical. Good patio lighting ensures your outdoor space remains a beautiful and functional extension of your home day and night.

DIY Project Ideas for Square Red Patio Stones

Square red patio stones are a fantastic material for weekend warriors and seasoned DIYers alike. They offer a classic look that can instantly make your backyard feel more put together and inviting. If you’re ready to roll up your sleeves and add a personal touch to your outdoor space, these stones are your best friend. You can use them to create functional areas for dining and relaxing or add simple decorative touches that make a big impact. The best part is that you don’t need a massive budget or a construction crew to get started.

With a bit of planning and some elbow grease, you can tackle a variety of projects that will transform your yard. From a simple walkway to a full-blown patio extension, the possibilities are exciting. We’ve gathered a few ideas to get your creativity flowing. You can find even more inspiration by watching how different projects come together on the Gappsi YouTube channel. And remember, while these projects are DIY-friendly, our team is always here to help if you decide to take on a larger project or need professional guidance.

Build a Patio, Pathway, or Fire Pit Base

The most popular use for square red stones is creating a beautiful patio. A red stone patio provides a warm, welcoming surface for outdoor furniture and gatherings. You can also use these stones to lay a charming pathway that guides guests through your garden or from the driveway to your front door. Another great idea is to build a sturdy, non-combustible base for a fire pit. This not only defines the fire pit area but also adds a layer of safety. While laying stones seems straightforward, a professional touch ensures longevity, something our masonry experts have perfected over decades.

Construct a Raised Garden Bed or Decorative Border

Think beyond flat surfaces. Square red stones are perfect for adding dimension to your landscape. You can stack them to construct a durable and attractive raised garden bed, making it easier to tend to your flowers or vegetables. This method prevents soil erosion and gives your garden a clean, organized look. You can also use the stones to create a decorative border around existing flower beds, trees, or along the edge of your patio. This simple addition helps separate your lawn from your garden areas and adds a polished, cohesive feel to your entire yard. A well-designed border can be a key part of your overall landscape design.

Extend Your Patio with a Custom Red Stone Design

Is your current patio feeling a little cramped? You don’t have to start from scratch. Use square red stones to extend your existing outdoor living space. You can add a simple rectangular expansion or get creative with a custom design that complements your home’s architecture. This is a great way to create a designated zone for a grill, a small dining set, or a couple of lounge chairs. Mixing red stones with other materials can also create a unique look. Exploring different porcelain and natural stone options can give you ideas for creating beautiful contrasts and textures in your expanded patio design.

Common Installation Mistakes to Avoid

A DIY patio project can be incredibly rewarding, but it can also be frustrating if you make common mistakes. One of the biggest errors is improper site preparation. A patio is only as good as its base, so failing to excavate enough soil or using a cheap, unstable base material will lead to shifting and uneven stones down the road. It’s essential to create a solid foundation with the right materials to ensure your patio lasts for years. If you’ve already experienced issues with an old patio, our restoration and sealing services can help correct problems and protect your investment from future damage.

Related Articles

Frequently Asked Questions

How do I choose the right material for my red patio stones? The best material really depends on the look you want and your budget. Concrete pavers give you the most options for shades and textures, making them incredibly versatile. Clay bricks offer that timeless, deep red color and are known for their durability. If you’re aiming for a more unique, high-end look, a natural stone like red sandstone provides a one-of-a-kind surface. Think about your home’s architectural style and which material’s character best complements it.

Will a red stone patio be too hot for bare feet in the summer? It’s a great question to ask, and the short answer is yes, it can get quite warm. Darker colors absorb more sunlight and heat than lighter ones, so a red stone surface will feel hotter on bare feet than a beige or gray one. This is an important factor to consider, especially if the patio is around a swimming pool or in an area where children will be playing.

What kind of upkeep is needed to keep my red patio looking great? Proper maintenance is simple but makes a huge difference. The most important step is to have your patio sealed after installation and then periodically resealed every few years. Sealing helps protect the stone from stains, locks in that rich red color, and prevents fading from sun exposure. For winter care on Long Island, avoid using harsh rock salt, which can damage the stones. It’s much better to use sand or a calcium-based deicer for traction.

I’m worried red stones won’t match my house. How do I make them work? Red is a surprisingly versatile color that works with many home styles. Instead of covering a huge area, you can use red stones as a beautiful border for a patio made of a different color or as an accent in a walkway. The key is to coordinate with your home’s existing colors. Look at your siding, trim, and roof, and choose a shade of red that shares a similar warm or cool undertone. Then, you can tie it all together with furniture cushions and planters that complement the red.

If I want to install a small red stone path myself, what’s the most important thing to get right? The foundation is everything. The most common mistake in any DIY paver project is not preparing a proper base. If you don’t excavate deep enough or you use a flimsy base material, your stones will shift, sink, and become uneven over time. Taking the time to create a solid, level foundation of compacted stone and sand is the single most critical step to ensure your path looks great and lasts for years.

Modern wood pergola on a patio, built by a premier Long Island pergola builder.

Find the Best Pergola Builder in Long Island

Building on Long Island comes with its own unique set of rules and challenges. Our coastal climate, with its salt air and seasonal storms, demands materials and construction techniques that can stand the test of time. Furthermore, every town from Suffolk to Nassau County has specific building codes and permit requirements. This is why choosing a builder with deep local experience is so important. A team that knows the area understands how to design and construct a pergola that not only complements local architecture but is also built to last. We’ll explain how to identify a pergola builder Long Island whose local knowledge will be your project’s greatest asset.

Key Takeaways

  • Choose a builder who sees the big picture: Your ideal builder is a design partner, not just a contractor. They should help you see how the pergola fits with your whole yard, account for Long Island’s specific weather, and handle the project from start to finish.
  • Define your pergola’s purpose and material: First, decide if your pergola will be a standalone feature or an extension of your home. Then, select a material (like natural wood, easy-care vinyl, or sleek aluminum) that matches your home’s style and the amount of maintenance you’re comfortable with.
  • Protect your investment with proper vetting: Before signing anything, confirm the builder is licensed and insured. Review their portfolio to check for quality and style, and make sure you get a detailed contract that clearly outlines the project scope, timeline, and costs.

Finding the Best Pergola Builder in Long Island

Choosing the right builder for your pergola is just as important as picking the design itself. You’re not just hiring someone to assemble a structure; you’re looking for a partner who can bring your vision for an outdoor oasis to life. A premier builder acts as your guide, helping you through every step from the initial concept to the final installation. They understand the unique character of Long Island homes and how to create beautiful pavilions and pergolas that complement your property’s style and withstand our coastal weather. This local expertise is invaluable for making smart decisions about materials and placement.

A truly great builder offers a holistic approach. They consider how your new pergola will integrate with your existing patio, pool deck, or garden. They think about traffic flow, sun patterns throughout the day, and your long-term goals for the space. This is where working with a comprehensive design and construction company makes a significant difference. Instead of just getting a standalone structure, you get a thoughtfully integrated element of your overall landscape design. They ensure your investment not only looks beautiful on day one but also adds lasting value and enjoyment for years to come. Finding a team that can manage the entire project, from design to sourcing materials, creates a seamless and stress-free experience for you.

What to Look For in a Premier Builder

A premier builder stands out by offering deep expertise and a client-focused process. They should guide you through material options, explaining the benefits of wood, vinyl, or aluminum for our Long Island climate. Look for a team that goes beyond a one-size-fits-all approach. They will carefully assess your property to recommend the right height and dimensions, ensuring the pergola provides effective shade without feeling cramped. A skilled builder also considers how you’ll use the space, planning for comfort at all times of the day. Finally, they must be well-versed in local building codes and handle all necessary permits, guaranteeing your pergola is both safe and structurally sound. This attention to detail, which you can see in a builder’s project portfolio, is what separates a simple contractor from a true design partner.

Exploring Pergola Types and Materials

Choosing the right pergola is about finding the perfect blend of function and style for your backyard. Think of it as creating an outdoor room. Do you want a cozy, defined space away from the house, or a seamless extension of your indoor living area? The first big decision is between a freestanding or attached structure. From there, you get to pick the material that best suits your home’s look and the amount of maintenance you’re willing to do.

Each material, from classic wood to modern aluminum, offers a different aesthetic and level of durability. We’ll walk through the most popular options to help you find the right fit. Gappsi offers a wide selection of custom pavilions and pergolas to match any vision you have for your Long Island home. Understanding these types and materials is the first step toward creating an outdoor space you’ll love for years to come.

Freestanding Pergolas

A freestanding pergola is a standalone structure that isn’t attached to your house. This gives you incredible flexibility with placement. You can position one over a patio in the middle of your yard, create a shaded retreat next to your swimming pool, or design a beautiful focal point for your garden. Because it’s a separate structure, a freestanding pergola acts as a destination, clearly defining an area for dining, lounging, or entertaining. It’s an excellent way to add architectural interest and function to any part of your property.

Attached Pergolas

If you’re looking to create a smooth transition from your indoor space to your backyard, an attached pergola is a fantastic choice. This type of pergola is built directly onto your home, usually extending over a deck or patio just outside a back door. It provides shade and cover right where you need it most, making your outdoor area feel like a true extension of your house. An attached pergola can also help cool the interior of your home by shading windows and glass doors from direct sun. It’s a practical and elegant way to enhance your home’s existing masonry or deck.

Wood Options

For a timeless and natural look, nothing beats a classic wood pergola. Materials like cedar and pine bring warmth and organic texture to your backyard, blending beautifully with gardens and natural surroundings. Wood is also highly customizable; you can have it stained or painted in any color to perfectly match your home’s exterior. While wood requires some periodic maintenance like sealing or staining to protect it from the elements, its traditional charm and versatility make it a consistently popular choice for homeowners looking to enhance their landscape design.

Vinyl and Composite

If you love the look of a classic pergola but prefer a low-maintenance solution, vinyl or composite materials are an excellent alternative. These pergolas are designed to mimic the appearance of painted wood but without the need for regular upkeep. Vinyl and composite are incredibly durable, resisting moisture, rot, and pests. You’ll never have to worry about staining or painting them. They typically come in classic colors like white and almond that stay vibrant for years, giving you a beautiful and hassle-free structure that complements any style of home remodeling.

Aluminum and Metal

For a sleek, modern aesthetic, an aluminum pergola is the ultimate choice. These structures are known for their clean lines, durability, and minimal maintenance. Aluminum is naturally resistant to rust and corrosion, making it a perfect material for Long Island’s climate. Metal pergolas are also incredibly strong, allowing for wider spans and more minimalist designs. Many modern aluminum pavilions and pergolas can be equipped with functional features like adjustable louvers or retractable canopies, giving you complete control over sun and shade. They offer a sophisticated look that lasts a lifetime.

Budgeting for Your Long Island Pergola

Planning your budget is one of the most important first steps when adding a pergola to your home. The total investment can vary quite a bit, depending on what you have in mind. Understanding the key cost factors will help you set a realistic budget and make informed decisions as you work with your builder. From the size of the structure to the materials you select, every choice plays a role in the final price. Let’s walk through what you need to consider as you explore different pergola designs.

How Size and Design Affect Cost

The size of your pergola is one of the biggest factors affecting the cost. A larger structure naturally requires more materials and labor, which increases the price. Beyond just the footprint, the complexity of your design also plays a part. A simple, classic pergola will be more budget-friendly than a custom design with intricate details or built-in features like lighting or motorized louvers. Ultimately, the final price tag is shaped by your vision, your backyard’s layout, and the materials you choose. Thinking through these elements early on will help you and your builder create a beautiful structure that fits your budget.

Understanding Site Prep and Labor Costs

Before construction can begin, your site needs to be ready. Site preparation can include leveling the ground, pouring concrete footings, or even removing an old patio. These tasks add to the overall cost and are essential for a stable, long-lasting pergola. Labor rates on Long Island also influence the final price. A professional team ensures your pergola is built safely and correctly, which is an investment in itself. The right pergola style and material should match your home and patio layout, and a good builder will help you make choices that work with your property and prevent unexpected issues during installation.

Exploring Your Financing Options

A custom pergola is a wonderful addition to your home, but it’s also a significant investment. If you prefer to pay for your project over time, financing can be a great solution. Many homeowners find that breaking down the cost into manageable monthly payments makes their dream backyard more accessible. At Gappsi, we want to make the process as smooth as possible, which is why we offer flexible financing options to help you get started. Investing in a high-quality, professionally built pergola not only adds value to your home but also ensures it meets all safety and structural standards for years of enjoyment.

What to Expect From the Building Process

Bringing a new pergola to life is an exciting project. Knowing the steps involved helps make the process smooth and stress-free, so you can focus on the fun part: imagining all the time you’ll spend in your new outdoor oasis. From the first design sketch to the final installation, here’s a look at what you can expect when you work with a professional builder to create your dream pergola.

Your Initial Consultation and Custom Design

The journey begins with an initial consultation. This is where a designer will meet with you at your home to measure your space and, more importantly, listen to your ideas. We’ll discuss how you plan to use the space, your style preferences, and how the pergola should complement your home’s existing architecture. This collaborative first step is essential for creating a truly custom design that fits your vision and property perfectly. At Gappsi, our design expertise allows us to translate your dreams into a functional and beautiful plan for your new pavilion or pergola, ensuring the final structure feels like it was always meant to be there.

Handling Permits and Local Codes

Before any construction can start, it’s important to address local building codes and secure any necessary permits. While some sources note that homeowners are often responsible for this step, working with an experienced local builder can make it much easier. A seasoned team will be familiar with the specific regulations in towns across Long Island, from Suffolk to Nassau County. This expertise is invaluable for avoiding costly mistakes or delays. Our experience with large-scale home remodeling projects means we know how to manage the permitting process efficiently, ensuring your project is fully compliant from day one and giving you complete peace of mind.

Understanding the Installation Timeline

Once the design is finalized and any permits are approved, the installation can begin. You might be surprised at how quickly your pergola takes shape. While the entire project, from design approval to completion, typically takes a few weeks, the on-site construction is often finished in just a day or two. A professional crew works efficiently to assemble the structure with minimal disruption to your daily life. Our goal is to have you relaxing in your new outdoor living space as soon as possible. You can see our teams in action and get a feel for the installation process on the Gappsi YouTube channel, where we showcase completed projects.

How to Choose the Right Pergola Builder

Selecting the right builder is just as important as choosing the perfect pergola design. This isn’t just about hiring someone to construct a structure; it’s about finding a partner who will bring your vision for an outdoor oasis to life. A great builder guides you through every step, from initial design concepts to the final installation, ensuring the result is not only beautiful but also safe and durable. They should be a trusted resource who can answer your questions, offer expert advice, and manage the project with professionalism.

The best builders combine technical skill with a creative eye, helping you create a custom structure that complements your home and lifestyle. They understand how to work with different materials and can recommend the best options for Long Island’s climate. As you begin your search, focus on finding a company that demonstrates a commitment to quality, transparency, and customer satisfaction. Taking the time to vet your options thoroughly will ensure your investment is in good hands and that you’ll love your new pergola for years to come. Gappsi offers a full range of services for pavilions and pergolas, from design to construction.

Verify Licensing and Insurance

Before you get into the exciting details of design and materials, you need to cover the basics. Confirming that a builder is properly licensed and insured is a critical first step that protects you and your home. A valid license proves they meet state and local requirements to perform the work, while insurance protects you from liability in case of accidents or property damage during construction.

Any professional and reputable builder will readily provide you with their license number and proof of insurance. You can often verify a contractor’s license through local government websites. This simple check gives you peace of mind, knowing you are working with a legitimate business that adheres to industry standards and safety regulations. Don’t be afraid to ask for these documents upfront; it’s a standard part of the hiring process.

Review Their Portfolio and Services

A builder’s past work is the best preview of what they can do for you. Spend time reviewing their portfolio, looking for examples of pergolas they have built. Do their projects align with your personal style? Pay attention to the quality of the craftsmanship, the materials used, and the creativity of the designs. Look for a gallery that showcases a variety of styles, from classic wooden pergolas to modern aluminum structures.

This is also a good time to see what other services they offer. A company that provides comprehensive landscape design and construction can offer a more cohesive and integrated plan for your entire backyard. They can ensure your new pergola fits seamlessly with your existing patio, pool, and garden, creating a unified and stunning outdoor living space.

Assess Communication and Design Options

Building a pergola is a collaborative process, and clear communication is key to its success. From your first conversation, your builder should be an attentive listener who is genuinely interested in your ideas and goals. They should also be a proactive communicator, explaining the process, setting clear expectations, and answering your questions thoroughly. A great builder will help you think through details you might not have considered, like how the sun will hit your patio in the late afternoon or how to position the pergola for optimal privacy.

Avoid anyone who rushes you into a decision. A true professional will take the time to explore all the design possibilities with you, helping you select the right materials and features to fit your budget and lifestyle.

Examine Contracts and Warranties

Once you’ve found a builder you trust, it’s time to get everything in writing. A detailed contract is essential for protecting both you and the builder. It should clearly outline the full scope of the project, including the specific materials to be used, a projected timeline for completion, a payment schedule, and the total cost. Read through it carefully and make sure you understand every detail before signing.

A strong warranty is another sign of a confident and reputable builder. It shows they stand behind the quality of their materials and their workmanship. Ask about the warranties they offer on both the structure and the installation itself. A company that is proud of its work will have no problem guaranteeing it, giving you confidence that your new pergola is built to last.

Common Hiring Mistakes to Avoid

Even with the best intentions, it’s easy to overlook a few key details. One common mistake is not considering how your yard’s conditions change throughout the day. A spot that seems perfect in the morning might be in direct, harsh sunlight by the afternoon. A good builder will help you analyze sun patterns to ensure your pergola provides shade when you need it most.

Another frequent error is choosing a design or roof type that isn’t suited for Long Island’s weather, leaving you with a structure that doesn’t offer enough protection from sun or rain. Similarly, placing a pergola in a location that is too exposed to strong winds can create an uncomfortable environment. An experienced masonry and construction company will anticipate these challenges and design a solution that is both beautiful and functional for your specific property.

Related Articles

Frequently Asked Questions

How do I decide between an attached and a freestanding pergola? Think about your goal for the space. An attached pergola is perfect if you want to create a seamless transition from your house to your patio, making your outdoor area feel like a true extension of your home. A freestanding pergola is a great choice if you want to create a special destination elsewhere in your yard, like a quiet reading nook in the garden or a shaded lounge area by the pool.

Which pergola material is best for Long Island’s weather? Each material has its benefits for our coastal climate. Wood offers a classic, natural look but requires regular sealing to protect it from moisture. Vinyl and composite give you a traditional appearance without the upkeep, as they resist rot and don’t need painting. For a modern and extremely durable option, aluminum is fantastic because it won’t rust and can withstand strong winds with a sleek, minimal design.

What does the process look like from design to installation? It all starts with a design consultation where we discuss your vision and measure your space. From there, a custom plan is created. Once you approve the design, your builder will handle any necessary permits. The actual on-site installation is surprisingly fast, often taking just a day or two for a professional crew to complete with minimal disruption.

Do I need to handle the building permits myself? While homeowners can sometimes manage permits, you shouldn’t have to. A professional, full-service builder will be an expert on local codes and will handle the entire permitting process for you. This is a major benefit of working with an experienced team, as it ensures your project is compliant from the start and saves you from the stress of managing the paperwork.

How much should I budget for a pergola? The final cost depends on a few key factors: the overall size, the complexity of the design, and the materials you choose. A simple, standard-sized vinyl pergola will have a different price point than a large, custom aluminum structure with motorized louvers. A good builder will work with you to understand your budget and design a beautiful pergola that meets your financial and functional goals.